Header

Tag Archives | Paper Crafting

Hit the Books with a Back to School Tag!

With July 4th gone, that means for many of us the summer is officially half over. It’s already time to start thinking about back to school! Our cute back to school tag is perfect for teacher gifts, first day of school lunches, and decorating backpacks!

Back to School tag with button collage | Nancy Nally for ButtonsGaloreAndMore.Net

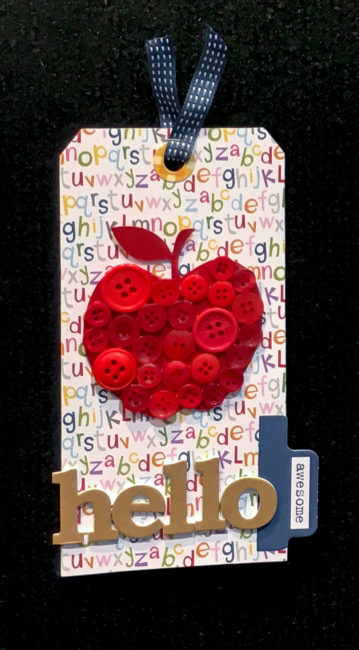
Making this tag is so quick and simple – the kids can help! Die cut the tag base and hole reinforcer out of patterned paper, and glue them together. Attach tab and alphabet stickers across the bottom of the tag. (Instead of “hello”, you could substitute a name, or the year if you’d like!)

To make the button collage on our back to school tag, use a die cut machine (I used my Cricut Explore) to cut an apple shape out of red cardstock that matches the “Red Hot” buttons. Spread a nice thick layer of the PPA Matte Adhesive all over the fruit of the apple. Begin to fill it in by carefully selecting various sizes of the buttons to fill as much of the space as possible. Push the buttons down into the glue to make them really secure!

Teacher Tag for Back to School | Nancy Nally for buttonsgaloreandmore.net

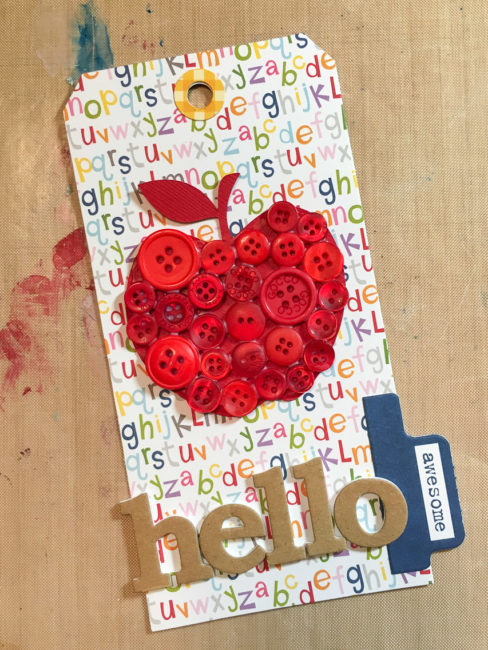
Once the glue is dry on your apple collage, glue it in place on your tag! For the finishing touch, slip a piece of ribbon through the tag’s hole and secure it with a staple.

To make this back to school tag double-sided, select a double-sided paper (like this one) for your tag base. Or cut a second tag from the die and glue them back-to-back.

Whose back to school are you going to make awesome with an apple button collage tag?

Supplies Needed:

  • Buttons Galore “Red Hot” Button Basics
  • Bella Blvd “Tiny Tots” Alphabet Paper
  • Bella Blvd “Simply Spring” Eggstravaganza (plaid paper)
  • Bella Blvd “Tiny Tots” Treasures & Text stickers
  • Momenta kraft alphabet
  • Red Cardstock
  • Sizzix Tim Holtz Alterations “Tag & Bookplates” die
  • Cricut Explore machine & apple cutting file
  • PPA Matte Adhesive
0

Take a Doodle Picnic and Create Some Button Fun Cards

DoodlePicnicPacking

It summertime…a great time to picnic…creative style.  I packed up my bag and headed to the nearby creek to create.  This is what I came up with.

IMG_5877 IMG_5895

I doodles a few flowers and the framed them in and colored them with my Tombow markers and cut them out.I used Power Adhesive Tabs to mount them to pre-cut note cards with envelopes then added buttons from the Laura Kelly collection of bright colors to make them “pop”!

TombowDoodleFlowerCards

If you want to know what goes in a Doodle Picnic Bag to ensure the most successful outing, visit Laura’s blog for those details!

Happy SUMMER!

1

Cozy Brads + 15 minutes = cute handmade card!

Good Morning! It’s a great day to encourage someone to reach up and go for their dreams….what better way to do that than with a handmade card??? And this one can be created in less than 15 minutes! I know for a fact because…..
Confession time: I should have had it done and up on the Card Positioning Systems blog, ready to run first thing on Tuesday morning, but totally spaced it and didn’t create it or load it!!! So I had to whip it up first thing and it took less than 15 mins start to finish. I just used the weekly sketch, threw in a mix of fun patterned papers, some ribbon and two fabulous Cozy Brads and BAM!!! Done! Enjoy!!


Supplies:

Stamps: Hero Arts – Anytime Messages
Ink: Tsukineko Memento Dye Ink – Tuxedo Black
Patterned Paper: Fancy Pants Designs – Childish 6×6 Paper Pad
Cardstock: Bazzill Basics
Brads: Buttons Galore & More – Cozy Brads: All Boy
Dies: Spellbinders Paper Arts
Ribbon: Generic Grosgrain
Punch: Fiskars Scalloped Punch

0

Powered by WordPress. Designed by WooThemes