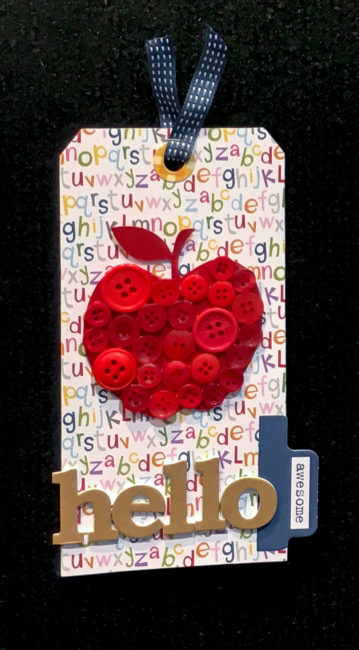
It’s November and that means…the leftover trick or treat candy has been eaten (at least at our house)…and it’s time to jump full on into Christmas trees and snowflakes and all things Christmas! For our readers that like to personalize their gifts, today I’ve got a holiday gift tag that will be remembered long after the holiday is over!
Supplies:
- Buttons Galore Winter Flurries Button Basics
- 28 Lilac Lane Attic Findings embellishment kit
- 28 Lilac Lane Let It Snow embellishment kit
- PPA Matte Adhesive
- White #8 Tag
- Watercolor Paper
- Ranger Tim Holtz Distress Ink in Salty Ocean, Faded Jeans, Mermaid Lagoon, Tumbled Glass, and Clear Embossing.
- Ranger Archival Ink in Jet Black
- Ranger Embossing Powder in White
- Stampendous “Snowflake Sky” stamp
- Faber-Castell Watercolors
- Ranger Stickles in Frosted Lace
- Tim Holtz for Stamper’s Anonymous “Christmas #4 Minis” stamps
- Tim Holtz idea-ology “Small Talk – Occasions” stickers
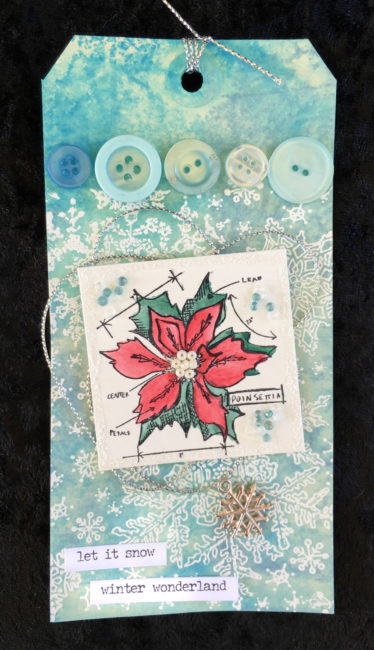
The background on this tag was created by inking a craft mat with the four shades of blue Distress Ink, spritzing it with water, and then dragging the tag through it. A heat gun helped to speed the drying process. The nice thing about this technique is that if you don’t like the effect that you get, you can add and remove color by spritzing the tag with water, or adding another layer of color, until you get just the effect that you are happy with.
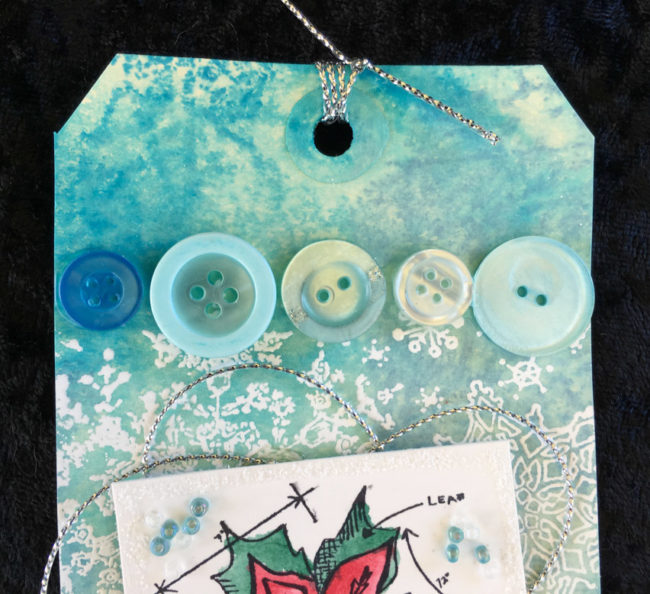
Once the background was thoroughly dry, I stamped the snowflake stamp with clear embossing ink and heat embossed it with white embossing powder. Since the stamp was not as tall as the tag, I made sure that I started the stamp at the bottom of the tag. Using the PPA Matte Adhesive to glue a line of buttons across the area where the snowflakes stop disguised the transition area from snowflakes to plain background.
Next, I stamped the poinsettia stamp in Archival ink on watercolor paper, and colored it in with watercolors and a waterbrush. Finally, I trimmed it to a size that would work on the tag.
It’s not very visible in the photos, but I used Stickles to create a border around the outside edge of the poinsettia square to add a little extra glint of sparkle to the tag. I also used various colors of seed beads from both of the embellishment kits to create some dimension in some areas and create the flower’s center. (The seed beads in our kits adhere beautifully with the PPA Matte Adhesive, which is what I used here.)
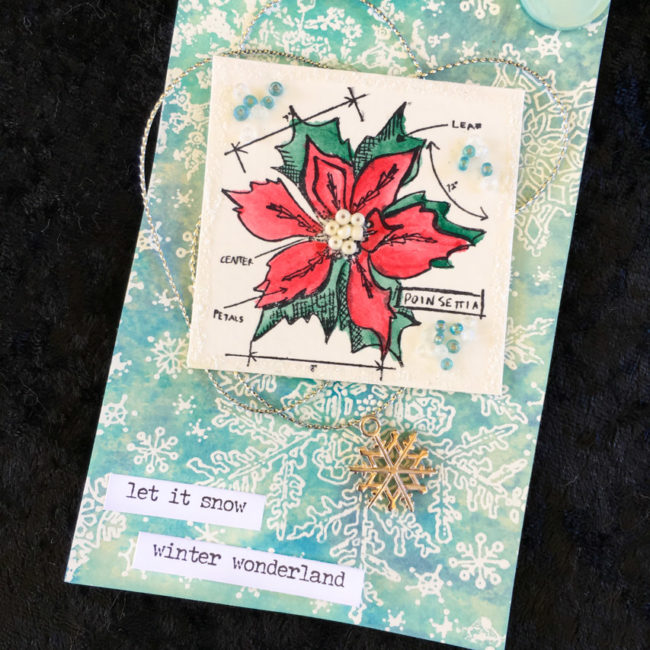
The trickiest part of assembling this holiday gift tag is getting the loops of silver string and the poinsettia layered and adhered. I laid down a pool PPA Matte Adhesive in the middle of the tag, and created my string loops by passing the string through the glue area repeatedly. Then I pressed the poinsettia block down on top of it and when it dried, everything was adhered together!
At first glance, it looks like the snowflake charm is looped through the string but if you look closer…it is not. I simply glued it on with the loop laying over the string. This helps everything lay a little more flat and stay adhered better.
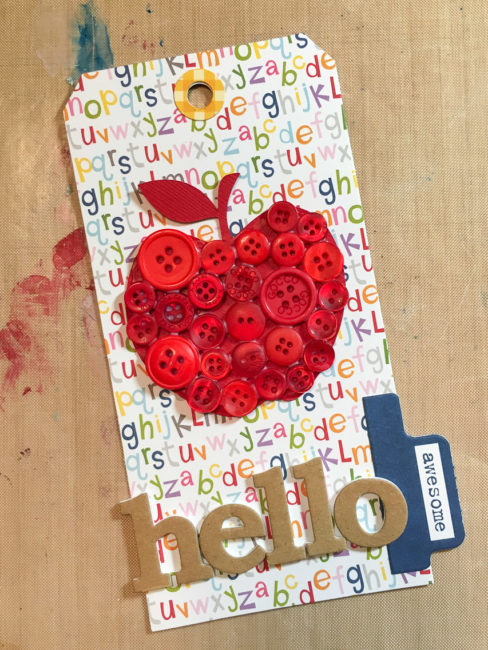
The final touch on my holiday gift tag are the two phrase stickers I added in the bottom corner. If you didn’t want to put the to and from information on the reverse side, these strips could have it instead.