Header

Tag Archives | bracelet

Wear a Hemp & Button Bracelet for Spring Break!

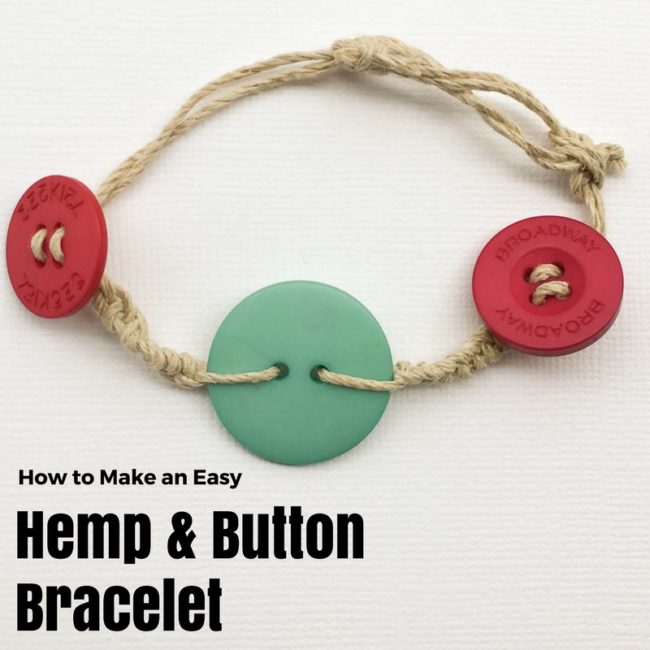
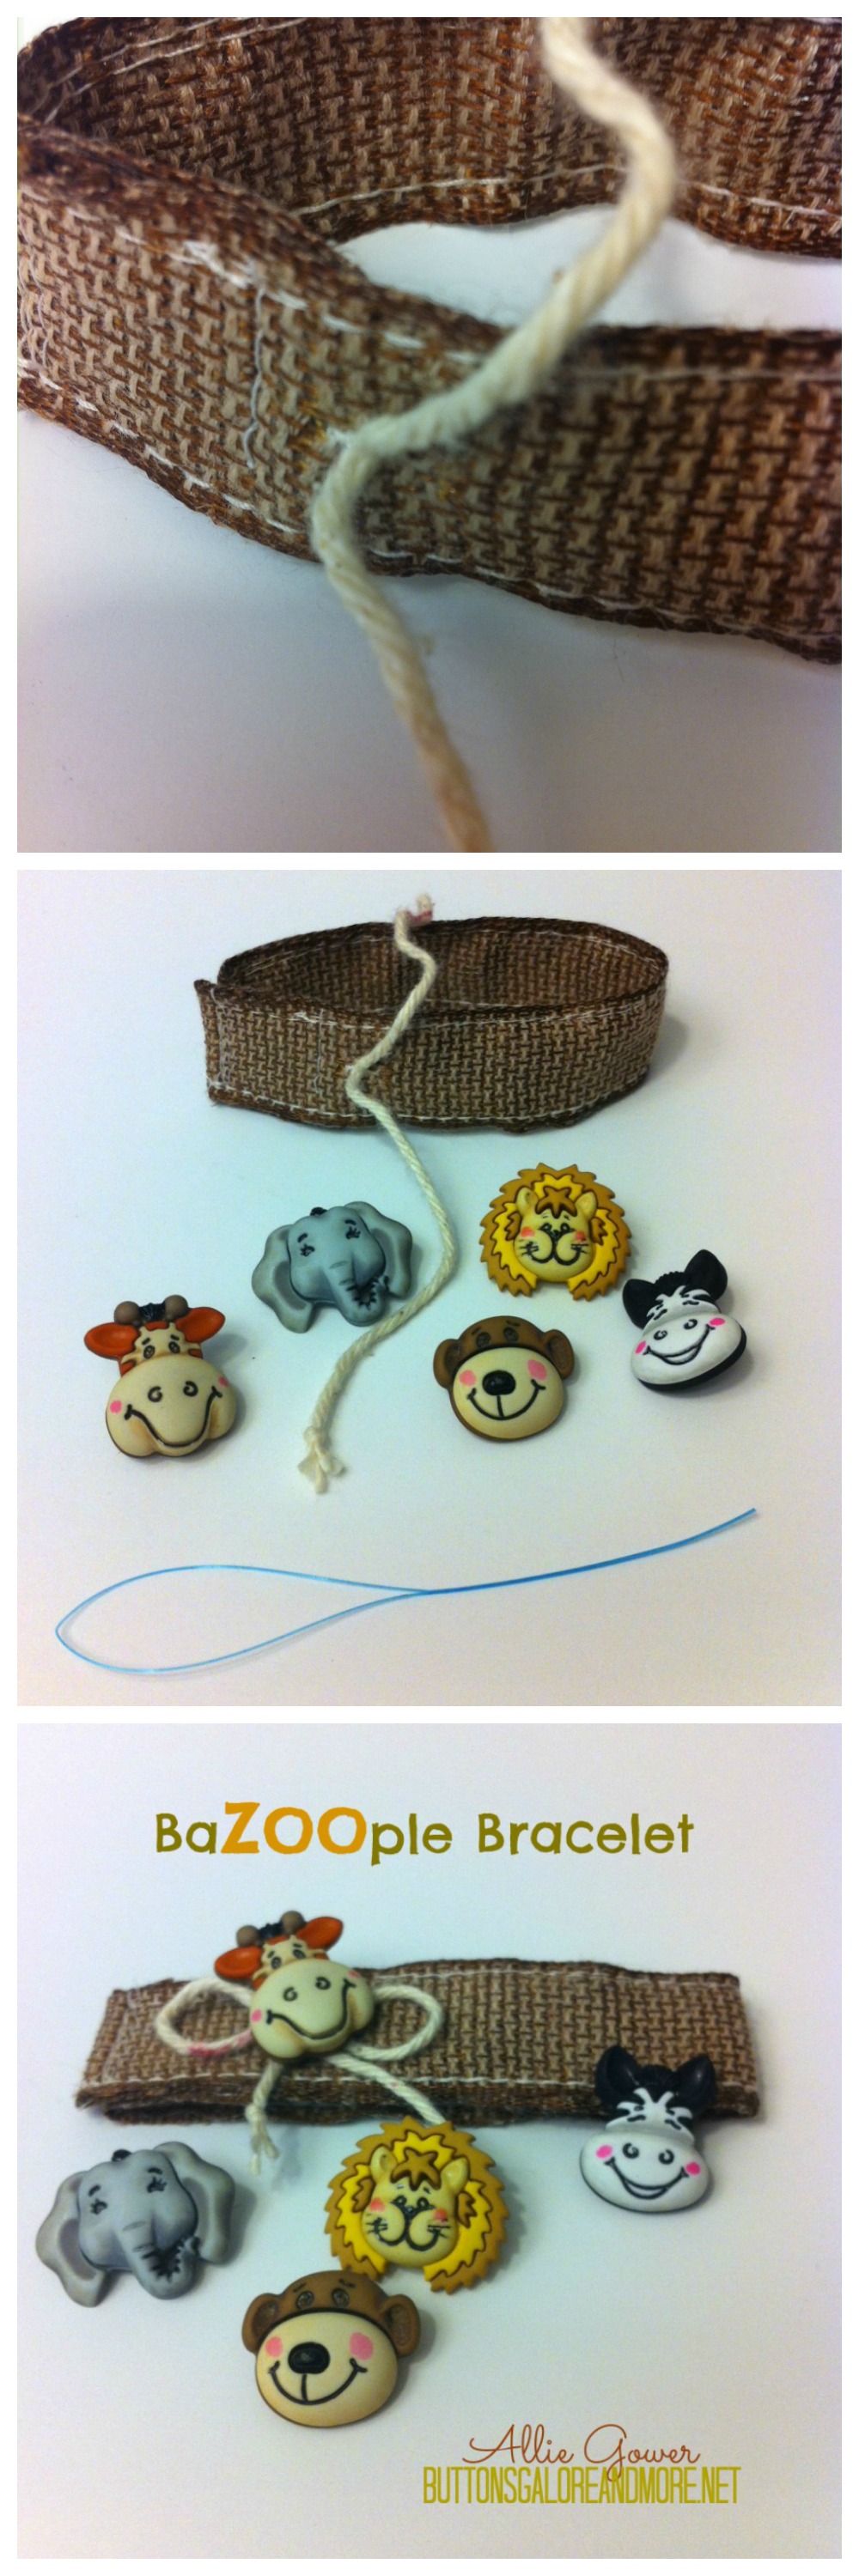
It’s spring break time in a lot of places and that means time to head for the beach! Let’s make some fun vacation jewelry just for the beach – a fun hemp & button bracelet!

Hemp Button Bracelet

Supplies:

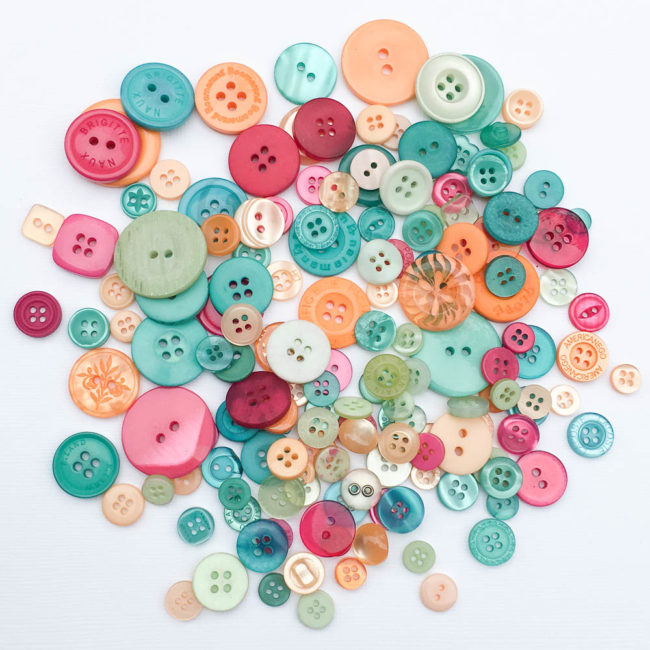
  • Buttons Galore “Vacation” Button Tote
  • Hemptique “Sea Glass” Hemp Cord Assortment

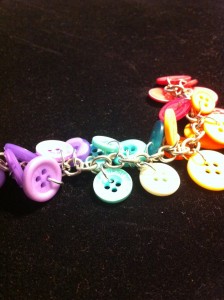
This hemp & button bracelet uses one of our Buttons Galore Button Totes that is called (appropriately) Vacation.  It’s a fun mix of fuschia, turquoise, light orange, and light green.

Vacation Button Tote

Making this button bracelet is super fast and easy!

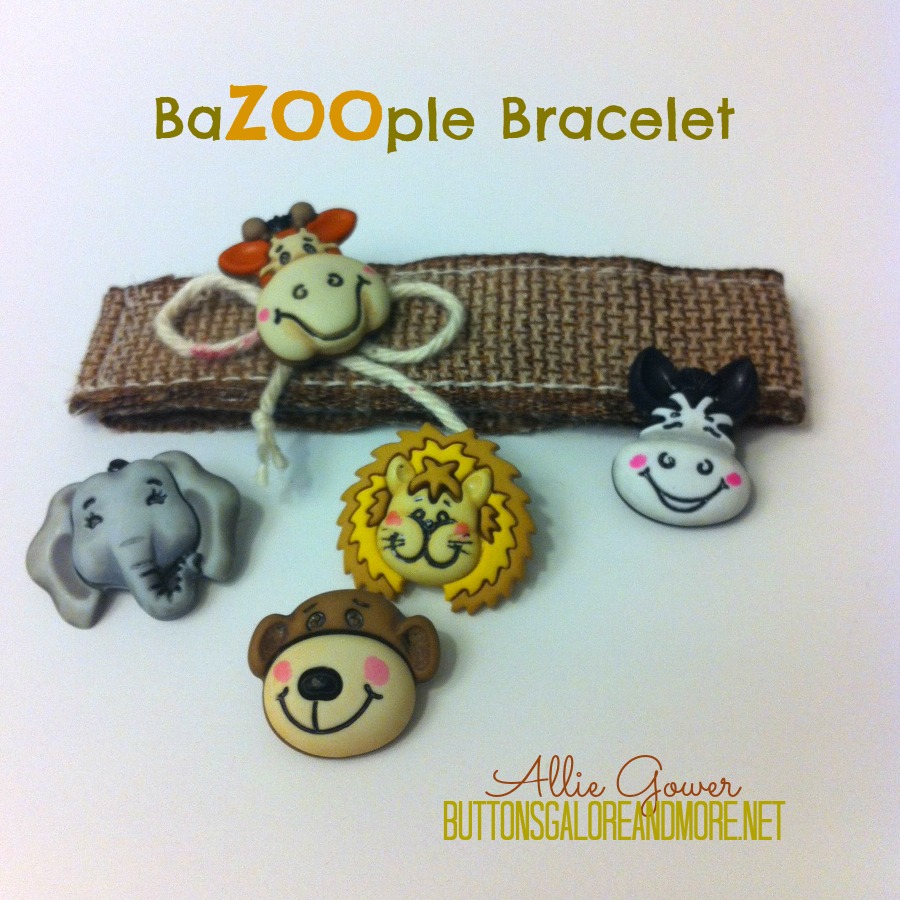
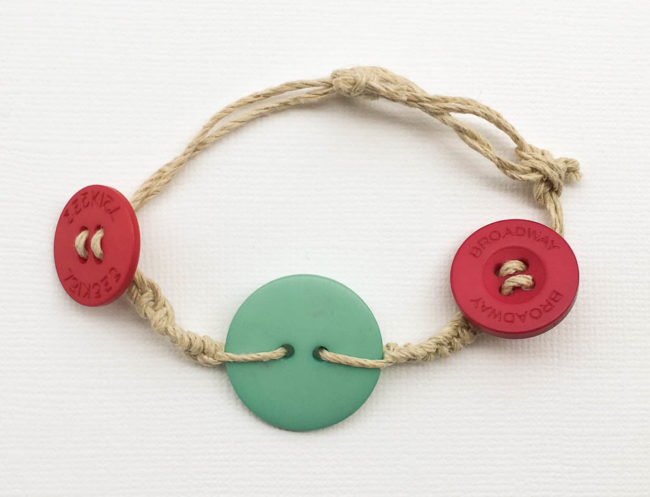
To start, choose a large button for the center of your bracelet. Select two coordinating medium sized buttons with four holes for the sides of your bracelet, and set them aside.

Cut two long lengths of hemp. Thread one length of hemp through one of the holes in the large button, and pull it through until the ends are even. Pull one end of the hemp tight, and start tying half knots around that strand with the other strand. Stop at ten knots, or adjust for your desired bracelet length. Repeat this process for the other side of your bracelet.

Place the smaller buttons onto the bracelet by threading each of the threads on each side through two of the holes in a button. Pull the button tight against the knotted section.

Finish your hemp & button bracelet by creating slipknots to create an adjustable and removable bracelet band, or just tie your bracelet on permanently until vacation is done!

How to Make A Hemp & Button Bracelet

0

Easy Gold Button Charm Bracelet

This gold button charm bracelet project is easy to make with only a few supplies, and makes a perfect gift for the special stylish woman in your life!

Gold Button Charm Bracelet Supplies

Supplies:

I also recommend having on hand a pair of jewelry pliers (long nose or bent nose) to open and close the jump rings to complete this project more easily.

Once the supplies are assembled, select a random assortment of stem buttons from the button bag. You’ll need enough to put one button on each link of the bracelet chain.

gold button charm bracelet

Use the jump rings to attach the stem buttons to the bracelet chain. Attach one button per link in the chain, keeping all of the buttons on the same side of the links.

Vary the size and design of the buttons that you use as you go to get a good random appearance. If you look closely above, you can see that I put larger buttons in the center of the bracelet, and smaller ones at the ends, to create a taper effect and make the bracelet more comfortable to wear.

gold button charm bracelet

That’s all there is to it! This fun gold button charm bracelet gift is so easy to make, but the results are stylish!

For a different look, try making this button charm bracelet project with our Fancy Silver Haberdashery buttons, and a silver bracelet and silver jump rings.

0

Burlap and Buttons Cuff

Short-sleeved, summer tops demand a good burlap and buttons cuff, don’t you think?  Create this simple and rustic burlap cuff for your next walk on the beach.  It’s hip and cool and so easy to make!

Cuff Beauty Shot

Supplies:

  • Burlap cut to 10″ by 6″
  • Assorted colors of felt scraps
  • Buttons
  • Embroidery floss & thread

Instructions to make a burlap and buttons cuff:

1. Fold the burlap into thirds to create a long strip measuring 10″ x 2″.  Pin in place and stitch along the edges.

Putting Cuff together

2. Using felt scraps, cut out petals and leaves to form a flower.  Arrange in the center of the burlap rectangle and using embroidery thread, stitch them into place.

3. Stitch buttons into place.  Use them for the center of the flower.  You can really go crazy and add more into the design. (I strongly believe you can never have too many buttons on a project!)

Sew on felt pieces and buttons

4.  Once the design is stitched in place, use embroidery thread to attach the two short ends of the cuff together.

Note: I measured my wrist at the beginning of the project and made sure that I could slip the cuff on and off.  If you prefer a tighter fitting cuff, measure your wrist size and then use a hook & loop, snap, or BUTTON closure to secure the cuff on your wrist.

Thanks for getting crafty with me today!  For more button crafts, stitching and lifestyle ideas visit me on my blog at www.laurabraydesigns.com.

www.laurabraydesigns.com

1

BaZOOple Bracelet

I’ve got a BaZOOple bracelet for you today. The buttons can be changed out.

We go to the Zoo a lot during the spring and summer, and I think this will be lots of fun to make and wear with the kids.

Bazoople Bracelet.

BaZOOple Bracelet


Supplies

I like to include a floss threader in my little bracelet kit. These can be found in the dental area of your pharmacy – they’re very inexpensive and they really make my life easier!

How to Create the BaZOOple Bracelet

  1. Create a cuff using ribbon or fabric. I sewed a long piece of ribbon in half.
  2. Sew some yarn or twine to the cuff.
  3. Add your choice of buttons with shanks.

It’s really that easy!

BaZOOple Bracelet

Thanks for joining me today.

See more of my creations at MyCardParty.

0

Patriotic Bracelet with Buttons and Ribbon

Create a Patriotic Bracelet with Buttons and Ribbon. This could easily be done with the kids in a variety of colors with lots of different buttons.

I’ve knit my ribbon by wrapping it around my fingers. As a child I would sit for hours and make yarn chains and pull them out. I guess I was bored during the summer! If you aren’t familiar with this technique, you could easily braid some ribbons.

It’s fun to find inexpensive craft ideas for the kids during the summer.
Patriotic Bracelet Ideas


Supplies

  • Buttons – Patriotic Value Pack
  • Ribbon – Michael’s
  • Embroidery Thread – Coats & Clark
  • Rhinestones – Want2Scrap Bulk Bling

How to Create a Patriotic Bracelet with Buttons and Ribbon

  1. Knit or braid ribbon, leaving a length at each end to tie on wrist.
  2. Tie a bow with buttons around the bracelet with several strands of embroidery thread.
  3. Hot glue a rhinestone on each bow to hold knots in place.

Thanks for joining me today.

See more of my creations at MyCardParty.

0

Easy Button Bracelet DIY


Easy Button Bracelet Tutorial by Allie Gower

Easy Button Bracelet by Allie Gower


Ready for a fun and easy Button Bracelet DIY project? This bracelet is put together very easily. I used a variety of buttons, some fun Turquoise Bulk Buttons, along with Orange, Pink and Purple buttons from a bag of Color Bulk Buttons in fun sizes and shapes, and used Tiny, two holed White Buttons for a little more jiggle and dimension. On the colored buttons, I had to just sample and try to see which ones fit the jump rings I had on hand. It’s so nice to have a variety to choose from.

Directions for the Button Bracelet DIY

I attached colored buttons by jump rings to a chain segment, one per link. I attached a white button via a second jump ring to each of the colored buttons. Toggles are added to each end.

Button Bracelet in Progress

Note: be sure to take into account the size of your closure in the measurement of your bracelet, and add a little room for bulkier bracelets

Buttons Galore Products Used:

Additional Supplies needed:

You’ll need two sets of pliers, I use Half Round Flat Nose – these are lined with nylon so they don’t scratch up some of the softer metal jump rings. Chain nose pliers would be fine too. If you’ve never worked with jump rings before, Fire Mountain Gems has some great tutorials. This article “All About Jump Rings” is a great start.

  • 48 jump rings
  • 48 buttons ( I used 6 each of the blue, pink, purple and orange, and 24 white)
  • chain – most wrists are 7.5″
  • closure

I hope you enjoyed this easy Button Bracelet DIY – give some jewelry a try!

3

Powered by WordPress. Designed by WooThemes