Header

Tag Archives | Tsukineko Memento Ink

Follow Your Heart

If you are lost, you must quiet your mind, and follow your heart.


Follow Your Heart


Follow Your Heart

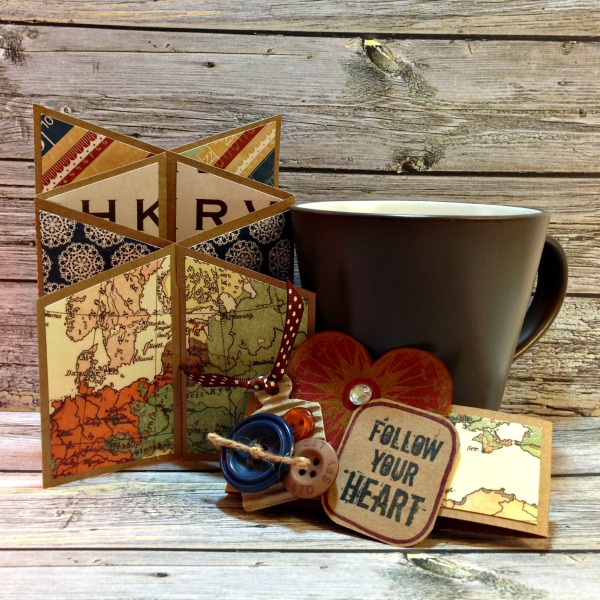
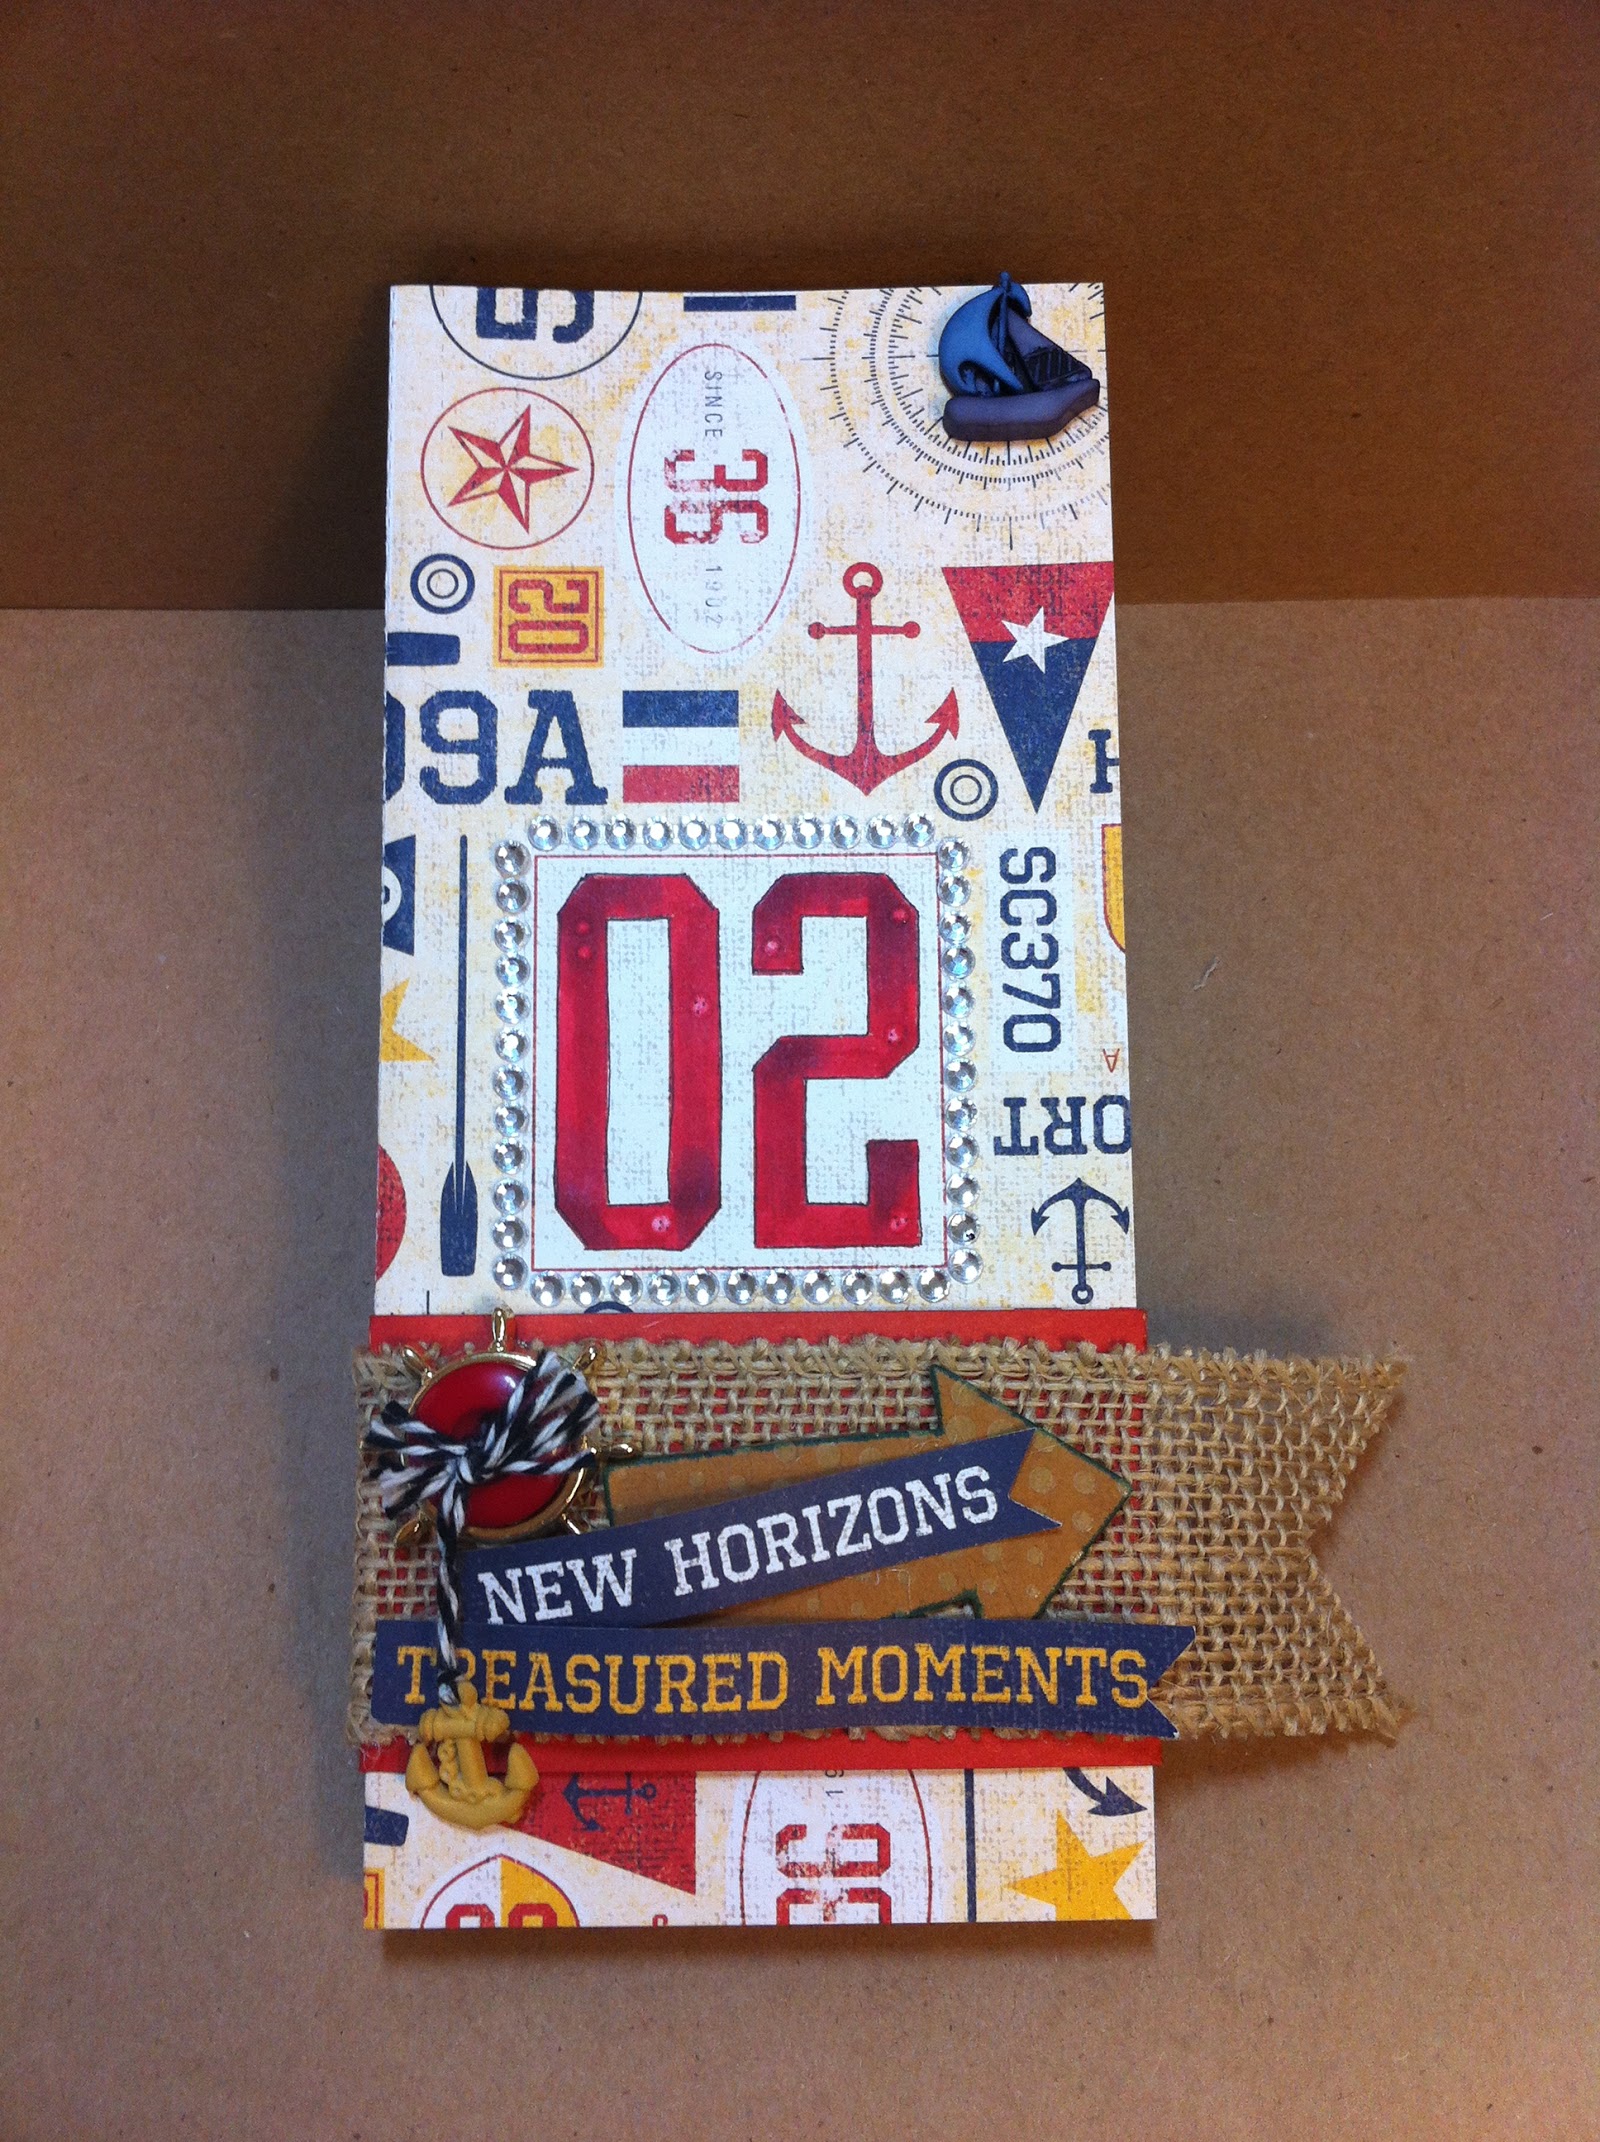
This card style is called a Stretch Card. I added a decorative band, because I plan on placing a gift card inside and I want it to stay hidden until the right time.

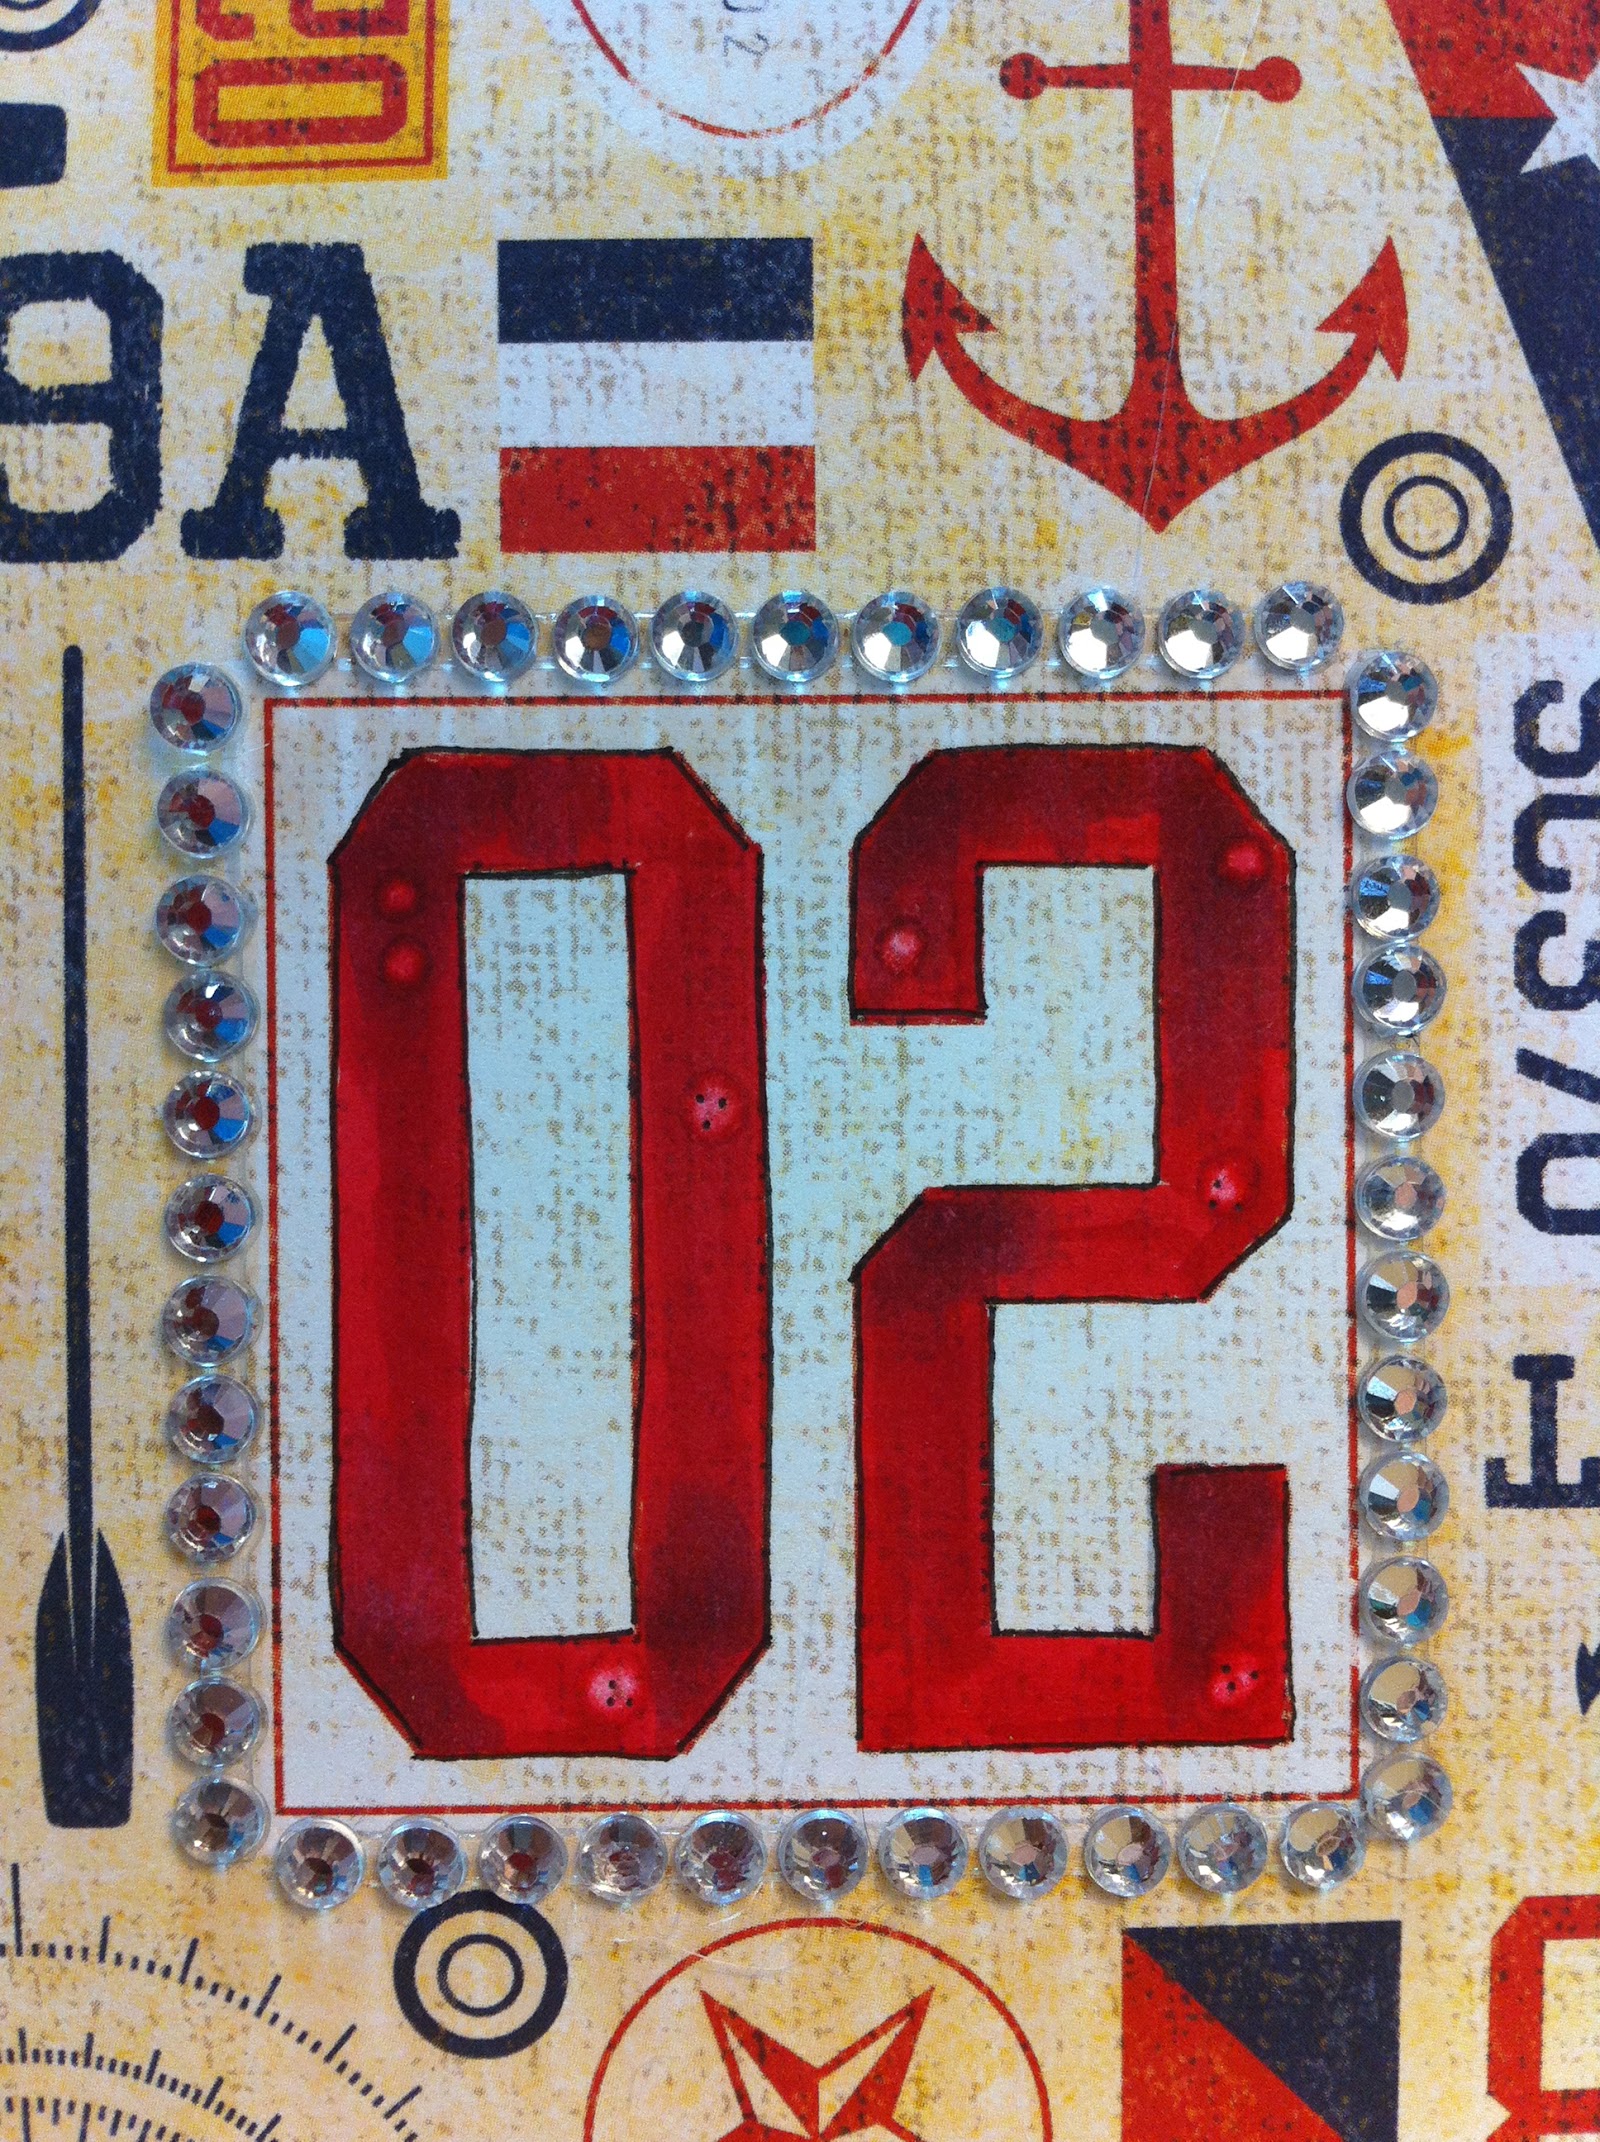
I used Lori Whitlock’s Reflections Papers from Echo Park, and some Kraft Paper from Close To My Heart.

Supplies for Follow Your Heart Card:

  • buttons: Nautical Value Pack 
  • paper: Lori Whitlock’s Reflections (Echo Park), Kraft (Close To My Heart)
  • stamps – Unity
  • ink – Versamark Gold Dazzle, Rhubarb Stalk Memento and Tuxedo Black Memento (Tsukineko), clear embossing powder
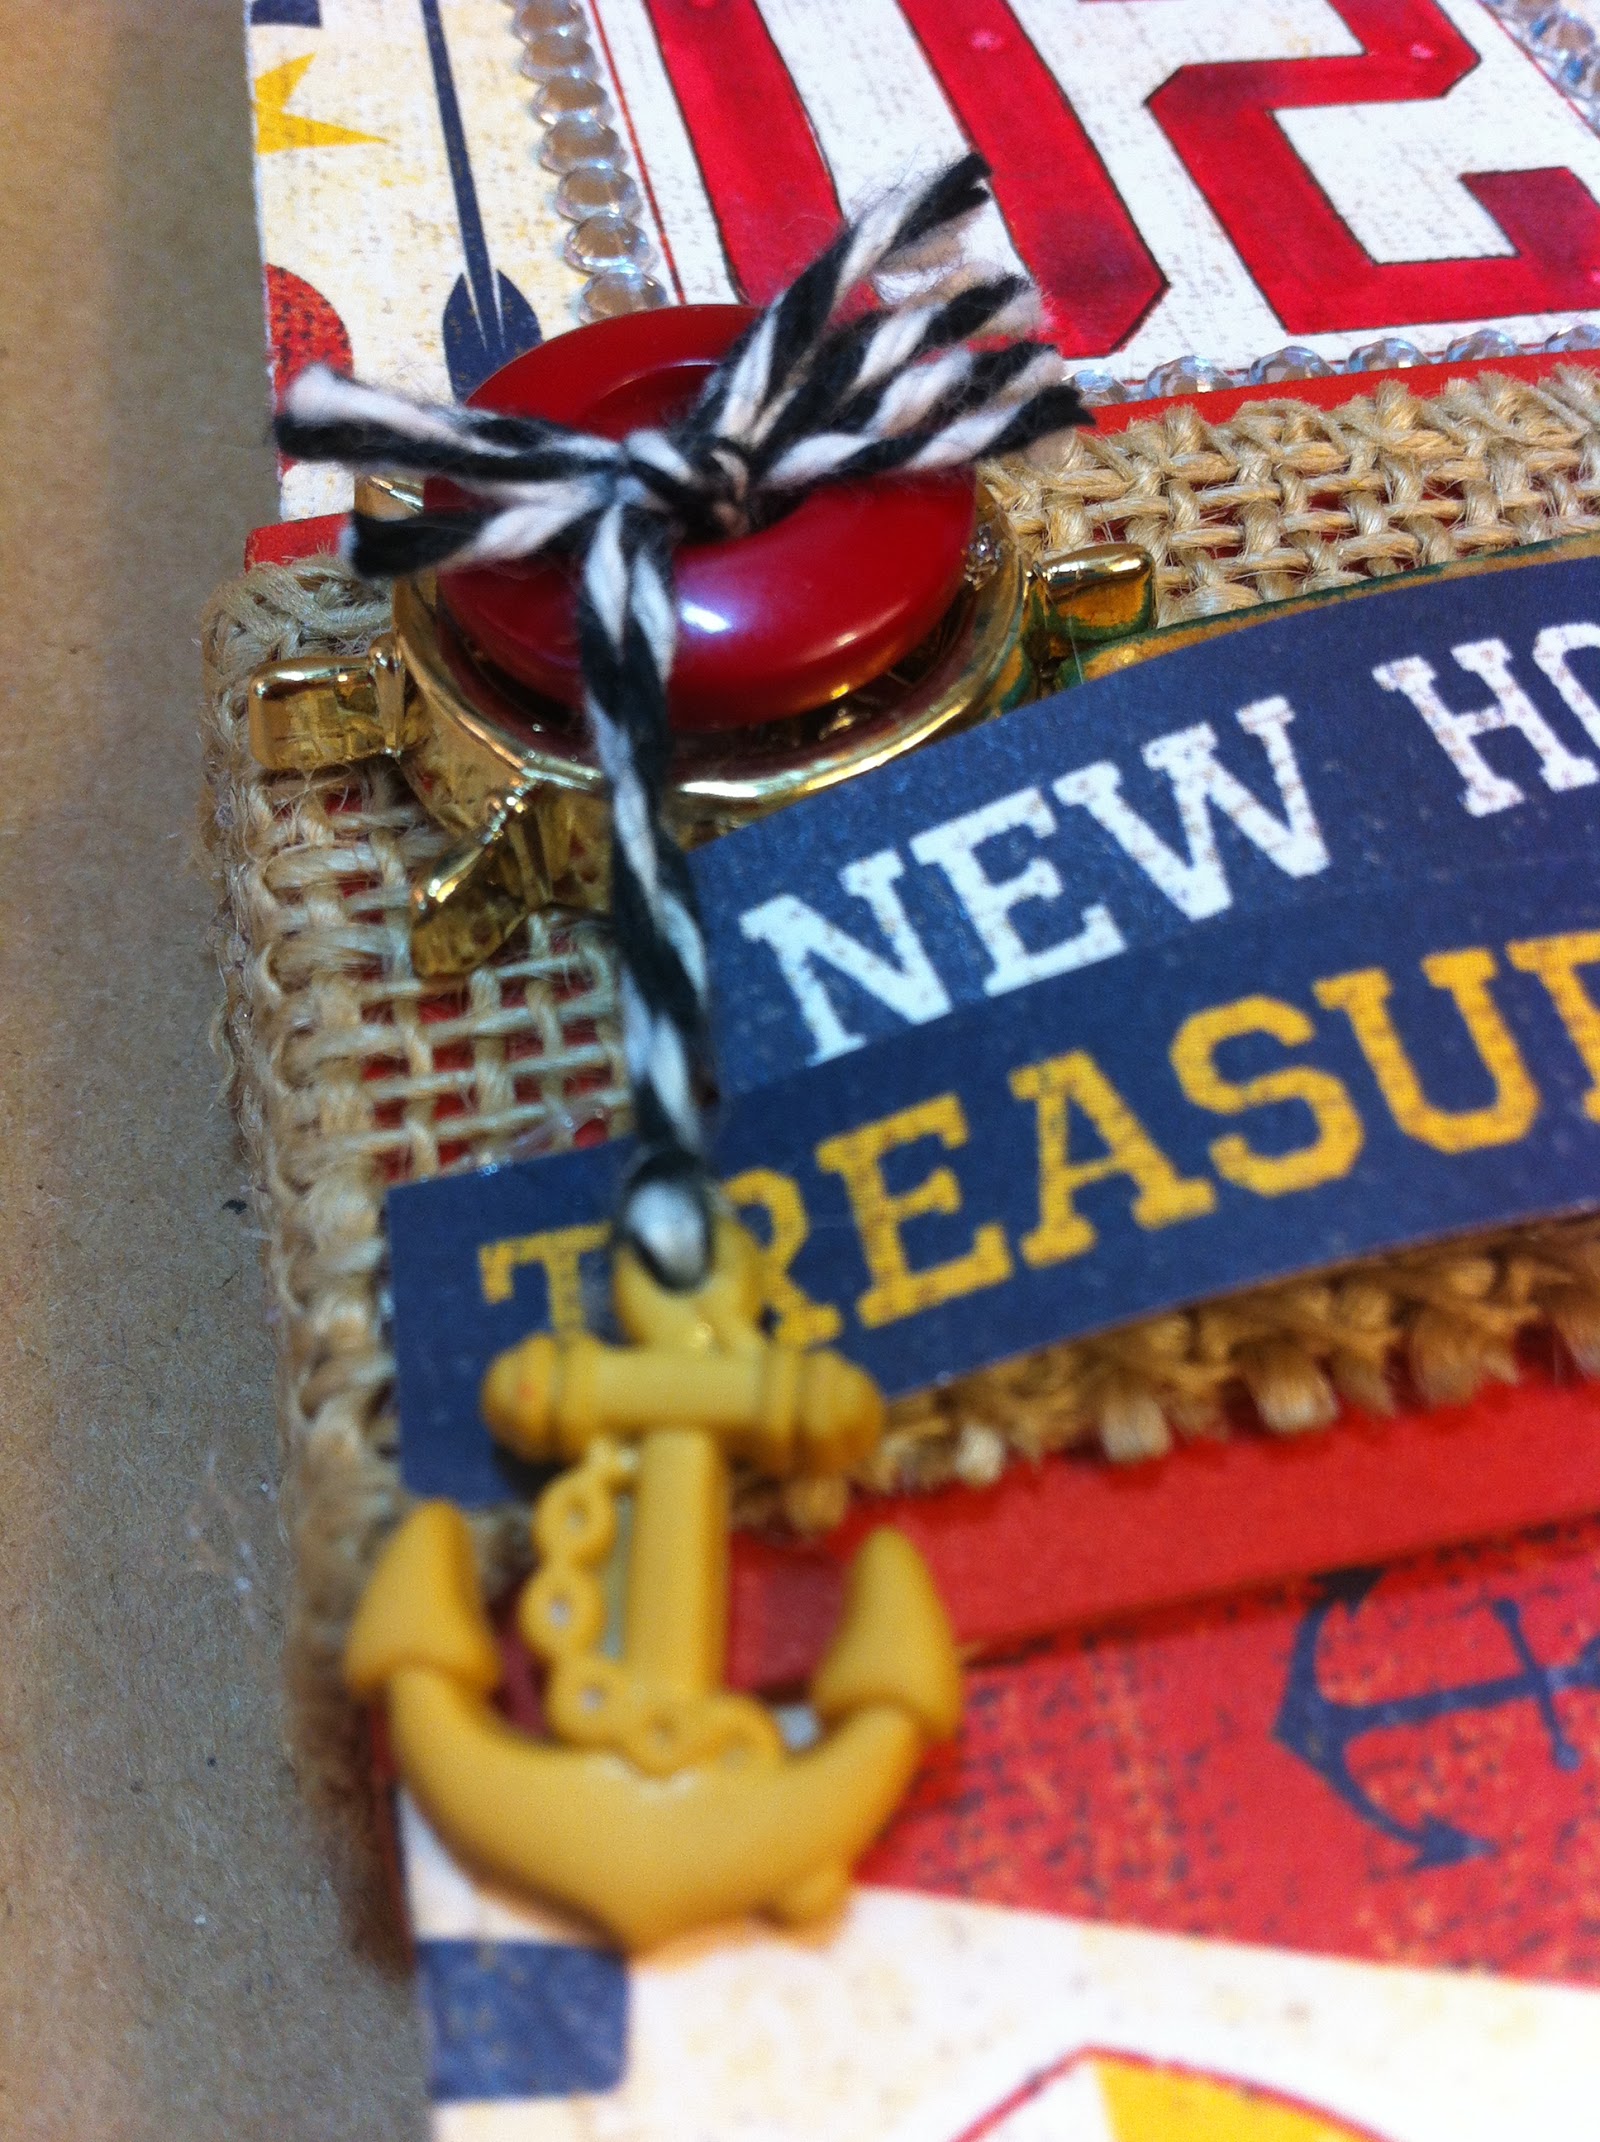
  • embellishments: ribbon (Bo Bunny), bling (Want2Scrap), twine (My Mind’s Eye), corrugated tag (Close To My Heart)
  • adhesive: Scor-Tape, Adtech Hot Glue Gun and Glue Sticks, Dimensional Foam Tape, Glue Dots
  • other: Heat Embossing Tool, Corner Rounder, Silhouette Cameo, Scissors (Westcott)

Instructions:

  1. Cut basic card pieces and layered pieces and assemble. Lori Whitlock has a great video here: http://youtu.be/KaDIpjGL4zk
  2. Create a sleeve – 1.5×10″ and secure at the back of the card.
  3. Stamp heart on Kraft paper with Versamark Gold Dazzle Ink and sprinkle with clear embossing powder – heat to melt. Dab Rhubarb Stalk Memento Ink on heart and cut out. Add a rhinestone to the center with a Glue Dot.
  4. Stamp sentiment with Tuxedo Black Memento. Round Corners.
  5. Tie ribbon to Corrugated Tag. Tie twine through a button. Hot glue Nautical Buttons to the tag. Adhere tag to band with Dimensional Foam Tape.
  6. Add heart and sentiment to band with Scor-Tape.
  7. Slide band onto card.


0

Organizing with Nautical Buttons

Try organizing with nautical buttons.

Keep your supplies stored in style this year!

Create a fun storage tray for pencils.

Supplies for Organizing with Nautical Buttons

Additional Supplies

  • Patterned Paper – Tommy Collection, Cardstock (Honey, Cranberry, Outdoor Denim), Burlap Ribbon, Chipboard Arrow – all from Close To My Heart
  • Bling – Want2Scrap Sleek Strips Silver Rhinestones
  • Twine – Doodlebug Design Doodle Twine
  • Ink – Copic R46, R29, C3, C4, Blender (0) and SP05 Multiliner, Cantaloupe and Bahama Blue Memento Dye Ink (Tsukineko)
  • Adhesive – Scor-Tape (Scor-Pal Company) and AdTech Adhesive Hot Glue
  • 3d Pencil Box with Wrap SVG – Designed by Jamie Cripps (Silhouette Online Store)

Create a fun storage tray for pencils.Create a fun storage tray for pencils.Create a fun storage tray for pencils.

Directions:

  1. Cut two outer panels, one of the Tommy themed paper – one of Outdoor Denim (both from Close to My Heart). Adhere together with Scor-Tape. Save leftover patterned paper – on the back there is a word strip that is used in the embellishments. Note – the Outdoor Denim liner is a special addition – it gives the box a little bit of added sturdiness.
  2. Color numbers of choice using Copic Marker R29 and R46. Add shadows with C3 and C4. Add accents with Blender pen and Copic Multiliner.
  3. Cut insert from Honey Cardstock. Assemble and attach to the outer portion of the box.
  4. Cut band from Cranberry Cardstock.
  5. Loop twine through Anchor button and tie through red button. Adhere red button to Ship’s Wheel button using AdTech Adhesives hot glue.
  6. Adhere burlap ribbon and buttons with AdTech Adhesives hot glue.
  7. Ink Chipboard Arrow (From Lucky Level 2 Assortment – Close To My Heart) with Cantaloupe Ink and edge with Bahama Blue Ink (Tsukineko – Memento Dew Drop). Adhere with AdTech Adhesives hot glue.
  8. Choose sentiments from leftover Tommy paper and “pink” edges. Attach to burlap using AdTech Adhesives hot glue.
  9. Outline numbers with Sleek Strips Silver Rhinestones.

Create a fun storage tray for pencils. 

Note – for additional assistance assembling the box, Jamie has a wonderful tutorial on her blog.

http://www.jamielanedesigns.blogspot.com/2013/07/pencil-box-with-wrap.html

 Thanks for joining me today. Hope you have fun getting organized in style.


* * * * * * * * * * * * * * *

Linking up with Transformation Thursday


TT logo

1

Taking inspiration and making something totally different

A few weeks back I was perusing Pinterest and I saw this totally cute pin idea and instantly thought  “I could make a really cool clean and simple card with this as inspiration”. So I repinned the blog post over at Imparting Grace where she had seen a Pottery Barn Pillow using buttons and was inspired to make it herself.


Image courtesy of Pottery Barn

I in turn was inspired by her post to make the general idea into a card!! Here’s my take on the simple but oh so button savvy design! I started with a 4 1/4 ” x 11 1/2″ strip of cardstock. I scored 5 1/2″ from the end and folded along the score line to make the spine of my card.  I then made and additional two score lines using my Scor-Pal Scoring Tool 1″ from the spine of the card and 1 1/2″  from the spine of the card.  I then folded at the score lines to create the “pleat” that you see on the left side of the card lining up the ends of the cardstock strip.  A little line of 1/4″ Scor-Tape to hold the folds and the base of the card was done. I then used four red buttons from the Girly Button Pack and tied a bit of twine through each before adhering them to the card front just past the “pleat”, stamped the simple sentiment and BAM! Done! :)

Have you ever been inspired by something and gone in a totally different direction with it? For example this was a pillow design and I translated it into a clean and simple card. Share a link! We’d love to see what inspires you and how you translate it into making it your own!

0

How to make a statement by using a grouping

A few weeks ago I was stuck. I had to make my weekly card for Card Positioning Systems and I had everything but the finishing touch just wasn’t working. The sentiment I wanted to use was too small for the label die cut I was working with and I really wanted to use THIS SENTIMENT. You know how you can just get stuck with the image in your mind and nothing else works?? Yeah I was there…so I decided to embellish my main image…and not just with one, not two, but THREE fun buttons. Here you can see I chose some buttons from the Girly Button Pack. They were JUST THE RIGHT COLORS to go with my chosen patterned papers. So I kinda played around with the color balance and felt the two reds and one green was just what I needed. To spice things up I decided to use natural colored hemp in the red buttons, tied in a knot and snipped short. For the green button to add balance and interest I tied white twine, tied a big loopy bow and snipped the tails a bit longer. I felt it gave the card fun whimsy! If you’d like more info feel free to pop over to my blog Pink Lemonade. Enjoy!!

0

Powered by WordPress. Designed by WooThemes