Header

Tag Archives | rubber stamping

altered buttons make great embellishments!

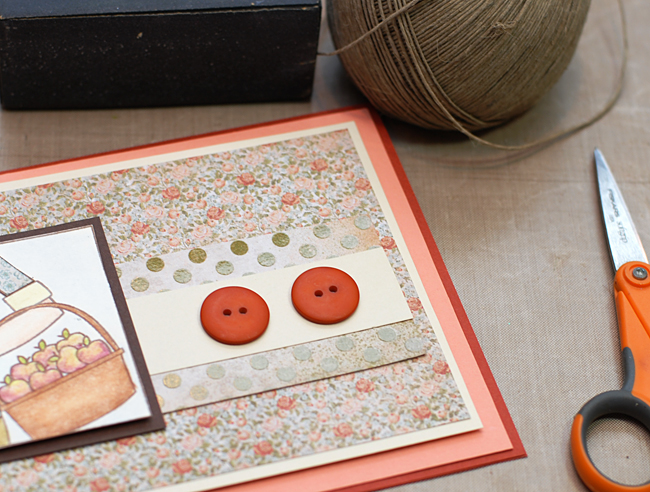
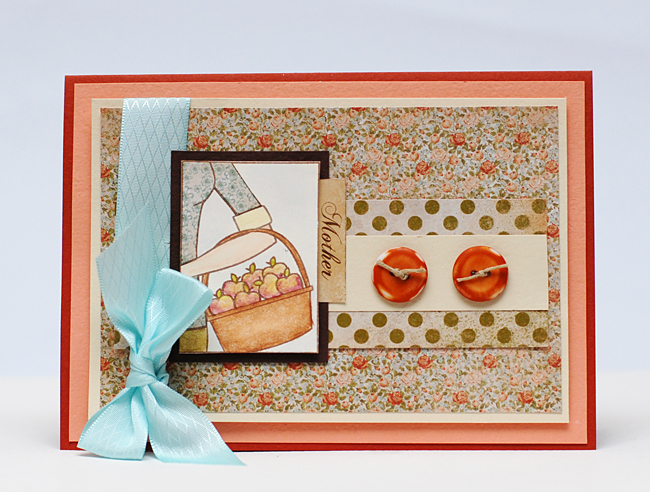
Today I thought I would bring you an Autumn themed card and share a few tips on how to alter buttons for embellishments. I know it is hard to  believe Summer is passing and we are moving into the Autumn season?  Creating distressed or altered buttons is not a new concept, that I know. But sometimes being reminded that creating handmade embellishments isn’t feasible and that altering embellishments is the next best thing! Here I will share with you one way I like to alter my button embellishments that takes just a few quick strokes of sandpaper in two different grits and you have an entirely new and interesting look to your buttons! I started with two buttons of the same size and color from the Gingerbread Assortment and then went to town!


 The buttons I chose to use from the Gingerbread Assortment matched perfectly with my color palette however,

I thought they’d look good with a little “character”.


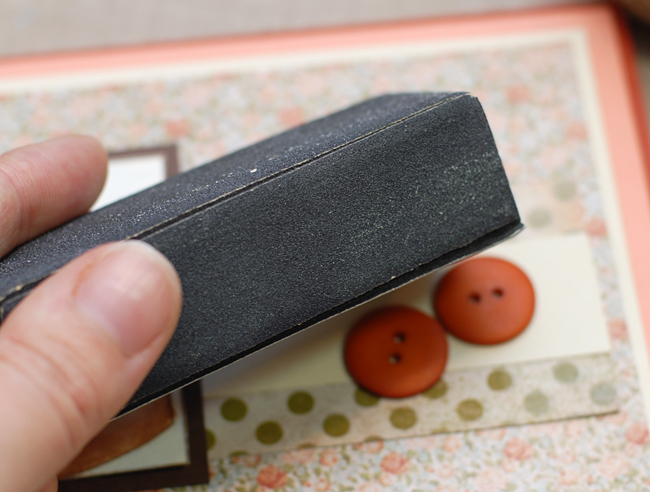
 Starting with a rough grit side of the sanding block, sand the edges.


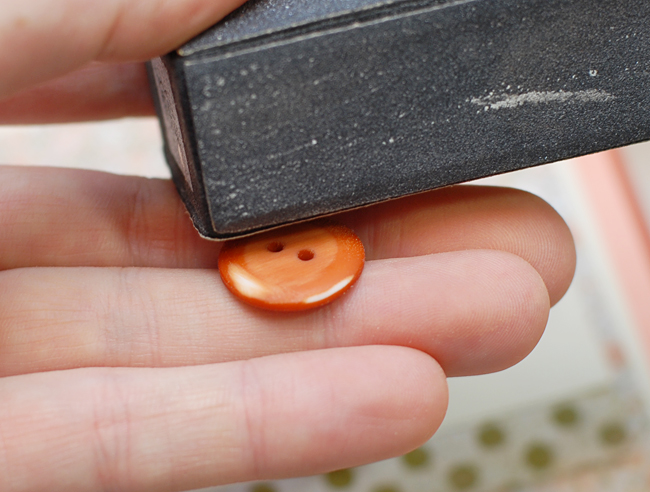
 Next using a less rough grit, sand the surface of the face of the button to lightly distress it.


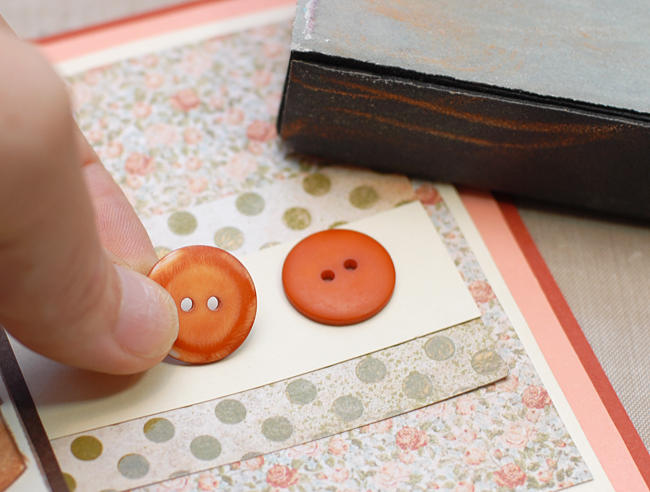
 Notice the difference? It’s just a few simple steps to really personalize your button embellishments.


And the finished result!

0

Stamps, Die Cuts and Buttons – A natural Pairing for a blog hop

My Favorite Things and Buttons Galore Blog Hop

Buttons Galore and My Favorite Things have teamed up to bring you an inspiration filled blog hop.  You’ll want to leave a comment on EACH designer’s blog because there is $100 in prizes up for grabs. MFT will give away 2 MFT Gift Certificates for the blog hop.  One $25 gift certificate to one randomly chosen winner from commenters on the MFT Designers’ blogs and one $25 gift certificate to one randomly chosen winner from the commenters on the Buttons Galore Designers’ blogs.  We will give two $25 button assortments the same way. We will take care of choosing the winners and sending the prizes and will announce it on the BGM Blog on July 30.  Deadline to comment will be on July 29.  Same for MFT.

Design Team Blogs:


Link to the MFT Blog:

Grab a cup of coffee, sit back and relax and enjoy the inspiration that is being brought to you by the many talented designers from both Buttons Galore and More and My Favorite Things.

Don’t forget to leave a comment to be entered to win one of 4 great prizes!

Tell us which project you like best. What products you like from My Favorite Things, what your favorite button set is… whatever you like. Then make sure to leave a comment on each designer project page for another chance to win!


Guest Designer – Becky Thompson

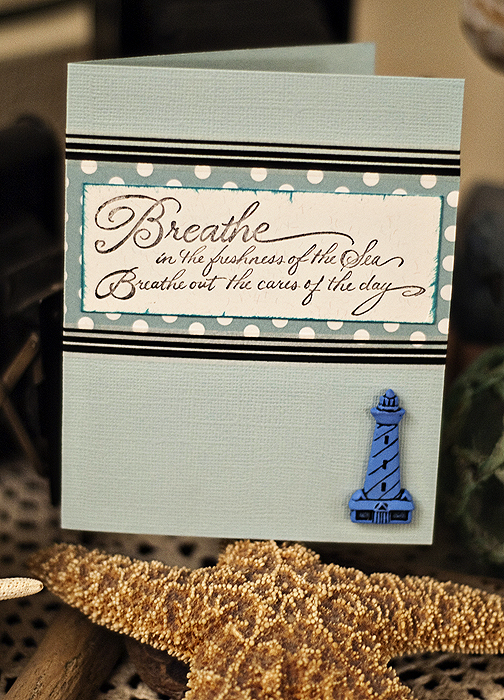
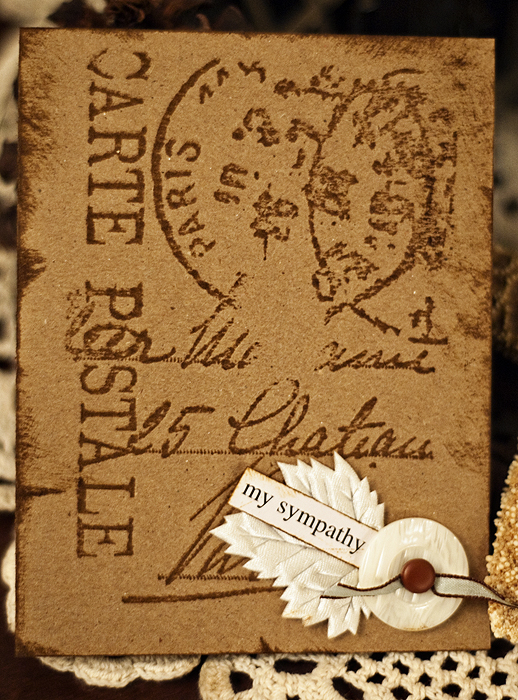
Handmade cards with an ocean theme:

Becky’s cards are simple and classic with added touches that never cease to inspire the creative individual.

Products used:

Breathe Card:
Lighthouse flat back button
Bazzil Cardstock
Patterned paper (SEI)
Washi Tape – Recollections
Ink – Tim Holtz
Stamp: Stampendous


Blank Card:
Seaside Big Ole Button
Fashion front Brads
Stamp – Stampabilities
Ink – Tim Holtz for Ranger
Kraft card blank – Stampabilities

0

Romantic Embellishments for Card Making

Good morning, Pinky here again,

I love making cards and scrapbooking but sometimes they just need a special embellishment to make them POP.

The cards I am sharing today really shine with the beautiful soft Buttons Galore & More buttons.

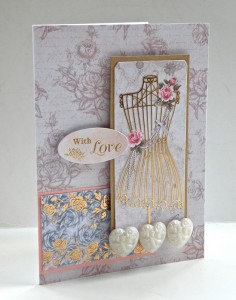
On this card I used the beautiful Buttons Galore & More Ribbon Heart buttons

First cover white cardstock 6X9″ with patterned paper.

Use alternating colored cardstock to matte dress die cut and patterned paper.

Adhere matted patterned paper as shown.

Using thick pop dots, pop up dress die cut as shown in photo.

Pop up sentiment die cut using foam pop dots.

Using hot glue gun adhere 3 Buttons Galore & More Ribbon Heart buttons as shown above.

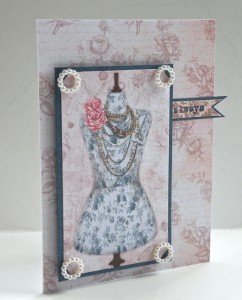
For this card:

First cover white cardstock 6X9″ with patterned paper.

Use alternating colored cardstock to matte dress die cut and sentiment.

Using thick pop dots, pop up dress die cut as shown in photo.

Tuck sentiment underneath dress die cut.

Using hot glue gun, adhere Buttons Galore & More Classic Circle buttons as shown.

2 beautiful cards in just 30 minutes!

Pinky: Buttons Galore & More Design Team

0

Friendship Mixed Media Canvas with Jacquard Lumiere

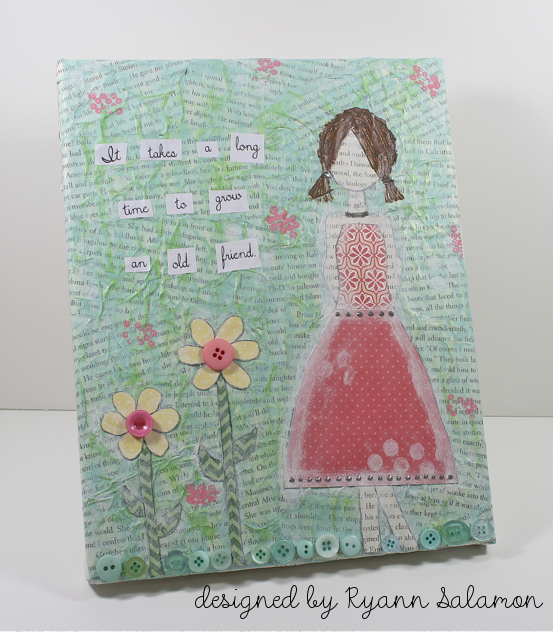
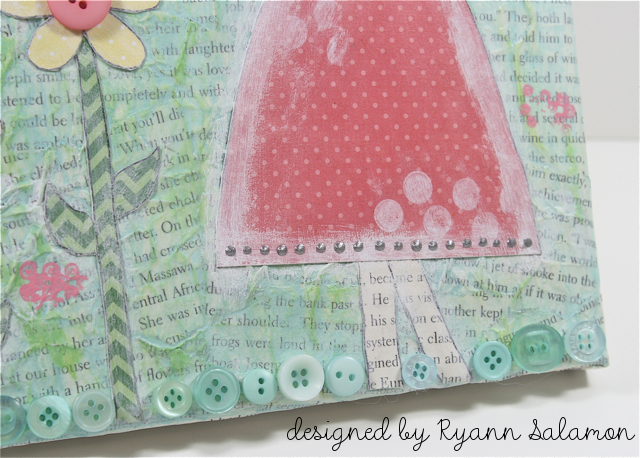
Hi all!  Ryann here with my take on a mixed media canvas piece.  Now I am first and foremost a card maker, but every once in a while I like to stretch my boundaries a bit and try something new. I recently took a paper doll tag class from Julie Nutting and left feeling inspired to create my own paper doll.  After deciding on a mixed media canvas, I began my project!

Supplies used:

Directions:
  1. Tear book pages into small pieces, tearing off any large white spaces (you want to work with just the words).
  2. Adhere onto canvas using Mod Podge.  Cover adhered book page pieces with a layer of Mod Podge and allow to dry.
  3. Lightly paint a layer of light blue acrylic paint.  Let dry completely and follow it up with a lightly painted layer of light green.  Allow to dry.
  4. On a book page, draw out your doll figure and cut out.  Draw doll clothes on patterned paper and cut out.  Adhere onto canvas using Mod Podge.  Apply layer of Mod Podge on top of doll and allow to dry.  Do the same for the flowers.
  5. Lightly go around edges of doll/clothes/flower with white paint and allow to dry.
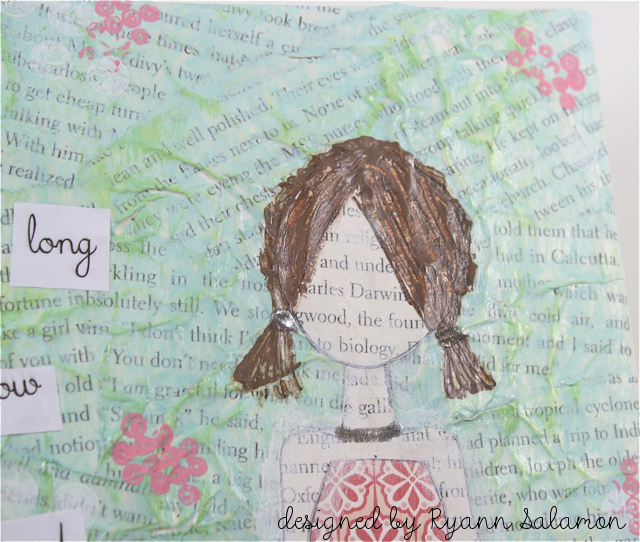
  6. Draw and then paint doll hair and allow to dry.
  7. Create sentiment in computer and print out.  Cut words out individually and adhere to canvas with Mod Podge.  Apply layer of Mod Podge on top of words and allow to dry.
  8. Stamp large polka dots with white ink onto canvas.  Stamp small polka dots with pink acrylic paint randomly around canvas.  Allow to dry completely.
  9. Adhere buttons onto canvas.
  10. Apply Lumiere 3D paint to doll to create texture on dress, neck and hair.  Allow to dry completely.
Thank you for joining me today.  I hope my story of creating outside my comfort zone inspires you to give it a try it too!  :)
Signing off,
Ryann


5

Large Circle Start Ups: Charmed, I’m Sure

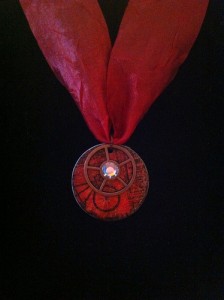
Hi y’all! Allie here… I got my hands on some of Button’s Galore’s Start Up craft shapes this week, the Large Circles. I had such fun making some charms with these blank circles. These blank craft shapes are blank poly plastic pieces that you can stamp on, rub on, ink, paint or embellish with anything you desire. I decided to get creative with some napkins and stamps, and some spritz.

I really love these blank craft shapes! They come in lots of shapes and sizes, from flowers to tags, to sliders and frames, and even holiday shapes. There are even start up packs, and collections including a variety of sizes. They are perfect for every project.


charms-cropped-edited-300x279


This picture shows the separate layers of the napkins I’m using. For my charms, I just used the very top layer.

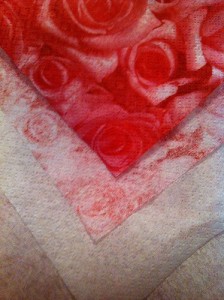
I decided to collage with napkins. I start by separating the layers of the napkin, so I’m working with the top designer layer. I use Claudine Hellmuth’s Matte Medium from Ranger, with a flat brush. Some people like to use a wet Q-tip to “cut” through the napkin, but I prefer to tear, and sand off any excess.

I used a little round file to clean out the holes in the charms. You can use any decoupage medium, whatever you prefer. I also like to seal the top when I’m done.


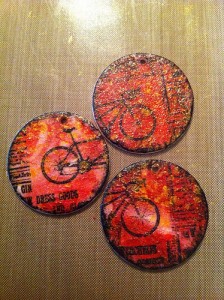
I skipped a few photos, but this is what happens after the decoupage step. I stamped the Large Circles with an Itty Bitty bicycle stamp from Unity Stamp Company. I used Jet Black Stazon ink from Tsukineko. I also lightly tapped around the edges of the Large Circles with the same black Stazon Ink. Once the ink was set, I gave the Large Circles a light spritz with Mr. Huey’s Gold spray from Studio Calico.

Use your favorite spritz, or you could even make your own.

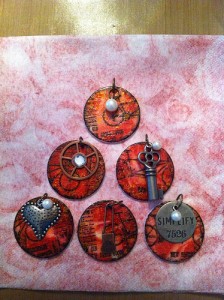
You can add anything you like to these little charms. I put a jump ring on each of them, and added little trinkets and bling. The metal pieces and the little pearls are from Ideaology, and are designed by Tim Holtz. I added bling to the sprocket, on the second row, the charm on the left. I love a little sparkle, don’t you?

Add some bling, little trinkets or baubles.

You could attach these charms to a chain, a hoodie, or anything you like. You can even keep it simple, and just thread it onto some crepe ribbon, as shown below. This ribbon is from Creative Impressions.


SUPPLIES AND MATERIALS

  • Blank Craft Shapes – Large Circles
  • Napkins
  • Decoupage Medium and a Brush for application
  • Stamps and Ink
  • Spritz
  • Trinkets and Jump Rings

0

Handmade Cards for All Skill Levels

Hi all!  Ryann here with my first Buttons Galore & More design team post and I couldn’t be more thrilled to be here with you today!  I have a fun handmade card set to share with you today in a weather theme using lots of buttons!  Now I know not everyone makes cards so I thought it would be neat to have a project for each type of card maker.  So whether you are a beginner, intermediate or more seasoned card maker, there is a project here for you!
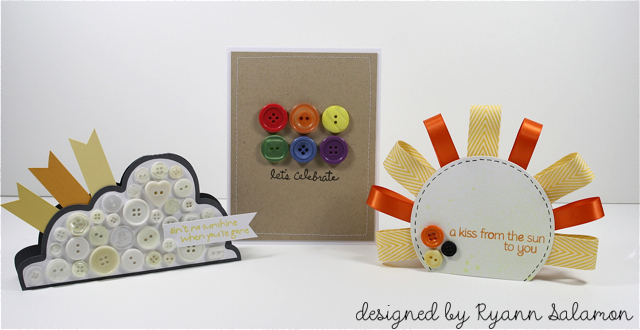
Supplies used:

Cloud card:  cardstock, ink, stamps, Neutrals buttons

Rainbow card:  cardstock, ink, stamps, sewing machine, thread, Primary buttons

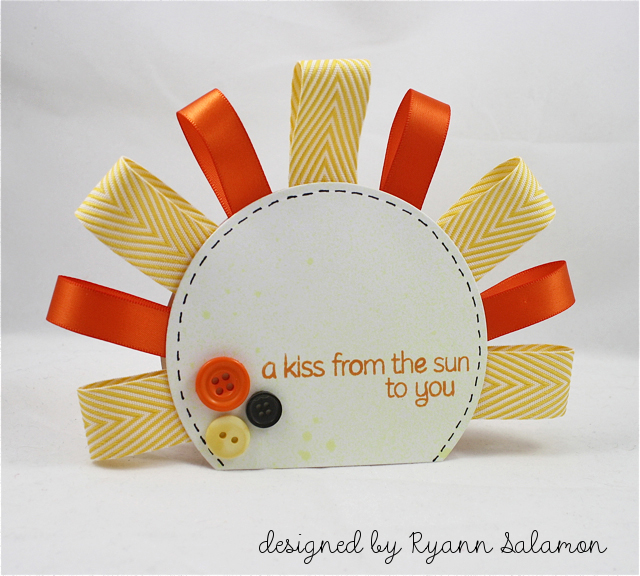
Sun card:  cardstock, ink, stamps, ribbon, marker, circle die, yellow spray mist, Harvest buttons, Tuxedo buttons
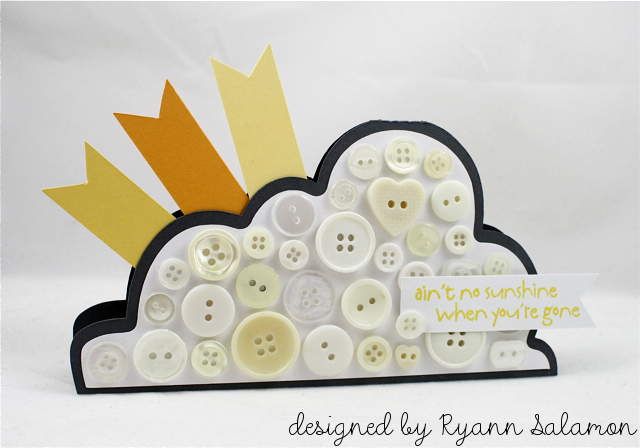
Cloud Card Directions:

1.  Sketch out the shape of your card onto a piece of sturdy cardstock and then cut out.  This will be your template to trace onto your gray card base and white mat layer.
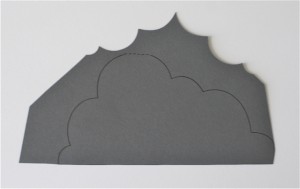
2.  Trace the cloud shape onto your card using the template.  The top of the template should match up to the top of your card (at the fold).  Cut out and set aside.  (Note: You’ll notice the template is backwards from the card pictured.  When you turn it around, your trace lines will be on the backside of your card, so they won’t be visible when decorating!)

3.  Trace the cloud shape onto white cardstock using the template.  Draw a cloud just a little bit smaller than the cloud you traced.  Use the traced cloud as your guide.  Cut out the inside cloud.  This piece will be the layer you adhere the buttons to.
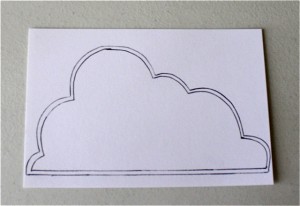
4.  Turn over your white cloud so the trace lines are on the back and adhere to your cloud shaped card base.  Adhere buttons onto card.

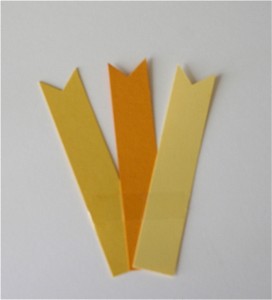
5.  Cut out three long strips of yellow/orange shades of cardstock.  Notch the ends to look like banners and arrange them how you want them to be placed behind the cloud.  Adhere the three strips together using scotch tape.  Adhere the sun rays behind the card front panel, NOT the backside of the card.
6.  Stamp sentiment onto strip of white cardstock and adhere onto card base.  Notch end of strip hanging off side of card.

Rainbow Card Directions:

1.  Create A2 card from white cardstock.

2.  Cut kraft cardstock to measure 4″ x 5-1/4″.  Sew along edges of kraft panel then adhere onto card base.  (Note: If you don’t have a sewing machine, faux stitching made with a marker will look just as good!)

3.  Stamp sentiment onto card, then adhere buttons in rainbow pattern.
Sun Card Directions:

1.  Cut out two circles.  Place them on top of each other and cut off a small section that will be the bottom of your card.  Set one circle aside.

2.  Stamp sentiment onto circle (card front) and create faux stitching along edges using marker.  Spray with yellow mist.

3.  Turn card front over and begin creating your sun rays from ribbon.  Create a loop from a small length of ribbon with your fingers and secure onto backside of card front.
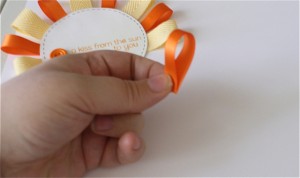
4.  Alternate ribbons going along the edge of your card front, securing as you go.

5.  When done, use a piece of foam tap at top of your card, on the backside, to adhere your card front and back together.  Turn over and adhere buttons onto the card.


I hope this handmade card set has inspired you to get crafting today!  Thanks for joining me in my first post with Buttons Galore and More.  We’ll see you again tomorrow for more crafty button inspiration!!

Signing off,

Ryann


8

Mixed Media Canvas Collage

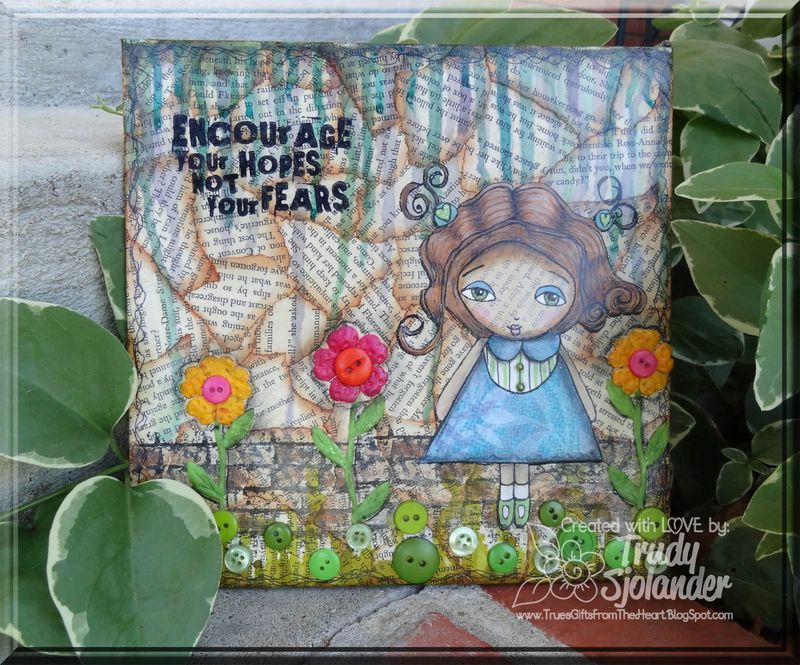
Today’s Internet Inspiration is from a product partner Helmar.  Their Designer Trudy made a darling mixed media canvas collage.

Mixed Media Collage Canvas

This is a quote from Trudy about our products.

“I love buttons and am excited to share my mixed media canvas with you. I used lots of buttons form our prefered partner company Buttons Galore’s – Candy Apple Green mix and a few from some of their other beautiful assortments.”

You can see the post HERE

0

BaZooples Card with hidden gift card holder idea

BZ100

Gertrude and Friends - BZ100


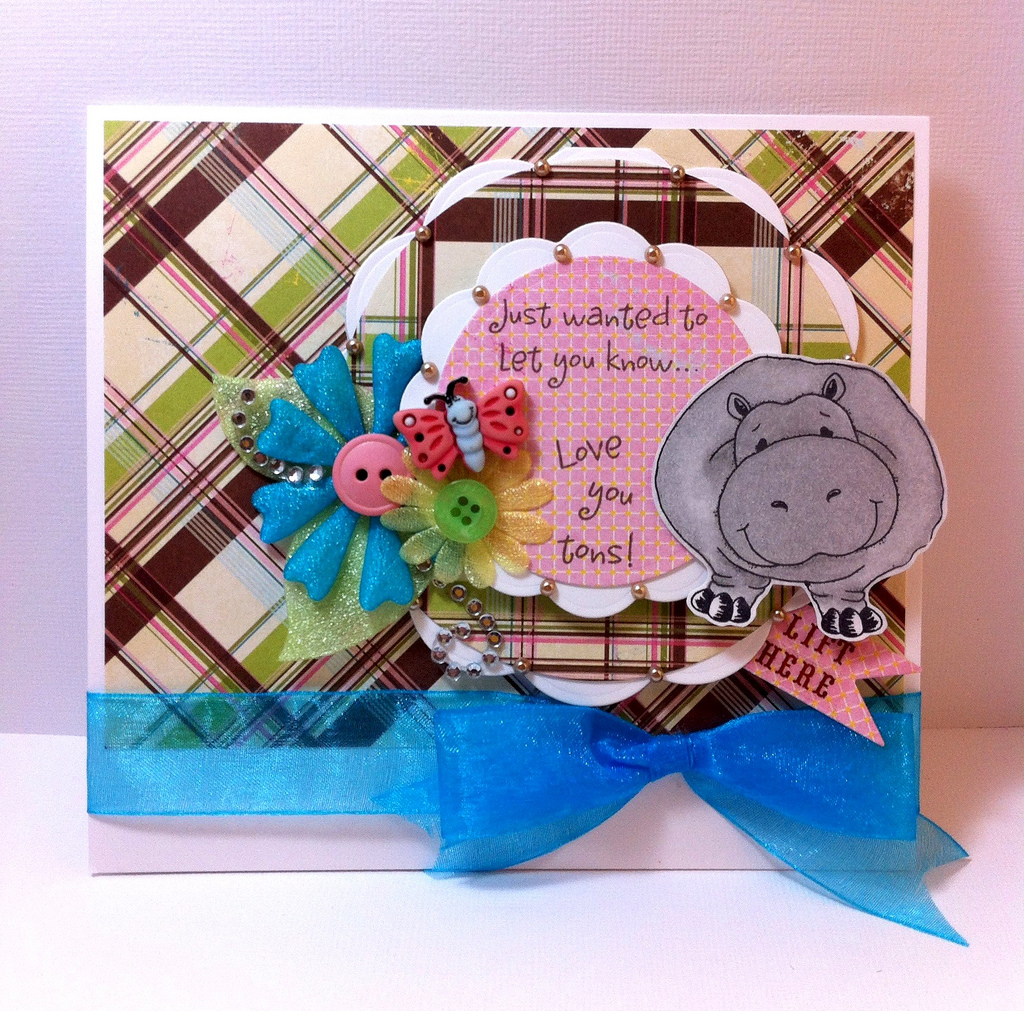
Handmade cards are extra special when they contain a gift cardI had some fun with the butterfly from this cute set of BaZooples novelty buttons. I paired it with a BaZooples image from Inky Antics that I colored with pencils and gamsol.

Handmade hippo card

Handmade hippo card

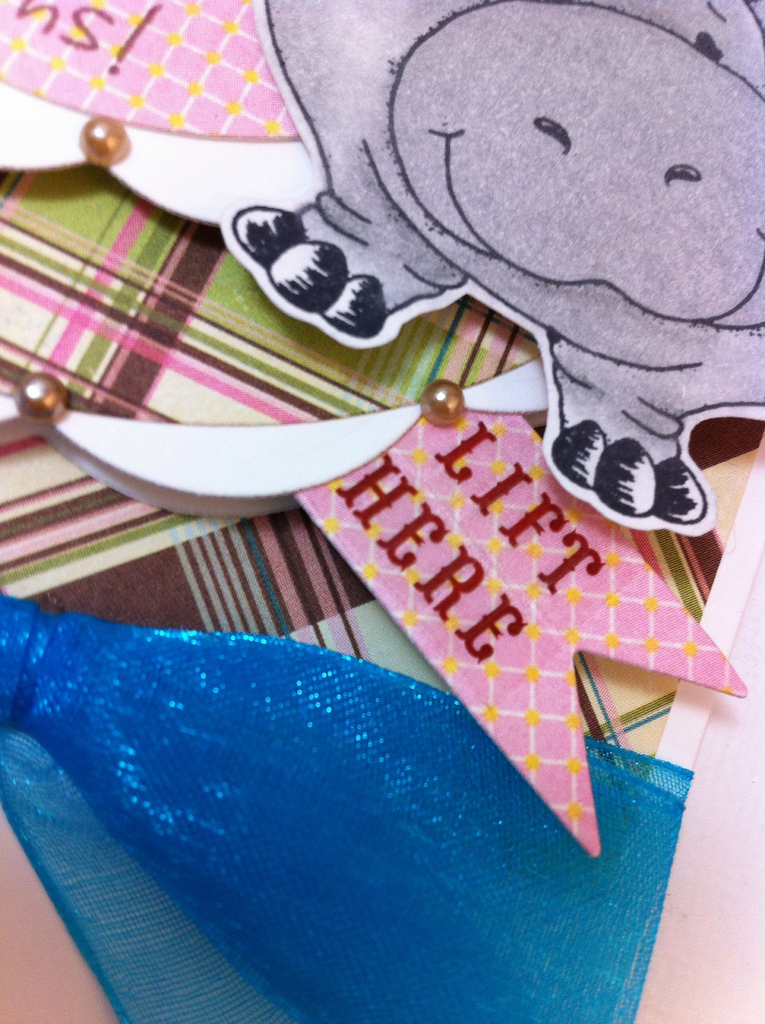
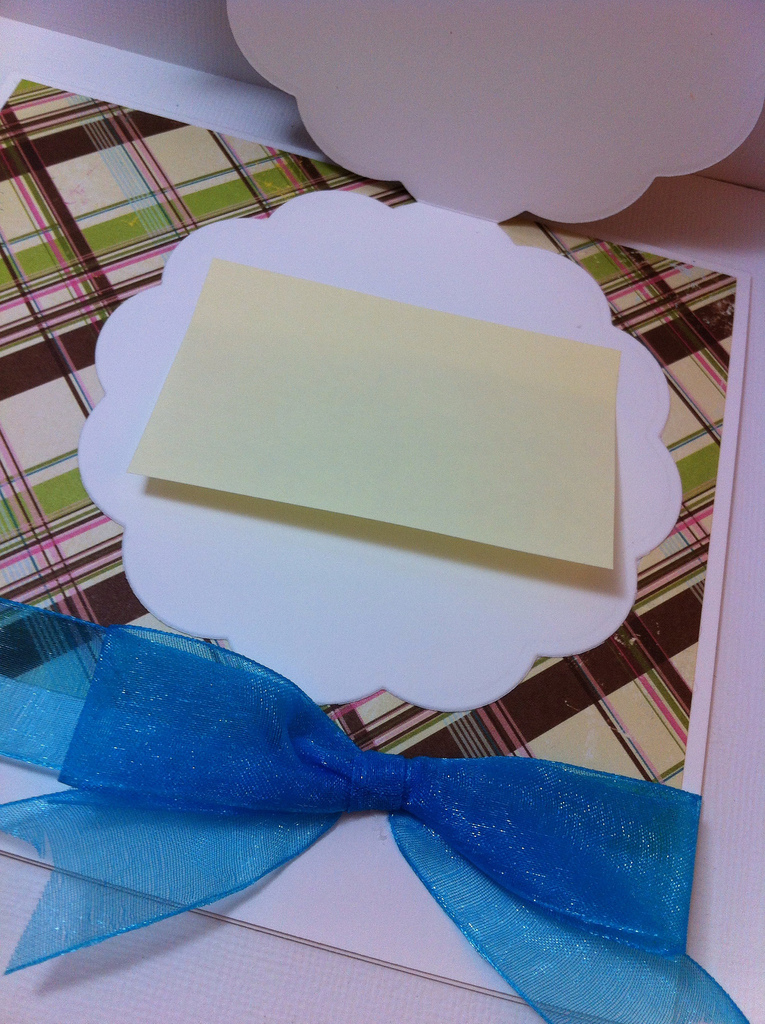
The card is a little larger than usual and has a mini card on top. Notice the “LIFT HERE” pennant? When you lift that, you have a space for a gift card! I didn’t have a gift card,yet.   So I placed a post it note just so you can see where that gift card would go. Inside the main card, there’s a panel of patterned paper, and plenty of room for a nice note. The sentiment reads “Just wanted to let you know… Love you tons!” Isn’t that the perfect sentiment for a Hippo card?


close up lift here

close up lift here


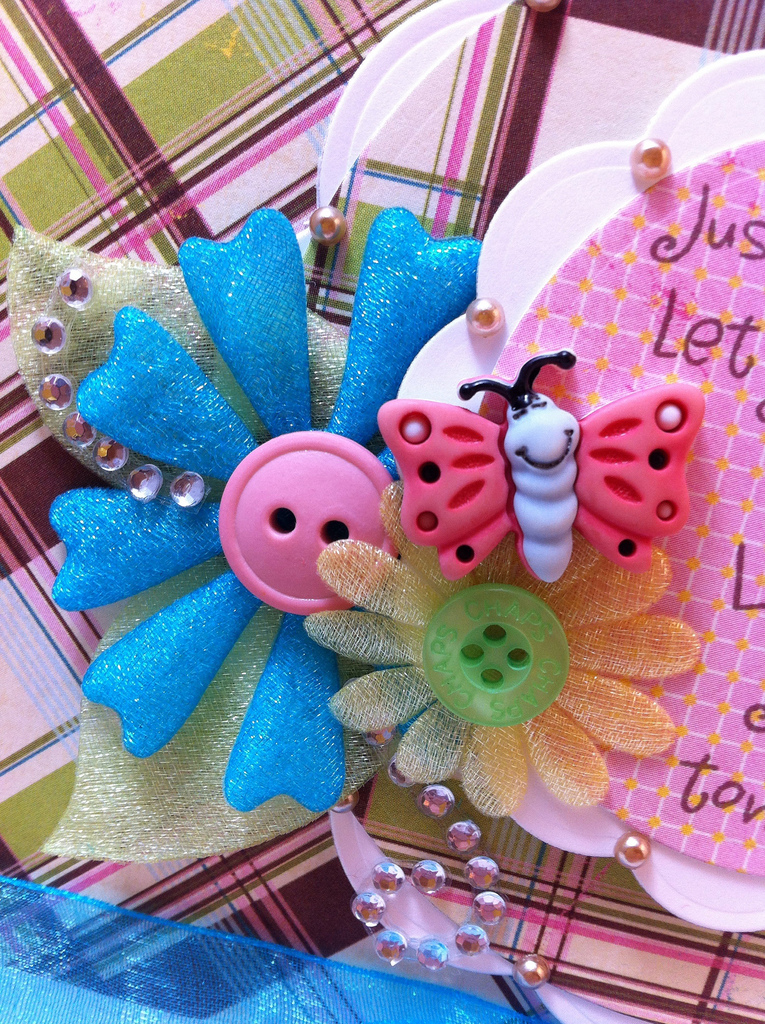
The gift card portion of the card was created using circle and scalloped circle dies from Spellbinders Paper Arts. The paper is from Authentique, and is accented with bling from Want2Scrap and some flowers from Creative Impressions. I used some additional buttons from my Buttons Galore jar for the flower centers.

inside close up gift card

inside close up gift card

close up flowers and buttons

close up flowers and buttons

I finished off the handmade card with a quick bow using some ribbon from my local craft supply. Sheer ribbon is so pretty and easy to tie.

Thank you for stopping by today!

1

Internet Inspiration

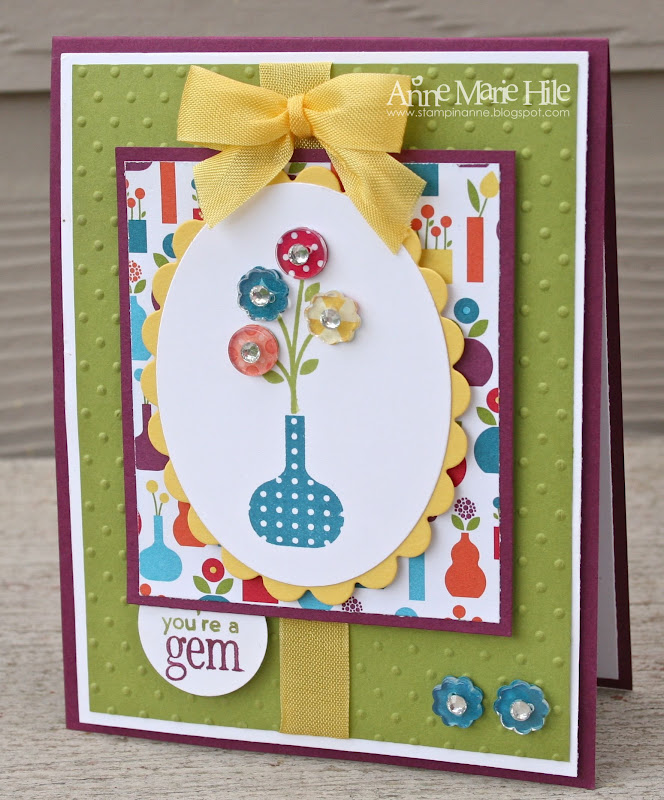
Browsing the internet can provide so much inspiration, and when we found this site we hit the jackpot!  The Paper Players blog not only did a challenge using buttons, they also have a section for their readers to share their creations.  Check out their site http://thepaperplayers.blogspot.com/2012/03/challenge-87-cas-with-buttons-from.html . This card below is one of the many fantastic creations they have for your viewing pleasure.

Paper Players Card with Buttons

Paper Players Card with Buttons

The card Annie made is crisp, clean and full of sparkle.  What is not to love?  Check back here again.  There is so much inspiration from crafters who use buttons in their projects.

Don’t forget we are holding a Pin it To Win It Contest too!


0

Handmade Little Boy Card – Pinterest Inspiration

Pinterest Inspiration

Pinterest Inspiration

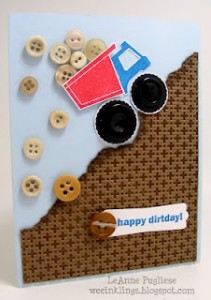
Browsing for little boy card ideas is not an easy task.  There are tons of  little girl cards, teen girl cards and feminine cards to be found almost everywhere.  Handmade masculine cards start appearing around graduation and Father’s Day, but handmade little boy cards that are designed well are few and far between.  WeeInklings.blogspot.com has this adorable card pinned on pinterest and I love it.  It is cute, creative and perfect for a little boy.  Her pin board is http://pinterest.com/source/weeinklings.blogspot.com/ and she has some fun stuff.

0

Powered by WordPress. Designed by WooThemes