Header

Tag Archives | Rainbow

Make a Rainbow Canvas with 28 Lilac Lane!

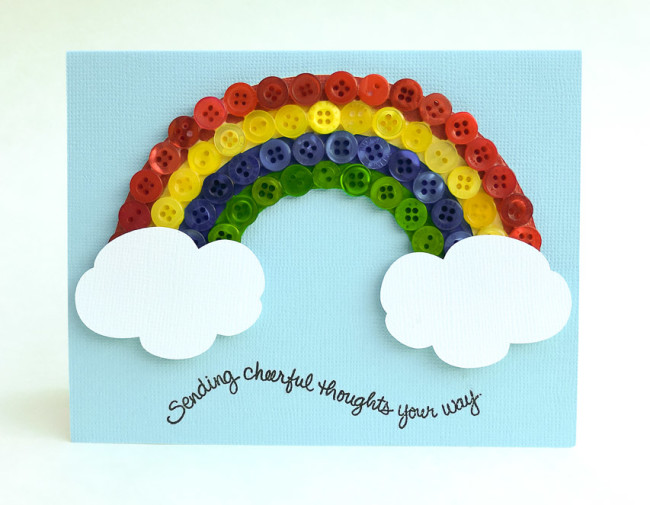
Wanting an uplifting, fun, and carefree kind of project this week I pulled out the entire 28 Lilac Lane line, some paste, liquid adhesive, and a 6×6 wood board to make a rainbow!

Rainbow Love Canvas with buttons by May Flaum

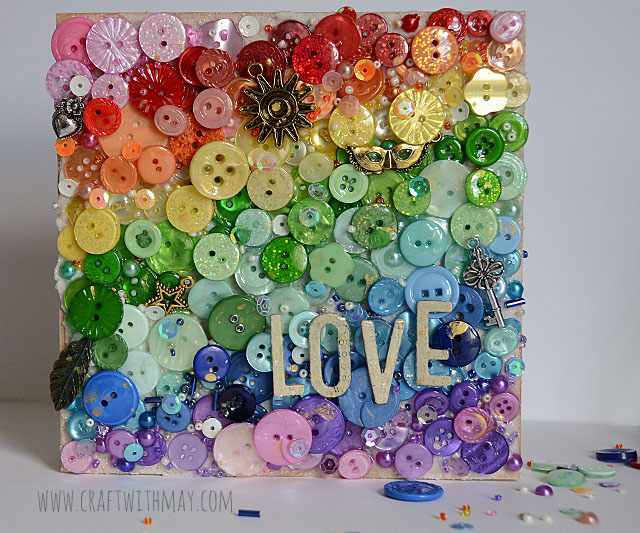
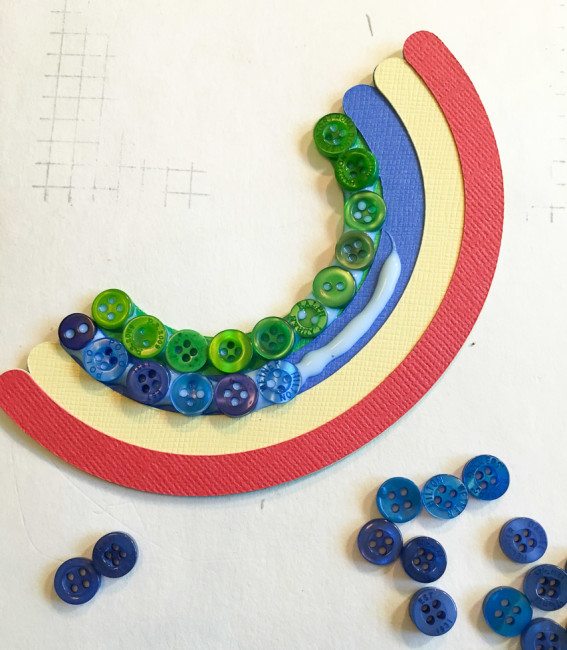
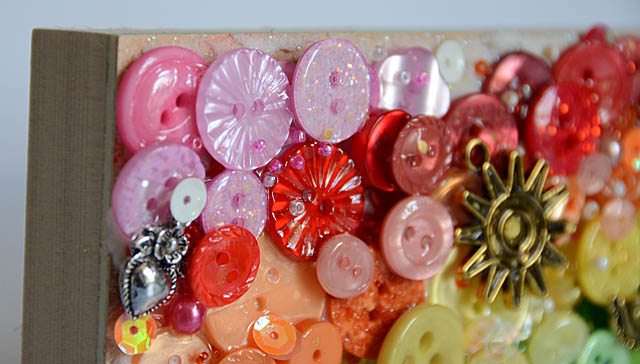
Did I really say the entire line? Yes, yes I did! I wanted to create a rainbow of buttons, beads, sequins, and pearls across this canvas and I wanted to have a wide variety. Beginning in the middle with green and working towards the edges, I just love the finished piece! Some charms from various kits as well as a few chipboard letters finished off my project before I used a glossy sealant to complete this piece. Note that I worked in layers, meaning that I built a base layer then went back over it several times to add more pieces and details. This project was such fun to make, and I love that it features at least one thing from every bottle and kit.

Rainbow love canvas close-up

Rainbow Love Canvas close-up

Want to make this with fewer items? Using the Dragon Fire, Pumpkin Spice, Hello Sunshine, Oh Christmas Tree, Winter Blues, and On Lilac Lane bottles would get you a lovely rainbow as well. I hope I’ve inspired you to create a bit of a rainbow with your next craft project, and get those fun buttons on display. For complete details and instruction be sure to watch my video below!

0

Send a Happy Button Rainbow Card!

I spent the weekend creating new storage for my buttons that has them arranged in rainbow order. After playing with a giant rainbow of buttons for hours, it left me in the mood to create a button rainbow card for my project today!

This happy button rainbow card is perfect to bring cheer for any occasion.

A rainbow like this is just a simple button collage. The trick is to get the curves lined up and space correctly. I made that simple for this project by using a die cut as a basis for the collage. Because I cut the die cut from cardstock that matched my buttons as closely as possible, the cardstock background will “fill in” visually between the buttons.

rainbow

Assembling the button collage is simple. Working one row at a time, I placed a line of glue along the row for each color. Then I selected small buttons to place along the row. It helped if the buttons were somewhat alternated in position from the previous row, since then I could put a slightly larger button into the gap created by the curves. I let each row dry until it was adhered firmly before beginning the next row to make sure that I didn’t accidentally displace the previous row adhering the new one.

button rainbow in progress

Once the rainbow was completed and dry, I adhered it to a blank card after first stamping the sentiment on the card. It was important to do the stamping first since the thickness of the button rainbow could make it difficult to get the stamp in position after it is adhered.

attaching adhesive to clouds

The final step was to adhere the clouds using 3D foam squares. I lined the squares up along the bottom of the clouds so they created a line across the center of the clouds. This edge butted right against the bottom edge of the rainbow when I adhered it. The top of the cloud doesn’t need adhesive because it is supported by the rainbow.

Supplies:

I hope you enjoy my button rainbow card! It’s an easy way to send some cheer to someone you care about!

0

DIY Craft a Rainbow

This is a really fun activity for kids, for kids of all ages that is.   You can use this project as a guideline to create using a variety of bright materials but I, of course, love BUTTONS!  You can find all of the colors of the rainbow in buttons in my Laura Kelly collection for Buttons Galore!

RainbowWindow

To create a rainbow of colorful fun, use a piece of waxed paper and create the arcs with Aleene’s Tacky Glue.

GlueRainbow

Then add objects in the colors of the rainbow to create the beauty.  Buttons works GREAT but so do other embellishments and random things from around the house.

GlueRainbowColor

Ta Da!  Once it is totally dry, cut it out and hang it up.  It works great on a glass window or door.

GlueRainbowFinal

Happy Being Bright and Cheerful,

Laura

0

Powered by WordPress. Designed by WooThemes