Walnut Hollow Wall Art
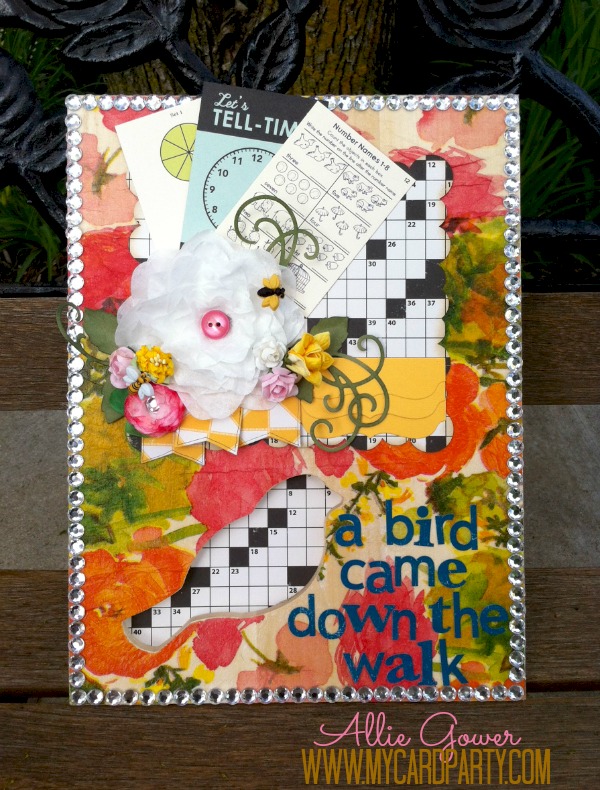
Allie here today making some Walnut Hollow Wall Art. This is really not hard, so colorful, and a lot of fun.
Supplies for my Walnut Hollow Wall Art:
- Sweet Blush Buttons
- Garden Bug Buttons
- Board – Walnut Hollow
- Bulk Bling – Want2Scrap
- Fucschia Dye – Rit Dye
- Crossword Puzzle Paper, Stickers and Vintage Cards – October Afternoon
- Flowers – some are handmade using Spellbinders, additional flowers from Wild Orchid
- Adhesives – Glue Dots, Adtech Hot Glue Gun and Glue Sticks, Plaid (Mod Podge)
- Dies – Spellbinders, My Favorite Things, and Heartfelt Creations, Silhouette
- Other – decorative napkin, coffee filters (for handmade flowers)
Instructions
- Decoupage a napkin onto the board and seal with Mod Podge.
- Cut main mat (Silhouette), flourish (Heartfelt Creations – Belle Rose Collection), tabs (My Favorite Things) and flowers (Spellbinders).
- Assemble large flower and add Sweet Blush Button center and Garden Bug accent. Assemble smaller flower (this flower was dyed with Rit Dye in Fuschia) and add Silver/Clear Bulk Bling Rhinestone.
- Add vintage cards and other paper embellishments. (Note – I doodled along the edges of some of these pieces.)
- Decorate edges with Bling.
- Add a sentiment using stickers. I chose a line from an Emily Dickinson poem. Note, stickers don’t stick well to the mod podge surface, so you may want to reinforce with adhesive.
Note – I lined the back of board with matching paper so that the crossword pattern would show through where the bird cutout is.
Thanks for joining me today.
See more of my creations at My Card Party.