Header

Tag Archives | Fiskars

A Patriotic Craft Party – the I Love the USA Blog Hop

It’s going to be a Patriotic Craft Party of epic proportions…

You’re invited to join us for the I Love the USA Blog Hop!

I Love the USA Patriotic Party Crafts - I Love the USA Blog Hop

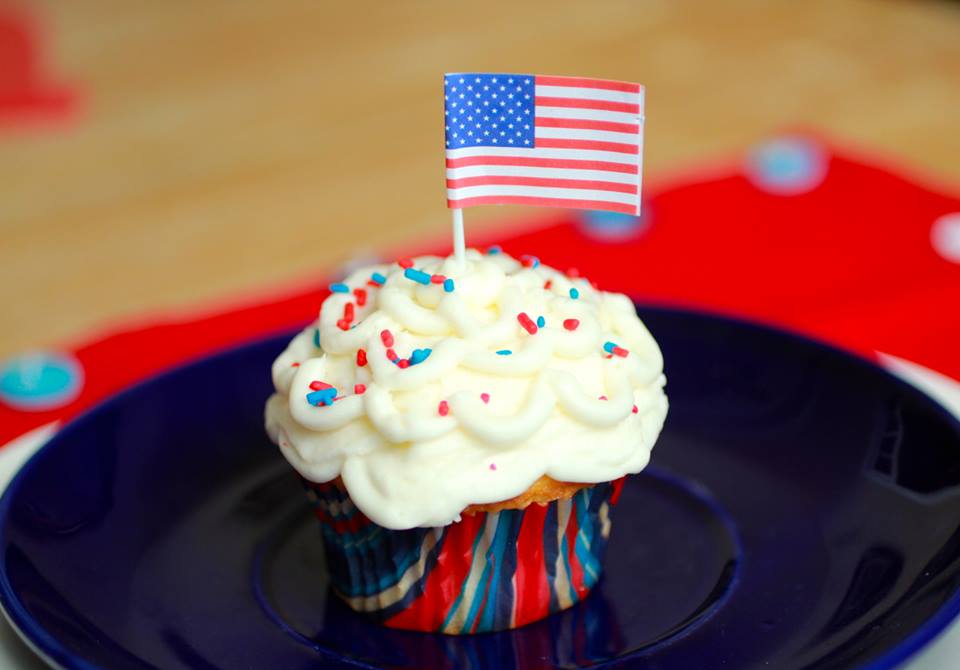
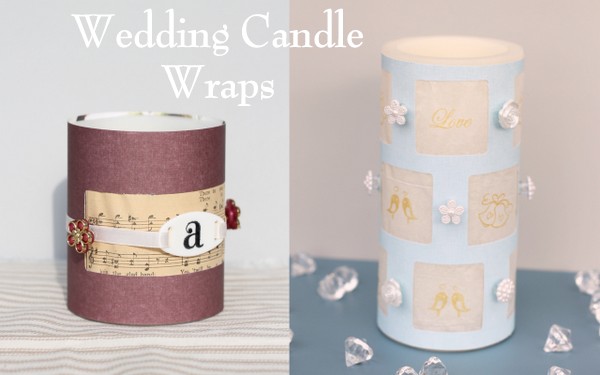
 Cupcakes say PARTY! You’re invited to a Patriotic Craft Party!

28 Fabulous Artists – scrapbookers, cardmakers, seamstresses and more joining forces to take your patriotic crafts soaring to new heights. Join our Hostess Artist Laura Kelly Walters and Jen Goode and a parade of sponsors including Laura Kelly “America the Beautiful” General Fabric for Jo-Ann’s Craft Stores, Coats & Clark, Plaid, Fiskars, and Buttons Galore.

A Patriotic Craft Party – the I Love the USA Blog Hop

Check out this ALL STAR Line Up for the Blog Hop!

Our Hostesses

The Button Bevy

And Lots of Honored Guests


Join us!  If you want to follow along with hashtags and share your projects with us on our Facebook, Pinterest or even Twitter use hashtags #ilovetheusabloghop  #craftpatriotic #laurakellyart  


0

Wedding Decorations – DIY Candle Wraps Two Ways

Looking for DIY wedding decorations for your wedding?  These candle wraps with buttons are perfect for your ceremony.  Plus there are two different looks to choose from.  These wedding decorations can be modified to work with any style.

Wedding Decorations Wedding Candle Wraps

Materials needed for candle wrap wedding decorations:

Wedding Decorations Wedding Candle Wraps

 Directions for making candle wrap wedding decorations:

For the blue candle wrap, cut a sheet of paper so that it fits your candle.  Punch out a pattern of windows in your scrapbook paper with the Fiskars Everywhere Punch.

Wedding Decorations Wedding Candle Wraps

Cut a sheet of tissue paper slightly smaller than your paper and tape to the back.

Wedding Decorations Wedding Candle Wraps

Use various stamps to decorate each window of your candle wrap.

Wedding Decorations Wedding Candle Wraps

Wrap the candle and secure with tape in the back.  The candles I am using are wax sleeves that accept battery power tea lights.  There is no threat of fire when using these types of candles.  Add random buttons from the Something New button pack around your candle wrap.  Use hot glue to secure your buttons.

Wedding Decorations Wedding Candle Wraps

Add this one to the center of your wedding table for a beautiful centerpiece.  A collection of these would look great at your wedding reception.

Wedding Decorations Wedding Candle Wraps

Now for the second version just to show that these can be customized to any wedding theme.  For this version, again I cut the paper to size.  This time I used my Fiskars Everywhere Punch to make an elongated hole.

Wedding Decorations Wedding Candle Wraps

I cut some sheet music to size and taped it to the back of the paper over the window.

Wedding Decorations Wedding Candle Wraps

Stamp the blank shape with the monogram of your choice.  Then thread through some ribbon.  Glue the shape and the buttons to the ribbon ONLY.  Do not adhere to your wrap in this step.

Wedding Decorations Wedding Candle Wraps

Wrap the paper only around your candle first and secure with tape.  Then add your ribbon and secure with hot glue.

Wedding Decorations Wedding Candle Wraps

You can change up the paper and buttons on your candle wraps to match your wedding theme.  These are a quick and easy addition to any wedding decor.  Not getting married anytime soon?  These could also be customized for any season or home decor.  Grab your buttons and get started on your wedding decorations today.

1

Sunday Card Making: Make an OWL LOVE YOU Valentine Card

Do you like puns?  There is nothing cuter than OWL LOVE. I think this card would work well for Valentine’s Day, or any day with the simple HELLO!

This card is not difficult, but it’s got a little cutting and some die cutting and punching.

I started with Spellbinders Labels 20 and cut two green shapes and embossed them. I though these worked well for bushy foliage. I also die cut a branch from the Spellbinders BUGS set, and I also embossed it and added some ink for added contrast.

I stamped the Owl with some Crystal Blue ink from Close To My Heart – the owl is a Stamp of the Week from Unity Stamp Company. I have a love for owls, and some of my close friends call me Owlie – it’s even the name of my character on the Wii. It’s okay to laugh! I fussy cut the owl – not as hard as SOME shapes. I doodled around his feet and gave him some eyelashes with a Copic multiliner. I stencilled on his nose – I stamped a second owl and cut out the nose. I colored and outlined. An owl can be blue and sit in a tree, but a blue nose – never! I added some metal brads for his eyes.

I punched a heart using a Fiskars punch. The paper is from Canvas Corp and has all kinds of love words on it. I added a Red Heart Button. I tied a little bow with some Doodlebug Design Twine. At the bottom, I stamped “hello” from the same stamp set. I colored in the heart with a Copic Marker and added some Turquoise Rhinestones from Want2Scrap.

I did a little rounding at the bottom of the card and on the sentiment.

That’s it!

I hope you will love this card.


Hello by Allie Gower

Buttons Galore Supplies used to make the OWL LOVE YOU Card:

Additional supplies used to make the OWL LOVE YOU Card:

  • Cardstock – My Favorite Things Replenishments
  • Stamps – Unity Stamp Company (Stamp of the Week Program)
  • Dies – Spellbinders Labels 20 and Bugs
  • Punches – Scalloped Heart and Corner Punch from Fiskars
  • Twine – Doodlebug Design
  • Ink – Close To My Heart and Copic
  • Bling – Want2Scrap

Do you want this OWL to love you forever?

I will send him to a lucky winner.

Leave a comment and PIN him. I know, you were going to do that anyway. Good luck and I’ll see you all next week.

Powered by WordPress. Designed by WooThemes