Taking time to recognize all the wonderful fathers out there is important & not just once a year, but the entire year through!
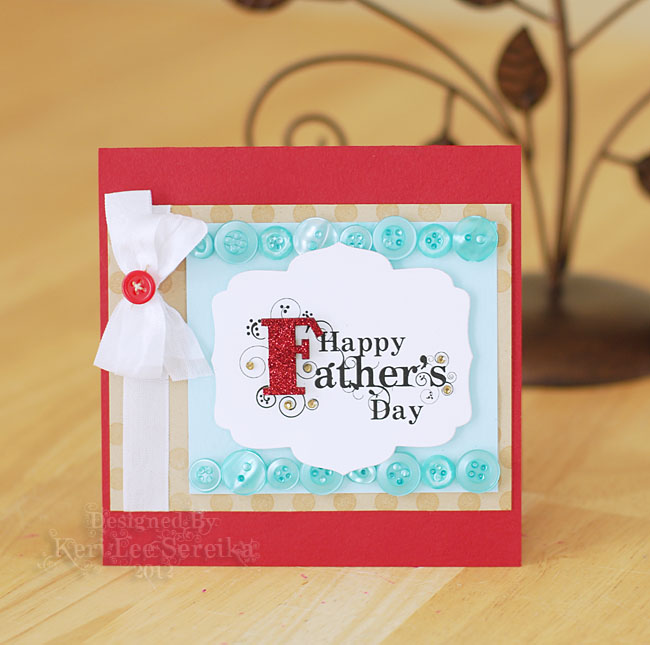
For this card I simply wanted to design something that my husband would love. I happen to love the colors kraft, red & blue together, no matter what the shades.
For the sentiment I had the notion to use a chipboard letter from Want2Scrap in place of the printed “F” but still use the fun swirls that come with that uppercase letter. To achieve this I opened a file in Photoshop, created a total of three layers, one for each word I was planning on using. I made the word “Father’s” larger than both of the other words. I then made sure that the “F” was even larger than the rest of the word. Finally, I created another layer. Then using the rectangular selector tool I created a selection over top of the “F” and filled it with white but kept the swirls that were coming off. My last step was to arrange the layers so that the sentiment was placed together so that there would be room to add the chipboard “F” as I had planned. I then printed the sentiment and die cut around it using Spellbinders Labels Four. To finish off my sentiment panel I simply inked the chipboard “F”, applied glue to the entire surface and applied red glitter to really give it “POP!”.
After that it was simply a matter of putting the card all together as you see here. I again used the Lumiere 3-D to adhere the buttons and fill the “naked” button holes, just like I did on my scrapbook layout earlier this month.
What a fun texture the strips of buttons add beneath the main focal image, don’t you think? Enjoy!

Supplies:
Sentiment: Duetica – Woodwynds Font
Cardstock: Bazzill: Red, White & Light Teal
Stamps: Gina K Designs – Vintage Backgrounds
Ink: Clearsnap Fluid Chalk Ink – Creamy Brown, Lipstick Red
Glitter: Clearsnap – Ruby Slippers
Ribbon: Really Reasonable Ribbon – White Seam Binding
Buttons: Buttons Galore & More – Button Tin in Sea Glass, red
Chipboard Letter & Gems: Want2Scrap
Other: Jacquard Lumiere 3D (To adhere buttons and fill button holes)
Latest posts by Keri Lee Sereika (see all)
- Quick and Easy Gifts – Make a handmade note card set - November 2, 2012
- A DIY on How to Make a No Sew Tutu Tutorial Embellished With Felt Leaves & Buttons - October 1, 2012
- altered buttons make great embellishments! - September 3, 2012


No comments yet.