Header

Tag Archives | red

Painted Holiday Rock With Purpose

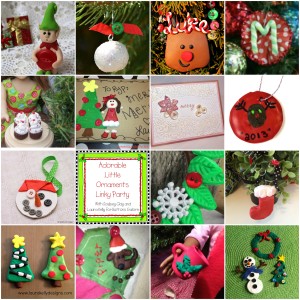
How adorable is this rock? It is not any ordinary rock. It is a special holiday hand-painted and button embellished rock that we use to hold the door open.  It is a rock with a message and a purpose.

Rock

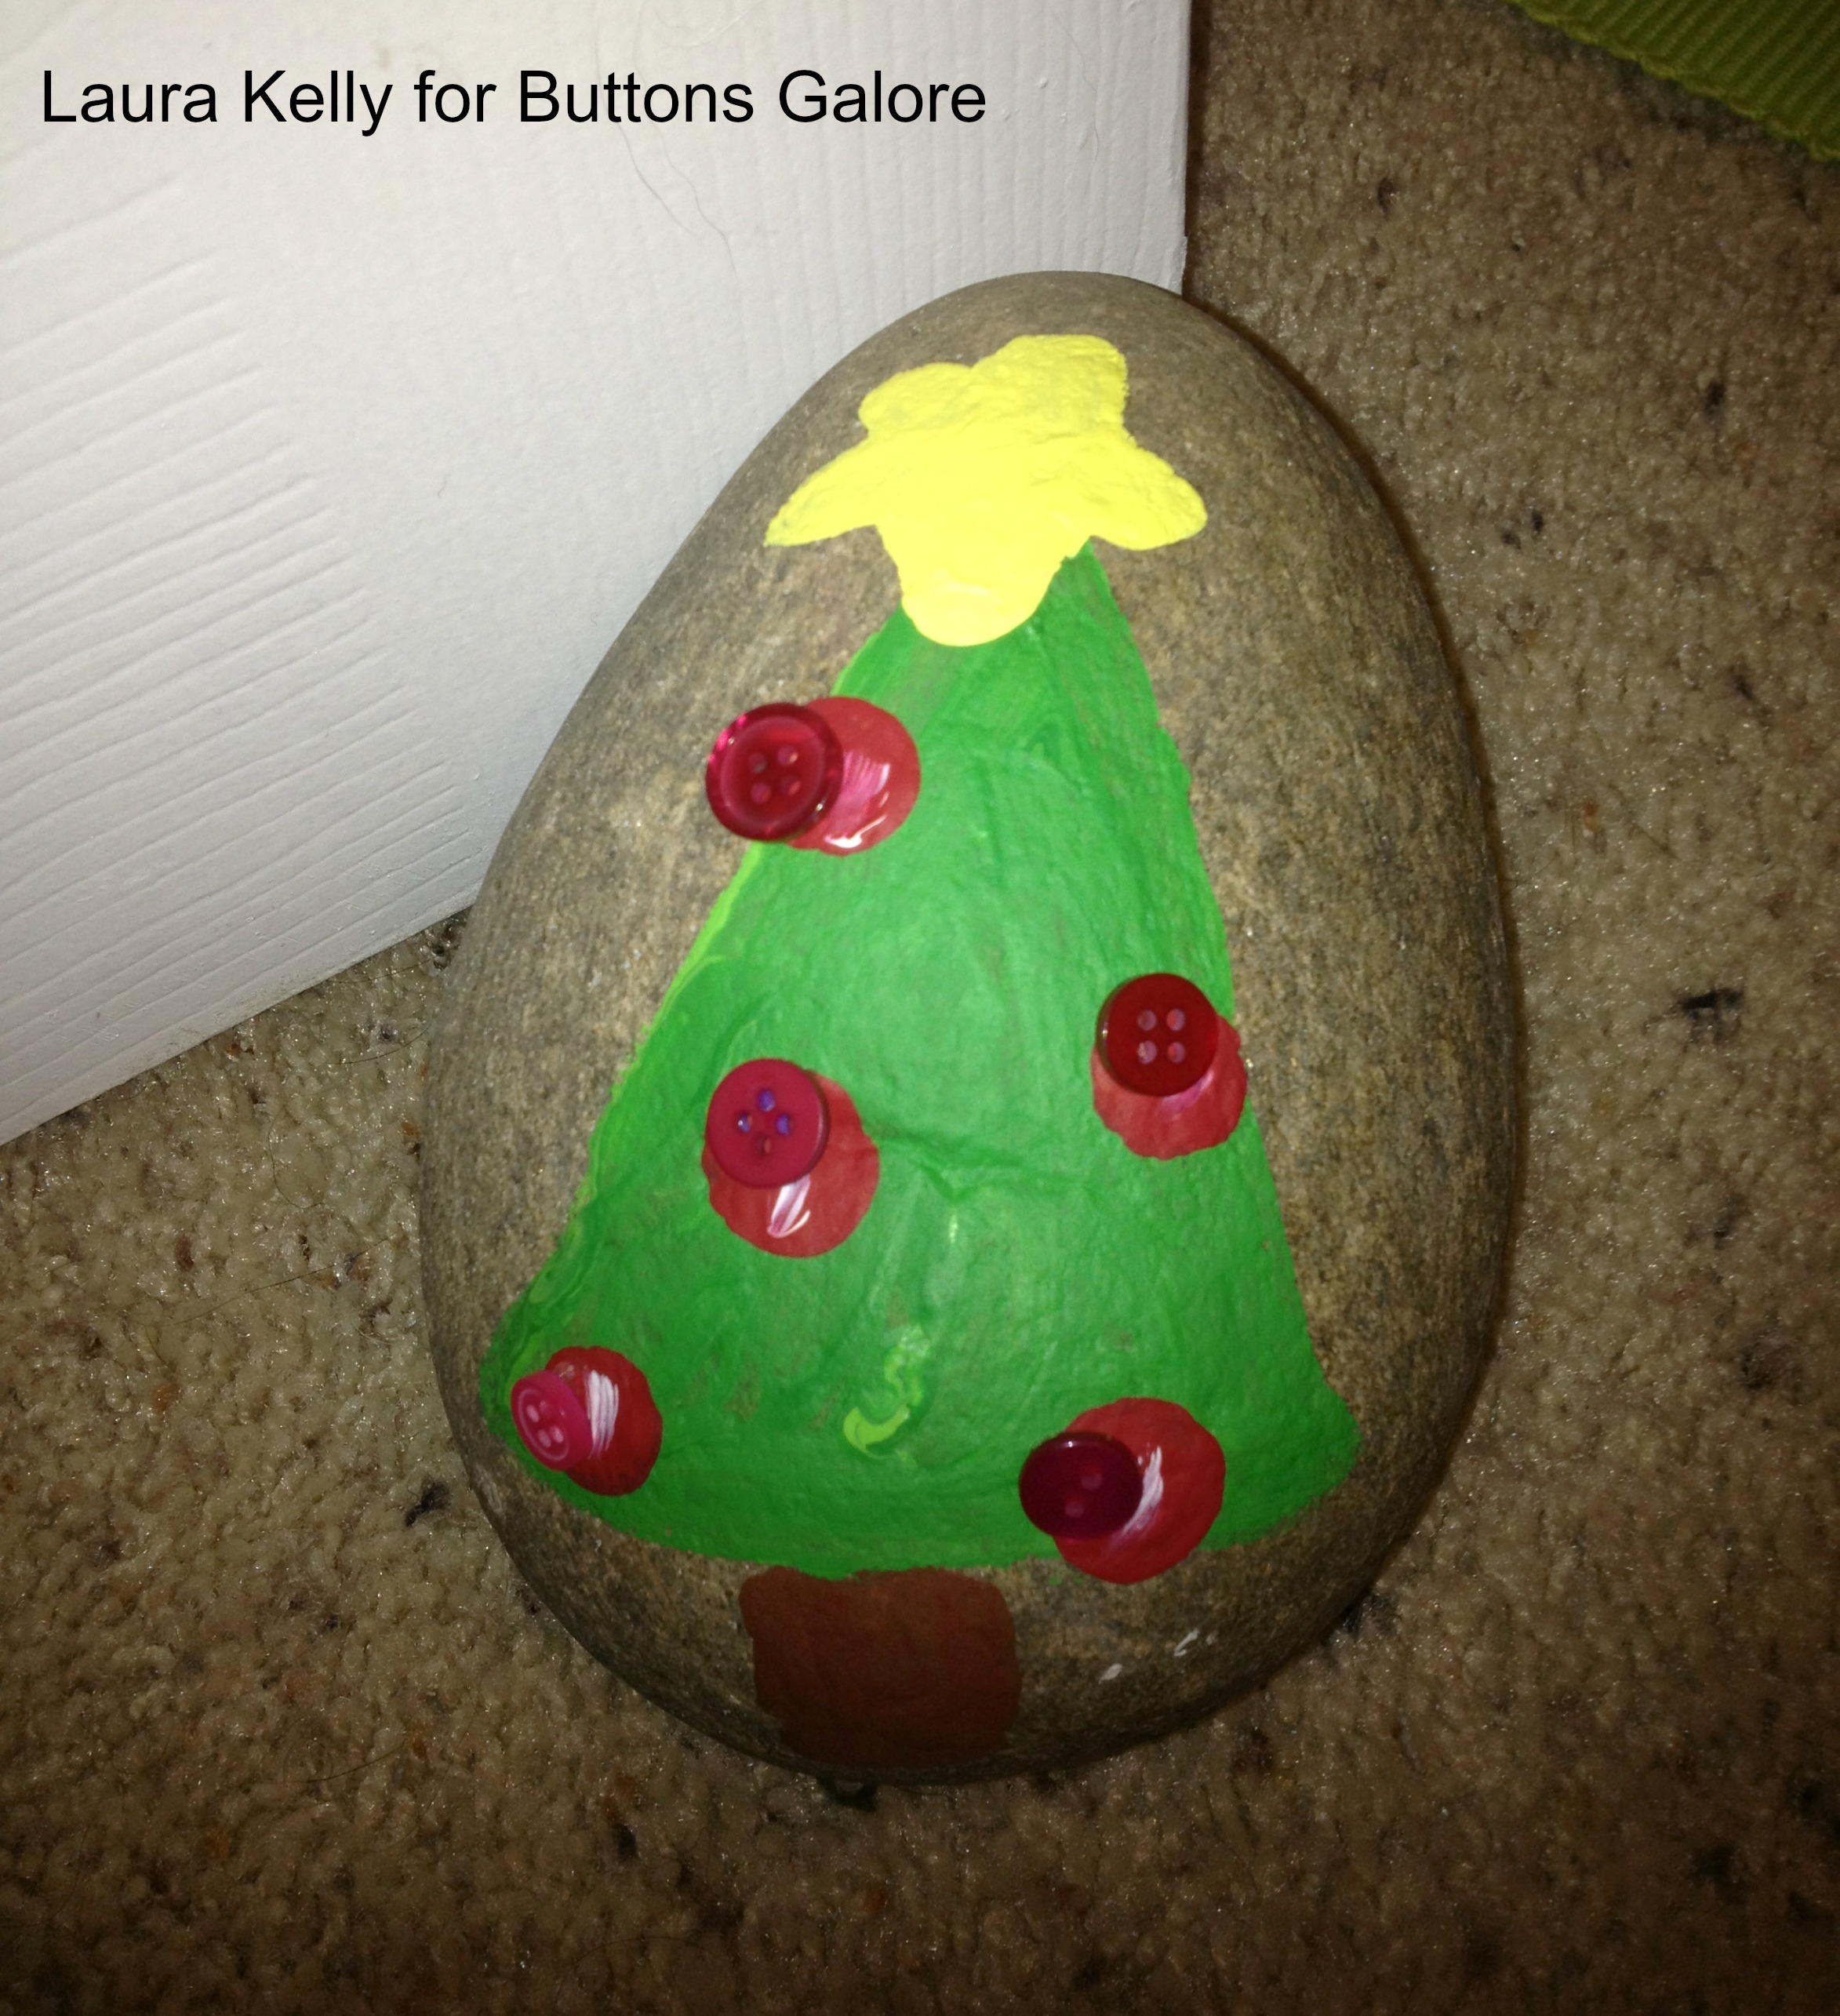
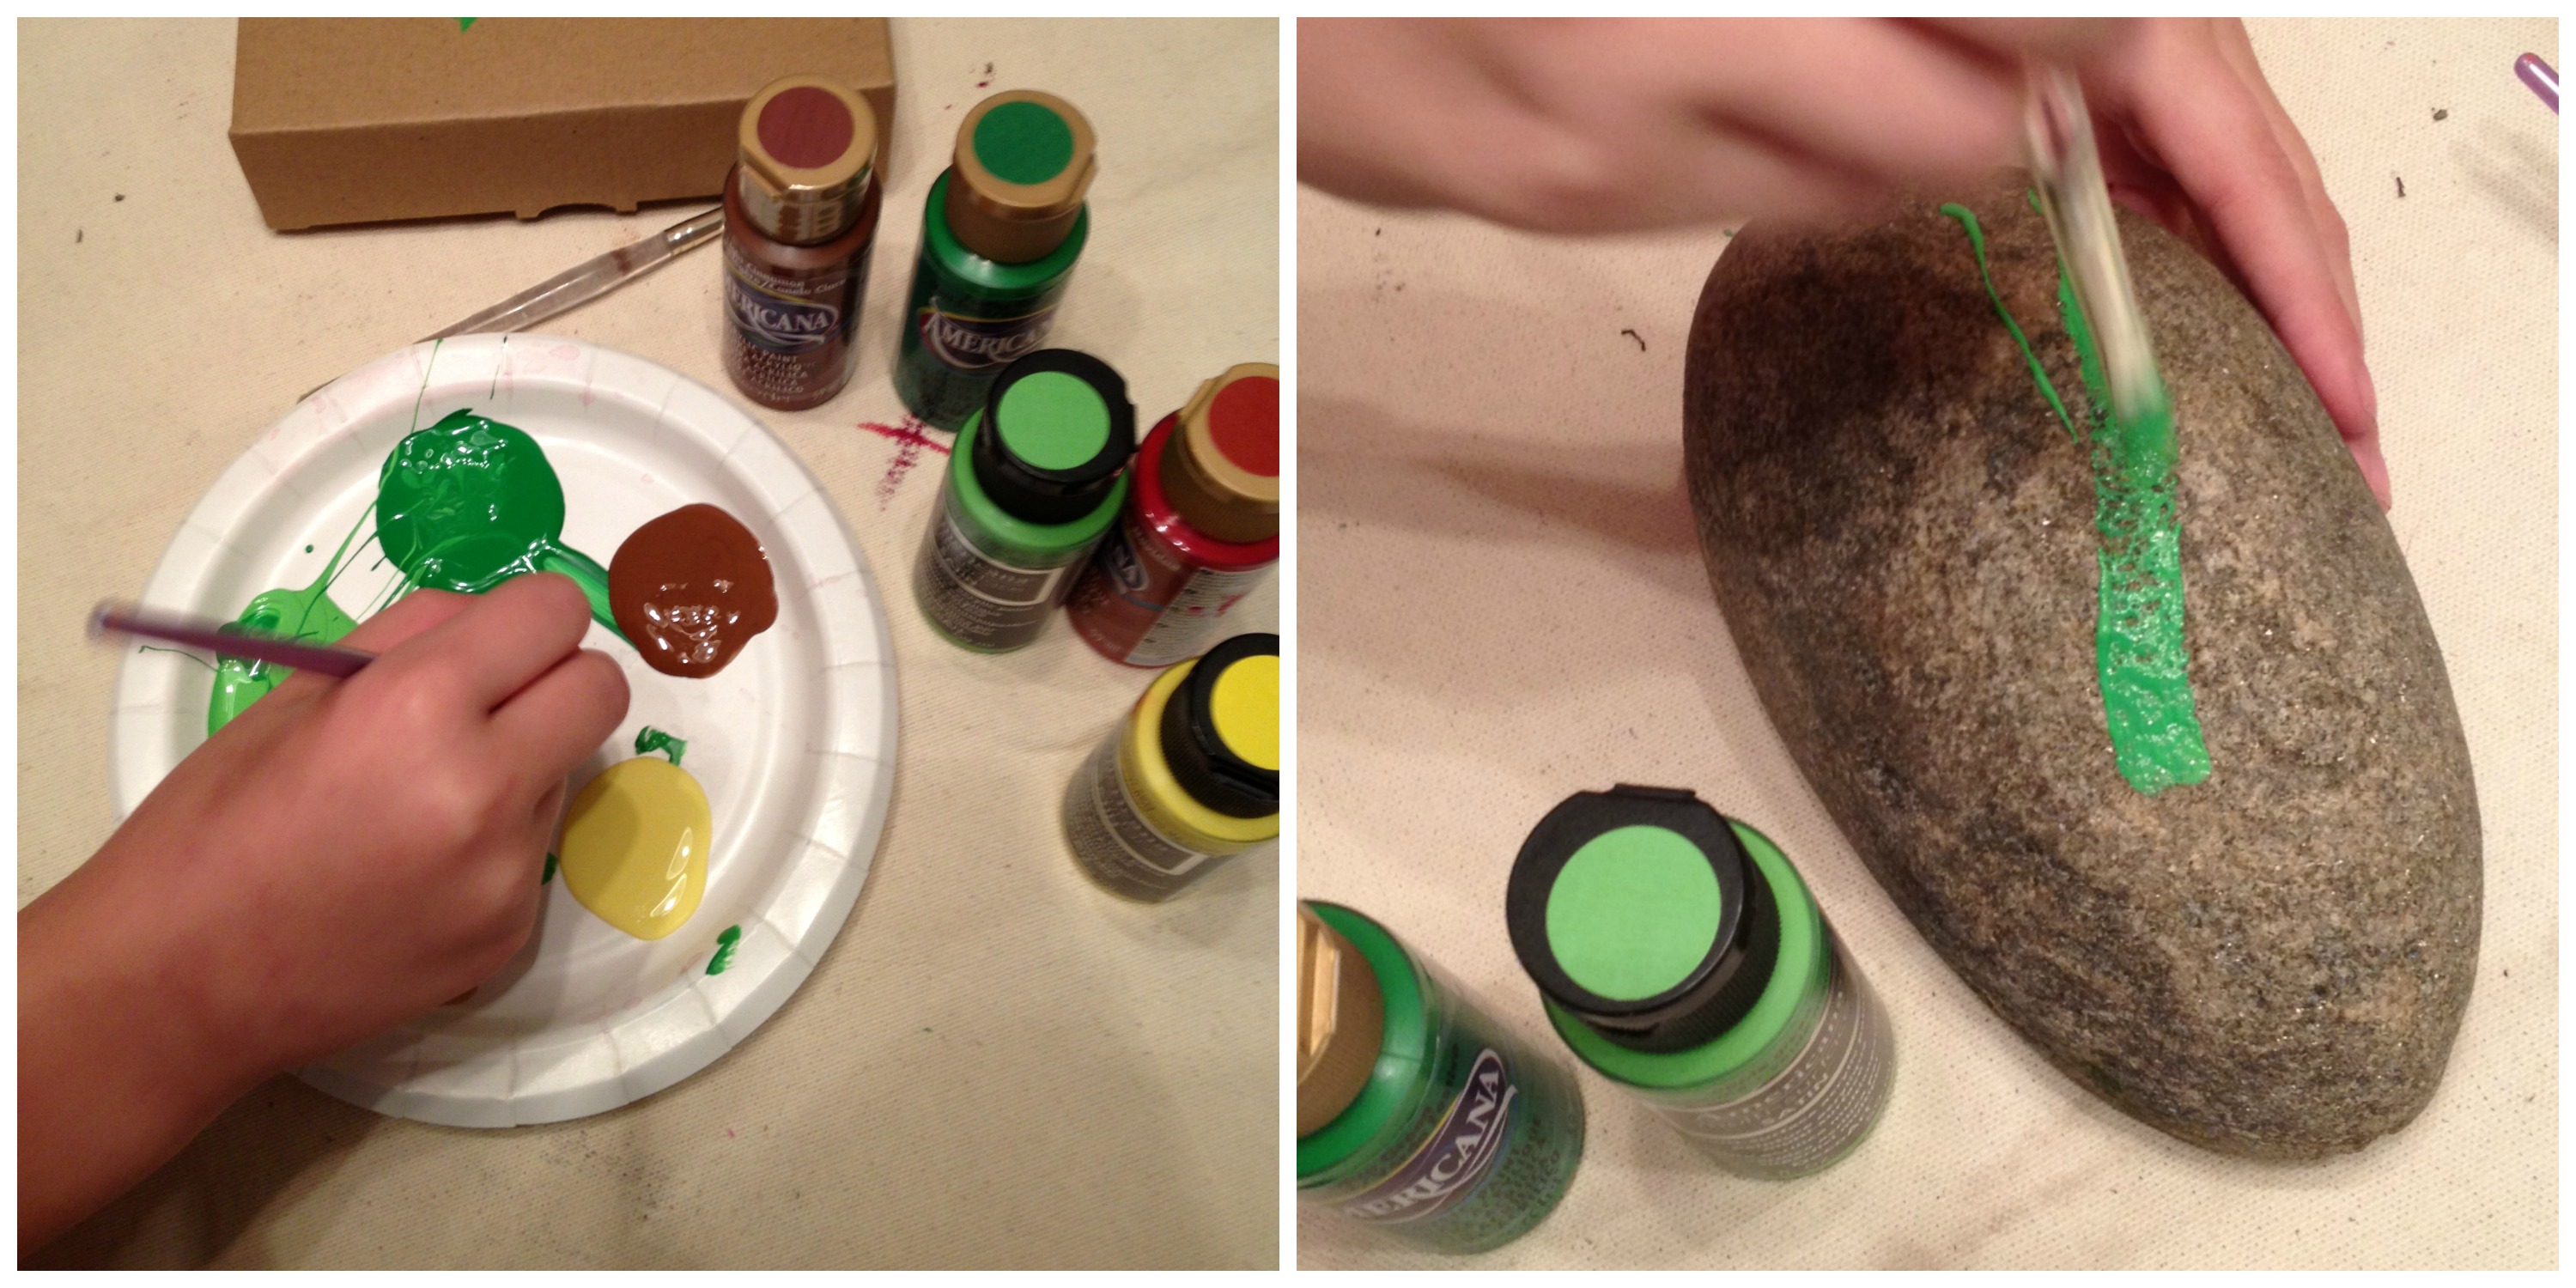
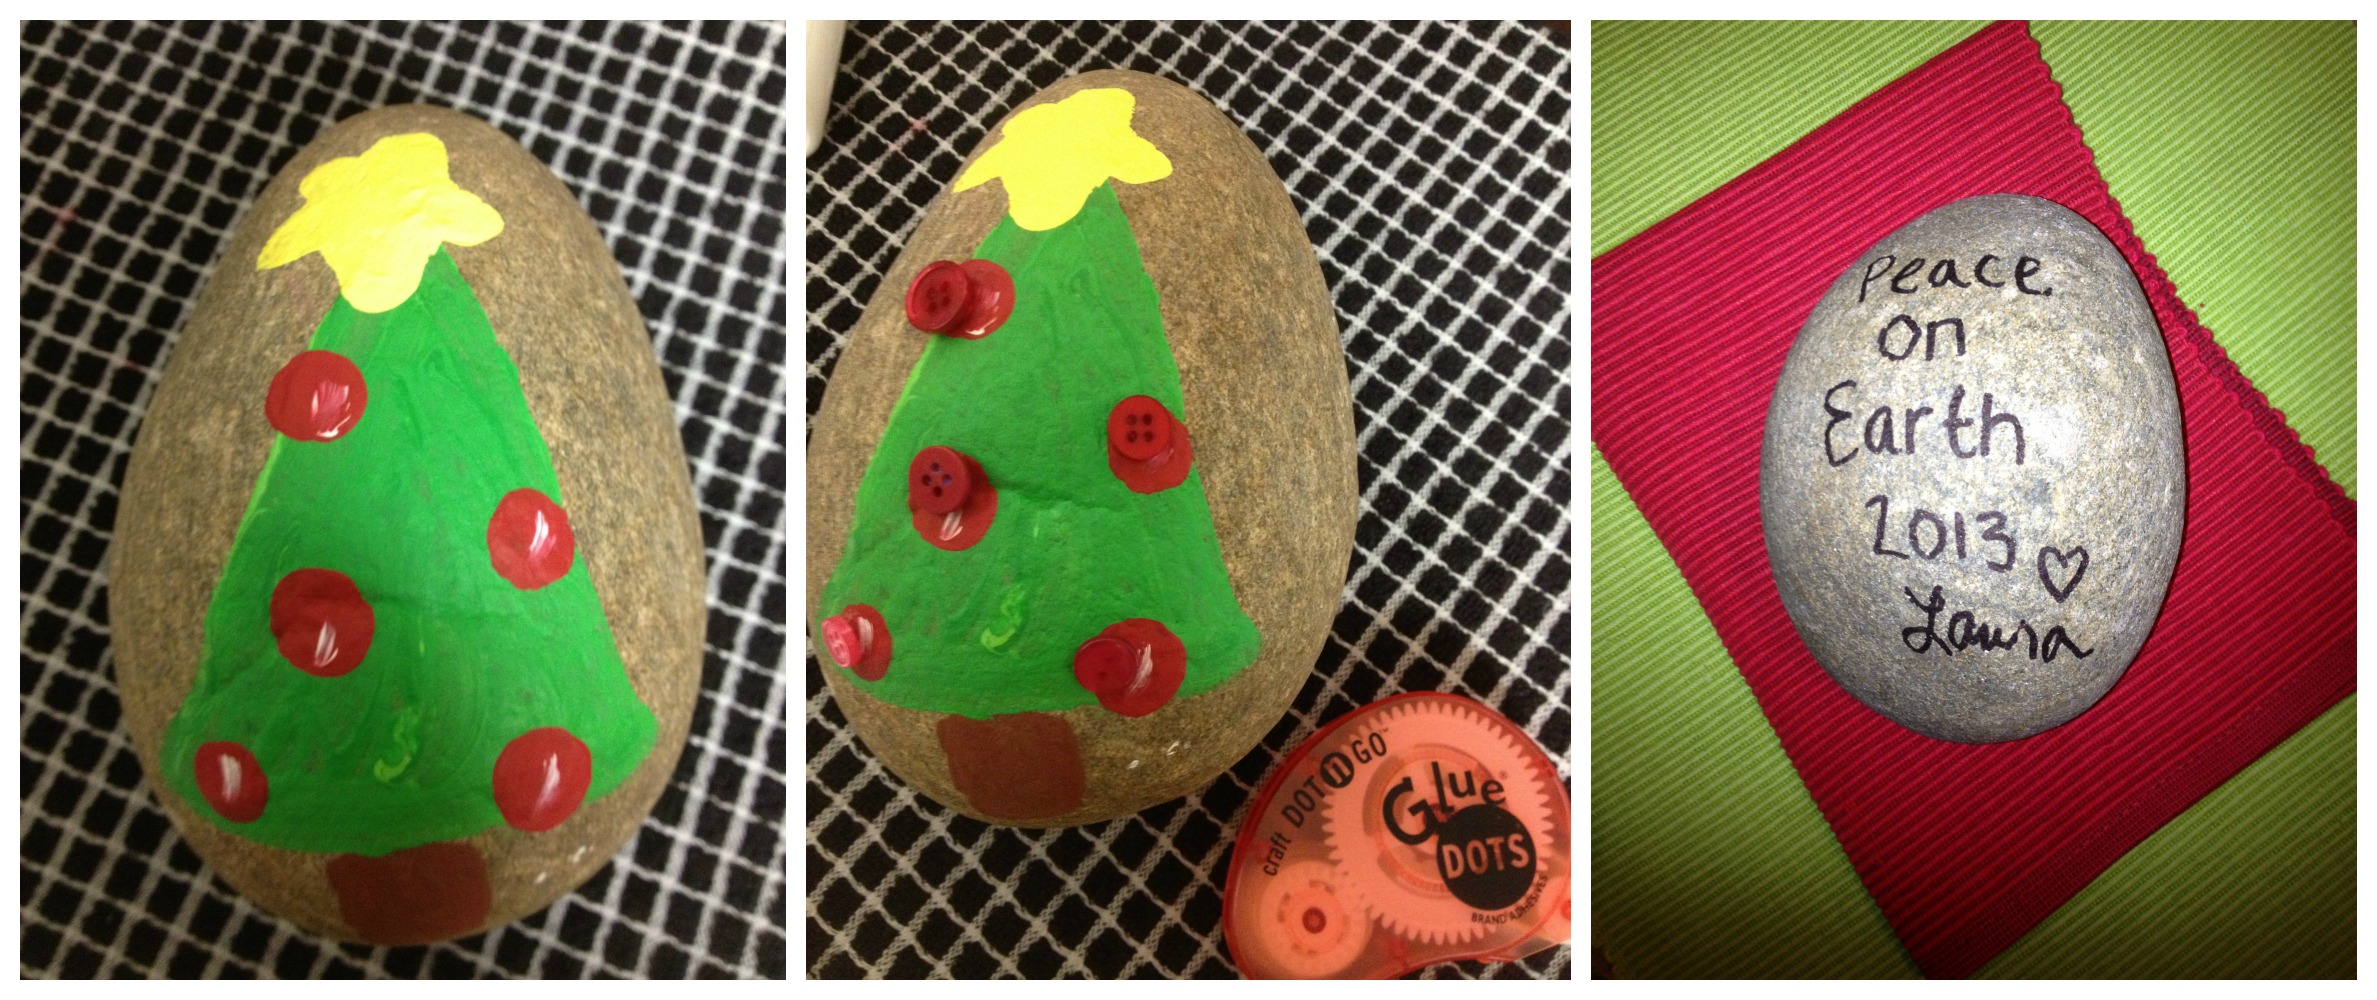
I hand painted the tree on the big heavy rock with Americana paints by Deco-Art.  I love these paints because they are thick enough that when I paint on a rough surface with a slant they don’t run.

RockPainting

When it was dry, I used Glue Dots to add the buttons (Radical Red from my Laura Kelly collection with Buttons Galore).  Then I used a Sharpie marker and added a message to the back.

RockFinal

I think these rocks would be adorable in all sizes and shapes as door holders and spreaders of Christmas spirit.  I plan to paint a bunch of little ones with messages to hand out over the next few weeks at the Starbucks drive through and the bank and to people I meet while out on my daily adventures.  Here are some of the messages I plan to use:

  • Spread Cheer
  • Joy to the World
  • Follow the Star
  • Christmas is Love

Here is the rock hard at work, holding the door to my bedroom open so our puppy won’t play with it and close herself out.

RockDoorHolder

I can’t wait to make more.  This little quick project was really fun.

Happy Creating Holiday Magic!

Love,

Laura


1

Adorable Little Ornament – Fifteen MINUTE Friday

Welcome to the Black Friday Cyber Sale, and to the Linky Party organized by our designer Laura Kelly using  Sculpey Polymer Clay products and her line of our buttons to create “Adorable Little Ornaments”.

For today’s project, I am sharing as a part of a linky party featuring adorable little ornaments made from clay and buttons.  Lots of designers and bloggers were sent Sculpey products and Laura Kelly’s buttons to create these adorable little ornaments.

SculpeyButtonCollage

How to make the button ornament

I used Sculpey clay in red and white to form a stocking, molding with my fingers.  When I was done stuck then end of an 8 inch long piece of wire into the top in two places to create holes that I would later need.  While the stocking was baking (following the directions in the packaging) I twisted the wire up and added a few Radical Red and Apple Green buttons along with my signature ribbon (black with white polka dots).

When the stocking was out of the oven and cooled, I added the wire using a tad bit of super glue on each end into the holes.  Wah-lah…an adorable little ornament.

ButtonsGaloreStocking

There are lots of ornaments being shared in the party.  Check them out.

a Rafflecopter giveaway

…and enter to win some clay and buttons of your own!

Happy Creating,

DD_SignatureHoliday

And now for the sale…

BLACK FRIDAY SALE, on Nov. 29th 2013 …    HERE’S HOW IT WORKS

Choose from our entire line at www.buttonsgaloreandmore.com Place your order during the following times using these  codes:

8am – 10am EST – 50% OFF – Code 50OFF

10am – 12pm EST – 40% OFF – Code 40OFF

12pm – 4 pm EST – 25% OFF – Code 25OFF

*PLUS FREE SHIPPING TO THE USA-ORDERS OVER $30*

3

Valentine's Day Countdown Calendar


If your little one is anything like mine, you pretty much start looking forward to Valentine’s Day right after Christmas.  I created this felt and button Valentine’s Day Countdown Calendar to channel some of my daughter’s excitement.


Supplies:

  • White felt
  • Red felt
  • Pink felt
  • Wave rotary cutter
  • Sewing machine
  • Buttons-I used Buttons Galore and More’s Raspberry Bulk Pack, because you can never have too many pink buttons!
  • Embroidery floss & Needle
  • Ink jet, printable fabric
  • 13″ wood dowel
  • Red & white bakery twine

Instructions:

  1. Cut a piece of white felt into a 17″ x 11″ rectangle.
  2. Fold one short side over 1″ then sew to create a pocket to put your dowel through later.
  3. Trim other short end using a wave rotary cutter or pinking shears.
  4. Cut a 7″ x 3″ rectangle from the pink felt.
  5. Using your printable fabric and word processing software, create a sign for the top of your calendar.  Mine says “Be My Valentine”.
  6. Cut the printable fabric into a 6.5″ x 2.25″  rectangle.
  7. Place pink felt triangle, centered and about 1″ inch down from top of white piece of felt. Remember, the top of your calendar will be where you stitched a pocket for the dowel.  Pin and sew.
  8. Center your printable fabric on the pink rectangle.  Pin and sew.
  9. Cut 14 2″ x 2″ squares from your red felt.
  10. Sew one pink button into the center of each red felt square.  I found the middle by folding the square in half, finger pressing, then folding it the other direction and finger pressing.  Attach you button where the lines cross.  Easy!
  11. Cut fourteen hearts from your white felt.  To get evenly sized hearts, I cut 2″ x 2″ squares from the white felt, folded them in half and cut half hearts.
  12. Carefully cut a small slit into the center of each heart.
  13. Measure down 1/2″ from the pink felt and 1/2″ in from edge of white felt.  Place your first red square there and pin.  Measure 1/2″ over to the right and pin.  Continue pinning on red squares, making sure you line them up evenly.  Sew the squares onto the fabric.  You can use your sewing machines to do this (just be careful not to run over the buttons) or attach them using a cute embroidery stitch.
  14. Cut a 5″ x 3″ rectangle from the pink felt.  Using your wave rotary cutters or pinking shears, cut a decorate edge along one of the long sides.
  15. Cut a 5″ x 1.5″ rectangle from the red felt.  Using your wave rotary cutters or pinking shears, cut a decorate edge along one of the long sides.  If you want to add a decorative ribbon, sew it on now.
  16. Place the red felt rectangle onto the pink felt rectangle, lining up the straight, long edge.  Sew three sides together, leaving the long, decorate edge of the red rectangle open.  You now have a pocket for your extra hearts.
  17. Sew the pocket onto the white base, 1/2″ down from the last row of red squares, 1/2″ from the right side of the white base.
  18. Cut out additional felt hearts in pink, red, and white and sew onto the calendar randomly.  Use cute embroidery stitches to attach them.
  19. Slide dowel through the top pocket of your calendar.  Tie baker’s twine to end of dowels and hang.

You are done!  Store your white hearts in the pocket.  As each day dawns, allow your child to button a heart onto one of the red squares.  When the all the squares are full, it’s Valentine’s Day!  Use the now empty pocket to store a few Valentine’s and enjoy your calendar for a couple of extra days after the holiday.


Valentine Countdown Calendar by Laura Bray


I know this calendar is a lot of work, but I was able to get mine done in about 3 hours total.  I think it’s worth the work-after all it’s a heirloom item.


2

Powered by WordPress. Designed by WooThemes