Header

Tag Archives | Mod Podge

Personalized Family Magnets

Holly here from Ribbons & Glue sharing with you a lil’ sneak  of Laura Kelly‘s  Me and My Peeps, Personalized Family Magnets made from Expressionery  Stationary and Buttons Galore buttons.

Peep Mom BGM

Personalized Family Magnets


Head over to my  Blog to see the full tutorial on how I made these Personalized Family Magnets and enter into the Rafflecopter for a chance to win a $200 Expressionery Gift Set.  

                                                                      Stay connected with Expressionary.com

Facebook   *  Twitter  *   Instagram  *  Blog

newsignature

Like Me on Facebook!

0

Distressed Serving Tray embellished with Buttons

So, you’ve been eyeballing a distressed serving tray in a home decor store that you’re  totally in love with but can’t seem to justify spending the money.

Well, no worries ’cause here is a simple tutorial on how to make your own distressed  serving tray by using a  Walnut Hollow Serving Tray  and Buttons Galore buttons that will make the perfect {inexpensive} addition to your home decor.


 Distressed Walnut Hollow Serving Tray


Supplies Used to Make Serving Tray:


1. Paint  2. Sand 3. Stain

 How to create a distressed look


 To give this tray a distressed look,  I painted it white,  used an electric sander to randomly distress areas and then applied a light coat of stain. ** Tip…A little stain goes a long way**

I applied the stain with a sponge brush then used a paper towel to quickly wipe off the excess.  As you apply and wipe off the stain, you’ll begin to see the distressed areas become darker in appearance developing into your aged look.   Just like magic!


tray2

Use Mod Podge to adhere patterned paper on tray


While I was waiting for the stain to dry,  I tore the edges off a piece of patterned paper and inked them with Colorbox ink  to create a distressed look.   When the stain was dry, I adhered the paper onto the tray using Mod Podge Matte.

tray1

Add buttons to wood projects

To complete my serving tray,  I added some buttons from Buttons Galore  Vacation &  Zesty Lemon  packs on to the four corners and tied the handles up with Hemptique Natural Cord.   Adding simple buttons on  to your projects can be an inexpensive way make them  beautiful.


tray2bgm

Use buttons as Home Decor accents


I’m totally in love with this tray.  I even like how it’s displayed with a vase full of buttons.  Buttons just make everything look better!


newsignature


Like Me on Facebook!


2

Scrap Paper & Button Gift Tag

Some times it is so much fun to create ways to use scrap paper and miscellaneous bright buttons.  This project is one that is worth “picking”, kind of like a pretty flower.

FlowerTag1

Materials for the scrap paper gift tag:

You will need scrap paper , Mod Podge (I used the washable kind for kids), a brush, black Sharpie marker, Laura Kelly buttons and ad-tech hot glue to create the flower.  You can buy a tag already to go or make one yourself.

Directions for the scrap paper gift tag:

Cut your paper into petals of any size and shape, whatever works for the tag size you are making.  Mine are about 2 inches long.  Cut another piece into a circle about an inch in diameter.  Using Mod Podge, brush a heavy coat on the circle then add the petals, brushing new layers of Mod Podge liberally between each petal.  Apply a final coat over the entire flower.  Set it aside to dry.  Cut a stem and leaves from your scraps and use the Mod Podge to apply them to your tag using the same technique.  Add the flower with Mod Podge and let it all dry.  To finish your project, use your ad-tech hot glue to apply several buttons in a stack in the center of the petals.  If you want to add the black decorations around the outside, you can’t beat the black Sharpie permanent marker.

PaperFlowerTag5

There are lots and lots of ways to use these paper flowers to create masterpieces.  You can visit Laura’s blog to find more ideas if you have more than fifteen minutes to create!


2

Friendship Mixed Media Canvas with Jacquard Lumiere

Hi all!  Ryann here with my take on a mixed media canvas piece.  Now I am first and foremost a card maker, but every once in a while I like to stretch my boundaries a bit and try something new. I recently took a paper doll tag class from Julie Nutting and left feeling inspired to create my own paper doll.  After deciding on a mixed media canvas, I began my project!

Supplies used:

Directions:
  1. Tear book pages into small pieces, tearing off any large white spaces (you want to work with just the words).
  2. Adhere onto canvas using Mod Podge.  Cover adhered book page pieces with a layer of Mod Podge and allow to dry.
  3. Lightly paint a layer of light blue acrylic paint.  Let dry completely and follow it up with a lightly painted layer of light green.  Allow to dry.
  4. On a book page, draw out your doll figure and cut out.  Draw doll clothes on patterned paper and cut out.  Adhere onto canvas using Mod Podge.  Apply layer of Mod Podge on top of doll and allow to dry.  Do the same for the flowers.
  5. Lightly go around edges of doll/clothes/flower with white paint and allow to dry.
  6. Draw and then paint doll hair and allow to dry.
  7. Create sentiment in computer and print out.  Cut words out individually and adhere to canvas with Mod Podge.  Apply layer of Mod Podge on top of words and allow to dry.
  8. Stamp large polka dots with white ink onto canvas.  Stamp small polka dots with pink acrylic paint randomly around canvas.  Allow to dry completely.
  9. Adhere buttons onto canvas.
  10. Apply Lumiere 3D paint to doll to create texture on dress, neck and hair.  Allow to dry completely.
Thank you for joining me today.  I hope my story of creating outside my comfort zone inspires you to give it a try it too!  :)
Signing off,
Ryann


5

Bandana Memo Board with Button Push Pins

Bandana Memo Board with Button Push Pins

I don’t know about your house but in my house we have FOUR young people. They are VERY BUSY young people and each one has a bulletin board. They are a super easy way to communicate within such a busy family. (Besides text messaging that they tend to read and then forget) A note on a bulletin board is a little harder to forget. It stays there, quietly reminding, until the event or reason for the note has passed.

Anyway, why have a boring bulletin board when you can have one that fits your decor, your personality or your hobbies?

Bandana Memo Board with Button Push Pins

This bulletin board uses a cork tile, a bandanna and a 12×12 frame along with a few other supplies.

Bandana Memo Board with Button Push Pins

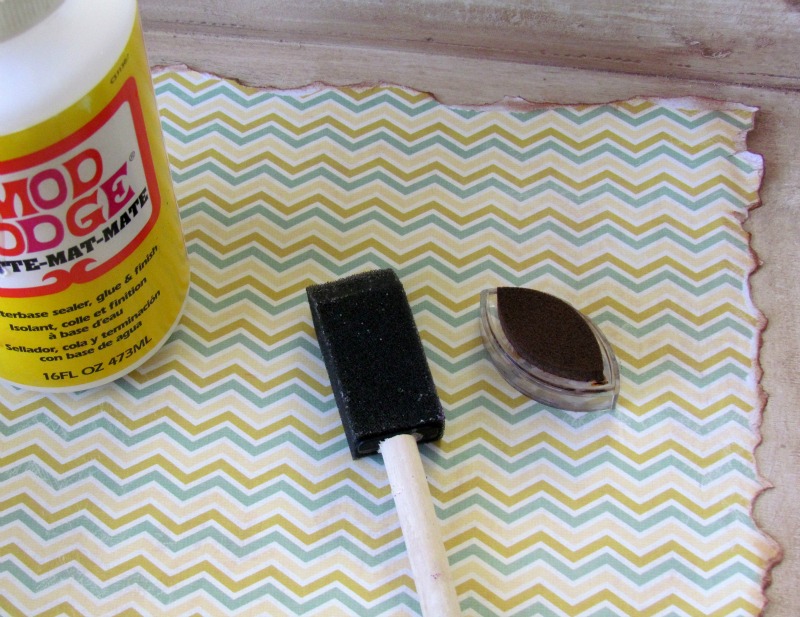
Cover the cork tile in Mod Podge.

Bandana Memo Board with Button Push Pins

And then smooth the bandanna over the Mod Podge and let dry.

Here is a tip: Before spreading any Mod Podge decide which portion of the bandanna design you want to see on your bulletin board. Don’t cut it all out ahead of time. Just figure out where you want to place the bandanna. (Cutting out the fabric ahead of time makes it too hard to line up.)

Bandana Memo Board with Button Push Pins

While the Mod Podge is drying you can make your thumb tacks or push pins. I simply hot glued white buttons to a flat topped thumb tack. Be careful of that hot glue! You could also use Amazing Goop or a cool temp glue gun a well. Poke the tacks into a piece of corrugated cardboard or foam core while they are drying to keep them upright.

Bandana Memo Board with Button Push Pins

My button push pins.

After the Mod Podge is dry cut away the excess fabric and insert it into the 12×12 frame.

Bandana Memo Board with Button Push Pins

Now you can embellish to your little hearts’ content. I used hot fix rhinestones in two sizes, Thickers alphabet stickers and the heads from 4 “silk” daisies.

Bandana Memo Board with Button Push Pins

Isn’t this fun? Girlie but not too girlie. Country but not too country.

0

Powered by WordPress. Designed by WooThemes