Hello Everyone! This is Katie from the Buttons Galore & More Design Team and today I have a unique but simple project for you guys to make this summer!
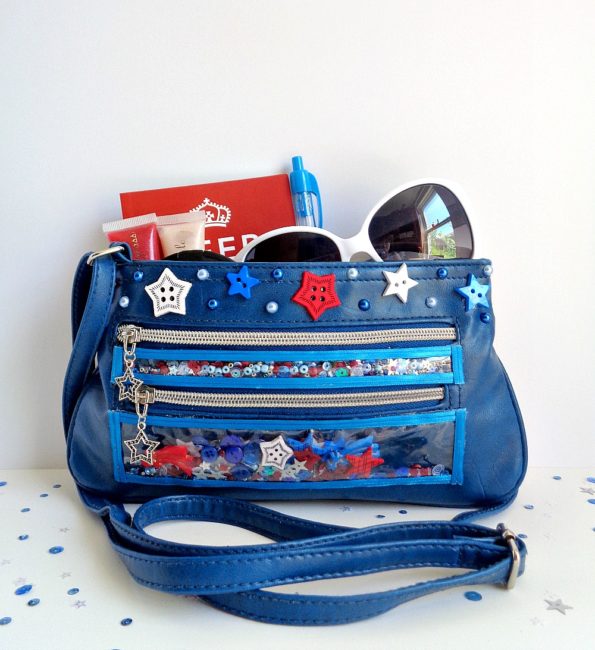
Today I will be showing you how to update an old crossbody bag by adding shaker elements onto the bag! What does that mean you ask? Well, if a shaker card and a crossbody bag got together, my project would be the final result. In today’s project, I will be showing you how to incorporate those shaker card elements into a bag. I will also be showing you how you can update a bag with items from the 28 Lilac Lane Embellishment Kit in Stardust.
In addition, I decided to go with a red, white, and blue theme for my crossbody bag. However, you can choose any type of theme and choose any type of bag style for this project. Just make sure that the bag doesn’t have any big embellishments on the outside and that the bag is cleaned (both inside and out) before you begin the project.
With all that in mind, below is the supplies that you will need to make this project!
Supplies Needed:
- 28 Lilac Lane “Stardust” Embellishment Kit
- 28 Lilac Lane “Stars & Stripes” Sequin & Seed Bead Mix
- Buttons Galore “Patriotic” Button Value Packs
- small crossbody bag or clutch
- We R Memory Keepers Fuse Tool
- 1 page protector
- ribbon
- E6000 Glue
- jewelry pliers
- ruler
- scissors
- jump rings (optional)

Step 1: Determine where you want the shaker elements to be on your bag. When doing this you will want to look for a ”small area” which is flat and that doesn’t interfere which any other components of the bag.
Once you have determined where you want the shaker elements to be, it is time to measure. Measure one area of the bag and then cut out 2 pieces of page protector which fit in that area. Then take your We R Memory Keepers Fuse Tool and fuse the sides and bottom of the 2-page protector pieces together. With that being said, make sure you leave the top of the page protector open. When you’re done, you should have created a little shaker pouch.
Repeat this step if you are creating more than one shaker element for your bag.
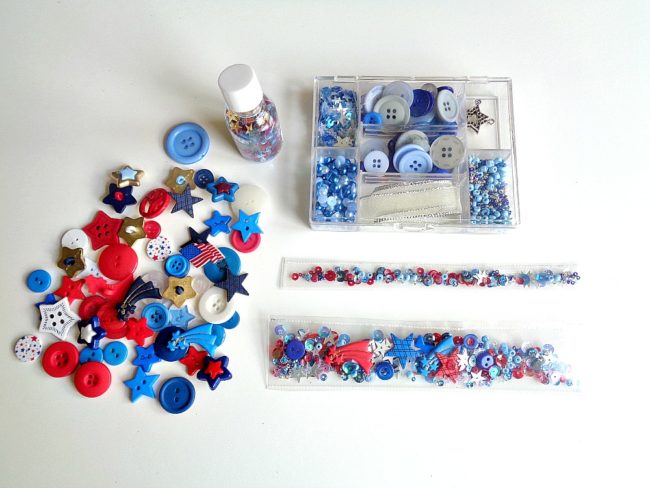
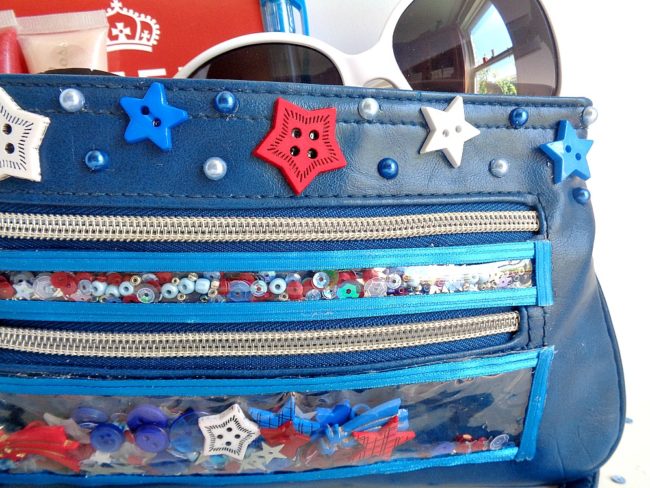
Step 2: Fill up the shaker pouch that you created in step 1 with buttons, sequins, and seed beads. For my two shaker pouches, I filled them up with buttons, sequins and seed beads from the 28 Lilac Lane Embellishment Kit in Stardust. I also used buttons from the Patriotic Value Pack and sequins/seed beads from the 28 Lilac Lane Sequin & Seed Bead Mixes in Stars & Stripes.
Once you have filled up your shaker pouches, fuse the top together so all your buttons, sequins, and seed beads are sealed in.
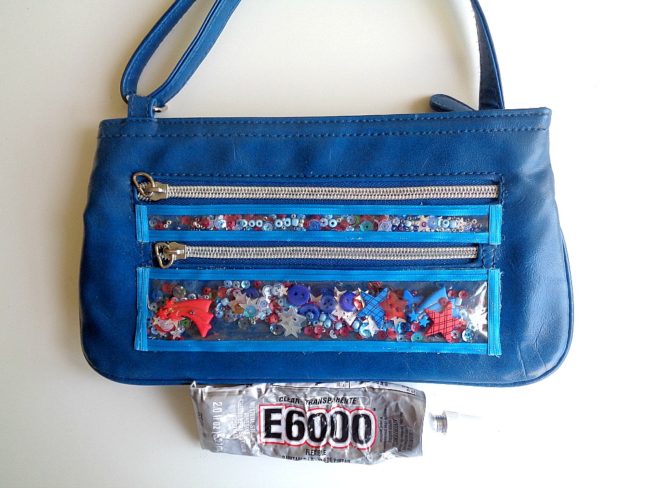
Step 3: Using some E6000, apply some glue onto the back of your shaker pouches and then adhere them to your bag. Then to cover up the edges of the shaker pouches, glue some ribbon around the edges of the pouch.
Once you are happy with the placement/look of your shaker pouches, set your bag aside to dry.
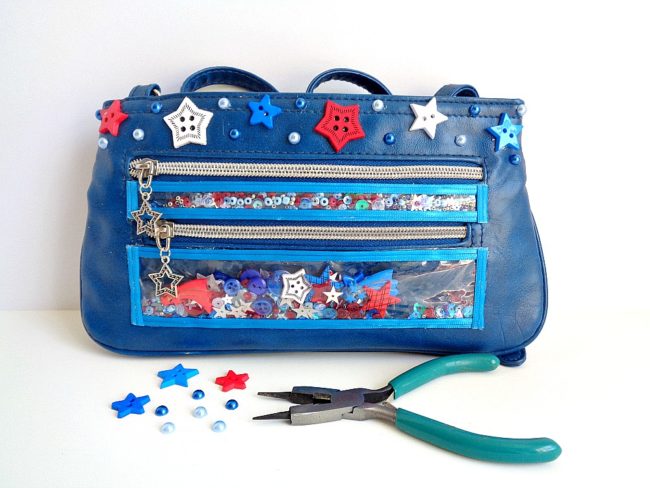
Step 4: Now it is time to decorate the rest of your bag! Grab all your different embellishments and begin playing around with how you want them to look on your bag. For example, I replaced the handles on my zippers with the star charms from the 28 Lilac Lane Embellishment Kit in Stardust. I also used the pearls from that kit to decorate the top of my bag along with some star buttons from the Patriotic Value Pack.
No matter how you decorate your bag, make sure you glue down your buttons with some E6000 and to set the bag aside to dry.
Once the glue on your bag has completely dried, you are now ready to wear it!
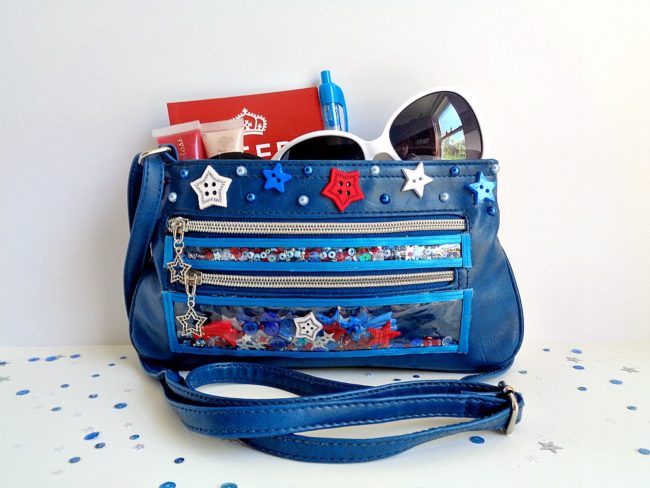
I loved how this bag turned out and think it would be so cute to wear to a barbecue! With that being said, I would recommend that you wear your shaker bag to functions which are more laid back. For example, a barbecue, going to the thrift store, and so forth.
If you made this shaker bag, what 28 Lilac Lane items would you use?