

Good Morning! Today I thought it would be fun to bring you a tutorial on how to create a wire wrapped ring using a button from the Genuine Vintage Button Tin as the focal piece. In addition to the button you will also need:
- Ring Mandrel
- Nylon Hammer (or rawhide – non marring hammer)
- Wire Snips
- Chain Nose Pliers
- 18 Gauge Artistic Wire® By Beadalon in Gun Metal Bronze
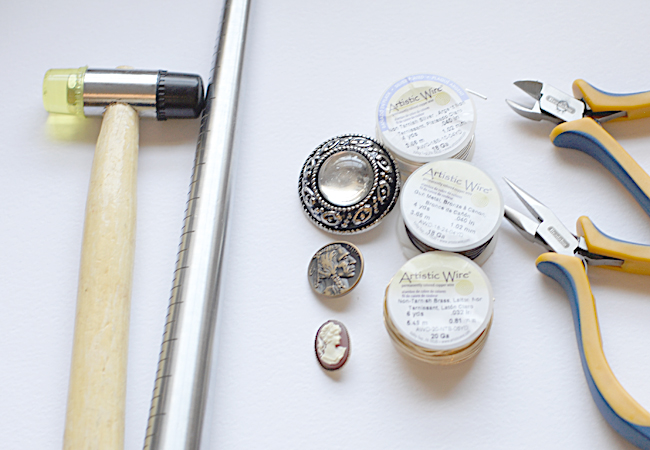
Supplies needed for an assortment of rings
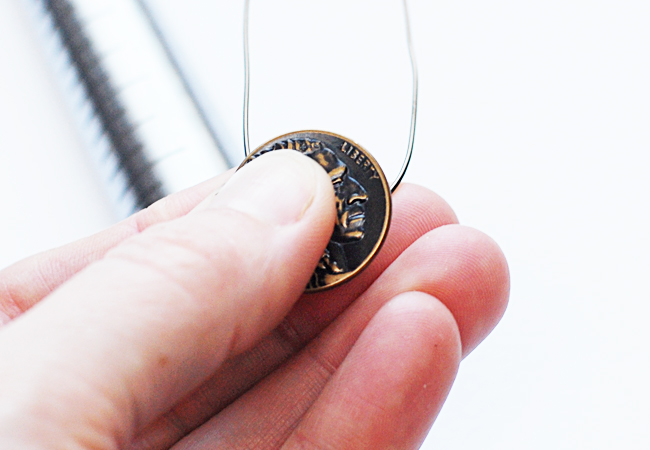
Begin by cutting a 20" length of wire. Run it through the shank on the back of the button, centering the button in the middle of the wire. Bend the wire into a gentle "U" shape.
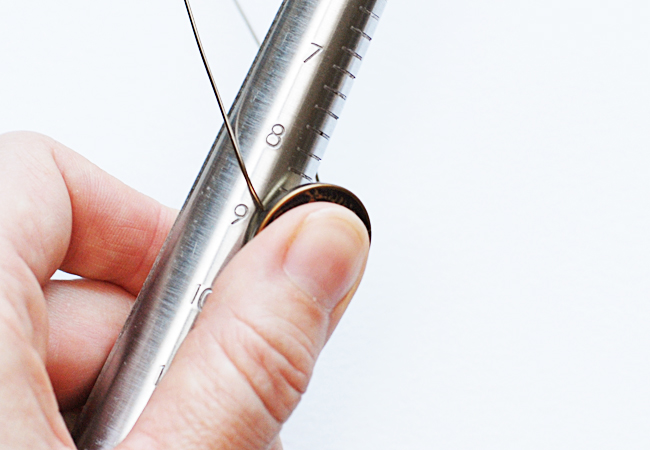
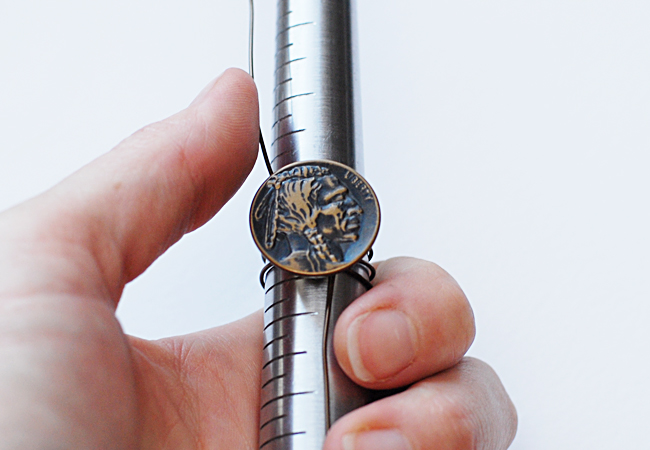
Place the center of the button onto the ring mandrel one full size larger than you need for the finished ring size. Here you can see that I need a 7 1/2 ring so I am beginngin at a size 8 1/2 on the ring mandrel.
Wrap the wire around the top and bottom of the button the mandrel so that you have four wraps around the mandrel.
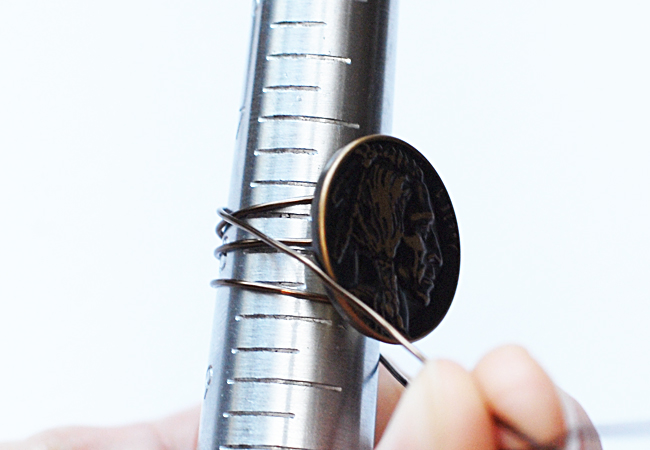
Pull the ends of the wire perpendicular to the mandrel and pull tightly to draw the wrapped sections to the center of the button.
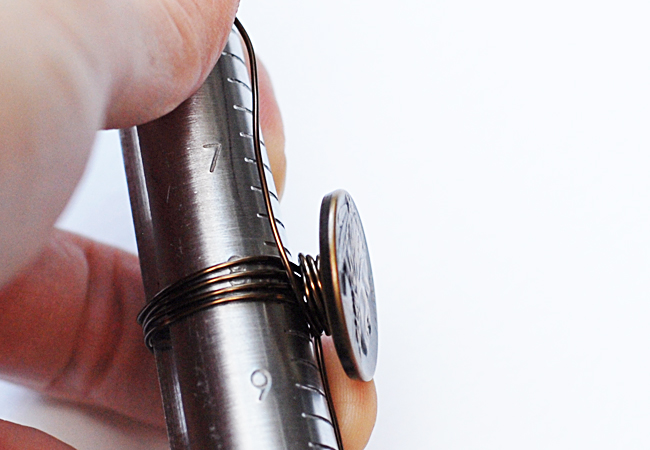
Begin to wrap the wires clockwise around the shank of the button. Wrap until you have atleast four wraps around the bottom, keeping pressure and tension on the wires at all times.
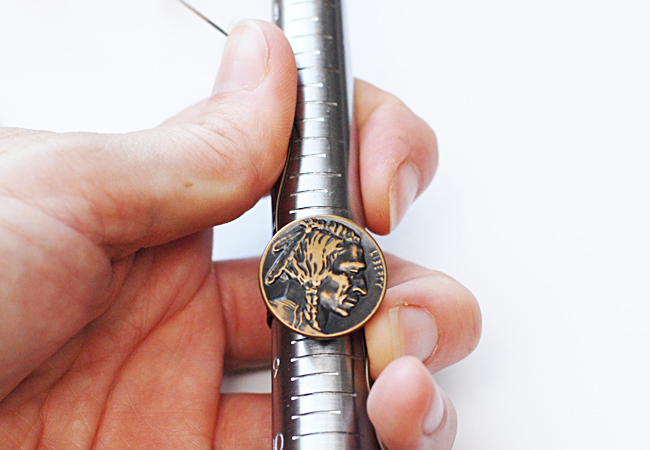
Again holding the wires perpendicular to the mandrel, remove the ring from the mandrel.
Pinch the button and the wire wraps between your nondominant thumb and forefinger.
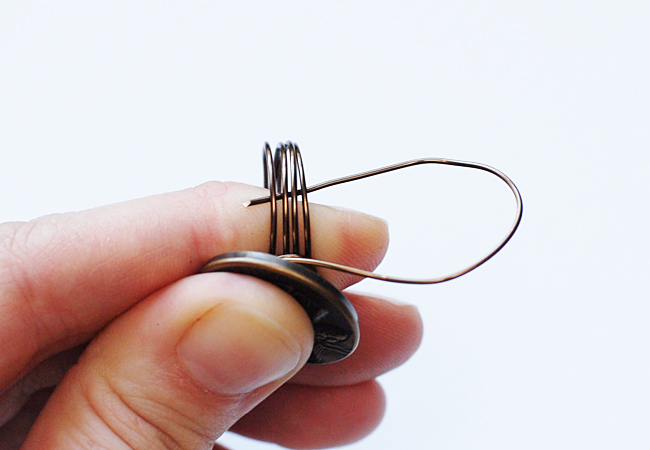
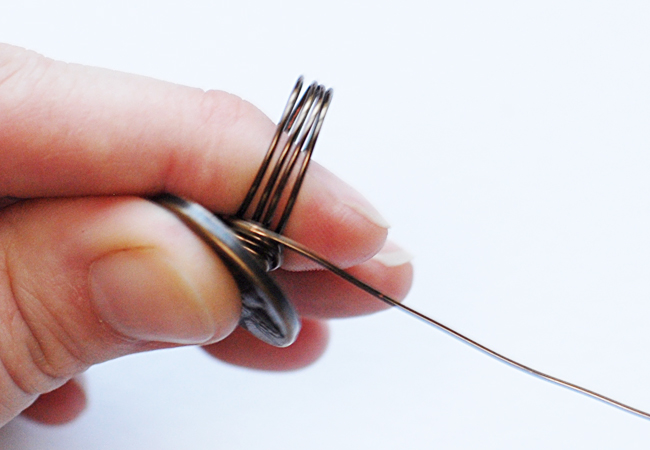
Using your dominant hand, wrap the end of the wire under the four wraps, then back up and around the wraps.
Continue to wrap three or four more times, pulling tightly each time. Make sure to keep the four wires flat against your index finger for a more comfortable fit.
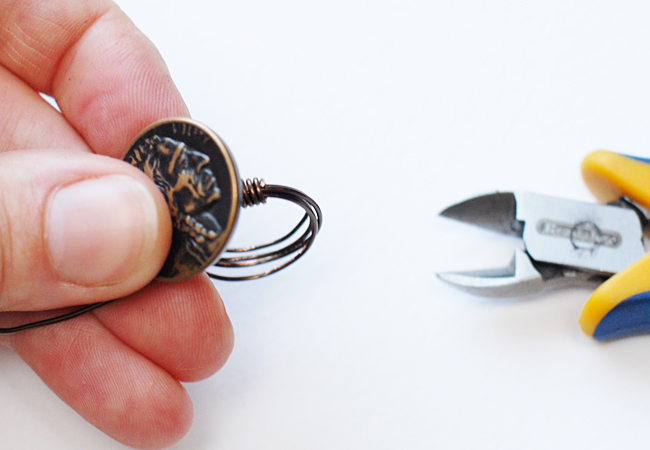
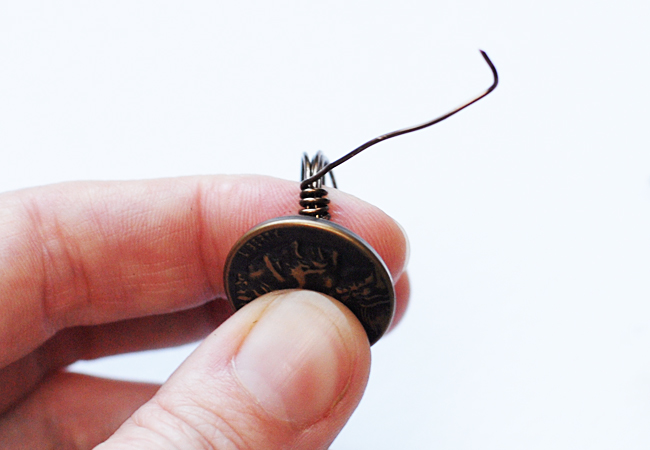
Using wire snips, clip end of wire close and press clipped end down using chain nosed pliers. Repeat wrapping on other side of ring.
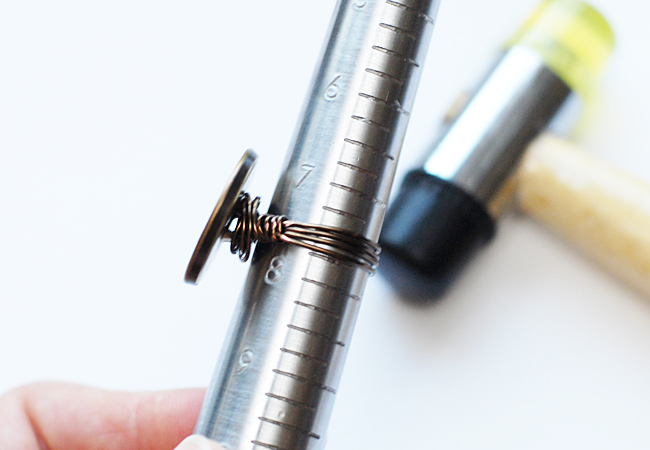
Place wrapped ring back on mandrel and being to hammer ring down mandrel. Remove ring, flip it and hammer it back down toward thick end of mandrel to make sure both sides are fully formed.
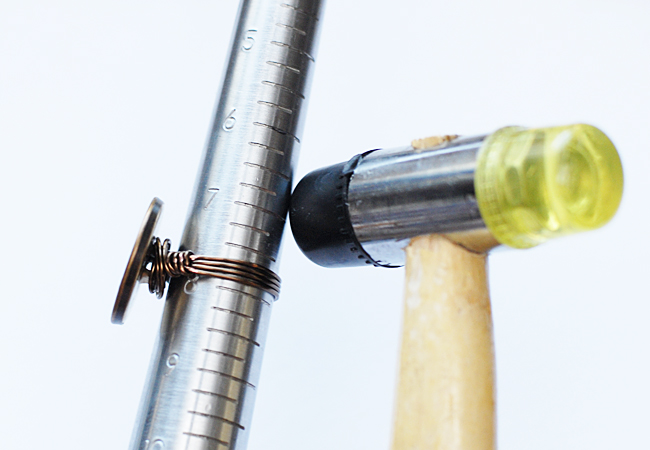
Tap around entire ring from side of button to side of button to work harden wires and make sure that the wires are going to lie flat.
Finished Vintage Button Wire Wrapped Ring
I hope you have enjoyed my first button jewelry project here on the Buttons Galore & More Blog! Be sure to add us to your reading list or subscribe so that you don’t miss out on the next one I have planned. It’s one that you will not want to miss!!! :)
K
P.S. Don’t forget to enter our PIN IT TO WIN IT CONTEST!
Latest posts by Keri Lee Sereika (see all)
- Quick and Easy Gifts – Make a handmade note card set - November 2, 2012
- A DIY on How to Make a No Sew Tutu Tutorial Embellished With Felt Leaves & Buttons - October 1, 2012
- altered buttons make great embellishments! - September 3, 2012
I love working with wire, and I’ve never tried using a button with a shank for a ring. Thanks for the great tutorial!
Hi! Love, love, love your ring! I’m a fellow button addict so I’m going to try this project. I also love how clean and bright your photos are. How did you achieve that? Jewelry is so hard to photograph. Your pictures look great too!
Sherry :o)
Wow, this is great. Thank you for sharing!
Keri, thanks for sharing this ring project – the directions are so well described & the photos are helpful. I had fun making rings with my little 3 yr. old son. :-)
awesome tutorial.I thought your idea was sweet .. i make and design jewelry and have so much fun doing it.I hope to see more of your things (jewelry) posted in the near future !! My husband is my best critic ..is yours also? <3