Header

Tag Archives | Twine

Button and Twine Medallion Tutorial

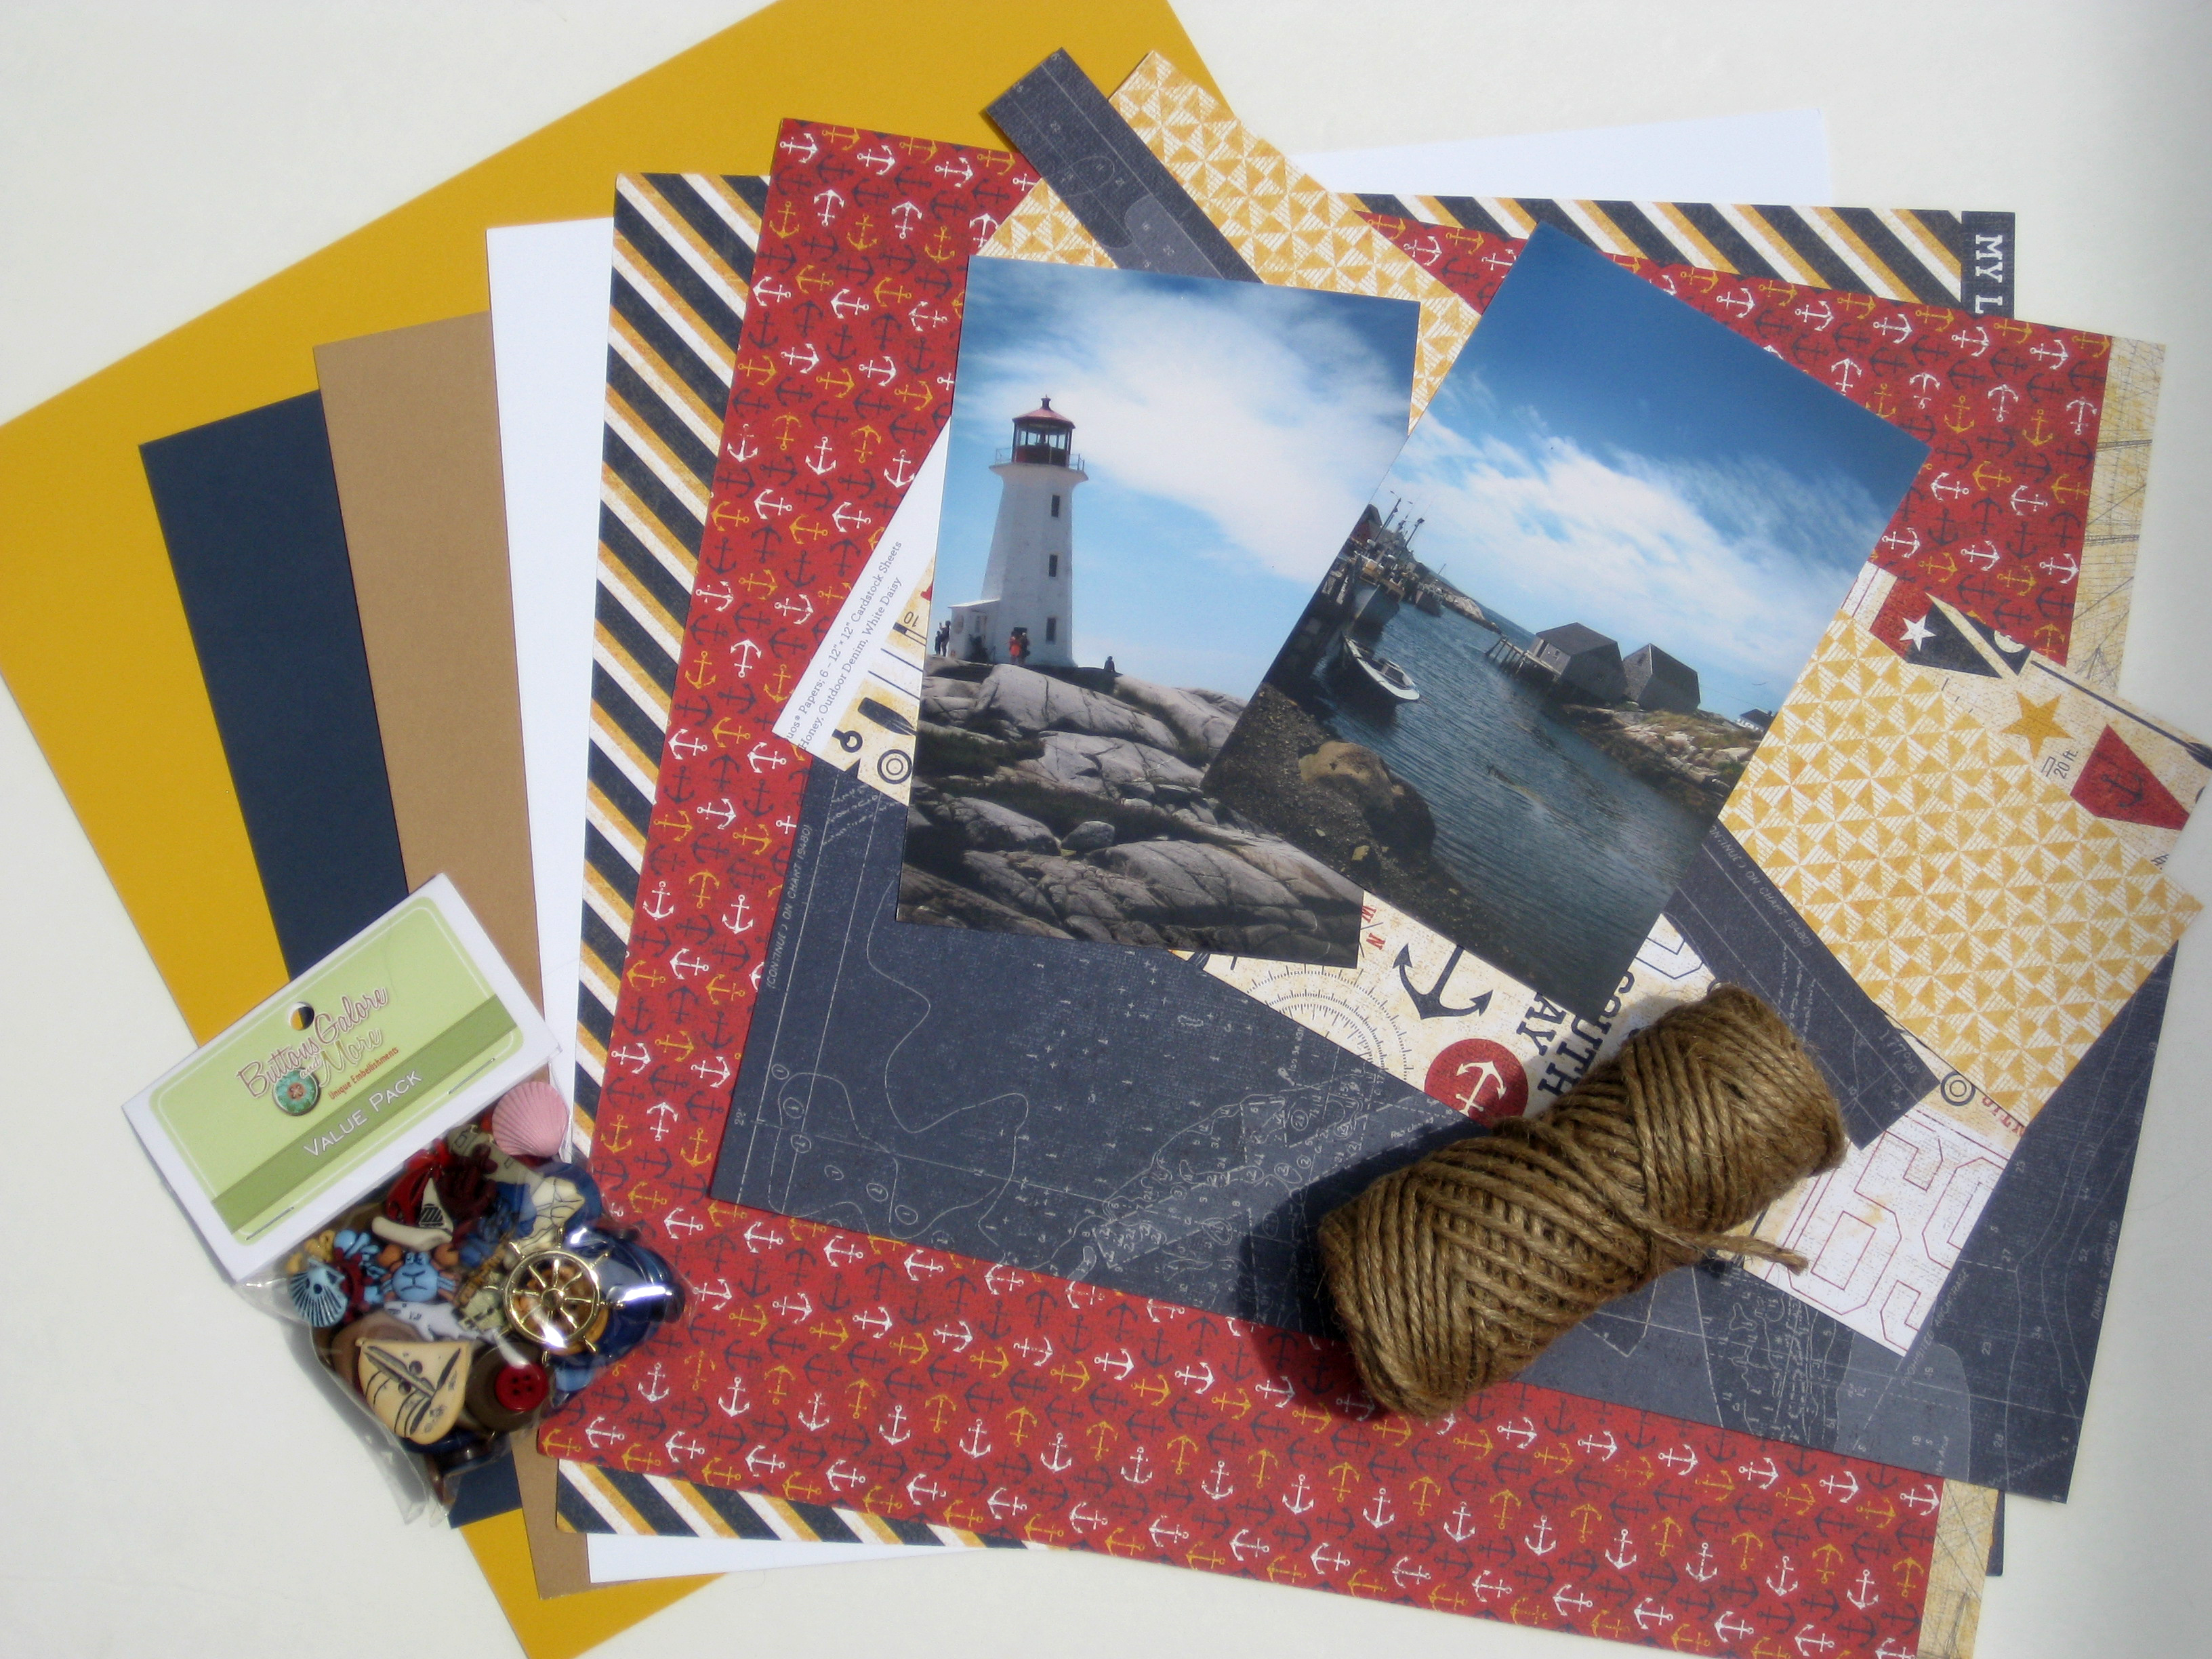
Join me for a step by step tutorial where we will make Button and Twine Medallions to use as embellishments for a seaside themed scrapbook layout. Nothing says seaside or nautical like red, white and blue with the texture of rope incorporated.

Products used to create this layout with Button and Twine Medallions:

IMG_5706

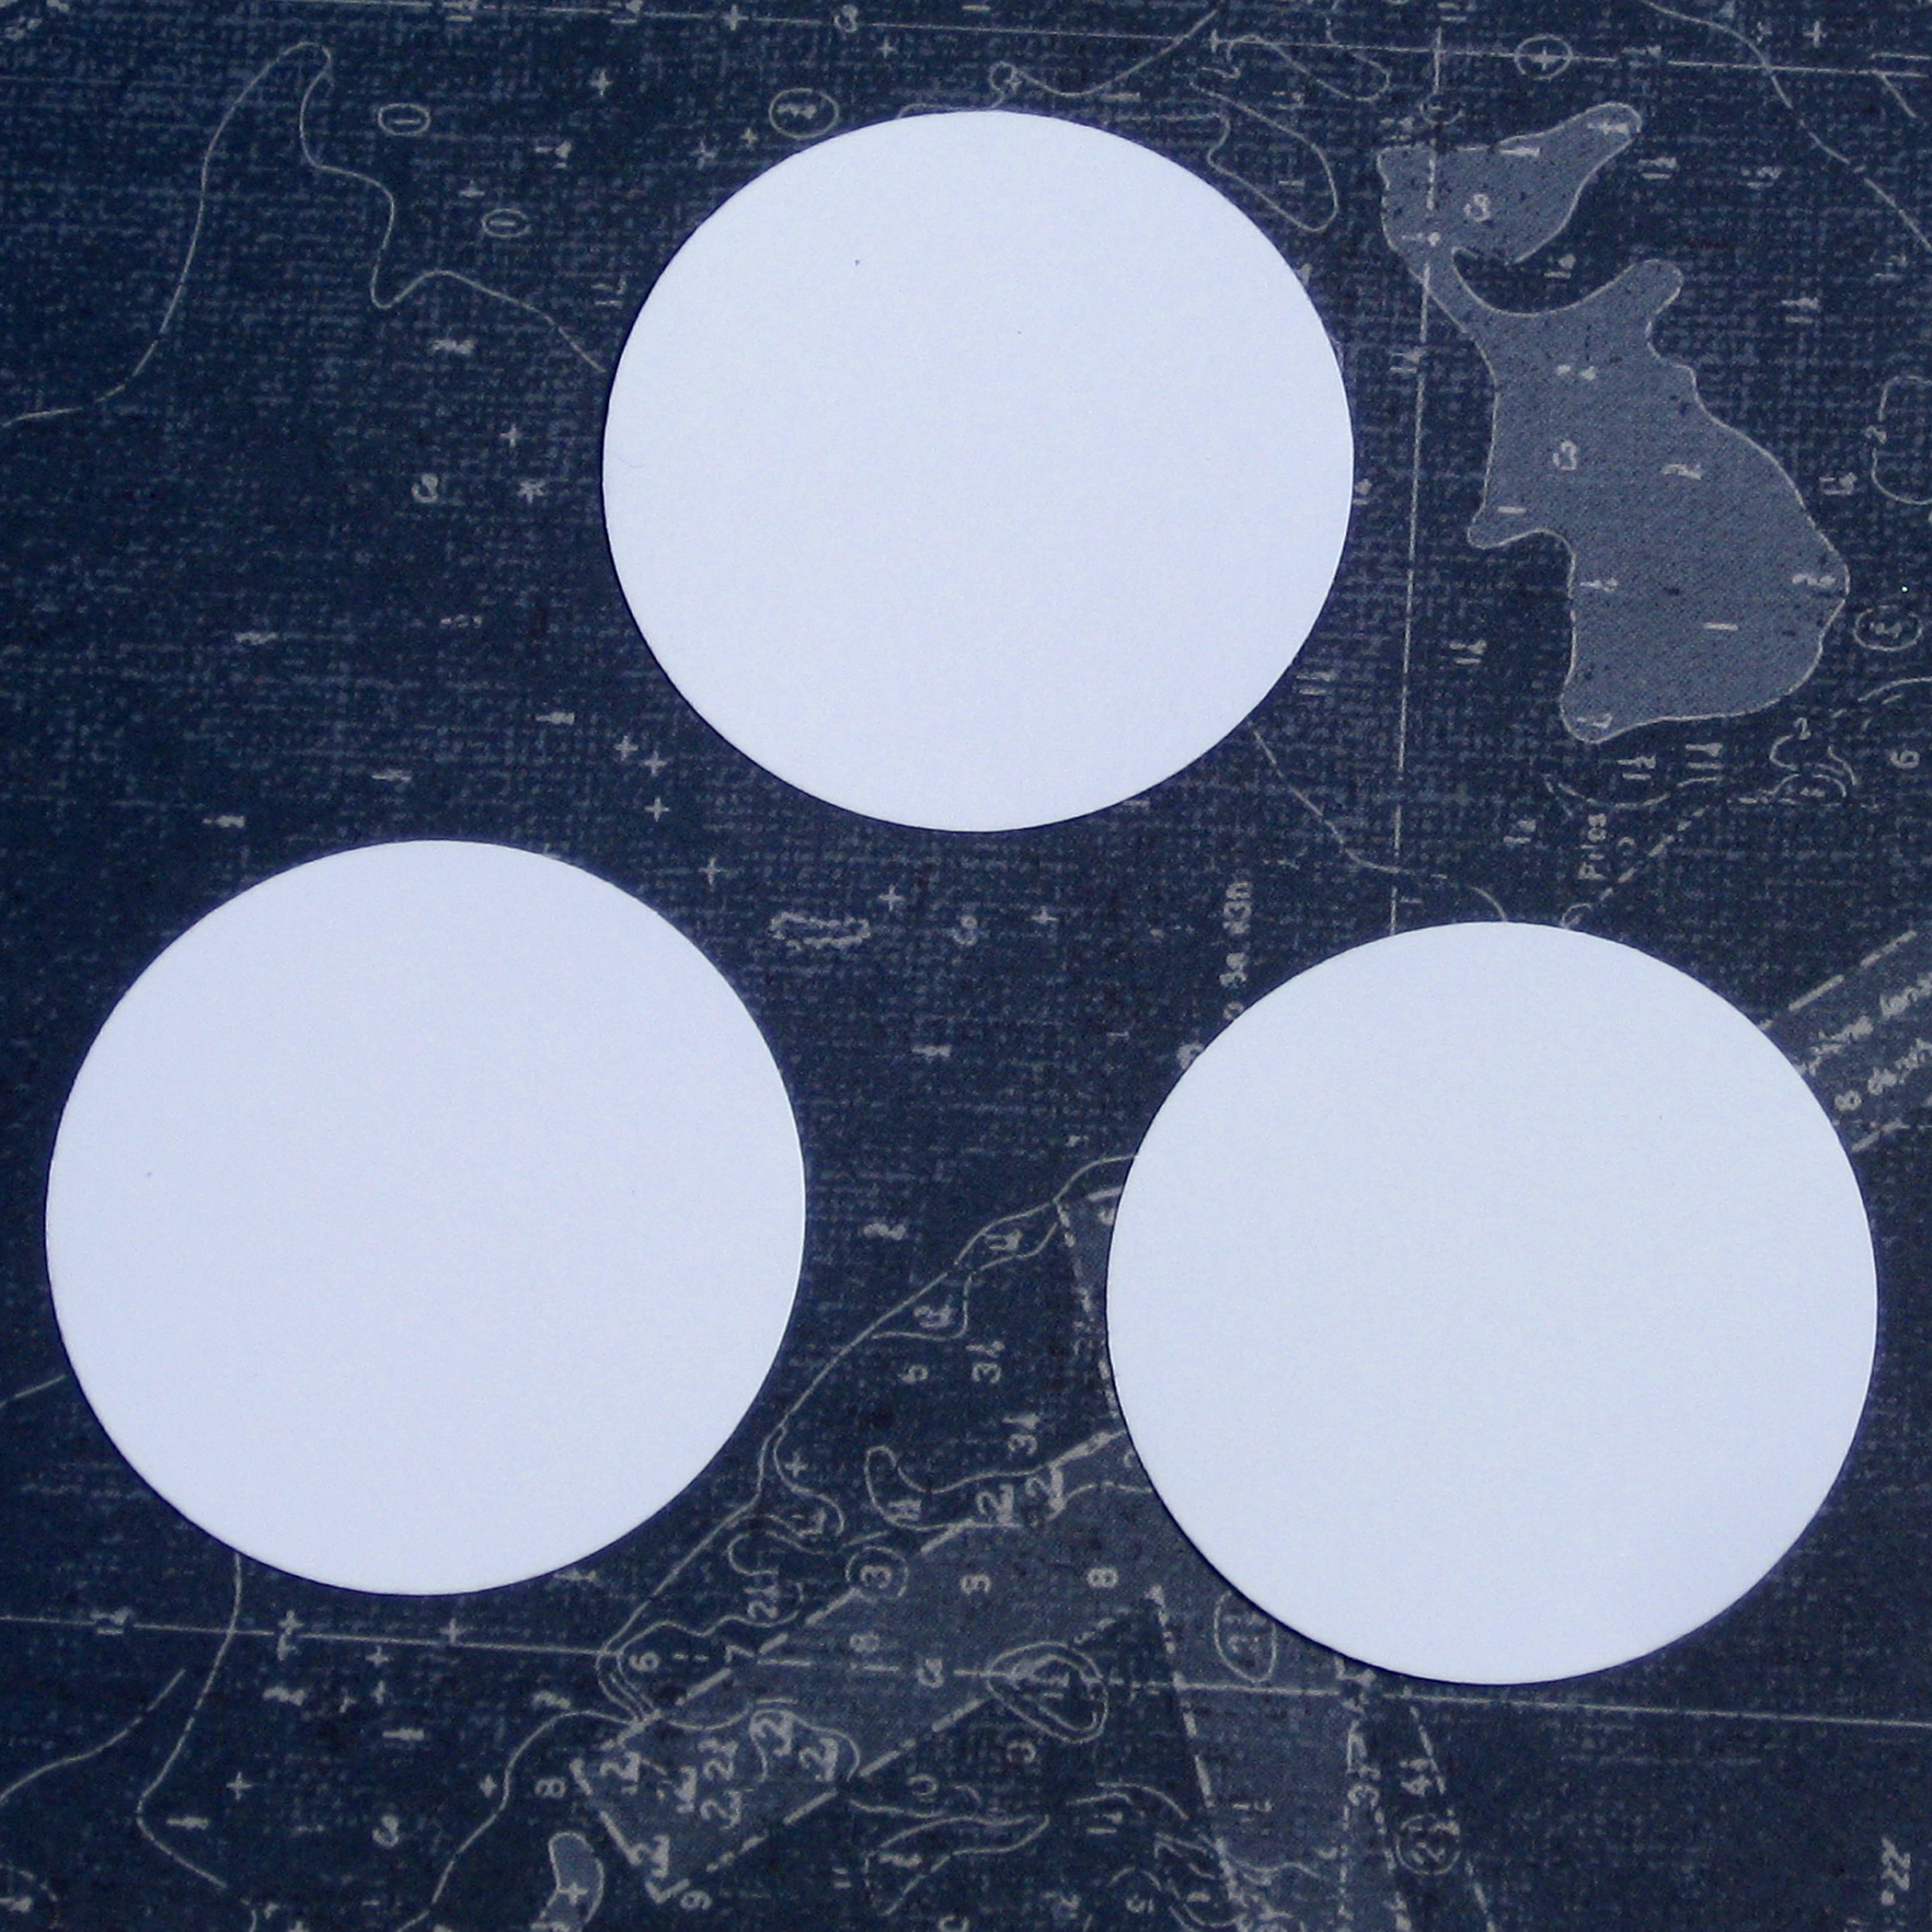
You want to start with cutting out circles from cardstock. This is going to be what you create your Button and Twine Medallions on. So make sure you use a punch that is the size you would like the embellishment to be.

IMG_5709

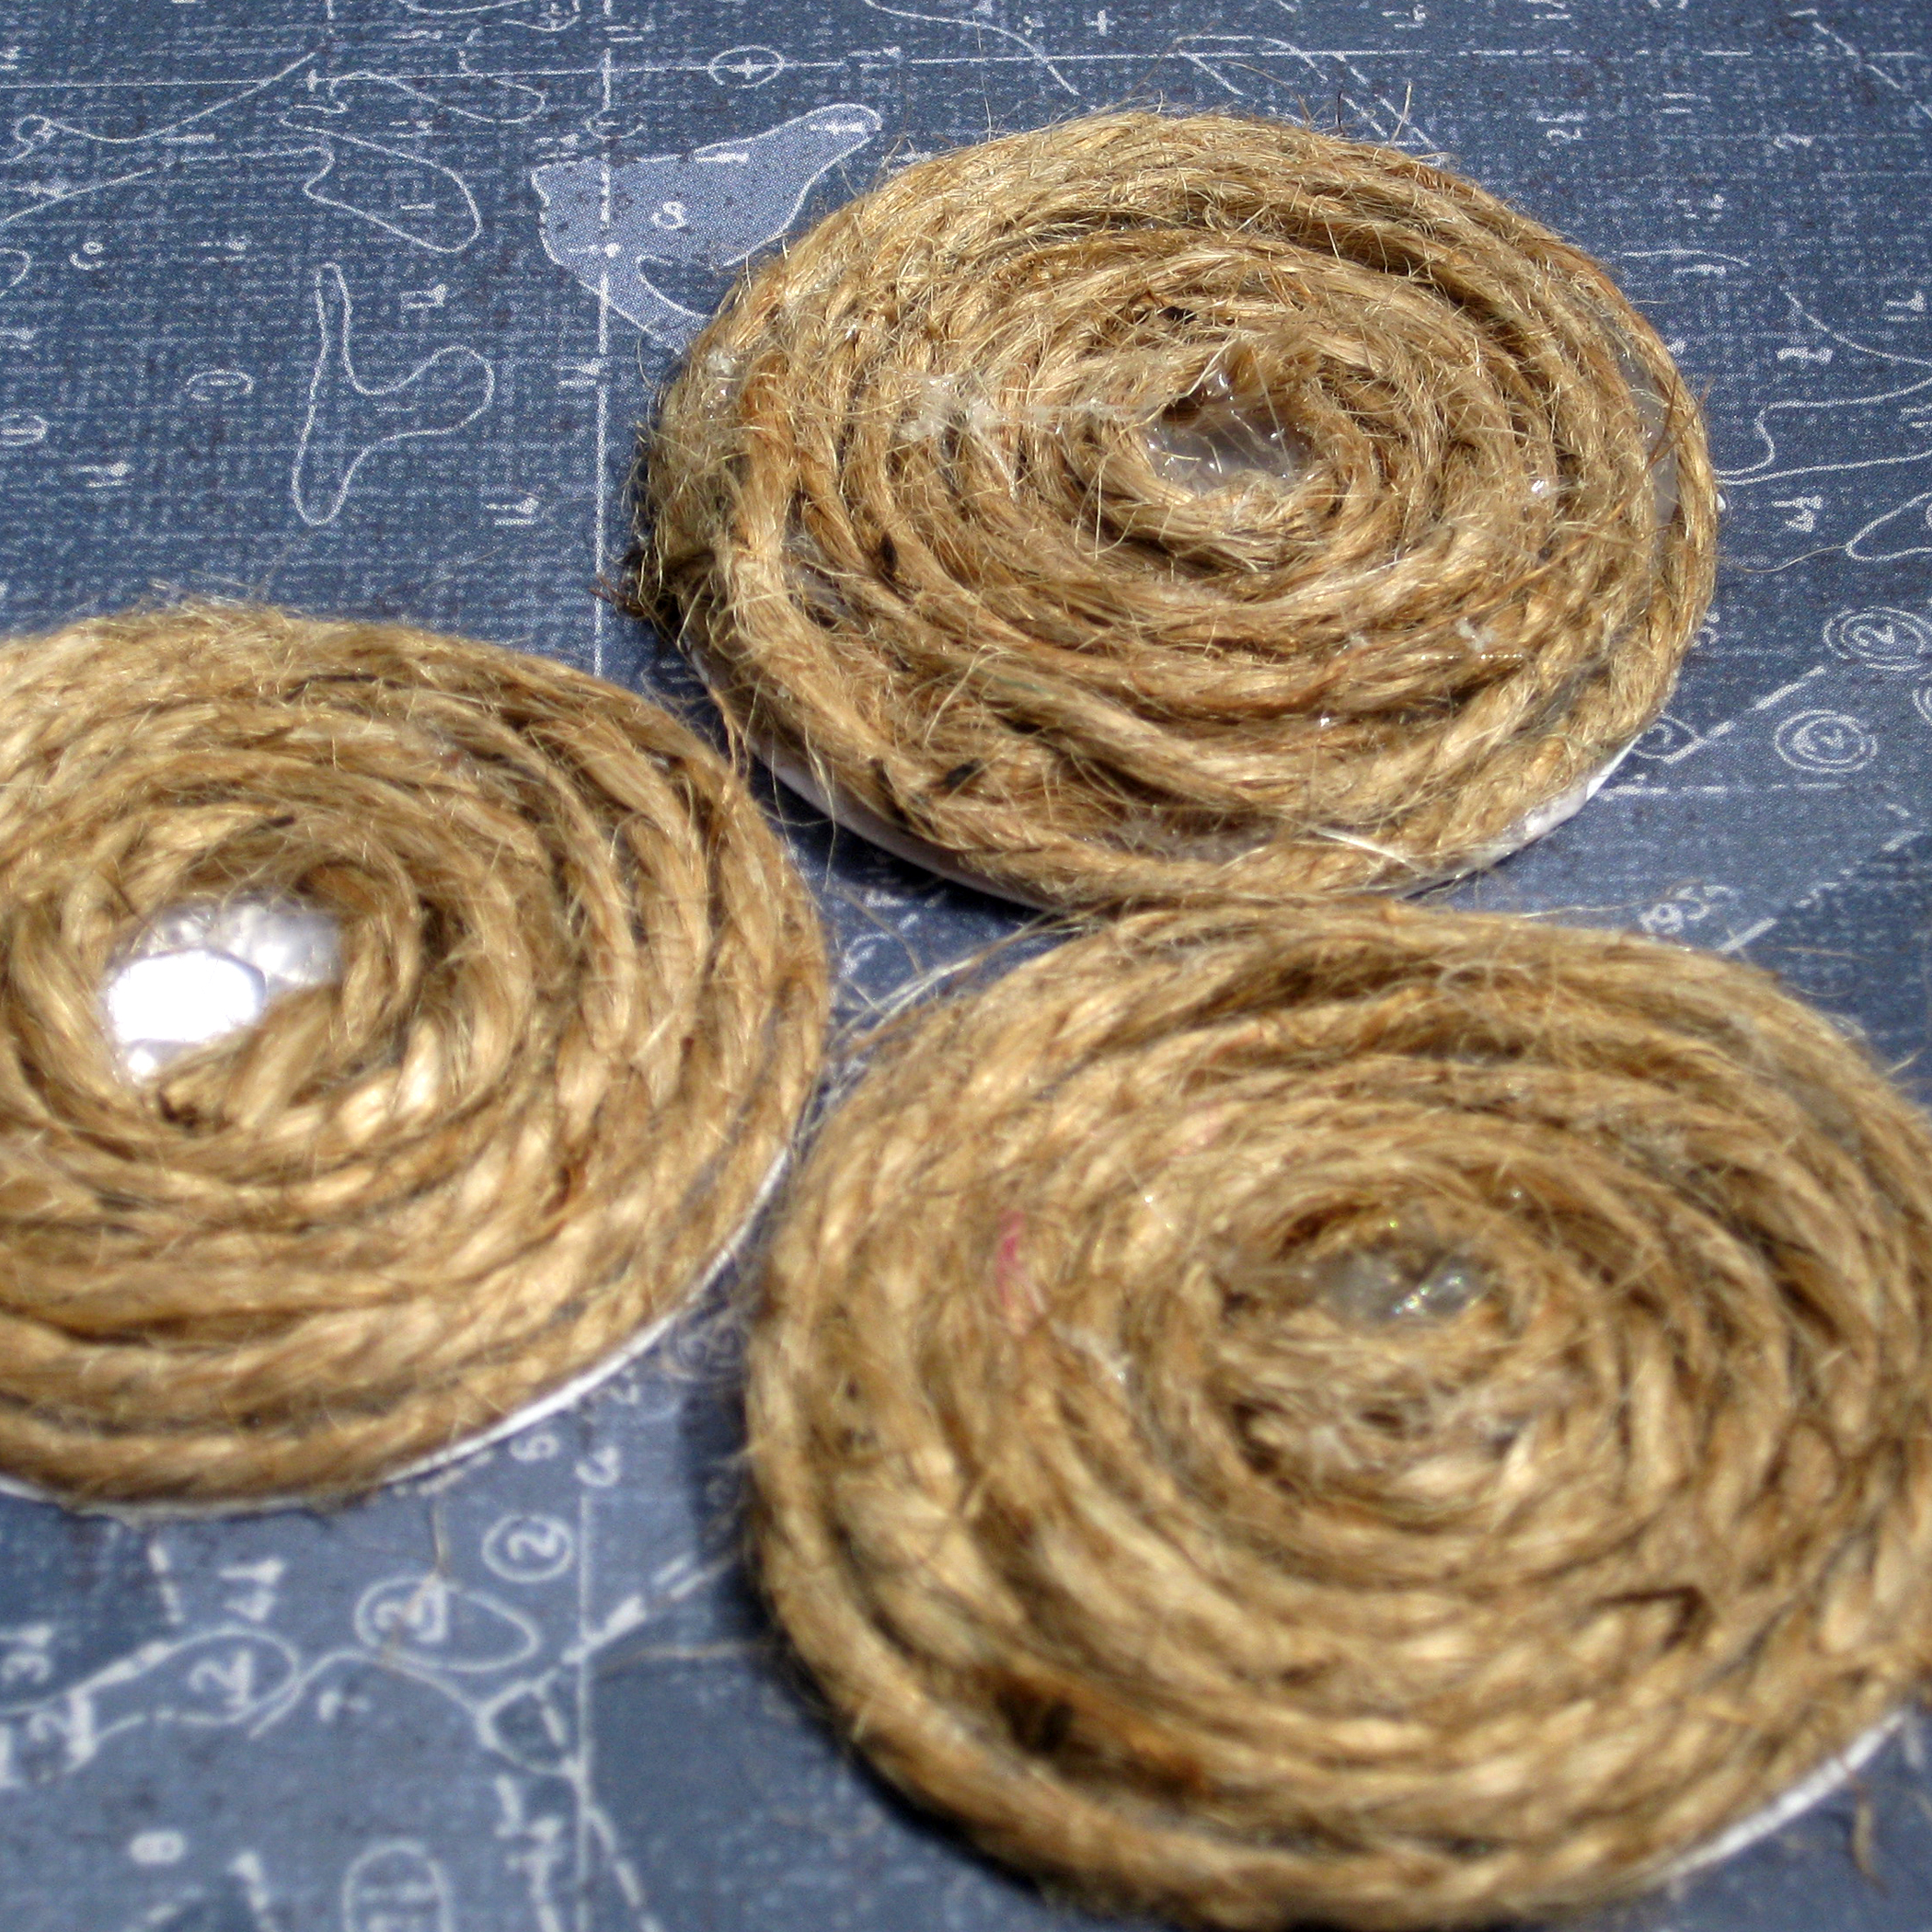
I then used hot glue to start adhering the twine to the outside of your cardstock circle.

IMG_5710

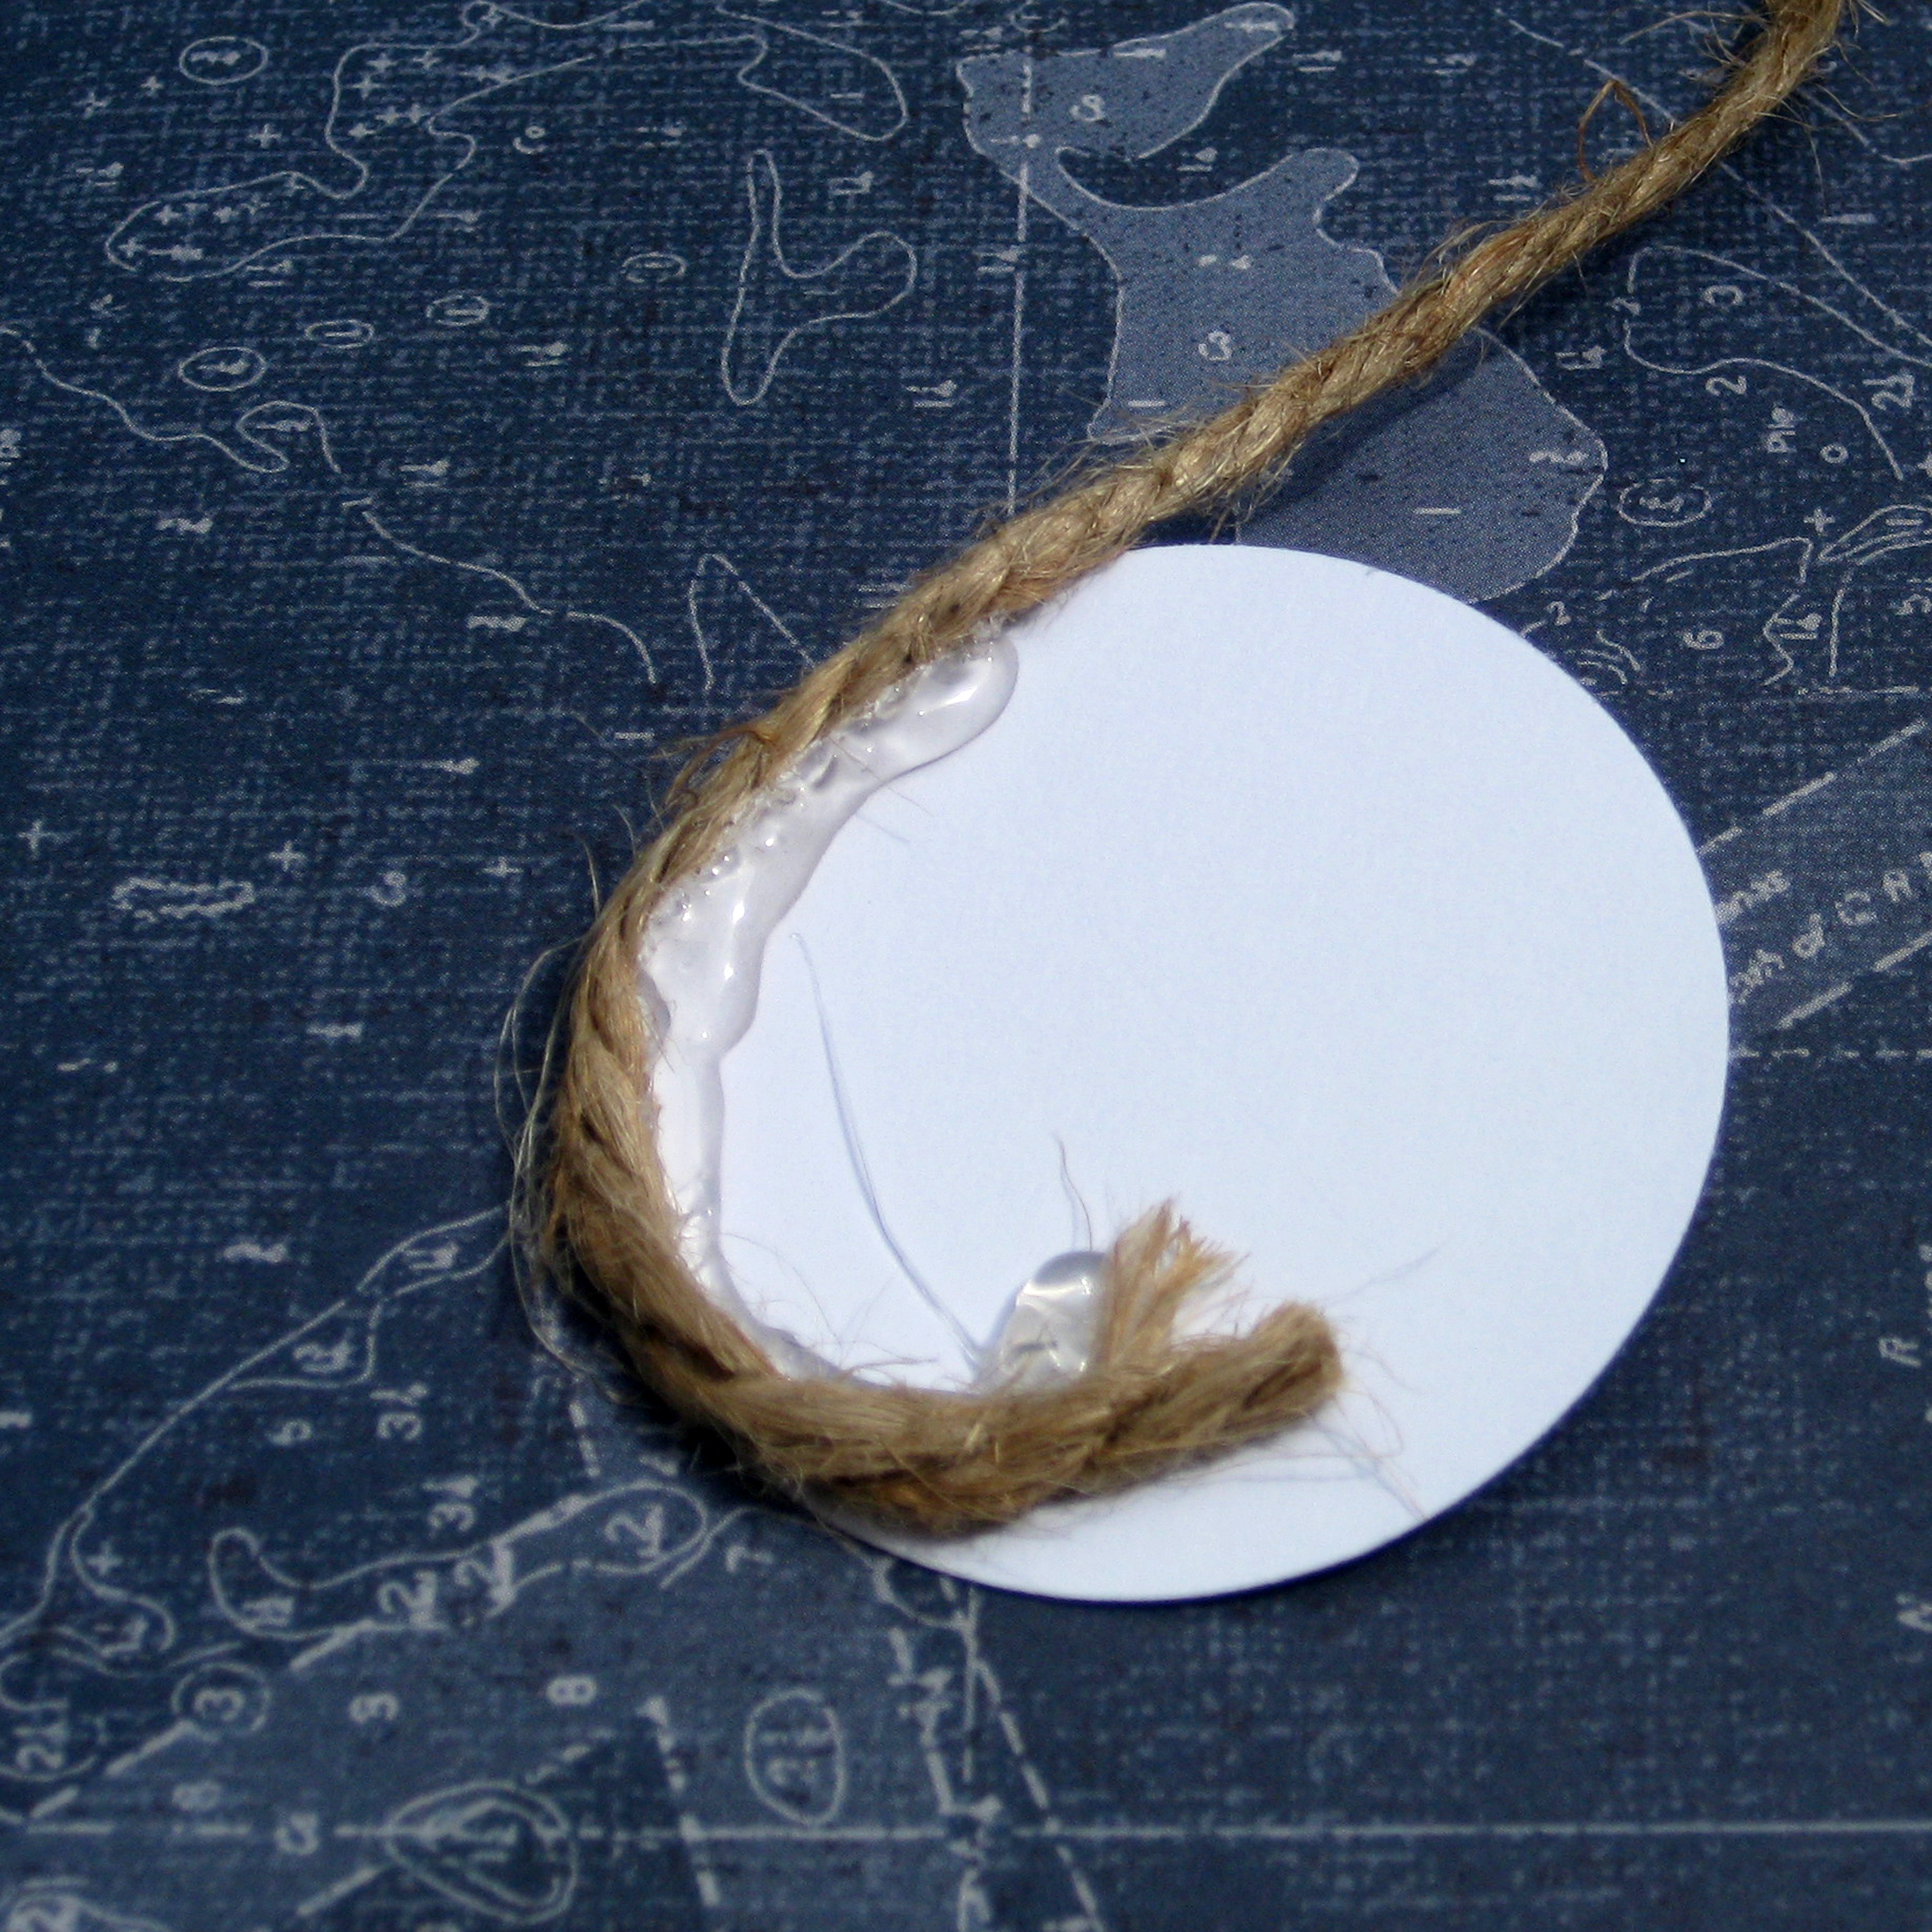
I left a small space in the middle of each of my medallions. That way if you have chosen buttons that have shanks, then you should be able to still just hot glue the buttons to the medallions.

IMG_5712

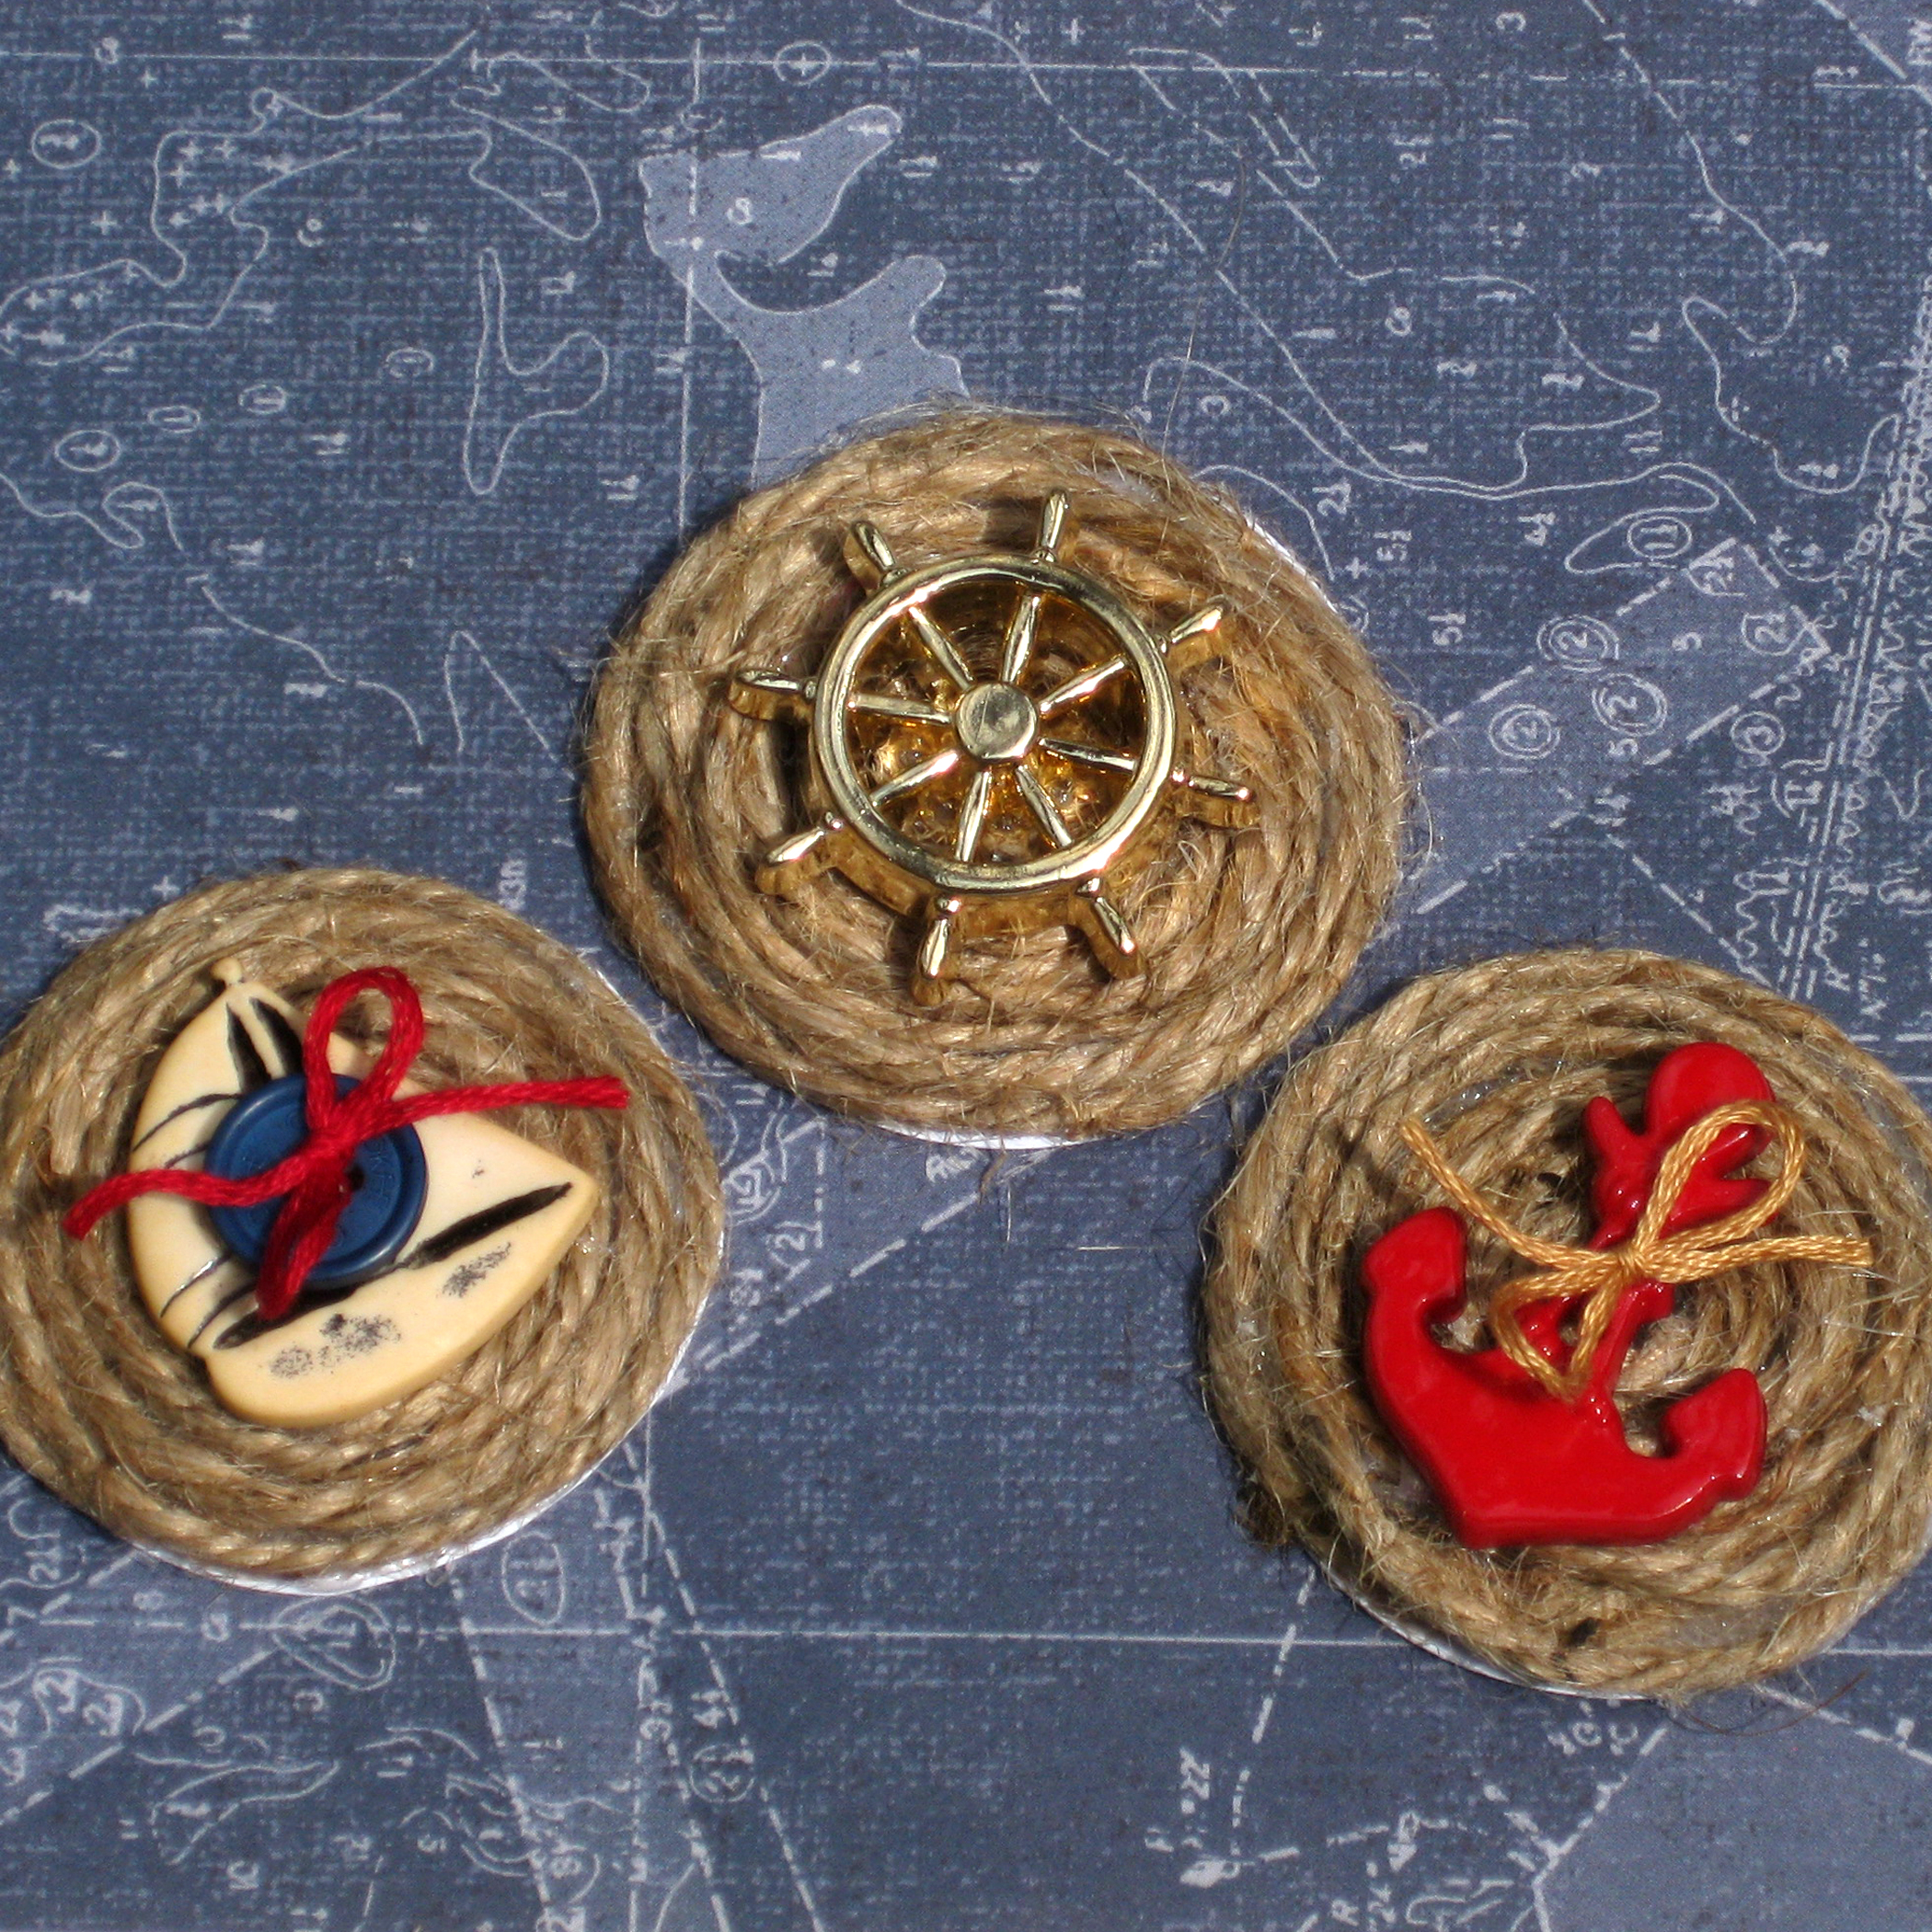
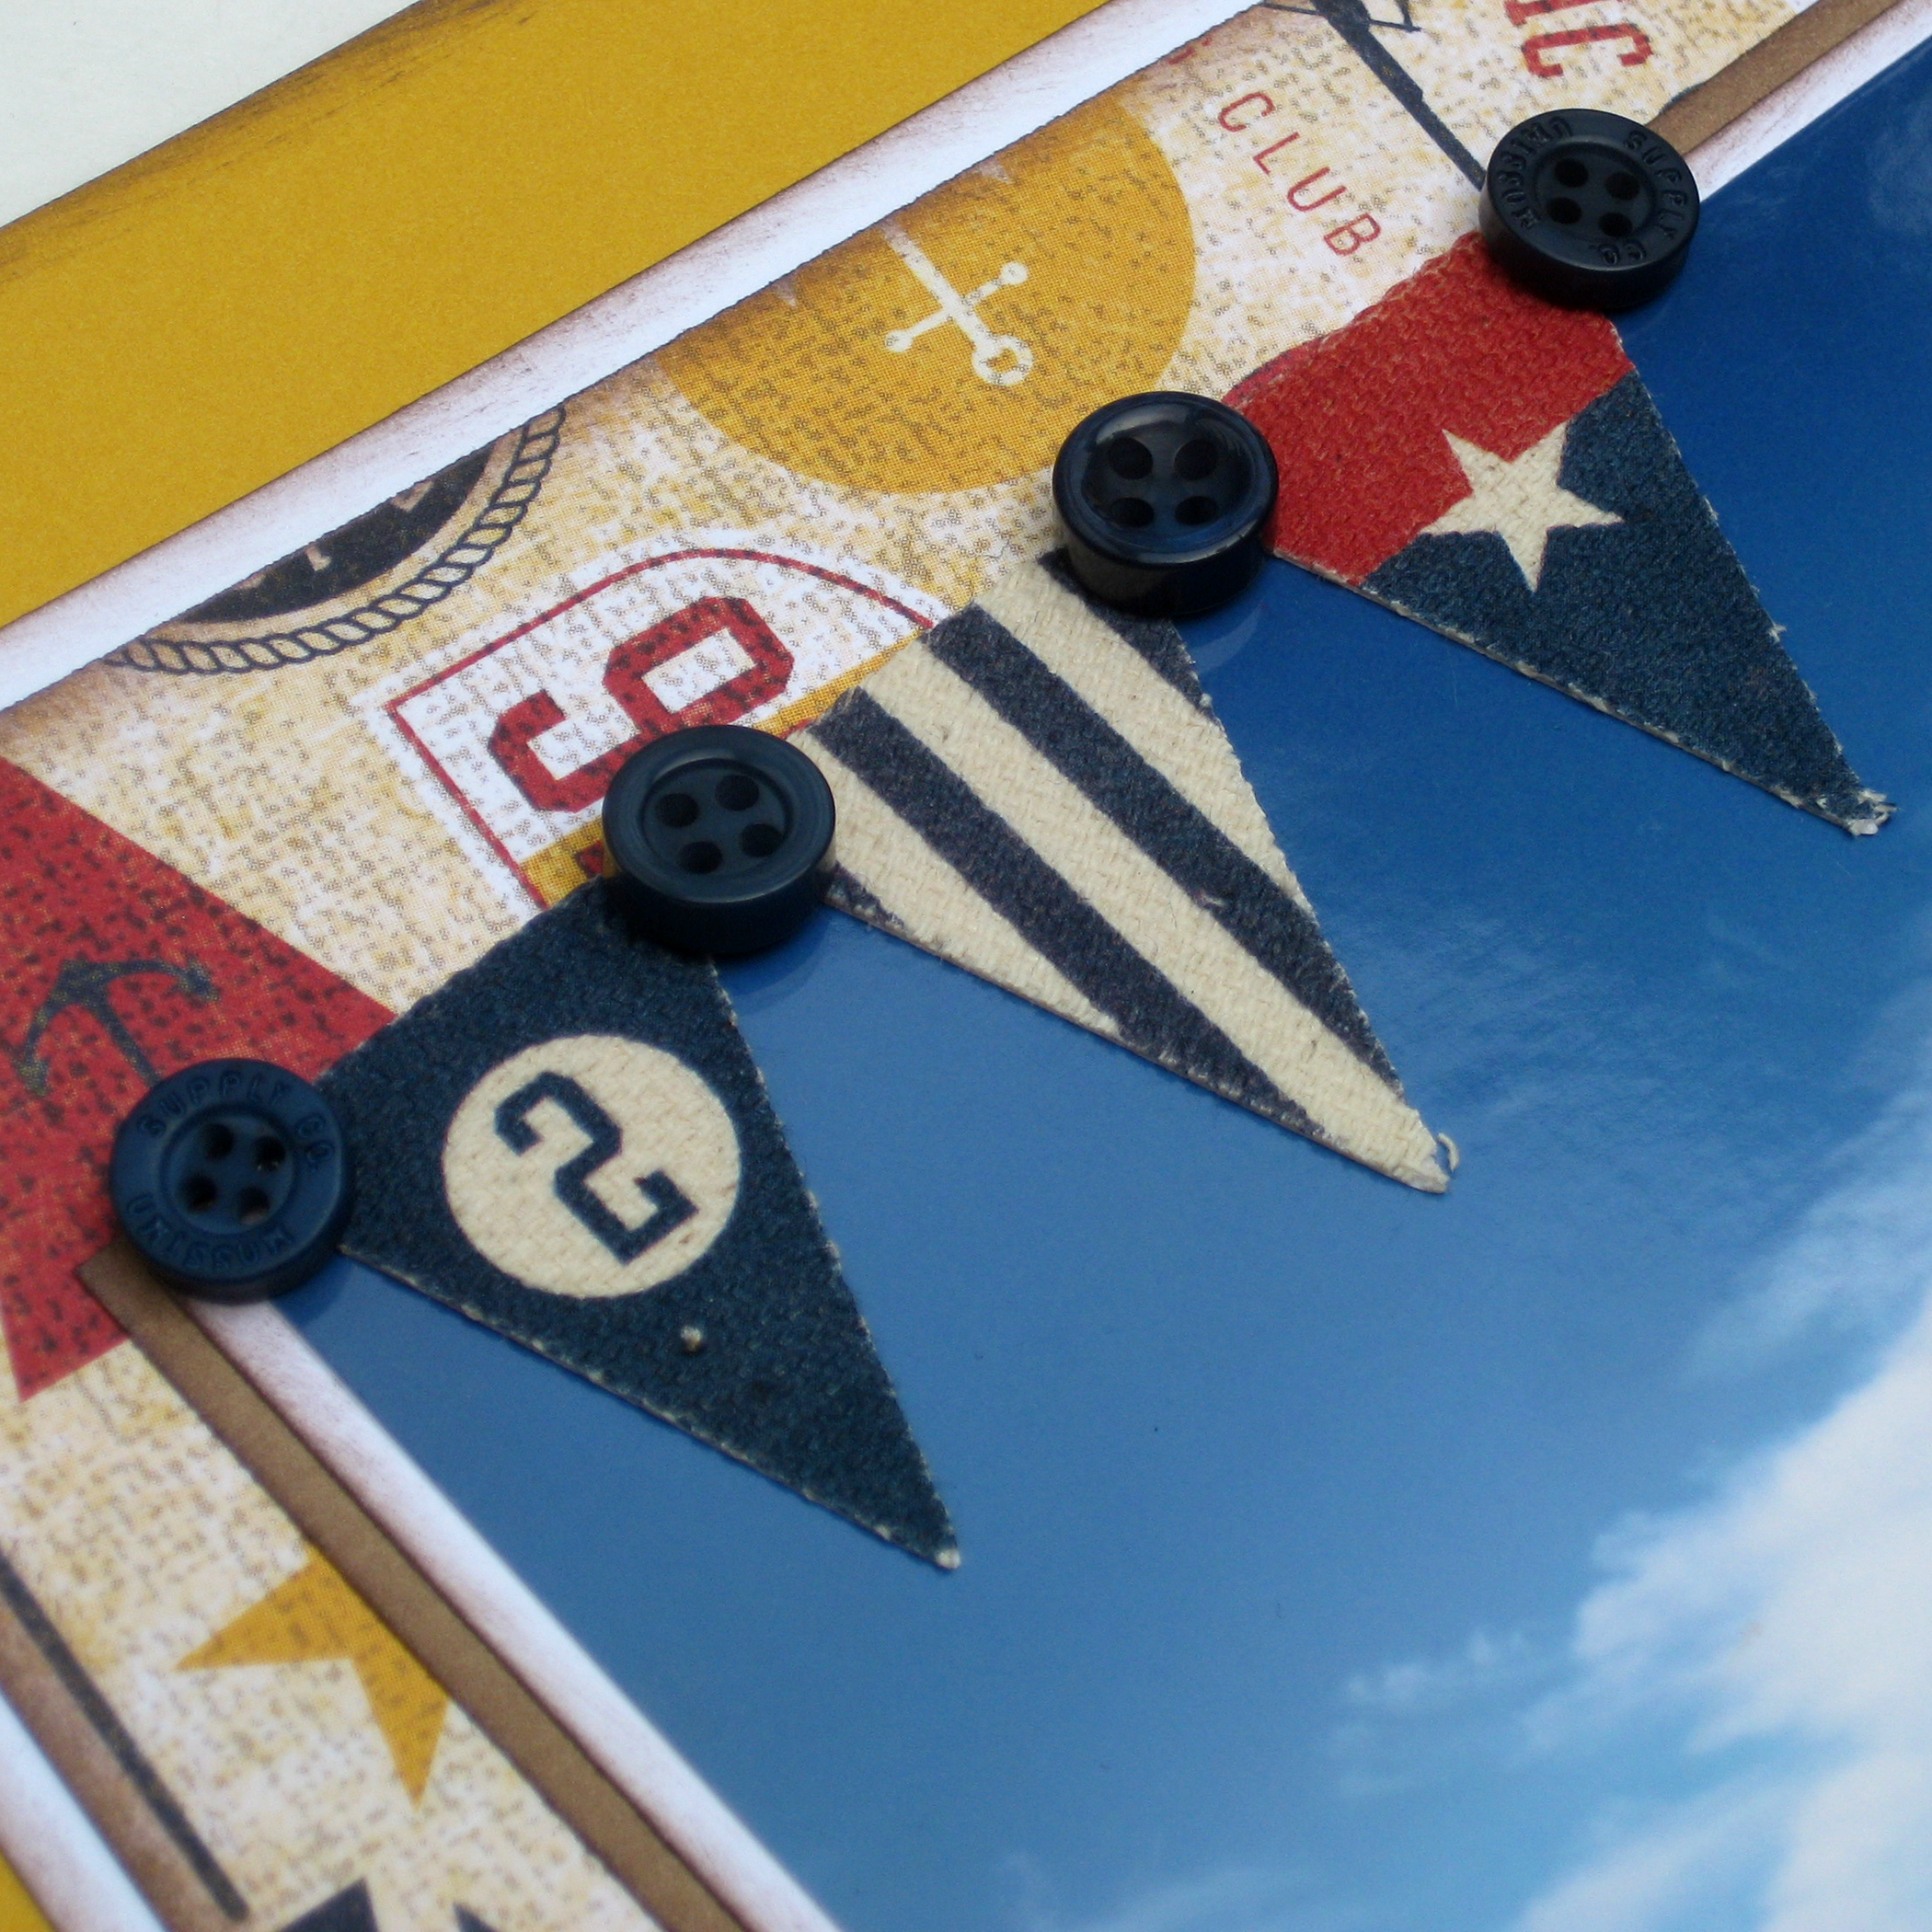
Here are the buttons that I chose from the Nautical Value Pack for my Button and Twine Medallions.

IMG_5714

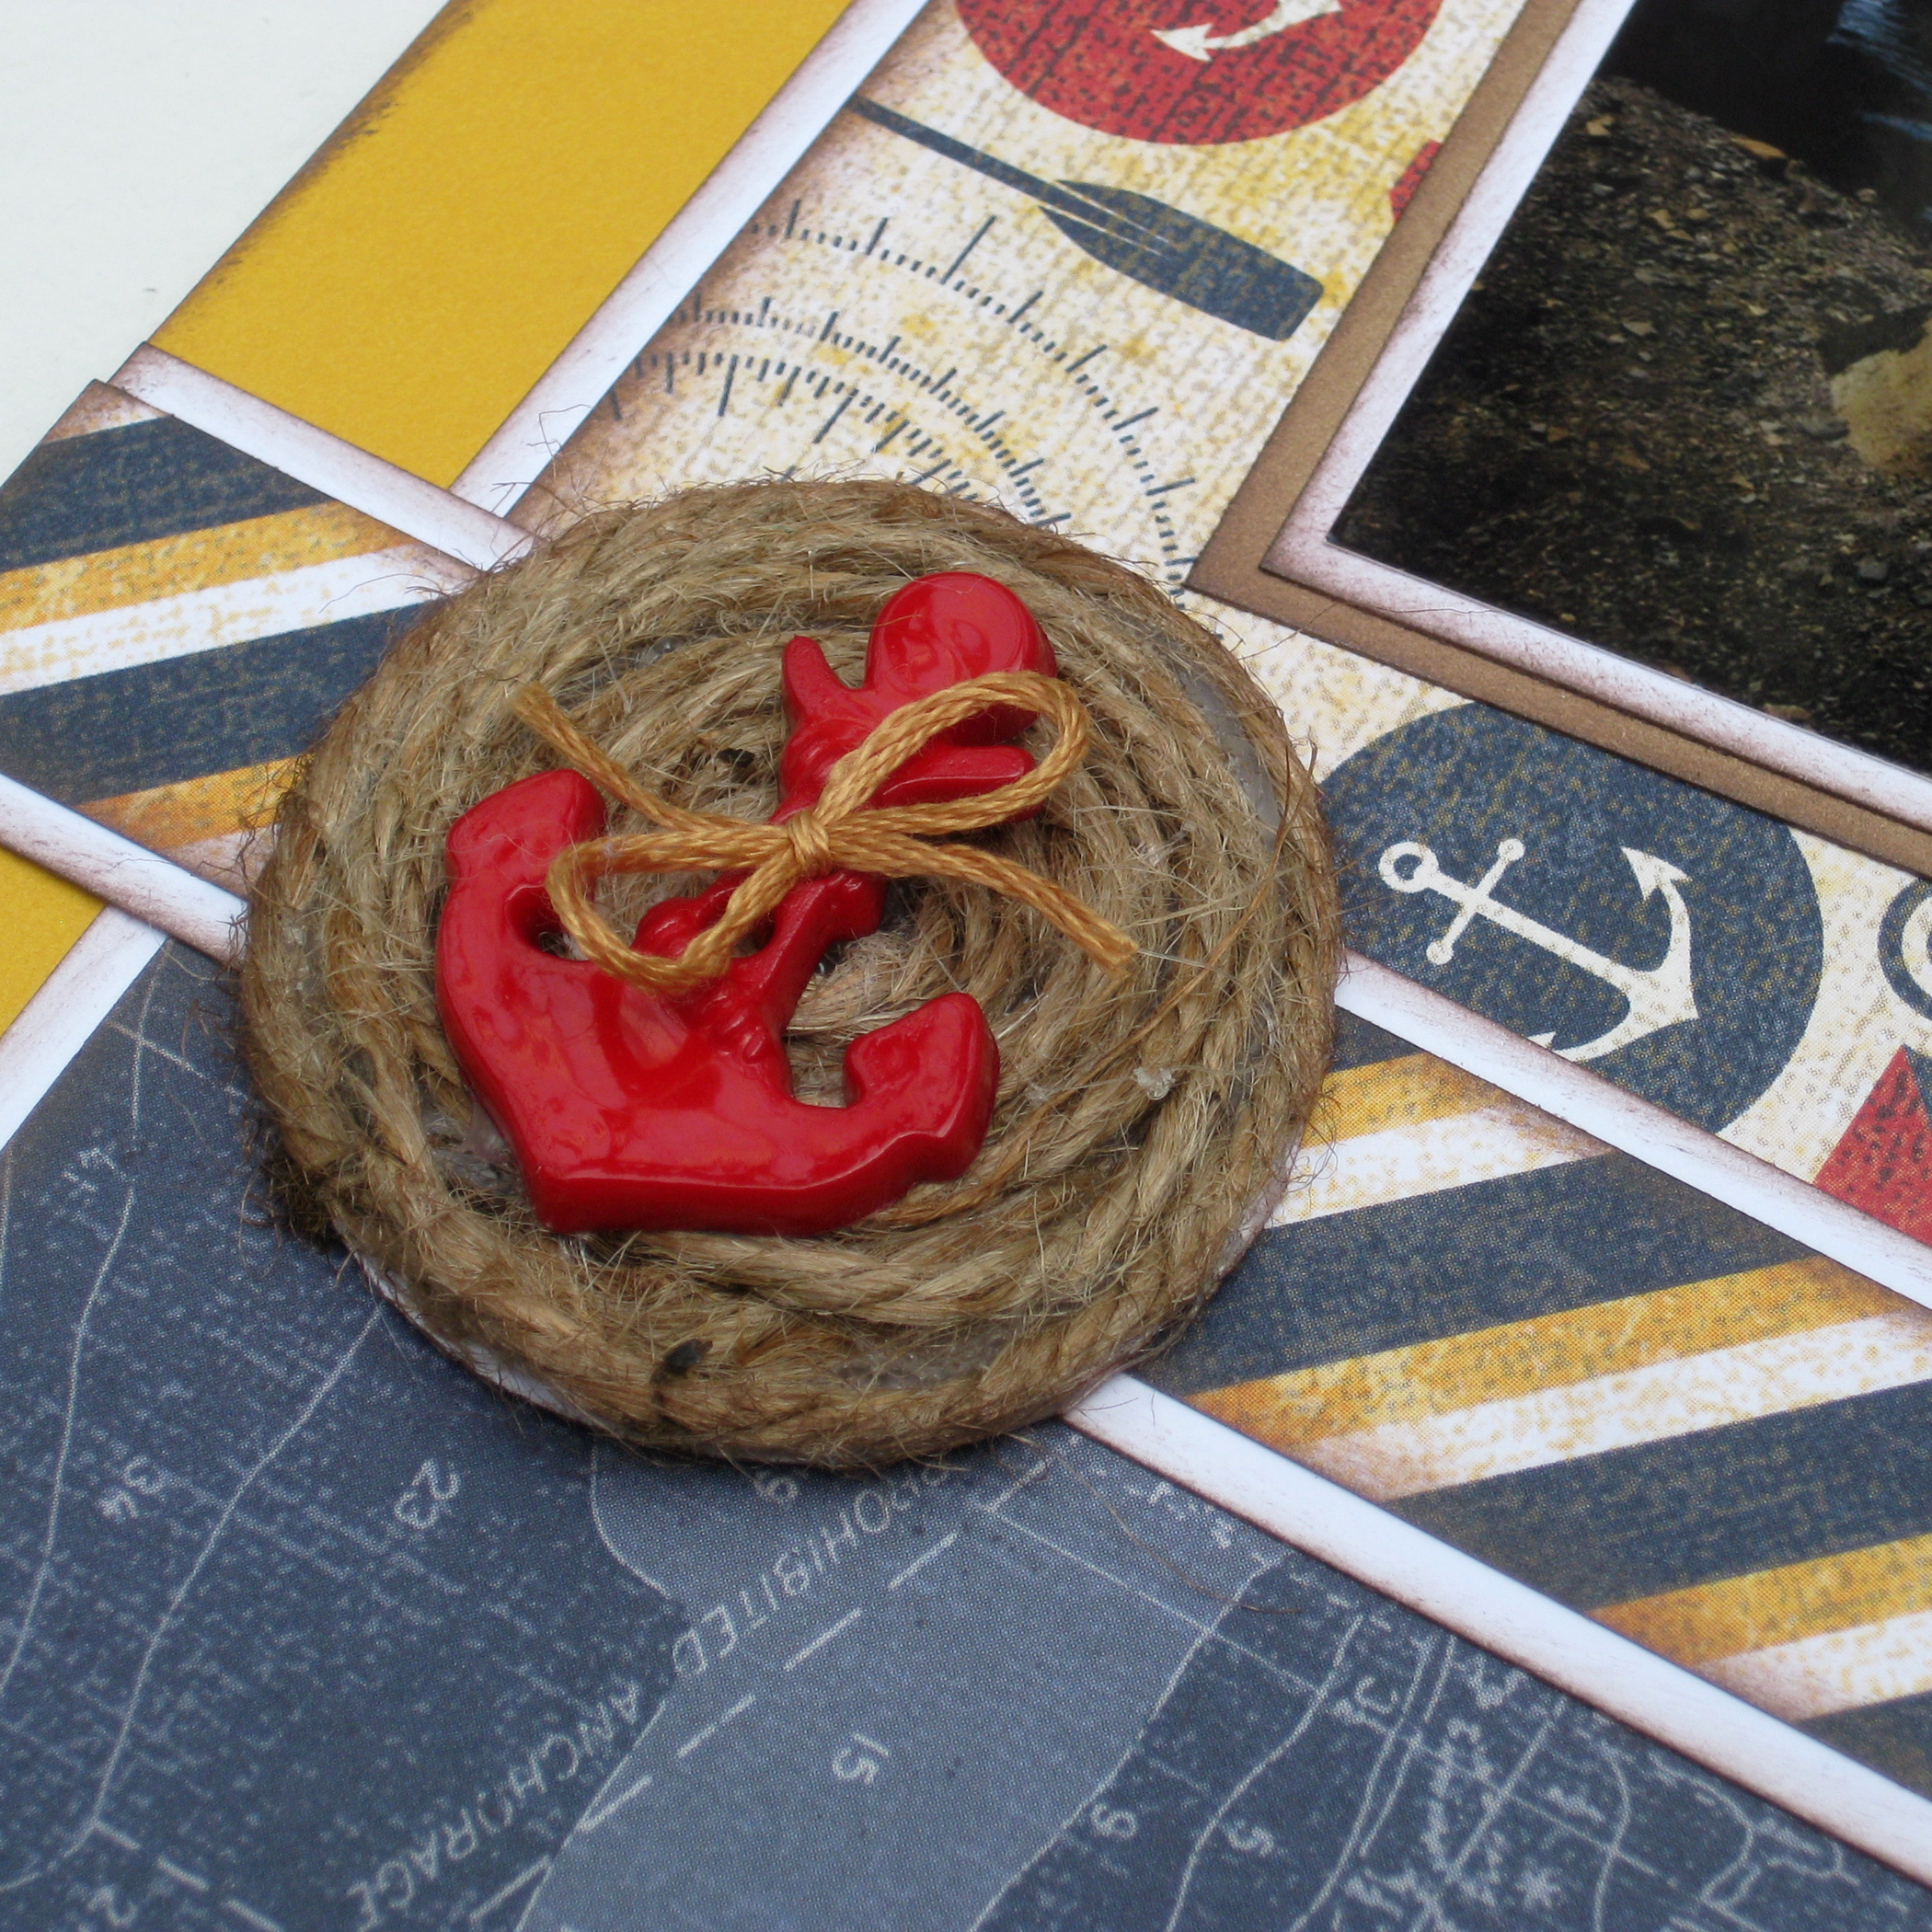
I added my Button and Twine Medallions to the border of my scrapbook layout.

IMG_5722

I added a few more buttons from the Nautical Value Pack along with some canvas stickers to the top of one of my photos.

IMG_5723

IMG_5725

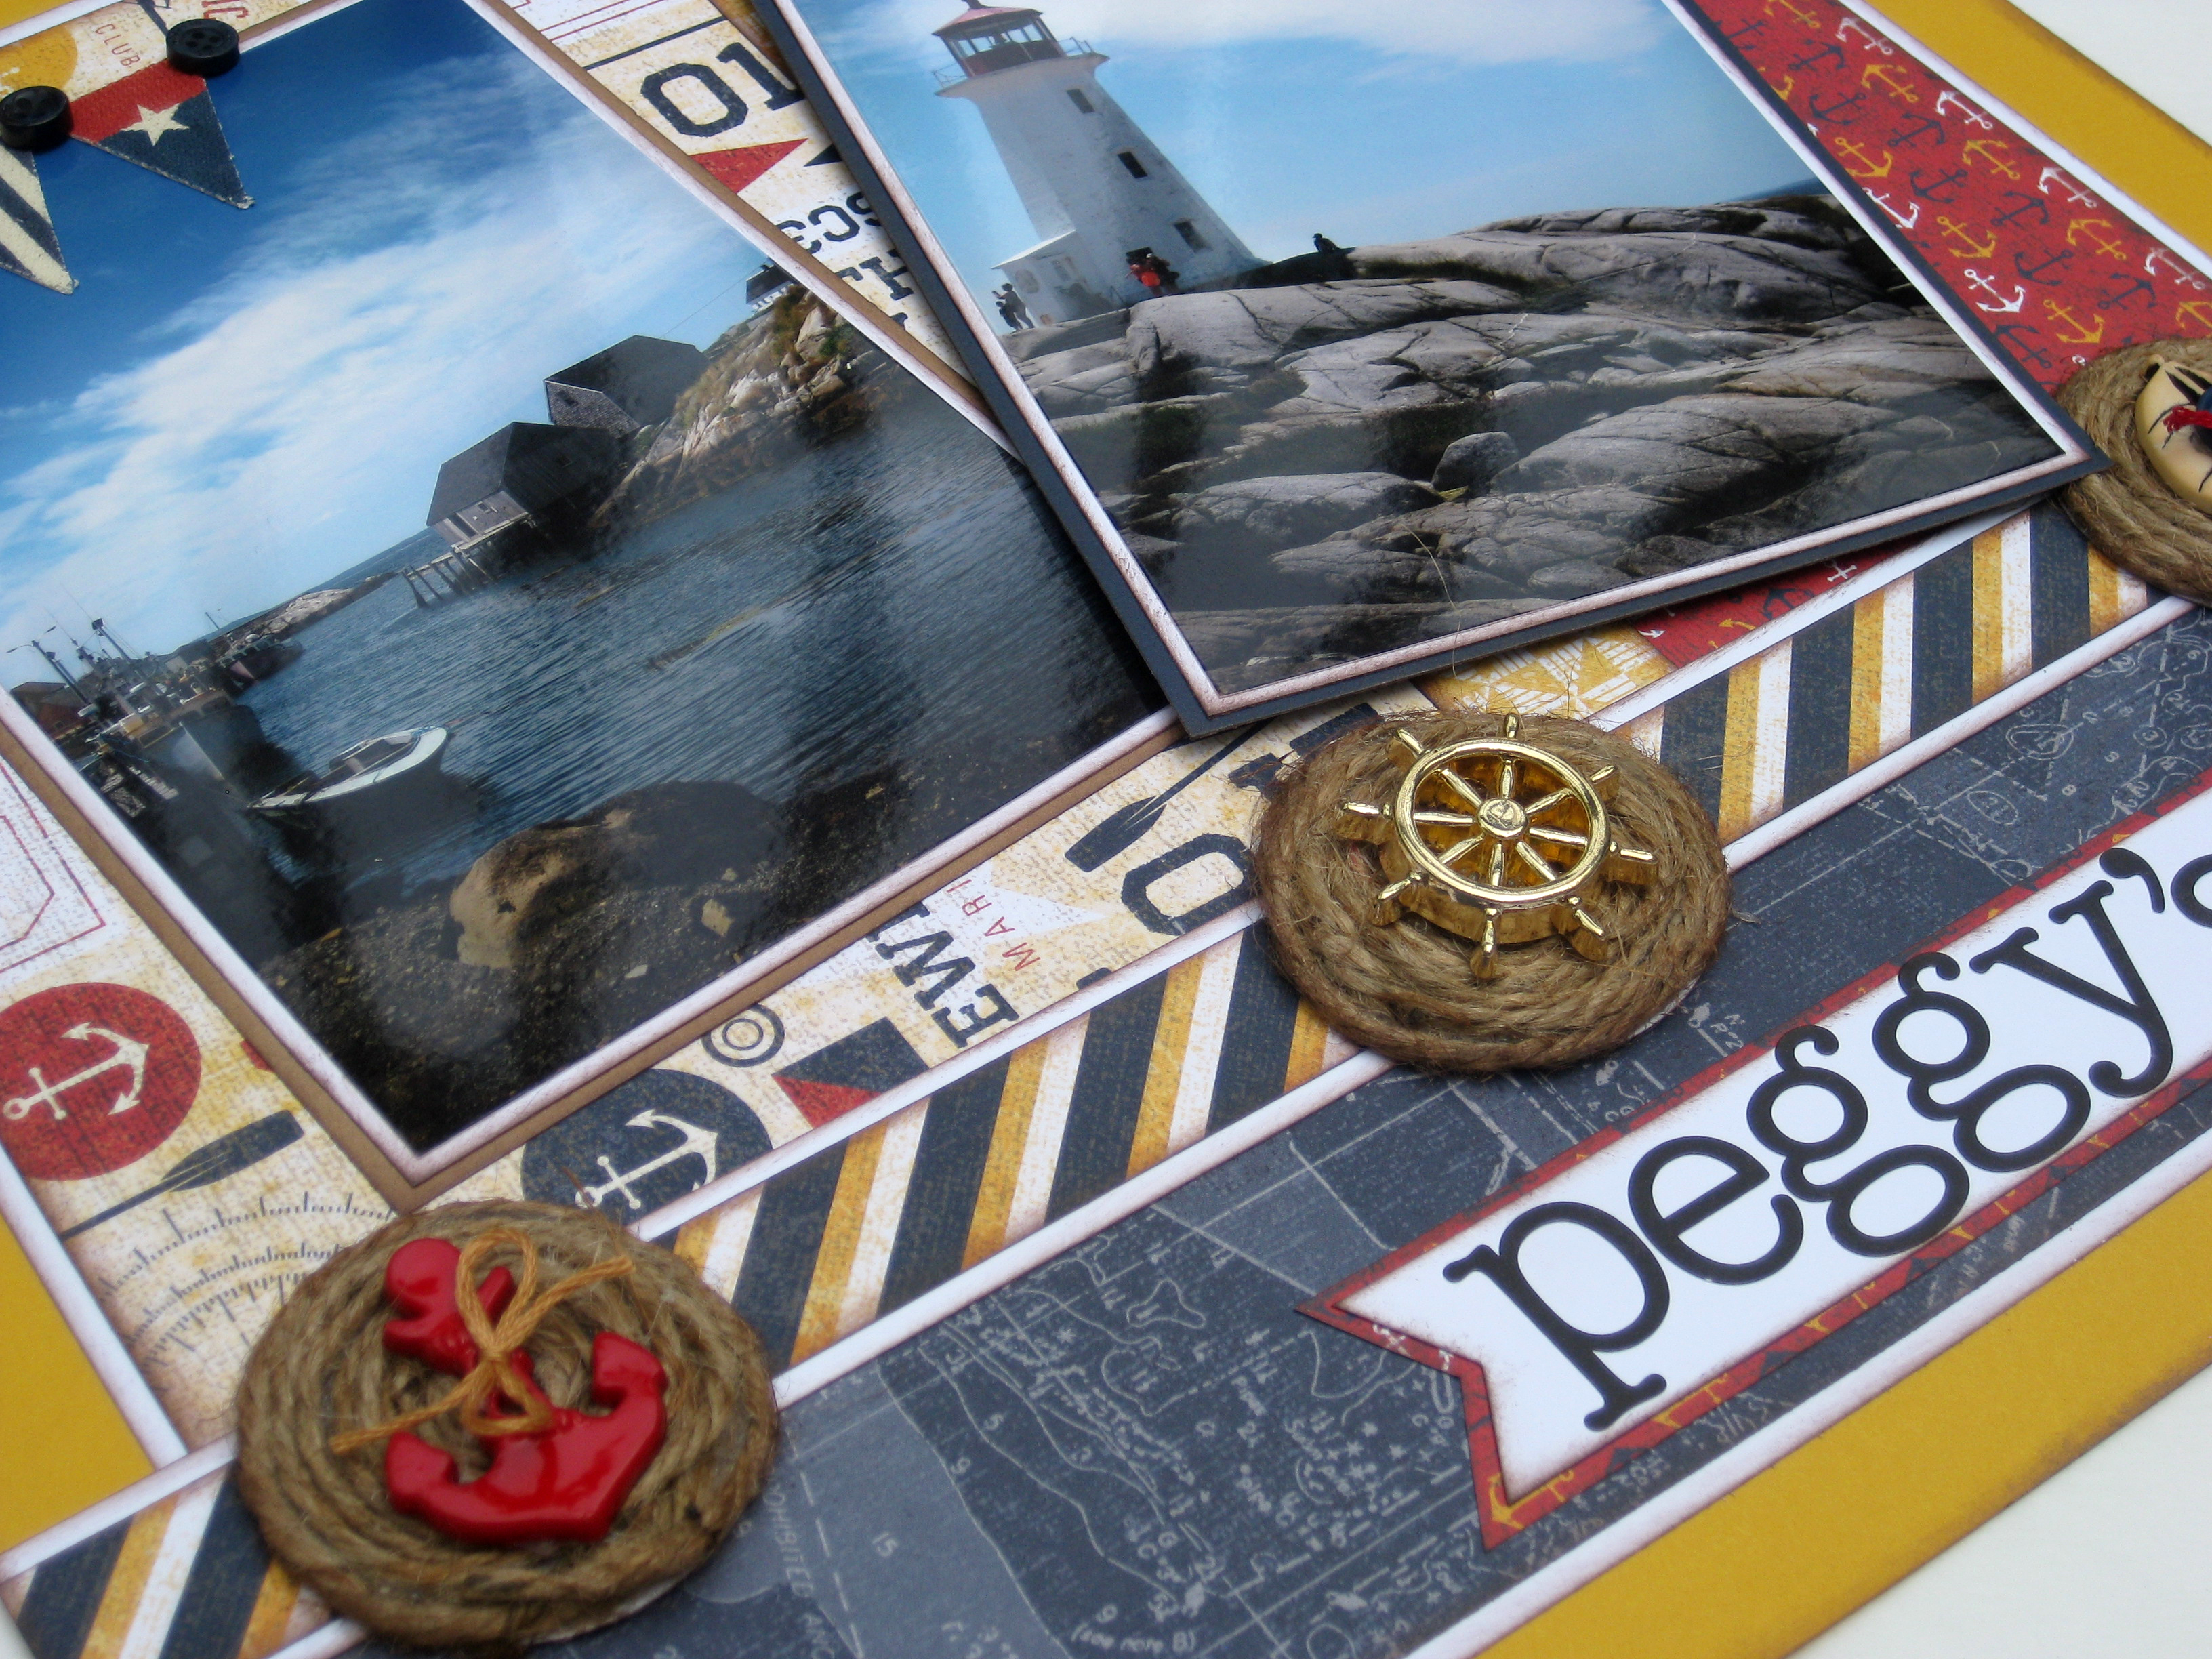
Here is my completed scrapbook layout with the Button and Twine Medallions as the perfect accent to my photos from the stunning Peggy’s Cove, Nova Scotia.

Thank you for stopping by and I hope these Button and Twine Medallions make it to your next nautical themed craft project.IMG_5720

1

Taking inspiration and making something totally different

A few weeks back I was perusing Pinterest and I saw this totally cute pin idea and instantly thought  “I could make a really cool clean and simple card with this as inspiration”. So I repinned the blog post over at Imparting Grace where she had seen a Pottery Barn Pillow using buttons and was inspired to make it herself.


Image courtesy of Pottery Barn

I in turn was inspired by her post to make the general idea into a card!! Here’s my take on the simple but oh so button savvy design! I started with a 4 1/4 ” x 11 1/2″ strip of cardstock. I scored 5 1/2″ from the end and folded along the score line to make the spine of my card.  I then made and additional two score lines using my Scor-Pal Scoring Tool 1″ from the spine of the card and 1 1/2″  from the spine of the card.  I then folded at the score lines to create the “pleat” that you see on the left side of the card lining up the ends of the cardstock strip.  A little line of 1/4″ Scor-Tape to hold the folds and the base of the card was done. I then used four red buttons from the Girly Button Pack and tied a bit of twine through each before adhering them to the card front just past the “pleat”, stamped the simple sentiment and BAM! Done! :)

Have you ever been inspired by something and gone in a totally different direction with it? For example this was a pillow design and I translated it into a clean and simple card. Share a link! We’d love to see what inspires you and how you translate it into making it your own!

0

Powered by WordPress. Designed by WooThemes