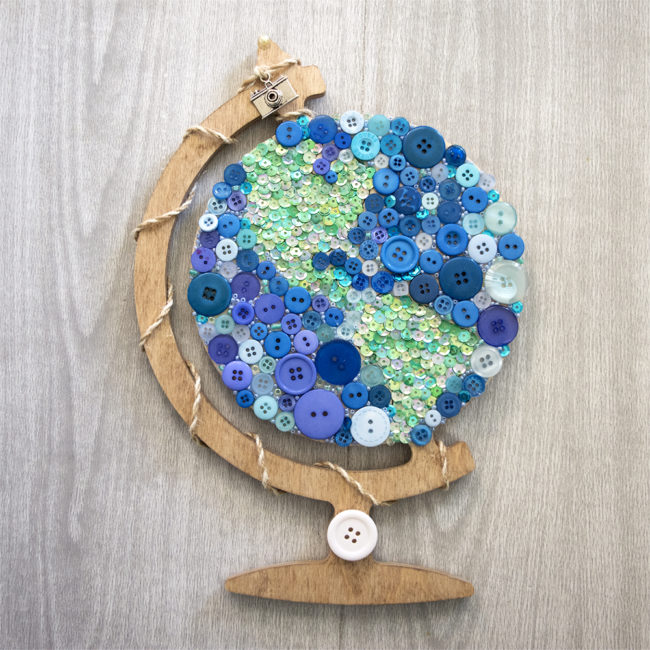
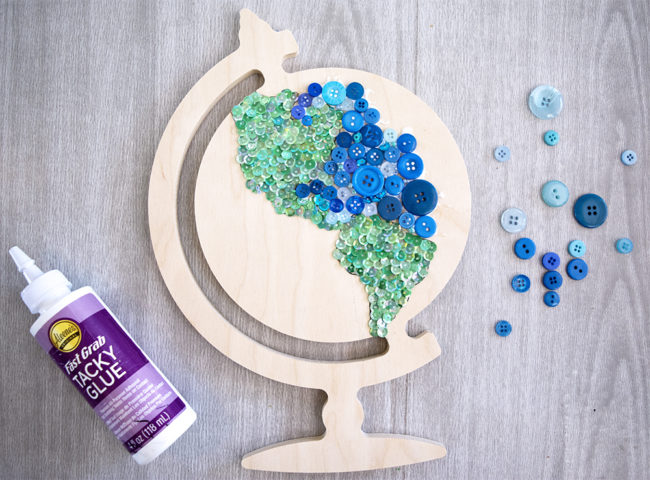
Hi! I’m Kelli, from the Craft Shack Chronicles blog and I’m so excited to be joining the Buttons Galore Design team! For my first project, I wanted to make a piece of home decor. I’m working on a gallery wall above my piano and I am having fun adding in lots of different colors and textures. You can easily add interesting depth and texture to your home decor pieces by using buttons and sequins to add color instead of paint. I used two 28 Lilac Lane kits to make this fun Button Globe Mosaic.
Supplies needed for Button Globe Mosiac:
- 28 Lilac Lane “Tea Time” Embellishment Kit
- 28 Lilac Lane “Let’s Go” Embellishment Kit
- Blue Buttons (I used blue buttons from Button Basics Bright Mix and Button Basics Blueberry)
- Walnut Hollow Wood Globe Shape
- Fast Grab Tacky Glue
- Wood Stain

Step one:
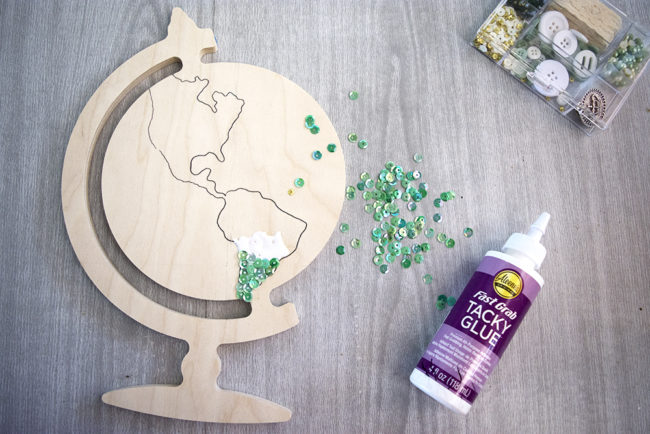
Draw the design outline onto the wood globe surface. You can trace it, transfer it, or freehand it. Draw the design onto the globe using a pencil. You won’t be able to see it when it’s covered in buttons and sequins so it doesn’t need to be perfect.
Step two:
Use green sequins from both Lilac Lane kits to fill in the land shapes. Add a little bit of glue and spread it out. Drop the sequins onto the glue one at a time. I find it easy to use a toothpick to arrange the sequins in the glue but you could use whatever you have on hand.
The glue will dry clear, so you don’t need to worry if you get a little messy.
Step three:
Fill the in the oceans with blue buttons. Try to mix large and small buttons into the mix to add interesting variations in the texture. The smaller buttons fit nicely in some of the small curves around the land, while the bigger buttons were easier to use further out in the ocean.
Cover the entire globe with buttons and fill in any gaps with seed beads, or blue sequins from the Lilac Lane Kits.
Step four:
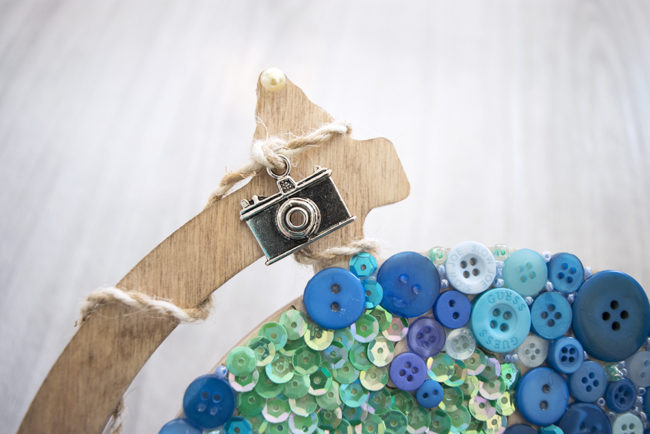
Use wood stain to finish the remaining wood part or fill it in with buttons that complement your home decor colors. Finally, use the beautiful rope trim from the Let’s Go kit to attach the camera embellishment from the same kit to the top of the globe. A big white button from the Tea Time kit was the perfect size to put on the globe base.
I’m thinking about adding a little red button heart in the general area where we live on the globe. Would you add it, or leave it as it is? I can’t decide! I’m so excited to hang my new Button Globe Mosaic on my gallery wall soon!