Header

Tag Archives | hearts

Make an Ombre Heart with Buttons!

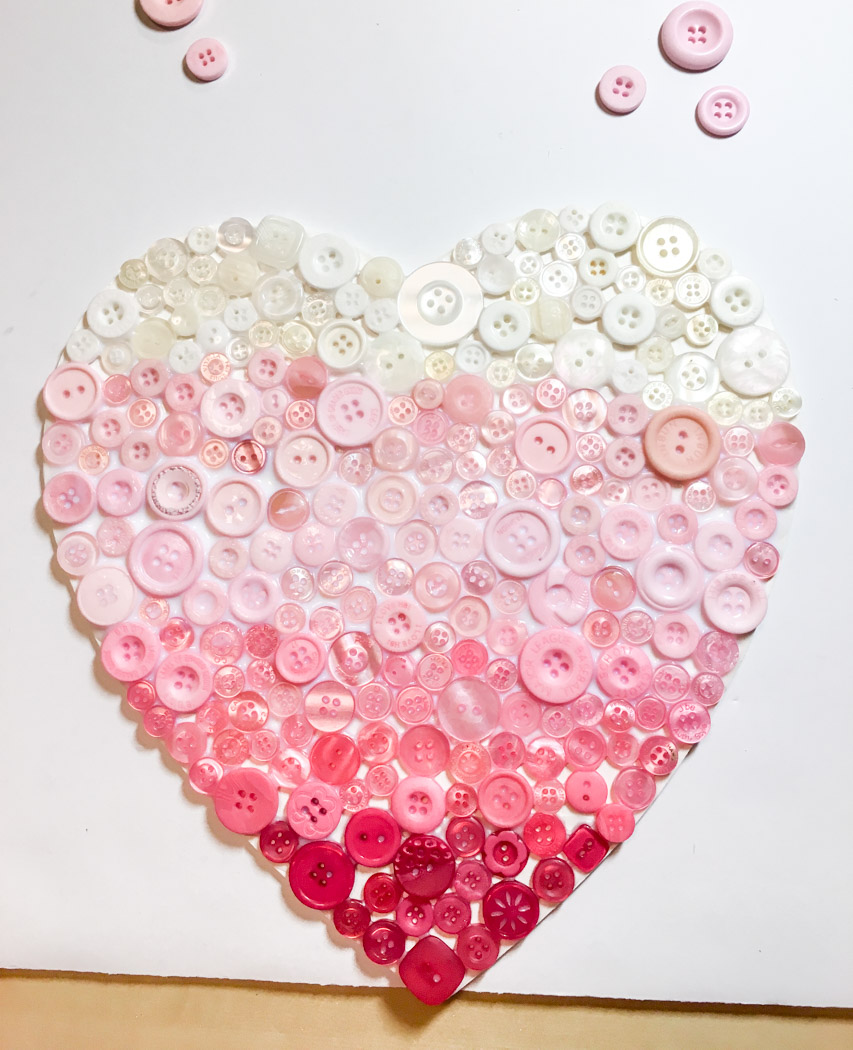
Now that the CHA Mega Show is over, we can start sharing with you a closer look at the projects that were designed for our booth, like this ombre heart!

I designed this ombre heart wall art by combining several of our button assortments that contain great shades of pink that work together to make the ombre shift.

Ombre Heart wall art made with Buttons Galore buttons

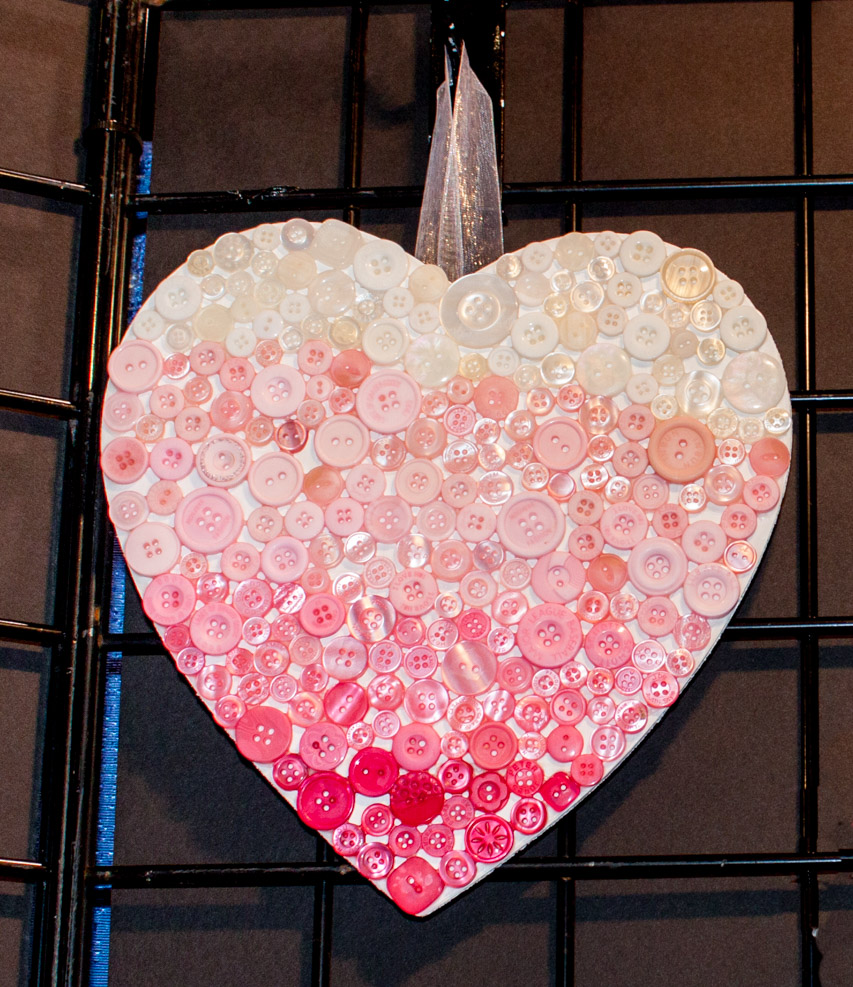
This project is surprisingly easy. The biggest challenge is the first step working with the buttons, which is simple but can be tedious. This is a great project to do with kids, to help teach color distinction!

Step 1: Paint the wood heart base with chalk or acrylic paint.

Step 2: Sort the pink buttons into five gradual color shades.

Step 3: Measure the heart from top to bottom. Divide that amount by six to get the width of each color band in the ombre heart. Mark off the divide between each color.

Ombre Heart construction

Step 4: Begin to apply the buttons. Apply a thick coat of glue in the first color band, and begin filling with the color for that band.

Ombre Heart construction

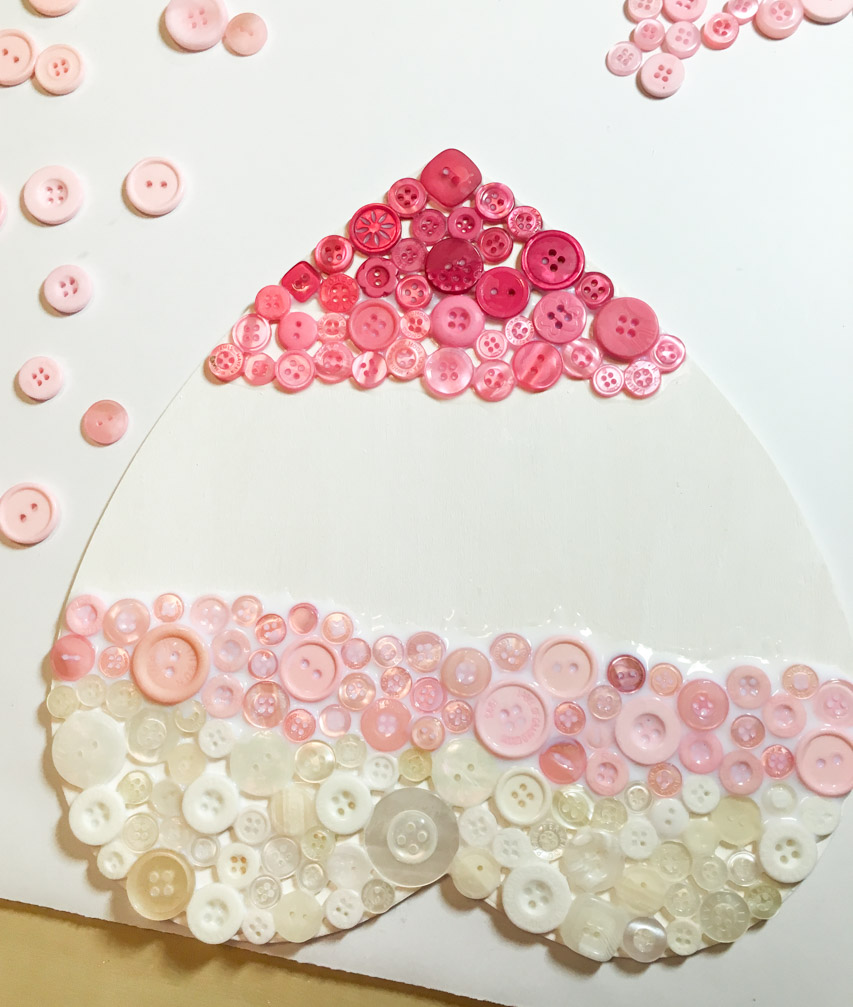
Step 5: While the first color dries, turn the heart around and work from the other end. Repeat until you meet in the middle and finish the final color.

Ombre Heart buttons finished

Step 6: Allow the glue to dry.

Step 7: Use hot glue to attach a loop of ribbon to the rear side on the top of the ombre heart to allow for hanging.

Supplies:

Also…don’t miss our winter sale! We’ve got great deals now through January 31st on Christmas, Winter, and Valentine’s Day themed buttons!

Winter-2

0

Button Bon Bons for Valentine’s Day

Button Bon Bons by Laura Bray

Button Bon Bons by Laura Bray


I love Valentine’s Day, but my hips don’t.  If you give me a box of chocolates, I will eat it!  So I whipped-up some calorie-free, faux chocolates.  Tucked into an old chocolate box (of which I have more than a few, ahem), they make a darling Valentine vignette.  Or pack up a few as party favors.  Here’s the recipe:


Button Bon Bons for Valentine's Day


Button Bon Bons

Ingredients:

  • Brown felt, cut into 3″ circles.  I just traced the bottom of a can to get my circle.  Use light and dark brown colored felts for milk and dark chocolates!  White works too.
  • Needle & thread
  • Stuffing
  • Buttons.  The colors in Buttons Galore & More Confection Button Jar are perfect!
  • Mini-cupcake wrappers
  • Craft glue
  • Candy box

Instructions:

  1. Sew a running stitch around the outside of the felt circle.  Pull ends like you are making a yo yo.  Before tying them, stuff the bon bon .
  2. Sew buttons onto top of felt bon bon.  Get creative!  Stack them up!
  3. Apply some glue to the bottom of a mini-cupcake wrapper, and place the felt bon bon into the wrapper.
  4. Arrange the bon bons in a candy box.
  5. Enjoy them, guilt-free!


  1. Button Bon Bons for Valentine's Day

    Button Bon Bons for Valentine's Day


2

Valentine's Day Countdown Calendar


If your little one is anything like mine, you pretty much start looking forward to Valentine’s Day right after Christmas.  I created this felt and button Valentine’s Day Countdown Calendar to channel some of my daughter’s excitement.


Supplies:

  • White felt
  • Red felt
  • Pink felt
  • Wave rotary cutter
  • Sewing machine
  • Buttons-I used Buttons Galore and More’s Raspberry Bulk Pack, because you can never have too many pink buttons!
  • Embroidery floss & Needle
  • Ink jet, printable fabric
  • 13″ wood dowel
  • Red & white bakery twine

Instructions:

  1. Cut a piece of white felt into a 17″ x 11″ rectangle.
  2. Fold one short side over 1″ then sew to create a pocket to put your dowel through later.
  3. Trim other short end using a wave rotary cutter or pinking shears.
  4. Cut a 7″ x 3″ rectangle from the pink felt.
  5. Using your printable fabric and word processing software, create a sign for the top of your calendar.  Mine says “Be My Valentine”.
  6. Cut the printable fabric into a 6.5″ x 2.25″  rectangle.
  7. Place pink felt triangle, centered and about 1″ inch down from top of white piece of felt. Remember, the top of your calendar will be where you stitched a pocket for the dowel.  Pin and sew.
  8. Center your printable fabric on the pink rectangle.  Pin and sew.
  9. Cut 14 2″ x 2″ squares from your red felt.
  10. Sew one pink button into the center of each red felt square.  I found the middle by folding the square in half, finger pressing, then folding it the other direction and finger pressing.  Attach you button where the lines cross.  Easy!
  11. Cut fourteen hearts from your white felt.  To get evenly sized hearts, I cut 2″ x 2″ squares from the white felt, folded them in half and cut half hearts.
  12. Carefully cut a small slit into the center of each heart.
  13. Measure down 1/2″ from the pink felt and 1/2″ in from edge of white felt.  Place your first red square there and pin.  Measure 1/2″ over to the right and pin.  Continue pinning on red squares, making sure you line them up evenly.  Sew the squares onto the fabric.  You can use your sewing machines to do this (just be careful not to run over the buttons) or attach them using a cute embroidery stitch.
  14. Cut a 5″ x 3″ rectangle from the pink felt.  Using your wave rotary cutters or pinking shears, cut a decorate edge along one of the long sides.
  15. Cut a 5″ x 1.5″ rectangle from the red felt.  Using your wave rotary cutters or pinking shears, cut a decorate edge along one of the long sides.  If you want to add a decorative ribbon, sew it on now.
  16. Place the red felt rectangle onto the pink felt rectangle, lining up the straight, long edge.  Sew three sides together, leaving the long, decorate edge of the red rectangle open.  You now have a pocket for your extra hearts.
  17. Sew the pocket onto the white base, 1/2″ down from the last row of red squares, 1/2″ from the right side of the white base.
  18. Cut out additional felt hearts in pink, red, and white and sew onto the calendar randomly.  Use cute embroidery stitches to attach them.
  19. Slide dowel through the top pocket of your calendar.  Tie baker’s twine to end of dowels and hang.

You are done!  Store your white hearts in the pocket.  As each day dawns, allow your child to button a heart onto one of the red squares.  When the all the squares are full, it’s Valentine’s Day!  Use the now empty pocket to store a few Valentine’s and enjoy your calendar for a couple of extra days after the holiday.


Valentine Countdown Calendar by Laura Bray


I know this calendar is a lot of work, but I was able to get mine done in about 3 hours total.  I think it’s worth the work-after all it’s a heirloom item.


2

Powered by WordPress. Designed by WooThemes