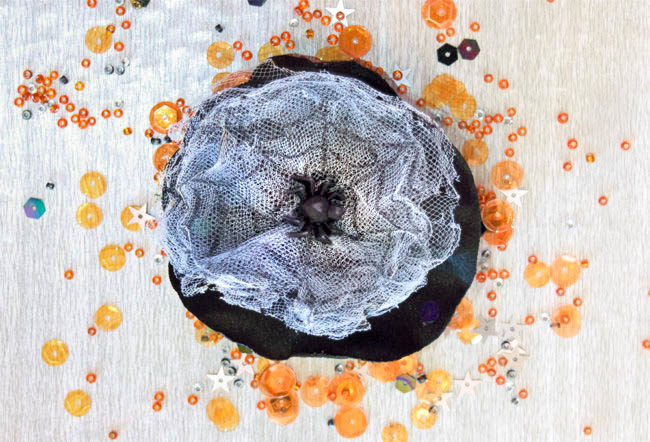
Halloween is coming soon – can you believe it?! You can make this fun Halloween Spider Web Hair Bow in less than 30 minutes. This is one spider web your little girls won’t mind having on their heads because it’s just so cute! It’s easy to customize too, using the same technique with different kinds of fabric, different colors or different accessories.
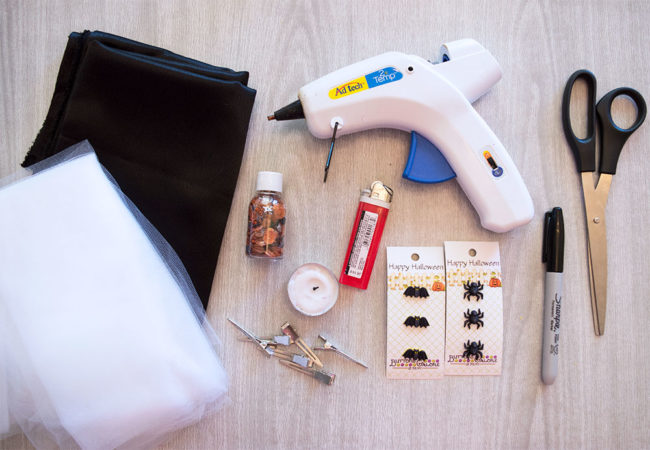
Supplies needed to make a Cute Halloween Spider Web Hair Bow:
- Buttons Galore “Happy Halloween – Spiders” 3D buttons
- 28 Lilac Lane “Trick or Treat” Sequin and Bead Mix
- White Tulle
- Black Satin or Chiffon fabric
- Black Marker
- Hot Glue
- Candle and Lighter
- Alligator hair clips
- Scissors
Step one:
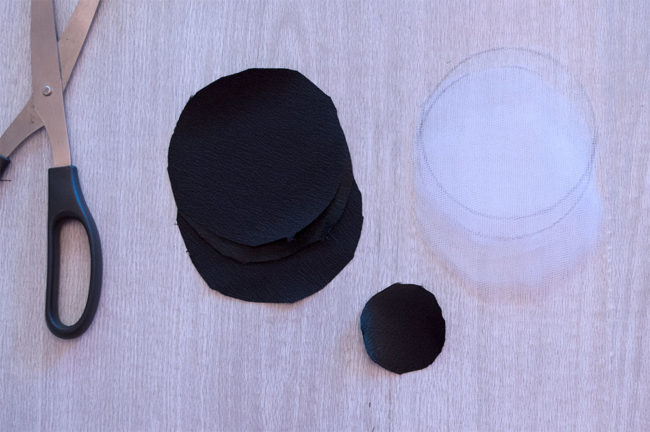
Cut circles in the tulle and black fabric. You will need two 3-4″ black satin circles, and one 1″ black circle. You will also need to cut six 3-4″ circles from the white tulle as well. I used a styrofoam cup to trace my circles. It was the perfect size.
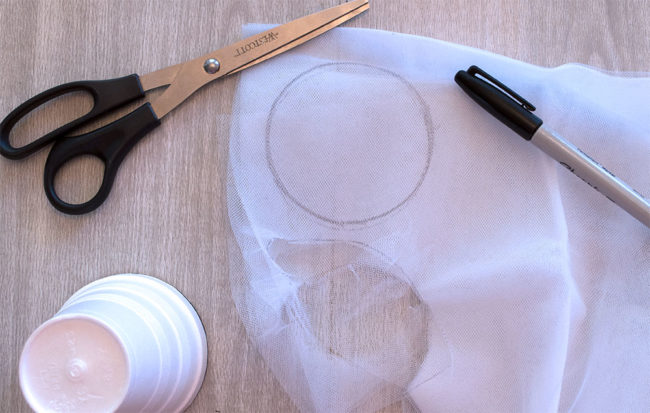
Lots of fabrics will melt great for this project, but I find cotton fabrics don’t melt as well as the synthetic blends. My favorites to work with are satin or chiffon fabrics. This is a great project to use scraps, and you should use whatever you have on hand. It doesn’t take much!
Step two:
Use a black marker to draw spider webs on the tulle circles. Be sure to put a piece of paper under the tulle so you don’t end up with black spider webs all over your work surface.

Step three:
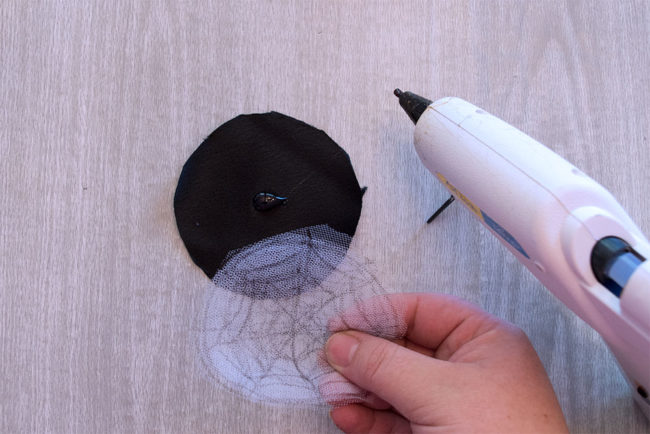
Assemble the fabric circles. I use hot glue to assemble mine, but you could easily sew them together if you prefer. Place a dot of hot glue in the center of each circle and press two circles together.
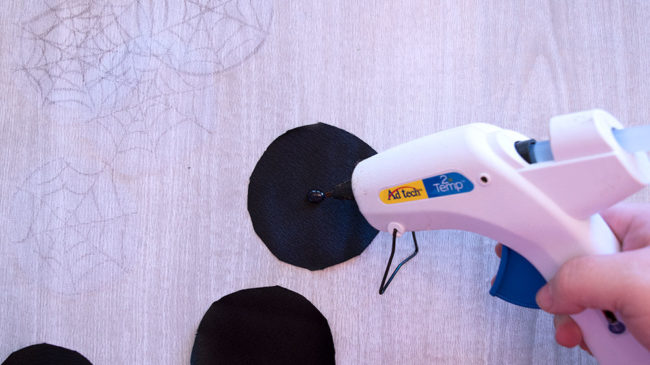
Stack the two black circles on the bottom, and the white tulle circles on top of those with a dot of hot glue between each layer.
Step four:
*Please use caution when working with an open flame. The melting fabric is hot to the touch. Always keep a bowl of cool water next to your work station when working with a flame in case of burns or fabric that accidentally catches fire.*
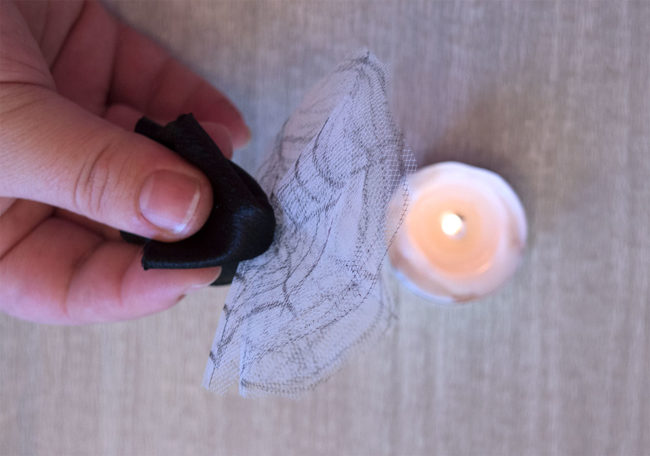
Using a small candle flame (I use a small tea light candle), melt the edges of the tulle and satin fabrics. Carefully hold the fabric down next to the flame. Don’t get it too close. It just needs the heat from near the flame to curl and melt the fabric.
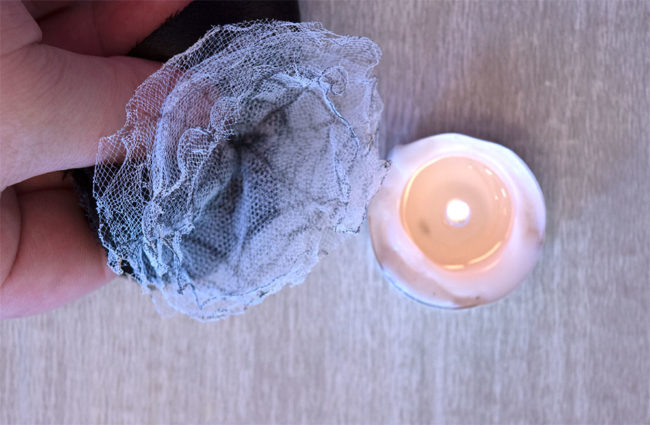
The tulle is very easy to burn. It does not need much heat to curl and melt. A little bit of charing on the edges of the tulle just adds to this cute Halloween spider web hair bow though! Satin fabric needs just a little more heat to curl and melt. Please be careful not to get your fingers too close!
Step five:
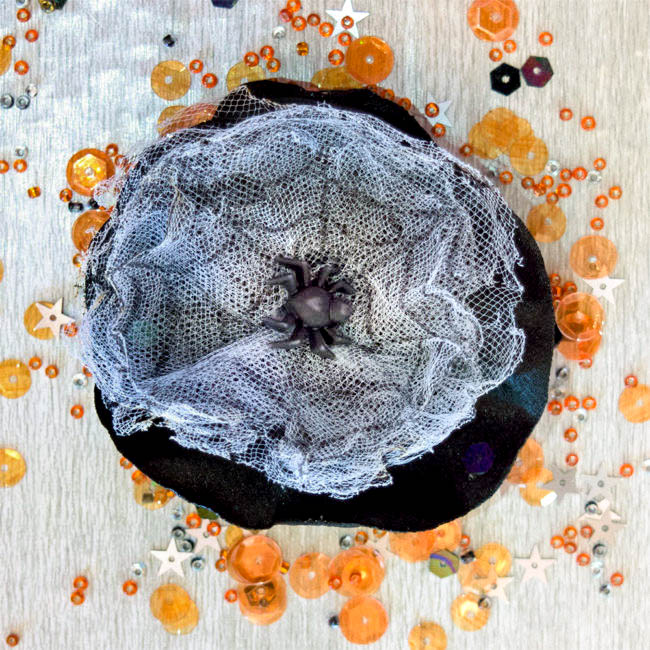
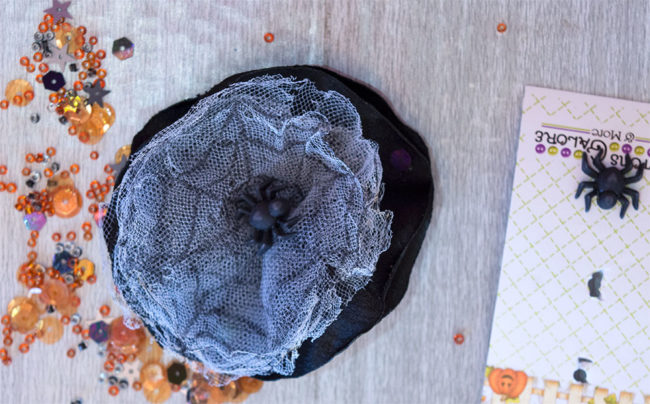
Use glue to attach the adorable 3D Spider Button to the center of the Spider Web Hair Bow. Glue some sequins from the Trick or Treat Bead and Sequin mix to the bow. I used black sequins from the mix and some black seed beads.
Step six:
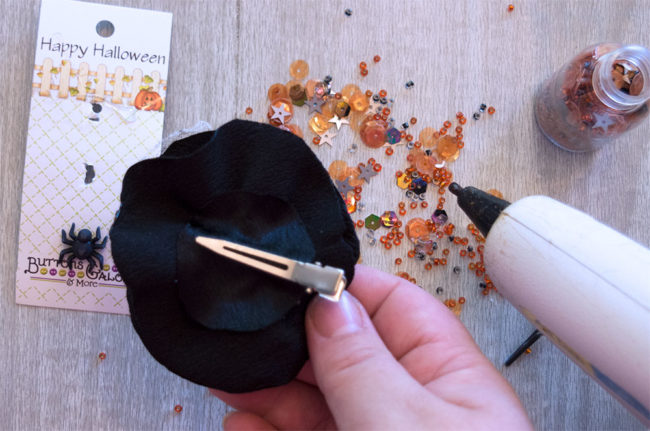
Attach the alligator hair clip to the back of your spider web bow using hot glue and the 1″ circle of black fabric.
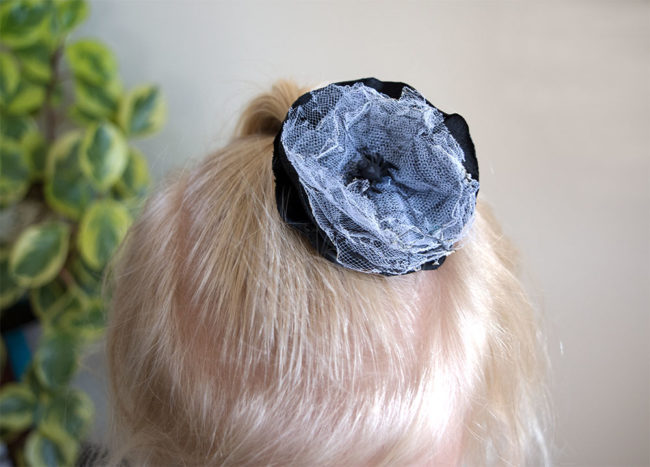
Isn’t it the cutest little spider web you’ve ever seen? I love how the adorable little spider buttons have a cute little heart shape on their backs. Even my spider phobic four-year old didn’t mind wearing this cute little spider in her hair!
You can easily change this technique to suit any style or holiday! Chiffon is my favorite fabric to melt. The curl is fantastic! Change the color of the fabric and the tulle and add other fun embellishments for endless combinations! I want to make one with red chiffon, white tulle, and these adorable 3D Candy Cane buttons for Christmas!
Which 3D buttons would you put in your hair bows?