It’s Red, White & Blue season, the perfect colors for this Snap Happy Card. Will you be taking lots of pictures on the 4th?
Every week we share fresh card making ideas using buttons. This week we’re using my absolute favorite Heart Novelty Buttons. I made a card with a gift card inside that’s good for some prints at one of our local stores. What family doesn’t print a ton of pictures?
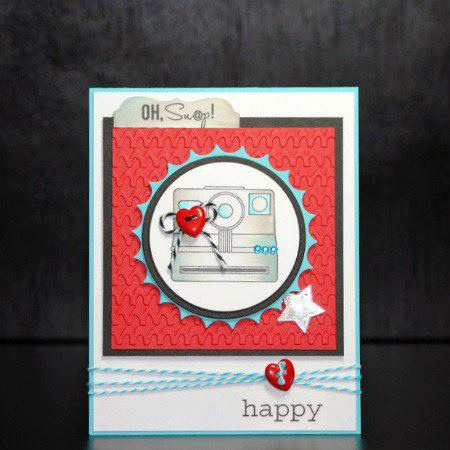
Supplies for creating Snap Happy Card
Buttons – two Heart Novelty Buttons – Buttons Galore and More
Stamps – Gina K Designs
Cardstock – DiscountCardstock.com
Embellishments – Turquoise Rhinestones – Want2Scrap; Twine – Doodlebug Design; Stickers – SRM
Tools: Dies (Inverted Scalloped Circles, Star, Circles – Spellbinders Paper Arts; Labels – My Favorite Things) ; Embossing – Sizzix
Adhesive: Hot Glue – Adtech; Dimensional Foam Tape – 3M; Scor-Tape – Scor-Pal
Other: Ink – Tsukineko; Markers – Copic; Flashing Tape – available at most Home Improvement Stores
Directions
- Create a Neenah Solar White cardstock base 4.25 x 11″. Score and fold in half.
- Cut your mats: Neenah Solar White mat 4 x 5.25″ – Black Licorice mat 3.5 x 3.5″ – Currant Red mat 3.25 x 3.25″ – Emboss Currant Red mat.
- Adhere mats to card with Scor-Tape.
- Die cut pieces: inverted circle from Lunar Blue Cardstock, a Black Licorice circle, and slightly smaller Neenah Solar White circle and label shape.
- Stamp and color image on Neenah Solar White circle. Stamp sentiment on label shape and attach to card.
- Embellish with Turquoise Rhinestones. Tie black and white twine through one Heart Novelty Button and glue to stamped image.
- Layer round pieces with Dimensional Foam Tape.
- Adhere Flashing Tape to scrap paper and die cut and emboss star. Adhere to card with Dimensional Foam Tape
- Wrap aqua and white twine around card and secure with second Heart Novelty Button.
- Add sticker sentiment to bottom of card.
Thanks for stopping by today. To see more of my art, please visit me at My Card Party. I’ll see you on Thursday with some new Button Jewelry.
Until then, keep creating!