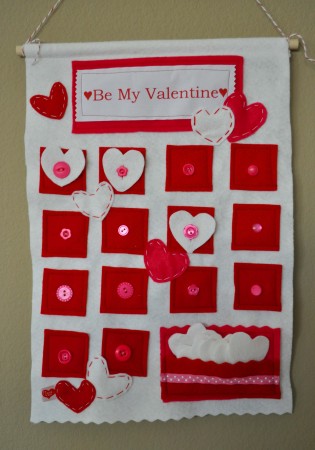
If your little one is anything like mine, you pretty much start looking forward to Valentine’s Day right after Christmas. I created this felt and button Valentine’s Day Countdown Calendar to channel some of my daughter’s excitement.
Supplies:
- White felt
- Red felt
- Pink felt
- Wave rotary cutter
- Sewing machine
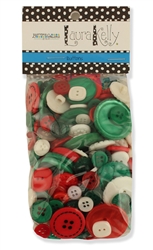
- Buttons-I used Buttons Galore and More’s Raspberry Bulk Pack, because you can never have too many pink buttons!
- Embroidery floss & Needle
- Ink jet, printable fabric
- 13″ wood dowel
- Red & white bakery twine
Instructions:
- Cut a piece of white felt into a 17″ x 11″ rectangle.
- Fold one short side over 1″ then sew to create a pocket to put your dowel through later.
- Trim other short end using a wave rotary cutter or pinking shears.
- Cut a 7″ x 3″ rectangle from the pink felt.
- Using your printable fabric and word processing software, create a sign for the top of your calendar. Mine says “Be My Valentine”.
- Cut the printable fabric into a 6.5″ x 2.25″ rectangle.
- Place pink felt triangle, centered and about 1″ inch down from top of white piece of felt. Remember, the top of your calendar will be where you stitched a pocket for the dowel. Pin and sew.
- Center your printable fabric on the pink rectangle. Pin and sew.
- Cut 14 2″ x 2″ squares from your red felt.
- Sew one pink button into the center of each red felt square. I found the middle by folding the square in half, finger pressing, then folding it the other direction and finger pressing. Attach you button where the lines cross. Easy!
- Cut fourteen hearts from your white felt. To get evenly sized hearts, I cut 2″ x 2″ squares from the white felt, folded them in half and cut half hearts.
- Carefully cut a small slit into the center of each heart.
- Measure down 1/2″ from the pink felt and 1/2″ in from edge of white felt. Place your first red square there and pin. Measure 1/2″ over to the right and pin. Continue pinning on red squares, making sure you line them up evenly. Sew the squares onto the fabric. You can use your sewing machines to do this (just be careful not to run over the buttons) or attach them using a cute embroidery stitch.
- Cut a 5″ x 3″ rectangle from the pink felt. Using your wave rotary cutters or pinking shears, cut a decorate edge along one of the long sides.
- Cut a 5″ x 1.5″ rectangle from the red felt. Using your wave rotary cutters or pinking shears, cut a decorate edge along one of the long sides. If you want to add a decorative ribbon, sew it on now.
- Place the red felt rectangle onto the pink felt rectangle, lining up the straight, long edge. Sew three sides together, leaving the long, decorate edge of the red rectangle open. You now have a pocket for your extra hearts.
- Sew the pocket onto the white base, 1/2″ down from the last row of red squares, 1/2″ from the right side of the white base.
- Cut out additional felt hearts in pink, red, and white and sew onto the calendar randomly. Use cute embroidery stitches to attach them.
- Slide dowel through the top pocket of your calendar. Tie baker’s twine to end of dowels and hang.
You are done! Store your white hearts in the pocket. As each day dawns, allow your child to button a heart onto one of the red squares. When the all the squares are full, it’s Valentine’s Day! Use the now empty pocket to store a few Valentine’s and enjoy your calendar for a couple of extra days after the holiday.

Valentine Countdown Calendar by Laura Bray
I know this calendar is a lot of work, but I was able to get mine done in about 3 hours total. I think it’s worth the work-after all it’s a heirloom item.