
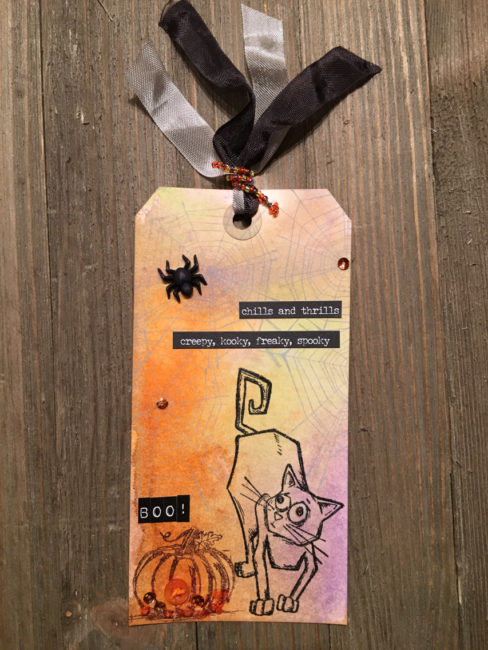
Halloween is coming fast! But there’s still time to make a few more Halloween projects – like this fun scaredy cat halloween tag! It makes a great decoration on a spooky tree or a fun goody bag attachment.
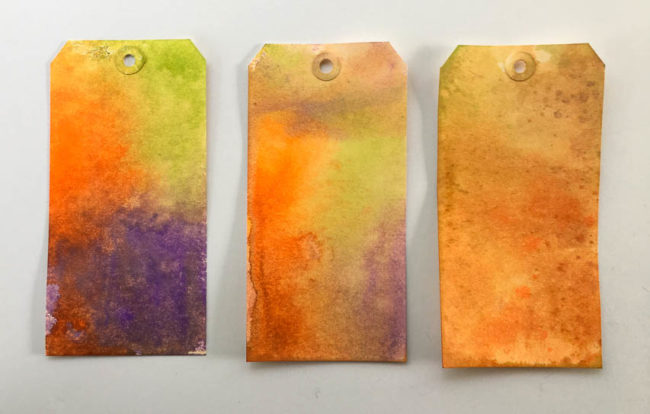
To make my scaredy cat halloween tag, I started with the middle tag below. This is a set of three tags that I made using Distress Spray Stain. I sprayed the three colors of stain on my craft mat in a triangle arrangement, and pressed the first tag into them. That created the tag on the left below. Then I added some water to the mat using my Distress Sprayer, and swiped a tag across my mat again, which got me the tag in the middle that I used for this project. Finally, I took a third tag and swiped it through the color mix that remained on the mat. By that time, the three colors were mixed together enough on the mat that it produced a more brown color, giving me the tag on the right.
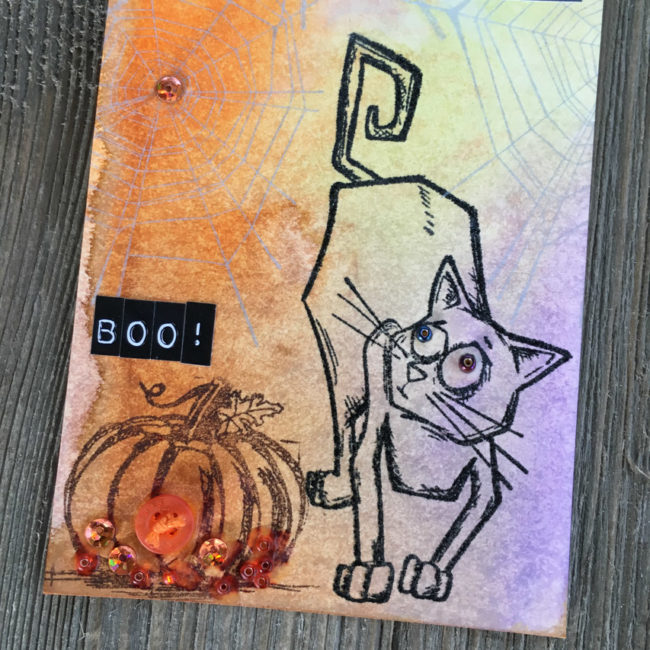
Decorating this tag started with a lot of stamping! I stamped the cat in black and heat embossed it with clear embossing powder. Then I stamped the pumpkin in brown, coloring in the part of the blueprint stamp that I wanted to use and stamping it. To make them look wispy, I used silver ink to stamp the spider webs to fill the top of the tag area.
Once the stamping was done, I stuck down the phrase stickers and the letters to spell “Boo!”
Next I got my PPA Matte Adhesive liquid glue to start adding some beautiful embellishments! Well, first I added a scary one…I cut the shank off of a spider button using button shank removers and glued it onto the spider web on the upper left of the tag. In that spot it looks like the cat is looking at it!
To make the cat’s eyes look really bugged out, I selected two dark colored seed beads from the 28 Lilac Lane “Paws & Pets” embellishment kit and glued them on top of the stamped dots in the cat’s eyes. It makes the cat look even more scared!
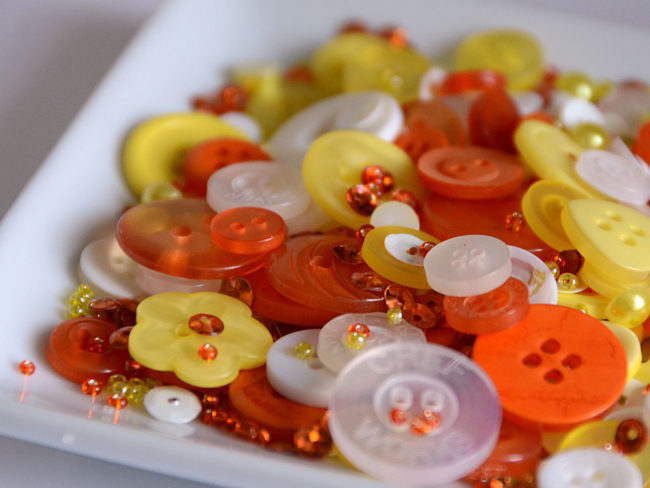
Finally, I dumped the new 28 Lilac Lane “Candy Corn” embellishment bottle (pictured above) into a craft tray, which is a great way to contain all of the small embellishments while you are looking for just what you need. With it all spread out I selected several small sequins to glue on to the spider webs, and glued some small seed beads, sequins, and a button onto the bottom of the pumpkin to give it some orange coloring.
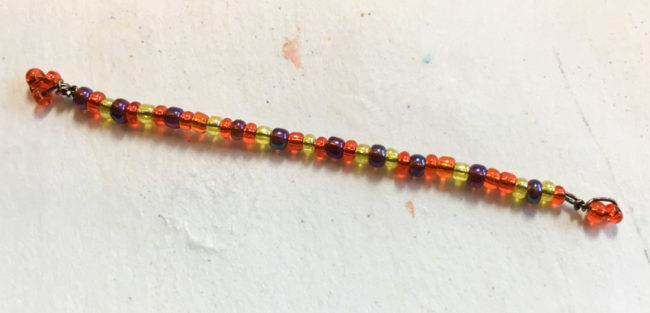
To really look finished, my tag needed some ribbon through the hole. I selected some gray and some black and strung them through the hole. But instead of tying them off, I made a seed bead “twist tie” to fasten it. I cut a piece of wire several inches long. To start, I looped the wire through and around a pair of beads and twisted it together, clipping one of the ends off. then I began threading seed beads onto the wire in a random pattern until the tie was the length I wanted. To finish the wire off, I once again created a loop with two beads in it and twisted the wire together below that loop. I made sure to cut off the ends very close to the twist and turn them under so no sharp points stick out!
The seed bead twist tie was then wrapped around my ribbon to cinch it tight (similar to a ponytail holder). It brightens up the ribbon and brings something shiny to the top of my scaredy cat halloween tag.
And now my scaredy cat halloween tag was ready to hang on my halloween tree with my other tags! (To see the other tags in the collection, check out the Spooky Halloween Tag and the Fall Pumpkin Tag).
Supplies:
- Buttons Galore “Spiders” 3D Buttons
- 28 Lilac Lane “Paws & Pets” embellishment kit
- 28 Lilac Lane “Candy Corn” embellishment bottle
- PPA Matte Adhesive
- Button Shank Remover
- Ranger Inkssentials #8 Manila Tag
- Ranger Tim Holtz Distress Spray Stain in Wilted Violet, Twisted Citron, and Carved Pumpkin
- Ranger Tim Holtz Distress Ink in Black Soot
- Ranger Ultra Fine Clear Embossing Mode
- Ranger Tim Holtz Distress Marker in Vintage Photo
- Colorbox Pigment Ink in Silver
- Stamper’s Anonymous Tim Holtz “Crazy Cats” stamps
- Stamper’s Anonymous Tim Holtz “Min Halloween 3” stamps
- Stamper’s Anonymous Tim Holtz “Halloween 2 Blueprint” stamps
- Tim Holtz idea-ology Label Letters
- Tim Holtz idea-ology Small Talk – Occasions
- Beadalon 26 gauge Antique Brass German Wire
- Ribbon (Black & Gray)
Do you make tags? What occasions do you make them for? Tell us in the comments!
Nancy Nally
Latest posts by Nancy Nally (see all)
- We’re blog hopping with Poppy Stamps! - September 28, 2017
- Announcing…New 28 Lilac Lane Premium Collection Sequin Tins! - June 30, 2017
- Announcing…the new Buttons Galore Design Team! - May 18, 2017
No comments yet.