
Make a button topiary. As the Ohio winter lingers on, I find that I am incorporating more bright cheery decor into my home. This trio of button flower topiaries fits the bill perfectly, adding a touch of Spring inside to hold me over until the snow melts and the daffodils peek through the ground again. You can make the button topiary as large as you would like. I chose to make a trio of small button topiaries.

Material used to make Button Topiary:
Buttons Galore & More Products used:
- Color Bulk Buttons
- Daisy Delights
- Granny’s Button Box Stitched Button (Tangerine)
- Button Shank Remover
- Beacon Fabri-Tac liquid adhesive
I also used:
- 3 Paper Mache’ Flowerpots (2 small, one medium)
- Yellow acrylic and glitter paints (DecoArt)
- 1″ Paintbrush
- 22 gauge craft wire
- needle nosed jewelry pliers
- Styrofoam Foam balls, cut (diameter of pots)
- felt flowers
- Coordinating ribbon
- Green surface material (like that used for models)
- Beacon Fabri-Tac liquid adhesive
Directions to make Button Topiary:

First, paint each flowerpot using yellow acrylic paint. Apply multiple coats as necessary. Paint one coat of yellow glitter paint over acrylic paint and let dry completely. Cut foam balls in half, placing one half in each painted flowerpot, and glue in place. (Steps a & b, above) Spread glue over foam ball and press green model foliage into glue to secure (Step c).
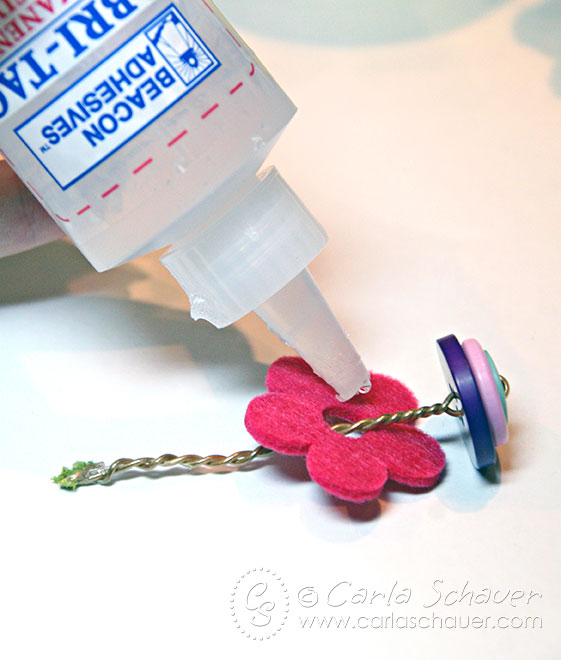
Cut 8″ length of craft wire. Choose 3-4 buttons of various colors and sizes from Color Bulk Buttons, and thread one end of wire up through holes on buttons. Bend wire in half using needle nose jewelry pliers and thread back down through button holes from top. Twist wire ends together under button “blossom” to add strength. Glue felt flower to back of several blossoms if desired (I added them to large button topiary only).
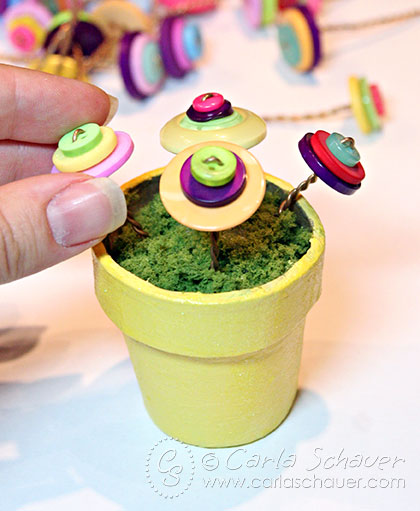
Once all the flowers are finished, start adding them to the flowerpots. Add a small dab of glue to the ends of the wire stems and gently push into the foam ball to secure. Fill in remaining spaces, bending wire stems as necessary to create arrangement. Repeat for additional flowerpots.
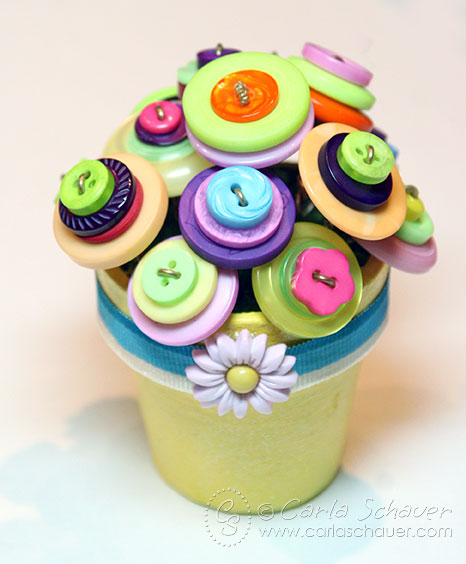
To complete the button topiary, wrap each flowerpot with coordinating ribbon and glue into place. For small topiaries, remove shank from Daisy Delights button and glue over ribbon ends. For large topiary, remove shank from Daisy Delights button and glue in center of Tangerine Stitched button. Glue button stack over ends of ribbon.
Enjoy the touch of welcome Spring color of a button topiary !
Thanks for stopping by,
Carla