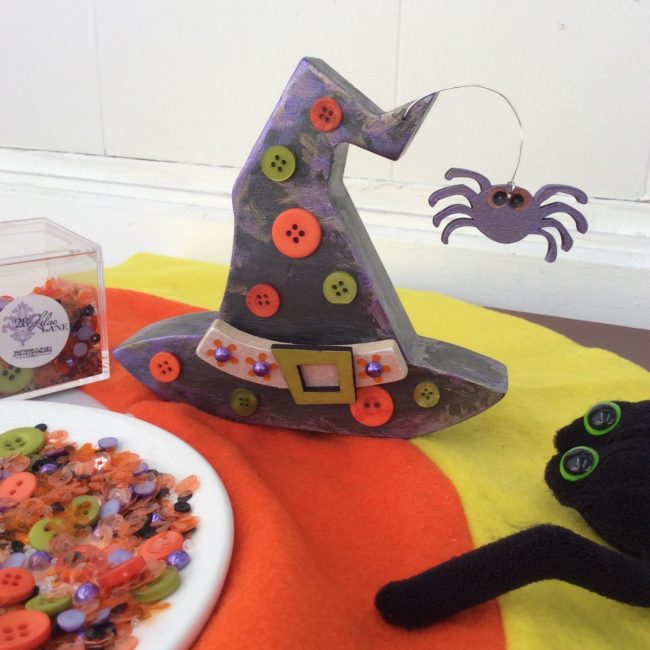
For this witch hat Halloween decoration I started with a wooden witches hat from Foundations Decor. The hat comes with a band, buckle and a cute little spider with a piece of wire you can curl any way you like.

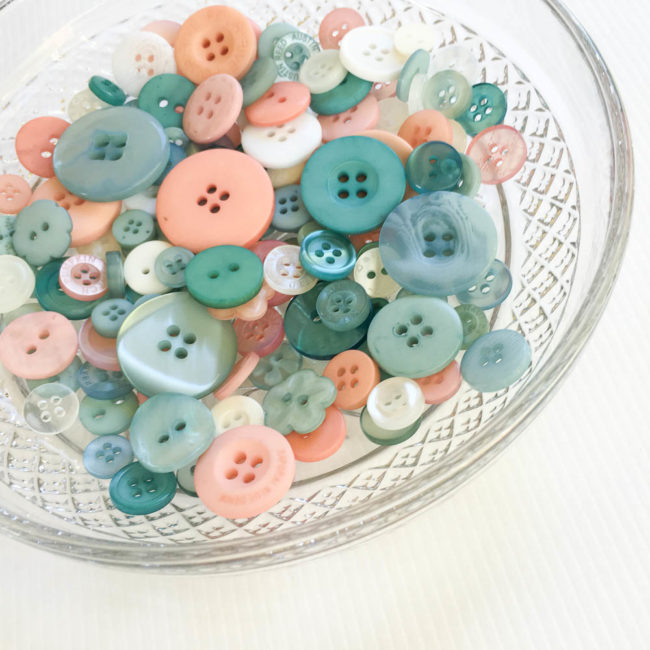
Craft ideas using novelty buttons, clear buttons and buttons in every color of the rainbow for all holidays and occasions of the year. Many of these projects are very easy to customize for any season or holiday!
For this witch hat Halloween decoration I started with a wooden witches hat from Foundations Decor. The hat comes with a band, buckle and a cute little spider with a piece of wire you can curl any way you like.

Nothing beats a cute holiday project that everyone can make together. With Independence day fast approaching, here is a simple project the whole family can enjoy.
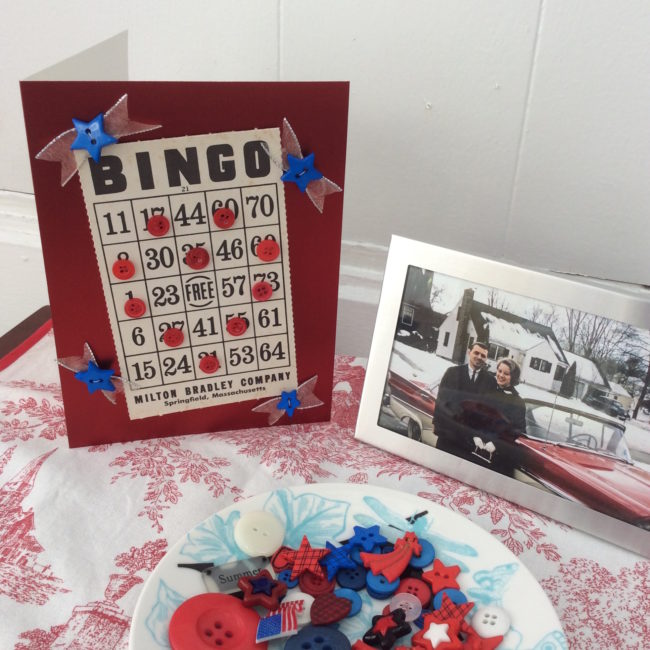
Vintage Bingo cards can be so fun to embellish with buttons. The grid makes a perfect surface to create patterns such as a heart outline. Our family tradition to play Bingo on the holidays and mu Dad is always the number caller. This card is for him.
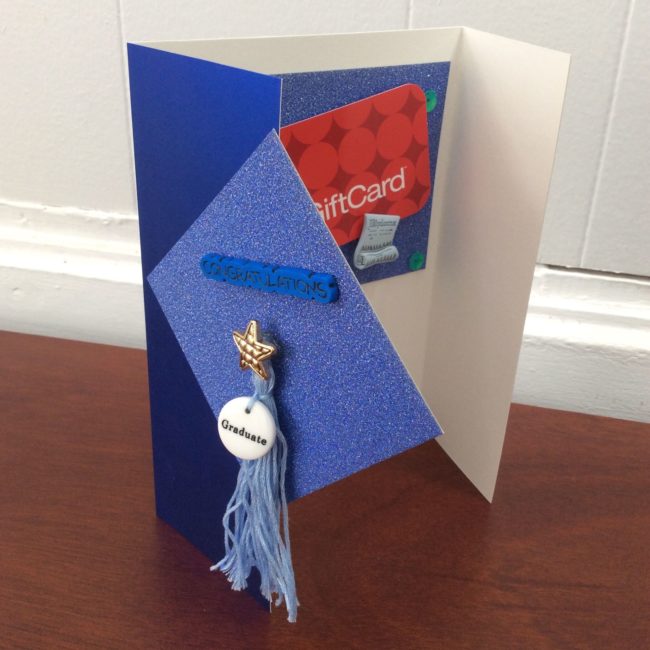
Create this unique graduation card for your very special graduate.
This card features a square on the top that looks like a graduation cap along and is adorned by a tassel. It is fun to make and embellish with buttons and elements from the Grad collection.
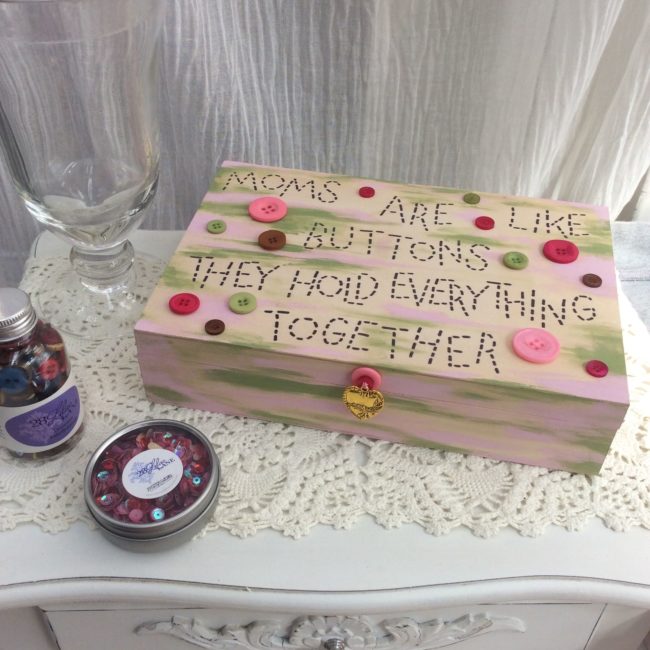
Here is an idea to keep Mom’s craft supplies organized. It’s both thoughtful and practical.
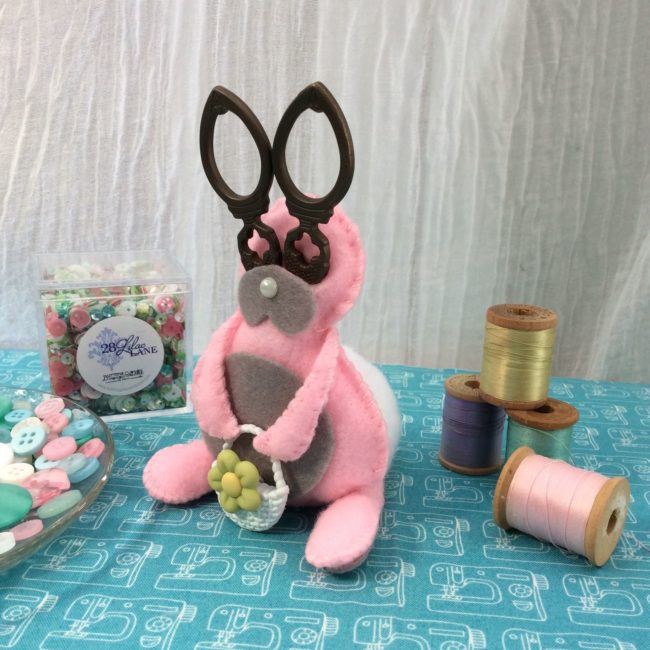
Making cute things to keep your sewing and crafting supplies handy on your desk can be fun.
I like keeping my scissors handy and I am also a big fan of vintage scissor cozies. I thought I’d make a scissor cozy by die cutting felt, stitching it up and embellishing it with novelty buttons from the Buttons Galore Spring Value Pack.
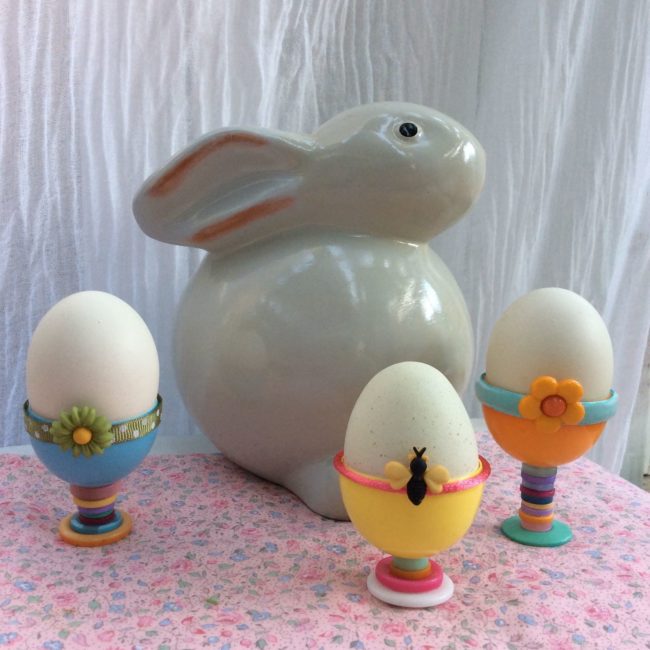
Here is a fun and easy way to display your Easter eggs? Colorful pedestal egg holders made with buttons are a pretty and unique way to showcase Easter eggs! For these egg cups I used a variety of sew through buttons from our several of our button collections to make the pedestal and flowers and a bee button from the Spring Fling 3D Button Collection for the finishing touch.
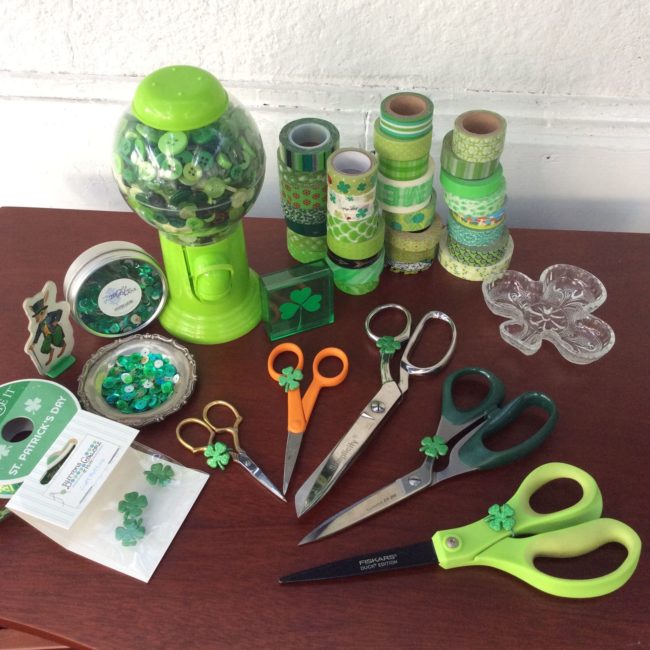
Everybody has a pair of scissors. Some of us, well, have a few pairs of scissors. In the past, I have customized my scissors with ribbon or decorative tape. I thought it might be fun to decorate the scissors for St. Patrick’s Day with Buttons Galore’s Glitter Shamrock Buttons. This is a fun and easy project for any level of crafter.
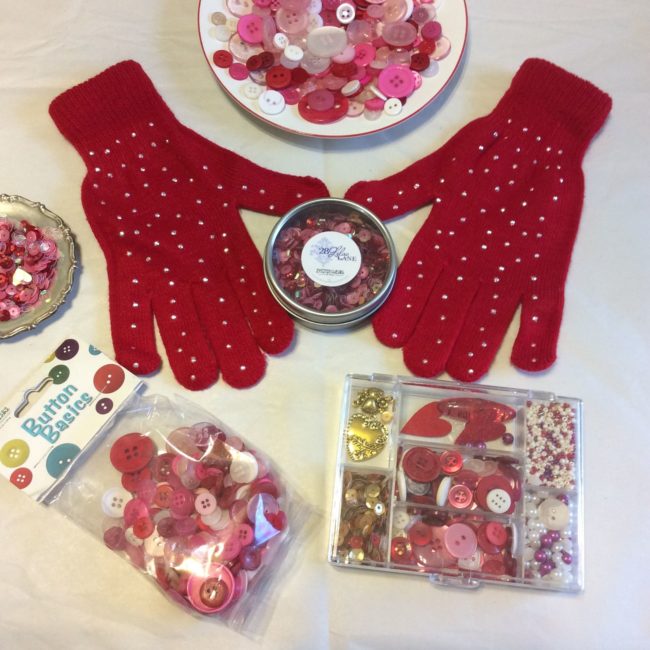
Hi, Stefanie Girard here with a quick and easy Valentine’s Day project. Embellished Gloves For Your Valentine make a great gift. The cuff of gloves is the perfect spot to add a bit of bling with your favorite buttons, sequins, charms and beads. Feel free to use any or all of the embellishments in the kit.
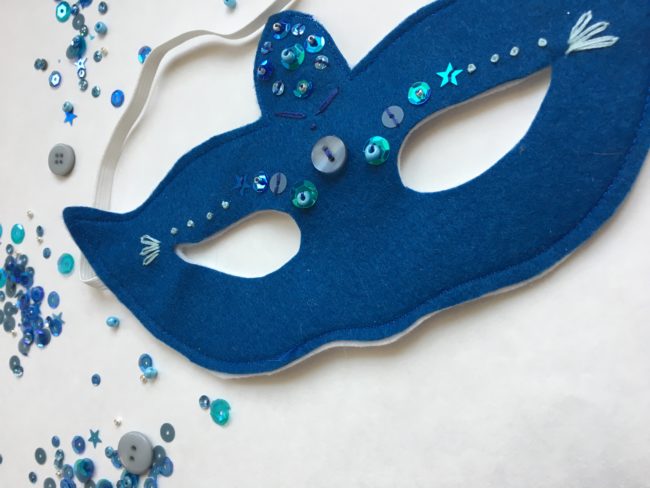
It’s Aimee here today for a little creative project to dress up your New Year’s Eve! (Although I’m still in denial that the holiday season is upon us in general.) This DIY New Year’s Eve mask project can be made with or without a sewing machine and is a great project for a novice stitcher – or even little hands wanting to get busy with a needle and thread. Continue Reading →
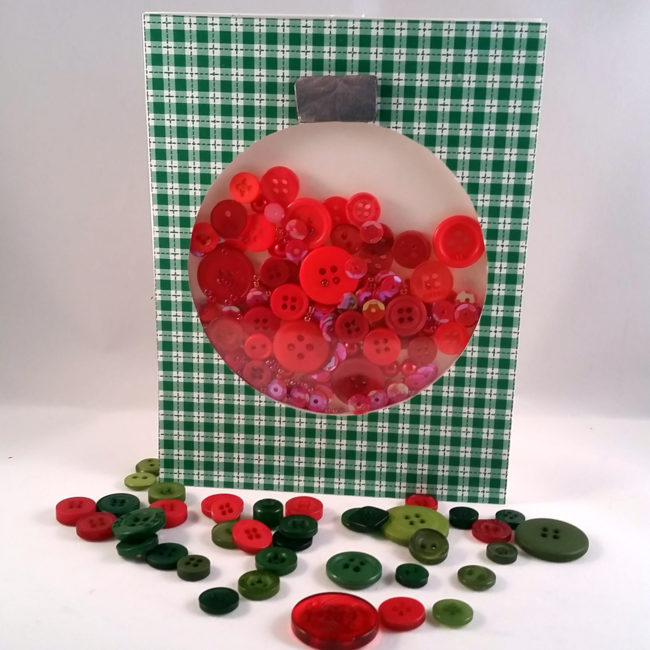
There are few card styles out there that are more impressive or fun than the shaker card. The 28 Lilac Lane Embellishment Bottles made this easy Christmas shaker card beautiful!
I made this easy Christmas shaker card using the 28 Lilac Lane Embellishment Bottle in “Dragon Fire”. The gorgeous red tones of the buttons, sequins, beads, and pearls are perfect for Christmas cards, and they all come together in one adorable little bottle! Continue Reading →
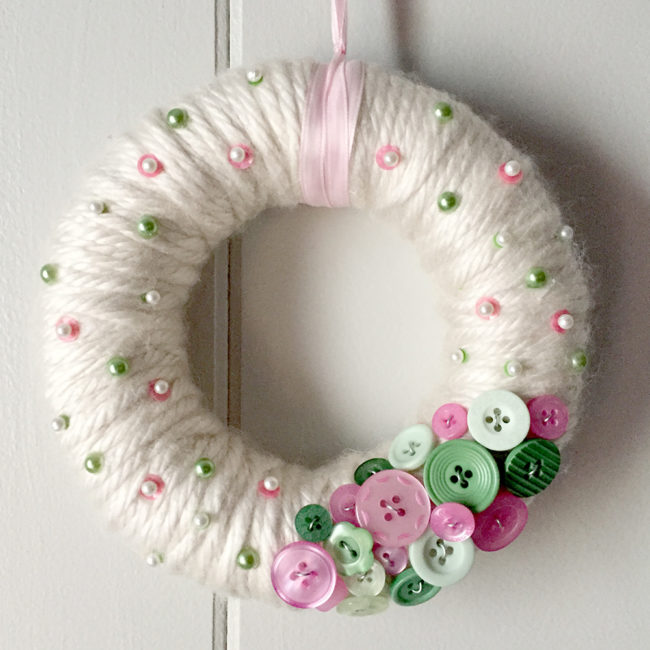
A beautiful wreath is an essential part of complete holiday decor. This yarn wrapped button wreath helps welcome guests to your home and allows you to express your creativity as well! Continue Reading →
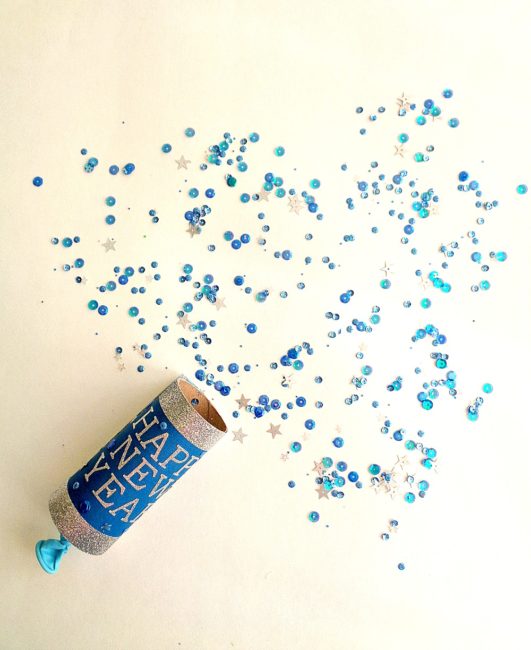
Hello Everyone! This is Katie from the Buttons Galore & More Design Team, and today I will be showing you how to make a fun project to celebrate New Year’s Eve: DIY confetti poppers!
New Year’s Eve may not be on your mind right now, but that doesn’t mean you can’t start gathering up ideas for the big day. One idea that you can add to your list are these easy to make confetti poppers! You may have seen confetti poppers before and thought that they were too difficult or too time-consuming to make. However, today, I will be showing you how you can make a stylish confetti popper in only 3 steps. Continue Reading →
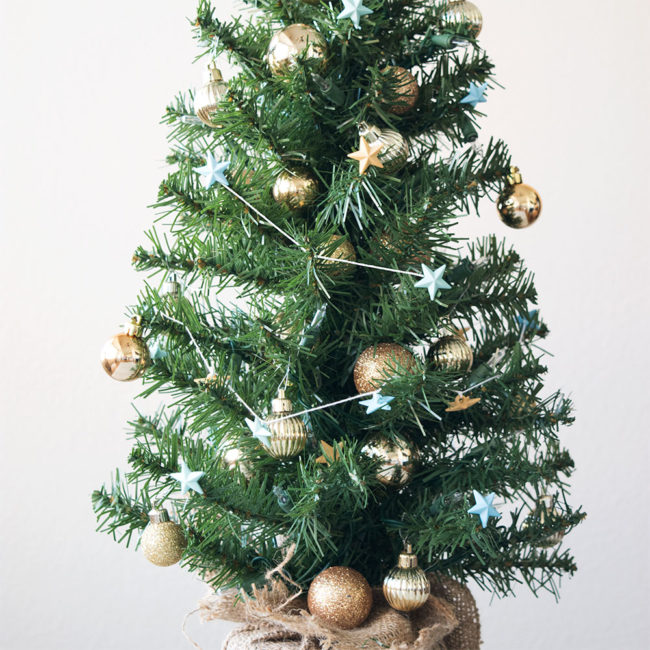
My favorite holiday decorations are lovely Christmas trees. I have my big full-size Christmas tree, of course. And several medium sized trees. But I also have at least a dozen cute little mini trees throughout the house. I think that the adorable little mini trees are just as fun to decorate as the bigger ones. Sometimes the small size ornament selection is lacking and they all seem the same from store to store. So I like to get creative and make my own! Continue Reading →
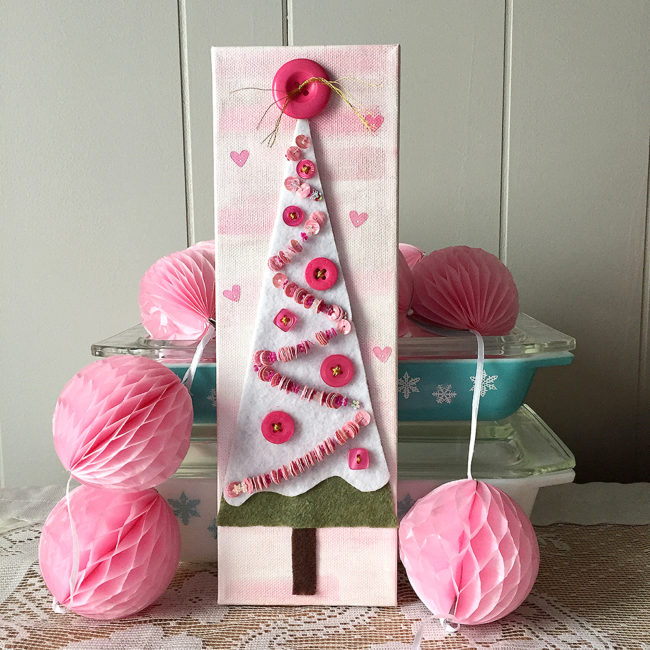
Do you love crafting for the holidays but just can’t stand making everything red and green? Good news – pink is trending this Christmas! Add this pretty pink Christmas tree decor to your decor to change things up a bit this holiday season! Continue Reading →
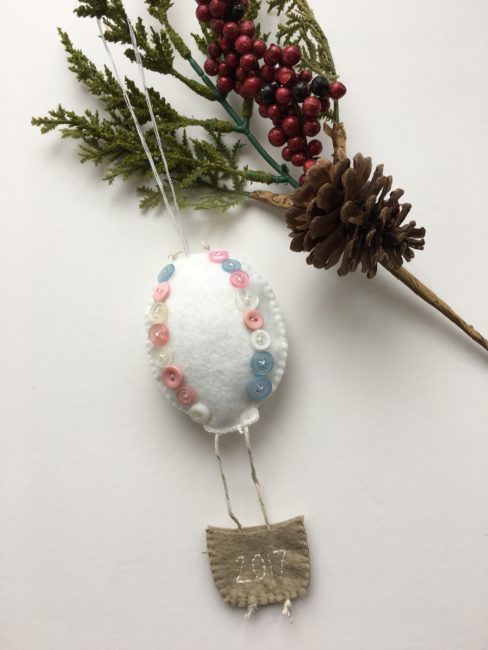
It’s Aimee here today with a simple little hot air balloon ornament, easy enough for the most novice of stitchers to complete. Gift this DIY Baby’s First Christmas Ornament to a friend’s newest little one or hang it on your tree to celebrate the new little life in your home! Continue Reading →
Hi, it’s Connie here today with the Buttons Galore & More design team sharing some really cute, wintery Christmas tree pins. These pins were created using a beautiful mix of buttons called “Winter Wonderland“. They are beautiful and perfect for this project! Continue Reading →
Aimee here and today I bring you a simple sewing project with all the directions you need to make a simple wall hanging, with just a little bling, just in time for the holidays! Continue Reading →
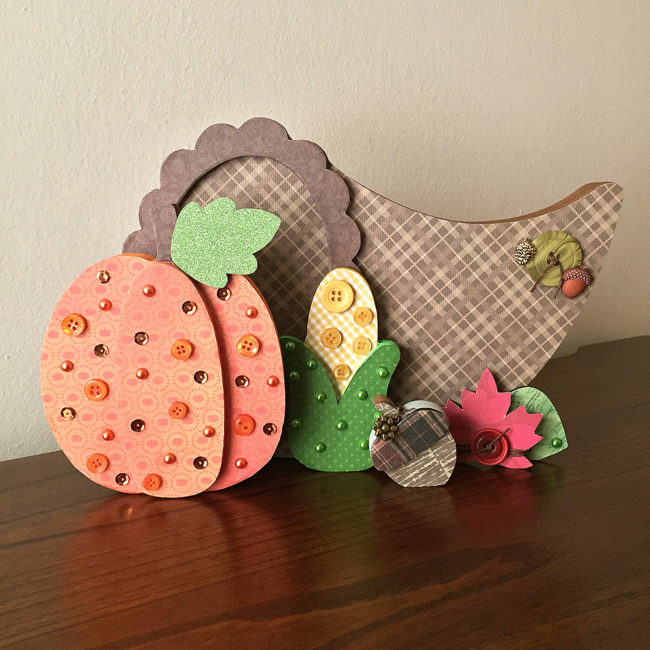
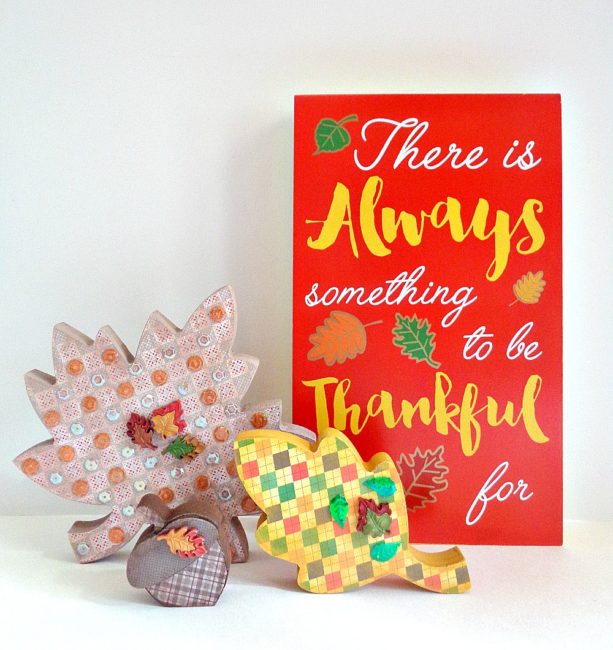
Thanksgiving will be here soon and the house will be full of relatives and friends. Why not create something to show off before dinner with this DIY thanksgiving cornucopia home decor set? Continue Reading →
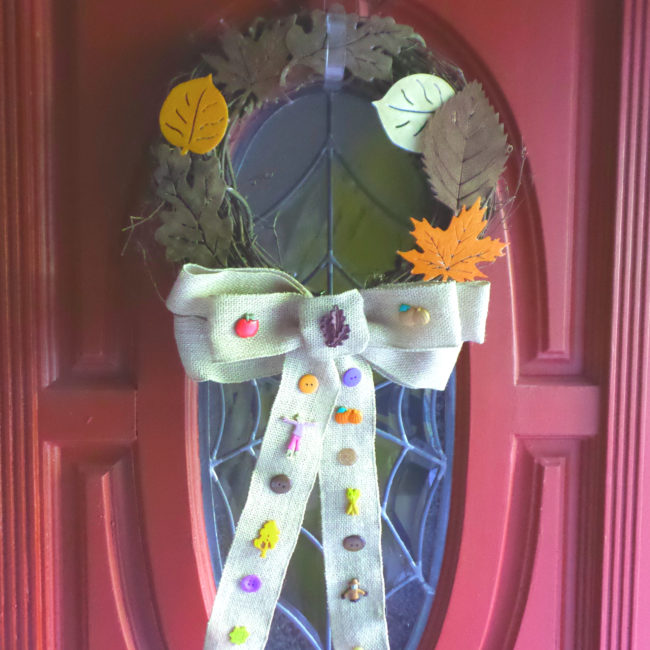
Hi everyone! It’s Lorrie here with a fall wreath featuring autumn-themed buttons from Buttons Galore & More! This fall wreath will look great on your front door to greet visitors, or on the wall inside your home to add some seasonal flair.
To make this easy fall wreath, I started with a grapevine wreath and a plain burlap bow that I picked up at my local craft store. I decorated the wreath itself with some plastic leaves that I painted in beautiful autumn colors. But the real fun starts with the bow! Continue Reading →
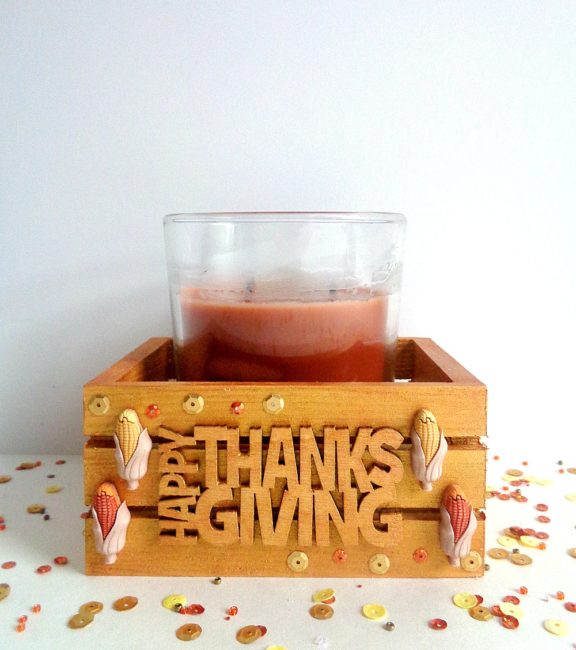
Hello Everyone! This is Katie from the Buttons Galore & More Design Team and today I will be showing you how to make a Thanksgiving candle holder for super easy decoration for your Thanksgiving!
Making decorations for Thanksgiving Day may not be on your radar, simply because you are most likely too worried about making Thanksgiving Day dinner. However, making some type of decoration for Thanksgiving does not have to be difficult or time-consuming. To prove it, today I am going to be showing you how to make your own Thanksgiving Candle Holder! Continue Reading →
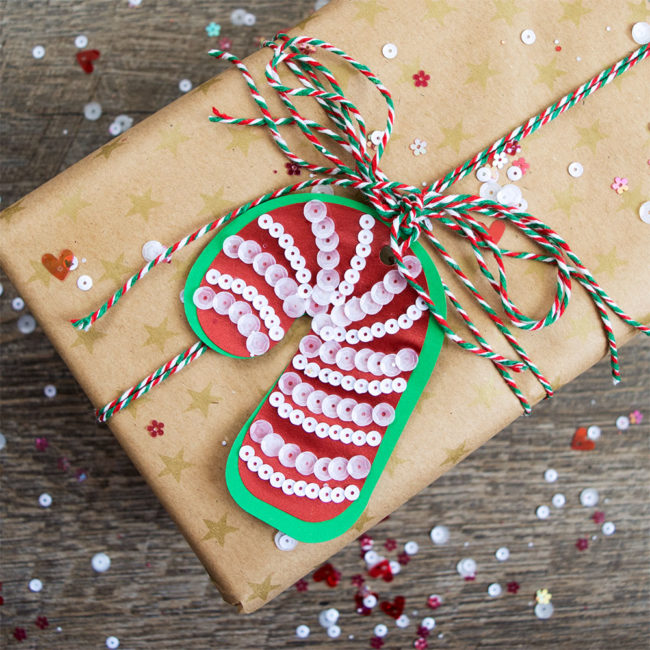
One of my favorite things during the holiday season are handmade gifts. But even more fun than making just the gifts, I love to make the tags and even the wrapping paper to wrap the handmade gifts in. I start making my holiday gift wrap and tags super early in the year and I put them on everything! These fun 28 Lilac Lane Candy Cane Sequins were perfect to make candy cane Christmas gift tags! It’s such a lovely mix of red and white sequins for the holiday season. The candy cane gift tags turned out so festive and cute. It’s the perfect little tag for a cute little package! Continue Reading →
Hi, it’s Connie here with the Buttons Galore & More design team! Today I’m sharing a handmade Christmas shaker card, using the Deck The Halls Shaker Mix by 28 Lilac Lane. The 28 Lilac Lane Shaker mixes are full of beautiful colors of sequins, beads and buttons, mixed perfectly together to get you into the Christmas spirit or at least in the mood to start your Chrismas shaker cards! Continue Reading →
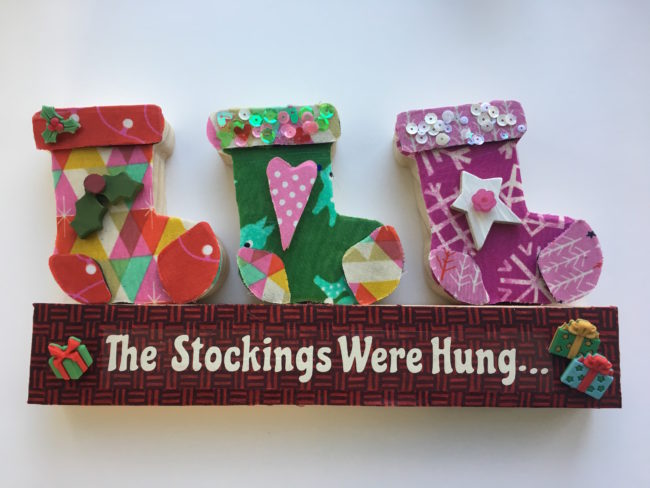
Hi! It’s Aimee here with a great project to add to your Christmas mantle decor this year. Using the new stockings set, I added a little fabric and some button bling to dress up these simple wood decor pieces. Continue Reading →
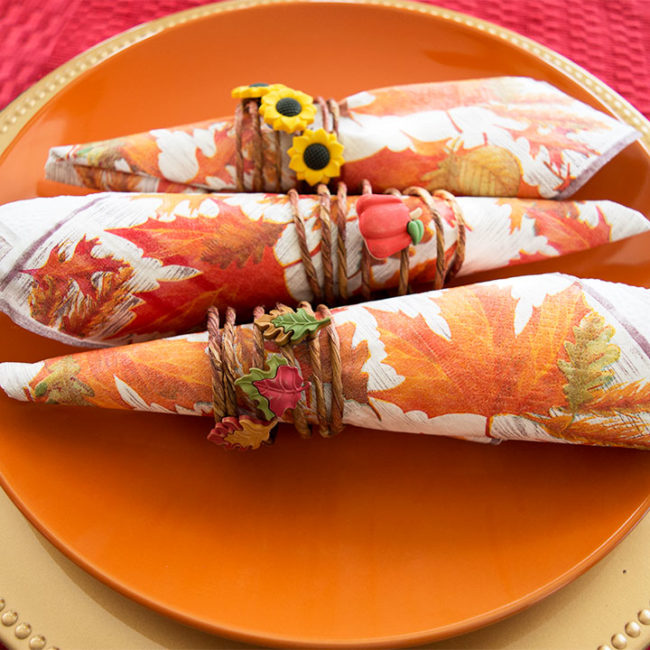
With Thanksgiving right around the corner, I’ve been thinking about how to dress up my holiday table a little bit more this year. I’ve never actually used napkin rings before, and I thought it might be a fun addition to my Thanksgiving table. These easy Thanksgiving napkin rings only take about 10 minutes to make. Thanksgiving table decor couldn’t get any easier! I love the fun fall vibe they add to the table. And the buttons from our super adorable Fall Friends button collection were so perfect for the project! Continue Reading →

Hi, it’s Connie here with Buttons Galore & More design team! I have a fun and festive project to share today using “Christmas Tree with Presents“, one of the new Foundations Decor pieces that are now available from Buttons Galore. The 28 Lilac Lane O’Christmas Tree embellishment bottle added some green sparkle alongside some really cute Buttons Galore 3D Christmas buttons. Continue Reading →
Hello Everyone! This is Katie from the Buttons Galore & More Design Team and today I will be showing you how you can decorate a new product available from Buttons Galore and More!
If you haven’t noticed, Buttons Galore & More has a new area on their website which is dedicated to home décor. This home décor is a new line of wooden products which are super easy to embellish and decorate. The nice thing about the new line is that you have tons of options for different holidays, themes, or seasons. Continue Reading →
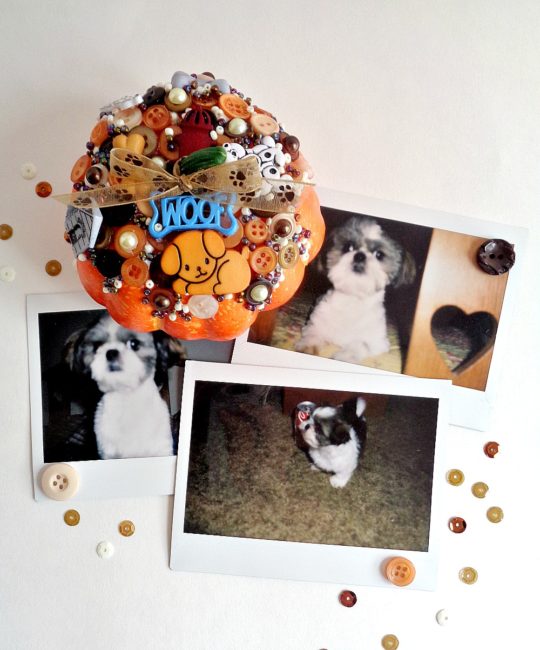
Hello Everyone! This is Katie from the Buttons Galore & More Design Team and today I have a cute pumpkin decorating project that involves your furry four-legged friend! Continue Reading →
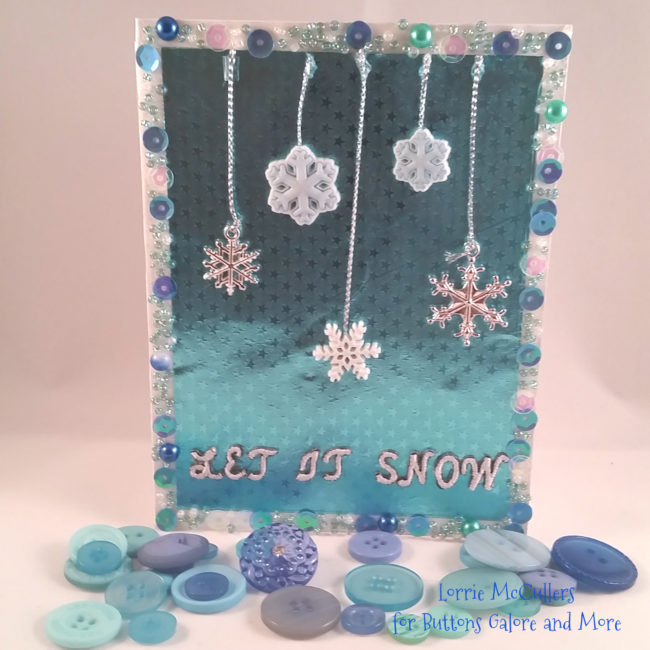
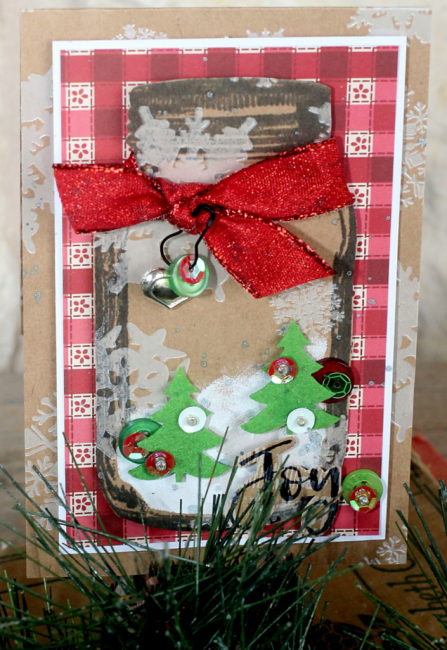
Nothing says Christmas like a flurry of snowflakes! Using adorable buttons and a beautiful sequin mix from Buttons Galore and More, I am getting into the Christmas spirit with this Let It Snow Christmas card. Continue Reading →
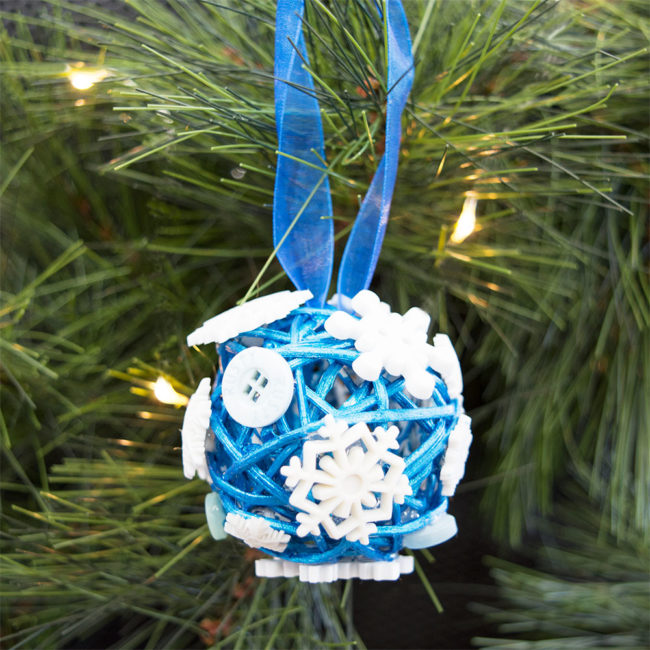
I’m not quite ready for Christmas just yet, but it’s never too early to start planning! Snow is not my most favorite thing in the world. It’s wet and much too cold for this desert girl! I’m a summer fan for sure. However, I do love beautiful snowflakes. Every year I decorate my kitchen with lovely, sparkly snowflakes. I always say that it’s my favorite kind of blizzard! This year I have plans to put a small white tree in the kitchen, decorated with more snowflakes, of course. I wanted to make some of the ornaments myself, and the adorable snowflake buttons in the Snowflakes Value Pack were just perfect for the task of making snowflake ornaments! Continue Reading →
Hi, Connie here with Buttons Galore & More design team sharing a Snow Globe Christmas card using the Holly Jolly embellishment kit by 28 Lilac Lane. It is never too early to start thinking of creating special, one-of-a-kind Christmas cards for those special people you love. Our 28 Lilac Lane collection has put together embellishments kits that take the guess work out of creating special cards. Holly Jolly is the Christmas embellishment kit that is full of festive embellishments that will make beautiful cards – the cards people will want to keep and display! Continue Reading →
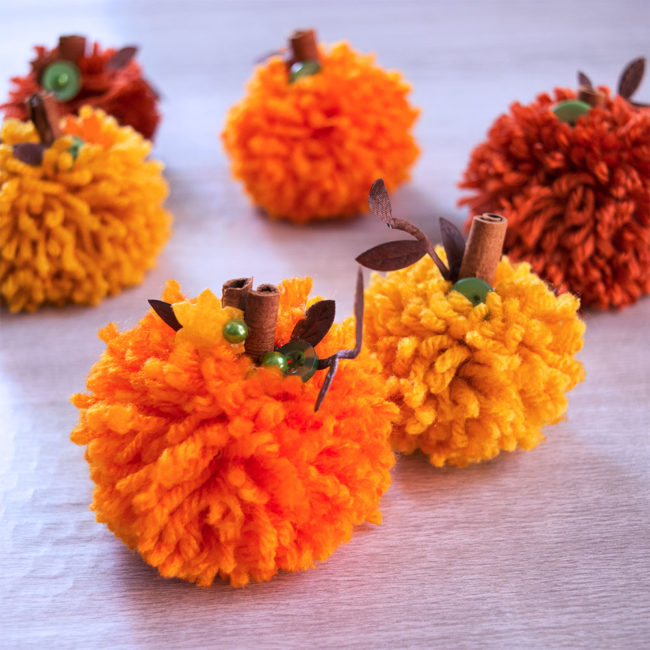
The weather here has started to cool down this week and so I’ve decided it’s time to bring out those pretty autumn colors. Pumpkins are my favorite seasonal decoration in the fall – I love using both fresh pumpkins and artificial pumpkins in my decor. Yarn pom poms are such a fast and easy craft to make. They can add a bit of whimsy to any decor. I wanted to make some DIY pom pom pumpkins to add to my fall decorations, and the beautiful Autumn Afternoon Embellishment Kit from the 28 Lilac Lane collection was the perfect addition to finish off these cute little poms! Continue Reading →
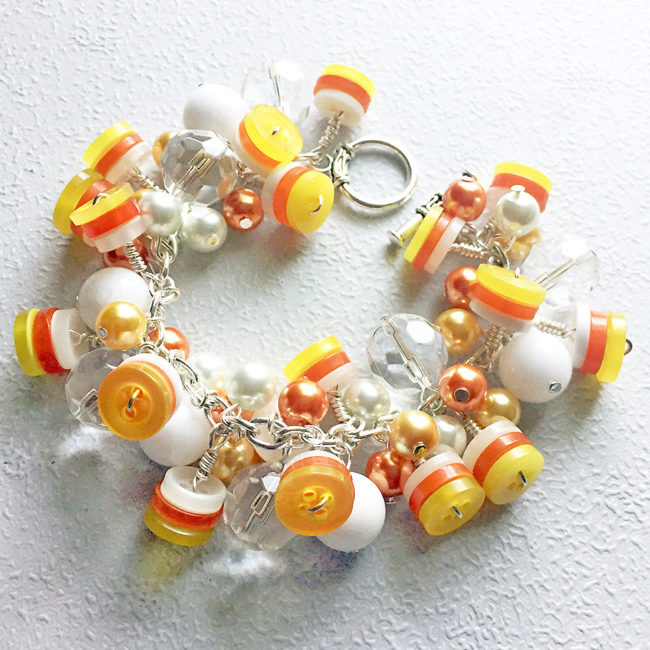
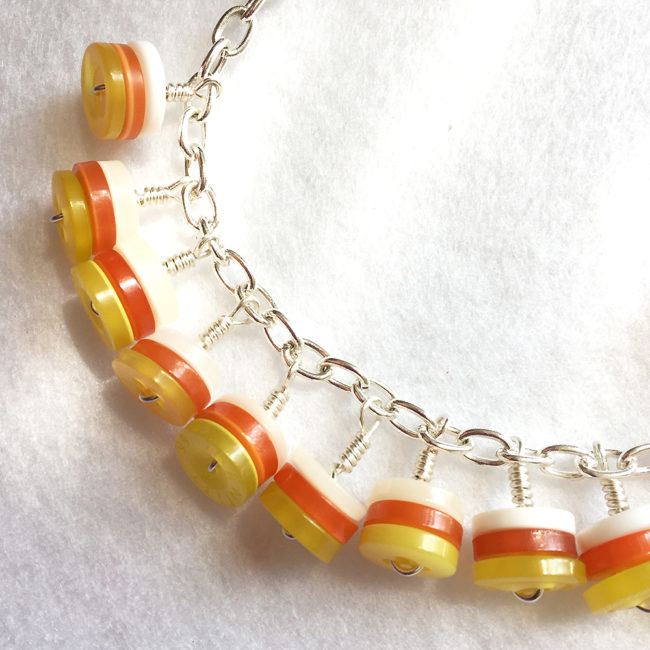
Hi everybody! It’s Anaya from the Buttons Galore & More Design Team. Halloween is fast approaching and I must confess, I’m excited. No, I’m not into the creepy scary stuff – I’m just looking forward to the candy! If you love Halloween candy like I do, I know you’ll enjoy making this super sweet candy corn bracelet.
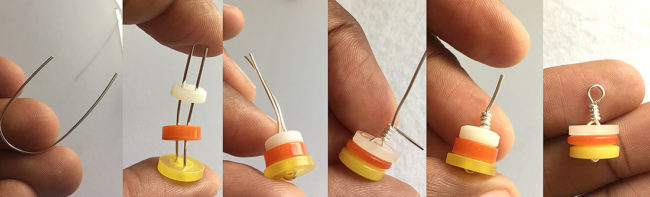
Start your candy corn bracelet by separating the buttons by color and size. You will need to select buttons of a similar size to stack and create little button candy corn charms for your bracelet. Cut a 3-4″ length of wire and gently fold into a ‘U’ shape. Stack buttons with yellow on the bottom, orange in the middle, and white on top. Push the buttons together and twist one end of wire tightly around the other. Trim the excess wire and create a loop using round nose pliers.
Repeat this step a until you have enough to fill your your chain. My bracelet is 7″ and I have attached a button charm to every other link.
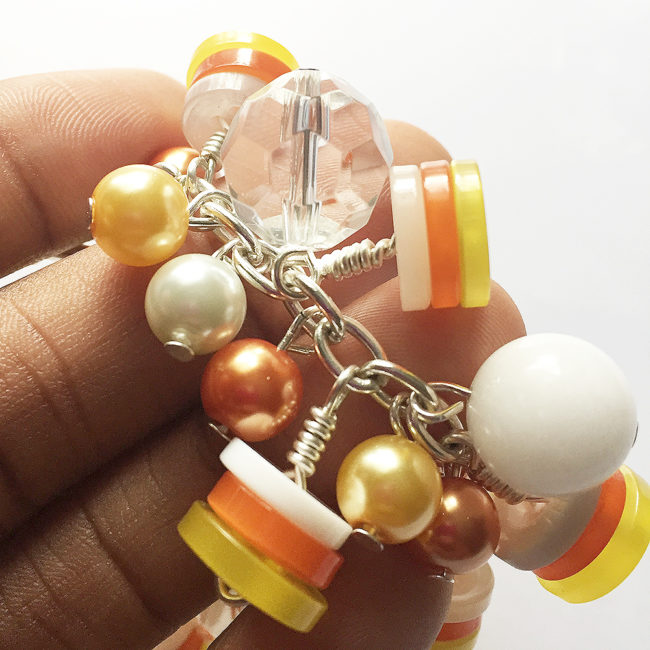
After filling the candy corn bracelet with button charms, gather your selection of beads. I am using 10mm yellow, orange, and white glass pearls along with larger clear and white glass beads. Using headpins, add 2-3 beads to each of the remaining empty links in the chain.
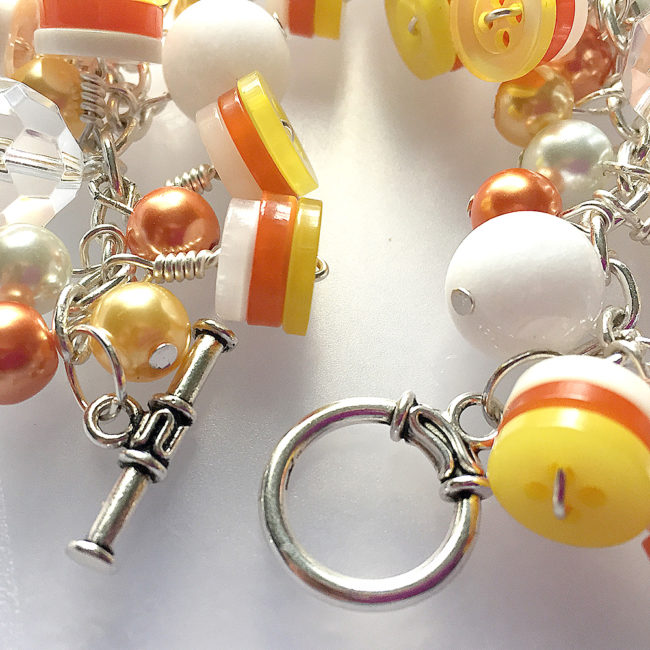
Once the bracelet is as full as you’d like, place a jump ring on each end of the chain. Attach the toggle clasps to the jump rings and your candy corn bracelet is complete!
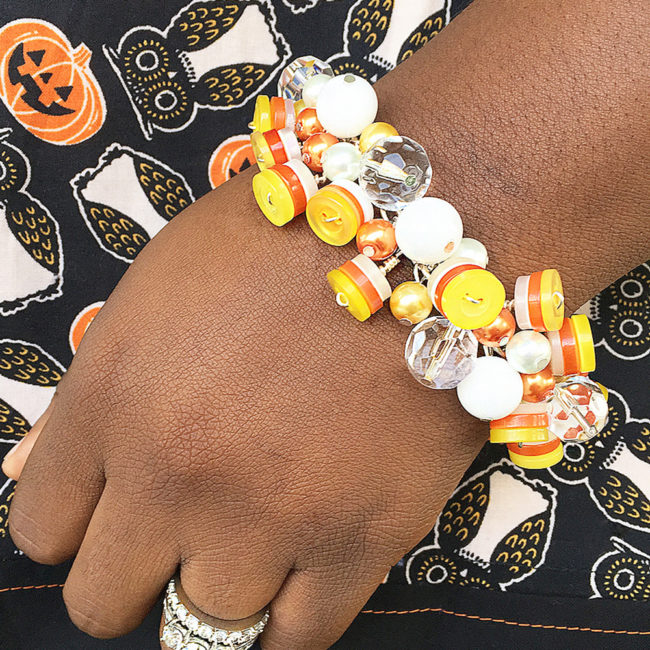
I hope you’ll give this candy corn bracelet a try! It’s so cute that it’s definitely worth the time and effort to make. You can even modify the steps a bit to create a matching Halloween necklace and earrings. With this kind of arm candy, you’ll be sure to get all the sweet treats you desire this Halloween candy grabbin’ season!
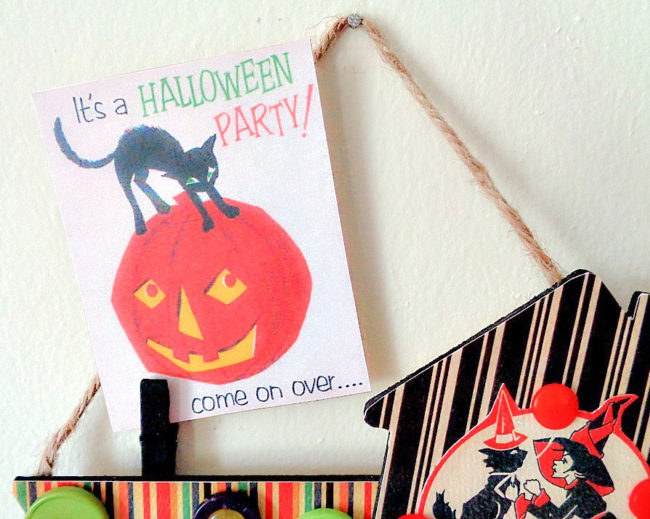
Hello, everyone! This is Katie from the Buttons Galore & More Design Team and today I have a fun Halloween Photo Holder project that you can make to display those Halloween photos or reminders!
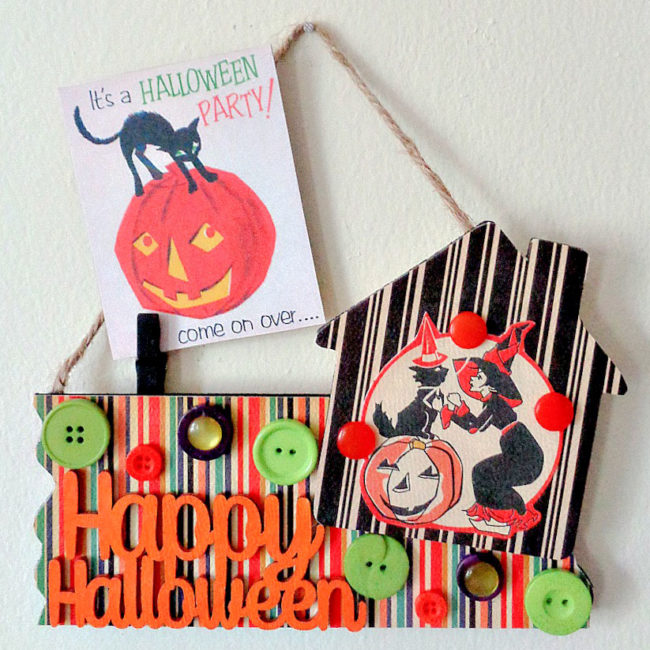
This Halloween Photo Holder is perfect for the Halloween season, due to all the pictures you will be taking during the holiday month. With that being said, even though I’m labeling this project as a photo holder, it could also hold other items as well. For example, it could hold notes, reminders, or that special Halloween party invitation.
To decorate my Happy Halloween Photo Holder, I decided to go with a vintage Halloween look. I achieved this look by using scrapbooking paper that had a vintage Halloween theme and by using the Buttons Galore & More ‘’Scary’’ button tote. This particular button tote was a perfect color palette to use in this project because it included all of the main Halloween colors. Besides the color selection being great, this pack of buttons also provides a wide variety of buttons in different styles and in different shades of those main colors. Overall, whether you like a vintage, modern, or spooky Halloween look, this button pack (I believe) could be used to achieve any number of styles.
So, to find out how to make your own Happy Halloween Photo Holder, keep reading below!
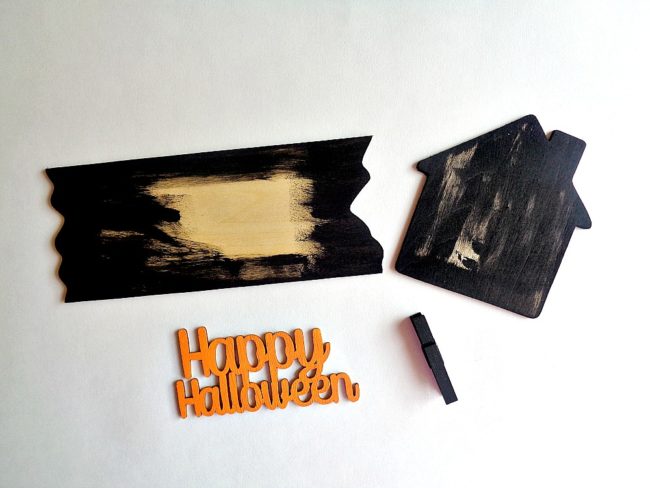
Step 1: Paint your wooden pieces in whatever colors you like and then set them aside to dry.

Step 2: Cut out pieces of scrapbooking paper that will fit on the front of your wooden sign and on the front of your wooden house shape. Then grab your Mod Podge and adhere those pieces of scrapbooking paper to your wooden pieces. Finally, set everything aside to dry.
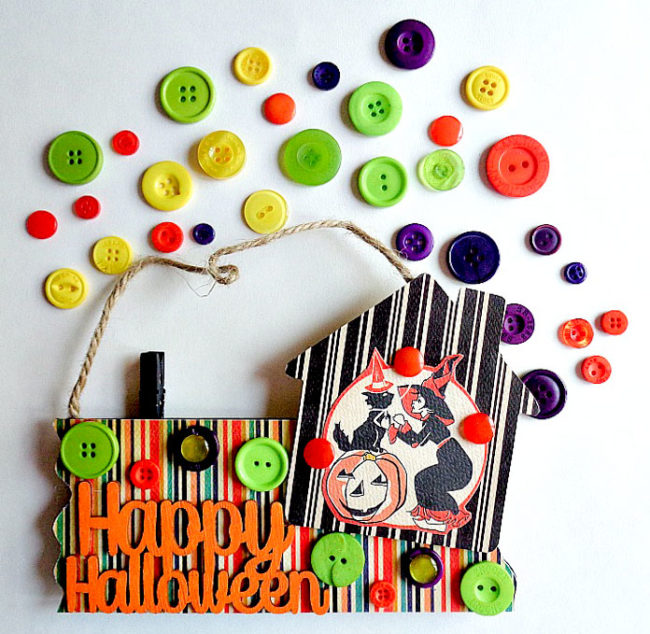
Step 3: Grab your hot glue gun and begin assembling your photo holder! To do this, first glue on your ‘’Happy Halloween’’ phrase and your wooden house shape to the main wooden sign. Then have fun decorating the sign by adding all the buttons that you like! For my photo holder, I chose to use a variety of buttons from Buttons Galore & More ‘’Scary’’ button tote.
Once the front of your photo holder has been decorated, flip it over to the back. Then hot glue your close pin to the back of your sign with the clamp side facing up and sticking out over the edge of your sign. Finally, glue on a piece of twine to create a way to hang your photo holder.
Once you have added your twine you are ready to display your new Happy Halloween Photo Holder!
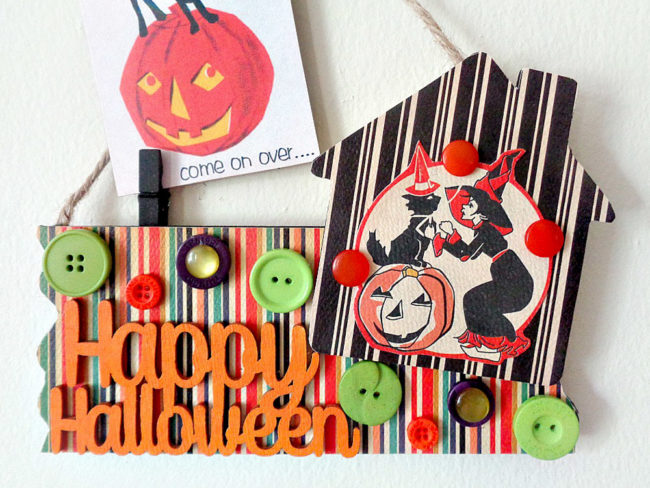
I love how this Happy Halloween Photo Holder turned out! It would look so cute hanging in an office or even on a simple cork board.
This design could be adapted for any holiday (such as Christmas) by changing up the buttons and paper. What holiday would you like to make it for?
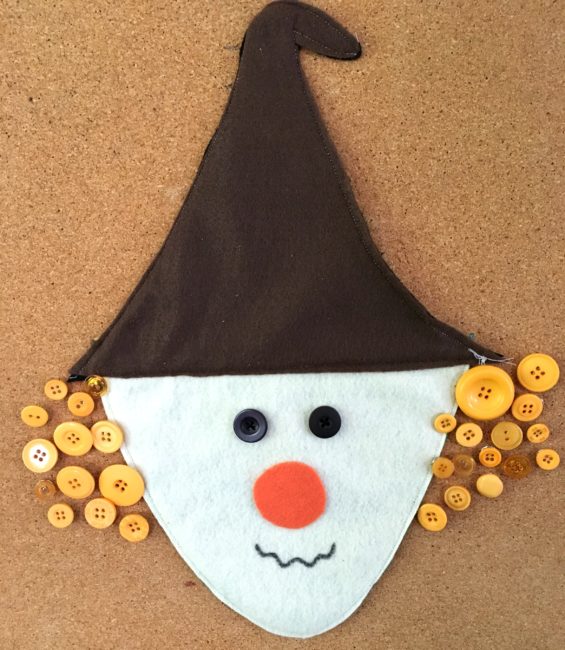
It’s hard to believe it, but fall is creeping upon us and with Fall comes holiday after holiday. Here is a fun and fairly easy fall countdown calendar project to count down the days till Halloween and/or Thanksgiving using some easy to find craft materials and of course…buttons!
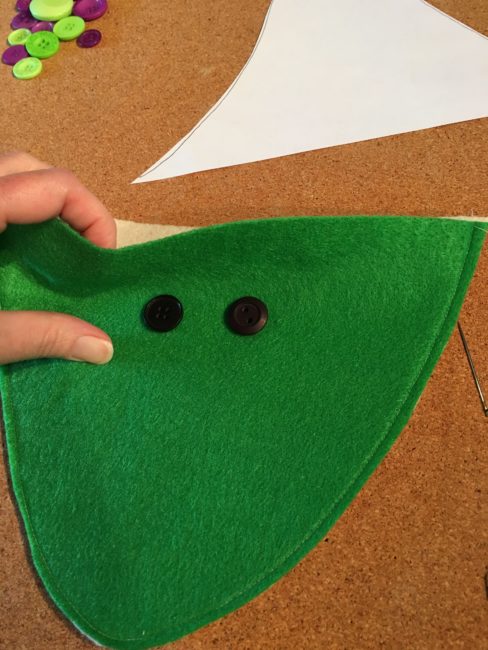
Here’s what you need to make this fun, reversible witch and scarecrow fall countdown calendar.
First, print out your patterns and cut out the felt according to the directions on the patterns. You will have 1 brown hat, 1 black hat, 1 green face and 1 tan face. If you are sewing your project together, go ahead and sew around the curved part of the face. Don’t forget to leave the top open! You will then need to sew your black button eyes onto the green face and onto the tan face.
If you are gluing your project, go ahead and glue the two faces together and then glue the black buttons for eyes onto each face. Let dry well before going on to the next step.
Cut out a wiggly, carrot shaped nose for your witch, along with a circle nose for your scarecrow. Attach them to your faces with craft glue. Use the black permanent marker to draw a mouth for each.
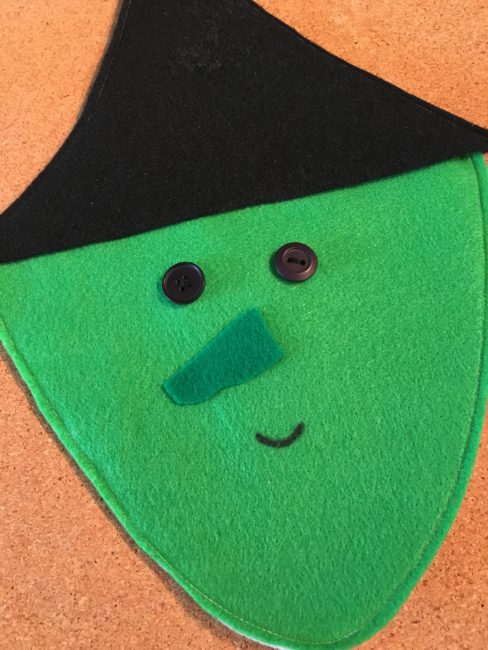
Next, if you are sewing your hats together, sew up and around the two sides, leaving the straight edge of the hat open. Then slide your face inside the two pieces of your hat and sew together; making sure to sandwich all the layers of the felt together when you are sewing.
If you are gluing, glue the hat pieces together and then slide the face inside the hat. You can attempt to glue these parts together, but I would recommend leaving them unattached. They will appear one piece when you attach it to the cork board.
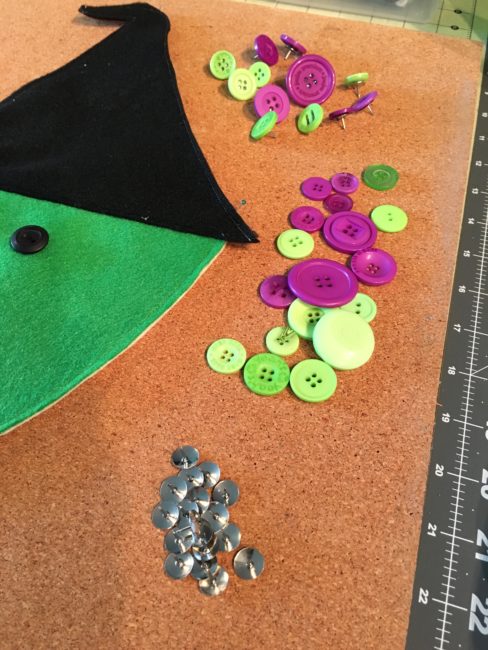
Heat up your hot glue gun and while it’s heating, separate your button pack. The witch hair uses 31 of the purple and green buttons and the scarecrow uses 28 of the orange from the Trick or Treat Button Basics BCB129. Glue the buttons on the thumb tacks and let them cool off.
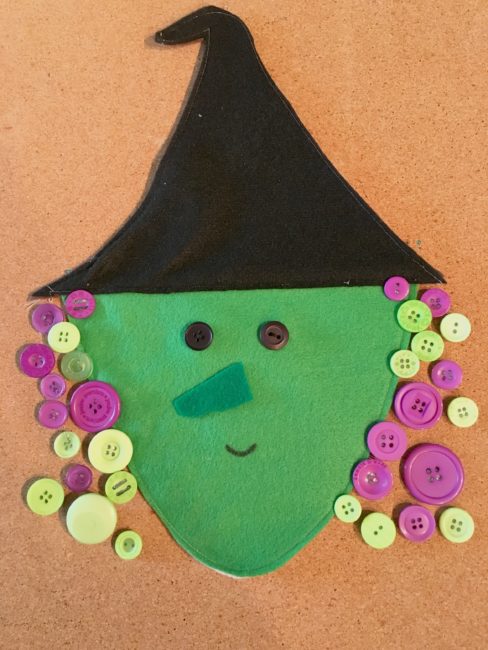
And there you have it! Attach your witch to your cork board with straight pins and either start out with all 31 buttons, taking one off each day until Halloween arrives, or add a button each day as it gets closer! Whichever you prefer!
Once Halloween is past, flip over your witch and start counting down the days till Thanksgiving!
Thanksgiving and Halloween are coming fast…make your fall countdown calendar today!
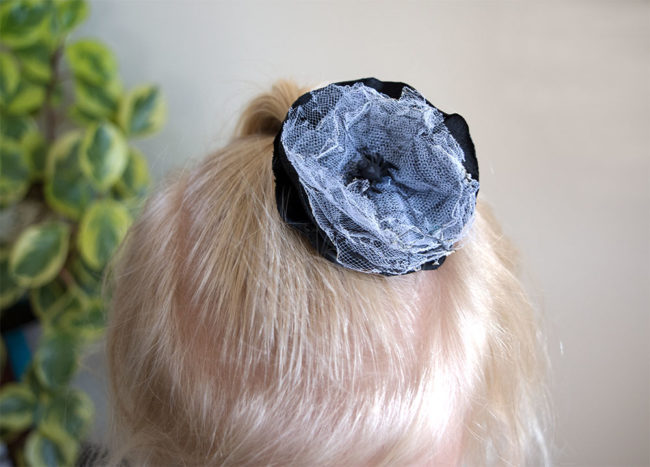
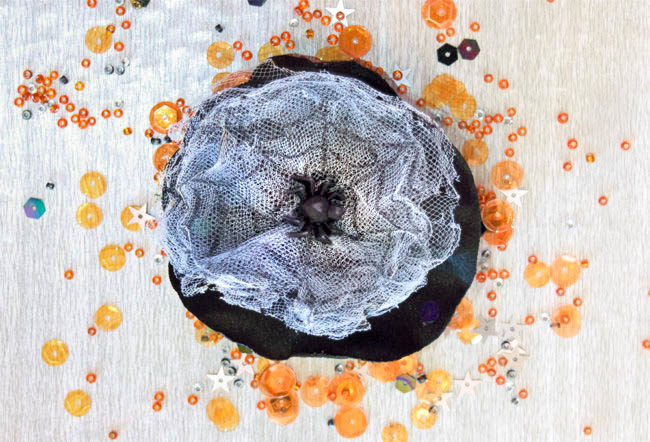
Halloween is coming soon – can you believe it?! You can make this fun Halloween Spider Web Hair Bow in less than 30 minutes. This is one spider web your little girls won’t mind having on their heads because it’s just so cute! It’s easy to customize too, using the same technique with different kinds of fabric, different colors or different accessories.
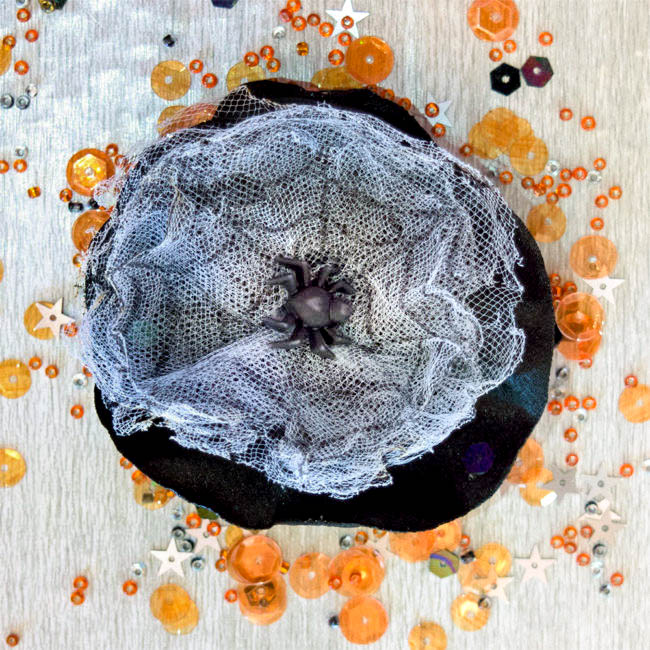
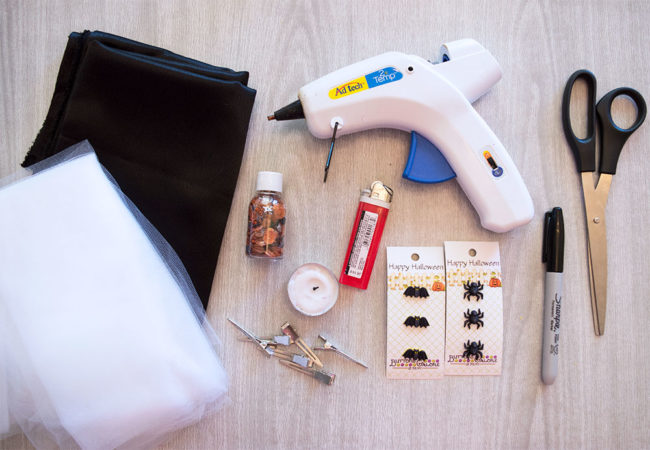
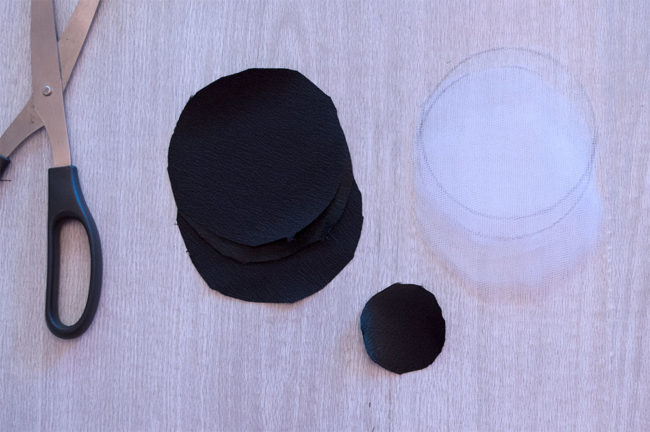
Cut circles in the tulle and black fabric. You will need two 3-4″ black satin circles, and one 1″ black circle. You will also need to cut six 3-4″ circles from the white tulle as well. I used a styrofoam cup to trace my circles. It was the perfect size.
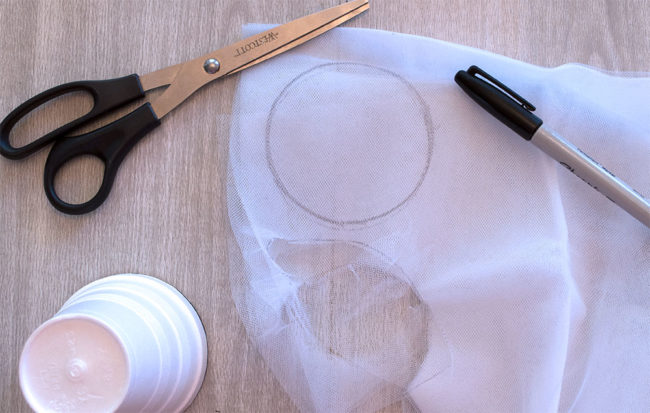
Lots of fabrics will melt great for this project, but I find cotton fabrics don’t melt as well as the synthetic blends. My favorites to work with are satin or chiffon fabrics. This is a great project to use scraps, and you should use whatever you have on hand. It doesn’t take much!
Use a black marker to draw spider webs on the tulle circles. Be sure to put a piece of paper under the tulle so you don’t end up with black spider webs all over your work surface.

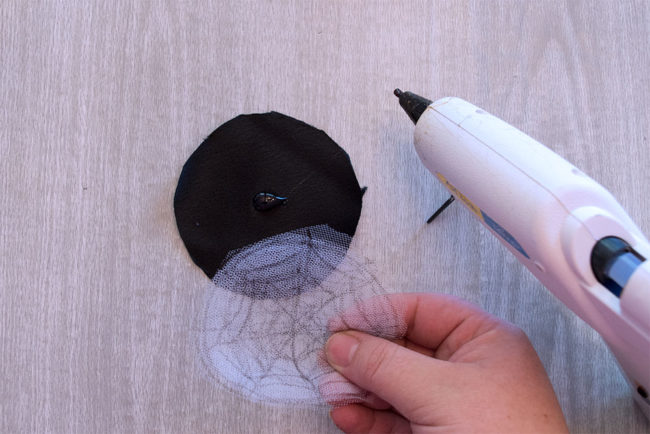
Assemble the fabric circles. I use hot glue to assemble mine, but you could easily sew them together if you prefer. Place a dot of hot glue in the center of each circle and press two circles together.
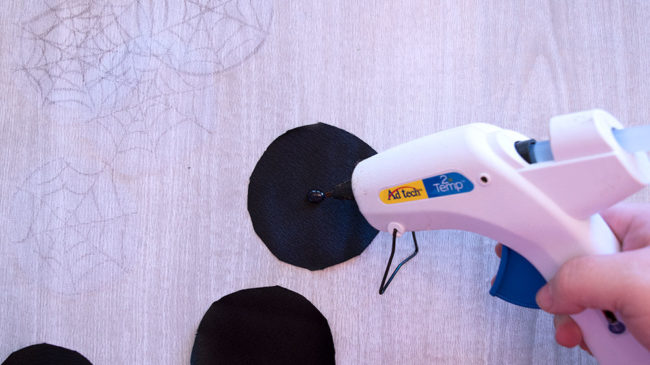
Stack the two black circles on the bottom, and the white tulle circles on top of those with a dot of hot glue between each layer.
*Please use caution when working with an open flame. The melting fabric is hot to the touch. Always keep a bowl of cool water next to your work station when working with a flame in case of burns or fabric that accidentally catches fire.*
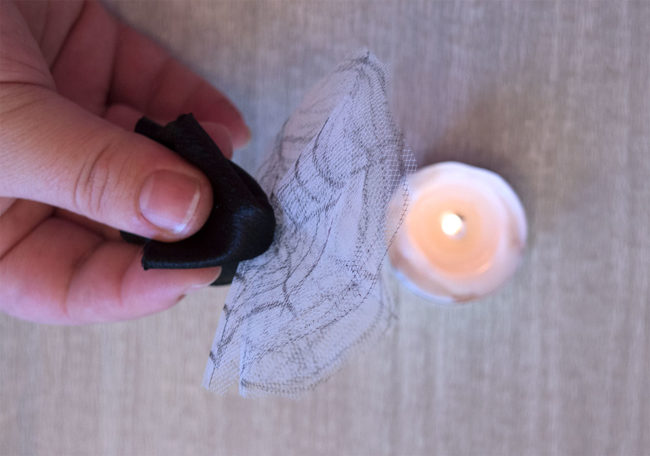
Using a small candle flame (I use a small tea light candle), melt the edges of the tulle and satin fabrics. Carefully hold the fabric down next to the flame. Don’t get it too close. It just needs the heat from near the flame to curl and melt the fabric.
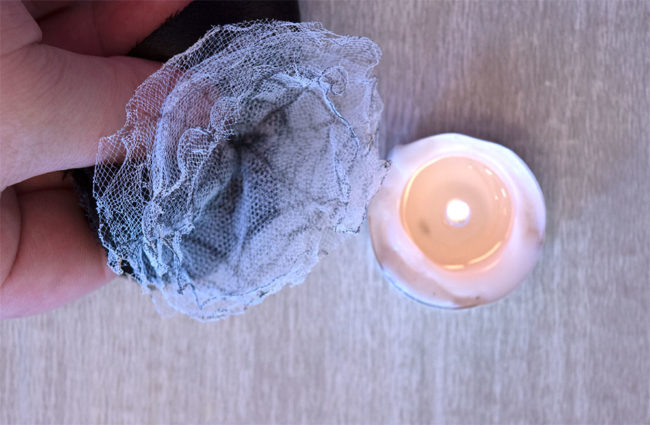
The tulle is very easy to burn. It does not need much heat to curl and melt. A little bit of charing on the edges of the tulle just adds to this cute Halloween spider web hair bow though! Satin fabric needs just a little more heat to curl and melt. Please be careful not to get your fingers too close!
Use glue to attach the adorable 3D Spider Button to the center of the Spider Web Hair Bow. Glue some sequins from the Trick or Treat Bead and Sequin mix to the bow. I used black sequins from the mix and some black seed beads.
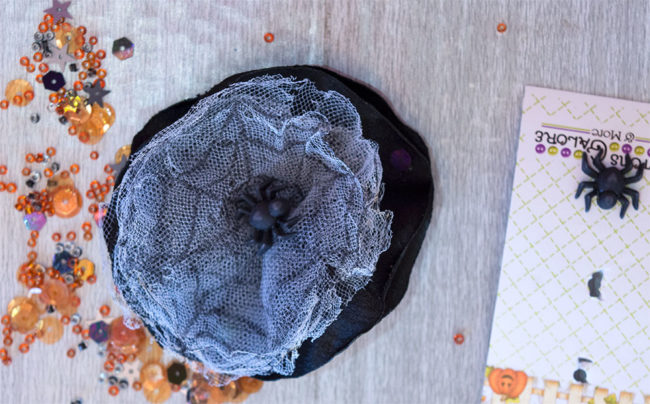
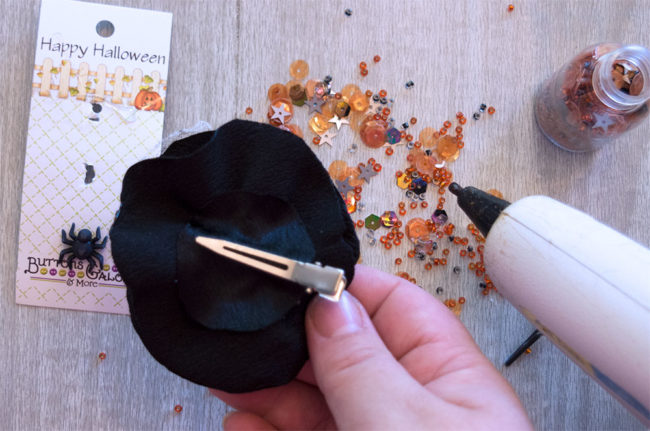
Attach the alligator hair clip to the back of your spider web bow using hot glue and the 1″ circle of black fabric.
Isn’t it the cutest little spider web you’ve ever seen? I love how the adorable little spider buttons have a cute little heart shape on their backs. Even my spider phobic four-year old didn’t mind wearing this cute little spider in her hair!
You can easily change this technique to suit any style or holiday! Chiffon is my favorite fabric to melt. The curl is fantastic! Change the color of the fabric and the tulle and add other fun embellishments for endless combinations! I want to make one with red chiffon, white tulle, and these adorable 3D Candy Cane buttons for Christmas!
Which 3D buttons would you put in your hair bows?
Hello Everyone! This is Katie from the Buttons Galore & More Design Team, and today I have a fun button pumpkin wall hanging project to get you in the mood for fall decorating!

This project is perfect to make if you are looking for an easy and inexpensive way to spice up your home décor for fall, halloween, and thanksgiving. I got the idea for this project when I saw a felt wall hanging designed for the 4th of July. However, instead of a pumpkin, the original wall hanging had a heart shaped flag made from felt and a few buttons. Personally, I thought the idea was cute but could be recreated in a simpler way. In today’s project, the whole DIY is only 3 steps and does not involve any sewing tools!
To decorate my button pumpkin wall hanging, I used two button sets for a majority of the project. Those two button sets were the 28 Lilac Lane ”Pumpkin Spice” Embellishment Bottle and the Buttons Galore Autumn Value Pack. Both of these button sets provided a wide variety of harvest/fall style buttons and worked really well together. My personal favorite out of both of these sets was definitely the 28 Lilac Lane ‘”Pumpkin Spice” Embellishment Bottle because you received a ton of beautiful orange colored buttons.
So, to find out how to make your own pumpkin button wall hanging, keep reading below!
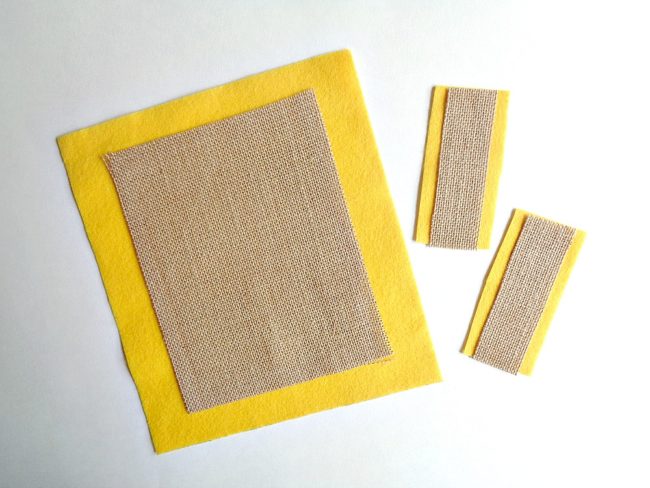
Step 1: Cut one piece of felt that measures 9 inches by 10 inches and two smaller pieces of felt that measure 2 inches by 3 ½ inches. Then cut out one piece of burlap that measures 6 ½ inches by 8 inches and two smaller pieces that measure 1 inch by 3 ½ inches.
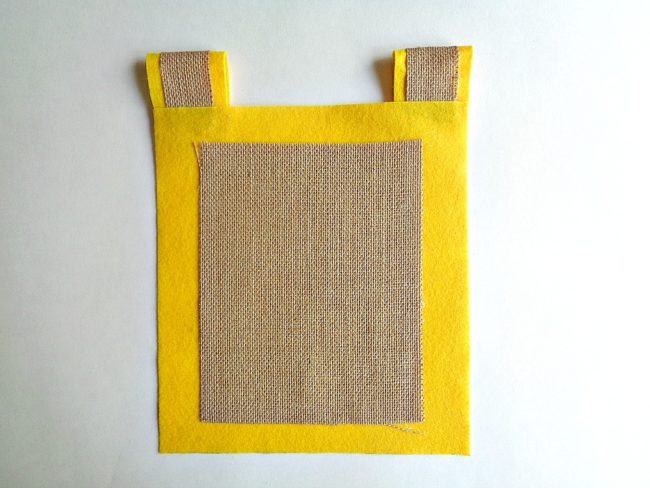
Step 2: Layer the larger piece of burlap centered onto the larger piece of your felt and glue it into place with your hot glue gun. Then layer the smaller pieces of burlap centered onto your smaller pieces of felt and glue them into place. Finally, create loops for your wall hanging by folding over the smaller pieces of felt/burlap and glue them in the corners of your larger felt piece.
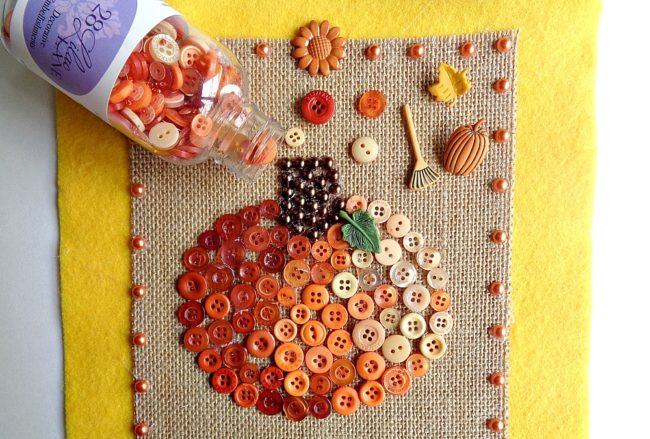
Step 3: Now take your pen and draw the outline of a pumpkin onto your burlap. Then begin gluing on your buttons around the outside of your pumpkin to create an outline and then fill in the middle with more buttons. For my pumpkin, I decided to go from dark to light buttons and then use shimmering half pearl flat backs for the stem. Finally, use the rest of your normal buttons and decorative buttons to decorate the rest of your wall hanging.
For my button pumpkin wall hanging I used the following:
Once you are happy with how your button pumpkin wall hanging looks, you are ready to hang it on the wall by sliding a dowel rod or wooden stick through the two loops!

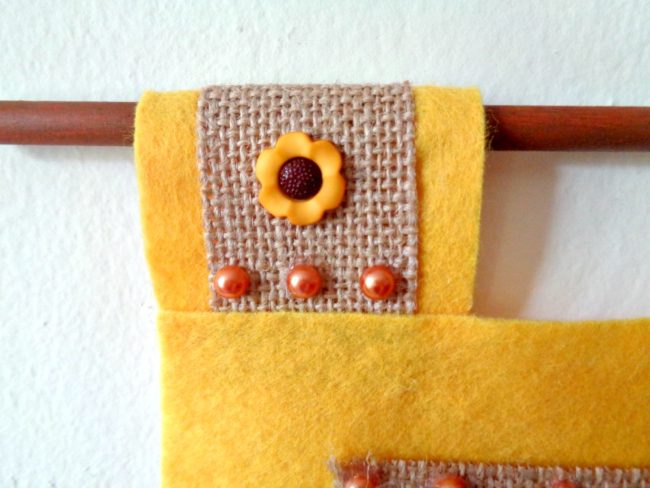
I loved how this pumpkin button wall hanging turned out and I think it would look so cute as part of a gallery wall!
While creating this project, I did free hand the design of the pumpkin. However, if you are not comfortable drawing your own pumpkin (in step 3), you can always google ”pumpkin template” and print out a template to trace around. With that being said, if pumpkins are not your thing, you could always change the main image to be something else. For example, I think a leaf created from the 28 Lilac Lane “Toasted Graham” Embellishment Bottle would look really pretty.
If you made this pumpkin button wall hanging, what 28 Lilac Lane items would you use?
You can celebrate a little bit of Christmas in July by crafting this fun and easy Embroidery Hoop Christmas Card Holder. This simple craft is a great way to get your kids involved and teach them basic button sewing. It will look so cute on the wall holding your Christmas cards! You can customize it by changing the button shapes, or colors to suit your decor needs.

To start making your embroidery hoop Christmas card holder, lay your embroidery hoop on your fabric and trace around the outside edge of the hoop. Don’t trace right along the edge of the hoop, since you want the fabric circle to be bigger than the embroidery hoop. The circle doesn’t need to be perfect. You will need two fabric circles. I used a canvas drop cloth that I already had, but you could also use a cotton fabric or even burlap. You don’t want the fabric to have too much stretch though, since it needs to hold the weight of the buttons and the cards firmly.
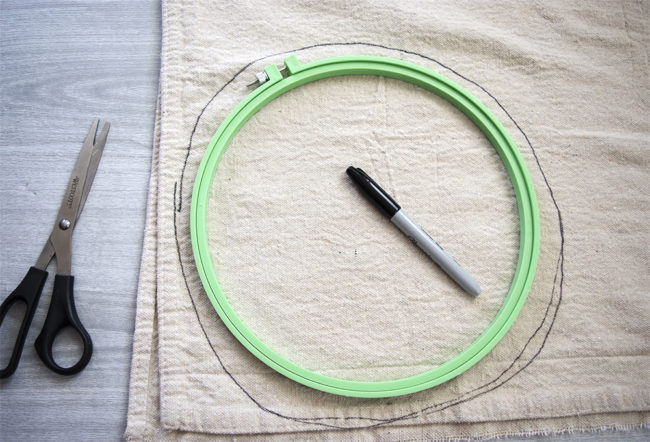
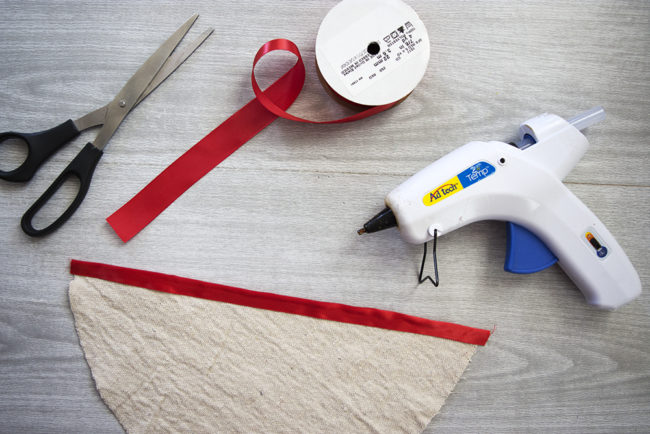
Cut out the circles of fabric, and then cut one circle in half. Don’t waste too much time trying to get the cuts perfect. You won’t even be able to tell if they are or not once the project is finished!

Finish the straight cut edge of your half circle by gluing ribbon to the edge and folding it over.
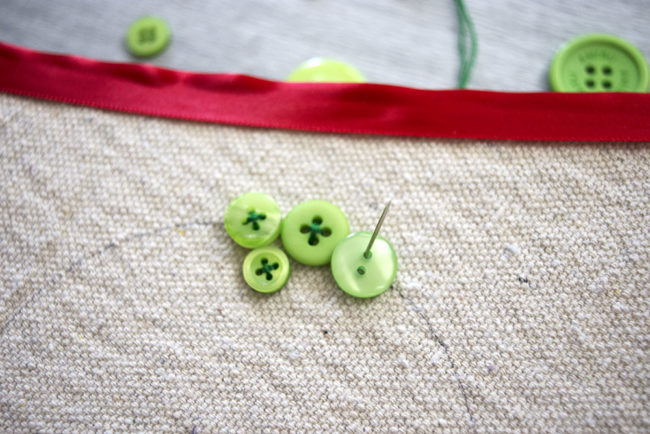
Trace a small circle onto the half circle of fabric. I used a wide mouth mason jar lid to trace the circle for my wreath.It was a perfect size. You can make your wreath bigger or smaller as desired.
Stretch the half circle fabric piece into the embroidery hoop for stability. Sew green buttons around the circle that you traced on the fabric. Tie a knot in your string and start under the fabric. Bring the needle up through the button and back down into the fabric.
Repeat this step again so that your button is firmly attached to the fabric.

I used big buttons and small buttons around my wreath for some visual interest, and I used green buttons from both the Contemporary Christmas mix and the Button Bonanza Christmas Mix to vary the colors.
Use a few small red buttons for berries in the wreath. Sew them randomly into the green buttons using the red thread.
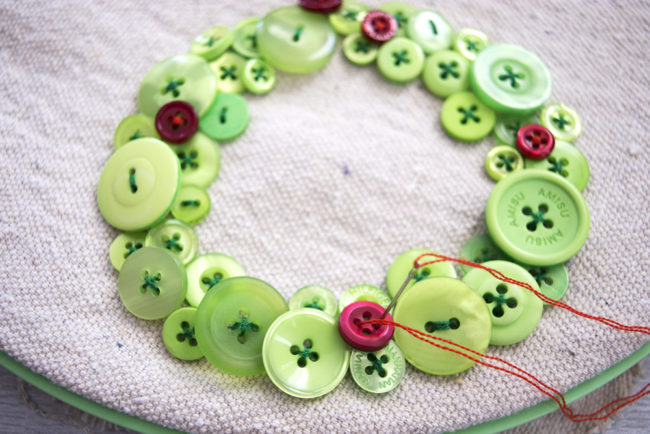
Add a small red ribbon bow to the button wreath. You can sew the bow to the wreath with your red thread, or you can use hot glue to attach it.
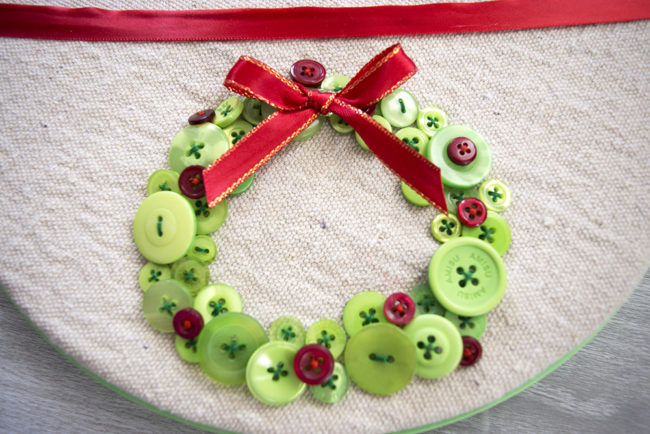
Lay your button wreath half circle of fabric over the full circle you cut in step one, and stretch them into the embroidery hoop. This creates the pocket for your cards to go into. Trim any extra pieces of fabric on the back of the hoop. Hang your completed embroidery hoop Christmas card holder on your wall!
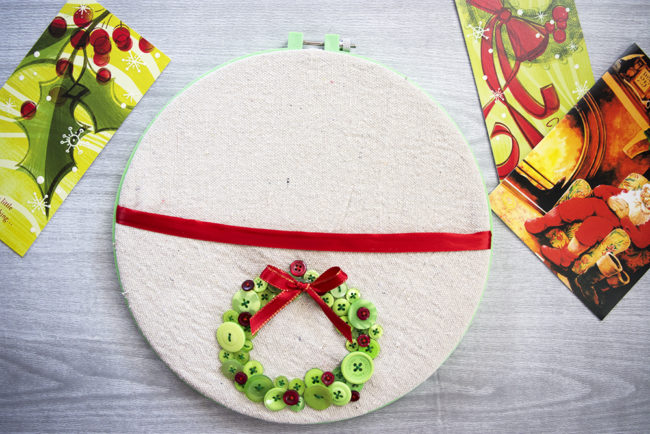
You can fit quite a few cards in one hoop, but if you typically get lots and lots of cards from your friends and family, you might want to make a couple of these fun hoops and hang them in a fun arrangement on the wall.
I think I will make two more hoops and put a Christmas tree shape on one, and perhaps some Christmas holly on another. The buttons are such a fun and cute way to add the colorful shapes to the fabric. Do you do any Christmas in July crafts? If Christmas in July isn’t your thing, this fun card holder can be customized to any time of the year! Create a fun button flower shape and hang it on the wall year round to hold other special occasion cards you might receive, or even just to hold your mail!
Hi everybody! It’s Lorrie here from the Buttons Galore and More design team, and today I am here to show you a fast and fun way to craft a Christmas tablescape for your holiday gatherings. This holiday decor project is amazingly easy — the kids could even help out with this one!
To start your Christmas tablescape, wrap a styrofoam ball once with ribbon. Cut and glue the ends of the ribbon. Continue wrapping the styrofoam ball with ribbon until the entire ball is covered.
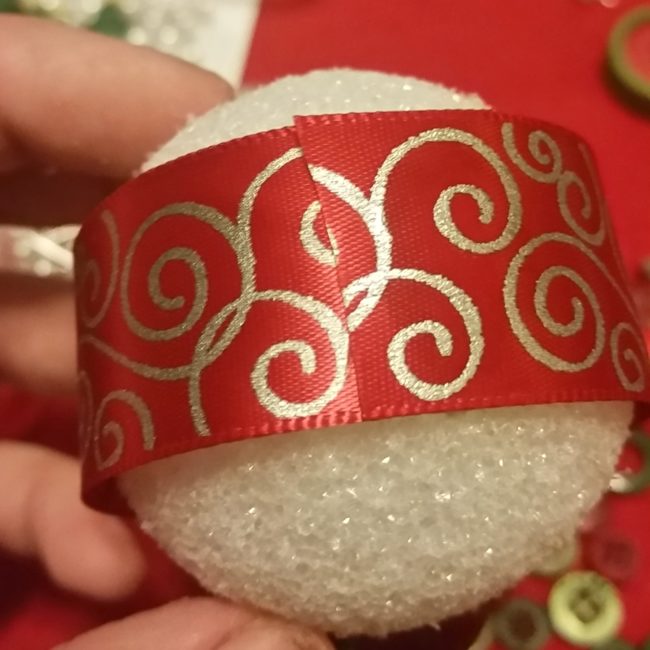
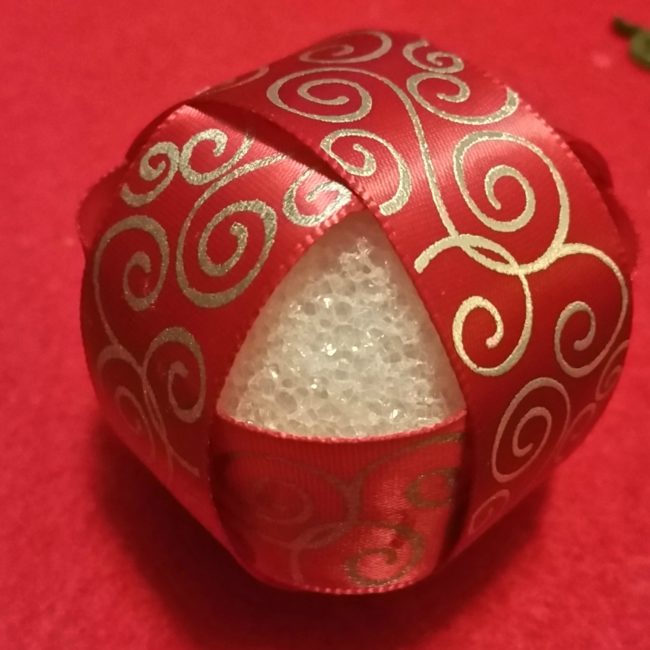
Once the styrofoam ball is entirely covered in ribbon, glue buttons to the ribbon in a variety of patterns. (Before gluing down shank buttons, use a pair of scissors or a button shank remover to cut the shanks off.)
Repeat the previous steps until you have made enough balls to fill a jar or vase for your Christmas tablescape. To display your balls, fill the bottom of the vase with a mixture of red and green buttons (such as Buttons Galore “Christmas” Button Bonanza, and then add your new ornaments!
This Christmas tablescape project is so quick to make but would add so much to your holiday table, mantel, or coffee table. Of course, if you prefer a more trendy color scheme for your holiday decor, try pairing these buttons with white ribbon and our Contemporary Christmas button mix for a touch of lime green and light pink. It also doesn’t have to be just for Christmas — you could always make the same craft using different ribbon and buttons for various holidays or for every day use!
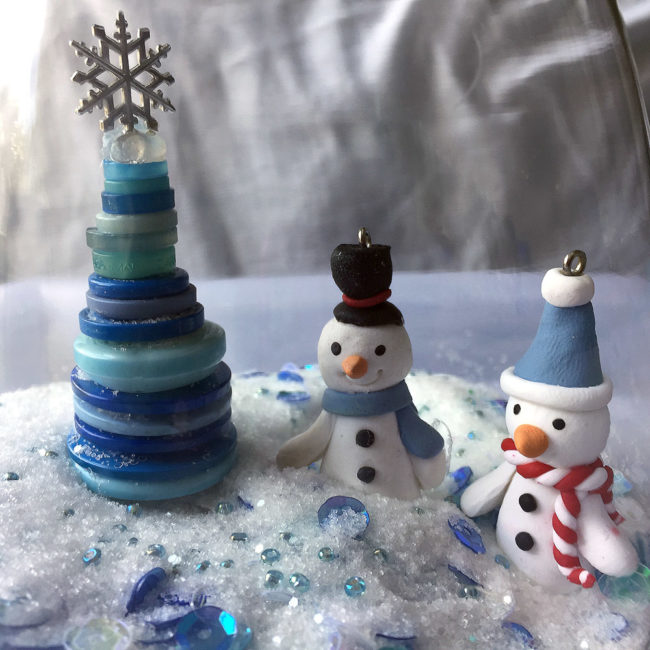
It’s Christmas in July! I’m thinking cool thoughts and making cool things, like this sweet snow scene in a jar!
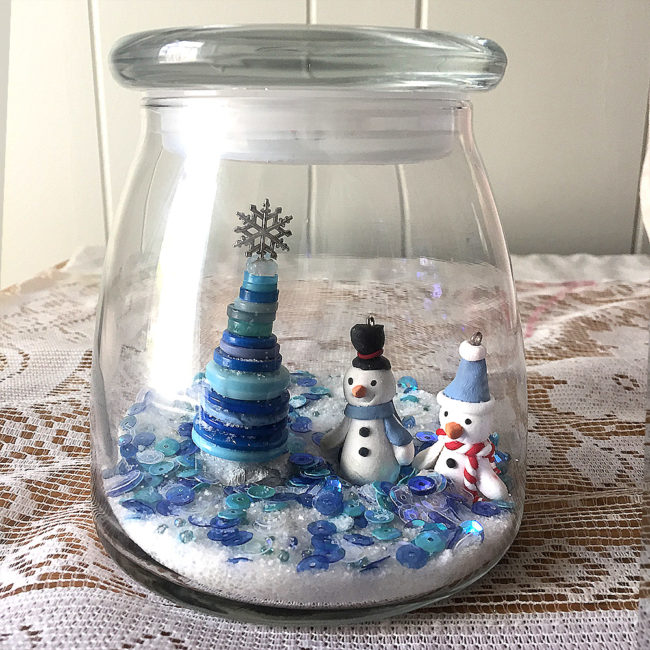
Begin by rolling up a 1″ ball of aluminum foil, and then press it down to make the ball flat on the bottom. Cover the foil with a layer of white paint and allow to dry. To make the button tree, cut 6″ to 7″ inches of wire, and fold in half. Start with one of the snowflakes in the embellishment kit to attach as the tree topper. To keep the snowflake centered, apply some glue to hold it in place. Continue adding buttons from smallest to largest until it is to the height you desire. Twist the remaining wire and trim. Leave just enough wire to place in the hole of your snow hill with a dab of glue.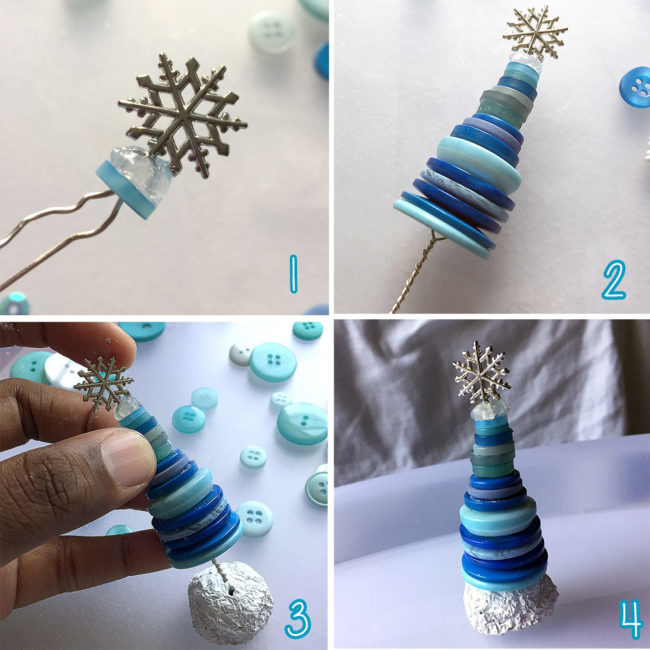
Glue the snow mound, along with any other little holiday figures you may have to the bottom of your glass jar. 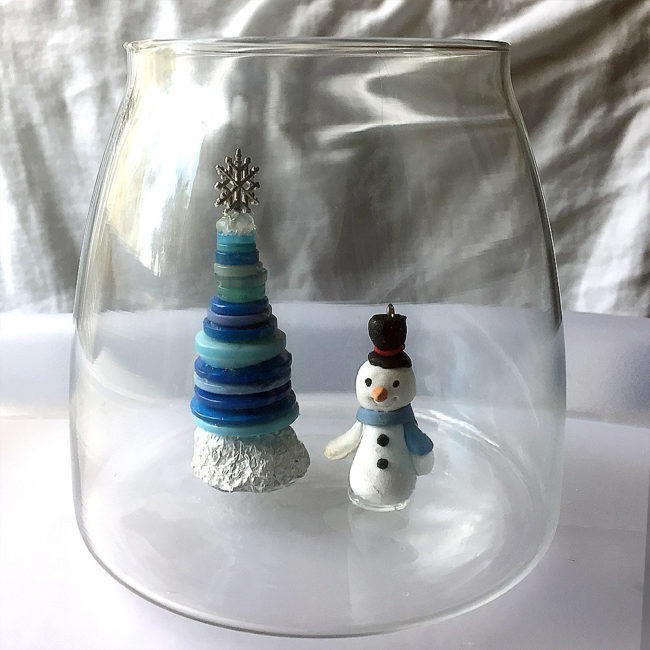
The last step is to add some sparkle and ‘snow’. Pickling salt may sound like a strange item to use in crafting, but it’s really awesome because it’s bright white and looks so much like snow! Also, the salt is heavy and will keep the sequins and beads from settling directly to the bottom of the jar. Pour in as much salt as you want until it reaches a height that makes you happy. Add sequins and beads from the kit, and then give the mixture a gentle swish from side to side to mix things up. That’s it! Your scenic snow jar is complete.
Have fun and experiment with various jar sizes and embellishments to decorate your home or give as gifts. This project takes just a little time and very basic craft skills. I hope you’ll give it a try if you’re looking for something quick and easy to craft up for the holidays.
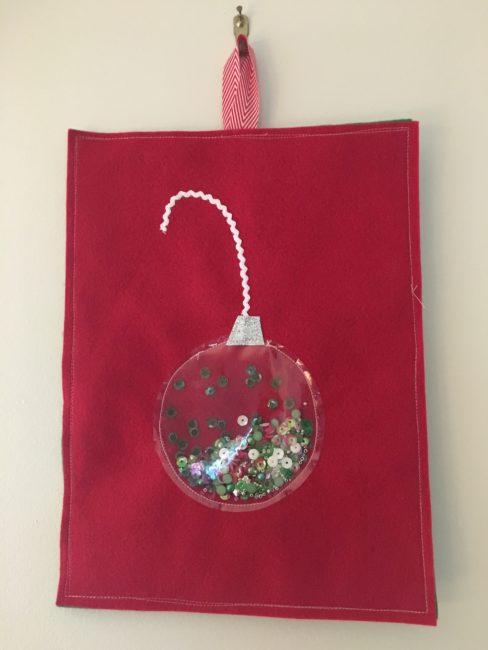
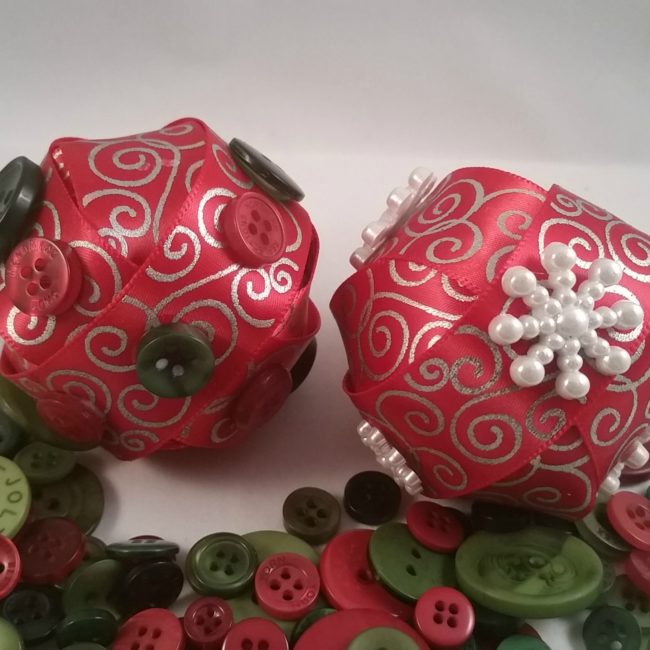
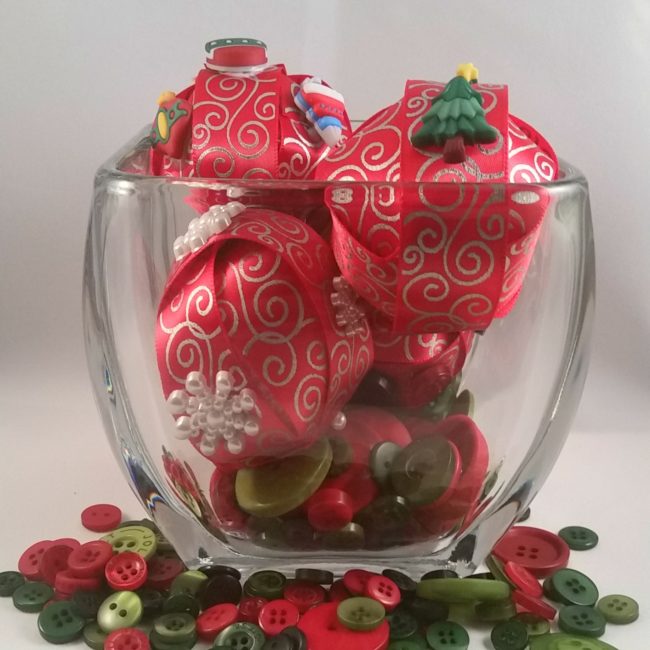
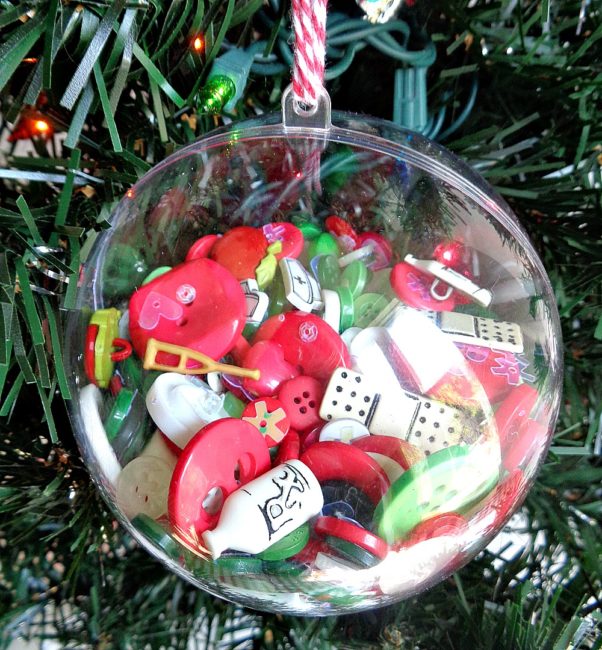
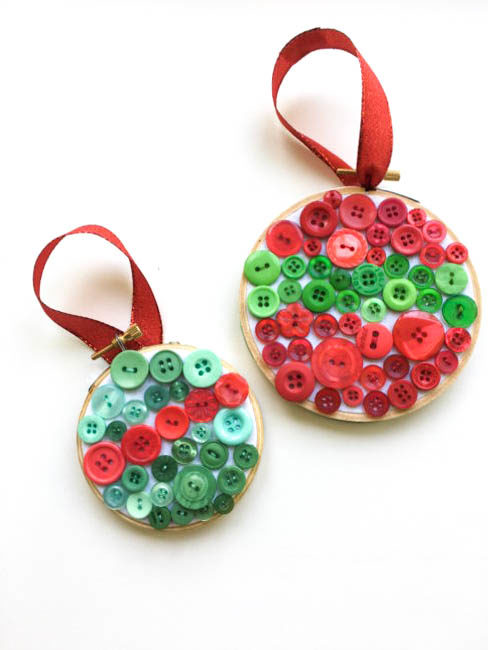
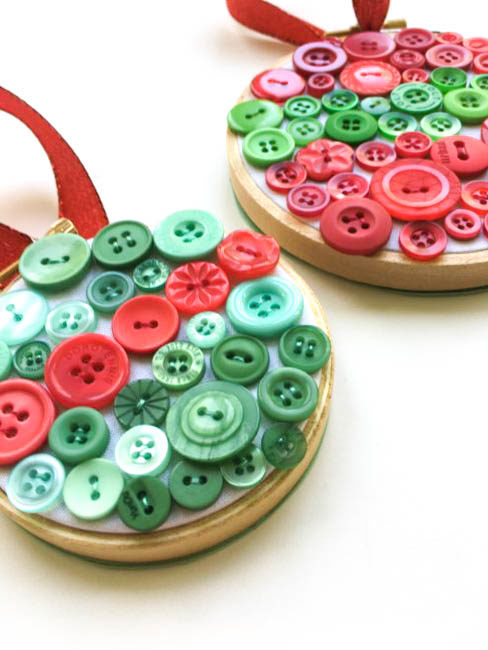
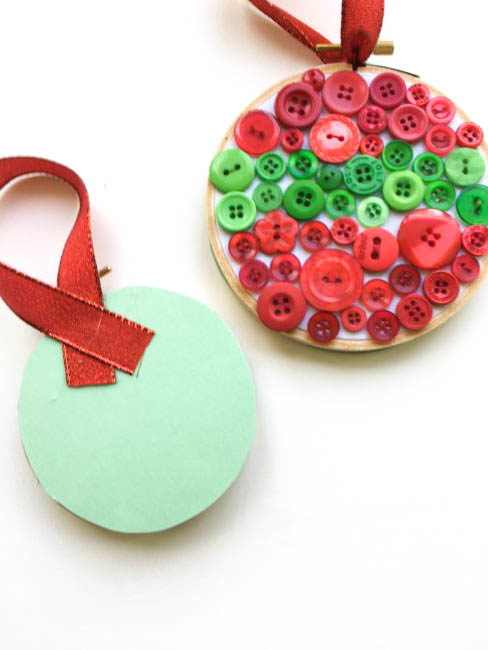
Hello Everyone! This is Katie from the Buttons Galore & More Design Team and today I have a fun button filled ornament project for you to make if you are loving Christmas in July!
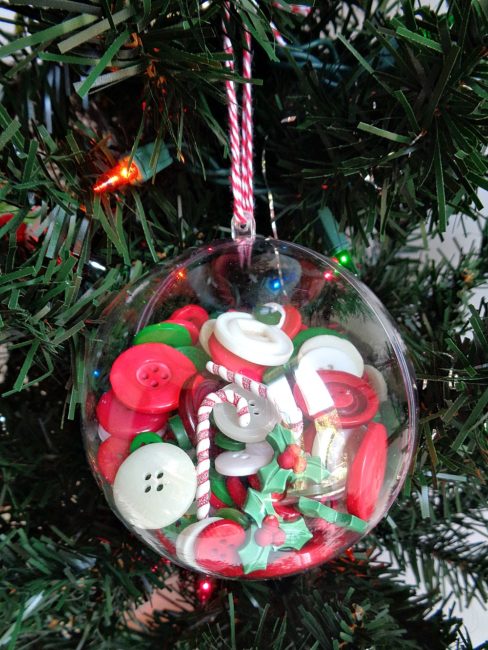
The great thing about this button filled ornament project is that it doesn’t involve any type of special tools or glue. Because of that, these button filled ornaments are super easy to put together and would be the perfect project to make with your kids. In addition, since this project requires no drying time and is only three steps, you can make a ton of these ornaments over the course of a weekend!
To decorate my ornaments, I used a combination of buttons and sequins. With that being said, I decided to stick with a traditional color palette of red, white, and green. So, in this tutorial, you will see buttons and sequins in those particular colors. But if you want to experiment with a more non-traditional palette, you could try using the The Merriest Button Bonanza, the Winter Wonderland Button Bonanza, the Contemporary Christmas Button Basics, or the Winter Flurries Button Basics.
So, to find out how to make your own button filled ornaments, keep reading below!
Supplies
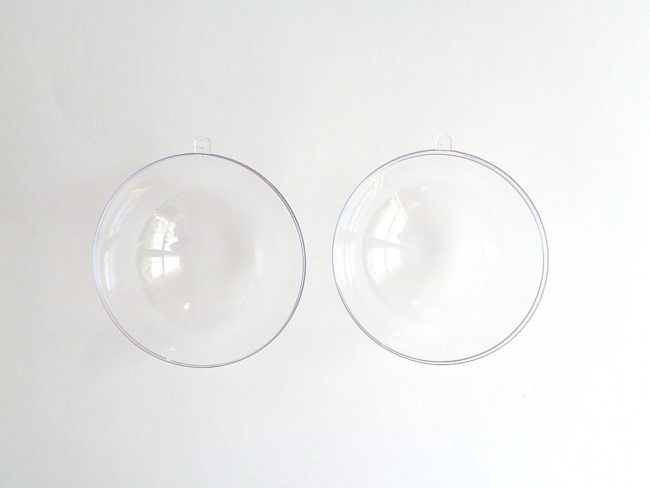
Step 1: Take apart the two sides of your clear ornament ball, and clean out both halves. (The reason why we are doing this is to make sure that there is no dust or small particles in your ornament.)
If you are using another type of clear ornament ball, simply take off the top and run it under some water to clean out the inside. But using the type of ball that separates into two halves is best as it lets you put larger items inside the ball.

Step 2: Fill up your ornament with buttons, sequins, seed beads and whatever else floats your boat! In the ornament above, I used the following: “Christmas” Button Bonanza, “Holly” 3D Buttons, “Sugarplum” 3D Buttons (I used the candy canes from the pack), and the 28 Lilac Lane ”Winter Wonderland” Embellishment Bottle.
When doing this step, I recommend filling up only one side of the ornament ball. Filling up only one side of the ornament will make snapping the two halves of the ornament back together much easier.
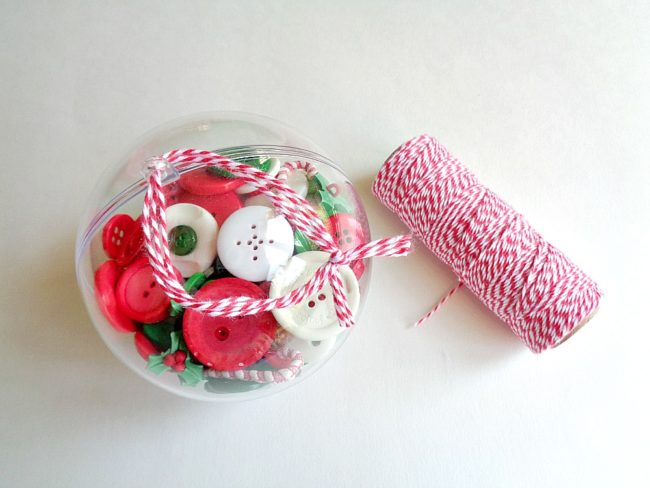
Step 3: Once your ornament has been filled, gently snap the two halves back together. Then tie on a string or ribbon to the top of the ornament.
Once you are happy with how your ornament looks, you are ready to hang it on the tree!
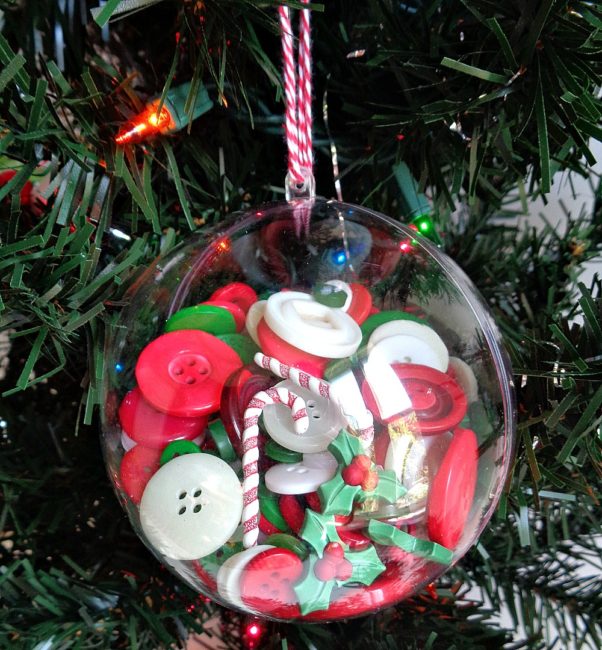
These button filled ornaments were so easy to make and were so much fun to put together! Creating this project actually got me really excited for Christmas!
While creating this project, I started thinking about how these ornaments would make great gifts for co-workers, family, or friends. If this is something that you are considering, then you could personalize these ornaments even more by adding buttons related to that person’s career or hobby. For example (like shown in the last photo above), if you are giving this ornament to a nurse, you can mix in some buttons from Buttons Galore and More’s “Doctor Doctor” button set.
If you made these Button Filled Ornaments, what color or style of buttons would you use?
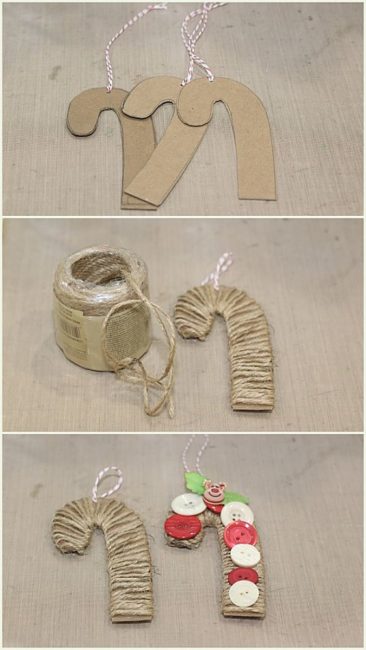
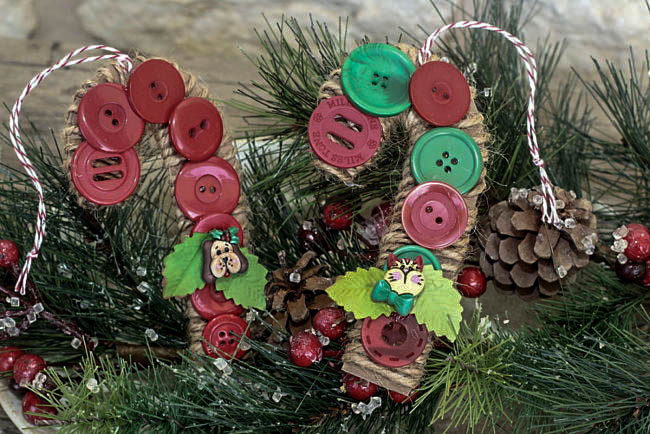
Hi, it’s Connie here with the Buttons Galore & More design team. We are celebrating Christmas in July, with handcrafted ornament ideas to create with the family. Looking for a DIY Christmas ornament that is easy for little hands to make? These DIY candy cane ornaments with big red, green and white buttons are easy for little hands to pick up and glue down.
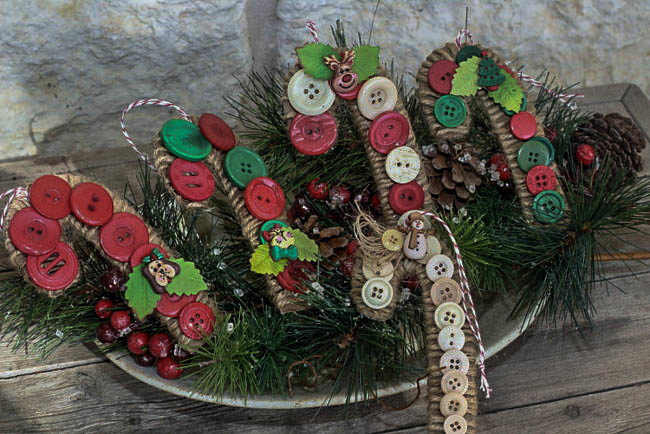
These DIY Christmas ornaments are fast and are very kid friendly to create!
 Instructions:
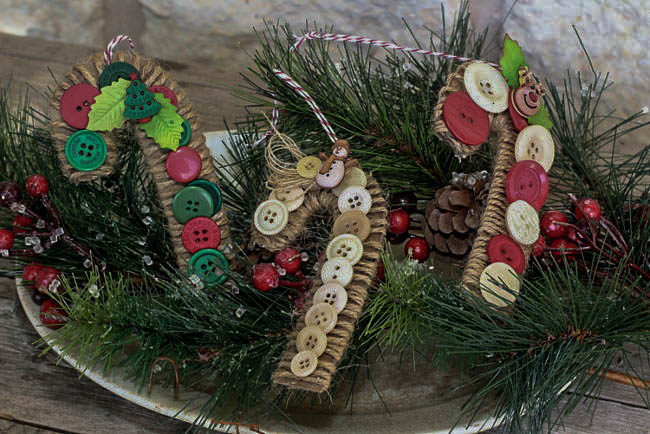 The candy canes are wrapped with jute loosely. Once the big buttons are adhered the jute is nice and secure.
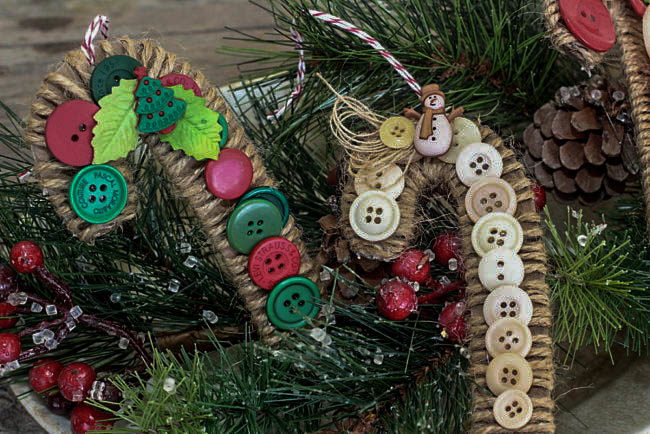 You may be familiar with our color mixes of flat buttons, but did you know that Buttons Galore & More also makes the cutest 3D buttons? Today, I’m using some called the Holiday Fun collection, that include snowmen, Christmas trees, stars, deer, and a cat and dog, just to name a few. They are so fun, just like their name! I snipped the shanks off and added these cute “Holiday Fun” buttons to the candy cane ornaments. Paper holly leaves are tucked in behind the “Holiday Fun” buttons.
These ornaments are great for gift exchanges and teacher gifts. Decorating a gift bag is another way to use these candy cane ornaments!
 I’m looking forward to adding these handcrafted candy cane ornaments to my little Christmas tree this year, mixed with some real candy canes. That is sure to make everyone happy!
Supply list:
Thanks for stopping by~
Connie Mercer/DT Member
July has come and that means we are half-way to Christmas! Even though the heat index is out of this world, it’s never too early to start working on Christmas crafts, ornaments and decor. I’ve got an easy button Christmas ornament craft that is simple for even the most beginner seamstress to do. All you need are a few easy-to-find supplies and a cozy spot to sew, and you are ready. This is a super craft for children learning to sew also.
Here’s what you need:
Put your cotton fabric scraps inside the hoop and gather up your buttons and sewing supplies.
You can attack this little project a couple of different ways, by planning ahead or by winging it! I prefer to go ahead and lay out all the buttons ahead of time, so I have an idea of how many I will need. Or you can just choose the buttons you want as you go. Either way works!
No matter how you decide to proceed, you do need to sew down the center row first. For the smaller hoop, it works best to make a center line with 4-5 buttons of equal sizes. For the larger hoop, it’s fun to mix and match and make it look a little zig-zag. Use one strand of a corresponding embroidery floss color and sew each button down with at least 2-3 stitches. After you have your center row stitched down, it’s time to start filling in the top and bottom of the hoop.
To finish, cut your white fabric about one inch from the outside of the hoop and hot glue it to the inside of the hoop back. Then you can hide all your stitches by cutting out a piece of scrapbook paper and gluing it to the edge of the hoop back. Use the ribbon from the embellishment kit for hanging your ornament, and find a fun place to display your new ornaments!
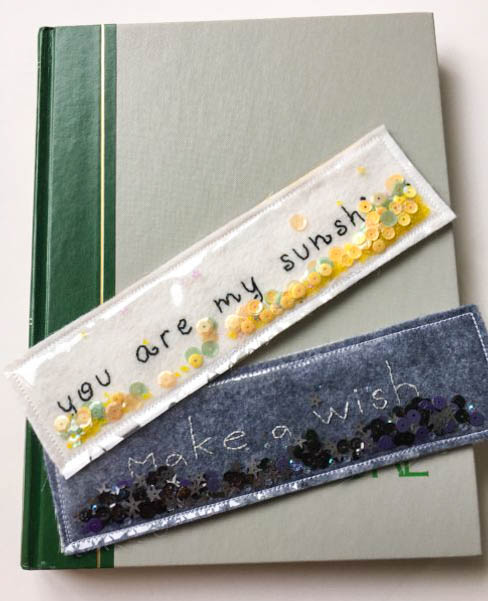
Aimee here with a great beginner sewing project for adults and children! These sequin filled bookmarks make a perfect little gift for all the book-lovers in your life.
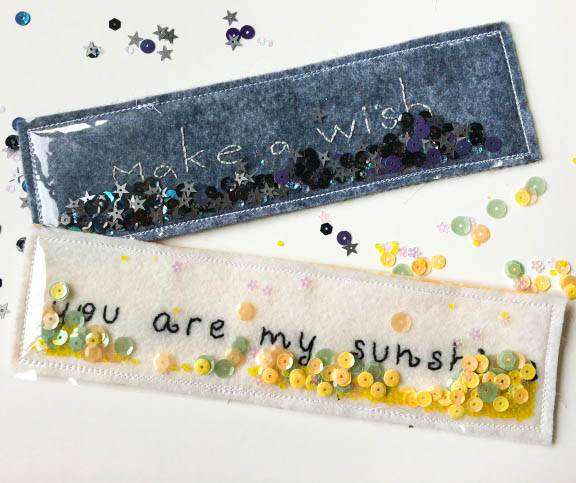 Here’s what you need to make your own sequin filled bookmarks:
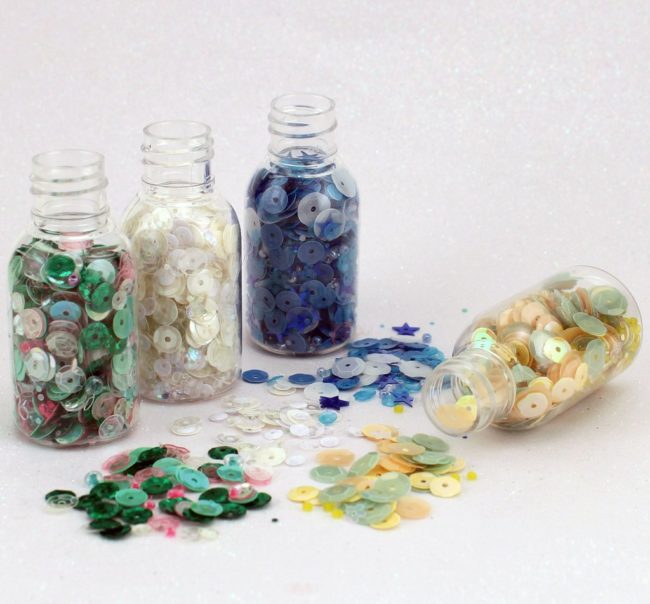
This project uses two gorgeous new 28 Lilac Lane sequin products: the “Haunted House” Premium Sequin Tin, and the yet-to-be-officially-announced“Pastel Dreams” Sequin & Bead Quartet that is pictured above. (Yes, you are getting a sneak peek of a new product today!)
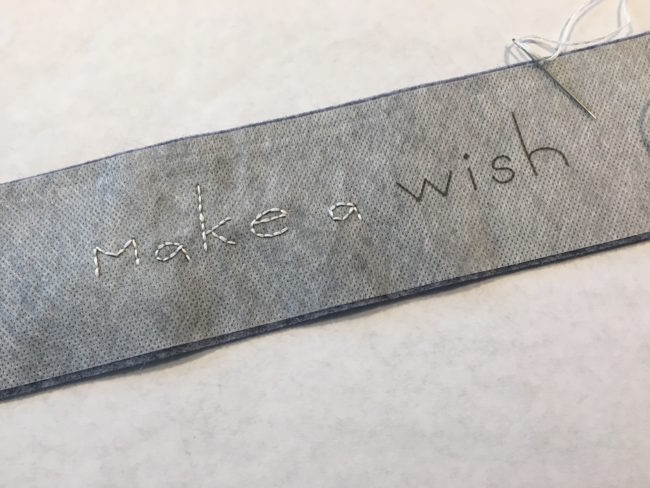
To begin, take your pattern (linked in the supply list) and using the dotted lines cut out your felt, clear vinyl and fabric pieces. To transfer the embroidery design to the felt I recommend using Fabri-Solvy. To use, print out the pattern following the directions on the package, tear off the backing and place your rectangle on top of the corresponding felt. Using three strands of embroidery floss; stitch through the felt and the Fabri-Solvy along the text with a back stitch.
Don’t want to embroider? You can easily adapt this project by printing the pattern onto cardstock. Cut out your bookmark along the dotted lines and continue the following directions. Most sewing machines will sew just fine through paper.

Now it’s time to put your sequin filled bookmark together. Lay your three pieces in this order: fabric (wrong side facing up), your felt embroidered piece (or your piece of printed card stock) and your piece of clear vinyl. Use a Wonder Clip or even a small clothespin to hold the layers together, and take it to your sewing machine.
Start your seam on the bottom long edge, making sure that you are leaving a hole to put the sequins and beads in. Stitch all along the three edges about 1/4 inch from the edge. (Tip: if you have a walking foot, this is a great project for using it.) Fill up your bookmark with the sequins and beads. I used roughly one tablespoon. Take it back to your machine and sew up the hole and all the way around the sides again. (This sewing could also been done by hand but it will be more time consuming, of course.)
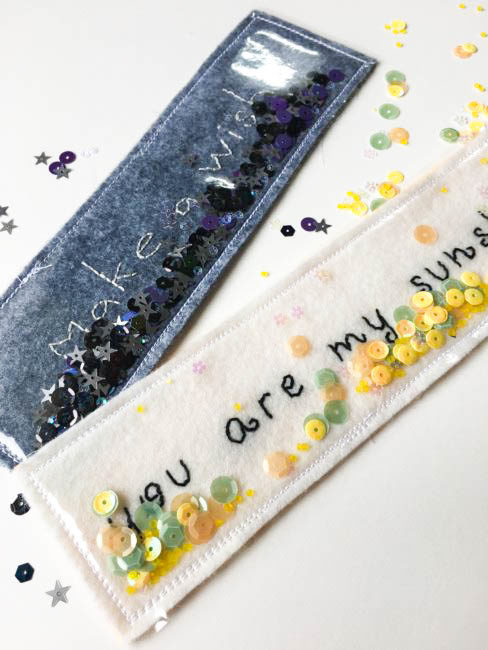
There you go! Your sweet sequin filled bookmark is all ready for your next great summer read. (These also make fun back to school teacher gifts, too, if you change up the sentiment on them!)
Hi, Connie here with Buttons Galore & More design team! This fun handcrafted sequin flag project is great to create with children, and will look fabulous in your home or on your front door, tucked into a grapevine wreath.
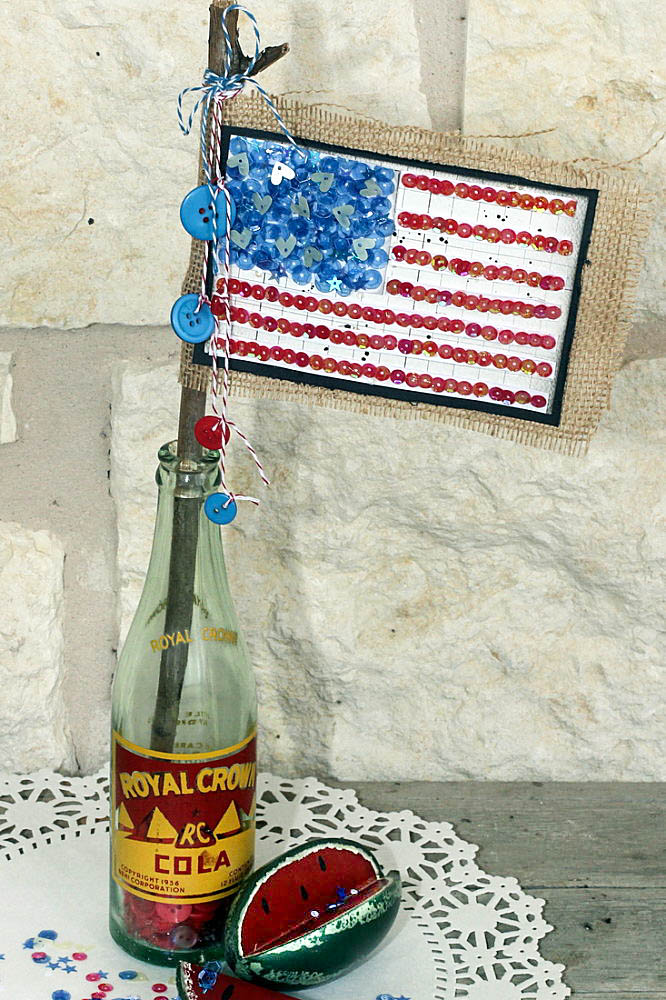
This sequin flag project was created using the brand new Bon Voyage Sequin tin by 28 Lilac Lane. Take a closer look at this beautiful new premium sequin tin!
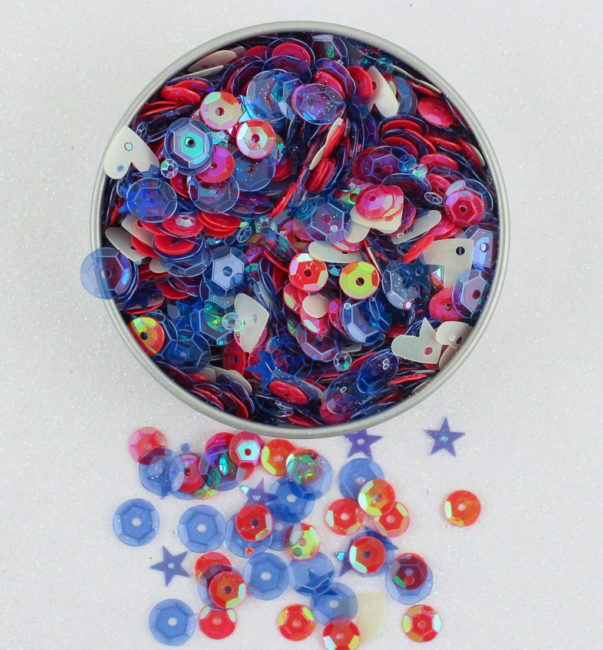
The inspiration for this sequin flag project came from the Bon Voyage sequin tin itself. It is full of red, white and blue sequins along with white hearts and blue stars – so lush! Can’t you see a child waving this flag at a celebration parade and then saving it, by tucking it away in a grapevine wreath for the front door? Or displaying it in a vintage soda bottle? Either way this flag will be a super cute was to display your patriotism!
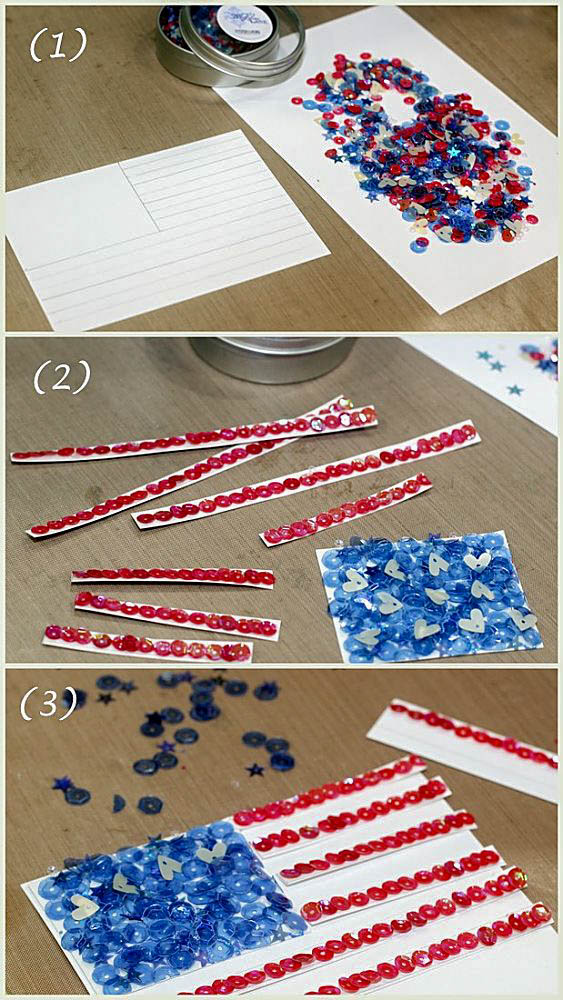
(1) Sketch out a USA flag on white cardstock that is about 4″ X 6″. Separate the large blue sequins, using a toothpick, from the sequin tin.
(2) Glue the large blue sequins on the flag with clear drying glue. Add the white hearts to the blue section and let dry. Do the same with the small red sequins, placing them in strips. Let dry.
(3) Cut the blue section out, and then the red strips. Piece them on a 4″ X 6″ piece of white cardstock or grid paper. When it is dry, mat the flag on black cardstock.
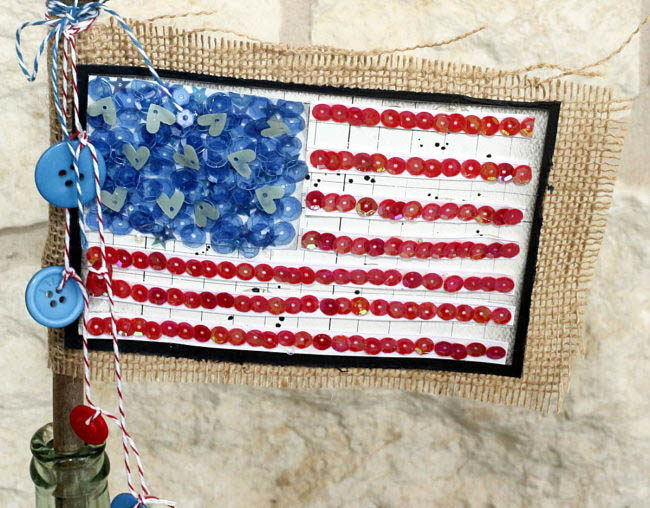
(4) Glue the flag to a piece of burlap ( 5″ X 7″ ) and then glue a stick to the reverse side. (I used a stick from my yard.)
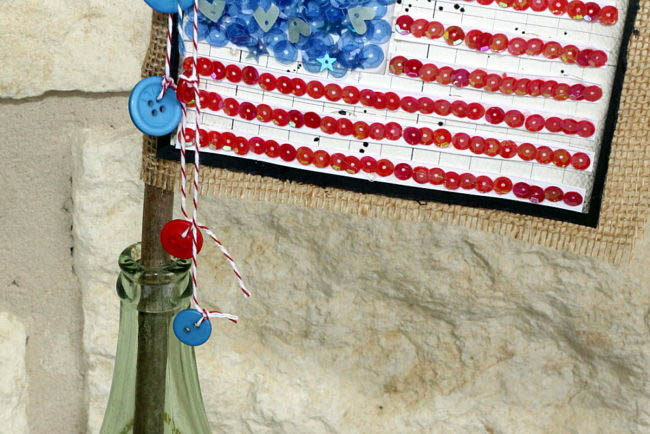
(5) Use twine and buttons, create streamers for the side of the flag. Tie these to the top of the stick.
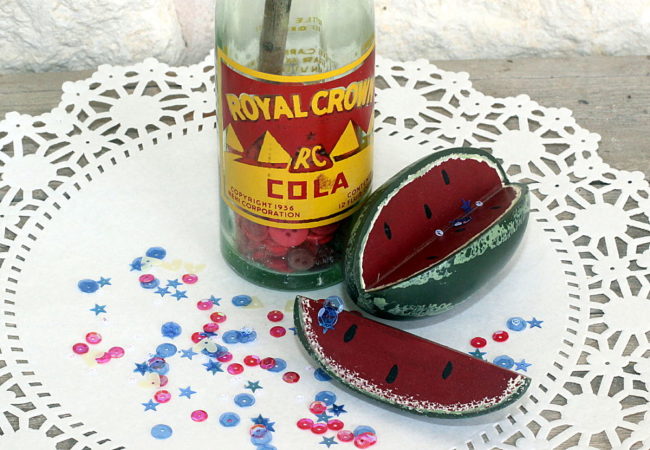 I chose the vintage soda bottle to display my flag instead of a grapevine wreath. The soda bottle is full of red buttons to hold the stick in place. I really love the finished look!
Thanks for stopping by~
Connie Mercer/DT Member
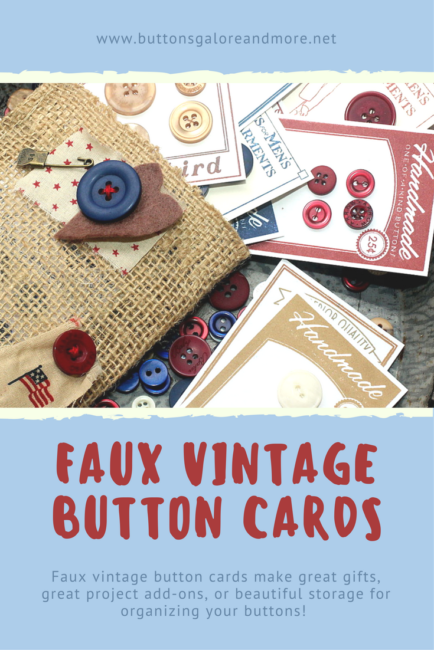
Hi! It’s Connie here with my first post for the Buttons Galore & More design team! Today I am sharing a fun project using Button Galores’ “Patriot” Button Tote to make faux vintage button cards and a tote to store them.
Inspired by the navy, natural, deep red and white buttons in the tote, I created a button bag along with hand stamped faux vintage button cards. The buttons are beautiful and look gorgeous on the button cards! This isn’t a difficult project, just a project that requires time. The end result is a beautiful button bag, full of custom assembled faux vintage button cards, that can be used as a decorative way to store buttons, add them to projects, or for giving the buttons as gifts to fellow crafters.
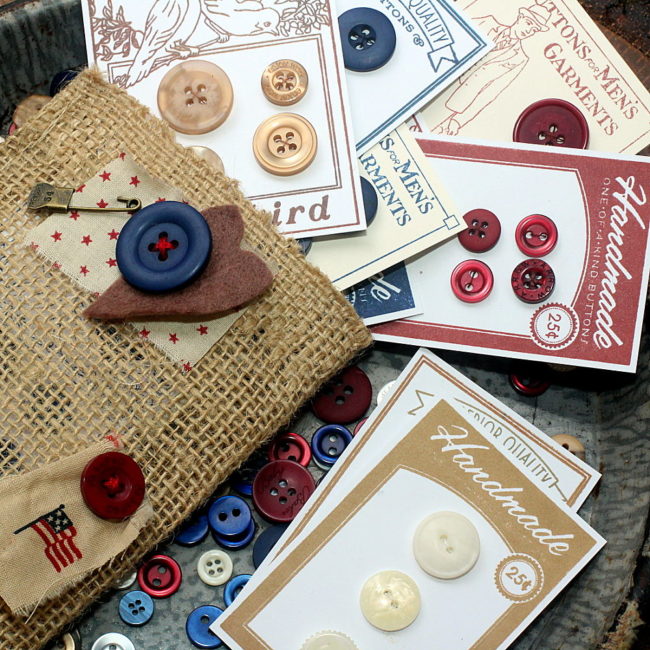
Supplies needed:
The button cards were created using a button card stamp and beautiful buttons from Buttons Galore. Each card has a sample of the buttons that are included in the Patriot Button Tote. No card is alike, as each is created with different buttons. Each button is hand sewn on the card, for easy access and future use. They are created just like the faux vintage button cards (well almost)! Button cards come in all sizes – these are about 2.5″ X 3″. There is plenty of room to mix large buttons with small or medium buttons on the button cards. These are a great gift idea for a crafter or sewist who is crazy about buttons!
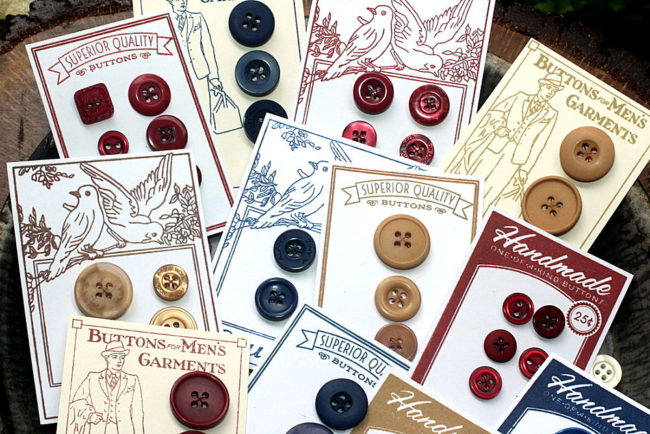
The burlap bag is stitched with some scraps of material and more buttons, after all, it is a button bag. The embellishment layers are hand stitched, to the burlap, on the front of the button bag. The button cards fit nicely in the bag. and will work as a great storage idea or a gift that will be loved.

The finished project, with the faux vintage button cards inside the button bag, is all ready to tuck in a gift bag for a special gift!
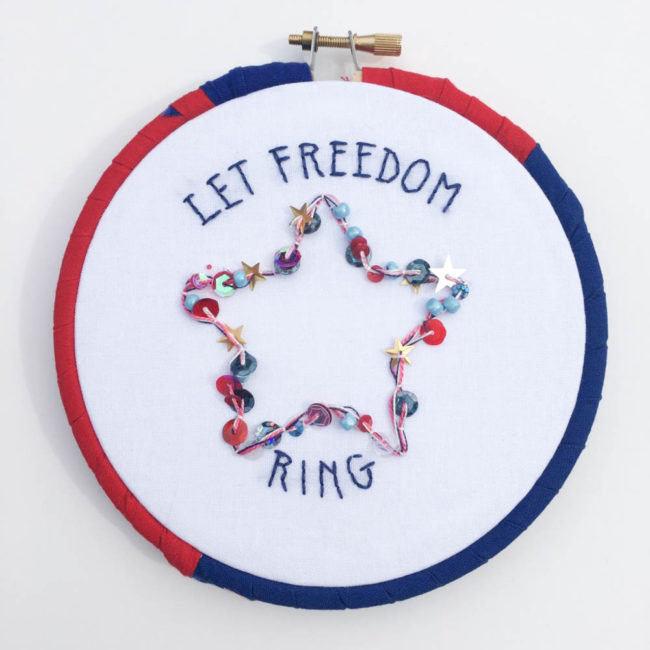
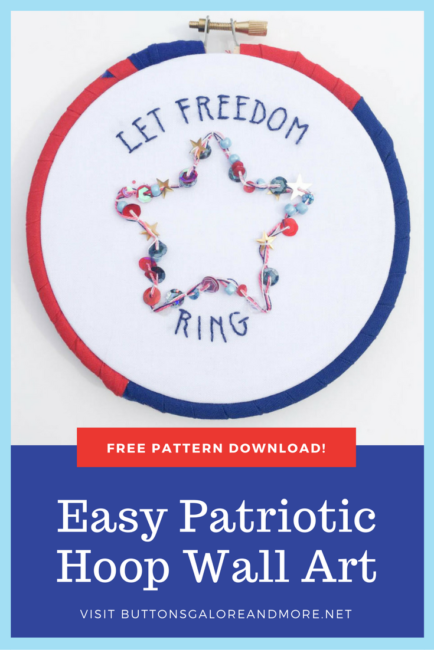
Summer time is kicking up into full gear and July 4th will be here before you know it! Red, white and blue and backyard BBQs are on the horizon! This little patriotic hoop is a great way to get started on those patriotic decorations.
Supplies Needed:
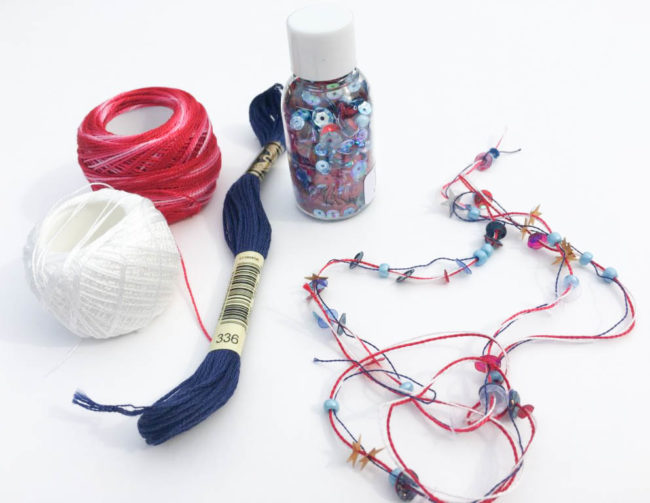
This patriotic hoop features the Stars & Stripes sequin & bead mix that is a mix of larger blue beads, small and large sequins, star sequins and smaller seed beads and glitter. I used the blue beads and sequins to create beaded thread for my hoop.
To get started: take about a yard of each thread; using only 1 strand of the blue divisible floss. Thread all three colored threads onto your needle and pick up different bits of the sequin and beads and push them along down your thread. Continue until you have distributed the beads and sequins sporadically along the thread. They don’t need to be in any sort of order, just make sure that they are spaced out well.
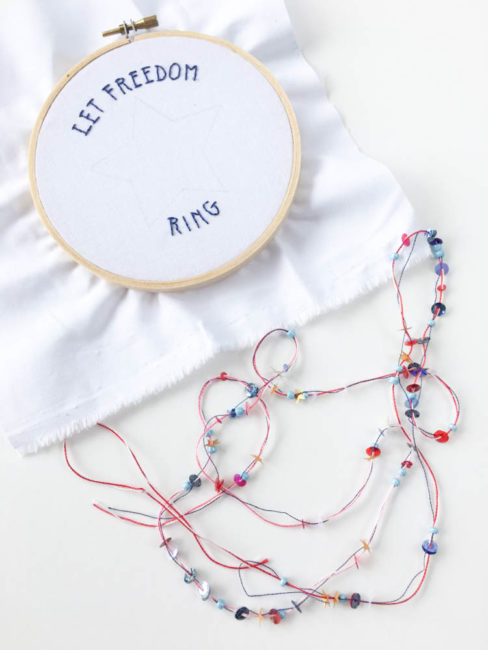
Find a sunny spot and transfer your embroidery pattern onto your fabric. Use three strands of the blue embroidery floss (#336) and backstitch the text. Lay your beaded thread on one of the star lines and with the white cotton perle, use a couching stitch to sew down the beaded thread along the outline of the star. Couch your beaded thread around the star two times.
To finish your hoop you can wrap it in a mix of blue and red fabrics, as I did, or you could even paint the hoop. Set your finished piece inside the hoop, trim your fabric about one inch from the edge of the hoop and hot glue it to the inside.
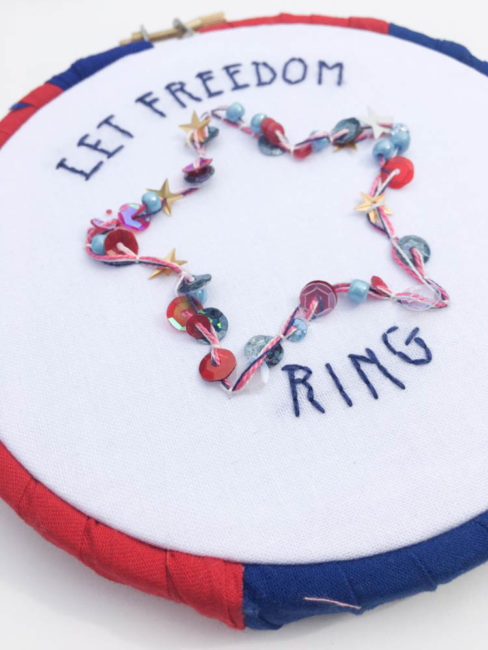
This patriotic hoop wall art is a great project for even a beginner at embroidery. It’s one that looks like it took hours and advanced skills, but is made up of basic embroidery stitches and techniques and can easily be finished in an afternoon!
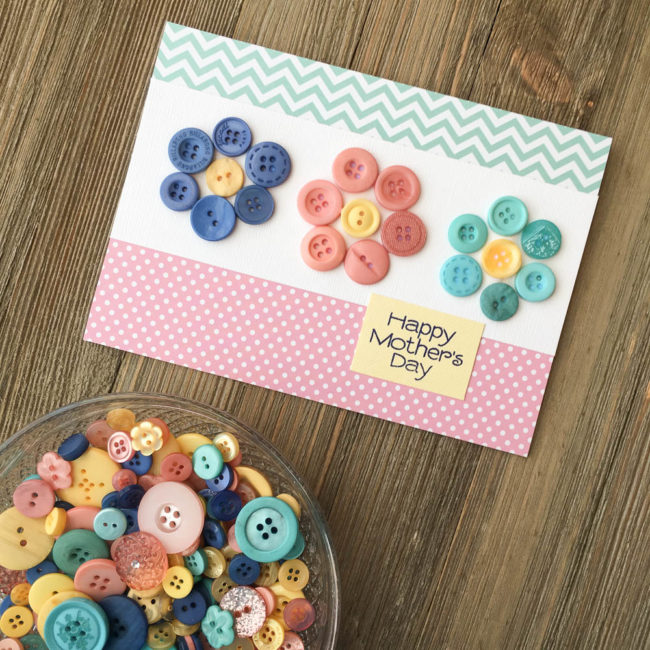
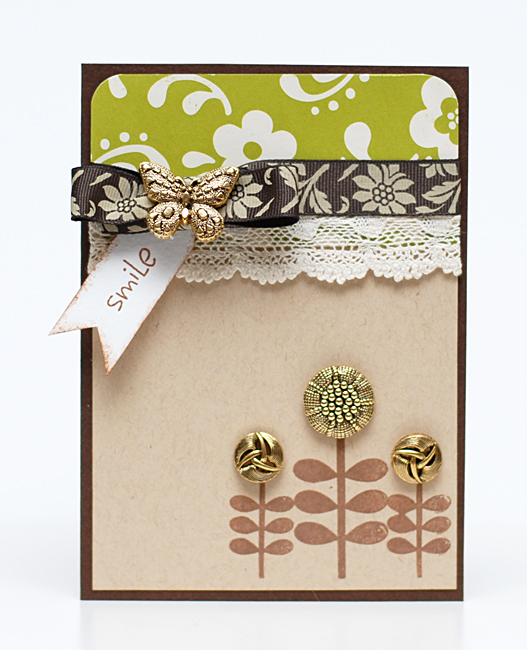
The spring flowers are in bloom, and Mother’s Day will be here before you know it! So why not combine the two to make a pretty button flower card for mom for Mother’s Day?
Supplies Needed:
This 5″ by 7″ button flower card is super simple to make but so cute! And it’s so easy to make that it would make a great kids’ project for the holiday.
To start this card project, cut a 10″ by 7″ piece of white cardstock and fold in half along the 10″ edge to create your card base.
Cut a 2.5″ by 7″ piece of cardstock from the scraps of the white sheet. Select buttons from the Glam Girl Button Bonanza to make your button flowers with. Then, using the PPA Matte Adhesive, adhere the buttons in place using dots of glue. Set the flower strip aside to dry.
While the glue dries, cut a 1.5″ by 7″ strip of paper for the top of the card, and a 2″ by 7″ strip of paper for the bottom. Adhere them in place along the top and bottom of the card front.
Stamp “Happy Mother’s Day” on a yellow cardstock scrap in dark blue ink. Trim the cardstock to slightly larger in size than the sentiment.
After the glue on the flowers is dry, adhere the flower strip in place across the card front. Glue the sentiment block down on the right side of the card front, over the seam between the flower strip and the bottom patterned paper.
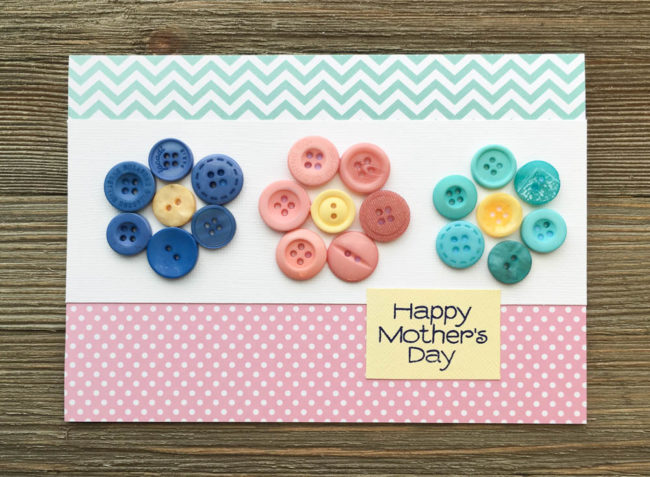
This card design is so versatile! Just by changing the sentiment, the design could also be used for a thank you card, or for a birthday, or for a variety of other occasions. It’s a classic that you can use over and over! To create a smaller card, just use smaller sizes of buttons. With theGlam Girl Button Bonanza bag, you can make this beautiful button flower card over and over!
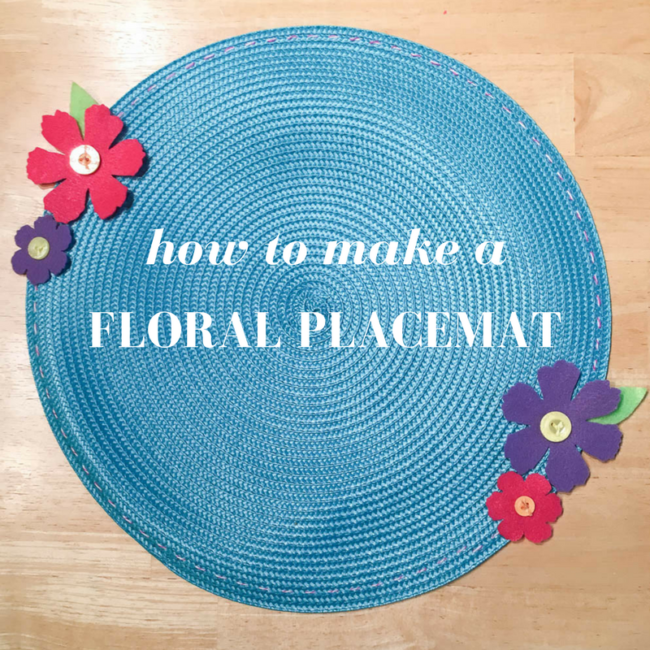
Spring means lots of special occasions! This flower placemat design is great for Easter, Mother’s Day, or for making a birthday girl feel extra special – and it’s super quick and easy to make!
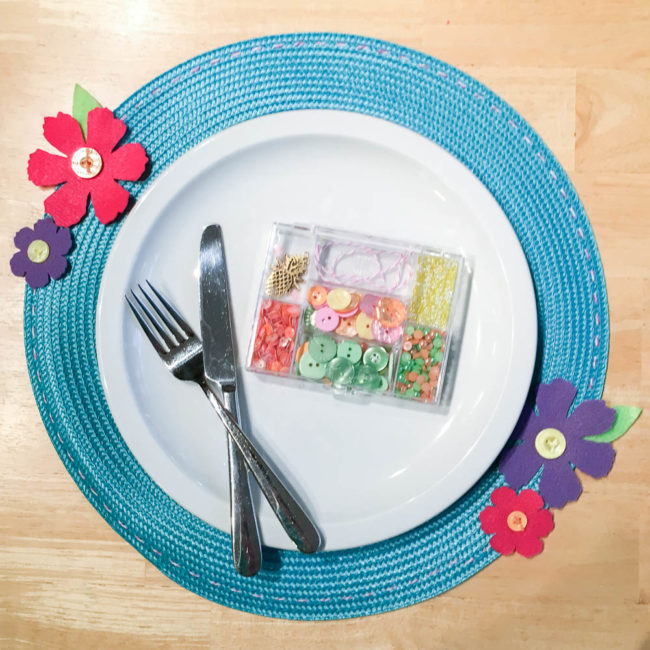
This flower placemat uses supplies from the popular 28 Lilac Lane “Tropical Twist” kit. You can tell that it’s definitely one of my favorites since many of the supplies are used from it! Although the name of this kit, and its themed charms, are definitely summer themed, this project is a great reminder to look at your kits not just as themes but as color palettes as well.
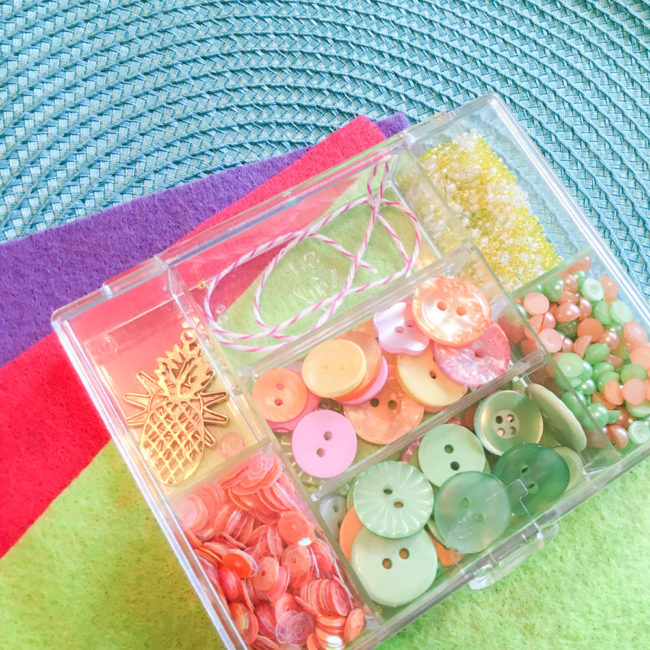
Supplies Needed:
To start making this flower placemat, get out a large needle. Thread it with the baker’s twine from the Tropical Twist kit, and stitch around the outside edge of the placemat. (I recommend doing this is several short lengths to avoid abusing your twine and for efficiency.) To make more than one placemat, use embroidery floss for this step as the kit only contains enough twine for one.
Next, use a flower die to cut flowers out of felt (or hand cut your own). Use scissors to hand cut the leaves.
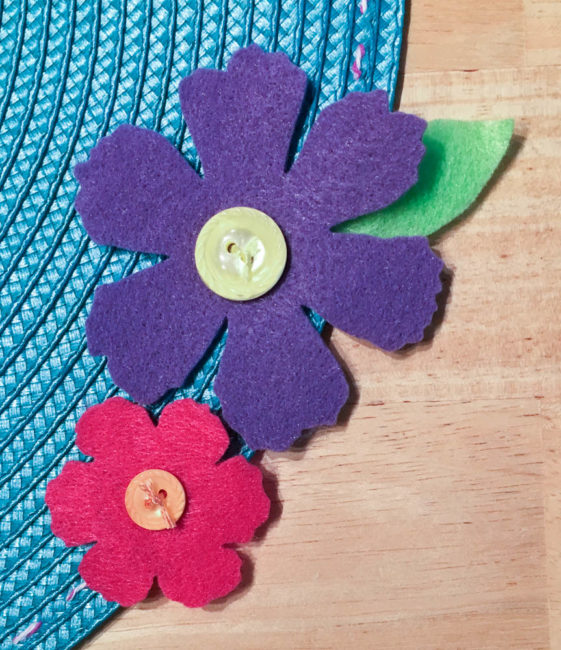
Position your flowers, and select buttons from the Tropical Twist kit to create their centers. Stitch through both the buttons and the flowers with a needle and embroidery floss to attach the flowers to the placemat. Use a needle and thread that matches the felt to stitch the leaves in place under the edges of the flowers as well.

Whether the occasion is Easter, Mother’s Day, or something else…this flower placemat will definitely brighten your spring table!
Springtime is a great time for crafting! There’s so many occasions to craft for, and spring flowers are so inspiring. Here’s a sampling of some of our favorite past spring and Easter crafts from the blog to get you inspired!
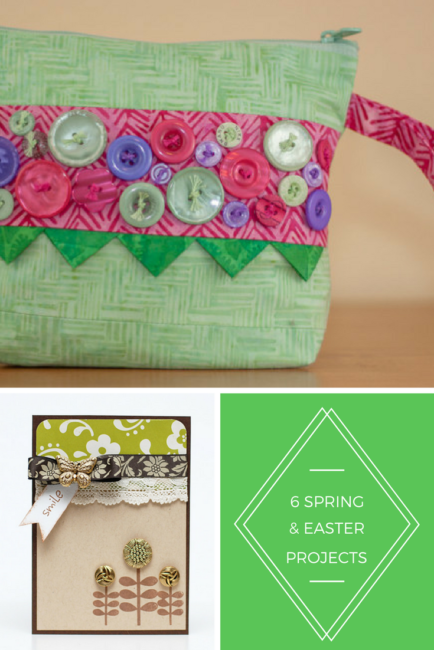
This mixed media tote by designer Melony Bradley uses dyed cotton strips to make flowers and then finishes them off with buttons! There’s no mistakes, or right or wrong way to create this beautiful spring garden that will earn compliments wherever you take it.
If you are looking for a way to bring some bright spring flowers inside without bringing sneezy pollen with them, try some buttons! These pretty little blooms by designer Jen Goode are easy to make and oh-so-springy!
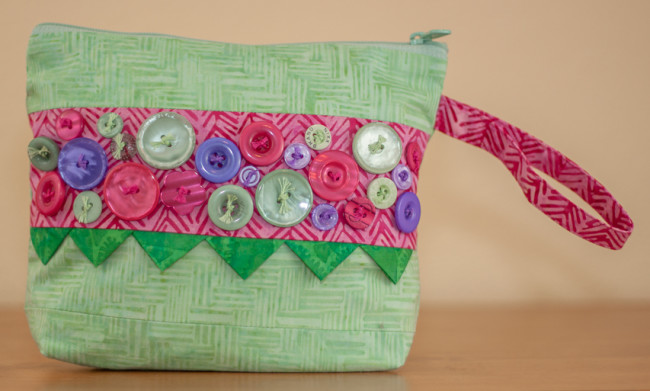
You can travel in style with your essentials in the button embellished zip tote that I made from bright spring colors using a simple pattern. It also makes for a wonderful gift for mom or a new graduate!
Spring flowers don’t have to mean bright colors…designer Keri Lee Sereika used gold buttons to create flowers for a beautiful vintage look on this handmade card! Send this card for a touch of more formal cheer on any occasion.

Speaking of vintage, do you have vintage (or vintage looking) Easter figurines that you would like to keep little fingers off of? Designer Dana Gustafson’s mason jar displays filled with buttons in the bottom are the perfect way to display them beautifully and safely!
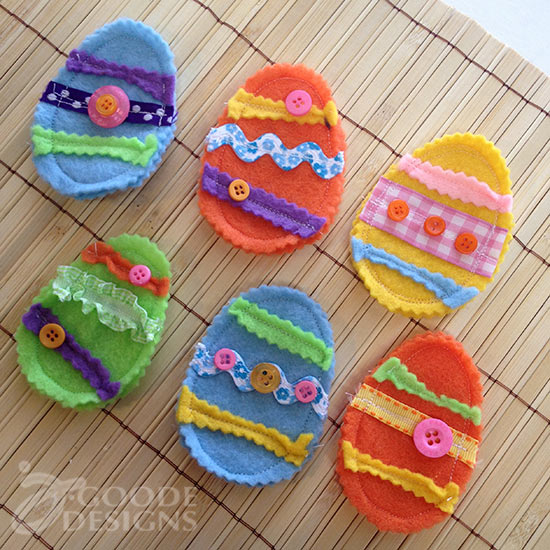
Designer Jen Goode has a fun way to decorate those special Easter treats – and these felt Easter treat pouches are so easy to make that the kids can help, too. Use them year after year and make a new family tradition!
Whatever spring craft that you choose, don’t forget to stock up on all of your favorite colors of buttons before you start!
Embellishing an Easter egg card is a great reason to get out your 28 Lilac Lane embellishments and go crazy with color. The flat back pearls and buttons in our embellishment bottles will have your Easter egg card shining like a jewel!
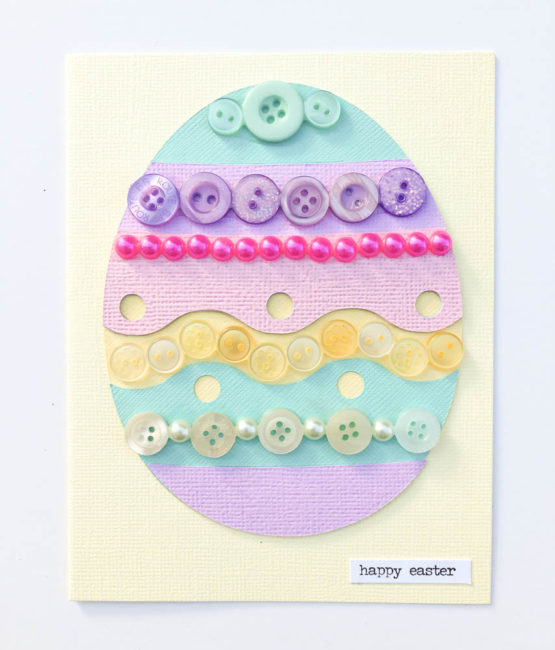
supplies needed:
One of the great things about having a large selection of 28 Lilac Lane embellishment bottles on hand is the ability to mix and match them to create colorful projects like this Easter egg card! By combining small amounts from five different bottles, I was able to create a jeweled effect on my Easter egg that allows the egg to stand as the entire design of the card.
Locate a decorative Easter egg design in your die cut machine software. (If your machine doesn’t have this particular design, it will certainly have a similar design that can be embellished in the same manner. Look for a design with lots of straight lines or wide spaces that can be filled with embellishments.)
Cut the Easter egg design out of cardstock scraps, and assemble with glue. Then glue the assembled Easter egg to the front of a coordinating blank card base.
Using 28 Lilac Lane embellishments that coordinate with each area of the Easter egg card design, add rows of embellishments to the card with a liquid adhesive like PPA Matte.
Finish the card with a sentiment sticker in the lower right.
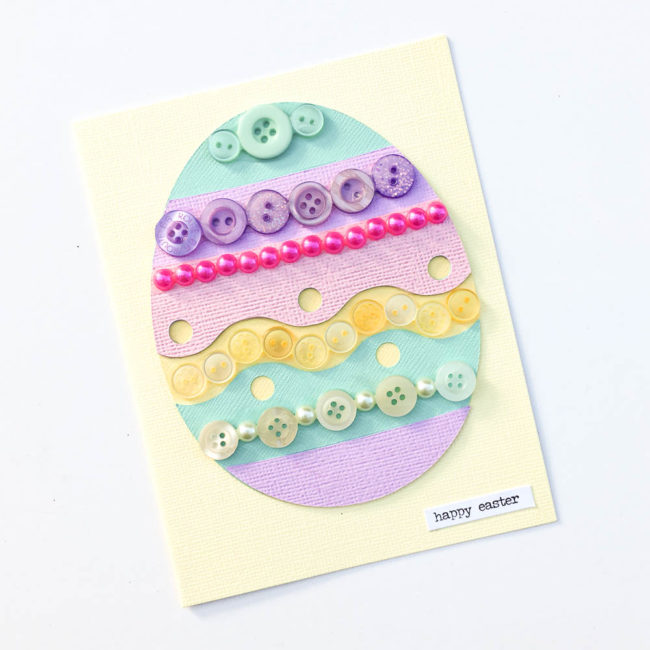
This is a great project for kids and grown-ups to do together….make the cards and then let the kids do the decorating!
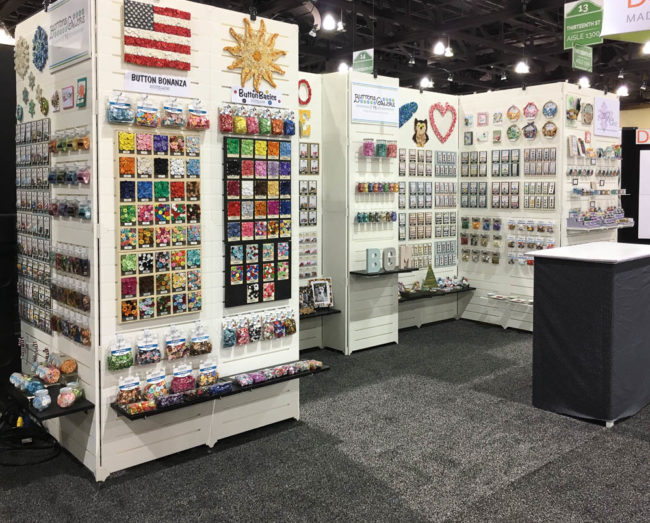
One of our favorite things about attending shows is the chance for our staff and some talented craft designers to show off in our booth the beautiful range of possibility that can be created with Buttons Galore products. So today, for those who weren’t at Creativation, we’re going to give you a peek into our booth at the show to see all of the gorgeous inspiration we shared!
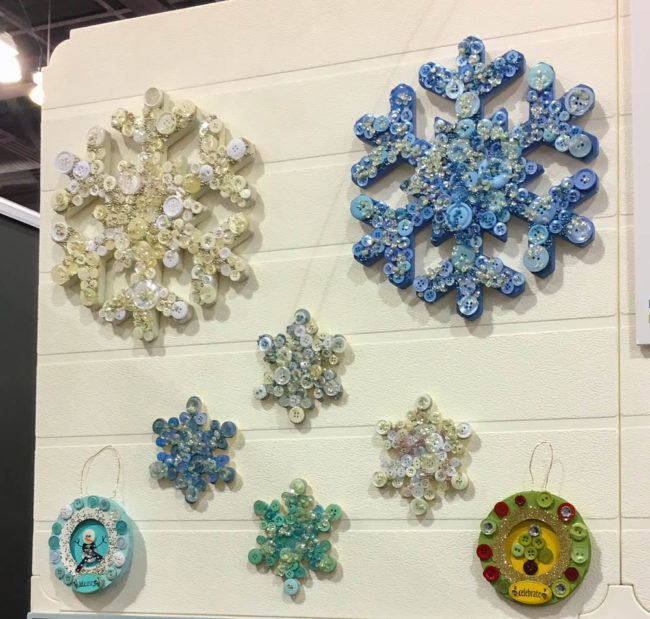
It may have been warm in Arizona, but inside the convention center it was snowing a blizzard in our booth! These snowflakes, created by Buttons Galore staff, show that buttons make gorgeous snowflakes of all sizes from tree ornaments to wall art.
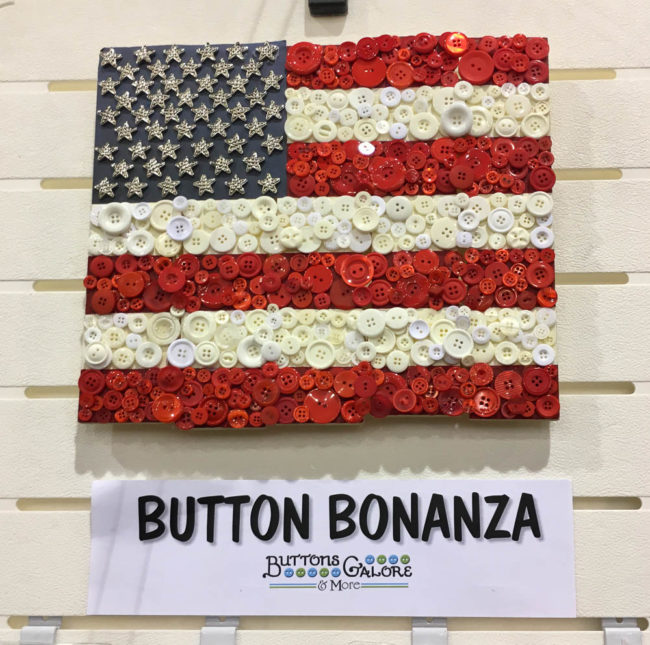
This American flag wall art piece, also created by Buttons Galore staff, combines our bulk buttons with our 3D decorative star buttons. It’s perfect for holiday decor for occasions like July 4th, or leave it up all year round for a patriotic touch of homespun decor.
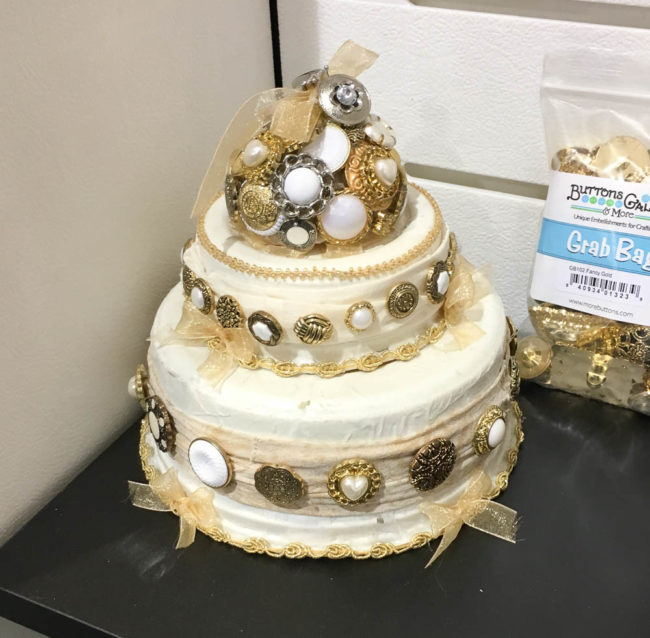
Speaking of special occasions, our decorative button grab bags are a beautiful and affordable option for creating decor for events like showers and weddings! This button cake, created by designer Jen Goode, is perfect for decorating a buffet table.
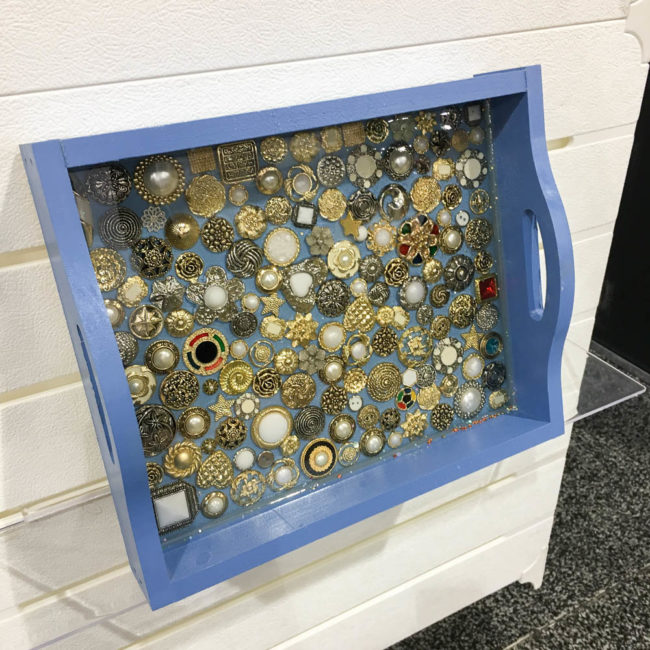
Love to entertain? Our decorative 3D buttons will make your tea time, cocktail hour, or coffee break oh so elegant! This tray project, by Buttons Galore staff, is quick and easy, too!
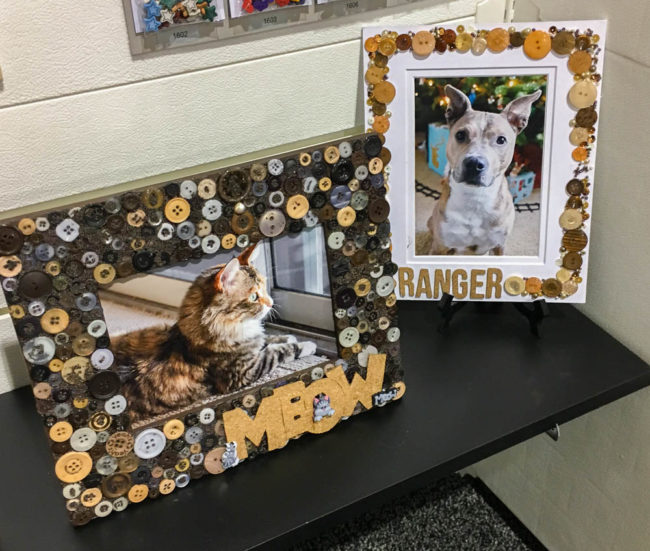
And let’s not forget our furry family members! Our booth went to the cats and dogs with these fun frames to display your favorite picture of your pet cat (by me) or dog (by 28 Lilac Lane designer May Flaum). For the instructions for the cat frame, click here.
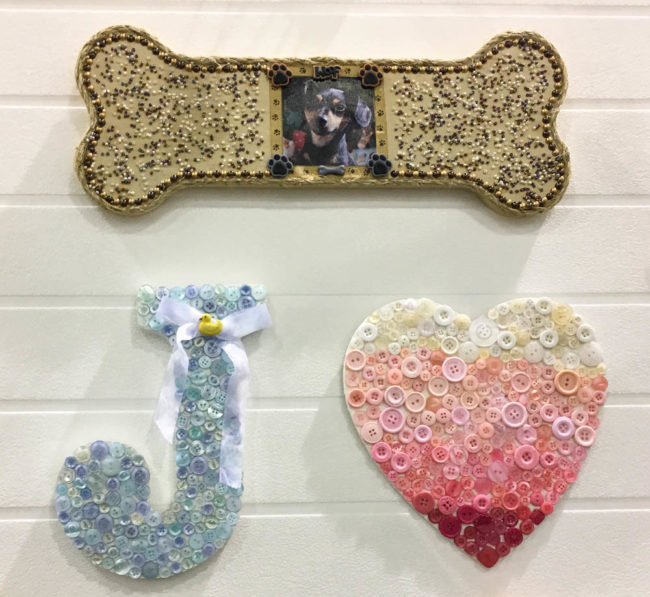
If you’d rather hang your pet photo on the wall, try out this dog bone wall art project by Buttons Galore staff!
This button monogram is easy to make and perfect for a nursery or kids room! (Click here for instructions.) Or create an ombre heart wall art piece for someone special to remember you by. (Click here for instructions.)
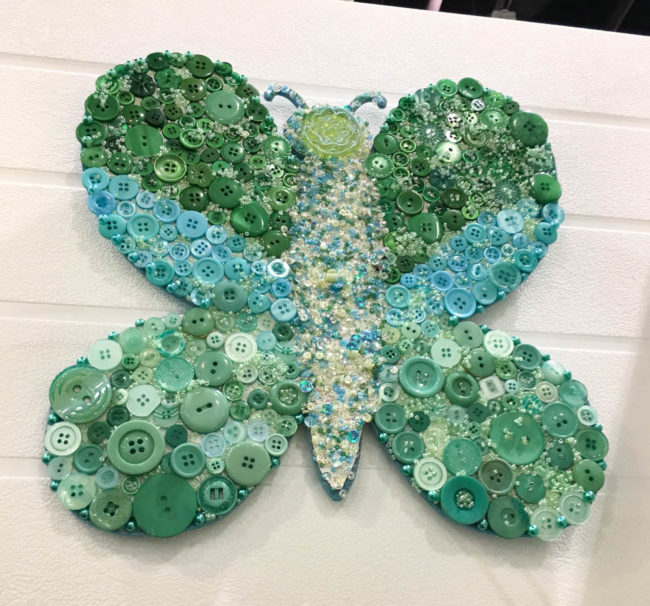
It seems everyone is in love with butterflies this season, and we agree! Our wall art butterfly, made by Buttons Galore staff, is great decor for a kid’s or teen’s room.
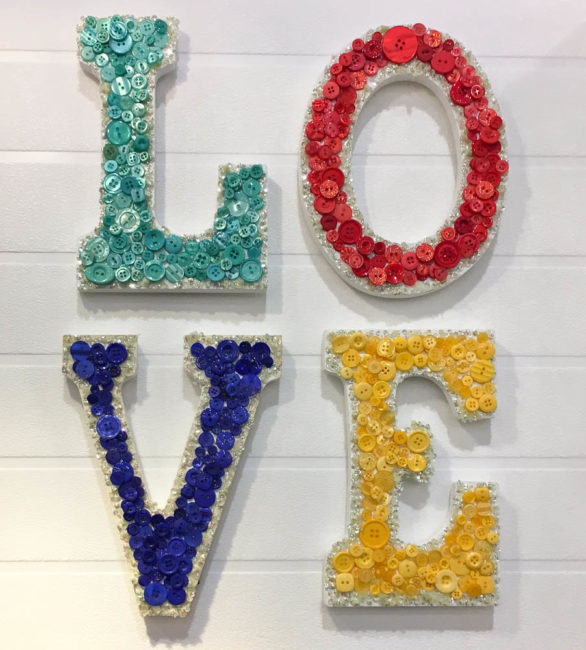
Text as wall art is very hot in home decor, and our staff decided to pay tribute to the greatest sentiment of all: love! These easy to make letters could be made in any colors to coordinate with the decor of a nursery or a shabby chic home decor.
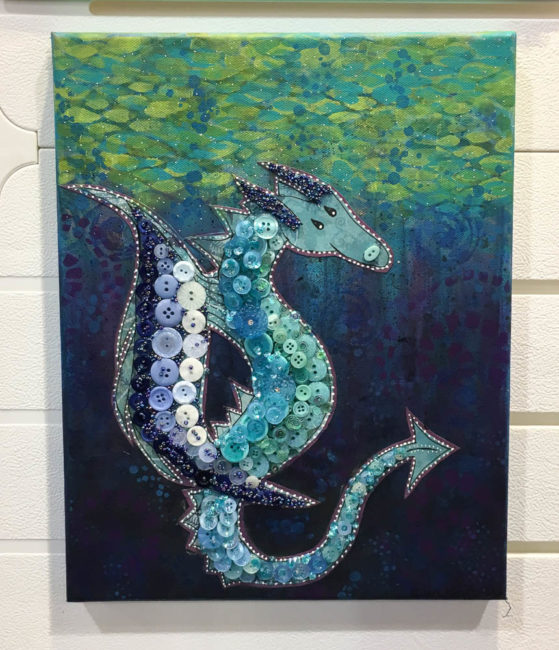
Our buttons are fabulous for working in mixed media, and designer Maura Hibbitts took them to canvas for us! This whimsical sea monster is full of texture and color!
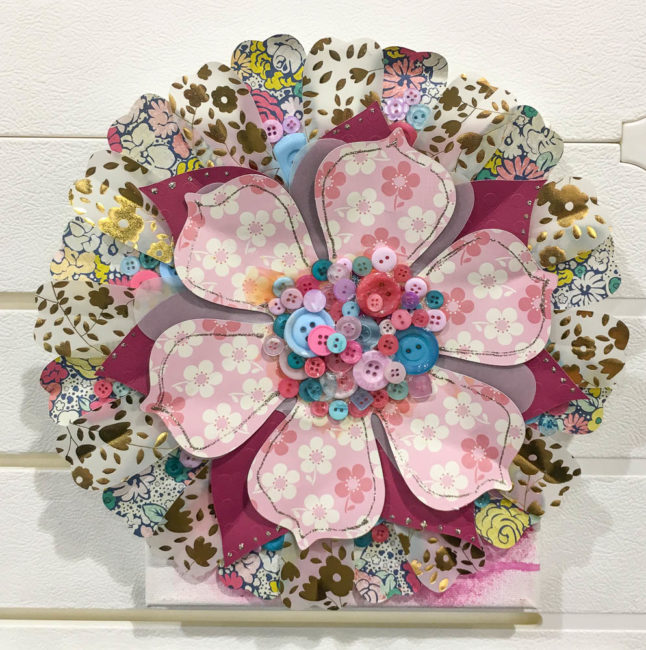
Last but not least, 28 Lilac Lane designer May Flaum shared her take on the 3D paper flower trend in our booth. Accented with a center of buttons, this flower will bring color and pattern to your walls or your party decor!
We hope that you enjoyed this peek at some of our booth projects from Creativation! Thanks to all of you who visited to see them in person!
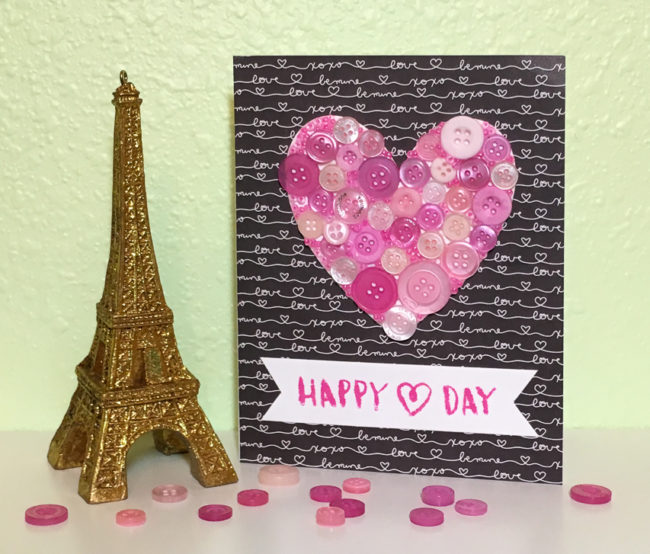
I love making button collages on small items – you may remember my button collage apple on my teacher tag awhile back. Collaged die cuts are a fun and simple way to add some dimension and detail to a design. Today, I’m falling in love with a button collage heart for Valentine’s day!
Supplies Needed:
I started this card by cutting my 3″ high heart out of plain white cardstock on my Cricut Explore using the software’s basic shape tool. Then, starting in the upper right corner, I gradually spread white liquid adhesive (PPA Matte) over small areas and filled them in with the Strawberry Cheesecake buttons.
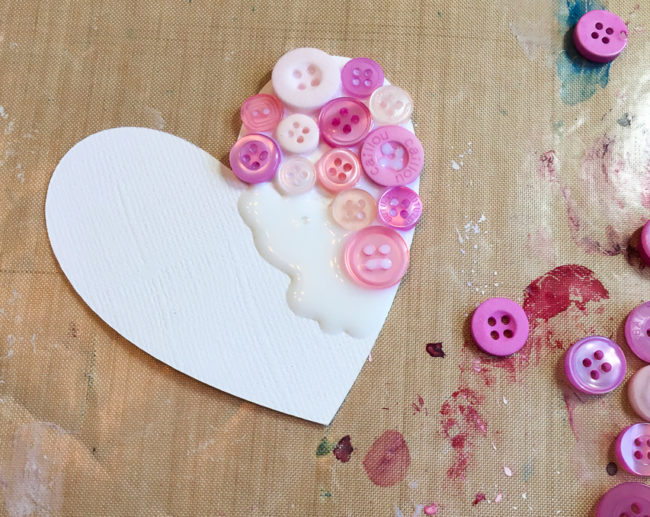
While my glue was drying on my button collage heart, I cut my background paper to the size of the card front and adhered it. Then I stamped the sentiment on a strip of the white cardstock. Once the ink was dry, I snipped the ends to create a banner look for the sentiment strip.
The button collage had white spaces showing through between the buttons after the glue was dry. To fill these in, I dropped spots of glue on them, and pushed seed beads from the Pretty Princess bottle down into them. Some of the white edges also weren’t entirely covered, so I ran beads of glue along those areas and pressed beads into there as well.
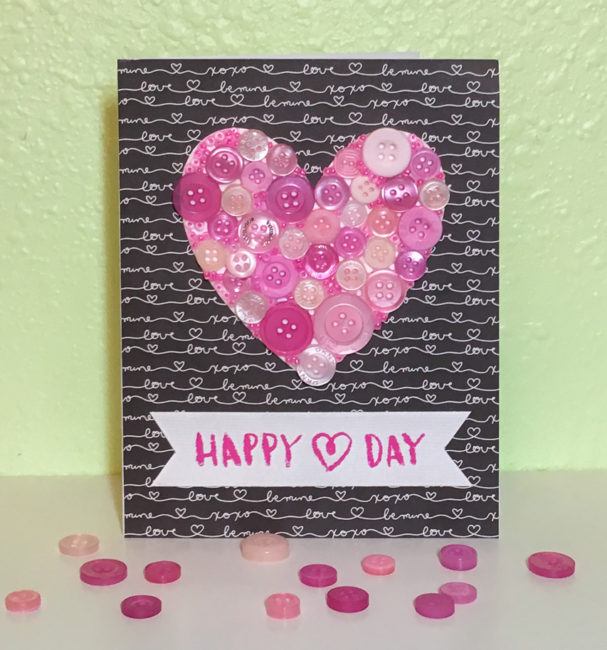
After all the glue was dry, I simply attached my heart and my sentiment strip to the front of the card. This simple design has a lot of “pop” from the color contrast and the button detail. I can’t wait to share it with someone special!
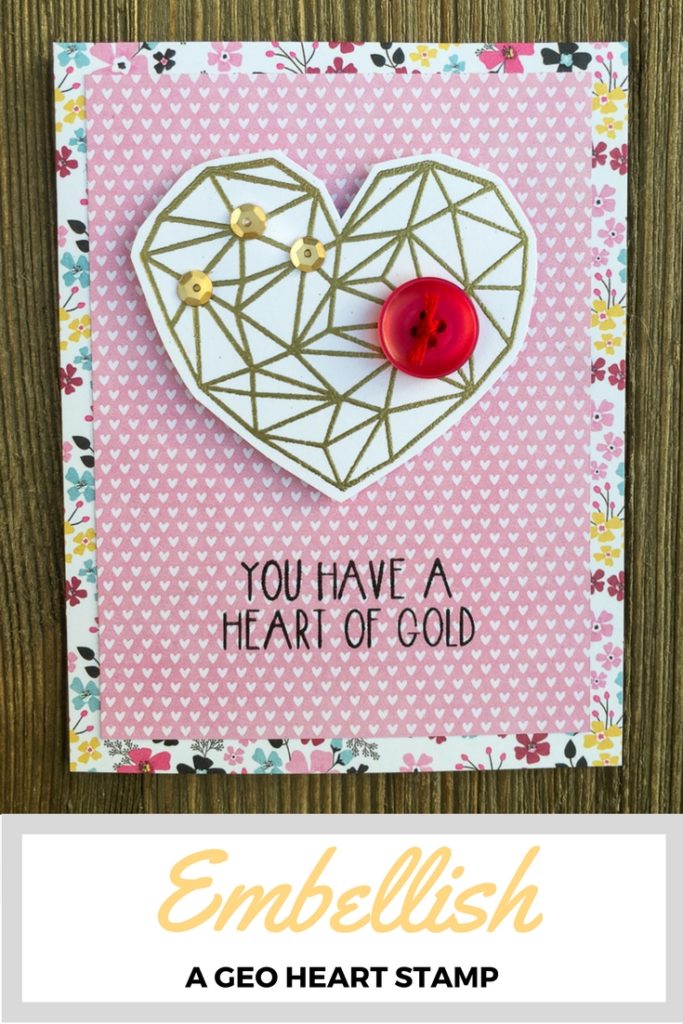
Are you feeling the love? It’s time to start thinking Valentine’s Day! This geo heart valentine card is trendy, fun, and best of all…oh so easy to make!

Supplies:
Valentine’s Day is the perfect time to use our 28 Lilac Lane embellishment kit called “Love Story”. This kit is packed full of beautiful rose and white buttons and seed beads, along with gold and rose pearls and sequins. For those extra-special greetings, there’s even a few charms and some ribbon, too. Love Story will make loads of valentines for the ones you love!
One of my favorite things to do with my 28 Lilac Lane embellishments is to customize my stamps with them. I love stamps, but it can be difficult to create different looks using the same image repeatedly to get value out of it. Adding buttons, sequins, pearls, or beads over an image can help make it look like an entirely new design!
This clean and simple geo heart valentine card design is very quick and easy to make with only a few basic supplies. It truly is only a ten minute project! Or it can turn into twenty minutes if your cat gets up on your work table and knocks over your entire container of beautiful “Love Story” embellishments so you have to clean them up. (Let’s not talk about how I know that…)
To make this geo heart valentine card, I cut my floral paper to the size of the card front. Then I glued it down to the blank white card base. I cut the heart print paper a half inch smaller each direction, and glued it centered on top of the floral paper. To finish preparing the card base, I stamped the sentiment in black ink on the center of the bottom of the card front.
I stamped the geo heart design on white paper with embossing ink, and then heat embossed it with gold embossing powder. I used fine pointed scissors to cut out the heart. Don’t worry if your hand cutting skills aren’t the best! Since this heart doesn’t have super smooth curves, it’s quite easy to hand cut.
To embellish the heart, I glued a few gold sequins at the intersections of lines in the geo heart. Then I chose a nice big rose button for a big pop of color, and then tied it off with matching embroidery floss before gluing it down. Finally, I used foam dot adhesive to attach the heart to the card front.
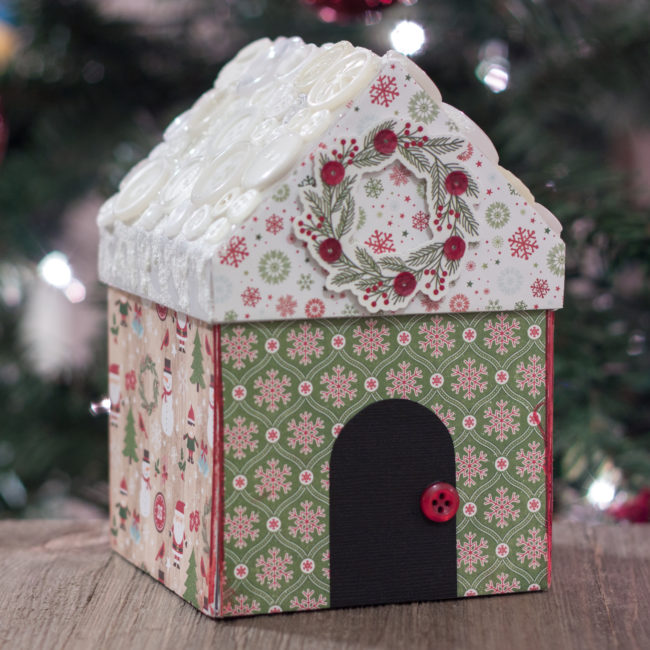
It’s a gift box…it’s Christmas decor…it’s a Christmas album! Today, we are closing out our Christmas projects with a Christmas Village Gift Box that is beautiful holiday decor while it hides a few secrets!
Supplies:
This project is based on an “explosion box” by DCWV. Take the lid off, and it opens up to hide a small gift inside and also show a few mini album pages!
All of the sides of the box are covered in fun patterned papers that were applied decoupage style with white glue. Once the glue dried, embellishments were added. The “door”was cut from black cardstock and glued on, along with a button handle. The wreath sticker had sequins added to it before it was attached with foam dot adhesive to give it depth. And on the rear, a sticker announces the house as a gingerbread bakery!
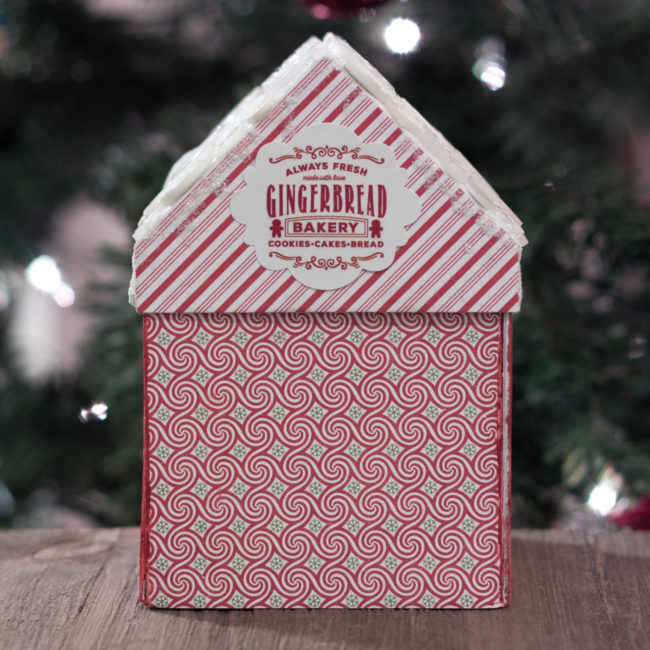
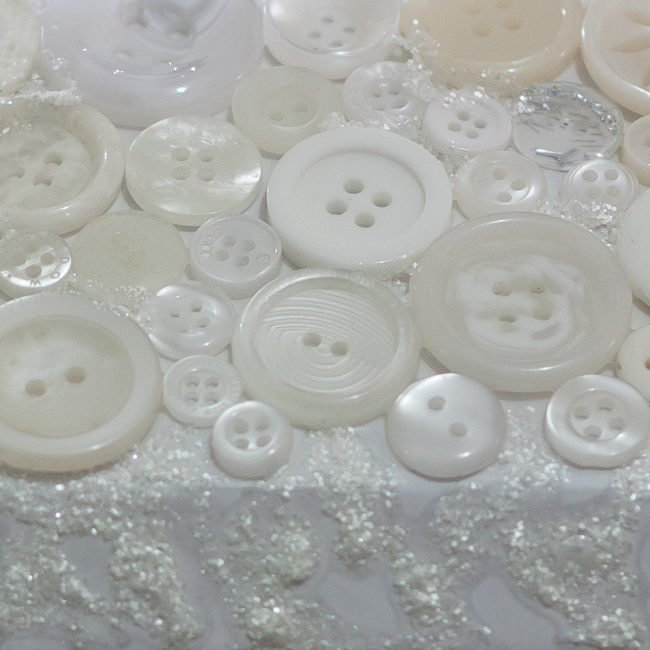
The roof top of my Christmas village gift box was left blank when the papers were decoupaged on the rest of the house. The blank white surface gives the appearance of snow, but was pretty boring. A collage of white buttons, interspersed with white glitter glue, gives the roof some fun texture! I used a combination of several of our most popular white and ivory button assortments to create my roof, but any one of them would work fine by itself.
I applied the buttons only to the two large surfaces of the roof, and then dripped the glitter glue like icicles down the sides onto the two small edges. I also dripped the glitter off the rear edge of the house. The great thing about this technique is that there is no “wrong” way to do it, since it is supposed to look messy and random.
This fun little Christmas village gift box with buttons up on the roof top will decorate your holidays long after it is opened! Have a happy holidays, everyone!

TExt
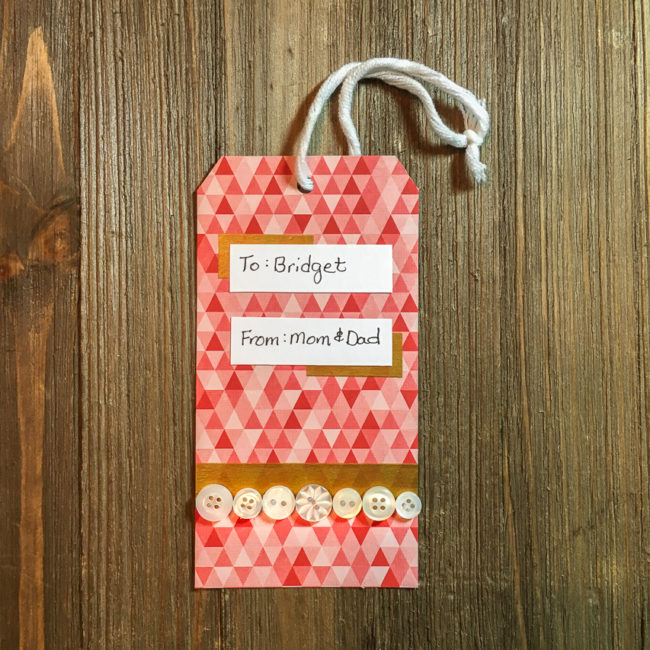
Think buttons aren’t a match for modern style? Our 28 Lilac Lane “Winter Wonderland” embellishment bottle, paired with washi tape, makes a quick and easy modern Christmas gift tag that will add sparkle and style to your special gift this Christmas!
Supplies:
To create the tag base, cut the 6×6 pad in half to create a 3×6 piece. Snip off two corners to create the top of the tag, and then use a hold punch to create the hole.
Lay a strip of the gold washi tape across across the tag about 2/3 of the way down from the top. Cut two more small strips and position them one to each side closer to the top.
Select buttons to create a row across the tag along the bottom of the washi tape. Adhere the buttons using white glue or a hot glue gun.
From the white cardstock, cut a 5/8″ strip. Write the to/from information for your gift on it, and then snip the pieces off of the strip. Adhere them using paper adhesive.
Cut a length of yarn. Loop it through the tag’s hole and tie it off to attach your gift.
This modern Christmas gift tag only takes a few minutes to make, but will definitely brighten up your Christmas wrapping for someone special!
Looking for an activity to entertain the kids this Christmas? Our felt Christmas tree ornament project is quick and easy, and perfect for kids of all ages! Better yet, it’s a great (and affordable) activity for doing with large groups for parties and class activities.
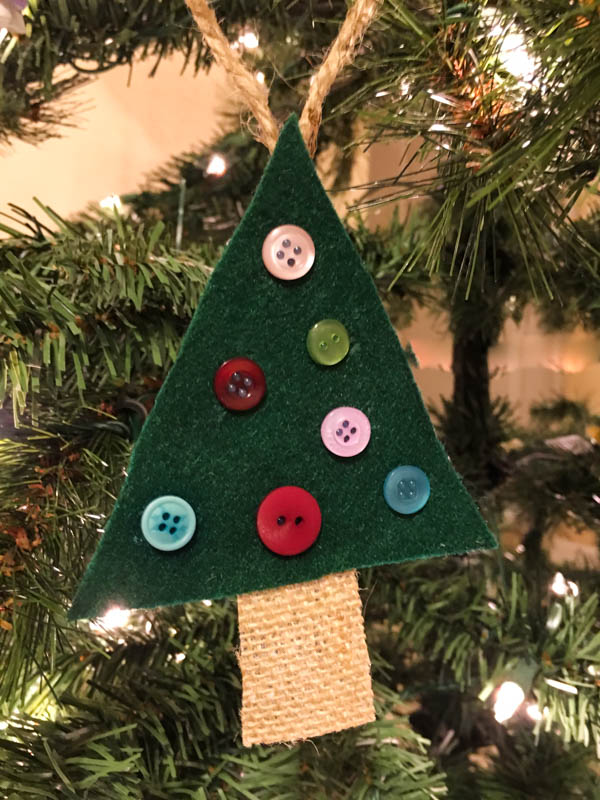
Supplies:
Any felt will work for this project, but I chose to use the heavier Eco-Fi Plus because it stands up better to the weight of the buttons than thinner felts and hangs better as a result.
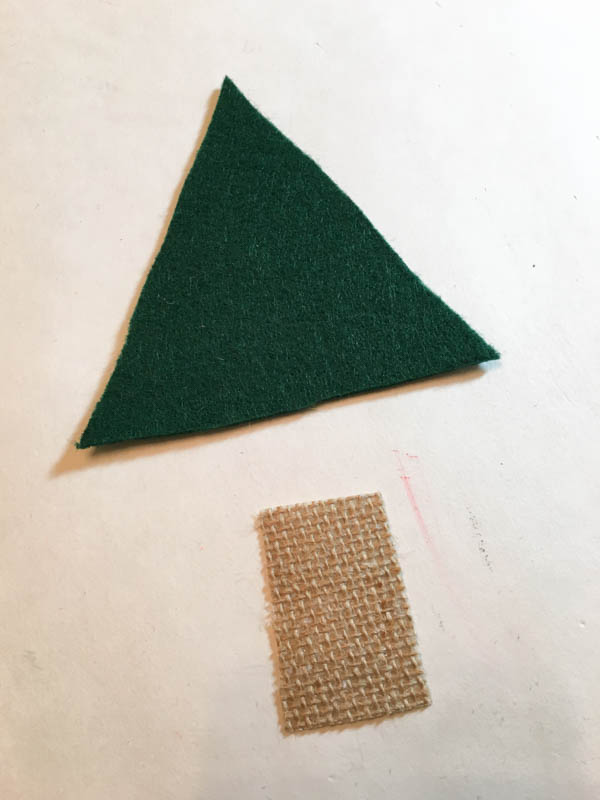
Constructing these tree ornaments are fast and simple. They are created from two simple shapes cut by hand from felt and/or burlap. Older children can draw and cut their own shapes, and the shapes can be pre-cut for younger children.
Assembling the tree parts (and adhering the buttons) can be done with hot glue or with a clear drying white glue, depending on the age of the kids making the ornaments. The hot glue will dry faster, if the ornaments need to be moved or hung quickly. Or, to make the project even more educational, practice some sewing skills and sew everything together!
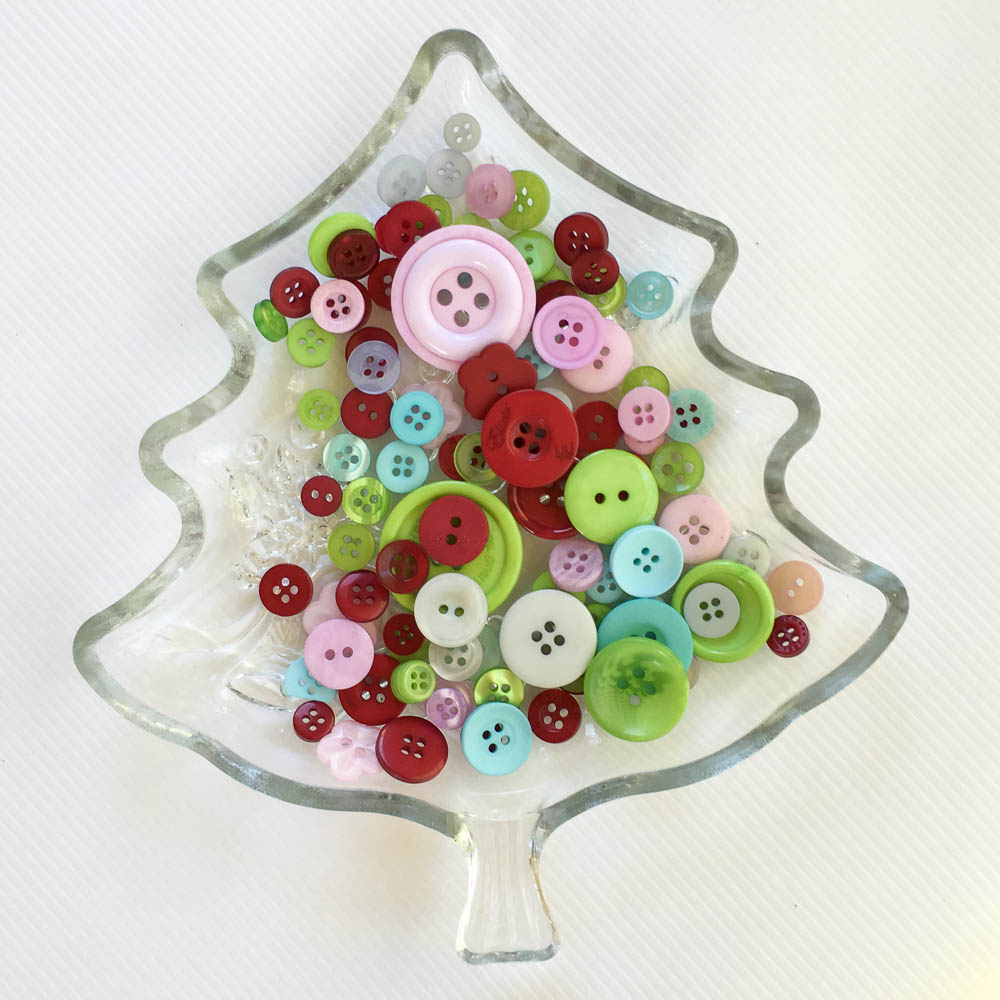
Choosing different buttons will make each kid’s felt Christmas tree ornament look unique! For a fun country Christmas look, I decorated my felt Christmas tree ornament with buttons from our new Button Bonanza called “The Merriest”.
To complete your ornament, it needs a hanger. I made a loop of twine and attached it to my ornament with hot glue. Ribbon or yarn could also be used.
This easy and fun felt Christmas tree ornament will provide fun for the whole family, and the kids will love creating their own personal design for it! These ornaments would also make beautiful custom gift tags (with the addition of an address label sticker on the back for writing on) for grandparents that can be saved and treasured for years to come.
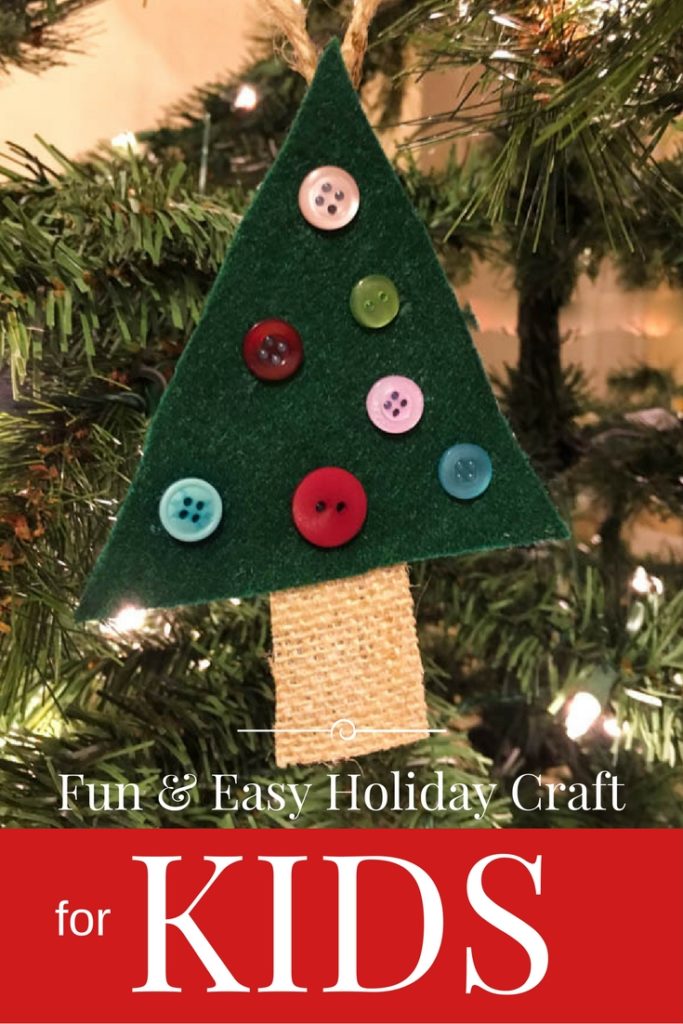
Are you going to button up your Christmas tree this year?
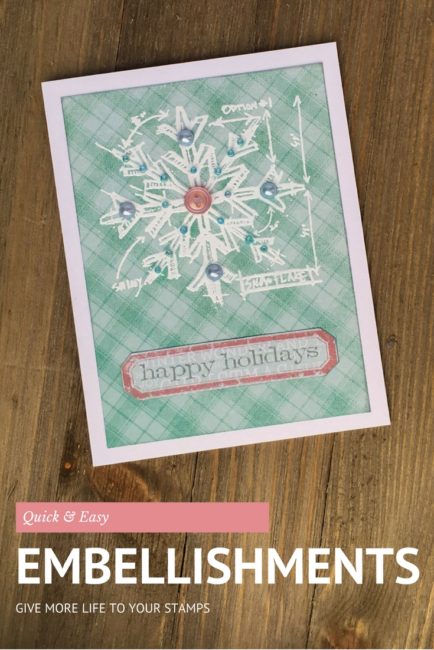
Stamps are a great investment because they are a tool that can be used over and over again. However, using them over and over again can quickly get boring…so how do you spice things up and put the fun back in your stamps again? 28 Lilac Lane has the answer!
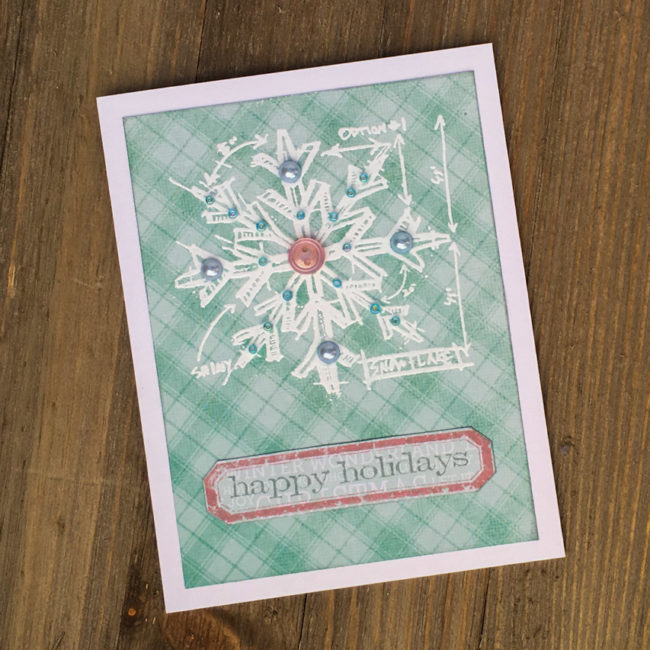
Supplies Needed:
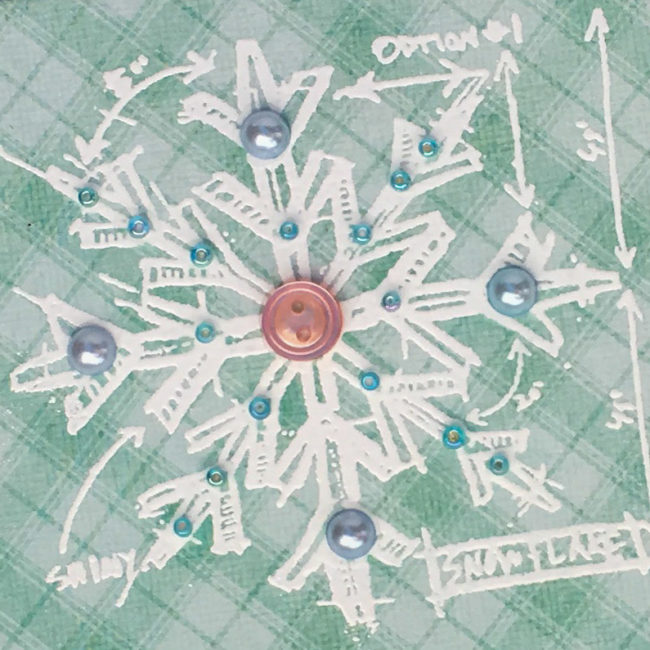
One of my favorite ways to make my old stamps look new again is to embellish them! And with the 28 Lilac Lane embellishment bottles, I have the choice of seed beads, sequins, flat back pearls, and buttons to embellish my stamps.
I chose the Cotton Candy bottle because it matched my paper pad. [The 28 Lilac Lane “Cotton Candy” embellishment bottle is available at the our online store, Scrapbook.com, A Cherry On Top, Ellen Hutson, Simon Says Stamp, Create for Less, and others, or check your local retailer].
To create this card, I first made a card base by folding a half sheet of letter sized cardstock. Then I cut a 3.75″ by 5″ piece of the blue plaid paper, and inked the edges in Iced Spruce before adhering it in the center of the card front.
Next I used embossing ink to stamp the snowflake design on the top of the card front, and heat embossed it with white embossing powder. Once the heat embossing was cool, I selected embellishments from the Cotton Candy bottle and adhered them with small dots of clear drying white glue.
The sentiment on the bottom of the card front was created by first stamping the label outline in Victorian Velvet on the pale turquoise patterned paper. Then I cut out the label using scissors, close to the edge of the stamped label. I stamped the sentiment in Iced Spruce, and adhered the label to the card front.
What stamps do have that could be given new life with embellishments?
What’s sparkly, shiny, and shimmery all over? It’s a 28 Lilac Lane Christmas, of course! Here’s a round-up to all the projects that you need to make your Christmas a 28 Lilac Lane Christmas!
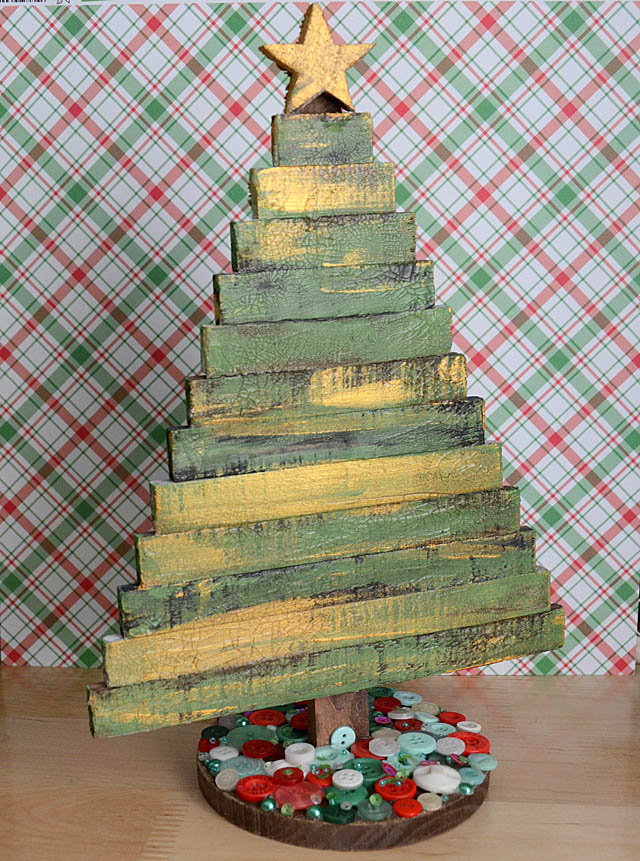
No 28 Lilac Lane Christmas would be complete without a tree! This little wooden Christmas tree bought from a craft store got a touch of alteration – including some 28 Lilac Lane button bling – from designer May Flaum to make it extra special.
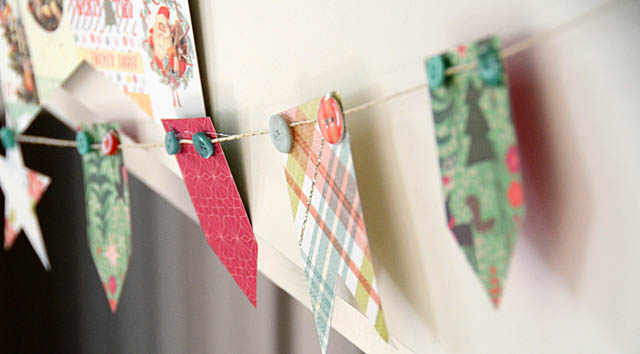
But why stop at a tree? Deck the halls with buttoned up banners that are fun and easy to make!
The gifts that go under the tree need their own sparkle too, and with 28 Lilac Lane, your gifts will look festive and gorgeous! A clean and simple understated look to your gift box is easy when you top it with charms and buttons:
Or go for a more luxurious look, with a button and jewel encrusted top like this one by 28 Lilac Lane designer May Flaum that is rich and feminine! This is one gift box that won’t be going in the trash after the gift is opened!
Since not everyone can get our Christmas wishes in person, how about some Christmas cards?
To see a video on how to make these two beautiful cards, and get information on a free card making class at Scrapbook.com that uses 28 Lilac Lane, visit May Flaum’s blog!
Or, if bright retro is more your style…try our funky paper pieced trees card:
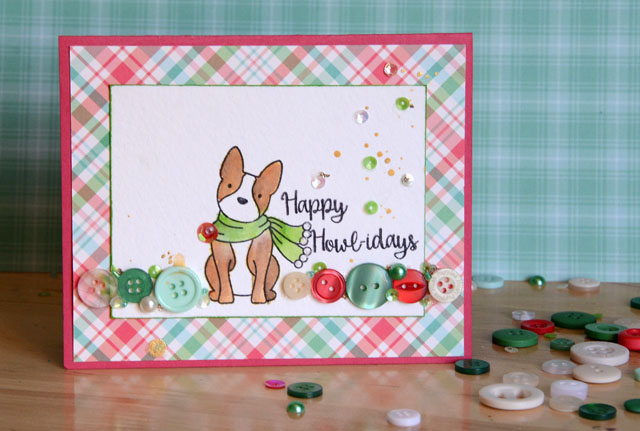
A button border makes any project a little more special. The 28 Lilac Lane one on this Happy Howl-idays card is spiced up with pearls and sequins for some extra bling!
Have you made a 28 Lilac Lane Christmas project? Please share a link in the comments! We’d love to see it!
Nothing’s more fun at Christmas than an ugly Christmas sweater. So why not send one to a friend in the form of an ugly Christmas sweater card for the holidays?
Supplies Needed:
This card’s technique is simple – just creating two strips of paper by stamping the sweater knit stamp over and over, alternating the color and embossing it. The Twisted Citron ink is embossed with clear embossing powder, and the red is clear embossing ink that is heat embossed with Red Tinsel powder. The strips need to alternate to create the effect on the front of the card.
Doing all that stamping and embossing while changing colors takes a bit of time, but the result is a great effect!
Once strips are made, they can be adhered to a card base. Start by attaching the one on the right side of the front. Position it, glue it down, and then trim off any excess. The front is layered, with the left side overlapping the right panel, so there’s no need to worry about how wide the panel is on the card front.
To emphasize the layered effect and create bulk in it as if it really is a sweater placket, adhere two inch wide strips of paper underneath the right edge of the left panel before attaching it to the card front. This will slightly raise the area under the buttons up, creating depth and shadow that look like a true sweater! For a little extra shadow, run a dark red pen or inkpad along the paper edge where the pieces overlap as well.
Now that your sweater has a placket, it needs buttons to fasten it! “The Merriest” Button Bonanza has red and green shades that match the card base. Adding in the the pink and blue shades that are also in the assortment looks a bit random on top of all of that red and green, and is the perfect way to “ugly” up your ugly Christmas sweater card. Glue your buttons down with a clear drying adhesive like PPA Matte Adhesive.
The finishing touch is the “patch” that has the sentiment on it. Just stamp and emboss the sentiment, and then draw stitching lines around it with a pen. Adhere it at a jaunty angle to your sweater’s “front” and you are done!
Who do you know that needs an ugly Christmas sweater card? Send them one today!
Christmas isn’t just green and red anymore…pink and blue are also becoming more part of the palette. Today, I’m going to show you how to create a beautiful pastel Christmas tree card with our versatile new “Coral Reef” Button Bonanza bag!
Supplies Needed:
This card uses our new “Coral Reef” Button Bonanza to create a fun pastel blue and pink Christmas look that is super trendy and oh-so-pretty! The shades of pale blue, soft rose pink, and white are perfect for a retro pastel Christmas tree card look.
Making this card is fast and easy, but with the gorgeous patterned papers and the pearly button accents, it looks anything but plain!
To begin your card, cut the pink background for your card base to 4.25″ by 5.5″. Then cut the garland paper to 4″ by 5.25″, and adhere it on top of the pink base. Next, get out a blank card base and adhere the layered background to the front of it.
Stamp the Christmas tree in brown ink on blue text pattern paper, and then add the star in gold at the top. Trim closely to the tree in a rectangle shape. Adhere the tree block on top of the pink striped paper, and trim it to leave a small border around the edges of the tree.
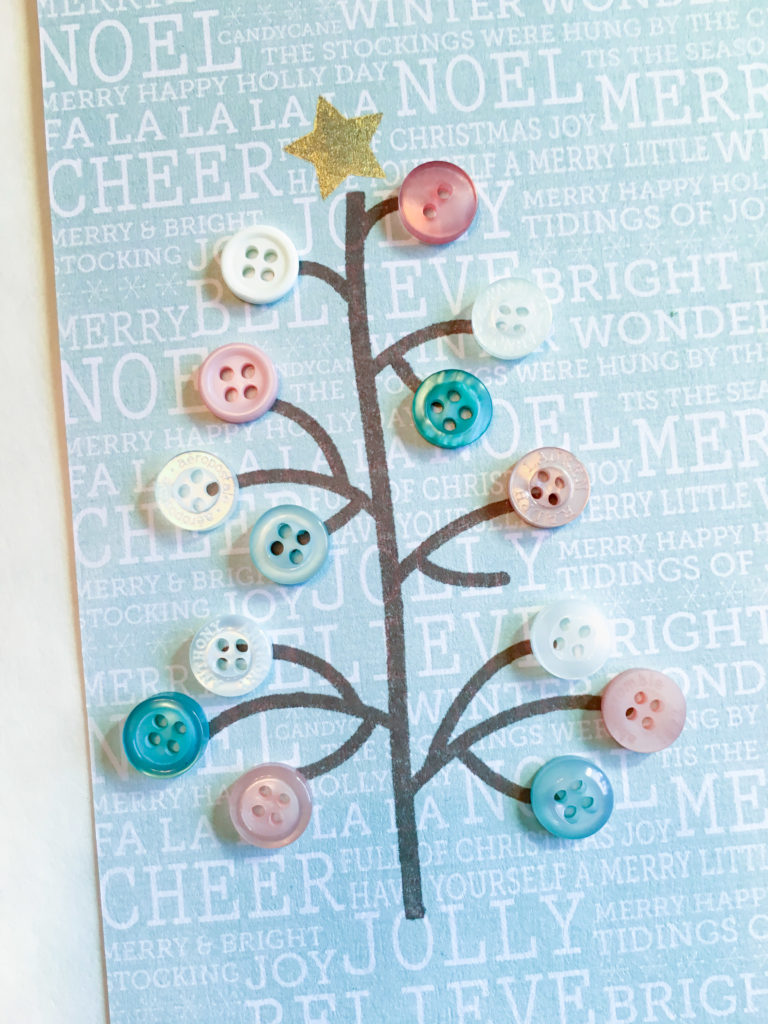
Select buttons from the Coral Reef collection, and use PPA Matte Adhesive (or other clear glue) to adhere them to the tree. Once the glue is dry, attach the tree block to the card base, angled in the upper left corner.
Stamp sentiment on green patterned paper, and trim to size. Adhere in lower right corner.
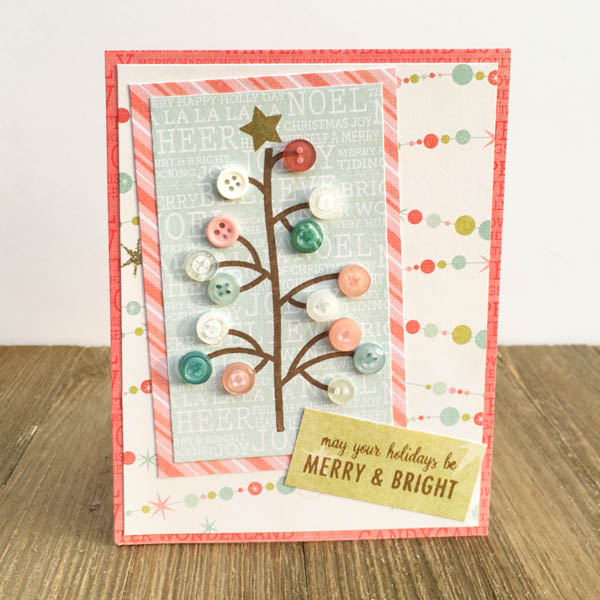
This pastel Christmas tree card design could be used to create seasonal trees all year round – pretty spring blossom colors mixed with bright green, fall colors, or all white for a snow covered winter tree! What season’s tree will you button up?
Pink is hot, hot, hot for Christmas this year! Today we’re sharing a beautiful rose Christmas ornament by 28 Lilac Lane designer May Flaum that will add a brilliant touch of pink and gold to your Christmas tree.

May’s rose Christmas ornament is created with one of her six brand new 28 Lilac Lane shaker mixes that have just been released. This pink and gold shaker mix is called – you guessed it! – Rose Garden. This gorgeous mix will take you from a retro pastel Christmas, into Valentine’s Day, or use it to create beautiful girly embellishments year-round!
And now, May herself will show you how it is done!
![]()
With the holidays fast approaching I am always looking for hand crafted gift ideas and special homemade touches. These new shaker mixes are great for so many projects including homemade ornaments. In this video tutorial I will walk you through creating a lovely rose garden ornament perfect for my aunt who loves pink & gold at the holidays.
Here’s a closer look at my finished DIY rose Christmas ornament project!
![]()
Don’t miss the chance on our Black Friday Sale to get May’s 28 Lilac Lane embellishment bottles for 15% off! Use code EMB15 through Friday, November 25th to save on all your favorite bottles from the collection. Don’t miss out on the new ones like Savannah Stroll, Winter Wonderland, and Coral Reef!
Nothing says you care at the holidays like a handmade gift! These DIY Holiday Gift Ideas with buttons will help you create a gift that matches everyone on your list.
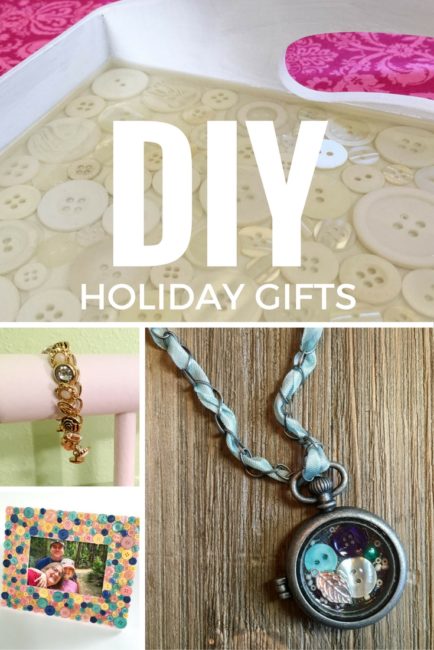
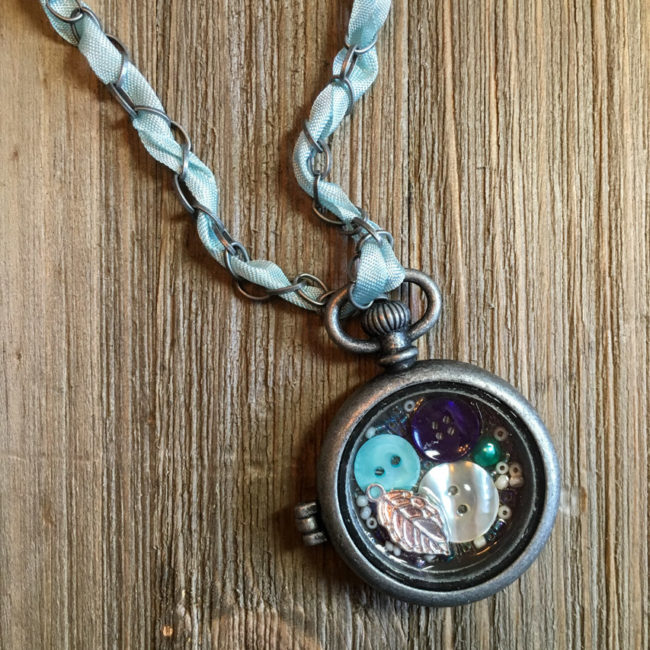
With a few jewelry findings and one of our 28 Lilac Lane embellishment kits, you can make a one-of-a-kind locket for a special woman (or girl) in your life. Make it sweet, or make it dramatic…you decide and choose the embellishments!
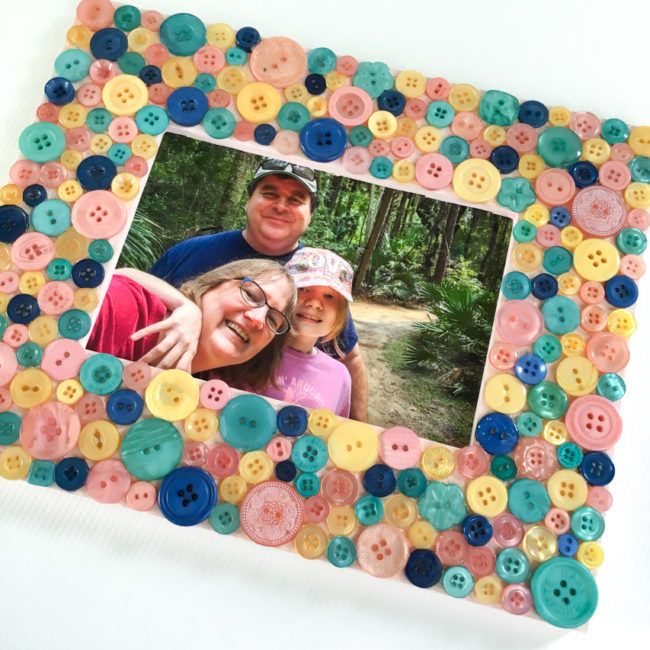
A button collage frame is so easy to make the kids can do it…but with the right color choices, it can be perfect for any decor from farmhouse to graphic. This one, made with our Glam Girl Button Bonanza, will fit in a tween room or a country decor. An all white version (like the tray below) could go shabby chic, or try shades of pink for a cute girl’s room accessory!
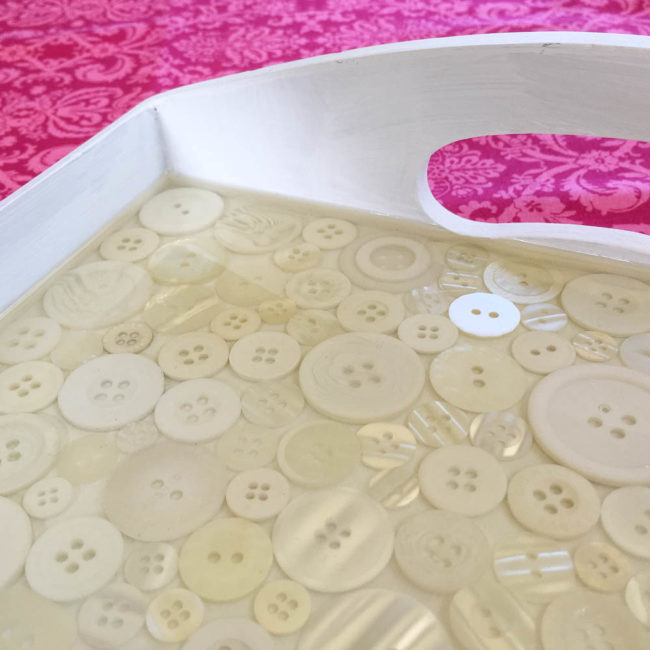
A simple wood tray becomes a beautiful accessory for decor or entertaining with a button collage and some resin. For a shabby chic look, choose the Ivory/Pearl Haberdashery buttons, or for a more rustic or beachy feel for poolside entertaining, try the Natural Haberdashery.
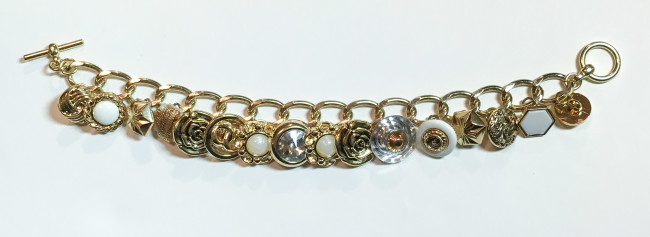
How about a little button bling? Pair some of our Gold/Silver Haberdashery buttons with a chain link bracelet and you’ve got a retro Button Charm Bracelet. It’s a great piece to accessorize all of those trendy 70’s looks with!
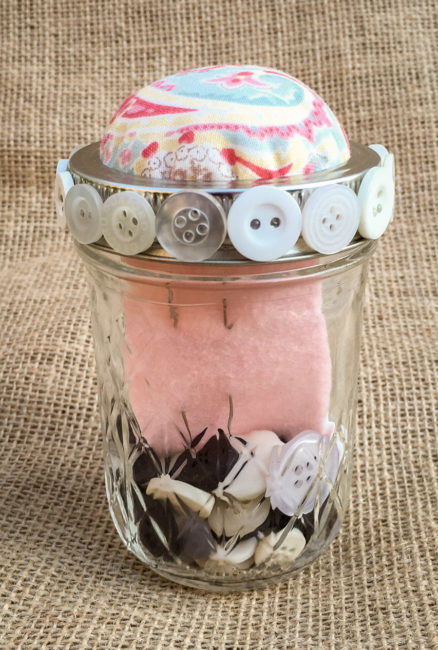
Looking for something pretty and practical too? This mason jar sewing kit will make it easy and fun for your college student or newlywed to replace that missing button. And it is decorative while it is waiting to be used!
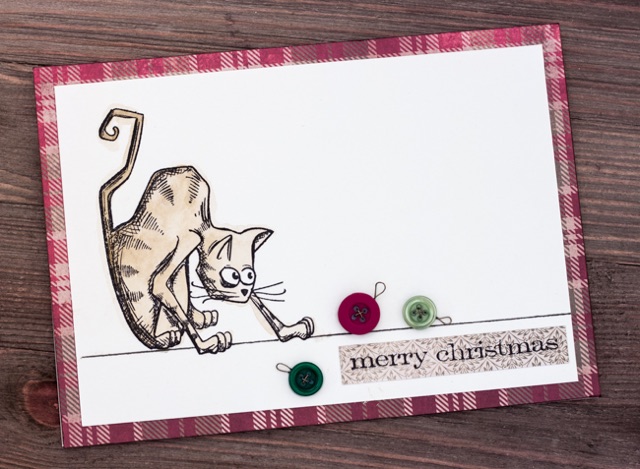
We’re cat owners at our house, and as anyone who owns a cat knows…it makes Christmas decorating extra, well, interesting. We decorate, the cat un-decorates. So today, my project is a Merry Christmas cat card that celebrates that annual feline-human war of December!
Supplies:
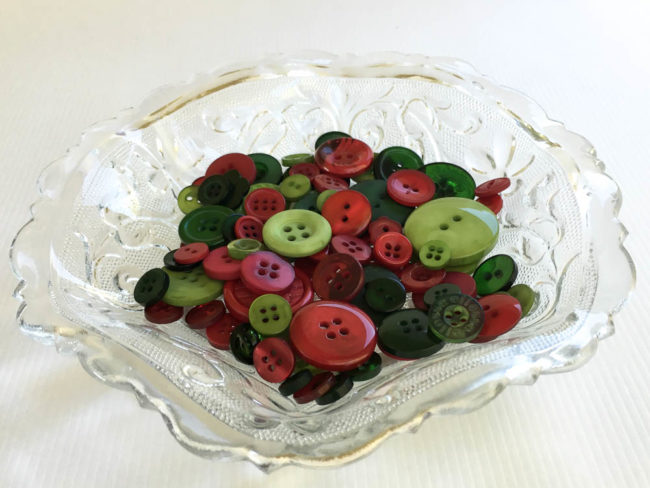
This Christmas cat card has a very simple design. It’s featured embellishments are Christmas ornaments made from buttons from the “Tis the Season” Button Bonanza that is brand new for this holiday season. Featuring deep red and green tones that are accented by a light sage green shade, “Tis the Season” is a versatile button mix for almost any holiday craft project.
Instructions:
Cut a piece of watercolor paper to 4.5″ by 6.5″. Use Archival ink to stamp the Crazy Cat.
Use a ruler and the black pen to draw the line across the bottom underneath the cat. Don’t draw through the cat’s paws!
Scribble on a scrap piece of watercolor paper with the Distress Crayon. Using your waterbrush, pick up some of the color and use it to watercolor the cat.
Cut a piece of patterned paper to 5″ by 7″ and ink the edges. Adhere the watercolor paper centered on it. Cut a piece of cardstock to 7″ by 10″. Fold in half to make a 5″ by 7″ card, and adhere card front to it.
Cut a strip of patterned paper 1/2″ wide. Stamp the sentiment on it, and trim the ends. Adhere to bottom right of card.
Select three buttons to serve as your “ornaments”. Thread the holes on the buttons with German style wire. Use the tail of the wire to create a loop for the ornament’s “hanger” before snipping off the excess wire.
Use liquid glue like PPA Matte Adhesive to glue the button ornaments in place.
Since it mostly relies on bulk supplies like buttons and tools like stamps to make, this Christmas cat card could easily be made in quantity. Simply substitute cardstock or a variety of patterned paper for the paper used for the matted background and the sentiment strip. and you can make this card over and over with a Button Bonanza and your stamp! And since it is fast and easy to make, your cards will be done in no time!
Tis the season to be jolly! Today I’m here to show you how to combine two of our holiday products that have a turquoise toned blue in their palette to make a fun retro Merry Christmas card!
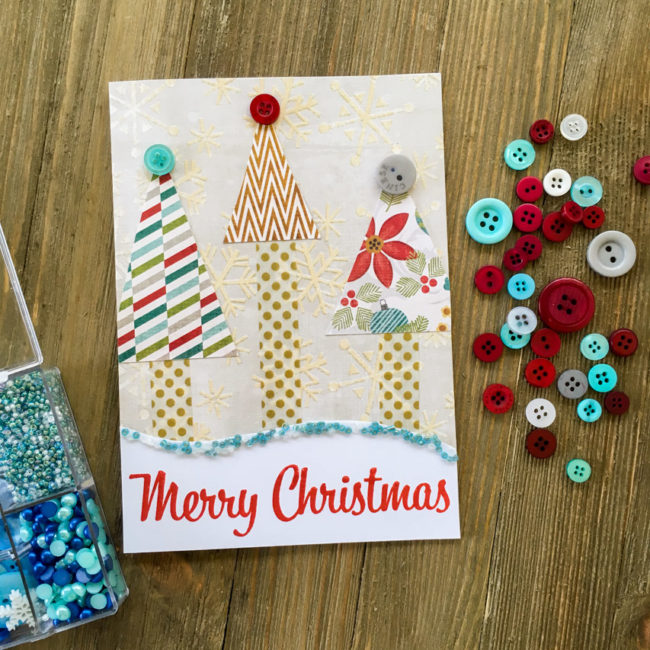
Supplies Needed:
This project pairs seed beads from our beloved 28 Lilac Lane “Let It Snow” embellishment kit with buttons from our new “Cool Winters” Button Basics. With similar tones of blue, these two coordinate together beautifully to add a pop of trendy color to holiday projects of all kinds.
This card is 5″ by 7″, so to start my retro Merry Christmas card I cut the snowflake background paper to that size.
Next, I cut a 5″ wide strip of white cardstock that was a few inches tall. I stamped “Merry Christmas” on it with red ink, centering the image near the bottom. Then I used scissors to cut the top of the sentiment block into a wavy design.
To create the beaded edge, I started by spreading a bead a white glue along the edge. Then I sprinkled seed beads over the glue until it was covered, and set the sentiment block aside to dry.
Cutting the trees is easy! I simply used three scraps of paper and cut them into various sizes of triangles. The tree “trunks” are made from washi tape (but could also be made from strips of paper). Some of the tree triangles hung over the edge, so I just snipped them off. Once those elements were adhered in place, then I used liquid glue to adhere three buttons as toppers for the trees.
Once the glue holding the seed beads was dry, then I adhered the sentiment block across the bottom.
To finish my card, I used white cardstock to make a blank card and then adhered the finished card front onto it.
I hope this cheery little retro Merry Christmas card greeting will help you brighten the holidays of someone special!
Welcome to the Handmade Holidays blog hop at Buttons Galore! We’re sharing a faux wood pallet Christmas tree to decorate a desk or tabletop…but this tree is hiding a very useful secret!
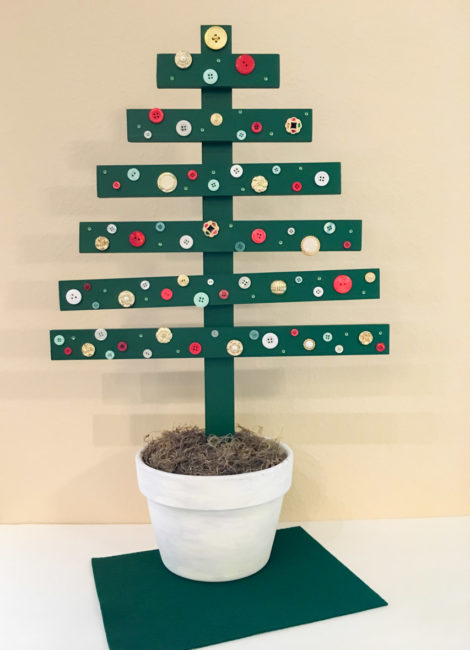
This fun little pallet Christmas tree is equally at home in a dorm room, or a farmhouse style decor. But at 17″ wide and more than two feet tall, it’s a challenge to store after all the gifts are opened. Or is it?
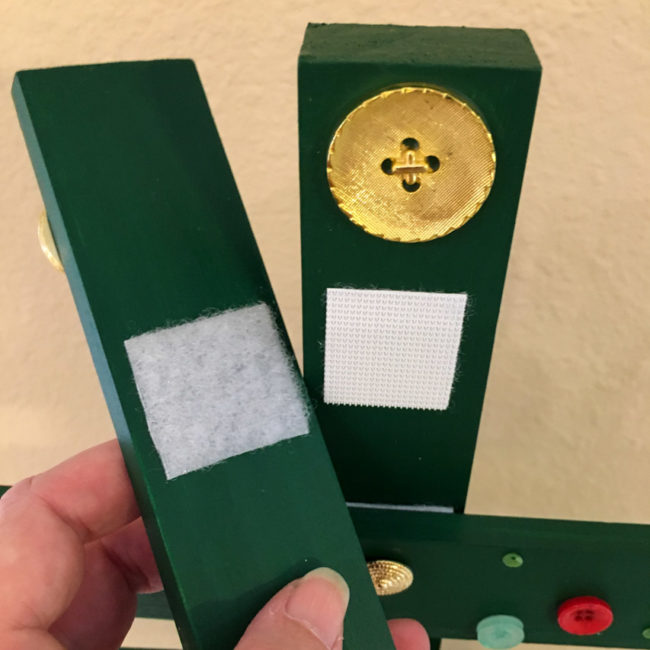
By using Industrial Strength Velcro to assemble the pallet Christmas tree instead of glue or nails, I made it able to be completely disassembled! Just pull apart the Velcro and instead of a big awkward tree, you’ve got a small bundle of wood that can be much more easily packed in an ornament box!
Disassembly also allows the flower pot – which is deliberately not seasonally decorated – to be used year round for flowers or other seasonal decorations when it isn’t being used for the tree.
Supplies Needed:
I started by cutting the craft wood into the following lengths: 6″, 9″, 12″, 14″, 16″ and 17″. Then I trimmed the 1″ x 2″ pine board to 26″ in length.
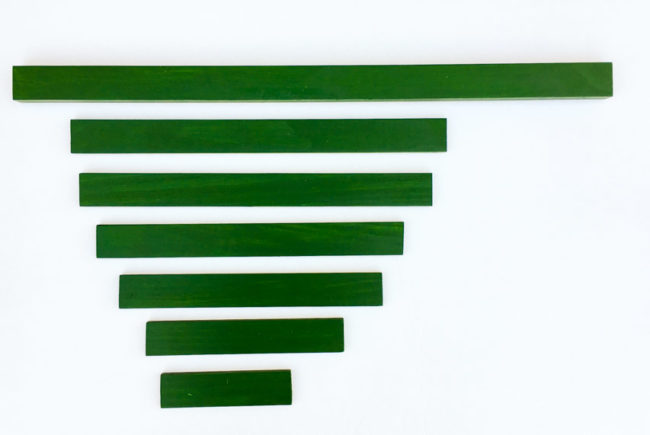
I used the Americana satin paint (made by DecoArt) in multiple thin coats applied with a foam brush to get a nice smooth finish on the boards.
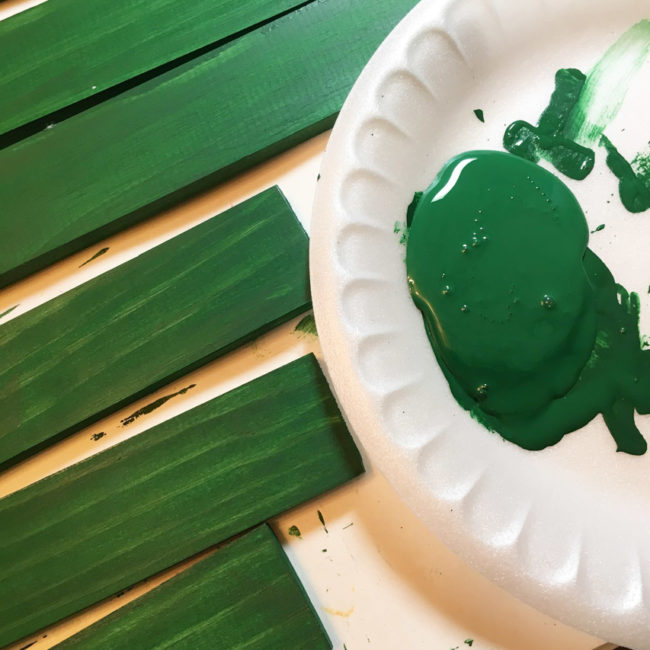
After the paint was dry, I laid out my boards in the arrangement for the tree. Then I started decorating my tree! I used Button Shank Removers to cut off the stems from the Haberdashery buttons, and filled in around them with buttons from the 28 Lilac Lane bottles and kit. Tiny green sequins from the Yuletide Greetings bottle added nice little sparkly highlights around various areas of the tree, too!
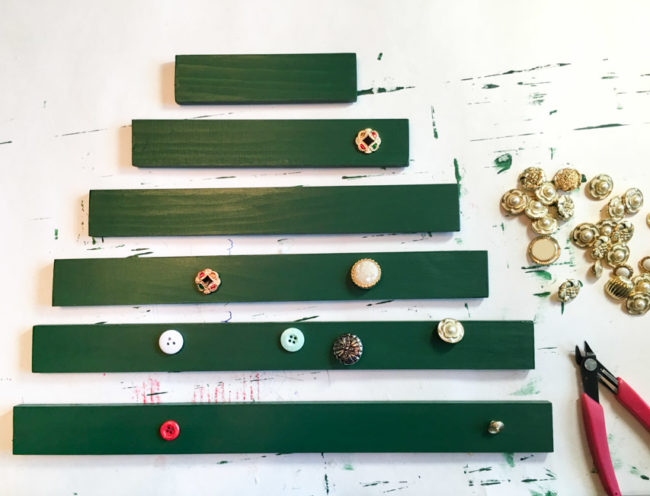
When it was all glued down, I was left with this! Notice how I hung some of the button “ornaments” off the edges of some of the wood branches to add some interest.
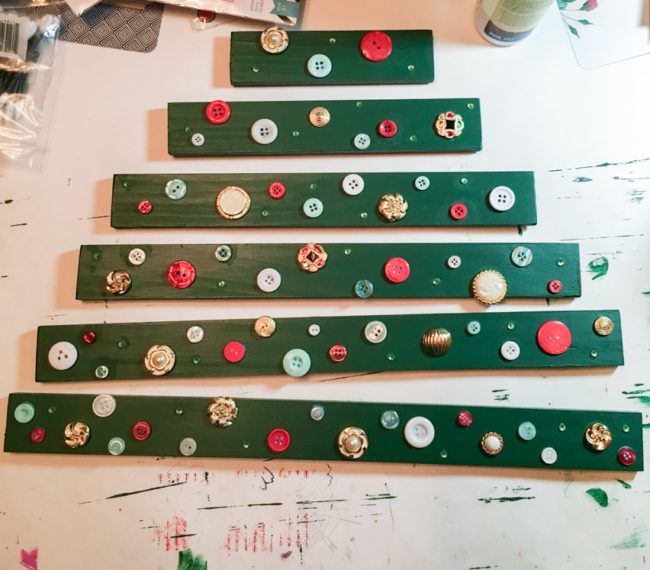
Attaching the branches to the stem was super easy with the Velcro. First, I cut 1.25″ squares from the Velcro. Then I measured and placed a mark at the center of the back of each “branch”. I peeled one side of the Velcro and adhered it centered vertically on the branch, using the center mark to get it centered left to right.
Then I peeled the second side of the Velcro and pressed the branches into place on the tree’s “trunk”. Once they were in place, I glued a big gold button to the top of the trunk as my tree’s top.
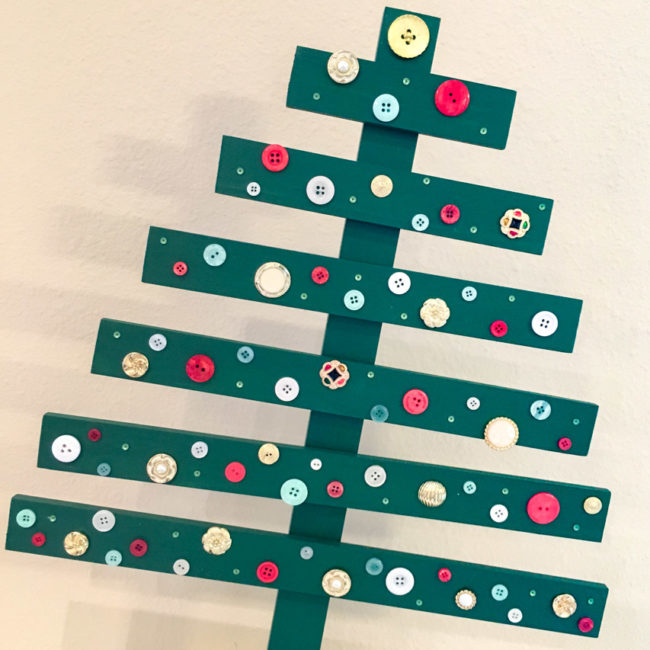
Painting the pot is fast and easy! I just dipped a paintbrush in water and then into the white chalk paint. This diluted the paint and when it spread, it created a whitewash effect. In areas that it didn’t spread as much as I would like, I just dipped the brush in water again and used the water to dilute the paint a bit more.
To create a second layer of paint for a mottled effect in the whitewashing, I repeated the technique with the more cream colored chalk paint. This time I just dabbed the paint instead of trying to fully cover the pot, and it created the textured look below.
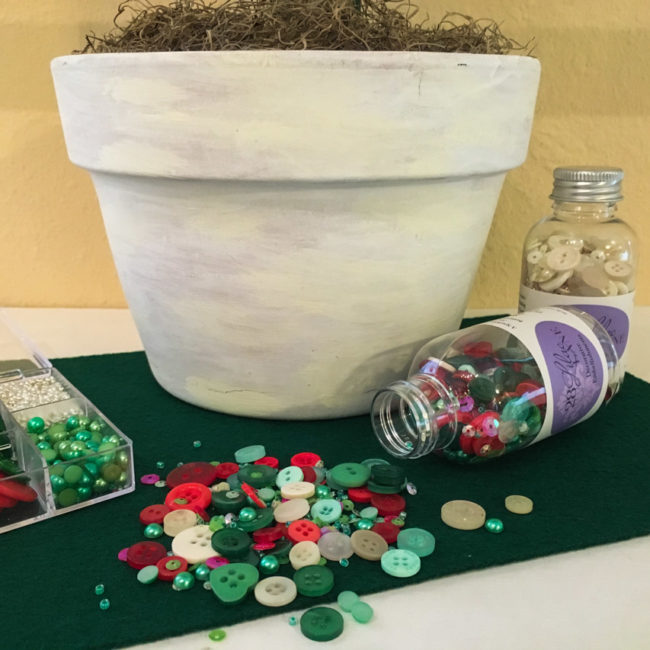
The base is part of what makes the pallet Christmas tree collapsible. I trimmed the foam so that it fit nicely into the pot, and then carved a hole down the middle of it for the tree trunk. To make the fit nice and snug, I wrapped the trunk in a strip of felt. This method makes the fit adjustable as wear and tear erodes away the foam base!
For the finishing touch, to hide the foam, I covered it in a layer of moss.
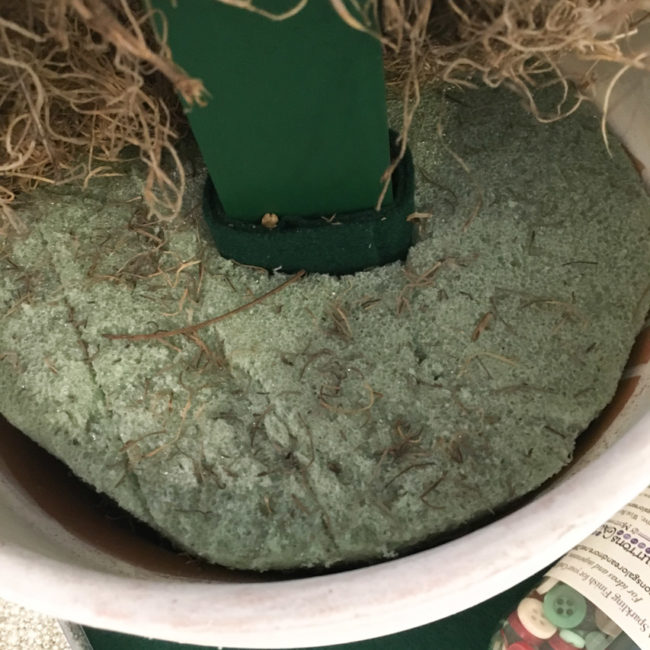
This faux pallet Christmas tree is the perfect decoration for a buffet table, an office, or a kid’s bedroom! There’s so many places to use it…where will you put yours?
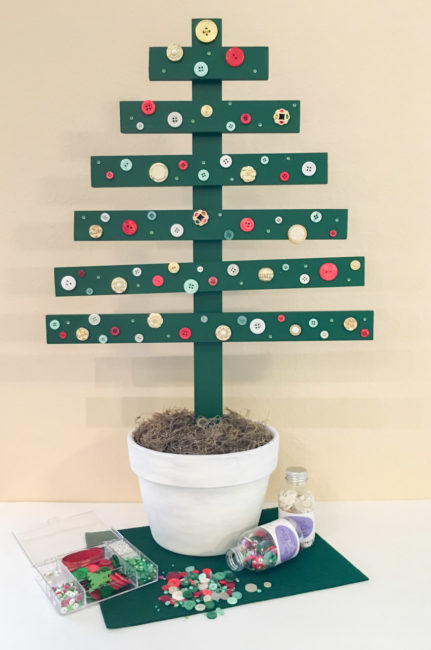
Now, it’s time to get hopping to see more holiday decor ideas. But before you go…how about a giveaway? Here’s a peek at the huge assortment of prizes that are up for grabs!
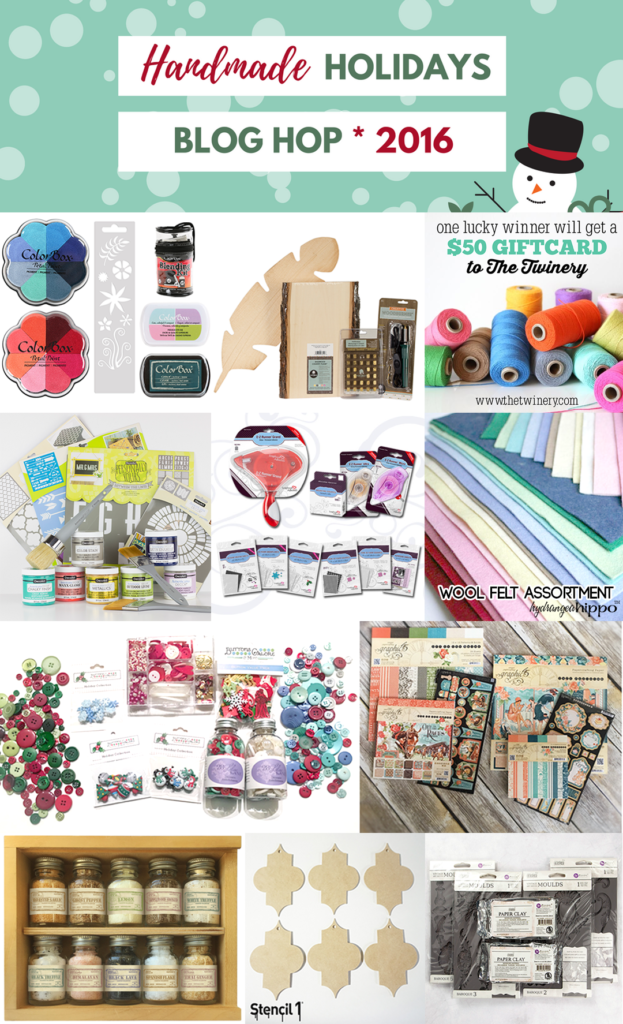
Use the Widget below for your chance to enter!
Thanks to all of our fellow sponsors!
Now…click here to visit the next stop on the hop – or click below to see the entire hop list:

It’s November and that means…the leftover trick or treat candy has been eaten (at least at our house)…and it’s time to jump full on into Christmas trees and snowflakes and all things Christmas! For our readers that like to personalize their gifts, today I’ve got a holiday gift tag that will be remembered long after the holiday is over!
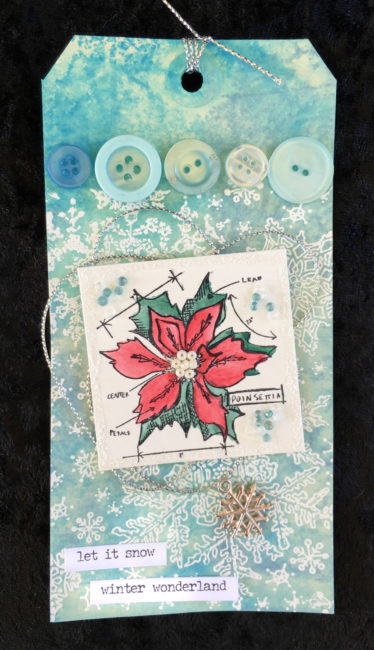
Supplies:
The background on this tag was created by inking a craft mat with the four shades of blue Distress Ink, spritzing it with water, and then dragging the tag through it. A heat gun helped to speed the drying process. The nice thing about this technique is that if you don’t like the effect that you get, you can add and remove color by spritzing the tag with water, or adding another layer of color, until you get just the effect that you are happy with.
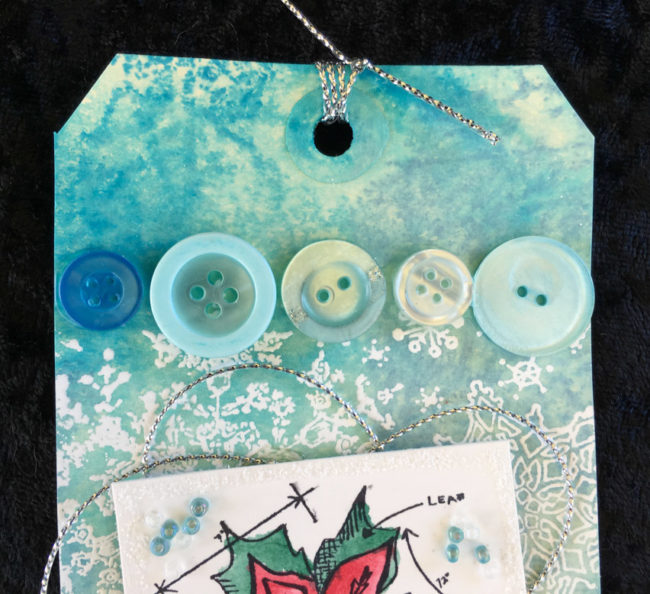
Once the background was thoroughly dry, I stamped the snowflake stamp with clear embossing ink and heat embossed it with white embossing powder. Since the stamp was not as tall as the tag, I made sure that I started the stamp at the bottom of the tag. Using the PPA Matte Adhesive to glue a line of buttons across the area where the snowflakes stop disguised the transition area from snowflakes to plain background.
Next, I stamped the poinsettia stamp in Archival ink on watercolor paper, and colored it in with watercolors and a waterbrush. Finally, I trimmed it to a size that would work on the tag.
It’s not very visible in the photos, but I used Stickles to create a border around the outside edge of the poinsettia square to add a little extra glint of sparkle to the tag. I also used various colors of seed beads from both of the embellishment kits to create some dimension in some areas and create the flower’s center. (The seed beads in our kits adhere beautifully with the PPA Matte Adhesive, which is what I used here.)
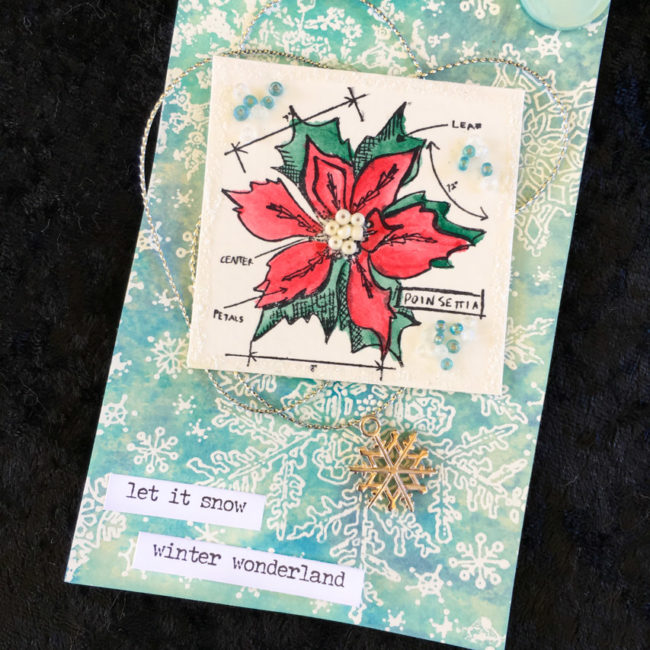
The trickiest part of assembling this holiday gift tag is getting the loops of silver string and the poinsettia layered and adhered. I laid down a pool PPA Matte Adhesive in the middle of the tag, and created my string loops by passing the string through the glue area repeatedly. Then I pressed the poinsettia block down on top of it and when it dried, everything was adhered together!
At first glance, it looks like the snowflake charm is looped through the string but if you look closer…it is not. I simply glued it on with the loop laying over the string. This helps everything lay a little more flat and stay adhered better.
The final touch on my holiday gift tag are the two phrase stickers I added in the bottom corner. If you didn’t want to put the to and from information on the reverse side, these strips could have it instead.
In only a few weeks, December will be upon us! For many scrapbookers, that means recording our December holiday celebrations in special page-a-day pocket scrapbooks. Our 3D buttons are a fun and simple way to add embellishment to your December album!
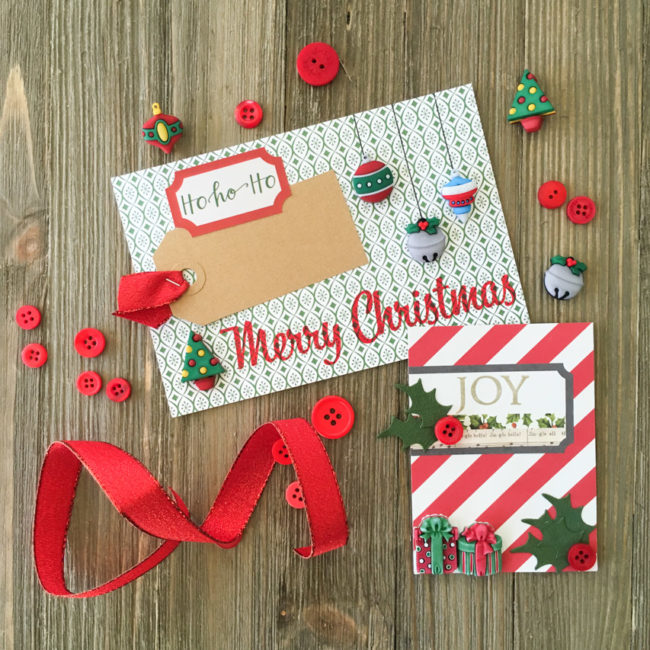
Most of us using pocket scrapbooks for our December album will have at least a few 4×6 cards in our album to highlight important topics or days. This journaling card could hold very large number stickers to put focus on a special date (such as #25) or the kraft colored tag could be used for journaling space!
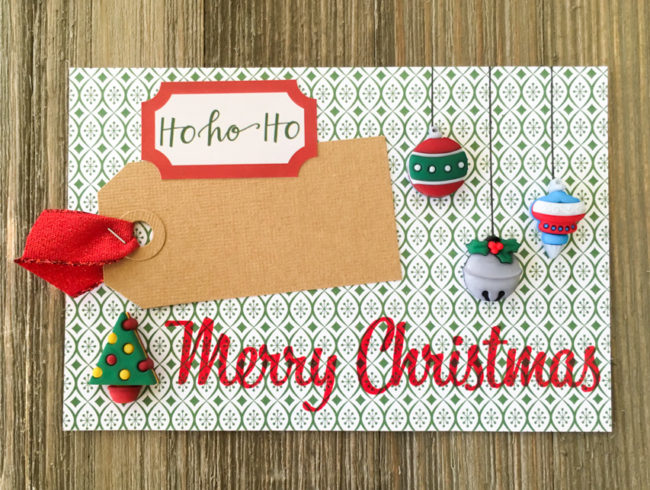
Supplies:
To make this card, I cut a 4″ x 6″ piece of patterned paper. Then I stamped “Merry Christmas” on the bottom right and embossed it with clear embossing powder. After I die cut the tag from cardstock, I looped ribbon through the hole, and secured it with a staple. I adhered the tag in place and laid the sticker in place on top of it.
The buttons were the final touch. These buttons are shank buttons, so I had to use button shank removers to give them a flat back. Before gluing them down, I used a pen to draw “strings” from the top of the card to the locations of the baubles that I wanted hanging. Then I glued all three buttons down on top of the drawn strings, and also added the Christmas tree in the bottom left corner.

Supplies:
I also started this 3×4 card by stamping the sentiment in the upper part of the white box. Then I added the washi strips in the bottom part of the box, trimming them so they fit the decorative shape of the bottom corner. I die cut the small holly leaves and adhered them, adding small red buttons as berries. Finally, I cut the shanks off of two 3D present buttons and glued them down in the bottom right corner using PPA Matte adhesive.
Whether you are using a kit or doing it yourself, we’ve got the perfect buttons for your December album. Visit the Christmas category on our website, or our new section to see our latest releases to find great options for your album!
Halloween is coming fast! But there’s still time to make a few more Halloween projects – like this fun scaredy cat halloween tag! It makes a great decoration on a spooky tree or a fun goody bag attachment.
To make my scaredy cat halloween tag, I started with the middle tag below. This is a set of three tags that I made using Distress Spray Stain. I sprayed the three colors of stain on my craft mat in a triangle arrangement, and pressed the first tag into them. That created the tag on the left below. Then I added some water to the mat using my Distress Sprayer, and swiped a tag across my mat again, which got me the tag in the middle that I used for this project. Finally, I took a third tag and swiped it through the color mix that remained on the mat. By that time, the three colors were mixed together enough on the mat that it produced a more brown color, giving me the tag on the right.
Decorating this tag started with a lot of stamping! I stamped the cat in black and heat embossed it with clear embossing powder. Then I stamped the pumpkin in brown, coloring in the part of the blueprint stamp that I wanted to use and stamping it. To make them look wispy, I used silver ink to stamp the spider webs to fill the top of the tag area.
Once the stamping was done, I stuck down the phrase stickers and the letters to spell “Boo!”
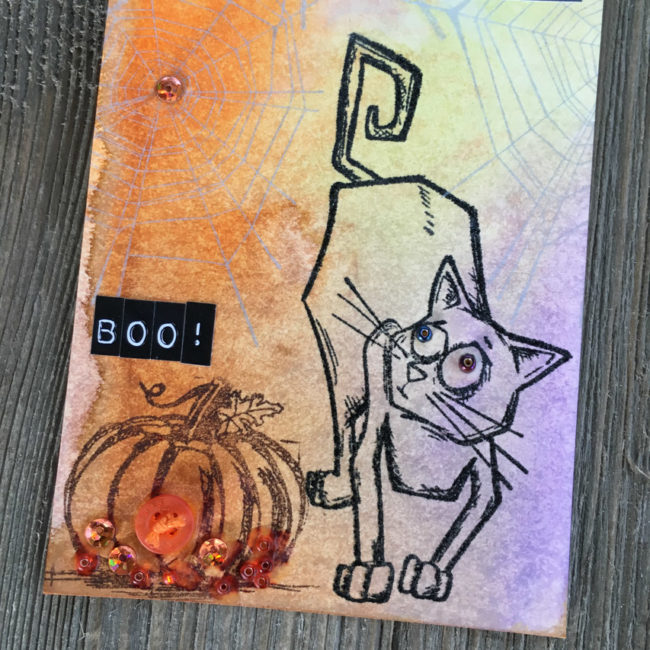
Next I got my PPA Matte Adhesive liquid glue to start adding some beautiful embellishments! Well, first I added a scary one…I cut the shank off of a spider button using button shank removers and glued it onto the spider web on the upper left of the tag. In that spot it looks like the cat is looking at it!
To make the cat’s eyes look really bugged out, I selected two dark colored seed beads from the 28 Lilac Lane “Paws & Pets” embellishment kit and glued them on top of the stamped dots in the cat’s eyes. It makes the cat look even more scared!
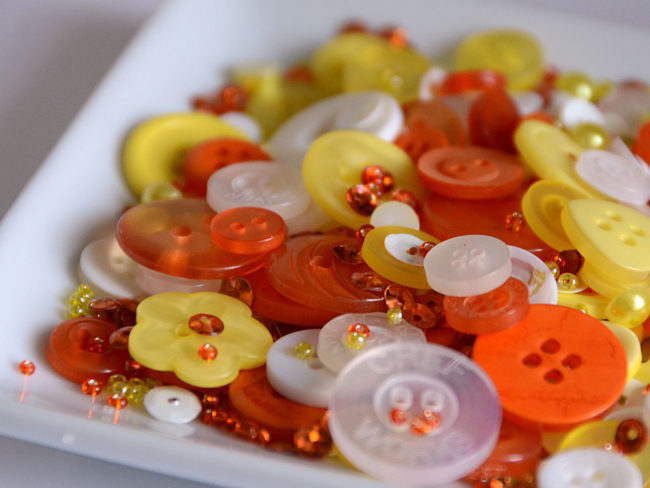
Finally, I dumped the new 28 Lilac Lane “Candy Corn” embellishment bottle (pictured above) into a craft tray, which is a great way to contain all of the small embellishments while you are looking for just what you need. With it all spread out I selected several small sequins to glue on to the spider webs, and glued some small seed beads, sequins, and a button onto the bottom of the pumpkin to give it some orange coloring.
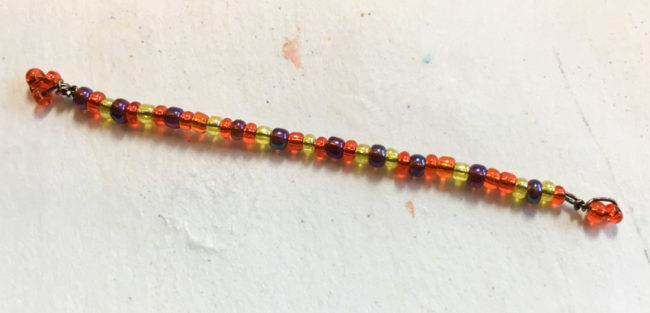
To really look finished, my tag needed some ribbon through the hole. I selected some gray and some black and strung them through the hole. But instead of tying them off, I made a seed bead “twist tie” to fasten it. I cut a piece of wire several inches long. To start, I looped the wire through and around a pair of beads and twisted it together, clipping one of the ends off. then I began threading seed beads onto the wire in a random pattern until the tie was the length I wanted. To finish the wire off, I once again created a loop with two beads in it and twisted the wire together below that loop. I made sure to cut off the ends very close to the twist and turn them under so no sharp points stick out!
The seed bead twist tie was then wrapped around my ribbon to cinch it tight (similar to a ponytail holder). It brightens up the ribbon and brings something shiny to the top of my scaredy cat halloween tag.
And now my scaredy cat halloween tag was ready to hang on my halloween tree with my other tags! (To see the other tags in the collection, check out the Spooky Halloween Tag and the Fall Pumpkin Tag).
Supplies:
Do you make tags? What occasions do you make them for? Tell us in the comments!
October is flying by, and that can only mean one thing…that chill in the air is going to bring snow soon – and Christmas!
Today we’re excited to be announcing new 3D buttons that are perfect for your winter and Christmas crafting. We’ve got snowmen and snowflakes perfect for all of your project needs. (And don’t miss the peek at the end of even more new holiday goodness!)
Adorable snowmen are a holiday must-have, and we’ve got two versions – a bright one and a more rustic one. No matter what your style…we’ve built the snowman for it!
If you are dreaming of snow…snow…snow…in your winter holidays (and your winter craft projects), we’ve got a huge new selection of 3D snowflake buttons!
Our new 3D snowflake buttons come in three different styles that are available in several sizes and shades of blue. Packaged in five different assortments, there’s a perfect one for your needs no matter what your project!
All of these buttons, except for the snowflakes on the far left above, have shank backs for sewing them on to projects. But for crafters who prefer flat backs, the shanks can be easily removed with scissors or a button shank remover. (The set of snowflake buttons that doesn’t have shanks has a flat back and holes that can be used for sewing it onto projects.)
In addition to our snowflakes and snowmen, we’ve also got a great selection of new 3D Christmas designs such as gingerbread men, Christmas trees, stars, adorable holiday icons, and more!
All of our new holiday 3D buttons are available now on our website – click to see the entire selection!
Editor’s Note: Today we welcome back former design team member Laura Bray as a guest designer to share a project for embellished Thanksgiving napkins that are an easy way to make your holiday table beautiful!
Hi Button Lovers! It’s Laura Bray. Some of you may remember me when I was on the design team for Buttons Galore & More. I still use my BGM buttons on my craft projects and I’m so excited about the 28 Lilac line of buttons – the kits and bottles make it so easy to make a pretty, coordinated craft.
It’s almost Thanksgiving, so I wanted to show you how you can turn a plain, cloth napkin into beautiful, boutique-style table décor for the holidays.
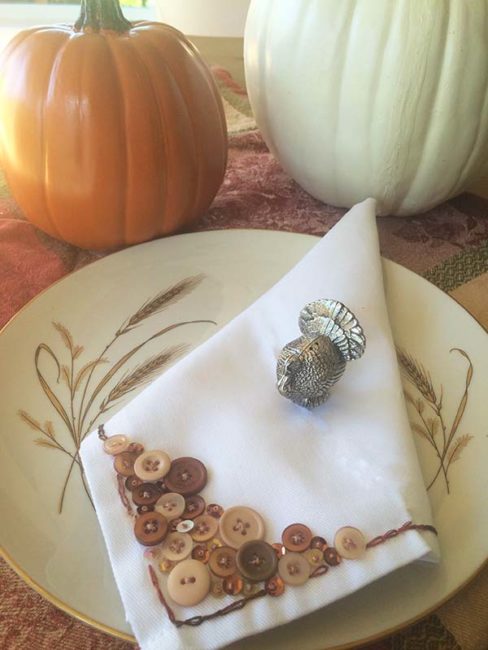
Supplies:
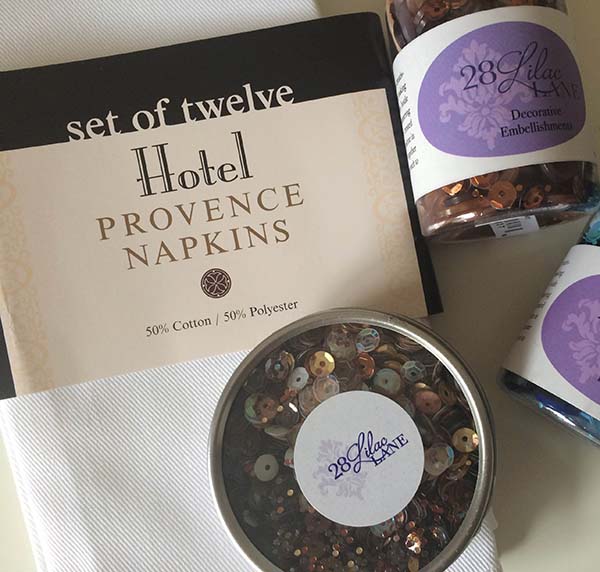
Pick a corner to embellish, then begin stitching on buttons of varying sizes and sequins onto the napkin randomly. Not a sewer? You can also use fabric glue!
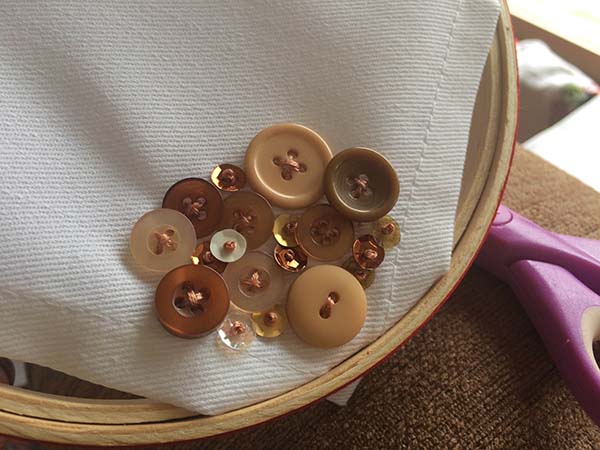
To clean your napkins, hand wash and try to avoid submersing the embellished corner in water.
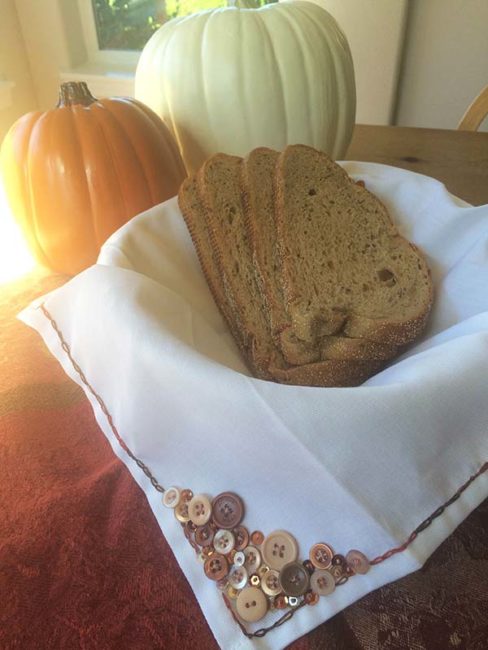
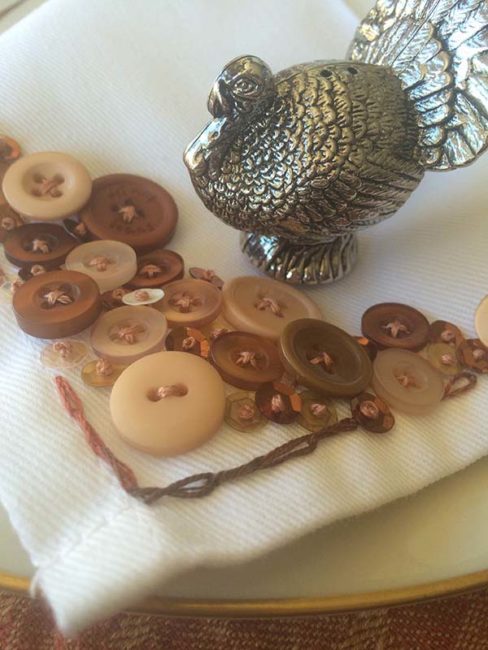
These look so stunning they will probably become family heirlooms!
October is half over and that means it’s beginning to look a lot like Christmas in most crafter’s work spaces! Today, we’re going to share a few ideas of how to embellish a Christmas gift box with buttons to make your gifts look extra special.
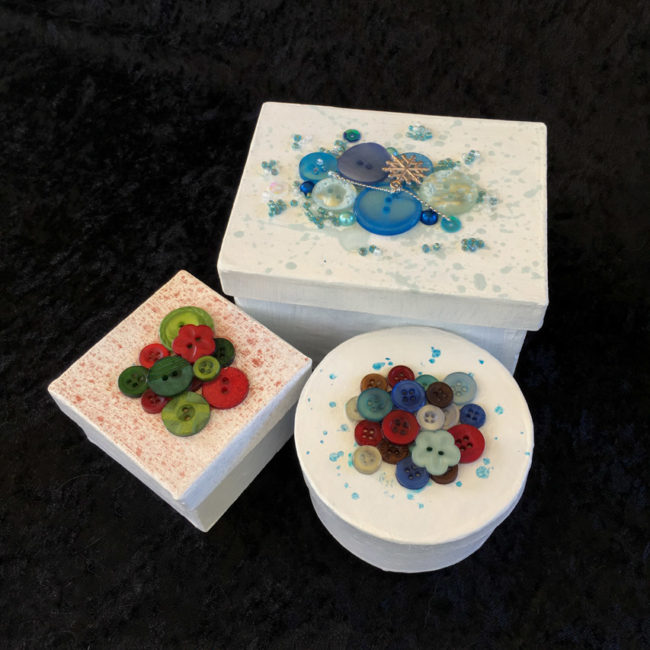
All of these boxes are created from paper maché boxes that are painted with white acrylic paint. Then the tops of the boxes were splattered with spray ink or paint to add some color, before buttons and other embellishments were added.
The large rectangle Christmas gift box is created with embellishments from the 28 Lilac Lane “Let It Snow” embellishment kit. To create this embellishment collage, I started by laying down a pool of white glue in the middle of the lid. Then I placed the large items first, creating the arrangement of the buttons. I filled in around the buttons with the small embellishments like the sequins and beads, creating a feeling of an explosion of embellishment spreading across the lid. For the final touch, I glued the snowflake charm from the “Let It Snow” kit on top of the button collage.
Supplies:
For the round box, I used the new “Winter Wonderland” Button Bonanza. I started this one by making the first layer of buttons. Then, once that layer had dried securely in place, I glued a second layer of buttons on top of the center of the first layer.
Supplies:
I used the same technique on the square box, creating a two layer collage of buttons one layer at a time. The key to making the prettiest collage is to vary the size and type of the buttons that you use. Also, it helps to balance the colors. On this box, the center has one of each color, and then there is an outer ring that shows the green shades alternating with red.
Supplies:
Grab some boxes…grab some glue…this project only takes a few minutes to make beautiful holiday gift packages. And it’s so easy that the kids can help out. What are you waiting for? Button up a few holiday gifts!
I’m dreaming of shorter days and weather cool enough to wear sweaters! This summer has been so hot and rough – I’m ready to be done with it! Oh, and it probably has something to do with fall being my favorite season as well.
Today I’ve got a card to share that features my fall inspired Autumn Afternoon embellishment kit from my 28 Lilac Lane line. Here is a look at the finished card:
The process to make this card is simple!
It is really that easy!
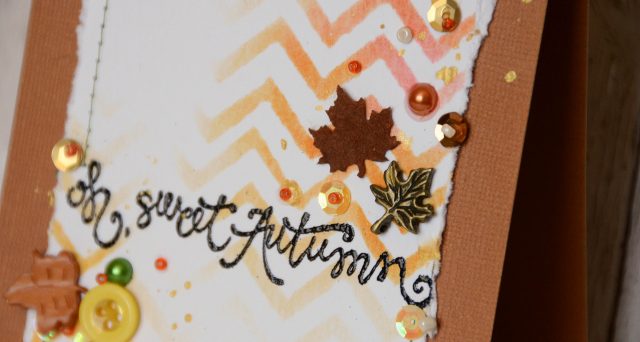
Now I’m back to dreaming of autumn, cocoa, and ending these triple digit days!
Autumn Afternoon isn’t the only fall-themed 28 Lilac Lane kit…don’t miss out on the 28 Lilac Lane Limited Edition Fall Mix that is only available in the Buttons Galore online store! Looking for some inspiration of what to do with my fall limited edition mix? Check out these bloggers! Ashli Oliver, Libby Hickson, Maura Hibbitts, and Rebecca Vick all have outstanding posts up. Enjoy!
The calendar is about to turn October, and most of us are in full-speed Halloween crafting mode! In case you are still in need of some Halloween crafts inspiration, here’s a round-up of our favorite Halloween crafts using our favorite crafting embellishment – buttons, of course!
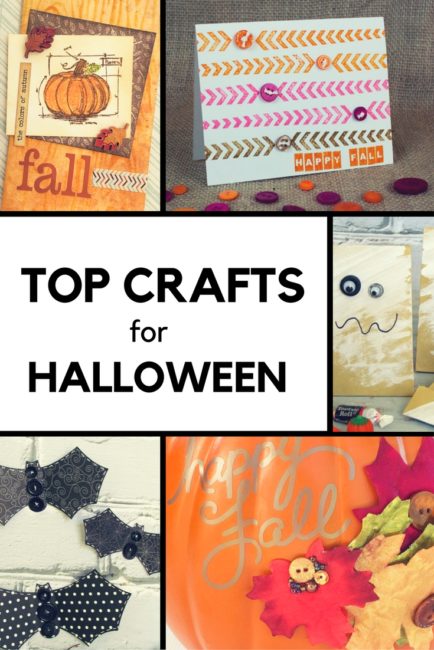
Our autumn frame is super easy to make with no sewing, and will make a great addition to your home decor or your buffet of candy treats. And it’s a great way to use up those fabric scraps!
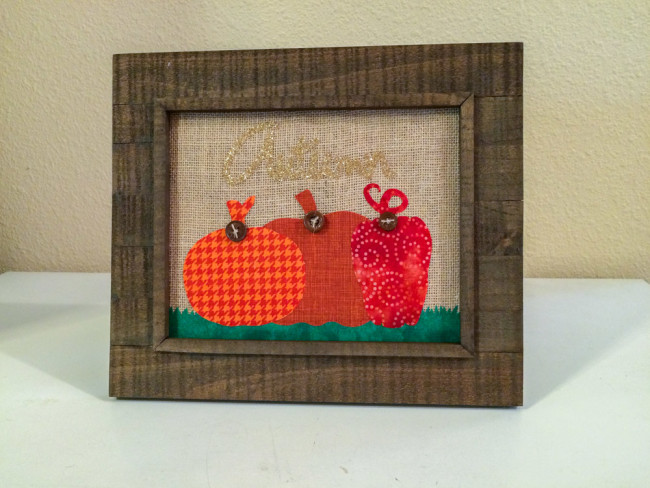
Whether you are planning a hospitality gift for your party hosts, or dropping some fresh baked pumpkin spice brownies at the neighbor’s, this fall pumpkin tag is a warm and friendly way to say “hello” to someone special!
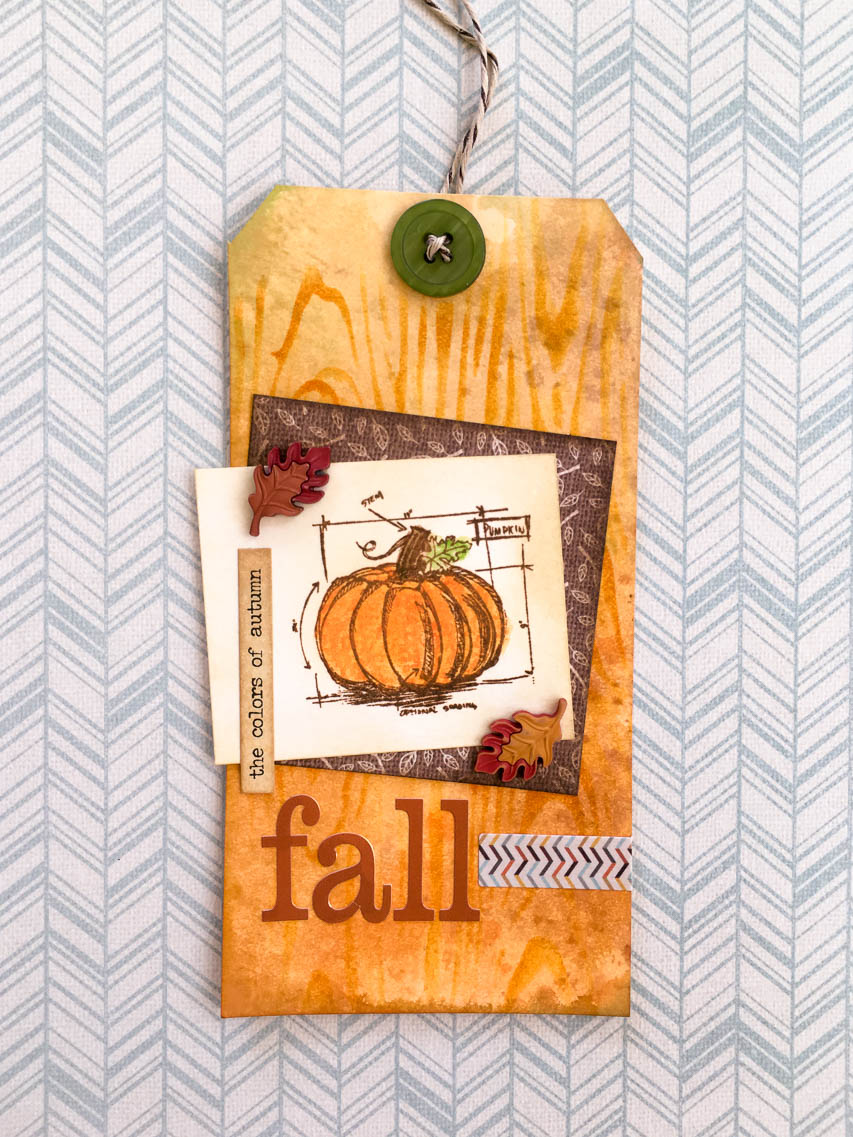
When it comes time to hand out candy, our spooky button eye bags will be the talk of the neighborhood or your kids’ classroom! They are so simple to make that the kids can help!
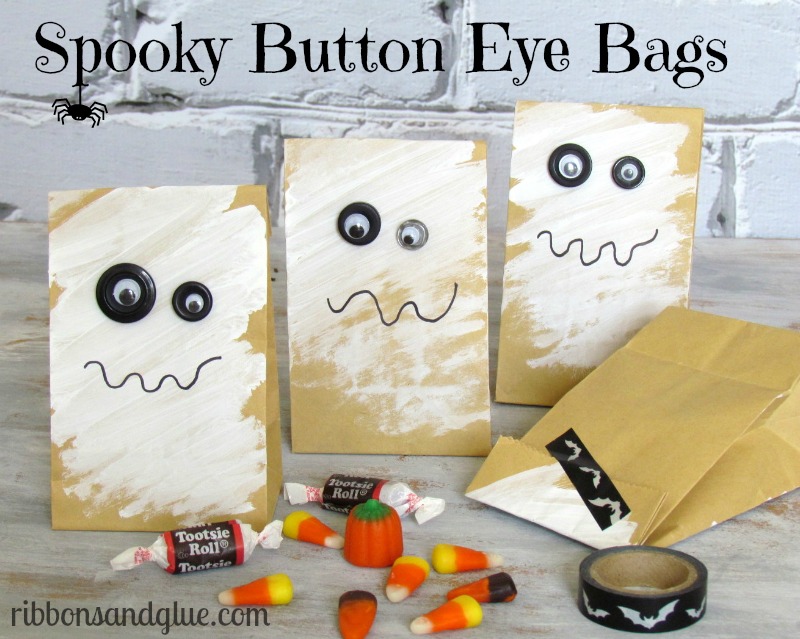
Pumpkins are seasonal decor that can go from early fall all the way through to Thanksgiving. This decorative pumpkin will add a beautiful touch to your home or porch all season!
Halloween wouldn’t be complete without some bats! These button bats are more cute than spook, and will look great hanging from the ceiling, staked into a plant, or stuck to a wall.
If you aren’t quite ready to give up all the color in your world for the browns of fall, we’ve got the perfect card for you! This fall card brings nice bright pink and orange to a cheery “happy fall” sentiment.
Looking for buttons for your Halloween projects? Don’t miss our brand new Scary Button Bonanza, Trick or Treat Button Basics, and Fall Festival Button Basics!
We’ve got Christmas cards on the brain here at Buttons Galore! Since World Cardmaking Day the first weekend of October is the unofficial launch of the holiday card making season, we’re sharing another card idea today to help your Christmas card planning. Our buttons, sequins, and beads are the perfect easy and affordable embellishment to use for making loads of Christmas cards.
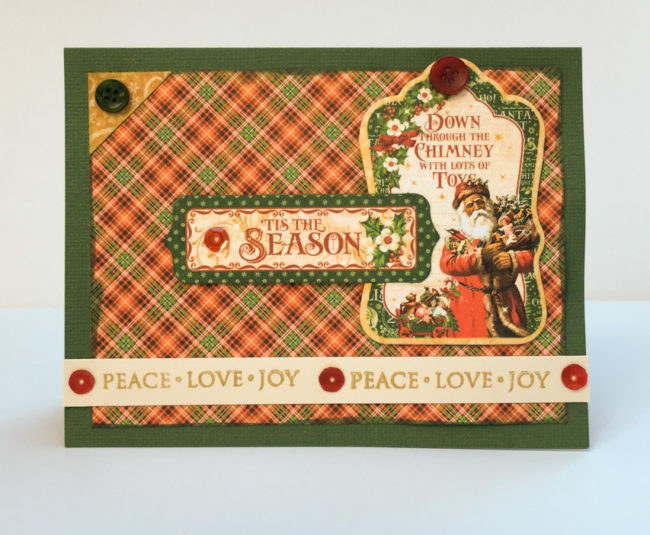
Supplies:
Creating this Christmas card is quick and easy with buttons, and pre-coordinated paper and embellishments.
Start by cutting a piece of plaid paper that is 5″ by 3.75″. Ink the edges with the green Fluid Chalk and adhere it in the center of the front of the card base.
Cut a triangle from the gold paper, and adhere it in the upper left corner of the plaid paper block.
Adhere the large chipboard piece in the upper right corner of the card. Adhere the “Tis the Season” tag layered on top of it, using foam adhesive dots for the end not on top of the chipboard.
To create the bottom text strip, cut a 1/2″ strip of cream cardstock. Use the Shimmer ink to stamp the sentiment twice across it, leaving room in the middle for a button. Adhere across the bottom of the card.
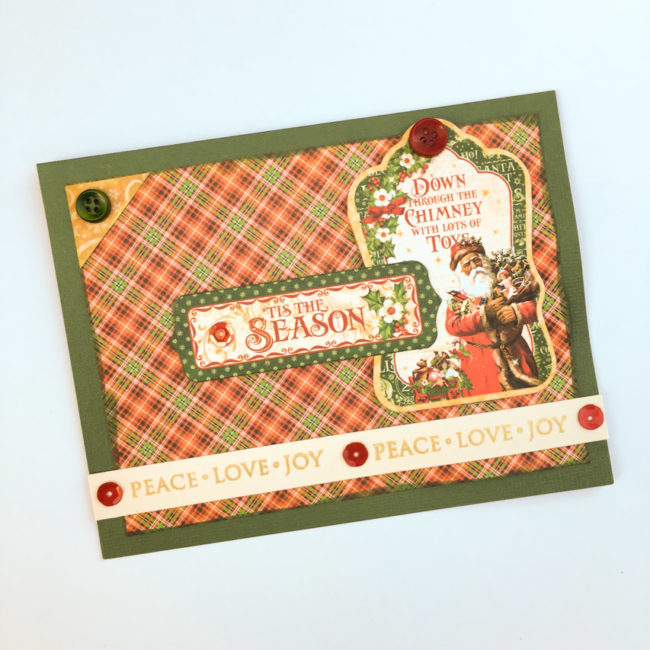
Using the PPA Matte Adhesive, place small dots of adhesive on the stamped strip and the sentiment tag. Press sequins into them and allow to dry. Also use the Matte Adhesive to adhere the buttons on the corner frame and the chipboard embellishment, and allow to dry.
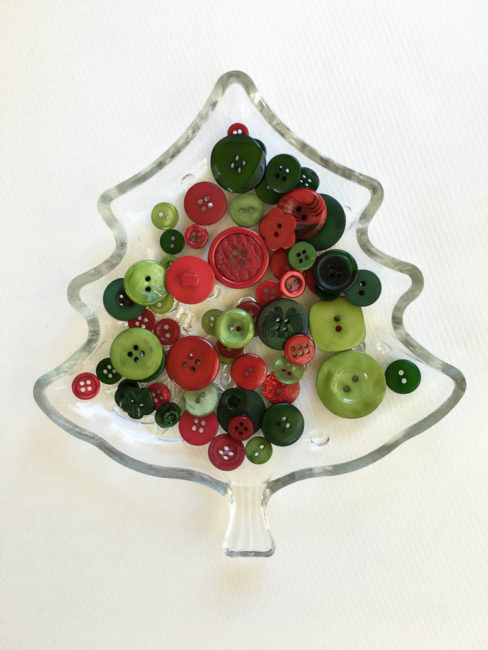
“Tis the Season” Button Bonanza is perfect for vintage color schemes, and if brighter is more your style, don’t miss “The Merriest” Button Bonanza, with bright green, bright red, and pastel pink & blue! We’ve got your Christmas cards buttoned up!
World Cardmaking Day is coming soon, and that means lots of crafters will be starting to think about making Christmas cards! Today’s holiday card idea uses 3D buttons to create dimension on a snowflake card that only takes minutes to make!
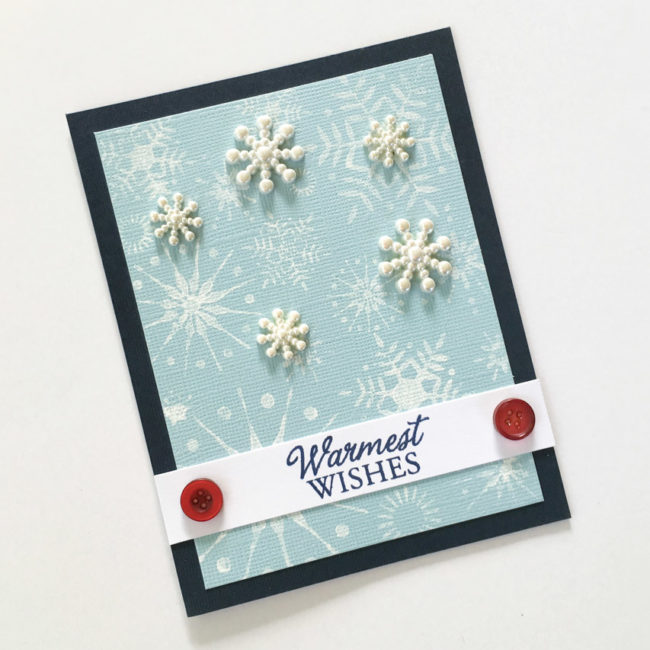
Supplies:
The key elements of this card’s design are very simple – a snowflake background stamp, stamped with acrylic paint, and 3D snowflake buttons. Layered together, these elements create a design this is simple, elegant, and dimensional.
To begin your card, cut a 5.5″ x 4.25″ background for the card from dark blue cardstock. Then cut a 5″ by 3.75″ layer of the light blue cardstock. Paint the snowflake stamp with the acrylic paint dabber, and stamp it onto the light blue cardstock. One dry, adhere the light blue cardstock layer on top of the dark blue layer.
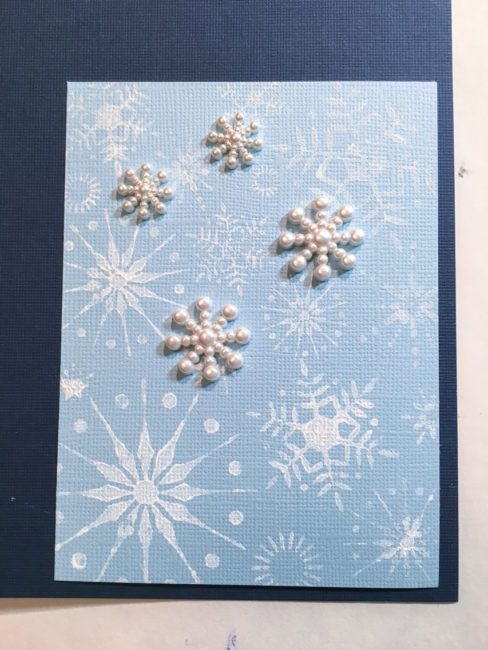 For the sentiment strip, cut a 3/4″ strip of white paper. If you stamp in the middle of that strip and then adhere it before snipping off the ends, it is easy to get your sentiment perfectly centered on the card front. Then you can arrange the red accent buttons around the edges of the sentiment strip and they will also be perfectly spaced!
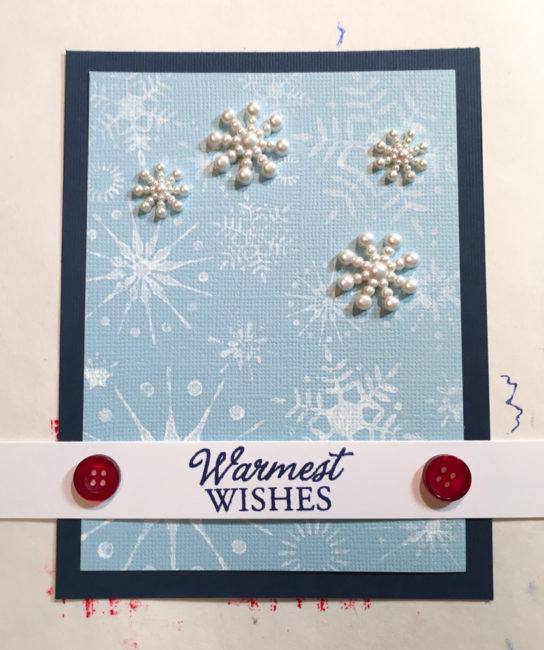
For the final touches on your card, remove the shanks from the 3D buttons using a button shank remover. Then adhere the the snowflakes with liquid glue in random places on the card front. You can choose to place them to accent a specific stamped snowflake (as I did in the upper right of my card) or randomly in open areas between the stamped designs.
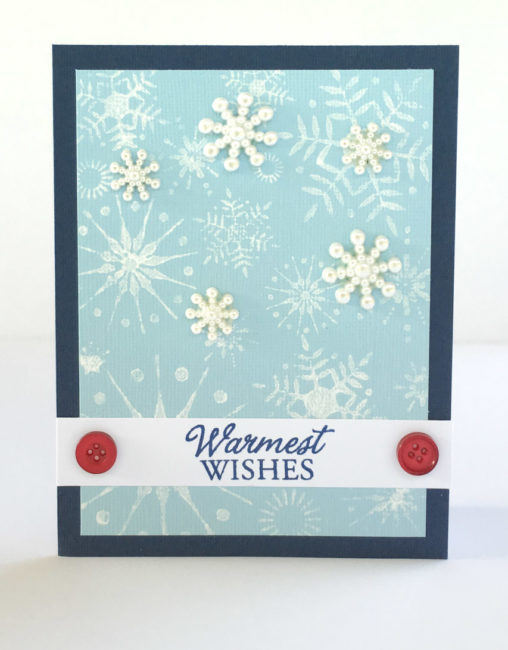
This holiday snowflake card is quick and easy to make. If you’d like to produce this card in volume for your holiday card list, these pearl snowflake buttons are also available in bulk via custom order from our customer service department.
Spooky trees are a fun way to decorate for Halloween. To keep it from getting too spooky and scaring my daughter, I’m decorating mine with some cute ghost ornaments that only take 15 minutes to make!
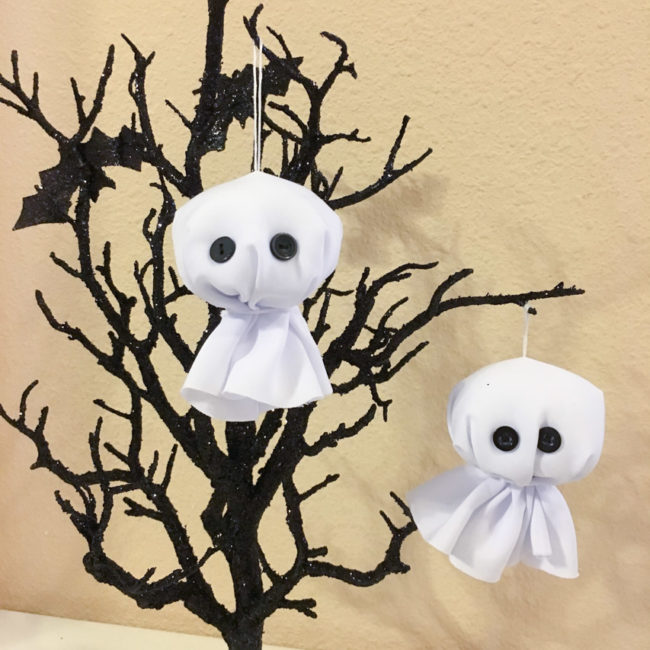
Supplies Needed:
To begin making these, I first had to raid my kitchen for a 10″ dinner plate to use as a circle template! I laid the plate out on the white fabric and drew around it with the fabric marking pencil. Then I cut the circles out, just inside the lines I had marked.
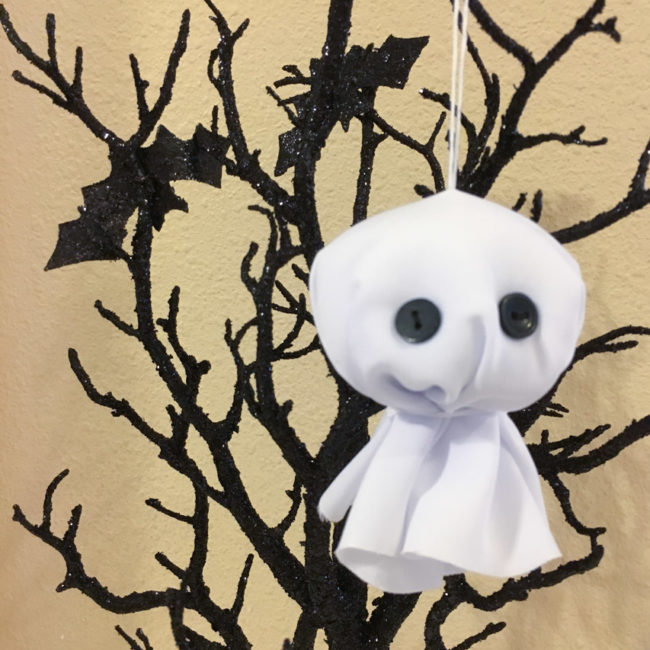
Next, to find the center of the ghost ornament, I folded the circles into quarters. I threaded a needle with white embroidery floss. Then I stitched up through the center of the fabric and back down, leaving a loose loop. I tied the threads together on the reverse side. (The side with the knot became the inside of the ghost.)
To create the pouffy head of the ghost, I balled up some fiberfill to about the size I wanted. Then I gathered the fabric around it, centering the hang loop at the top. I wrapped some embroidery floss around it to tie it off, leaving a small (about a half inch or so) opening so that it isn’t gathered too tight.
The final step was to sew on the buttons for the ghost’s eyes. I threaded my needle with black embroidery floss and used the opening at the center of the fabric gather to pull my needle through when I needed to sew from the underneath side.

Whether you make just one or a whole tree full, these cute ghost ornaments are a 15 minute treat that will make your Halloween extra festive!
Today we’re taking a walk on the creepy side of Halloween, with a spooky Halloween tag that makes a great attachment for a treat bag or can be a unique holiday greeting by itself!
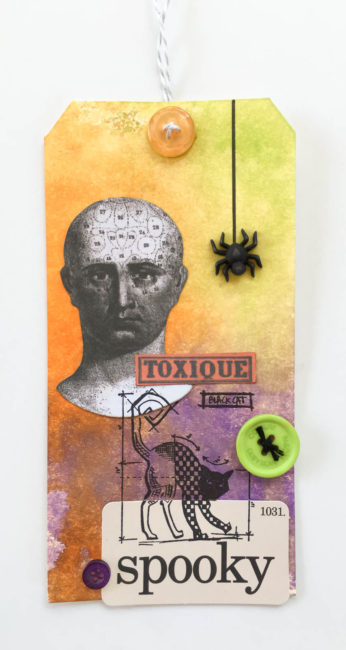
Supplies:
1. Create the background of the Halloween tag by spraying the three colors of Distress Spray Stain in a triangle arrangement on a craft mat and then dragging the tag across the ink. Allow to air dry, or dry with a heat gun.
2. Ink the edges of the paper elements with matching ink to hide the white edges, and glue them in place.
3. Using Archival ink, stamp the creepy cat on top of the background and paper elements.
Tip: If the stamp image is incomplete where the paper layers meet, use the fine point end of the Distress Marker to fill it in!
4. Draw a line for the spider web in the upper right corner using the brush end of the Distress Marker and a ruler.
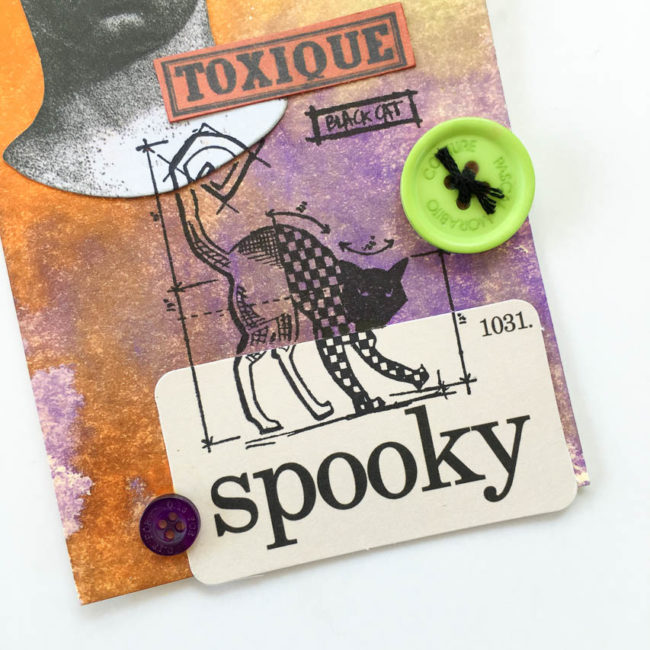
5. Thread black embroidery floss through the green button and tie off.
6. Use a button shank remover to cut the shank off from the back of a spider button.
7. Glue all of the buttons into place using the PPA Matte Adhesive. (Make sure to center the orange one over the hole in the tag.) Let dry.
8. Thread twine from the back through the button and ending at the back again, to tie off the tag.
9. Enjoy your Halloween tag!
That September chill is in the air, and that means pumpkin spice, apple cider…and Halloween on the horizon! Our 3D buttons make great accessories for your themed cards, and I’m here today to share an idea you can make with bat buttons from our Halloween Value Pack.
Our Halloween Value Pack includes approximately 50 assorted buttons. The buttons range from 1/2″ to 7/8″ in size and include shank and sew-through buttons. Designs include fun options like pumpkins, monsters, spiders, bats, and everything you need for your Halloween-themed projects!
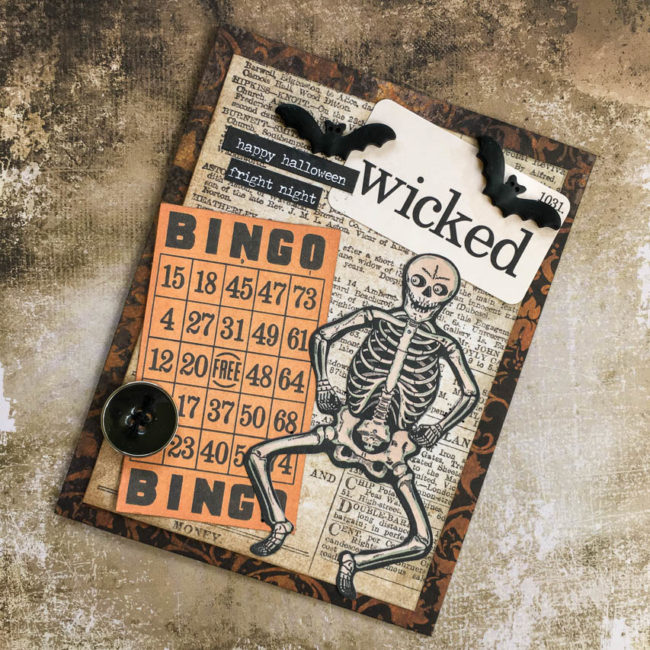
Supplies:
To create the base of the card front, cut a 4.25″ by 5.5″ piece of the black and orange paper. Adhere to the front of the card base. Cut a 3.75″ by 5″ piece of the text paper, and adhere it centered on top.
Select the bingo card and wicked flashcard from the ephemera pack, and adhere them angled in the corners of the card front. Adhere the skeleton ephemera on top of them.
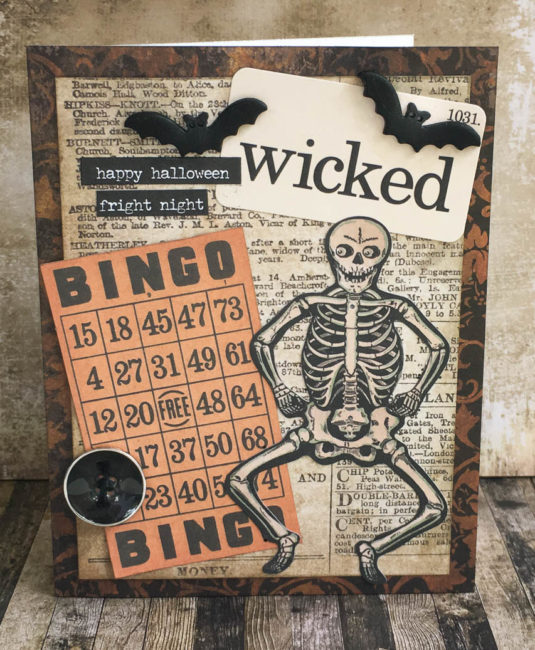
Tie embroidery thread through the large black button from the Halloween Value Pack and glue it on top of the bingo card using PPA Matte Adhesive. Use the PPA Matte Adhesive to also attach the bat buttons from the Halloween Value Pack on top of the “wicked” flashcard.
To finish the card, select some sentiment stickers from the Small Talk sticker set and stick them down in the upper left corner underneath one of the bat buttons.
This quick and easy card is a fun way to say “boo!” to someone for Halloween! Who do you want to send a friendly scare to this year?
This week, we’re introducing you to six new Button Basics assortments! One of the new assortments is a vintage fall palette called Fall Festival, perfect for making fall, Halloween, and Thanksgiving projects.
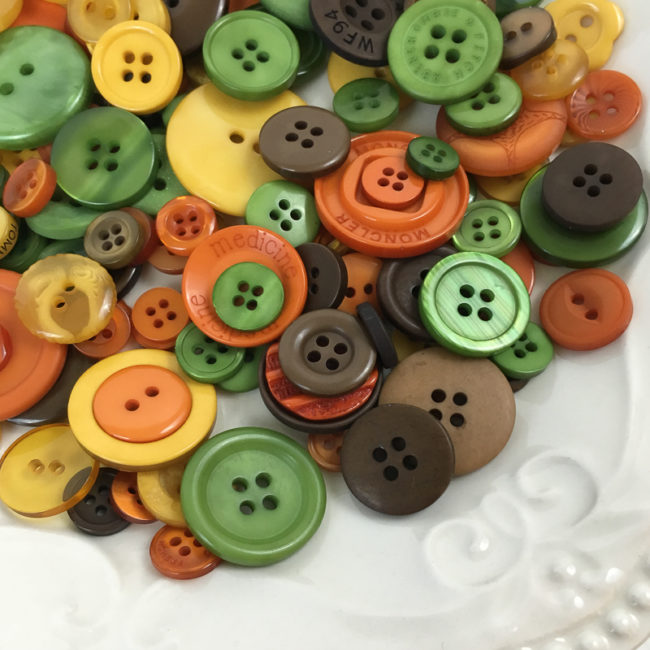
Fall Festival is a mix of brown-tinged tones of green, orange, and yellow, along with coffee shades of brown.
I decided to pair Fall Festival with Graphic 45’s new Halloween in Wonderland collection to make a retro fun Halloween card!
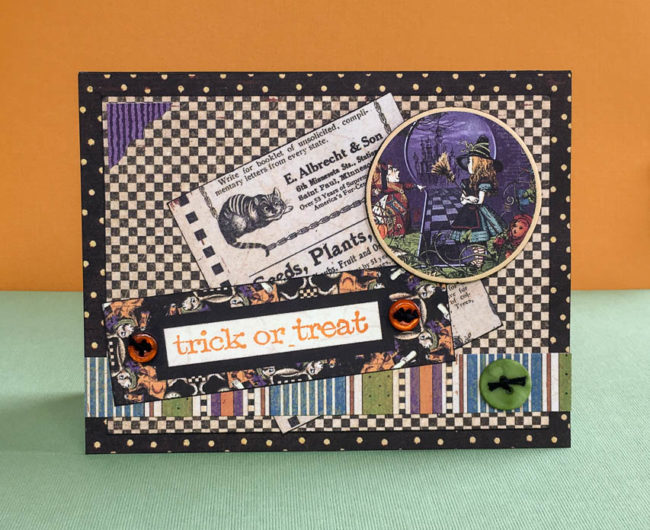
Supplies Used:
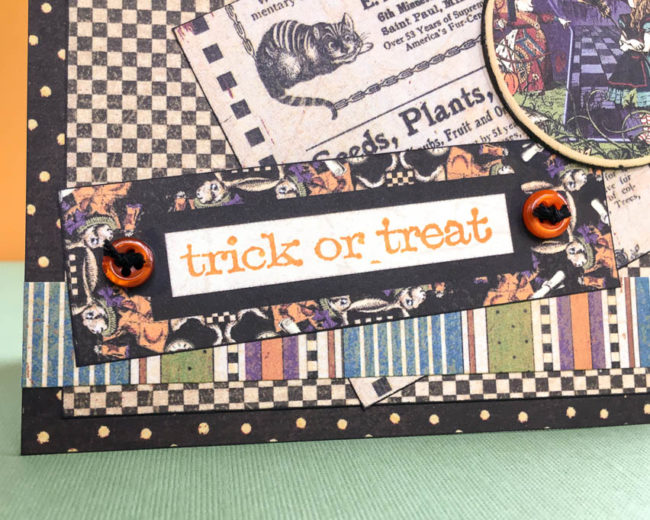
I used tiny orange buttons from Fall Festival, to visually “attach” the faux bookplate that is printed on the label from one of the cut out sheets in the Graphic 45 “Halloween in Wonderland” collection. The buttons highlight it as the sentiment block for my card, and Fall Festival’s color tones coordinate beautifully with the paper collection.
All of my buttons on this card are attached with PPA Matte adhesive, my favorite liquid adhesive for working with buttons and embellishments. It’s just the right consistency – thick enough to hold an embellishment in place, but not so thick that you can’t move it around to get it where you want it. It holds securely, and dries perfectly clear so there’s no need for anxious moments it a little spreads out from underneath your embellishment!
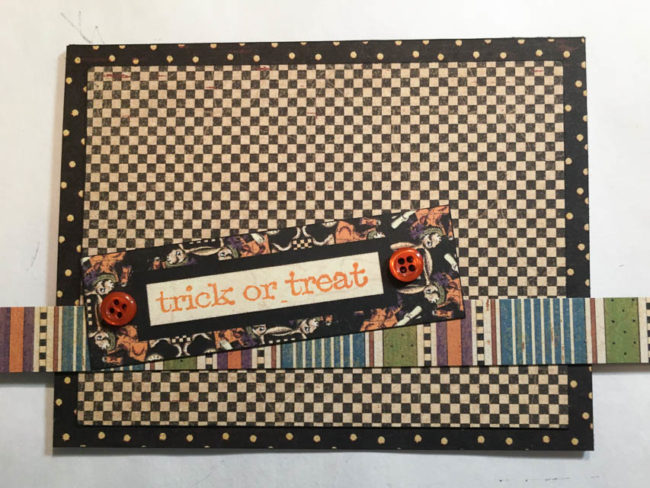
When making a project like a card, I frequently like to start with the most important elements of the design first, and then build around them. That means that I often am starting with elements that will be on top – like this sentiment block – and then working down in my design as I fill in around it. To do this, I lay pieces out without adhering them as I work.
I started by creating my background, and then putting in place the sentiment and the border that I wanted to anchor it. This of course, left me with a lot of open area made up of that super busy tiny checkerboard pattern. It overwhelmed my sentiment so I needed to tone it down.
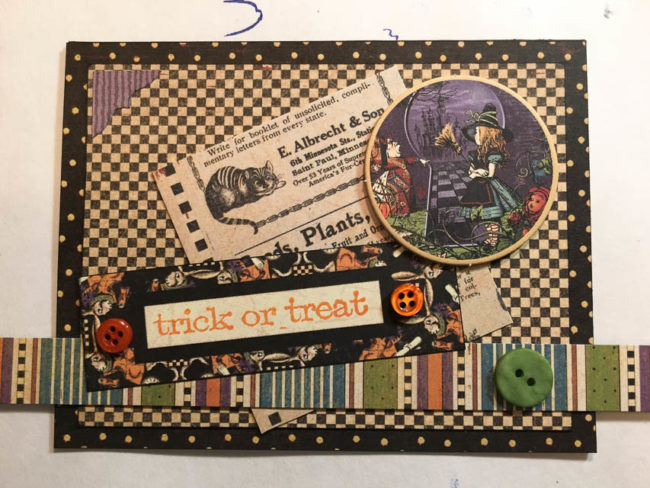
To fix this, I cut a block of a lighter, larger pattern and inserted it behind the sentiment block. Then I used a piece of decorative chipboard from the “Halloween in Wonderland” collection to fill a bit more of the space and add some color. A purple striped corner frame sticker completed the design.
I did all of that without adhering anything except for the purple sticker! So what do you do when you have everything arranged just how you want – but nothing is adhered? I grab my phone and just snap a picture like the one above. Then I can take the design apart to glue everything down, and use the photo as a guide to get everything back how I wanted it! It’s just another way we can turn the camera that is always in our pocket into a creative tool.
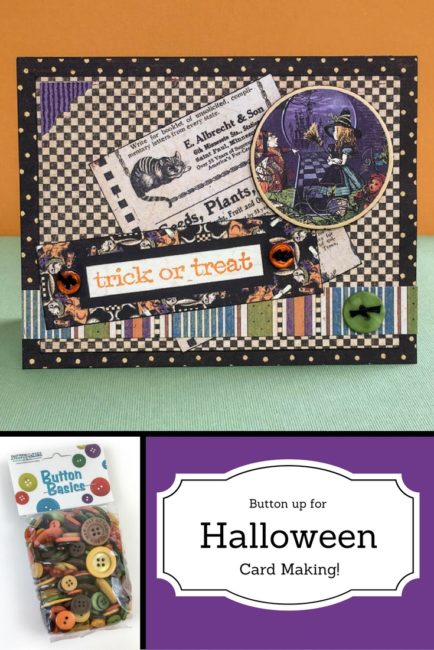
The days are ticking down to the start of the holiday season! Today, we’re going to kick off the holiday crafting season with a fun Christmas ornament full of buttons!
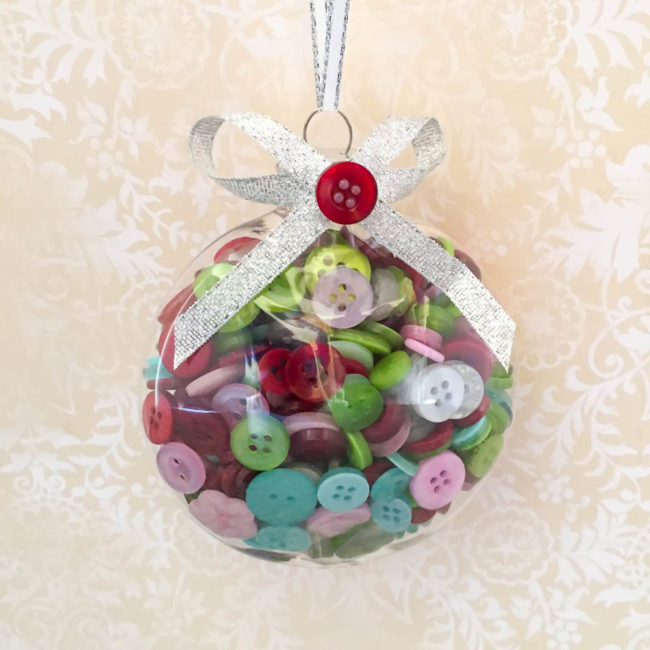
Supplies:
To make this ornament, I started with a clear acrylic Christmas ornament from a local craft store. These sorts of ornaments are widely available during the holidays and have removable tops because they are designed to be filled. The one I chose to work with was round, flat, and about 3/4″ thick.
For my buttons for this project, I had three beautiful new holiday Button Bonanzas to choose from! I chose “The Merriest”, a delightful combination of pastel blue, light pink, lime green, bright red and white. These colors will have beautiful pop against the dark green branches of a Christmas tree!

Making my button filled Christmas ornament was super simple! I started by filling the ornament with a selection of small buttons from “The Merriest” and replacing the top.
To decorate the top, I first wrapped a small piece of silver ribbon around the neck of the cap and secured it with my hot glue gun. Then I made a bow by looping another length of the ribbon, and secured it with the hot glue as well. Finally, I used hot glue to attach a button to the center of the bow.
This cute Christmas ornament is just a pretty decoration – it also doubles as a fun little gift for a crafter! After it’s done being decorative for the season, the recipient can just remove the top of the ornament to empty it out and enjoy using all these gorgeous button colors year-round.
Who do you know that would love a buttoned up Christmas ornament this year?
Today we are thrilled to share with you some gorgeous new products for crafting and sewing – six new seasonal and trendy Button Bonanza color mixes!
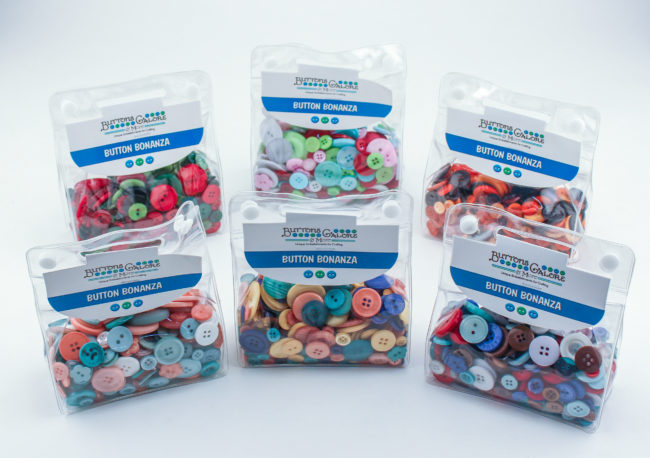
Our six new Button Bonanza totes, available today, include two new trend mixes, a Halloween mix, and three new Christmas and winter holiday mixes! Let’s take a closer look!
First up is Coral Reef, full of beautiful heathered blues and pinks that are reminiscent of this year’s colors of the year. Also, there’s a touch of white for some neutral to pair them with.
Coral Reef is great for baby projects, of course…but also so much more! These on-trend tones are great for stylish fashion projects, coordinating with many of the latest paper crafting collections, and so much more.
Up next is Glam Girl. This collection combines several very hot color trends into one gorgeous color palette that will make your projects look girly and glamorous! Navy, the neutral of the moment, anchors a palette of yellow, aqua, and rose pink to create Glam Girl. Yellow is THE home decor color at the moment.
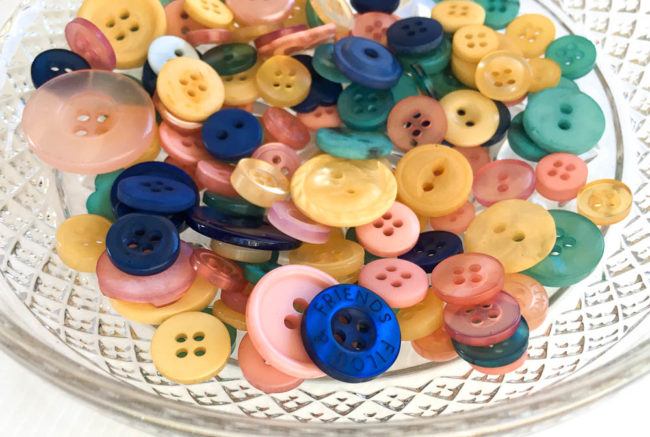
This palette of trend forward colors will work well year-round for all sorts of projects. Glam Girl is especially perfect for quilting, papercrafting, and feminine fall fashion projects!
Now, let’s talk holidays! The weather may still be hot, but cooler days are coming soon and with them the fall holidays. We’ve got the perfect new Button Bonanza for all of your Halloween crafting: Scary! It’s a mix of seasonal orange shades, with some black thrown in for extra scare!
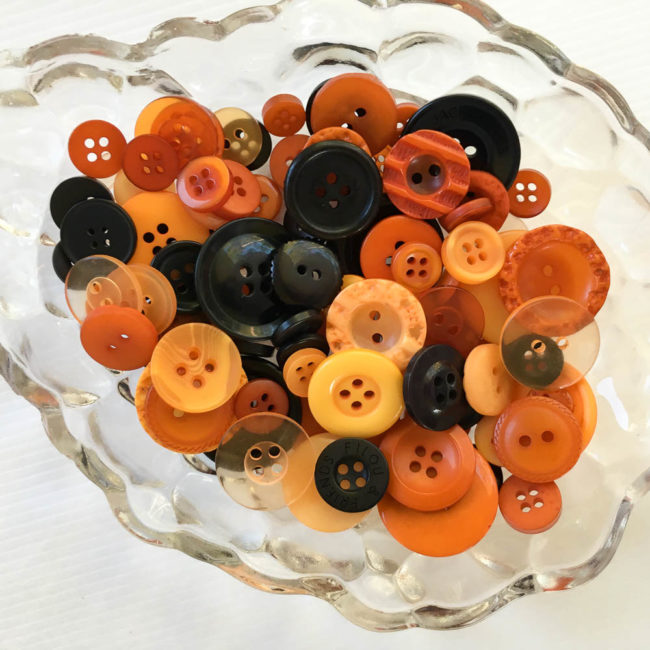
The Scary collection will take you from fall to Halloween to Thanksgiving with a perfect shade of orange for every project. Whether it’s treat bags, table decor, or a scrapbook page of your adorable trick or treater – it’s got to be Scary!
Christmas will also be here before you know it! Our three new Button Bonanzas for Christmas cover a wide range of popular color schemes for winter holidays.
Our Tis the Season Button Bonanza is a classic holiday color scheme – rich reds and deep greens, with a few contrasting lighter green shades to create perfect Christmas greenery!
This versatile combination is great for making ornaments & cards, wrapping presents, festive sewing projects…Tis the Season!
Blue, red, and white is also a popular winter color scheme and for fans of that palette, we bring you Winter Wonderland! Two different shades of blue – one light and one dark – paired with deep red and topped off with white and brown neutrals make Winter Wonderland perfect for everything from cute Christmas projects to winter snow scrapbooking!
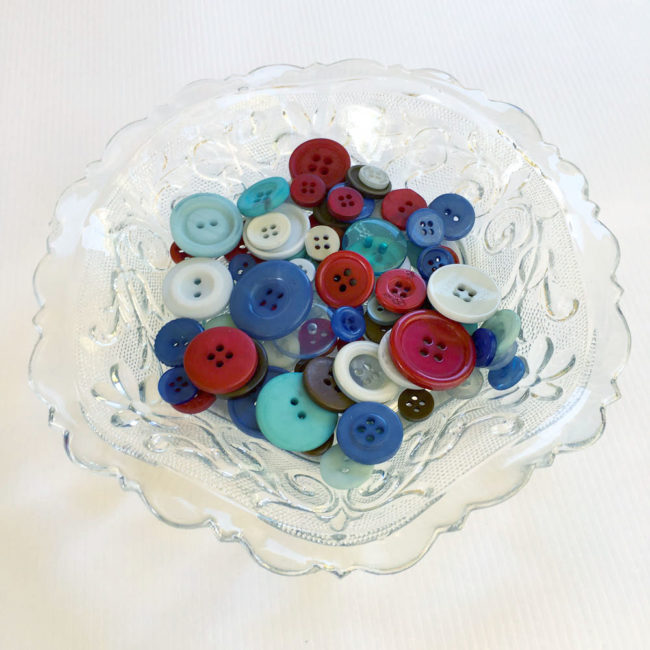
Winter Wonderland is a really versatile addition to your embellishment collection – when the winter is over, use the red, white and blue buttons for patriotic projects!
Finally, we have what may be The Merriest collection of all – a mix of pink, pale blue, lime green, and cranberry with white neutral. This fun combination is a great match for kids’ projects and for many of season’s more whimsical papercrafting collections. It’s a lighthearted alternative to the more traditional shades of green and red.
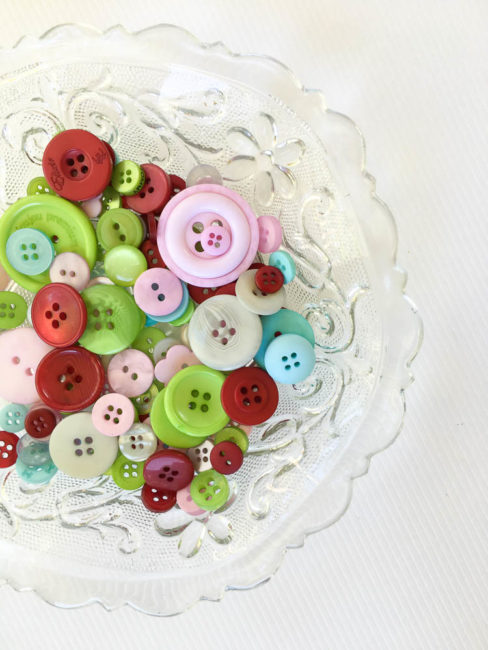
All of these new Button Bonanza products are available today in the Buttons Galore online store (and for wholesale order as well for our retail clients). We can’t wait to see what you all make with them!
School is starting in many parts of the country, and that means that cooler temperatures – and changing leaves – can’t be far behind! Today’s project is a piece of slate wall decor with painted leaves that will bring fall colors inside so you can enjoy them where it is warm!
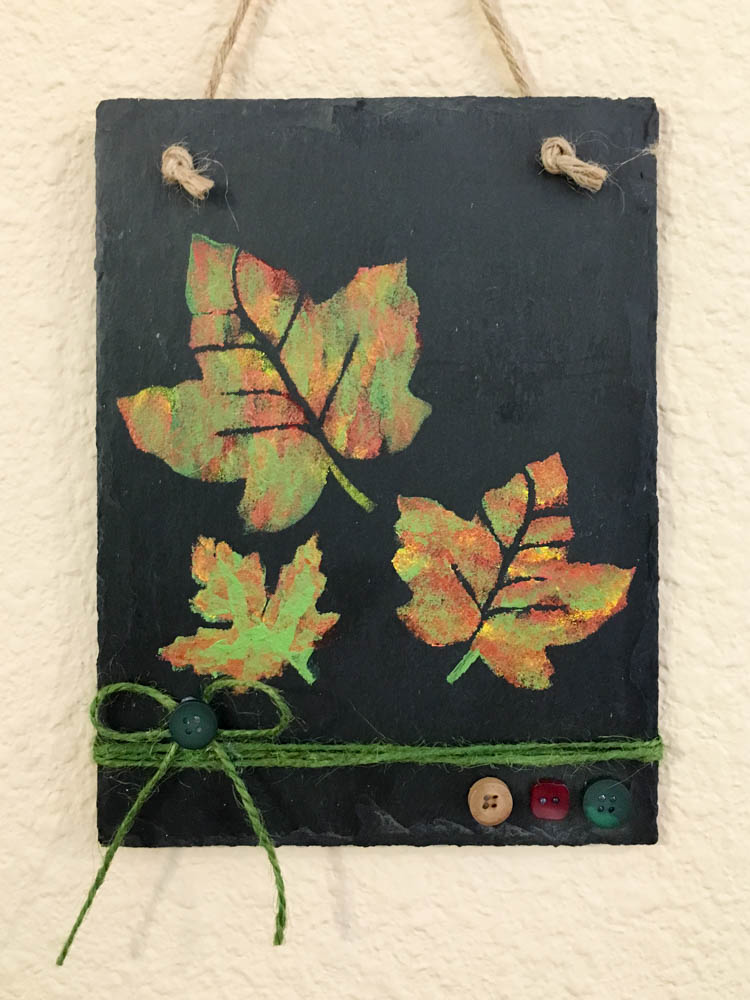
Supplies:
(For my paint selections, I used Delta Ceramcoat “Ranchero”, Delta Ceramcoat Select “Light Foliage Green”, Folkart “Cardinal Red” and “Daffodil Yellow”, and Martha Stewart Crafts Metallic Acrylic in “Rust”. But the exact shades aren’t as important as getting a light green, a red, an orange, a yellow, and a metallic.)
The paint effect looks complex, but the technique is actually really simple. The secret to it is using disposable make-up sponges to apply the paint with a “dabbing” motion, instead of a brush. It’s so simple that even young children can do it!
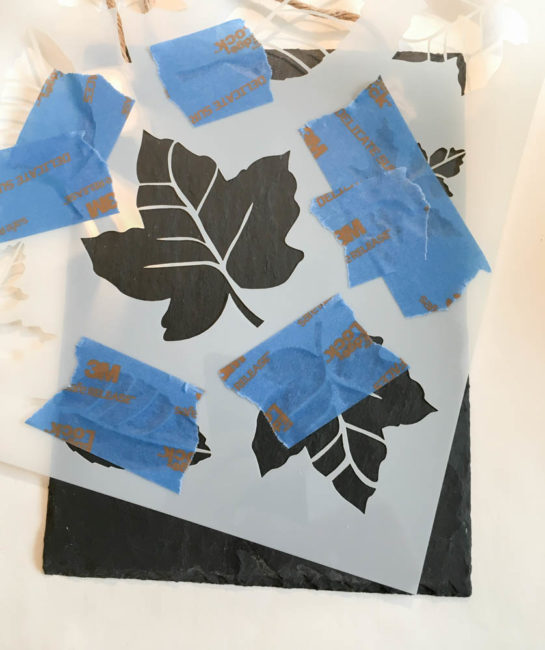
Taping down the stencil, and using tape to cover all of the nearby open areas that I don’t want to paint, helped to ensure that I got a perfect impression from my stencil.
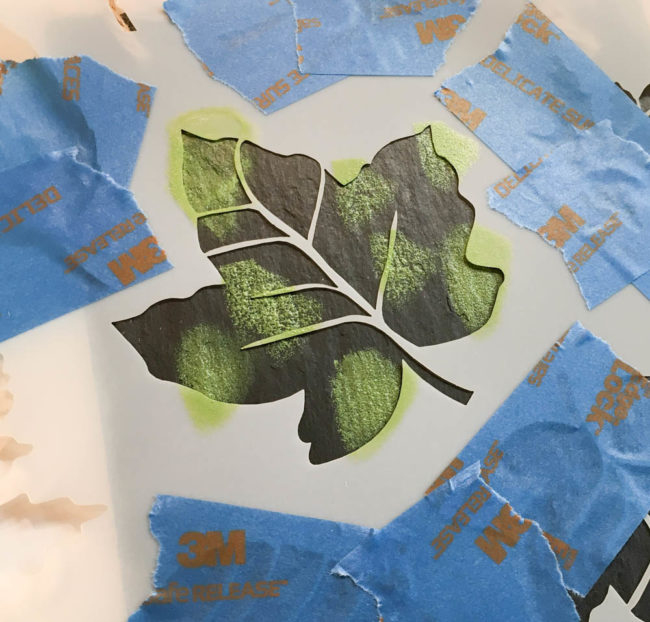
I started with the light green color of paint, using one of the cosmetic sponges. I dabbed one of the end edges of the sponge into the paint, and then dabbed most of the paint off on the palette that I was using. I then used the damp sponge to dab blotches of color onto the stencil. I repeated this process with each color (except the metallic), filling in the whole stencil area.
Then I used the metallic color and dabbed it heavily over the top of the stencil, but not filling in quite completely. I wanted small areas to peek out from underneath. Then I repeated a layer of the light green paint, but not quite as heavily as the metallic.
Sometimes when applying new paint over paint that is still wet your colors might mix and blend a bit. As long as the sponges aren’t too wet, the colors shouldn’t shift too much.
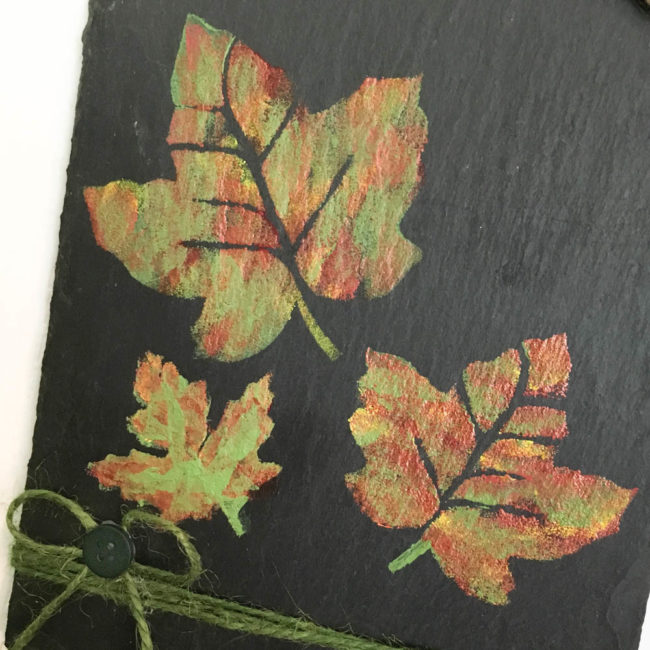
The finished effect will look something like this – a mix of metallic and green with hints of other colors like red and yellow peeking through. Just like with leaves in nature, no two painted leaves will come out the same!
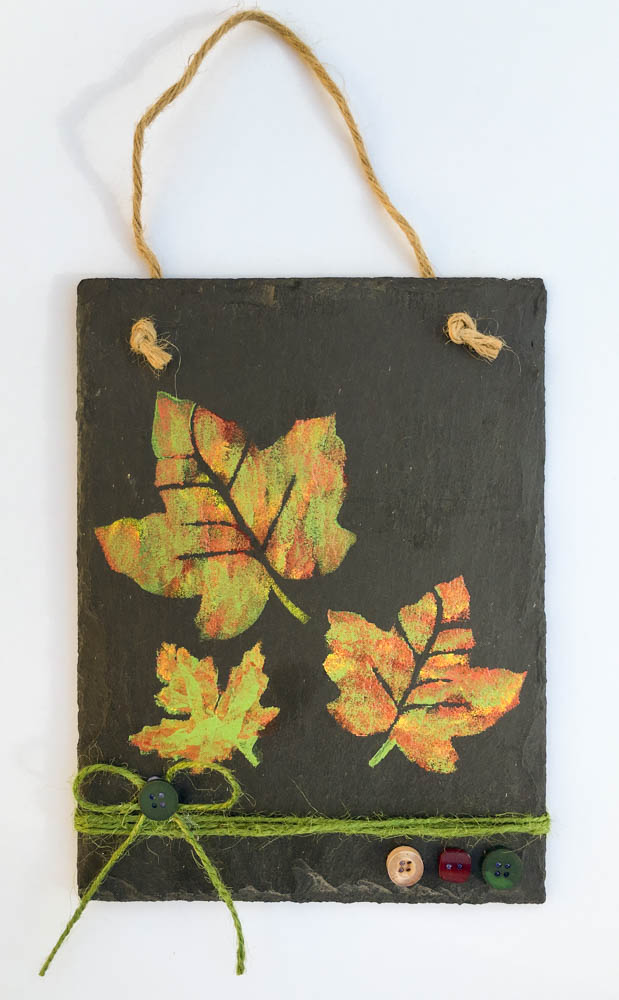
The painted leaves are pretty on their own, but the slate doesn’t really look finished without some dimension on it. I wrapped jute string around the bottom of the slate and secured it on the back with hot glue. The string provides “ground” that the leaves are falling to. Then I made a bow by twisting some string and attached it with some hot glue. I attached a button to hide the hot glue making the bow. Buttons are great concealers for glue and seams! Then, finally, in the bottom corner, I attached three more buttons. I like the repetition of the three leaves as three buttons for balance, and it provides a visual anchor for the other end of the string.

The buttons I used are from our “Argyle” Button Tote. With deep reds and greens, trendy navy, and neutral cream and black, the Argyle mix is a great selection to have in your creative toolbox for the holidays in the last part of the year! What will you use Argyle for?
It’s that time of year to think about a teacher gift! Today’s project will show you how to take an inexpensive basket available at any craft or discount store, and turn it into a beautiful back-to-school teacher gift.
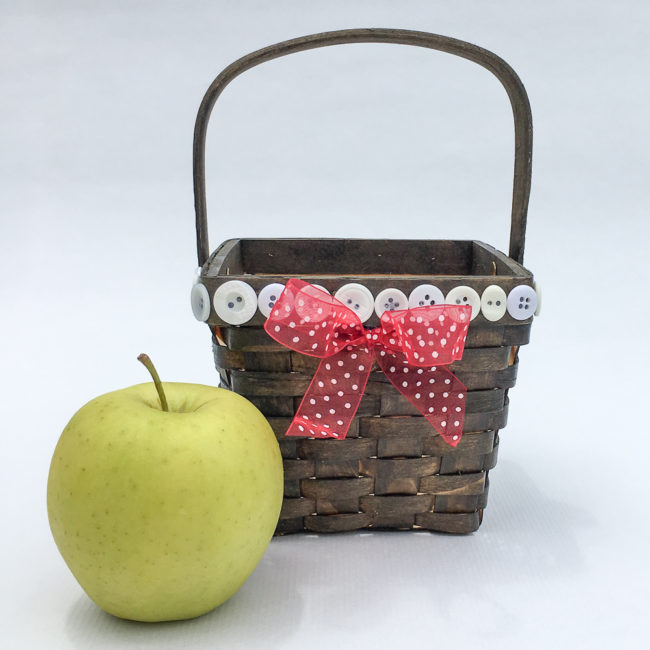
Supplies:
The basket that I used was a simple wood woven one that started out as unfinished wood. It cost less than $3 at a local craft store! It was the perfect size to hold a 15 ounce potted plant from the local home center.
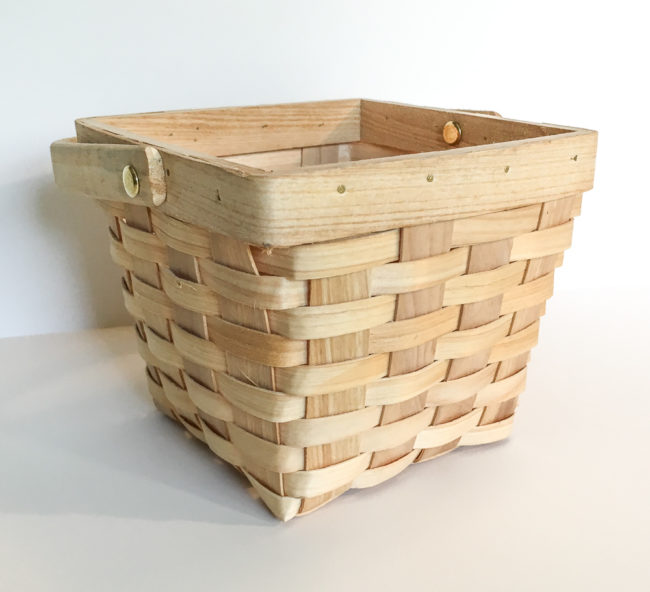
Start your teacher gift basket project by using a paint brush to apply the wood tint or stain to the basket. Be sure to use the brush to push the stain down into the cracks in the weaving so the basket’s original color won’t show through! Wipe off any excess tint and leave to dry.
While the basket is drying, select from your Button Bonanza bag a grouping of buttons that are approximately the same size and that will fit around the front edge of the basket. (You only want to do the front edge of the basket so that the handle will still be able to be put down.)
Once the basket is dry, use a hot glue gun to adhere the buttons around the top edge of the front of the basket. (Make sure to leave clearance for the handle to go up and down!)
A beautiful bow is the final touch to make your basket special. Tie a bow using some ribbon and snip off the ends at an angle. Use the hot glue gun to adhere the bow to the front of the basket.
Your completed teacher gift basket can be used to deliver a wide variety of gifts to teacher: a small plant, an assortment of snacks or school supplies, or useful goodies like hand sanitizer and wet wipes.
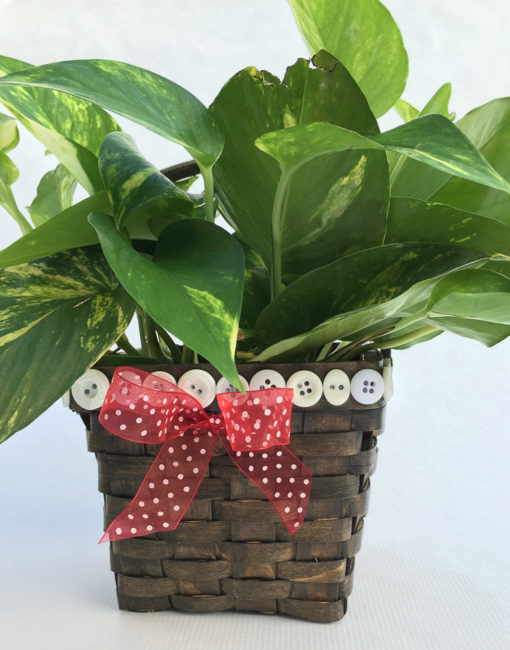
Change up the color scheme a bit (such as by trying red buttons with green ribbon) and this basket will make a great way to deliver a small gift for Christmas or another occasion!
What occasion will you make a button gift basket for?
On Tuesday, we shared a tag that is perfect for giving a back-to-school gift to your new favorite teacher. Stumped for an idea for a gift to attach it to? We’ve got the perfect gift idea – an easy to make Back to School Flower Pot Pencil Holder that is a pretty as it is useful!
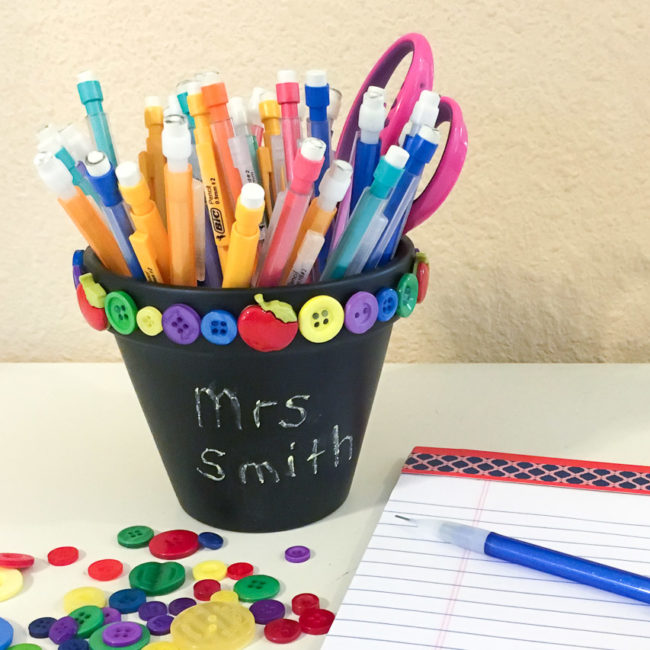
Supplies Needed:
This flower pot pencil holder is made from a basic small clay flower pot, available at any home center or craft store, that is painted with chalkboard spray paint. To spray paint items like this, I use a scrap of 1×2 board left over from a project and turn the pot upside down onto the end of it. Then I can take the item outside, hold it extended arm’s length away from me, and rotate it while spraying. This gets me good coverage with minimum mess and clean up, and I can get all the edges. To let it dry, I just prop the stick up against something with the pot still on top of it.
Once the painting is complete (I recommend two light coats) and dry, the rest was super fast and simple! Just grab a hot glue gun and get to work gluing the buttons around the top rim of the pot. Cut the shanks off of the apple buttons, and insert one of them periodically. Make sure to use enough glue that they are attached securely!
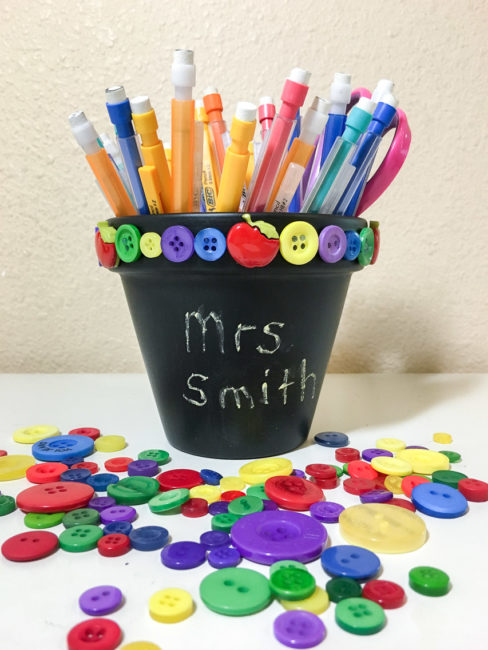
Finally, rub the bottom area with the side of a piece of chalk and then clean it off to “prime” it so that it can be written on. I chose to write the teacher’s name but you could also write instructions like “please return”. That’s one of the best things about using the chalkboard paint for this design – it’s not just classroom themed, it’s also useful!
The flower pot pencil holder will likely have a small drainage hole in the bottom of it. If you are concerned about things falling out through the hole when the pot is moved, cut a small circle of cardboard (such as from a recycled cereal box) and glue it into the bottom of the pot.
School will be here before you know it! Grab your 3D Apple Buttons and Primary Button Bonanza and start crafting your flower pot pencil holder for a beautiful classroom!
With July 4th gone, that means for many of us the summer is officially half over. It’s already time to start thinking about back to school! Our cute back to school tag is perfect for teacher gifts, first day of school lunches, and decorating backpacks!
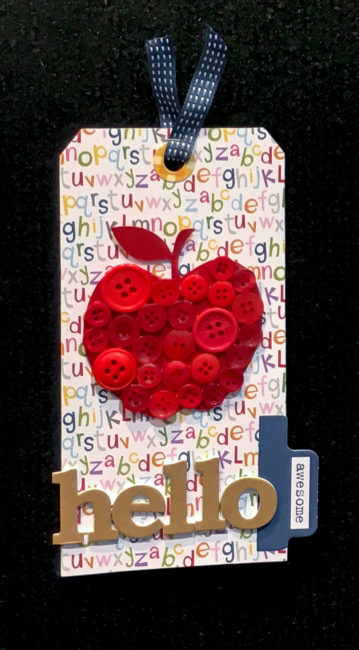
Making this tag is so quick and simple – the kids can help! Die cut the tag base and hole reinforcer out of patterned paper, and glue them together. Attach tab and alphabet stickers across the bottom of the tag. (Instead of “hello”, you could substitute a name, or the year if you’d like!)
To make the button collage on our back to school tag, use a die cut machine (I used my Cricut Explore) to cut an apple shape out of red cardstock that matches the “Red Hot” buttons. Spread a nice thick layer of the PPA Matte Adhesive all over the fruit of the apple. Begin to fill it in by carefully selecting various sizes of the buttons to fill as much of the space as possible. Push the buttons down into the glue to make them really secure!
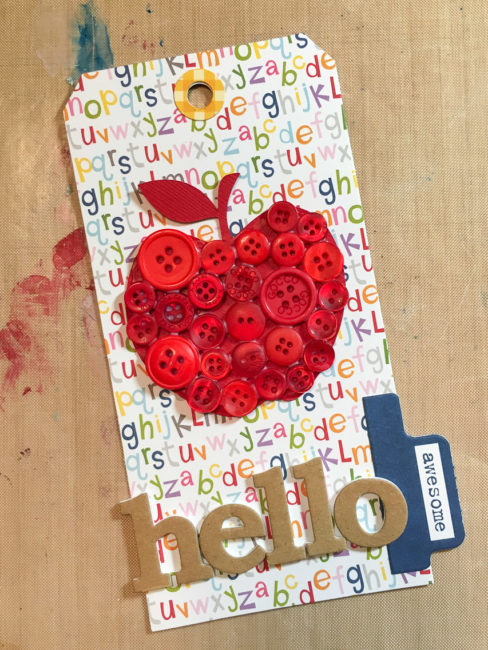
Once the glue is dry on your apple collage, glue it in place on your tag! For the finishing touch, slip a piece of ribbon through the tag’s hole and secure it with a staple.
To make this back to school tag double-sided, select a double-sided paper (like this one) for your tag base. Or cut a second tag from the die and glue them back-to-back.
Whose back to school are you going to make awesome with an apple button collage tag?
Supplies Needed:
It’s time to make another addition to our holiday frame project! This time, we’re creating a rustic flag insert for the frame that will be perfect for showing your patriotic pride for the 4th of July or the upcoming Olympics!
(For those new to the series, the holiday frame project is a 8″x10″ frame that I’m creating a series of decorative inserts for to celebrate various holidays and occasions. To see previous installments in the series, click here.)
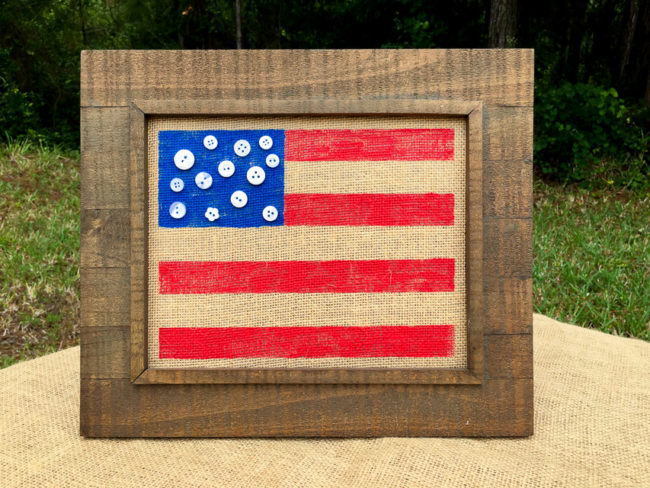
The hardest part of making this rustic flag project is…the math! To start, you are going to need to measure the opening on your frame, and decide how much border you want around your frame. Then use the painter’s tape to mask off the edges right up to the area that you want to paint.
Divide the remaining vertical area by 7 to determine the width of the stripes on the flag. Use painter’s tape to mark off the bottom stripe and fill in the stripe with paint. Remove the tape right away. While the stripe dries, determine how wide you want your blue area for the stars (I suggest about 40% of the width). Then mask it off with vertical strip of tape to protect it while you paint the top two red stripes. Measure down from the top to create your first stripe, lay down a piece of painter’s tape to protect the “white” stripe, and fill in the red stripe with paint. Remove the tape immediately after painting.
Letting each stripe dry before painting the next one, continue measuring and masking with tape before taping, until all 4 red stripes are painted.
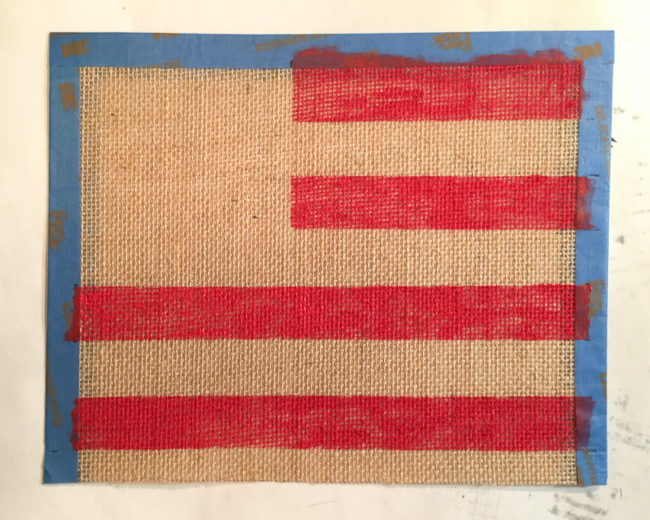
Once all of the red paint is dry, then you can lay down painter’s tape to paint the blue area.
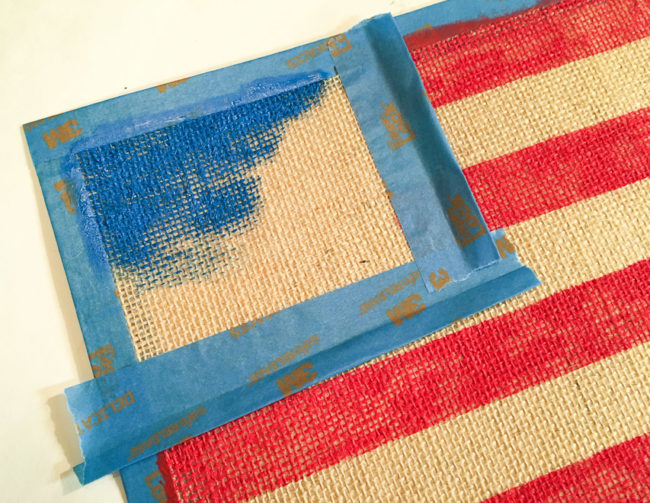
Peel the tape up as soon as you are finished painting, while the paint is still wet. Because of the open weave of the burlap, your paint will appear “patchy”, since in some places it will fill in the weave and in some it won’t. This adds to the rustic feeling of the project!
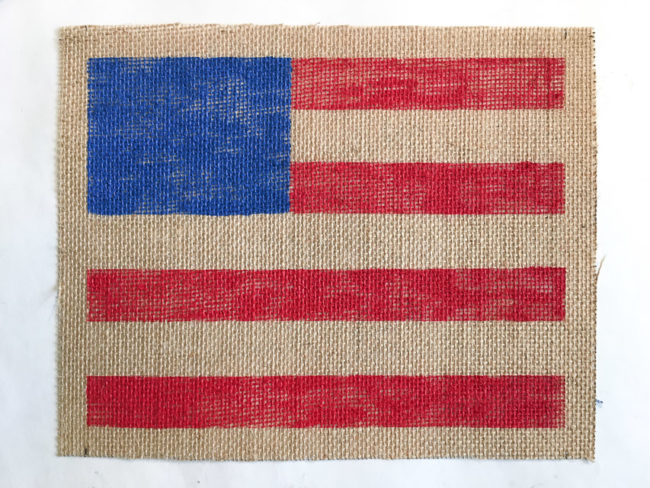
The final step is to select 13 small to medium sized white buttons from the Patriotic Mix of Button Basics. Arrange them in a random way in the blue area, and use a hot glue gun to attach them to the flag.
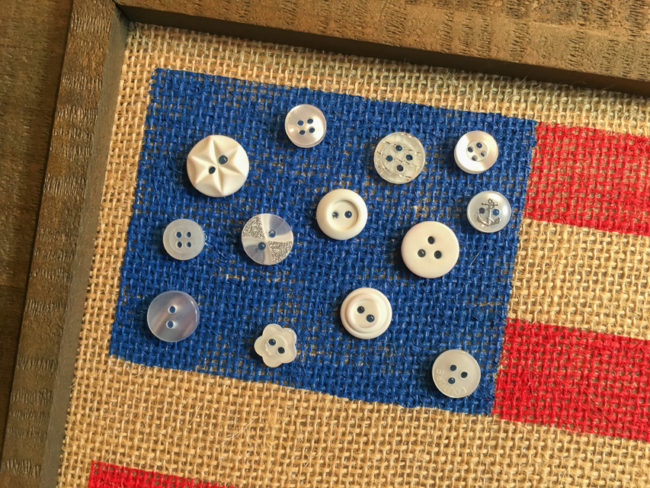
Now you’re all ready to put your flag in your frame and celebrate the 4th of July or cheer on Team USA for the Olympics this summer!

The summer holidays coming has many of us here in the U.S. wanting to display our more patriotic side. This simple pallet flag will help you show your love of country while bringing some country charm to your home as well!
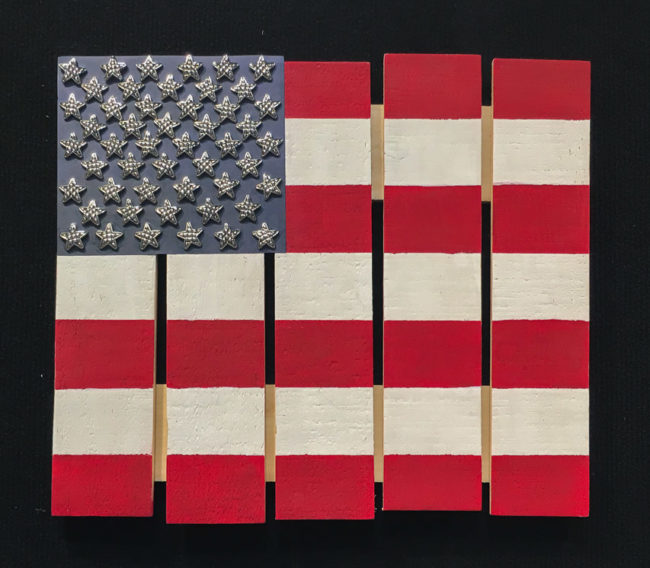
To create this pallet flag, I started by painting the entire pallet white. Then, to create my stripes, I measured the tallest height of the pallet and divided by seven (the number of stripes that I wanted) to get the width of my stripes.
Using painter’s tape to block off the areas that I didn’t want to paint red ensured that I got crisp edges on my stripes. I just measured the width I wanted and laid down a strip of tape at that mark. Then from that edge, I measured again and lay another strip of tape at that mark. That left a small open area between the two strips of tape. To protect my white paint from splatters while painting with the red, I laid down an extra strip of tape on top of the others to fill in that gap. When I was done, I had blue and white stripes like this:
Once the tape was in place, I painted the areas that weren’t covered in blue tape with red paint. The paint below appears patchy because I peeled up the tape while it was still drying – an important step to keep the edges of your paint crisp. Once dry, the paint is much more even.
Instead of painting the blue field for the stars I chose to use a paper background. The paper filled in the holes between the planks on the pallet, allowing for even spacing of the stars. It also allowed me to extend the paper above some of the shorter pallet planks, to the height of the taller planks. This gave me more room to work with for the stars. The paper was adhered down with matte finish white glue.
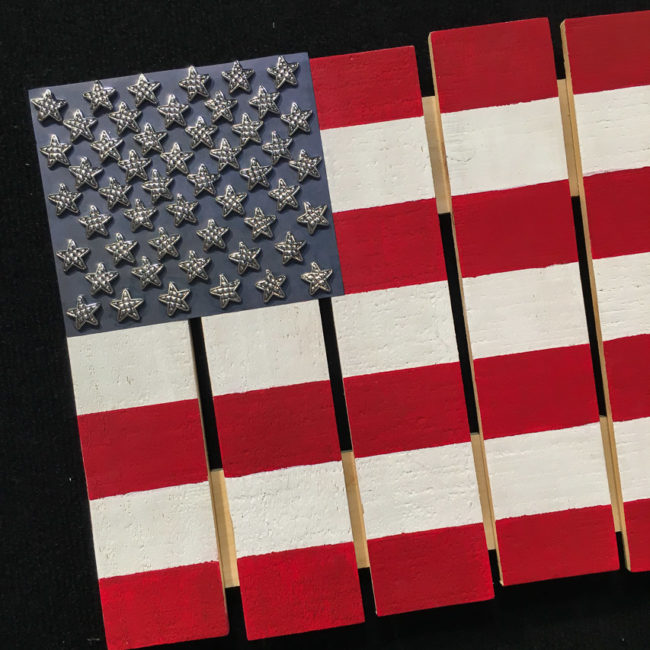
Before attaching the stars, their shanks had to first be removed. Placing the stars required a lot of patience. I worked in sections, letting glue dry on each row before moving to the next so that I wouldn’t push previous stars out of position placing the next row. It’s difficult to get the arrangement exactly perfect, but on a rustic pallet flag like this, that is part of the charm!
While I used silver quilted stars for this project, any of our 3/4″ or less sized stars would work (like our Texas Stars, our Gold Stars, or our Silver Star assortment, or the white stars from our Stars & Stripes assortment). If you don’t have the patience to do all 50 stars, try arranging 13 of them in a circle.
Supplies:
Is the dad in your life a sports fan? This baseball Father’s Day card may be the perfect way to send your love on Father’s Day!
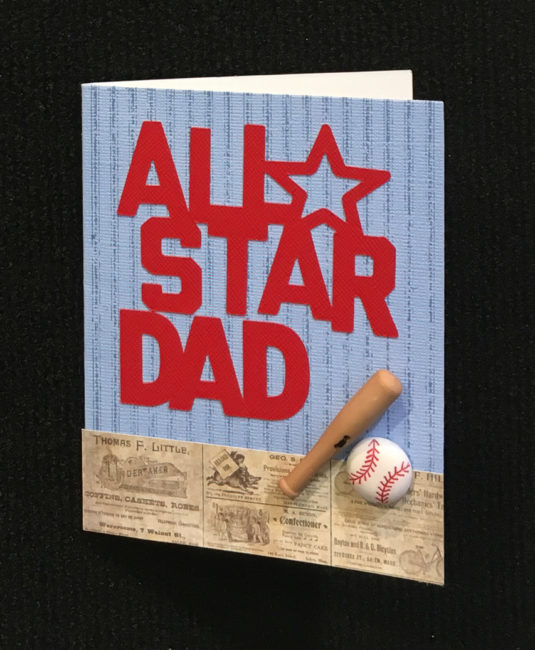
This simple Father’s Day card is based on only two main elements: a die cut and some of our fun 3D buttons!
A plain blank card takes on a baseball pinstripe look with the help of a background stamp. The texture of the blank card keeps it from stamping completely perfectly, giving it a vintage distressed look. A strip of patterned paper also helps to create a vintage vibe, which is perfect since baseball is a sport with such a strong sense of history. The die cut is cut from a red cardstock that matches to stitching on the baseball, and which creates a nice contrast to the blue. Once that is done, all that is needed is to attach the buttons. (The bat is attached with some embroidery floss, and the ball is glued.)
This baseball father’s day card could easily be themed for another sport with only a few changes. Simply change out the baseball buttons for other Buttons Galore sports themed ones such as basketball, soccer, or football, and then change the background stripes for stars!
Supplies:
Father’s Day is almost here, and that means time to make cards for dads, grandpas, and other special men in our lives! This quick and simple Father’s Day card is easy to make, and has a fun orange and turquoise color scheme that will make kids and grown-ups happy!
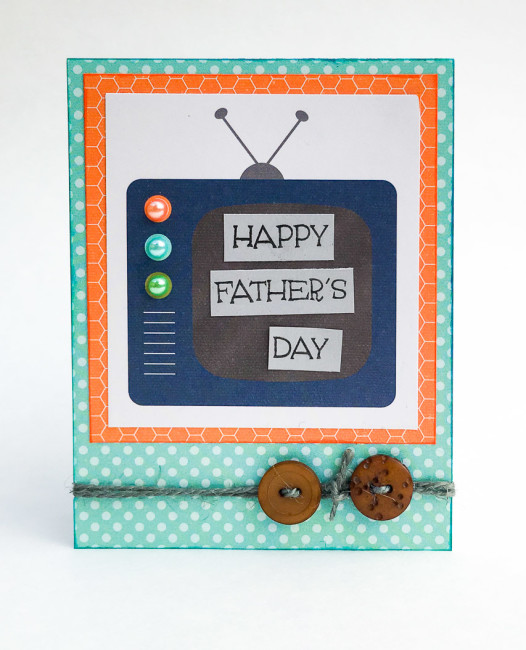
The card design is based on a preprinted journal card cut from a sheet of Simple Stories patterned paper. To keep it from looking plain as the basis of the card, embellish it with pearls that match the TV’s printed dials. The “screen” of the TV is the perfect place to hold the card’s sentiment. Stamp the sentiment on cardstock and then cut it apart to fit onto the screen. Adhere.
Next mat the TV card on orange patterned paper, and then mount it onto the card front. Finally, attach the card front to a blank card to complete the layers.
To wrap the twine, poke a hold in the spine of the card. Using the hole, wrap the twine around the card twice. Finish with the ends on the front. Thread a button onto each end of the twine, and then tie the ends together. To make the buttons lay more flat, glue dots can be attached behind them.
Supplies:
This card is perfect for any of the favorite fathers (or father figures) in your life. Who would you give this quick & simple Father’s Day card to for Father’s Day?
Mother’s Day is just around the corner, and what better way to tell Mom how much you appreciate her all year through than with a handmade card?
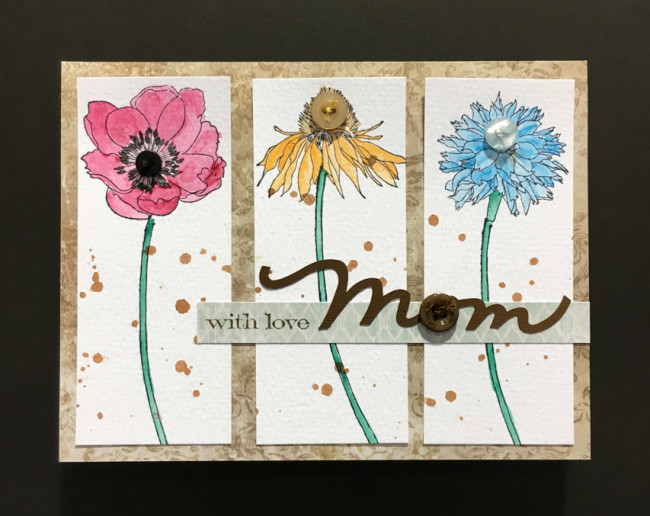 This fun and easy watercolor floral Mother’s Day card will show mom just how much you care!
Start by stamping the flowers on watercolor paper with permanent ink. Paint with watercolors. Remove the lid from the ink spray and use it to drop ink splatters onto the watercolor paper. Finish the flowers by adding button centers to them.
Cut and fold the cardstock to make a card base. Cut a piece of patterned paper to cover the front. Attach the flower elements on it.
Cut a patterned paper strip. Stamp “with mom” at one end of it, and adhere it across the card front. Use the die cutting machine to cut out the word “mom”, and attach it over the strip. Finish it with a button covering the “o”.
Supplies:
Do the dark days of February have you longing for spring? My spring button wreath project will put a little touch of spring green and flowers inside on your walls – no matter what the weather outside!
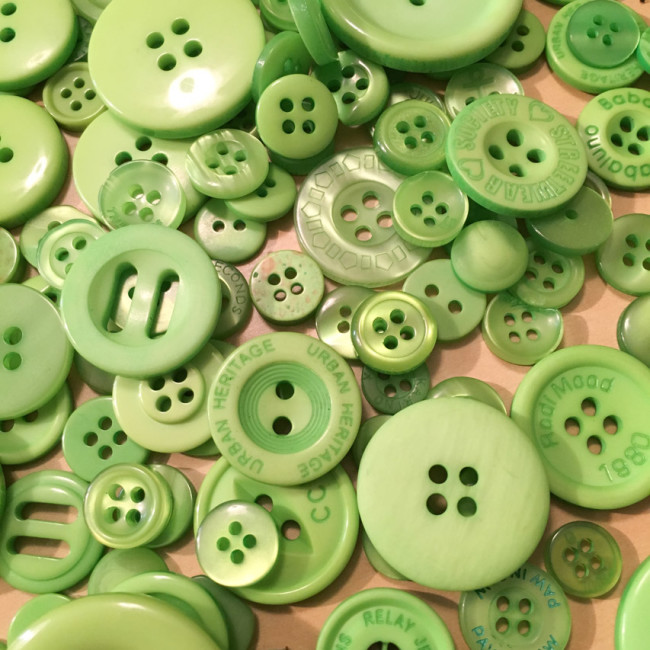
To create this project, you’ll need the following supplies:
Begin by wrapping the foam wreath in the burlap ribbon. The ribbon I chose is thin – more like fabric than canvas – which makes for smoother wrapping of the wreath and a better surface to serve as the base for the buttons. Secure the ribbon ends with floral greening pins. It may take several rolls of ribbon to complete the entire wreath.
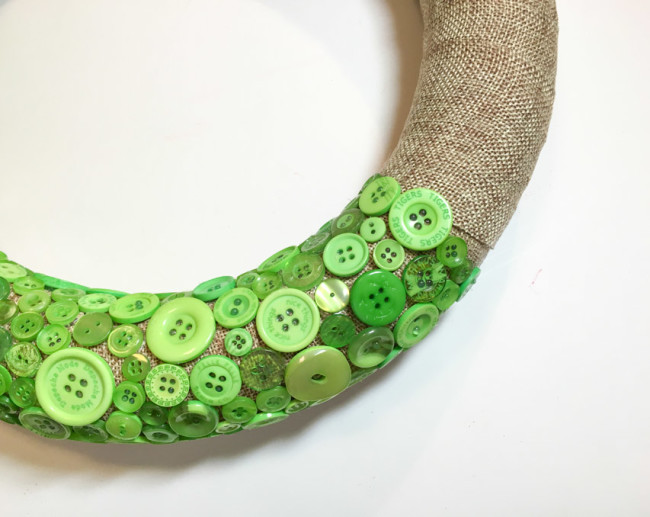
The next step is to use hot glue to start adhering buttons on the wreath. Working in small sections, lay down hot glue and then arrange buttons in it. I highly recommend using a protector (like the hot glue gun finger protectors make by Plaid) when you are pushing the buttons down to avoid burning yourself. Handle hot glue guns with care – even so-called low temperature hot glue will burn!
Once the buttons are all in place, trim the stems off of three spring floral blooms. Use hot glue to adhere them onto the wreath.
Cut the stems off of the Spring Fling buttons, and using hot glue, adhere them scattered around the wreath. Don’t forget to add a bee on one of the flowers!
Hang your wreath on the wall with a wire, a wreath hanger, or with a ribbon and nail – and then sit back and enjoy the spring!
Now that the CHA Mega Show is over, we can start sharing with you a closer look at the projects that were designed for our booth, like this ombre heart!
I designed this ombre heart wall art by combining several of our button assortments that contain great shades of pink that work together to make the ombre shift.
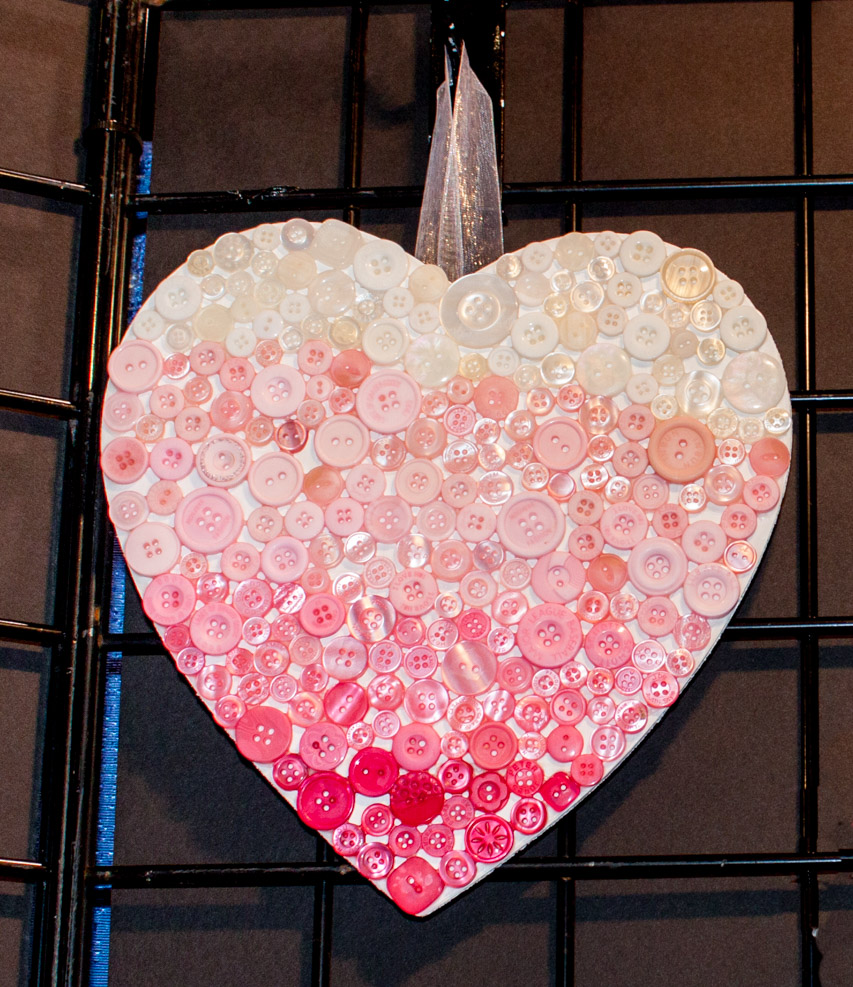
This project is surprisingly easy. The biggest challenge is the first step working with the buttons, which is simple but can be tedious. This is a great project to do with kids, to help teach color distinction!
Step 1: Paint the wood heart base with chalk or acrylic paint.
Step 2: Sort the pink buttons into five gradual color shades.
Step 3: Measure the heart from top to bottom. Divide that amount by six to get the width of each color band in the ombre heart. Mark off the divide between each color.

Step 4: Begin to apply the buttons. Apply a thick coat of glue in the first color band, and begin filling with the color for that band.
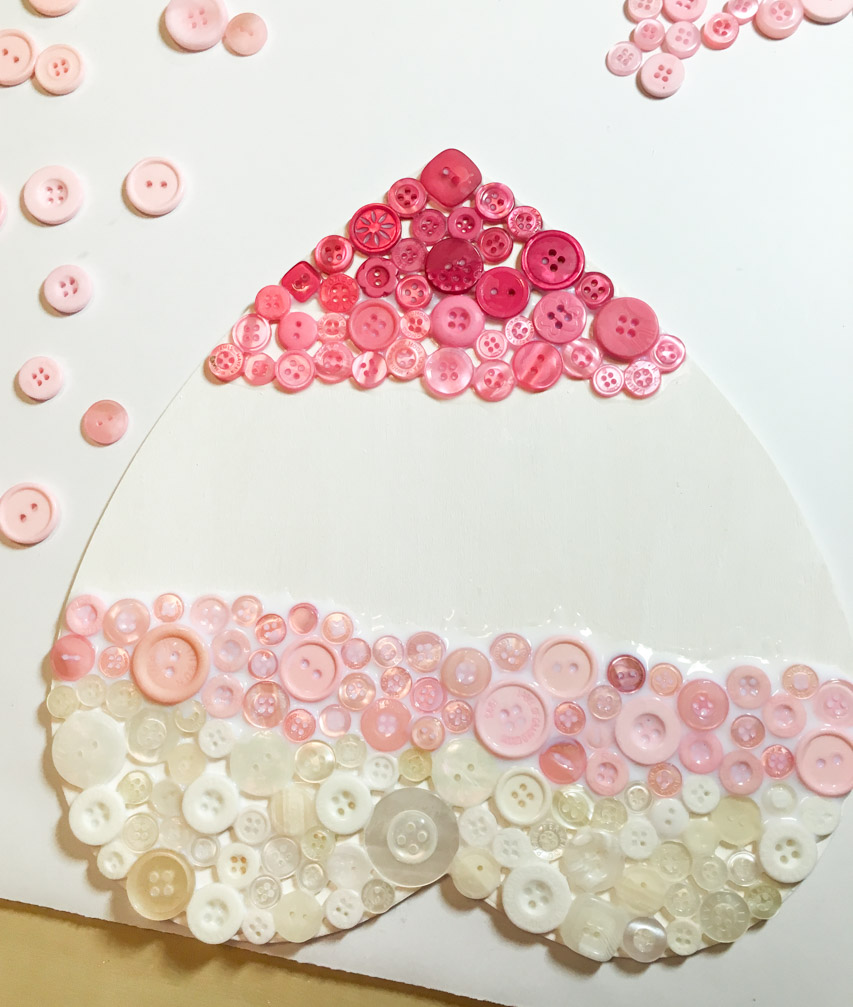
Step 5: While the first color dries, turn the heart around and work from the other end. Repeat until you meet in the middle and finish the final color.
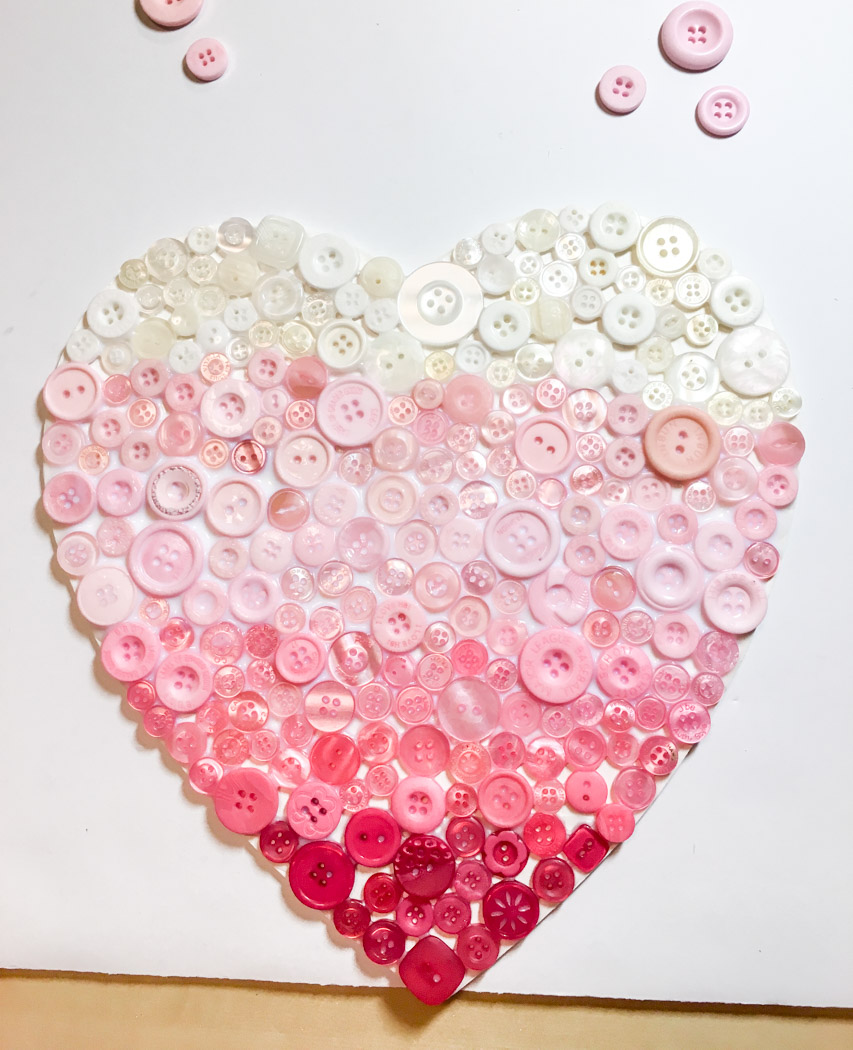
Step 6: Allow the glue to dry.
Step 7: Use hot glue to attach a loop of ribbon to the rear side on the top of the ombre heart to allow for hanging.
Supplies:
Also…don’t miss our winter sale! We’ve got great deals now through January 31st on Christmas, Winter, and Valentine’s Day themed buttons!

Remember that Autumn photo frame I shared awhile back? Well, it’s past time to decorate it for Christmas! This rotating seasonal decorative frame is so easy to to decorate to bring a seasonal spark to your home decor.
Supplies:
Instructions:
Cut an 8″x 10″ piece of the background fabric. Iron Heat n’ Bond to it to stabilize it.
Use die cut machine to cut tree and phrase out of glitter iron-on. Iron in place on on background.
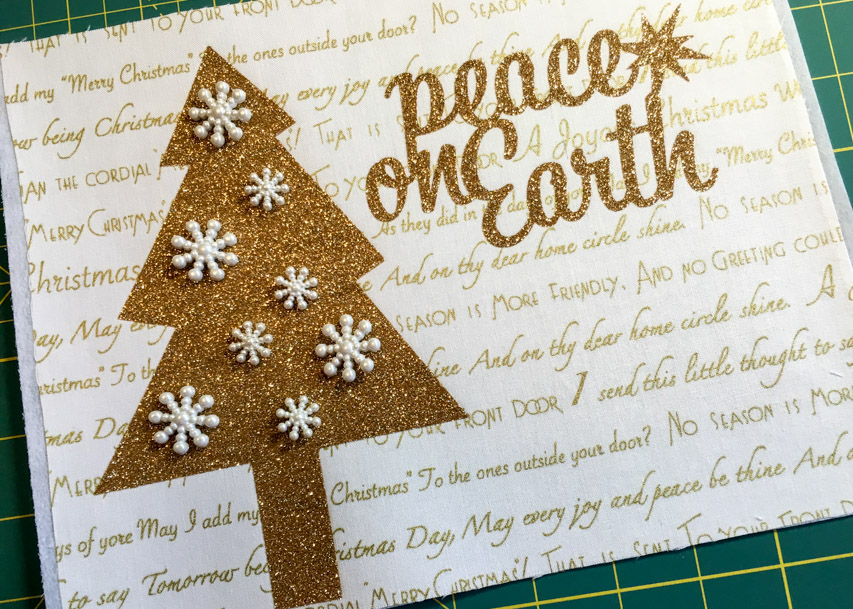
Carefully remove shanks from snowflake buttons using scissors or a button shank remover. Adhere on Christmas tree in random pattern using hot glue gun.
For an brighter look than the gold and white theme, try making ornaments out of bright red buttons!
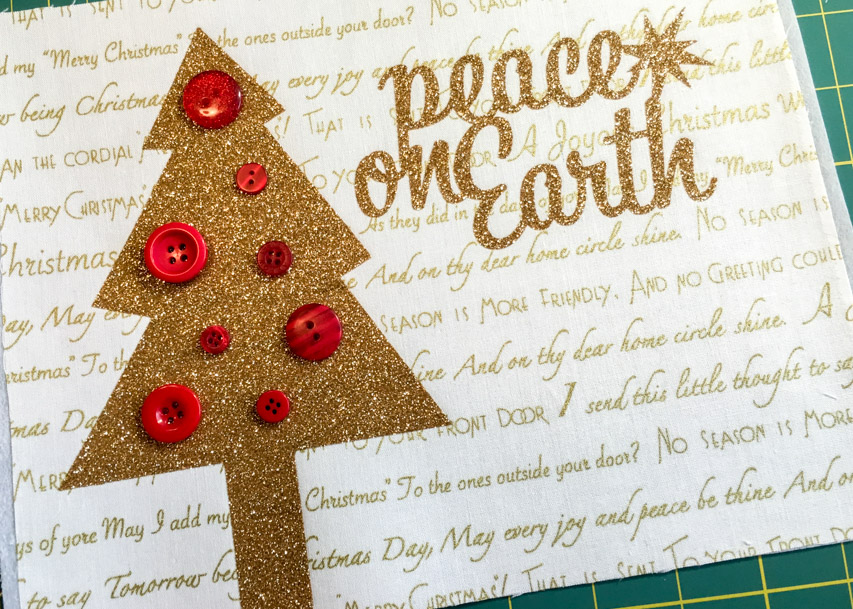
Trim off any excess interfacing around the edge of the fabric.
Insert the sheet into the frame, and enjoy your Christmas photo frame!
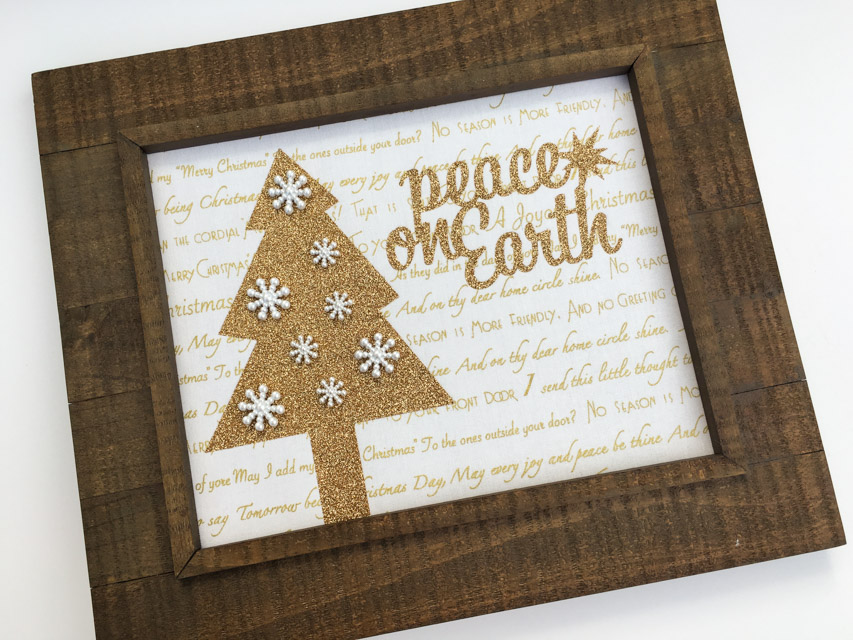
I’ll be back in January with a seasonal Valentine’s addition for your frame! In the meantime, we’ll have plenty of exciting things going on here on the blog as the Craft & Hobby Association in early January gets closer…starting with a big announcement tomorrow (Monday) here on the blog! Don’t miss it!

When it comes to gift giving, I love to put handmade touches on the wrapping when giving store bought items and one of my favorite ways to do this is with a decorated box. I’m known for making these gift boxes and in fact, the perfect item to decorate the top with is buttons! Today I’ll share with you just how easy this can be.
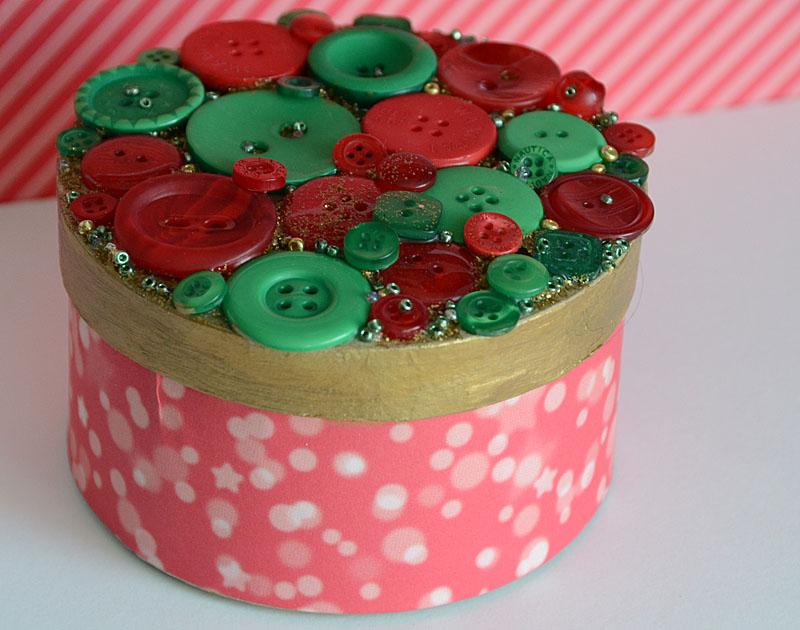
Supplies:
Step by step:
1. Remove the lid from the box and paint the sides, or cover in patterned paper. For this box I covered the bottom in patterned paper, and painted the top edge with gold acrylic paint.
2. Place a good amount of liquid adhesive onto the lid top, keeping it away from the edges. If some spills over, simply wipe away or brush back onto the top.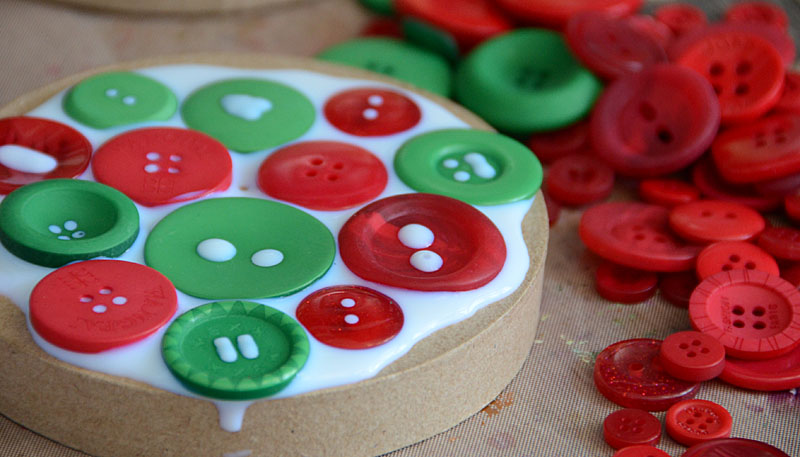
3. Begin by placing a few large buttons, then fill in areas. For a box like this I like to start at the middle and work out. Layer on a second layer of buttons if desired.
4. Once you are happy with your buttons, sprinkle something tiny like the seed beads that I have used on this box. This fills in any gaps and adds a great layer of texture and fun added dimension as well.
5. Allow the lid to fully dry before placing a gift inside the box, closing, and gifting!
If you’re wondering what to do with all of the metal christmas tree ornaments and décor shapes showing up in the local craft store the answer is simple: button them up! I had so much fun with this Christmas tree ornament project – and it really is simple and fun to do. In fact, my kids (8 and 10 years old) have made these kinds of projects themselves as well! Of course my favorite buttons these days are the color blends – and this is a perfect project to showcase them.
Supplies:
Steps:
Step 1: Cover the outside with washi tape.
Tip: Seal the edges with matte finish liquid adhesive so that it doesn’t come loose.
Step 2: Put a thick coat of liquid adhesive inside the shape. If there are unsealed edges be careful to either keep the adhesive away from the edge.
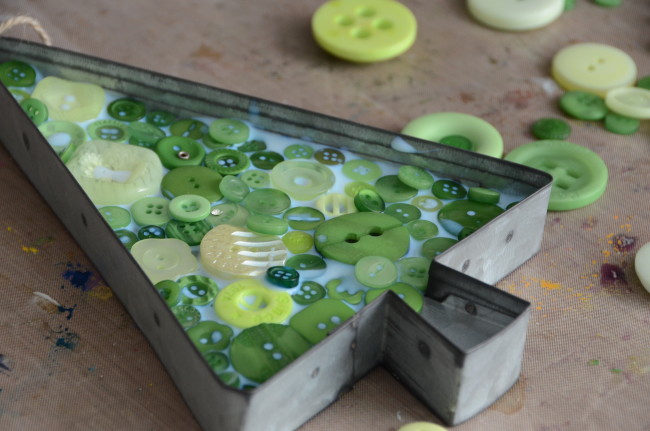 Step 3: Fill the shape with buttons! I used wood buttons for my trunk, and the beautiful green buttons all over the tree area.
Step 4: Layer a few small buttons if there are bigger gaps showing, just add a bit of liquid adhesive to the back of them when you set them on.
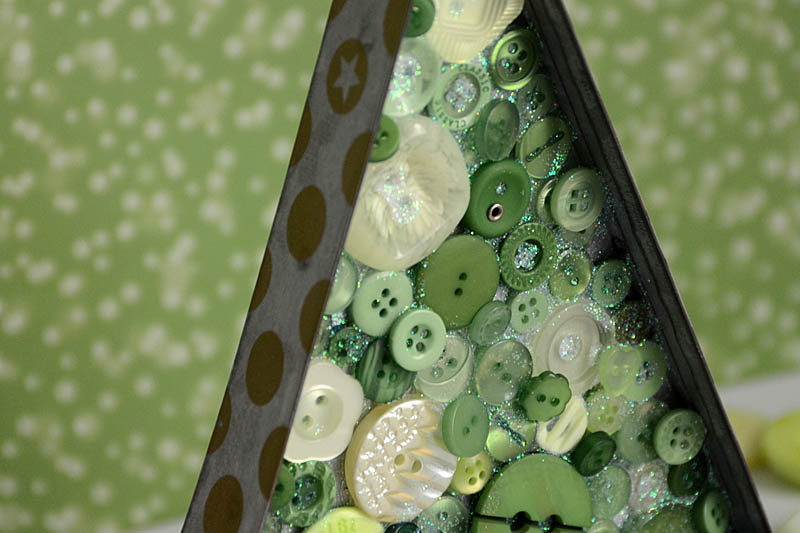 Step 5: Finish by sprinkling a bit of glitter if desired – this adds sparkle and will fill in any small crack areas.
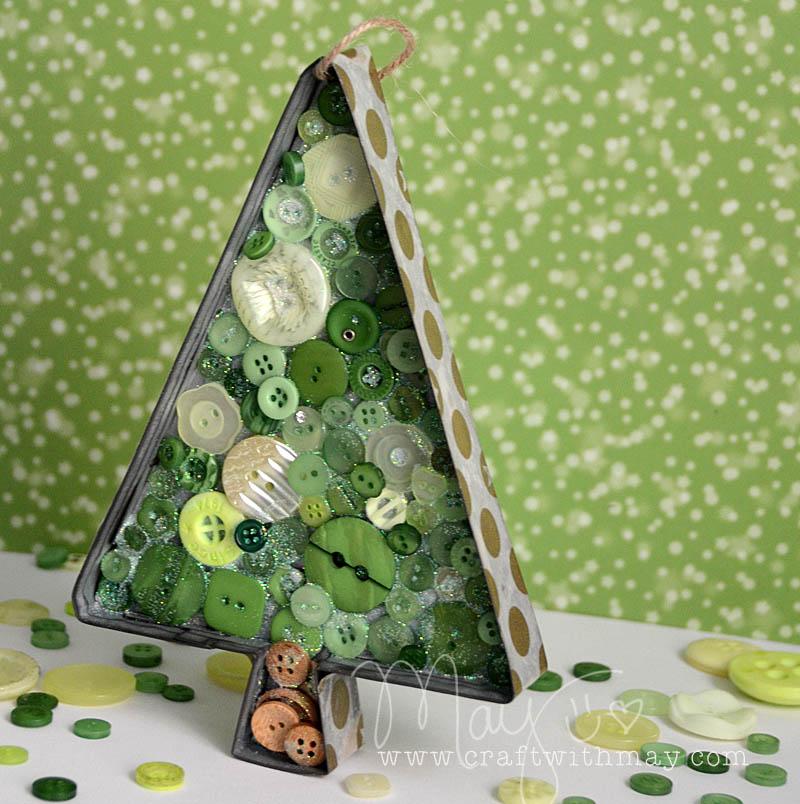
Utilizing basic supplies and everyday items in my crafting, and finding usefulness in even the simplest things is something I enjoy tremendously. With a few beautiful caramel buttons, some ink, and a little creativity I quickly came up with a fun card design that is perfect for any season.

Step 1: Take a circle object such as a cookie cutter or cup and tap with black ink. “stamp” onto your paper several times, creating a wreath shape. Repeat with brown ink.
Tip: Roll the cookie cutter or disposable cup around instead of stamping flat. This will give you more control of your lines.
Step 2: Use scissors to cut out leaf shapes and color with green watercolor or ink. Place these in three spots along your wreath, and add small caramel buttons as well. At this time you should also cut out a ½” high strip of cardstock for your sentiment, and notch the ends to fit.
Tip: instead of handwriting you could use a computer font or alphabet stamps.
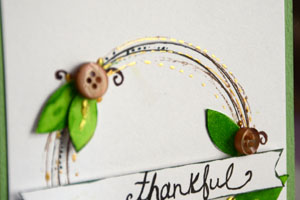
Step 3: Add the finishing touches to your card. Ink the edges of the sentiment banner, add some gold paint or ink to highlight the circle shape and around your buttons, and add any other details you would like.
Tip: Want even more: Use a pen to add flourishes and dots, as I did here with a brown pen.
When it comes to Thanksgiving I don’t do a lot of home decorating, but I do enjoy creating cards for a few special people. This card is a lot of fun to make with fabric scraps, though using patterned paper would work just as well. The harvest Button Bonanza bag is perfect for all your fall crafting needs and just screams Thanksgiving to me.
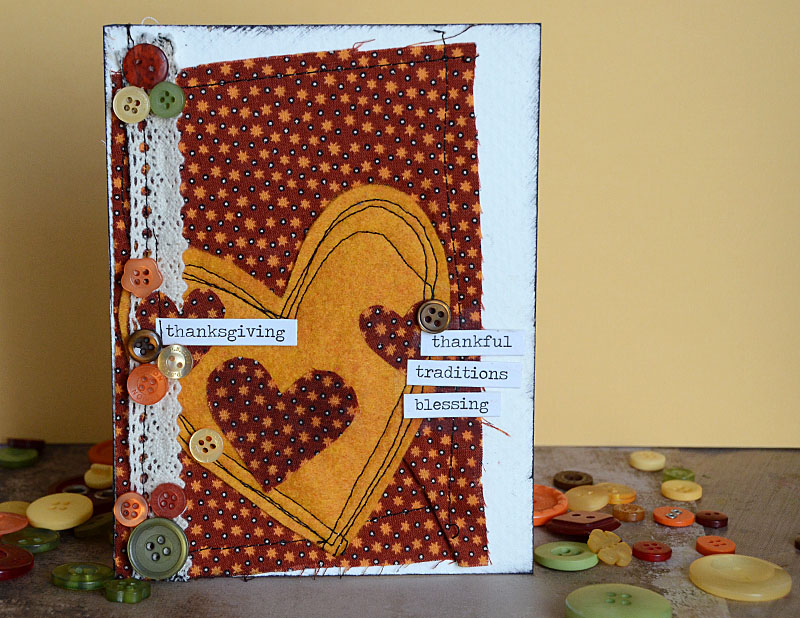
Supplies Needed: Felt, fabric with iron-on backing, word stickers, thread (hand or machine stitch), liquid adhesive, and harvest Button Bonanza bag
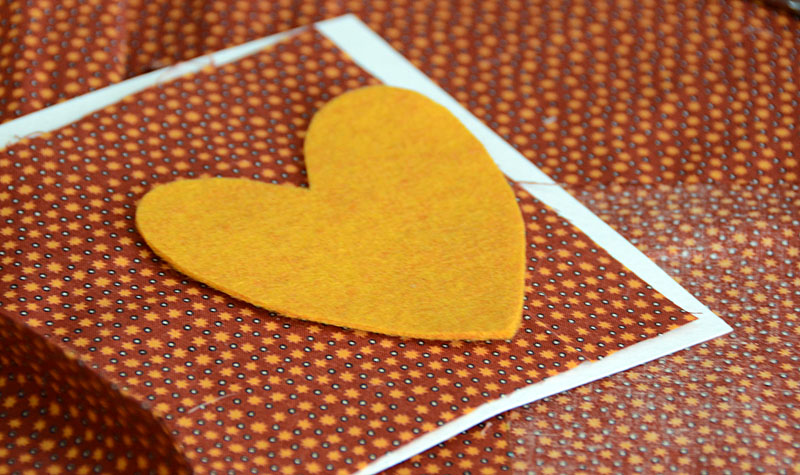

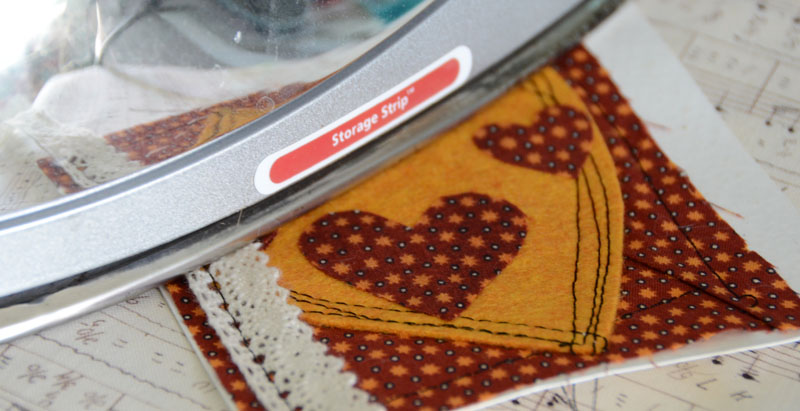
Beyond Thanksgiving, this simple card would be great for any holiday or occasion – and is a lot of fun to make! Don’t forget that you can create this design with either fabric or patterned paper.
Christmas is coming faster than it seems – there’s only 73 more days left! It’s time to start thinking about crafty holiday projects like cards, gift wrap, and home decor if you don’t want to be scrambling at the last minute.
This Christmas gift tag will make a festive addition to any package or bag. With plenty of room on the back to write a message and the recipient’s name, it’s practical as well as pretty. The wire heart is finished off and brightened up by a button, which also serves as a convenient anchoring point for the embellishment.
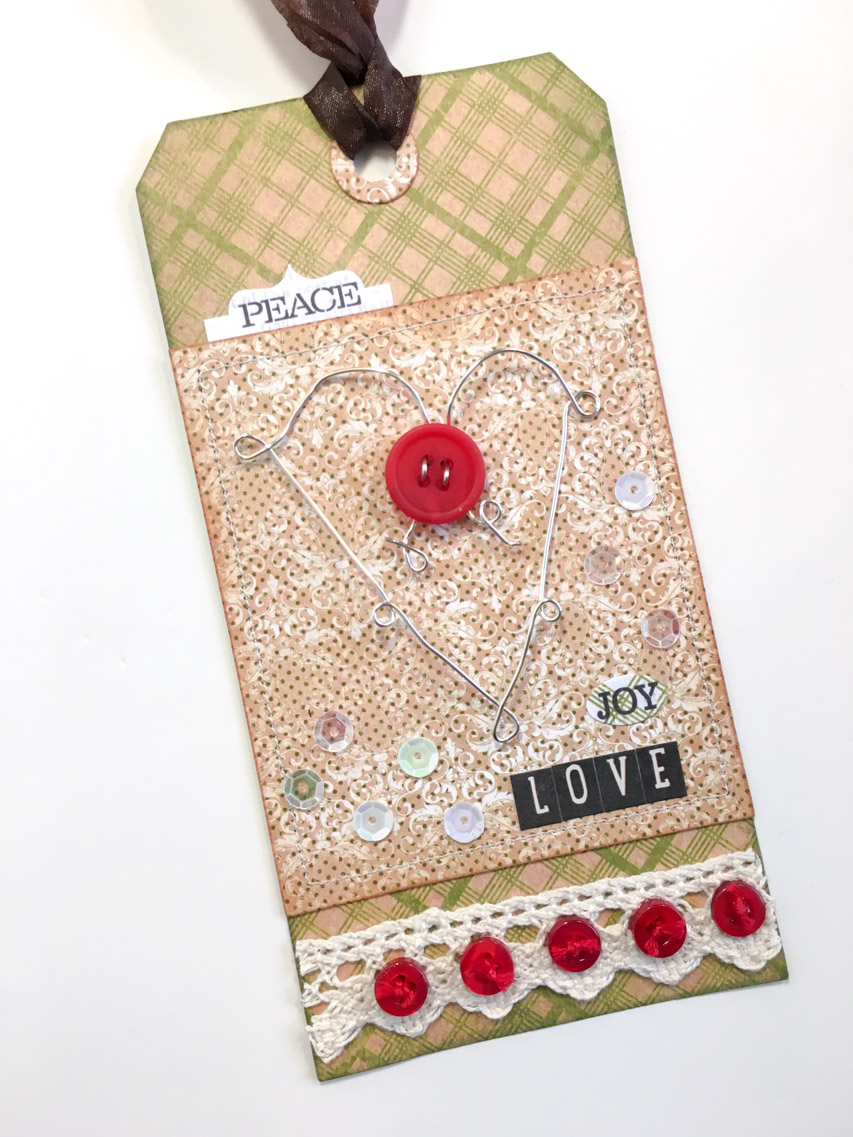
Supplies:
To begin the tag, use your die cutting machine to cut tags and hole reinforcer from the two different papers.
Trim the top off of the brown patterned tag to turn it into a rectangular panel. Stitch the edges of the panel with your sewing machine.
Ink all edges. Glue down the hole reinforcer and the stitched panel.
Glue crochet trim to bottom of tag. Thread small buttons and glue on top of trim.
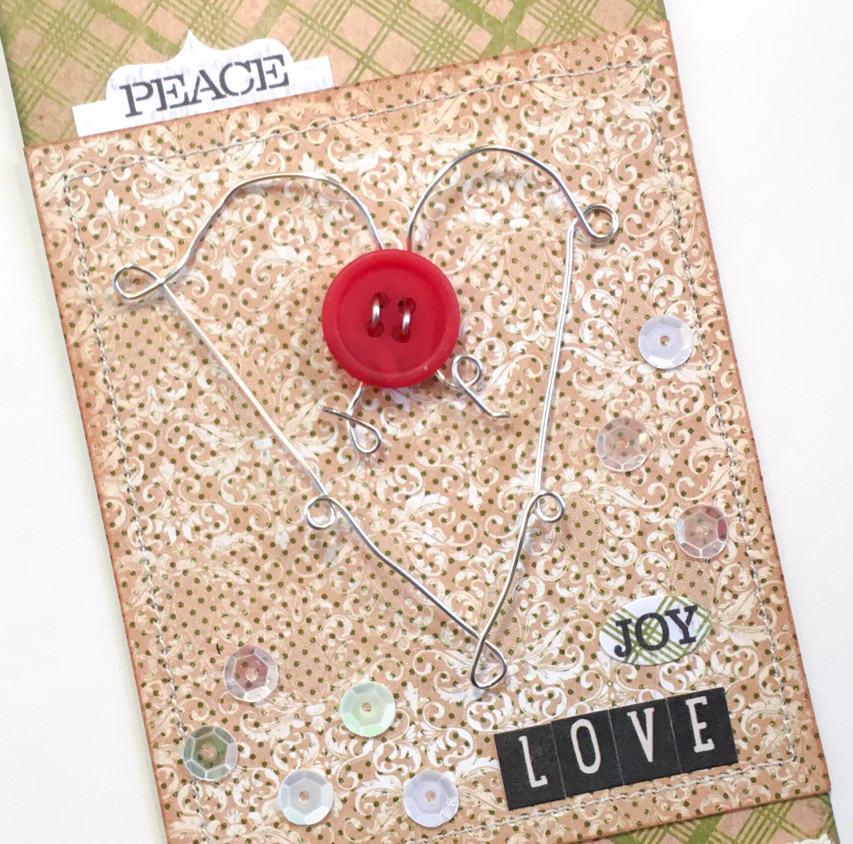
Create the wire heart using wire and jewelry pliers. (Grab wire with tip of pliers and twist to create loops.) Anchor wires together at “v” of heart by threading them through holes of a 4 hole button.
Use hot glue gun to adhere the wire heart to the tag, using the button as the anchor point.
Adhere word and letter stickers on tag. Glue sequins randomly around the wire heart.
Thread ribbon through the tag.
The kraft, plaid, and buttons give this Christmas gift tag a cozy Christmas look. Pair it with a generic red or kraft bag or gift wrap to dress up a basic package!
Welcome to our new Holiday Frame series! This is the first in a series where I will be creating interchangeable inserts for a photo frame to provide year round seasonal decoration for any room in your home!
This 8″ x 10″ frame can stay out all year round, and the interchangeable inserts can be easily filed away when the seasons change until it is time to use them again.
Our first design, with the word “Autumn” and pumpkins, can take you through the fall season and both the Halloween and Thanksgiving holidays.

Supplies:
Instructions:
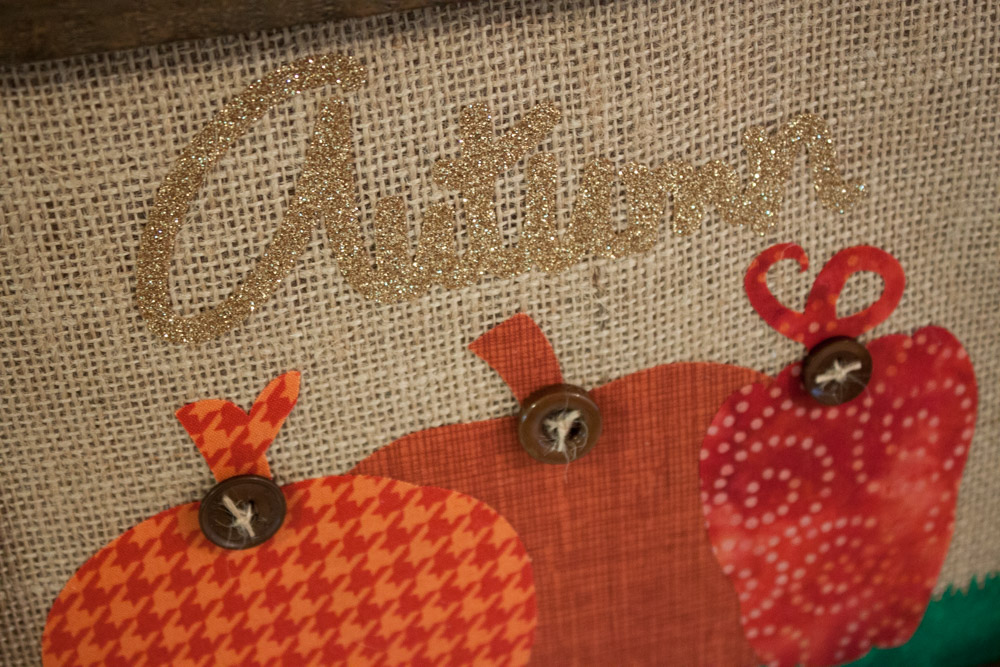 Cut the word “Autumn” from glitter iron-on material.
The buttons provide dimension to the design, as well as providing some brown that ties the design to the frame.
Come back in mid-November for the next installment in the series – for Christmas!
Fall is here, and it’s time to change out the summer decor for something more autumnal. May Flaum is joining us today with the perfect mixed media canvas to change the season on your walls in style. – editor
The beauty of this project is that it can be any color, subject, or size. Even better? It will allow you to use whatever color of buttons you happen to have a lot of! In this example I am working with the Ivory button bonanza bag, however I more often use a mix of buttons (often colors I don’t like or get too many of!). Everything is coated with gesso – so you can truly work with any colors you have!
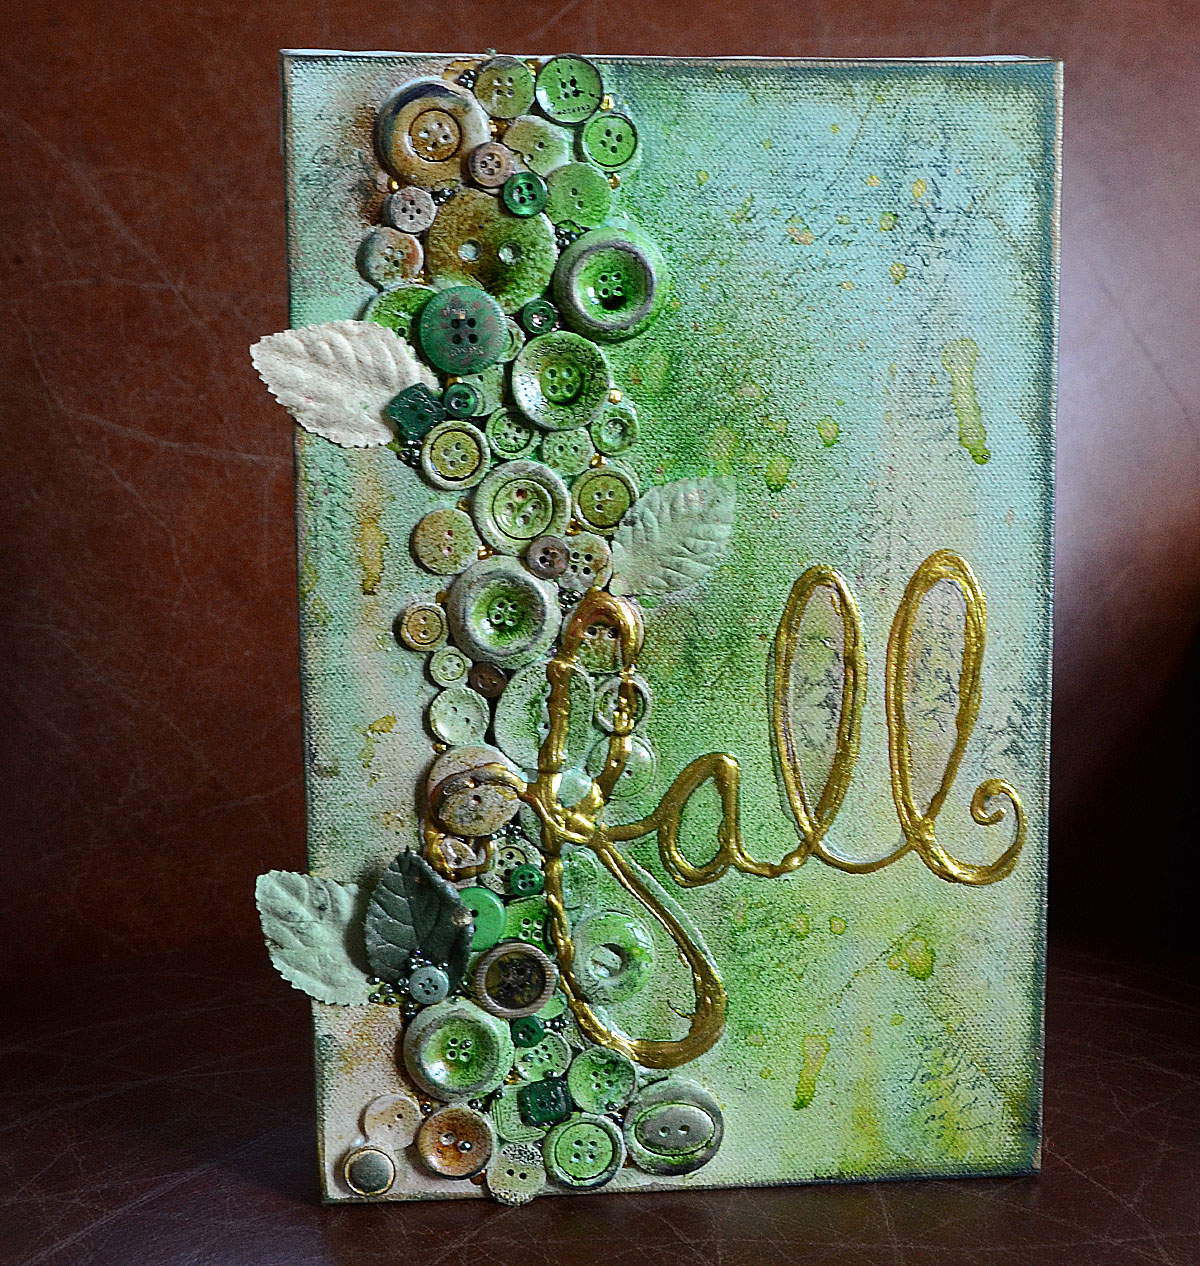
Supplies:
Step 1: Apply a generous amount of liquid adhesive in the area you wish to place your buttons. Add more as needed.
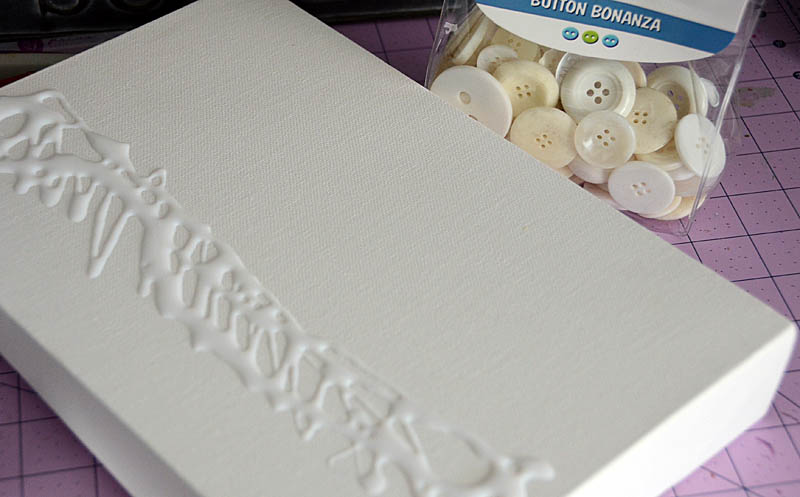
Step 2: Add buttons, beginning with larger ones and working smaller.

Note: From this step forward, you will need to let the project dry completely between every step.
Step 3: Using a dimensional liquid product such as gel medium or a white or pearl dimensional paint pen, write your word.
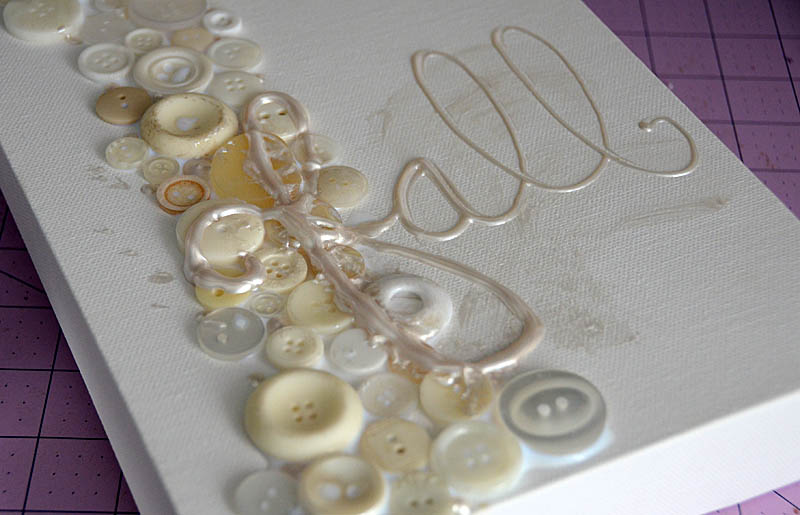
Step 4: Apply a good amount of gesso over the entire surface and work in so that everything is fully covered.
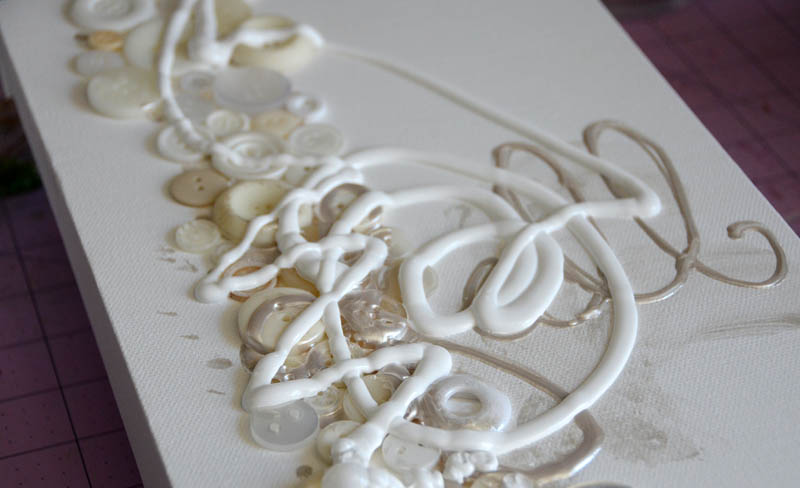
Step 5: Mist colors of your choice across canvas. Allow to dry and repeat this process until satisfied. If you’d like them to “run” then tilt canvas up on one side while wet.
Note: Depending on the brand(s) used and properties of your spray ink/colors results may vary. Don’t be afraid to repeat step 5 many times! If you don’t have sprays/mists, feel free to use any color media you have on hand such as watercolor or acrylic paint as a substitution!

Step 6: Apply liquid adhesive in spots and gaps where you can add more buttons. Then add buttons in colors that compliment your design, as well as leaves or other elements that you’d like to feature.
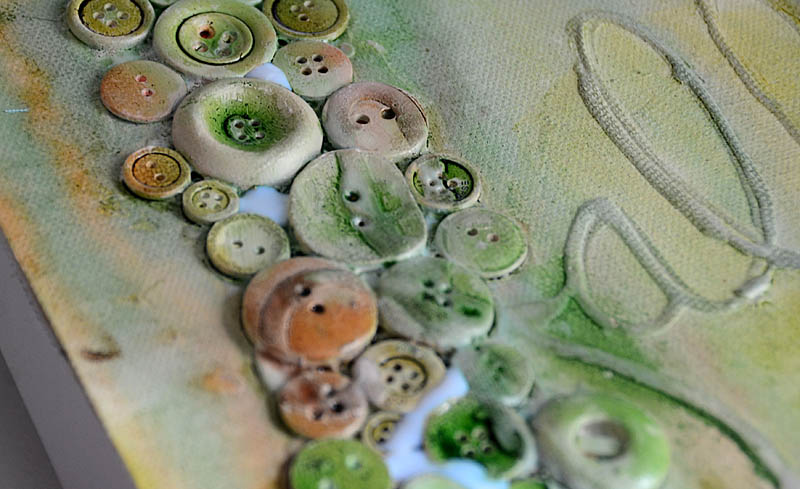
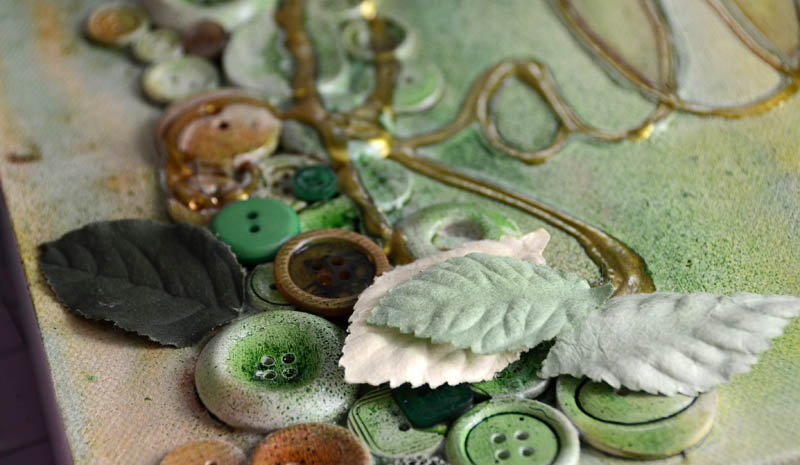 Step 7: Go over your word with gold dimensional paint or a pen to help it stand out, and spray a bit more color in a bold or dark color if desired.
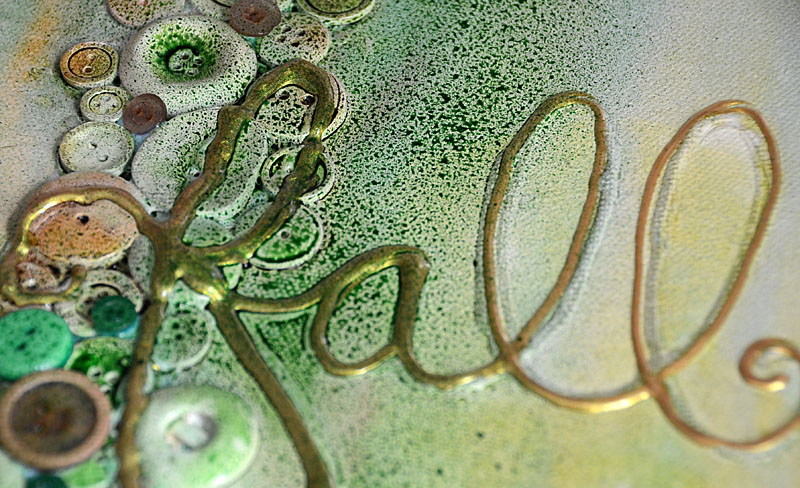
Step 8: Use a permanent ink pad and ink the edges of your canvas. If desired, repeat this with multiple colors. For this canvas I used a dark green and a black.
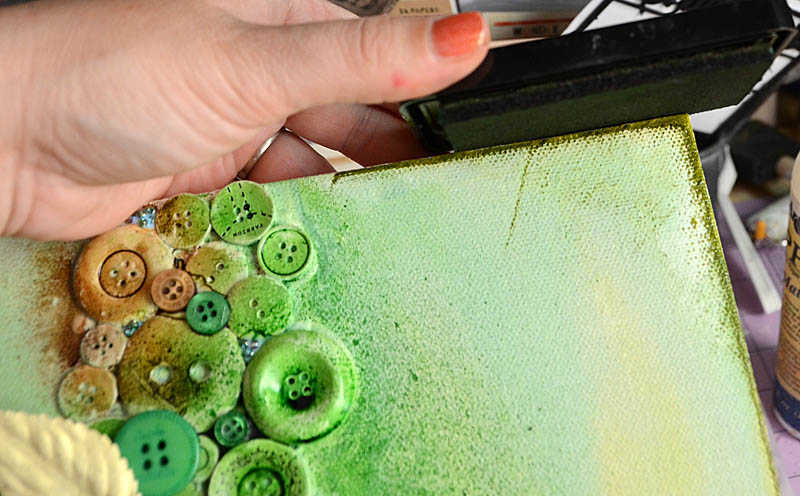
Step 9: Use a script or other design stamp and permanent ink, and stamp randomly around the canvas. This works best with an unmounted rubber stamp, and adds a lot of depth to the project.

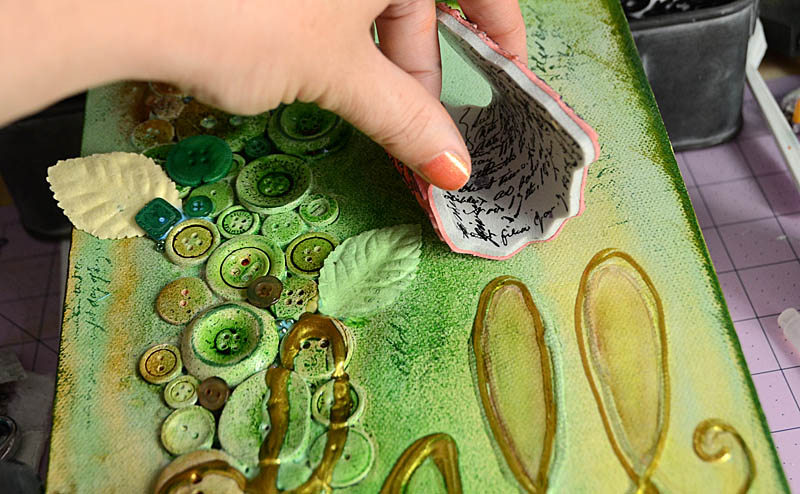
Step 10: Finish project by adding any finishing touches such as dots of gold paint, pearls, beads, rhinestones, and more.
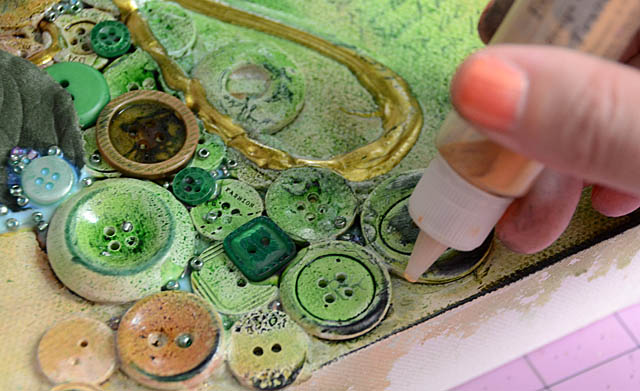
What I love most about this project is that you can customize it so many ways, and for any size or theme you like. It’s a great way to use leftover buttons and other supplies you may have sitting around. I hope you give it a try!
Even thought it’s still hitting temperatures close to 90 degrees at blog central here in Florida, Labor Day passing means fall will rapidly be settling in at Buttons Galore headquarters in New Jersey. And fall means a chance to pull out some colors and designs that many of us haven’t used all summer!
How about the Buttons Basics in Caramel and Outlandish Orange?
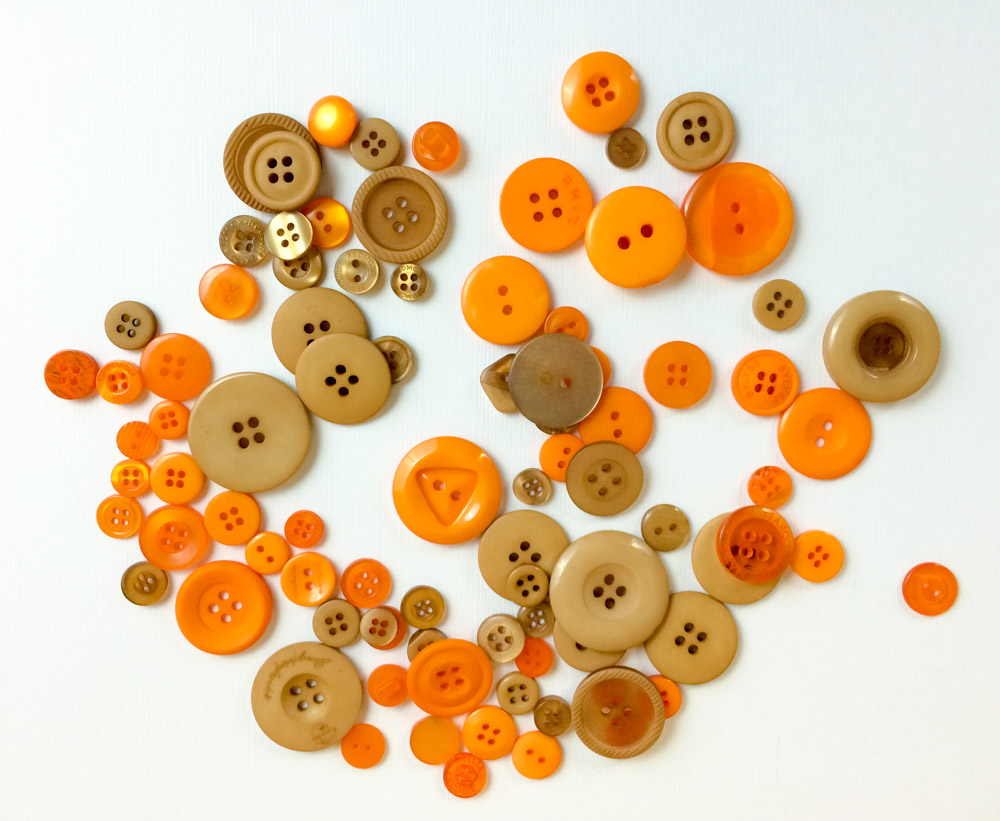
Add a nice holdover from summer – some deep pink from the “Summertime” Button Bonanza – and you’ve got a great mix of fall leaf colors!
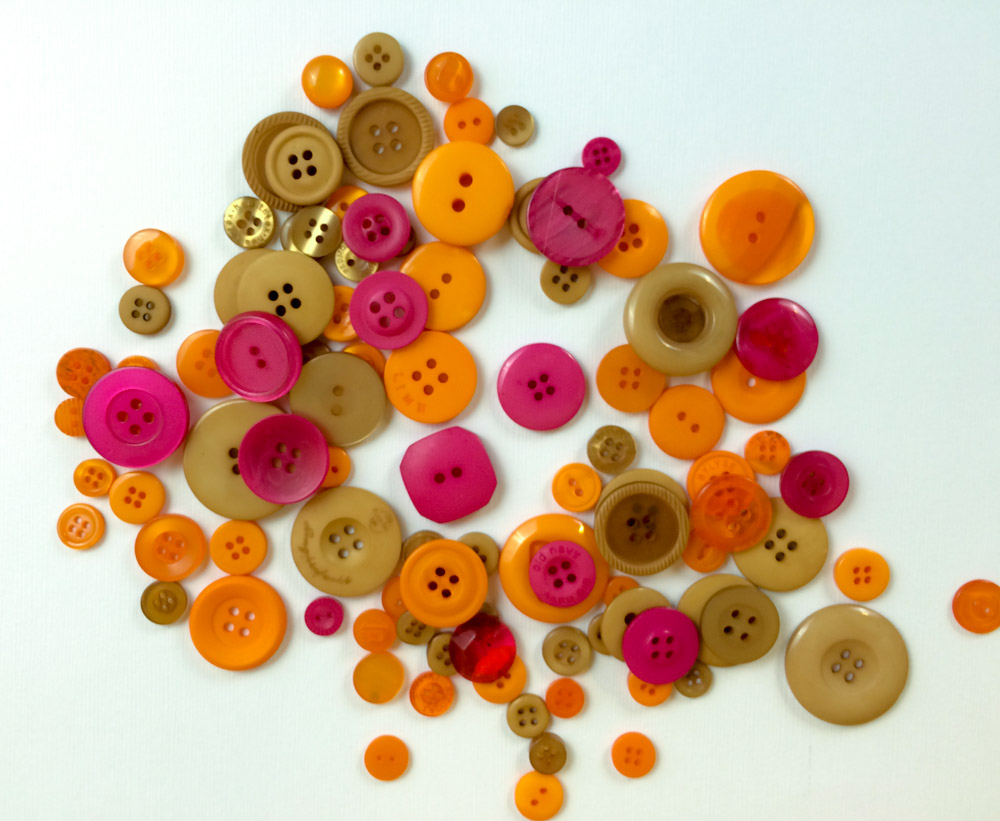
Fall brings many occasions that call for dashing off a quick note to someone. Let’s make them pretty – and festive!
Look for Outlandish Orange, Caramel, and the Summertime mix at AC Moore!
1. Cut paper in half longwise and fold to make a card base.
2. Starting near the fold, use the stamp set to stamp the arrow border once from each side, leaving a gap in the middle to place a button. Work your way down the card, changing colors as you get closer to the bottom.
3. Use the alphabet stamps to create the phrase “Happy Fall,” aligned with the right edge.
4. Thread buttons and tie them using embroidery floss and needle.
5. Attach buttons in border gaps with adhesive dots.
This versatile button card design could work for any season or holiday, simply by changing up the color scheme and the sentiment that is stamped. Try the bright primary colors in our Primary Button Bonanza (also available at AC Moore) for a birthday card, or red, white, and blue for a patriotic theme!
Even though summer is in full swing, Halloween is sneaking up on us (boo!). Today’s project will show you how to use some Halloween products without having to wait for Halloween – and how to kick it up a notch with buttons!
You won’t have to wait until Halloween to give someone this card! With it’s message of love, it can be delivered anytime during the Halloween season.
The buttons are a critical element in this design. They add a pop of color that breaks up the dark purple, but more importantly they add dimension to a design that would otherwise be entirely flat.
Supplies:
1. Cut a 3.5″ by 8″ piece of background paper for the card base. Ink edges. (While this is a non-standard card size, it will fill in a standard business sized envelope.)
2. Use die cut machine to cut out vine and flowers. Ink edges of all pieces.
3. Cut sentiment block from patterned paper. Ink edges and mat on patterned paper.
4. Adhere all pieces to background.
5. Sew thread through buttons and tie off. Adhere buttons on the center of the flowers.
6. Cut an 8″ x 7″ piece of cream cardstock to use as cardbase and fold. Adhere card front to base.
Who would you like to send a bewitching message of Halloween love to this season?
Today we’re joined by designer Lorrie McCullers, who is sharing a back to school project that is both a countdown calendar and school picture frame!
It’s back to school time! And what better way to keep track of time until the big day than with a countdown frame?
 I used three sets of buttons for this project: the School Value Pack, the Primary Grab Bag, and the Primary Tiny Round Buttons. I also used a pre-colored acrylic frame so there was no need to paint!
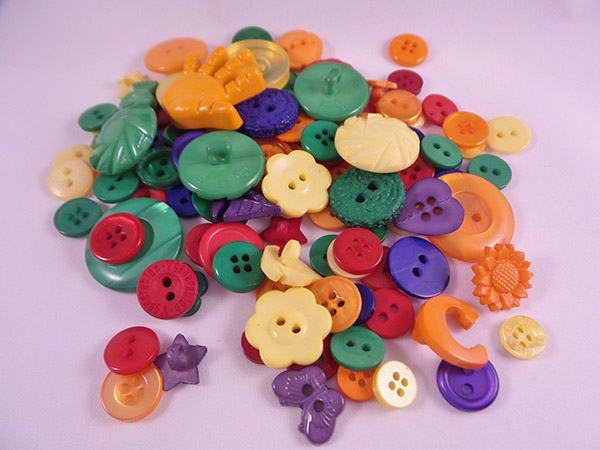
Supplies needed:
Buttons Galore School Value Pack
Buttons Galore Primary Grab Bag
Buttons Galore Primary Tiny Round Buttons
Deflecto acrylic 5”x7” frame
Aleene’s Liquid Fusion glue
button shank remover
dry erase pen
computer and printer (optional)
Directions:
Choose your larger buttons first. That way, you can fill in the empty spaces with smaller buttons.
Some of the buttons in the School Value Pack and the Primary Grab Bag have shanks on the back. To have your buttons lay flat to the frame, remove the shanks with a button shank remover.
Apply Aleene’s Liquid Fusion to the back of each button. Don’t apply too much or the glue will ooze out the sides of your buttons! Let dry for about 24 hours.
Print (or handwrite) a countdown for the first day of school, such as “____ days until school begins” or “School starts in ____ days!”
Keep track of the days with a dry erase marker. Acrylic frames are so great because you can just write on and wipe off!
After school starts, you can then use your project as a frame for that first day of school picture of your kiddo! Since the dry erase marker comes right off, you can use this frame year after year. This is a great project for kids to help with as well as a fun gift idea for a favorite teacher!
Lorrie McCullers is a paper crafts designer who blogs at Forty11 Designs. She is a Craft & Hobby Association Designer Member and currently designs for Etch All and Deflecto Crafts. To see more of her work, visit her blog.
Today we are joined by blogger/designer/instructor/author May Flaum, from www.craftwithmay.com, who is sharing a back to school project with us. – editor
When I have supplies not being used, I try to envision a purpose and make it useful. In this case I had a small 5×7 chalkboard that has been sitting around way too long. Since I don’t see myself using it as intended, I decided to convert it into a photo frame for this school picture.
This is one of my favorite ways to use buttons, and it’s a super quick and easy project too! It will work on any flat wood frame, and I love how it turned out. The less you think about perfect button placement, and the more you just fill the space and enjoy – the better it will turn out!
I worked with the beautiful Vintage Vogue buttons and I really liked how quick and easy they made this project.
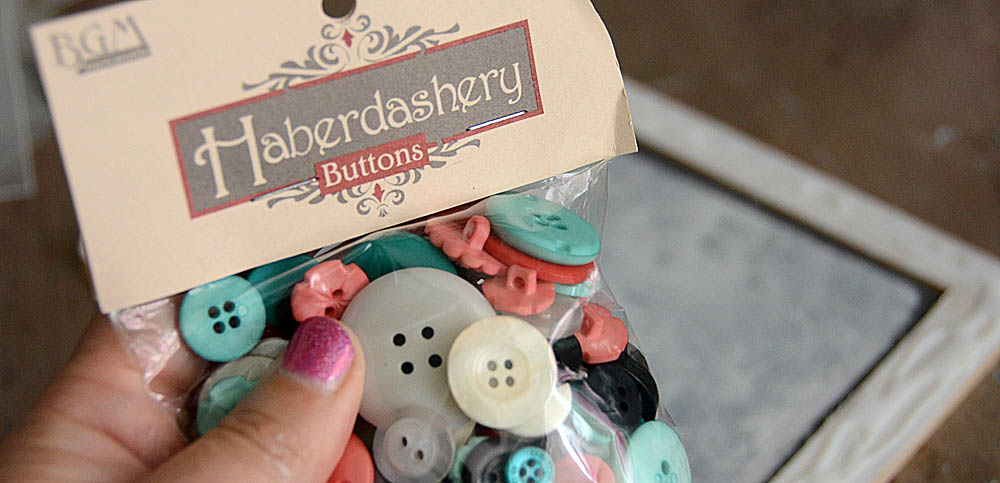
Supplies Needed:
How-to:
1. Paint frame with white paint if desired
2. Apply a liberal amount of liquid adhesive around the wood frame.
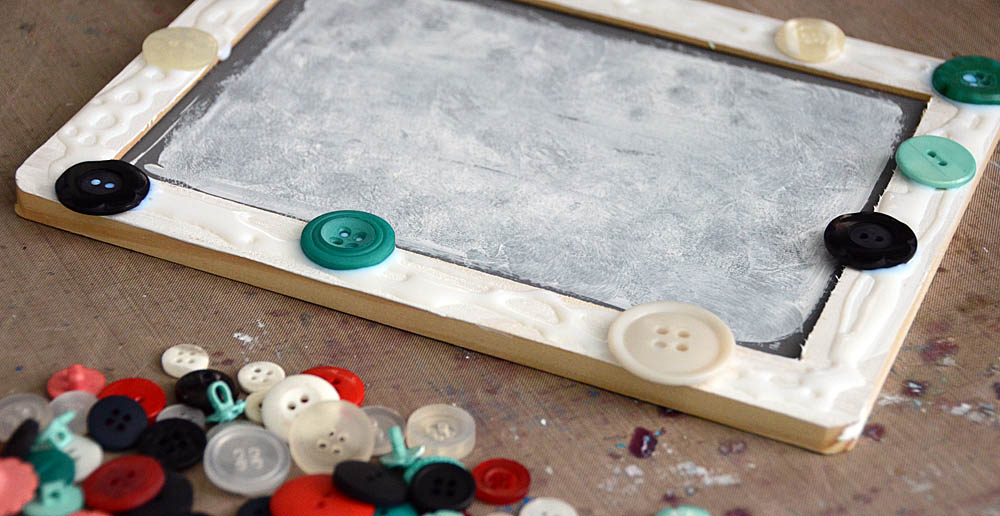 3. Start with large buttons, place at random in a few places. Then fill in spaces with medium and small buttons.
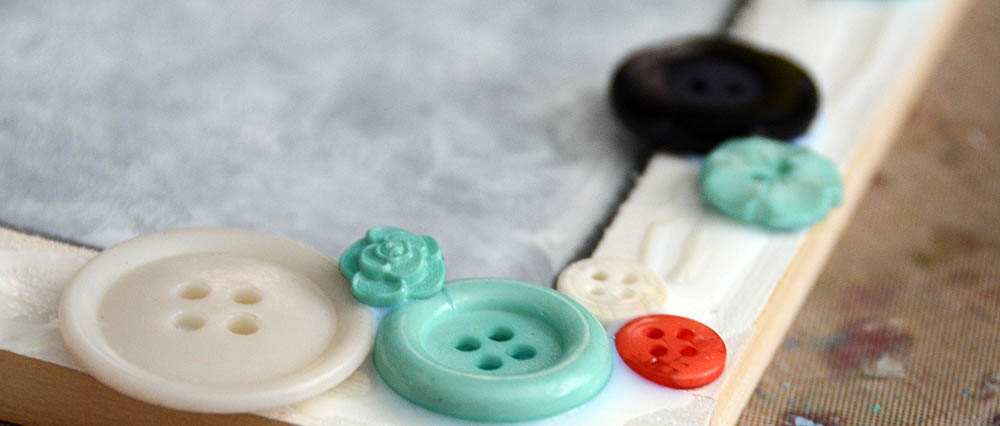 4. Add more adhesive as needed, place buttons until all spaces are full. If there are any awkward gaps, layer a button on top! Once satisfied, set aside and let it dry fully before adding a photo.
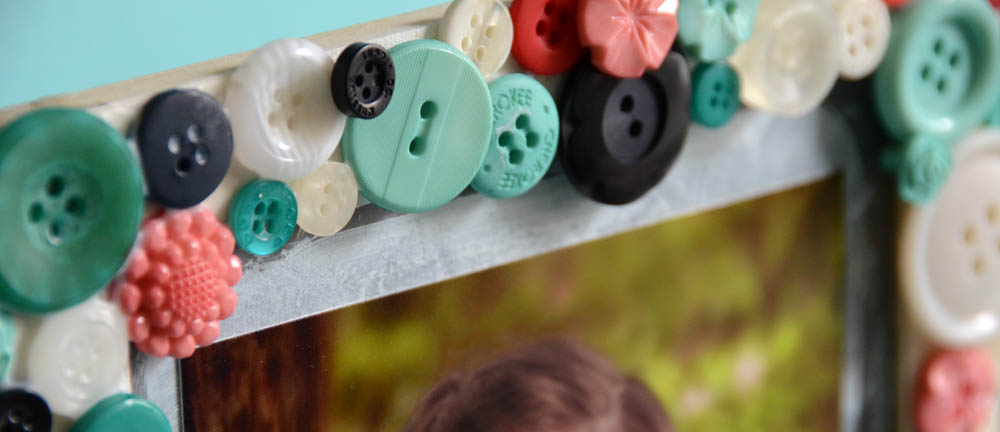
To learn more about May Flaum, see more of her projects or take one of her online classes, visit www.craftwithmay.com.
The Fourth of July is right around the corner, and for many of us that will mean taking our food outdoors for a party!
A $1 bucket can be a practical and festive way to hold your party’s utensils, with the addition of some jute ribbon – and of course, buttons!
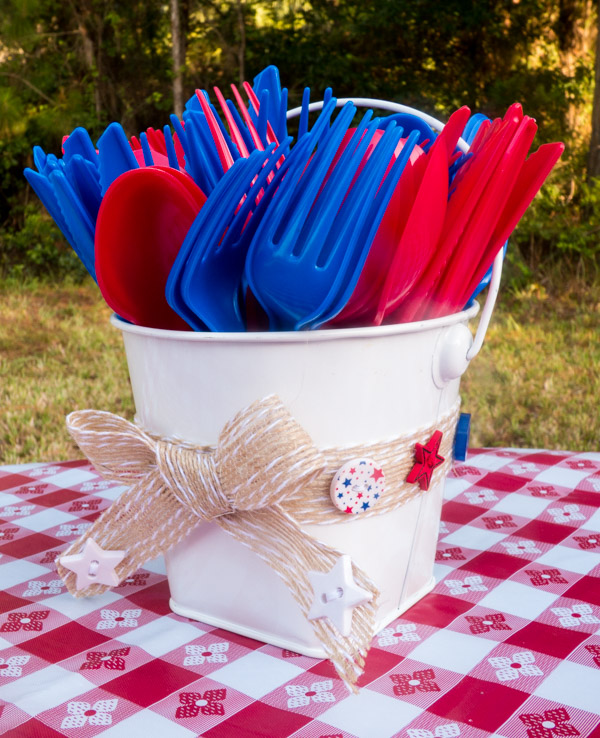
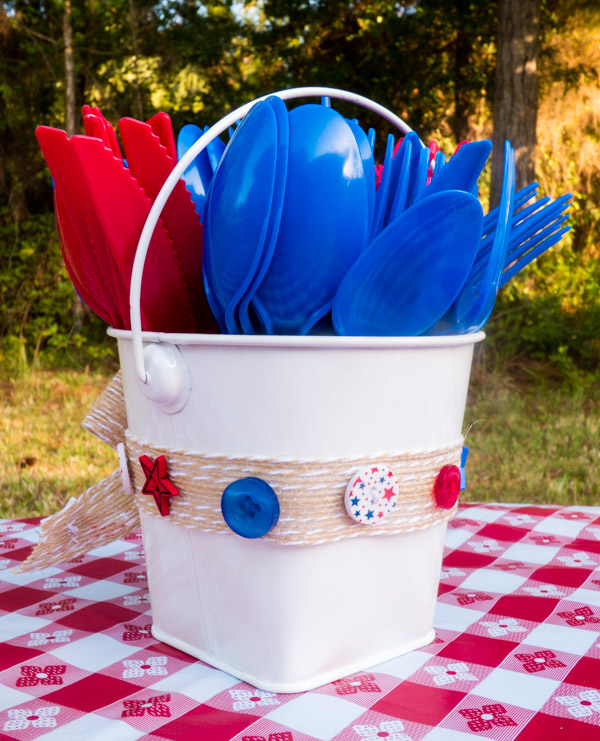
Buttons used in this project came from the Buttons Galore Patriotic Value Pack.
Constructing this project is easy:
1. Cut a length of ribbon that will fit around your bucket. Sew patriotic themed buttons from the Patriotic Value Pack along the middle 3/4 of it. Use adhesive dots to adhere the ribbon around the bucket.
2. Cut another length of ribbon, and tie into a bow. Sew star buttons to the end of the bow’s streamers.
This concept could be adapted for plenty of holidays just by changing button theme pack. Need a utensil holder for that holiday buffet? Try the Christmas Button Grab Bag instead. Or make it a holder for Halloween candy with the Scary button assortment. The options are as limitless as our button selection!
This adorable card was made by Laura Neiman from Housewife Hellraiser using simple and fun paper crafting techniques. It is the perfect card that can be made quickly which makes this a great project for Fifteen MINUTE Friday!
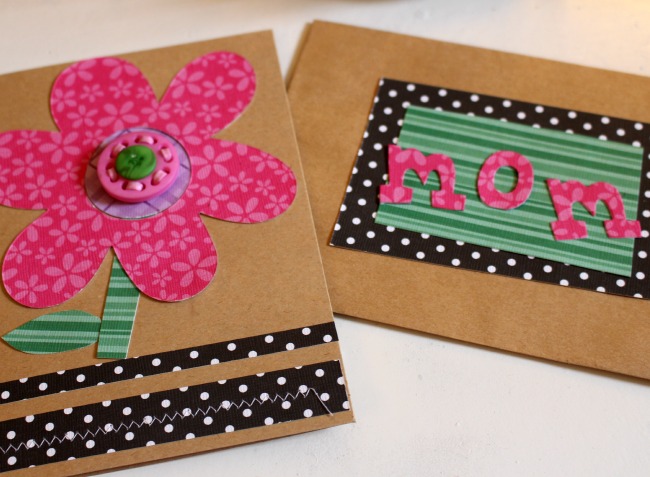
She used papers and a card/envelope combination from Darice and buttons from the Laura Kelly BRIGHTS collection along with adhesives from iLovetoCreate.
You can find out the details on her blog HERE.

There are so many great ways to create handmade cards with buttons. Browse the blog and you will be totally inspired!
Cheers,
Laura
Earlier this week I shared this project on my blog for Craft Lightning. It shows you how to button up a teacher gift in a flash which makes it perfect for Fifteen MINUTE Friday! Score!!!
I used the buttons from the Laura Kelly BRIGHTS collection. You can get them HERE!
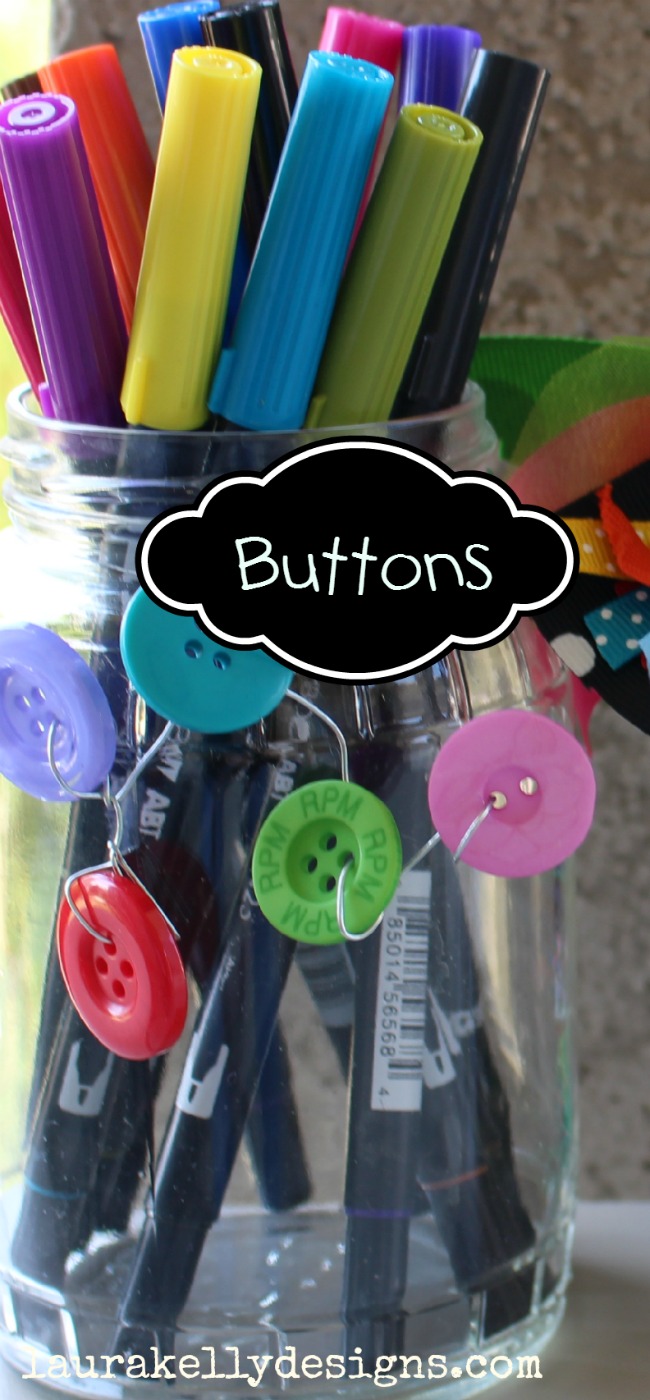
Just think of all the things you could put in a jar that a teacher would love. Here are my top ten ideas!
Isn’t is adorable with all the other fun jars?
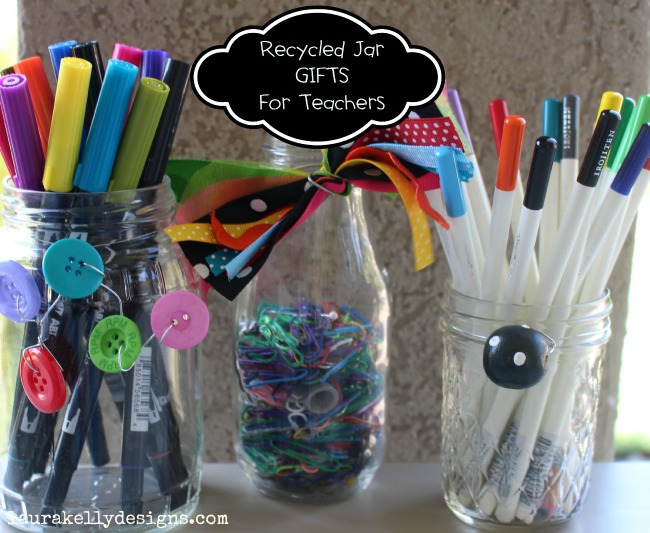
Teacher appreciation is coming up soon. Are you ready? I think you should recycle some jars and add a few buttons to create some handmade awesomeness for those who care for your kids all day every day!
Cheers,
Laura
Sending cards for the little holidays is not only fun but also very special. I mean come on, who doesn’t LOVE to get a note in the mailbox these days. This hand made card is not only adorbale but sure to spread luck and friendship for St. Patrick’s Day. Three cheers for Fifteen MINUTE Friday!
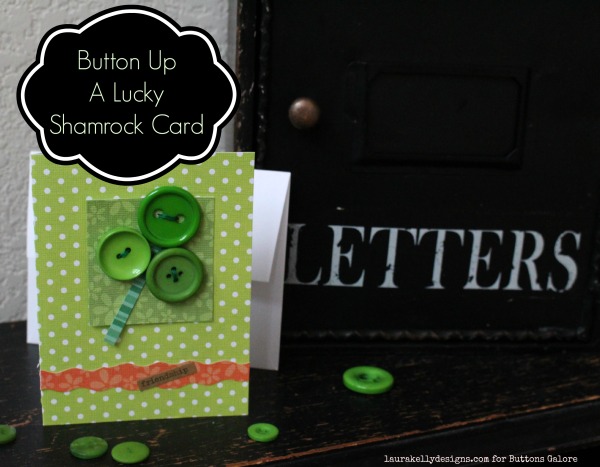
You will need the following:

Cut a fold over card to fit your envelope. This one is 8.5 x 4.25 to fit in an A2 sized envelope. Cut your other decorative papers to add color to your card front. Stitch your buttons to a piece of pre-cut card stock to form a shamrock. Knot it in the back.
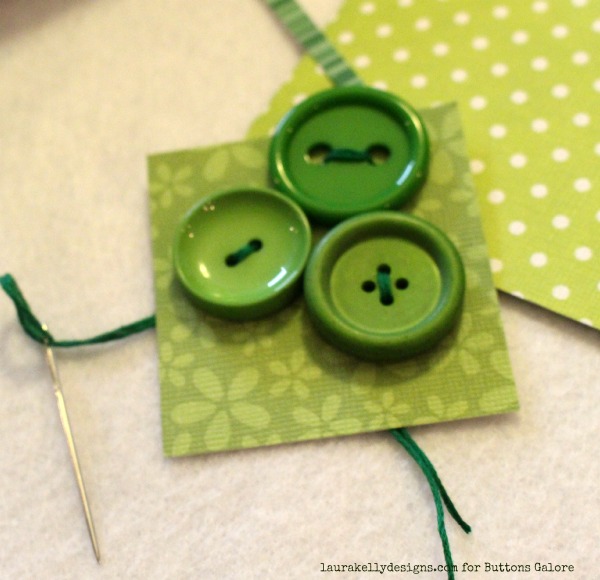
Adhere your pieces to the front of the card with Aleene’s Always Ready. Add a sticker message if you would like. You can also write your message with a marker or a pen.
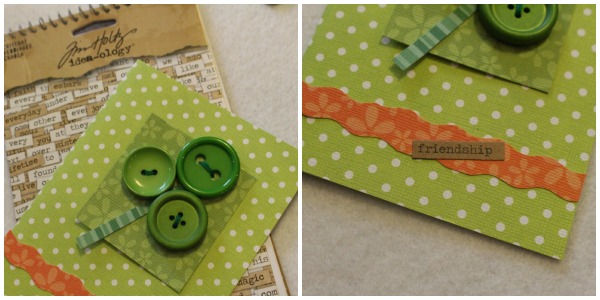
I hand-stamped the back of my card too with my self-inking stamp from Expressionery.Com. I think this makes it a little more special.
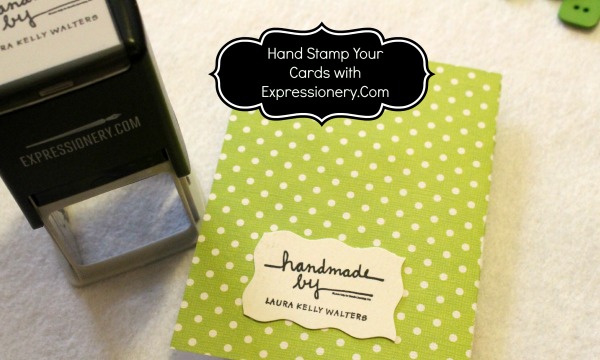
And now you are ready to write a for real, noteworthy, hand written letter to a friend!

Happy Creating,
Laura
We are excited to have a guest blogger sharing this fun project. Kadie from the fabulous blog 7 Alive is here to share her creativity. Kadie is a DIY junkie like many of us as well as a fantastic crochet designer and mother to five kiddos.

This easy project only takes minutes to create, and only a little longer to dry. You can easily create a fun shamrock for your kiddos or yourself to wear on St.Patrick’s Day.

You only need a few materials to create your own button shamrock. These buttons are from the Bright Mix by Laura Kelly. They are Forest Green and Candy Apple Green.

To make your button shamrock ~
This is perfect for boys or girls and will insure no one in your family will get pinched on St. Patrick’s Day. :)
You can find more inspiration on Kadie’s blog HERE or by clicking on the picture below!

If you would like to enter to win a craft stash of products (and a gift card to Starbucks), go for it.
Happy Creating St. Patrick’s Day Fun!
This little garland is super festive and so easy to create. The mini shamrock garland can be used to decorate in lots of fantastic ways and is perfect for a fifteen MINUTE Friday project.

You will need scissors, green decorative paper, Candy Apple Green Buttons, Ribbon or Ric Rac and Aleene’s Always Ready Fast Grab Glue.
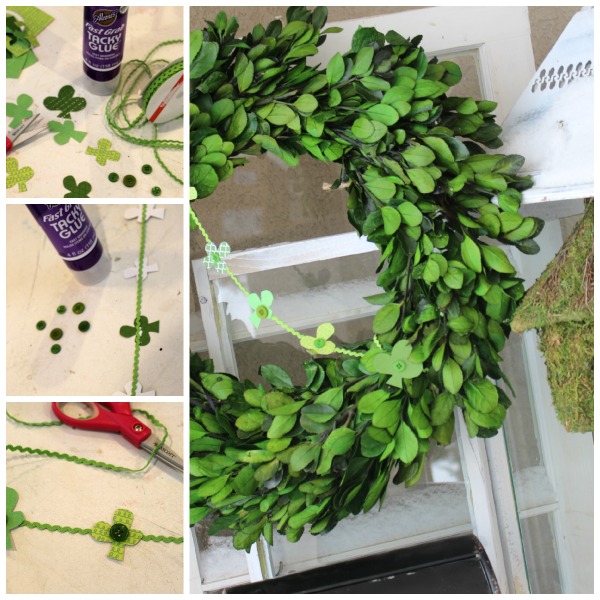
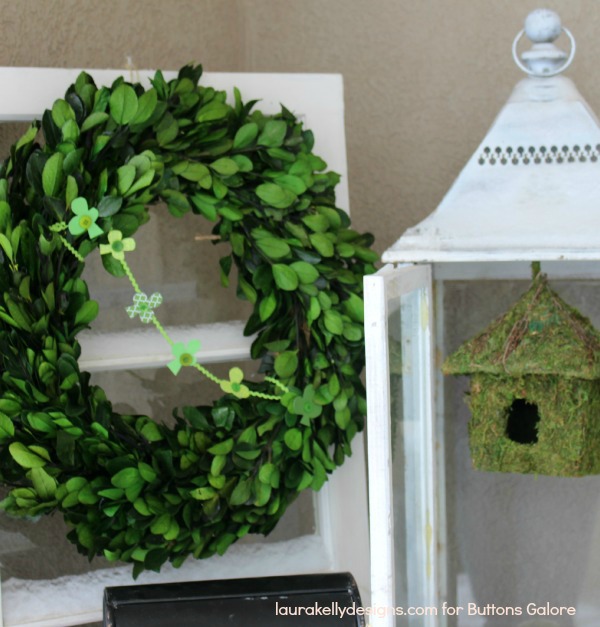
Ta Da! It looks so fun on this wreath on the front door.

Cheers,
Laura
I made these pillow and they literally took less than fifteen minutes each. The buttons stitched on to the hearts really make them adorable and special.
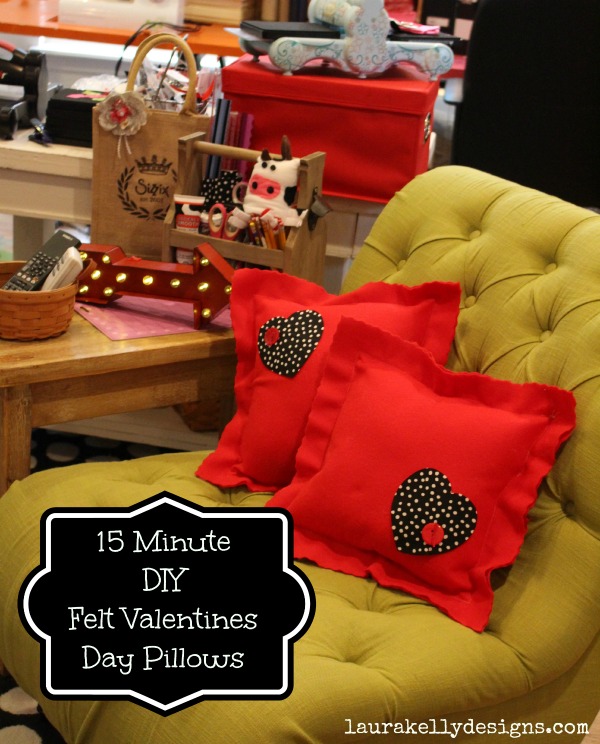
The radical red buttons are one of my favorite colors in my line of buttons with Buttons Galore.
I love the way that they come in so many sizes and shapes within each pack.
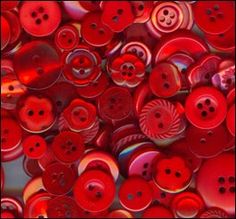
Ta Da!

To find out how I made this, hop over to my blog and check it out. You can do that here!
Happy Friday,
Laura
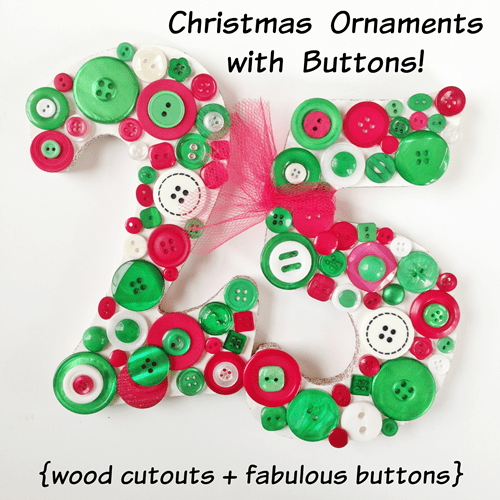
Laura here from Pet Scribbles, sharing an easy way to dress up those wood cutouts you see at all the craft stores:
Use some fabulous buttons! (Of course, right?)
I made this large 25 in honor of December the 25th, and I’ll show you just how easy it is to make your own!
It all starts with wood cutouts of your choice. I picked up these, which were already painted white:
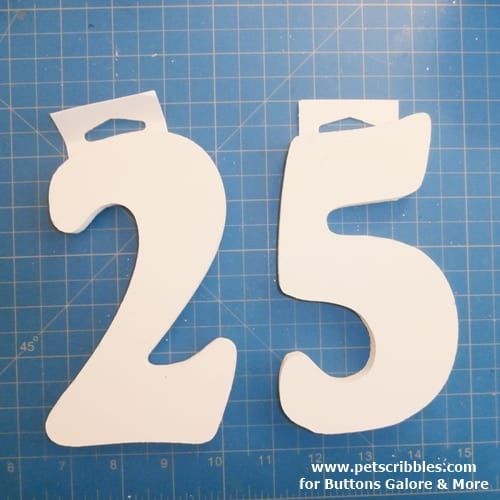
I painted the edges of each number with red glitter paint, and set them to dry on some recycled jar lids overnight.
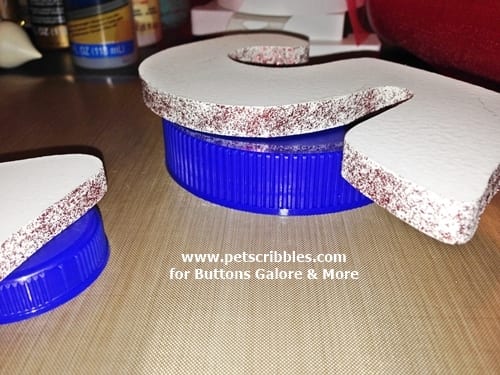
The next morning was the super-fun part: playing with the gorgeous buttons in the Laura Kelly Traditional Christmas Mix from Buttons Galore & More!
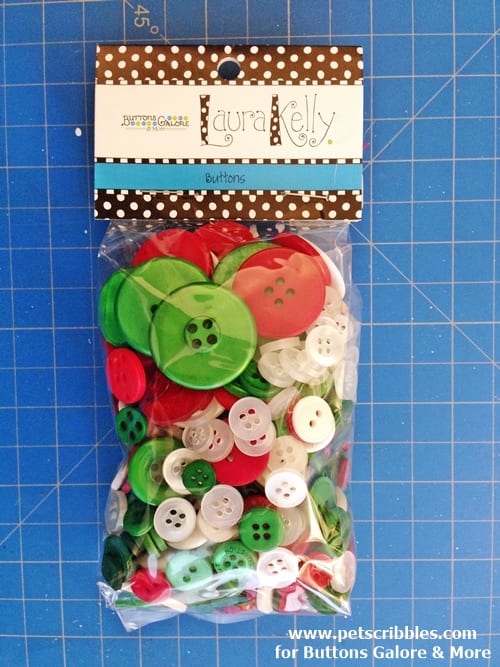
Check out these beauties up close!
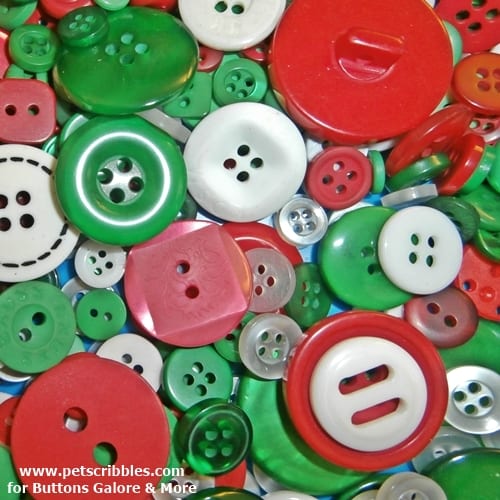
To make easy work of attaching many buttons to wood (and to each other), I use Aleene’s Fast Grab Tacky Glue.
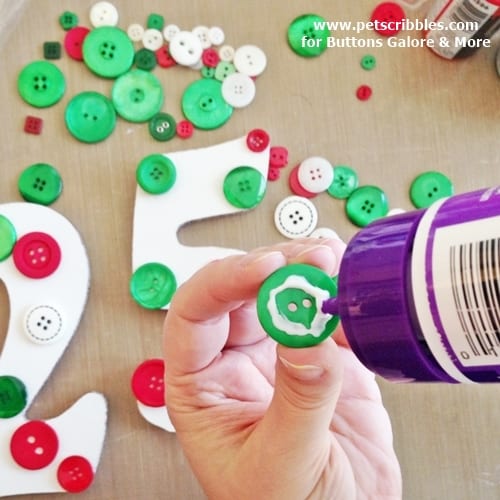
After applying the glue to the back of each button, just set in place and hold it there for a few seconds to set.
I began with some of the largest buttons first, then filled in with smaller buttons down to the tiniest (and totally adorable) sizes. And in some cases, I layered buttons on top of each other, for more texture and interest.
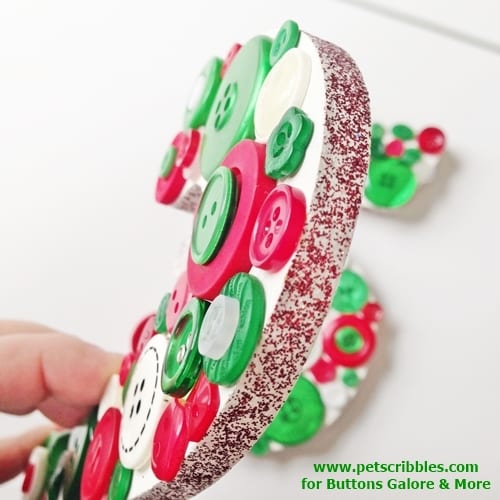
Once finished, I added some red tulle around the number 5 as a scarf, keeping with the cozy idea of Christmas Day.
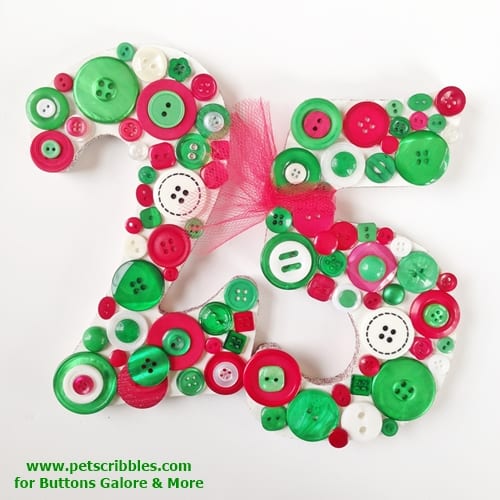
These wood cutouts are great to have on your Christmas tree, on a wreath, or maybe as shelf sitters.
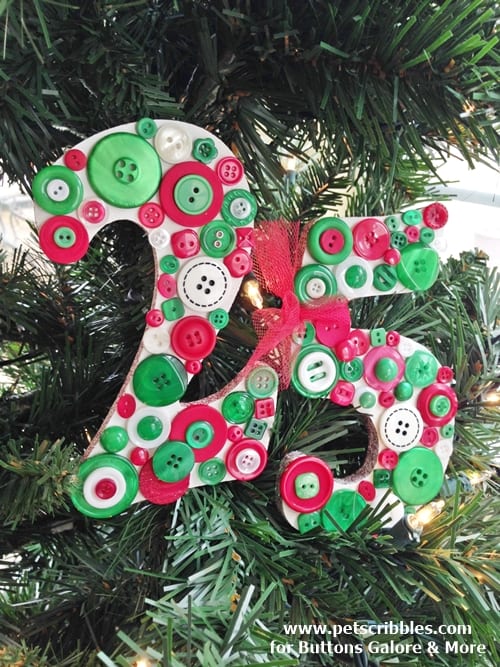
I think what makes these ornaments look so fun is the different styles, colors, shapes, sizes and textures of the buttons in the Laura Kelly Traditional Mix. There are buttons that are shiny, metallic, pearl, flat (no sheen), square, round, solid, and I could go on describing them for days. I even found buttons that had some glitter-like dazzle on them!
Supplies used:
Wood numbers
Red glitter paint
Aleene’s Fast Grab Tacky Glue
Laura Kelly Traditional Christmas Mix buttons
Thanks so much to Buttons Galore & More for inviting me to guest post here today!
Stop by my blog Pet Scribbles to see more button crafts and holiday inspiration!
How adorable is this advent calendar? It was created in a matter of minutes using buttons from my Holiday Collection!
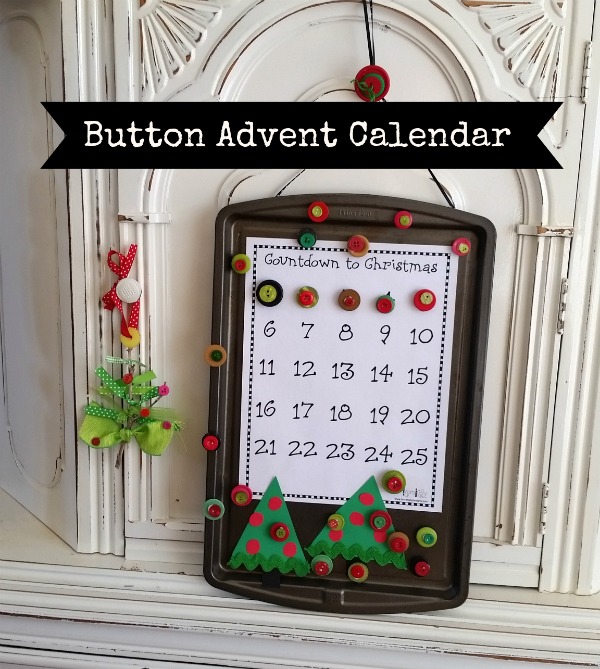
For the free printable and the tutorial, visit the full post on my blog here. To order the buttons, click on the image below!
There are lots of great ideas, activities, crafts and ways to celebrate the holiday season with kids. Here are lots of great ones for you to try out by fabulous bloggers!
And you can enter a contest too to win buttons and a crafty stash along with a $50 VISA card! That rocks! a Rafflecopter giveaway
Cheers,
Laura
I love this little paper crafted winter hat ornament. It would be great to use for decorating a tree or adding to a gift as a card or a tag.

I created it using one of the new dies that will launch in January 2015 with Ellison Education and Sizzix as part of the calendar set. Aren’t the little buttons from my Laura Kelly buttons line super cute on the ball of the hat?
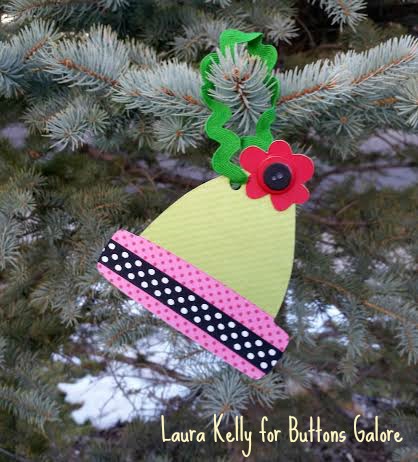
There are lots of great projects being shared using this hat today and I would love for you to hop around and see them all.
You can enter to win this fabulous prize too!
Happy Paper Crafting with Buttons,
Laura
Check out these adorable Christmas tree ornaments made from scraps of green ribbon and Laura Kelly buttons in Radical Red and Passionate Pinks (and one yellow)!
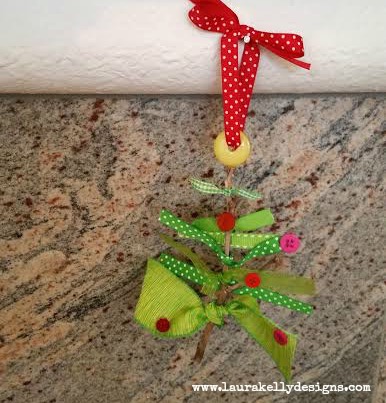
So cute, so easy and so much fun! The Aleene’s Quick Dry formula in the Always Ready bottle (available at Joanne’s) makes crafting things like this easy peasy. I am in love with the stuff!
Here are the simple directions:
This is a great craft for kids. Here are lots of other DIY ideas for celebrating the season with kids too!
And you can enter to win a fabulous contest too!
Happy Creating for the Holidays,
Laura
A whole year has gone by! Wow. It seems like yesterday when I was making this spider for the 2013 Halloween Popcorn Box Blog Hop!
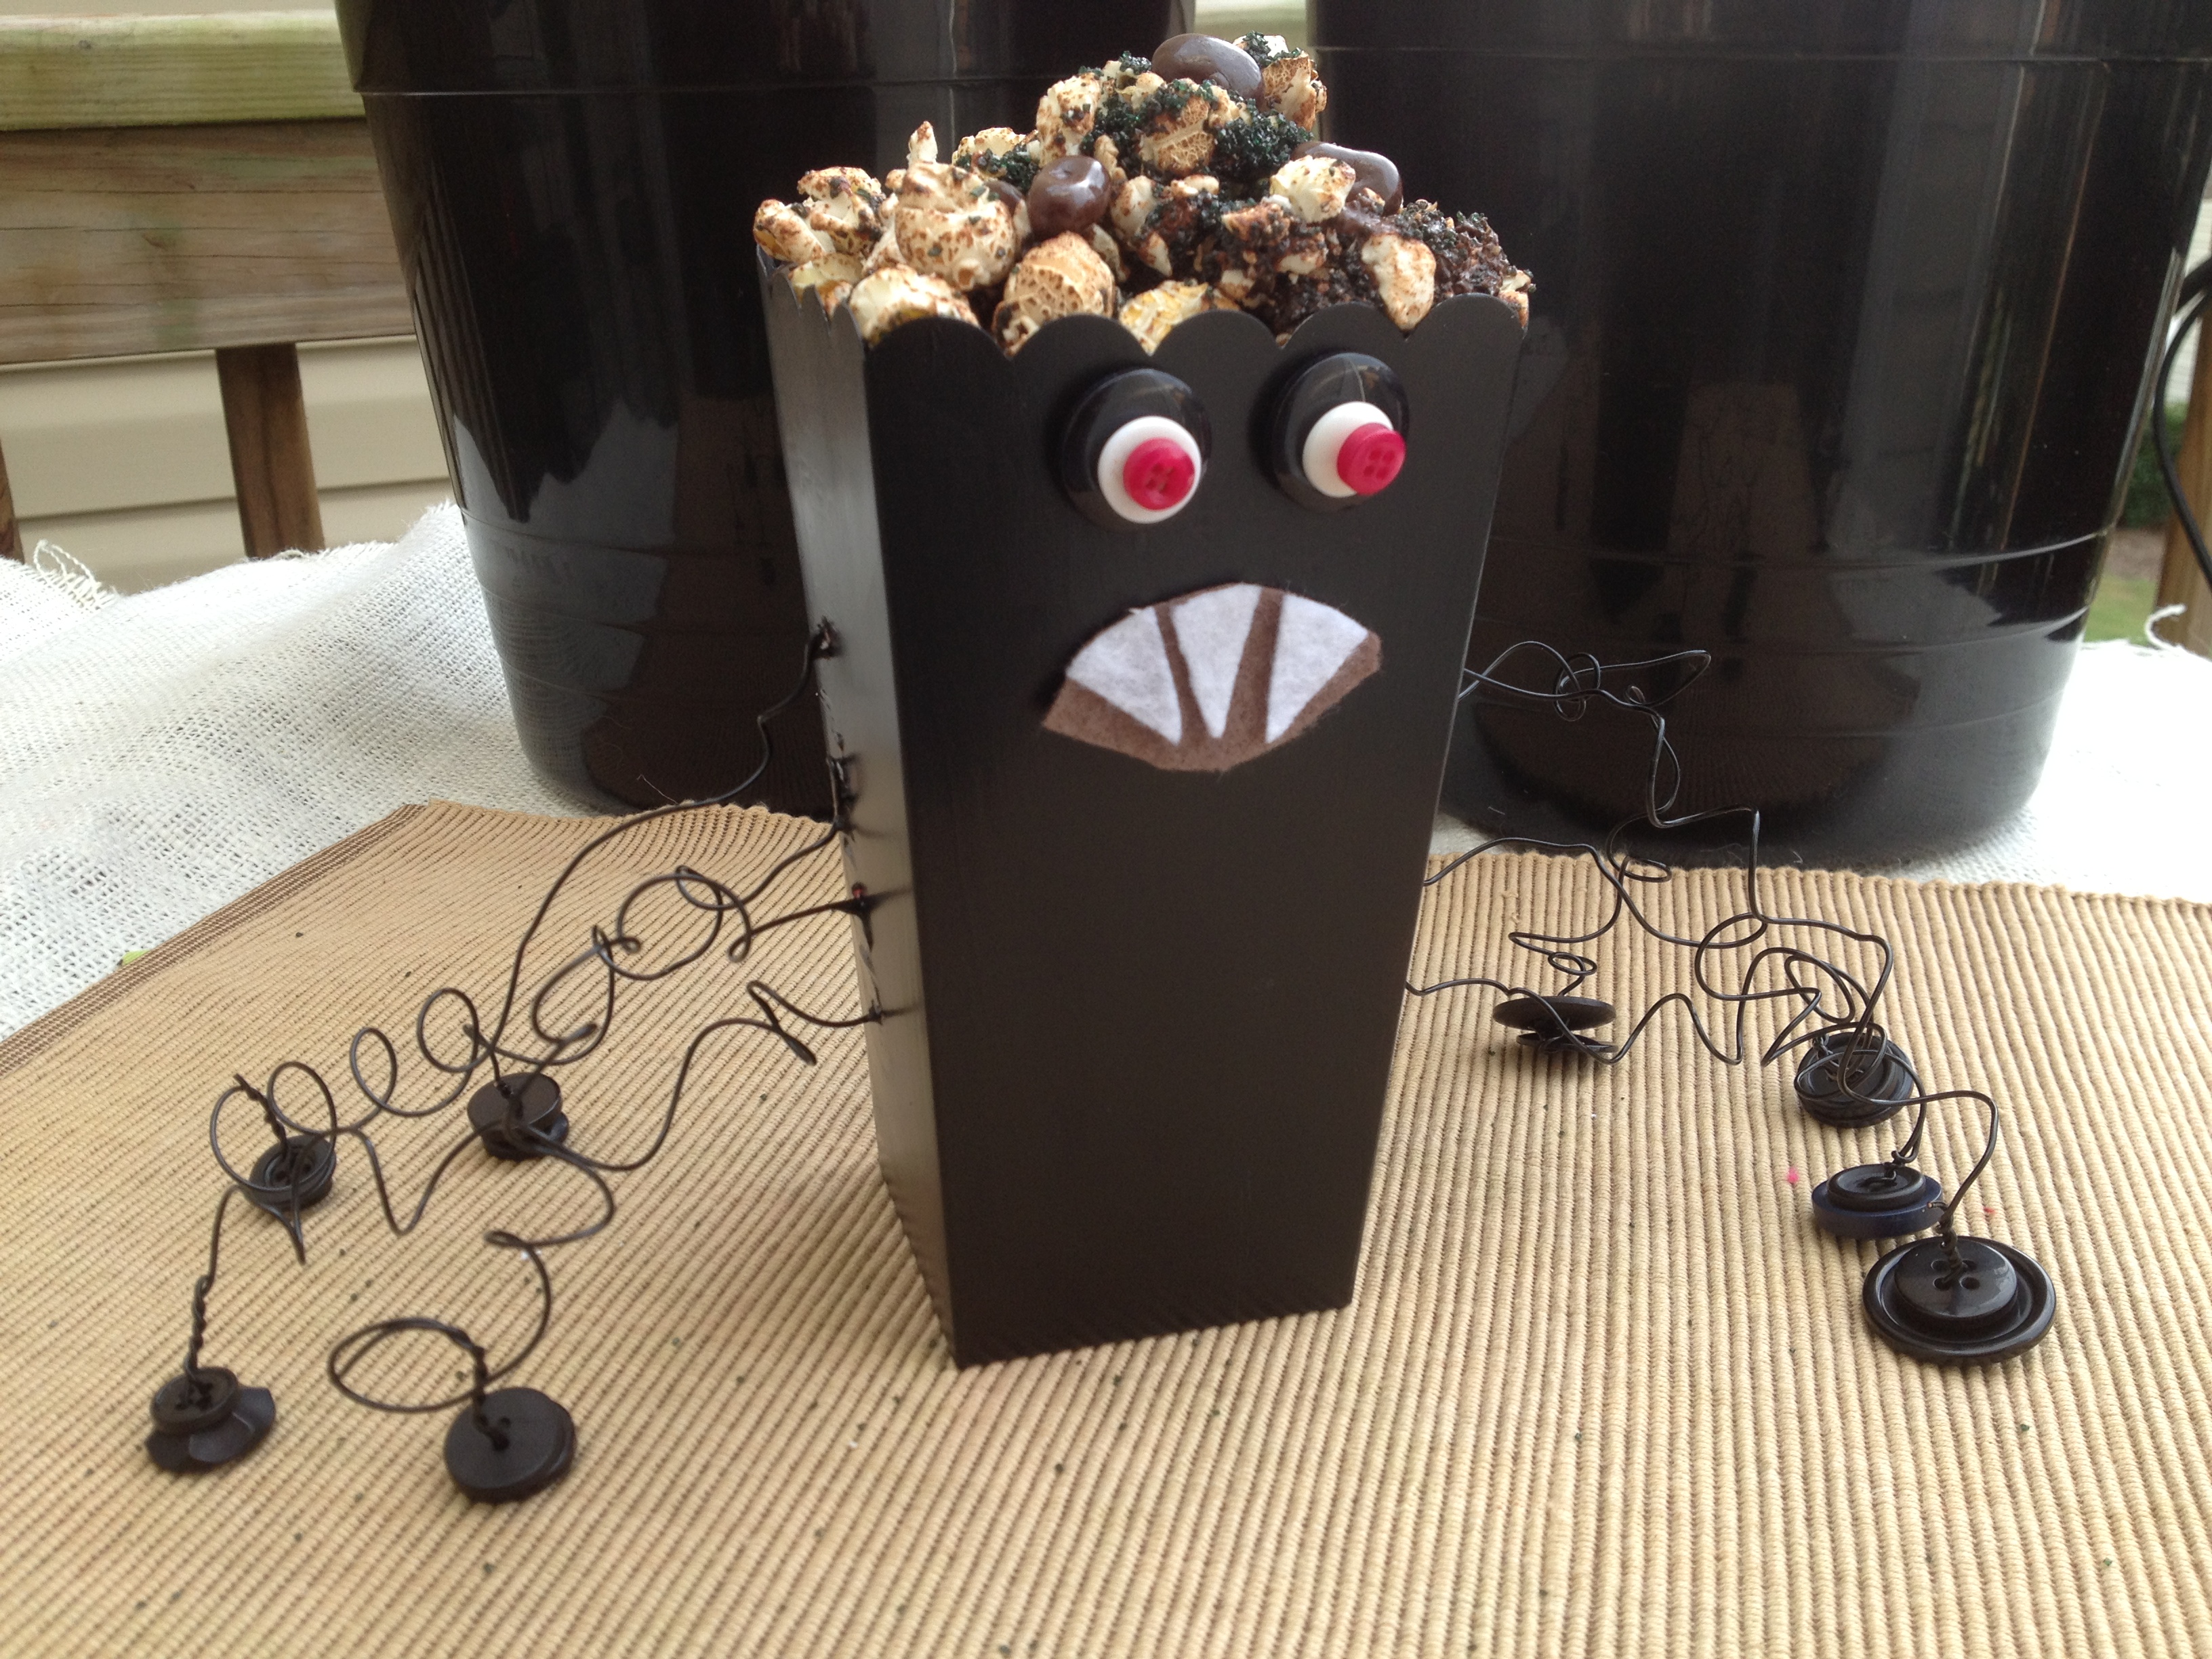
Well, it’s here again and I am loving this little box that I created as a pumpkin filled with….BUTTONS!
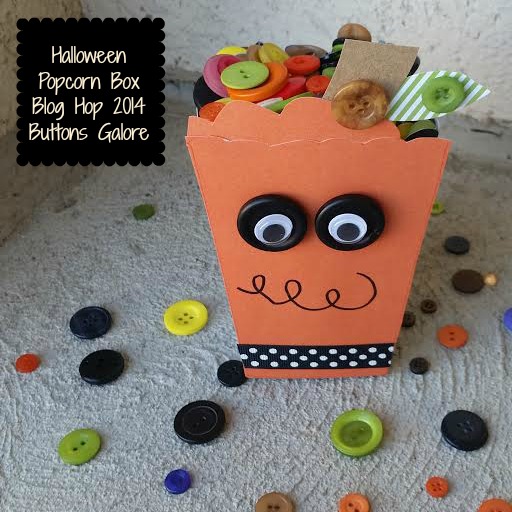
There are LOTS Of great creative inspiring projects this year!
And you can enter to win a fabulous prize too! a Rafflecopter giveaway
Buttons Make Everything Funner,
Laura
I am so excited to share these Dia De Los Muertos party favors with purpose. My friend, Kathy aka Crafty Chica, designs fabulous Day of the Dead themed products for iLoveToCreate and I used them to make these in less than FIFTEEN minutes. Yes, it is Fifteen MINUTE Friday again and this project is fabulously fun!
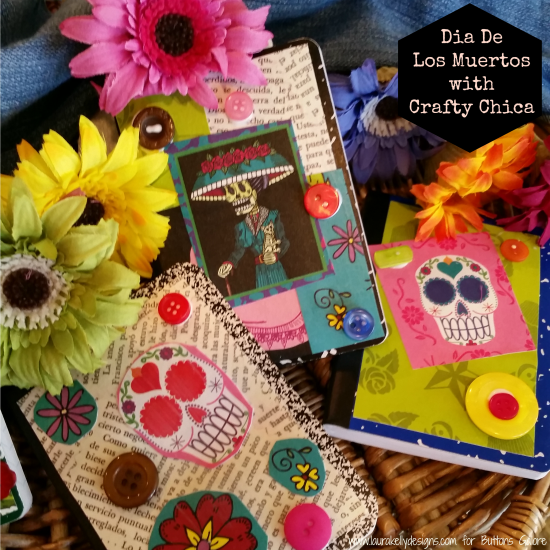
You will need Day of the Dead papers, mini composition books, Collage Pauge, Aleene’s Tacky Glue and Laura Kelly Bright BUTTONS!
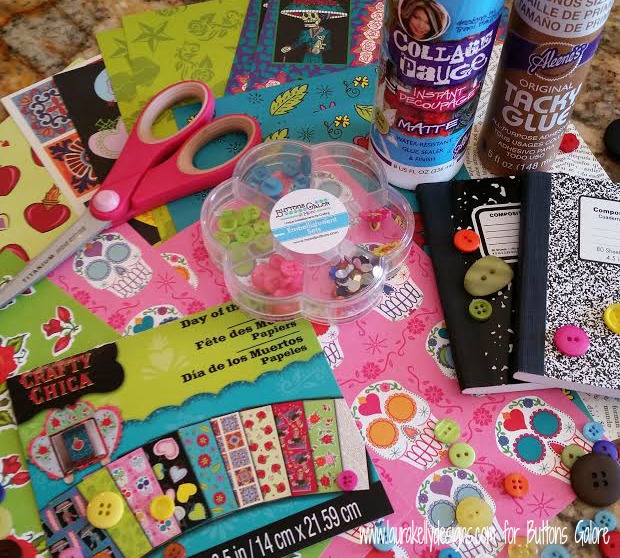
Cover your mini composition books with paper layers using the Collage Pauge and let it dry.
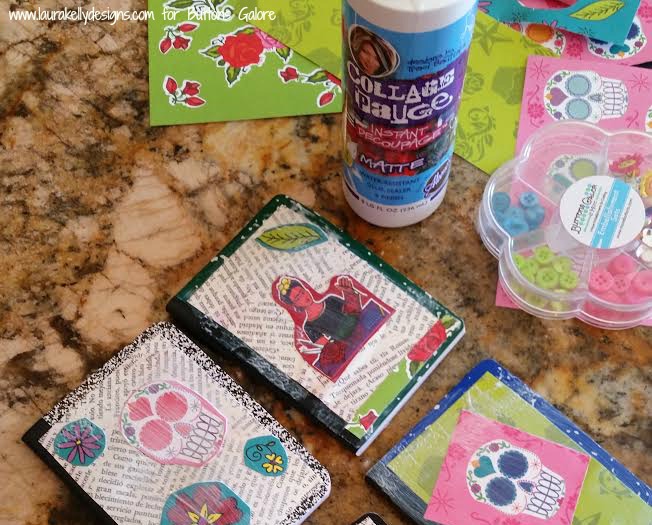
Add buttons with Aleene’s Tacky Glue to embellish and make your designs POP.
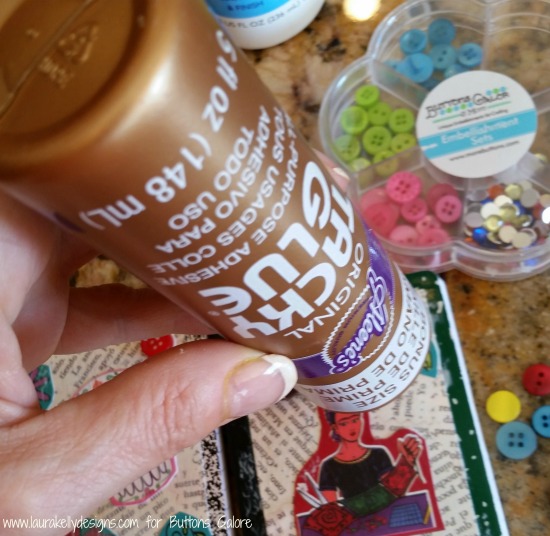
This is an awesome craft project to do at a Dia De Los Muertos party with grown ups or kids. It is fun and quick and the result are amazing (and useable!)
Happy Creating,
Laura
Check out this awesome project for the changing of the seasons! Creating crafty decorations with kids is so super fun and this is a great one for just that! This is especially awesome because it can be done in 15 minutes and left to dry which makes it perfect for a school or party activity.
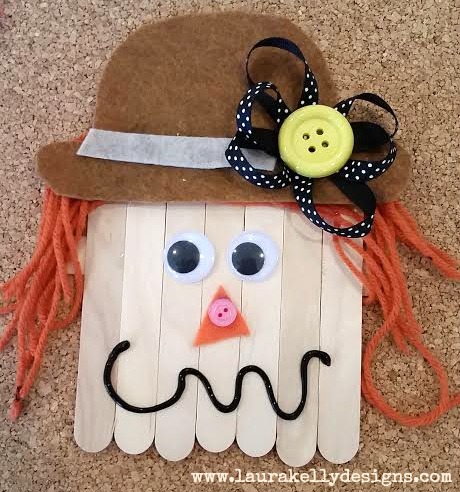
You will need popsicle sticks, glue, yarn, felt, buttons and google eyes (or whatever fun crafty things you have around the house).
Glue your sticks together to create a scarecrow head and let them dry.
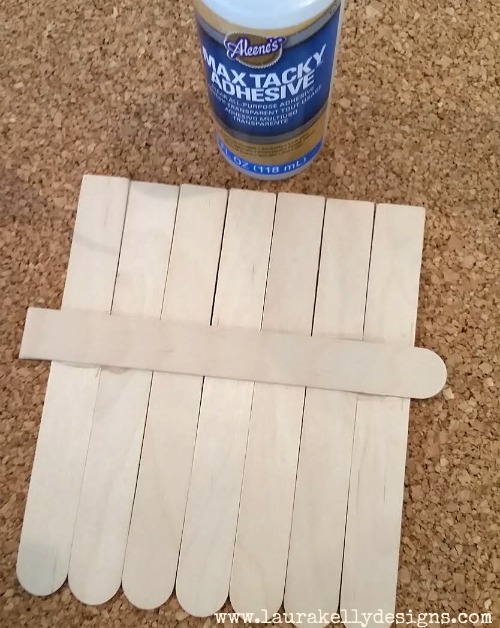
Then add your decorations with glue and let dry before you use it as a decoration.
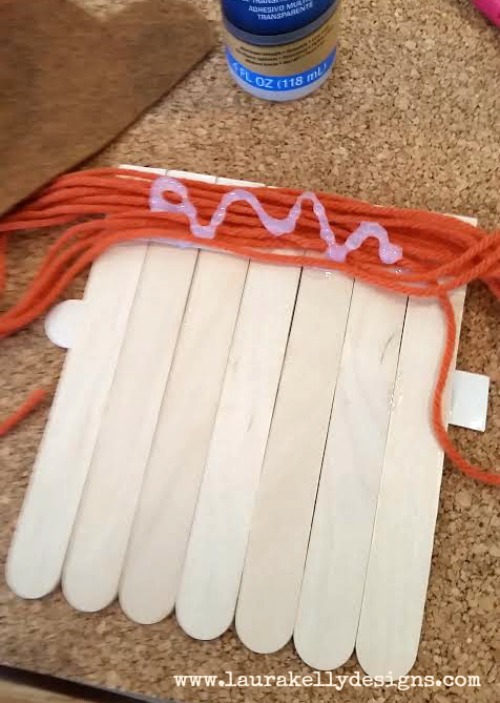
That’s all! HAPPY Fall Y’all!
Laura
It’s Fifteen MINUTE Friday and the 4th of July. Here is a really quick and cute way to pack up some snacks for the fireworks show. This little packaging idea would be great in a variety of colors for lots of occasions, goody bags and school treats too.
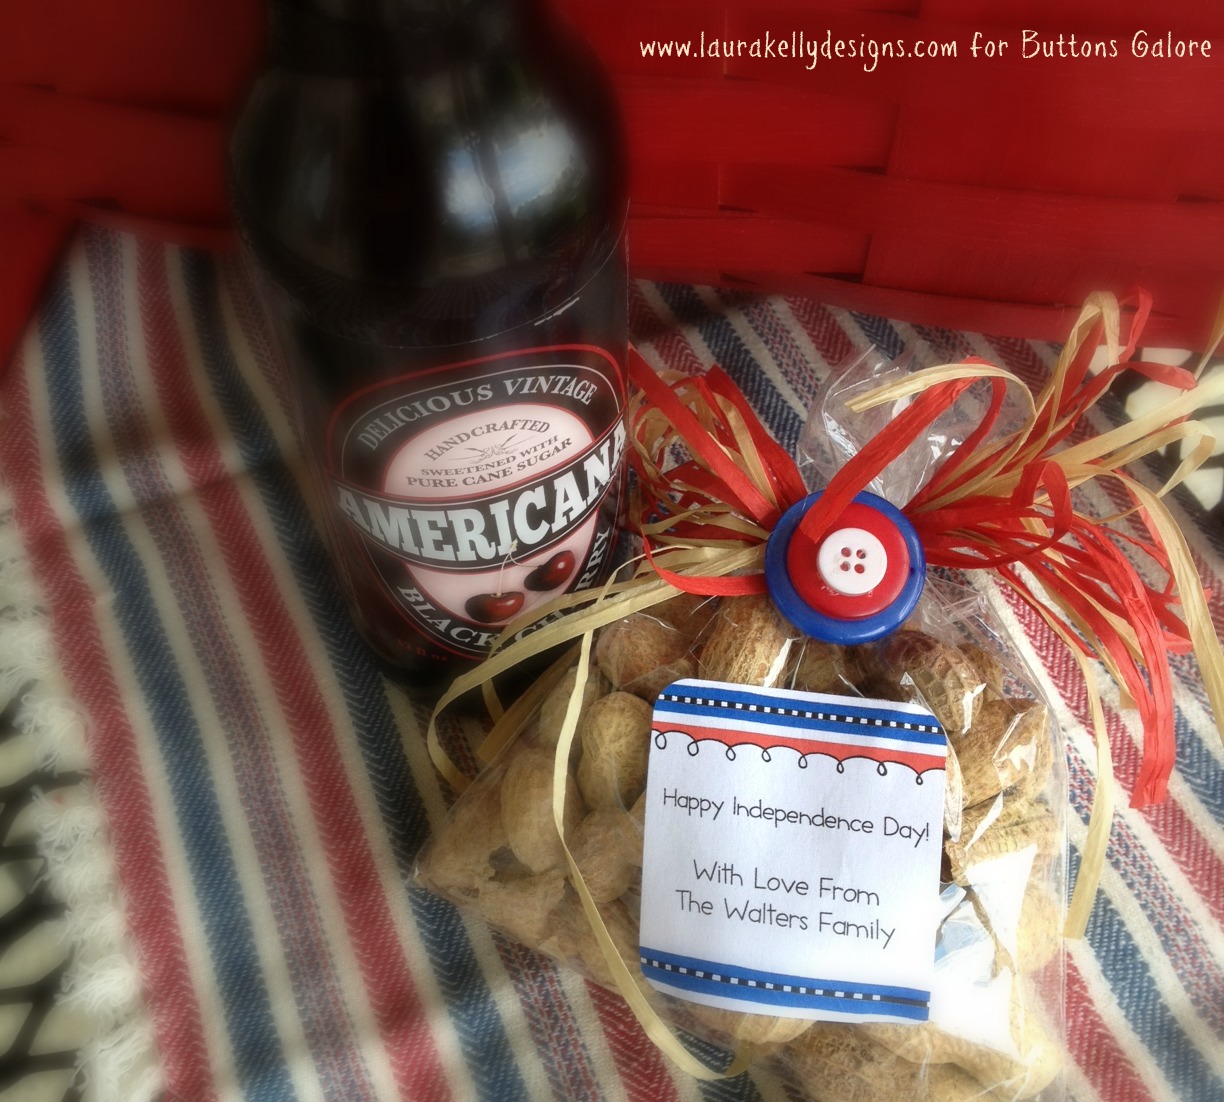
Put you snacks in bags that you can tie closed with ribbon or raffia then add the buttons with Aleene’s Turbo Tacky Glue. The super cute label is from Expressionery.Com and was designed by me so totally matches the colors of the buttons that come in the Laura Kelly Patriotic Mix.
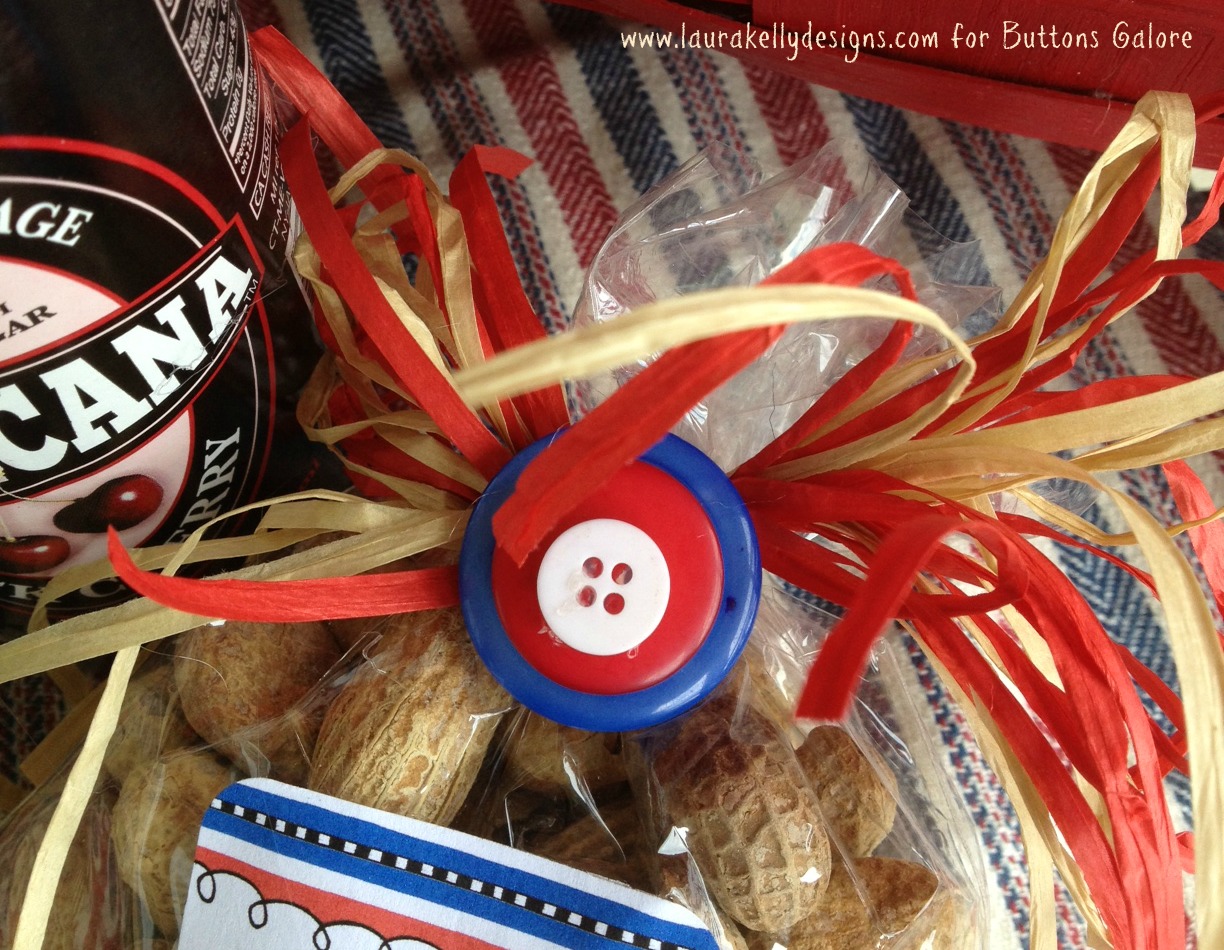
Happy Celebrating!
Laura
Today I am exited to share this awesome drink charm gift idea from Laura Bray. These adorable and simple drink charms are a fabulous idea for Father’s Day for those of you who want to create something magnificent in a short amount of time.
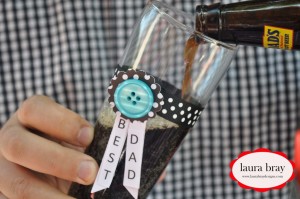
To get the tutorial and learn more about the amazing Laura Bray, visit her blog post here.
Happy Father’s Day Weekend,
Laura
Create dear old DADDY an adorable card or even gift wrap to celebrate his special day. This Father’s Day, get out your buttons and glue and make him a card he will want to keep forever.

To make this, you will need a few things:
Download the free printable of the ‘Me and My Peeps’ Daddy or draw your own then color it to match your daddy’s skin tone and hair color.

Use Aleene’s Tacky Glue to add buttons to the daddy shirt. The cut it out and add it to a card.
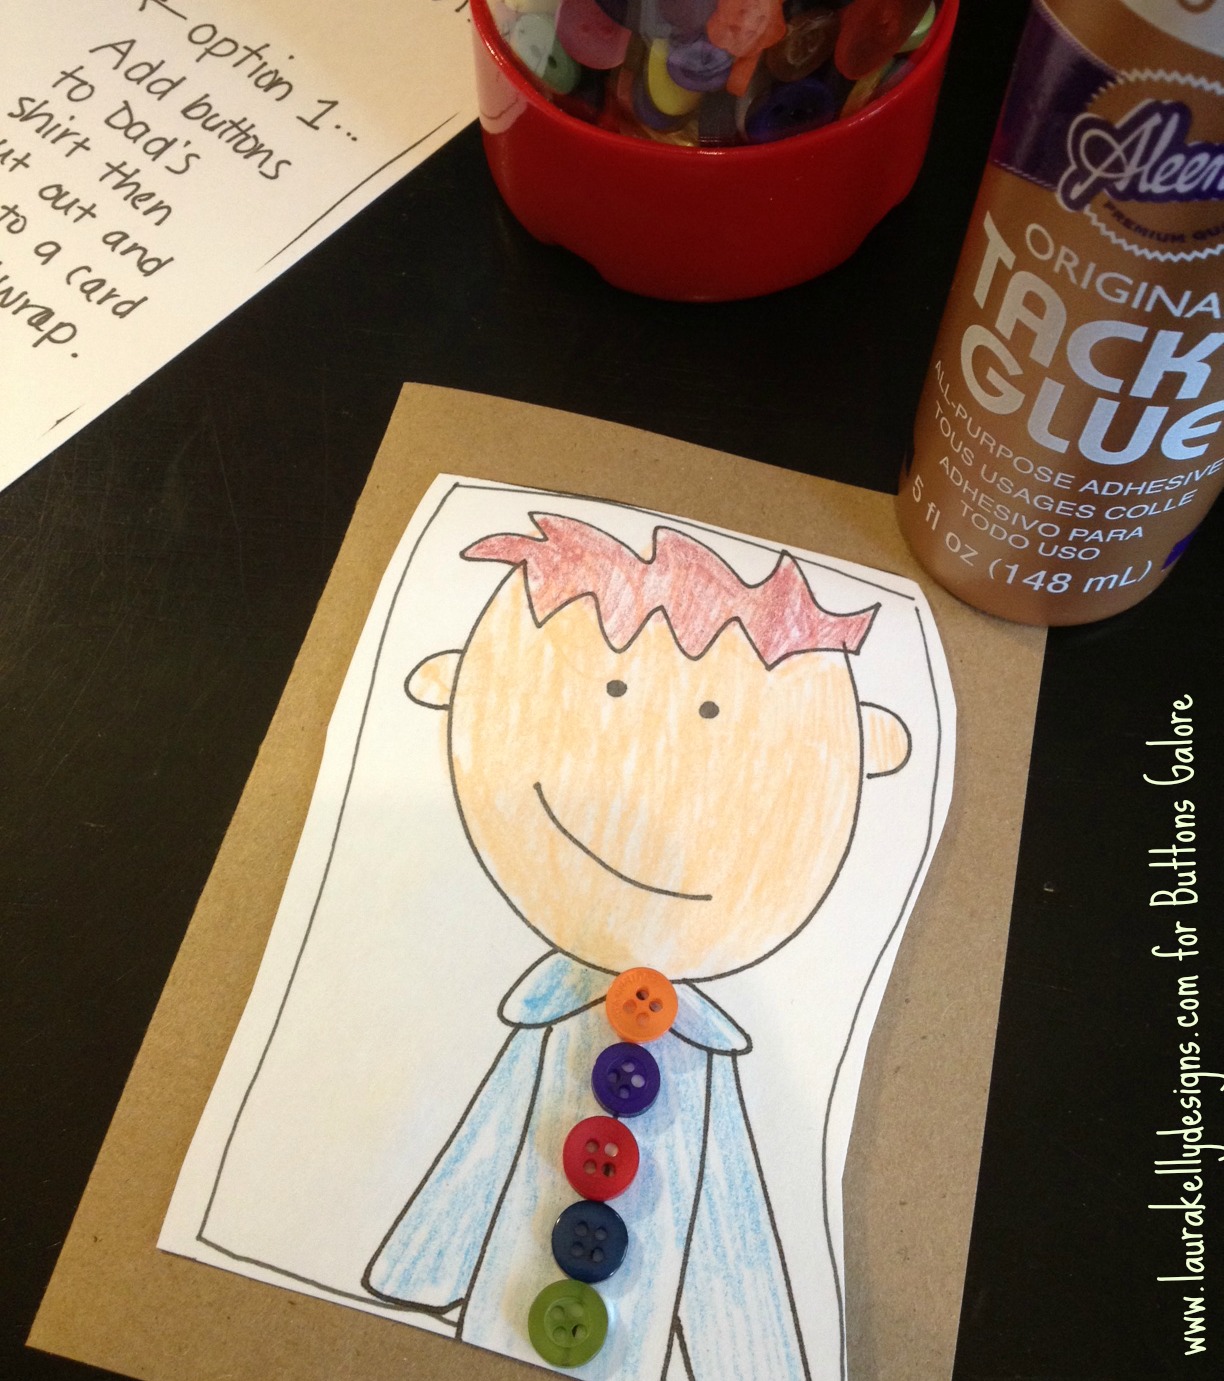
Write a message inside and you are all done!
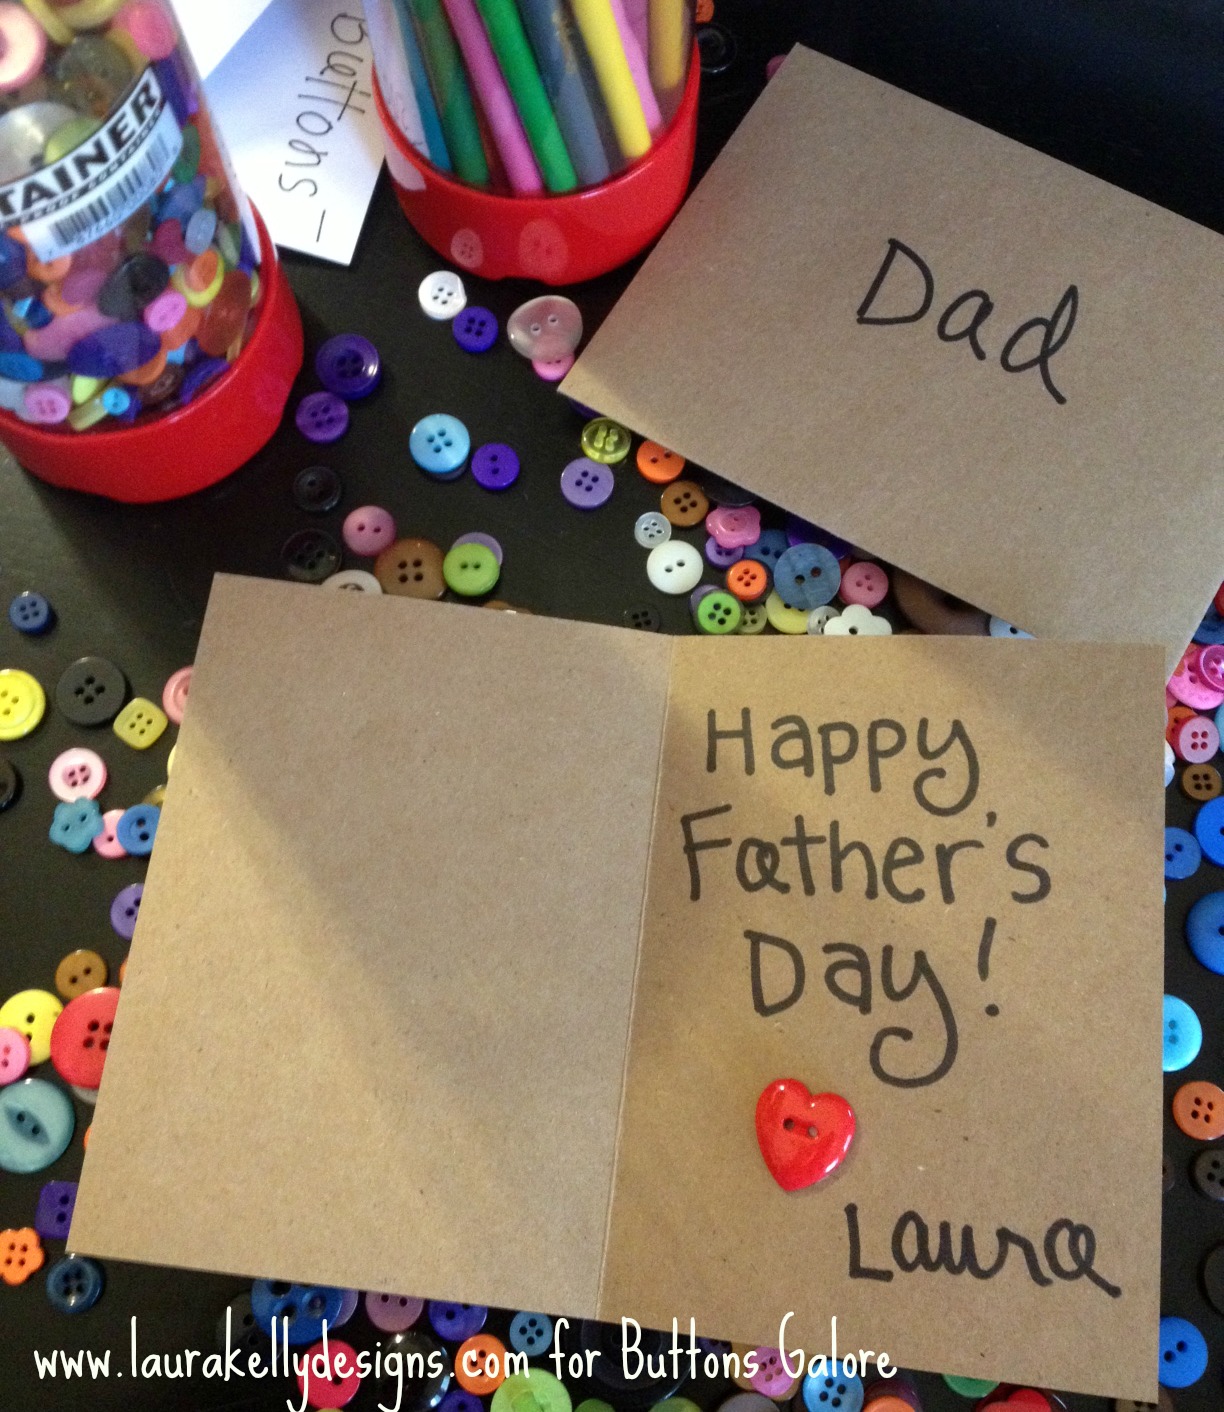
For another great buttons and glue Daddy Card, visit my blog!
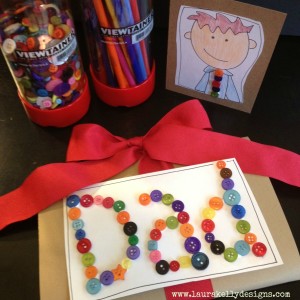
Happy Glueing and Celebrating Daddies, Step Daddies, Grand Daddies and Special Men,
Laura
Here is a festive, fun and simple to make PATRIOTIC PICNIC PAIL, great for holding snacks, silverware, candles, etc. and totally useable for Memorial Day, 4th of July and Veterans’ Day too!
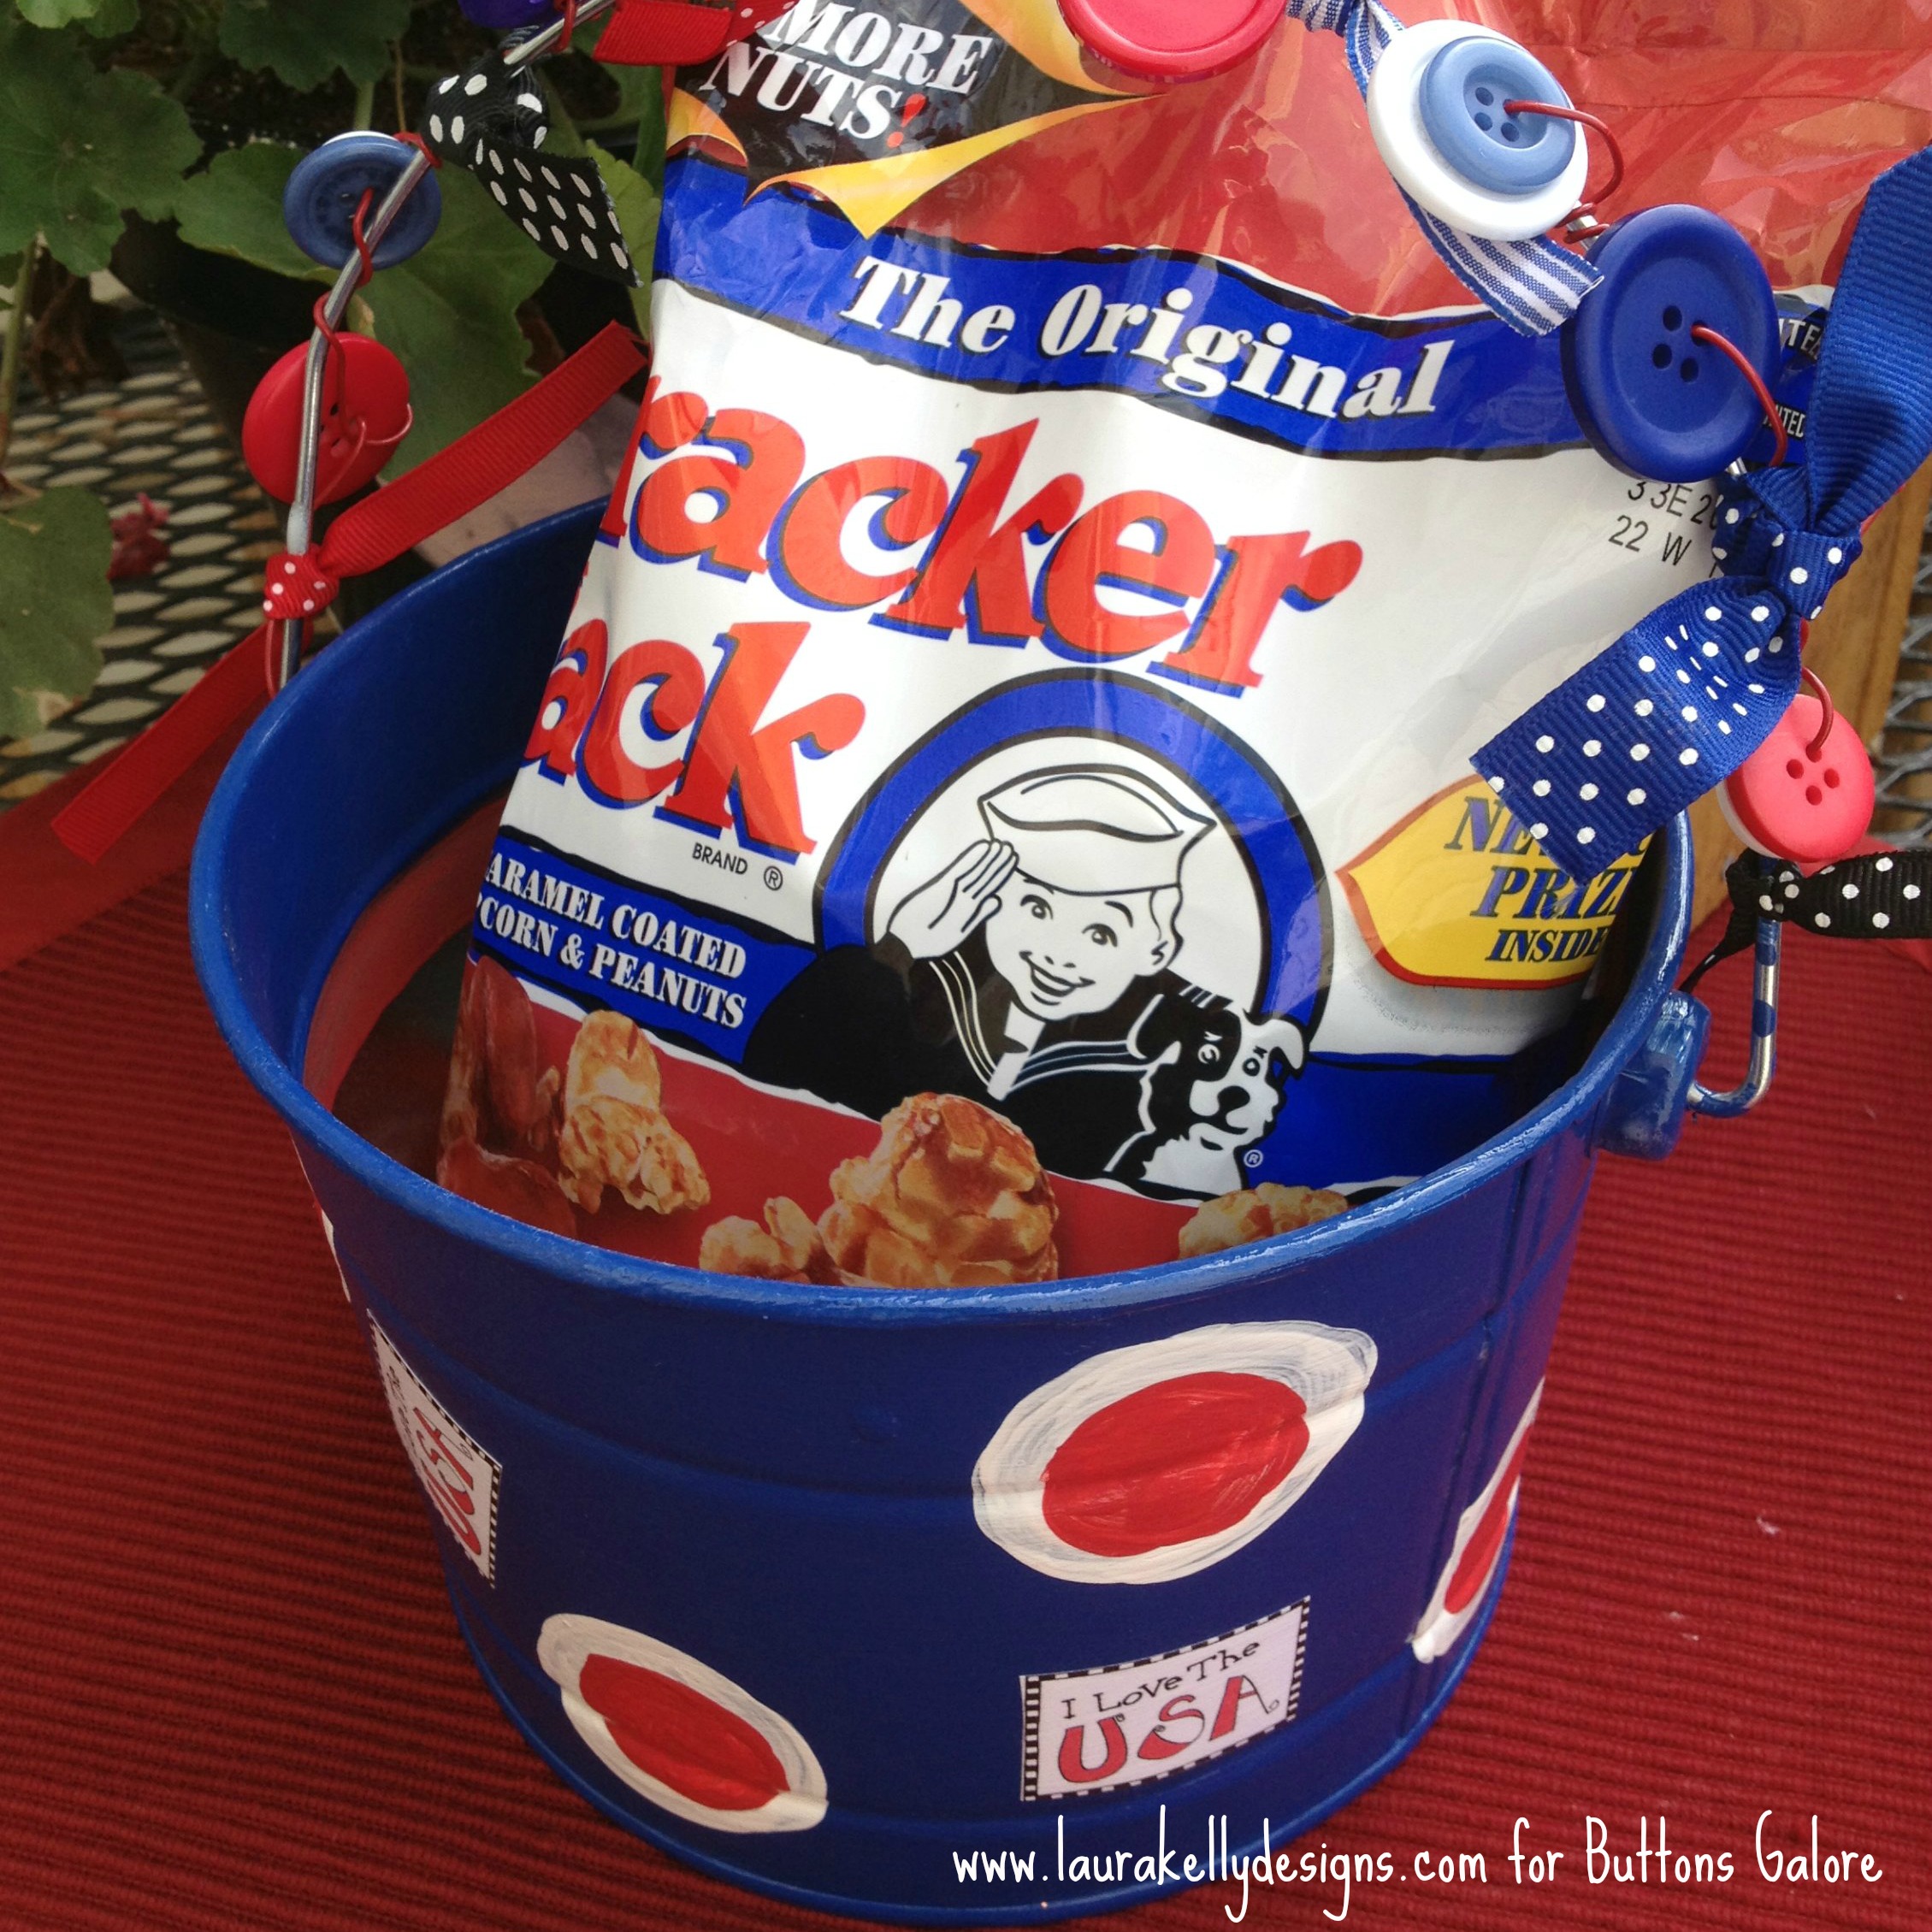
I gathered the products and materials I would need first. You can get my patriotic mix of buttons from Buttons Galore and save yourself from having to buy all of the colors individually.
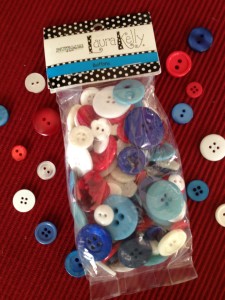
I painted the tin pail with blue paint, applying three coats to get it bright and covered completely. Then I added polka dots with white, applying two coats. To complete the painting, I added polka dots inside the white ones with red, again applying two coats. I also painted inside of the bucket.

When the paint was totally dry, I used decopauge to add a few “I Love the USA” additions. I printed them out on the computer and cut them first. My favorite choice here is Matte Collage Pauge from I Love to Create.

To decorate the handle, I added buttons from my Patriotic Mix from Buttons Galore by threading them onto red wire and twisting in onto the handle as I went from one end to the other. I added a few ribbons tied in knots.
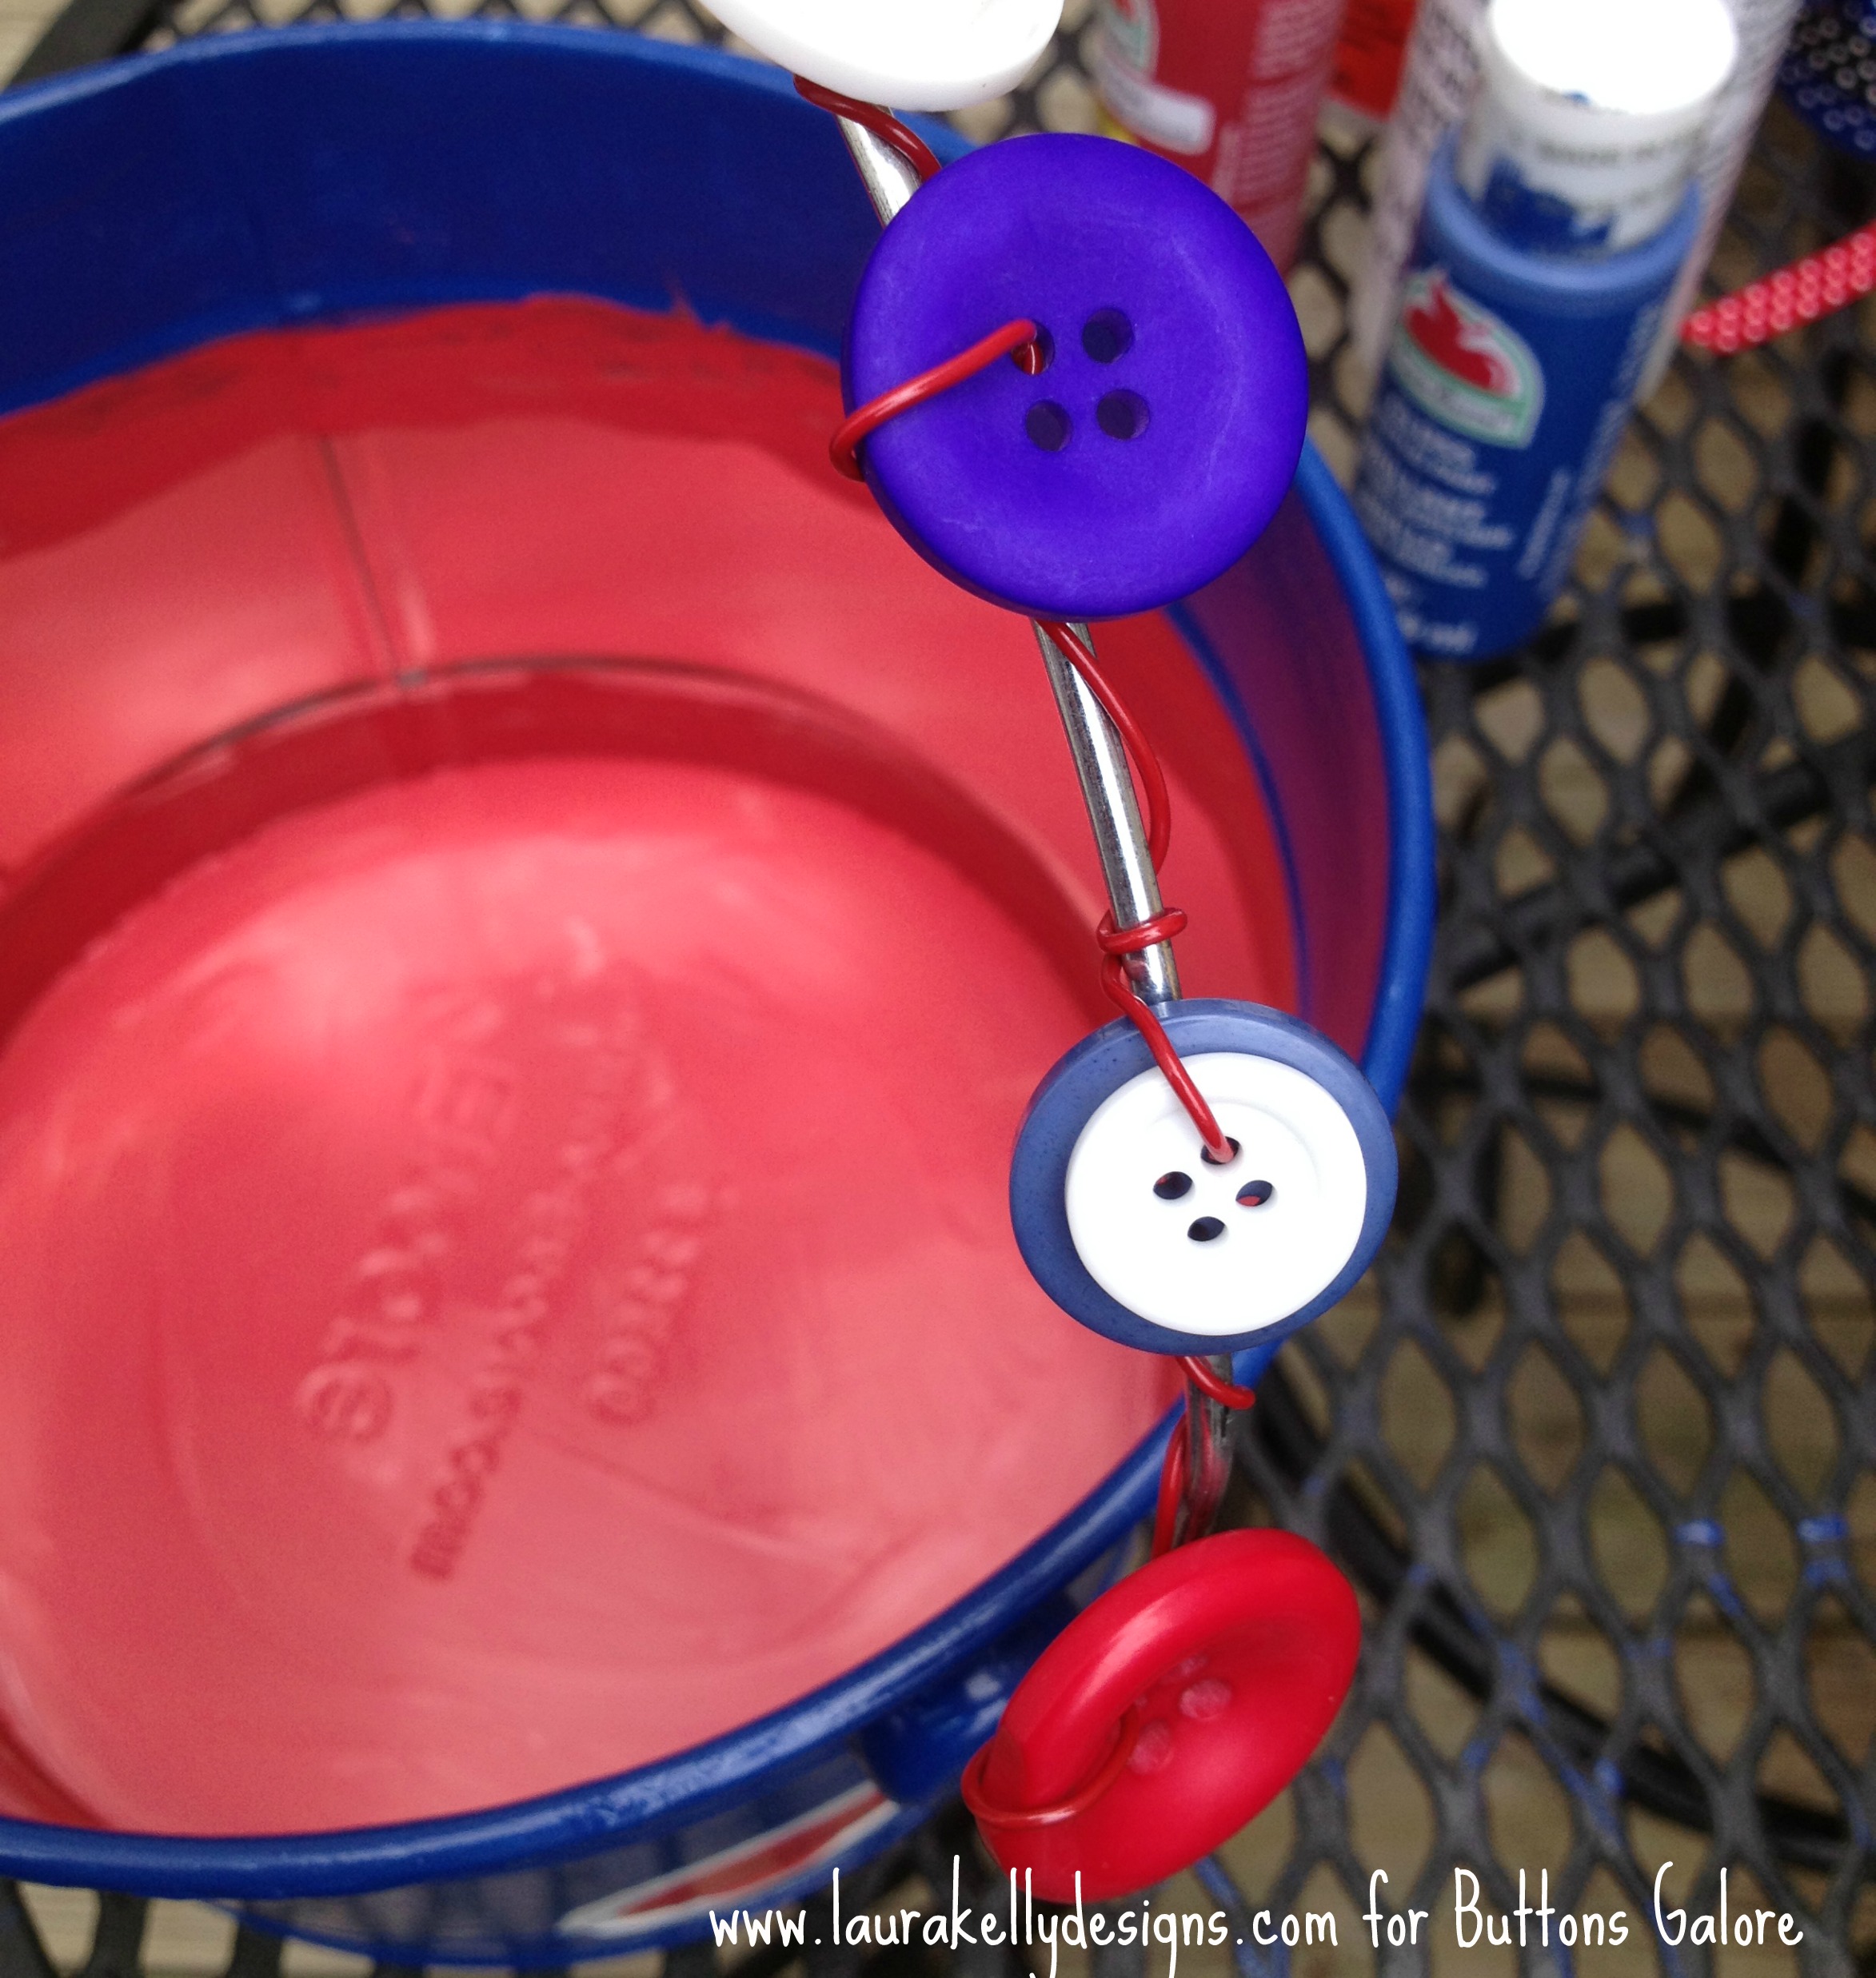
Then I added my favorite red, white and blue packaged snack to complete the project and turn it into a great hostess gift!
Happy Celebrating the USA and Creating with BUTTONS,
Laura
How beautiful are these ornaments for springtime?
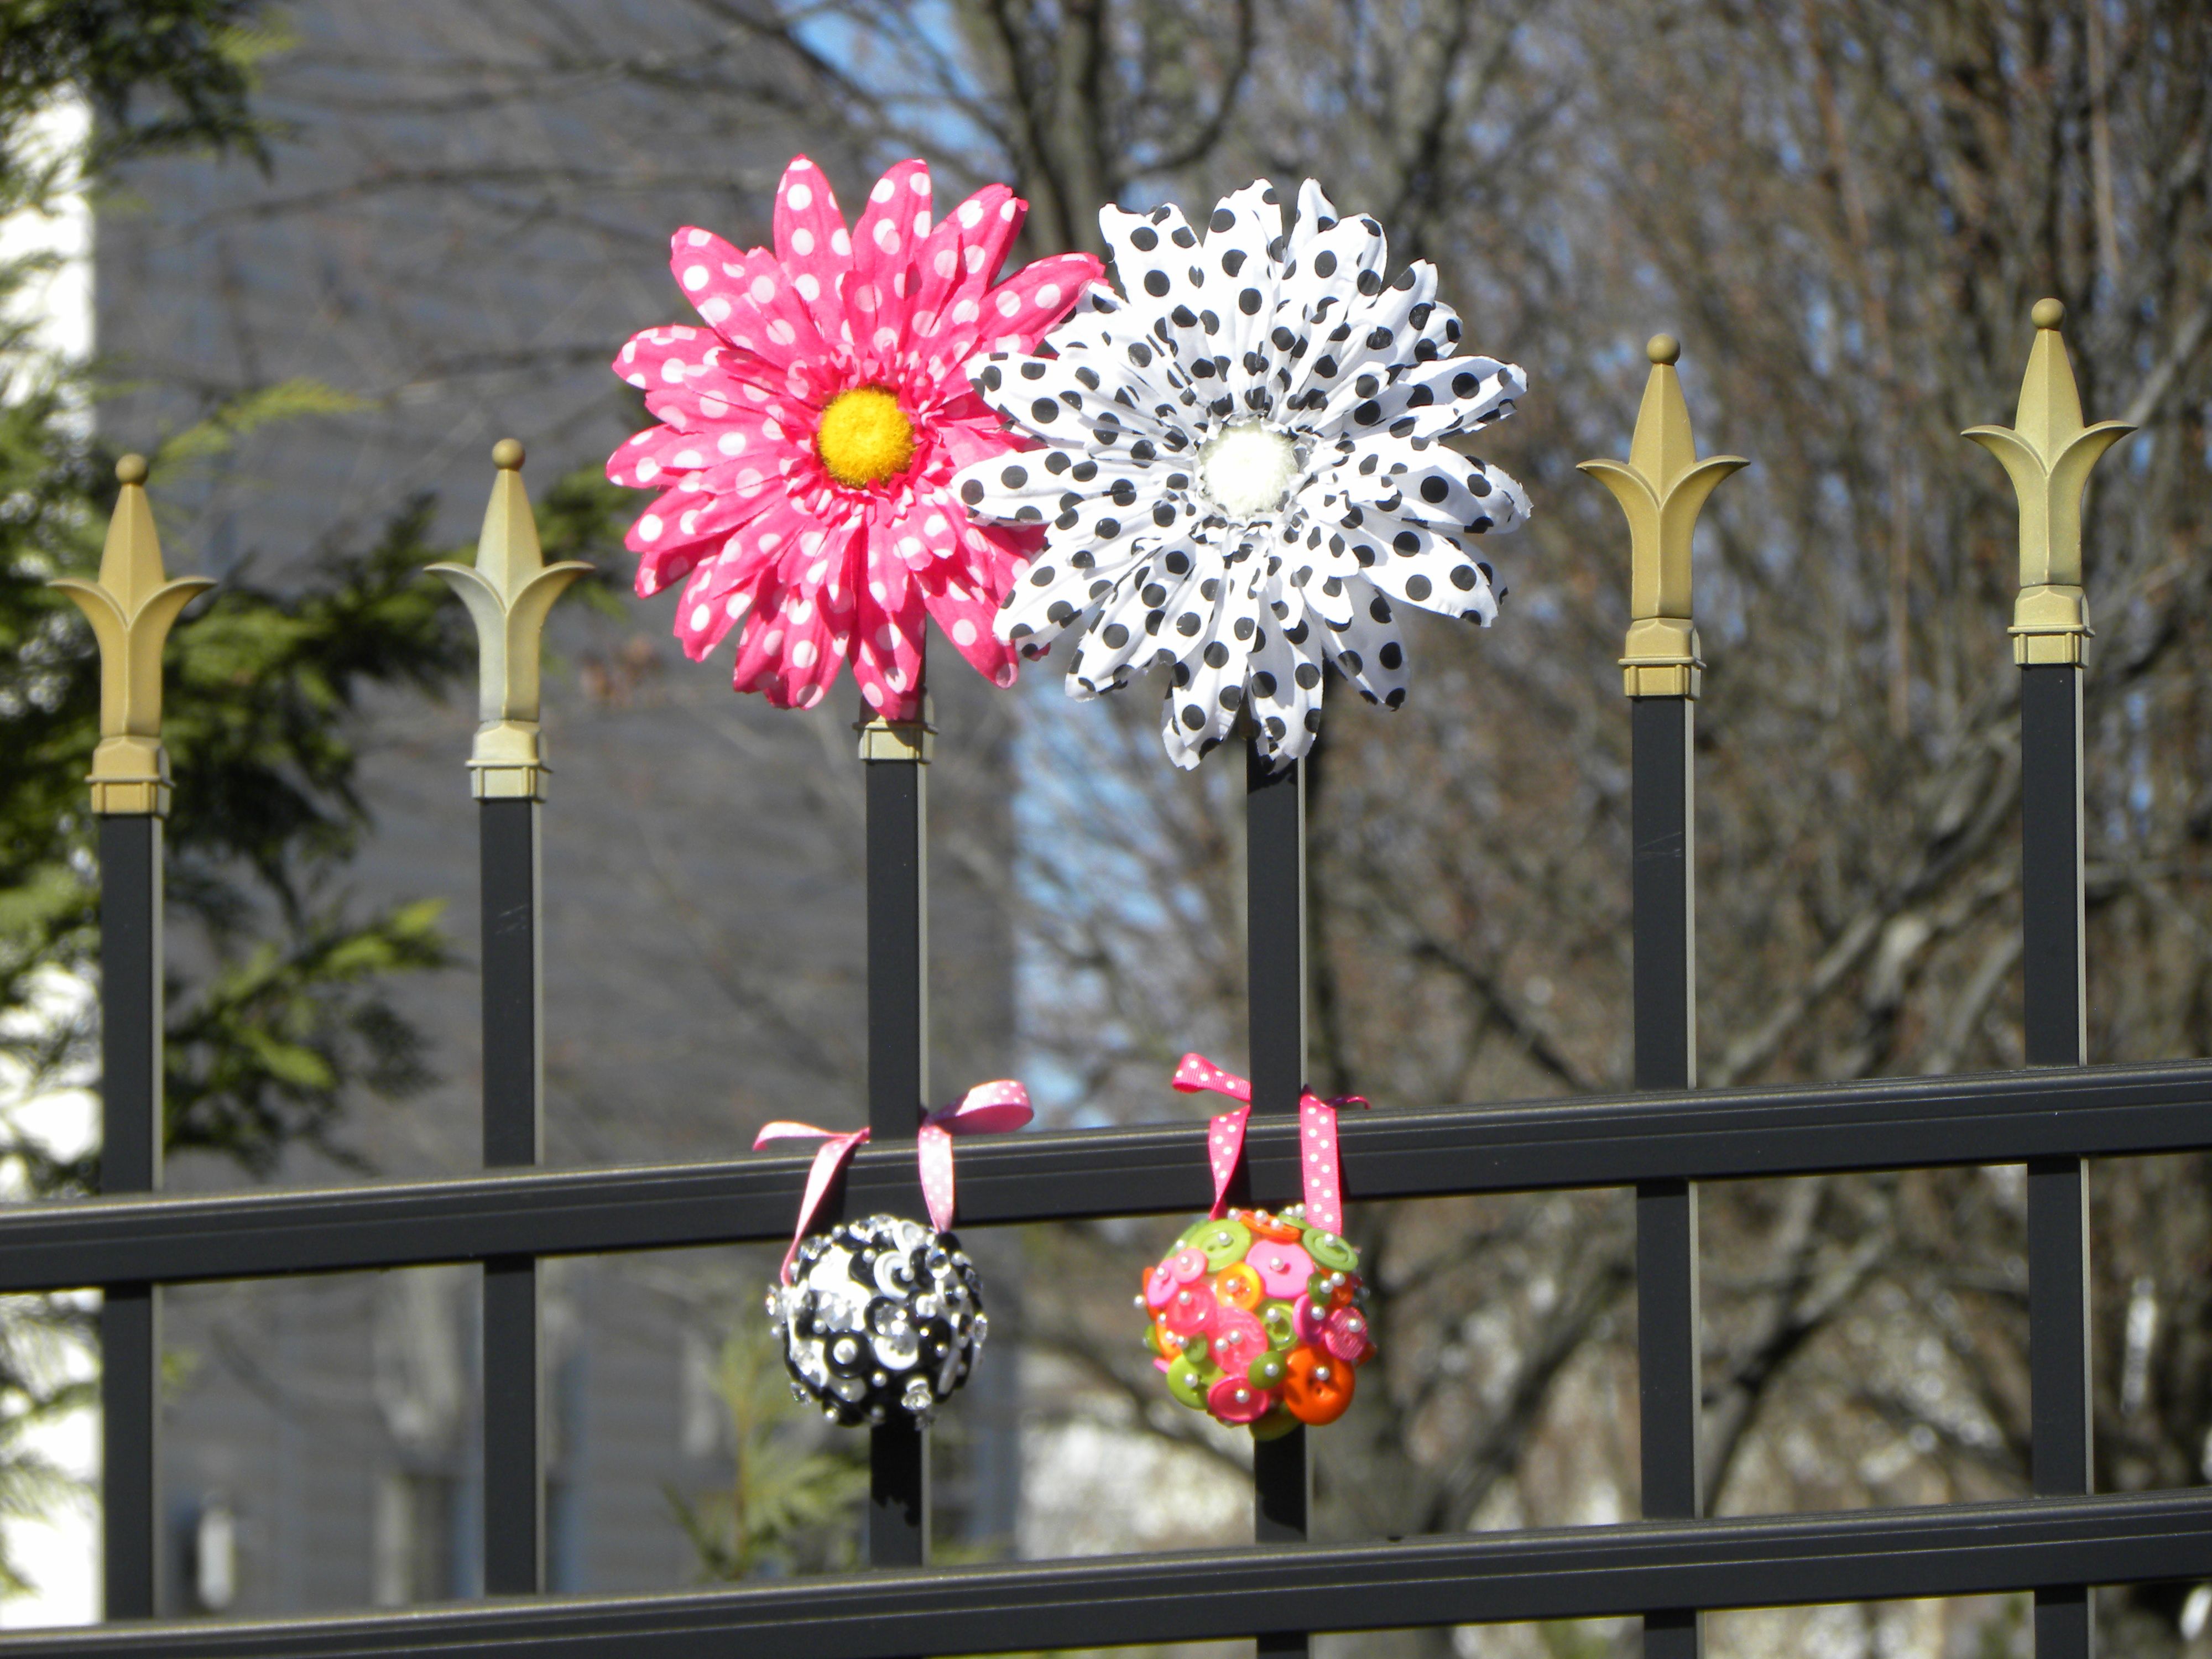
To create them you simply need a foam ball in the size you would like, buttons and ball-end pins. The longer pins can go through multiple buttons which is something to keep in mind when choosing materials. Attach the buttons to the ball by pushing the pins through the button holes into the ball. Cover the ball entirely then attach a ribbon for a hanger either with the pins or your favorite adhesive.
They are fun to put together for decorating.
They look great outdoors for a breath of fresh brightness.
Happy Springtime,
Laura
Here is a quick and fun way to embellish a bouquet of flowers for Mother’s Day with DIY picks. You can download the free printable of the ‘Me and My Peeps’ mom and color her to look like a mom that you love then embellish her to create this fun arrangement.
If you want to download the doodles, click here or on the photo below.
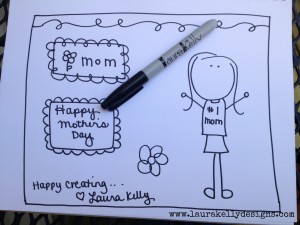
Have fun embellishing with lots of buttons. I used the ones from my BRIGHT collection. Isn’t she cute hiding in the flowers?
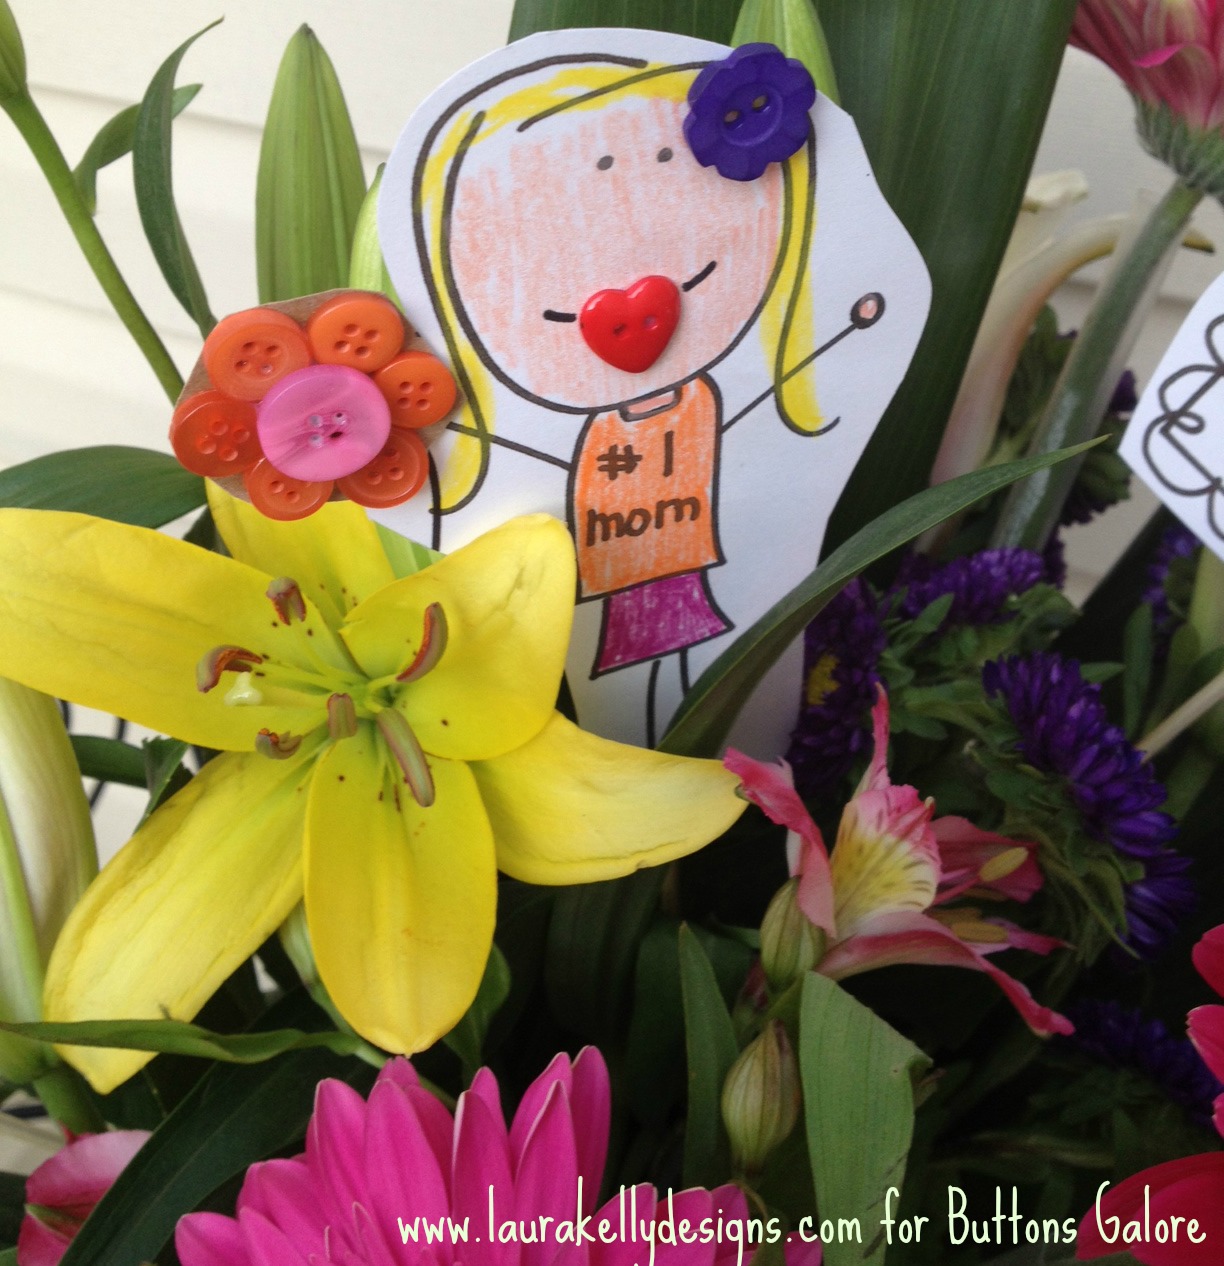
For more fun ways to use the printable, hop over and visit my blog here.
Have a great weekend,
Laura
It it that busy springtime season of gift giving again…Teacher Appreciation, Mothers Day, Graduation!!! Here is a cute bee that you can make out of buttons to decorate any gift and and let someone know that you think they are the bee’s knees!
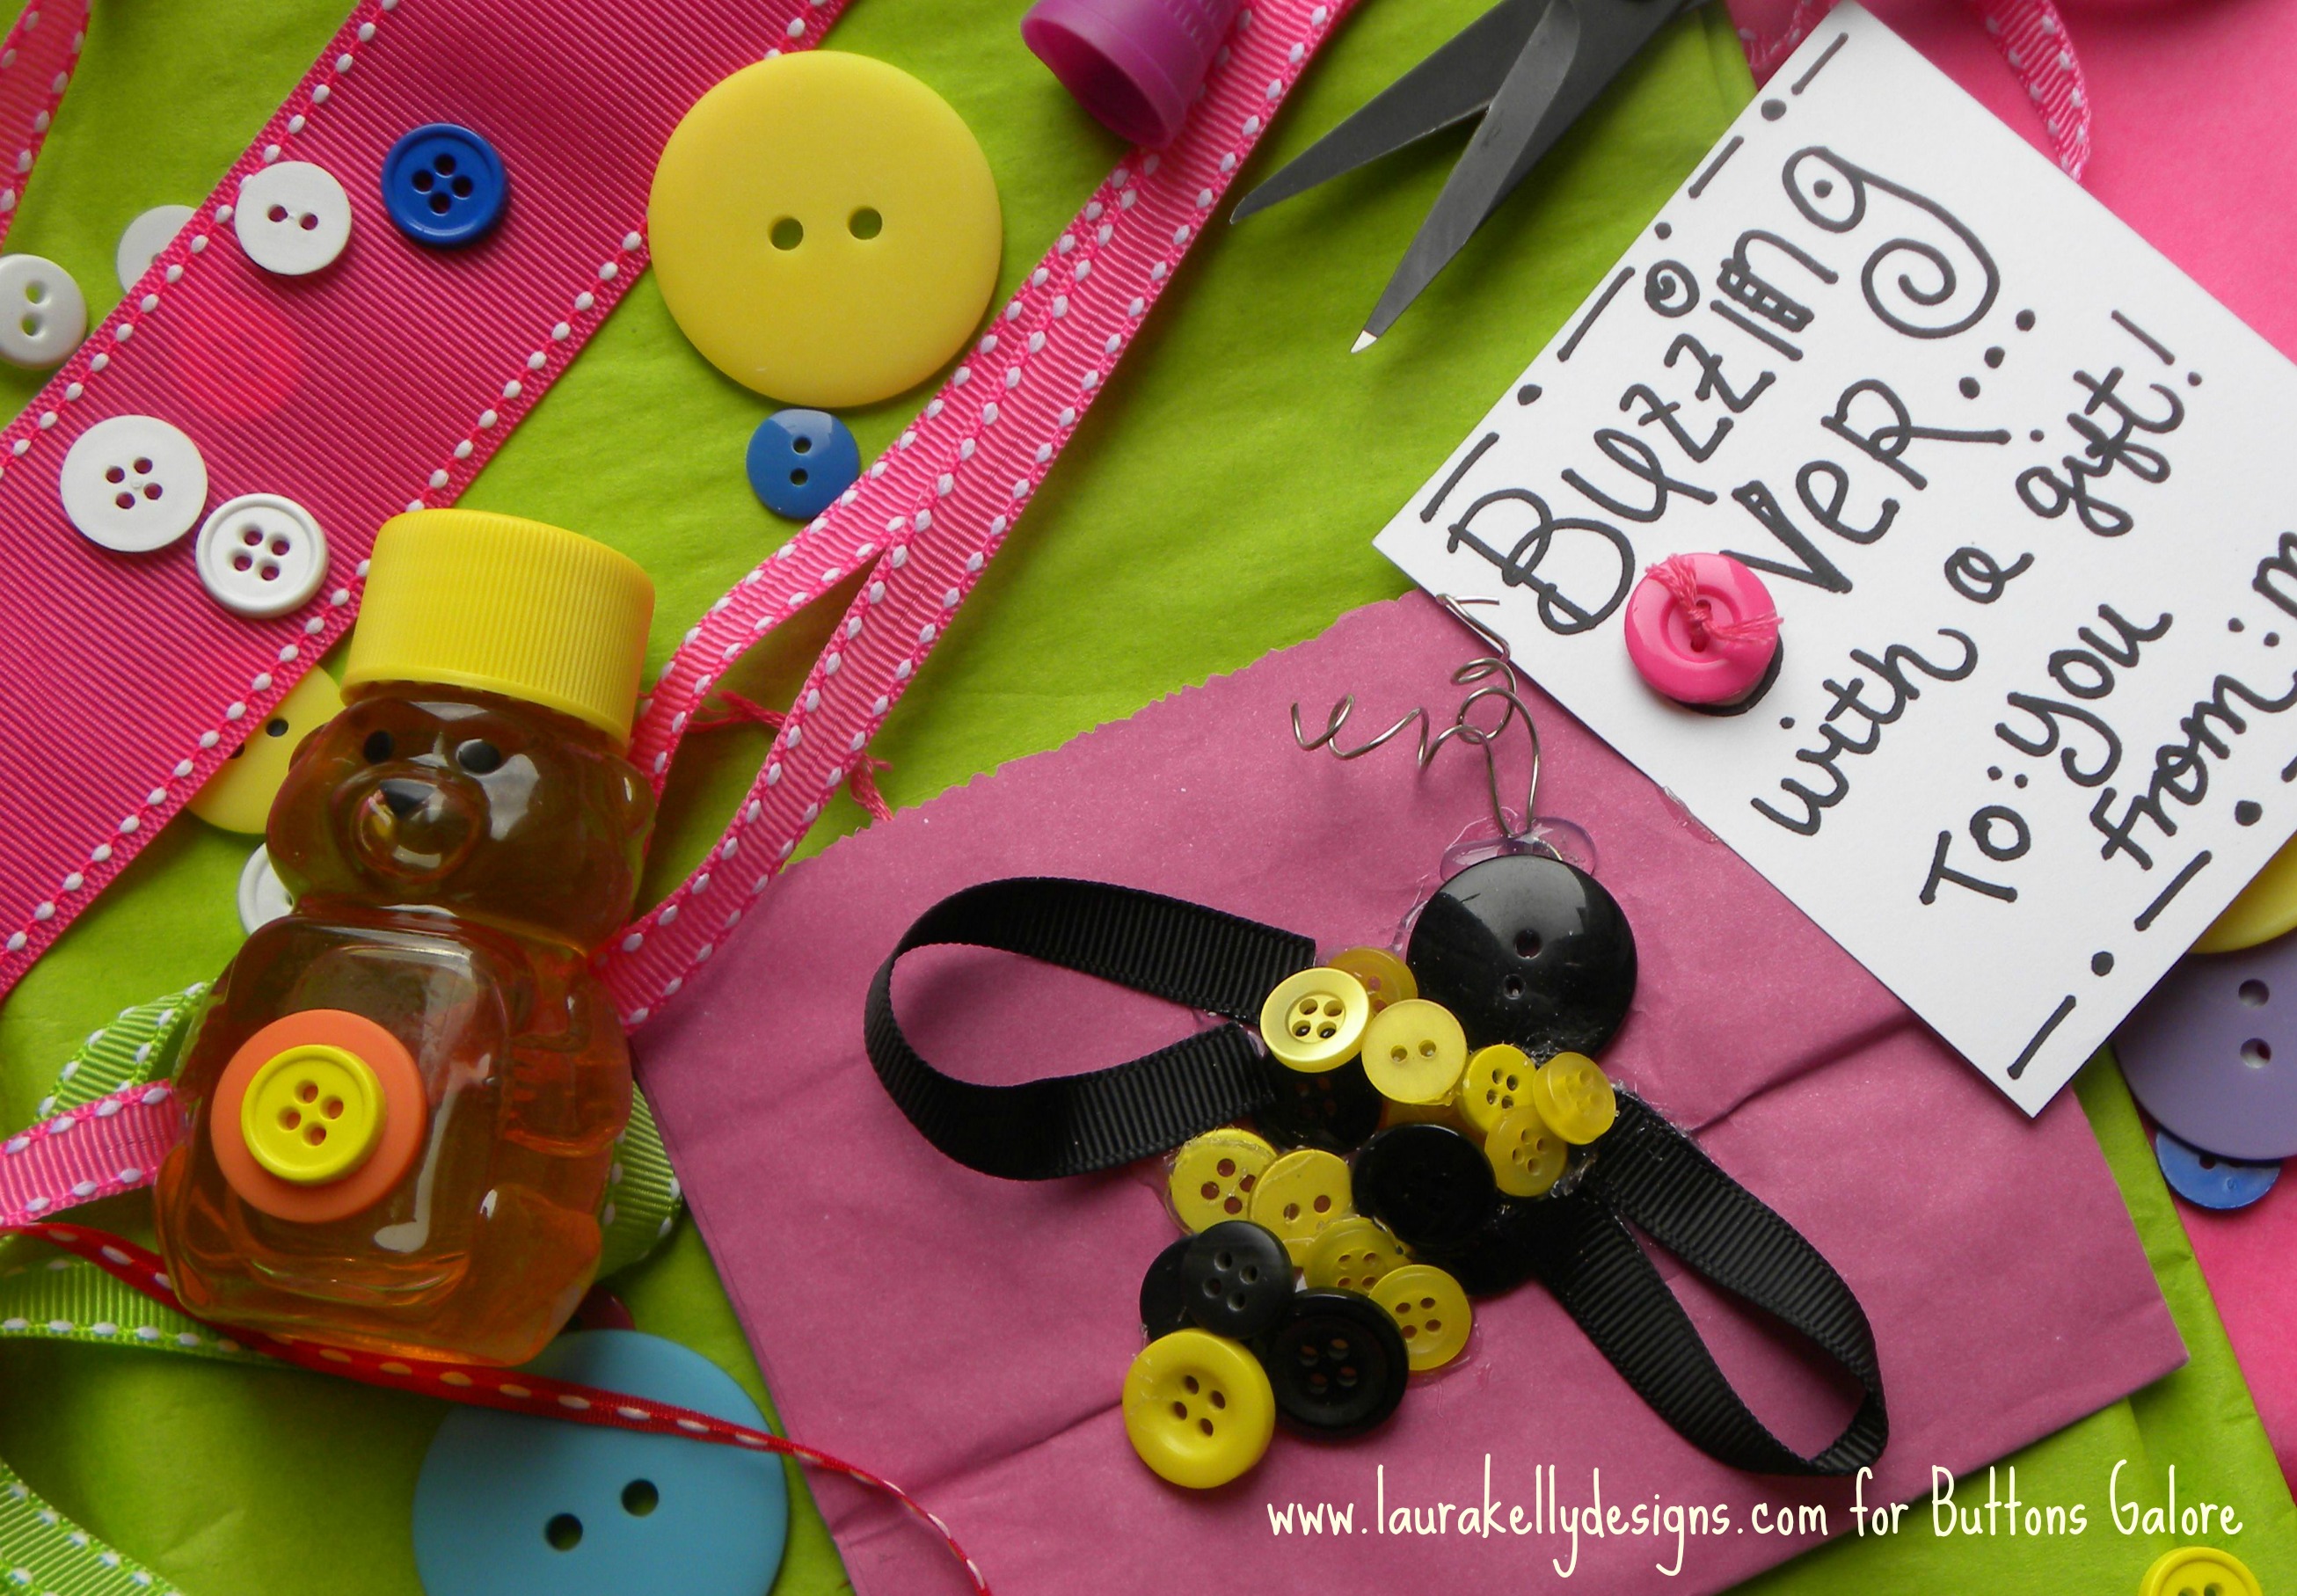
To make the bee, you will need to use hot glue to hold all of the pieces together. I added ribbon for wings and wire for antennas. Super cute, really easy and lots of fun!
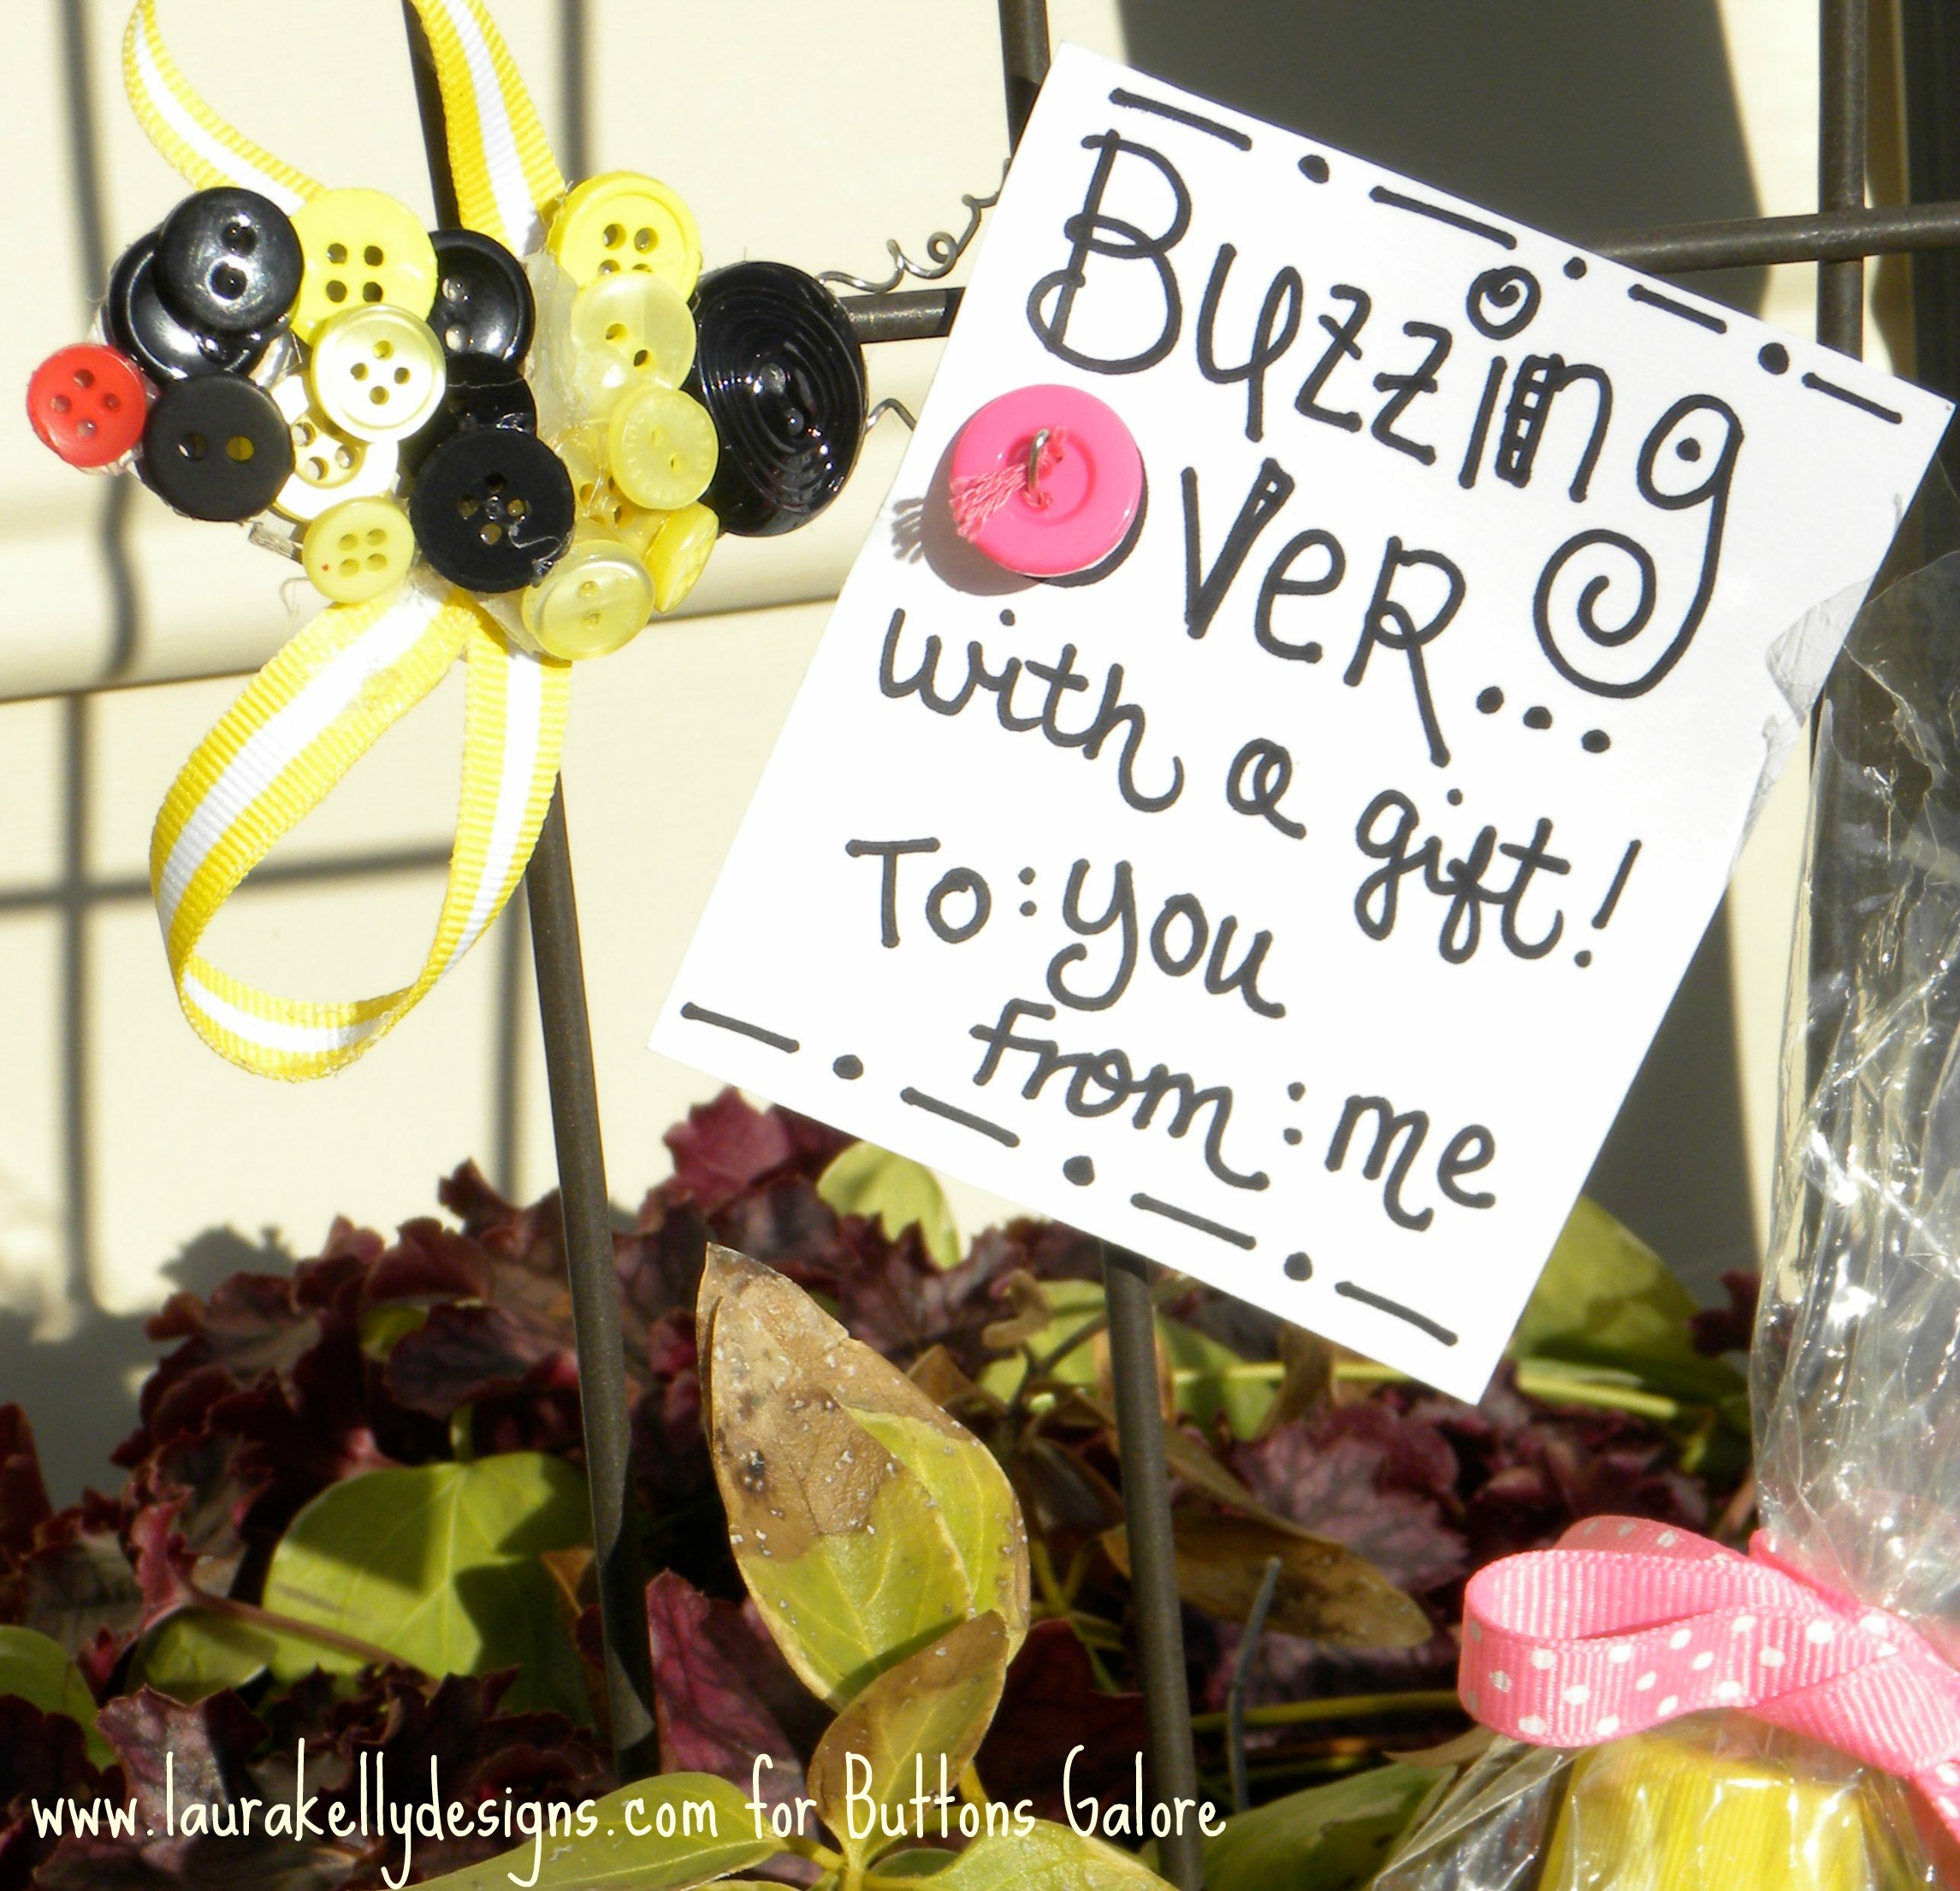
I chose my Sunshine Yellow and Black Beauty buttons from the Laura Kelly mix offered as a Bright Mix of Colors. You can buy them individually bagged by colors too.
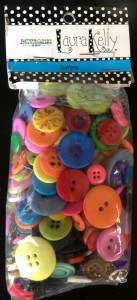
Happy Gift Giving,
Laura
These cute little felt flower clips are great to create and make for Teacher Appreciation and Mothers Day gifts. They are easy and fun!
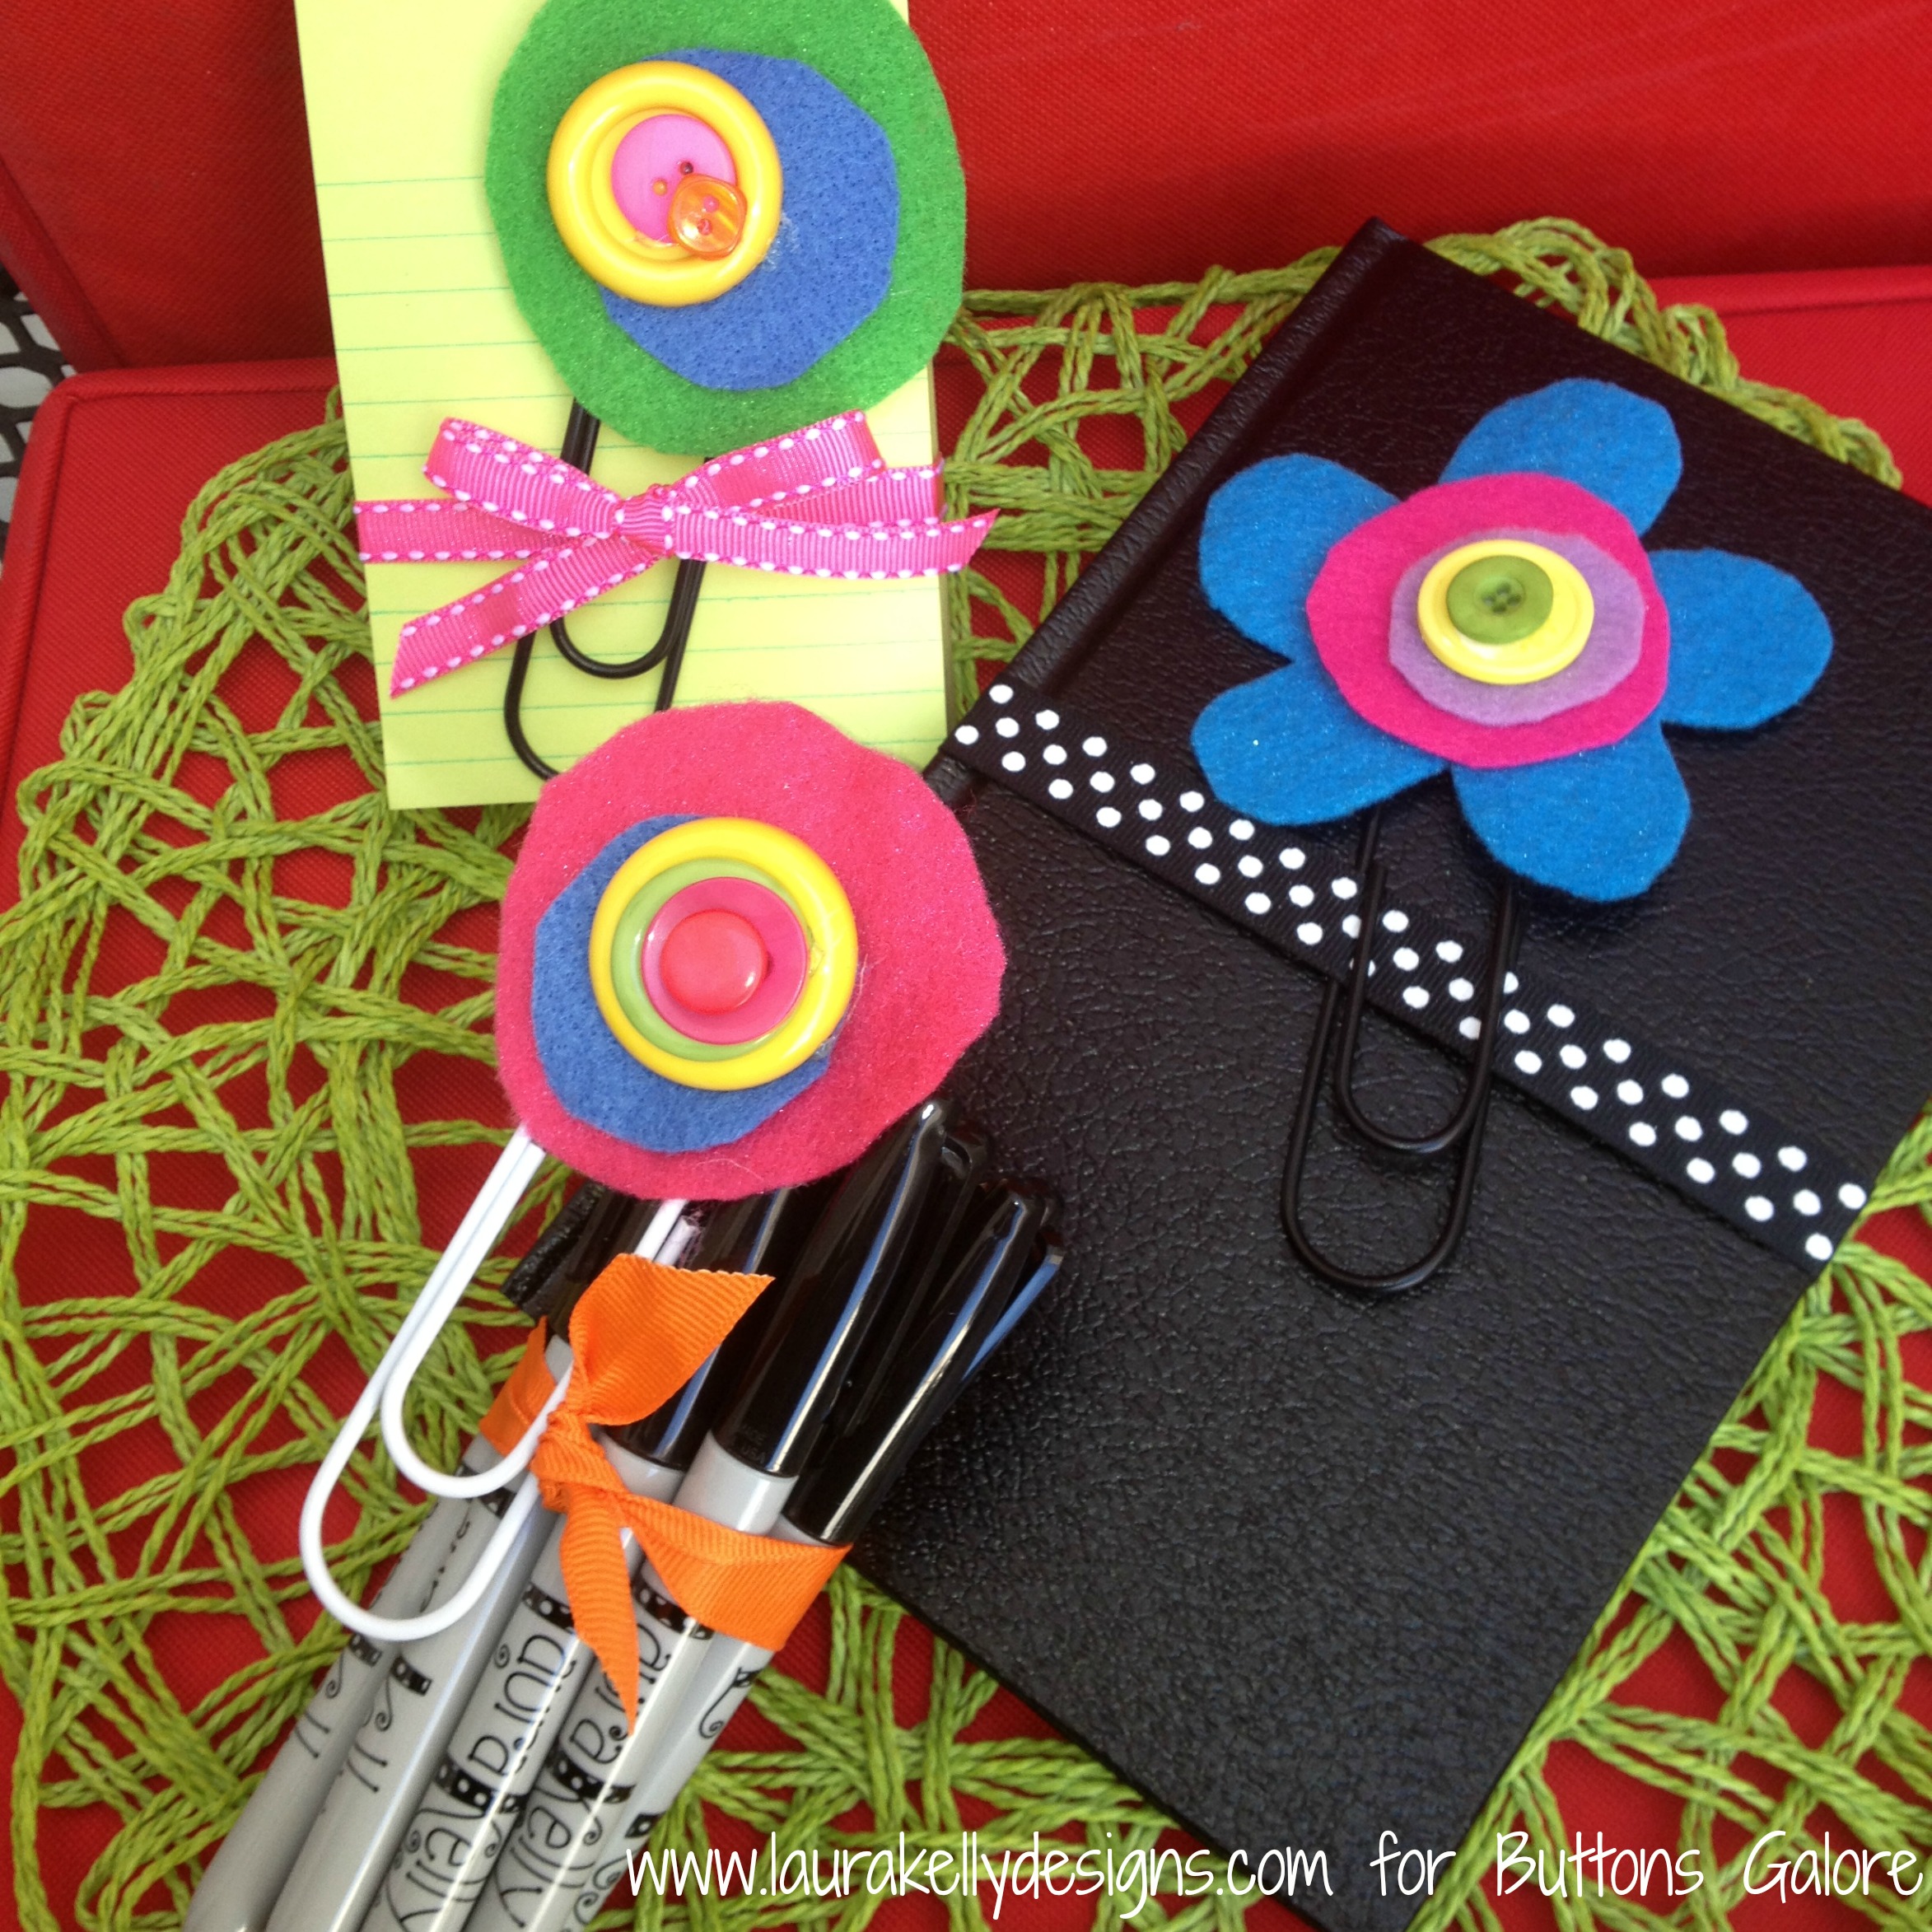
You only need BUTTONS (I used my Laura Kelly Brights Mix) giant paper clips (could use little ones too of course), felt (I used Kunin Group) and Aleene’s Max Tacky Glue. Cut out your felt flower layers then glue them together. Add a few buttons and wa-lah, you have super cute clips that can be used to hold paper together.
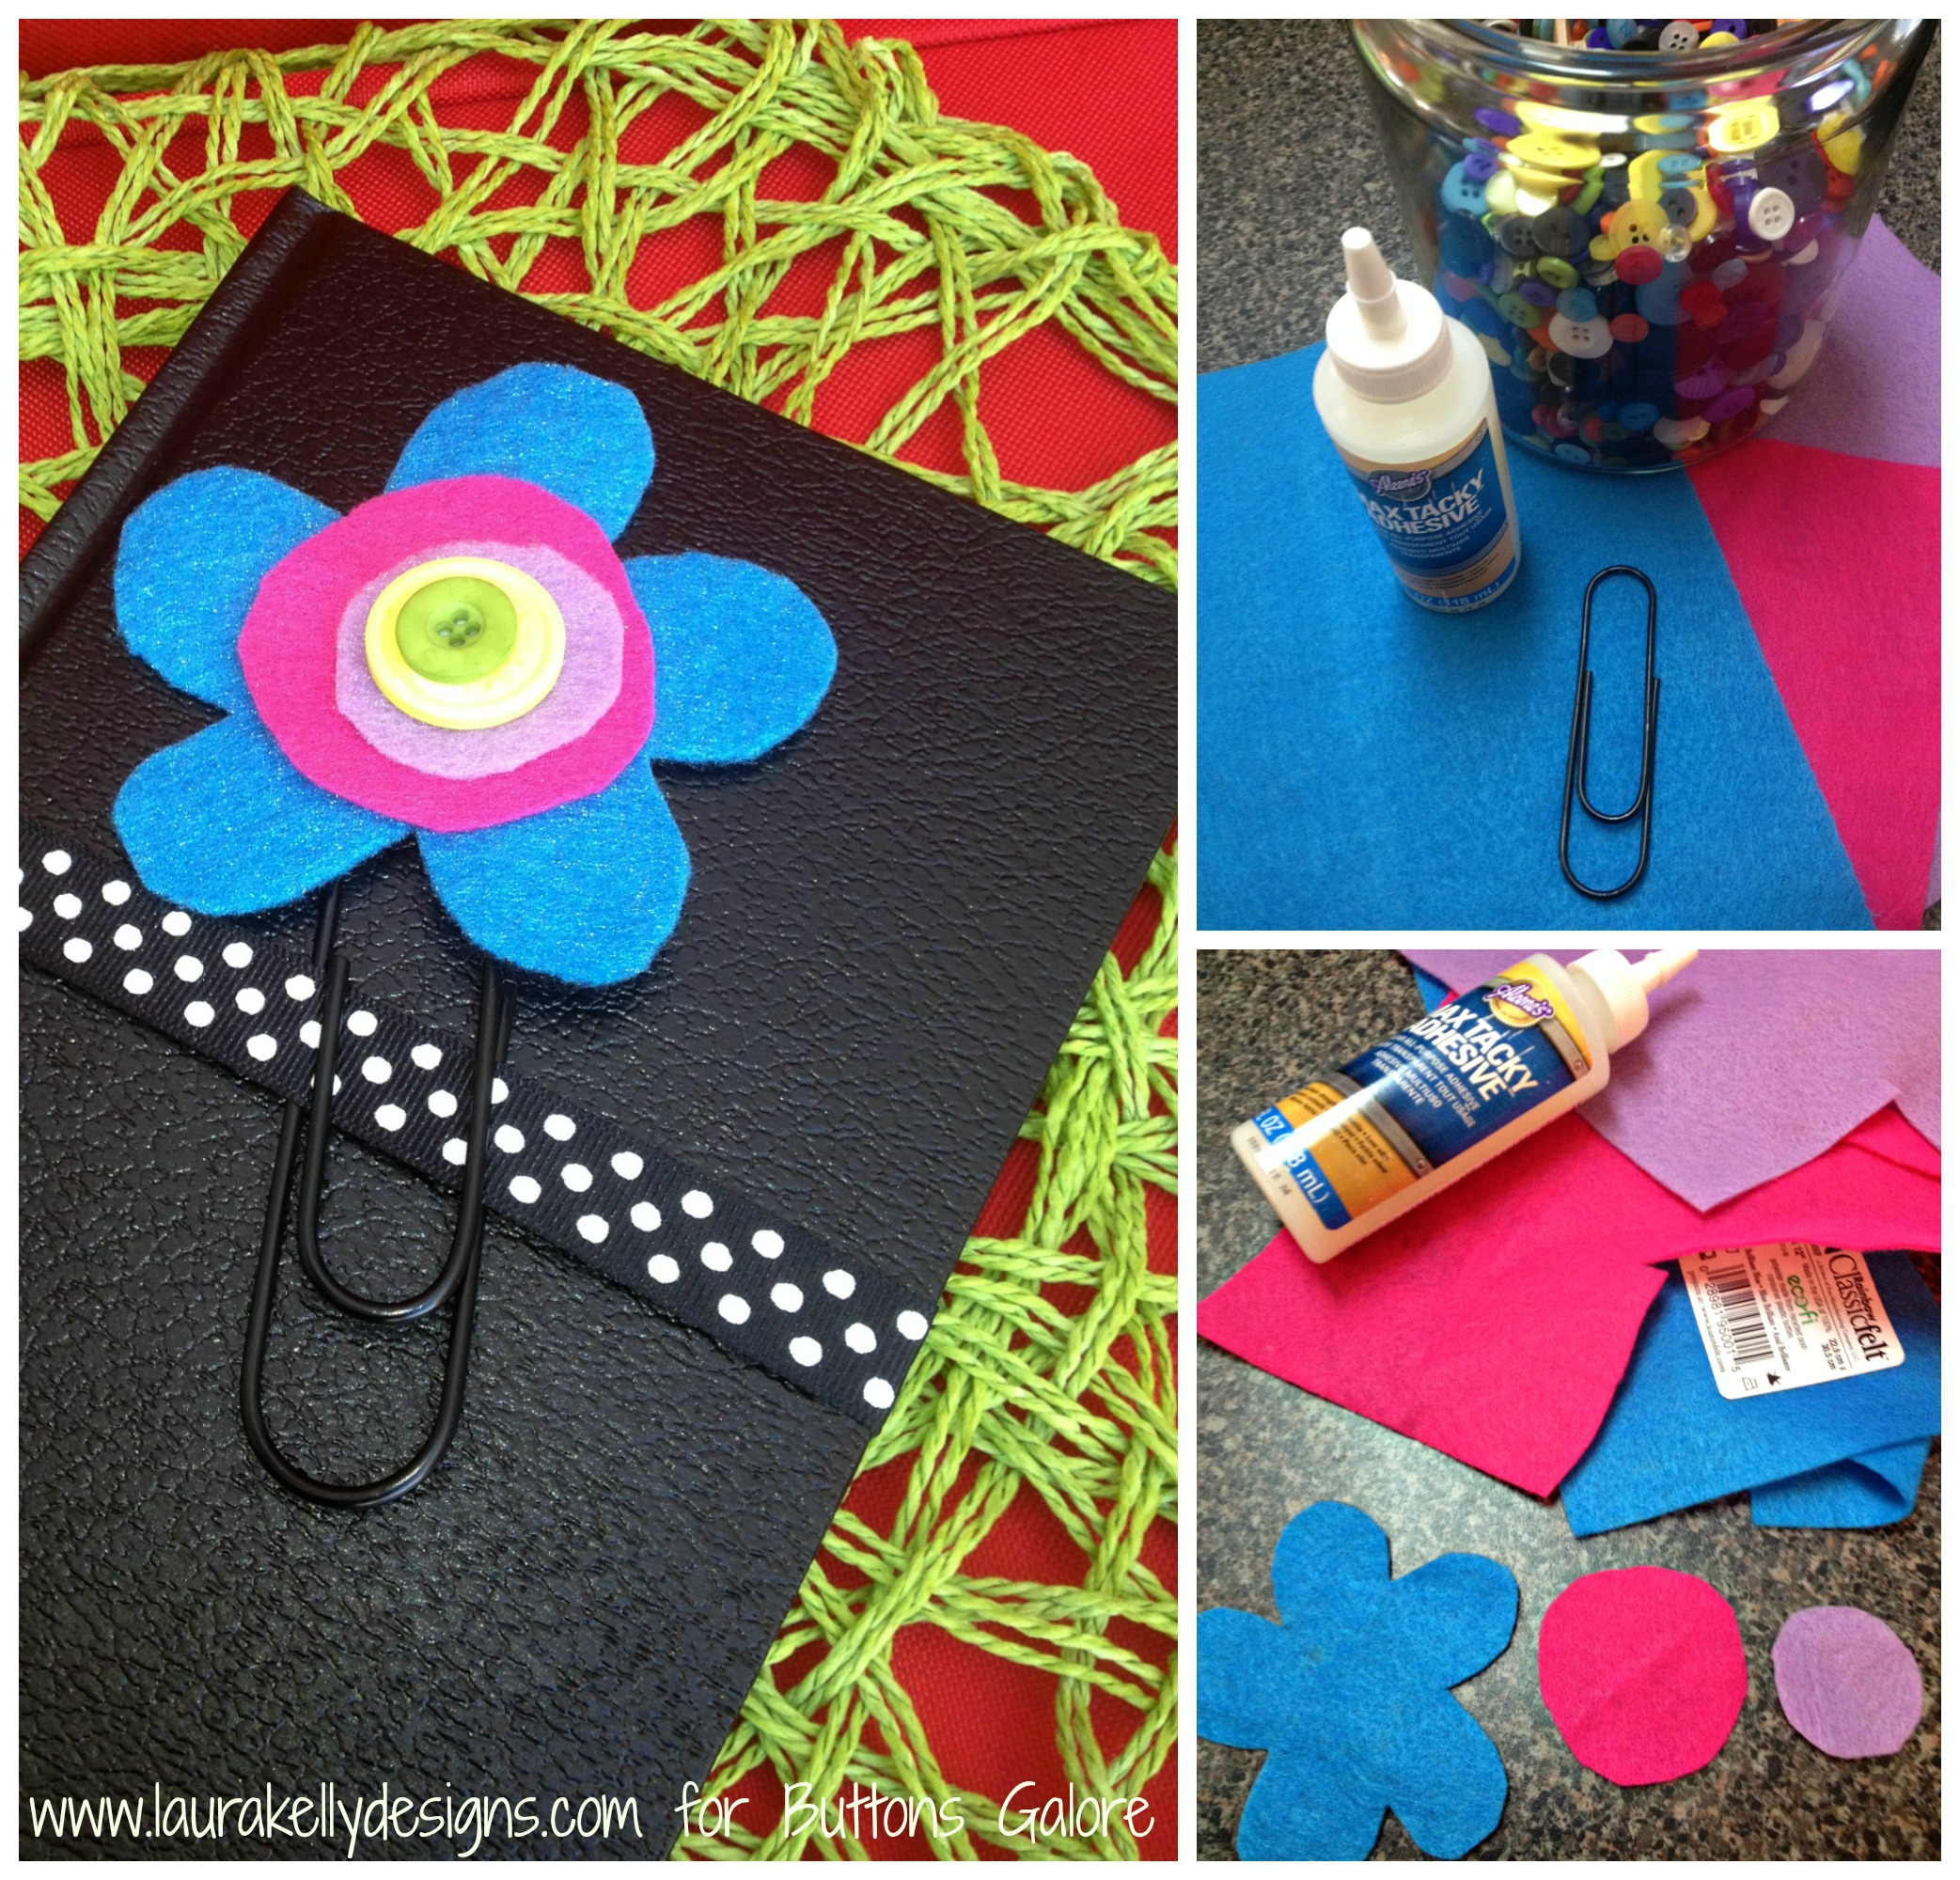
They make great bookmarks too and would be fun packaged with a journal or a cookbook or a gift card to a book store. I love this one packaged with a writing journal to give to a teacher.
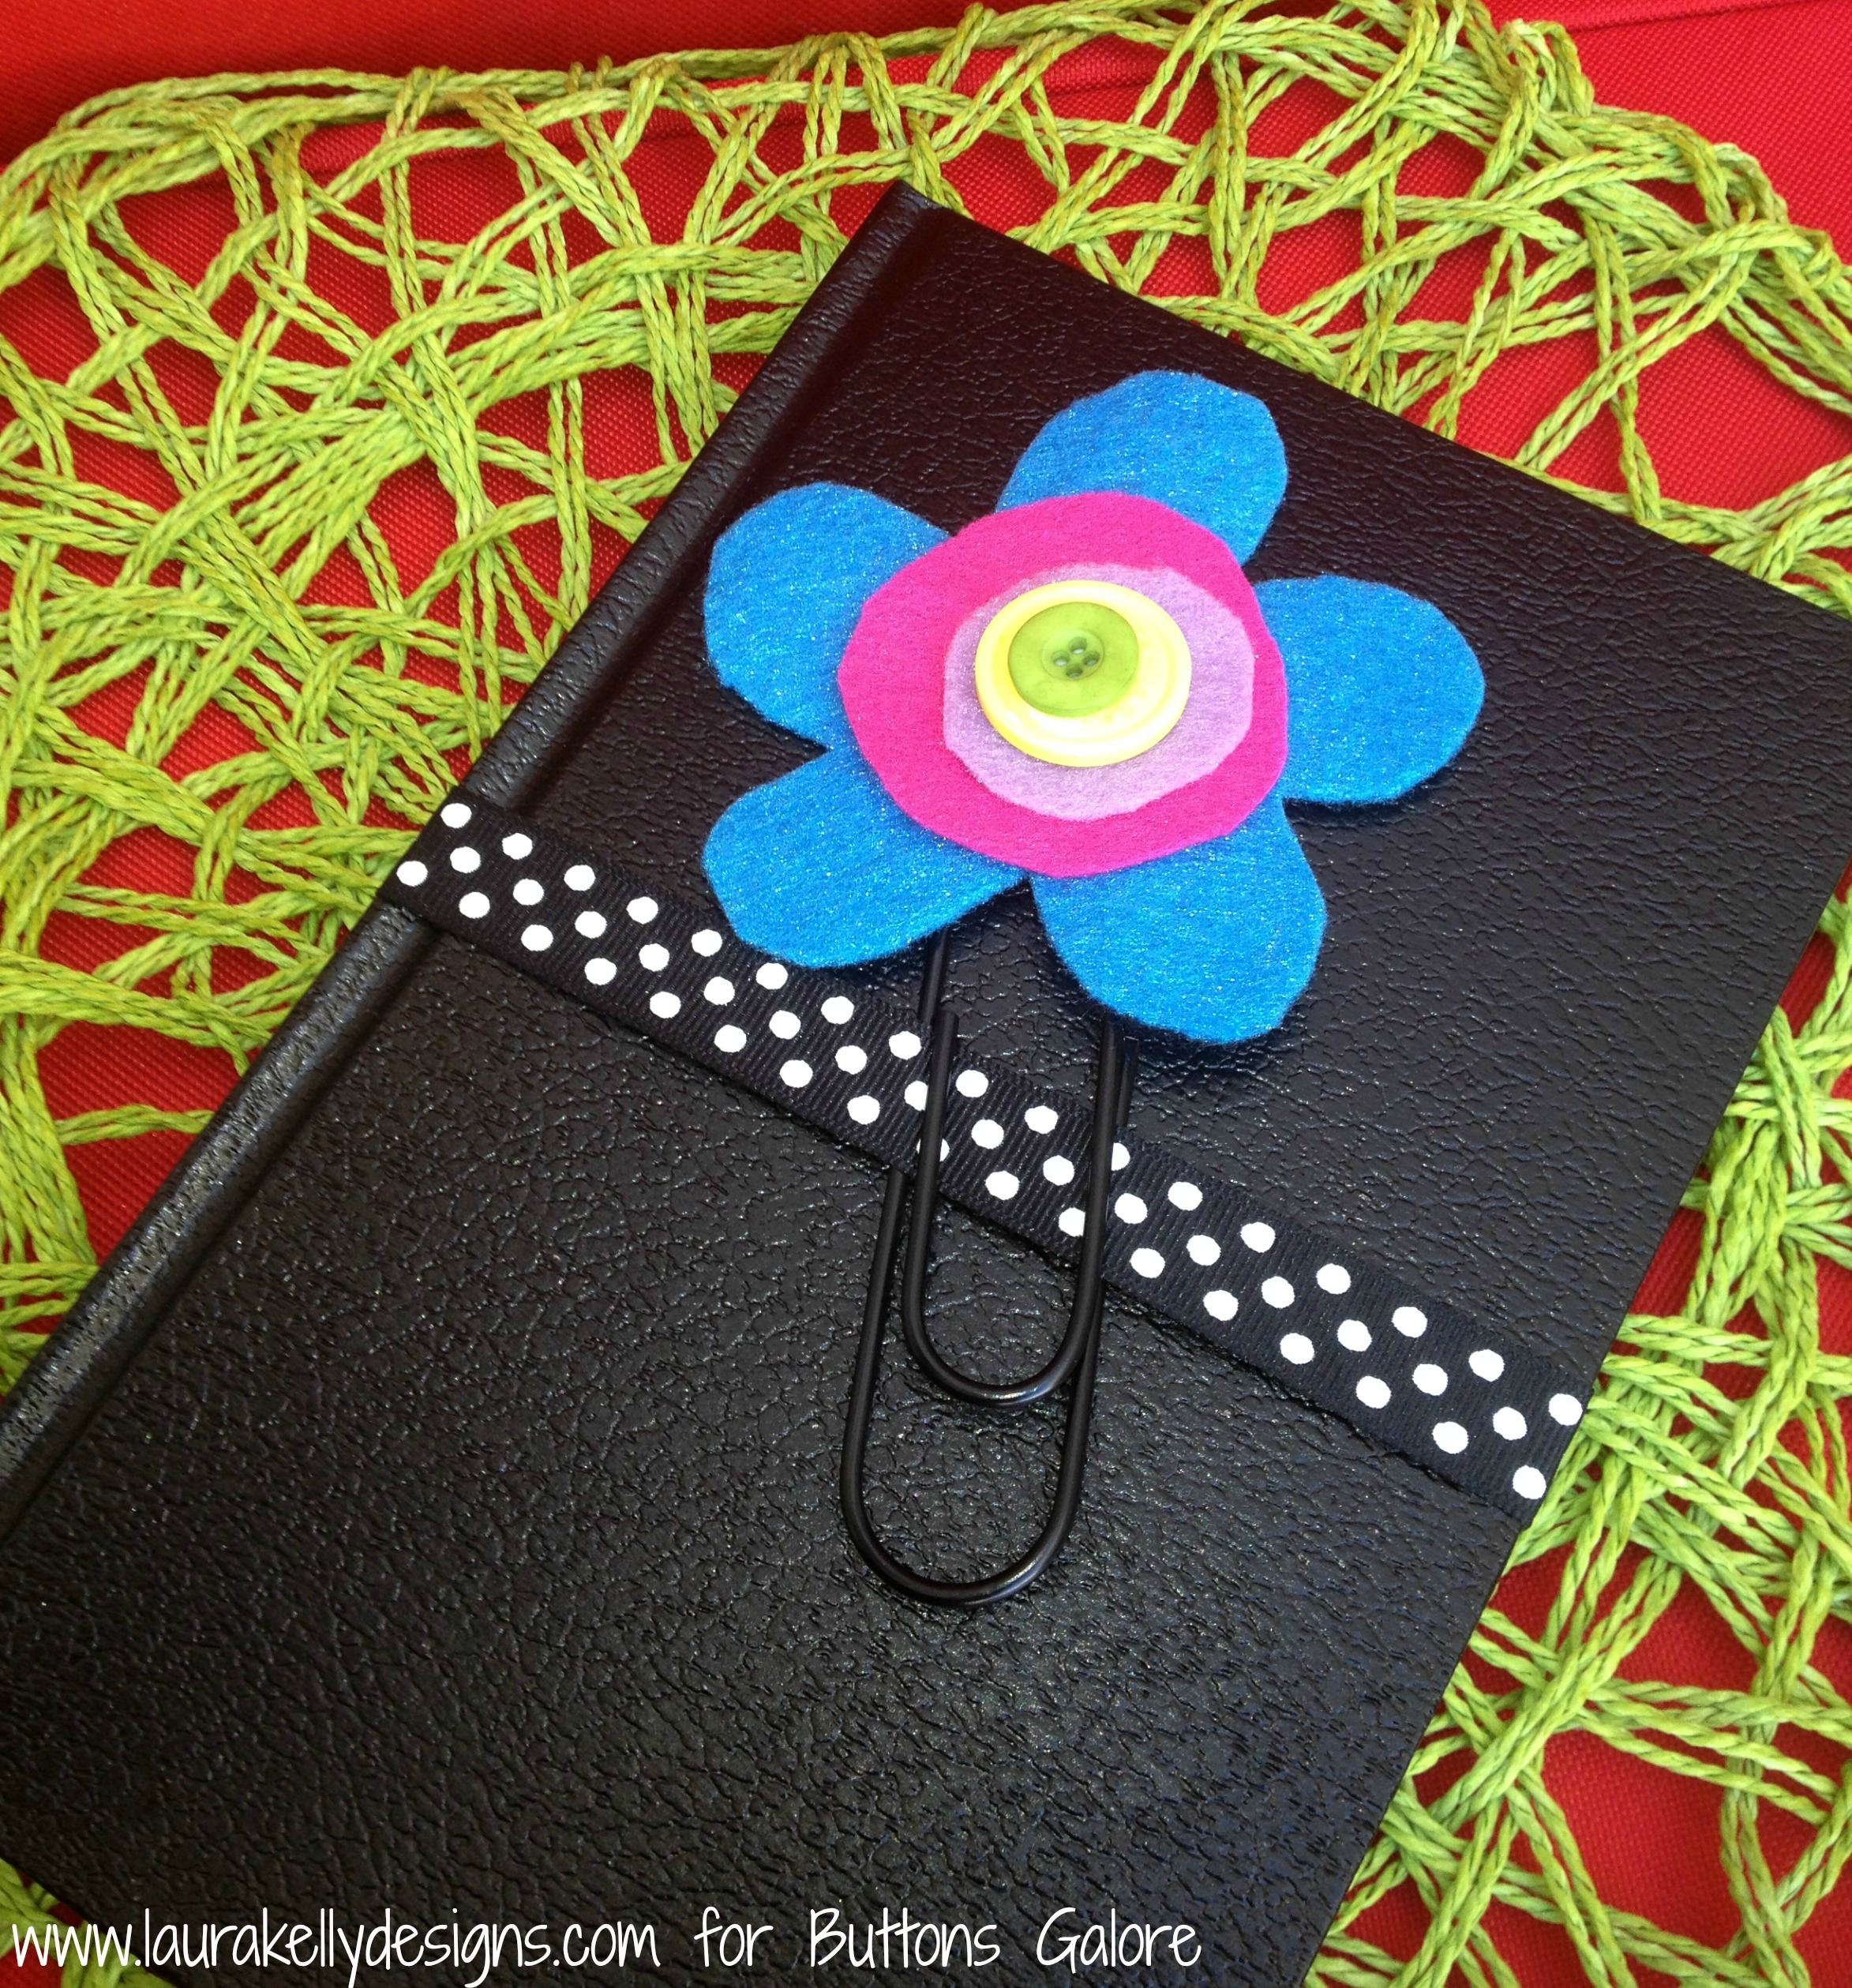
What other ways can you think of to use these giant clips. I wonder how they would work to hold bags of chips closed.
Happy Creating,
Laura
Don’t throw away those Starbucks frap bottles. They are perfect to up-cycle into adorable Easter candy creations. I filled this one up with mini marshmallows and created a bunny treat bottle that is quite adorable and super quick and easy to complete.
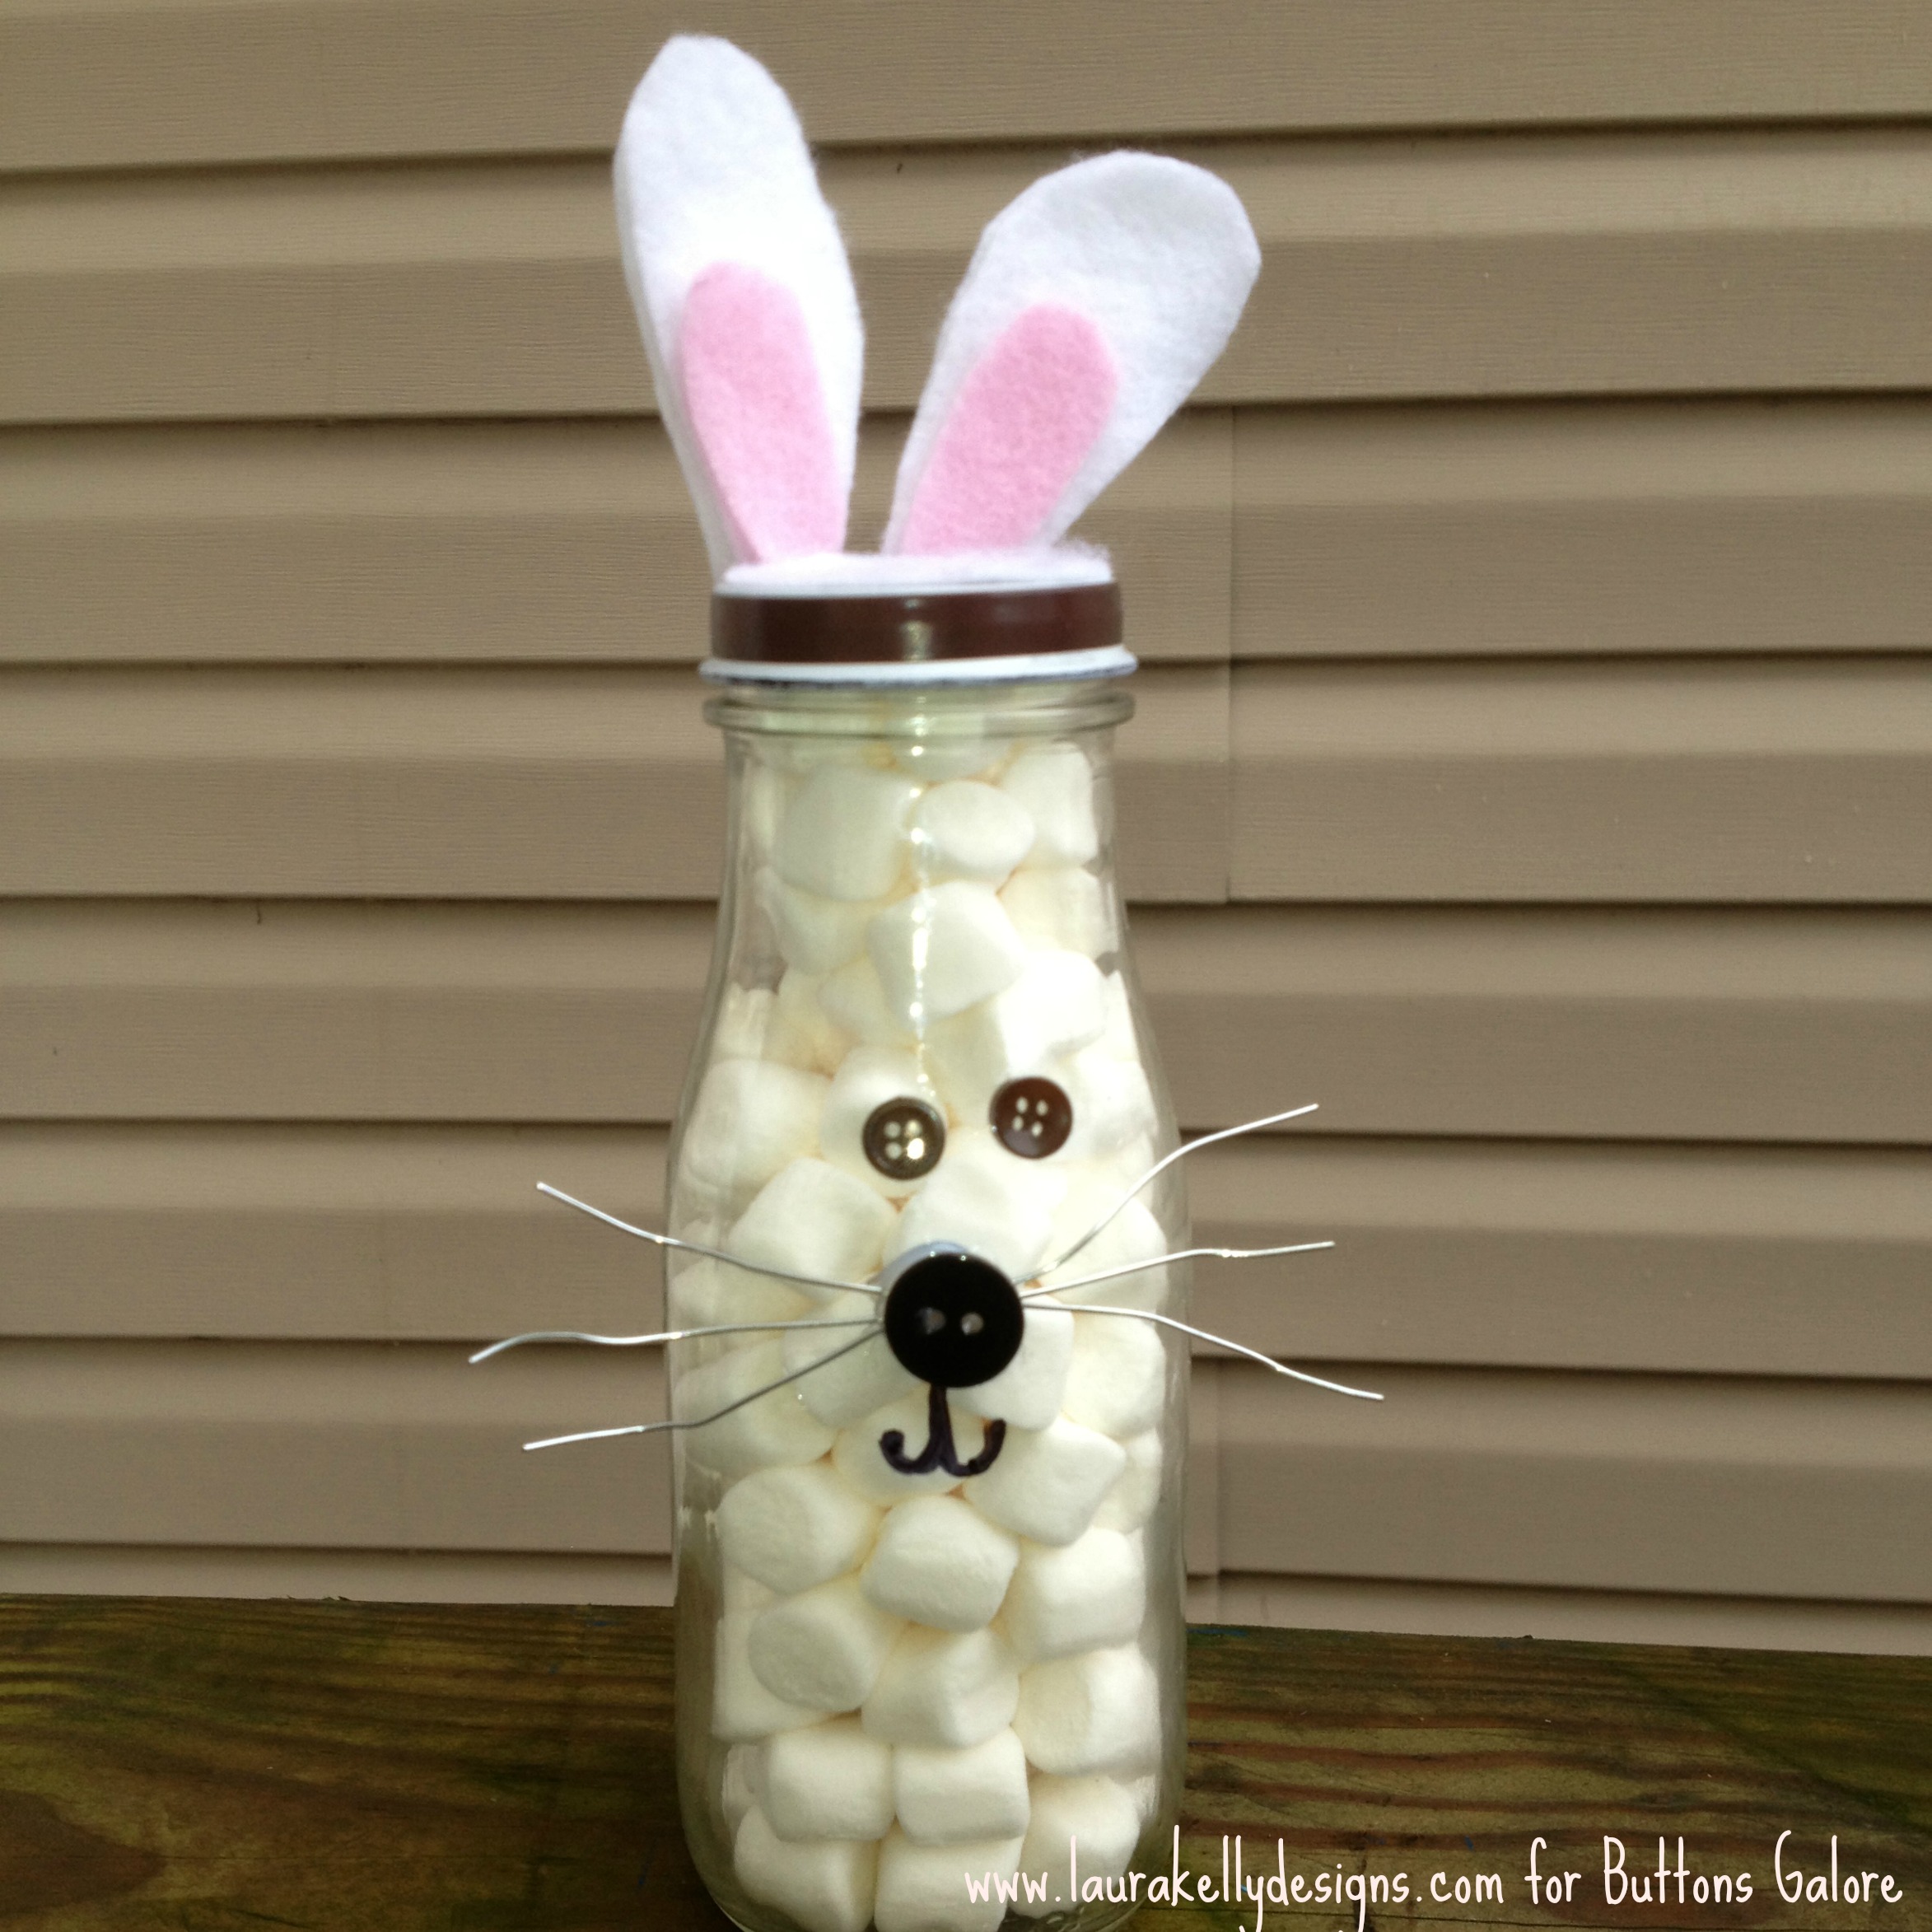
I cut white felt ears with pink centers and used Aleene’s Turbo Tacky Glue to attach them to the lid of the bottle. I added buttons for eyes and the nose (Black Beauty from my Laura Kelly collection) with wire under the nose for whiskers. I used a Sharpie marker to draw on the mouth.
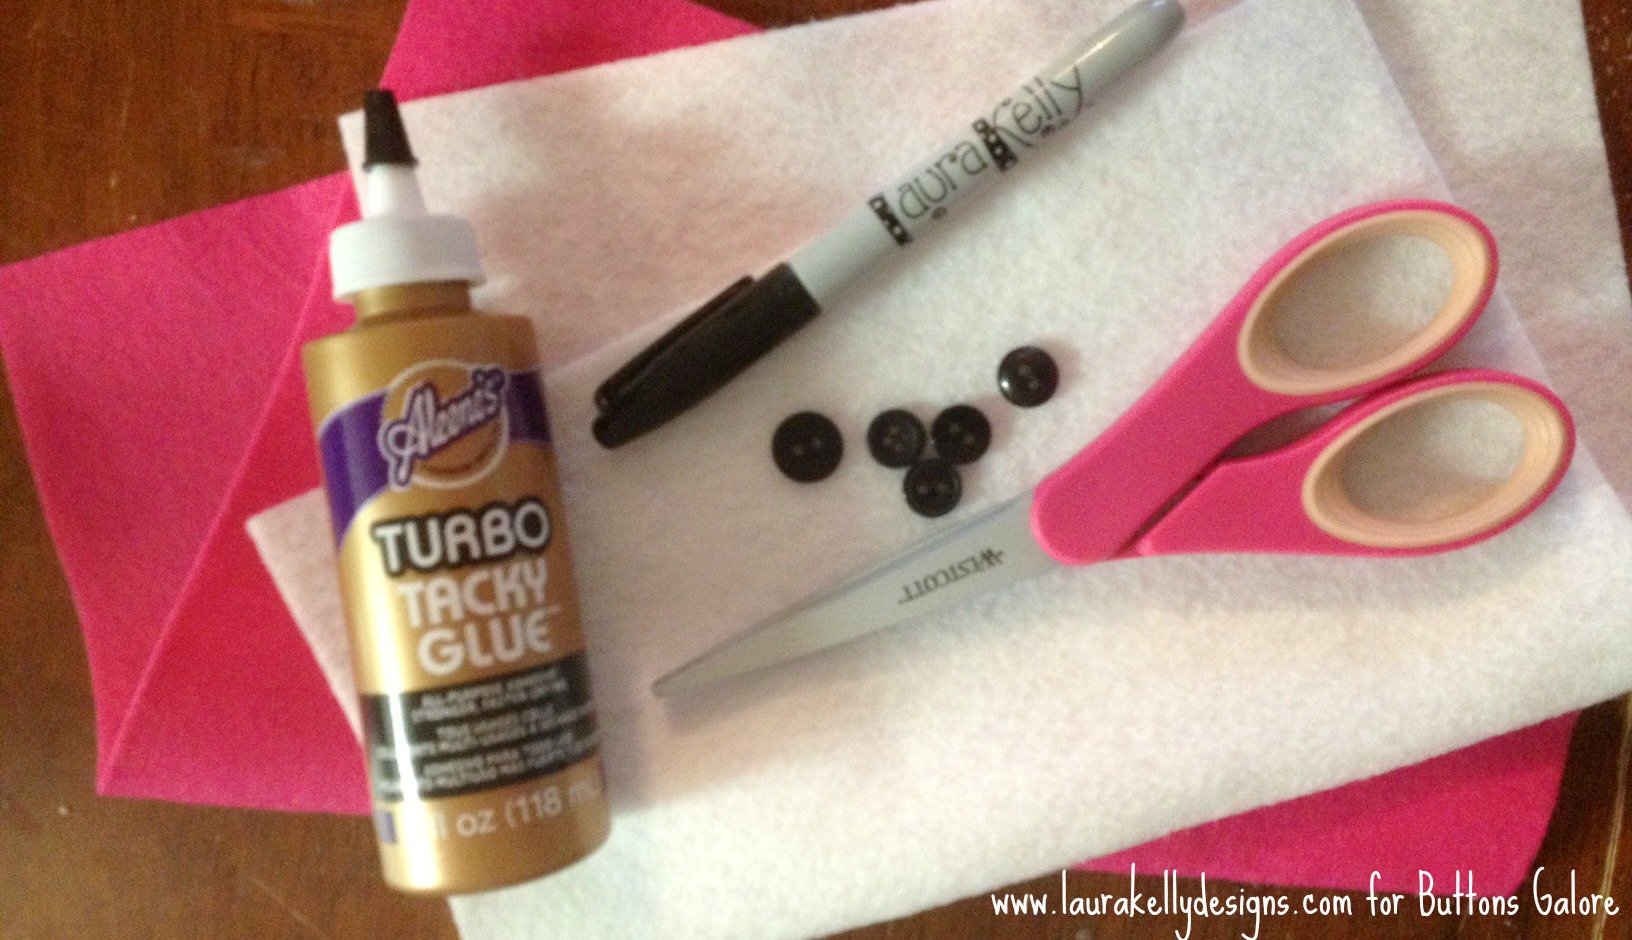
To create a tail, I made a pom pom from white yarn and used the glue to stick it to the back. So cute.

I made a super cute chick too. To see how I did it, check out the post over on my blog here.

Happy Fifteen MINUTE Friday,
Laura
It is coming soon, St. Patrick’s Day that is. Here is a super speedy decoration that you can make to celebrate the day using green pipe cleaners and Laura Kelly Forest Green Buttons!
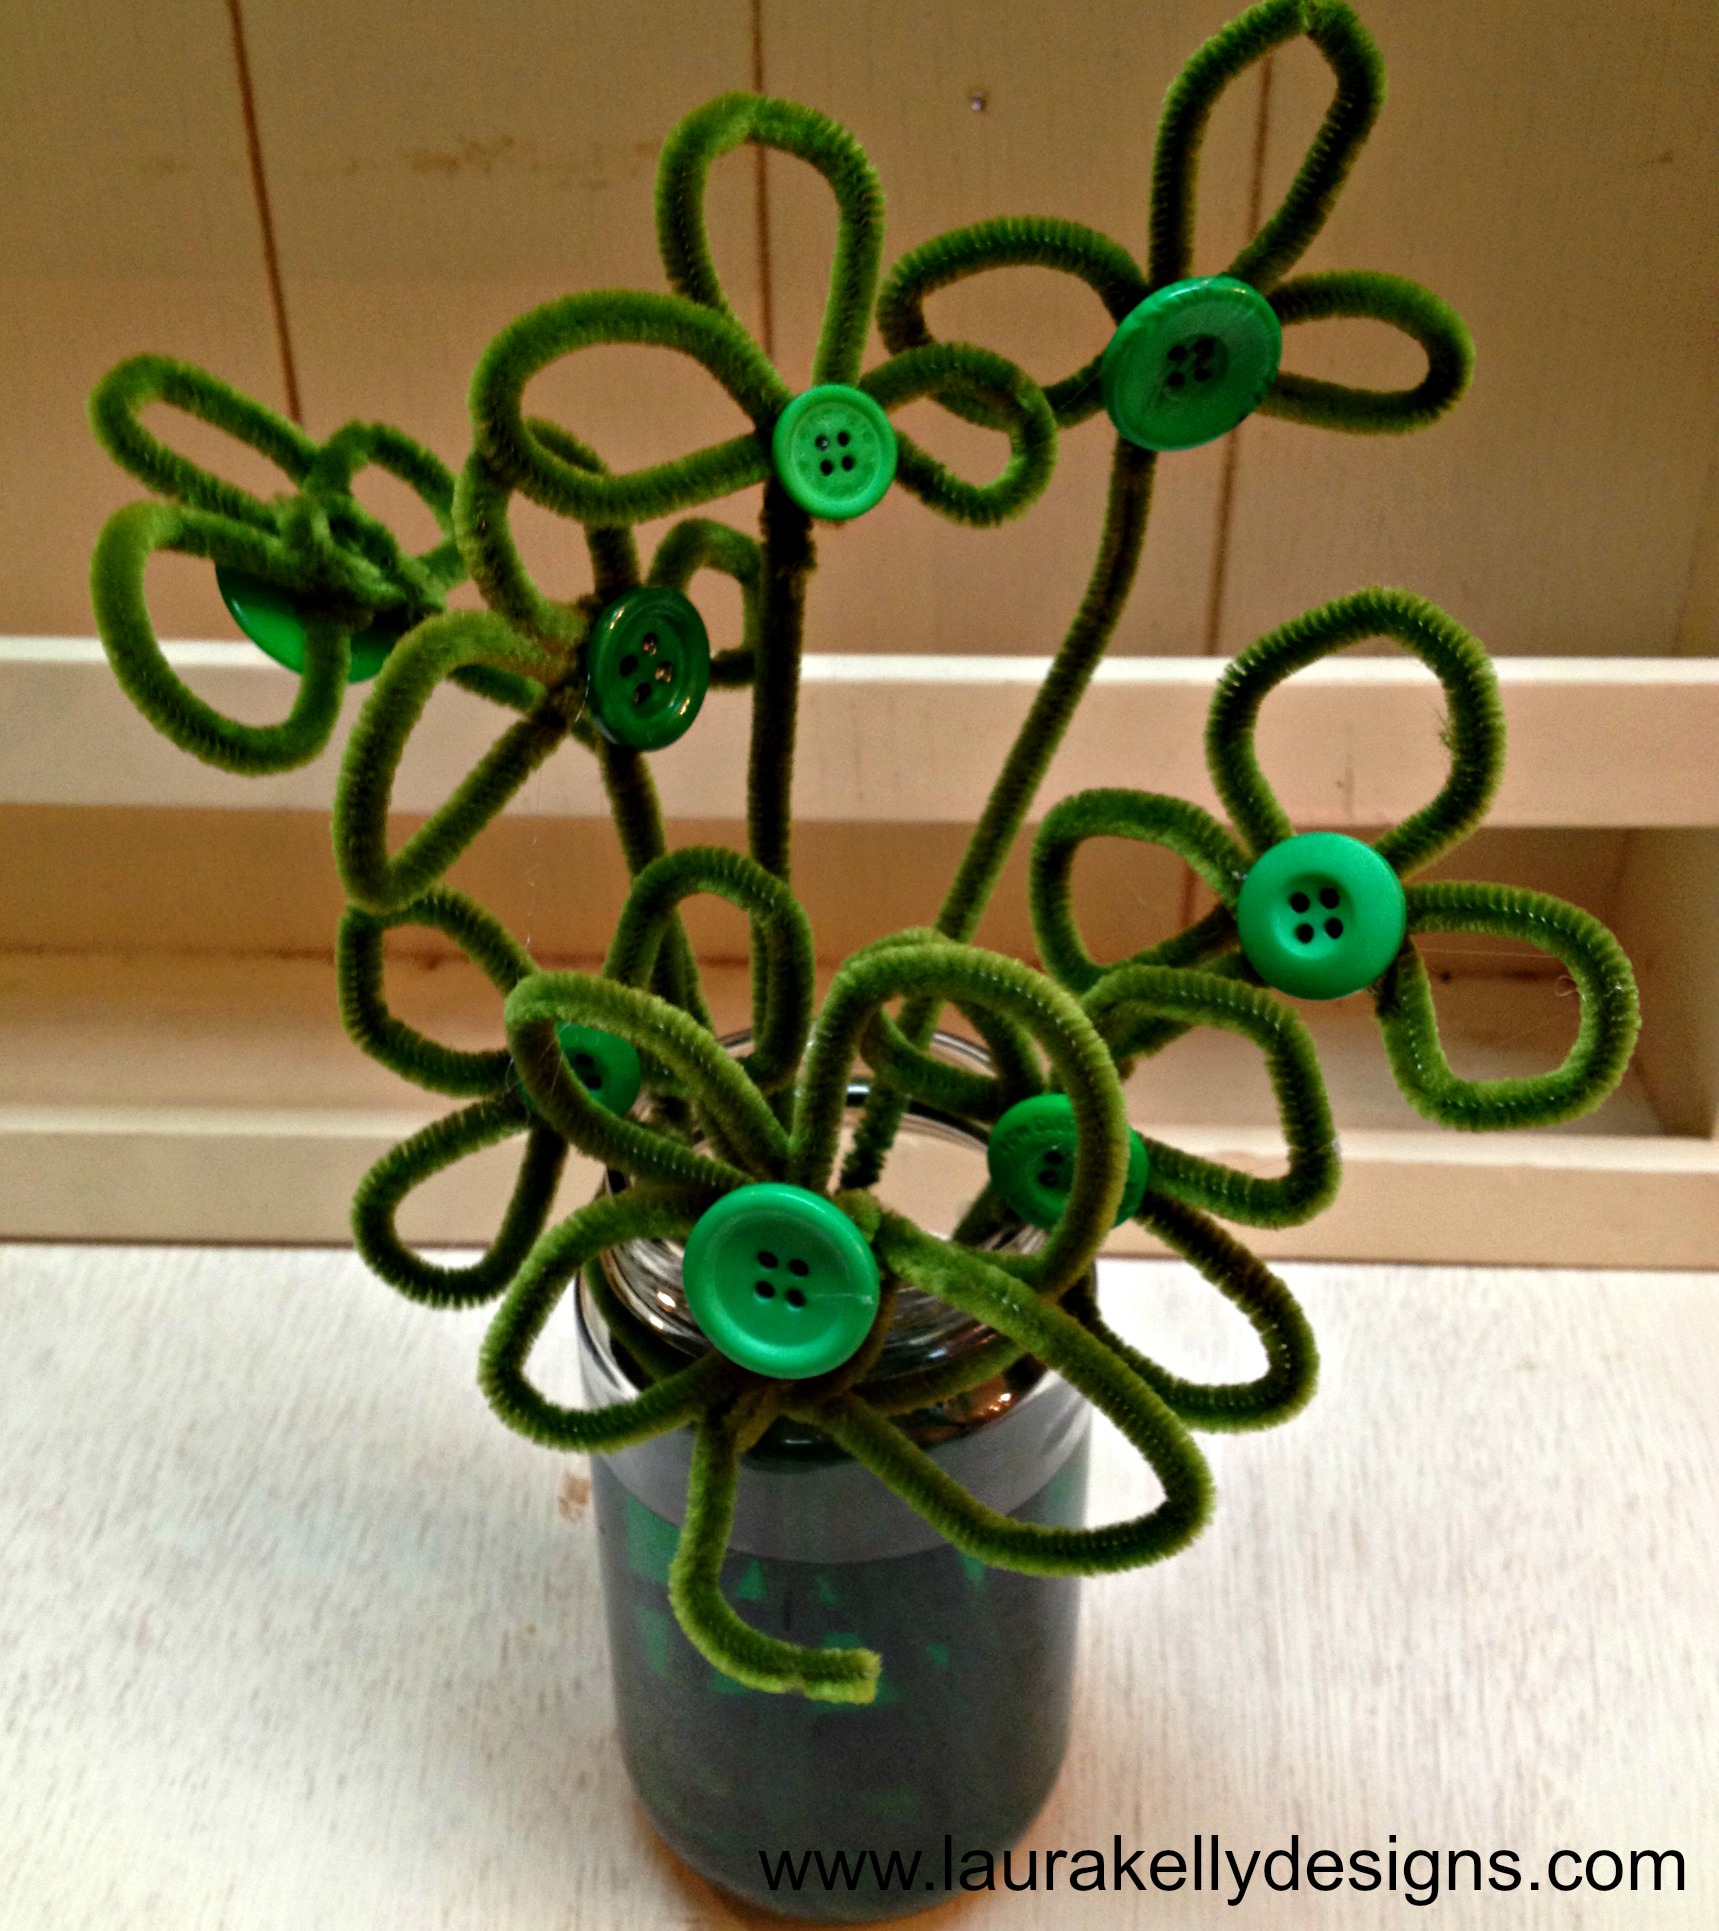
You will also need an adhesive to attach the buttons to the shamrocks. I used hot glue because I LOVE it.
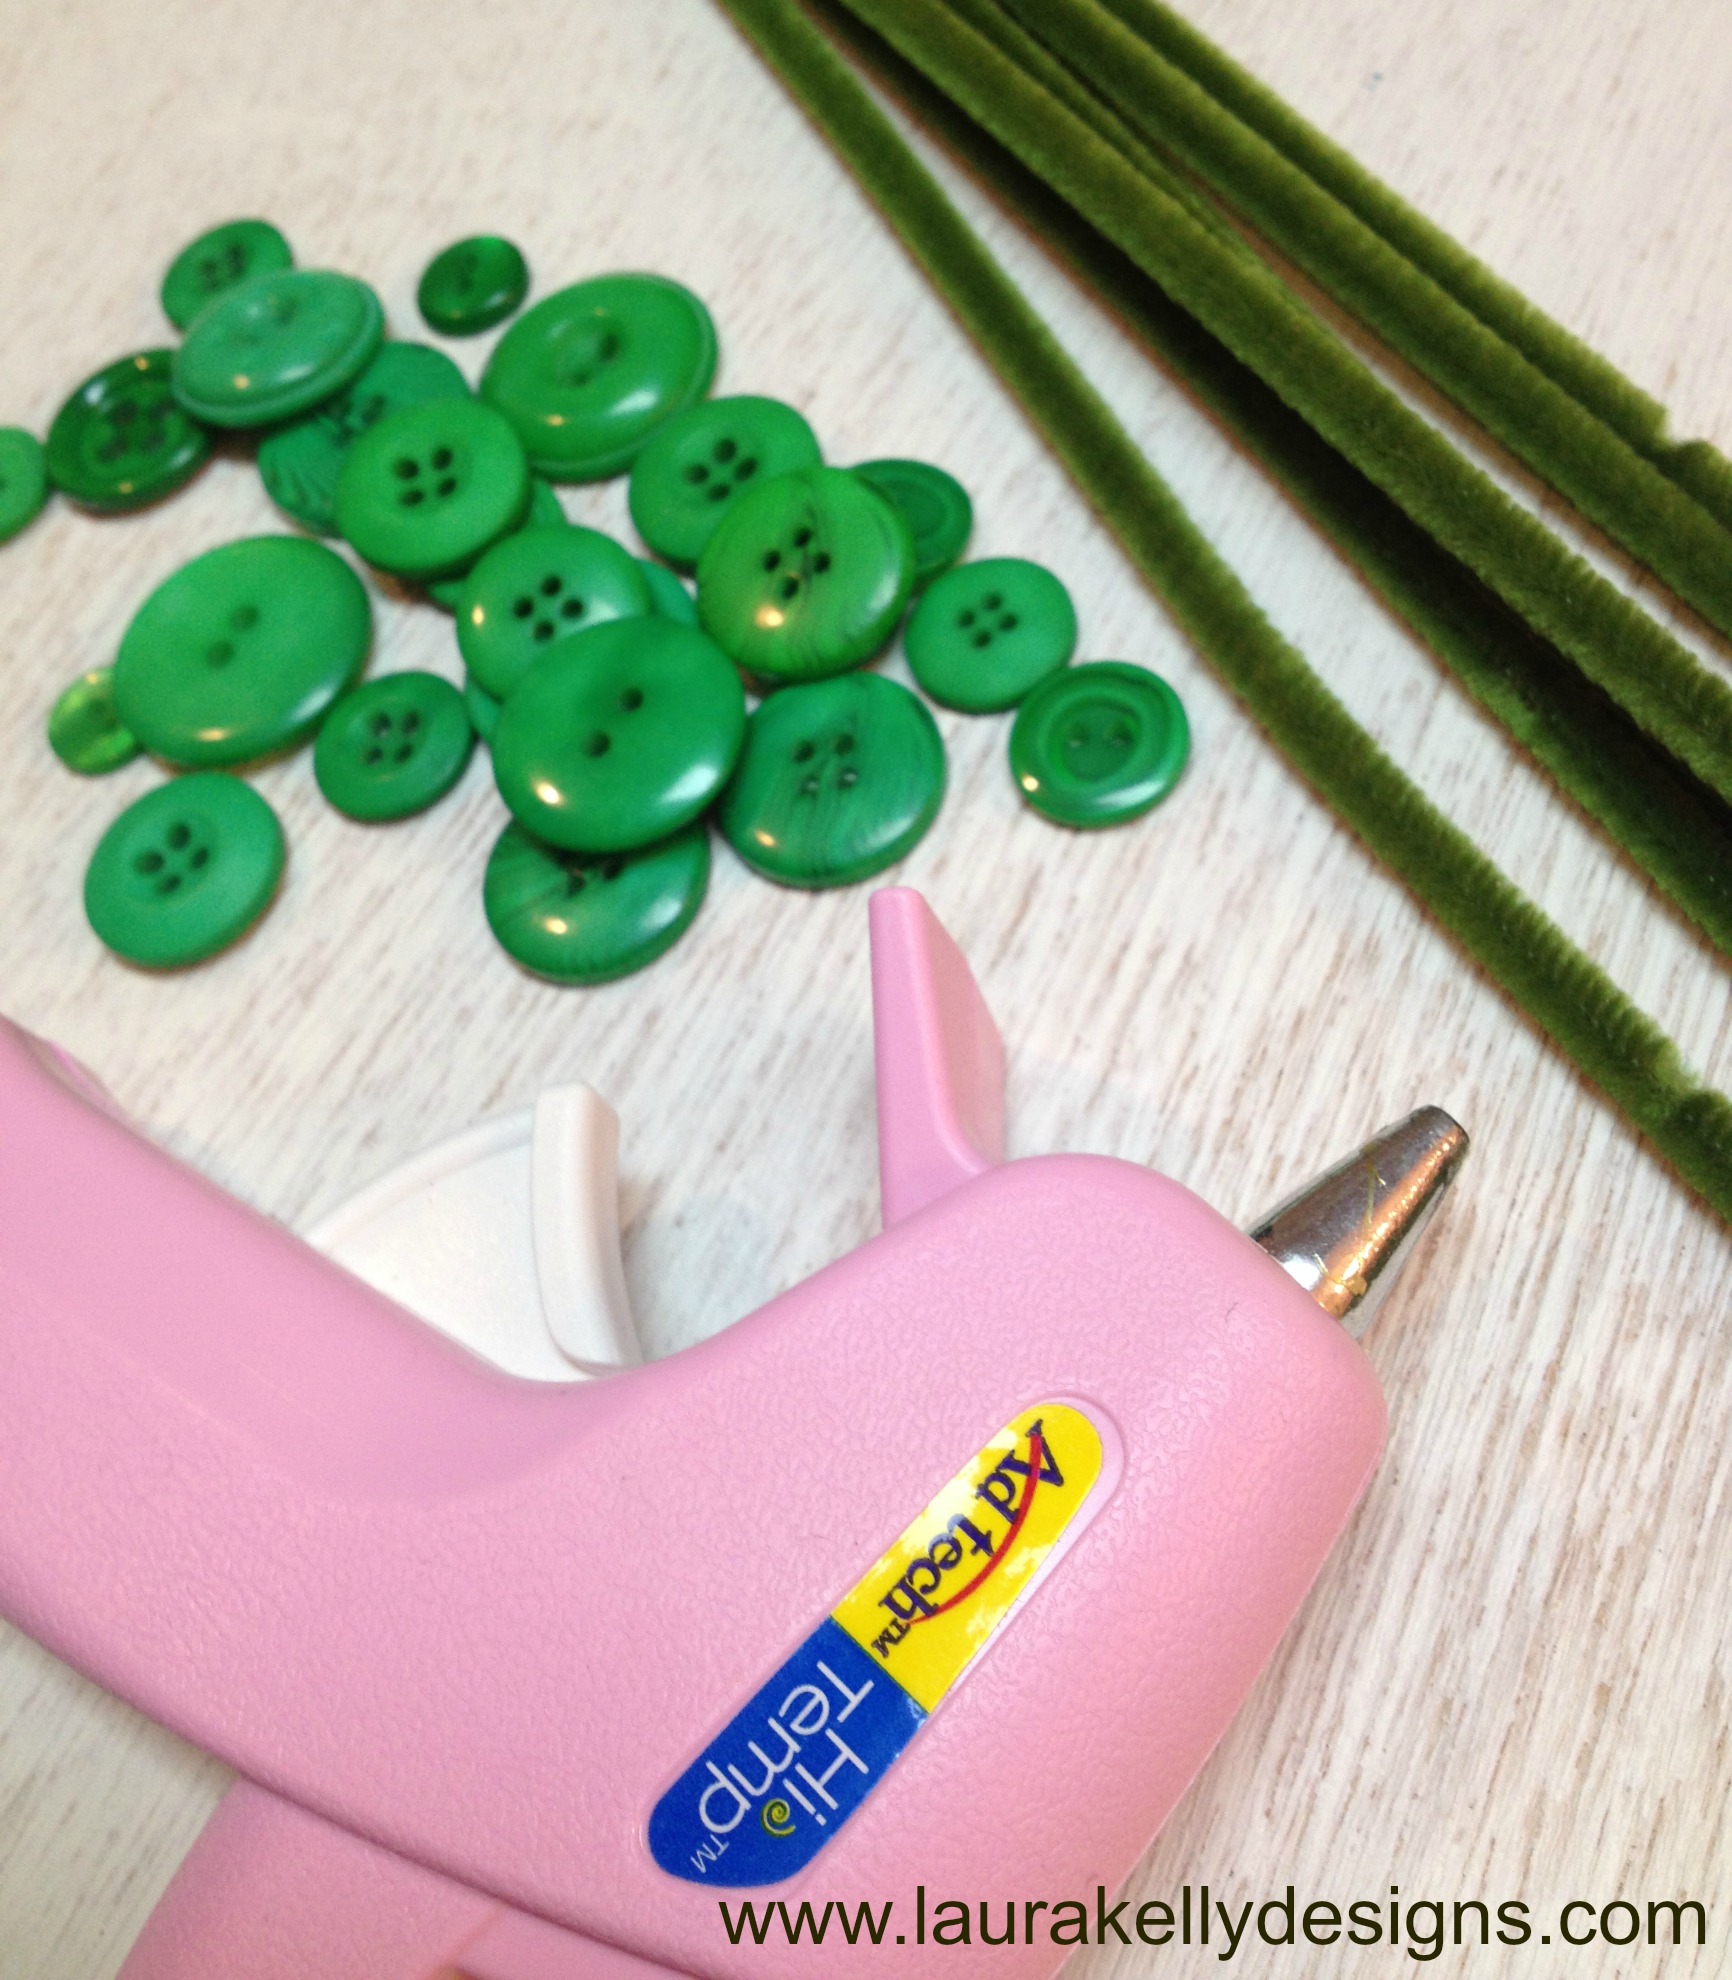
Simply, twist the pipe cleaners into shamrocks and then attach the buttons. You can make lots of them as a bouquet or do them individually to wrap around silverware, make hair decorations or use as a part of a larger project. Here is a picture tutorial that might be helpful.

Happy Speedy Creating Some St. Patrick’s Day Fun,
Laura
This quick craft creates a mini masterpiece that can be used to tie around a gift or use as a tie around a napkin for a table decoration. It’s a quick, fun festive way to celebrate St. Patrick’s Day around your home.
1. Cut a four leaf clover from the felt about 2 inches in diameter. I used pinking shears.

2. Cut another four leaf clover from the other shade just a tad larger.
3. Sew green buttons through the smaller felt shamrocks tying knots in the tops between each one.
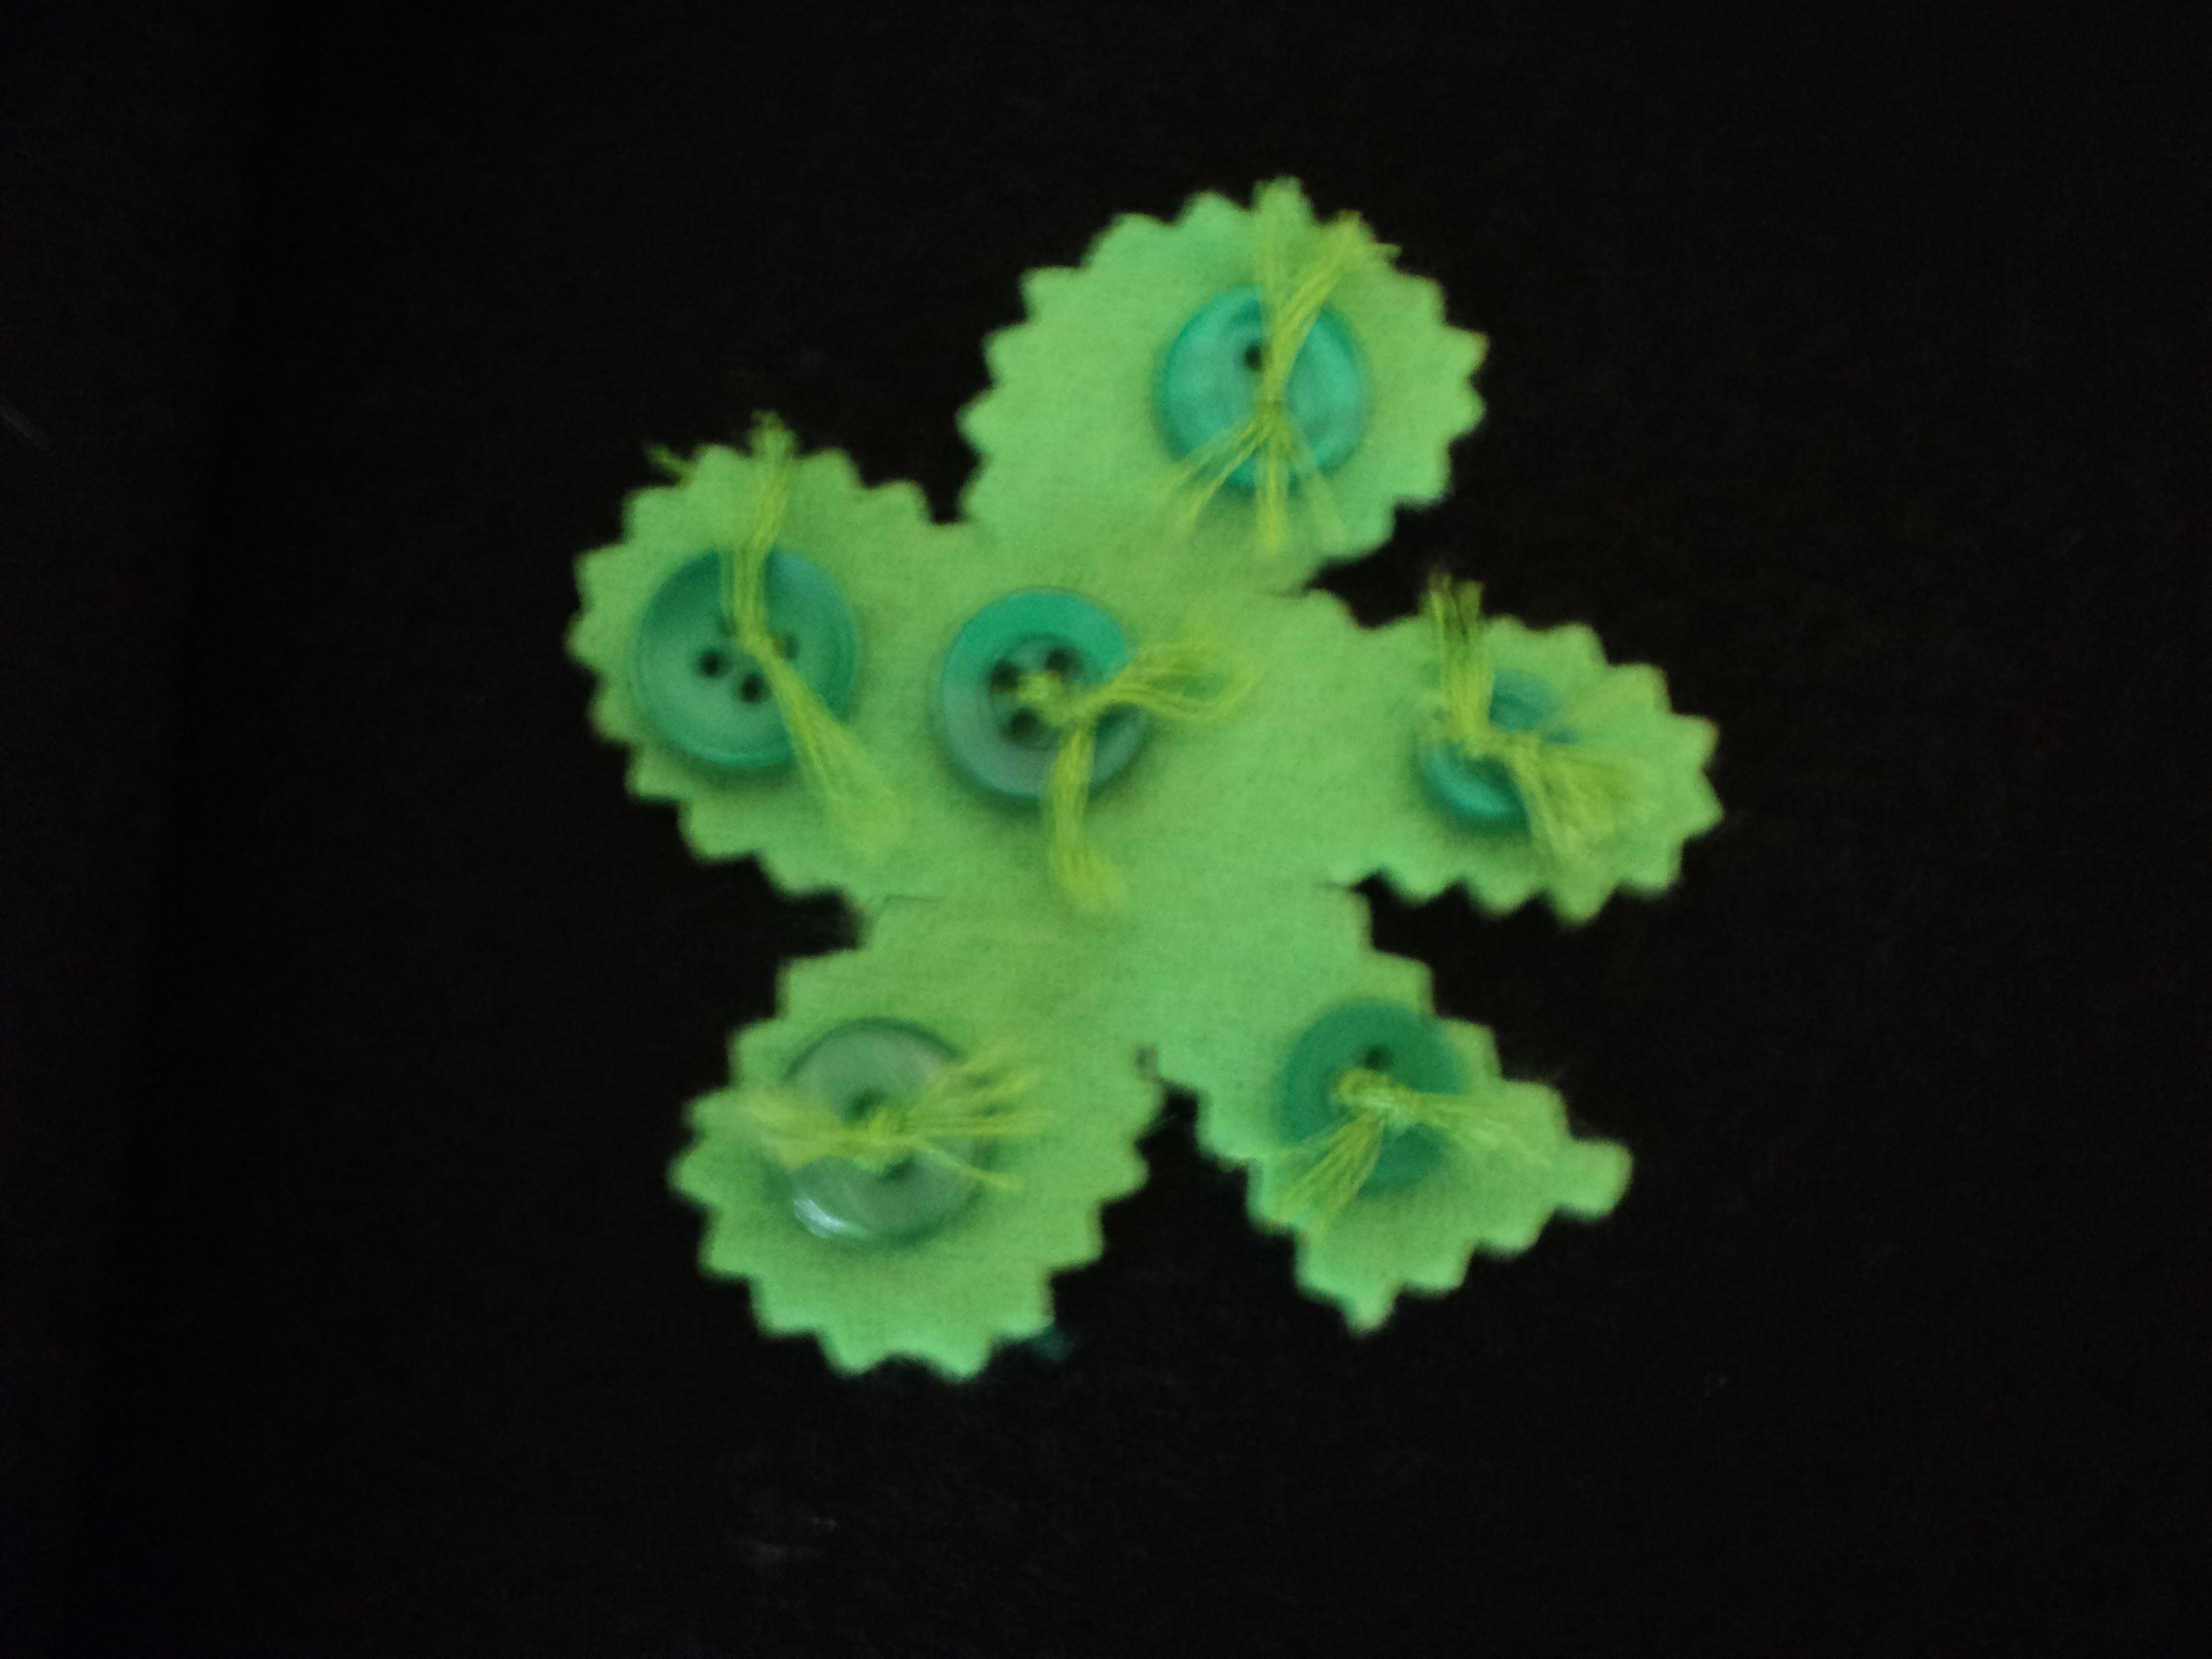
4. Sew the ribbon through both layers of felt hiding the stitches behind a button or two. Use a length or ribbon that will go around your gift or rolled napkin.

Ta Da…a mighty green little decoration that is bound to bring someone a little luck! As tiny bit of Irish information- when making a toast, the Irish say “Slainte”. Slainte is a well wish litterally translated – to your health.
You can add your link until February 7. To be eligible to win, your project must include the use of Buttons Galore & More products. You are welcome to share other Valentine projects, but only those featuring our products will be selected.
Happy Crafting!
Here is a quick and fun way to create a Valentines day candy bar wrapper and button it up with love! You can download the free Printable to use or use decorative papers to cover your candy bars then embellish them with Radical Red, Wild White, Sweet Blush and new Passionate Pink buttons from my Laura Kelly collection.
If you want to use the free downloadable printable, you can grab it on my blog here. There are several fun borders and cut outs that you can chop up and use with the buttons.

Here are a few other ideas of things you can wrap up with paper and buttons to create Valentines.
Holly here from Ribbons & Glue sharing with you a 3D Button Ladybug Valentine that is sure to make the “Love Bug” come out of you.
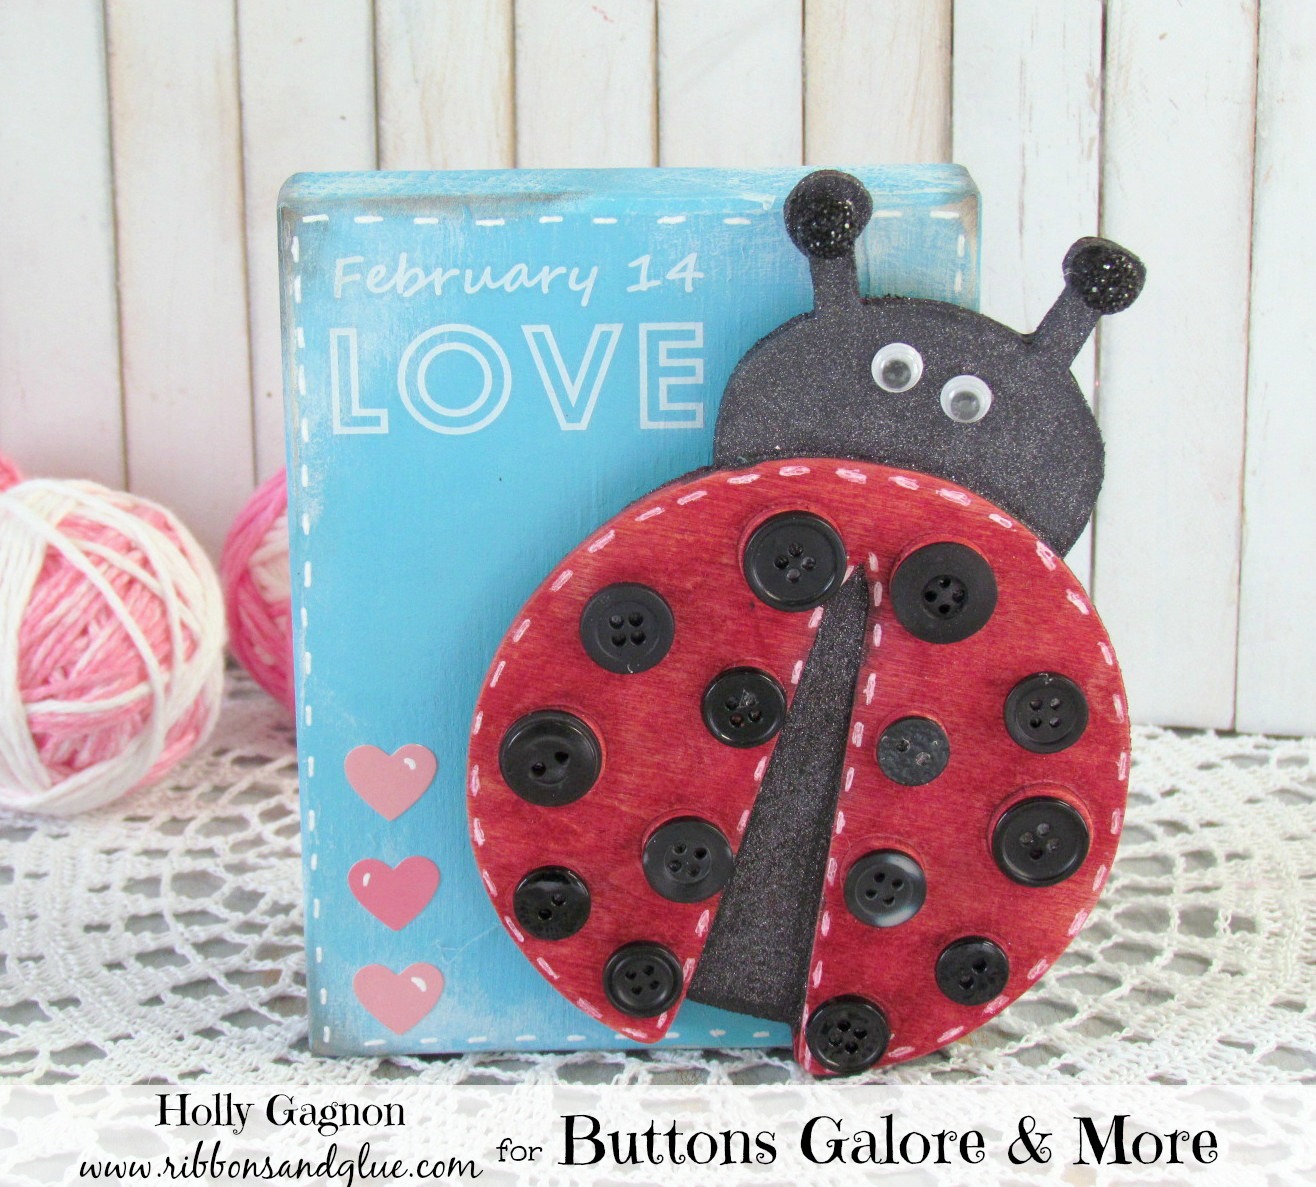
I’ve has this wood ladybug for a while now and always thought it would look really cute with Buttons Galore black Haberdashery Buttons on it. I finally busted her out of hiding and did just that.

I dyed the Ladybug Cherry Red using Rit Dye.

Then, painted the body of the ladybug with DecoArt Glamour Dust paint

and adhered black Haberdashery Buttons from Buttons Galore.

I hot glued the pretty lil’ Lady on a wood block to make it into a 3D Valentine and added a few embellishments from the Pebbles Inc Yours Truly collection.
For more Valentine’s Day inspiration check out my blog Ribbons & Glue.

Like Me on Facebook!
Sometimes the simple little cute things make the best gifts. Here is a way to use buttons to create flowers that are fabulous for Valentines Day and only take a few minutes.
To make the flowers, you will need buttons (Radical Red and Heart Shaped Ones are my faves for this) and green floral wire. I used floral wire with a green fabric-like coating. The first step is to lay out your flowers ahead of time, layering 2-3 buttons in stacks.
Feed the floral wire up from the bottom of the stack then back down through the other holes in the buttons then bend the wire to create stems/leaves.
Once your flowers are complete, there are lots of ways you can use them for Valentines Day. Here is a fun way. Twist the wire around a bag of kisses and add a little Valentine message.

If you want to see the ways that I used the other flowers made from buttons, you can visit my blog and get some more fabulous ideas. Click here to hop over there.
Happy Creating Button Valentines Day Flowers,
Laura
Here is a super quick and easy pattern and project for a Valentines Day frog to love.
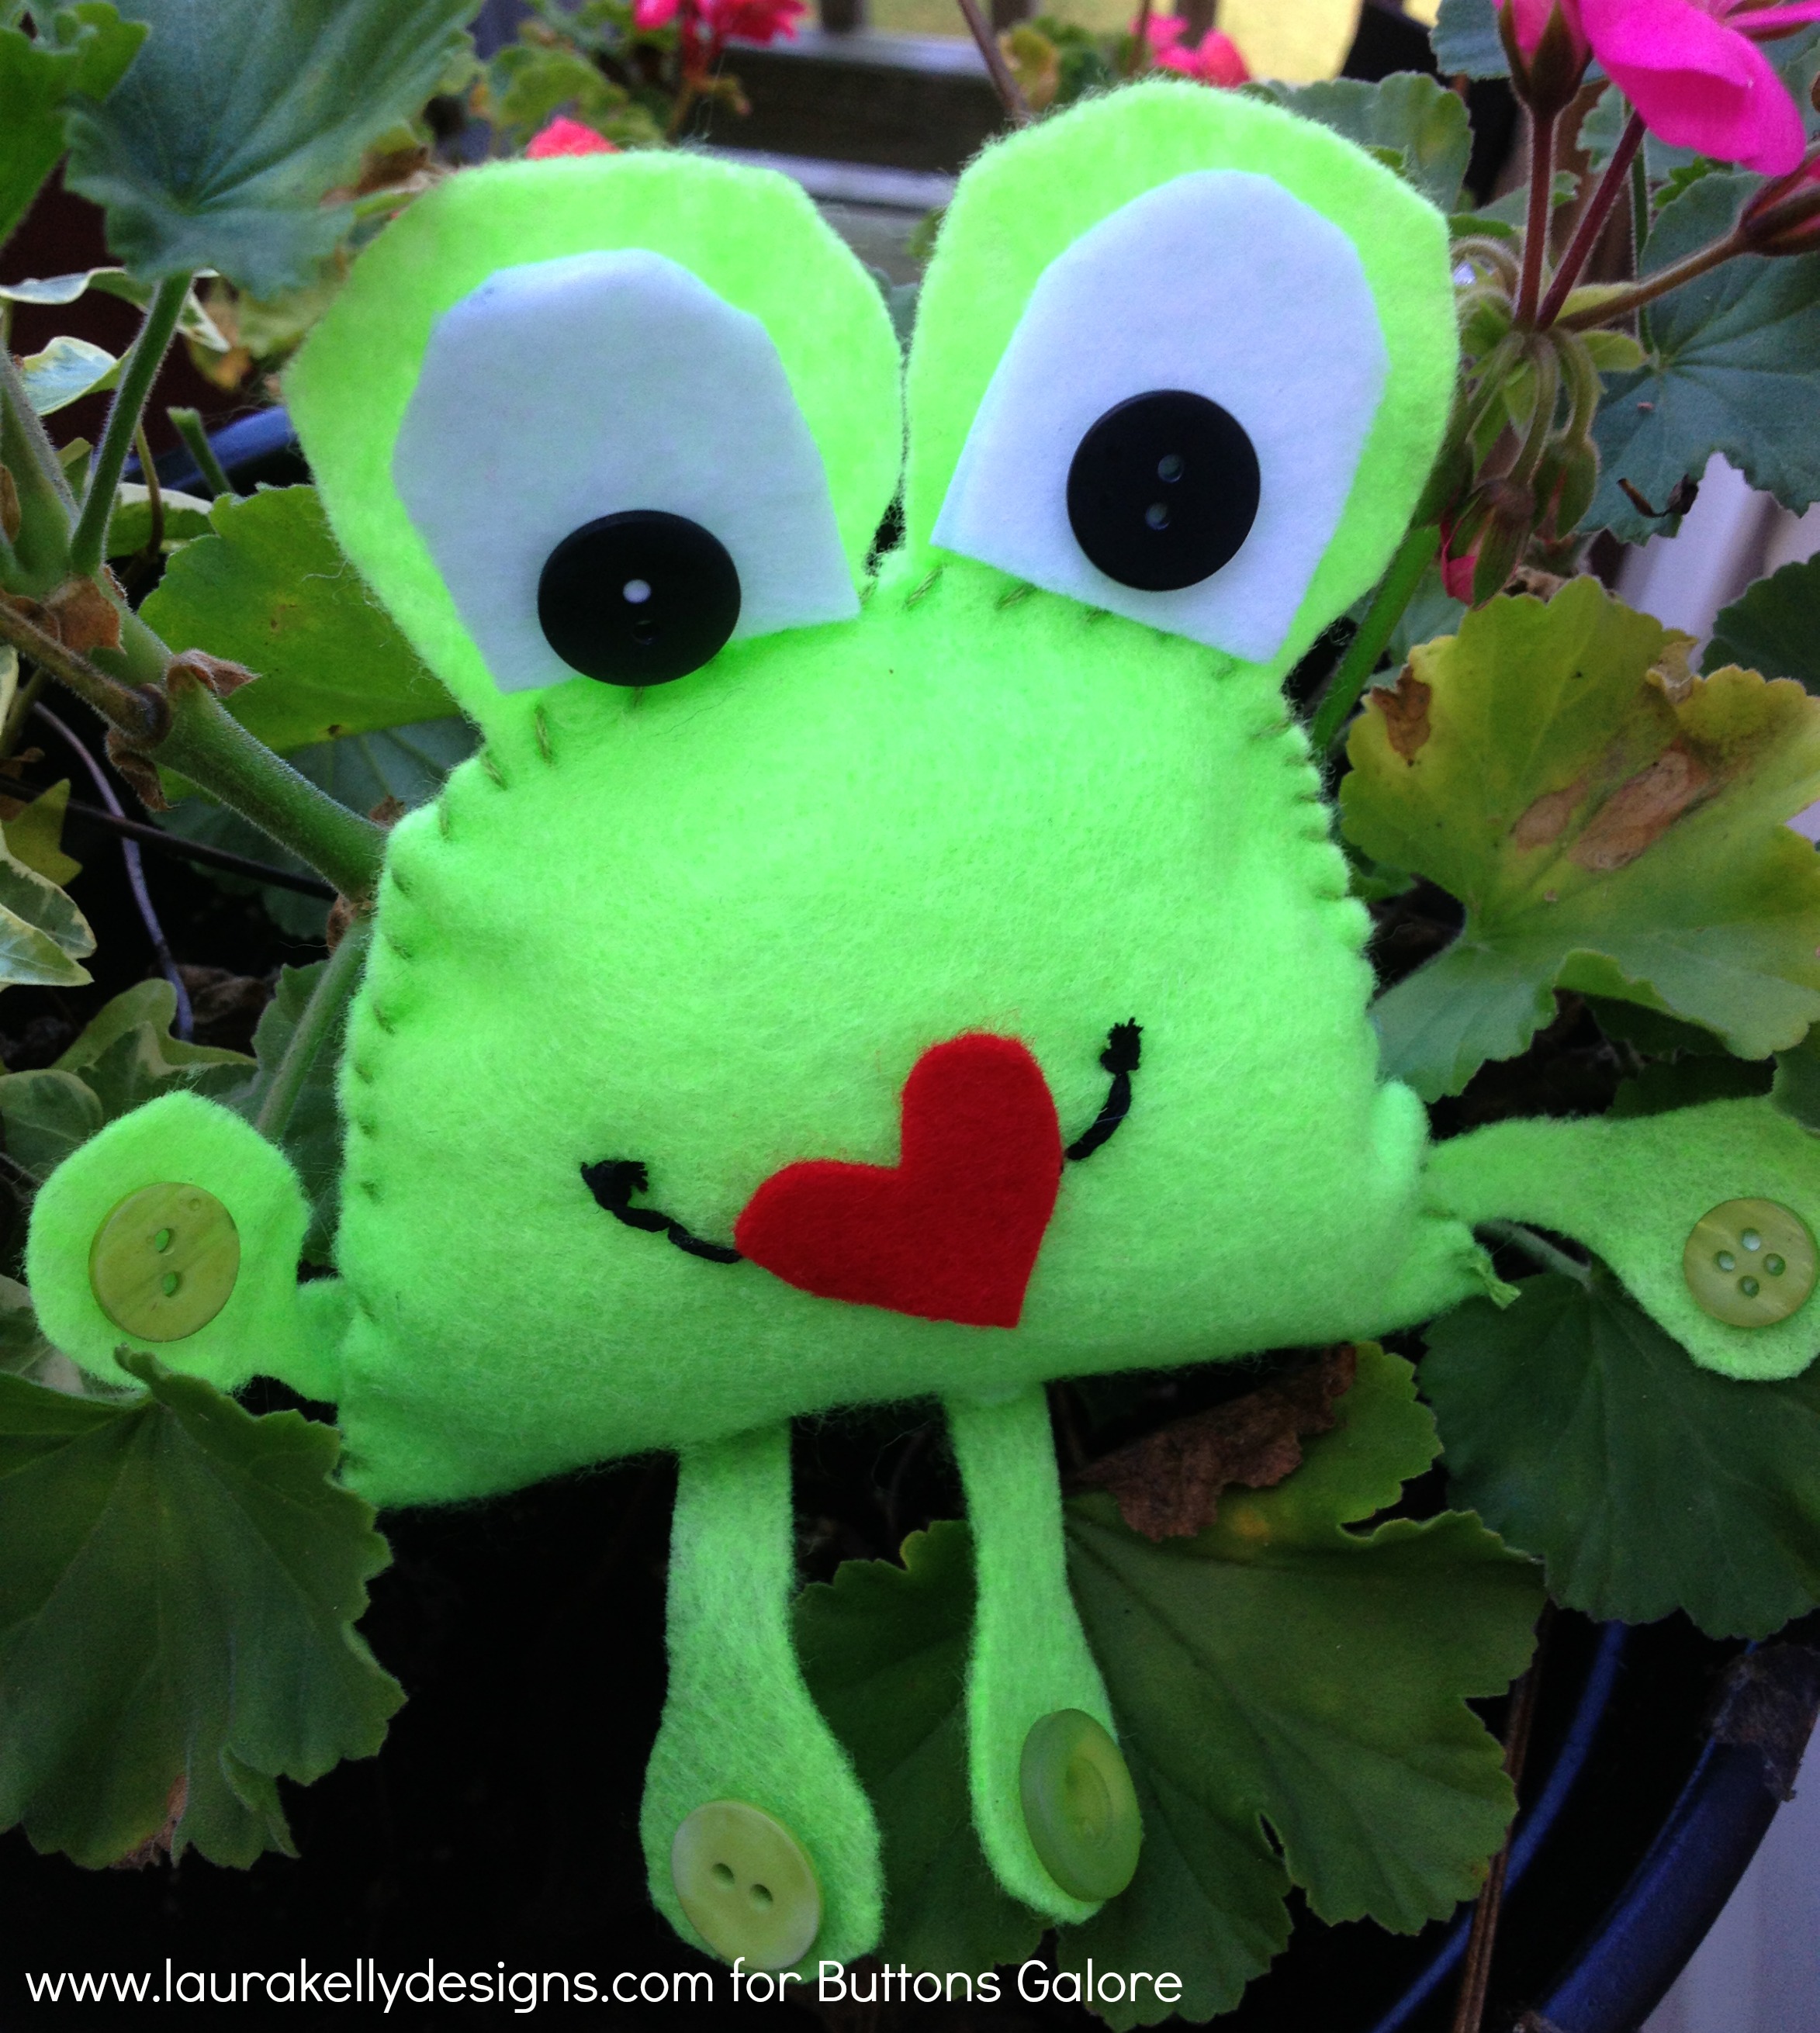
You will need a few supplies and can follow these directions or make up your own to suit your style. The pattern is simple and friendly. This is what I recommend:

Here is how I made it:
Use the patternto cut out the body and eyes from green felt. The body should be cut on the fold of the felt and the eyes are only 1 piece. Pin the eyes to the top inside of the frog body as shown. Stitch the frog body closed with green embroidery floss, leaving and opening to stuff if with filling. Then finish sewing closed. Use the pattern to cut out the white part of the eyes from Phoomph and white felt then adhere them to the frog prince and glue on the buttons. Using black embroidery floss, stitch a mouth. Cut a heart from red felt to make his kissy lips. Cut out four legs and attach them with either tacky glue or stitching.

Whoever said you had to kiss a lot of frogs to find a prince clearly did not know that you could just make one.
Happy Stitching, Glueing and Buttoning Up Some Valentines Day Fun,
Laura
Give the gift of handmade Valentines this year with these super simple mason jar Valentines. The perfect way to bottle up your heart and give it to someone you love. Grab a few supplies and your buttons from Buttons Galore and More to get started.
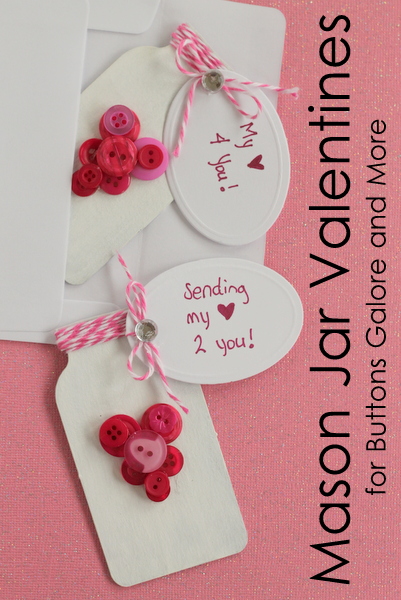
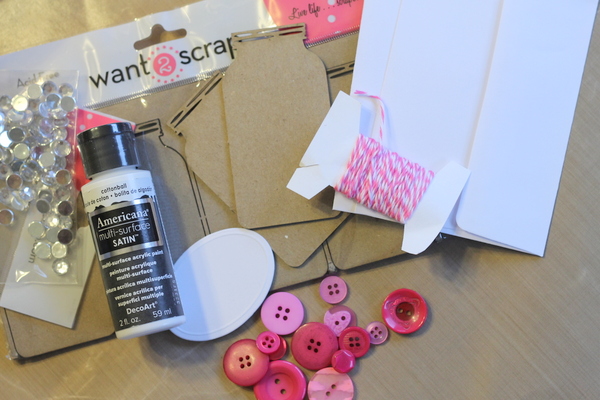
Paint both sides of the mason jar chipboard embellishment with the white paint. It will take 2 – 3 light coats of paint to completely cover the embellishment.
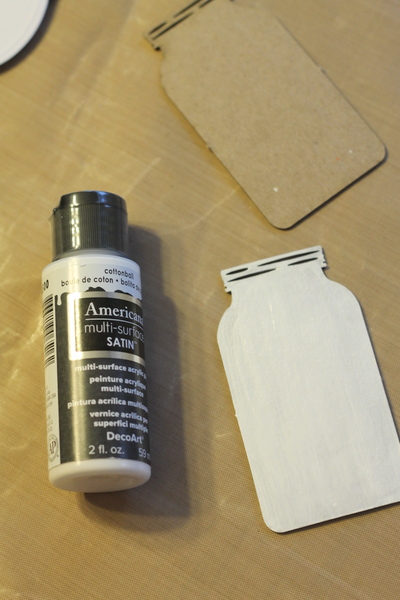
Allow your mason jar to dry completely. Then wrap the top with baker’s twine. Tie and leave your ends loose as shown below for now.
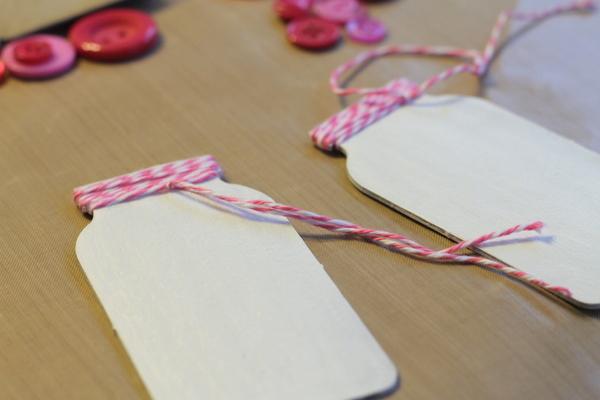
Play with your buttons until you get a heart like shape. Hot glue the first layer of buttons to your mason jar.
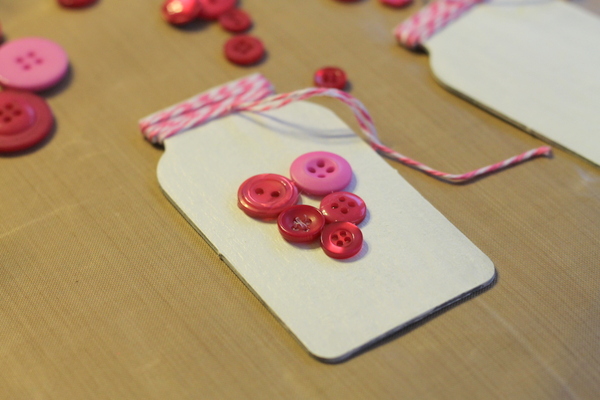
Add a second layer of buttons with hot glue. Write a sentiment on your tag and punch a hole. Tie your tag to the mason jar. Tie the baker’s twine in a bow and trim any excess. Apply a rhinestone to the center of the bow again using hot glue.
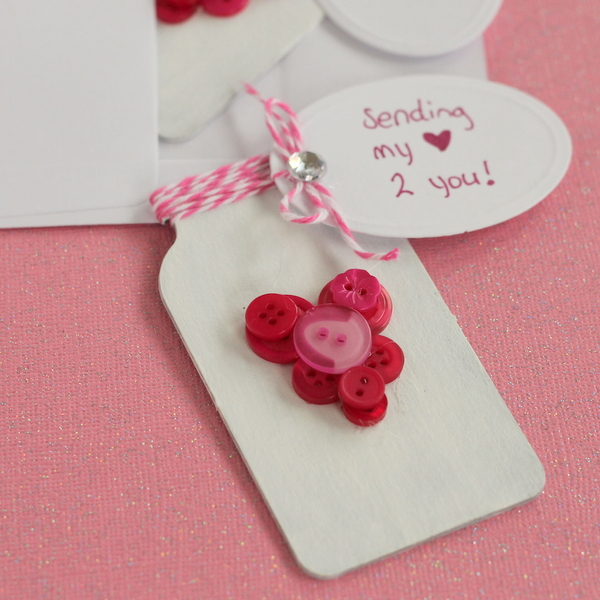
Slip your mason jar Valentines inside an envelope for delivery to that special someone. Who will you give your heart to this Valentine’s Day?
It’s a new year, 2014! That means we are that much closer to Valentines Day which I love, as in love. Here are a few quick and easy ways to doodle up some button Valentine art that can be used on gift cards, Valentines or gift bags (or anything else you might dream up).
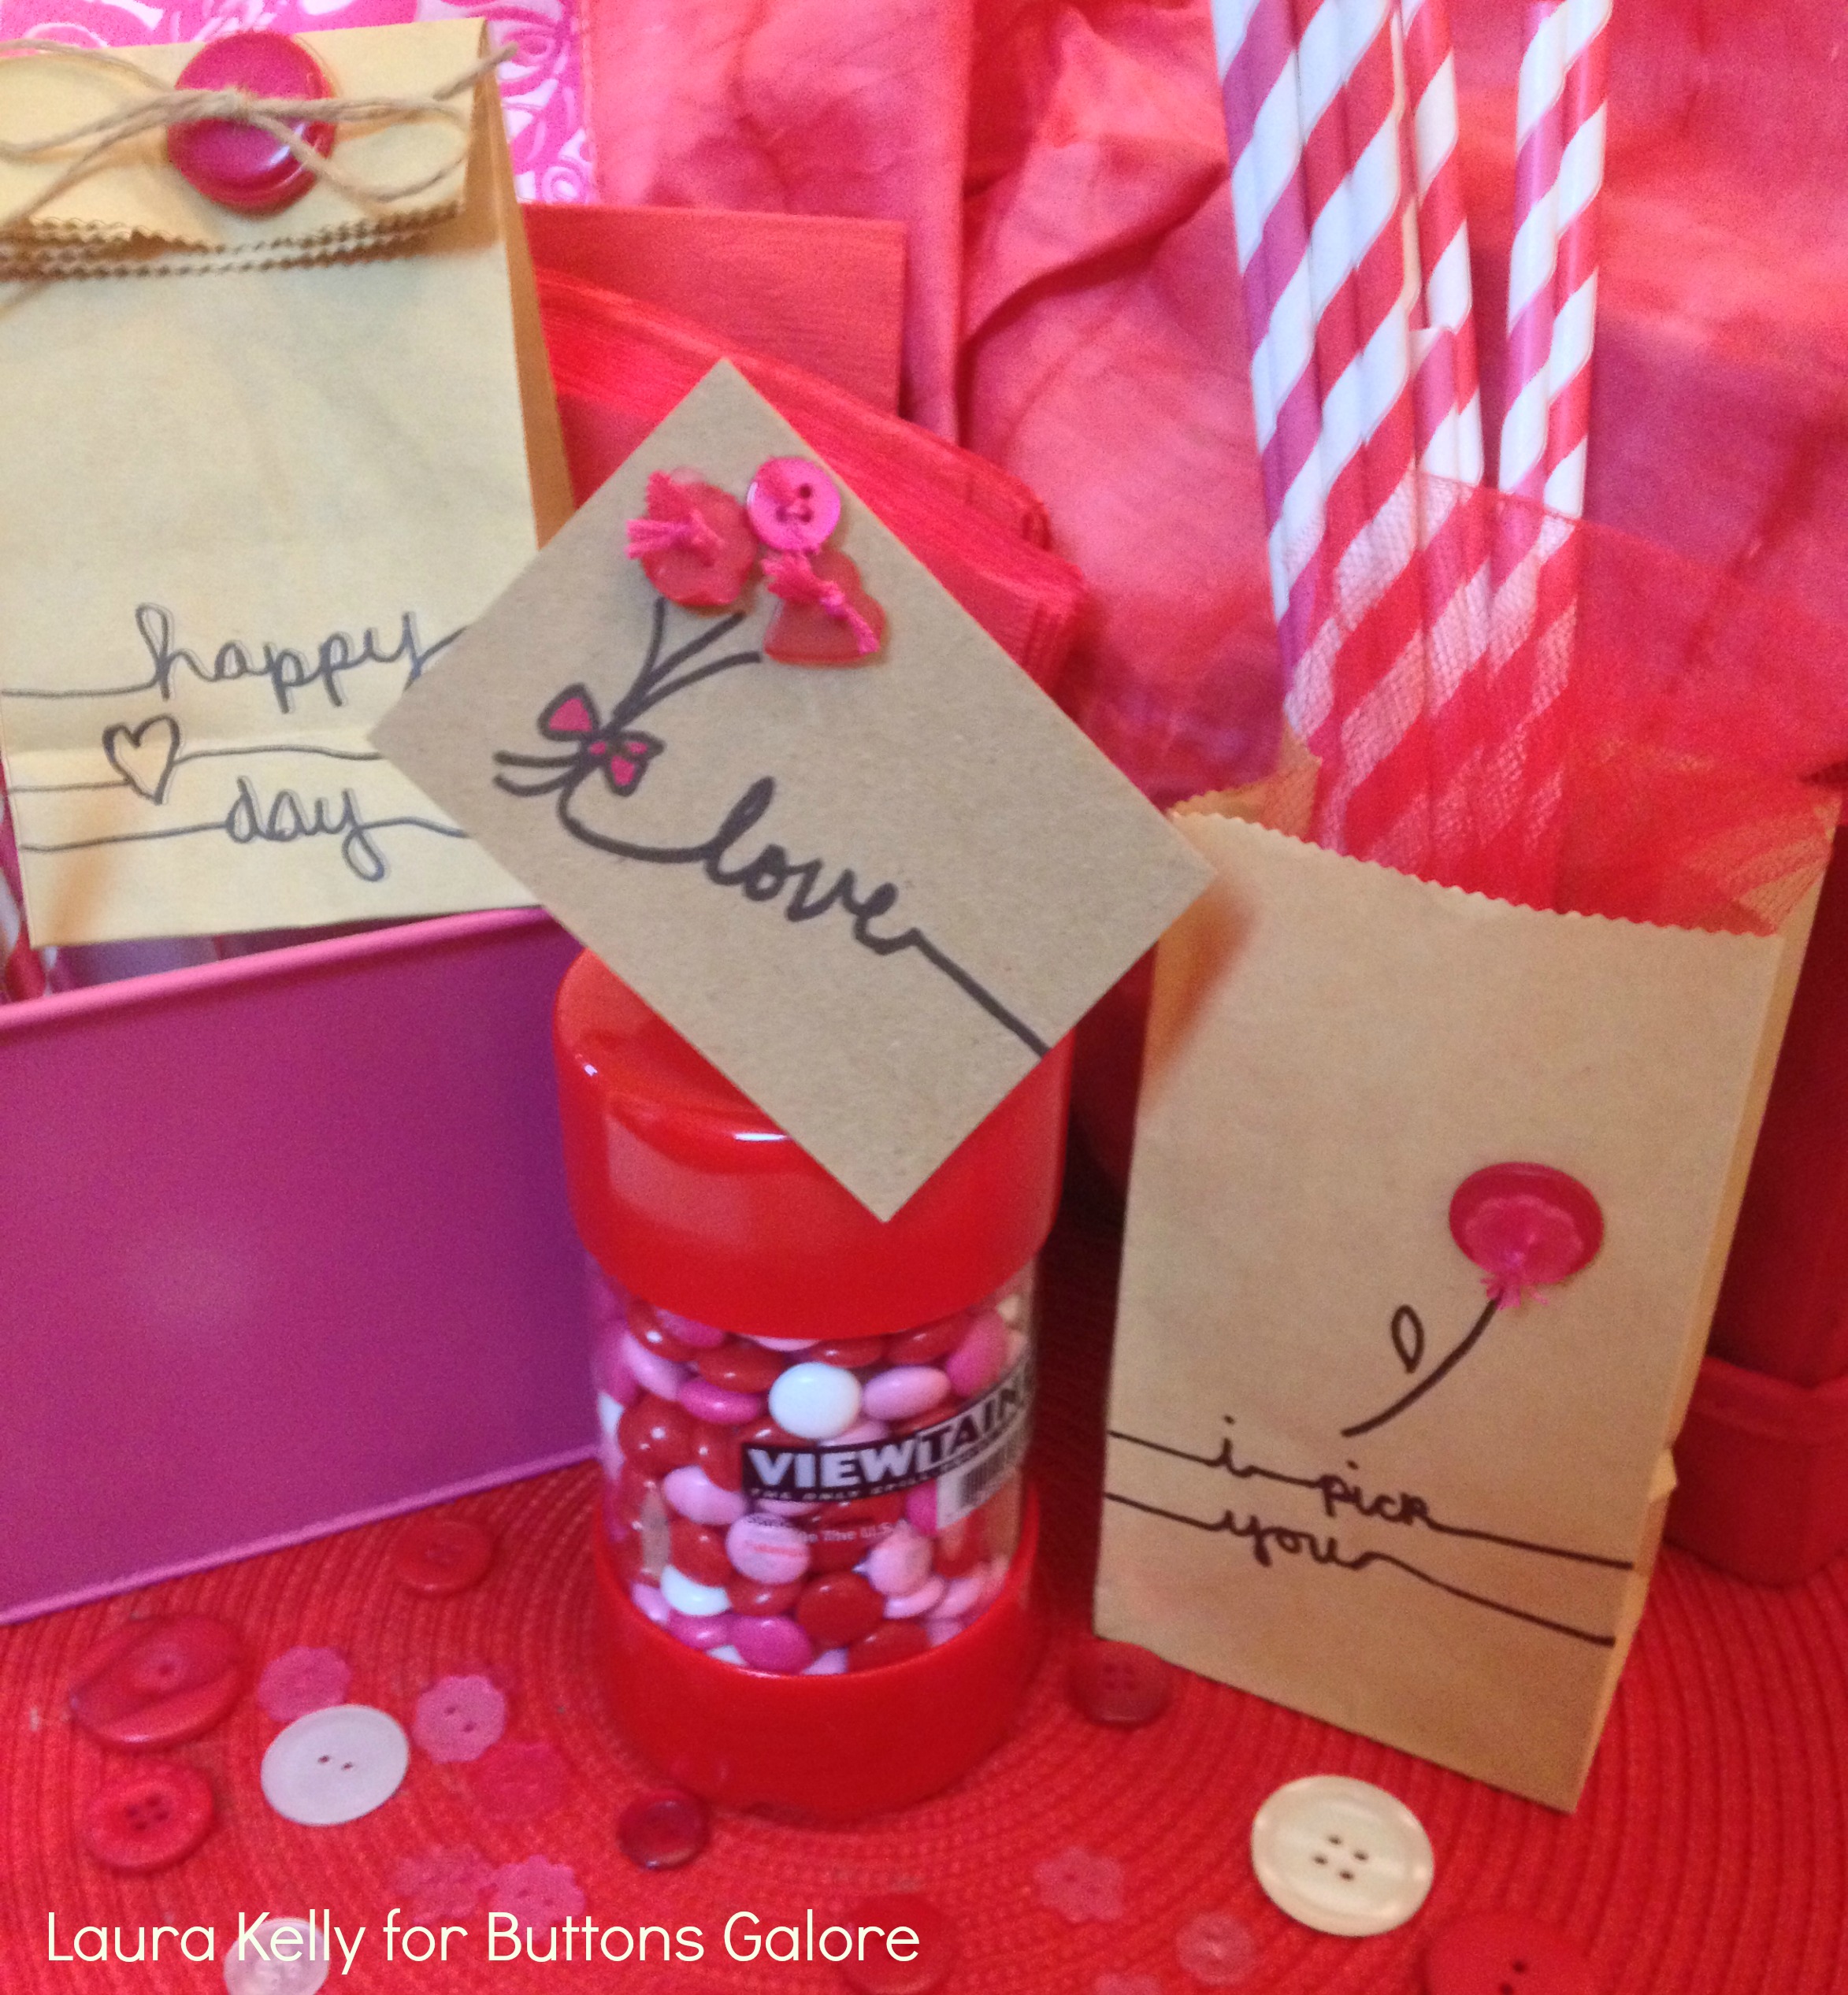
To create these masterpieces, you will need a marker ( I used a Sharpie of course) to do your doodling and Glue Dots to stick your buttons to your creations. The button colors that I used are all from my Laura Kelly collection, out of the assorted color mix. I did the doodling first (suggested are included here) and then attached the buttons and added tulle and twine and other ways make them each unique.
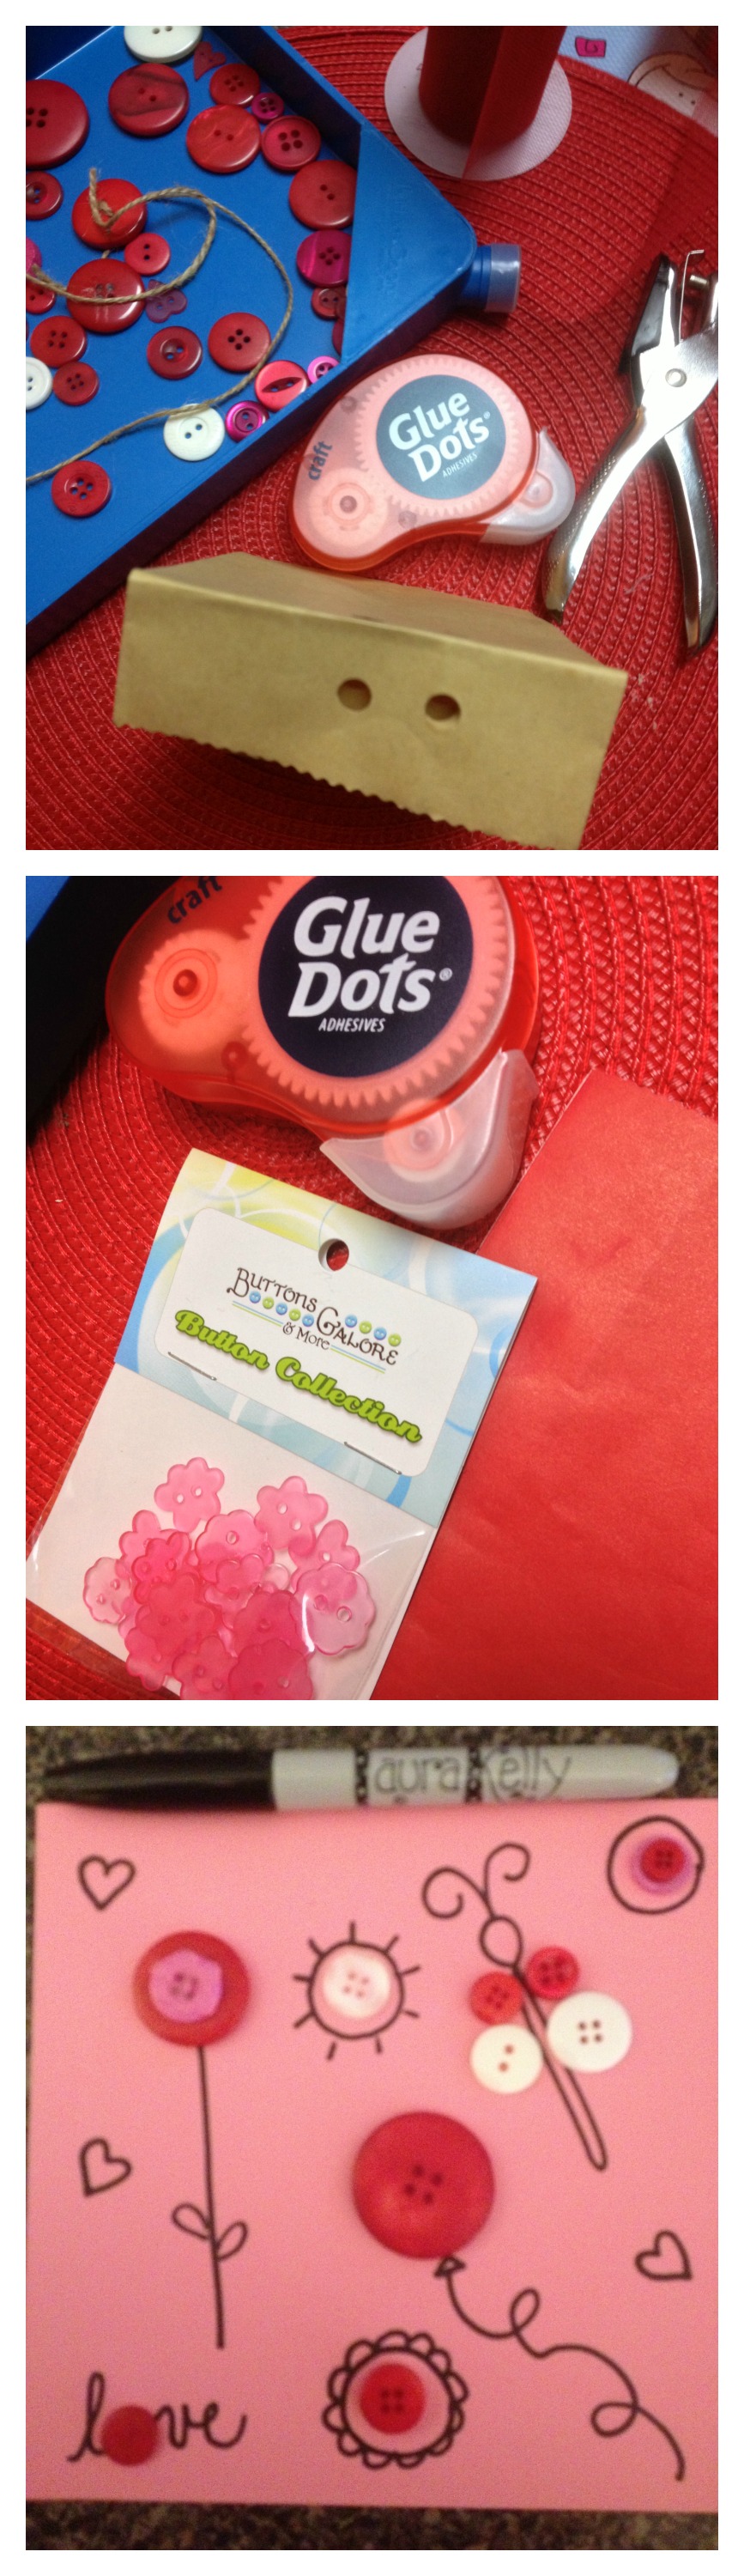
My favorite of these three is the one with the flowers, so much so that I created a variation of it for my blog too. I love the Viewtainer filled with candy for Valentines Day a lot too. After the candy is gobbled up, the container is the perfect storage place for BUTTONS!
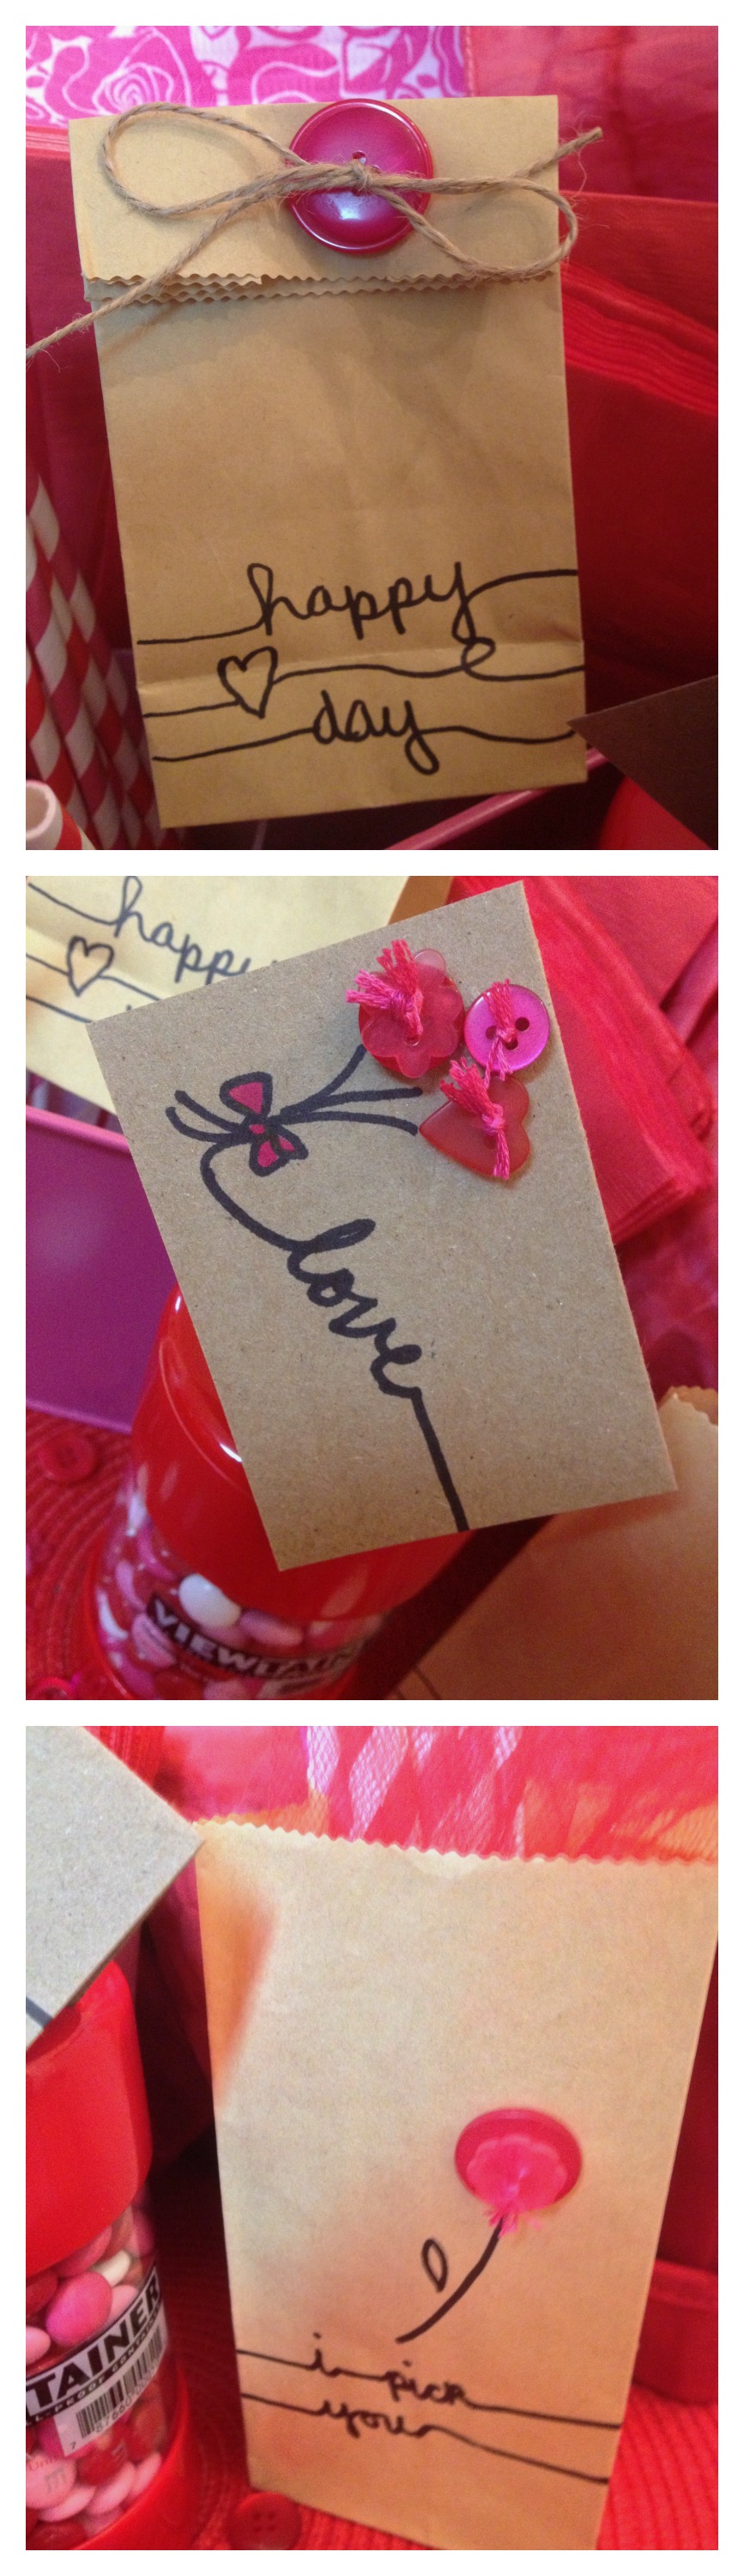
Which one do you like best? Do you want to create some of these fun doodle and button Valentines?
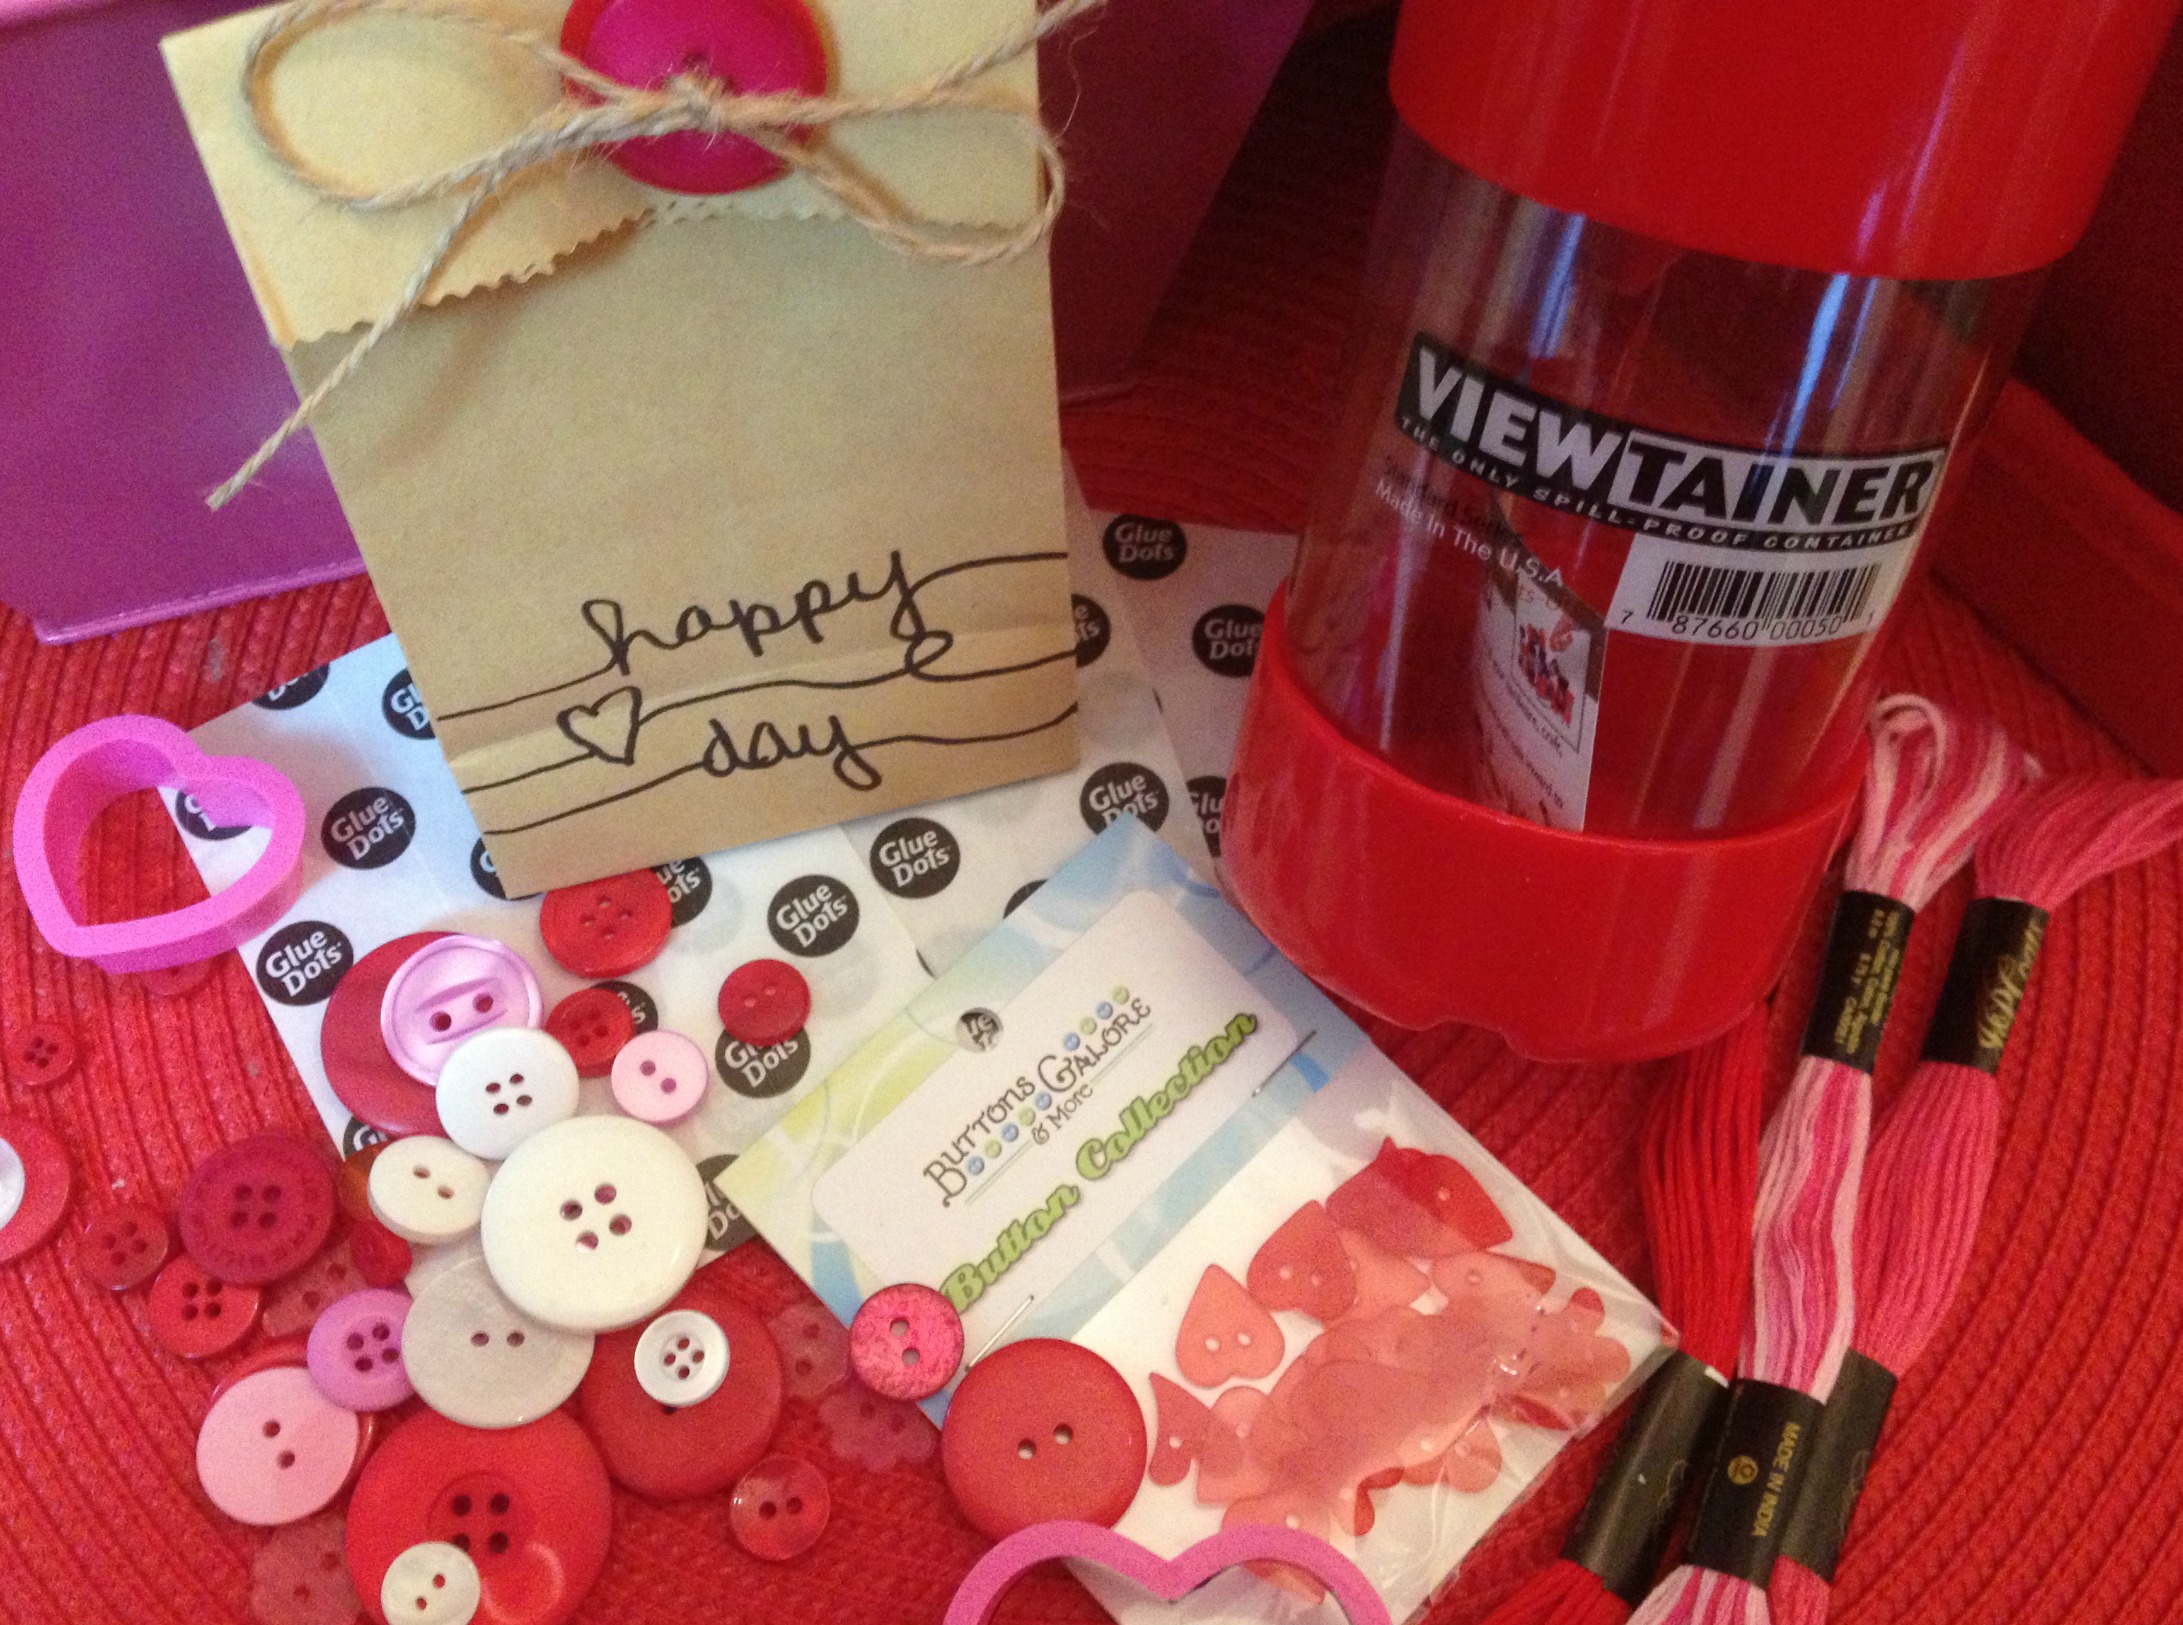
If so, then this prize might just be perfect for you. Enter to win a bright red Viewtainer filled with these goodies.
Happy Creating Love,
Laura
PS: To follow me on Facebook, click here.
I dyed these adorable little pennant pieces from Canvas Corp with Rit Dye…with intentions of making a holiday banner. Little did I know that they would end up being for the holiday of New Year’s when I dyed them Cherry Red. I am so glad I “forgot” to complete that project because they were perfect for this week’s blog post showing you how to stitch up an adorable banner to bring in 2014.
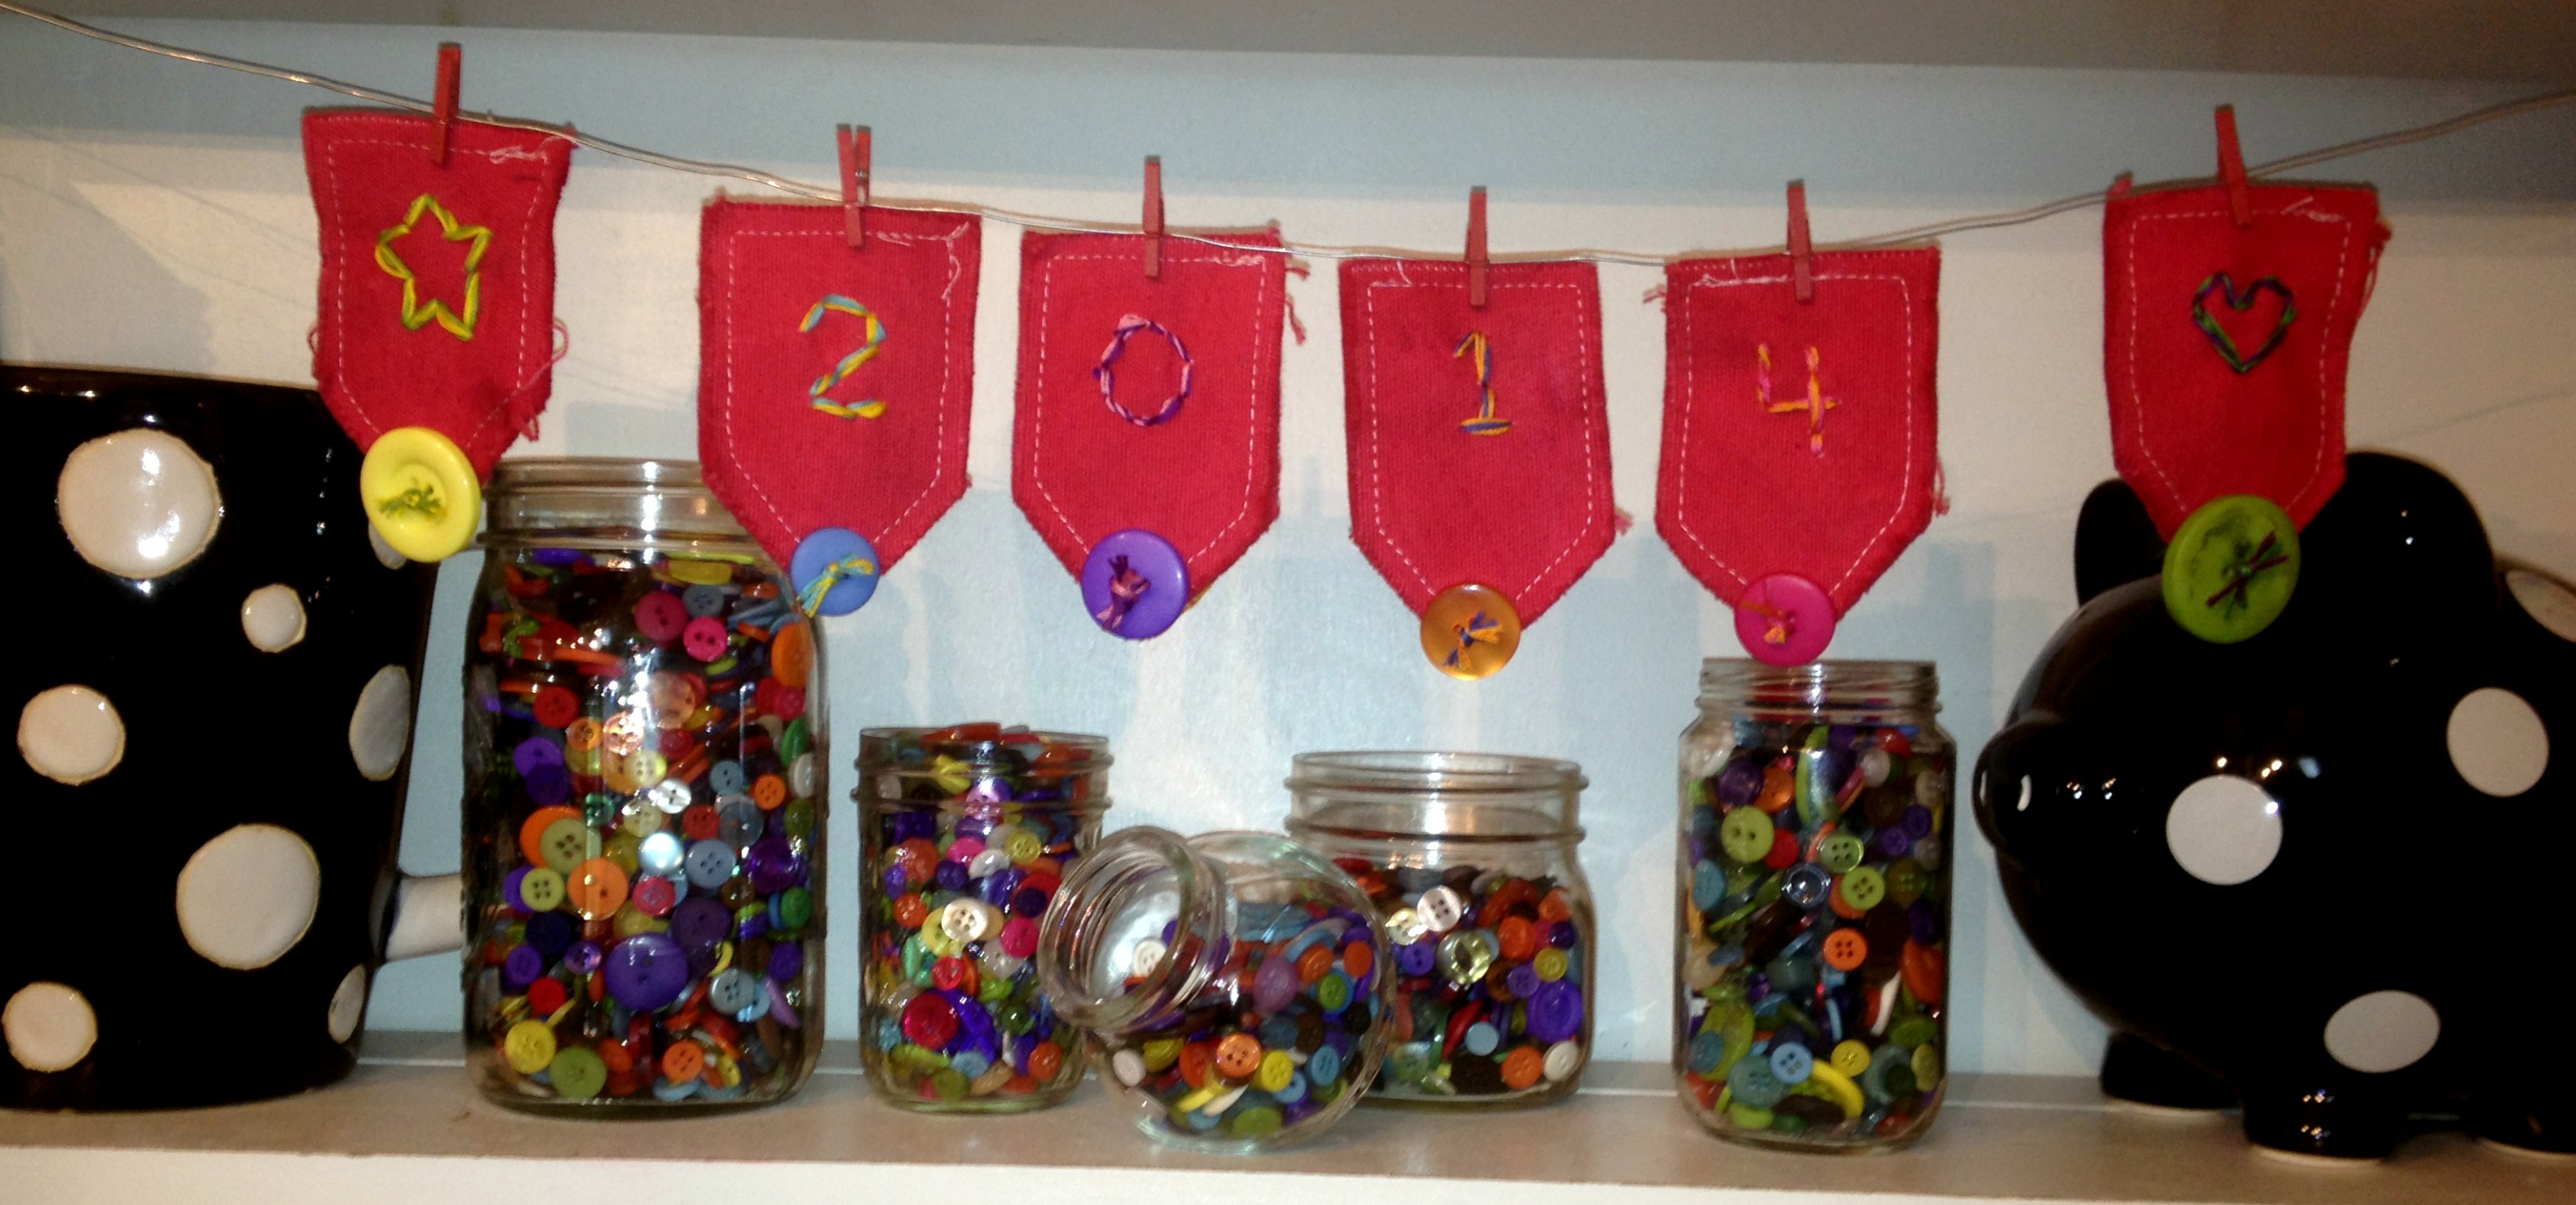
I sorted from my Laura Kelly collection of assorted buttons and found 6 large ones in different colors from the red.
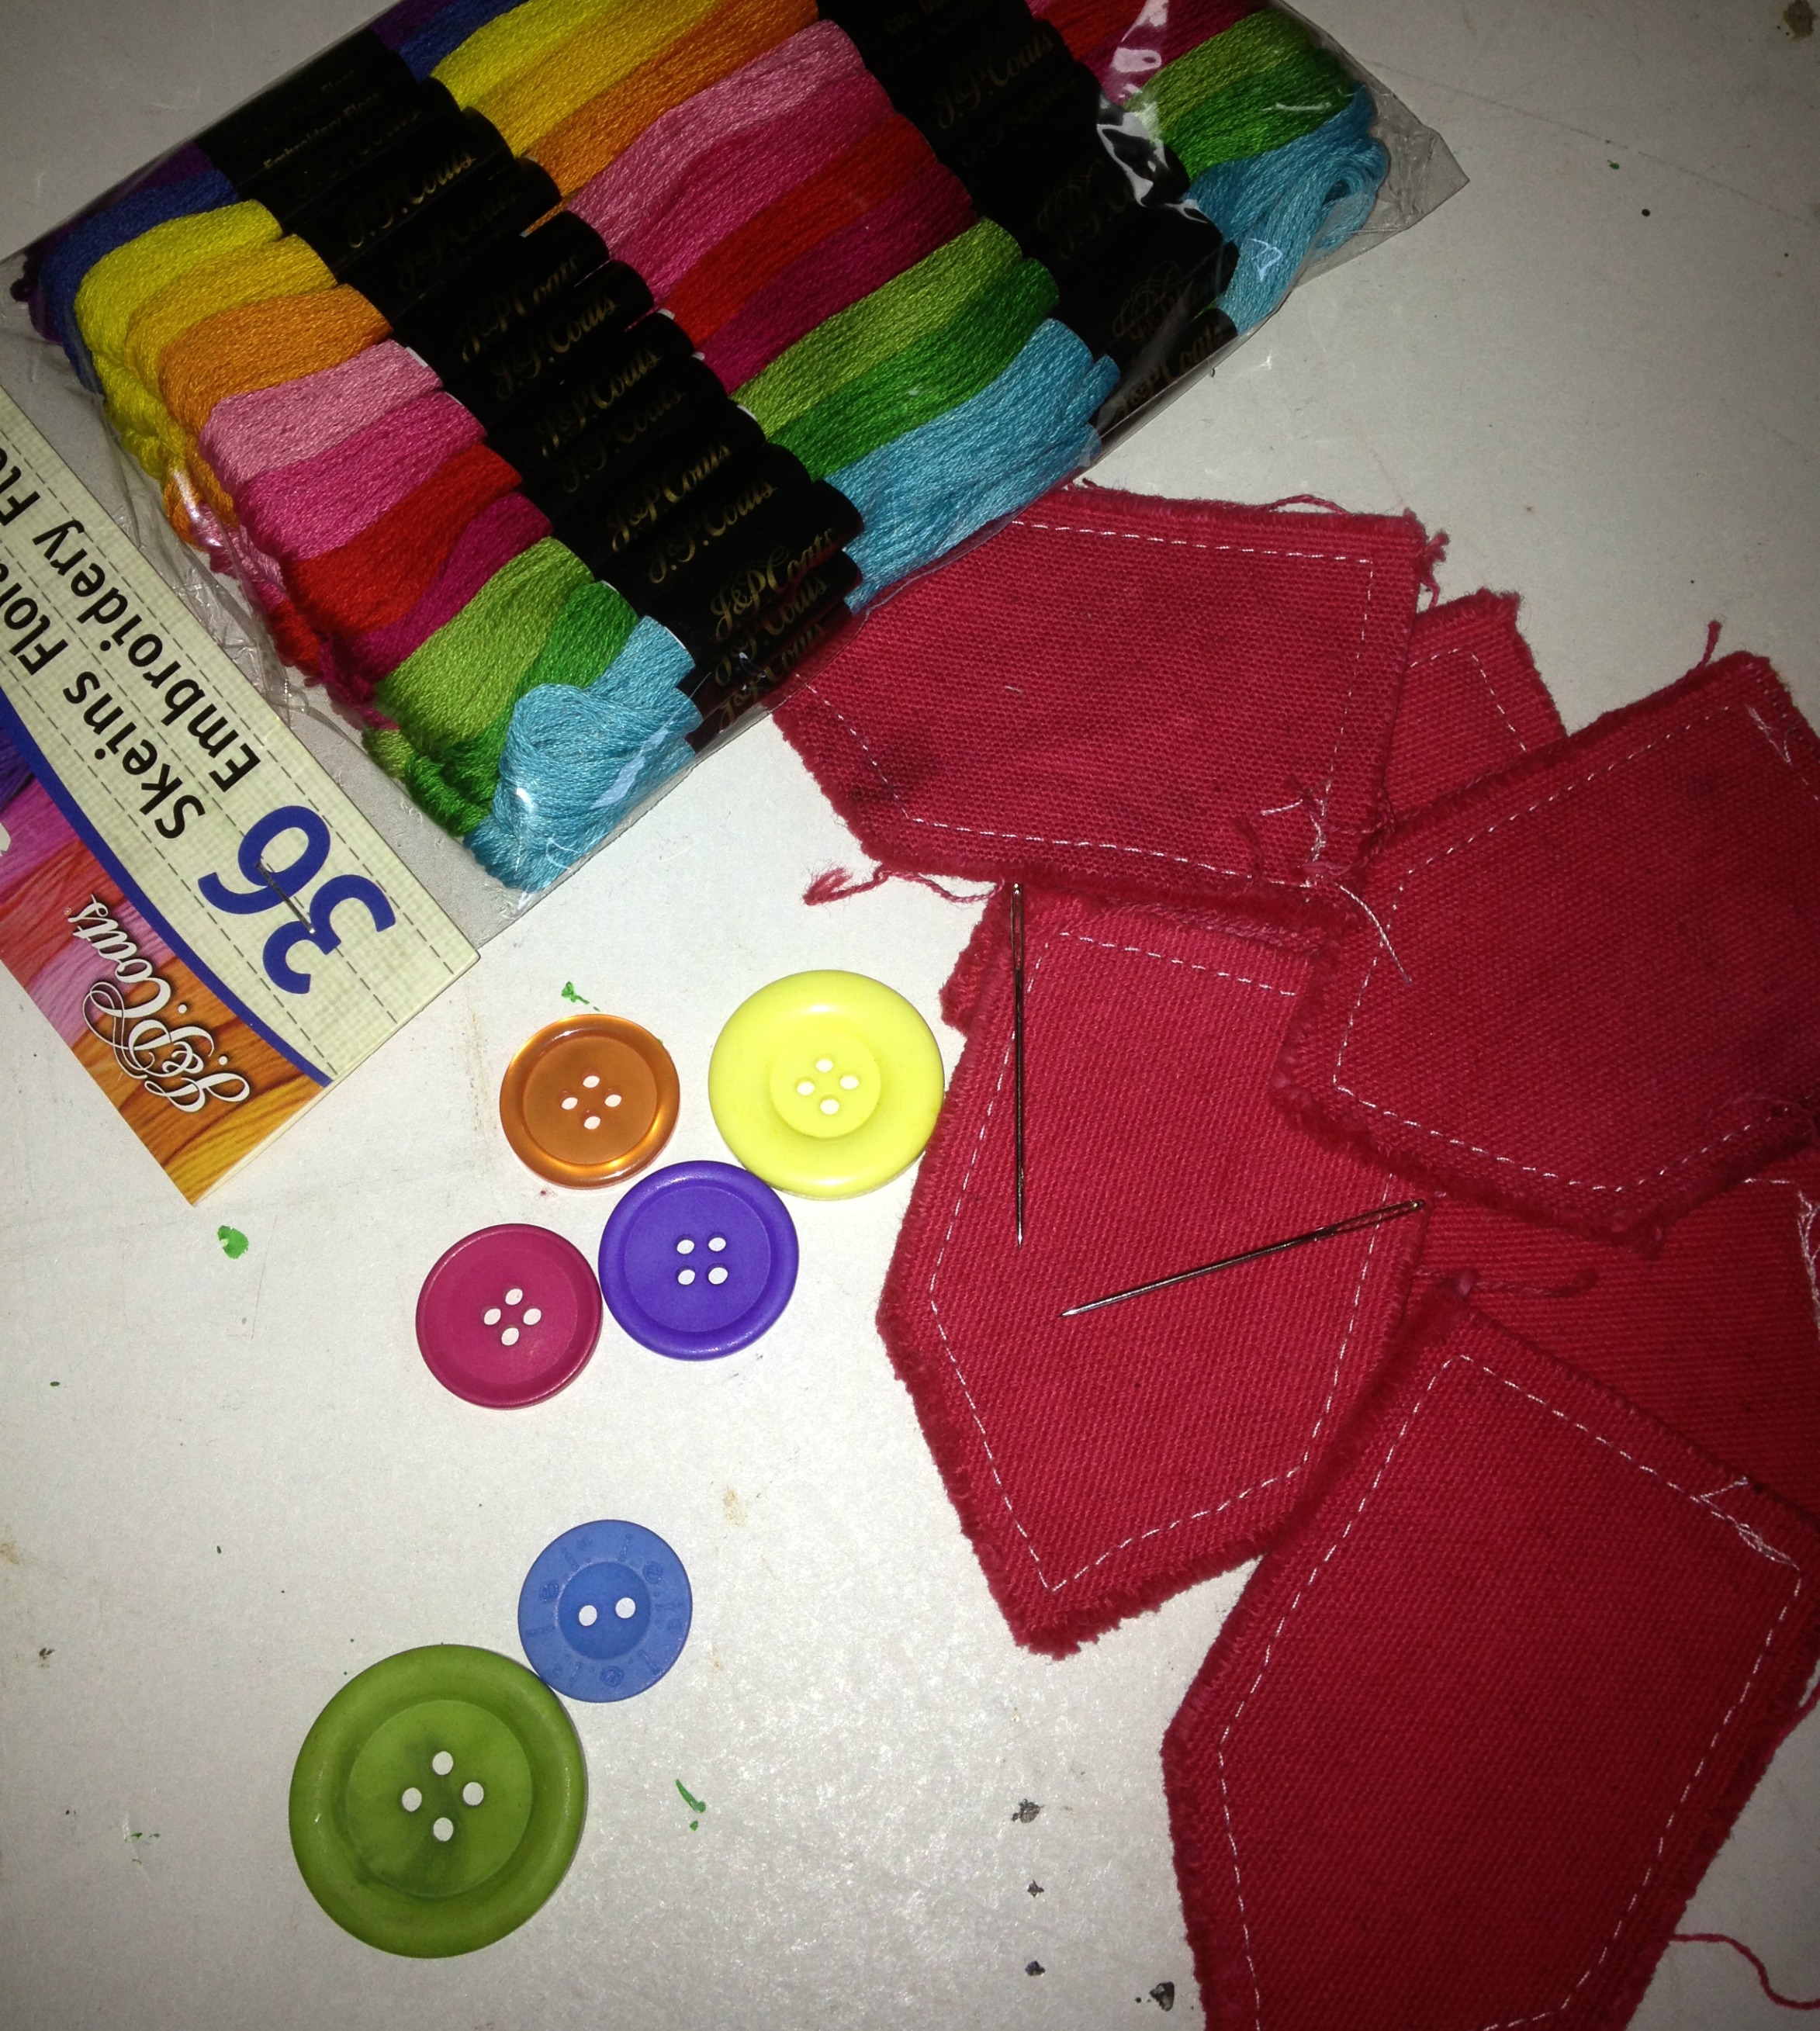
Then I matched up double colors of embroidery floss from Coats and Clark to do the stitching for each of the 6 pennant pieces. I set it all out to make sure it was going to be “just right” and balanced.
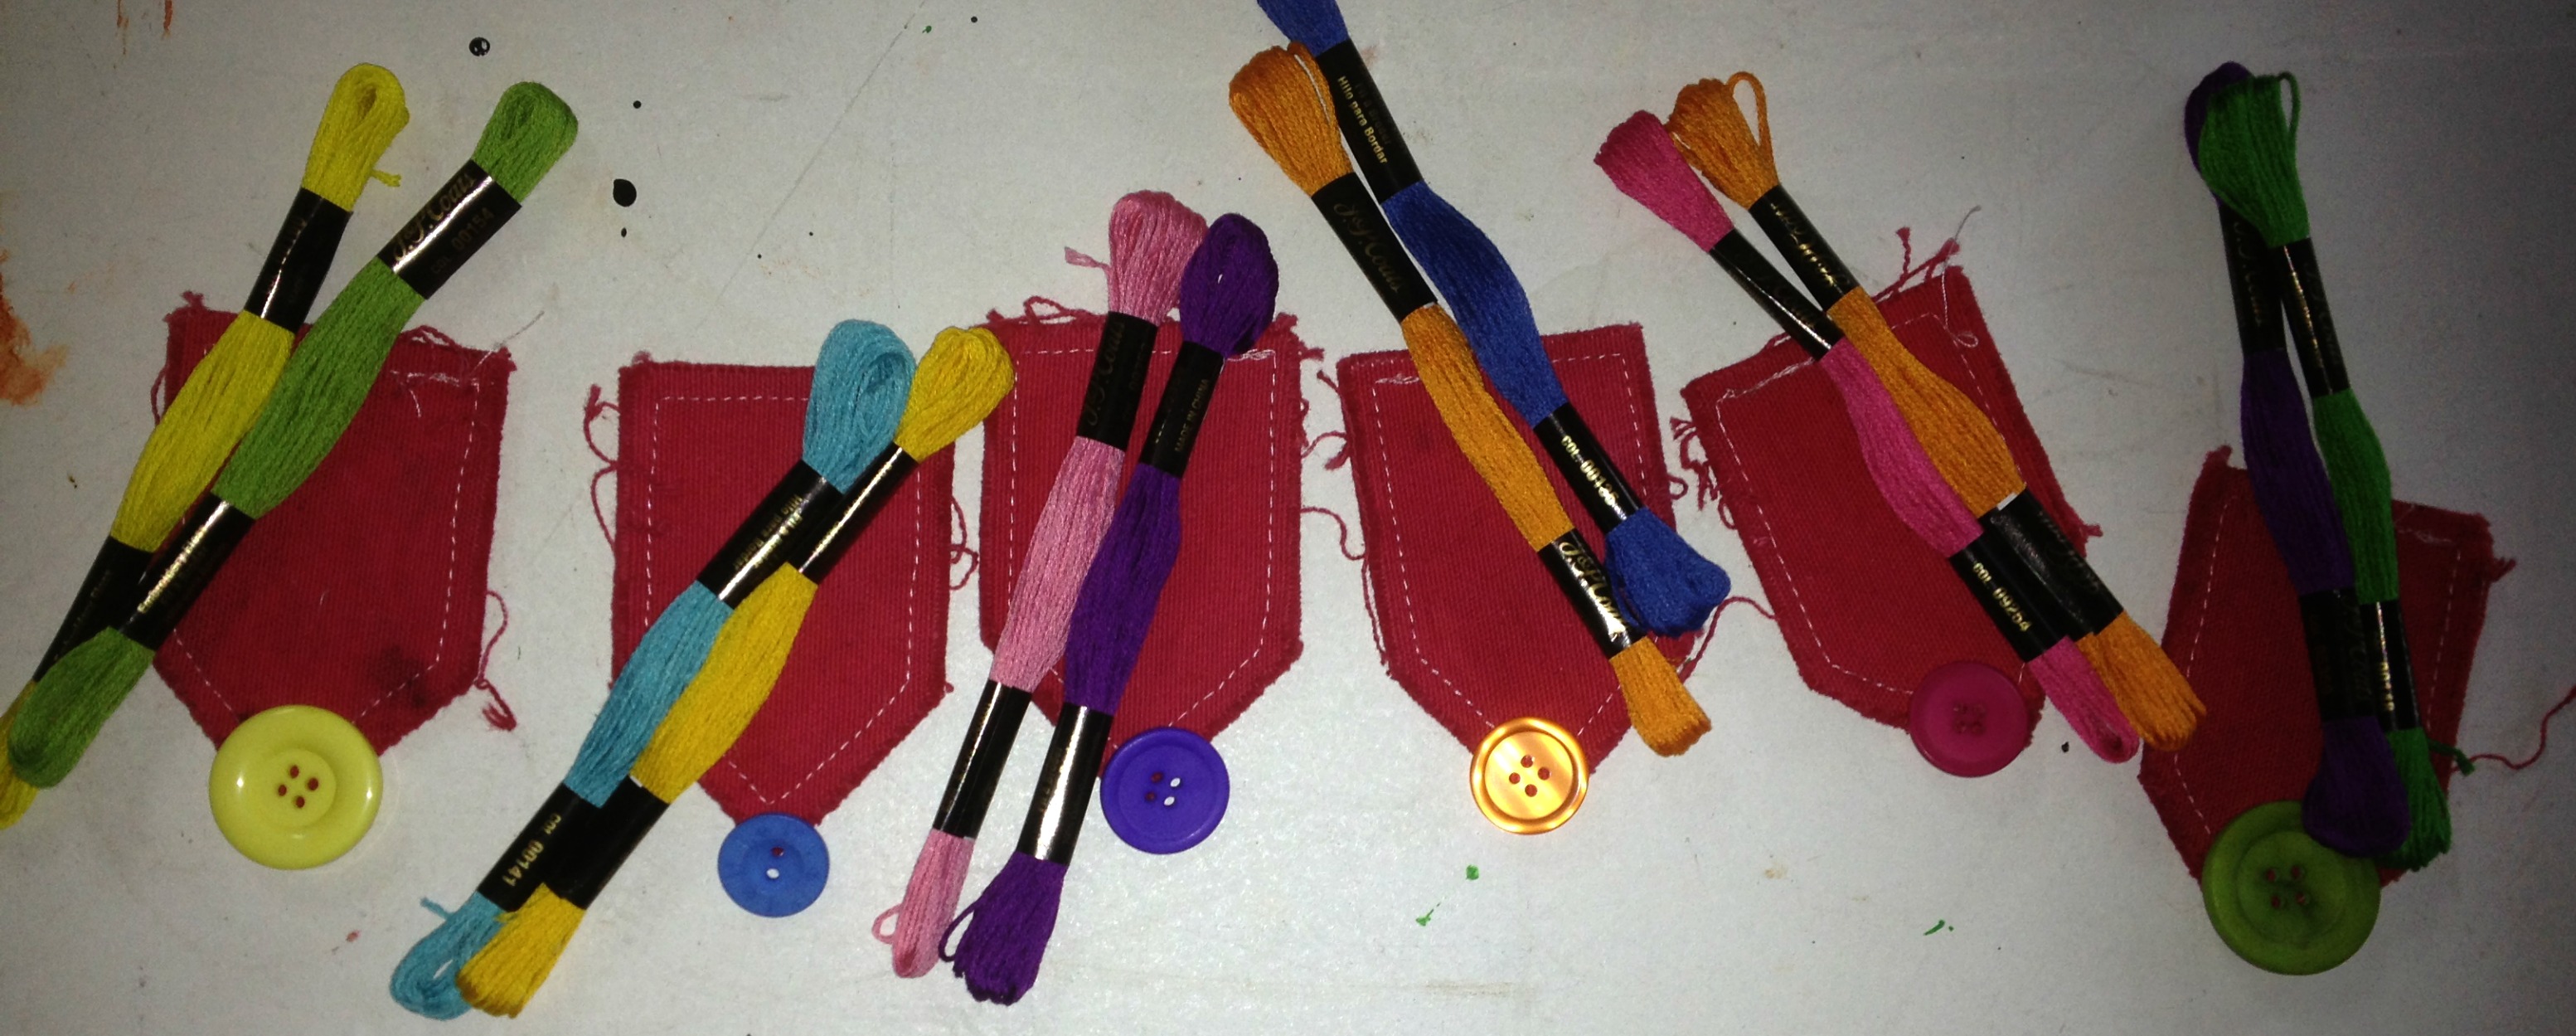
To stitch on the numbers and add the buttons (stitched through the front and tied in knots), I used two colors, doubled up.
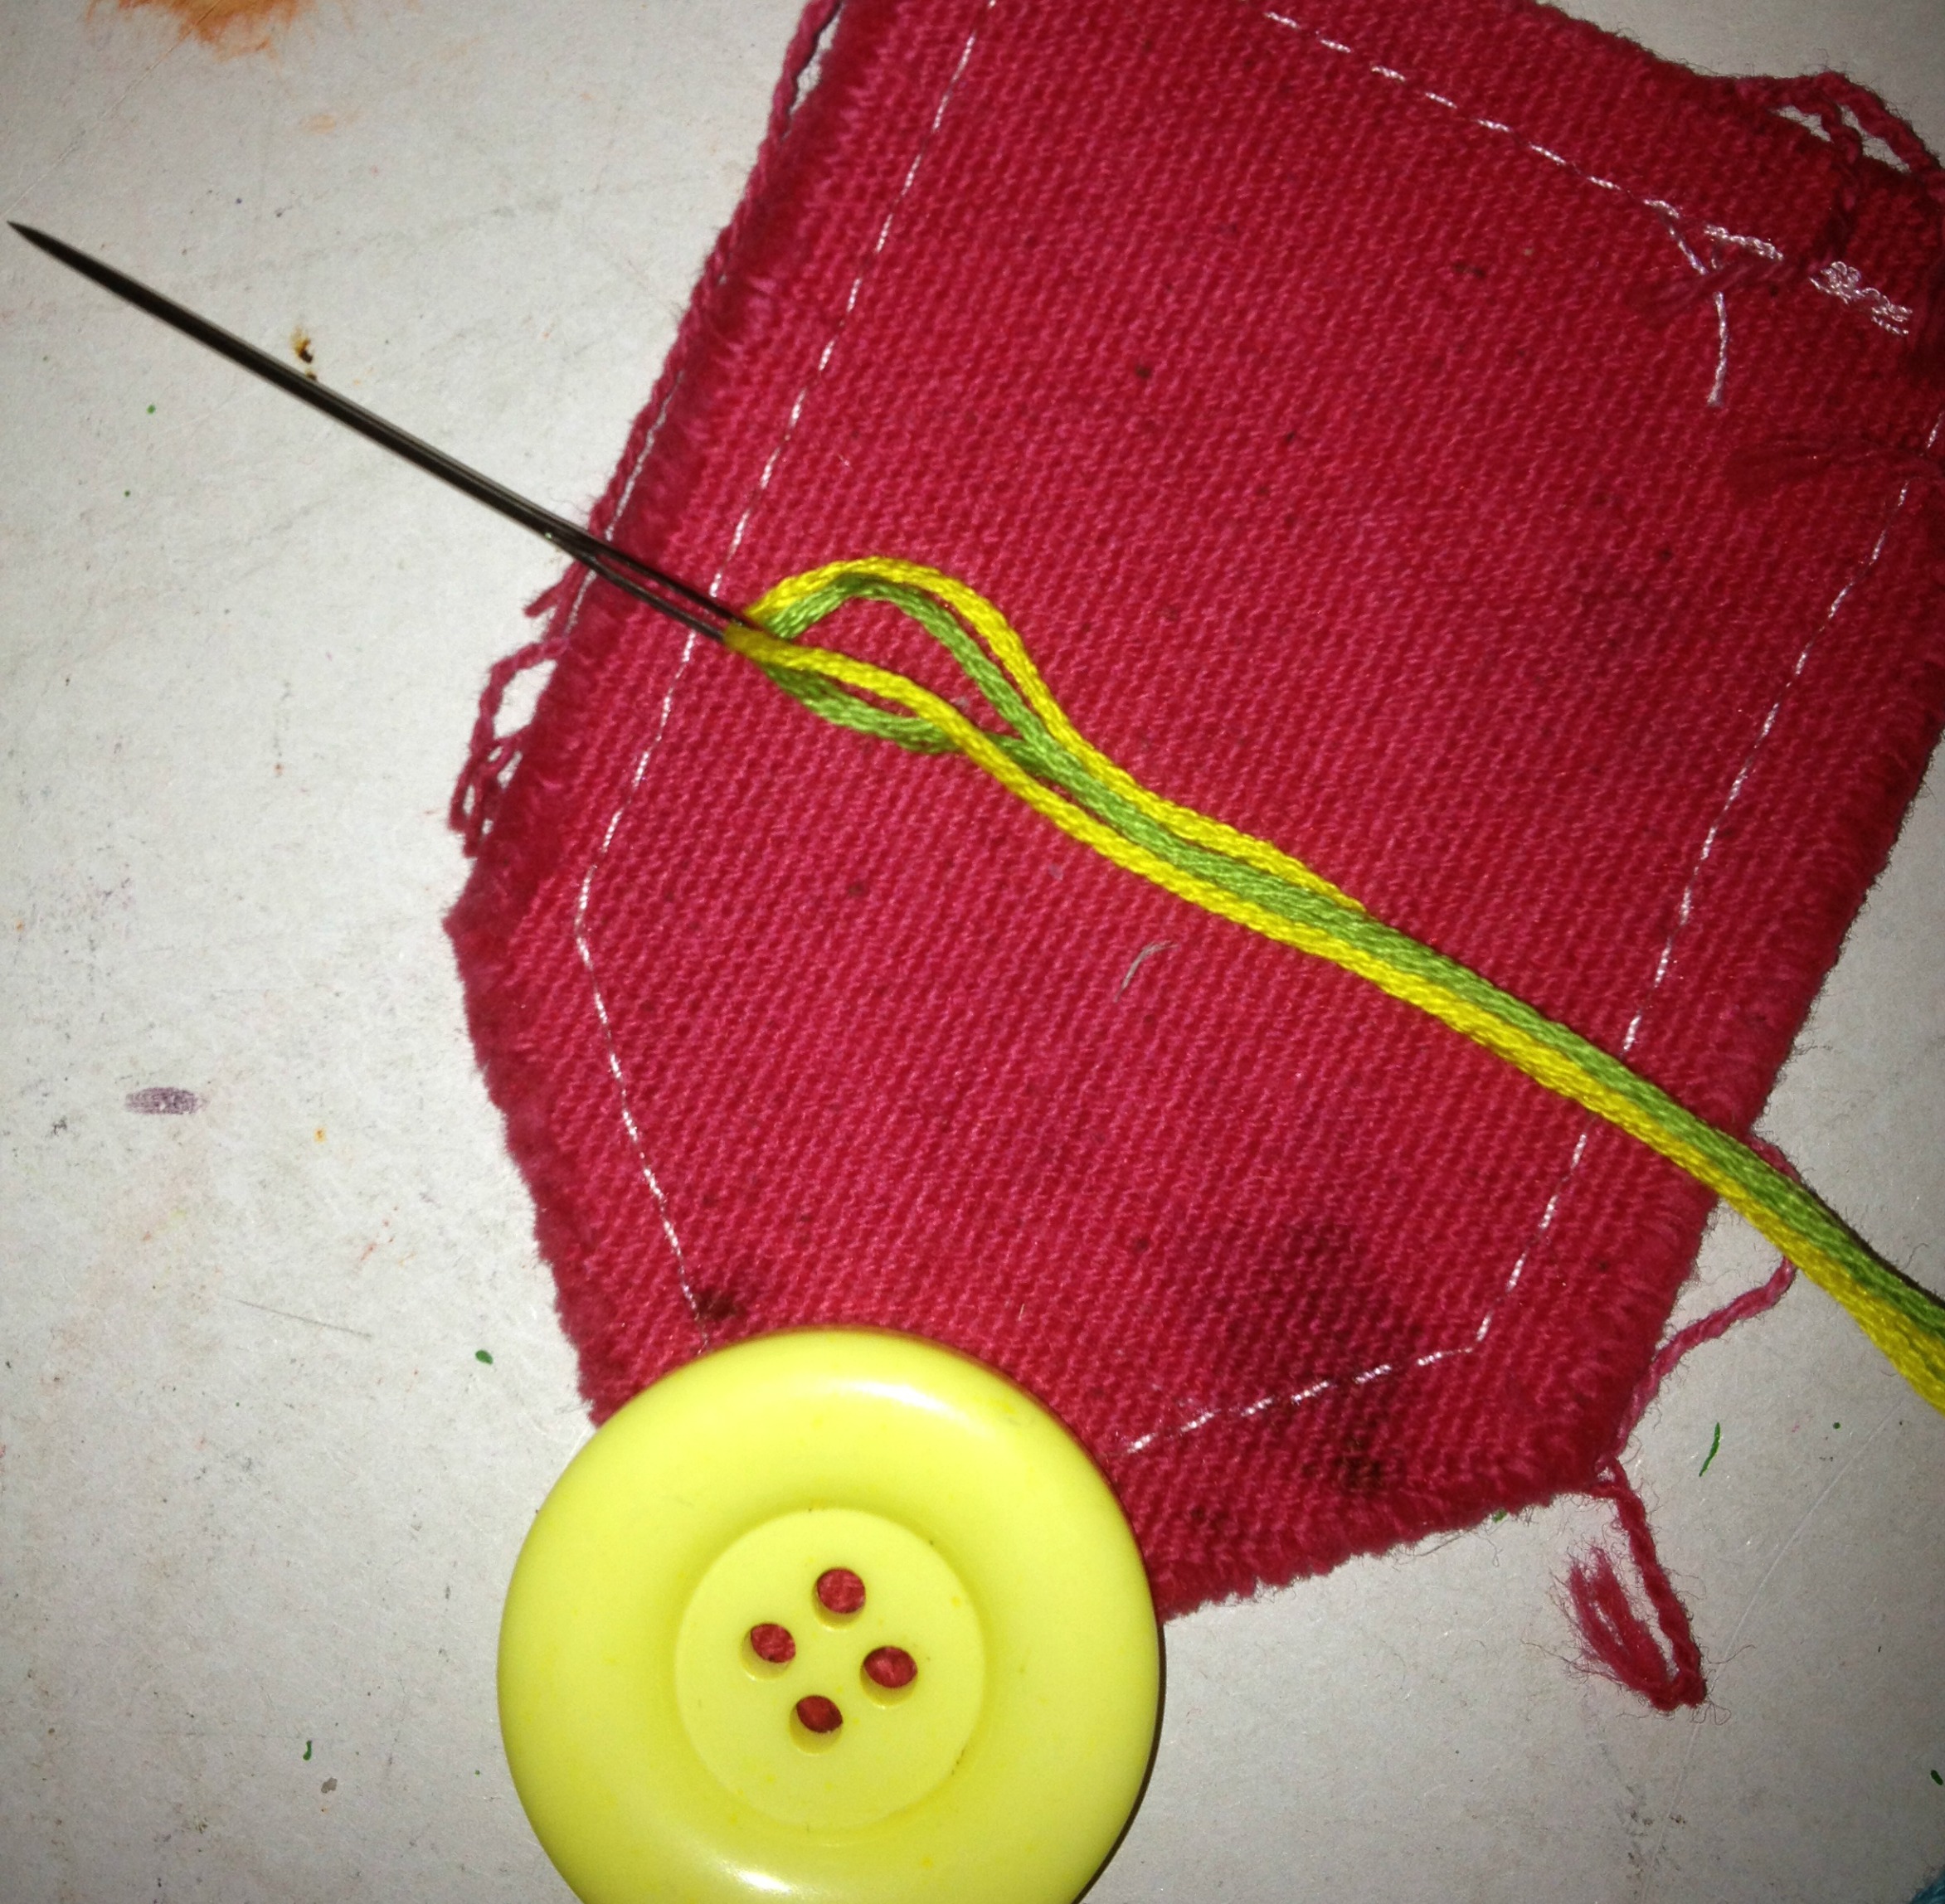
Then I set it all out to decide where it should be hung. I love my Westcott brand scissors almost enough to hang them too.
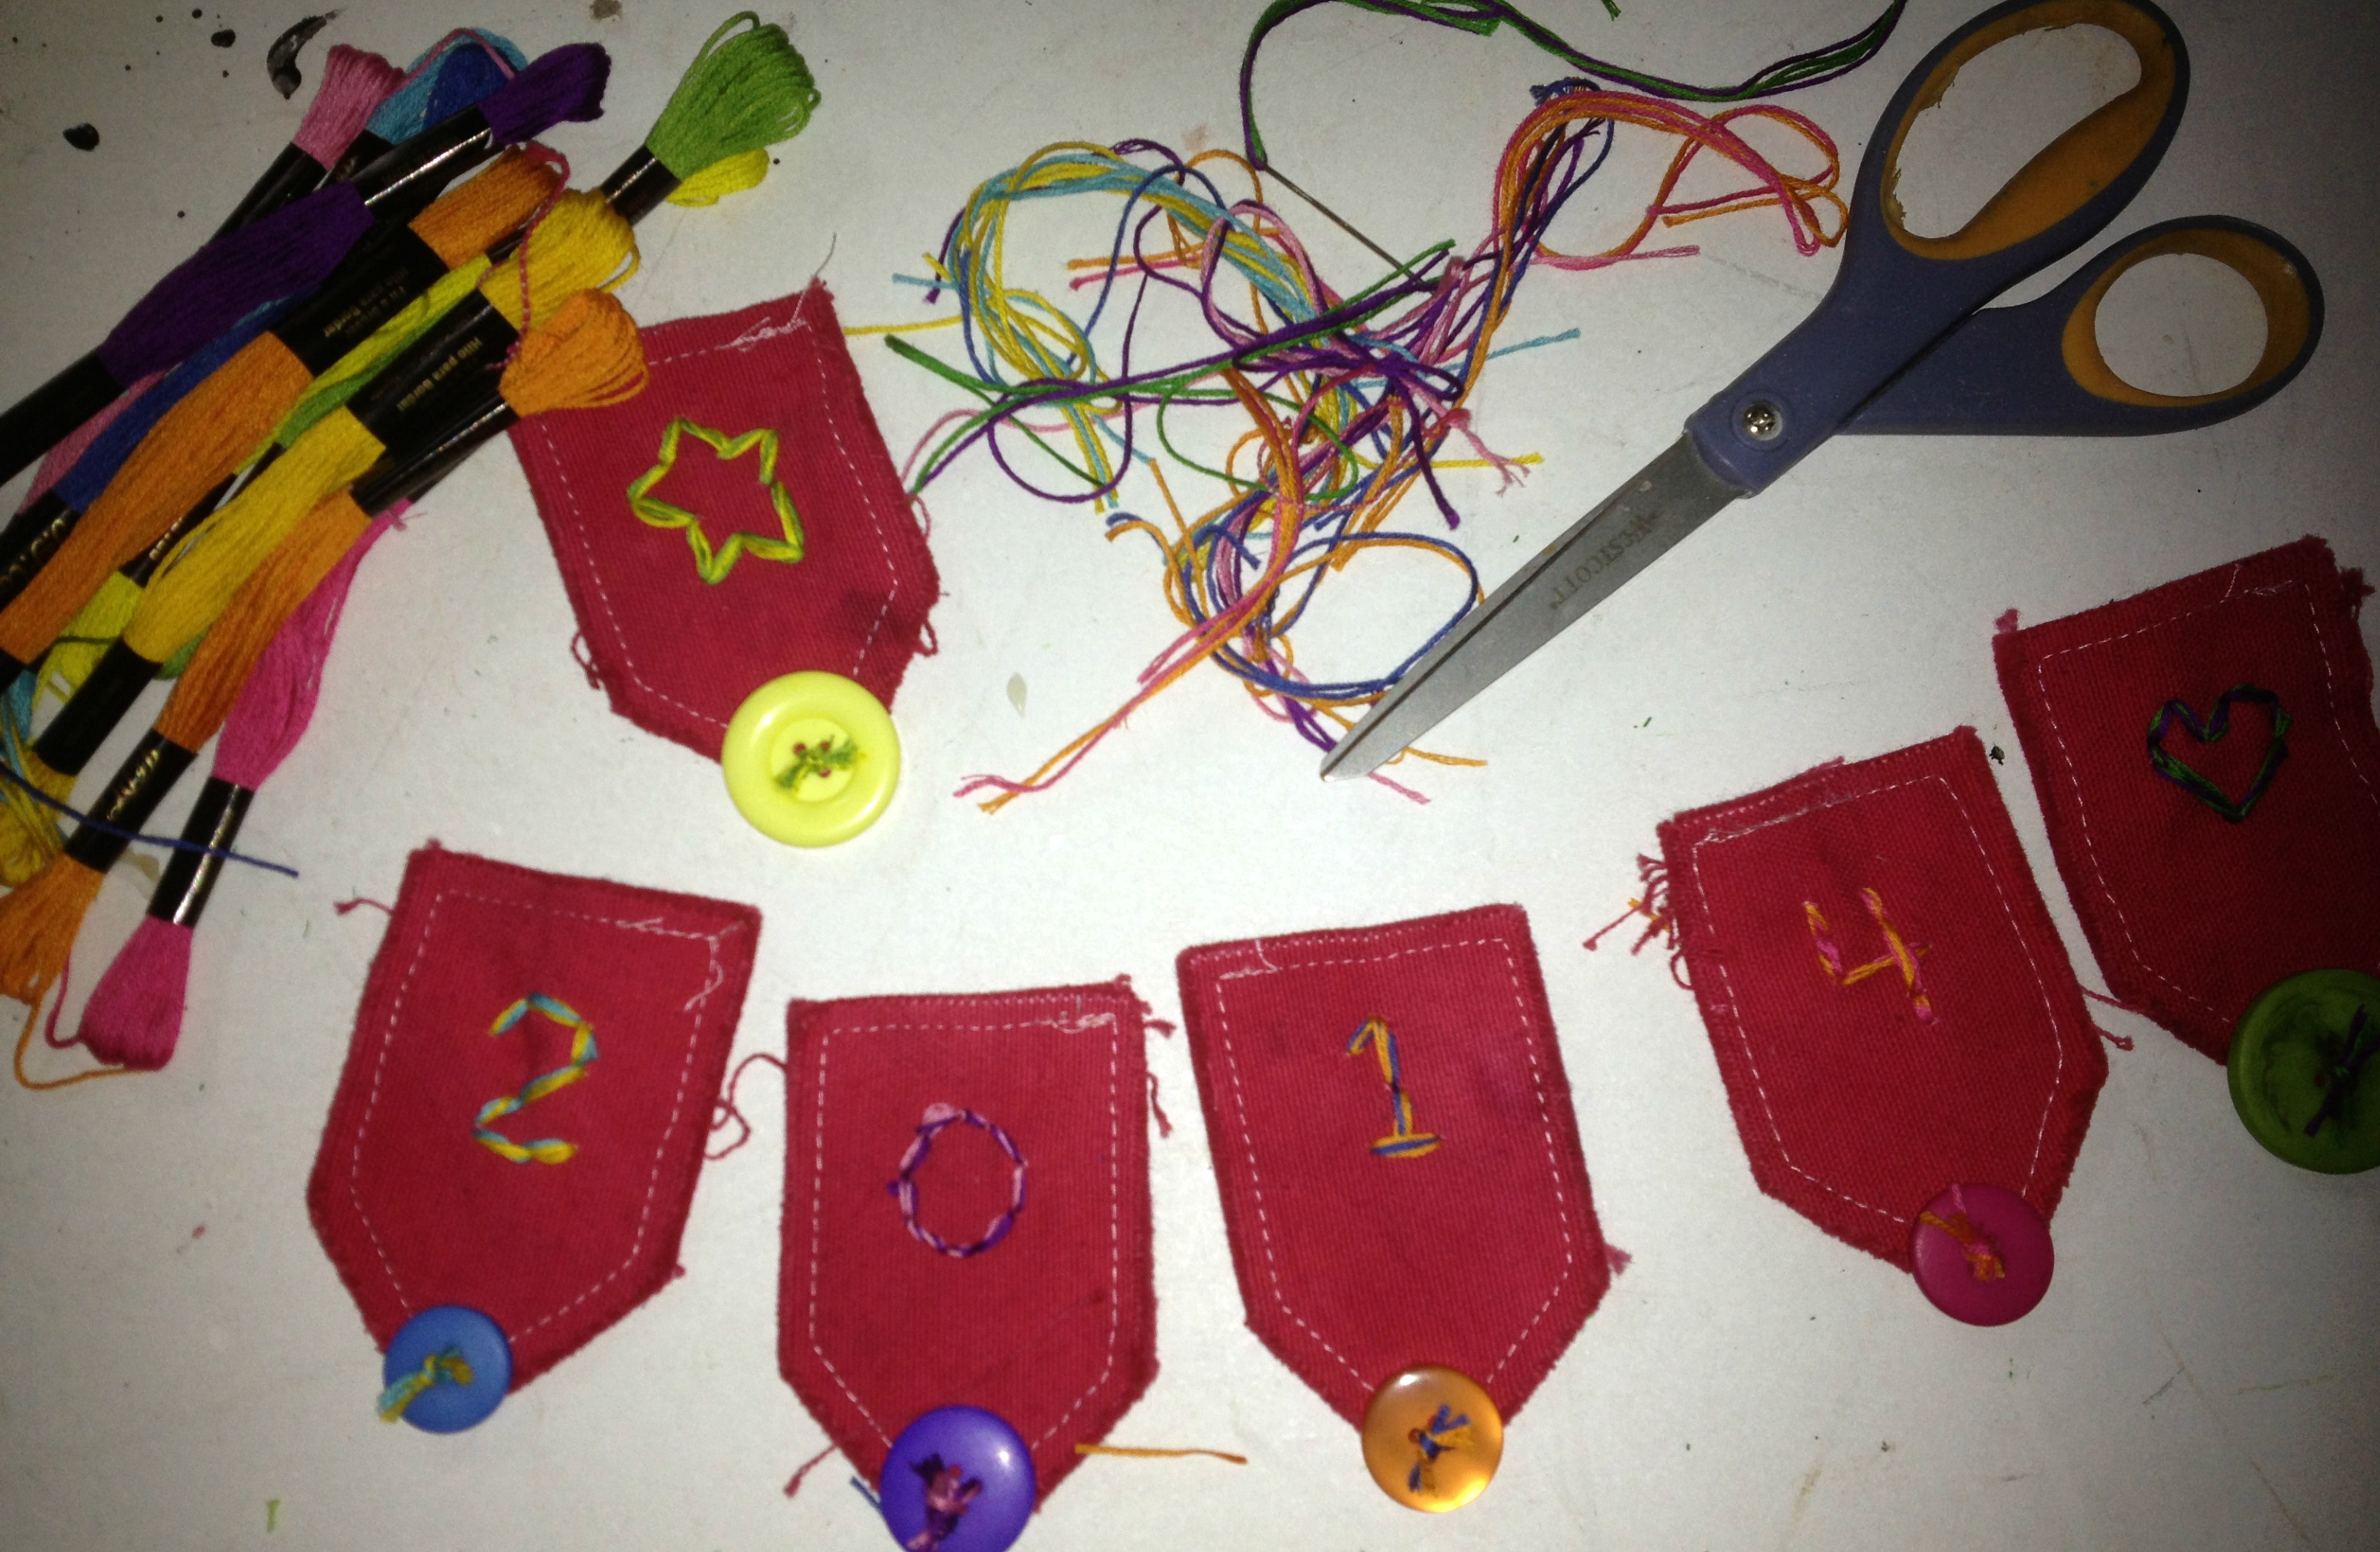
I decided that the perfect place was on my craft shelves. I think it looks great there and love the way the little pieces all hang with the mini clothespins (also from Canvas Corp). And now…to create new projects with all of the Laura Kelly bright, bold and amazing colors of buttons for 2014! It is going to be great!
Happy New Year,
Laura
Holly here from Ribbons & Glue sharing a Button Christmas Card with you today to show you how easy it is to embellish your Christmas cards this year with Buttons Galore buttons.

To make this Button Christmas Card, I used a Pebbles in My Pocket Mistletoe cut file, Pearl Buttons for berries and gorgeous May Arts Ribbons.
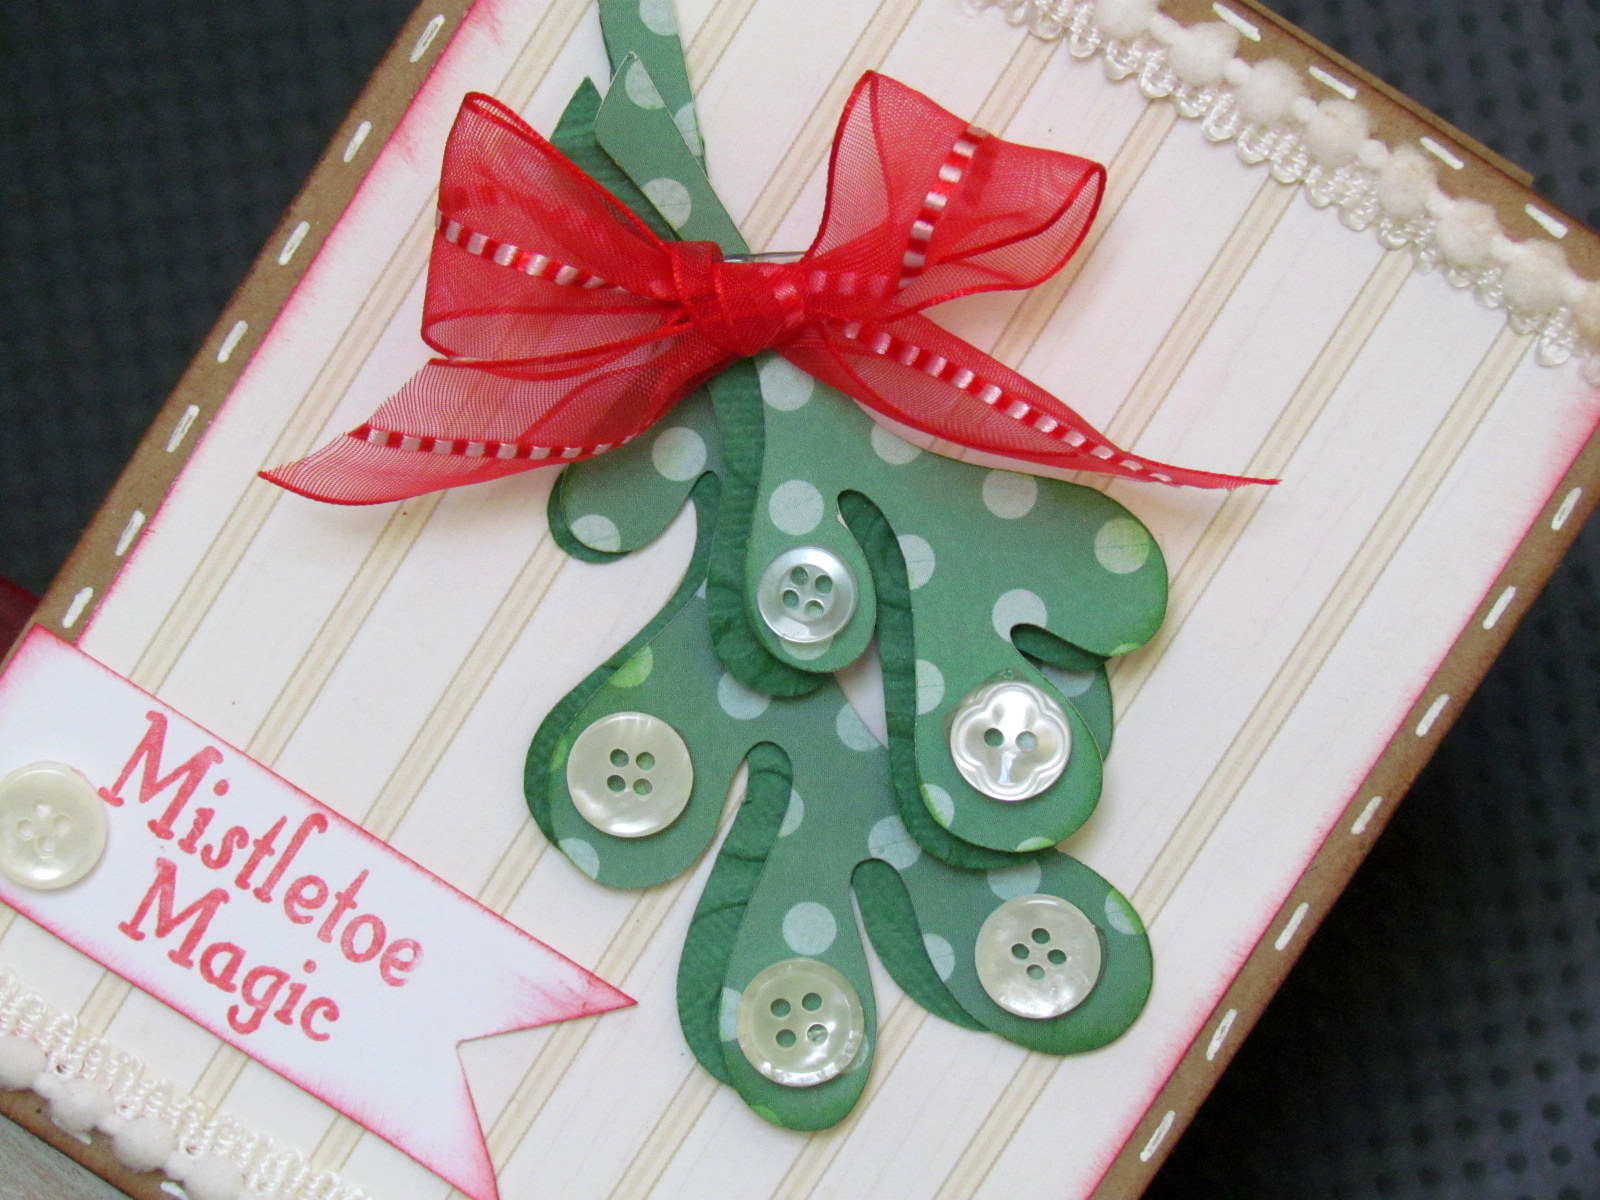
It really is easy to a add dimension on to your cards with simple buttons.
For more Christmas Inspiration, check out my blog Ribbons & Glue.
Like Me on Facebook!
While I was wrapping gifts for Christmas this year, I found my candy canes looking like hearts on the work table. I used hot glue and I am excited to share this super quick and easy (and totally adorable) ornament idea. I might add that they look super cute on gifts wrapped in butcher paper (or grocery sacks turned inside out if you are recycling).
You will need 2 candy canes, twine, buttons in Radical Red and Candy Apple Green and hot glue for each one you plan to create. You’ll need some adhesive too!
I used my Ad-tech low temp gun with low temp glue sticks.
To get started, glue your candy canes together in the shape of a heart. Then add a few buttons. Tie on some twine and you are done!
Hang it in the tree as an ornament.
…or add it to a gift!
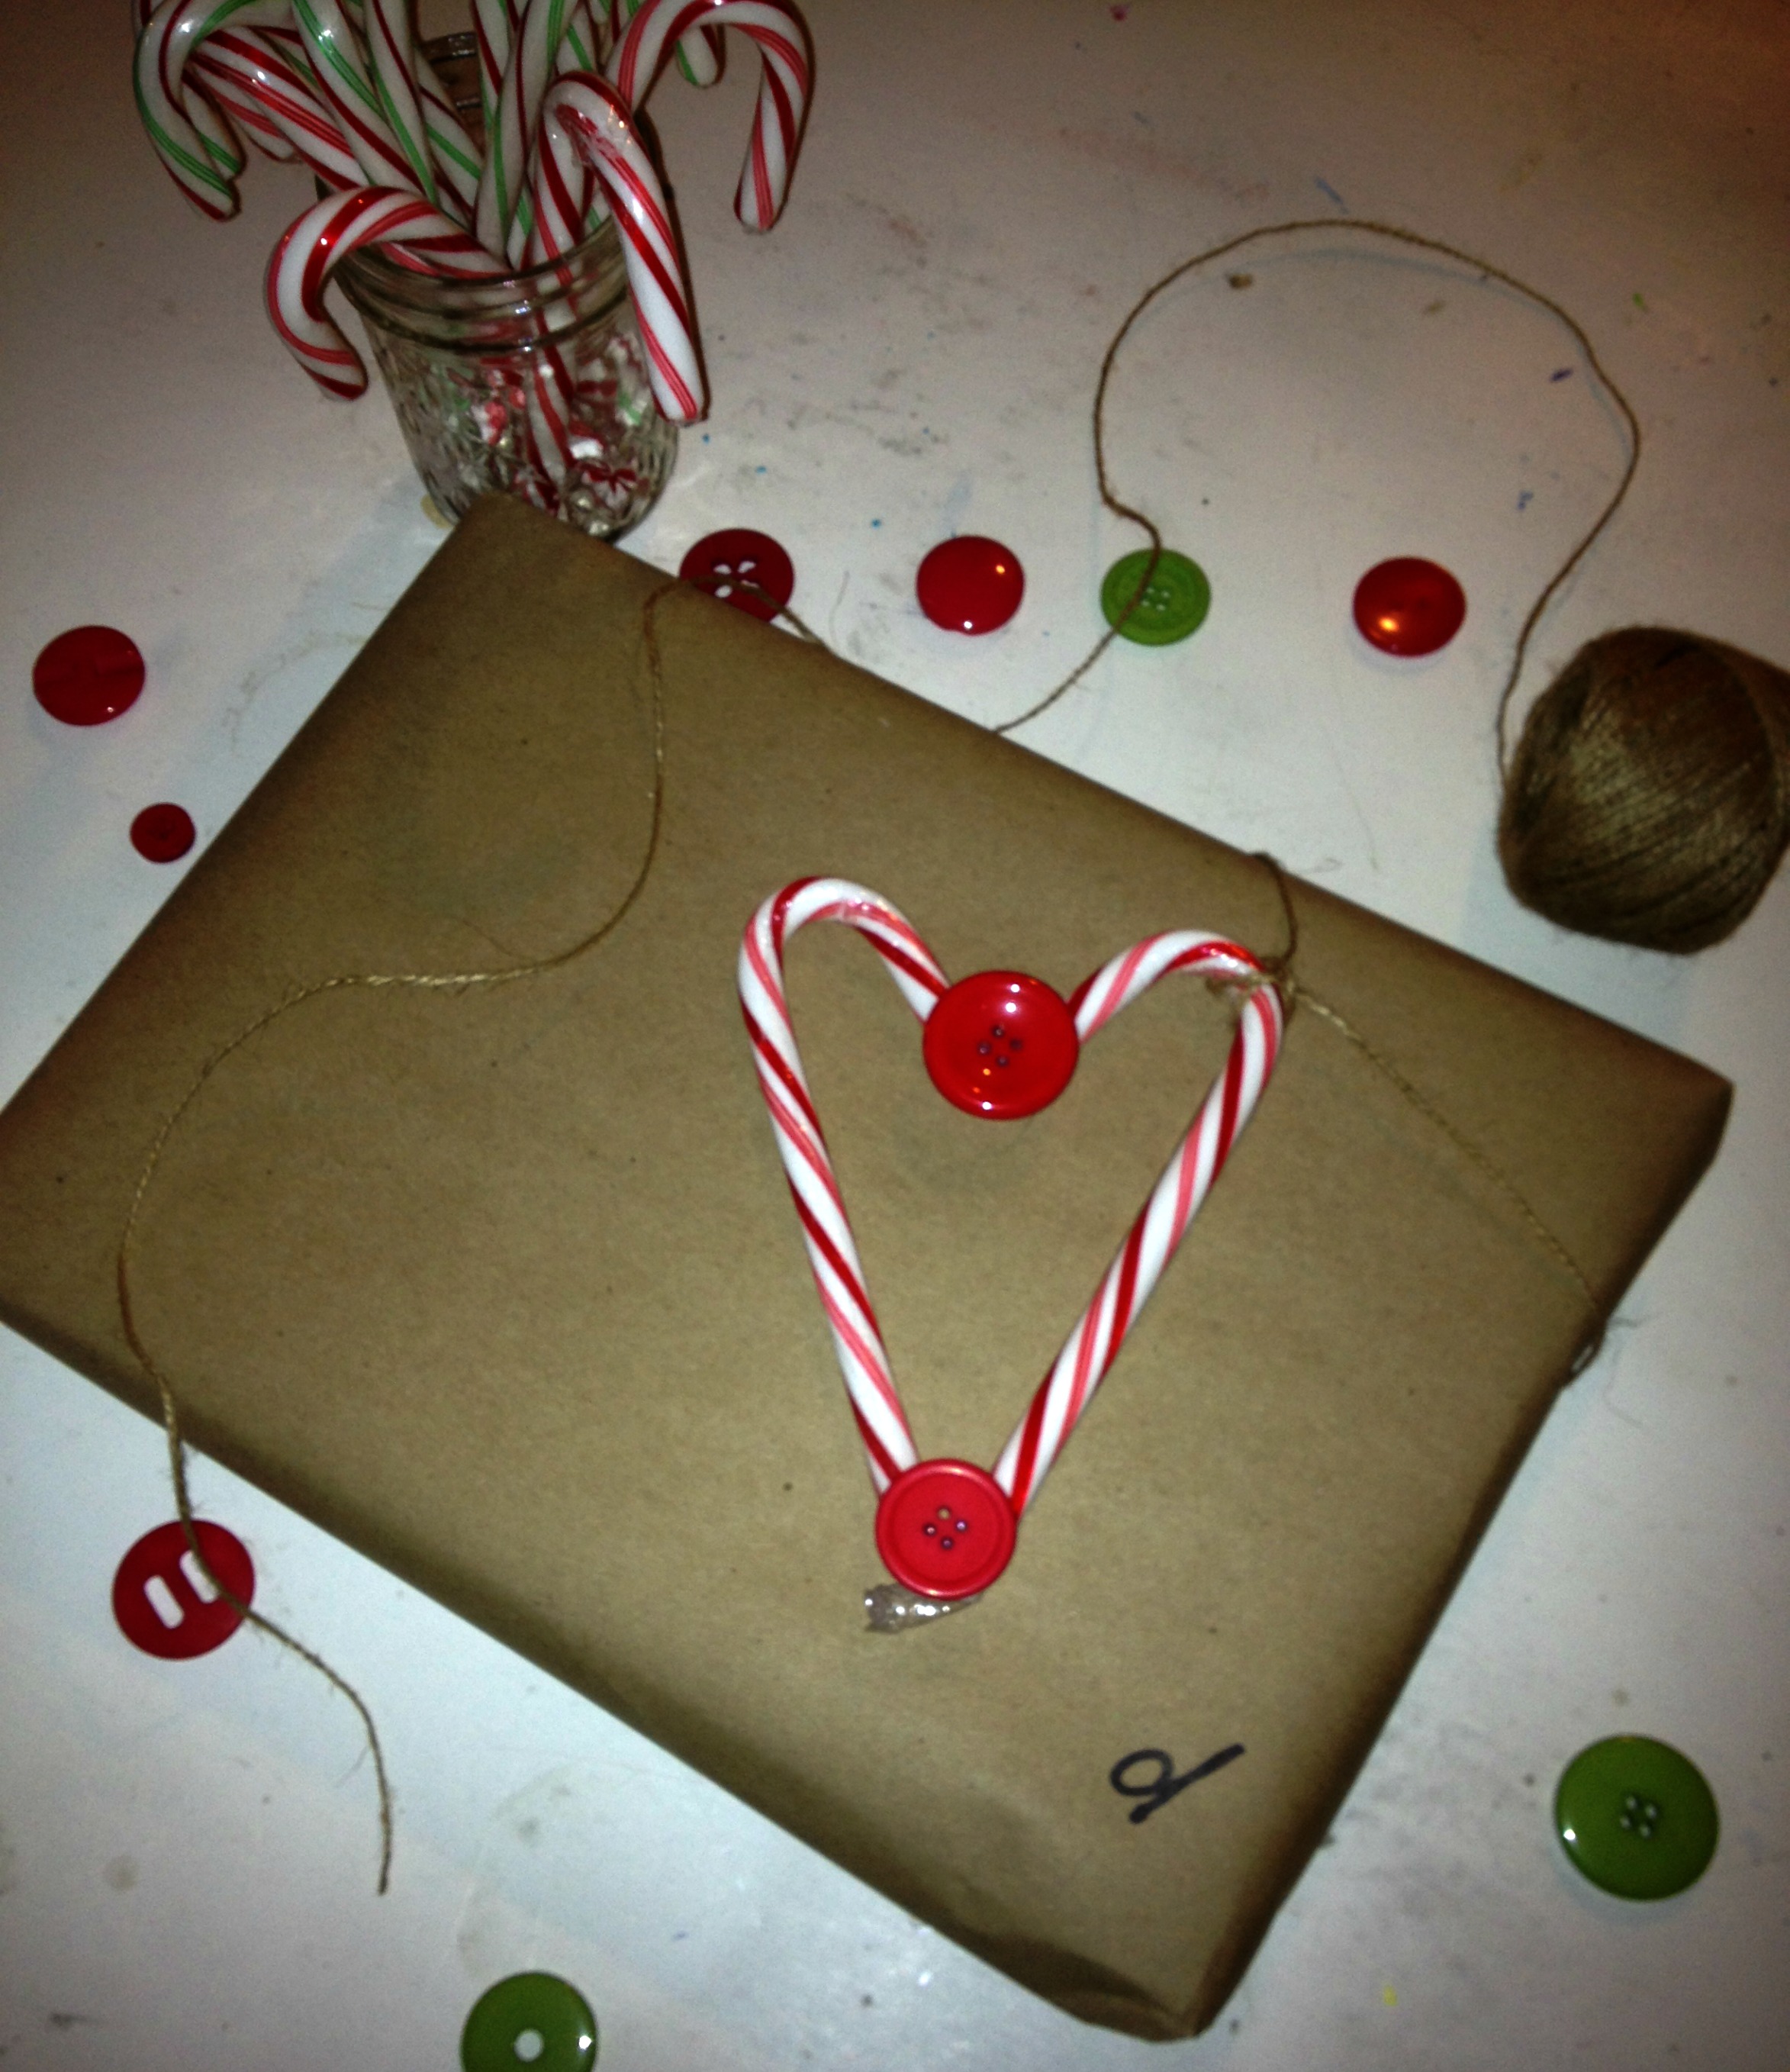
I created lots of wrapped gifts with buttons and twine and would love for you to hop over to my blog to check them out. You can get there here. I will share my favorite one with you but you will have to hope over to see the others.
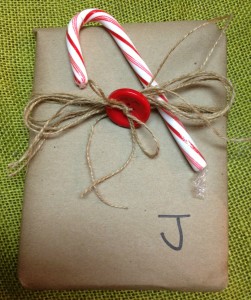
Happy Christmas Crafting,
Laura
Do you need some Quick and Simple Christmas Cards to finish your Holiday To Do List? Well as luck has it, I am sharing some Quick and Simple Christmas Cards with Buttons.
These first few Simple Christmas Cards were created with a very simple concept. My thumbprint using brown ink. I then added some simple doodles to create them into cute little reindeer. Once I added a single button for the nose, it was complete.

The images on these Simple Christmas Cards could also easily be Christmas Tags for someone special.
If you thought the little reindeer was cute, how about this sweet little bear? I added a plain cream button for his little bear belly. My sentiments are handwritten. “Wishing You a Beary Merry Christmas”
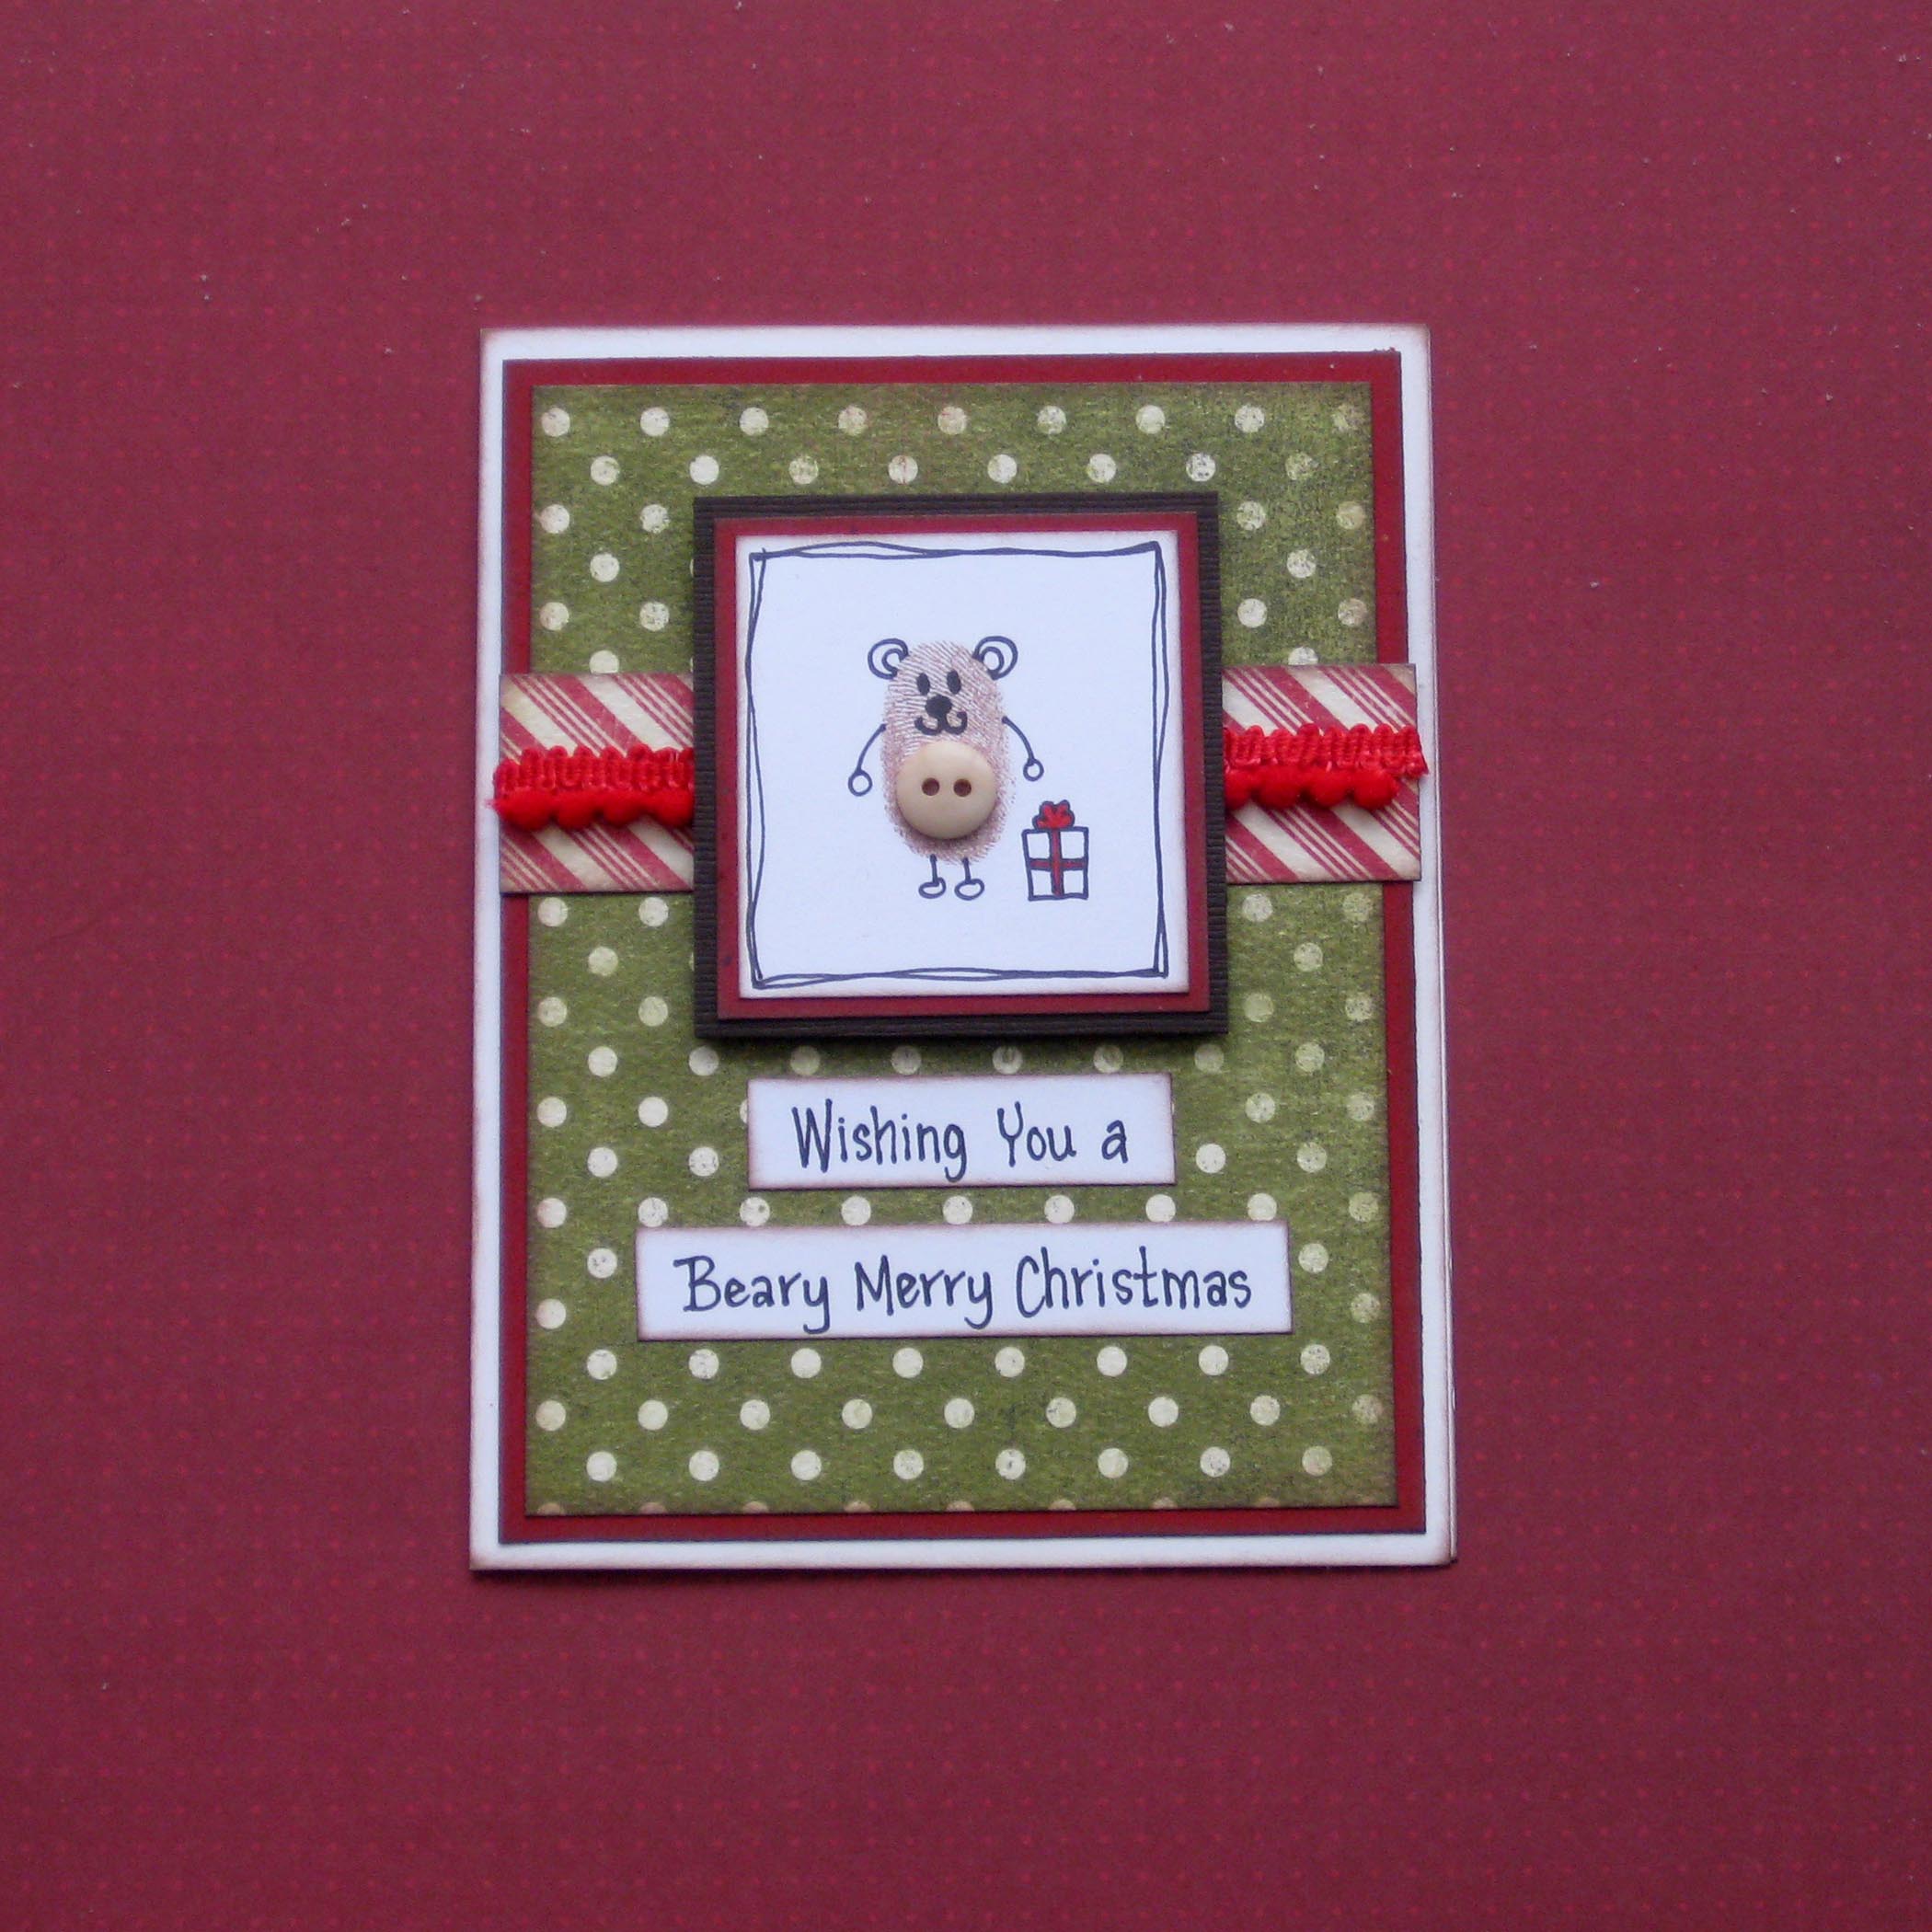
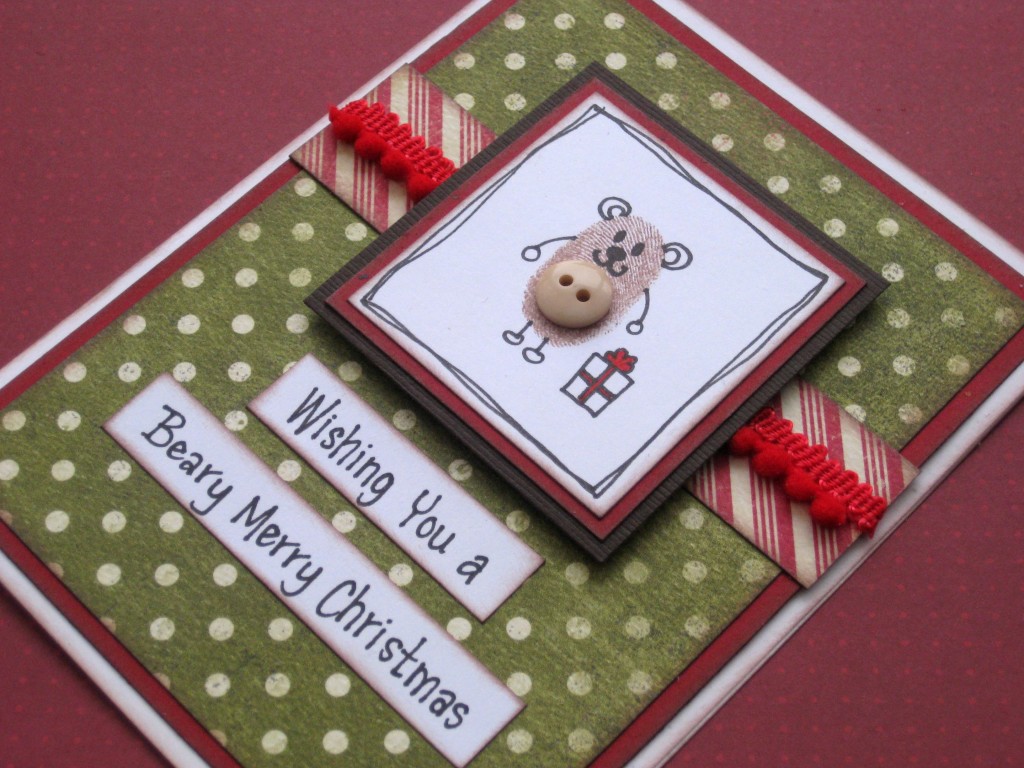
This final card of my Simple Cards started with a doodle of a car. I just added buttons for tires, and one of the tree shaped buttons from the Noel Button Mix on the top.
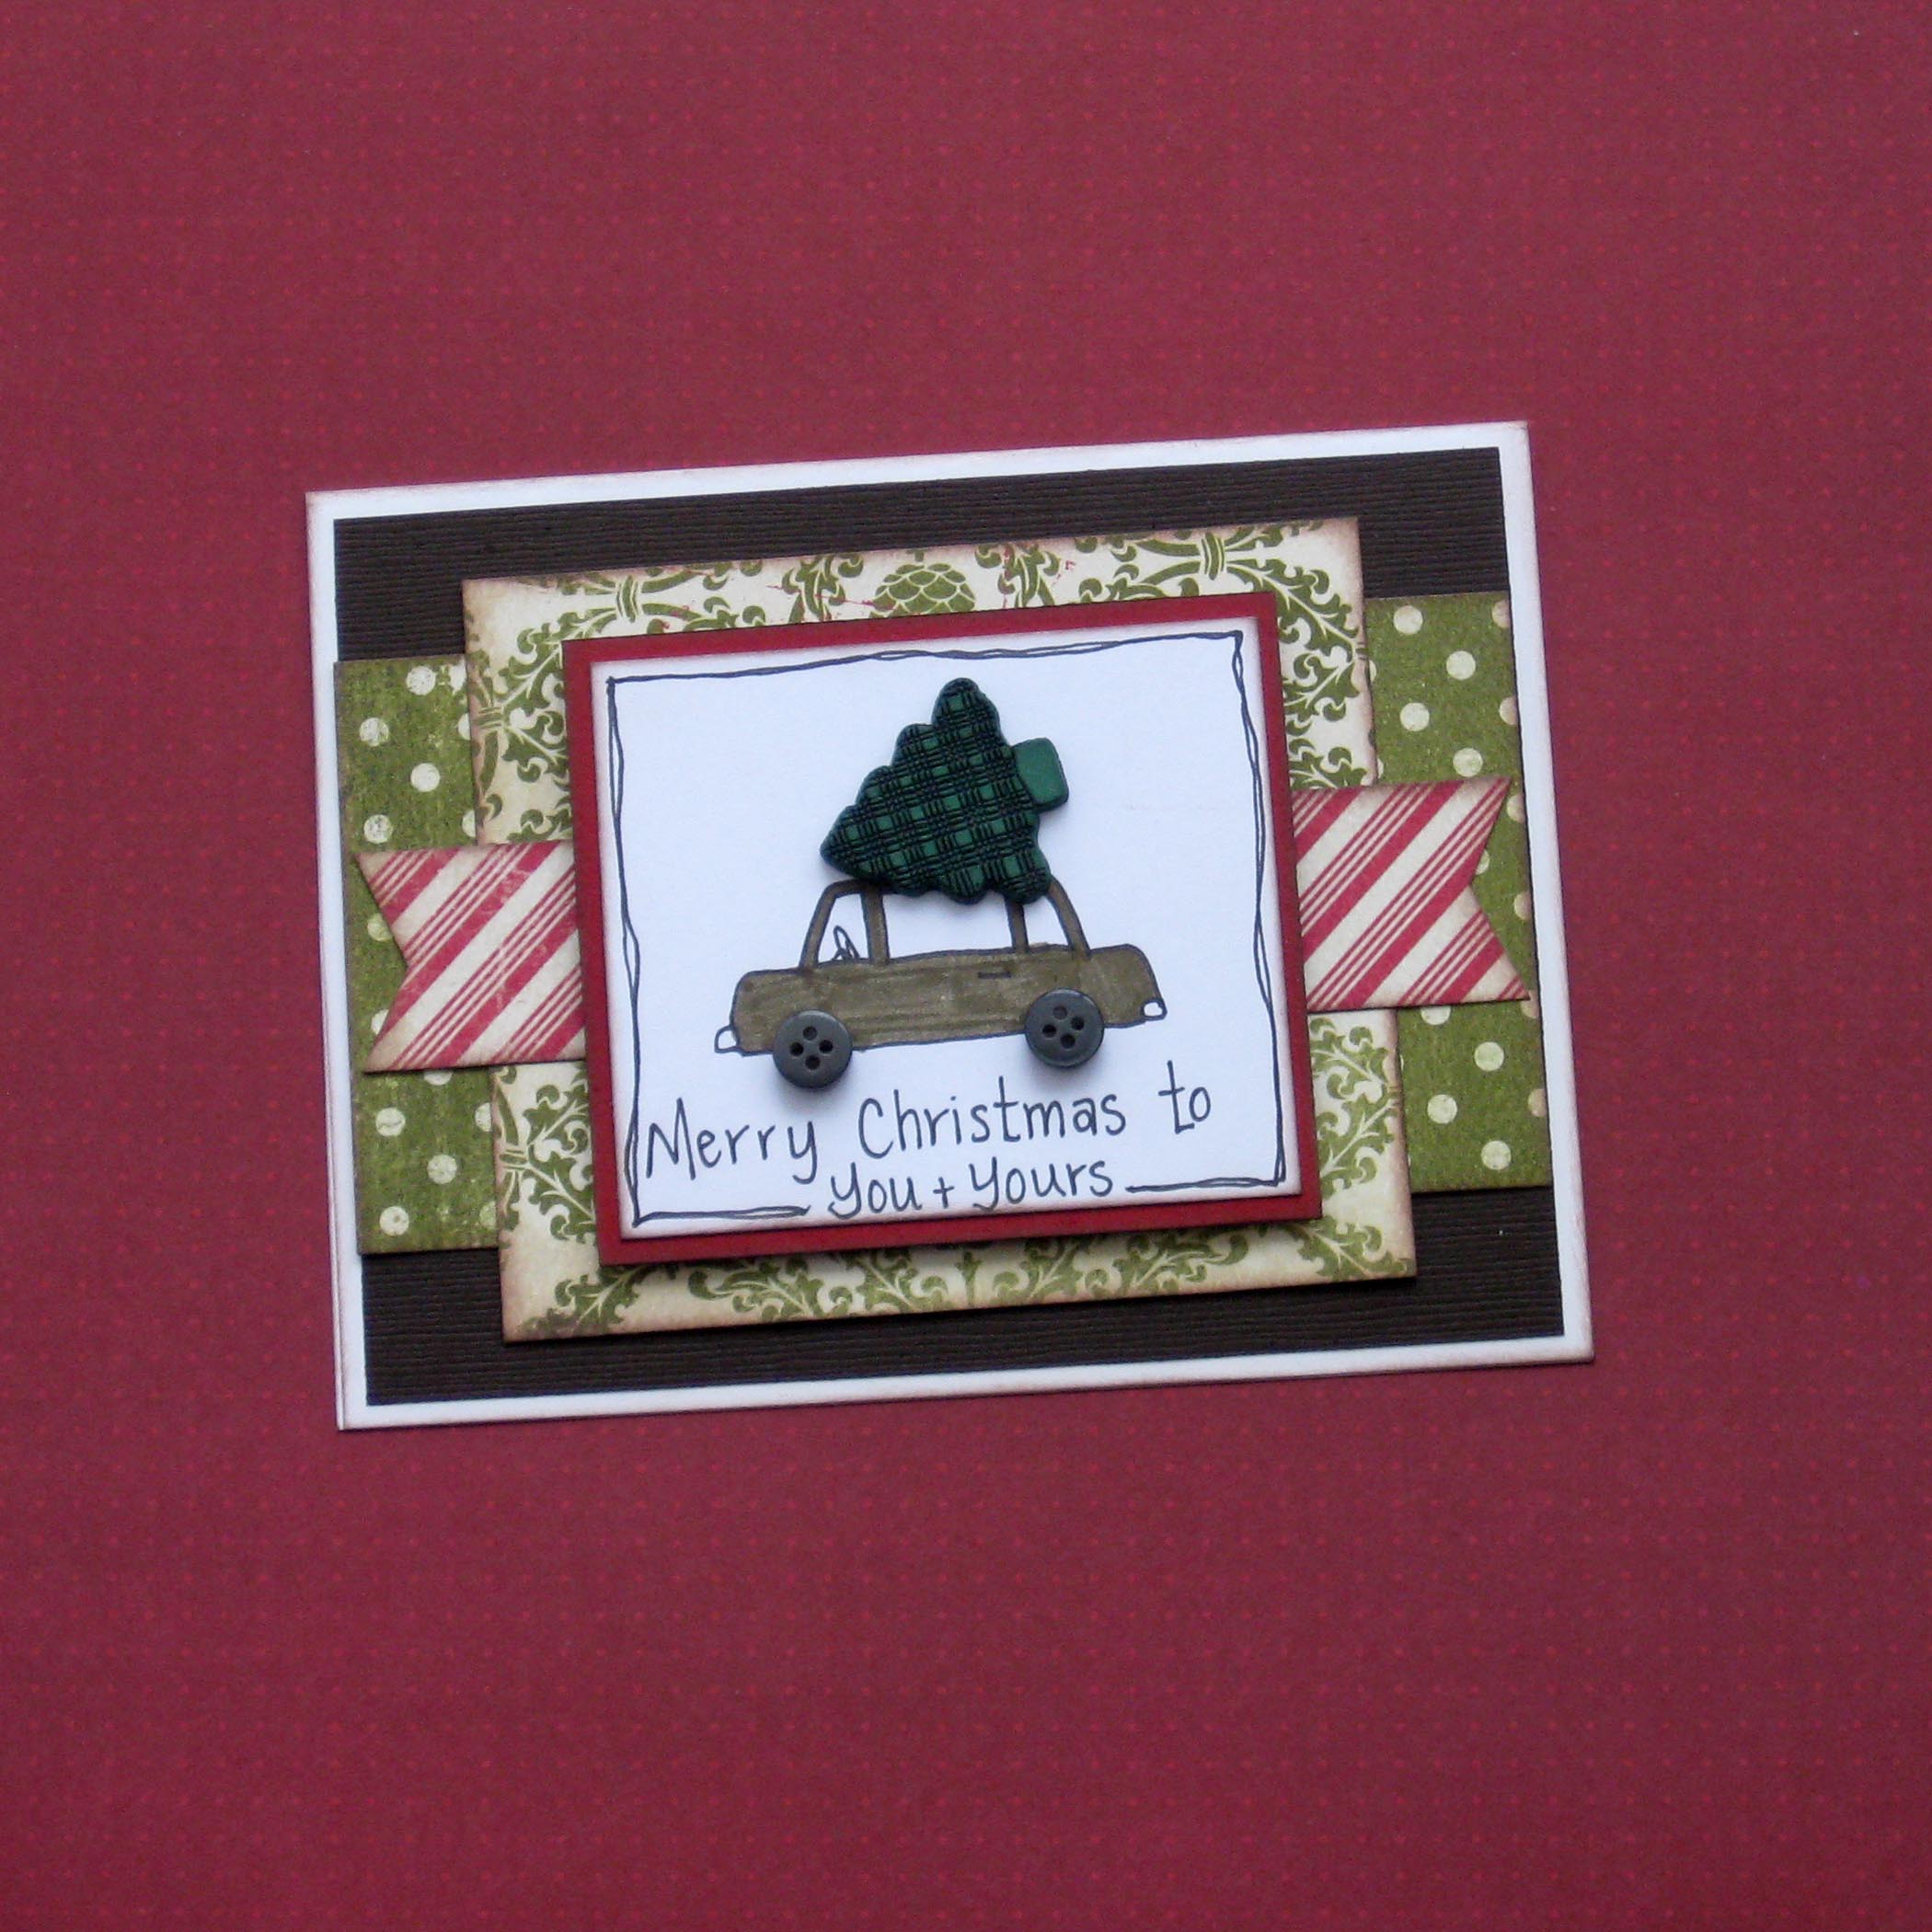

Thank you so very much for stopping by, and all the best in your Holiday crafting!

Click here to see this week’s special coupons. See special buys here.
What is more festive than this little Button and Clay Snowman?
I have loved working with Sculpey Clay these past couple of weeks. Being in the midst of this busy holiday season, I have found sitting back and creating with Sculpey clay to be ever so relaxing. A great way to wind down at night. This little Button and Clay Snowman is my most recent creation.
This little Button and Clay Snowman is pretty easy to recreate. Just a few rolled clay balls, and a cute little hat. The smaller details of the Button and Clay snowman are also not hard to recreate. I added the buttons after baking the clay. I found hot glue works best, and then this Button and Clay Snowman is sweet and complete.
Project Recipe:
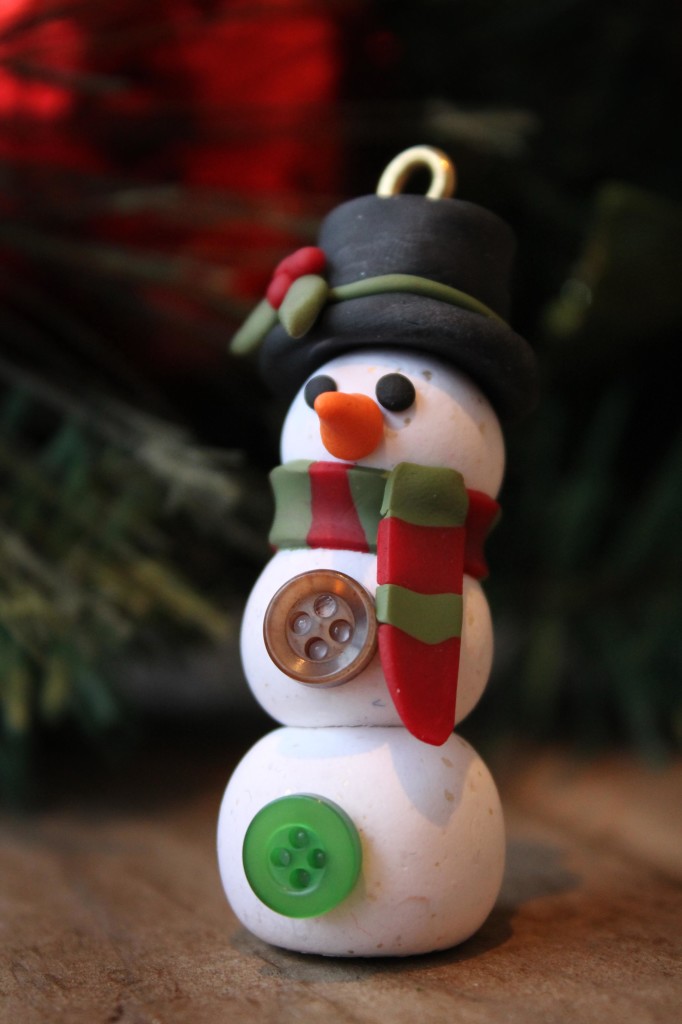
Thank you for stopping by to check out my Button and Clay Snowman. I hope you’ve been inspired to create something for the holidays with Buttons & Clay as well.
Click here to see this week’s special coupons. See special buys here.
It’s that time of year again. Time to scramble for gift ideas to give your children’s teachers, not to mention your hairdresser. Here’s a super quick and easy idea, give them a button ornament kit!

Button ornaments are super easy to make. Here’s how:
Supplies
Instructions
But we aren’t here for the ornaments, because who has the time this late in the game? What we need is to make is KITS to make the ornaments! Which is even easier!

Supplies
Instructions:

I didn’t include the pins in my kits, but you can always use a bigger jar and slip a box in.
See? Easy. Put the kids to work, assembly line style and you can whip a bunch of these out in no time flat.
Come and visit me on my blog for craft tutorials, musings on motherhood, and recipes!
![]()
Click here to see this week’s special coupons. See special buys here.
This little holiday wreath is simple to button up and make in a small amount of time. It is a great way to decorate for the holiday season in the reds and greens but you could do this for any holiday!

You will need a Sytrofoam ring and burlap to cover it. Simply put the burlap down with the ring on top then cut to be able to fold pieces over and cover the ring. Use hot glue to cover cover the Styrofoam surface, leaving it a little raveled and hand-made looking.

Then use hot glue to add buttons and decorate. I used the buttons from my Laura Kelly Mix.
I tied embroidery floss through them first so they would look stitched.
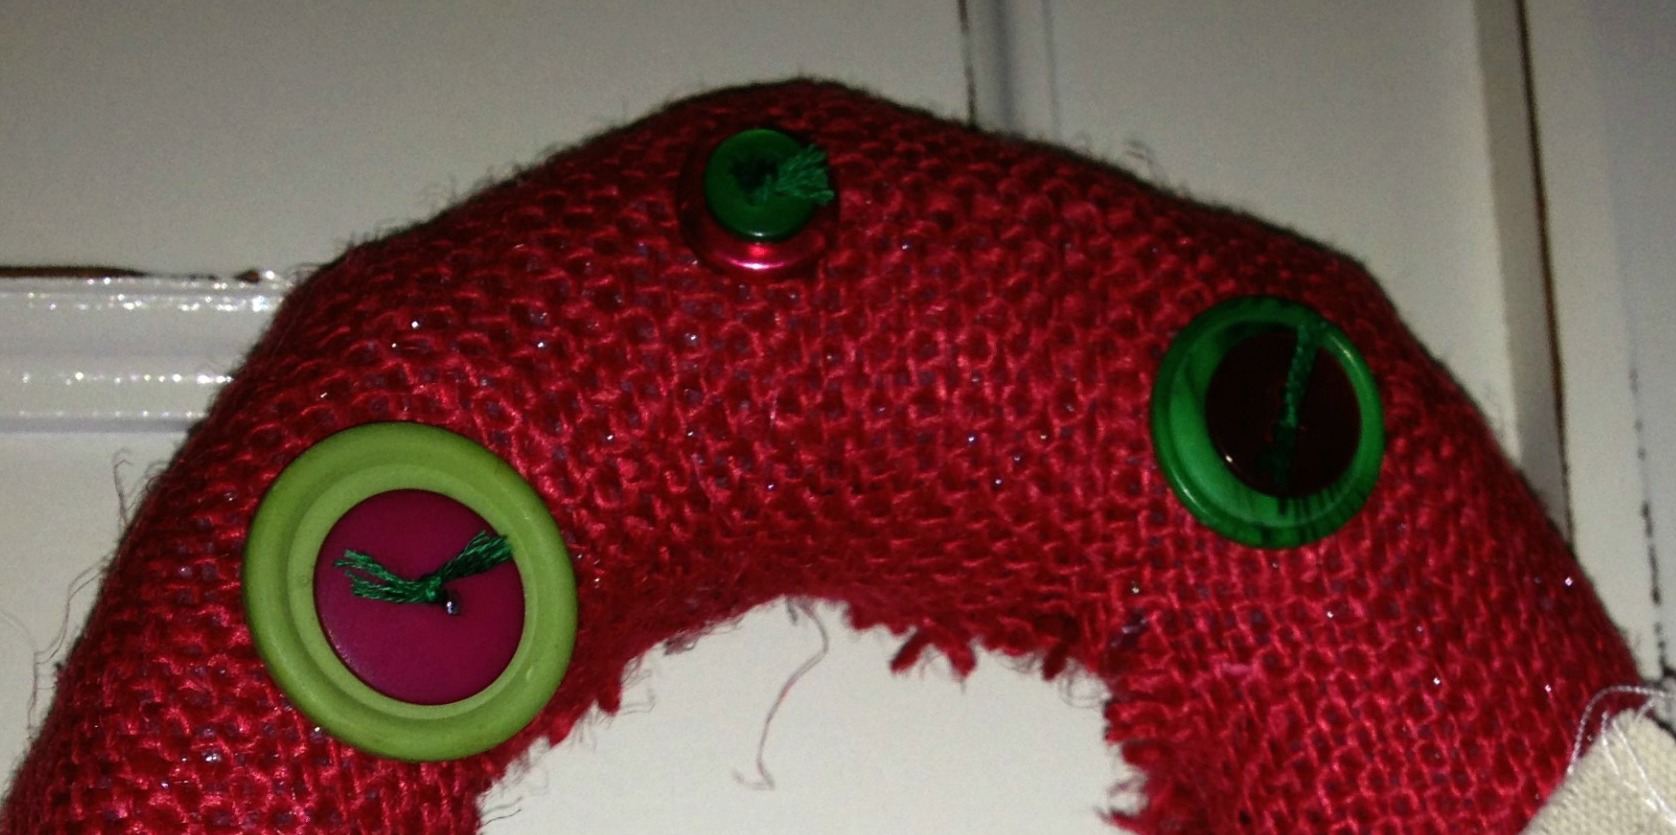
Then I added an owl that I made with Scupley clay and a hand-sew tag with a mini from Canvas Corp.
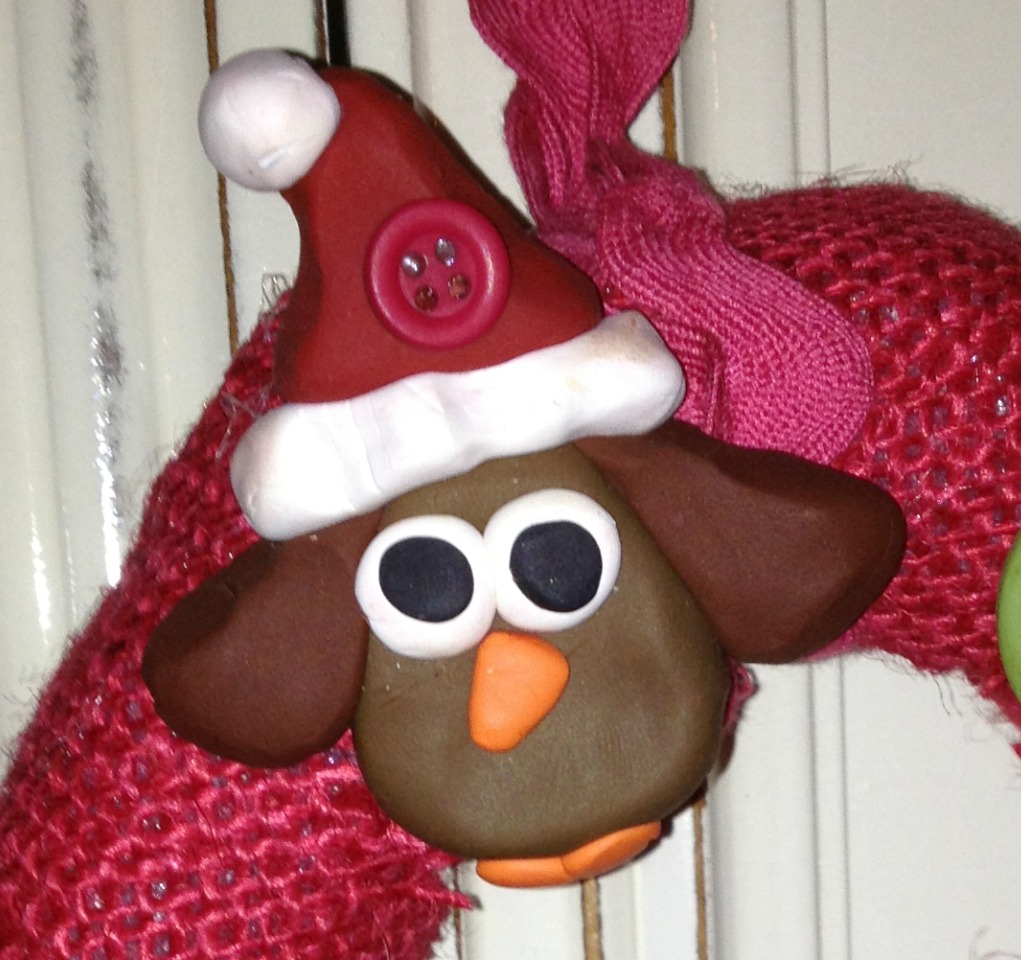
If you think he is cute, there are LOTS of great Sculpey clay and button ornaments that were share a few weeks ago for you to go check out here.
Happy Christmastime,
Laura
Our Laura Kelly Buttons Selection is growing. Which collection is your favorite?
To help you with your holiday crafts, here is a list of our current specials:
I love to make ornaments for my daughter, nieces, and nephew. When I was a girl, my grandfather made all the children in the family wood ornaments and I treasure them more than words can say. My grandfather has passed away so I’ve taken over the ornament making duties. Instead of wood, I make felt ornaments.They are different every year, but you can be sure they usually include buttons and embroidery! The Snowman Medley buttons by Vicki Schreiner were a great inspiration for this year’s ornaments. This project is great to work on while you are watching your favorite holiday movie, just cut out the pieces and stitch while you sip cocoa and put your feet up for a minute.
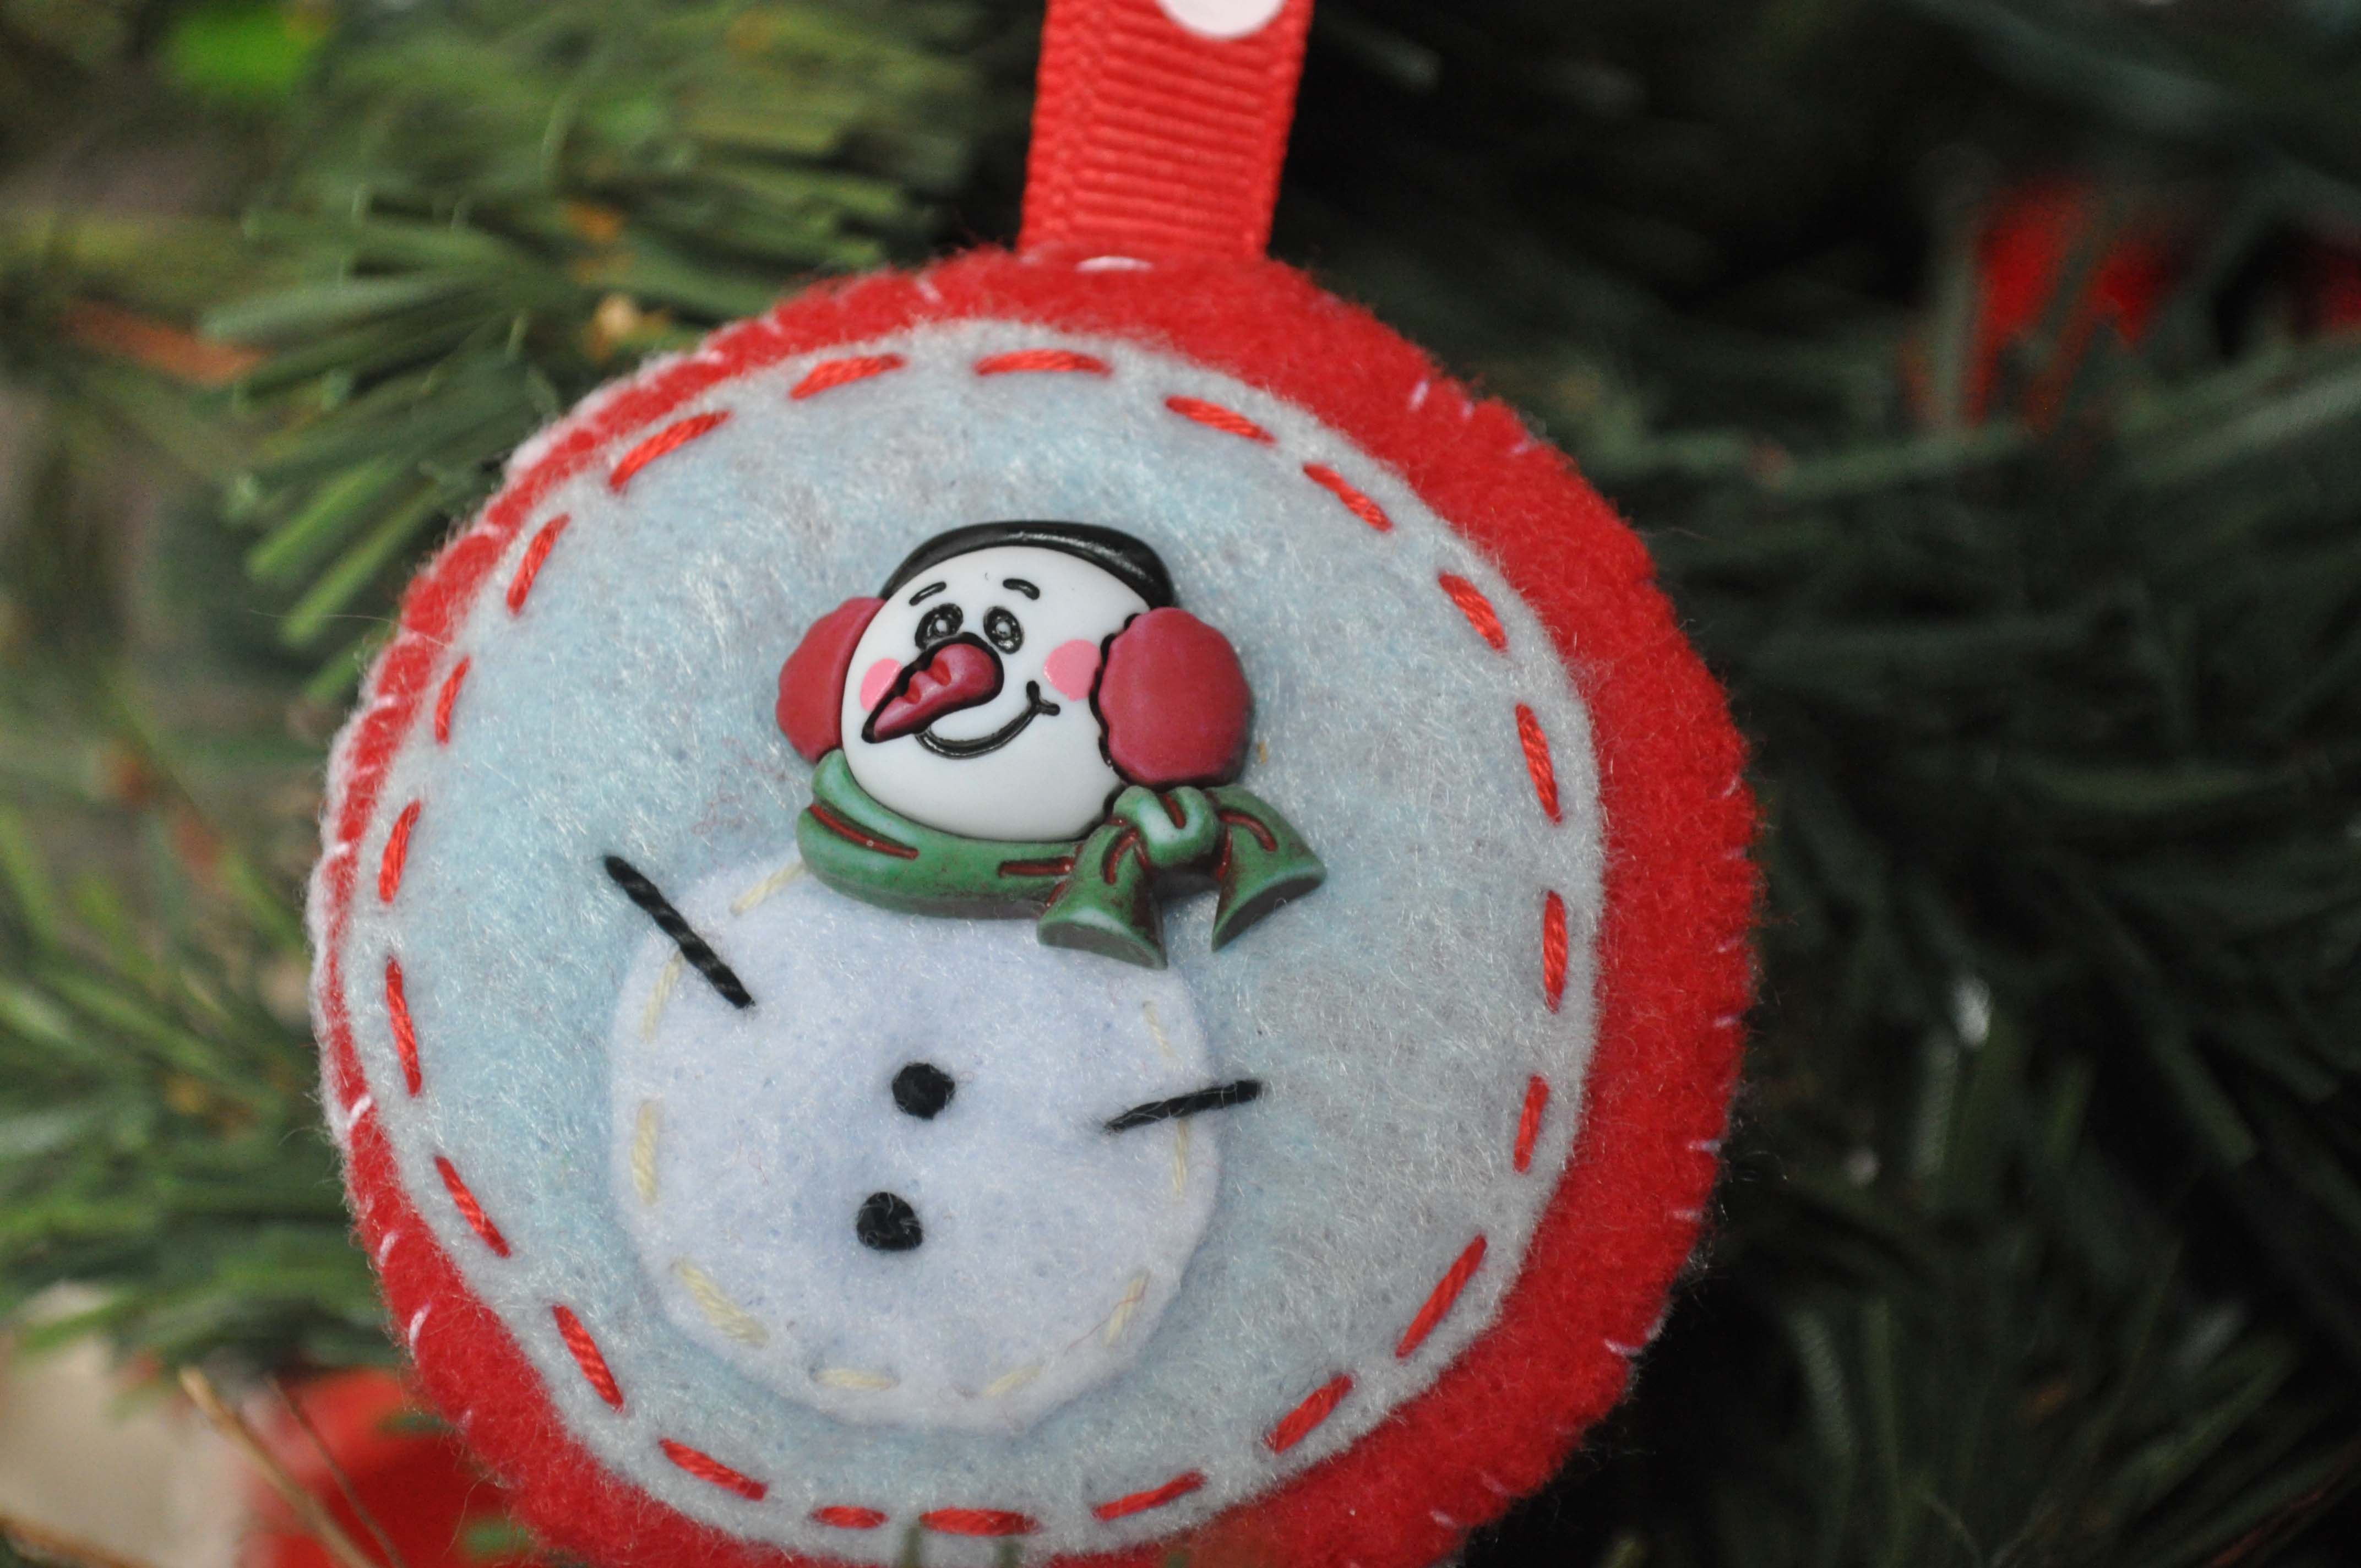
Supplies for felt ornaments
Instructions for felt ornaments
1. Cut two, 2 1/2″ circles from felt. They can be the same color or different. One circle will be the large background of your felt ornament and one will be the back.
2. Cut one, 2″circle from a coordinating felt color.
3. Cut one, 1″ circle from white felt. This will be the snowman’s body.
4. Place the 2 1/2″ circle on your work surface.

5. Lay the 2″ circle in the middle of the larger circle. Tack it down with a drop of glue.
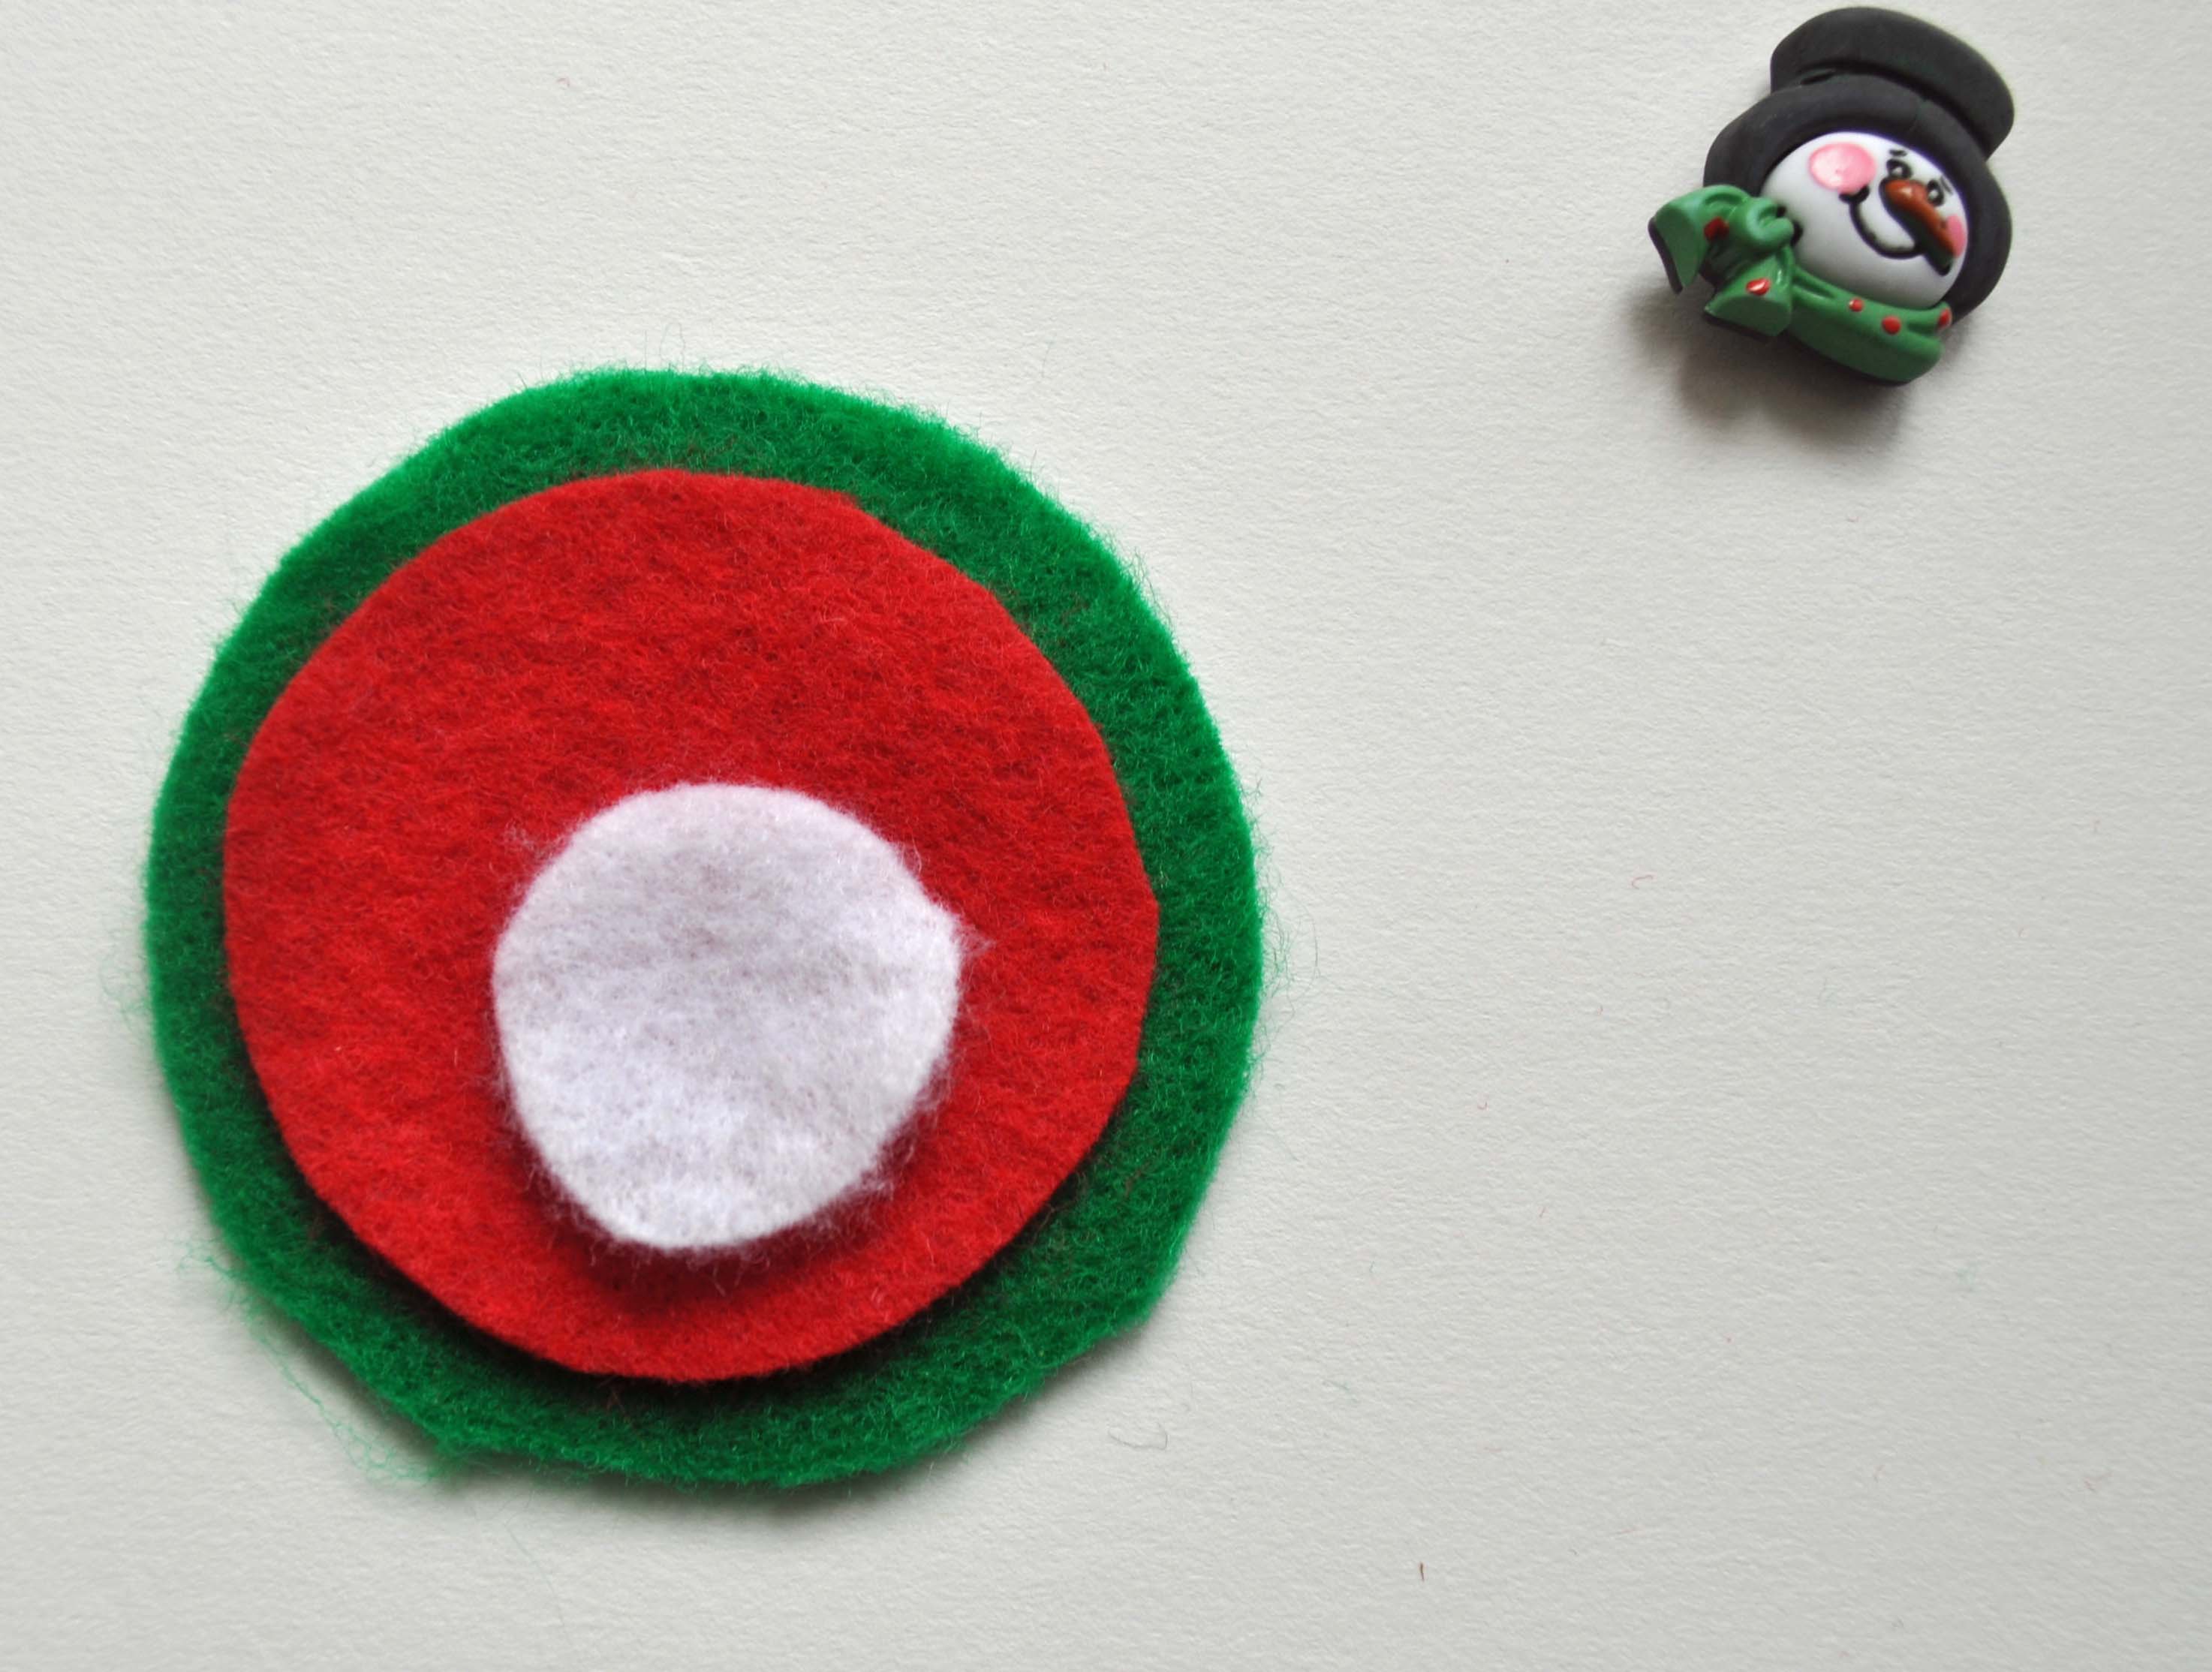
6. Place the snowman body onto the 2″ circle and tack it down with glue. Make sure you place the snowman body towards the bottom of the felt to allow for room for the snowman button.
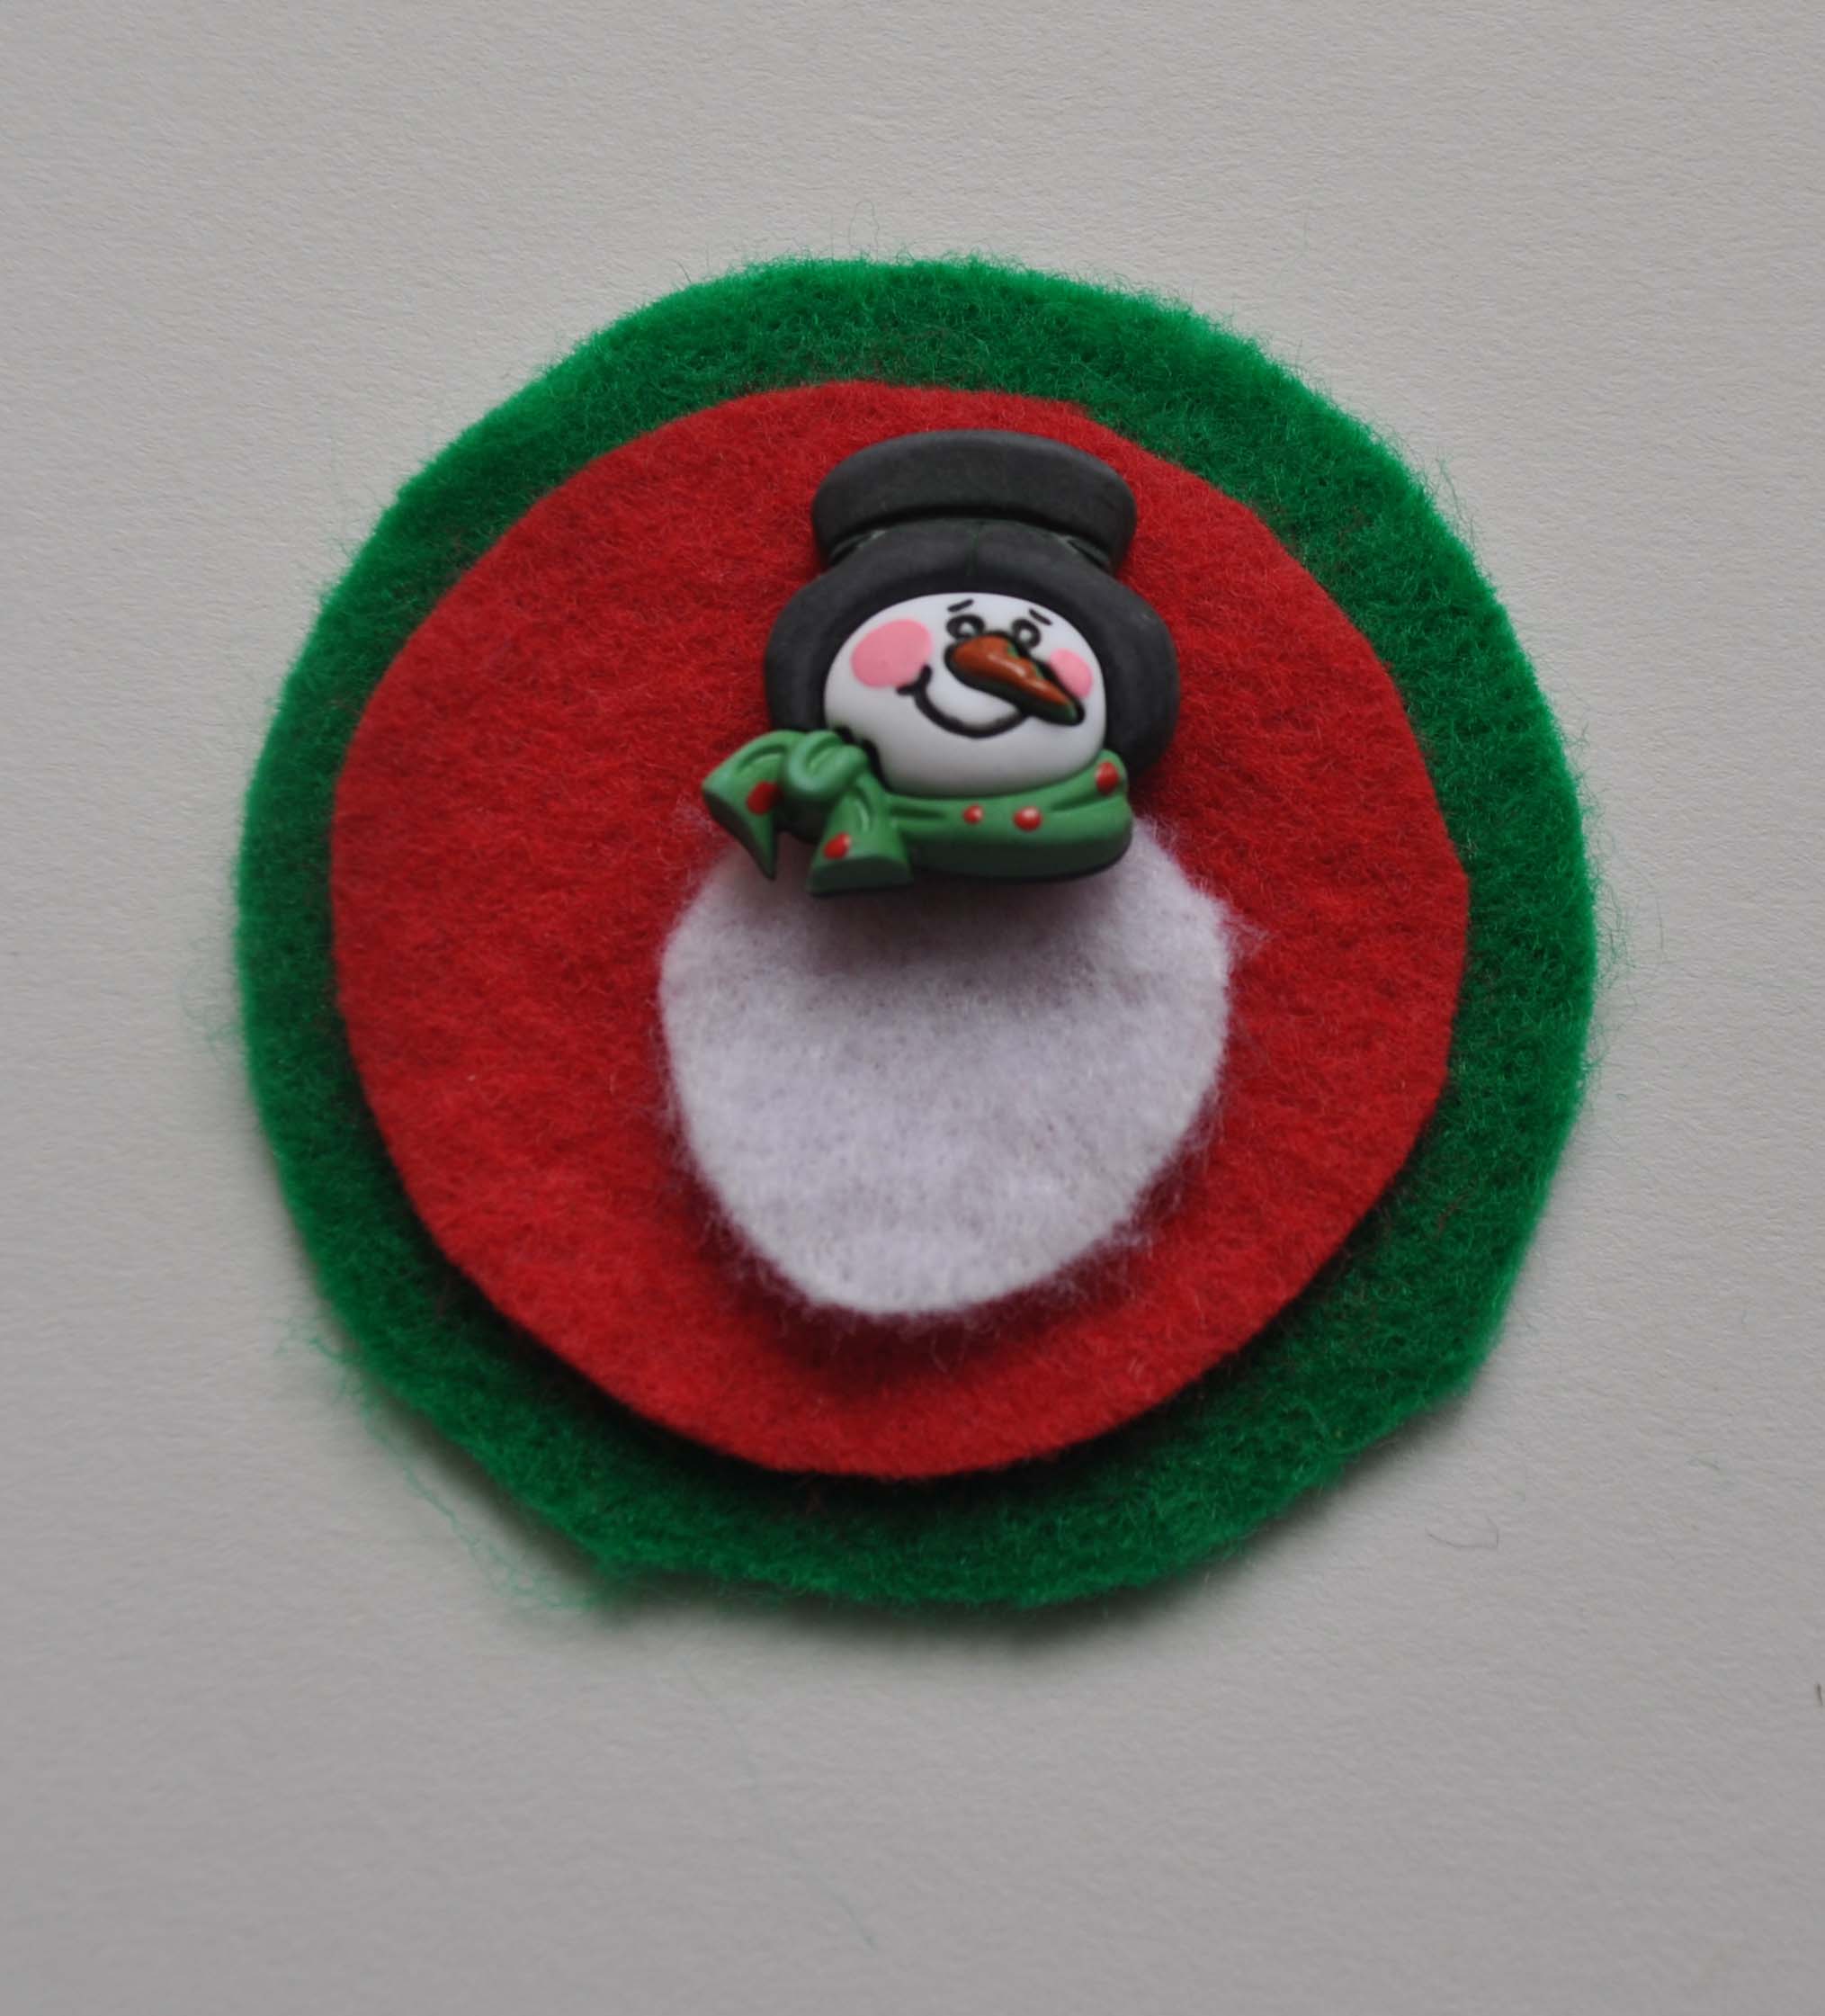
7. Using scissors, clip the shank off the back of the snowman button and glue it down.
8. Now it’s time to stitch! First stitch the 2″ circle onto the 2 1/2″ circle. I used a simple running stitch to do this.
9. Stitch the snowman body down. I used a running stitch to attach the body to the ornament, then added some arms with a straight stitch and coal button French knots. Play with the position of the arms on the snowman as this gives the little guy some personality. Is he throwing his arms up in delight? Keeping them by his side? Pointing the way to the North Pole?
9. Once everything is stitched into place on the front, it’s time to stitch the back felt circle to the front. You want to do this last as the back piece will cover all your stitching on the front piece. First, fold your ribbon piece in half and tuck it behind your stitched, front circle, at the top. Then place the back circle of felt on. Pin it all in place and do a blanket or running stitch to hold it all together.
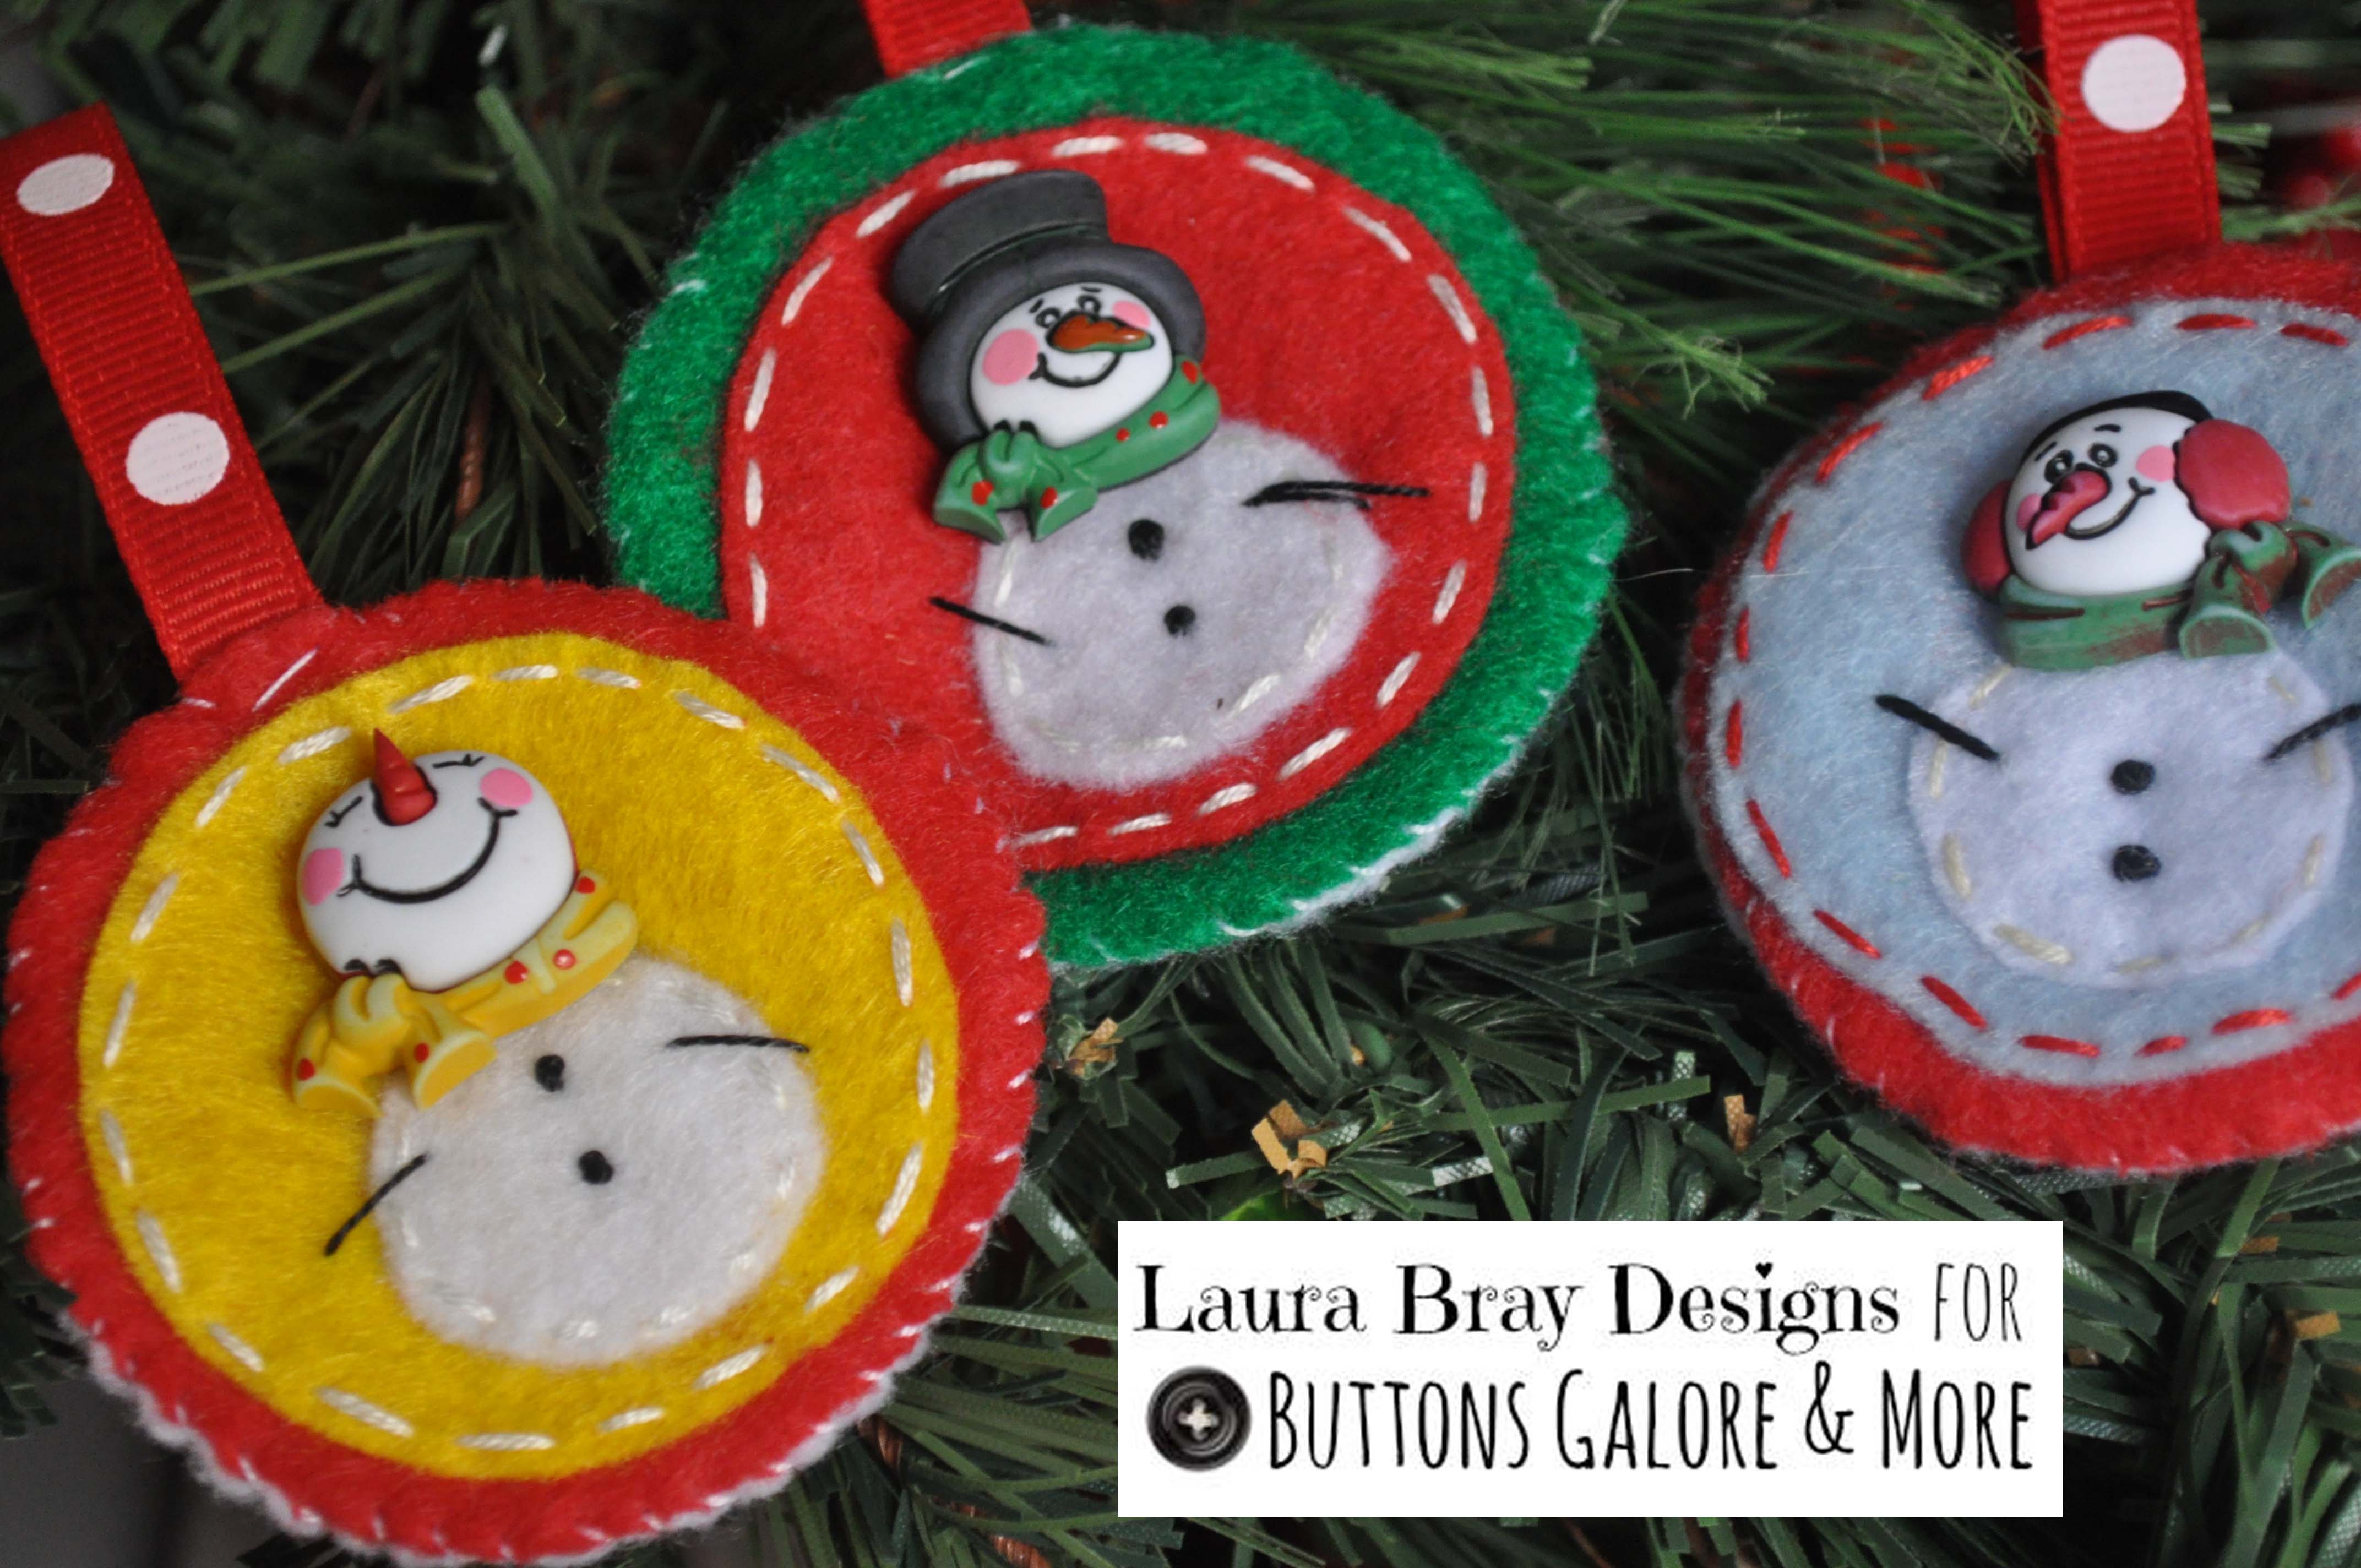
I hope you enjoy making holiday ornaments this year. Maybe you will even start a tradition of a yearly handmade ornament at your house!
Wishing you the Happiest of Holidays! To get lots of more crafty holiday ideas and recipes, please come and visit me on my blog at Laura Bray Designs.
![]()
Remember, you can enjoy 50% off the buttons used in our project today. Visit our Coupons page for details! Special offer ends January 14, 2014.
Happy New Year!!!
Here is a fun Christmas DIY for dolls that you AND the kids can create!
Anna at Doll-It-Up creates adorable Christmas Decorations using Laura Kelly’s Mixed Brights Button Collection.
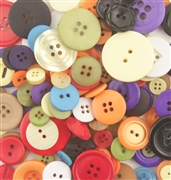
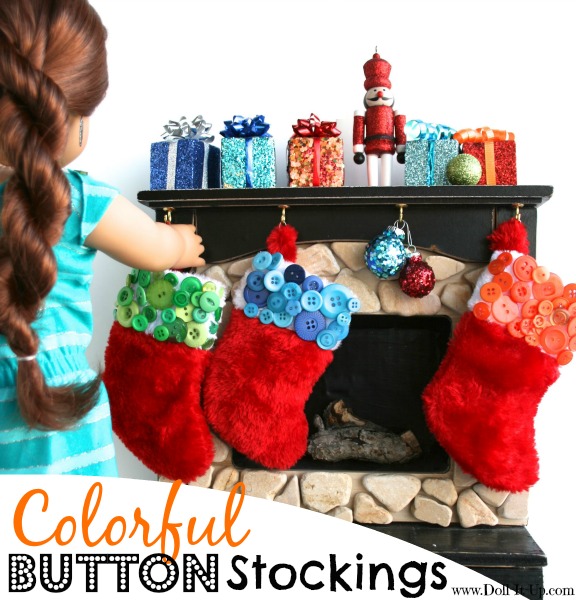
Read the rest of Anna’s post here.
Shop Buttons Galore and More now. Here are our current specials!
http://www.buttonsgaloreandmore.com/SearchResults.asp?Cat=1926
Expires 12-20-13
Code: CBTP1213
Expires 12-20-13
Code: 20HFUN
*Please note that offers may not be combined. Free Shipping to the US on orders over $30.
The wonderful folks at Doll Diaries love BUTTONS for making DIY Doll Accessories! Laura Kelly Buttons are the perfect craft staple for creating fun crafts for and with your dolls! From jewelry and clothing to accessories and decorations, the sizes and colors make creating easy.
DIY Christmas Tree Garland with Buttons Galore
Decorating for Christmas with the dolls has never been more festive with this DIY Christmas Tree Garland.
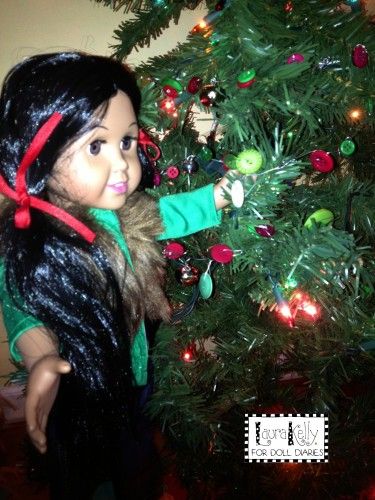
Doll Crafts – Button Jewelry for Dolls
Use Buttons Galore and More’s wonderful Snowflakes Value Pack or Olde Fashion Lights to make jewelry for your dolls and YOU.
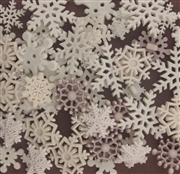

Wishing You a Cherry Christmas
Holiday Bazooples make perfect accents!

Santa & Friends

Here Comes Santa

Reindeer Games

Camp Doll Diaries: Make Button Yo-Yos
Two buttons and string? How many things can you create. #1 … Yo-Yos!

Doll Sized Bake Sale with Button Cookies
With a little creativity, buttons can become lots of wonderful things, including cookies!
Why should the kids’ table or the dolls’ table look any less festive. Learn how to make these adorable napkin rings. Make some for your table too!
Special thanks to the ladies at Doll Diaries for sharing their creativity with us.
Our Laura Kelly Buttons Selection is growing. Which collection is your favorite?
To help you with your holiday crafts, here is a list of our current specials:
Visit our “SPECIAL BUYS” section for savings:
Expires: 12/9/13 Code: HBH20
Expires 12-20-13 Code: CBTP1213
Expires 12-20-13 Code: 20HFUN
*Please note that offers may not be combined.
Free Shipping to the U.S. on orders over $30.
Need some fun craft ideas for handmade jewelry? Button Jewelry – Perfect Gifts!
We’ve gathered up some of our favorite fast and easy pieces.
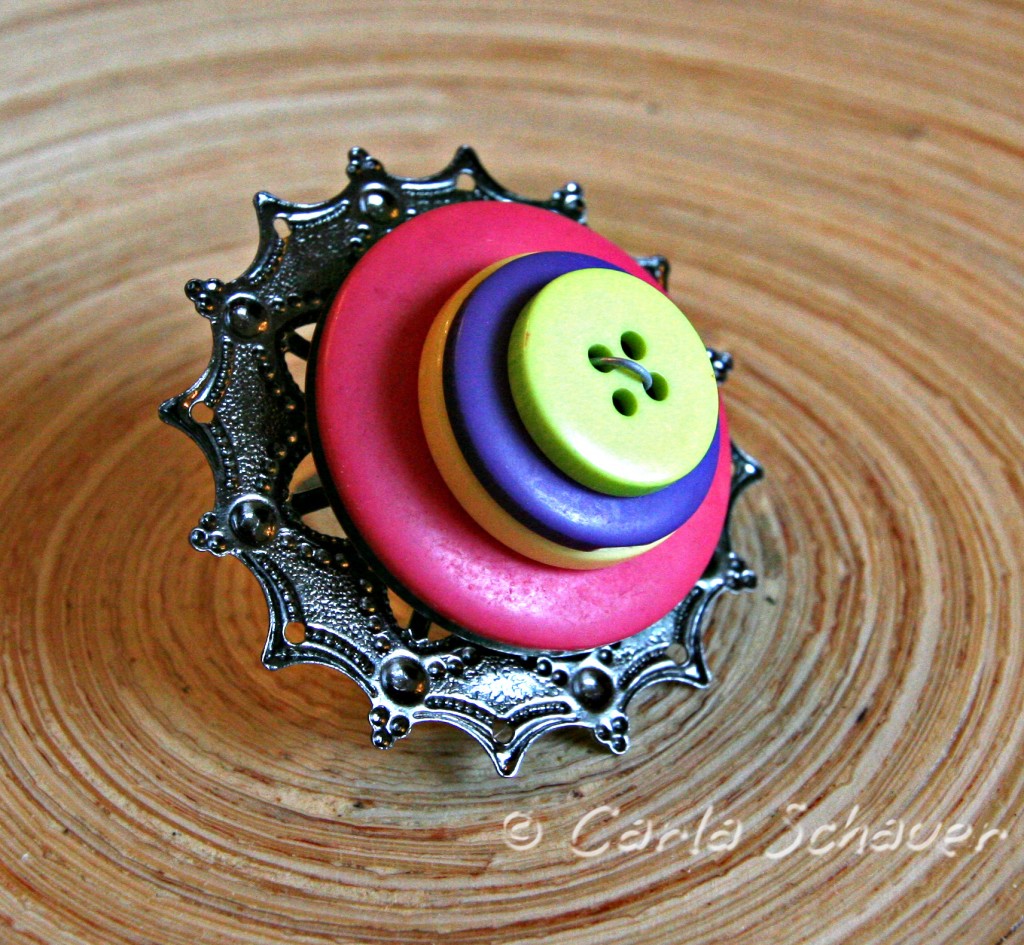
Make Easy Accessories Straight from the Button Jar
Upcycle Jewelry with Buttons and Hardware
Antique Button Earrings in a FLASH
Get all your buttons for your button jewelry at Buttons Galore and More. We have a large variety of buttons for sewing and crafting, as well as adhesives, trims and tools.
To help you with your holiday crafts, here is a list of our current specials:
Visit our “SPECIAL BUYS” section for savings:
Expires: 12/9/13 Code: HBH20
Expires 12-20-13 Code: CBTP1213
Expires 12-20-13 Code: 20HFUN
*Please note that offers may not be combined.
Free Shipping to the U.S. on orders over $30.
How adorable is this rock? It is not any ordinary rock. It is a special holiday hand-painted and button embellished rock that we use to hold the door open. It is a rock with a message and a purpose.
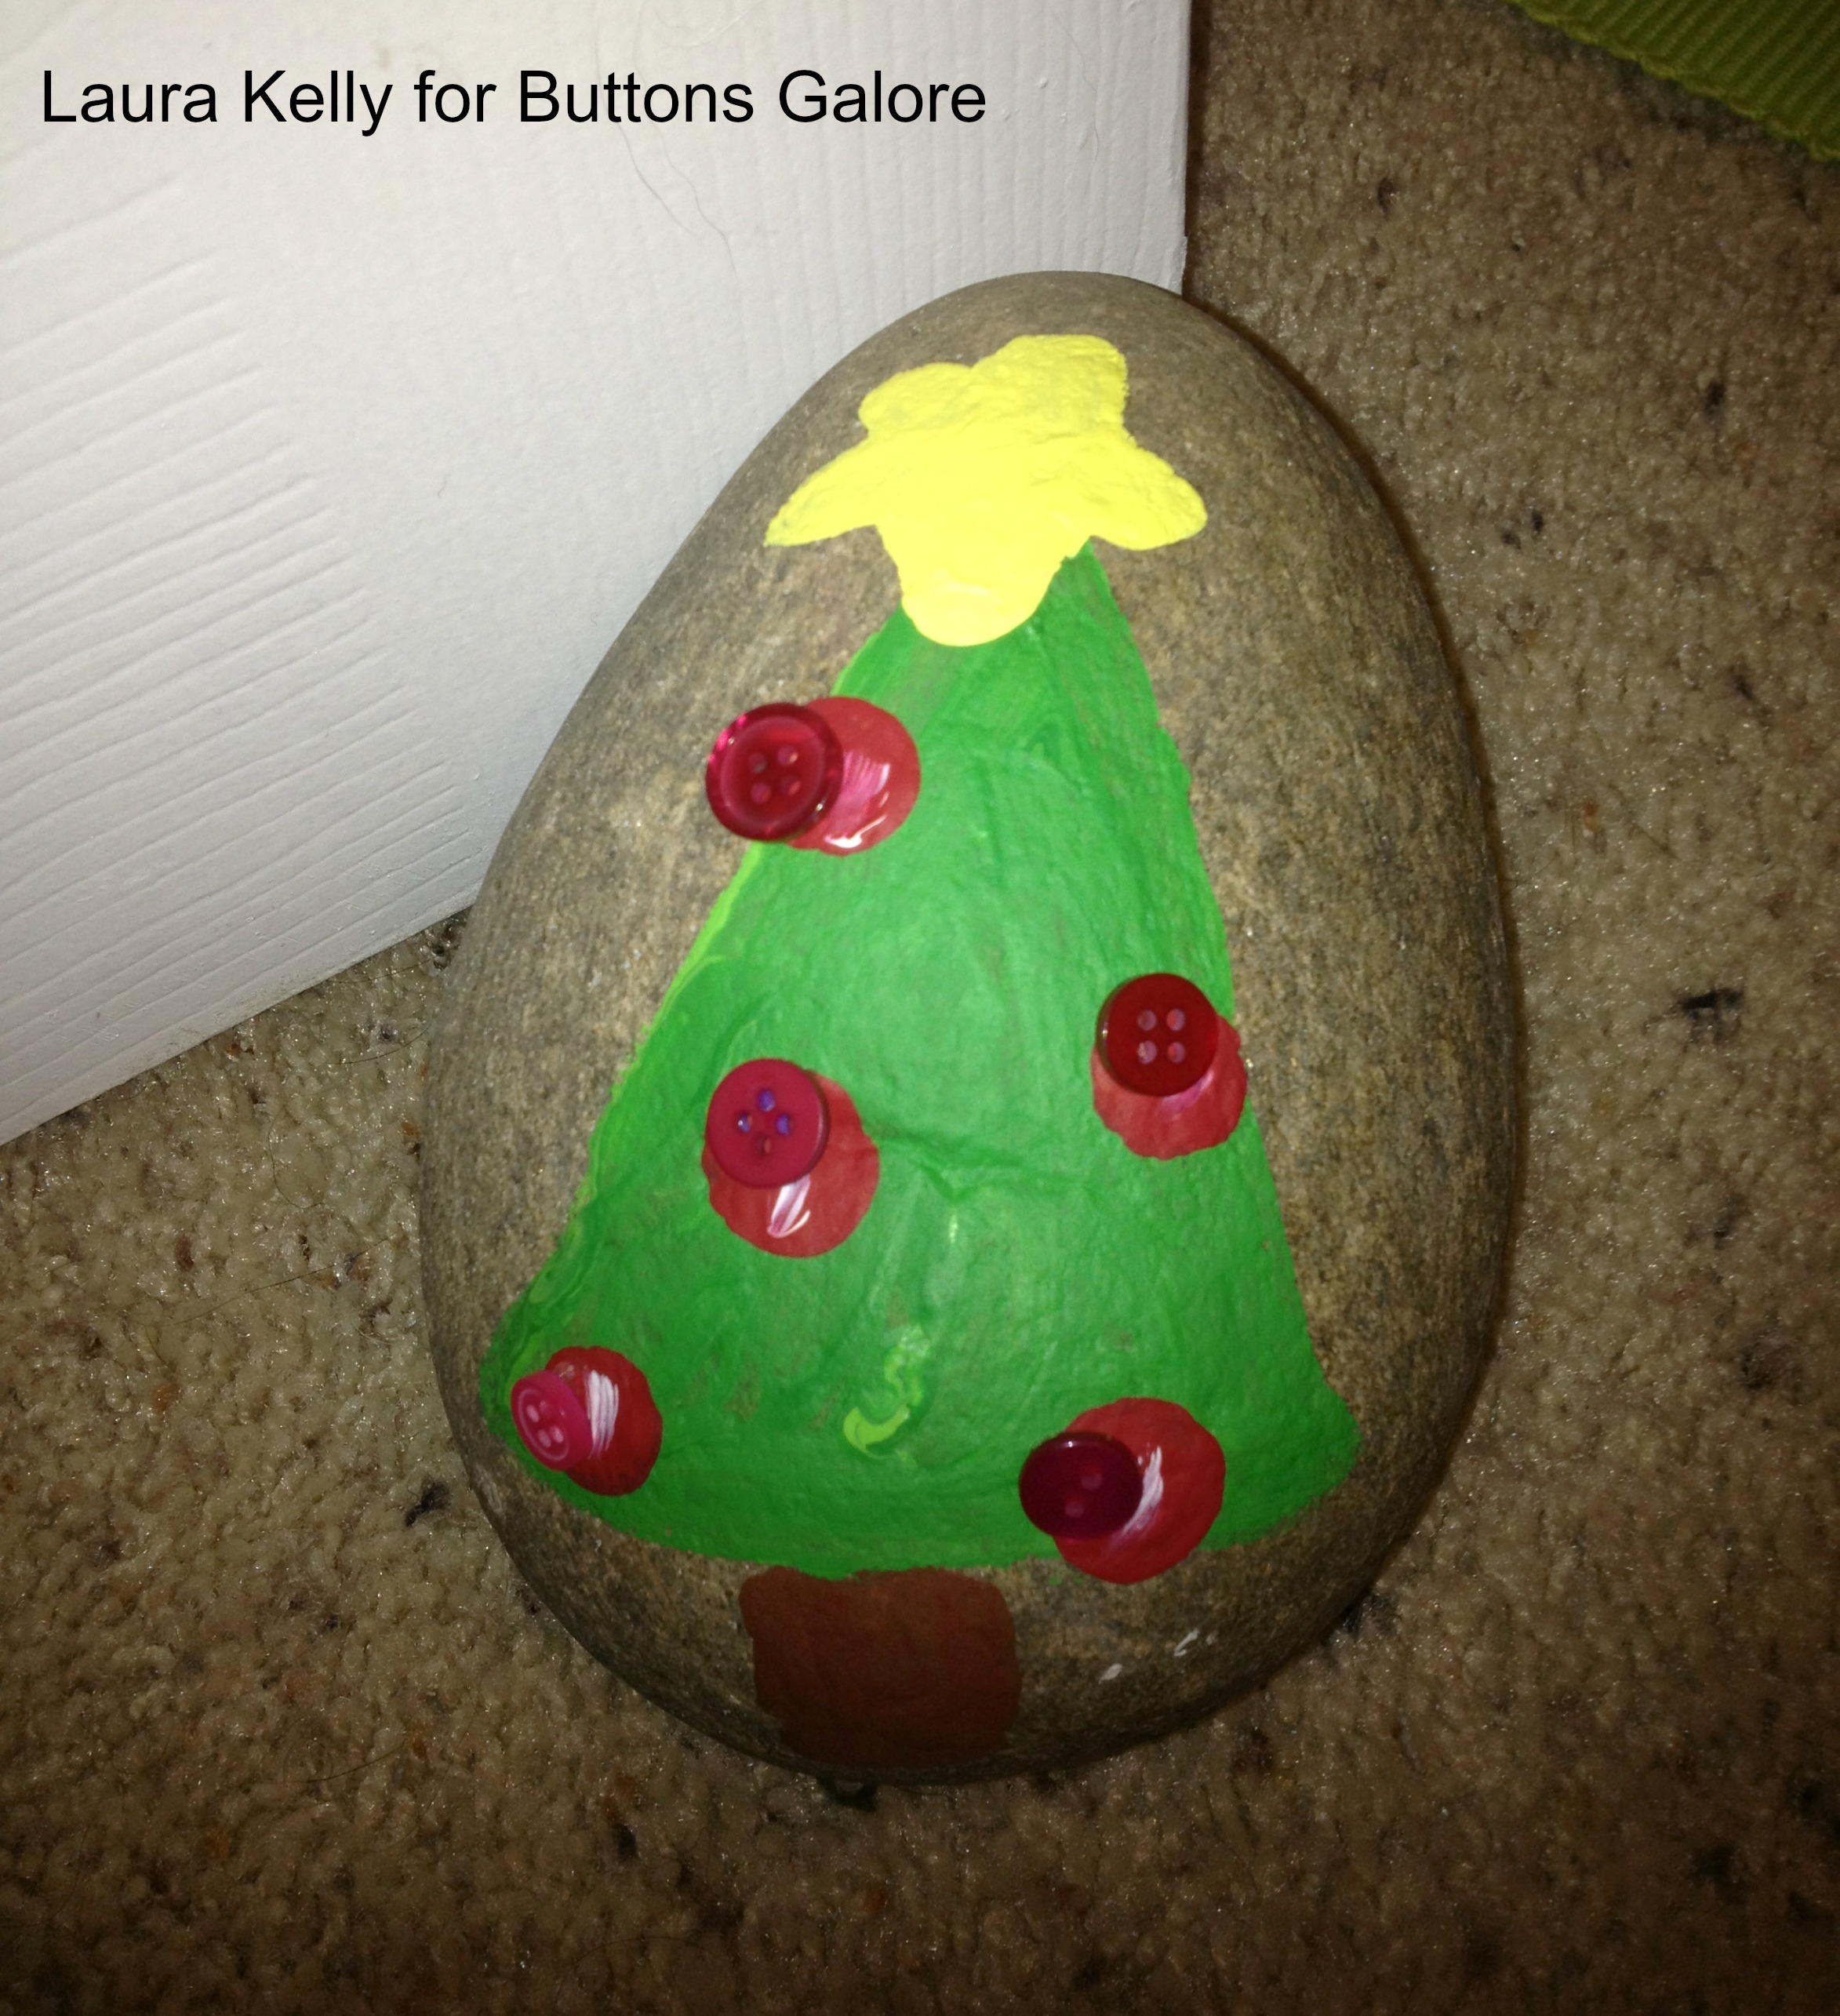
I hand painted the tree on the big heavy rock with Americana paints by Deco-Art. I love these paints because they are thick enough that when I paint on a rough surface with a slant they don’t run.
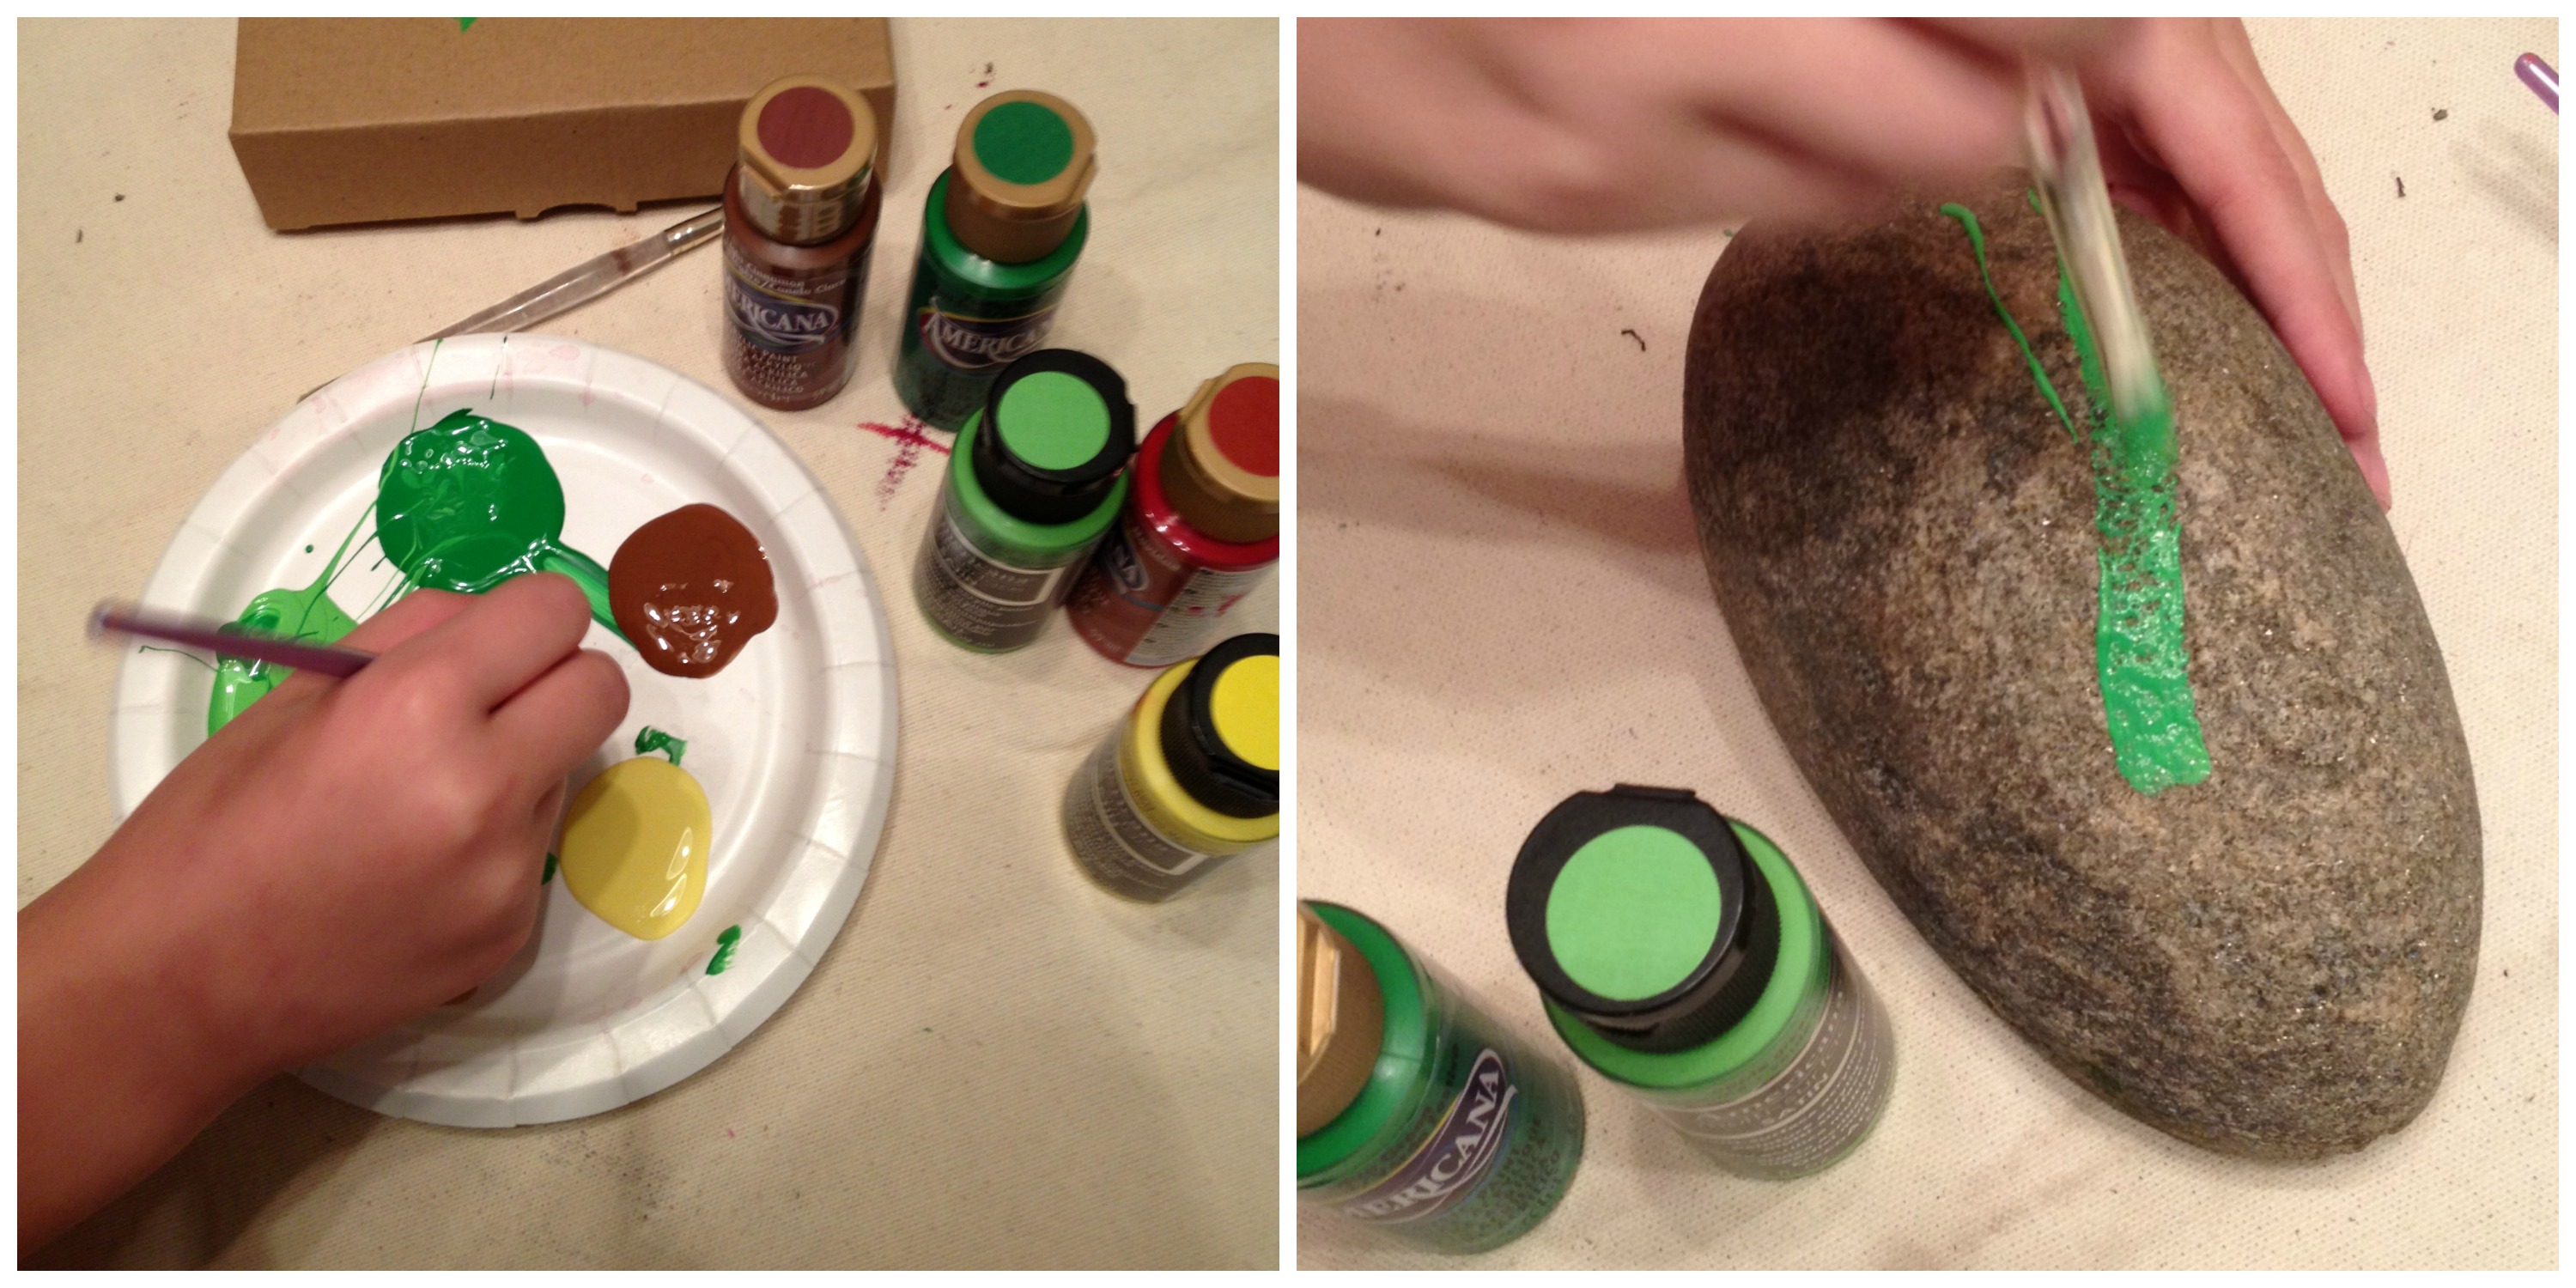
When it was dry, I used Glue Dots to add the buttons (Radical Red from my Laura Kelly collection with Buttons Galore). Then I used a Sharpie marker and added a message to the back.

I think these rocks would be adorable in all sizes and shapes as door holders and spreaders of Christmas spirit. I plan to paint a bunch of little ones with messages to hand out over the next few weeks at the Starbucks drive through and the bank and to people I meet while out on my daily adventures. Here are some of the messages I plan to use:
Here is the rock hard at work, holding the door to my bedroom open so our puppy won’t play with it and close herself out.

I can’t wait to make more. This little quick project was really fun.
Happy Creating Holiday Magic!
Love,
Laura

Handmade Christmas gifts with buttons
We have some great holiday ideas using Buttons Galore and More Buttons and May Arts Ribbon. Hop with us to see homemade Christmas gifts such as, ornaments, decorating ideas and more!
If you are here for the regularly scheduled project from Laura Kelly, do not fear her project is still featured here.
From Laura:
How adorable is this rock? It is not any ordinary rock. It is a special holiday hand-painted and button embellished rock that we use to hold the door open. It is a rock with a message and a purpose.
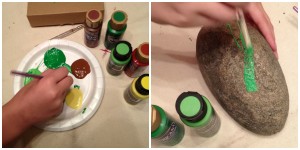
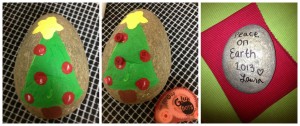
I hand painted the tree on the big heavy rock with Americana paints by Deco-Art. I love these paints because they are thick enough that when I paint on a rough surface with a slant they don’t run. When it was dry, I used Glue Dots to add the buttons (Radical Red from my Laura Kelly collection with Buttons Galore). Then I used a Sharpie marker and added a message to the back.
These rocks would be adorable in all sizes and shapes as door holders and spreaders of Christmas spirit. I plan to paint a bunch of little ones with messages to hand out over the next few weeks at the Starbucks drive through and the bank and to people I meet while out on my daily adventures. These are the messages I plan to use: Spread Cheer, Joy to the World, Follow the Star, Christmas is Love.
To help you make homemade Christmas gifts we have a discount code – HBH20 20% off entire order. This discount can not be combined with other offers. Retail customers only. The code can be used Dec. 6-9 2013 and if you spend $30 or more you get free shipping in the US.

Visit our Designers’ blogs listed below and leave them some love for a chance to win the wonderful craft prize package pictured above. Who knows there might be more than one prize so make sure you visit everyone.
Special thanks to May Arts for providing the Button Bevy with a wonderful assortment of ribbons
Save 20% off at Buttons Galore this weekend.
*enter the code “HBH20” – offers may not be combined*
Sale starts Friday and ends Monday.
My candy cane button tree is the perfect addition to your holiday decor. Grab a styrofoam cone and get started on this fun tree today. It may look complicated but I will show you how to lay out your colors to get those perfect candy cane stripes every time.
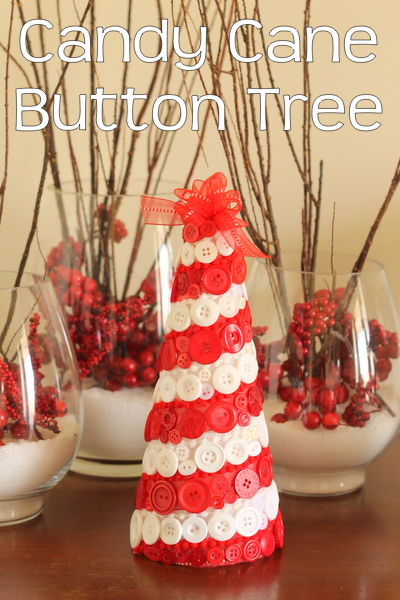
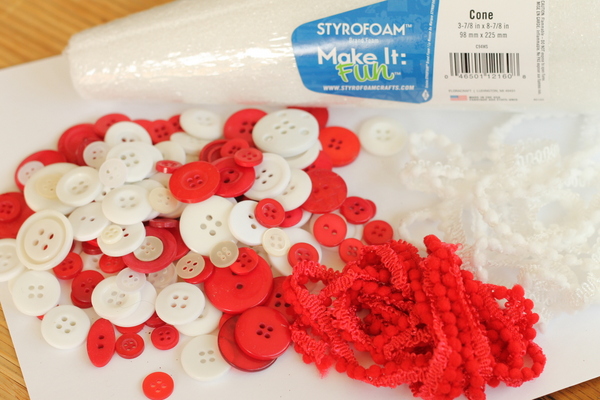
1. Wrap your red and white mini pompom fringe around the cone. Hold in place with sewing pins for now. Adjust until you like the spacing and location of your candy cane stripes. Hot glue your fringe into place and remove the pins.
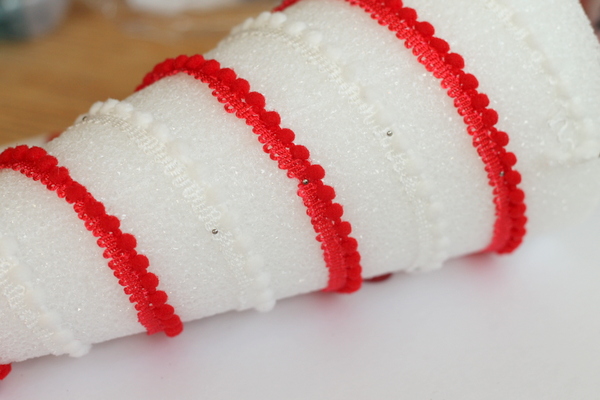
2. You don’t want the white cone showing through your red buttons so add the red shear ribbon just in the “red” stripes of your candy cane. Again hold in place with pins for now.
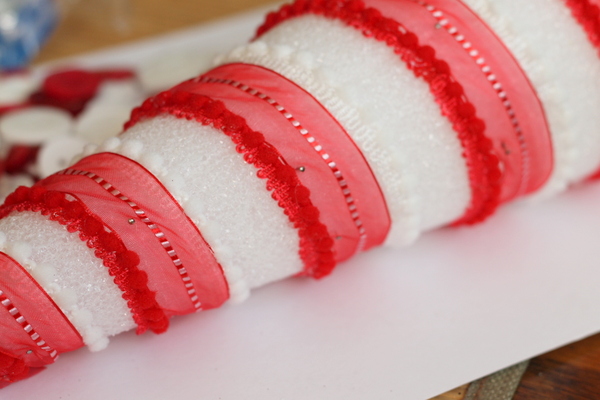
3. Because the ribbon is shear, there is no need to hot glue it down before you add your buttons. The hot glue will seep through the ribbon with the buttons on top. So start adding various size buttons with hot glue filling the red and white stripes all the way up the cone. Remove the pins in the shear ribbon as you go up the red stripe.
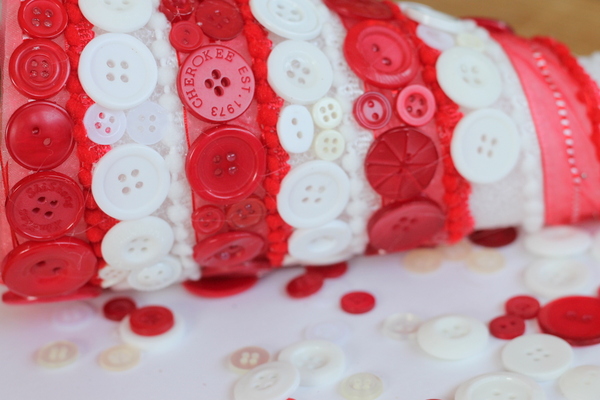
4. Once you reach the top, add a mini bow from some additional red shear ribbon. Again attach with hot glue.
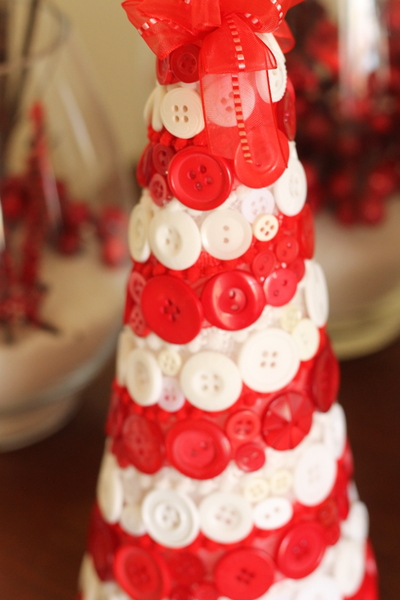
5. Use a hair dryer to remove any glue strings. You are ready to display your candy cane button tree for the holidays. This is a super fun way to celebrate the holidays in your home.

I love candy canes and of course candy cane button trees. How about you? Will you be making a button tree this holiday season?
Holly here from Ribbons & Glue sharing with you how to make Rustic Christmas Ornaments with Glitter Buttons for your tree this year by using Hemp Cord and Pearl Buttons from Buttons Galore.
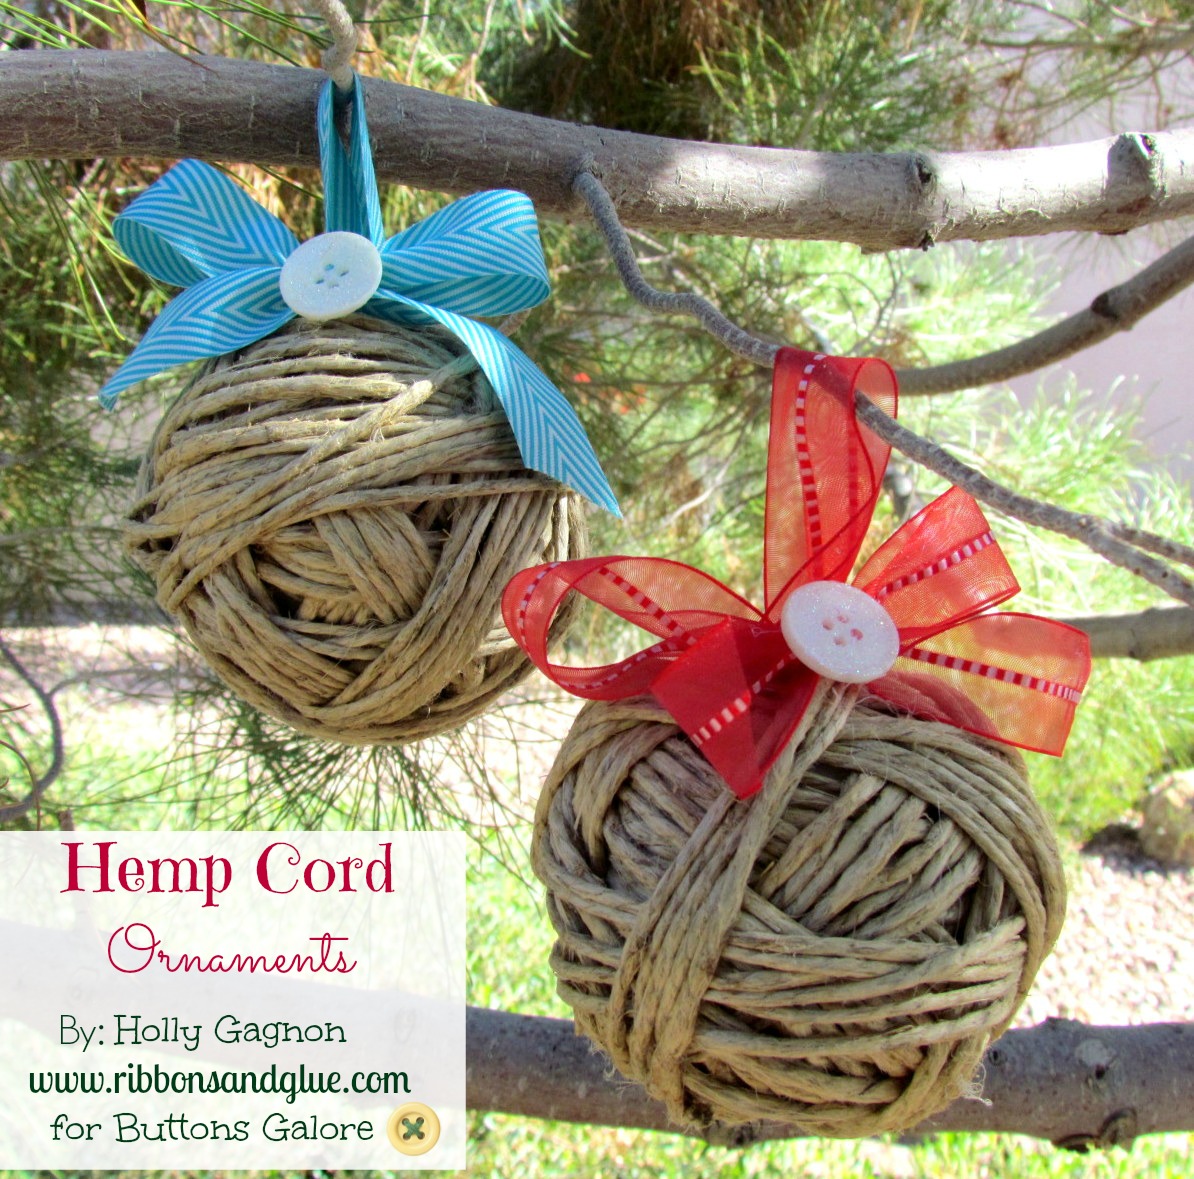
I love the feel of cozy, rustic Christmas Decor. You can find pine cones, tree branches, birdhouses and various things wrapped up in hemp cord along with lots of glitter around my house during the Holidays.
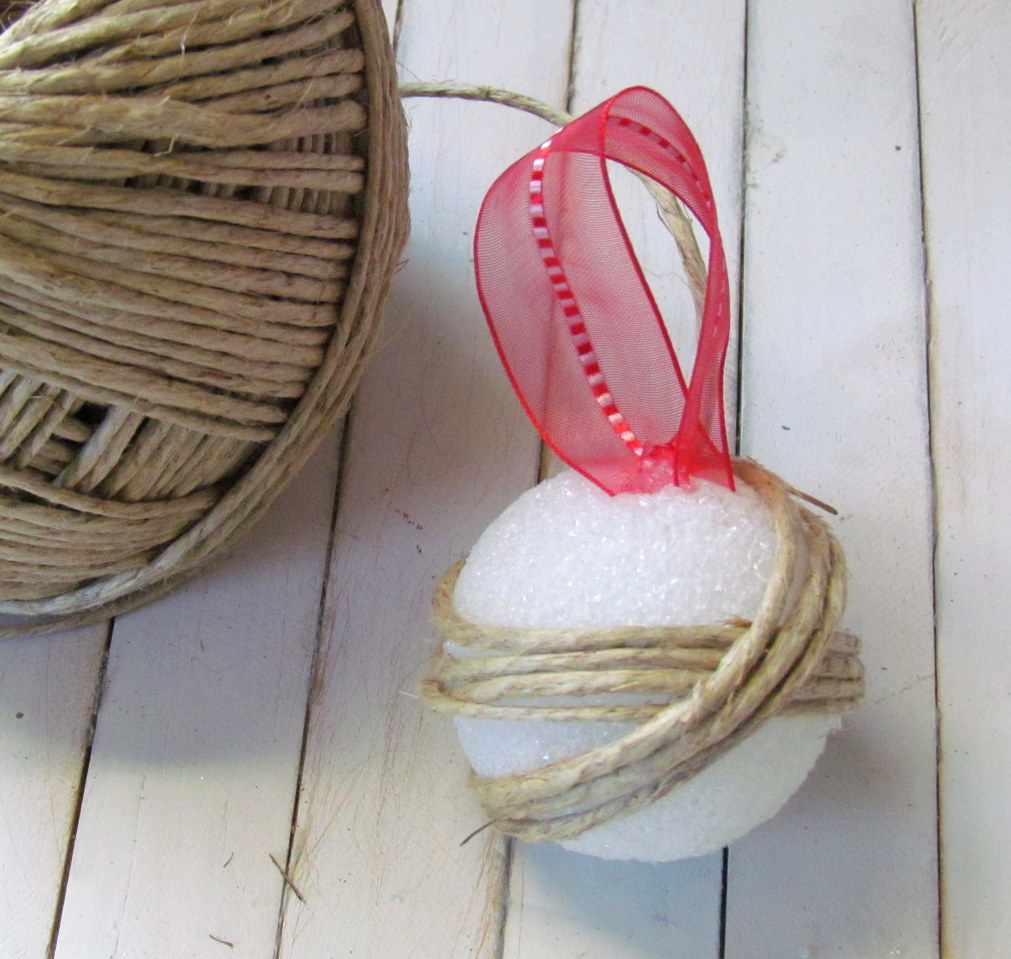
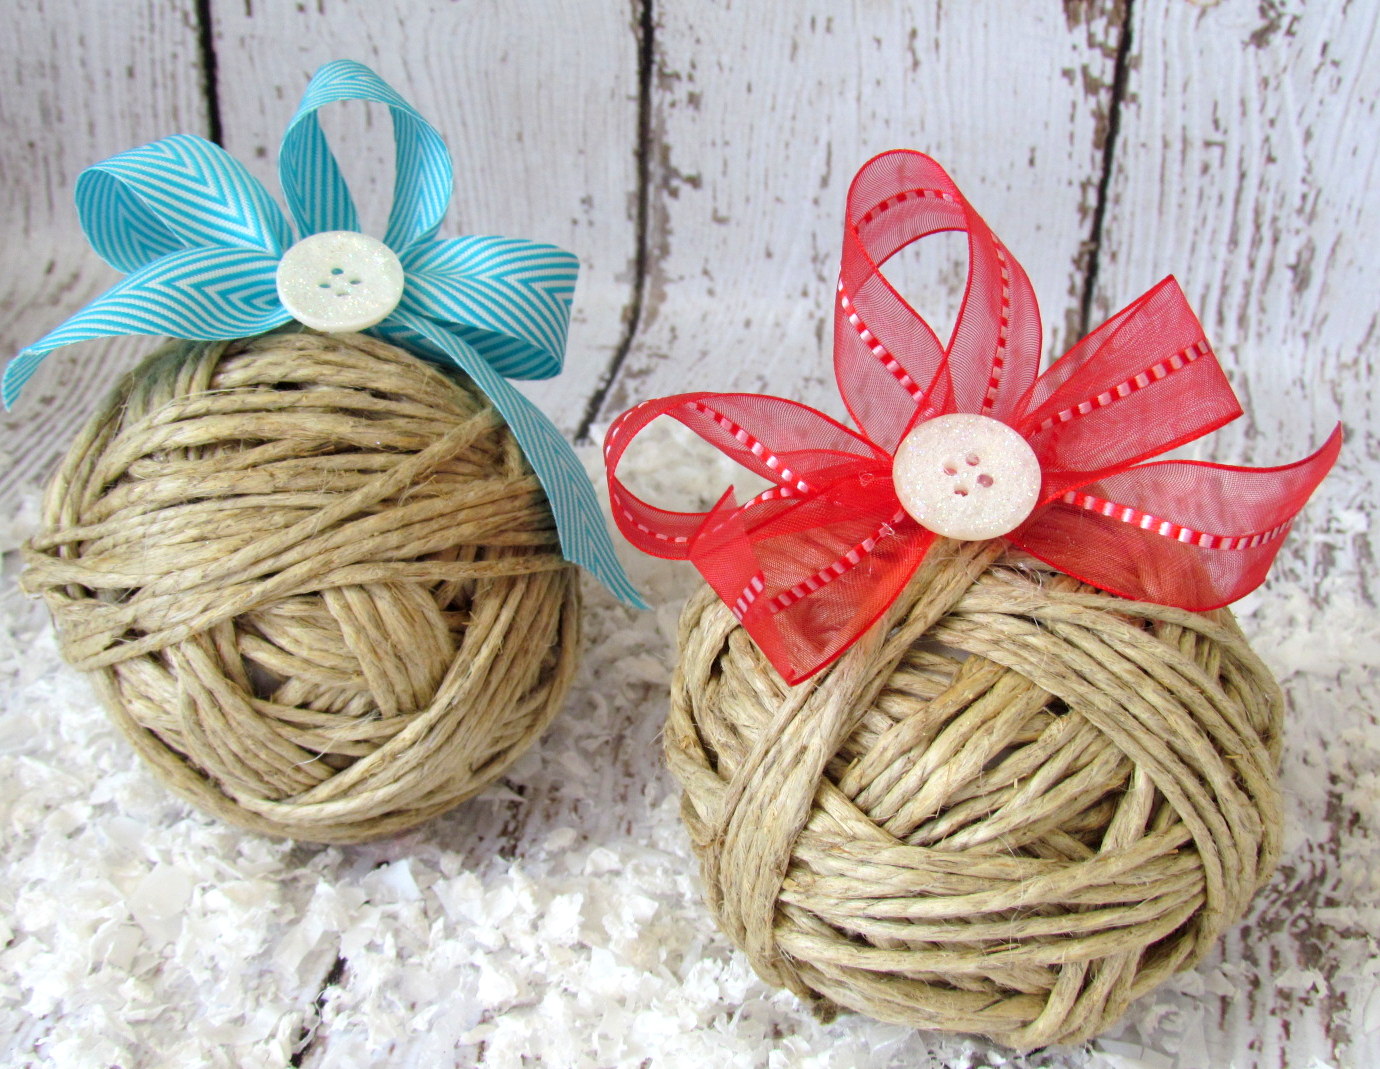
To add a little sparkle to my rustic Christmas Ornaments, I made glitter buttons.
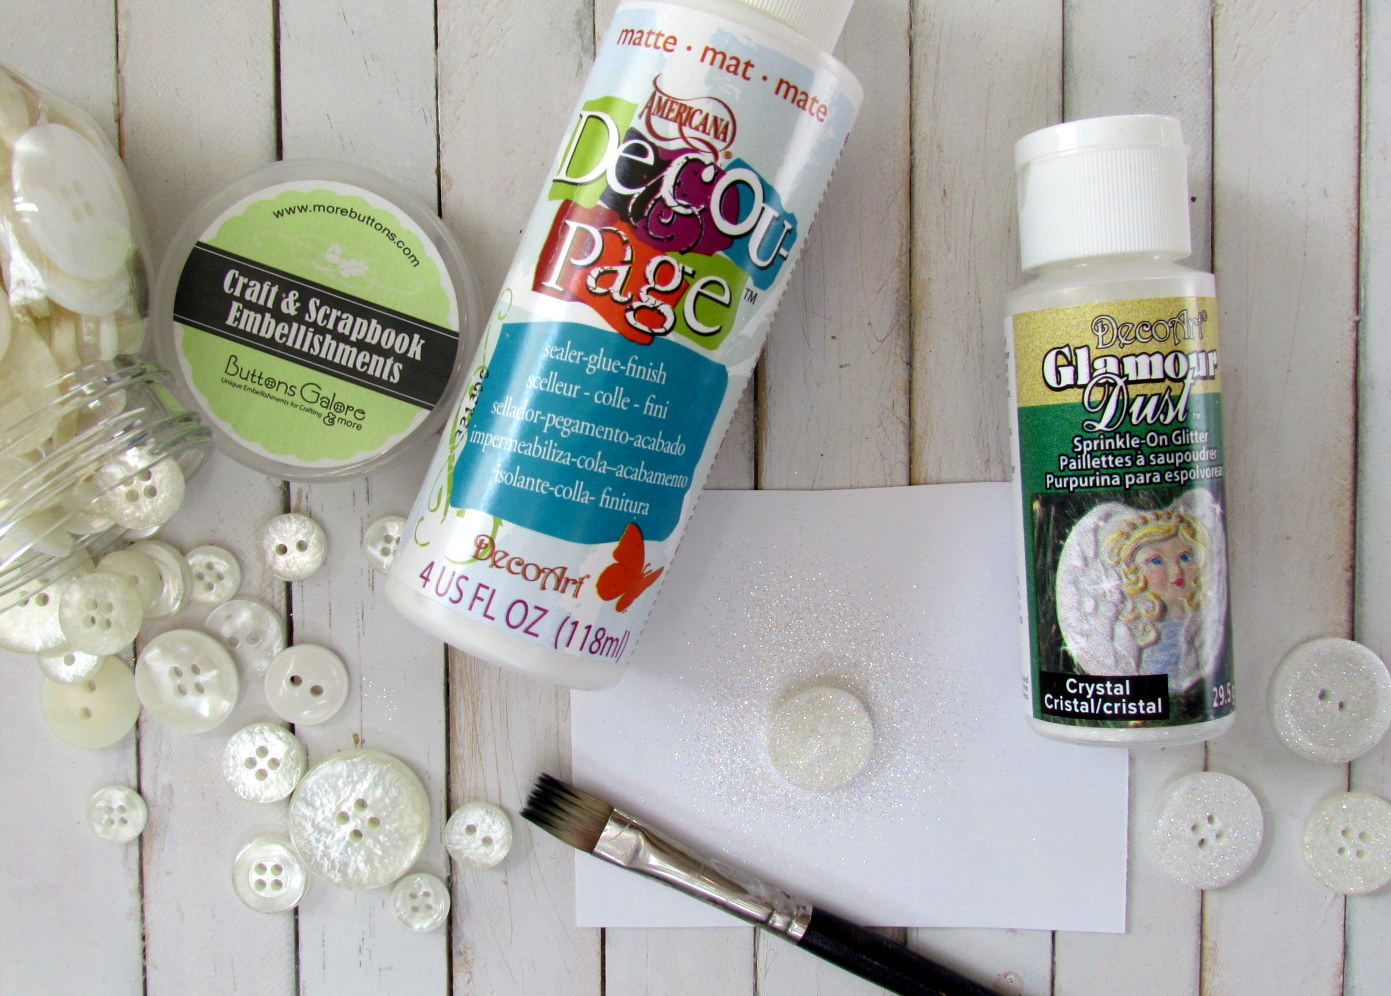
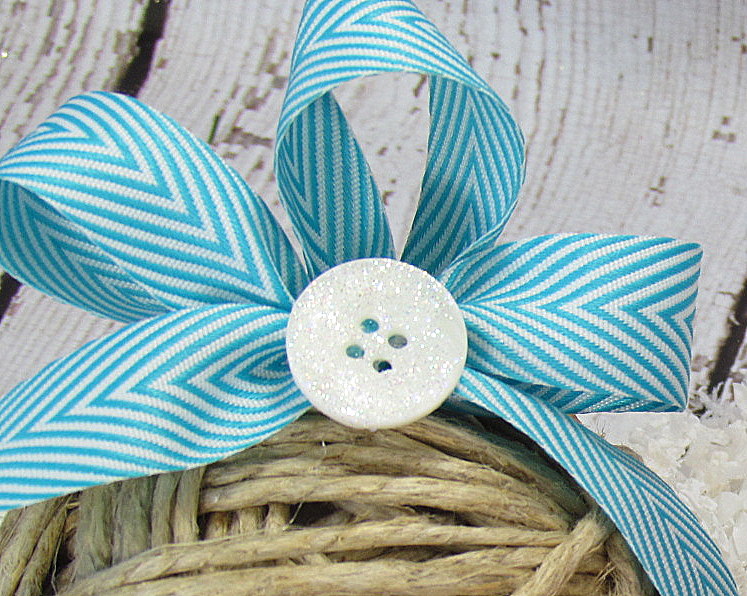
So pretty! The glitter just adds a little sparkle to your cozy, rustic Christmas decor.
For more Christmas Inspiration head over to my blog Ribbons & Glue.
 Like Me on Facebook!

This Christmas, why not give your artsy crafty friends and family Inspiration kits? These adorable Christmas Inspiration Kit Gifts are embellished with buttons. They are fun to make and will surely delight every creative person on your list.

To create your Inspiration Kit Gifts, die cut one Bag Caddy from the matboard. Assemble it according to manufacturer’s instructions using the red line tape.
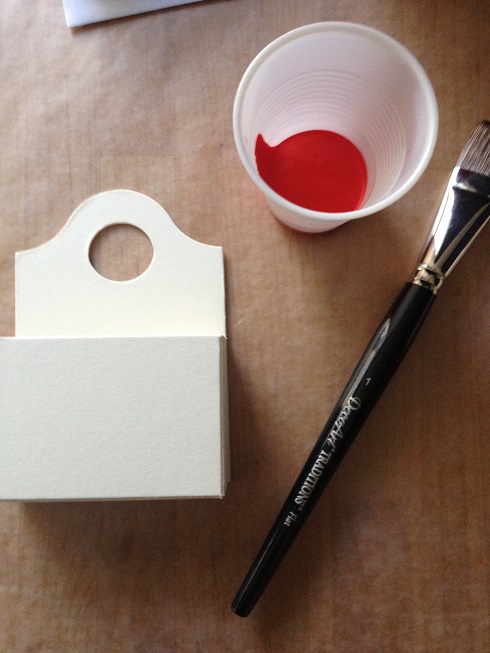 Paint the box, inside and out Tuscan Red. Measure the front and sides of the box and cut patterned paper using the paper trimmer. Use the foam brush and decoupage medium to apply the paper to the box.
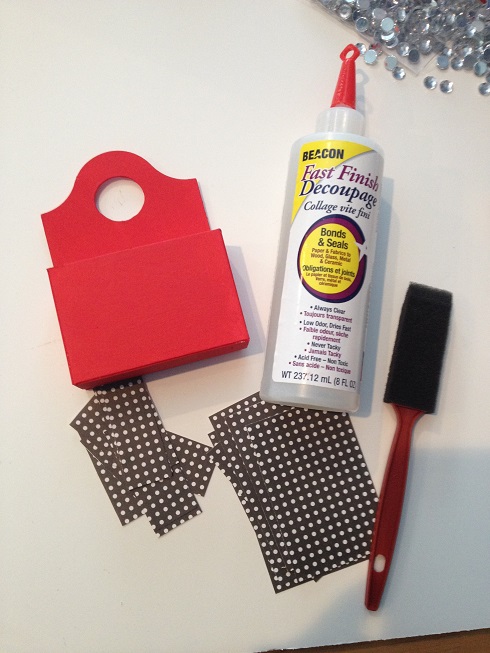 Dry brush snow white on front of box. Paint the bird shape Antique White. Paint the teardrop for wing and bird beak Lamp Black.

 Using the brown chalk ink, ink the clothes pin. Print out holiday sentiments using plain computer paper and a printer.

Cut the sentiments out with the scissors. Use the decoupage medium to apply them to the clothes pin. Glue button on one end of clothes pin with the Gem-Tac. If desired, glue a flat backed acrylic stone to the center of the button.
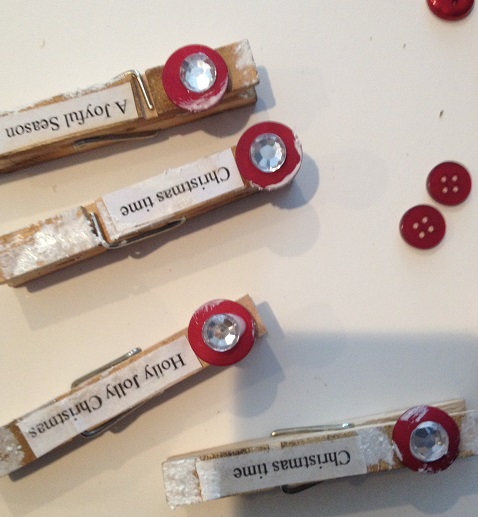
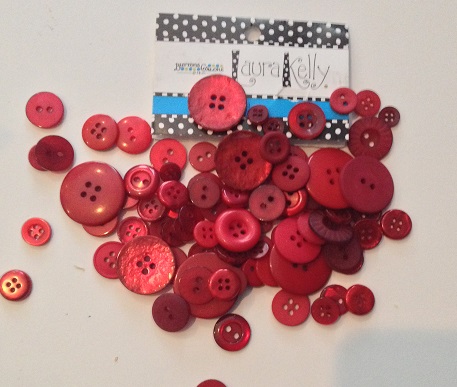 Glue the bird shape, wing and flower center to the box.
 Stamp sentiment over white swatch of paint on box front.
Here is the super fun part… die cut flowers, tags, etc. to fill your Christmas Inspiration Gift Kits. Die cut the cardstock and the wool felt.
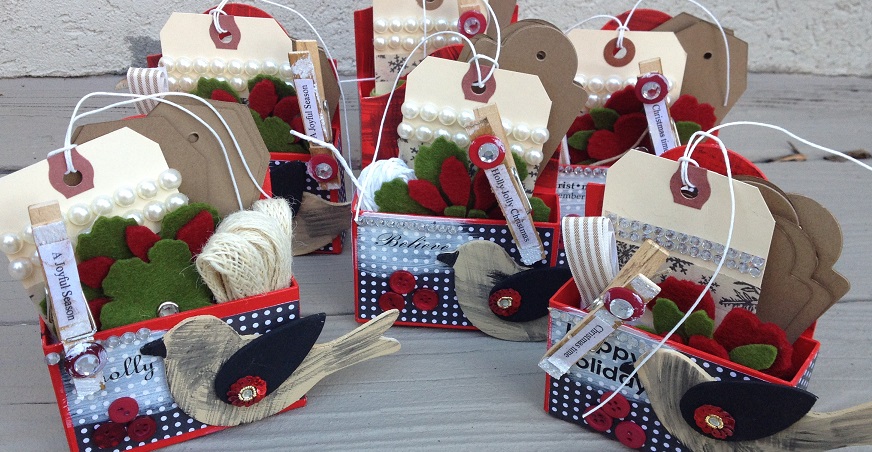 I also included some hand dyed stamped ribbon in my Inspiration Gift Kits.
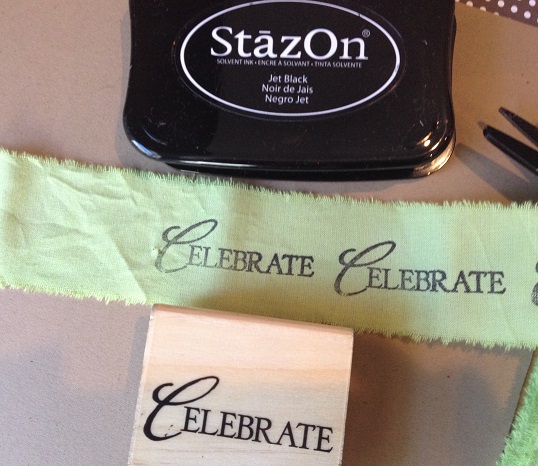 Glue some buttons to the front of the box.
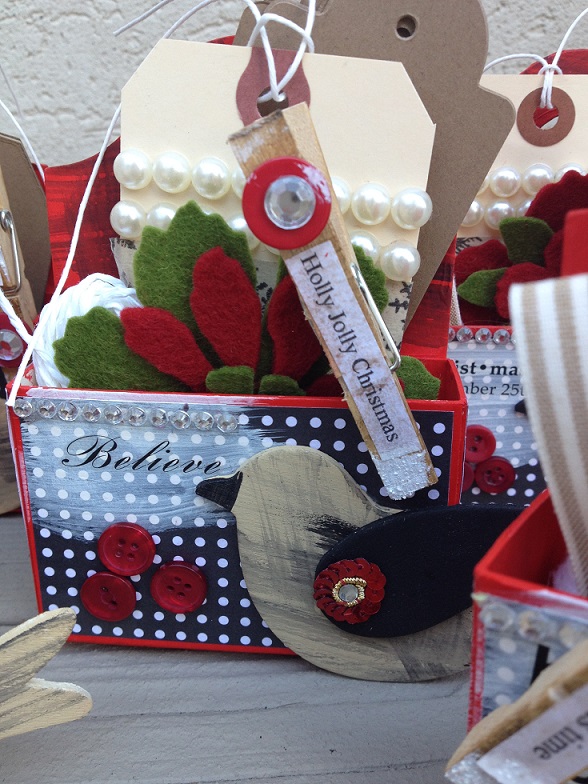
These Inspiration Kit Gifts are great gifts for teachers, hostesses, neighbors, gift exchanges, etc. Make several at once so they will be on hand if an unexpected guest drops by. Instead of art supplies, fill the boxes with homemade edible goodies.
Thanks for letting me share my Inspiration Kits with you.
Live Life Creatively,
Welcome to the Black Friday Cyber Sale, and to the Linky Party organized by our designer Laura Kelly using Sculpey Polymer Clay products and her line of our buttons to create “Adorable Little Ornaments”.
For today’s project, I am sharing as a part of a linky party featuring adorable little ornaments made from clay and buttons. Lots of designers and bloggers were sent Sculpey products and Laura Kelly’s buttons to create these adorable little ornaments.

I used Sculpey clay in red and white to form a stocking, molding with my fingers. When I was done stuck then end of an 8 inch long piece of wire into the top in two places to create holes that I would later need. While the stocking was baking (following the directions in the packaging) I twisted the wire up and added a few Radical Red and Apple Green buttons along with my signature ribbon (black with white polka dots).
When the stocking was out of the oven and cooled, I added the wire using a tad bit of super glue on each end into the holes. Wah-lah…an adorable little ornament.
There are lots of ornaments being shared in the party. Check them out.
…and enter to win some clay and buttons of your own!
Happy Creating,

And now for the sale…
Choose from our entire line at www.buttonsgaloreandmore.com Place your order during the following times using these codes:
8am – 10am EST – 50% OFF – Code 50OFF
10am – 12pm EST – 40% OFF – Code 40OFF
12pm – 4 pm EST – 25% OFF – Code 25OFF
*PLUS FREE SHIPPING TO THE USA-ORDERS OVER $30*
Buttons Clay Paper?
Who says you can’t use Buttons and Clay on a scrapbook layout? I was up for the challenge and decided to create this holiday themed layout that features buttons and clay as embellishments.
I have LOVED creating with Sculpey clay the last few weeks, and creating this Buttons and Clay embellishment for this layout was fun and easy. My embellishments were created by hand and the use of my Sculpey Essential Tool Kit.
I created the “F” and the holly leaves and baked the Sculpey clay as per the instructions. I added the buttons once cooled with some Mini Glue Dots. I did the same with the holly and scrolls. The buttons were all from a nice red mix from Buttons Galore.


Thanks for stopping by to check out this Buttons and Clay Layout and I hope you have a Happy Crafty Holiday Season!
Create a Buttoned Up Gift Box with paper, ribbon and buttons. A gift is much more special when presented in a handmade Gift Box.

This week’s project is extra special because it was created by a KID. It is also a speedy fun craft for the holidays that is a project for the awesome blog party known as Craft Lightning!

Zoe used Pluffy Clay by the makers of Sculpey to create the wreath. She rolled up little balls of clay then put them together and pressed down to get the to attach.
She used the red in the package to create the bow then we baked it for a few minutes to get it to harden.
When it came out of the oven, we used hot glue to add a few Laura Kelly Radically Red buttons and wah-lah…an adorable wreath ornament.
Happy Crafting for The Holidays,
Laura


A little bit about Anna-

Christmas craft ideas for kids, girls, boys, uncle Ed, aunt Martha and more. Click the pictures below to find out how to make the projects and the material list. Buttons Galore and More has novelty buttons with Christmas themes and solid color buttons in mixed colors.

Country Chic Cottage: Button Santa Ornament

Allie Gower: Holiday Bird Cage

Allie Gower: Christmas Tea

Allie Gower: Christmas Craft

Laura Kelly Designs: Holiday Gift Fun

Laura Kelly Designs: Christmas Aprons and Organization

Laura Kelly Designs: Festive Felt and Button Ornaments
Mel Bradley: Scrap Savvy Bird Ornament Tutorial
Mel Bradley: Painted Canvas Ornaments

Country Chic Cottage: Button Wreath Ornament

Country Chic Cottage: Button Ornaments with Kids

Country Chic Cottage: Bottle Cap Reindeer

Laura Bray Designs: Holiday Cards and Tags

Scrappy Chick Designs: Quick and Easy Holiday Cards

Laura Bray Designs: Holiday Headbands

Laura Kelly Designs: DIY Magic Reindeer Food
Styrofoam and buttons Christmas Money Tree
Vintage style Christmas Decorations
Styrofoam Christmas Ornament
I hope you enjoyed looking at the wide variety of Christmas crafts with buttons. Stop by the store if you would like to purchase the button, ribbon and glue supplies used in these projects. We have daily deals and weekly coupons. Stop by often as there are new items on the way.

A simple Thanksgiving Centerpiece – I made up in about 15 minutes using Buttons Galore Carved Wood Buttons and supplies I already had stashed. It seriously does pay off to hoard craft supplies.
This centerpiece happens to coordinate nicely with my Thanksgiving Dessert Table Decor that was featured on the Buttons Galore Blog recently too.
If I need to make up some quick and simple centerpieces, I always turn to making rosettes or finding something fun that can be stuck on a stick.

For this simple Thanksgiving Centerpiece, I added pines cones to a dollar store vase, made a 3″ rosette, added a BGM Carved Wood Button to the center then used my Silhouette to cut out a Turkey cut file.
If you don’t have access to die cutting machine, you could easily add more Fall rosettes in various sizes to your centerpiece along with Fall leaves or any other festive decor you like.
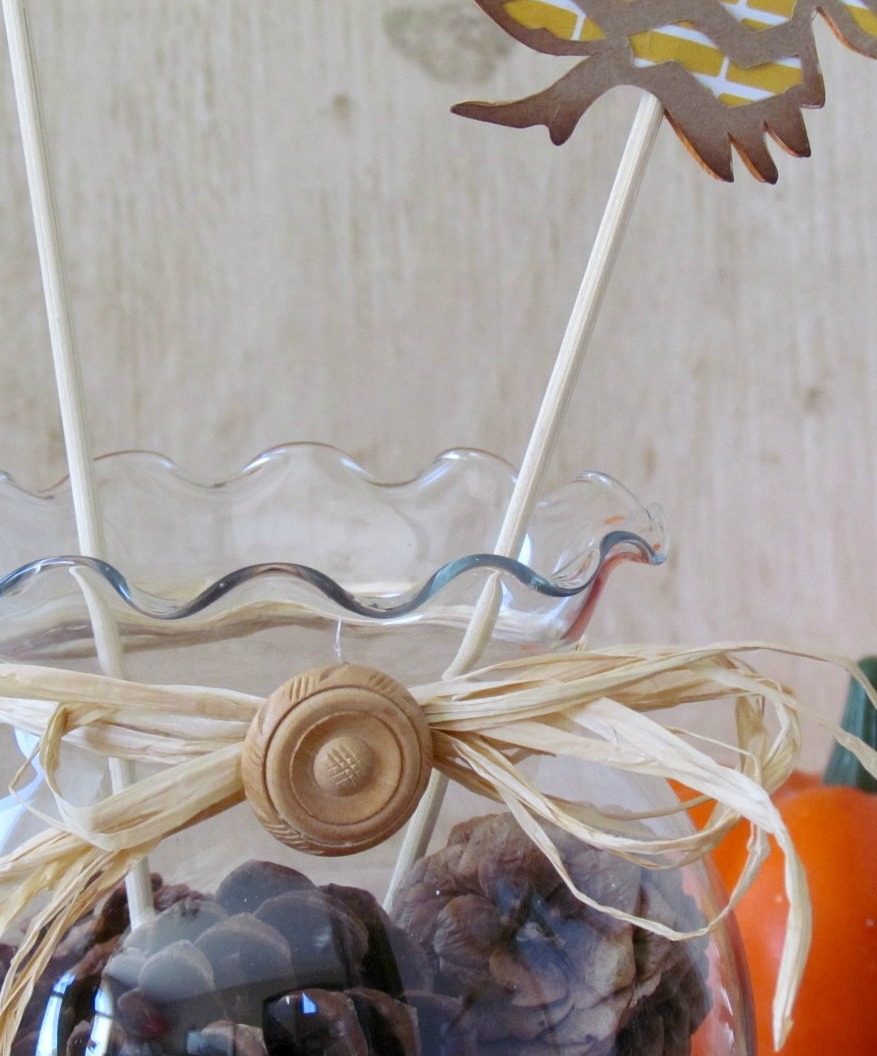
Everything just looks better on a stick right, right? Plus, Buttons Galore Carved Wood Buttons ties the Fall decor together nicely.
For more Fall inspiration head over to my blog Ribbons & Glue.
Like Me on Facebook!
Thanksgiving is my favorite holiday. Not only is the ultimate holiday for foodies, but it’s also a time to gather with loved ones and enjoy each other’s company without the distraction of gift giving. I host 12-14 people at my house every year. I love preparing the meal, but I also love coming up with a great table setting. The easiest way to set a table is to come up with a theme and then build on it. This year, I’m thinking Feathers and Buttons just might be my theme for 2013. Here are two Thanksgiving place card ideas for your table.

This place card idea reminds me of childhood trips to the Natural History Museum. I loved to peer into the glass cases and see the natural collections. These simple place cards bring back those special memories of learning about nature.
Supplies:
Instructions:
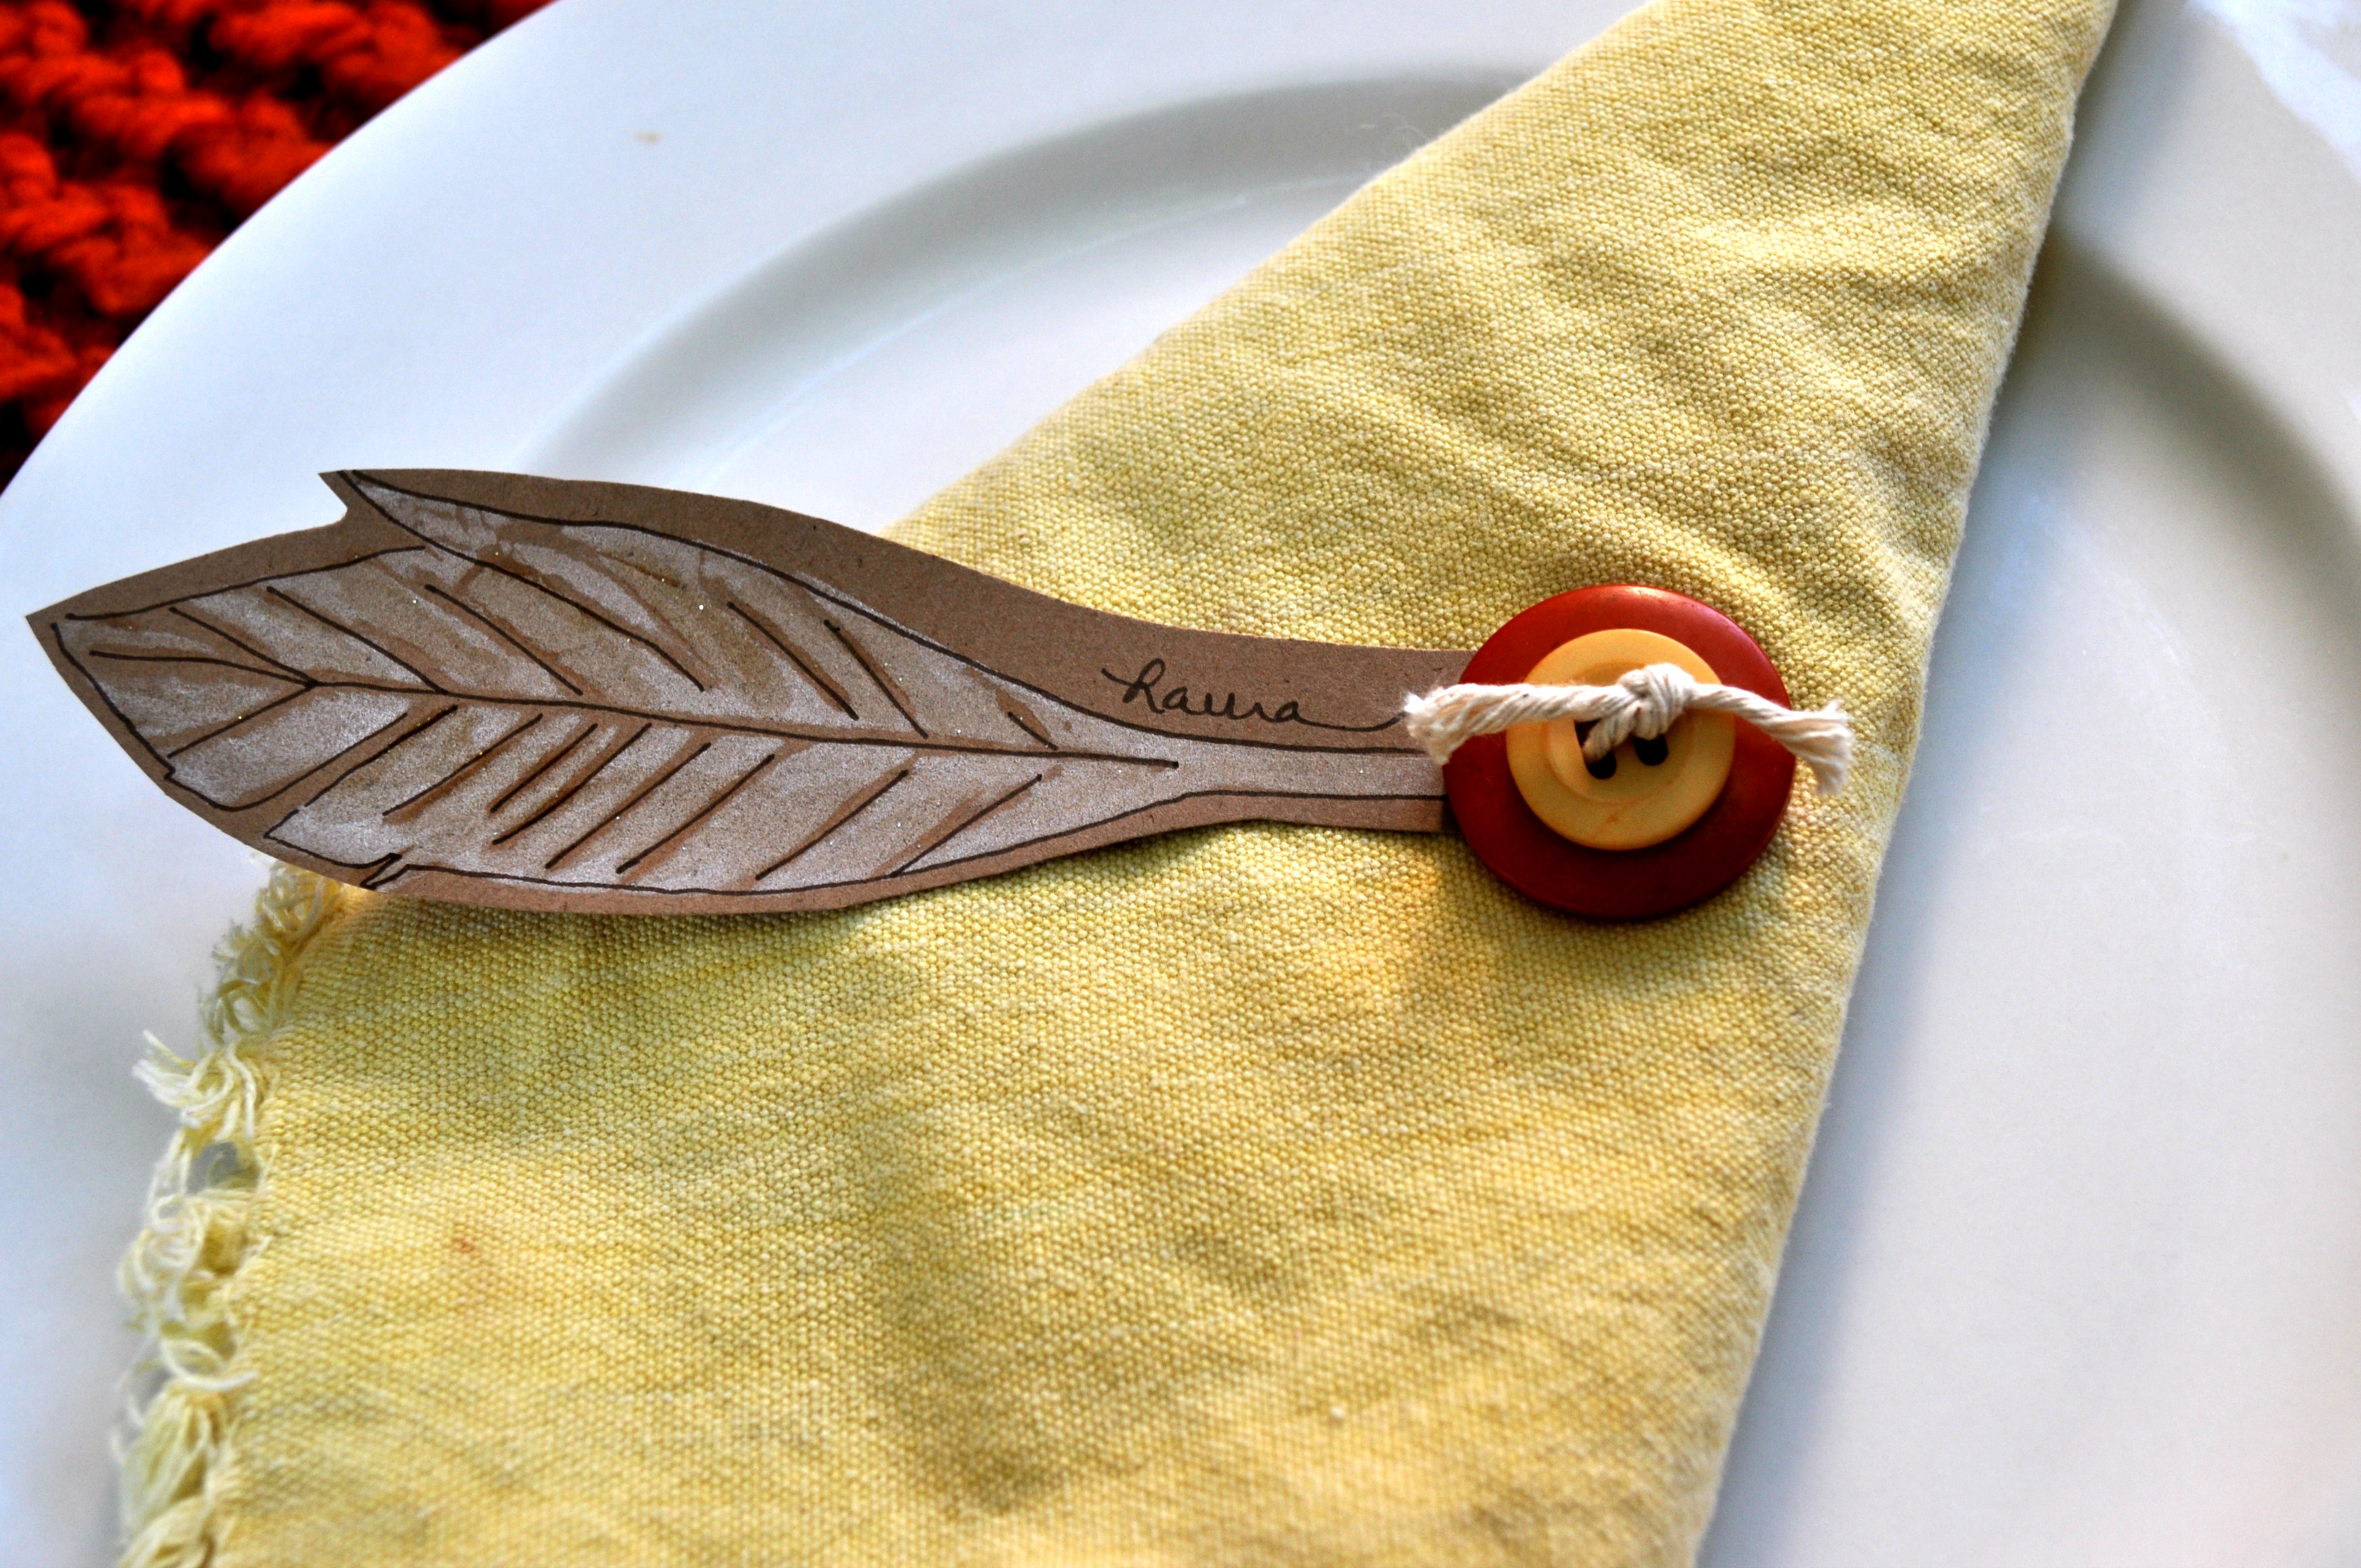
Supplies:
Instructions:
Thanks for joining me today. If you would like to get a free printable, Thanksgiving planner, come and visit me on my blog, Laura Bray Designs.
![]()
Button ornaments are great for kids to make. Here is a beautiful and easy to make paper crafted ornament using Decou-Page and buttons. The final ornament works great for decorating a tree, using for a gift tag or even for a place card.

You will need scrapbook paper scraps, chipboard or cardboard, Decou-Page, wire ,buttons (I used Candy Apple Green and Radical Red), a brush, scissors, a hole punch and ribbon.
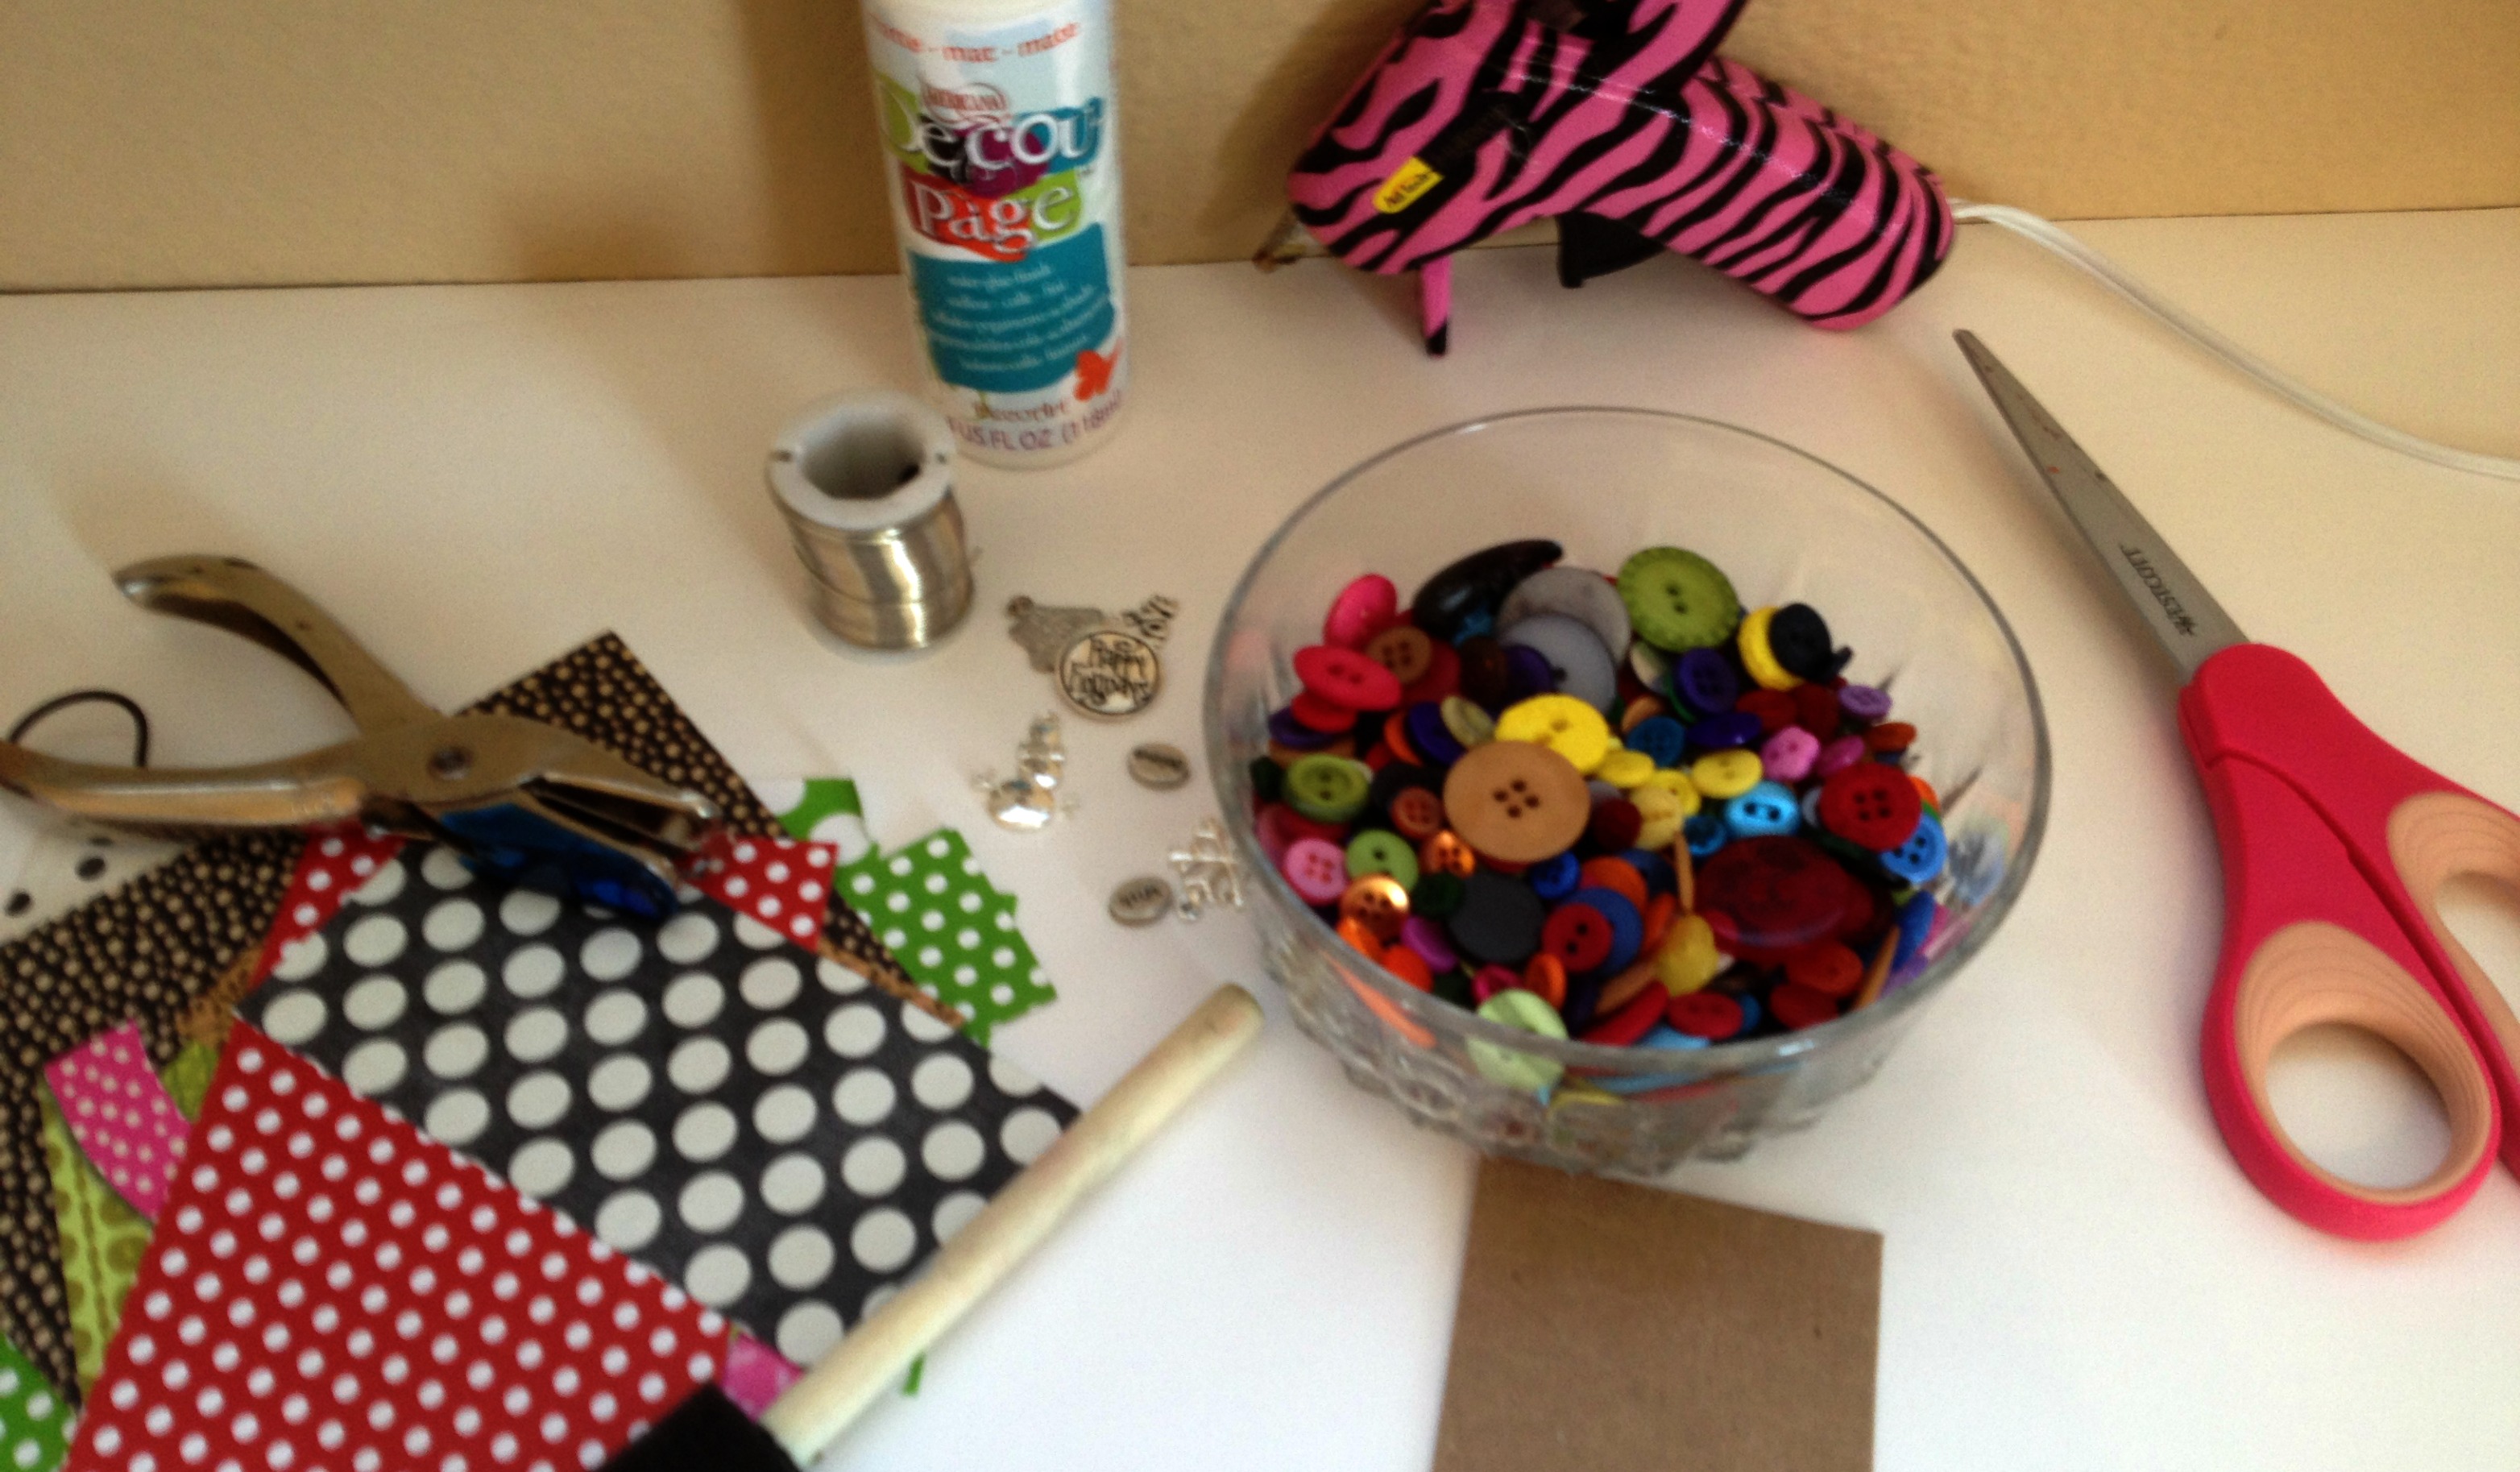

The next steps are as follows:

Ta Da! You have a beautiful ornament.
Happy Holiday Creating,
Laura
Holly here from Ribbons & Glue sharing a simple Thanksgiving Dessert Table Decor using Tiny Buttons from Buttons Galore that’ll add some glitz and sophistication to your Holiday table this year.
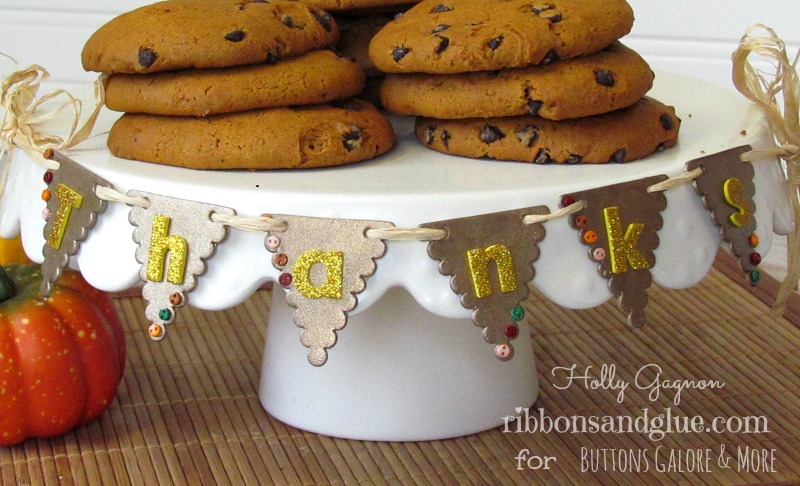
Thanksgiving Dessert Table Decor
When I think of Holiday gatherings, the first thing I think of is food and of course the yummy, rich desserts are the most important part. Show off those yummy desserts you’ve slaved over by creating this simple dessert table decor.

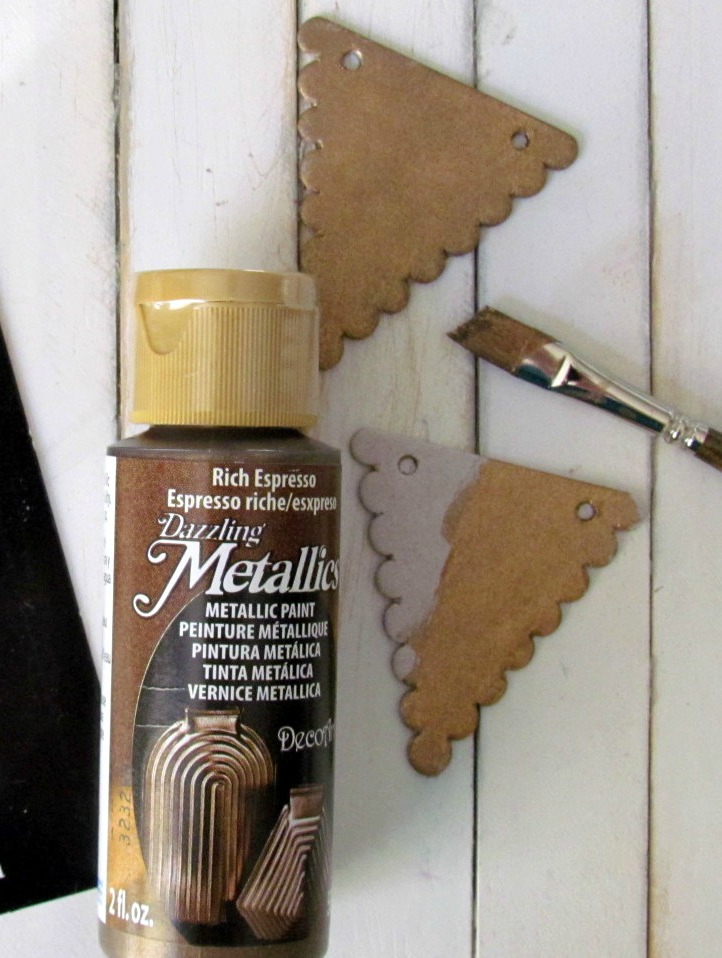

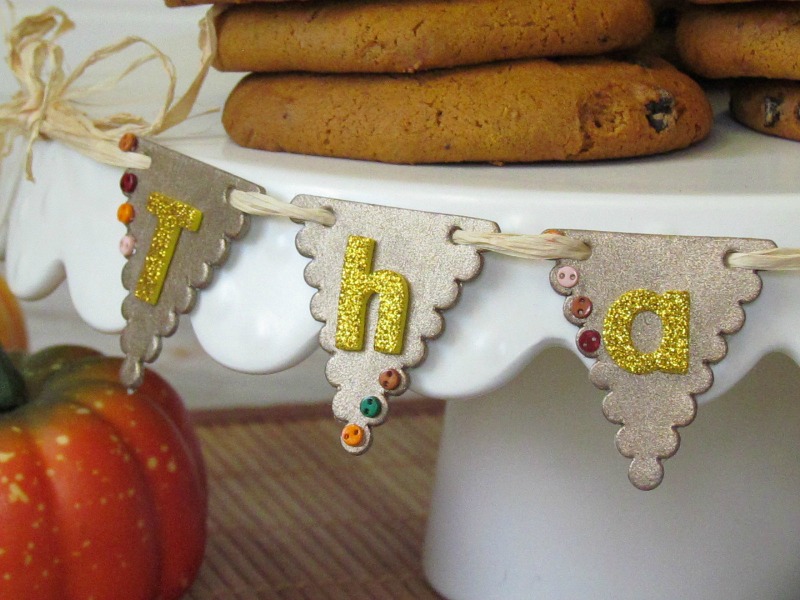
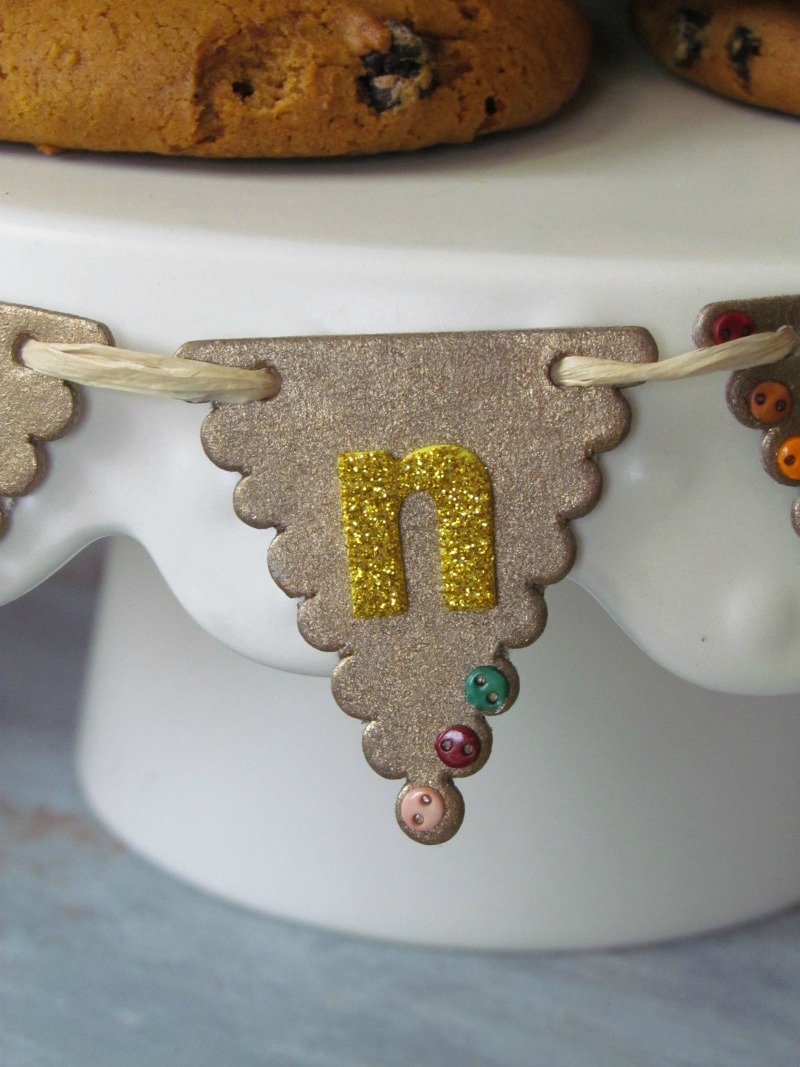
Like Me on Facebook!
For more Fall inspired crafts, visit my blog www.ribbonsandglue.com
This Autumn Button Border Layout shows so vibrantly exactly why I love the season….the stunning colors! I knew from the start of this creation that I wanted the embellishment focal point to be the Autumn Button Border.
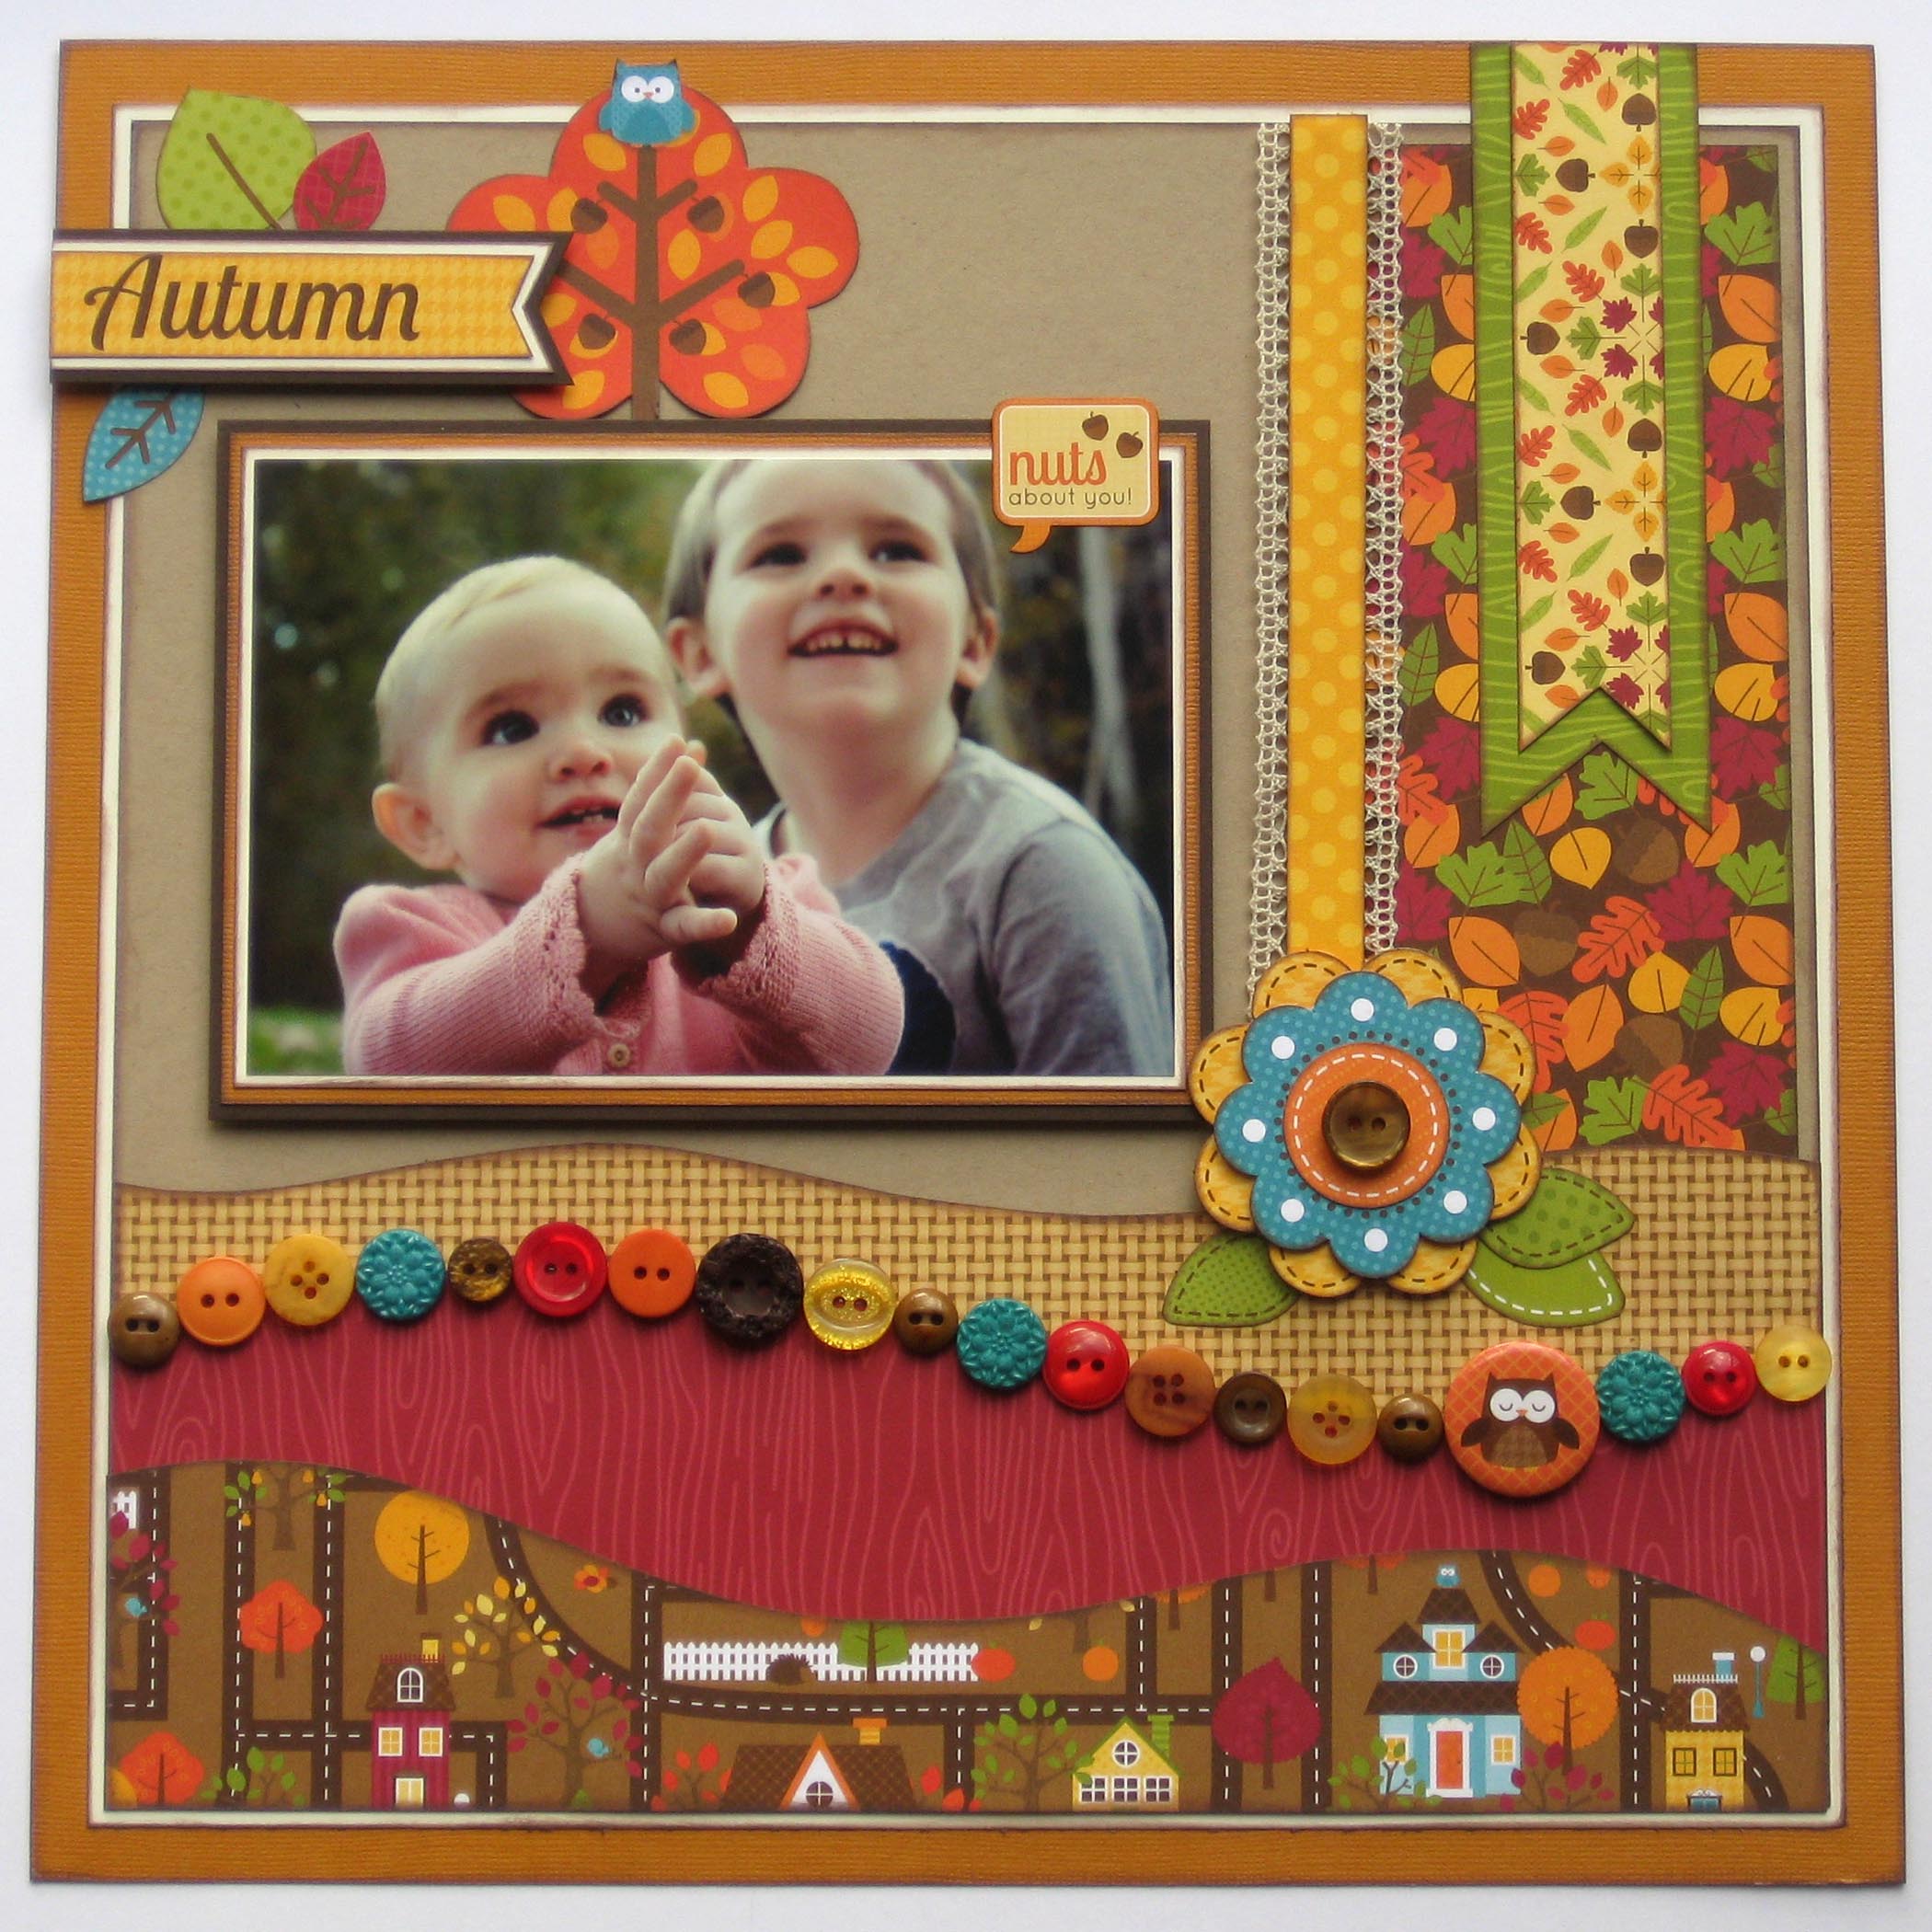
Here is what you will need to create this Autumn Button Border layout.
Project Recipe:
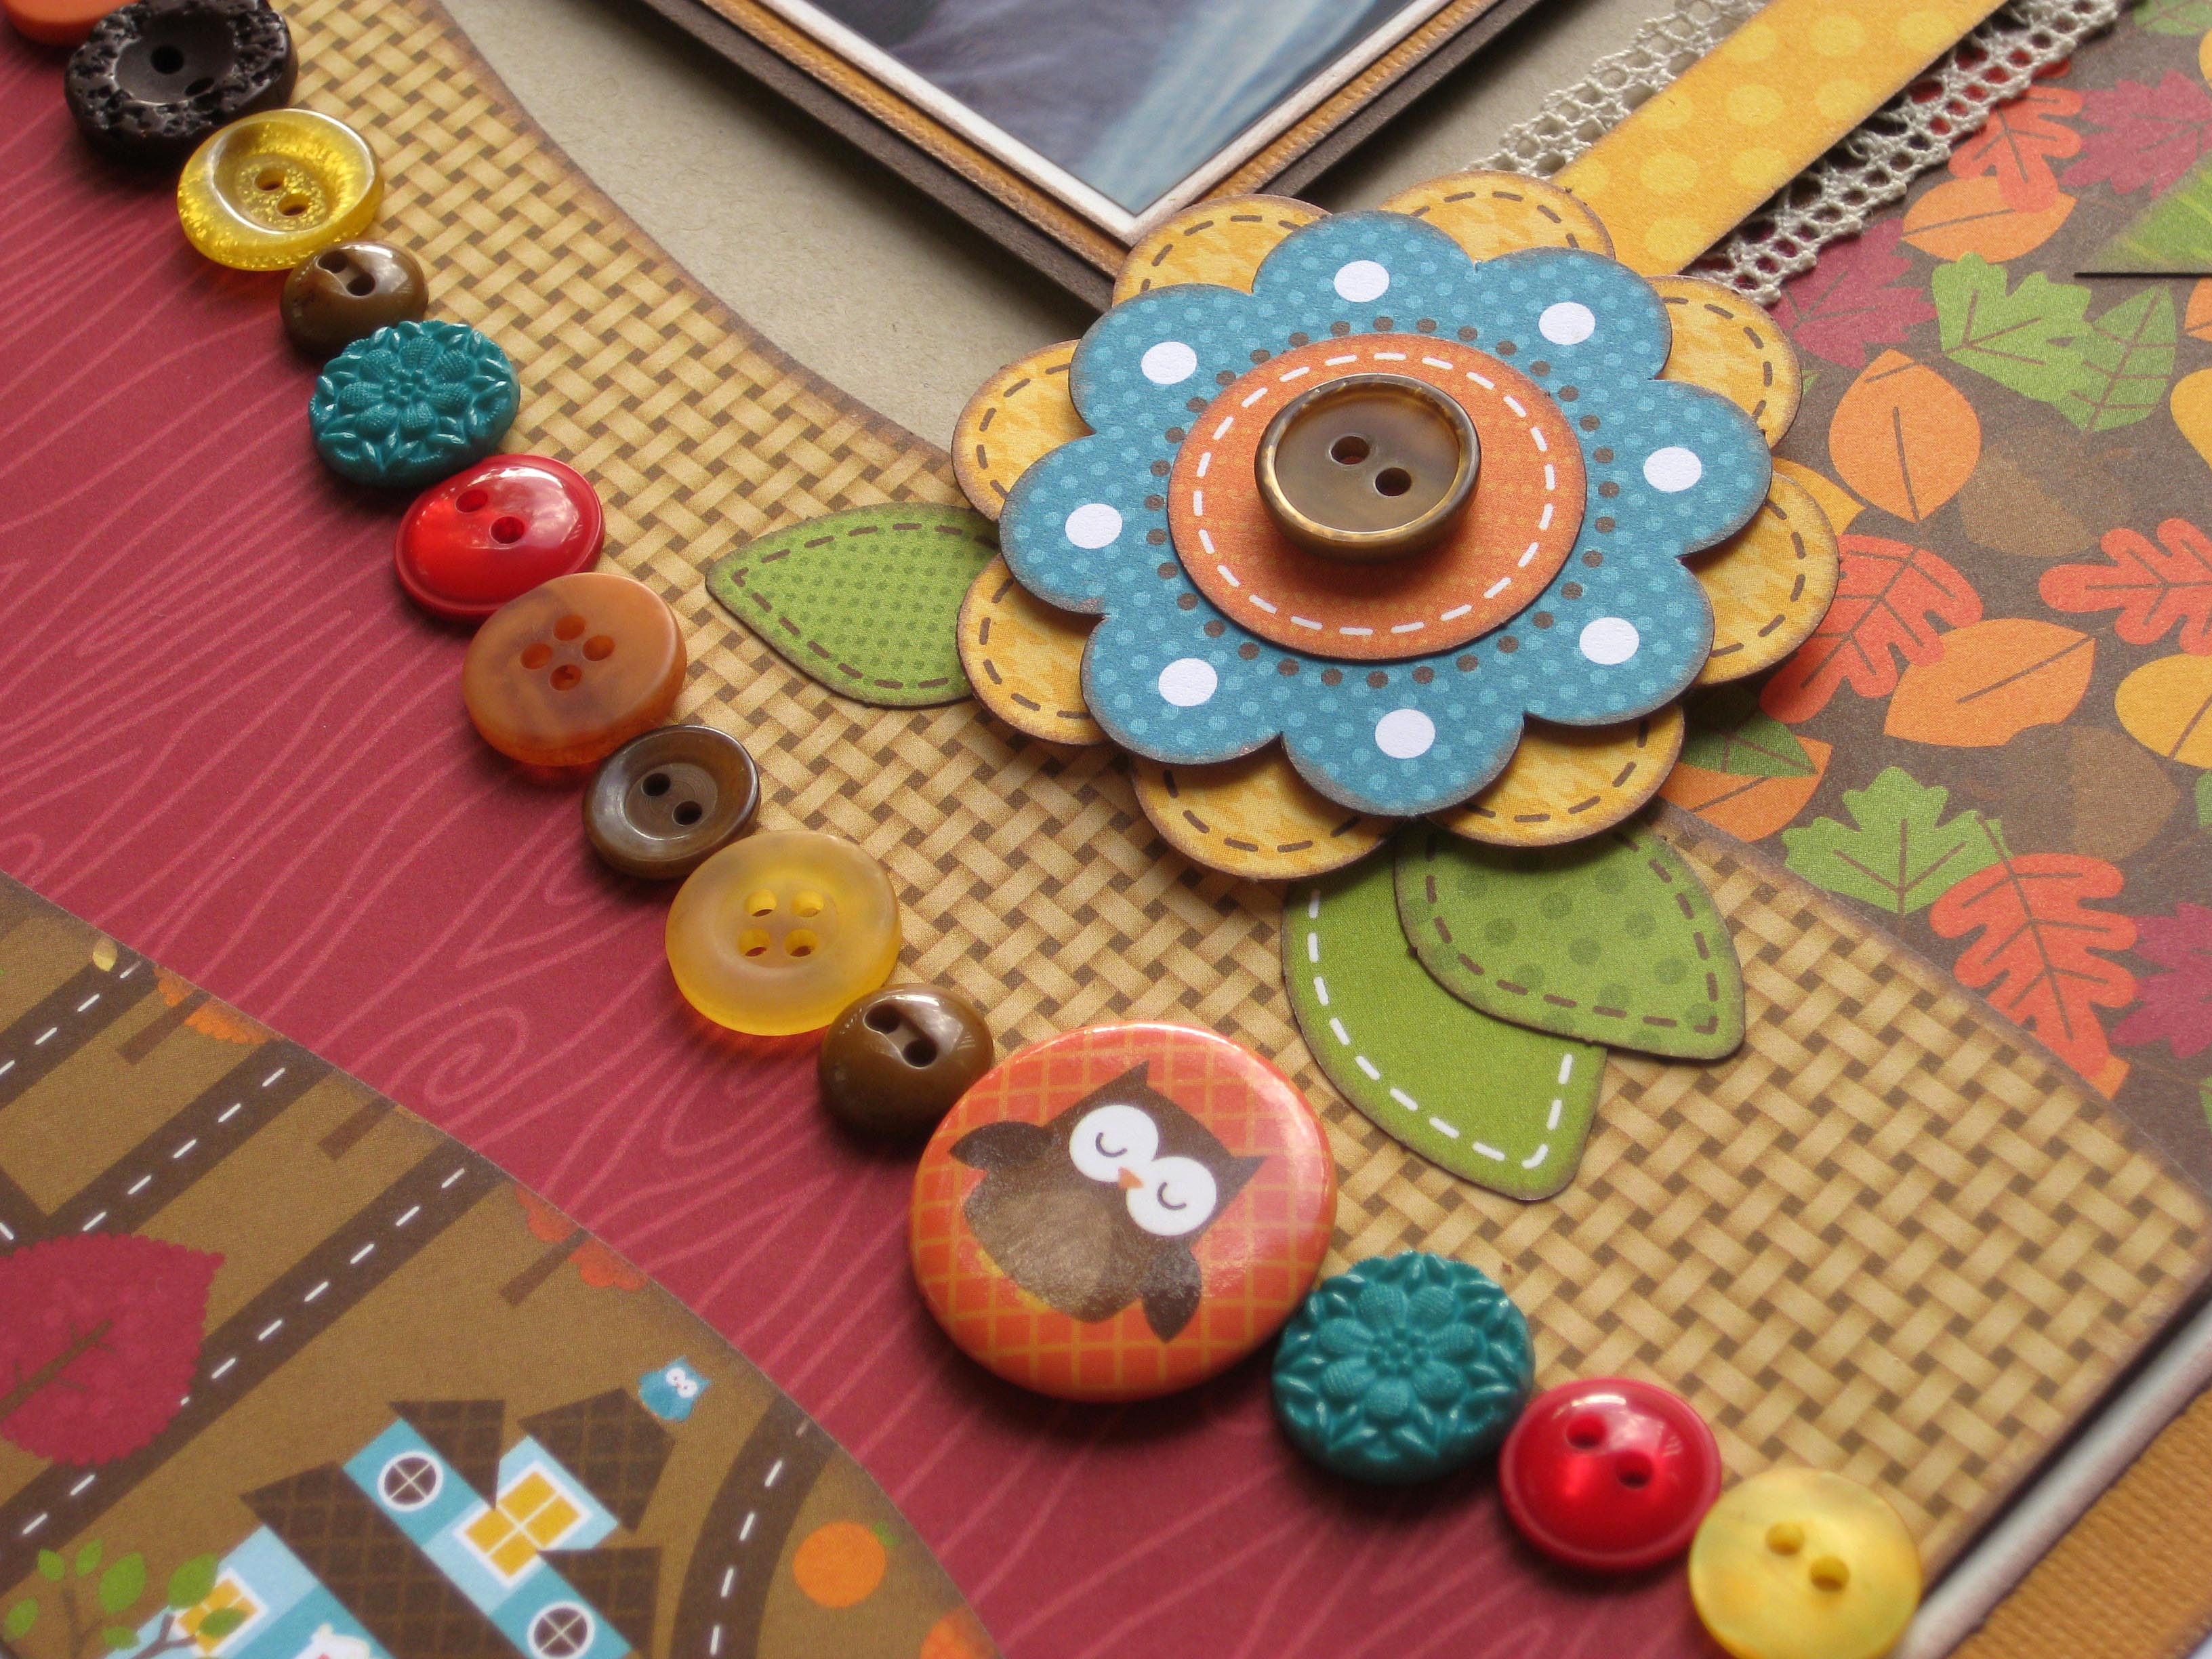
I wanted a true mixture of all of the rich colors of this paper collection, when creating this Autumn Button Border. I think the combination of the buttons and the coordinating embellishments from the paper collection were a perfect match.
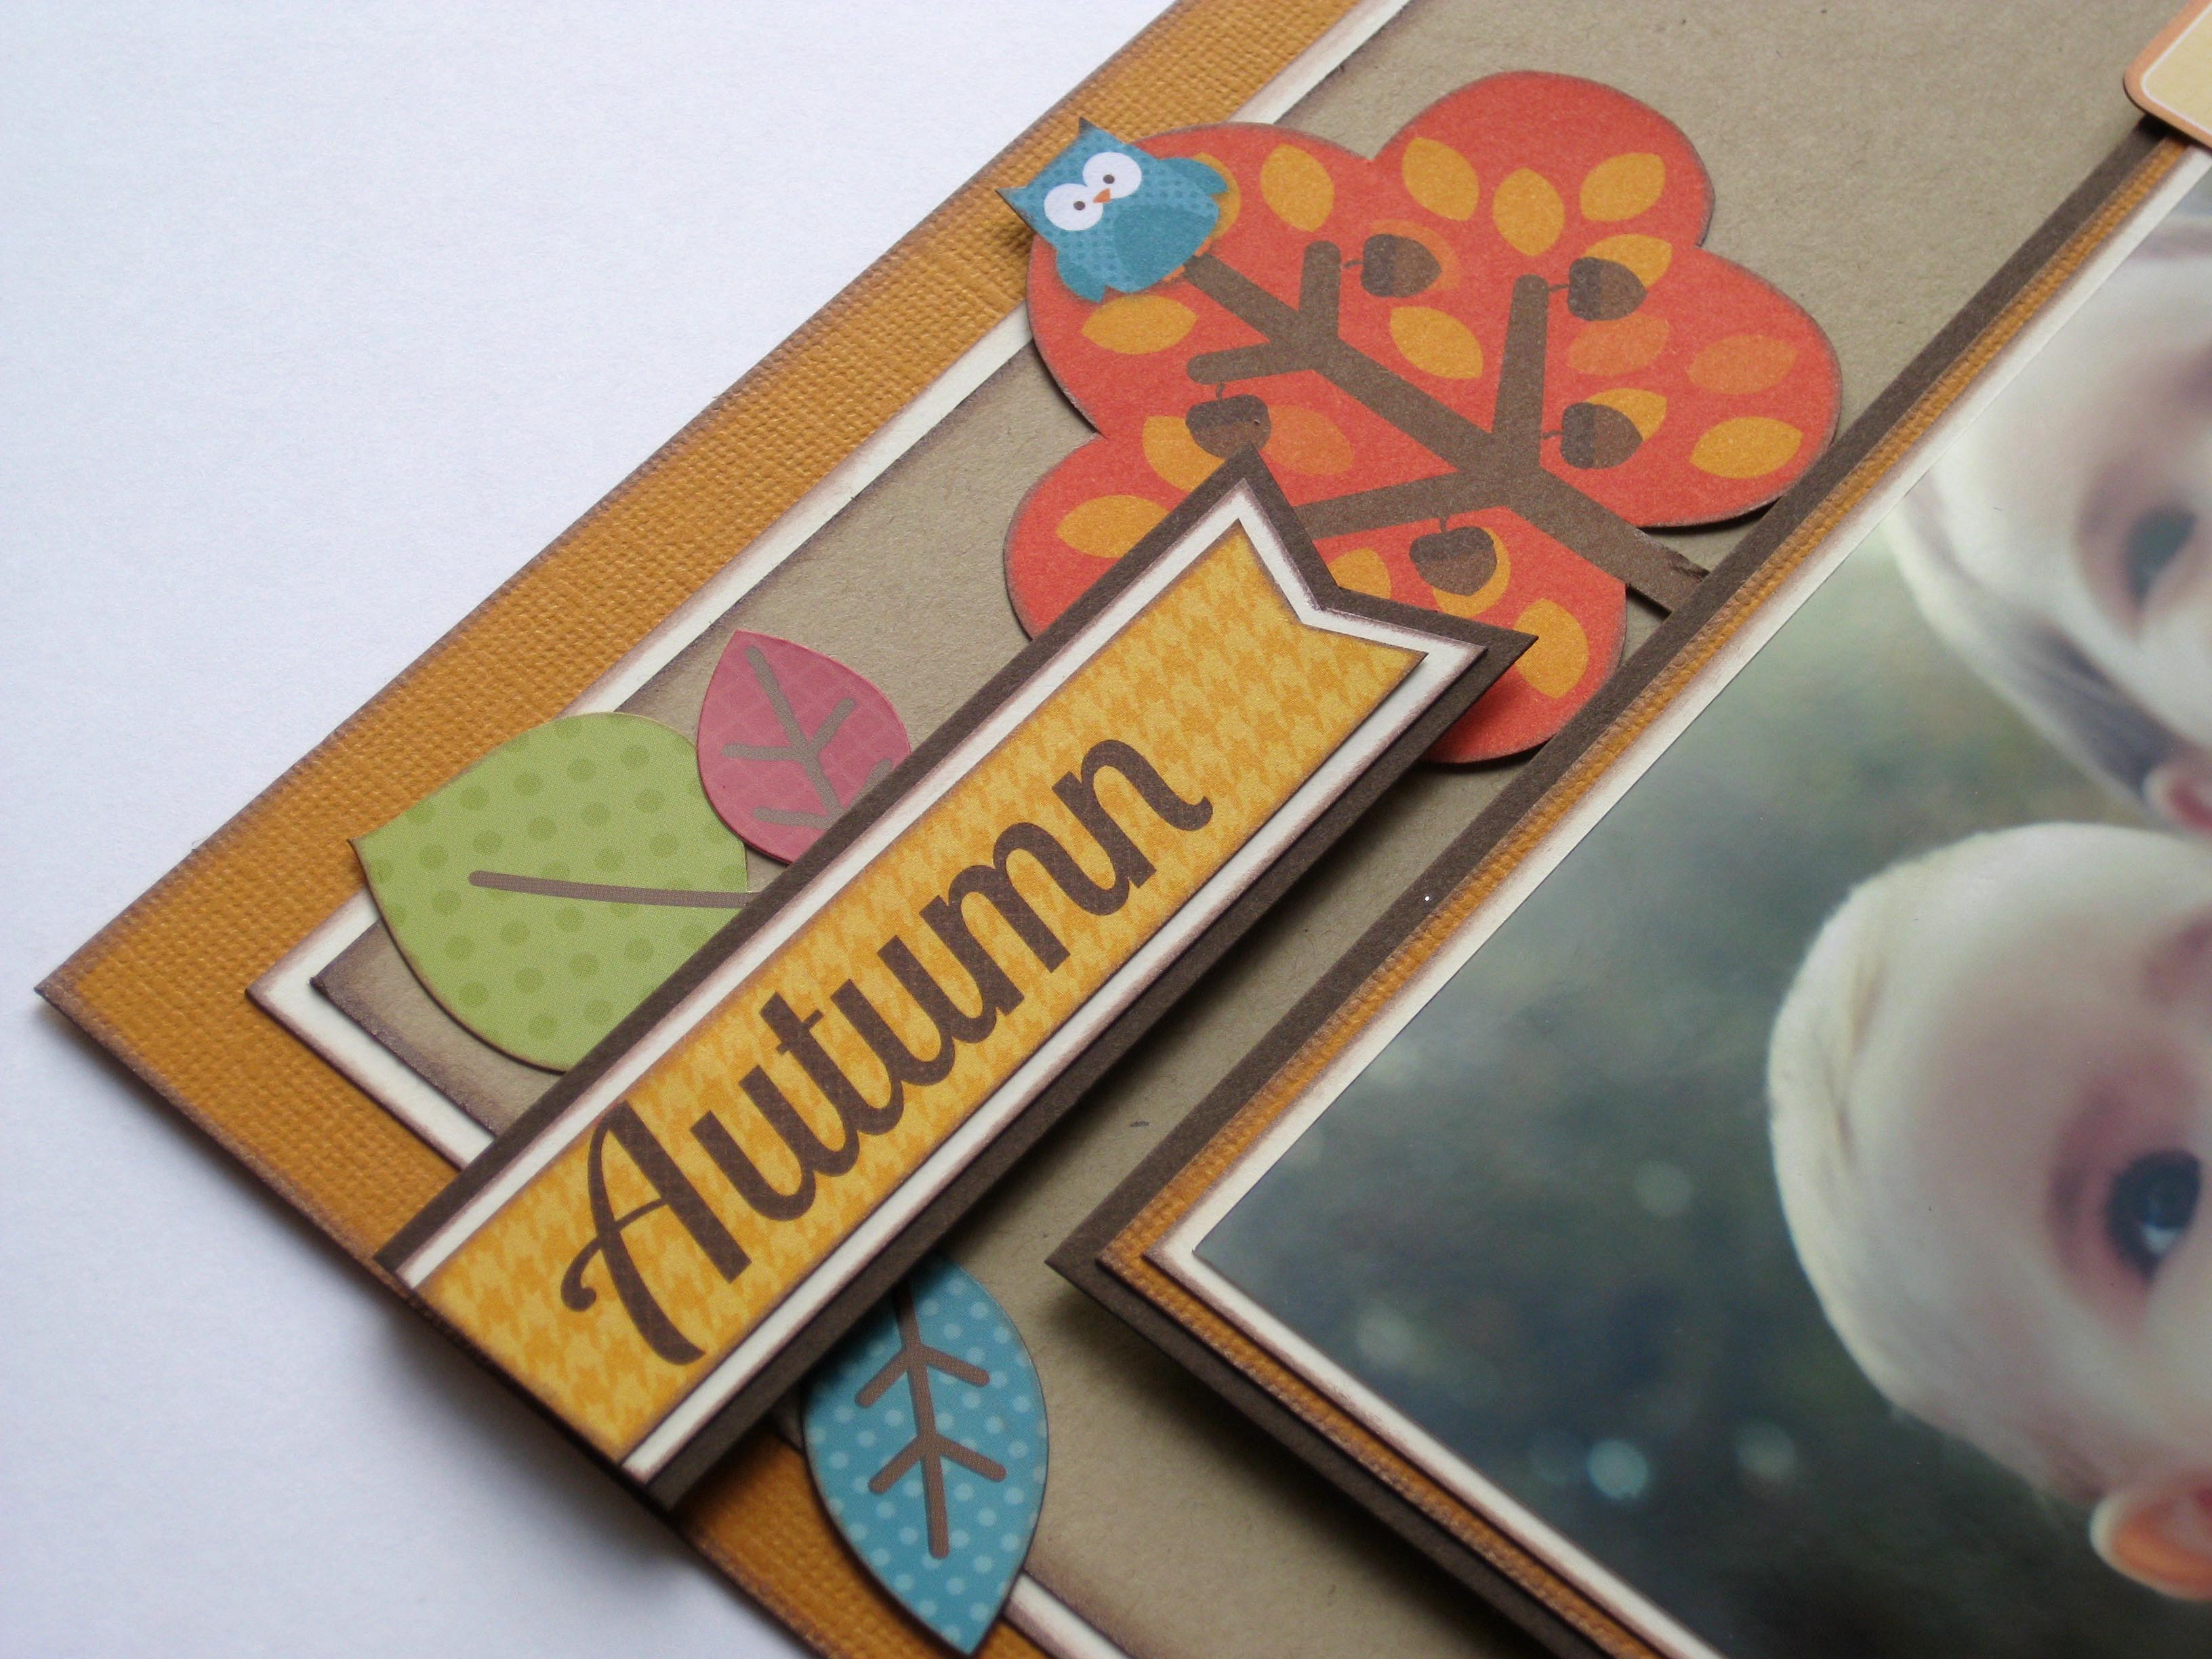
Thank you so much for stopping by. If you would like to check out more of my button and paper crafting creations, please check out my blog Scrappy Chick Designs.
My fall button serving tray is one of my favorite buttons projects I have ever made. Plus it is easy to make which is a win win right? Grab your buttons and a thrift store tray to get started making your own version. Don’t need a serving tray for fall? Maybe use this same idea with a button ornament in the center for Christmas? Or a heart in the center for Valentine’s Day? I can think of all sorts of different tray designs for all seasons of the year.

I started with a tray from the thrift store for 99 cents and a bottle of Americana gloss enamels in Antique Gold.
I painted my entire tray with 2 coats of the paint then grabbed some fall themed buttons from Buttons Galore and More.
I laid the buttons out on my tray until I was happy with the arrangement. I then used my 3 in 1 Beacon adhesive to glue them directly to the tray.
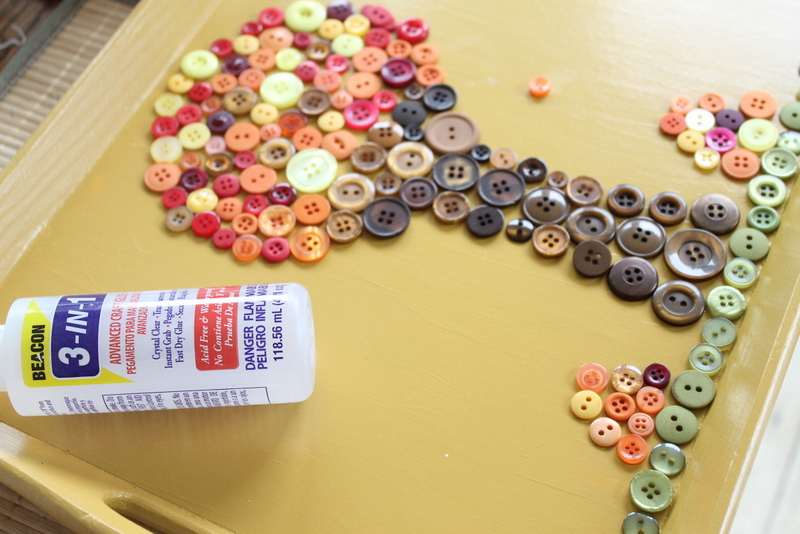
Once the glue was completely dry, I mixed a two coat epoxy to make my tray nice and smooth. Don’t be afraid of epoxy! Just mix and pour according to the package directions. I spent quite a bit of time using a flame to pop bubbles that come up from the epoxy itself and the buttons. Yes my finished project still has a few bubbles but overall it looks amazing. The buttons seem to create more bubbles than is normal with an epoxy project.
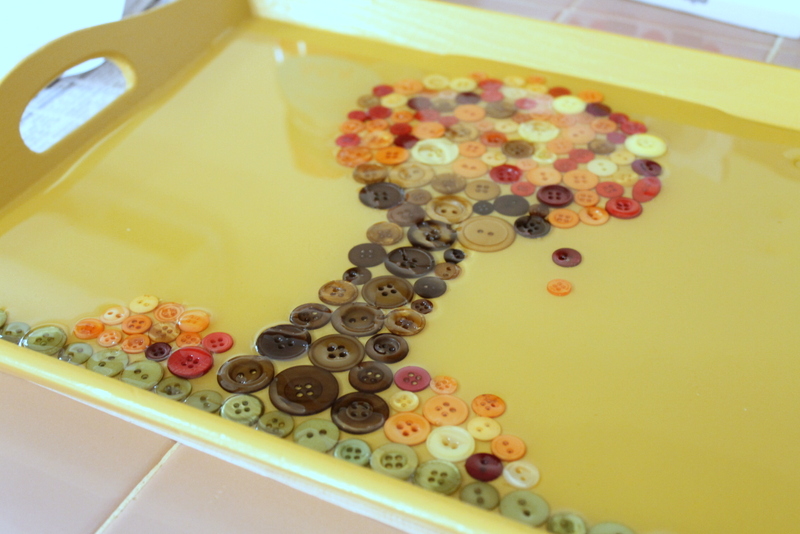
Allow your epoxy to dry for a nice long time before you touch it (don’t be tempted to touch!!). You will be left with a glossy flat serving tray with buttons in it! Now some of my buttons stick up just slightly out of the epoxy (there is a slight hump in the epoxy). This can easily be fixed with a second epoxy pour however the bumps do not really bother me for my needs so I am leaving them. You could also be extra careful when choosing buttons for your design and choose only the flattest buttons to include.
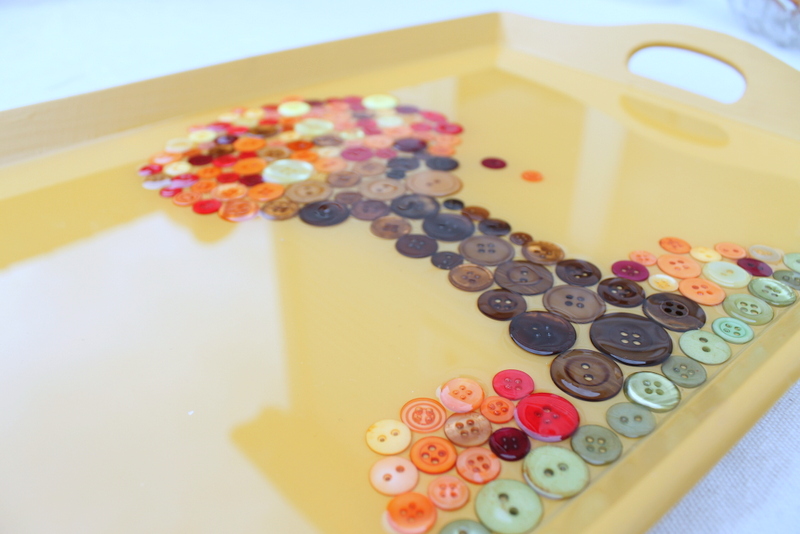
Just so you can see my entire button fall scene here is a picture of the entire tray.
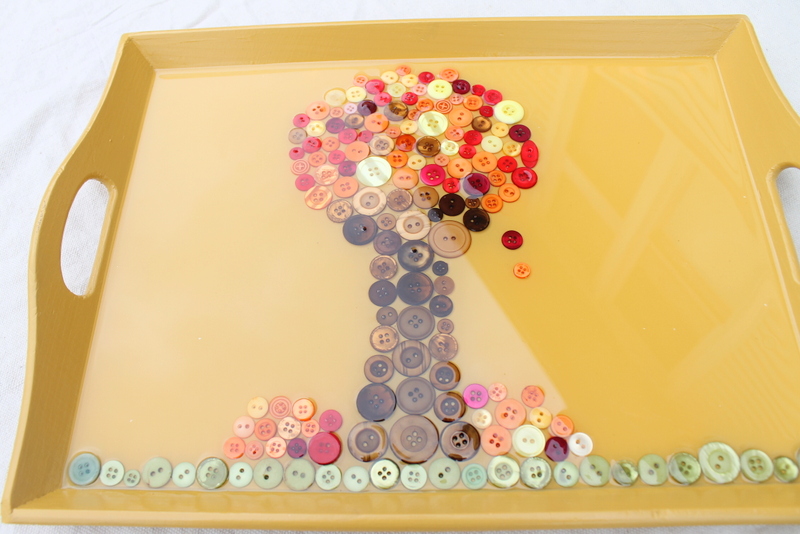
It is so darn cute I could eat it up. Speaking of eat it up, use your fall tray to serve snacks to the kids or for a wonderful addition to your Thanksgiving and fall themed parties. Want more buttons on your Thanksgiving table? Be sure to check out my rustic burlap napkin rings as well.
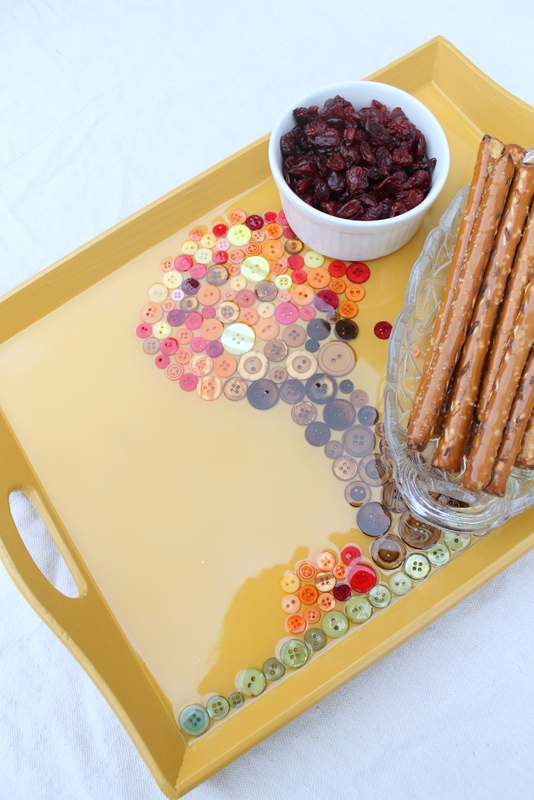
Will you be adding buttons to a tray anytime soon? Don’t let that epoxy pour scare ya! My fall button serving tray will make an appearance at our Thanksgiving meal and many snacks in the meantime.
Creating Christmas ornaments that are handmade and created with a personal touch have never been easier. With the pre-cut shapes that are available in all of the craft stores and buttons, here are ornaments you can make quickly that are to dye for – as in dye with Rit Dye that is.
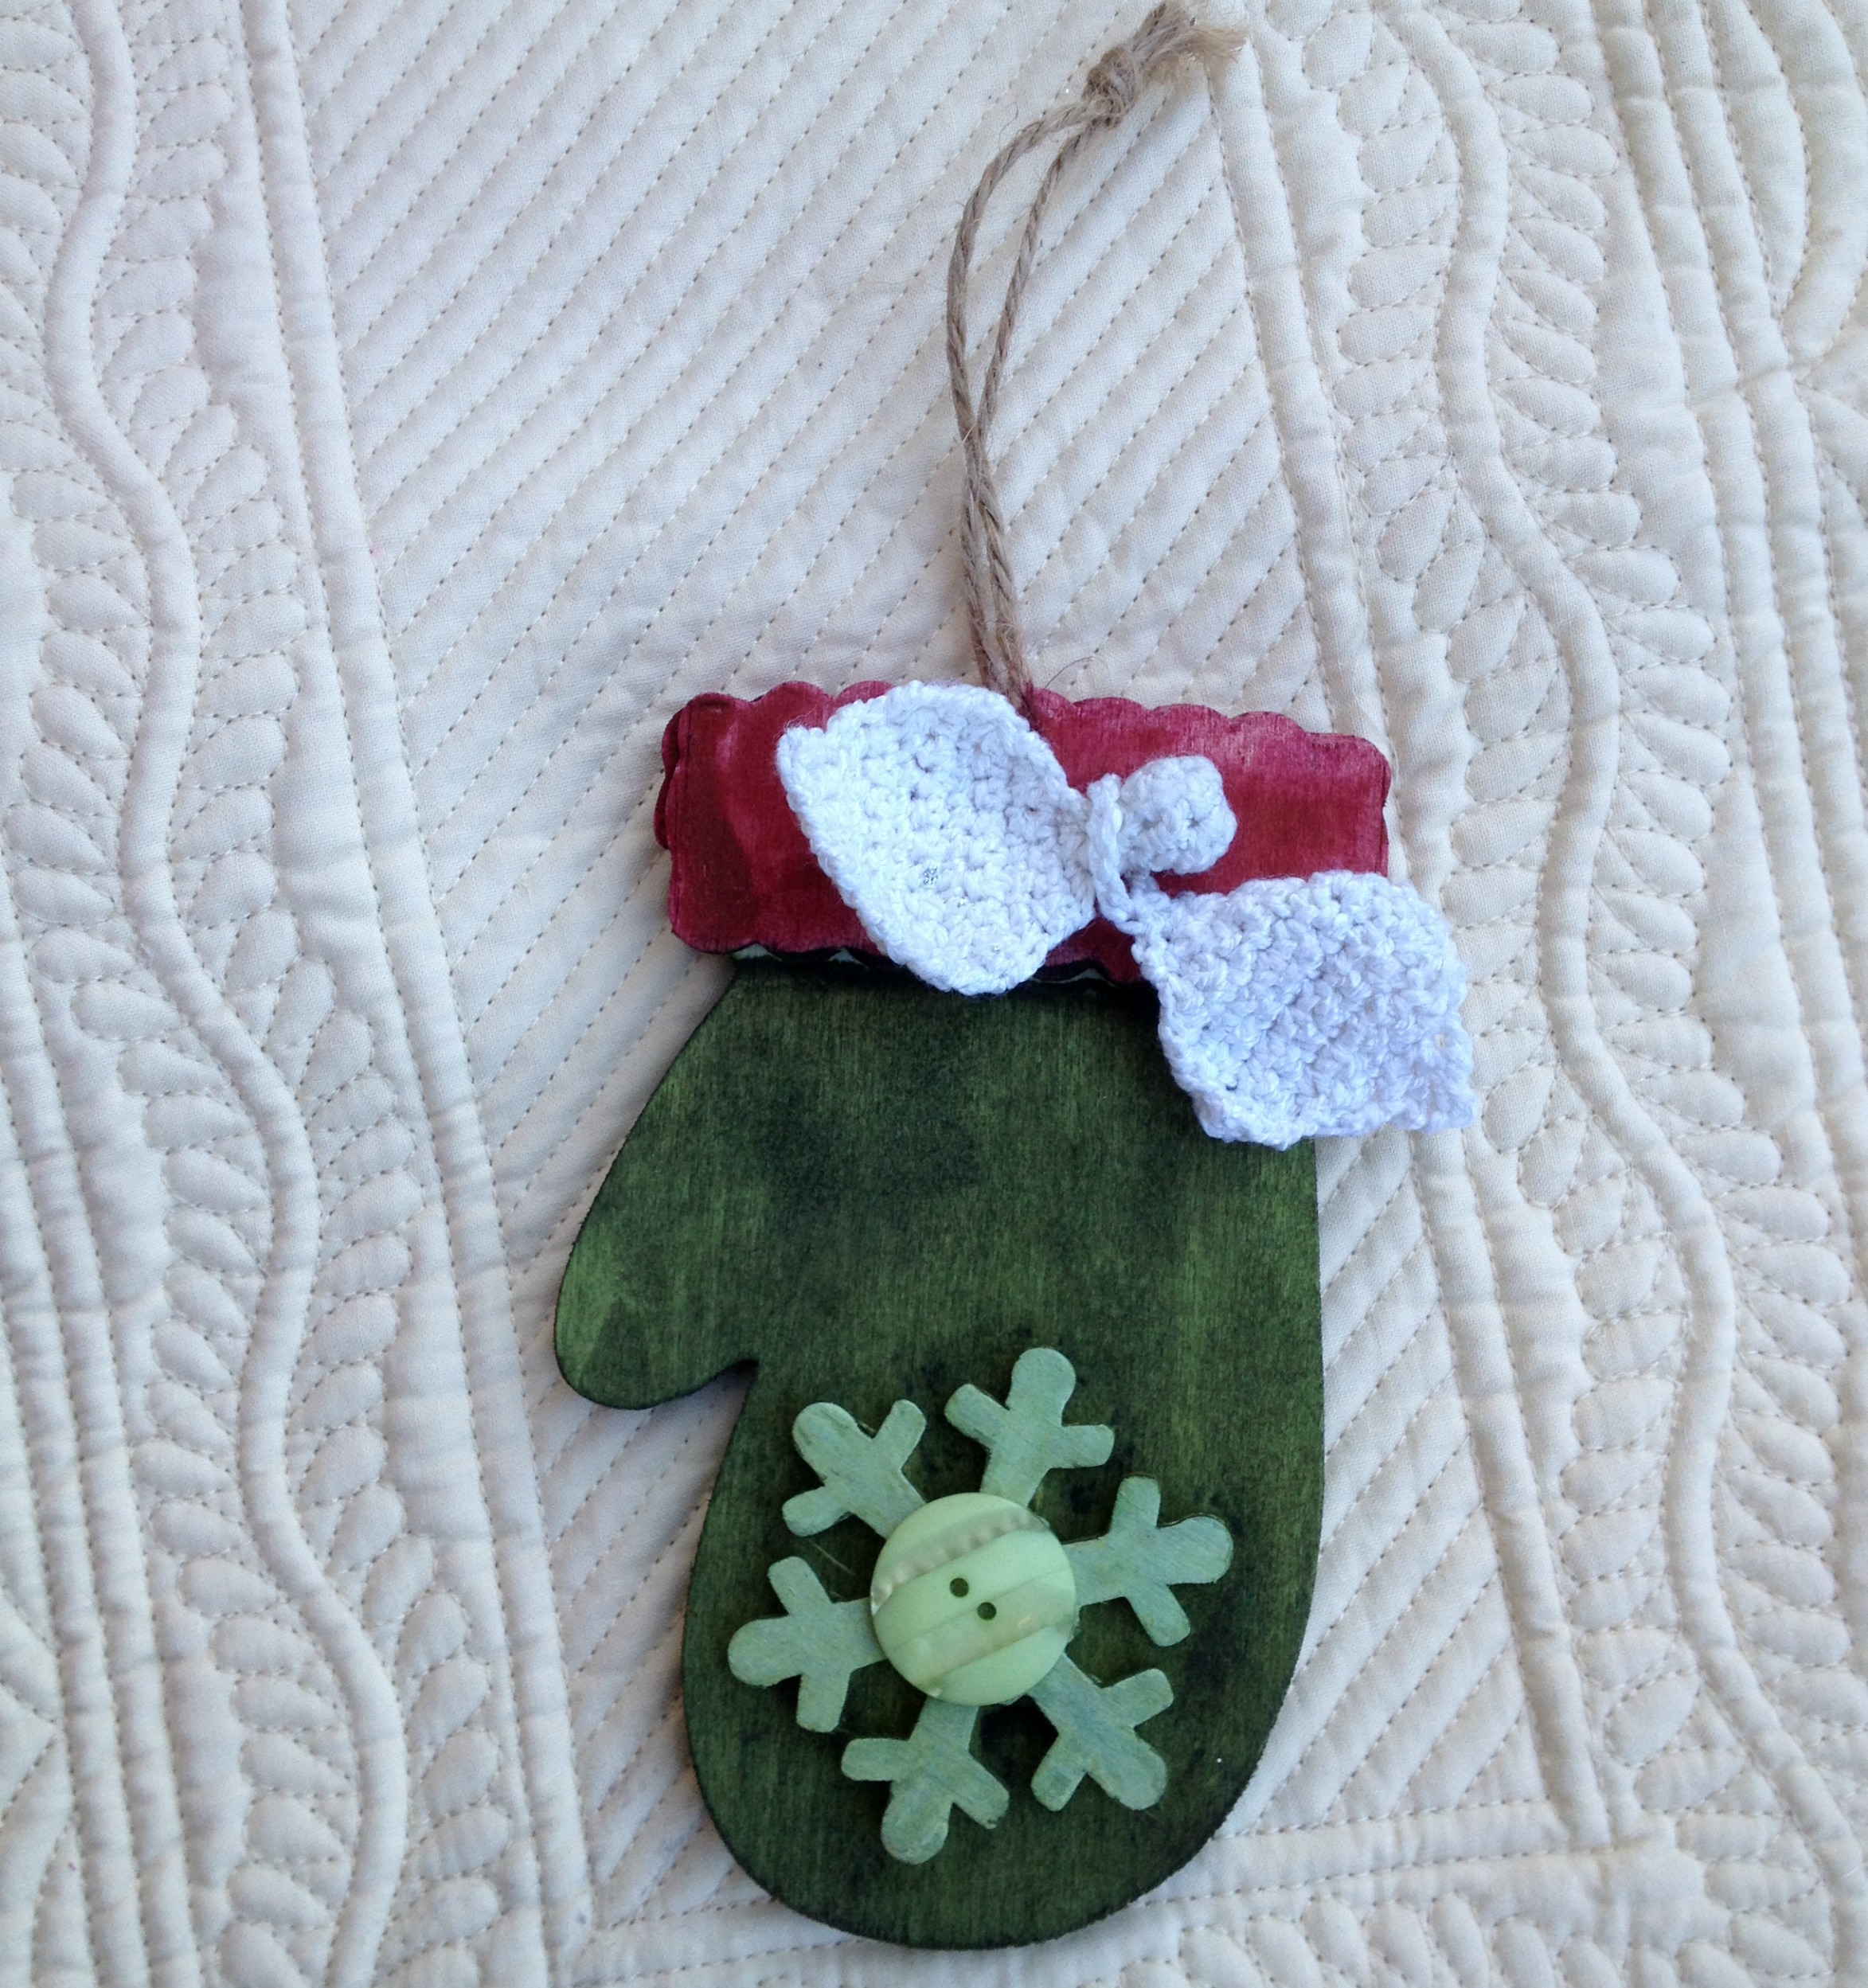
It is so incredible simple that you can make them in fifteen minutes or less. To do it, paint the wood with dye directly from the bottle. If you want it darker, heat it up first. It dries pretty quickly but if you are in a hurry, you can stick it in the microwave for 30 seconds to speed it up.
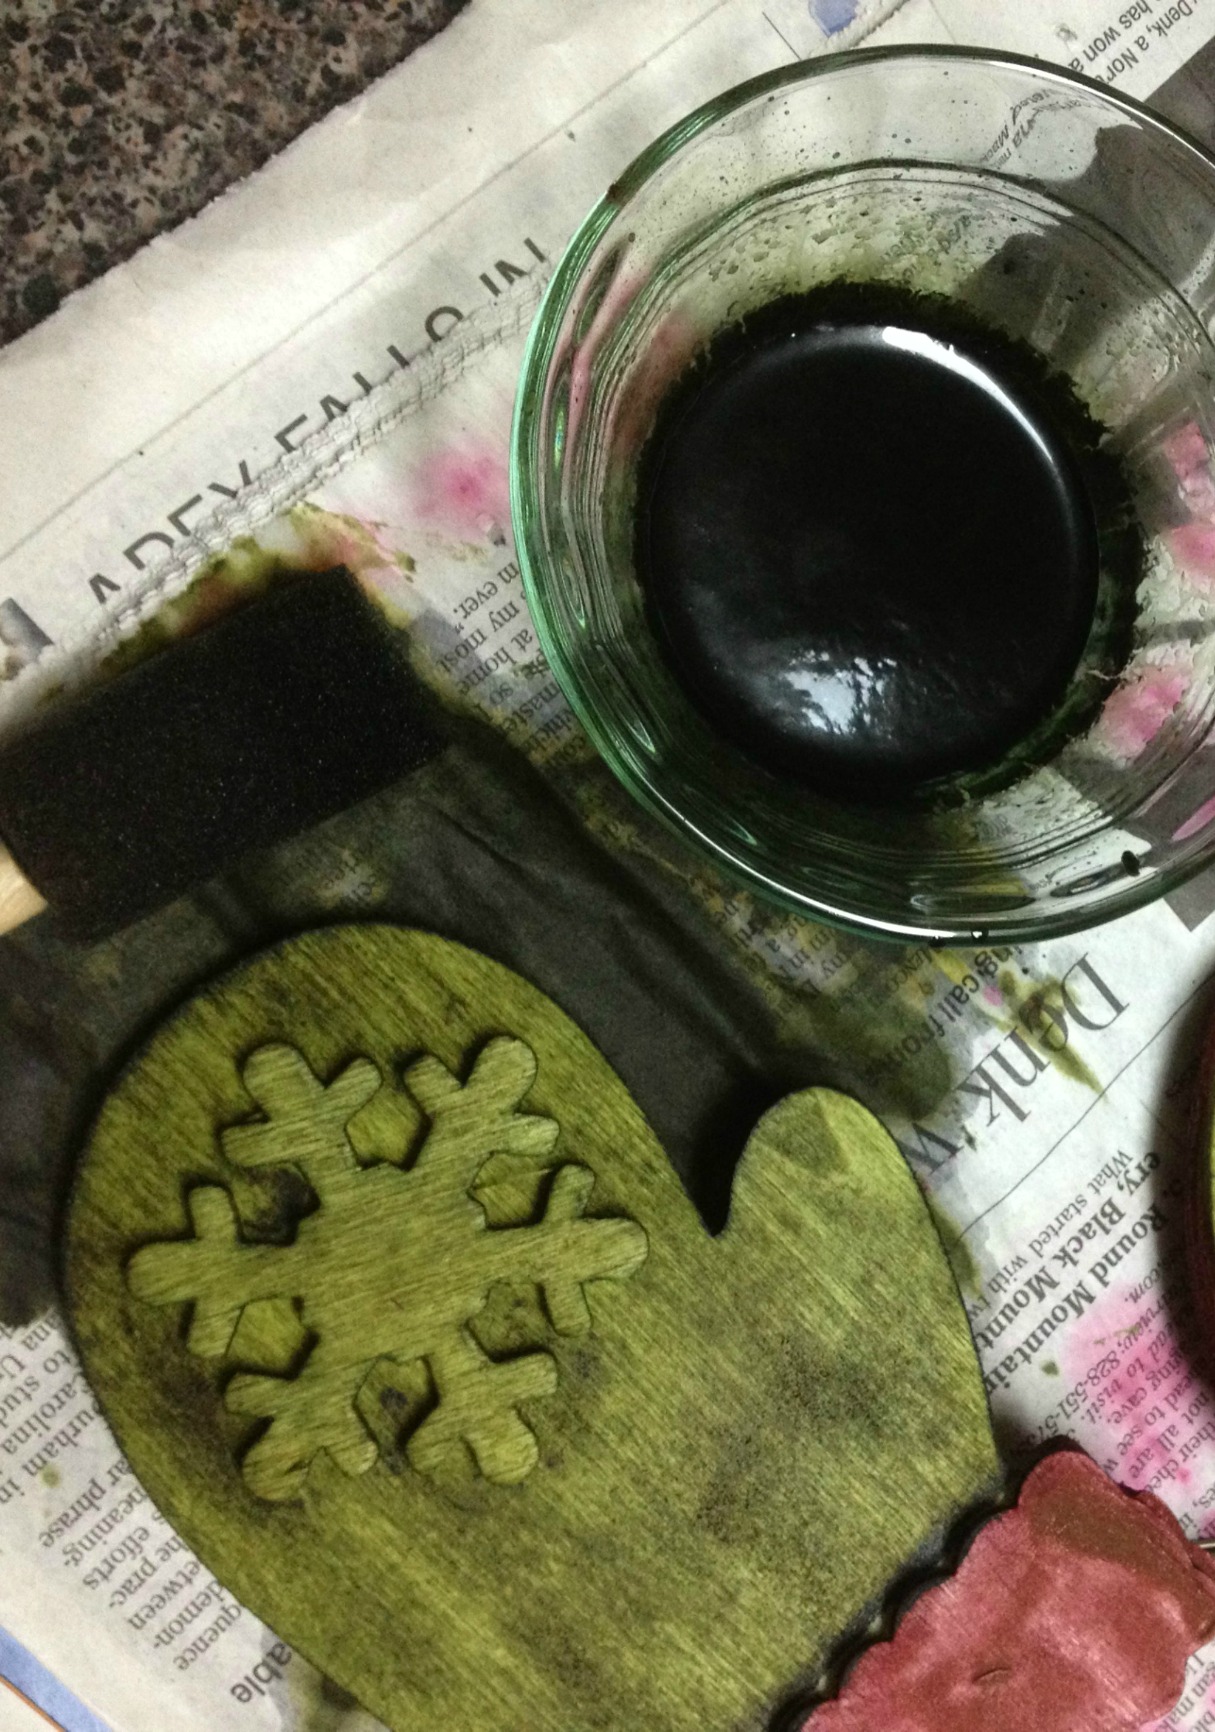
Then you add your buttons and embellishments to make it into something special. I used an Laura Kelly Candy Apple Green button on this ornament. Before I added it with hot glue, I went over the snowflake with a white paint pen a little bit.
Here are some that were created with a group of fabulous attendees at a crafting event last week. I had a blast leading the workshop and am amazed at how awesome their ornaments turned out.
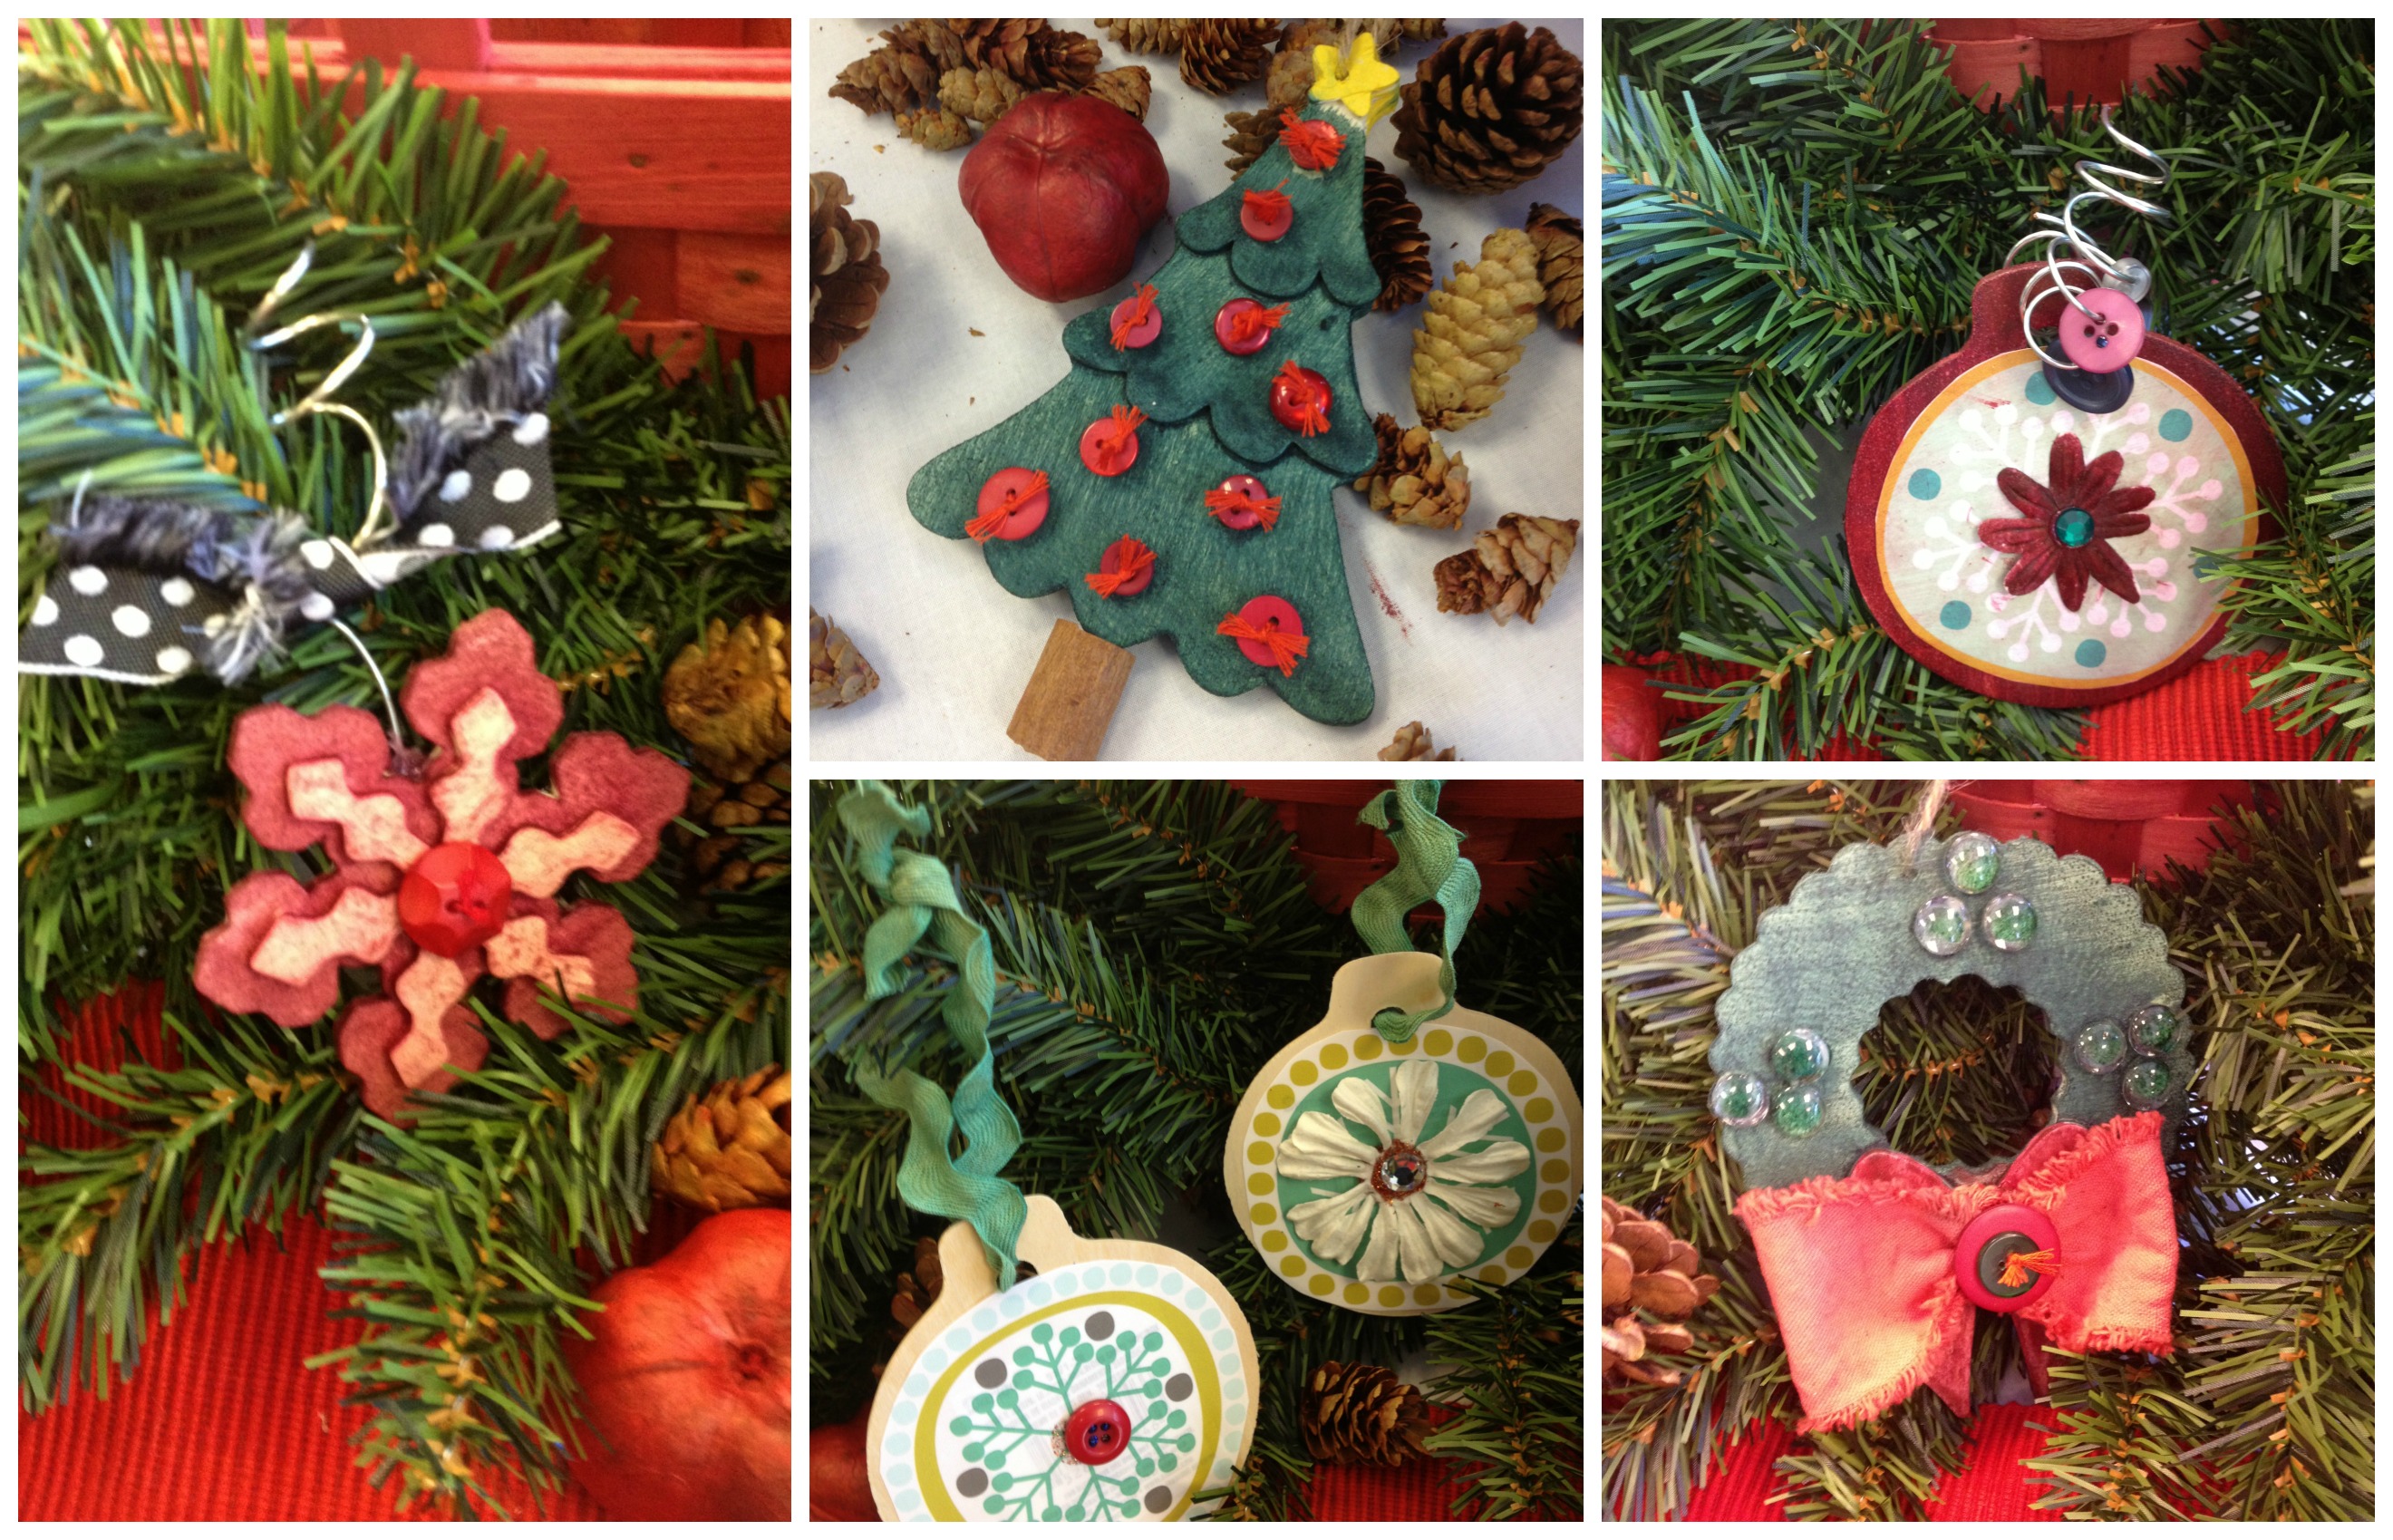
Happy Getting Ready For the Holidays,
Laura
These Button Pumpkin Stacking Boxes could be the perfect addition to your Autumn and Thanksgiving home decor. This post will give you a step by step tutorial on how to create something like these Button Pumpkin Stacking Boxes for your home.
Project Recipe:

I started creating my Button Pumpkin Stacking Boxes by painting all the boxes and their lids with Spiced Pumpkin paint. I used a foam brush and it only took one coat of paint.
Once I had my boxes painted I then inked all the edges to give more of a distressed look.
My next step was to cut patterned paper to fit on 4 sides of each of the boxes. I chose Echo Parks Fall Reflections Collection.
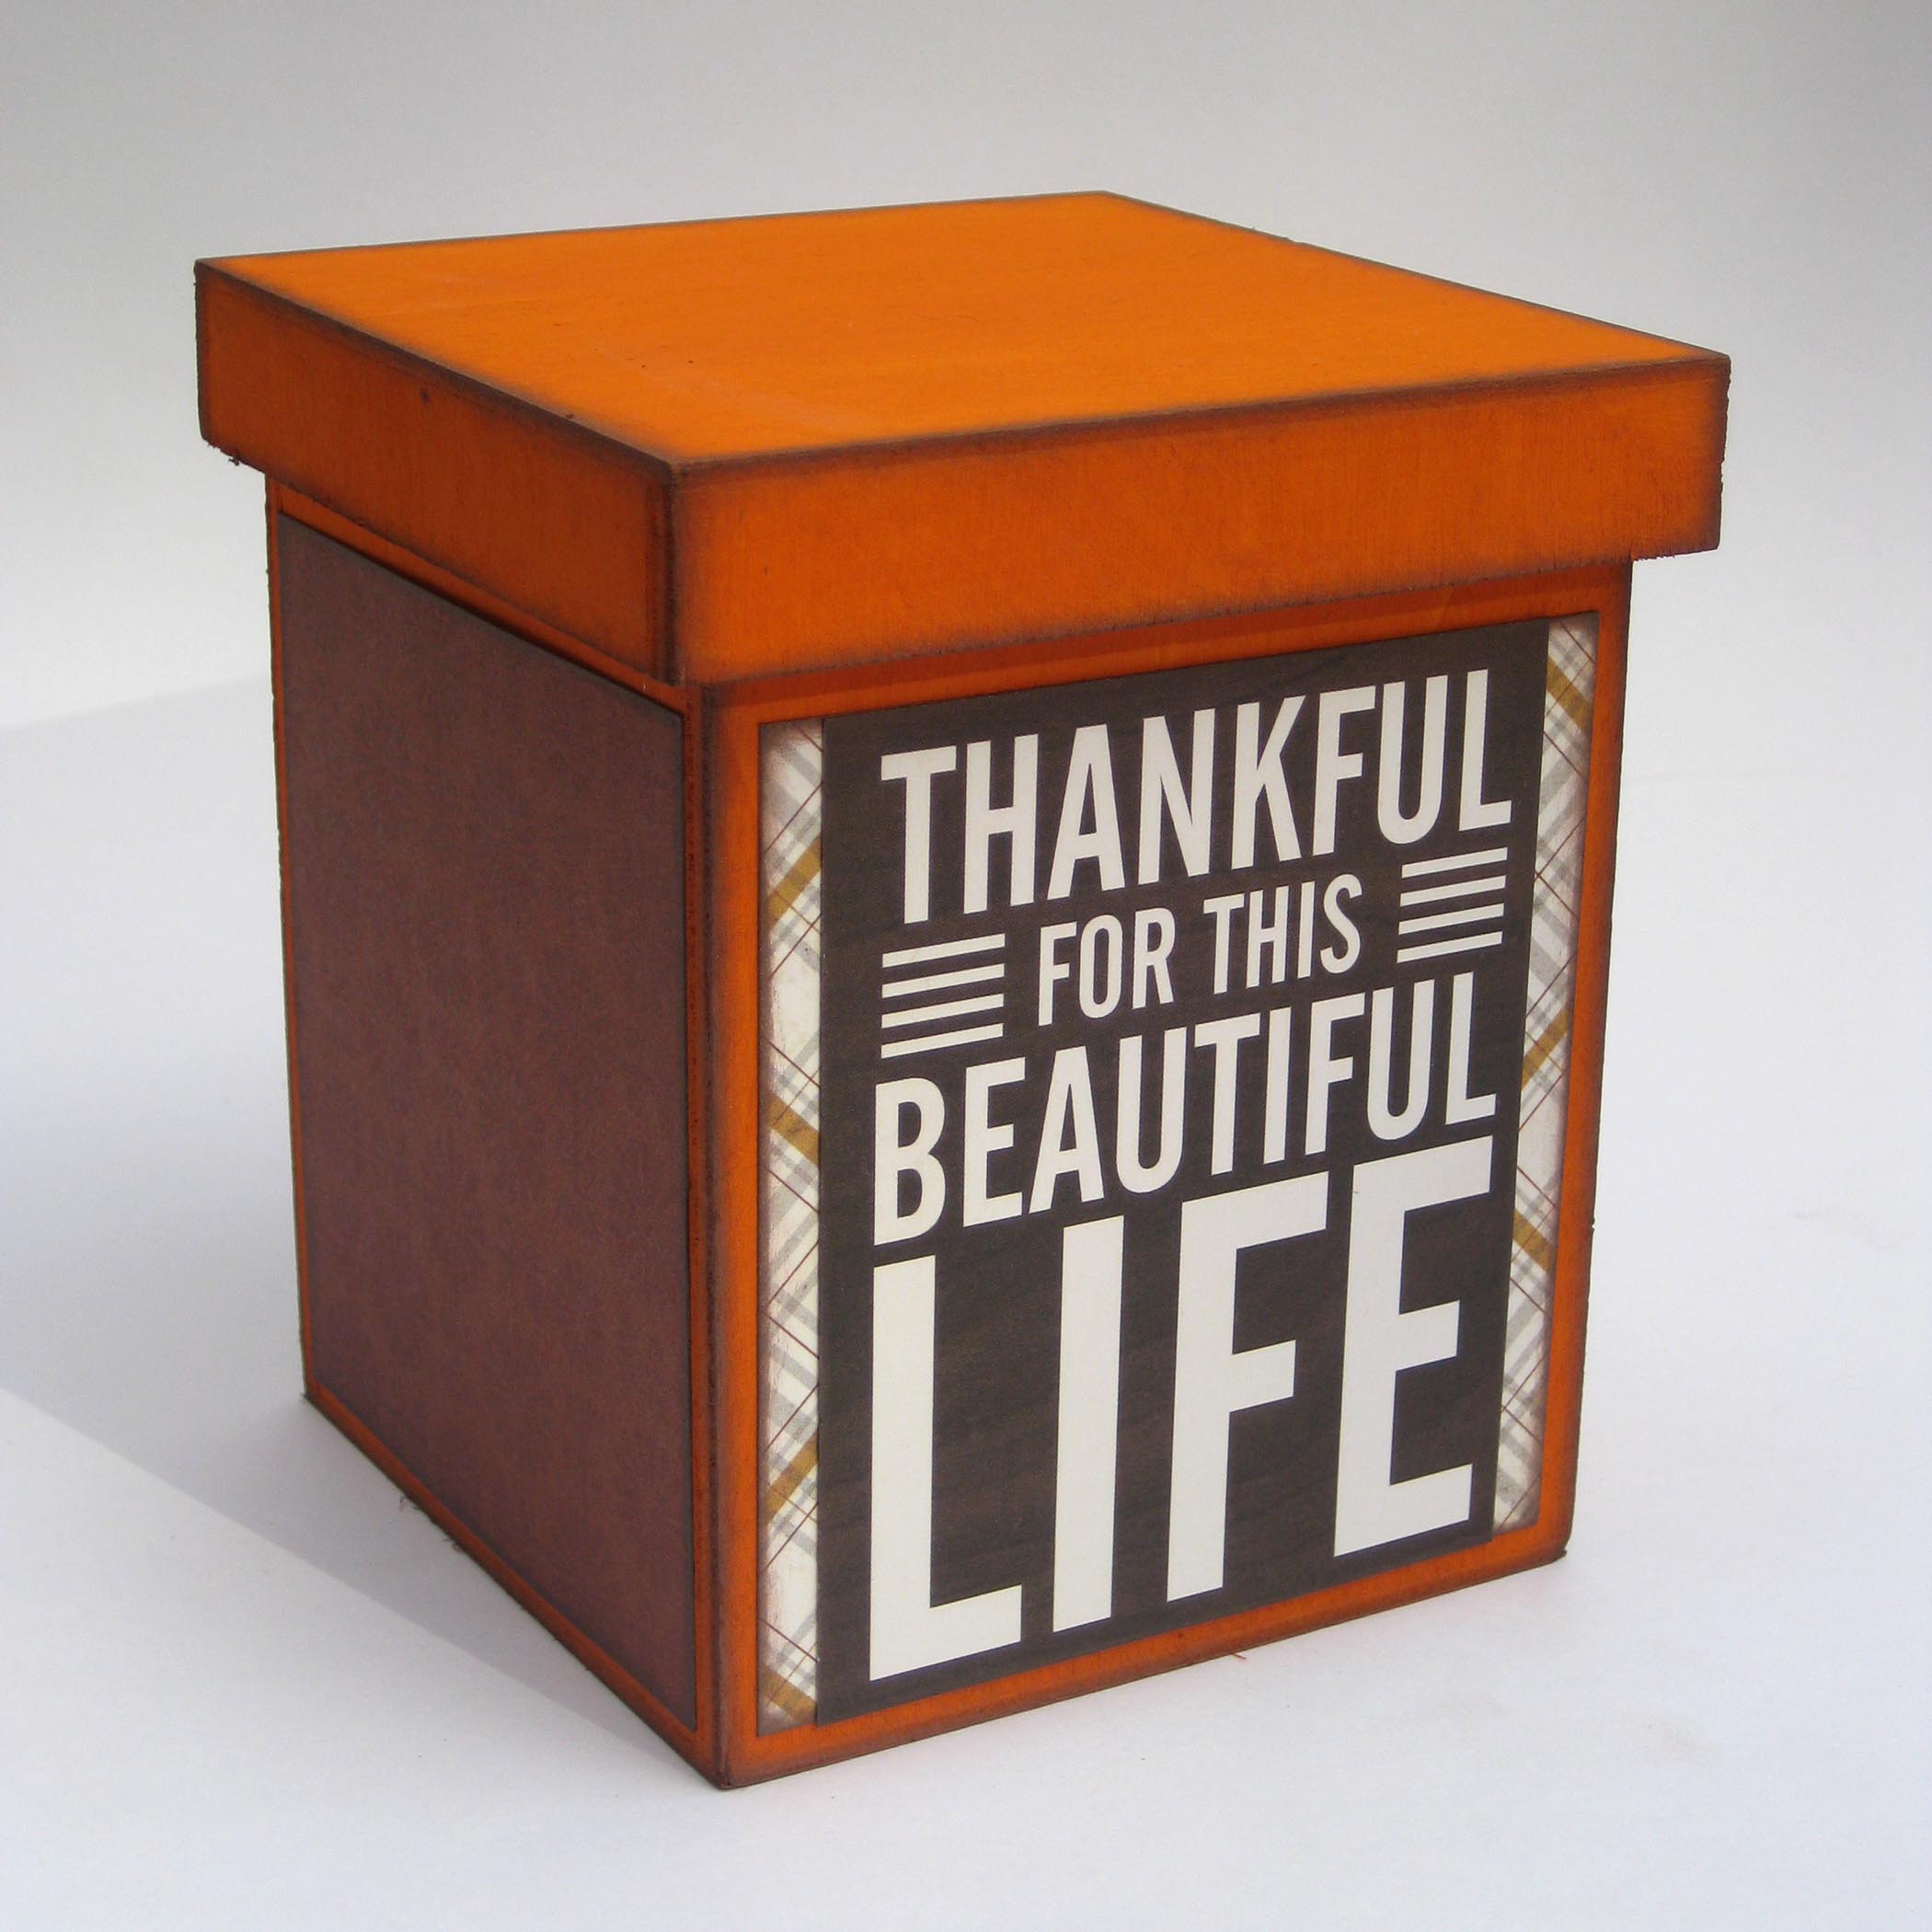
On the top and smallest of the Button Pumpkin Stacking Boxes I created a pumpkin stem by stacking brown buttons. I also added orange buttons around the lid of the smallest and the largest of the Button Pumpkin Stacking Boxes.
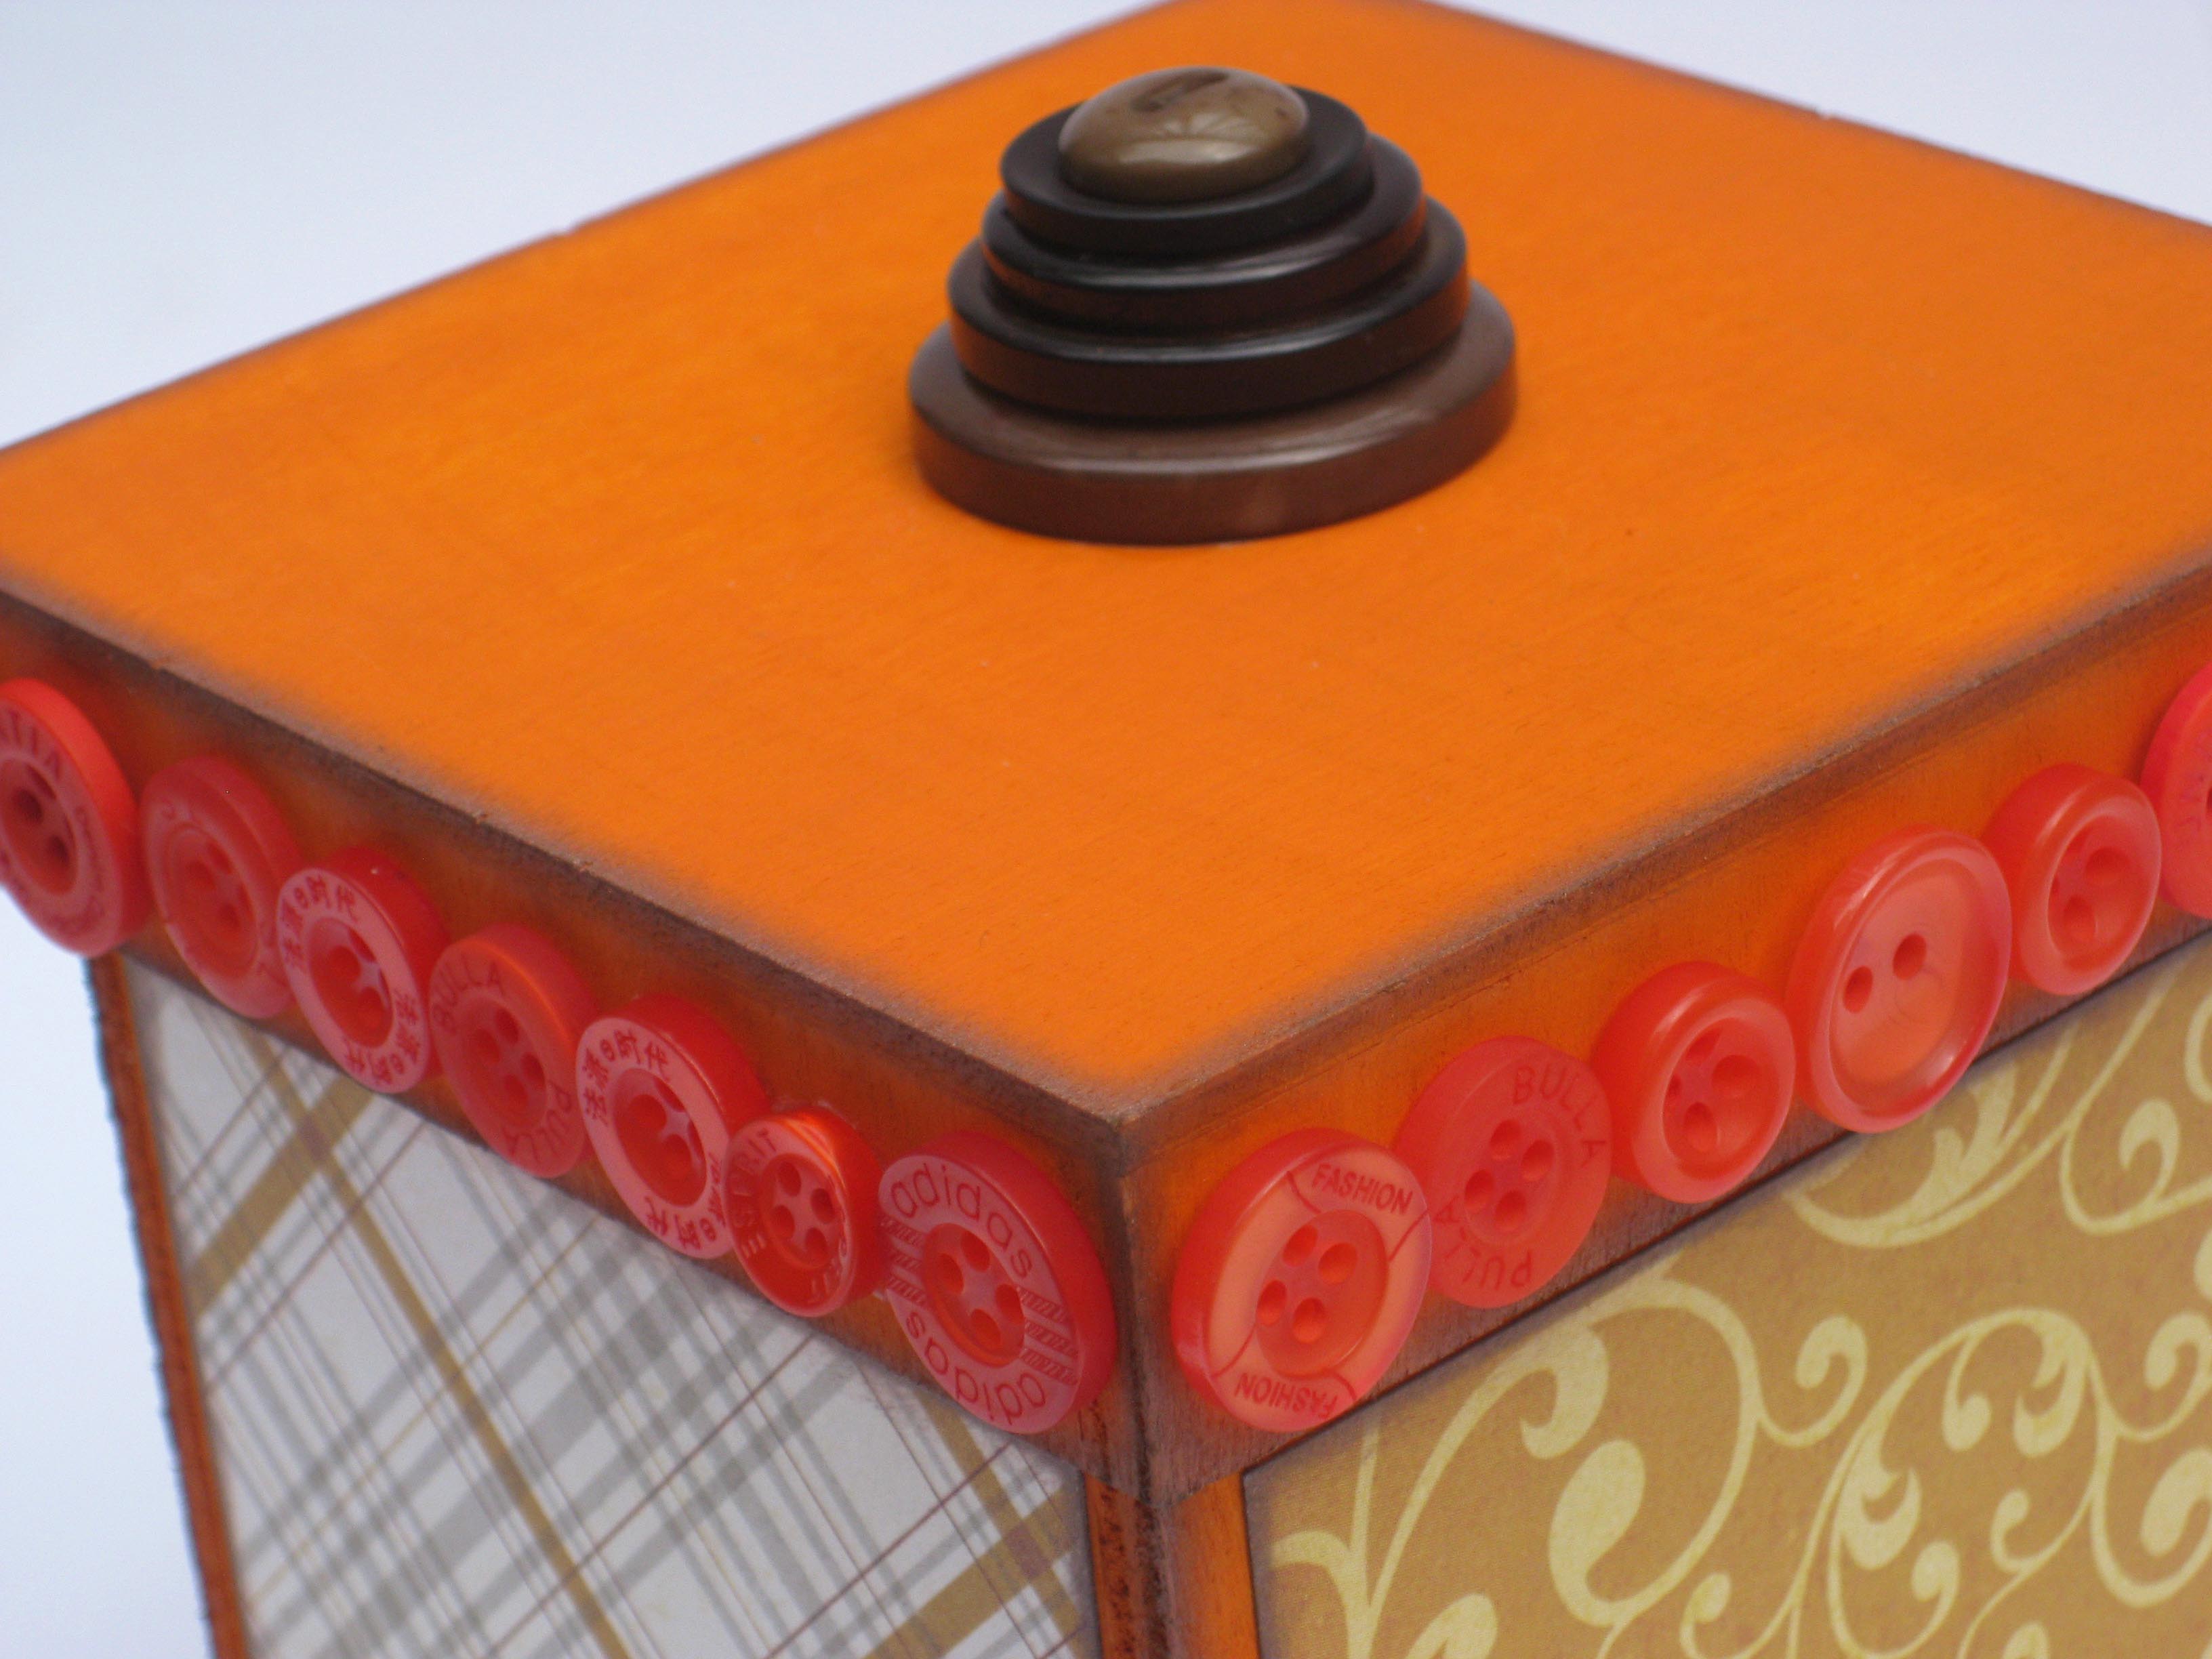
Then all there was left to do, was add a few more simple embellishments.
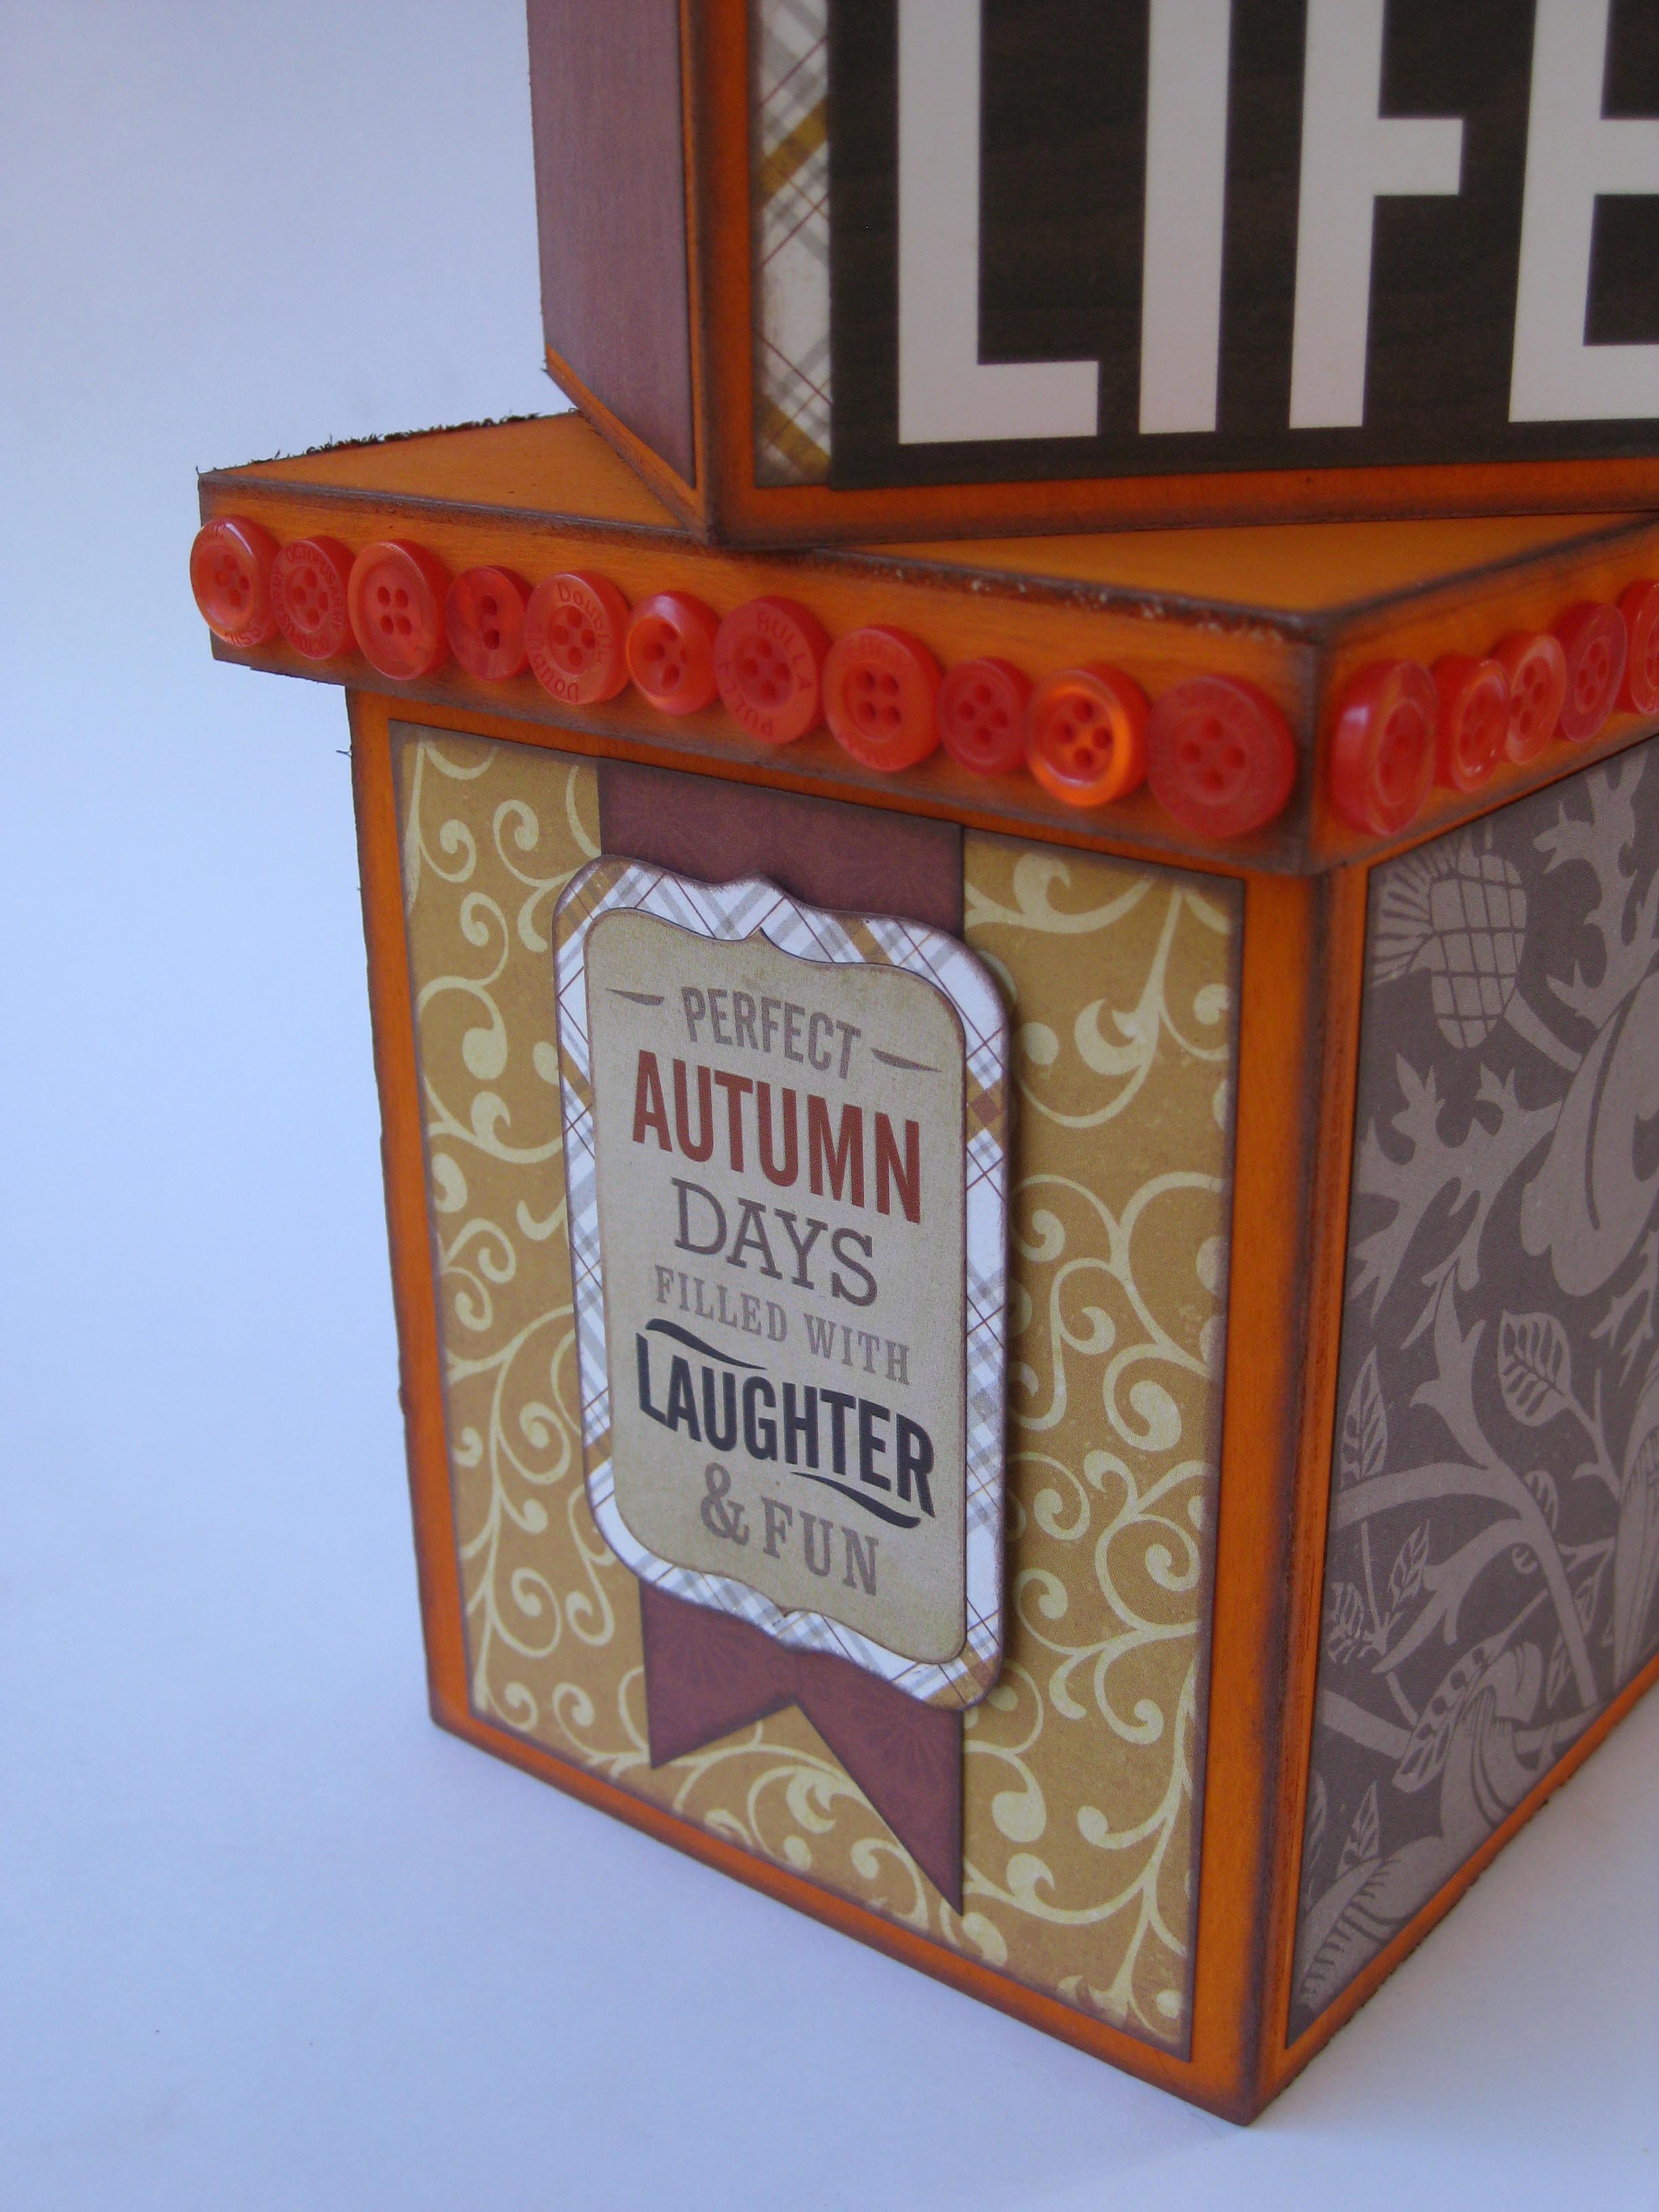
My Button Pumpkin Stacking Boxes are now ready to warm up my home’s decor for the holidays.
If you would like to check out more of my button and paper crafting creations, check out my blog Scrappy Chick Designs by clicking HERE. Thank you so much for stopping by.
My family hikes or goes for a bike ride every weekend and, inevitably, we always return home with a leaf, feather, or pine cone. The natural bits and bobs were piling up on the table, so I decided to create a nature mobile. I love how we can now display our finds in a piece of artwork and nothing is glued down, so we can change it out whenever we want.
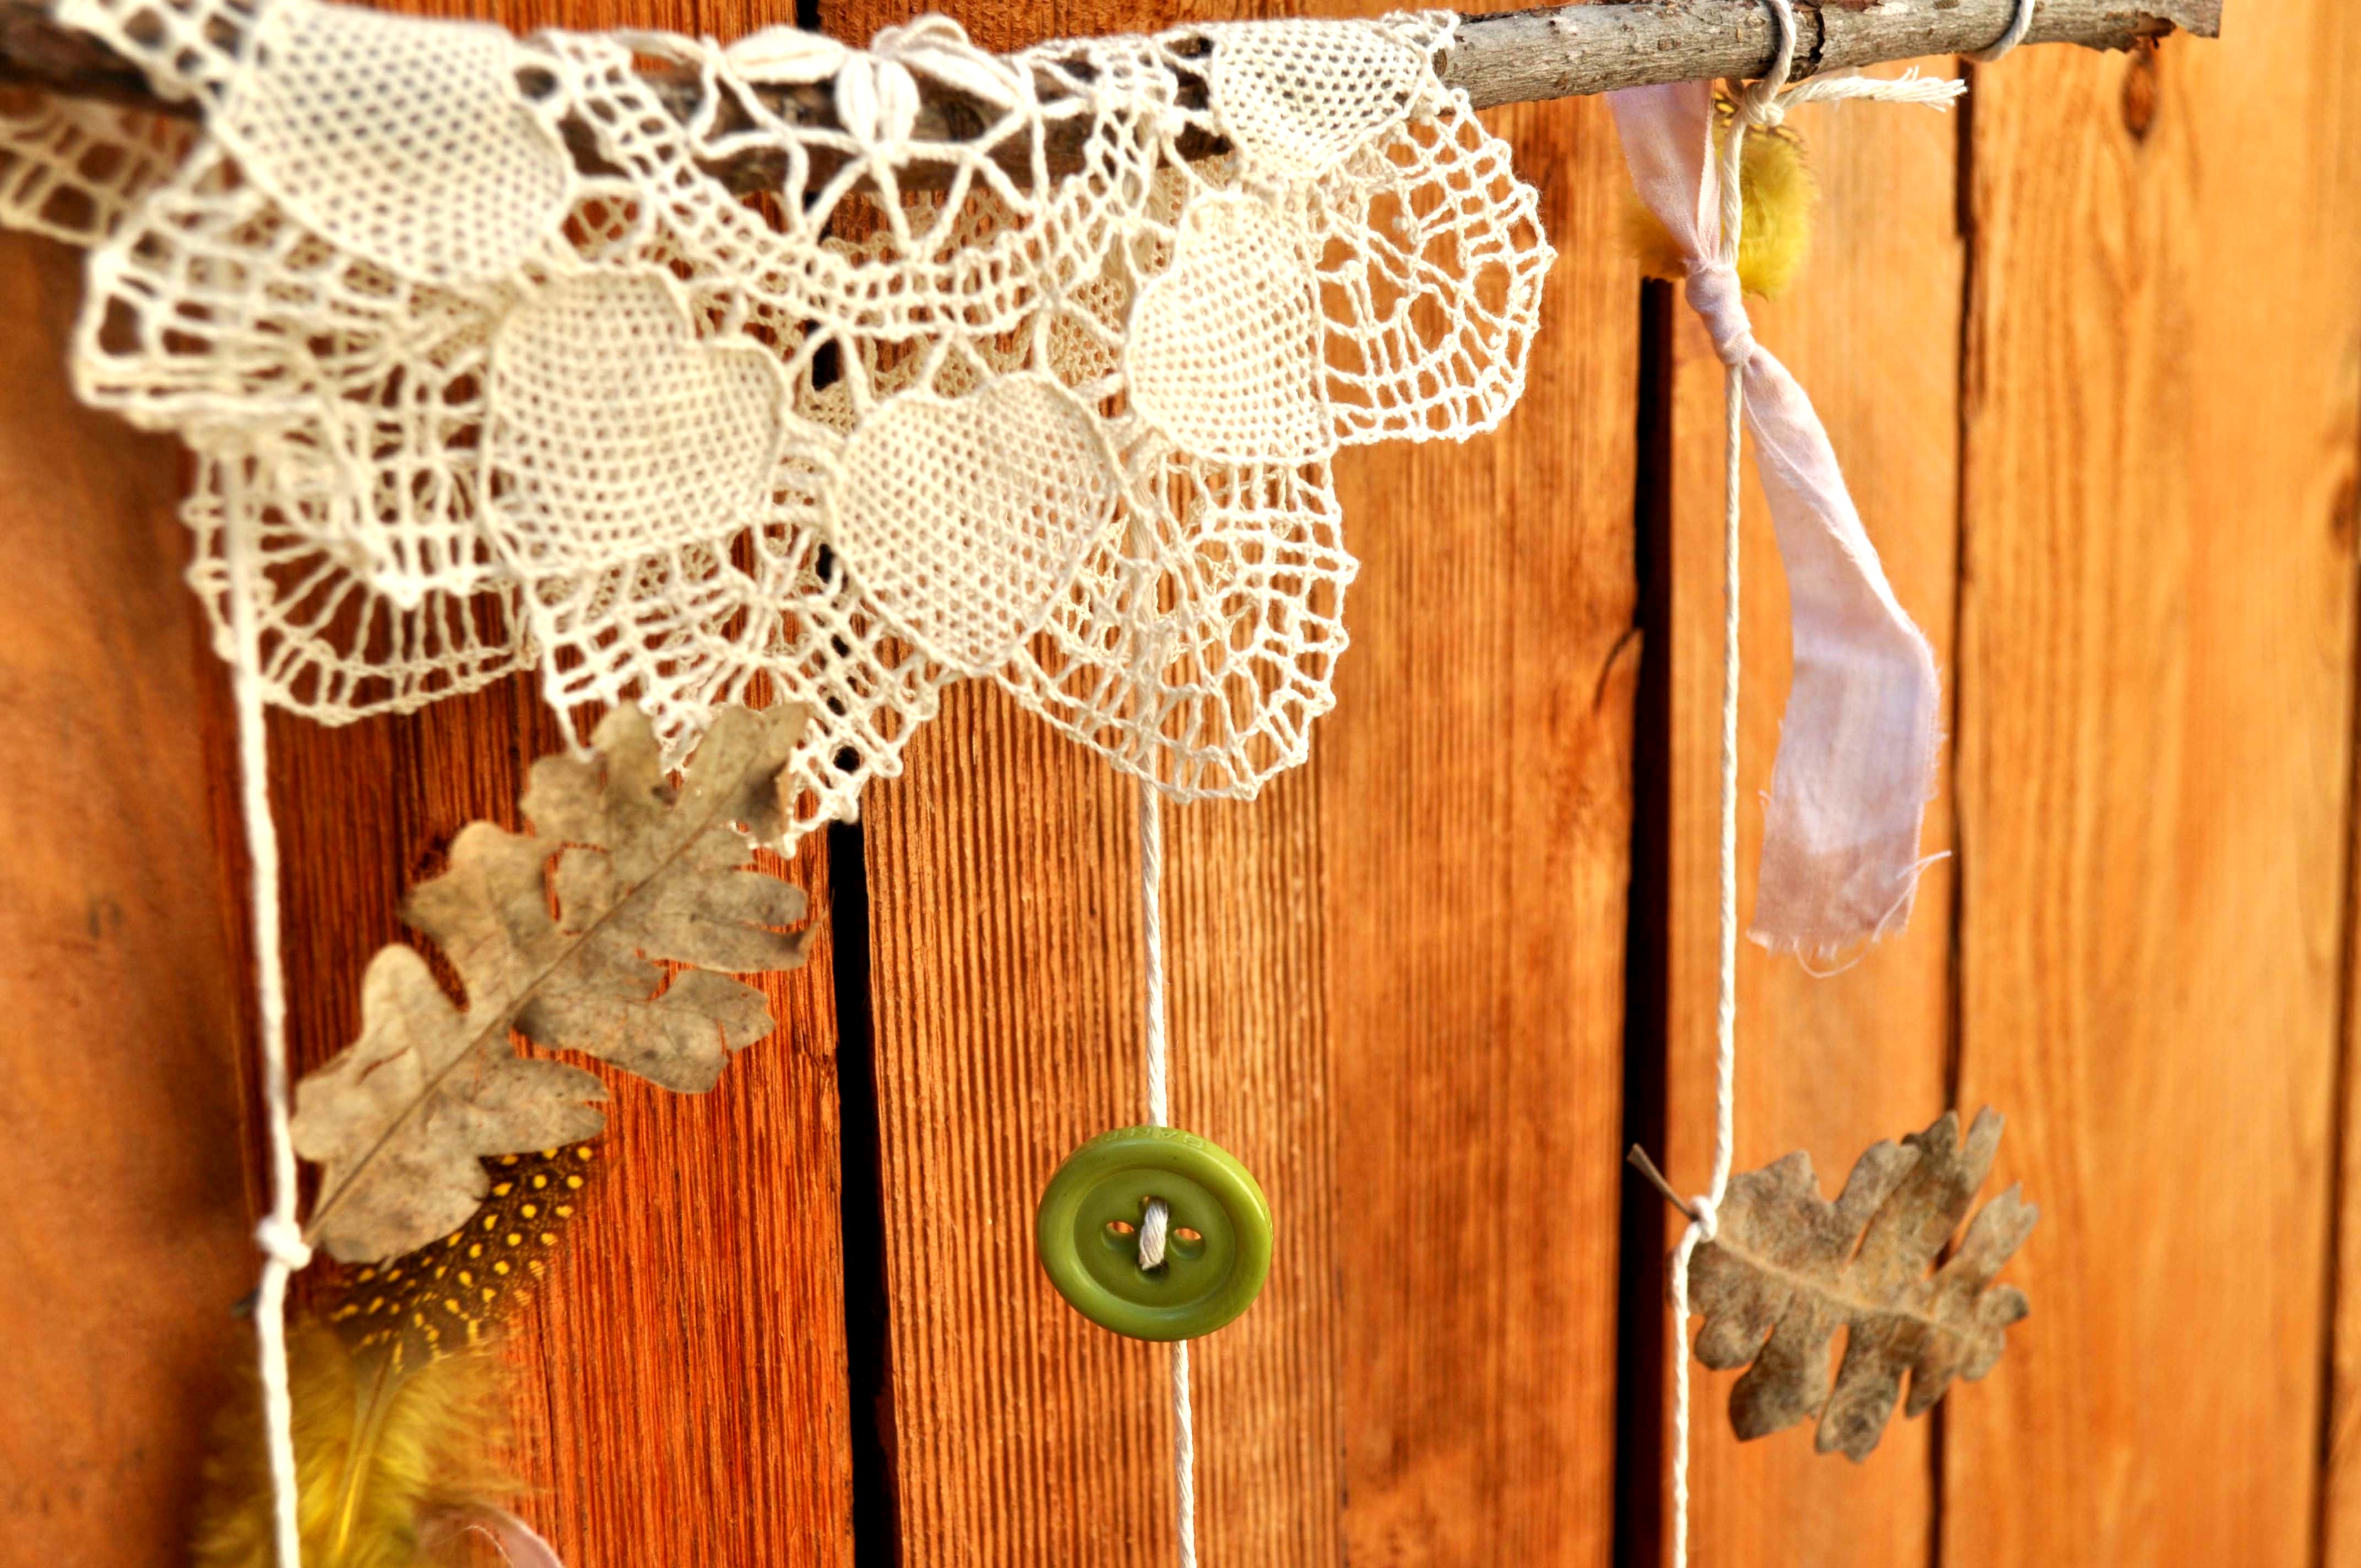
Supplies:

Instructions:
Thanks for stopping by today. Find out how to make another nature display on my blog, Laura Bray Designs.
![]()

Movember is here again, and it is a great time to make crafts for guys. Former Designer for Buttons Galore and More designer friend Jen Goode of http://www.100directions.com designed a mustache stamp wheel from Clearsnap so you can get your mustache creativity going all over the place. AND, she has asked a group of designers to create whatever they’d like to make, showcasing this fun craft tool and her stamp. One of my favorite things to do with the rollagraph is to make my own pattern paper. I used a piece of kraft card stock to make the cover or this journal. My son is in 5th grade and they have to keep a reading journal. I thought this would be perfect for him. Man was I right. He took it to school last week and I have a request for 4 more.

I used the Sharpie markers to make my own name plate, The thin Glue dots to adhere the buttons, and the name plate. The rollagraph to create the pattern paper for the cover and scissors to trim the edges. You can use a craft knife too.
Tis the season to say Thanks a Bunch … so glad you’re here today.

Autumn Value Pack
Create simple and elegant cards with card stock and button embellishments. Buttons Galore and more carries novelty buttons in almost any theme imaginable. Many buttons are available in both small variety packs and in large bulk packaging. Adhesives are also carried in the store.
Here are two really simple to make Thanksgiving card ideas using buttons from my collection with Buttons Galore. They are so much fun that you might want to gobble gobble about them after you create your own! I used pre-cut note cards and envelopes from my local craft store. They come in all kinds of colors. I also used trims that I had on hand and glue dots along with a downloadable doodle design sheet.
To make them you can draw your own pie and turkey background or you can download the template for free on my website in another Thanksgiving post that shares ideas of ways to use buttons to create some Thanksgiving fun. You can click here to get to my blog post to get the downloadable printable or on the picture below.
Either way, when you have you backgrounds drawn or printed, color them in and cut them out. The next step is to use Glue Dots to add a border of some sort using whatever trim or ribbon you have on hand. You could also use washi tape. Then Add your cutouts either directly or mounted on colored card stock and add buttons to create the 3-D effect. The colors I used are Outrageous Orange, Radically Red, Black Beauty, and Bold Brown.
If you want to add words to your cards you can, or you can leave them with your crafty design to speak for itself. If you are hand delivering, add a heart and a button to the back of the envelope. I am in love with the turkey doodle card. Gobble Gobble.
Happy Preparing For Thanksgiving,
Laura
Wishing you a day stuffed with reasons to be Thankful … with this set of Thankful Cards.
Autumn Value Pack
I am getting ready for a DIY Autumn Craft Night at my studio and I have these super cute little Halloween trinket tokens, lucky pumpkins! I wanted to wrap them up in a festive way for favors and this is what I came up with…mini autumn gift bags. I really like them because the buttons can be part of the favor as they can be reused on projects that my guests make when they get back to their studios and homes.
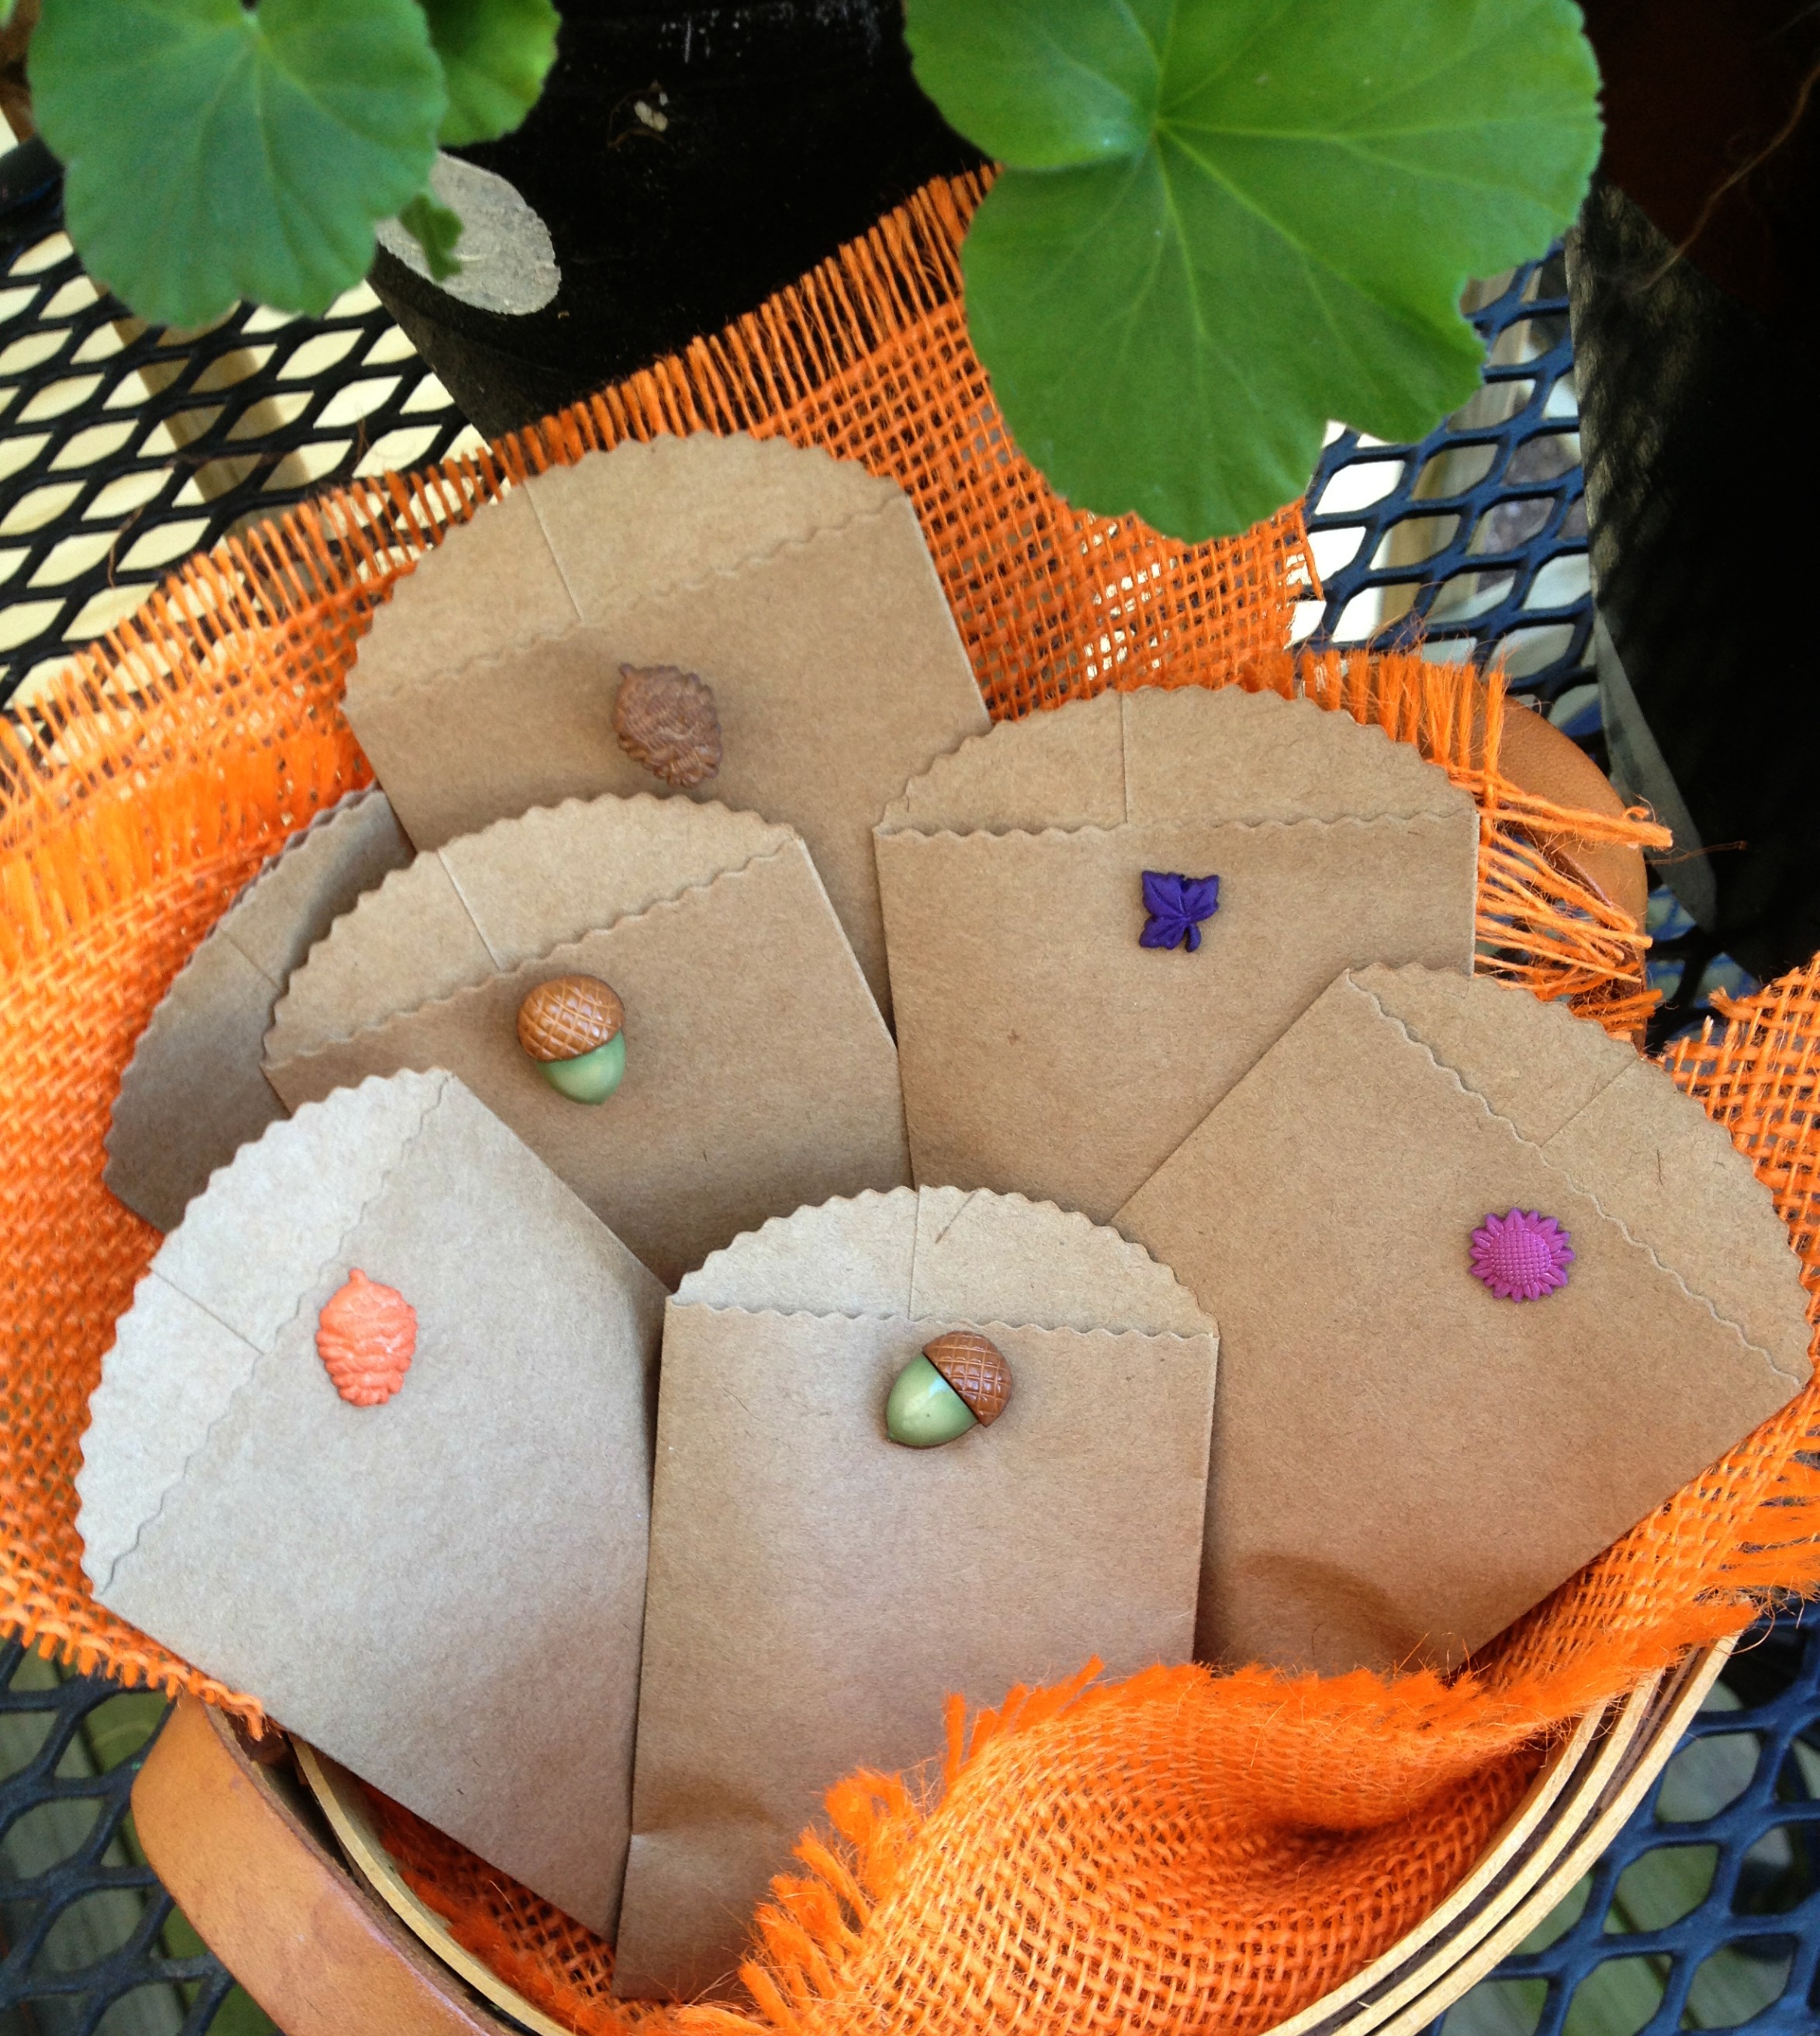
To create them, I used the Autumn Potpourri collection, a hole puncher and little bit of wire. I punched a hole in the mini treat bag (from Canvas Corp) then pushed the button through the hole. On the other side, I slid a short piece of wire through the button and twisted it. This is so easy and created such a fun little collection of favor bags.

This same method could be used to attach the autumn (or any) buttons through fabric and ribbon too. I have some really fun Christmas ones that I am going to try next with some gift wrap ribbon. Yes, I will share when I do it.
Happy Autumn,
Laura
Last month I dyed some buttons using Rit Dye, and I had some left over so I’ve made this Dyed Button Necklace.
I used one large Coconut button and embellished it. I love that these buttons have an earthy, natural feel, and come in their own little tin with a clear top. This tin is great for storage, and great for using later for creating more fun!

Rustic Coconut Shell
Rit Dye (Aquamarine), Imagine® Crafts/Tsukineko VersaMark ink and Gold Embossing Powder, and StāzOn™ Inks (in Olive, Forest Green, Rusty Brown, and Pumpkin for coloring charm – applied with Fantastix™ Applicators), 3-in-1 Glue, charm
Also: Jump ring, chain, pliers, heat tool (for melting embossing powder)
See Rit Dye for their Wood & Wicker Dyeing instructions. I had prepared dye in mason jars, and simply reheated it and added it to the button.
Make sure your button is dry before you try embossing. Sponge on ink and dip in embossing powder. Carefully heat set to melt. I did different areas separately, and used some tongs to hold the button.
I colored a charm with StāzOn™ Inks using Fantastix™ applicators and added a jump ring and chain, then adhered the charm to the button with 3-in-1 Glue.
I love the colors and how they all came together. Doesn’t fall have a beautiful assortment of colors to choose from? Fall is my favorite, no wait – I love snow, oh but spring flowers … Every season is lovely.
Thanks for joining me today for another project featuring button jewelry. Are you wearing your buttons? I’d love to see!
I like Halloween, but I’m not super into the really frightful stuff, I’m more into delightful – so this is about as creepy as I get with this Spooky Halloween Card!
I’ve stamped my batty background and the Happy Halloween sentiment using Happy {OWL}oween Stamps from A Jillian Vance Design. I inked my stamp with a Tombow Marker in sort of an Olive Green, which went well with the Kraft Cardstock. I colored each bat with a few shades of Copic Gray Markers – T1, T4 and W3.
I cut my Ghost and lightly sponged Toffee Crunch Memento ink around the edges, leaving the parts that overlap plain.
The focal word on my Spooky Halloween Card was created using Lavanderia Script from from LOST TYPE. I have a tutorial on my blog if you have a Silhouette and haven’t made fun focal words like this. “Make Pretty Words on the Silhouette” – it’s easier than you think! Once the word was cut out, I lightly inked it with Cloud White VersaMagic Ink.
To bring a little attention to the gorgeous Tangerine Button, I tied some waxed linen thread through it. This thread is thick but not super bulky, and it holds its shape perfectly!
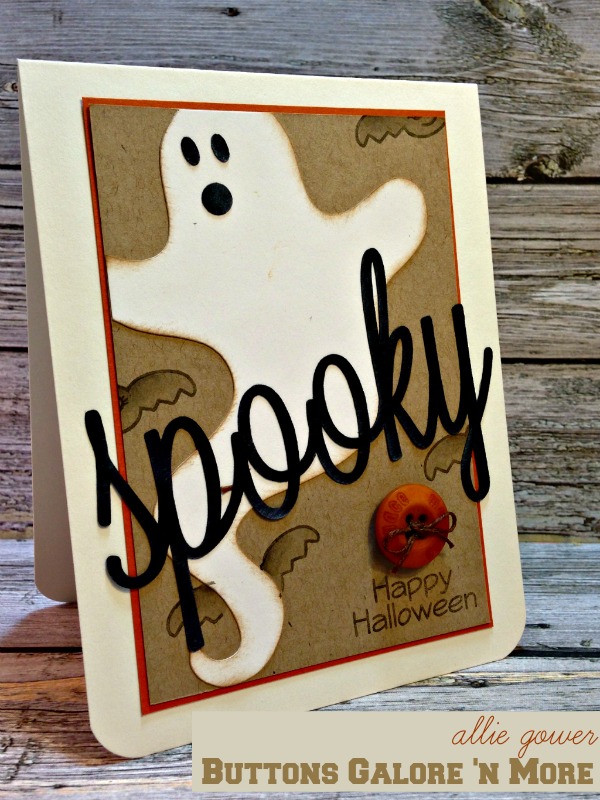
Tangerine Tango Buttons are perfect for Halloween. You get about 125 buttons in a reusable Pillow Box, and it’s such a fun assortment. They stay down well with Ultra Thin Glue Dots, also available from Buttons Galore & More.
I save a lot of money using Craft Glue to adhere all my paper. I find for the detailed titles, that painting the adhesive with a foam brush or a foam applicator works really well. It dries clear, without leaving a shiny finish, just in case I get a little sloppy.
Now this Friendly Frankenstein made from a paint chip is so adorable and so simple. This little guy would be fun for a party decoration, a door decoration or to stick in an envelope and mail to a pal.

You will only need a few things to make this green dude!
1. Buttons (Outrageous Orange and Black Beauty)
2. Paint Chips (Green and Brown)
3. Glue Dots
4. Sharpie Marker
5. Magnet
6. 2 Metal Bobbins
Use Glue Dots to add Outrageous Orange buttons across the top of the paint chip to create a hairline. Then cut two little strips from another color of paint chip to stick out of the sides of his head and add the bobbins. Draw a stitched wound and a creepy smile on the paint chip with Sharpie then add Black Beauty buttons to make it pop. If you want it to be magnetic, flip it over and add buttons to the backside, putting them strategically on the parts that are the heaviest.

He is so fun and so simple. You could also make a ghost from a white paint chip using just Black Beauty buttons and the Sharpie marker.

On my blog today, I am sharing the tutorial to make Frank some Jack-O friends. Hop over and check it out, if you dare!
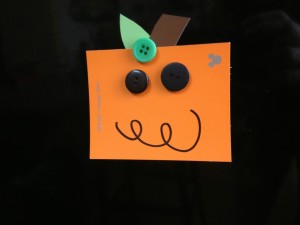
Happy Creating Fall Magic,
Laura
I’m creating a Button Charm today using a button as a frame for some seasonal artwork.
No, this is not hard. You can do this so easily.
As you can see, I’ve just used a single large button for my piece today.
I punched out some art work from a sheet of Halloween images from Bottle Cap Inc. and adhered it to the center of a large button. I used Tacky Glue to attach a spider and web charm to the top of the button.
I love the way that the button acts as a frame for the image, the color really has a fun splash of Autumn color.

Cappucino Grab Bag
Besides that big button and a focus image , you will want a charm. I purchase my charms at local bead shops, they have such fun, unique stuff. In addition, you’ll need some chain, jump rings, and pliers.
You will also need a good craft glue, I chose Tacky Glue. Let this set up overnight, at least 24 hours, before you wear it … this will make sure your charm stays put!
To finish off the piece, I added a little bit of bling from Want2Scrap, because I just like a little sparkle in … well, just about everything.
Lots Trick-or-Treaters will visit our house during Halloween and I like to give special treats to a few of my kids friends that come by. Something special and fun like these Spooky Button Eye Treat Bags.
Kids could easily make these spooky treat bags for there friends too.
Like Me on Facebook!
 Looking to create some fun for this Halloween for your spooky table decor? These Halloween Napkin Rings using Novelty and various flat backed buttons from Buttons Galore and More are as much fun to make as they are to enjoy. With details such as paint, burlap and stamped sentiments, you will love the detail of these Halloween Napkin Rings.
Buttons Galore and More Halloween Novelty Buttons
Laura Kelly Hand Dyed Buttons in colors of your choice
Various unfinished wood shapes of your choice
DecoArt Americana Acrylics in Lamp Black, Pumpkin, Olive Green, Grape Juice and Snow White
Scraps of burlap
Tiny alphabet stamps and ink
Beacon Adhesives Premium Tacky Glue
Buttons Galore and More Shank Remover
Paint brushes, sewing machine and thread, scissors
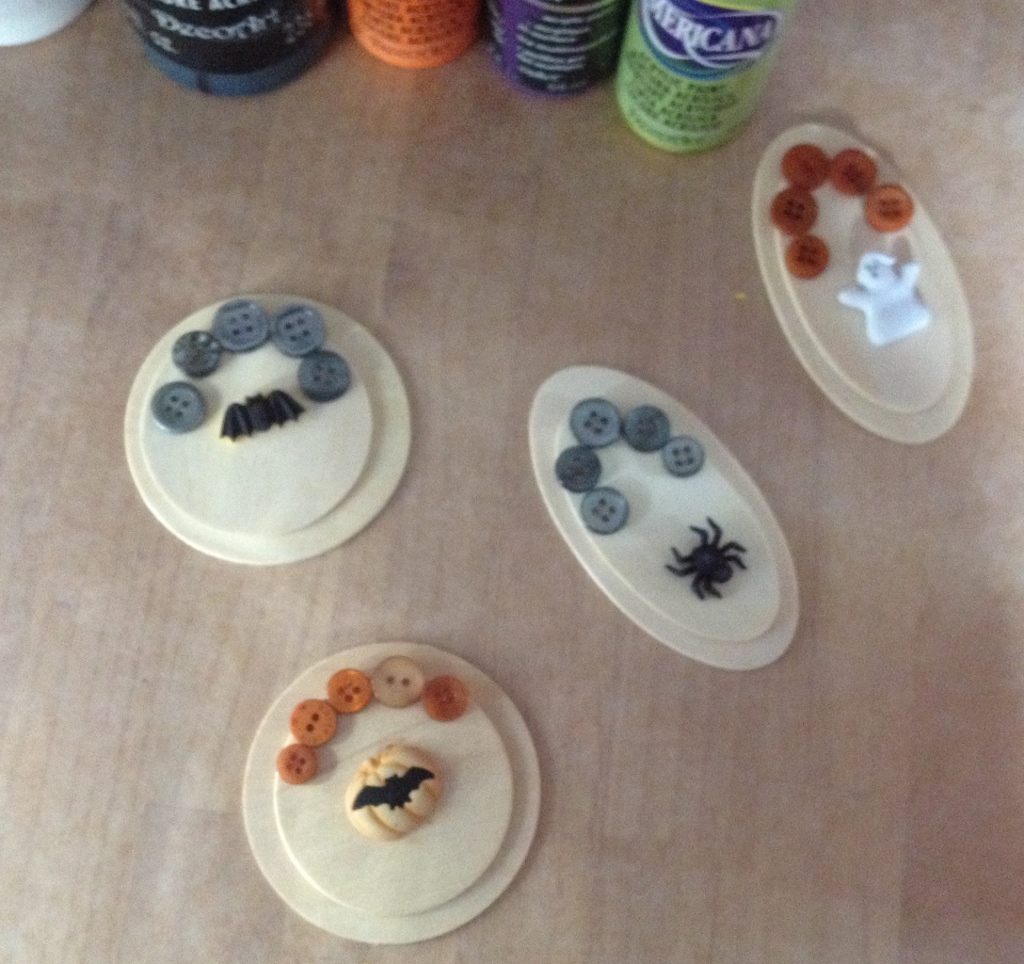 To create your own Halloween Napkin Rings, use the Button Shank Remover to remove the shank from the novelty buttons so that the novelty button lays flat on the wood. Lay out the design, layering the wood shapes and arranging the buttons on the shapes to decide on your design.
 For my Halloween Napkin Rings, I used Laura Kelly hand dyed buttons in Smoke and Outrageous Orange.
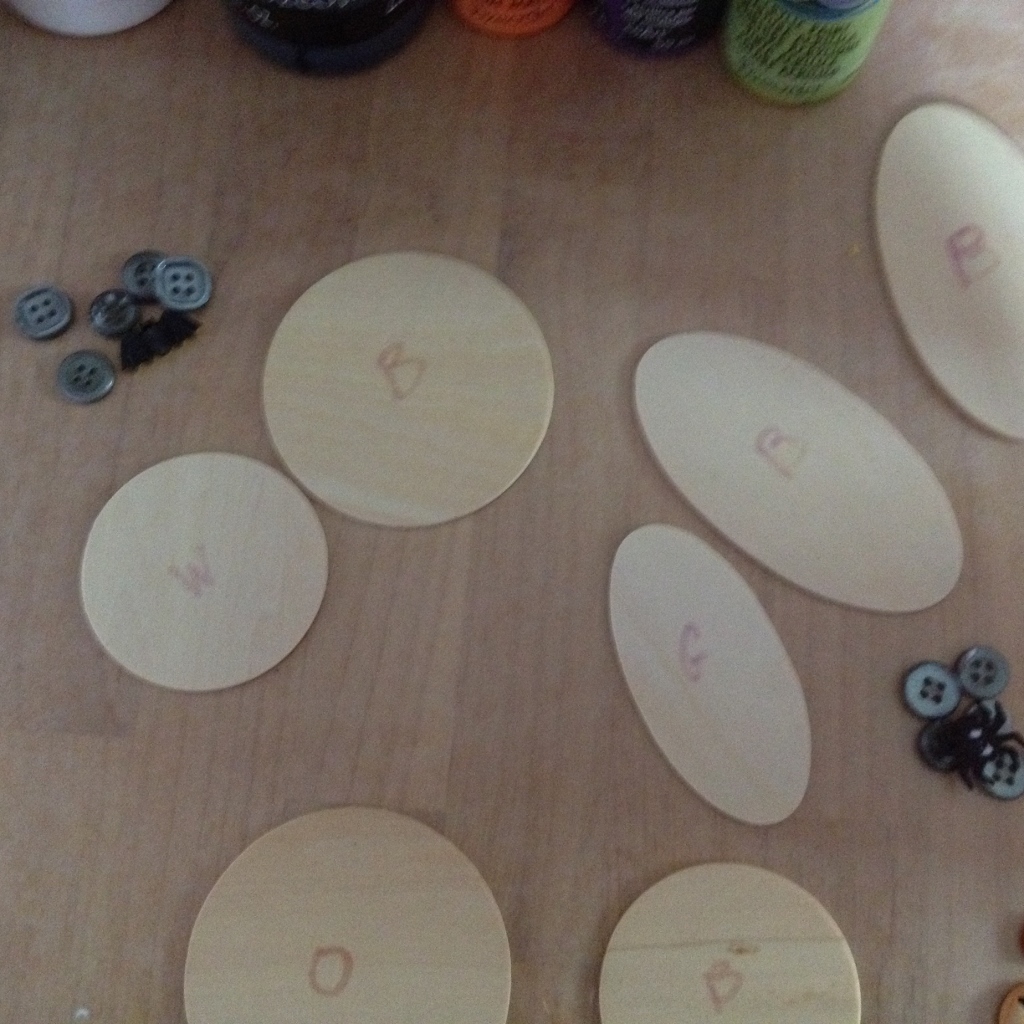 Since you will be working with so many shapes and colors, it is helpful to label your shapes with the first initial so you will know what color to paint it.
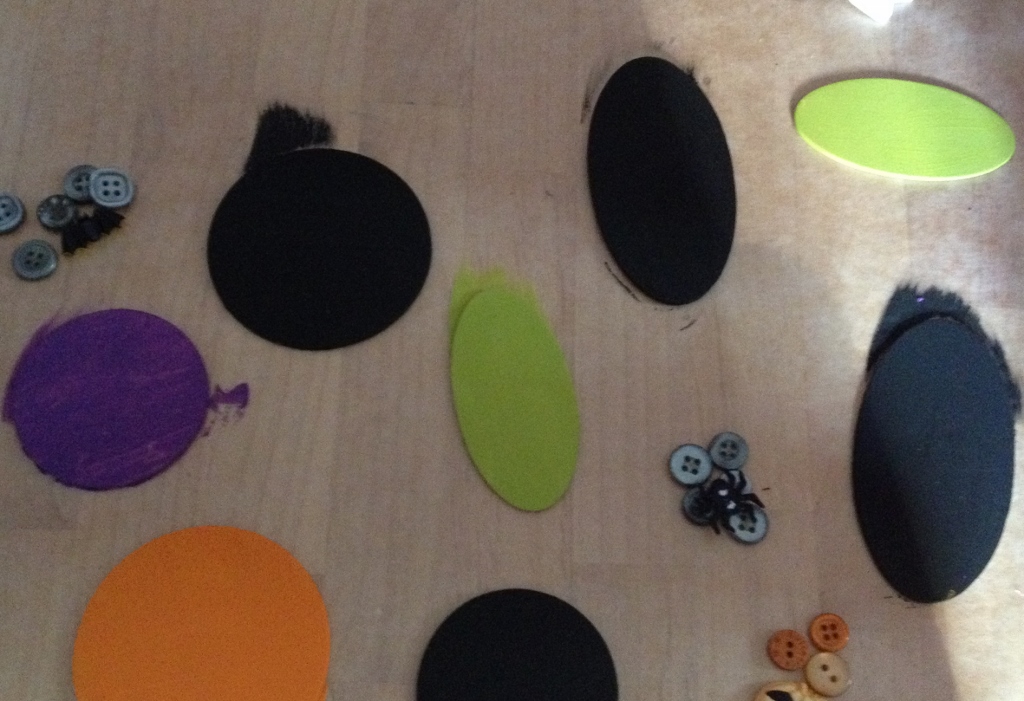 Paint your shapes front and back, using two coats.
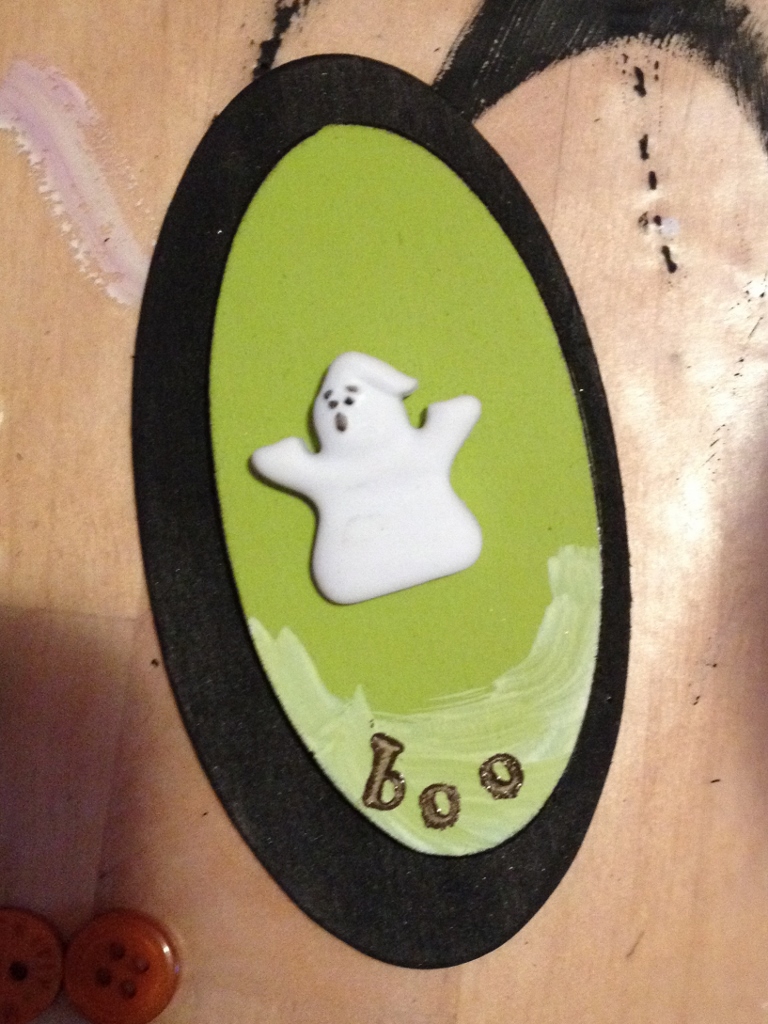 Layer your shapes and glue them together. Dry brush white paint on the bottom of the top shape. Use the alphabet stamps and ink to stamp the shapes. Glue the novelty button to the center of the shape.
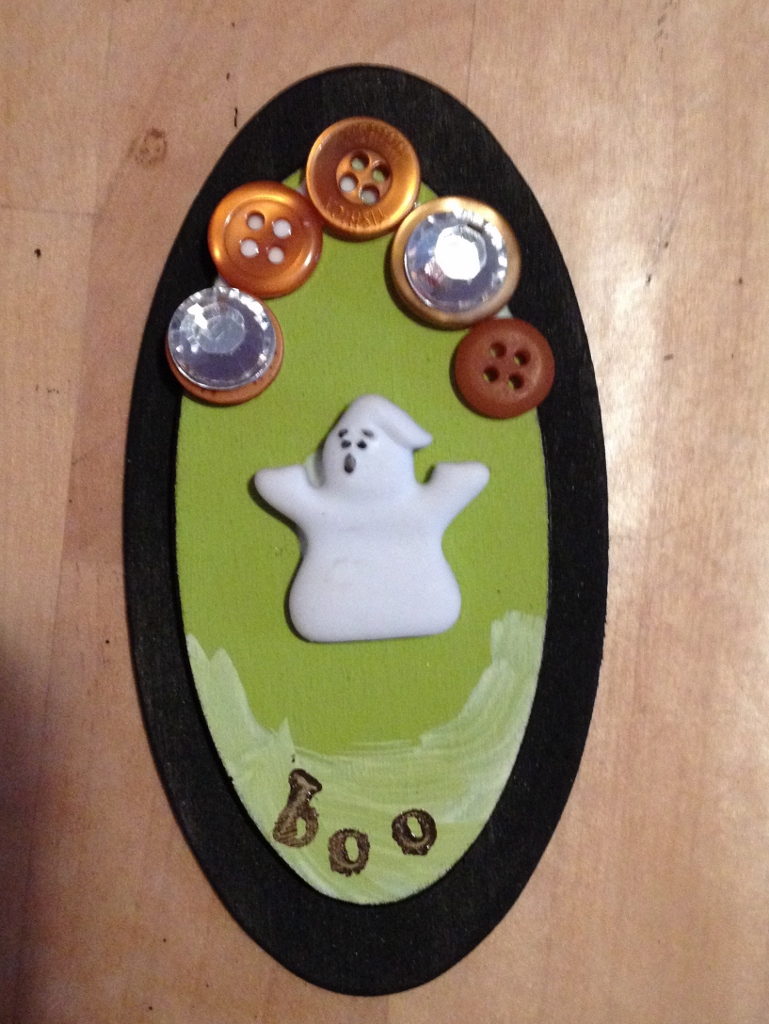 I also added some 9mm acrylic rhinestones to some of the buttons.
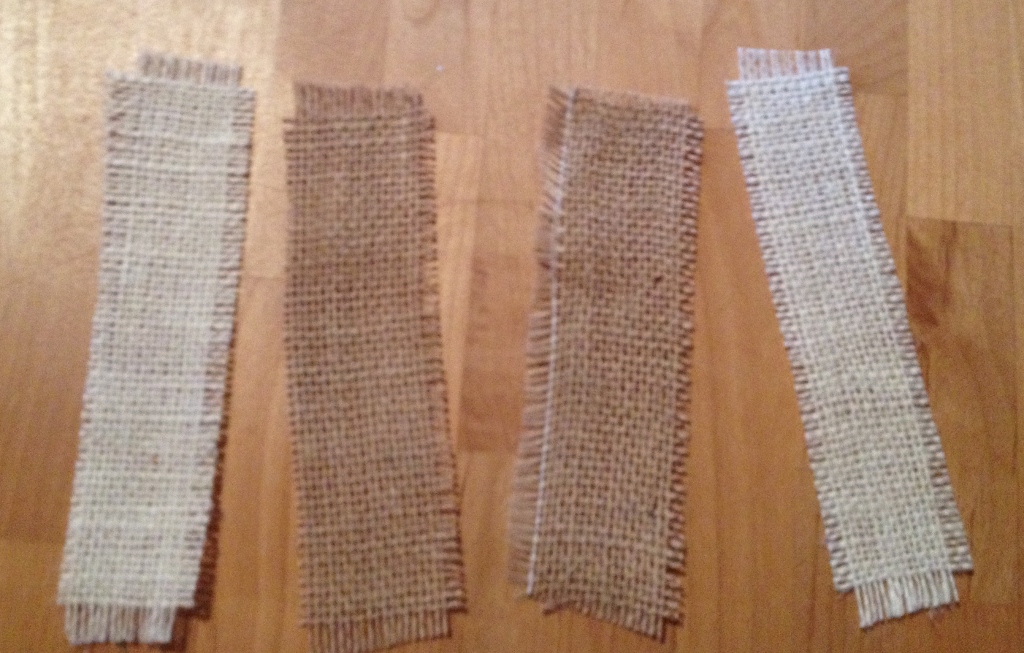 Cut some burlap into strips and use the sewing machine, thread and a zig zag stitch to sew the edges of the strips to prevent fraying.
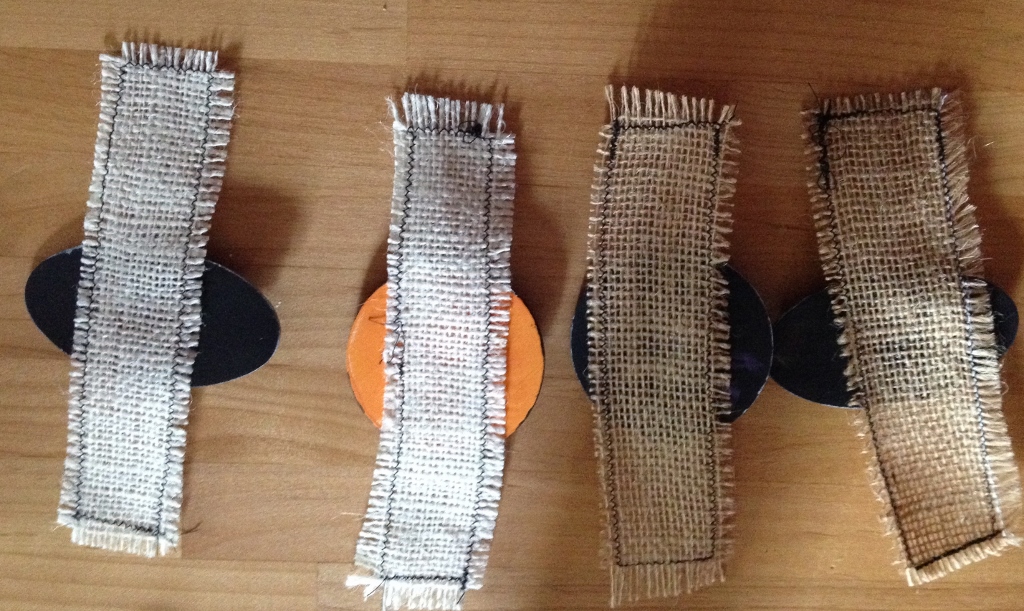
Glue the shapes to the center of each burlap strip and let dry.
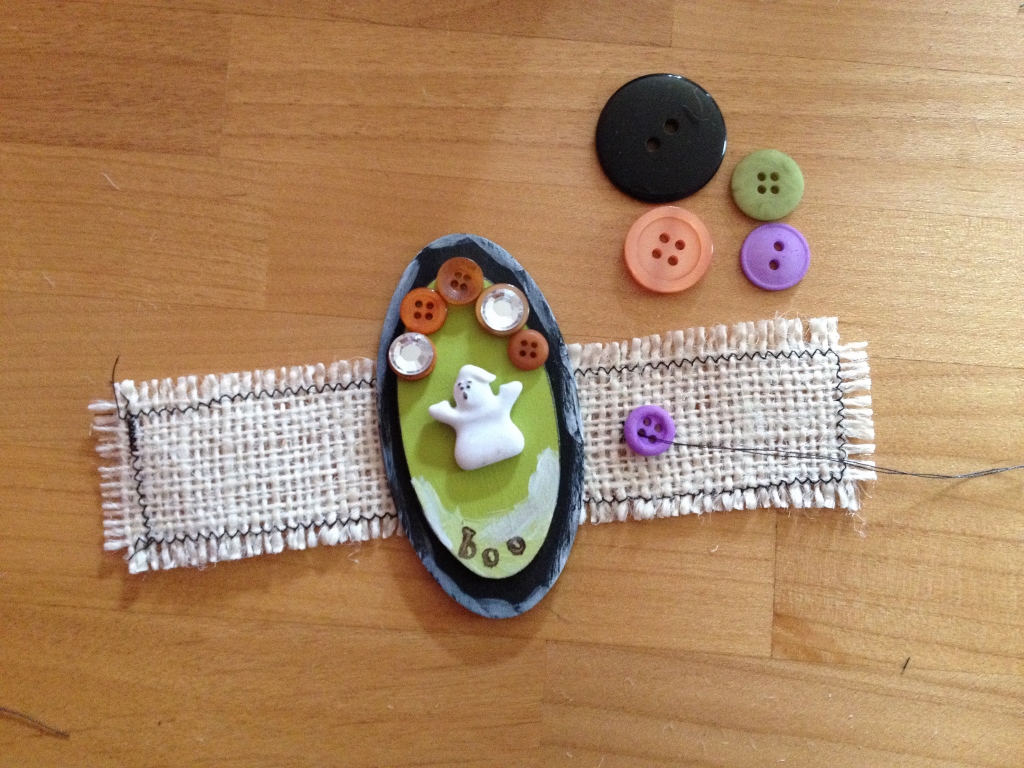 Sew buttons onto the burlap strips. I used orange, purple, green and black from the Laura Kelly Hand Dyed Buttons collection.
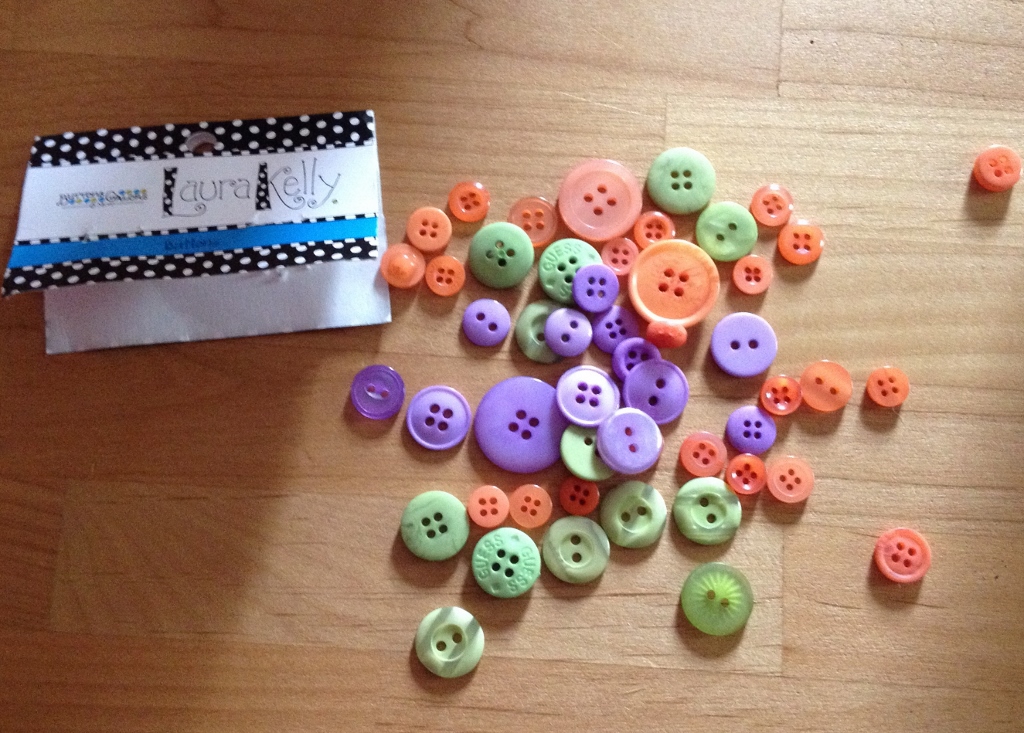
Once you sew on the buttons, use the center button to sew closed the burlap strip, creating a napkin ring.
 Create a set of these Halloween Napkin Rings to adorn a scary table setting using buttons!
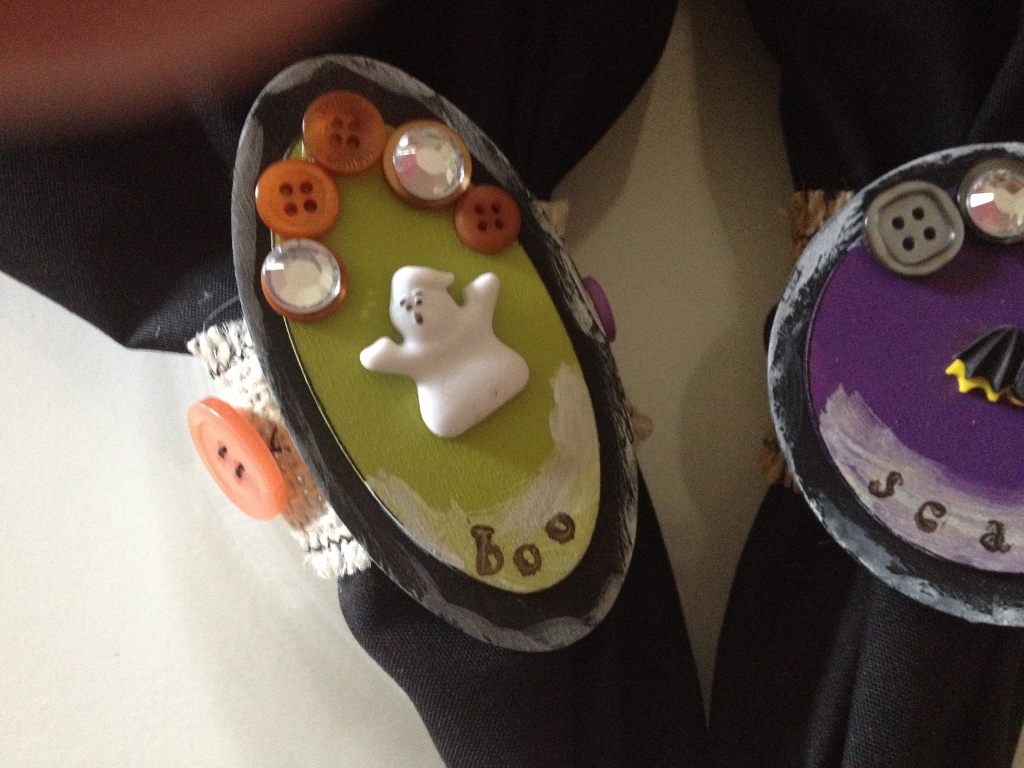 Live Life Creatively,
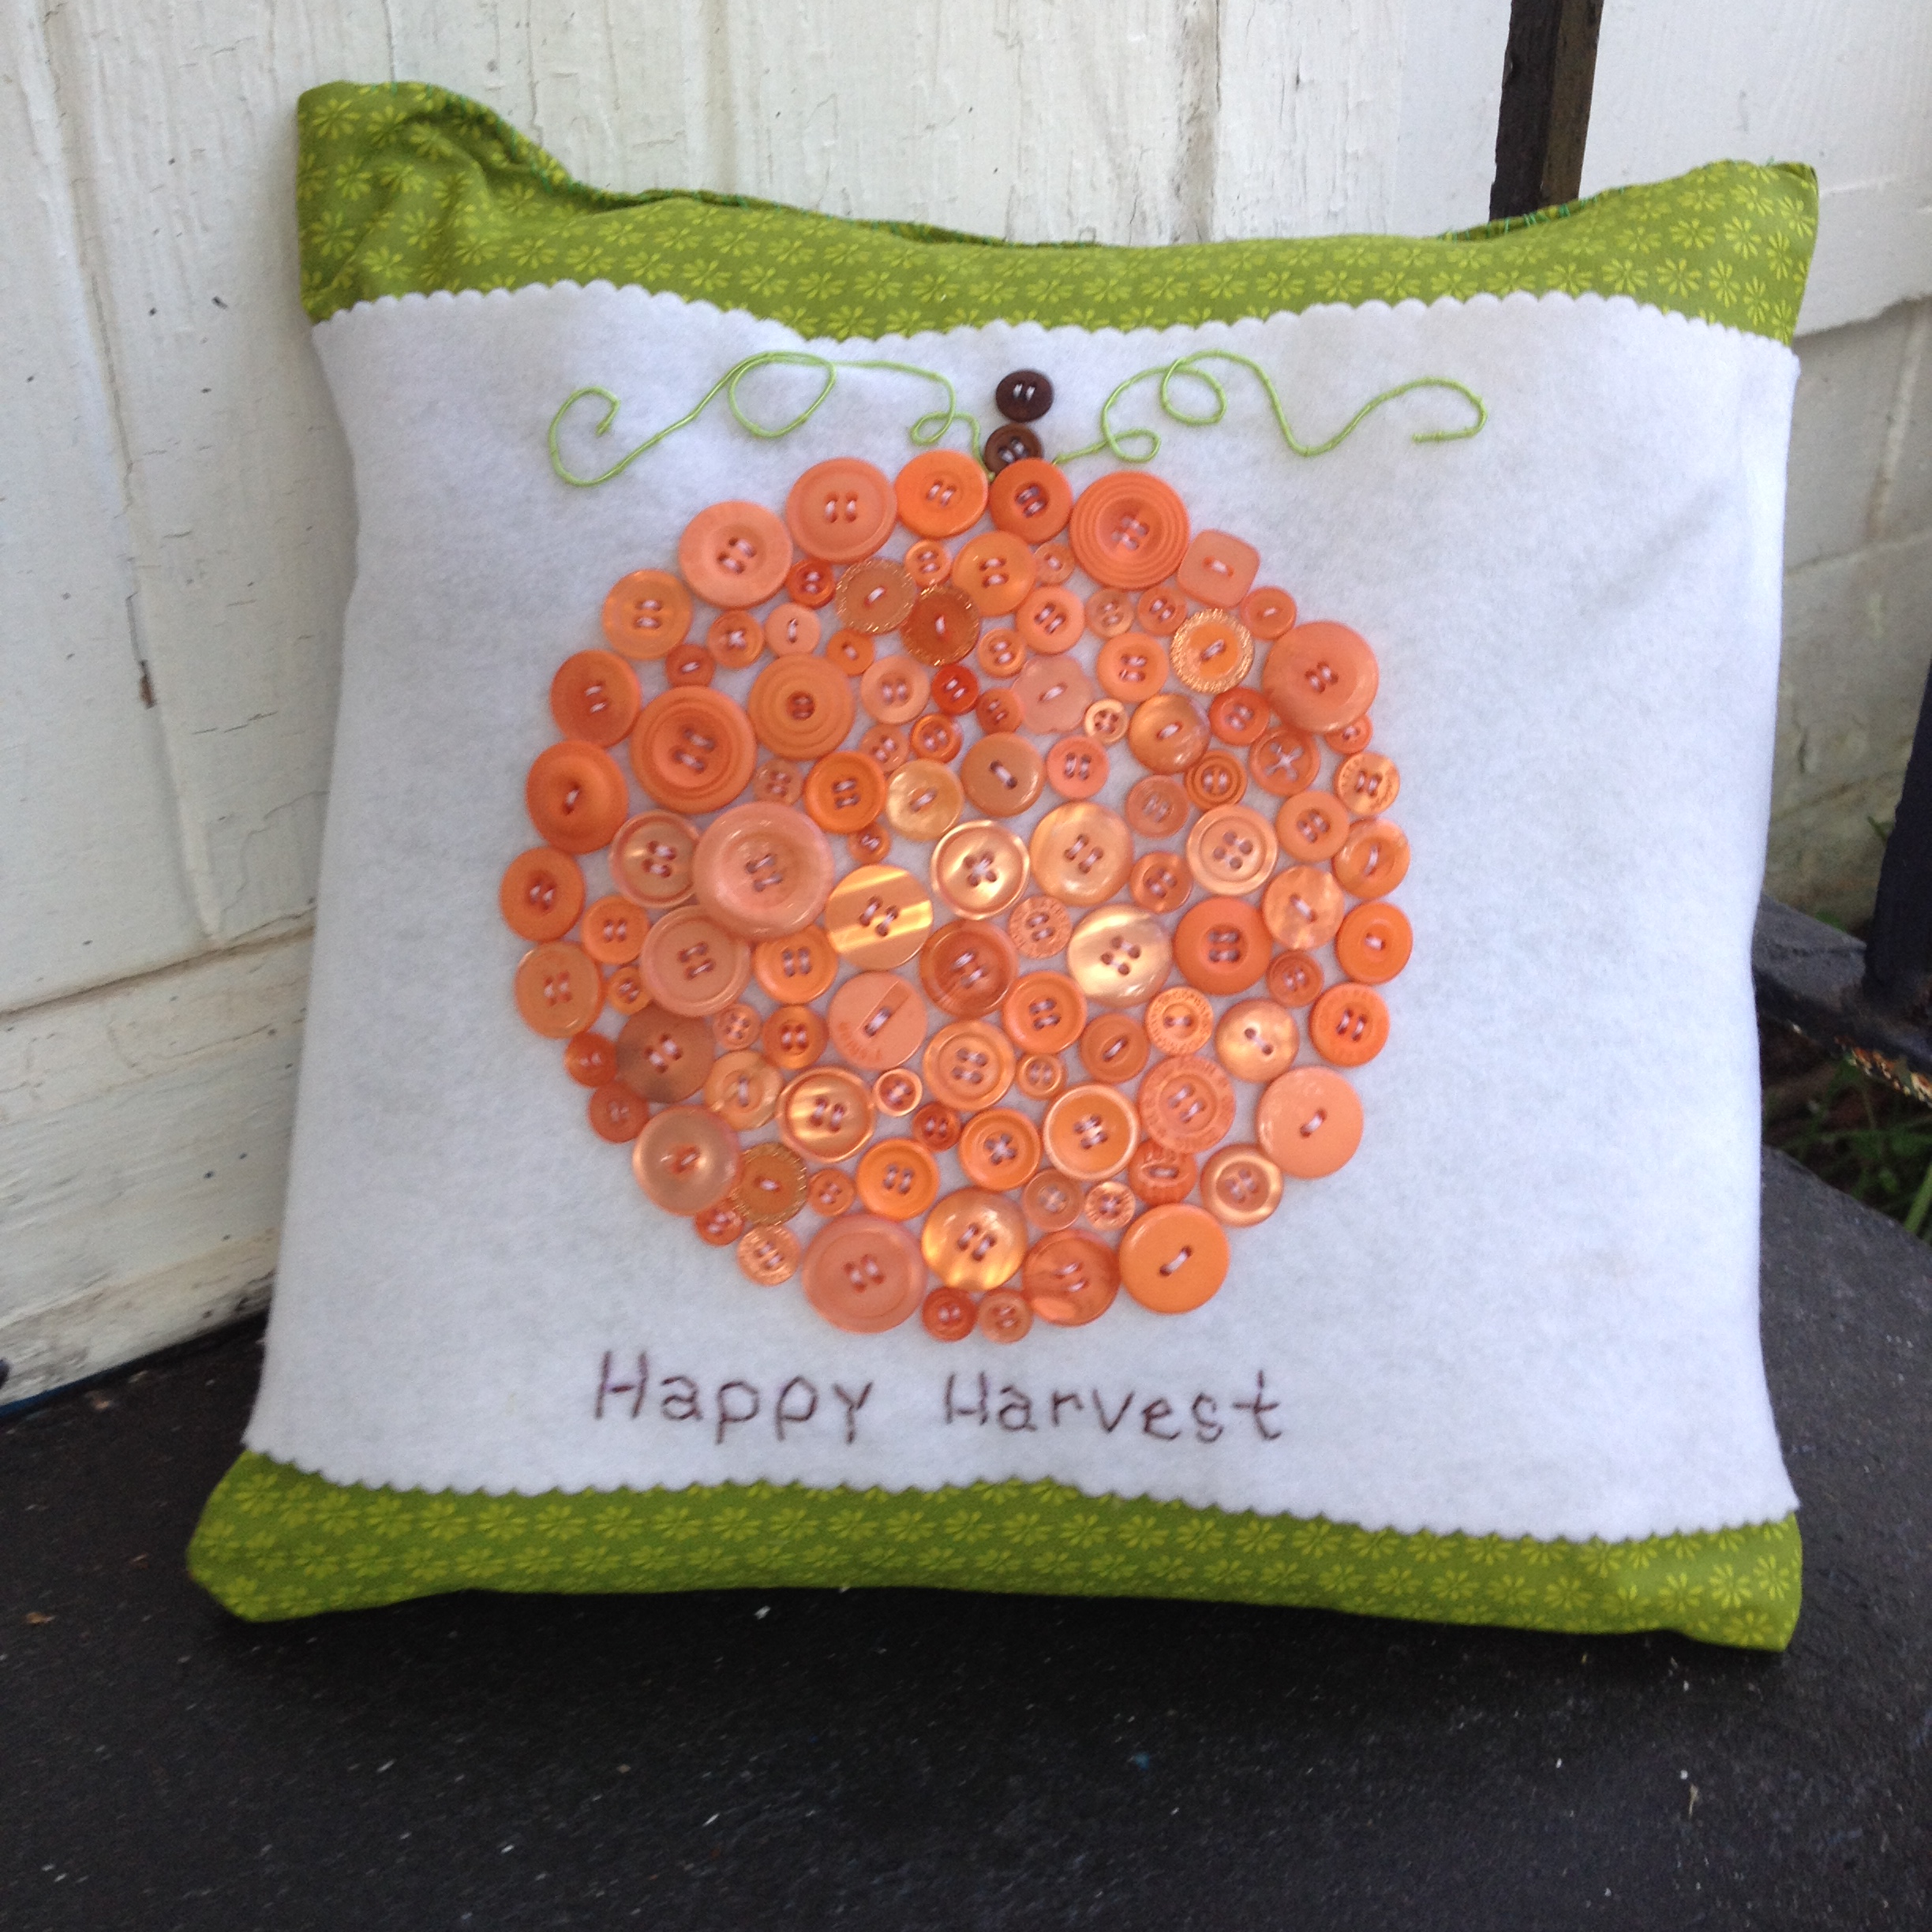 Its October! Time to think about refreshing your indoor decor with all things fall, spicy and harvest. One of the easiest ways to have found to give my decor a facelift is with pillows. Still easier pillow wraps! This easy to make pumpkin pillow wrap will have whet your appetite for making pillow wraps for every season. With an all seasons color like green, you can make pillow wraps for Spring, Summer, Fall and Winter. Here is my Autumnal version. Creating the pillow cover from scratch requires basic sewing experience but you can use a purchased pillow already covered and add your Pumpkin Pillow Wrap to it.
Square Pillow form in a size of your choice
Two green fabric squares that match your pillow form size plus 1/2″ seam allowance on all sides
Enough white felt to wrap around the pillow form snugly
Laura Kelly Hand dyed buttons from Buttons Galore and More in Outrageous Orange and Bold Brown
DMC Color Infusions Memory Thread in Light Green
Self adhesive Velcro Strips in White
Hand sewing needle and thread in white and light green
Brown embroidery thread (6-ply), embroidery needle
Scalloped edged scissors, rotary cutter and self-healing mat, scissors, sewing machine and thread, fabric marking pen
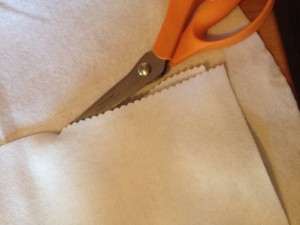 First, cut out the felt using the rotary cutter and mat. Trim the edges with the scalloped edged scissors. This will give your felt nice clean ornate edges that don’t have to be sewn.
 Use the fabric marker to trace a circle in the size of your choice. Remember that you will be sewing the hand dyed buttons to fill the entire circle so plan accordingly. Thread your needle and start the sewing the buttons on to create the pumpkin by pulling the thread from the back to the front. Just like you would sew on a button.
 Continue to fill in the traced circle, using the traced lines at a guide to make your pumpkin. Use the smaller buttons in the package to fill in the smaller gaps.
 Finally, a complete circle of hand dyed buttons on your pillow wrap that we will now add details to resemble a pumpkin!
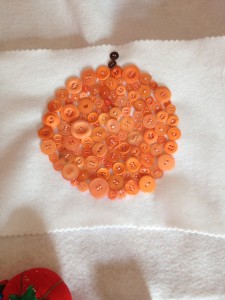 Use some brown buttons (2 or 3) depending on the size of your pumpkin to create a stem.
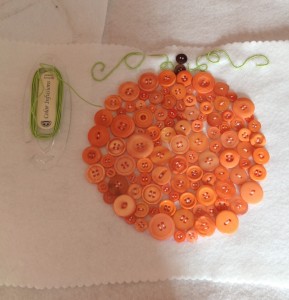 To create vines, I used Color Infusions Memory Thread by DMC in a light green. This can either can glued down or couched down with coordinating thread and a hand sewing needle. I find the couching down method to yield a neater and less messy result.
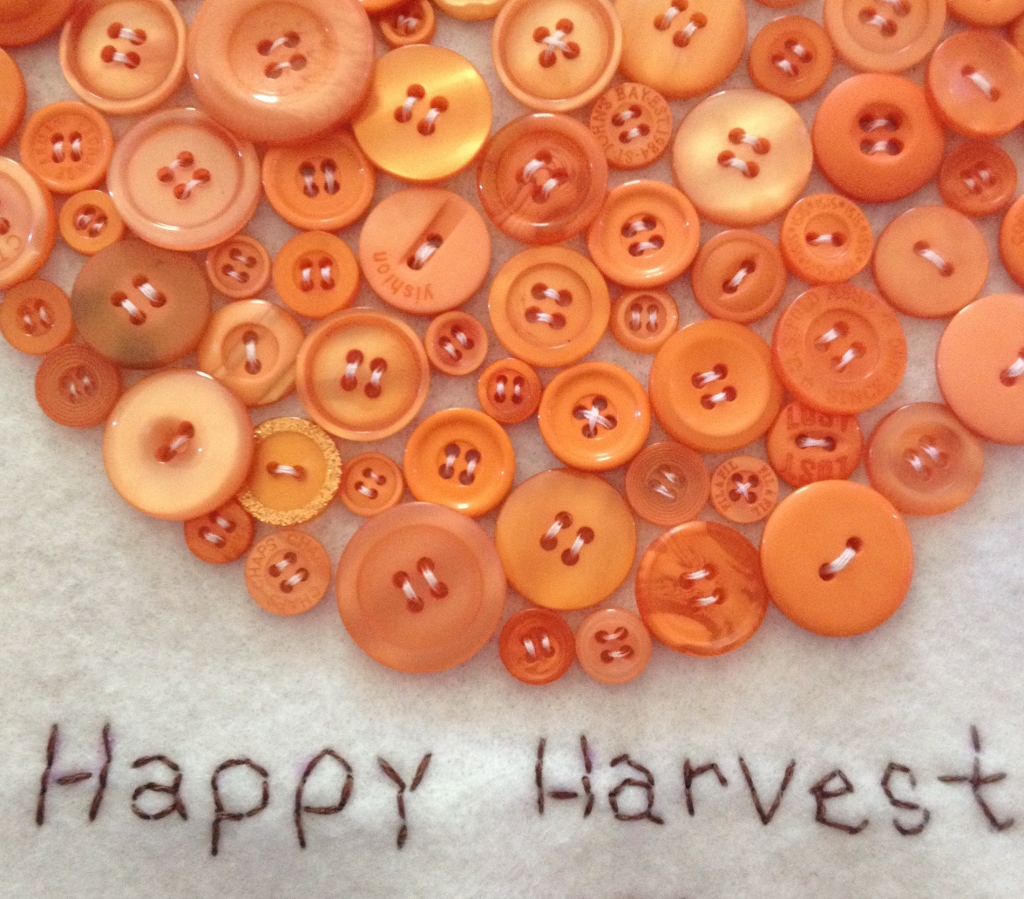
Thread your embroidery needle with three strands of the 6-ply brown embroidery thread. Use the fabric marker to write a sentiment onto the Pumpkin Pillow Wrap just under the pumpkin and back-stitch the sentiment.
 Iron your squares of fabric for the pillow cover front and back. Place the right sides together and machine stitch the left, top and right sides together using a 1″ seam allowance. Leave the bottom of the pillow open for turning and stuffing with the pillow form. Steam the seams open with the iron set on a steam setting and turn right sides out. Iron again and insert the pillow form into the bottom.
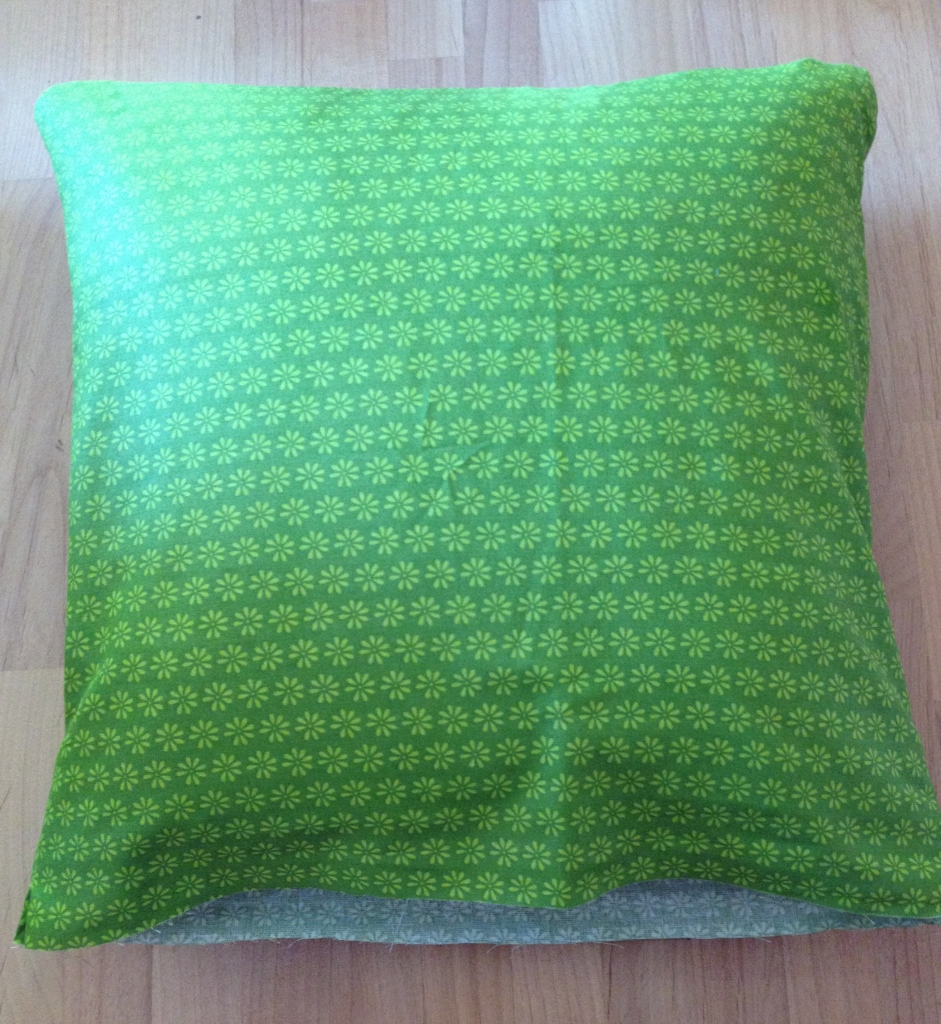 Sew the bottom of the pillow closed using a whip stitch, the hand sewing needle and thread.
 Add a strip of Velcro to the back of your Pumpkin Pillow Wrap as a quick and easy enclosure. I opted for the self adhesive version the sew on version will work as well.
 Now you have a Pumpkin Pillow Wrap that will not only be adorable for the Fall season, but it can be switched out seasonally very easily. Thanks for letting me share. Happy sewing!
Live Life Creatively,
Last week we made autumn scarves out of t-shirts (that we stole from Daddy’s drawer) using Rit Dye and we had a bunch of leftover scraps. Not being able to bear throwing away such beautifully dyed fabric, I decided to stitch up a DIY pumpkin and see how it would turn out for Halloween decor. It took less than 15 minutes and I think it is quite adorable and will make for some fun decorating.
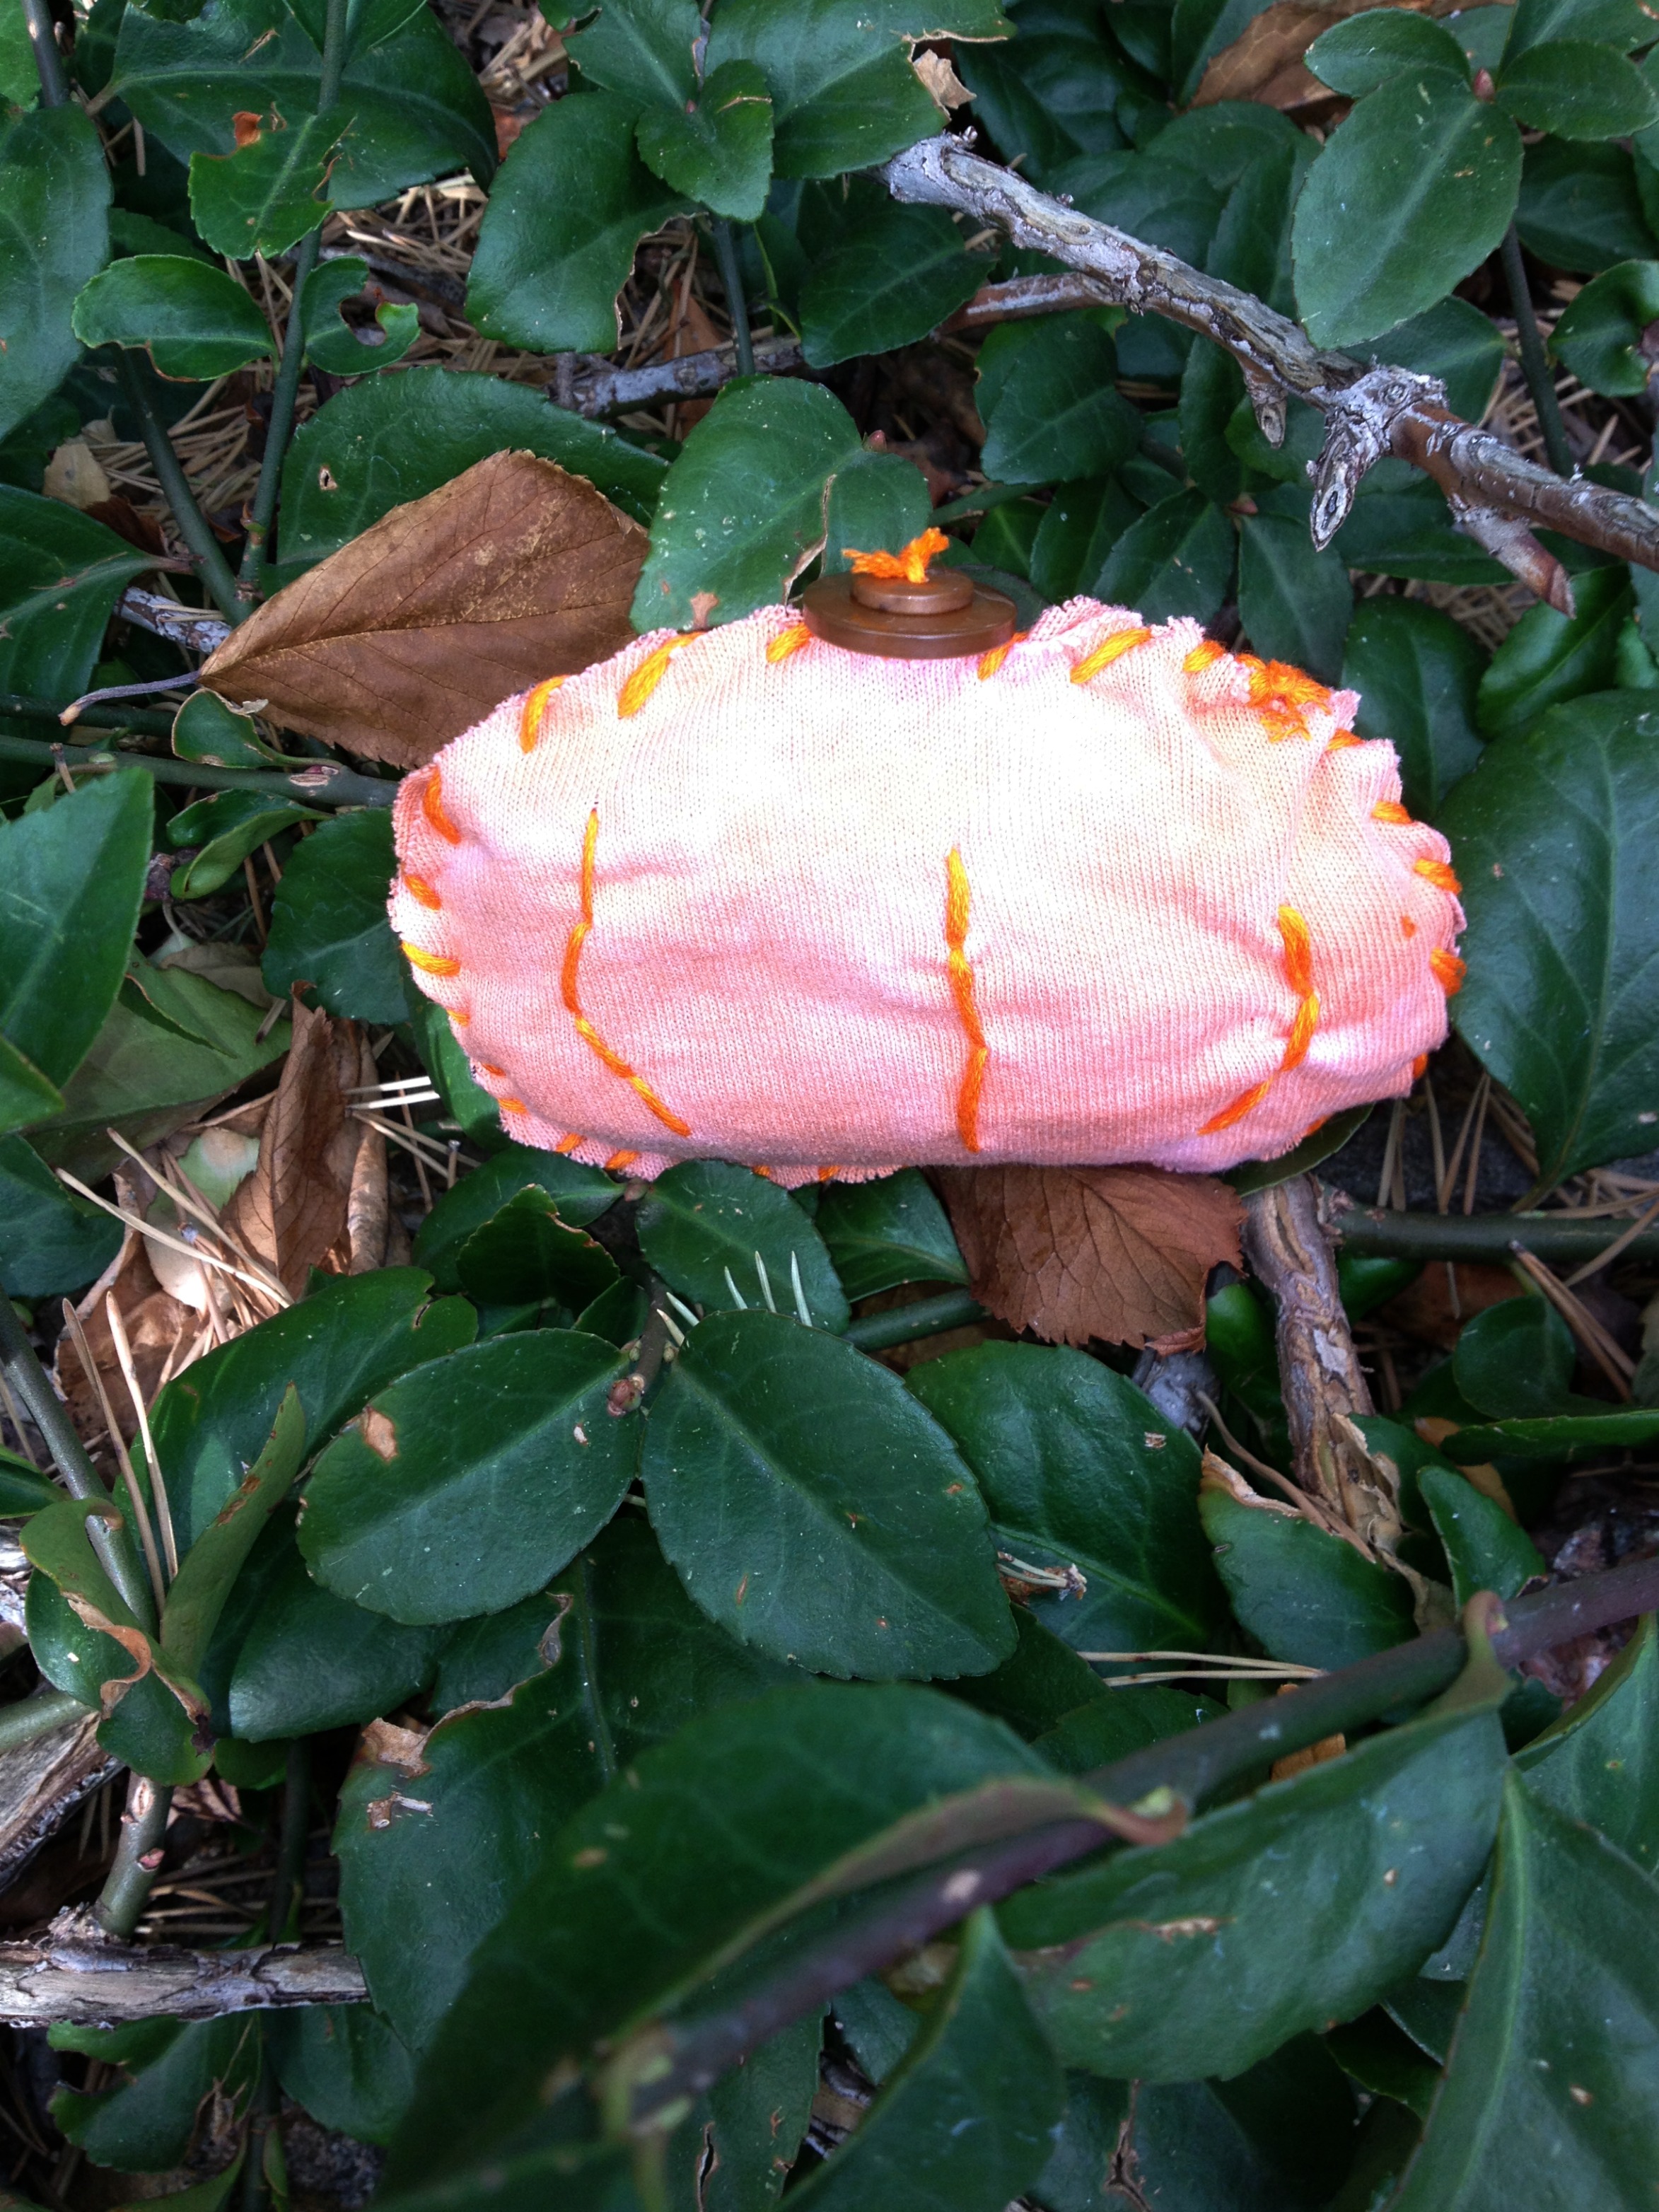
I matched up the fabric and drew on the top the shape of a little pumpkin. Then I cut the shapes out at the same time so they would match up for stitching. I stitched around the outside and stuffed the guts with a grocery bag. I love to use recycled items when I am crafting. I stitched on a two button stem (using Laura Kelly Bold Brown buttons) which I think really puts the mini decor into the “cute as a button” category. Now I want to make about 5 more because they look like they are growing on the vines when I put them outdoors.
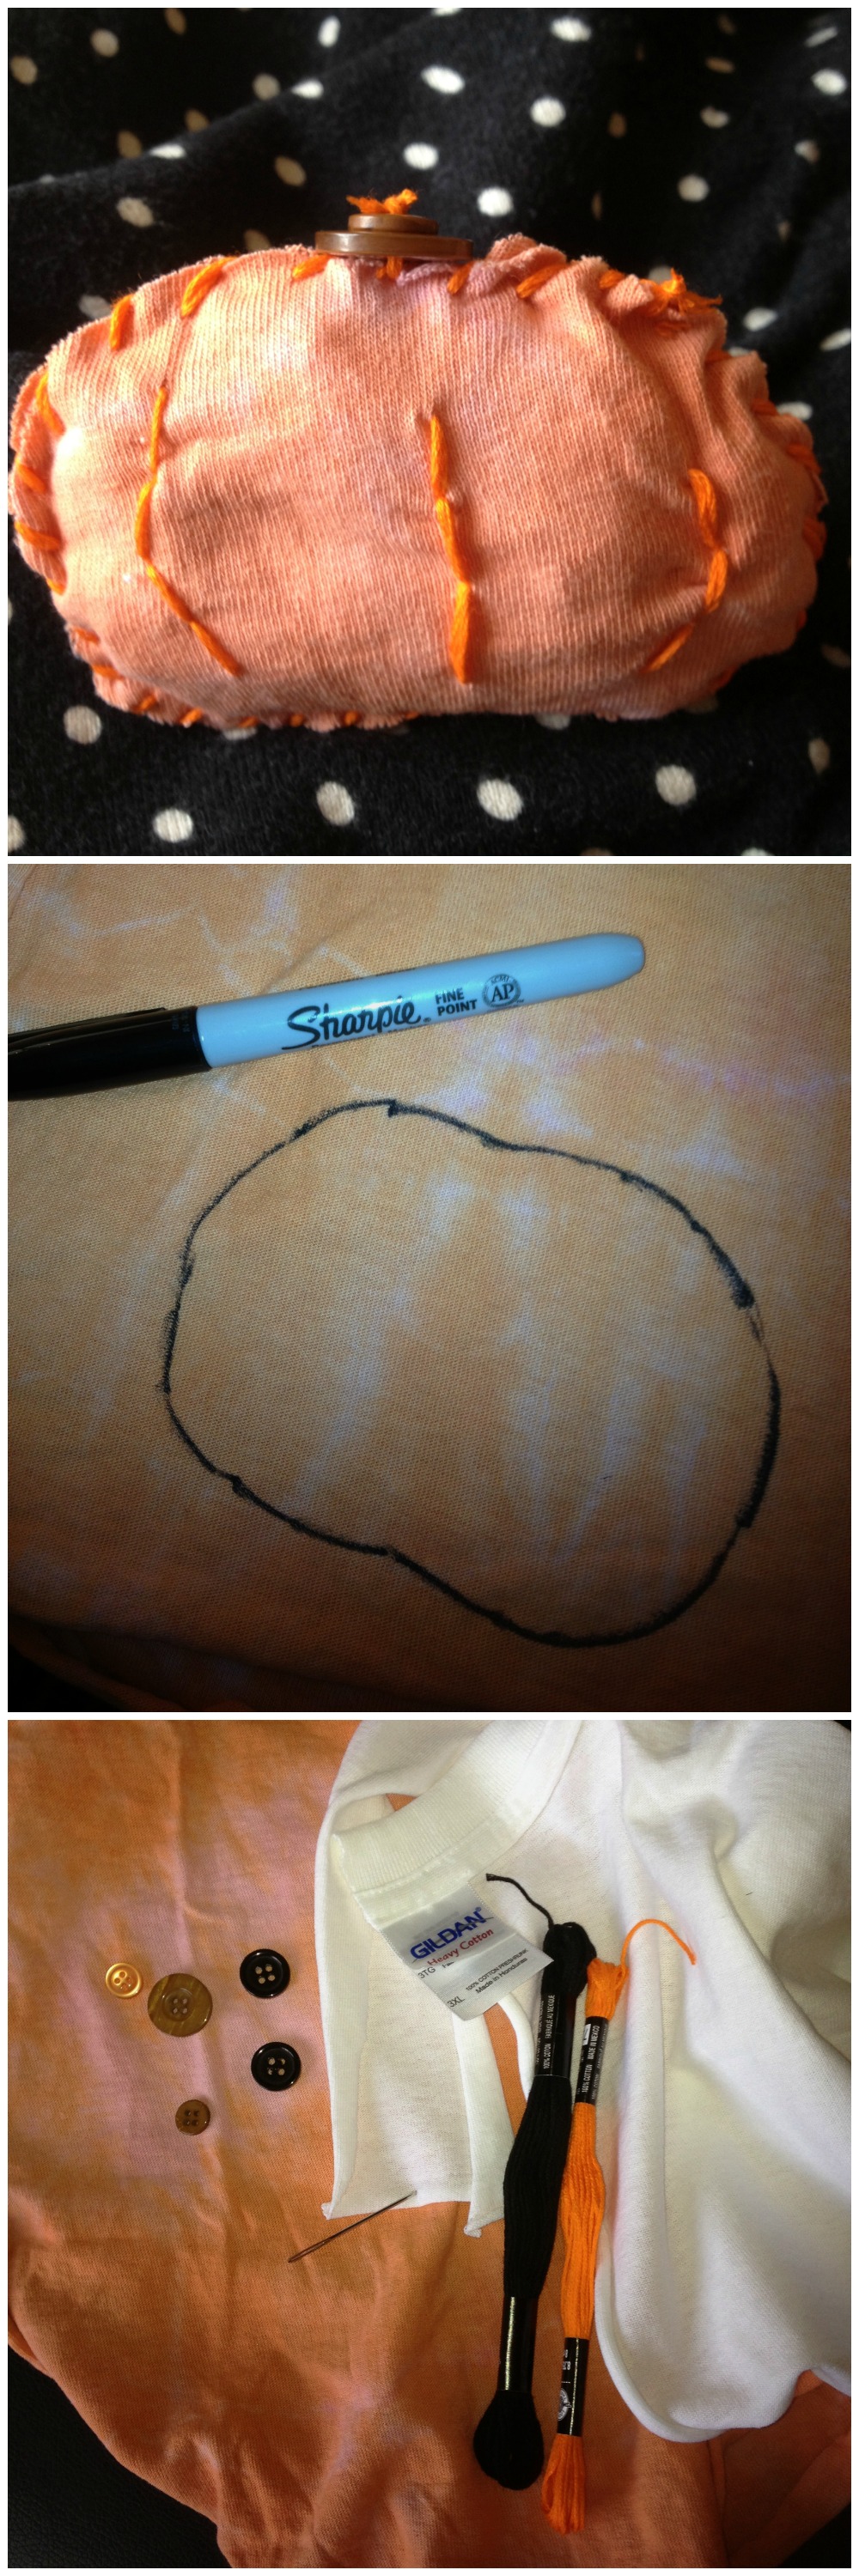
I also really like the way it looks outside on the fairy wall in the back yard. Maybe I will spray it with the stuff I use to waterproof my boots and leave it out to see how long it makes it in the weather. I think that a bunch of them around the fairy wall would be really fun and magical over the next few weeks.
I used the white scraps from the t-shirts too to make…a ghost of course. I am sharing that project on my blog today.
Happy Fifteen MINUTE Crafting,
Laura
There is nothing simpler than stringing buttons, so why not make a Seasonal Button Necklace?
This is is a simple statement piece, and one you can change out year round.
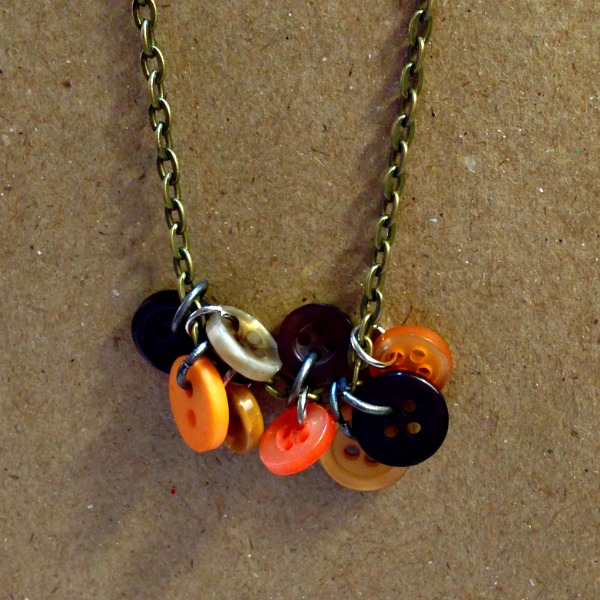
Some people hear craft, or DIY, and cringe. Pretty pieces do not have to be complicated, or expensive. This month I’m making several pieces that are very inexpensive, and assembled with just some basic pliers and or glue.
Grab a friend, get some buttons, and let’s make some fun things to wear. At the end of the season, repurpose them! Easy peasy.
I’m using some really fun assortments that just say pumpkins and spice and everything nice!

Black Beauty
Cappucino Grab Bag

Sunrise Assortment
You’ll need some chain, jump rings, and pliers.
![]()
I’m not into the traditional, spooky look of typical Halloween décor. I like cute and cute means buttons and felt. I created this Halloween wreath with that in mind. I love how the black and white reminds me striped witch’s stockings!

4. Glue buttons into center of flowers. Tip: If you want the flower centers to have little extra pop, slide white-topped pins into the button holes. So cute!
Thanks for crafting a cute Halloween with me today! For my holiday inspiration, visit my blog at Laura Bray Designs
![]() .
.
Use buttons to accent this fun Spider Pendant.
Along came a spider …
Let’s jazz up your Halloween Jewelry!
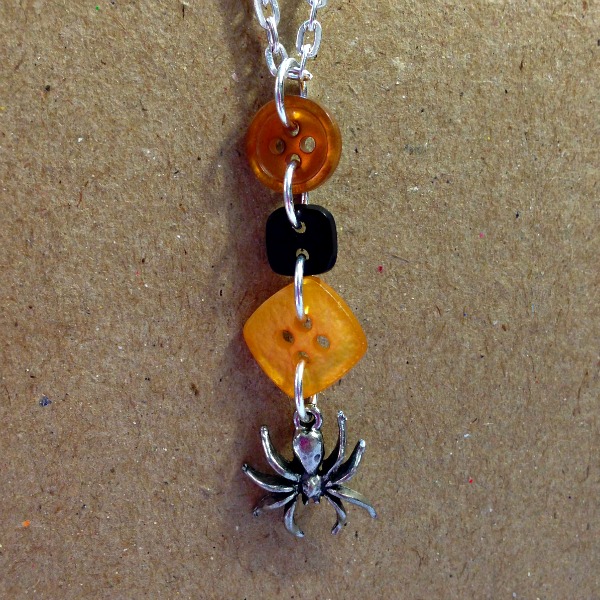
I’m using buttons from a few collections today. This idea could easily work for any occasion with a quick change of charms and button selections. Buttons Galore has buttons for just about EVERY occasion, from bats to baseballs, and everything in between.
This month, we’re all about Halloween and Fall.
Black Beauty
Cappucino Grab Bag
Sunrise Assortment
You’ll need some chain, jump rings, and pliers.
Bats are definitely not cute in my opinion but Button Bats are! Especially when there made “spooky cute” using Buttons Galore Haberdashery Buttons.
These bats are simple to make and can be a fun addition to any Halloween decor.


Like Me on Facebook!
Do you have an upcoming Halloween Party that could use a BOOtiful Halloween Banner?
Or maybe you would just like to add some flair to your home for all those cute little Trick or Treaters. A Halloween Banner is easy to make and can make all the difference in your holiday decor. This BOOtiful Halloween Banner is created using paper crafting supplies that you probably already have.
I generally start with a solid base for my banners. This BOOtiful Halloween Banner has a chipboard base that is covered in white cardstock.
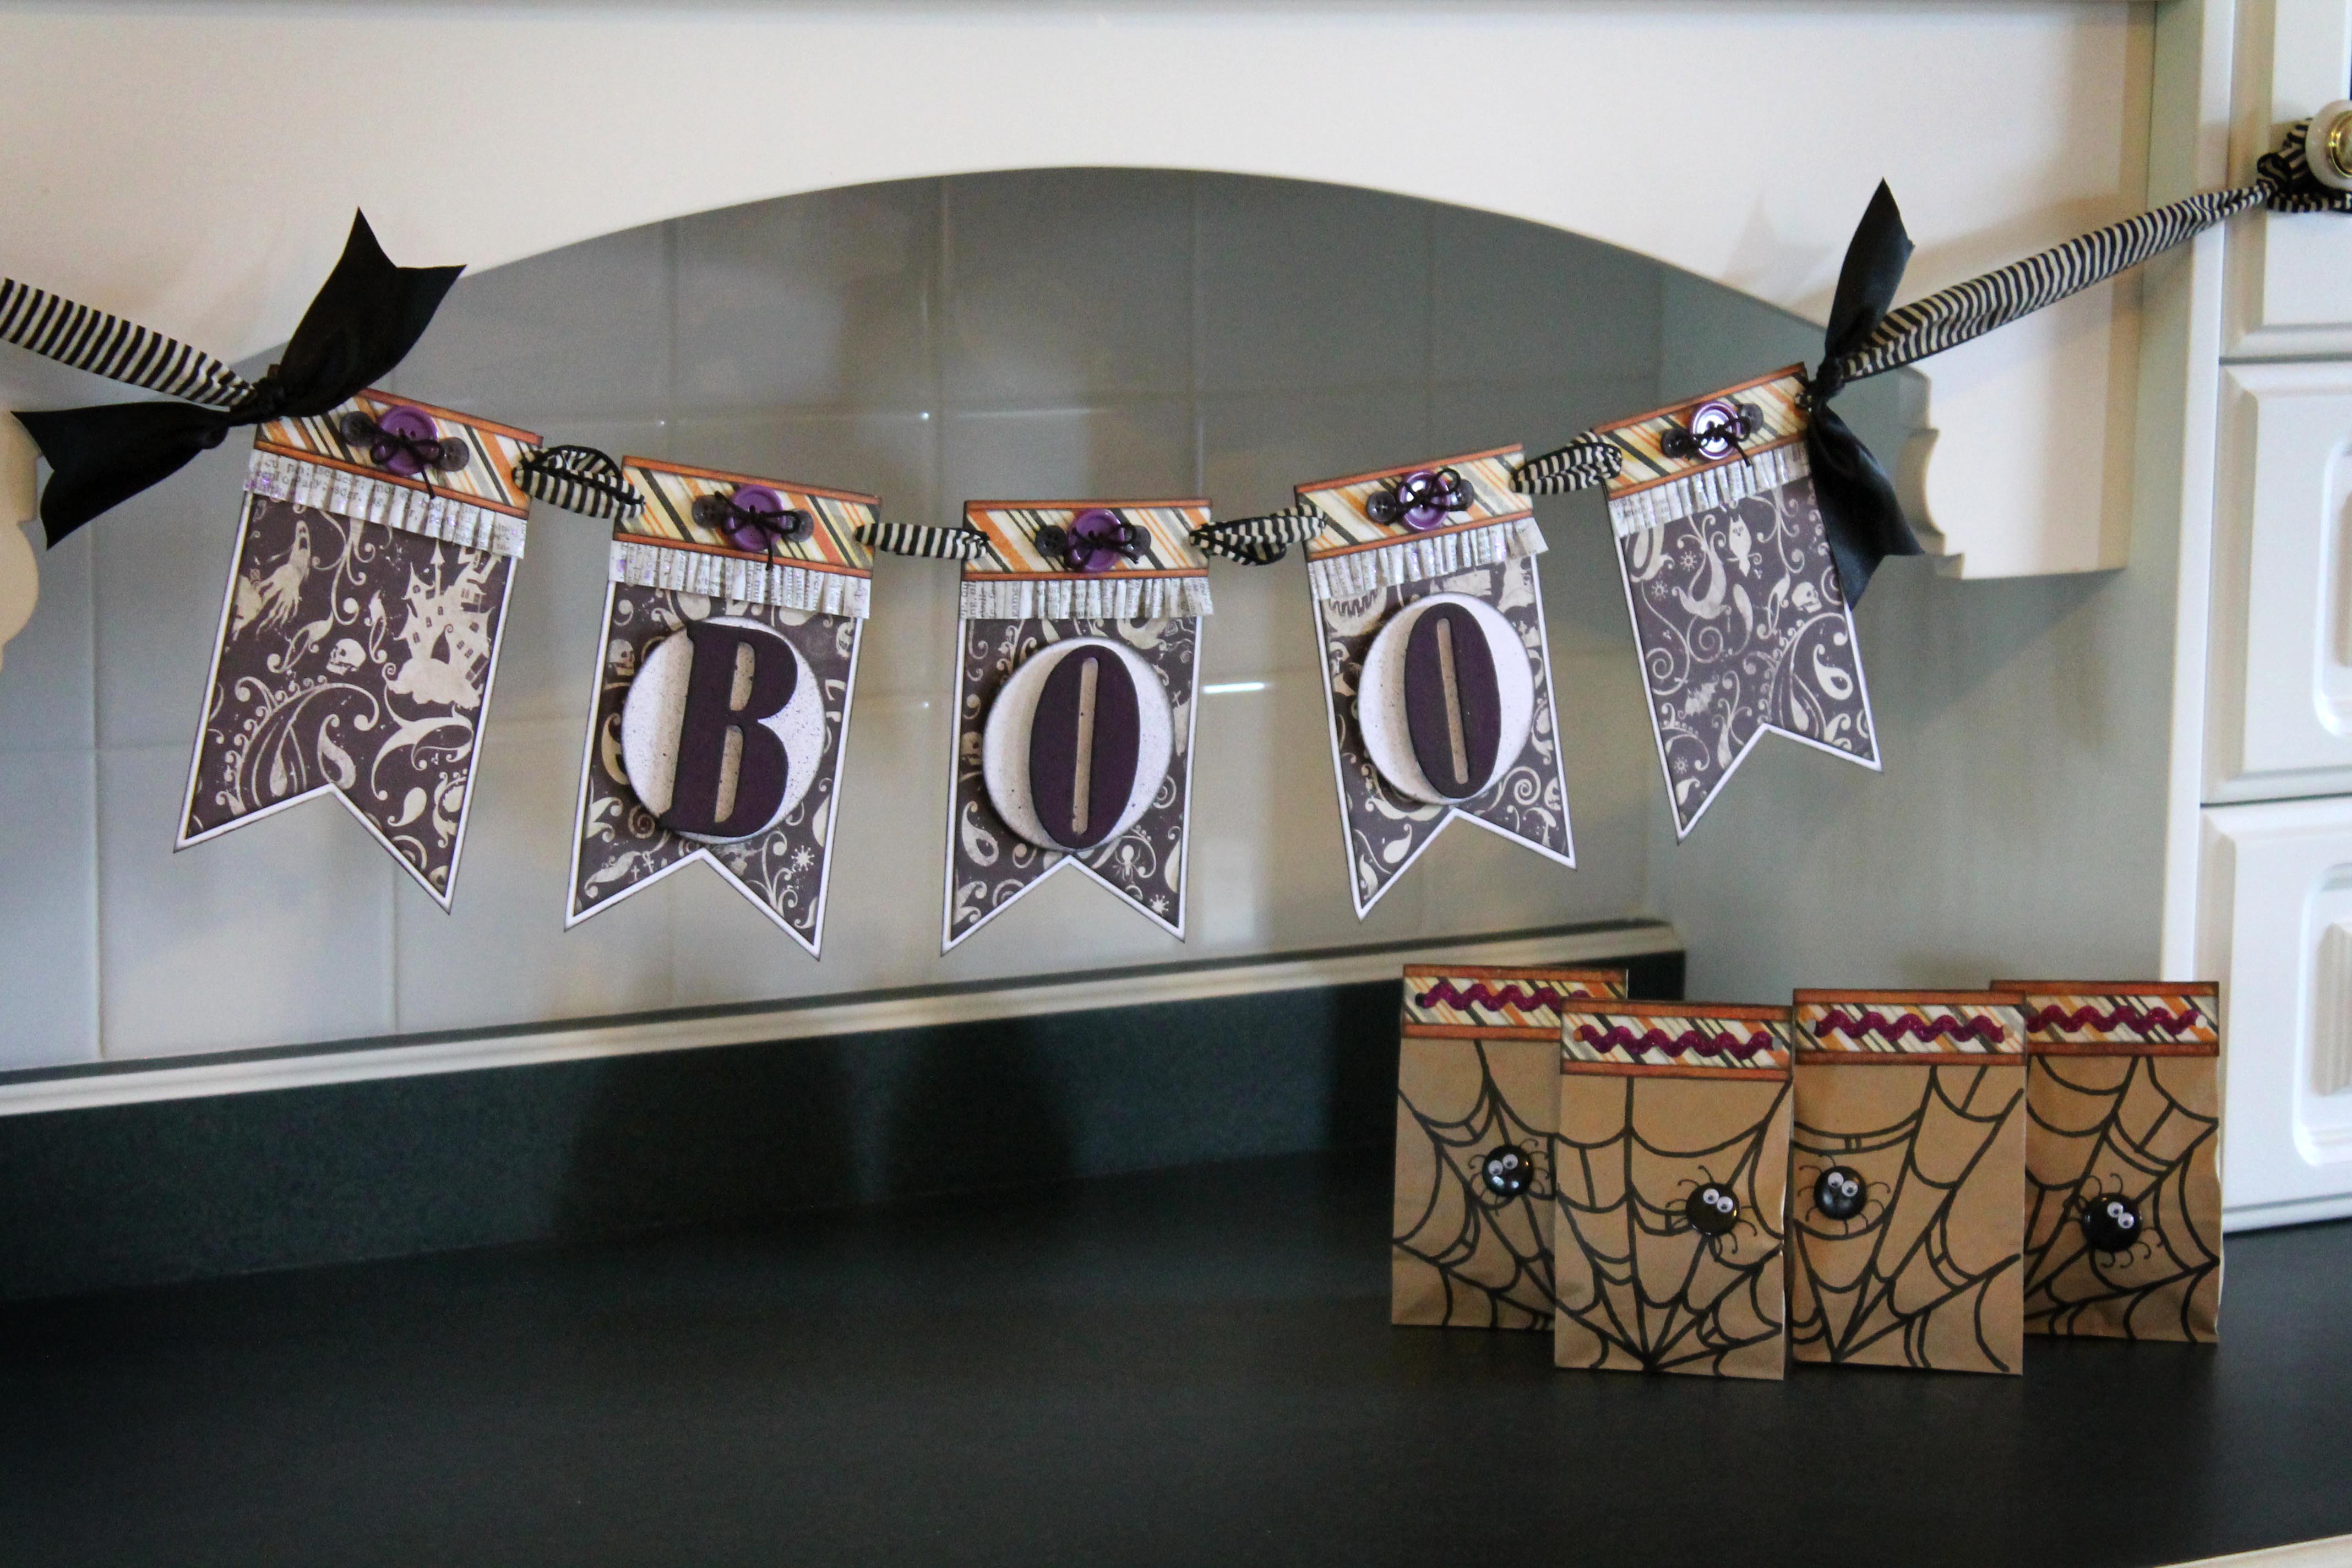
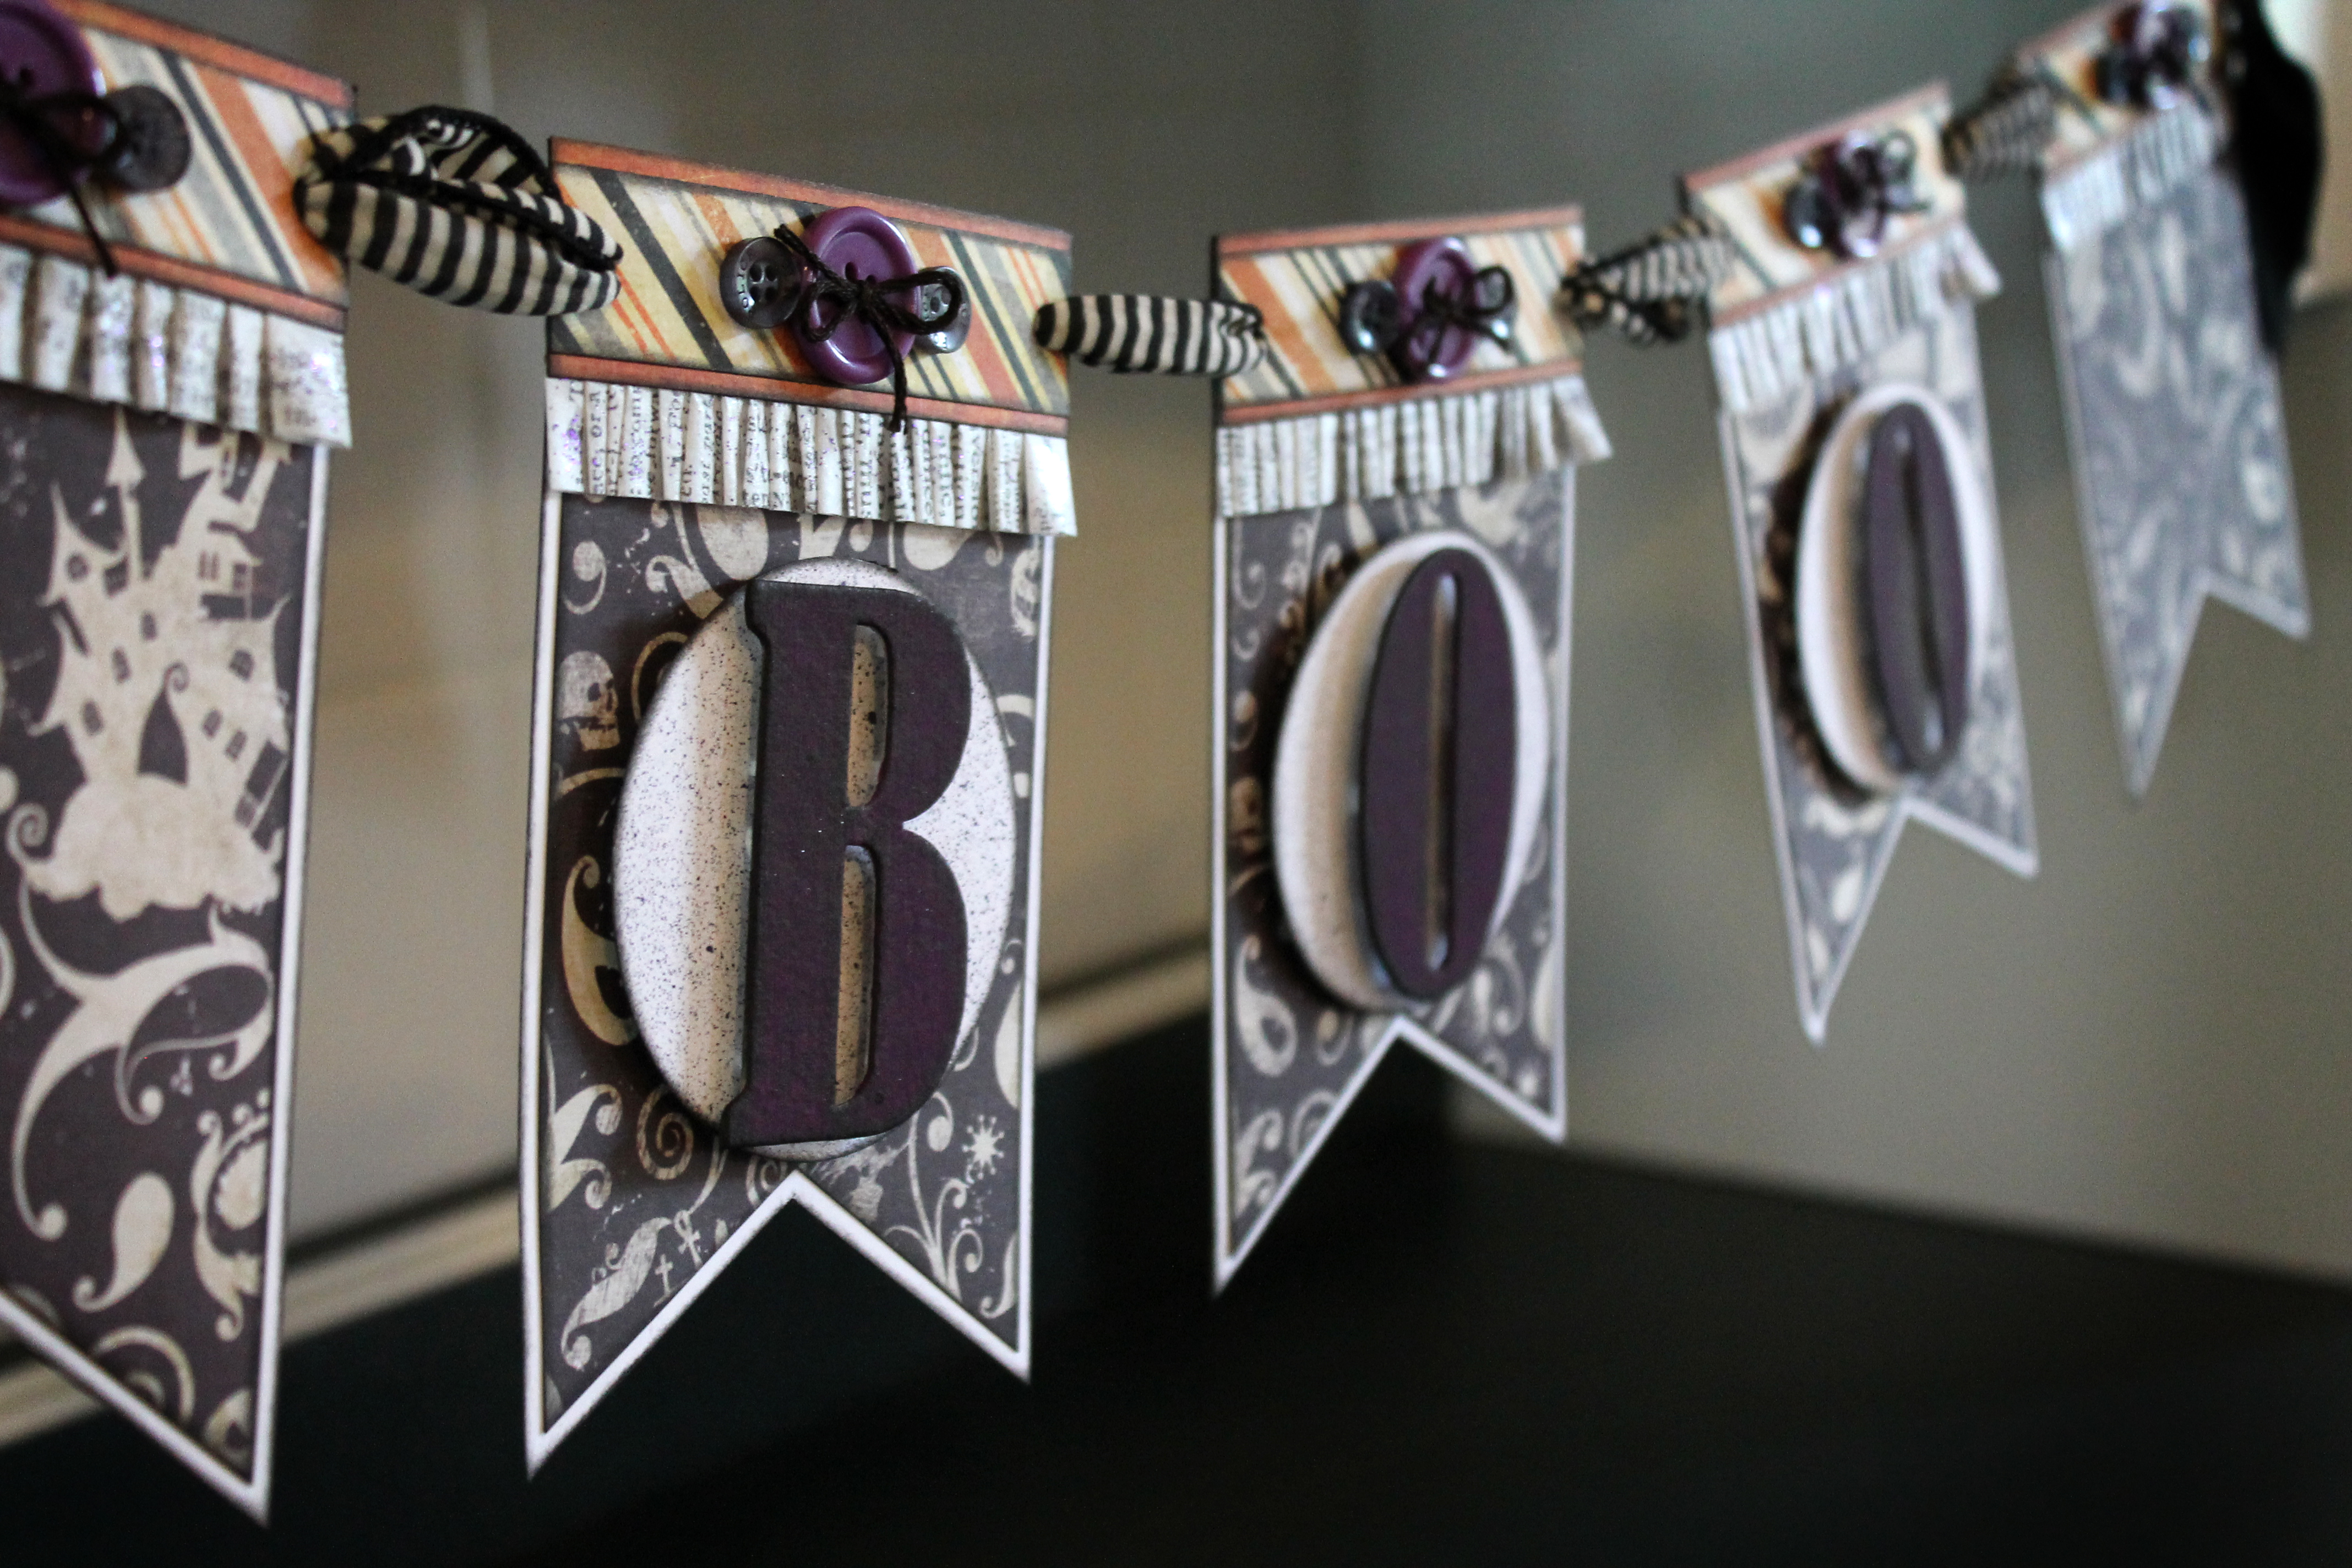
Here is what I used to create this BOOtiful Halloween Banner:
When I create anything that may have some wear and tear. I make sure that I use the proper adhesives. For projects like this BOOtiful Halloween Banner, there is nothing better than Glue Dots to keep everything exactly where you want it.
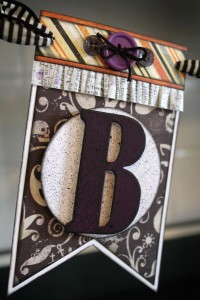
Thank you for stopping by and I hope your Halloween is filled with fun, candy and maybe even a BOOtiful Halloween Banner.
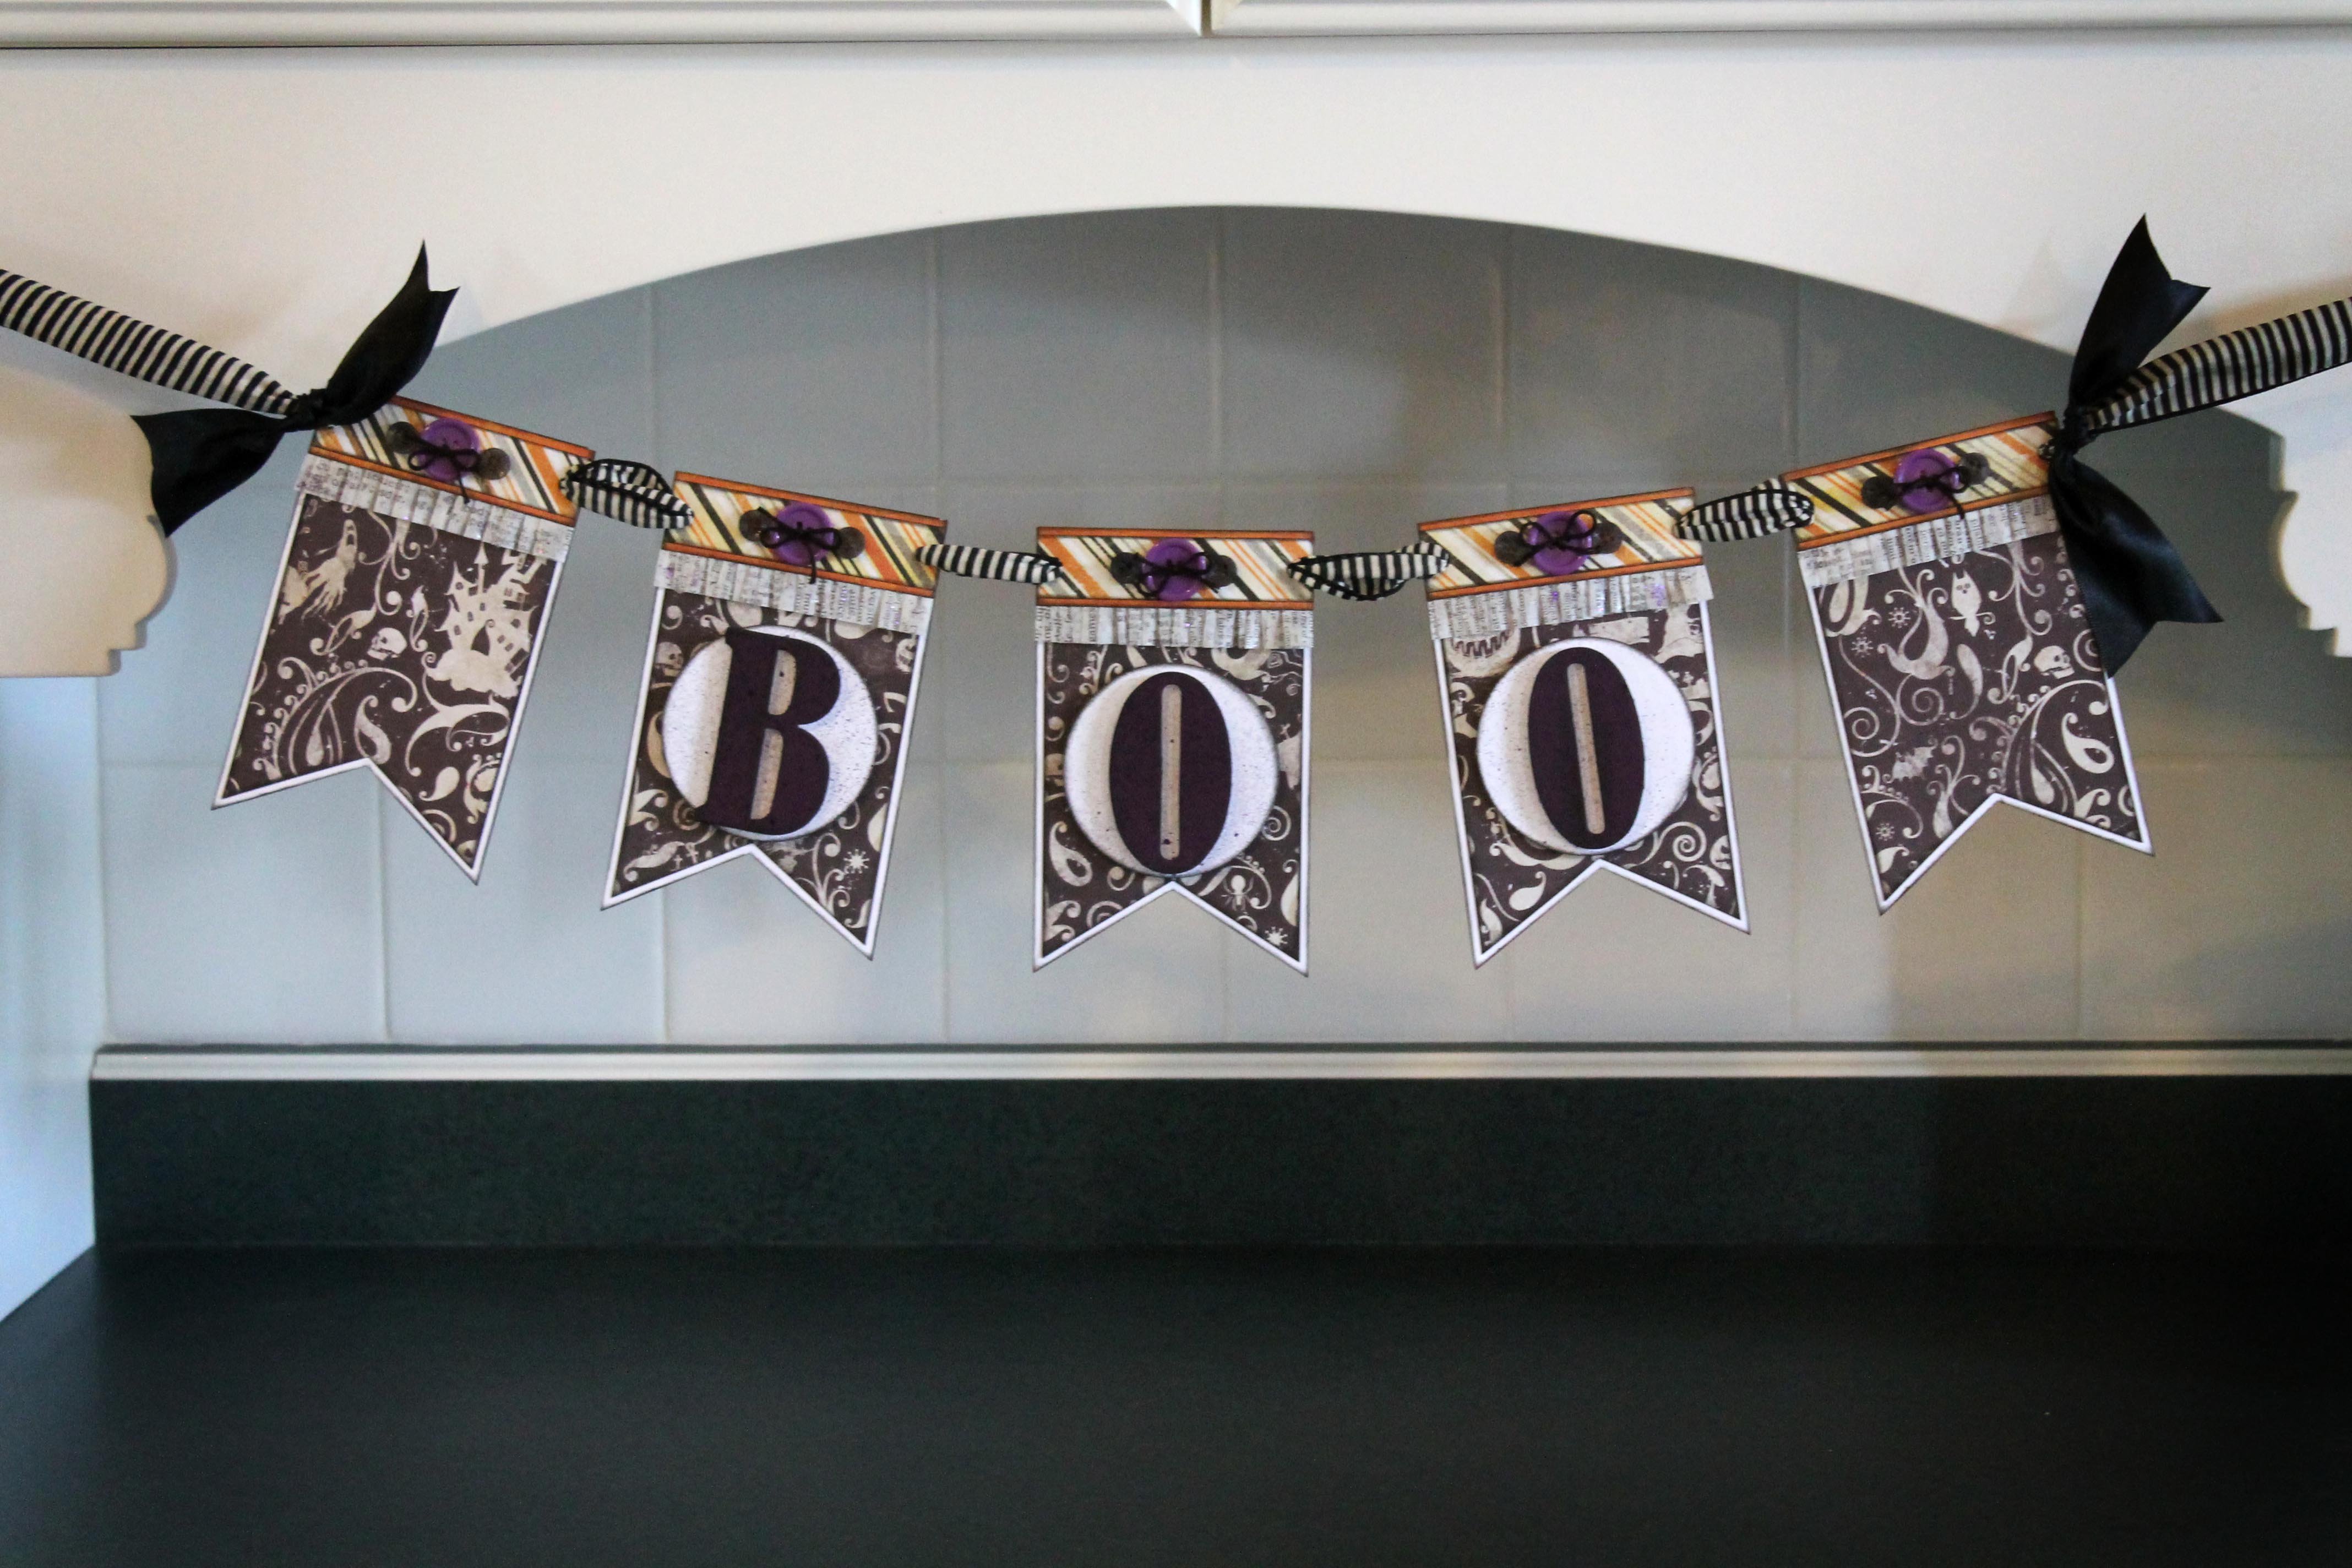
EEEK! It’s a great big SPOOKY Spider. No wait, it’s just a popcorn box in disguise. This Halloween treat box is a creation that I made for the Halloween Movie Popcorn Box Party Hop.
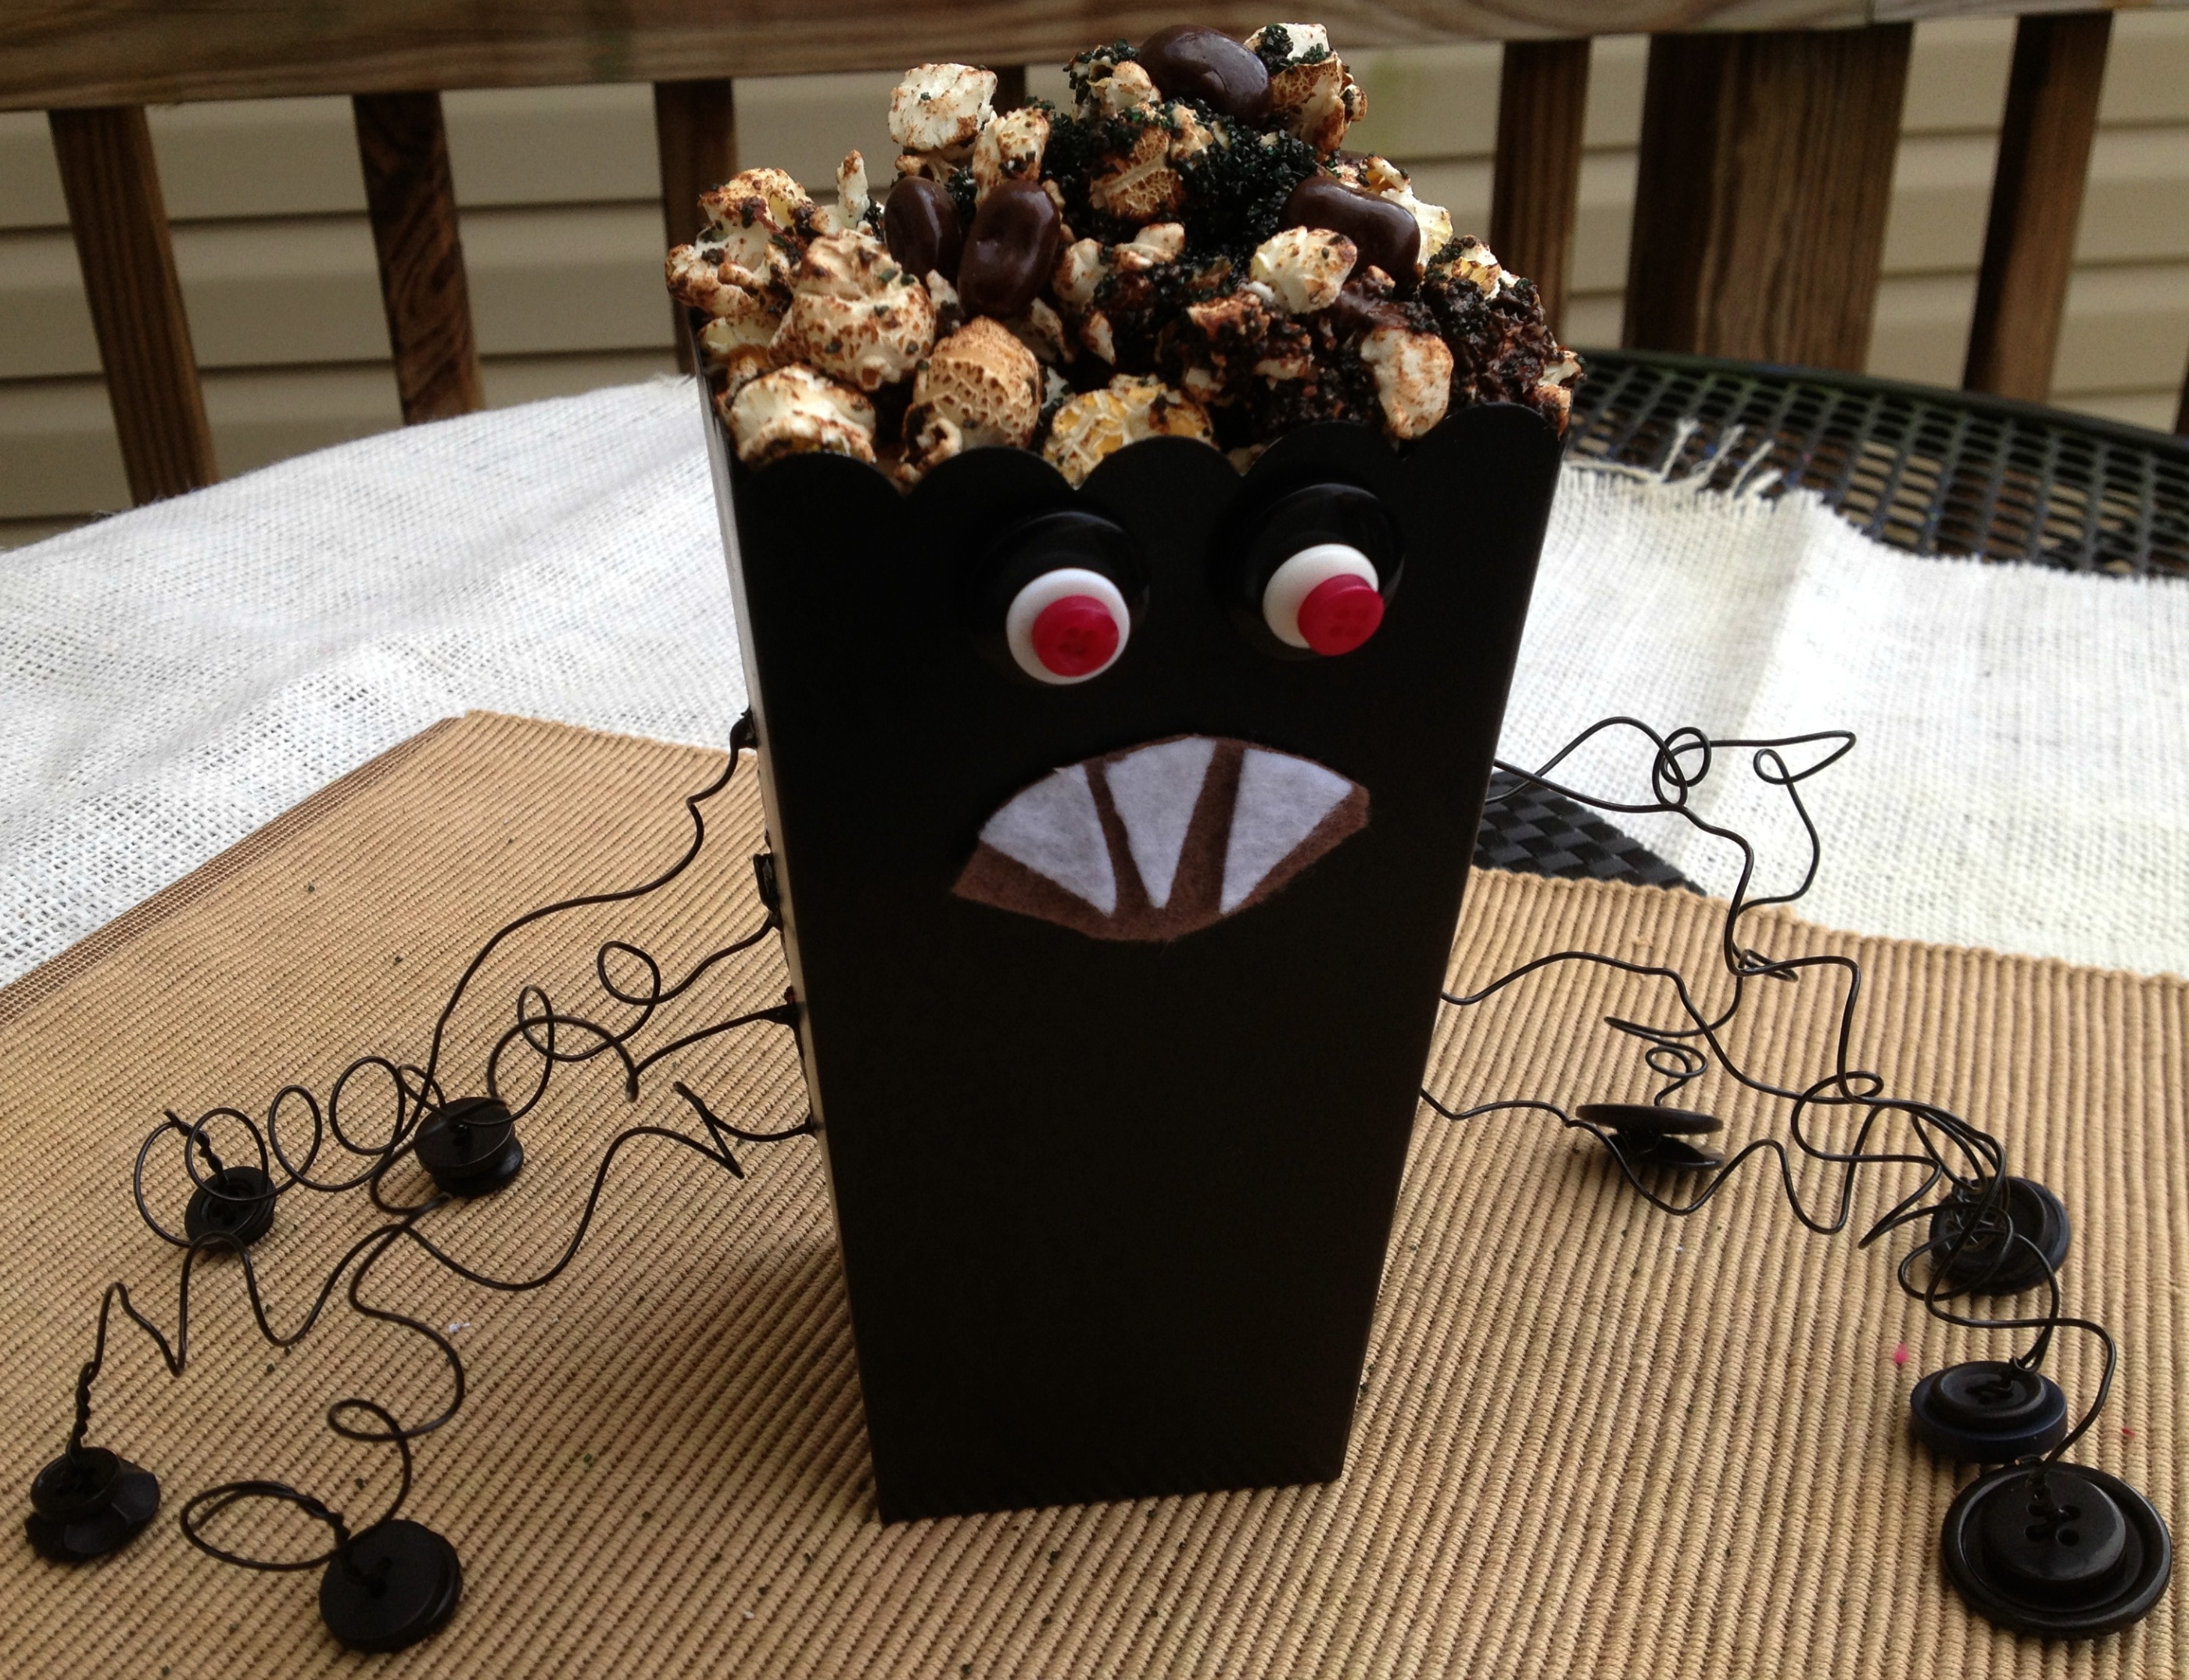
There are more than 30 popcorn boxes in this blog hop party that have been transformed into creations for Halloween. Lots of them use buttons from Buttons Galore as each of the designers was provided with a little package of Halloween colored ones from Laura Kelly’s collection.
Materials used for Spooky Spider:
![]()
I painted this one with Plaid’s Folk Art paint (Multi Surface Licorice) and then embellished with wires for legs and Laura Kelly’s Black Beauty buttons for feet and eyes. To get the wire into the sides, I poked holes with a sharp screw in hook. To fill it up and make it yummy, I added a mixture of popcorn that I shook up in chocolate and black sugar. I also added in some chocolate covered cherry Jelly Bellies to make it a little more fun.
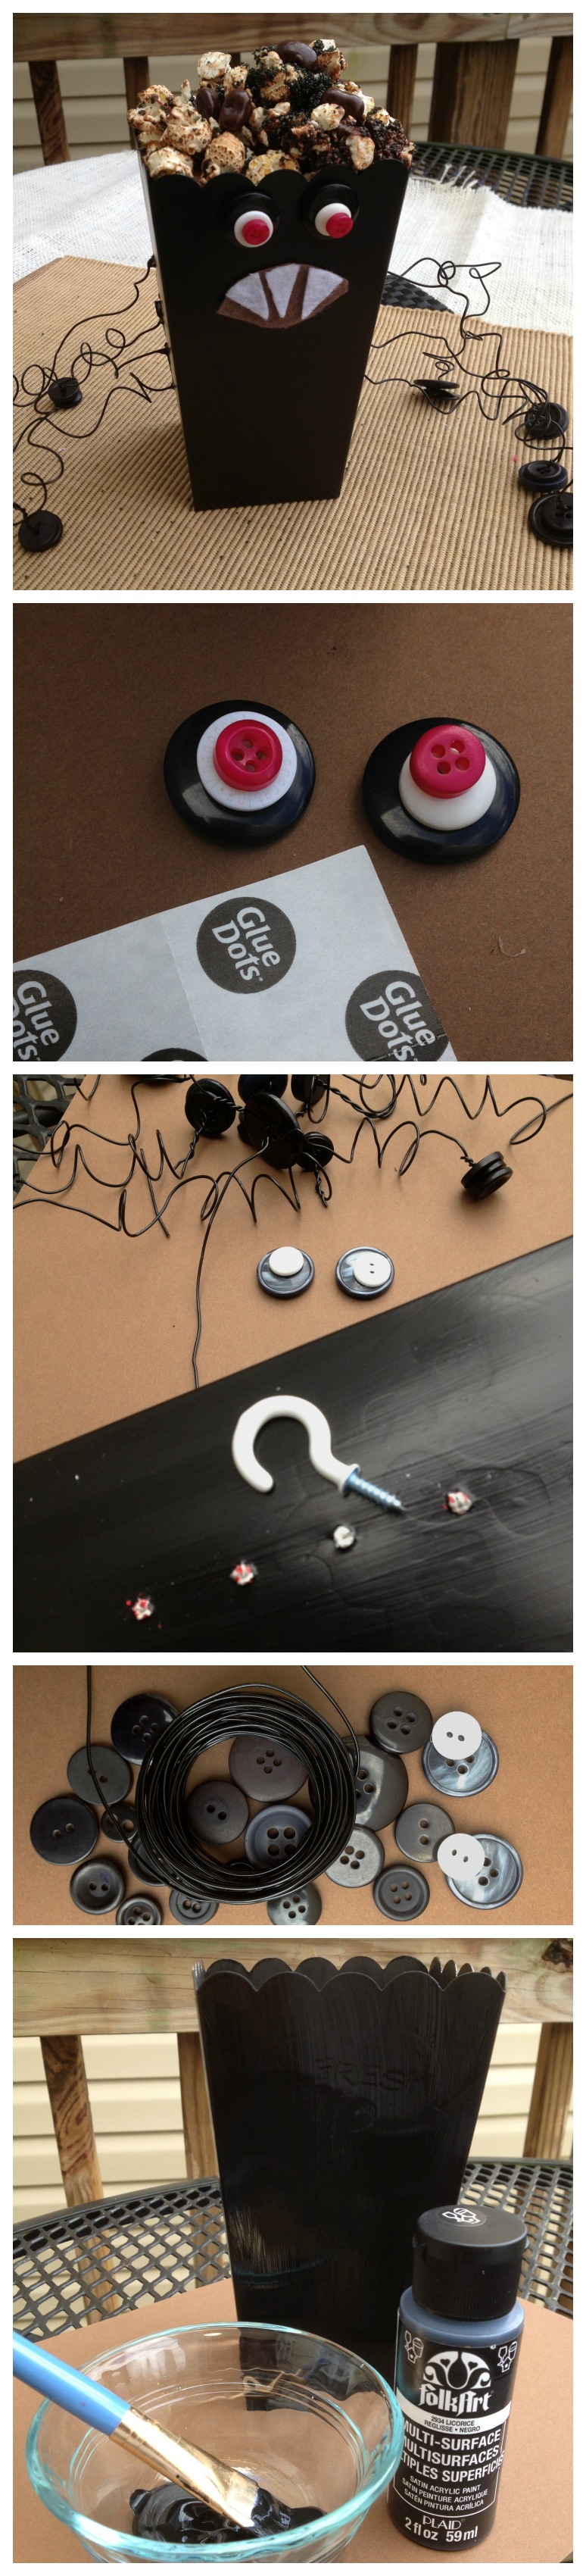
Check out the many other fabulous projects. Lots of them were done by our awesome Buttons Galore design team members and others by creative designers, artists, and bloggers.
Happy Popping Around,
Laura
Paper crafting can be fun and easy with novelty buttons. A few pieces of paper and a sentiment to convey your message, ribbon, a touch of buttons and VIOLA! A quick, cute and simple card you made yourself
Stay tuned for the next card in this series. It is equally as cute and just as simple as this one to make. Check out the website for sales on the buttons.

Wooden pumpkin crafts are great for autumnal home decor. I created a whole patch of pumpkins for display in my home. I am in love with the pumpkin frame and the way it stands out in the patch. I guess it is partially due to the adorable photograph I placed in the frame . It is my oldest son and the photo is from 14 years ago, but I really do think the frame is adorable too.

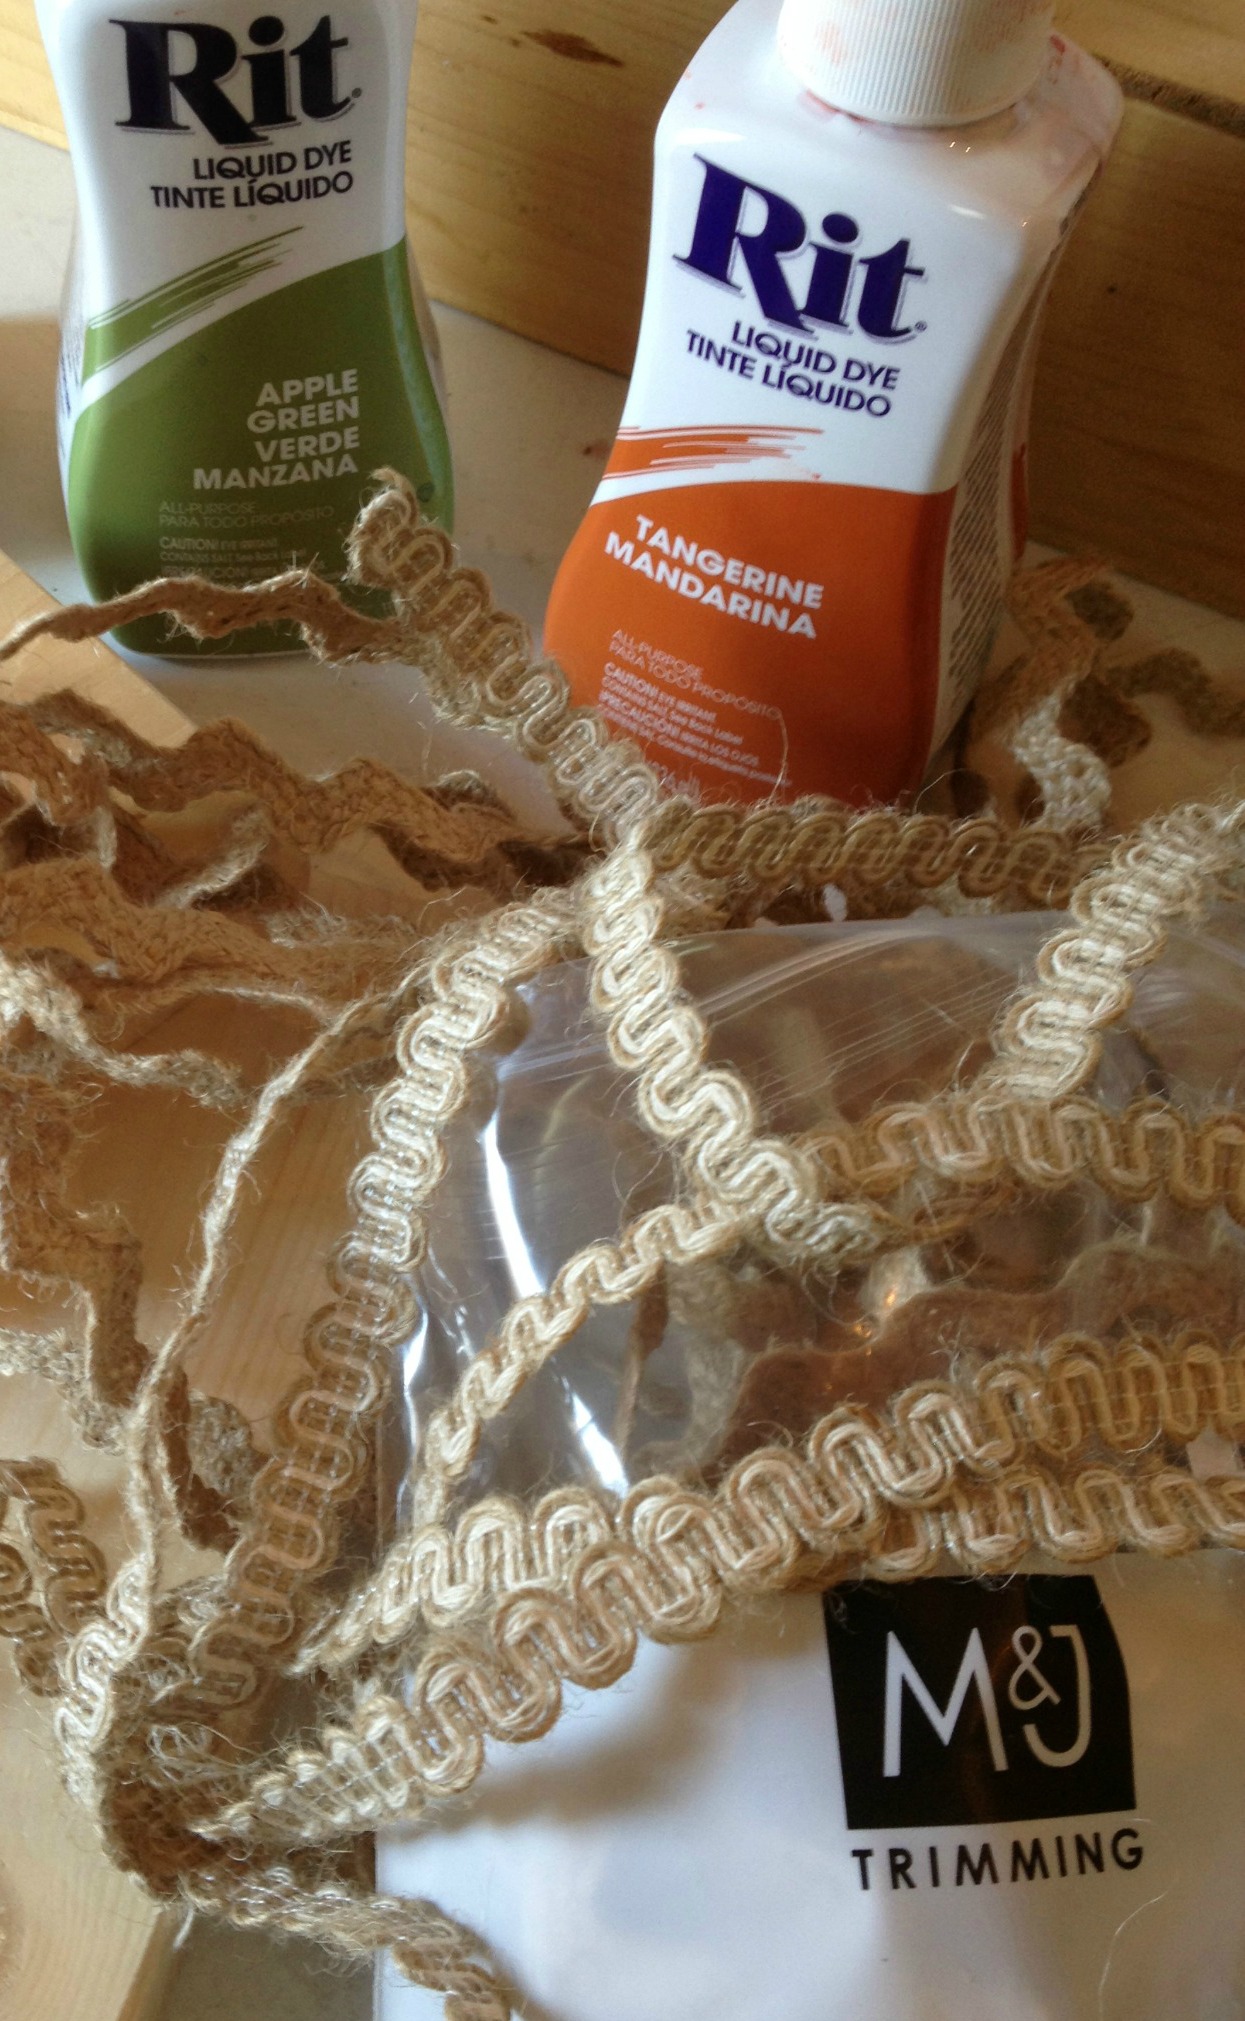
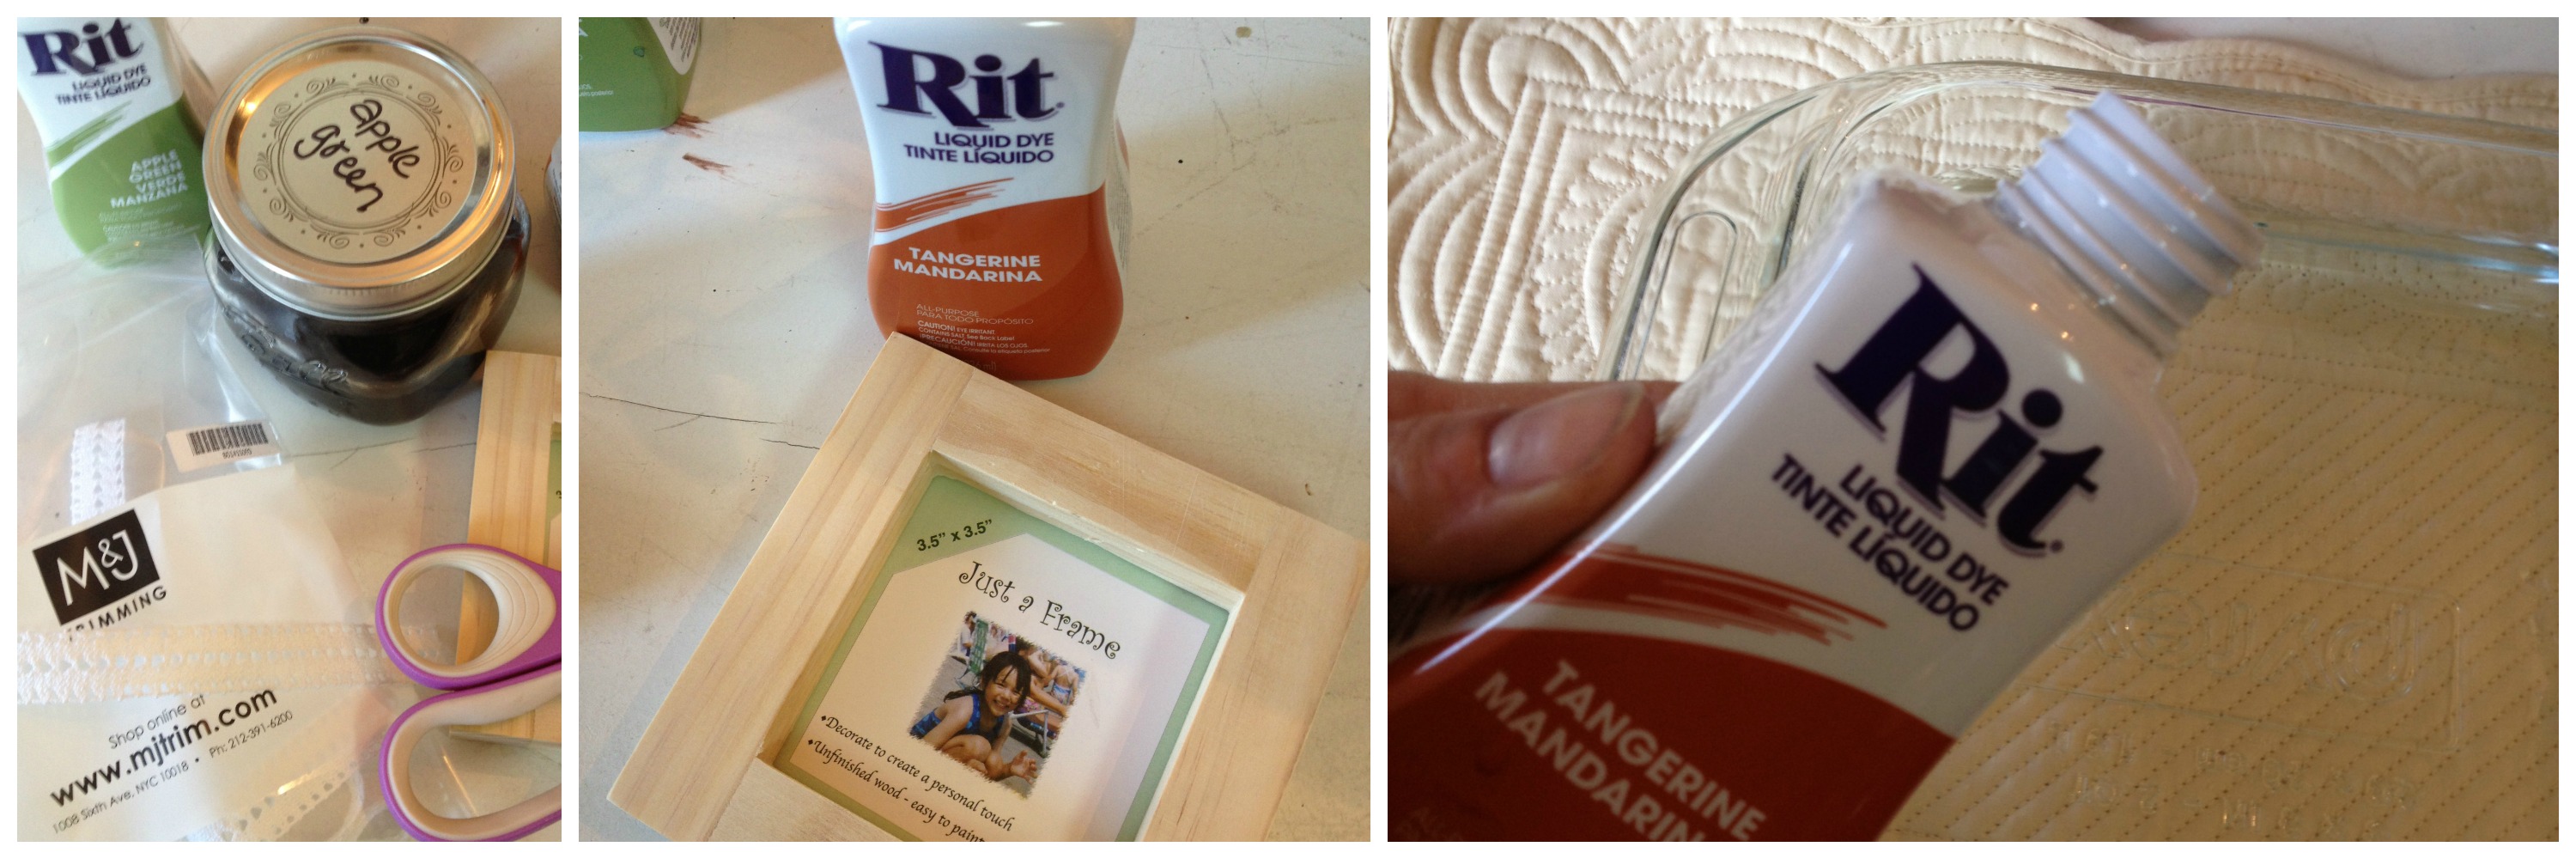
I created a button stack for a stem with my Laura Kelly Bold Brown buttons and love the way the stem turned out.

To find out more about making a whole patch of wooden pumpkin crafts, visit my blog post today.
Happy Decorating for Halloween,
Laura
Kids LOVE to know when they’re getting there, when their birthday is, how many days til their favorite holiday. Let them help you make a Peeps Halloween Countdown!
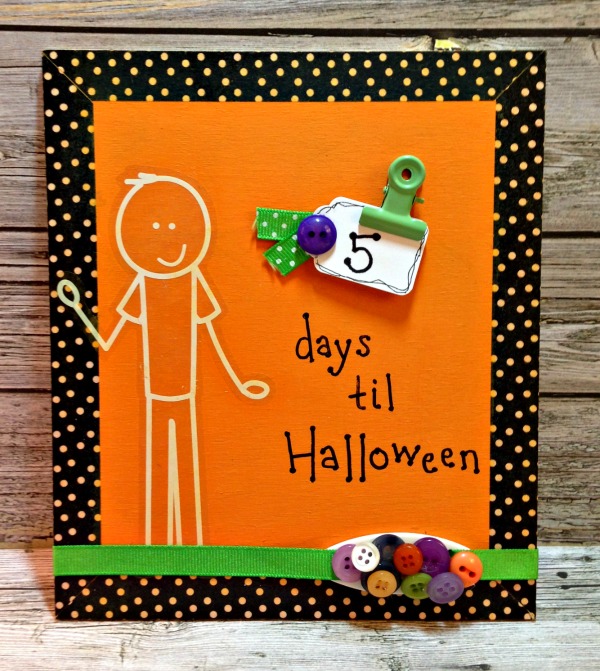
Allie Gower shows you how easy it is to Create a Halloween Wreath using the Halloween Button Assortment, an Archiver’s Exclusive.
Buttons Galore is heading to Archivers Mall of America for ScrapFest 2013.
Join us for fun make and takes each day of ScrapFest.

Please note that many of these supplies used to make the ScrapFest projects are readily available in your local Archivers, and many of them are available in the Archiver’s Annex Online.
Projects will be on display in the Archiver’s at the Mall of America.
See more of Allie’s work at her blog, My Card Party.
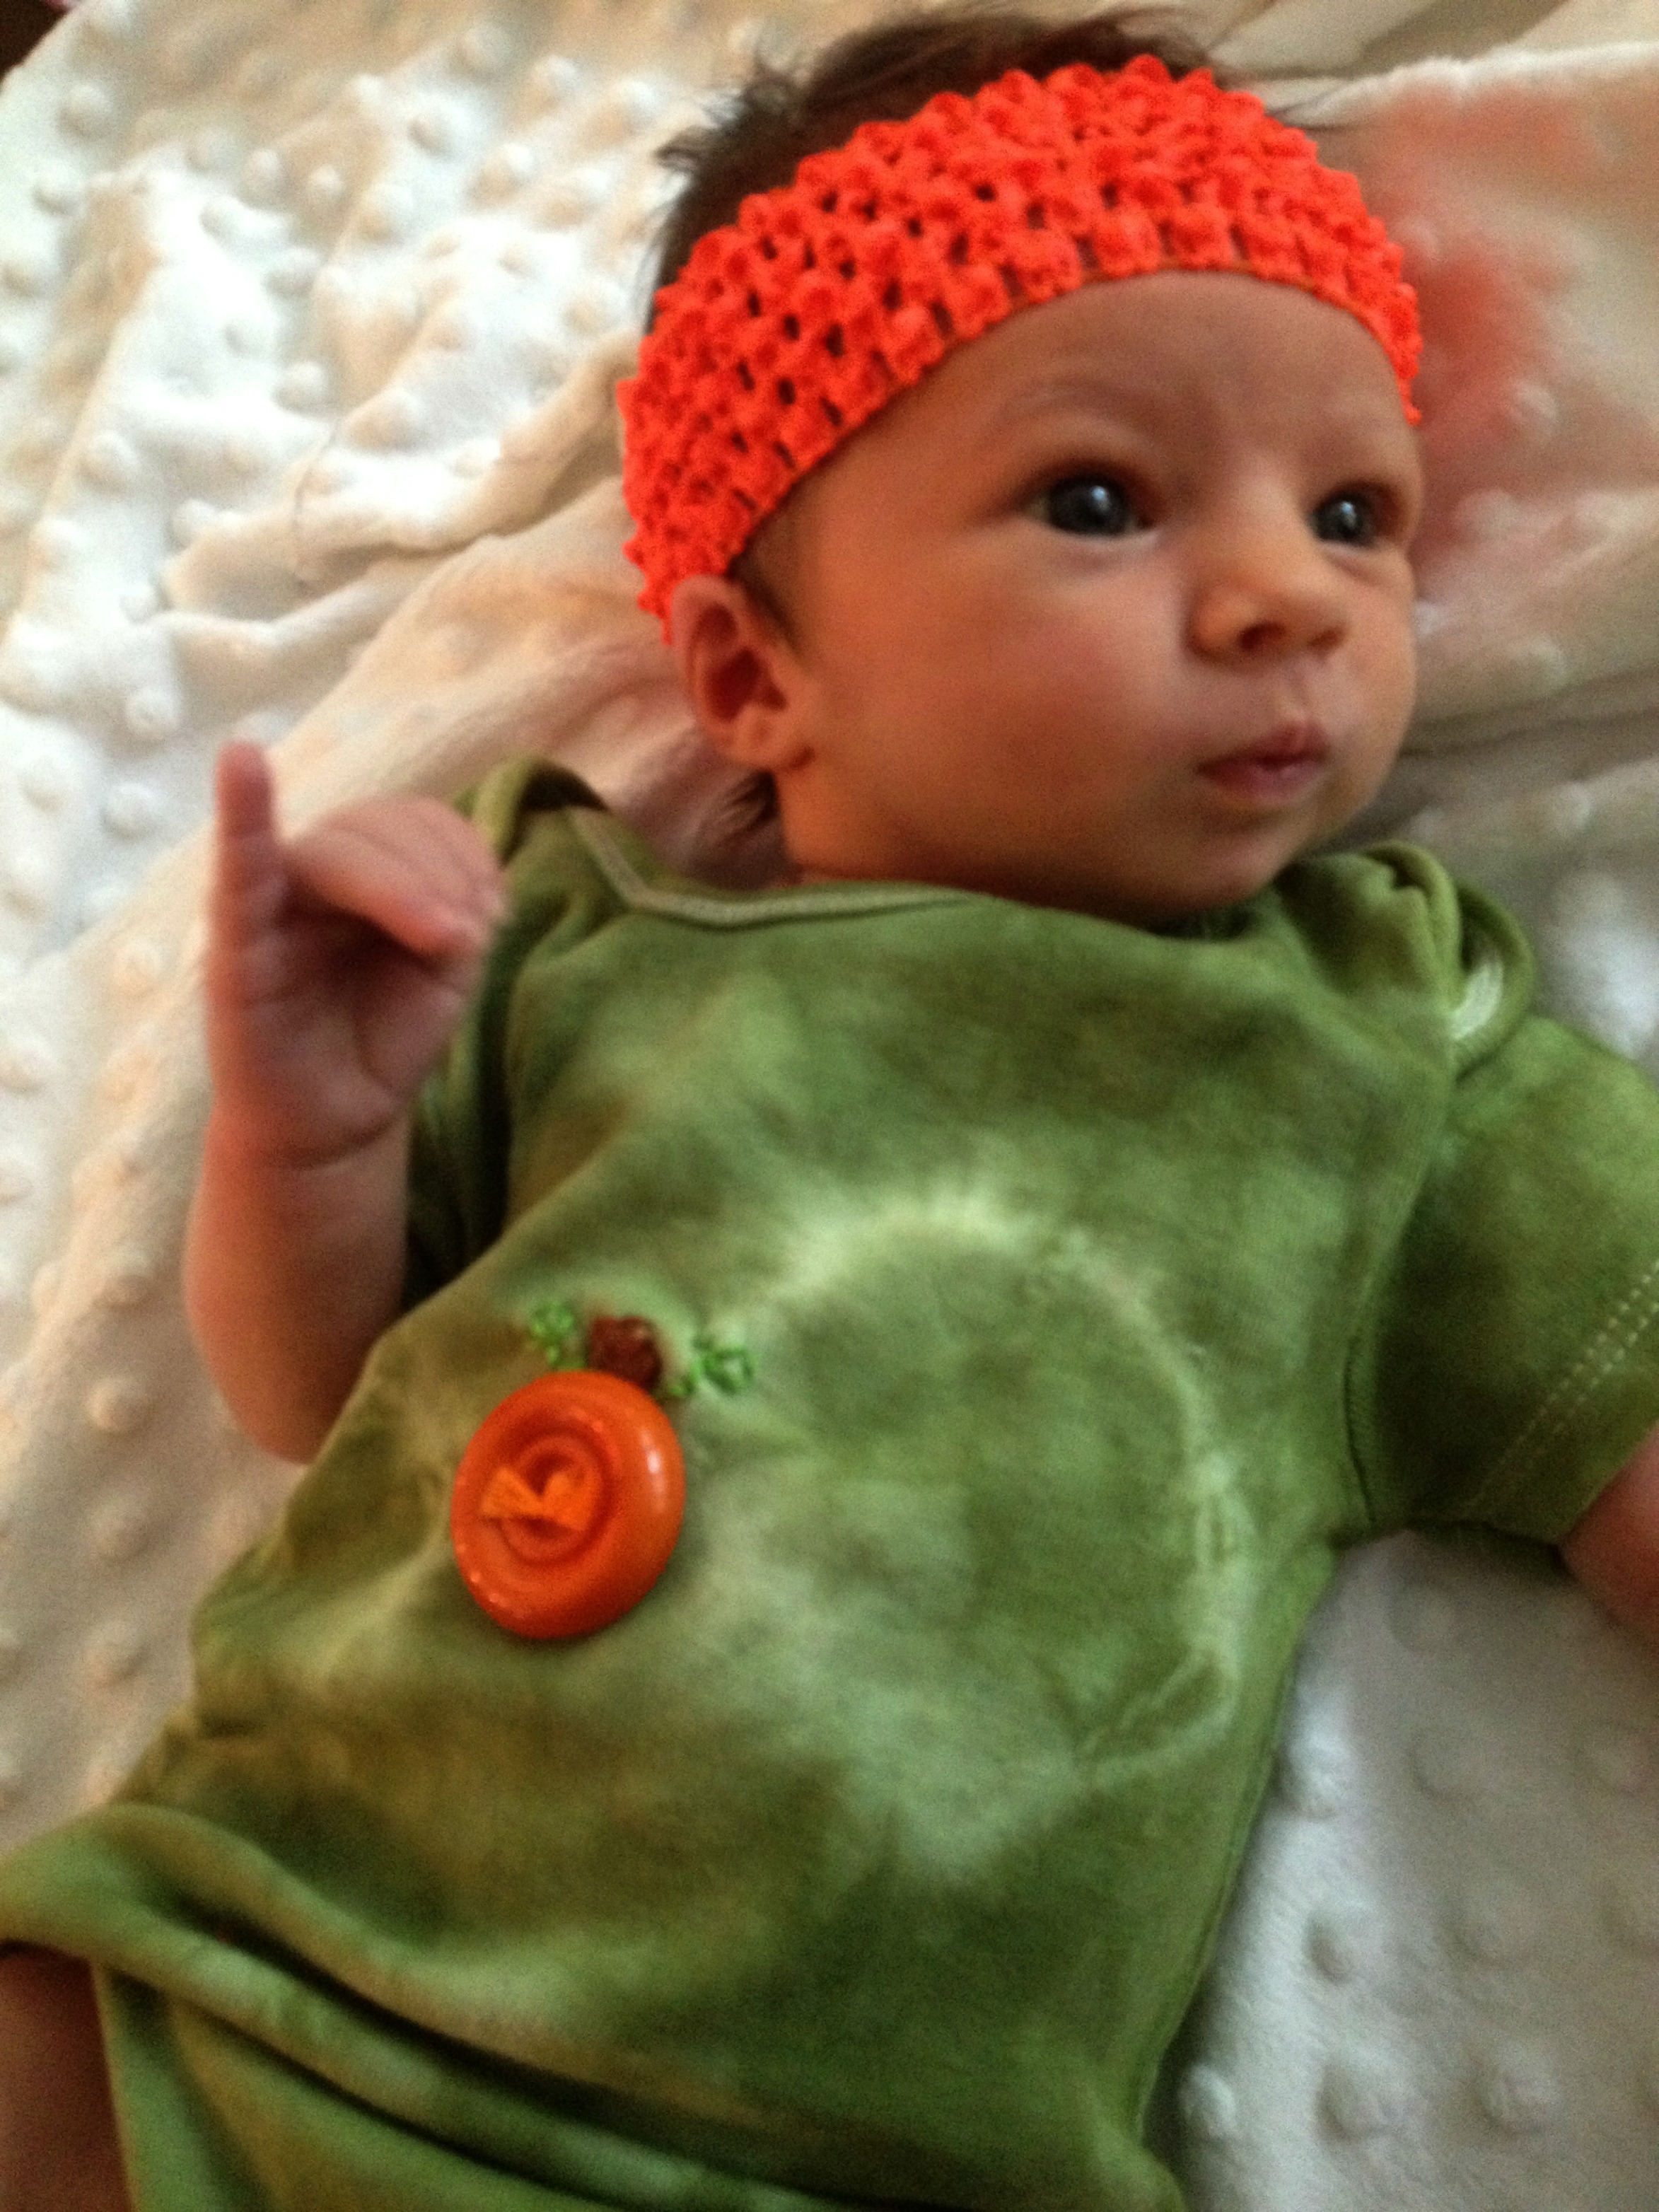
Babies are so adorable when they are dressed to celebrate the holidays. This pumpkin onesie creation for Halloween is super cute as well as quick and easy.

All you need is a onesie, embroidery floss and a large Outrageous Orange button . If you want to put your pumpkin on a green onesie and you can’t find one, you can dye one. That is what I did first. I used Rit Dye’s Apple Green and tie dyed it in a mason jar.

It is best to embroider the stem and vines first and then add your button. My favorite floss is embroidery floss by Coats and Clark! I think the little pumpkin is just simply so adorable. So make your little pumpkin a onesie today.
Happy Pumpkins, Buttons and Stitching,
Laura
Sometimes I feel like September is really new year. Back to school time calls for getting organized and cleaning out closets. As I was purging my closet, I found a pair of cute, polka dot shoes.
On their own they are pretty cute but, being the crafter I am, I couldn’t leave well enough alone so I was off to the studio to create some jewelry for my shoes.

You can buy shoe clips blanks at most craft stores. Buy a dozen. I promise you are going to be addicted to the craft once you find out how easy it is to do.
As for buttons, Buttons Galore & More’s large supply of novelty buttons means the possibilities are endless. Turn your favorite pair of shoes or pumps into cute retro shoes with cherries, decorate your child’s shoes with back to school buttons, or get a jump-start on the holidays and make some Christmas themed shoe clips. By simply adding shoe clips, you can turn one pair of shoes into endless looks.
1. Glue a novelty button onto a plain button. Set aside to dry.

2. Once buttons are securely glued together, attach your button creation to the shoe clip blank. Make sure the button is glued onto the clip so that when you clip it onto your shoe, the design is oriented in the way you want it.

TIP: Once you have glued the button onto the shoe clip blank, set it upside down onto a clean surface to dry. This will keep the buttons from sliding off the shoe clip while drying.
3. Once the clip is dry, attach it to your shoes and skip down the street.
To get more button craft tutorials, recipes, and lifestyle tips, visit my blog at www.laurabraydesigns.com.
![]()
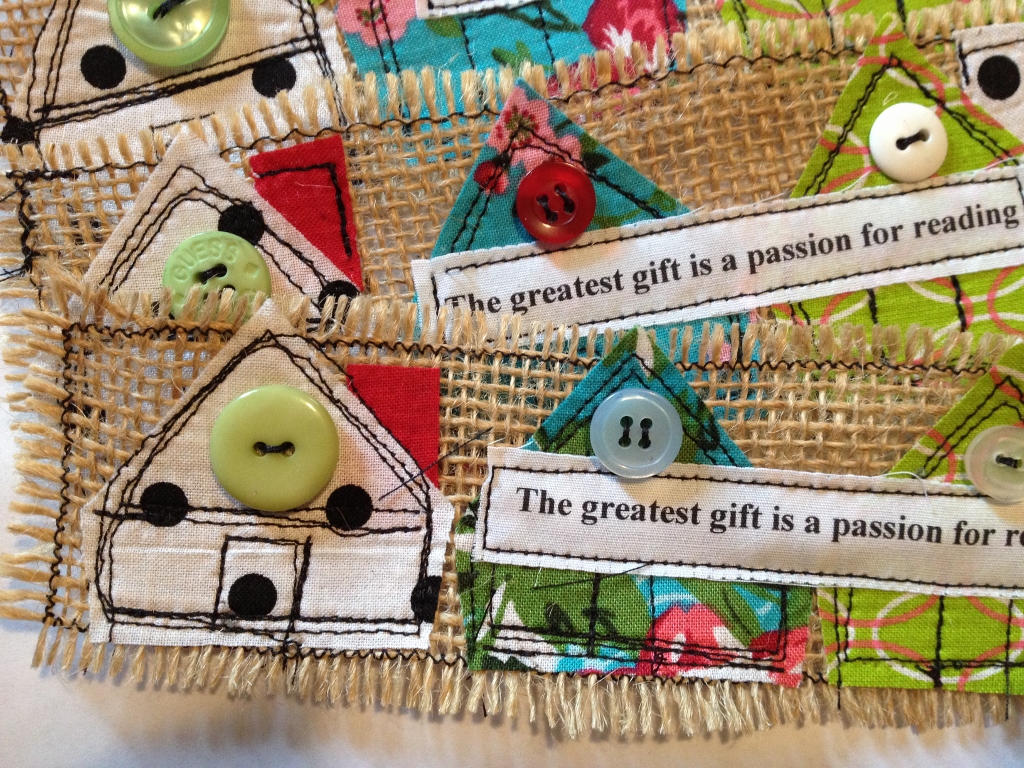
Quilting Arts Bookmarks – A recent post on Facebook asked “do you give teacher appreciation gifts for teachers at the beginning of the new school year?” While completing a quilted inspired pillow recently, it occurred to me that I could use the scraps to create a fun bookmark that any teacher would love and appreciate.
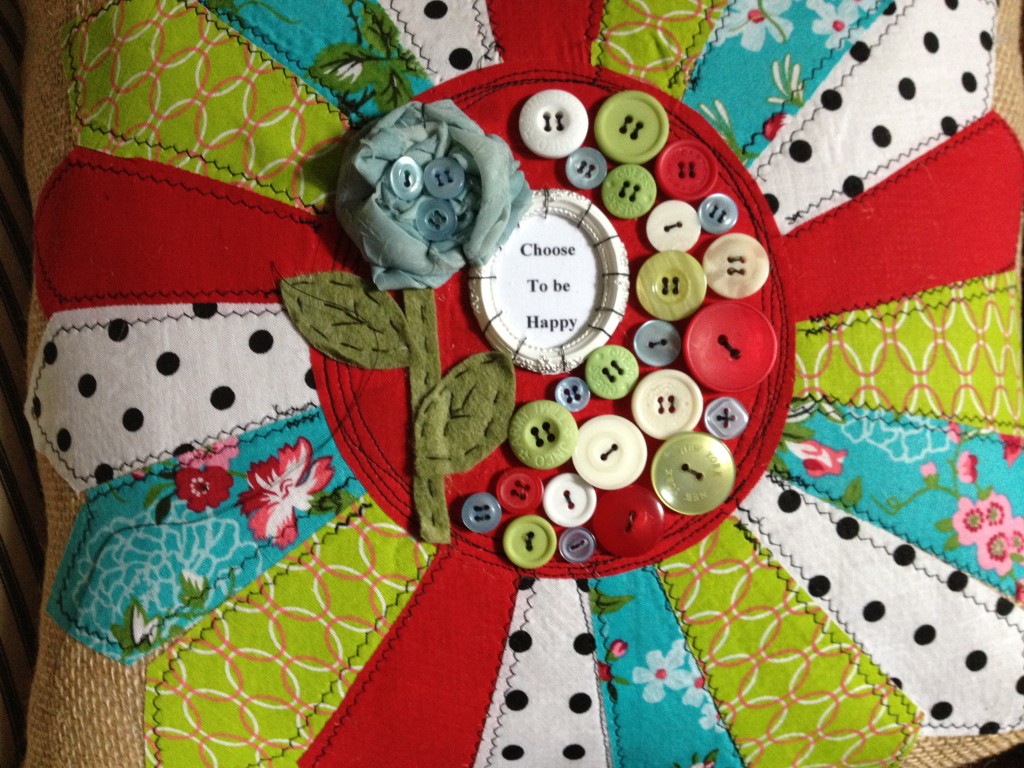
I am seriously loving the Dresden applique look that I am seeing on so many inspirational blogs and Pinterest. Some inexpensive fabrics sold by the fat quarter caught my eye at Walmart the other day and I knew they would be perfect for this Dresden pillow project. I cut lots of Dresden shapes using a pattern and had several leftover.
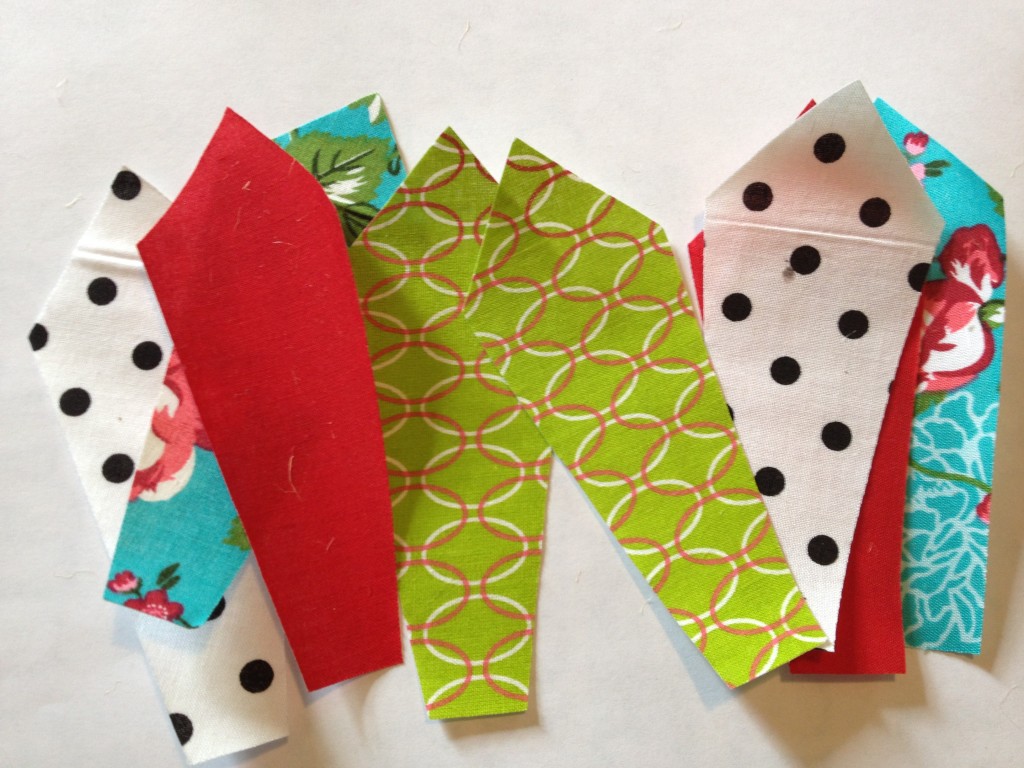
So, what to do with these fused pieces of shaped fabric? Quilting Arts Bookmarks, that is what. How about creating a row of houses on a burlap bookmark? (I had this out already too since I created the pillow back and front from burlap).
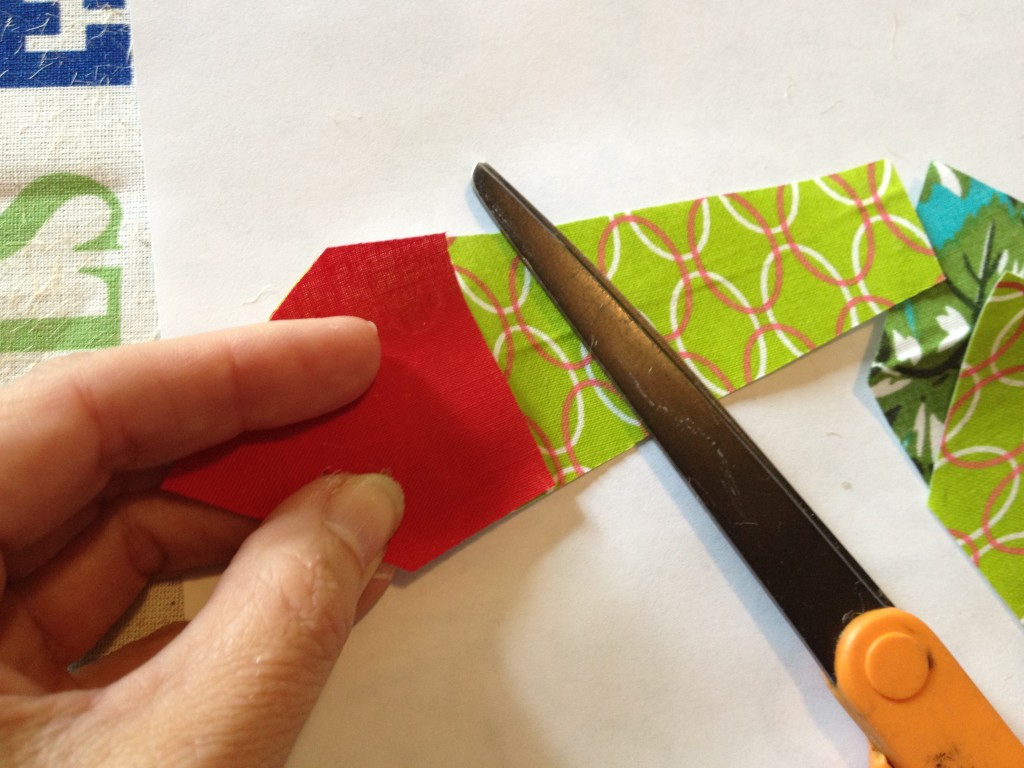
Trace a rectangular shape onto burlap using a cardstock rectangle pattern (mine were approximately 2 1/2″ x 9.” Leave some room on both the short and long edges for fraying. I used a permanent black marker to trace my shapes. You can also use a rotary cutter and self healing mat in lieu of the cardstock pattern if you wish.
Cut the shapes out and zig zag stitch the edges approximately 1/4″ from edge to leave some room for fraying. once you fray the edges, the stitches will stop further fraying.
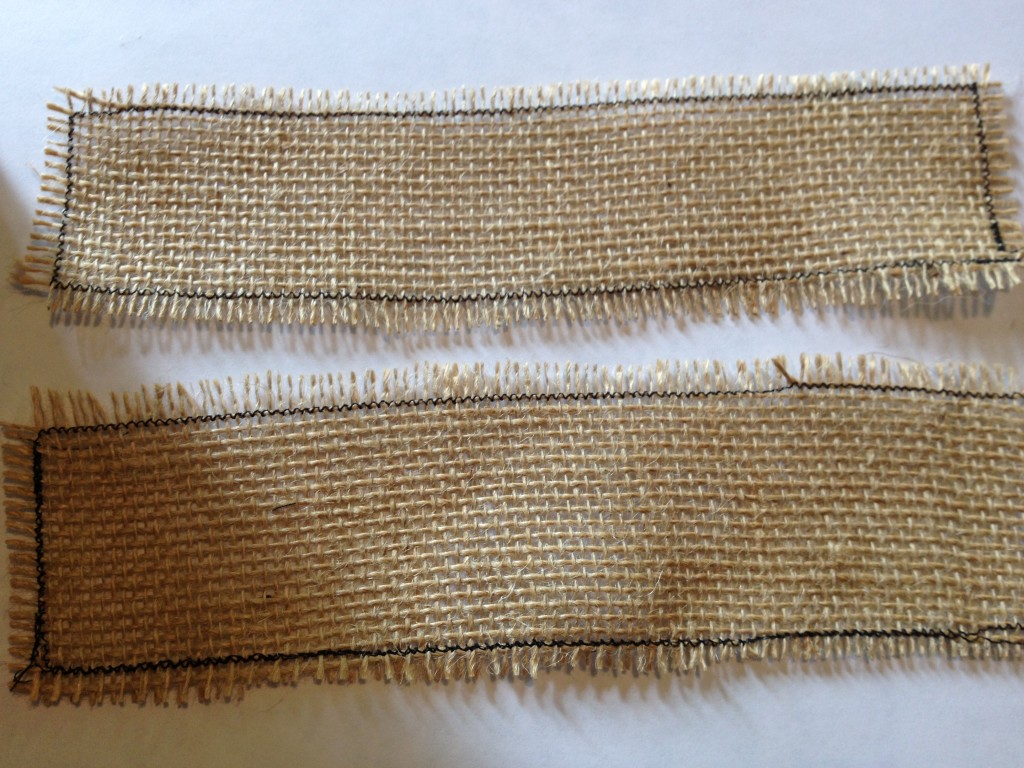
Now you can use your iron and pressing surface to fuse the house shapes to the burlap. Peel off the paper backing and fuse in place.
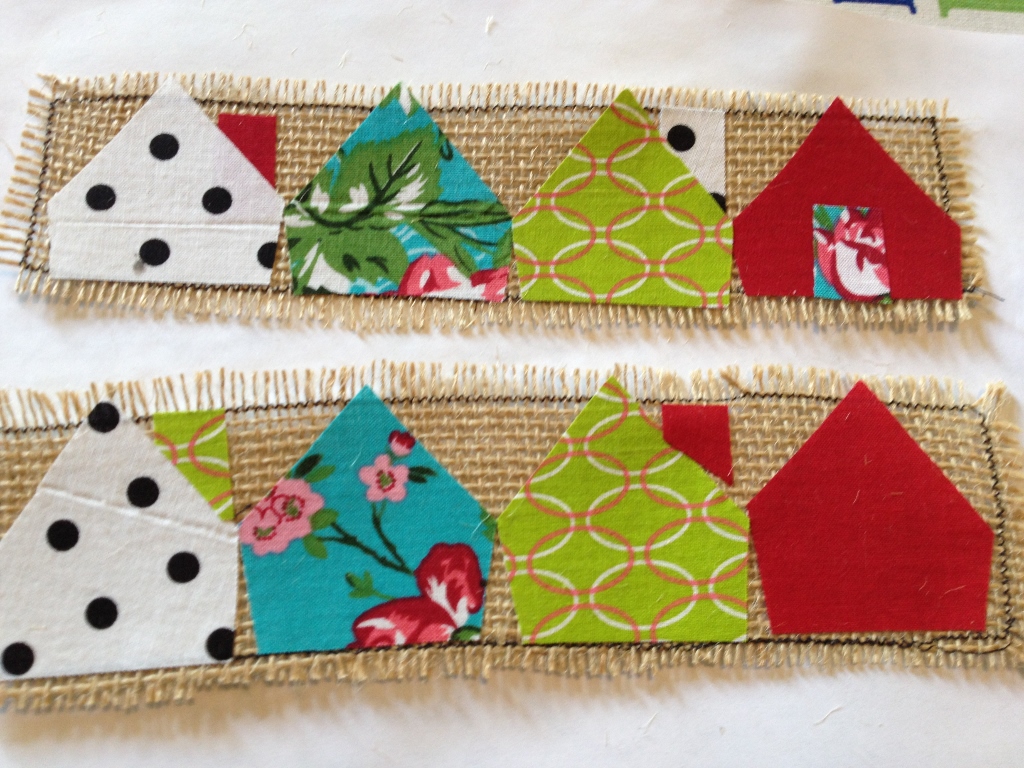
Now its time to back to the sewing machine and free motion stitch the house details. Often, you will notice that artists who free motion stitch intricate details such as text, intricate shapes (think animals, arm-chairs,etc) will use a free motion foot. But I have discovered that you can stitch simple free motion shapes with your regular sewing foot. After you have stitched your details, its time to sew on your inkjet fabric sentiment.
You can purchase specialty inkjet fabric that is paper backed so it’s easy to use with most inkjet printers. I love this sentiment because its so basic, but I also found another great one that would be perfect for educators. “If you can read this, thank a teacher.” How true!!
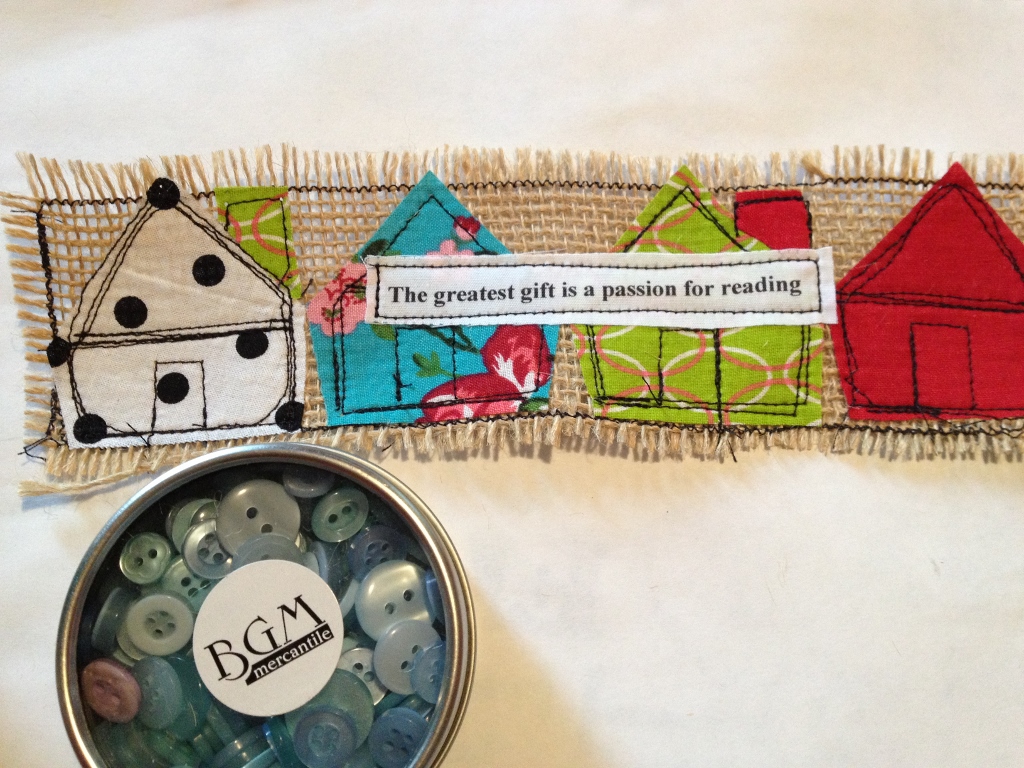
Last but certainly not least and once again the perfect finishing touch, add buttons from a variety of the wide selection from Buttons Galore and More with a hand sewing needle and thread.
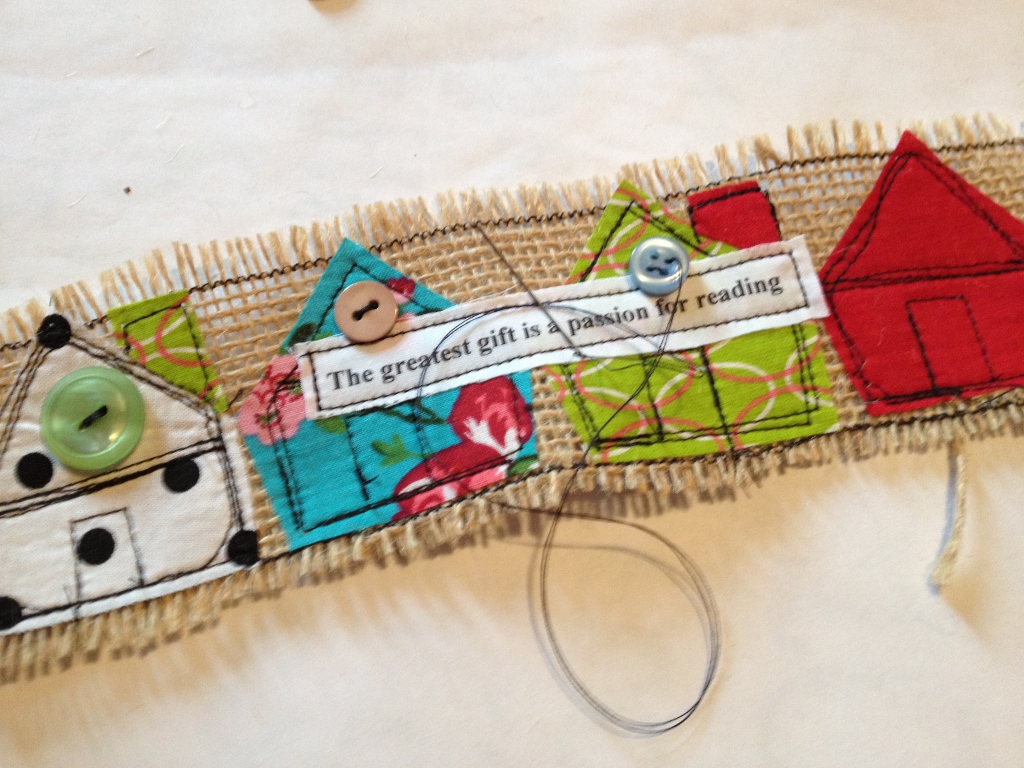
Make the Quilting Arts Bookmarks in multiples using your fabric scraps, burlap and buttons to thank those teachers for all the hard work they do!
Live Life Creatively,
Melony
Keep your supplies stored in style this year!
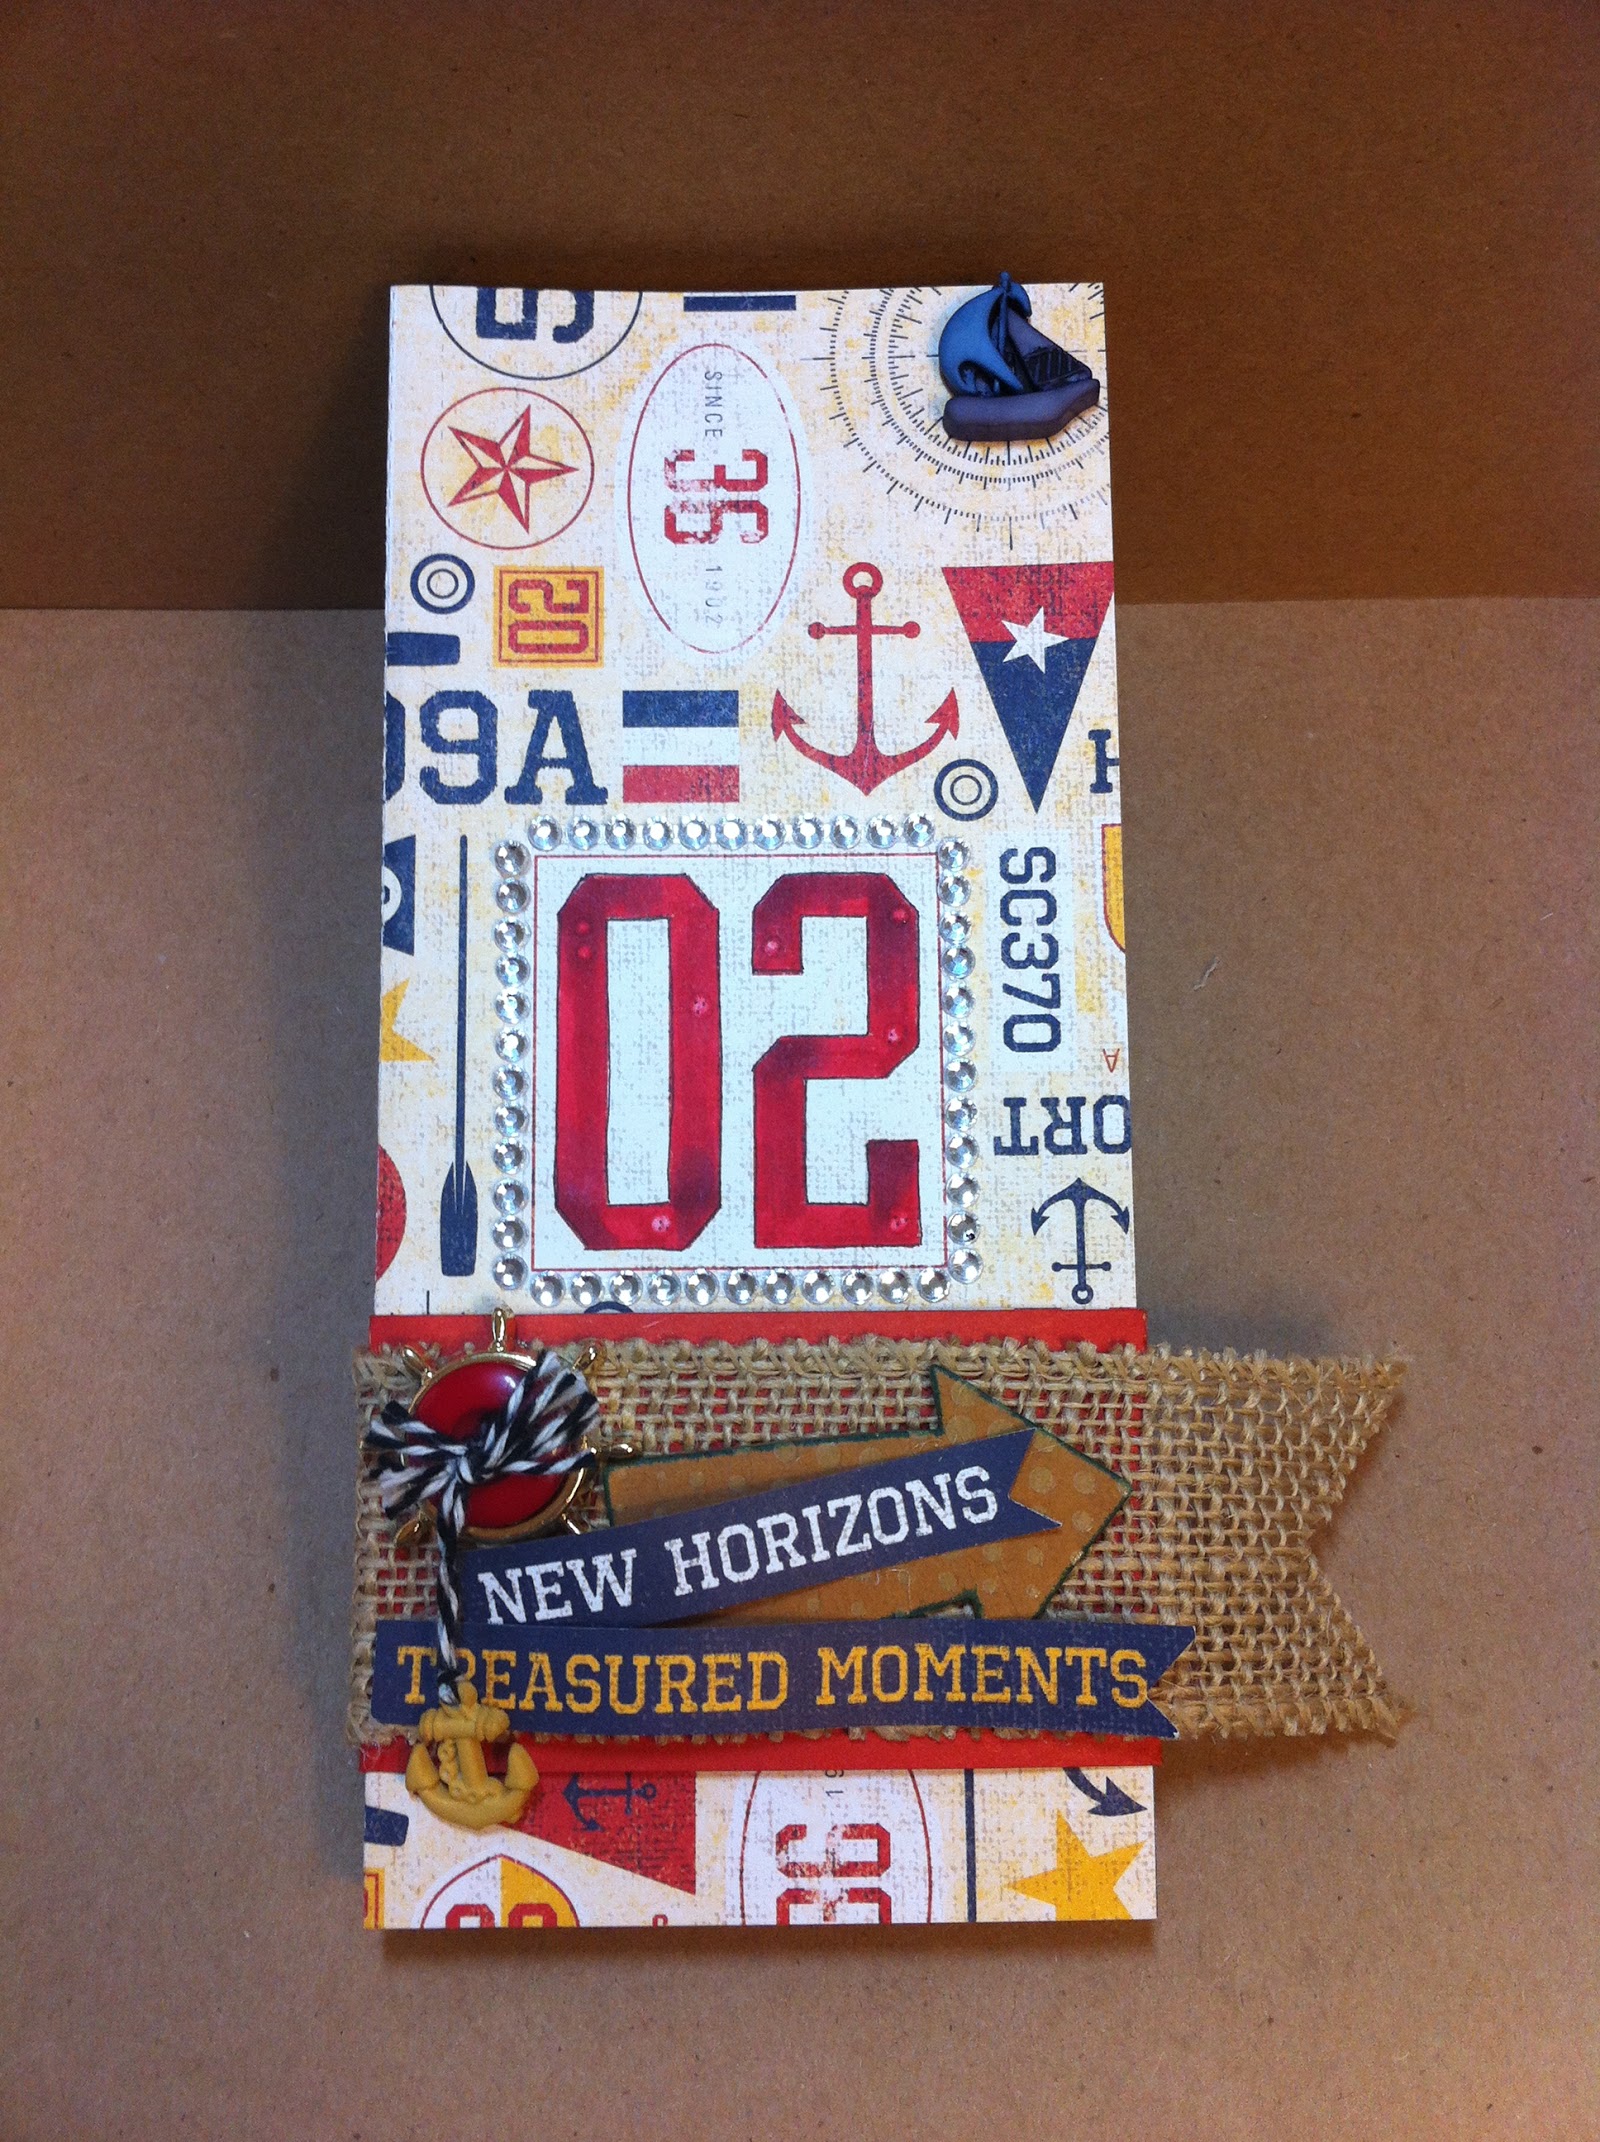

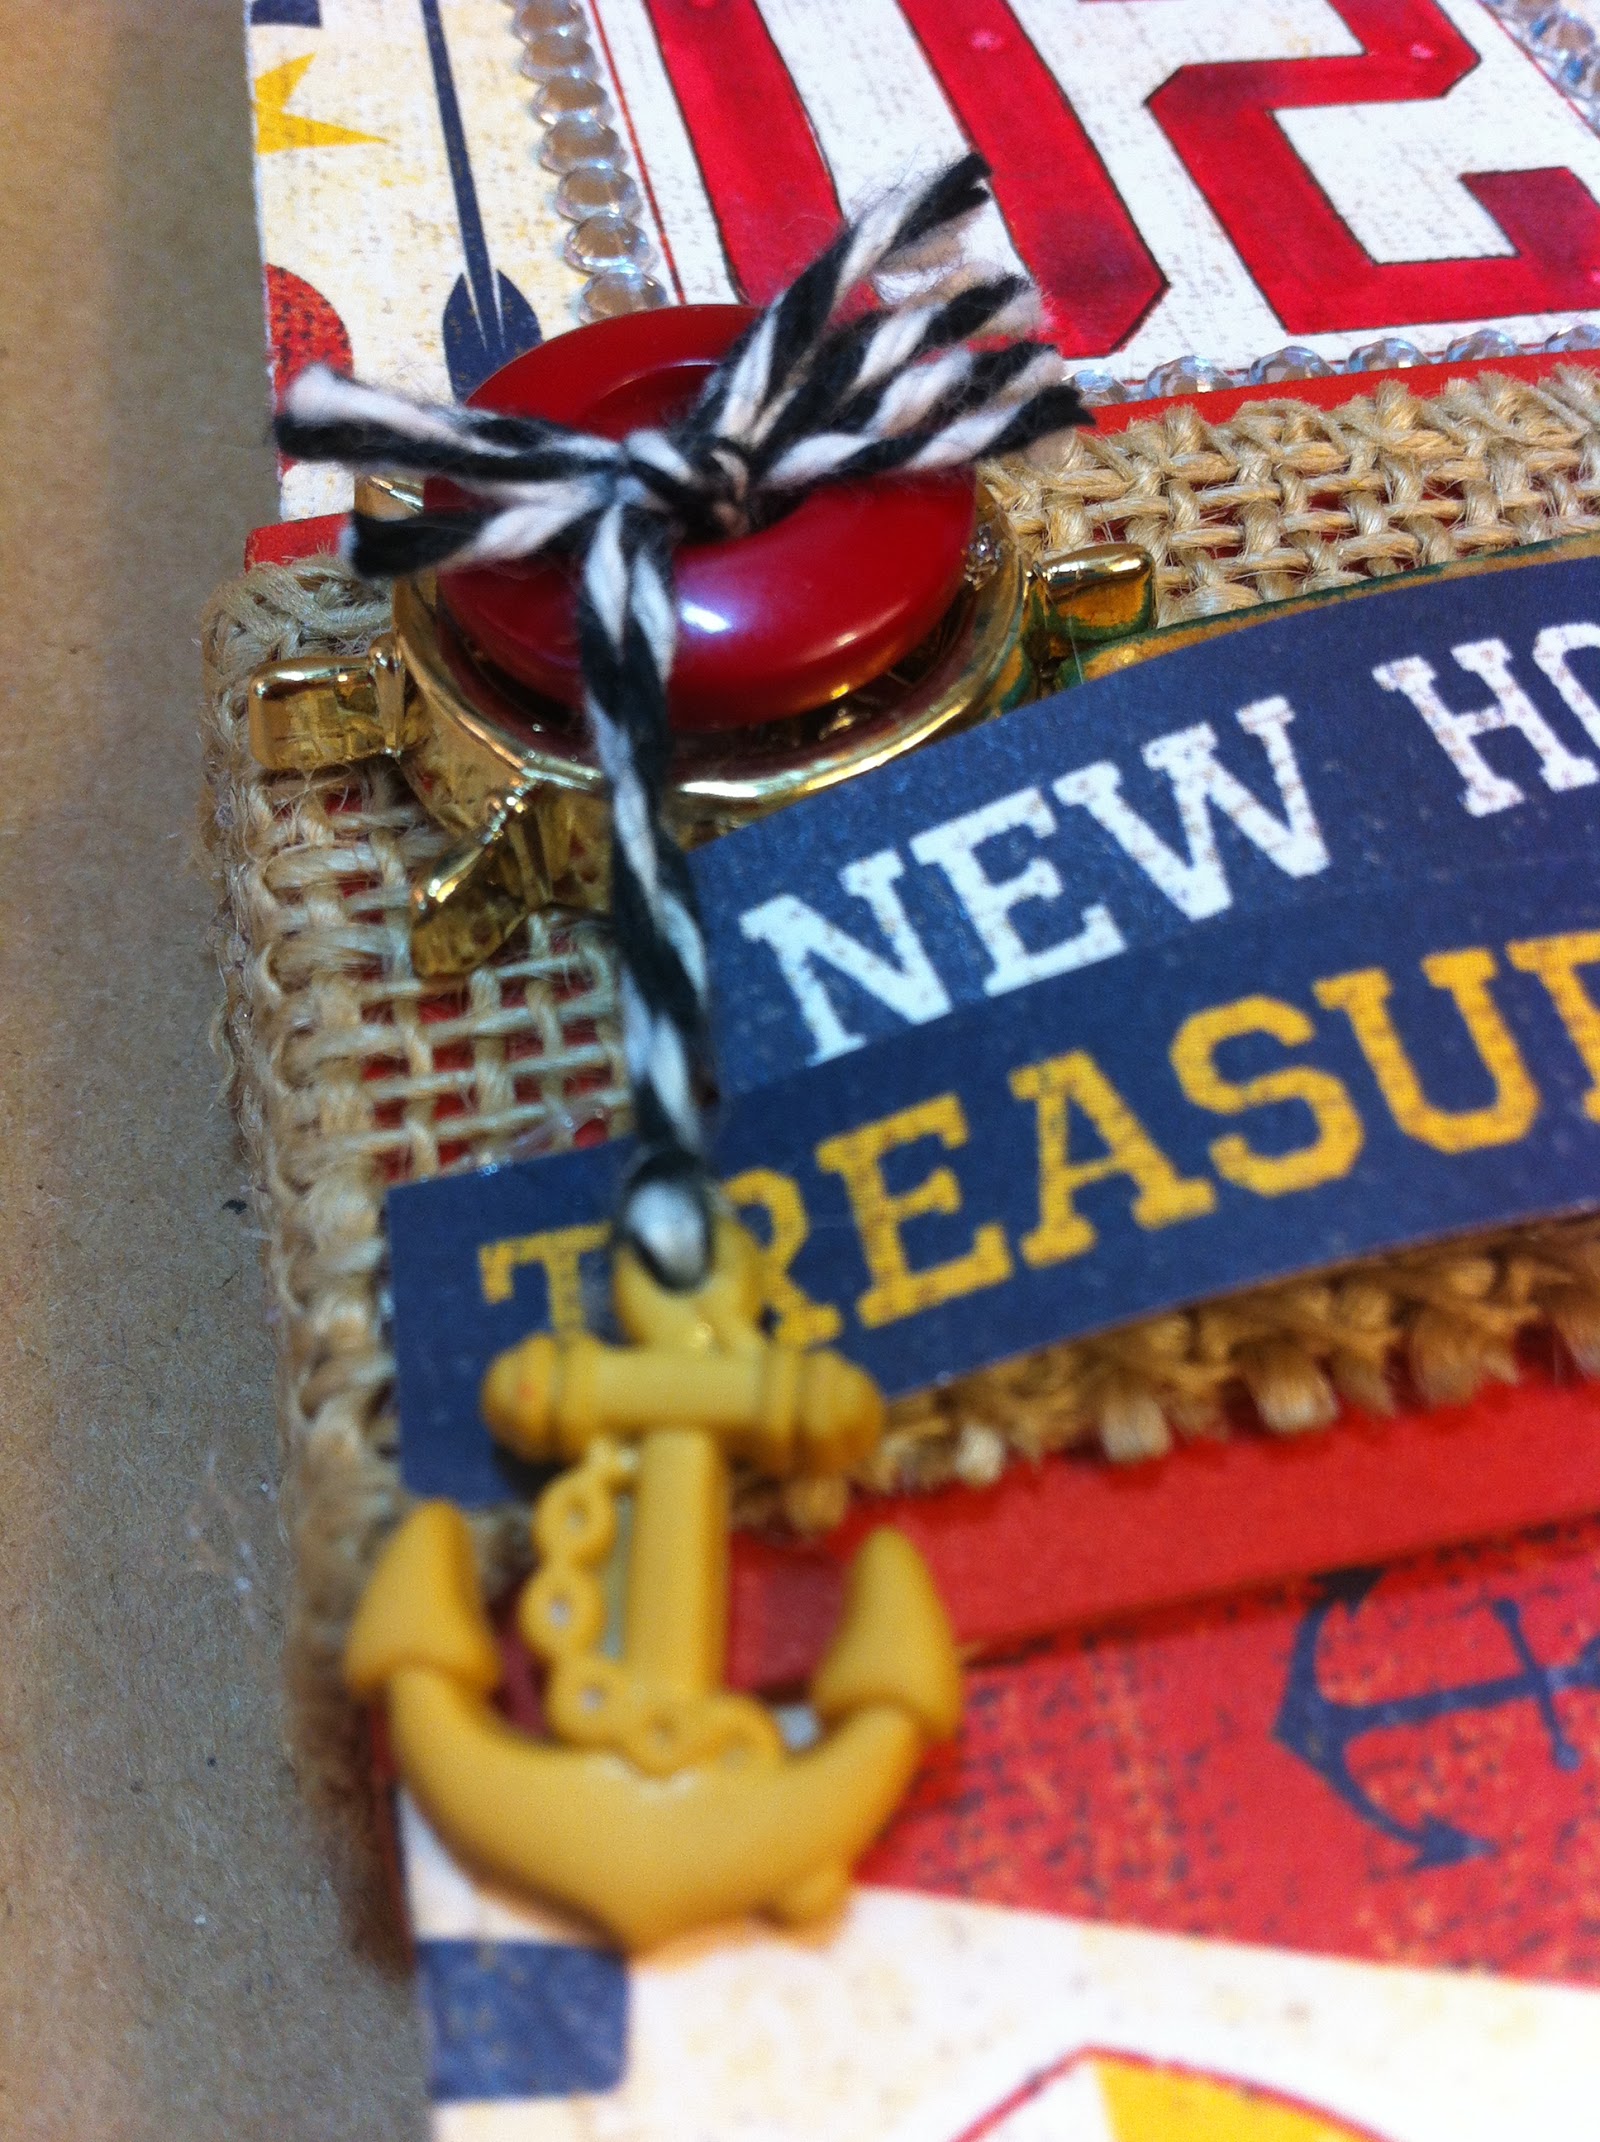

Note – for additional assistance assembling the box, Jamie has a wonderful tutorial on her blog.
http://www.jamielanedesigns.blogspot.com/2013/07/pencil-box-with-wrap.html
Thanks for joining me today. Hope you have fun getting organized in style.
* * * * * * * * * * * * * * *
![]()
Instead of jewelry this week, I’m playing with paper and buttons. I must say, buttons and back packs go together pretty well!

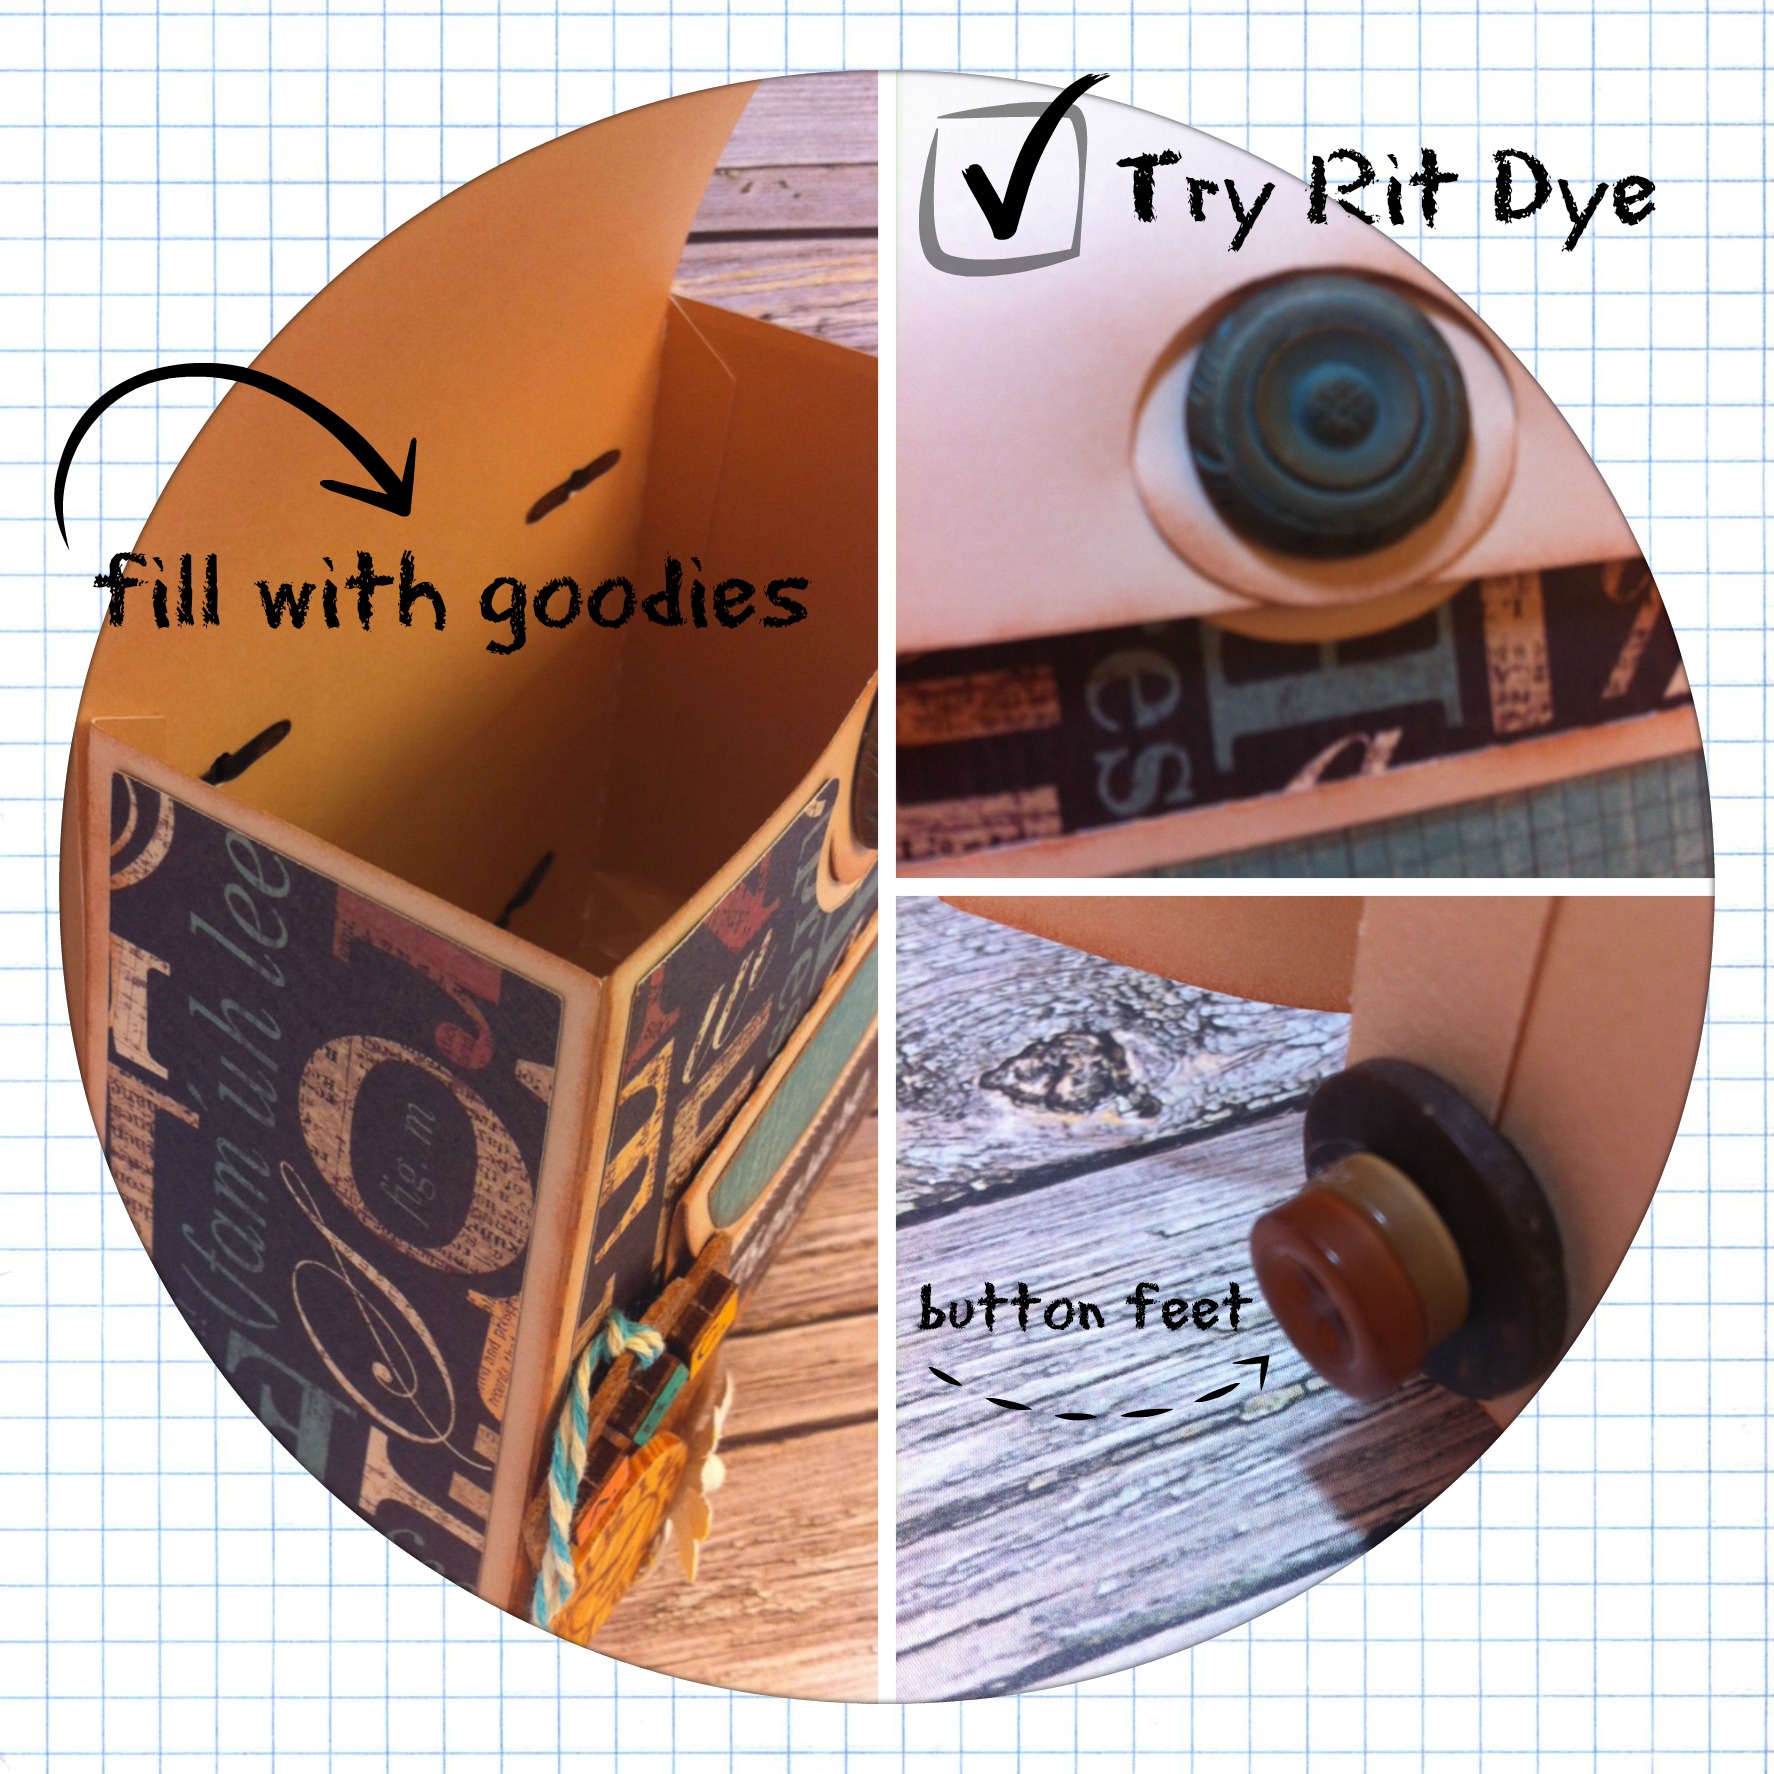
I created the backpack and inked the edges with Tea Bag ink. I dyed a wooden button and cut the shank off. The bag was then decorated with patterned papers and fun embellishments. To lift the bag up a little, I created little feet by gluing Coffee and Rustic Coconut Shell buttons together.
Now, it’s time to fill it with goodies for the teacher!
Hand Carved Wood Buttons
Canvas Shapes, Wood Shapes and Cork Tags (Little Yellow Bicycle), Champagne Cardstock, Tea Bag Ink, Patterned Paper (Close To My Heart), Brads (Creative Impressions), Twine – My Mind’s Eye), Letters (EK Success), Flower (Petaloo), Back Pack Template (SVGCUTS.COM)
Adhesive – Scor-Tape and AdTech Hot Glue Gun and Glue Sticks
Send your kids back to school in style with my embellished pencil pouch. Who wants plain old school supplies when you can have some with a little flair? You daughter will love showing off this little pencil pouch to her friends this school year. The best part is that it only takes a few minutes to add this little embellishment. You could coordinate a backpack or other back to school accessory to go with the pencil pouch as well.
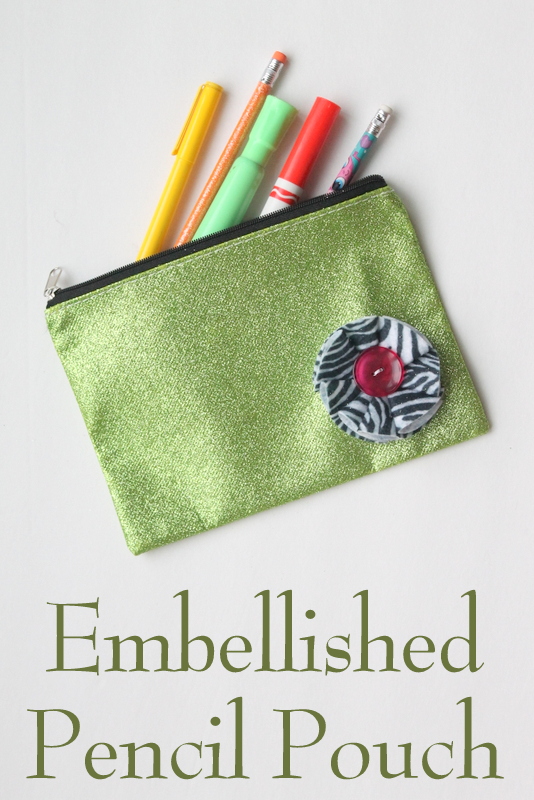
I have a treat for you all today. I am not going to just tell you how to make this great back to school accessory….I am going to SHOW you. Come on over to my house and grab a glass of sweet tea. Sit back and watch this short (less than 4 minute) video to see how to make a pencil pouch of your own. The video is captured live and is just me sitting and crafting along with you all. It is the equivalent of you coming to a crafting party at my house…if it was possible to squeeze all of y’all in here. So come on over and craft along with me.
http://www.youtube.com/watch?v=kHod6JPk3Nc
Did you have fun? Come back anytime y’all and craft with me via video. I love inviting my readers into my home with fun live videos. Plus when it is live there is no retakes. Just me, the camera, and some crafty fun. I have included a close up shot of the finished flower embellishment below in case y’all had a hard time seeing it on the video.
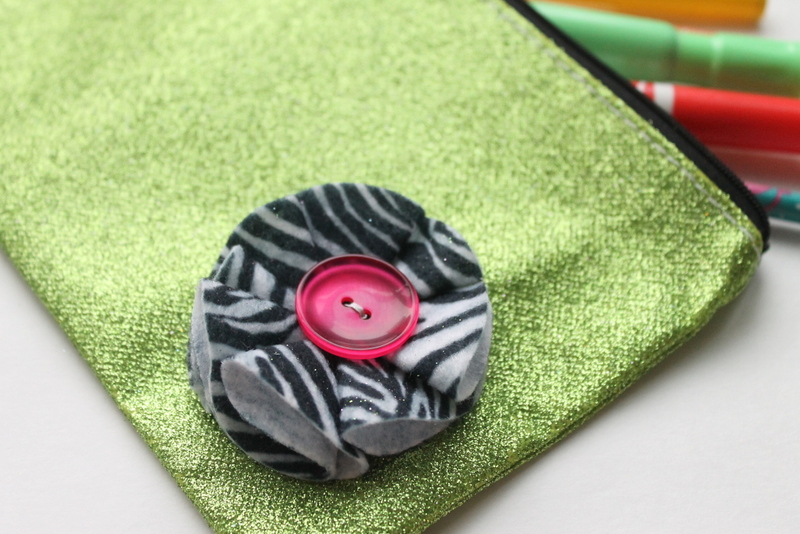
I hope you will add these fun flower embellishments to your daughter’s back to school supplies this year. What a fun and unique way to carry your pencils and even books. Grab some felt and have fun going back to school this year.
It’s back to school time already! How can that be? Every year I promise myself I’ll be more organized, so this year I designed a homework organizer for my daughter to keep all her homework supplies in. It’s so cute, I think my daughter might even be motivated to do her homework!

Supplies for homework organizer
Instructions for homework organizer
1. Paint the crate. Set aside to dry.

2. Once crate is dry, sketch an apple shape on the front of the crate.

3. Fill the shape with buttons, using glue craft glue to secure the buttons onto the crate.
4. While glue is still wet, sprinkle glitter over the apple shape. This will fill in the holes between the buttons and give it some sparkle. Instead of loose glitter, you can also use glitter glue to fill in the spaces.

5. Using a marker, draw a stem on your apple.
6. Cut out a small leaf shape from the green felt and glue it onto the stem.
7. Using letter stencils and markers, spell out school or your child’s name onto the crate.

Thanks for getting crafty with me today! For more button crafts, stitching and lifestyle ideas visit me on my blog at www.laurabraydesigns.com.
![]()
Create colorful back to school projects with Rit Dye and Buttons Galore and More. We are co-hosting a blog hop with Rit Dye featuring back to school items for students of all ages. Below you will find directions to this project, links to the other projects and a Rafflecopter entry form to win a GREAT prize package valued at over $100.
Create a wooden gift box for the teacher and add a gift card to their favorite school supply store. The box can be reused on the teacher’s desk to hold miscellaneous items.
It is easier than you would thing to dye wood. Rit has a page dedicated to tips on dying wood and wicker.

If you would like to order any buttons from the site click this link to the Buttons Galore and More store and enter the discount code of RIT20 for 20% off your order. Use all caps or the code will not work.
If you want to view the designers blogs you can also click the links below.

Teachers are so important and appreciate them lets them know it. There are lots of great ideas of way to show your teachers how much you care about them but this one is fun because you can make it and then fill up the jar with treats!
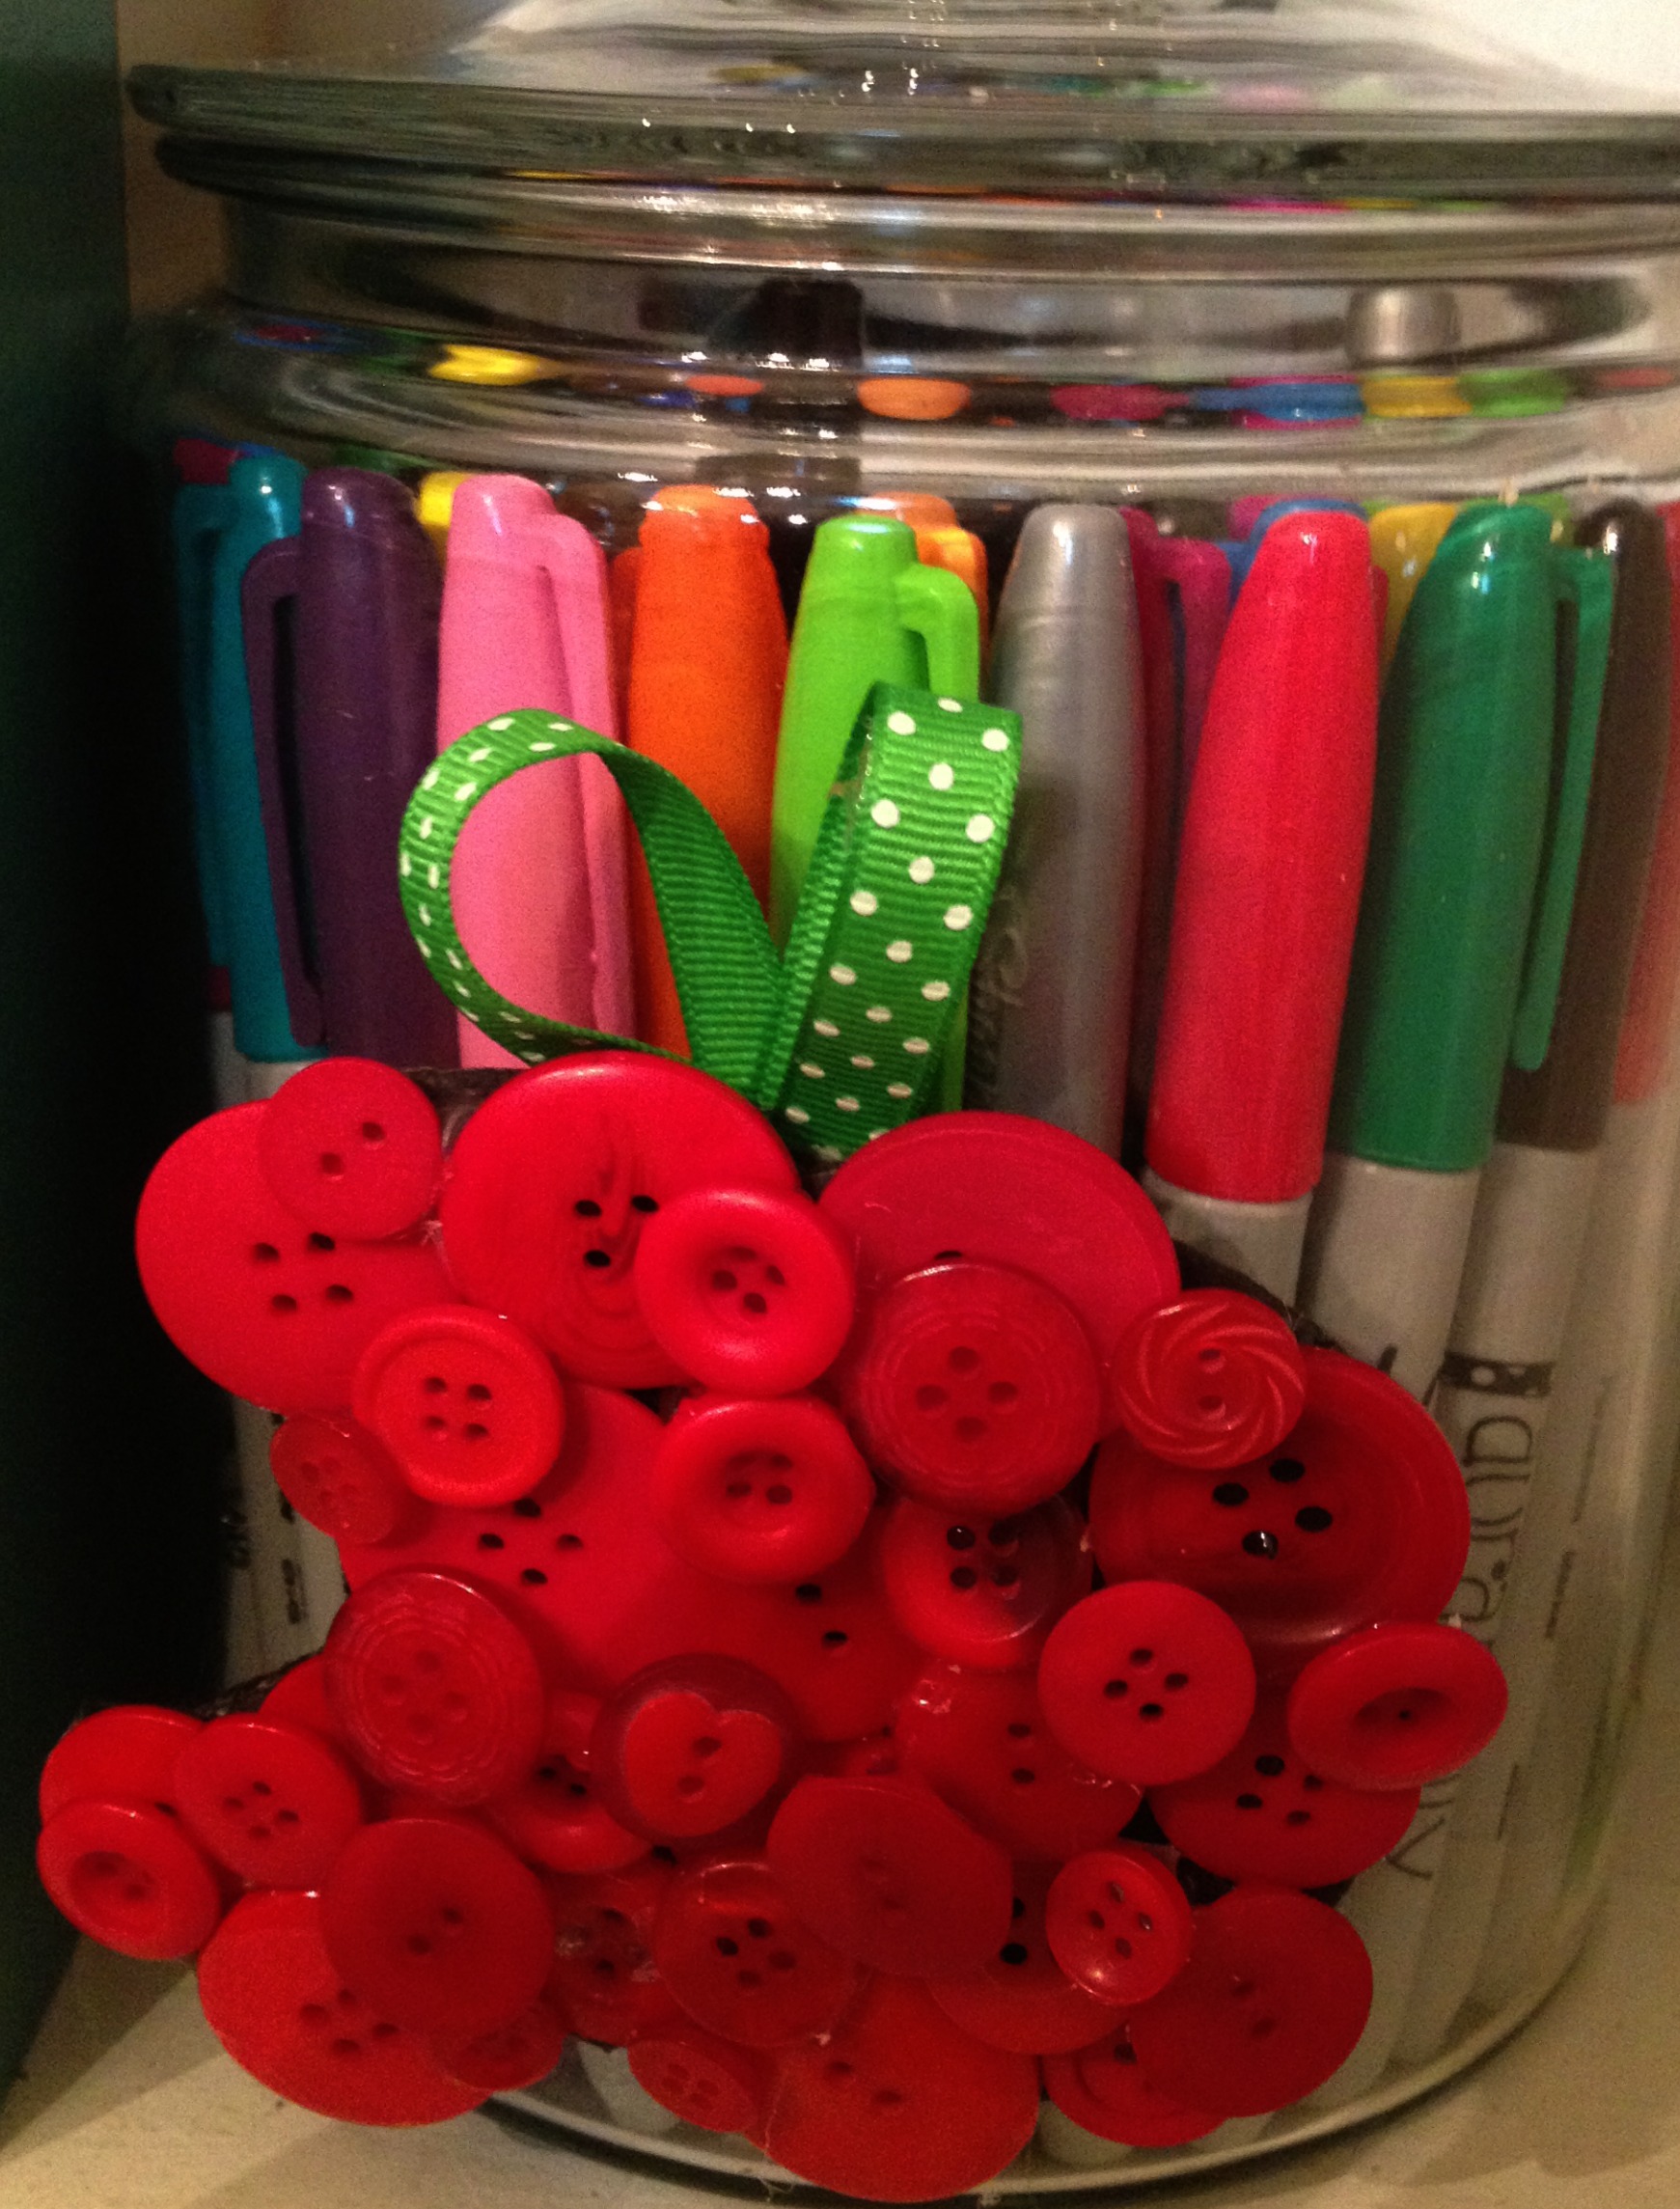
I filled the jar up with Sharpie Markers because I think almost every teacher would LOVE to get a jar full of bright fun colors of my favorite permanent markers.
To make the apple, I used a pattern and cut out an apple from black foam core. You can get the pattern here is the free printable download (that also has a word search to keep your kids busy while you use the hot glue)!
I covered it with Radically Red buttons from my collection and made the stem with ribbon then attached it to the jar, all with Adtech hot glue.
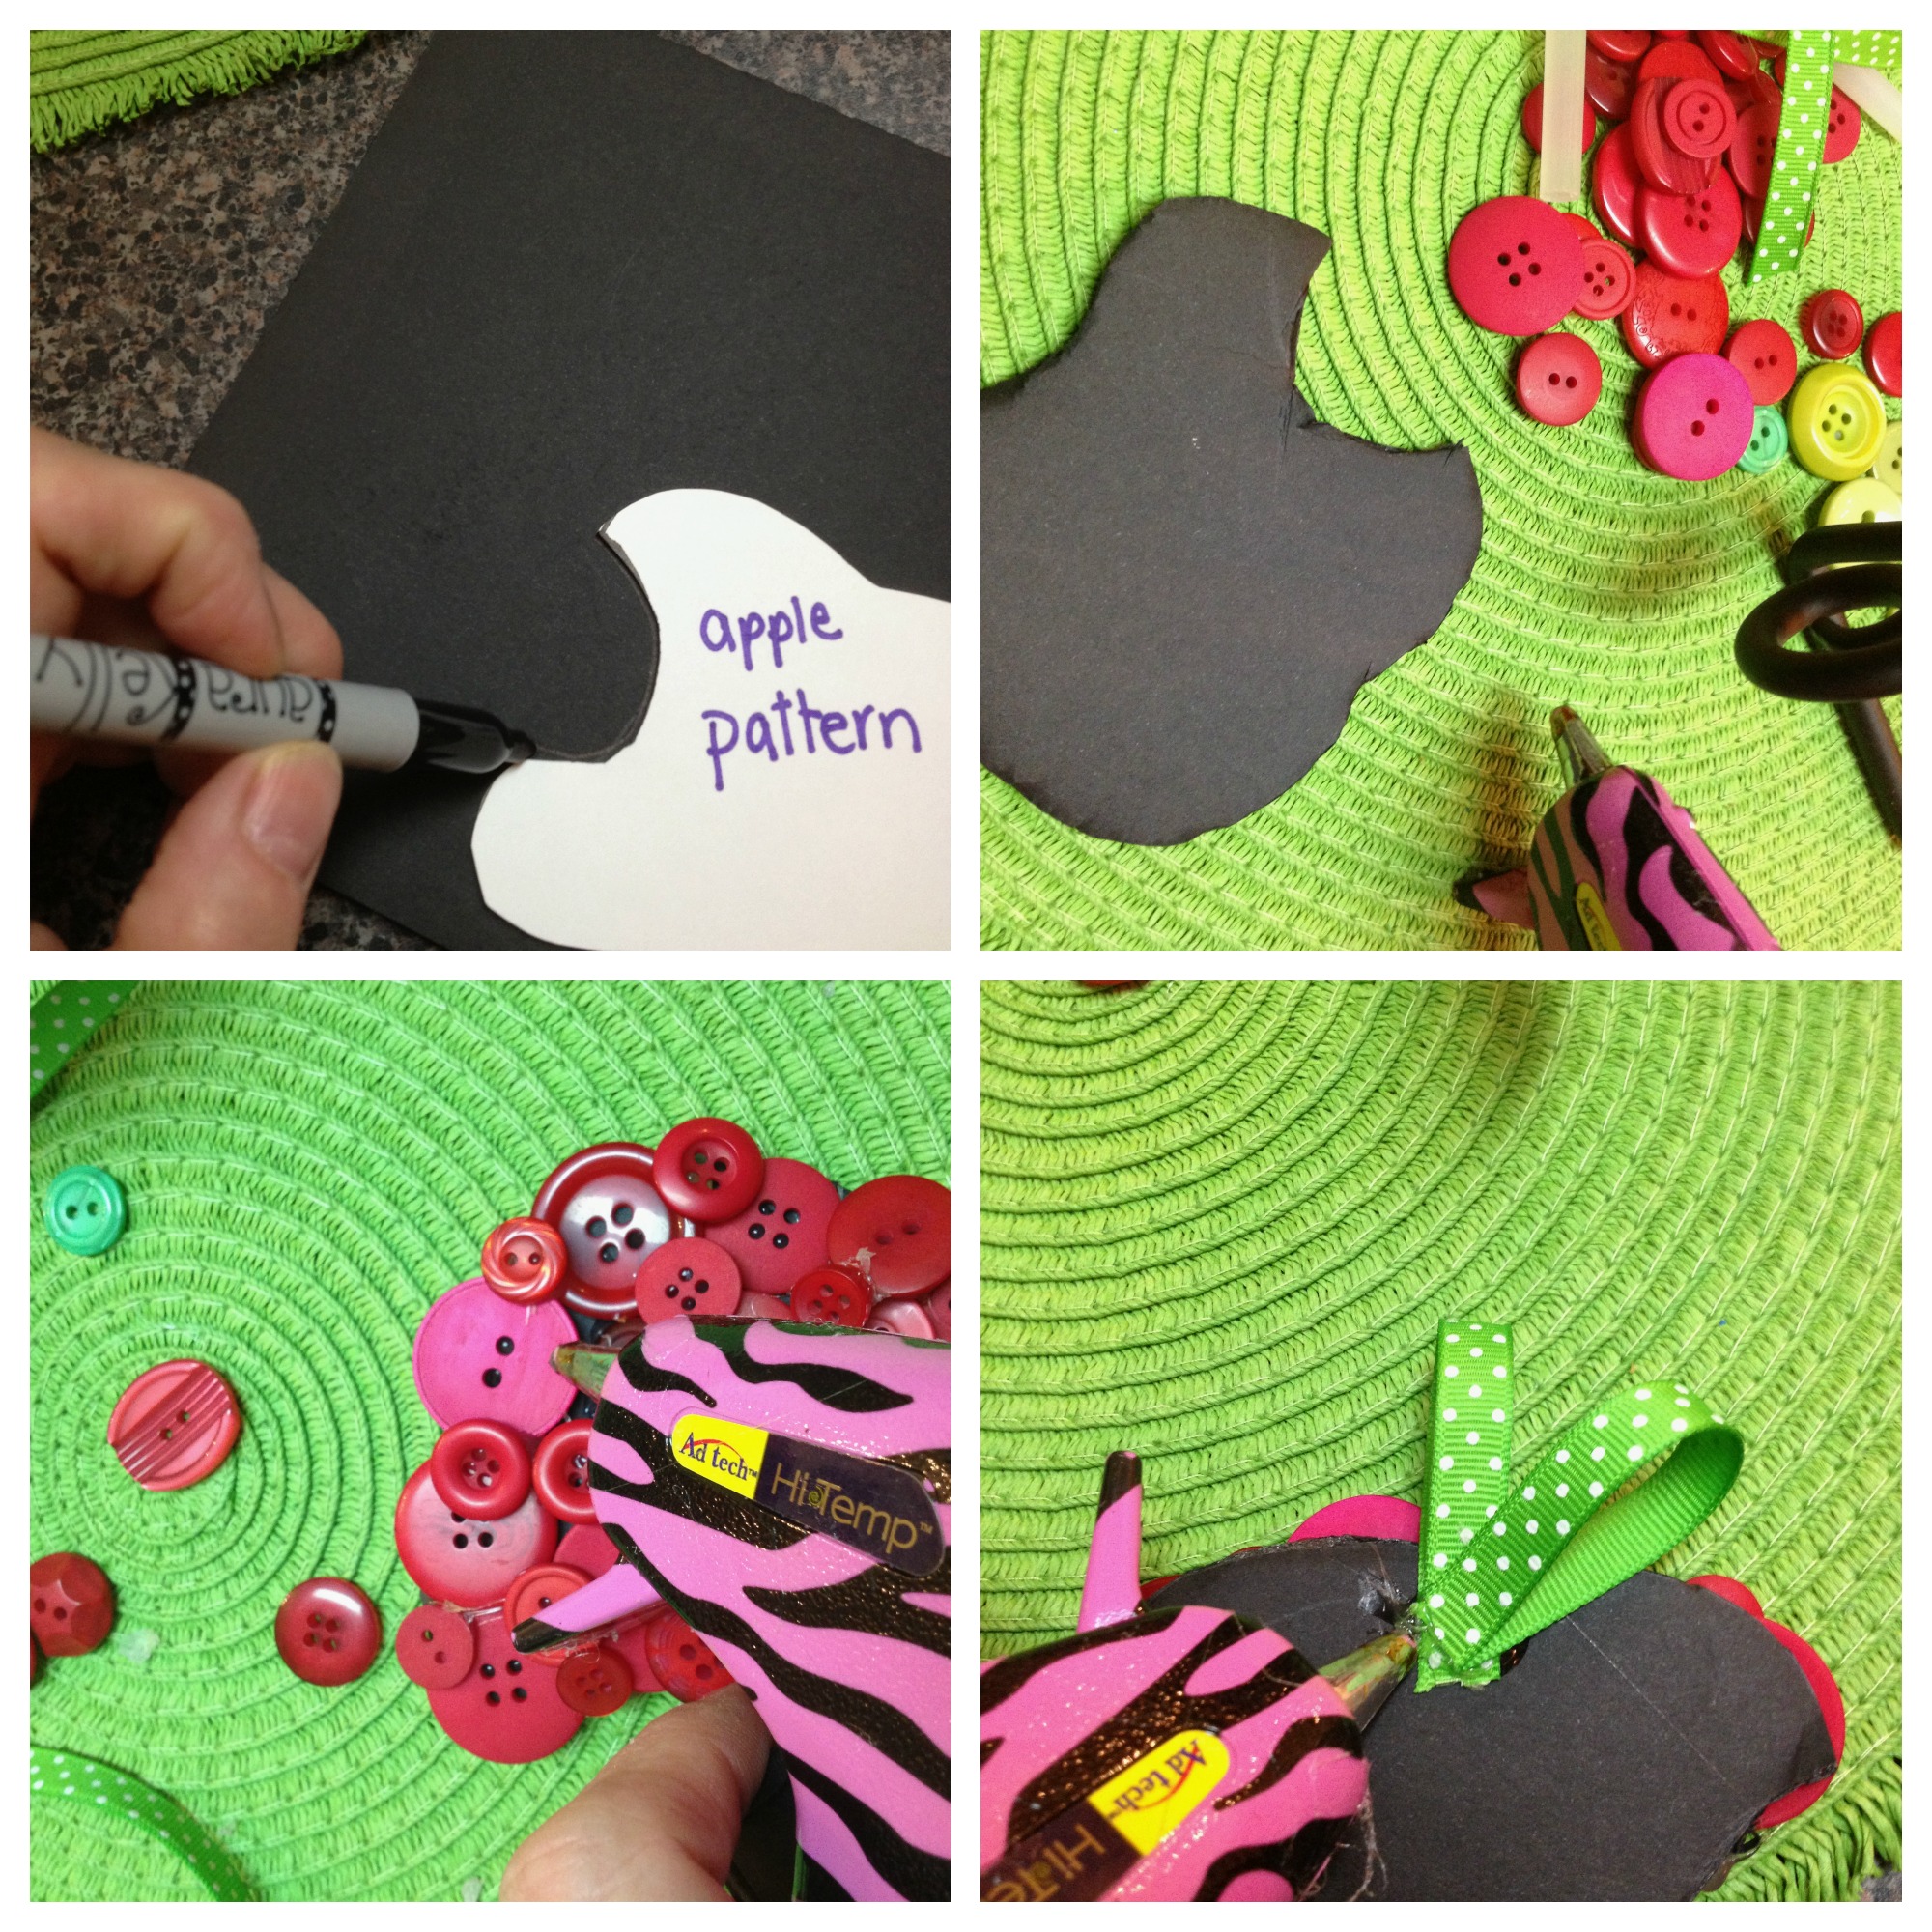
When it was done, I started thinking of all of the things that could be put in the jar that teachers would love! What do you think they would like most?
For another fabulous way to use the apple made of buttons, visit my blog.
Happy Creating,
Laura
It is August and that means back to school time. Boxtops for Education is a fabulous program that helps lots of schools with funding to purchase things for the students and classrooms.

Sometimes finding a place to keep them until the children take them in is the tricky part. Here is a fun way to upcycle a Mason Jar into a fun home for the cutout Boxtop pieces until it is time to send them in. Use hot glue and add buttons, ribbons and whatever else you have around the house that is fun to decorate the jar in a way that you like having it out as a reminder to clip and save.
If you fill the jar up, here is a fun sheet to tape the cutouts to for sending them in so you can hang on to your jar.
Happy Fifteen Minute Friday,
Laura
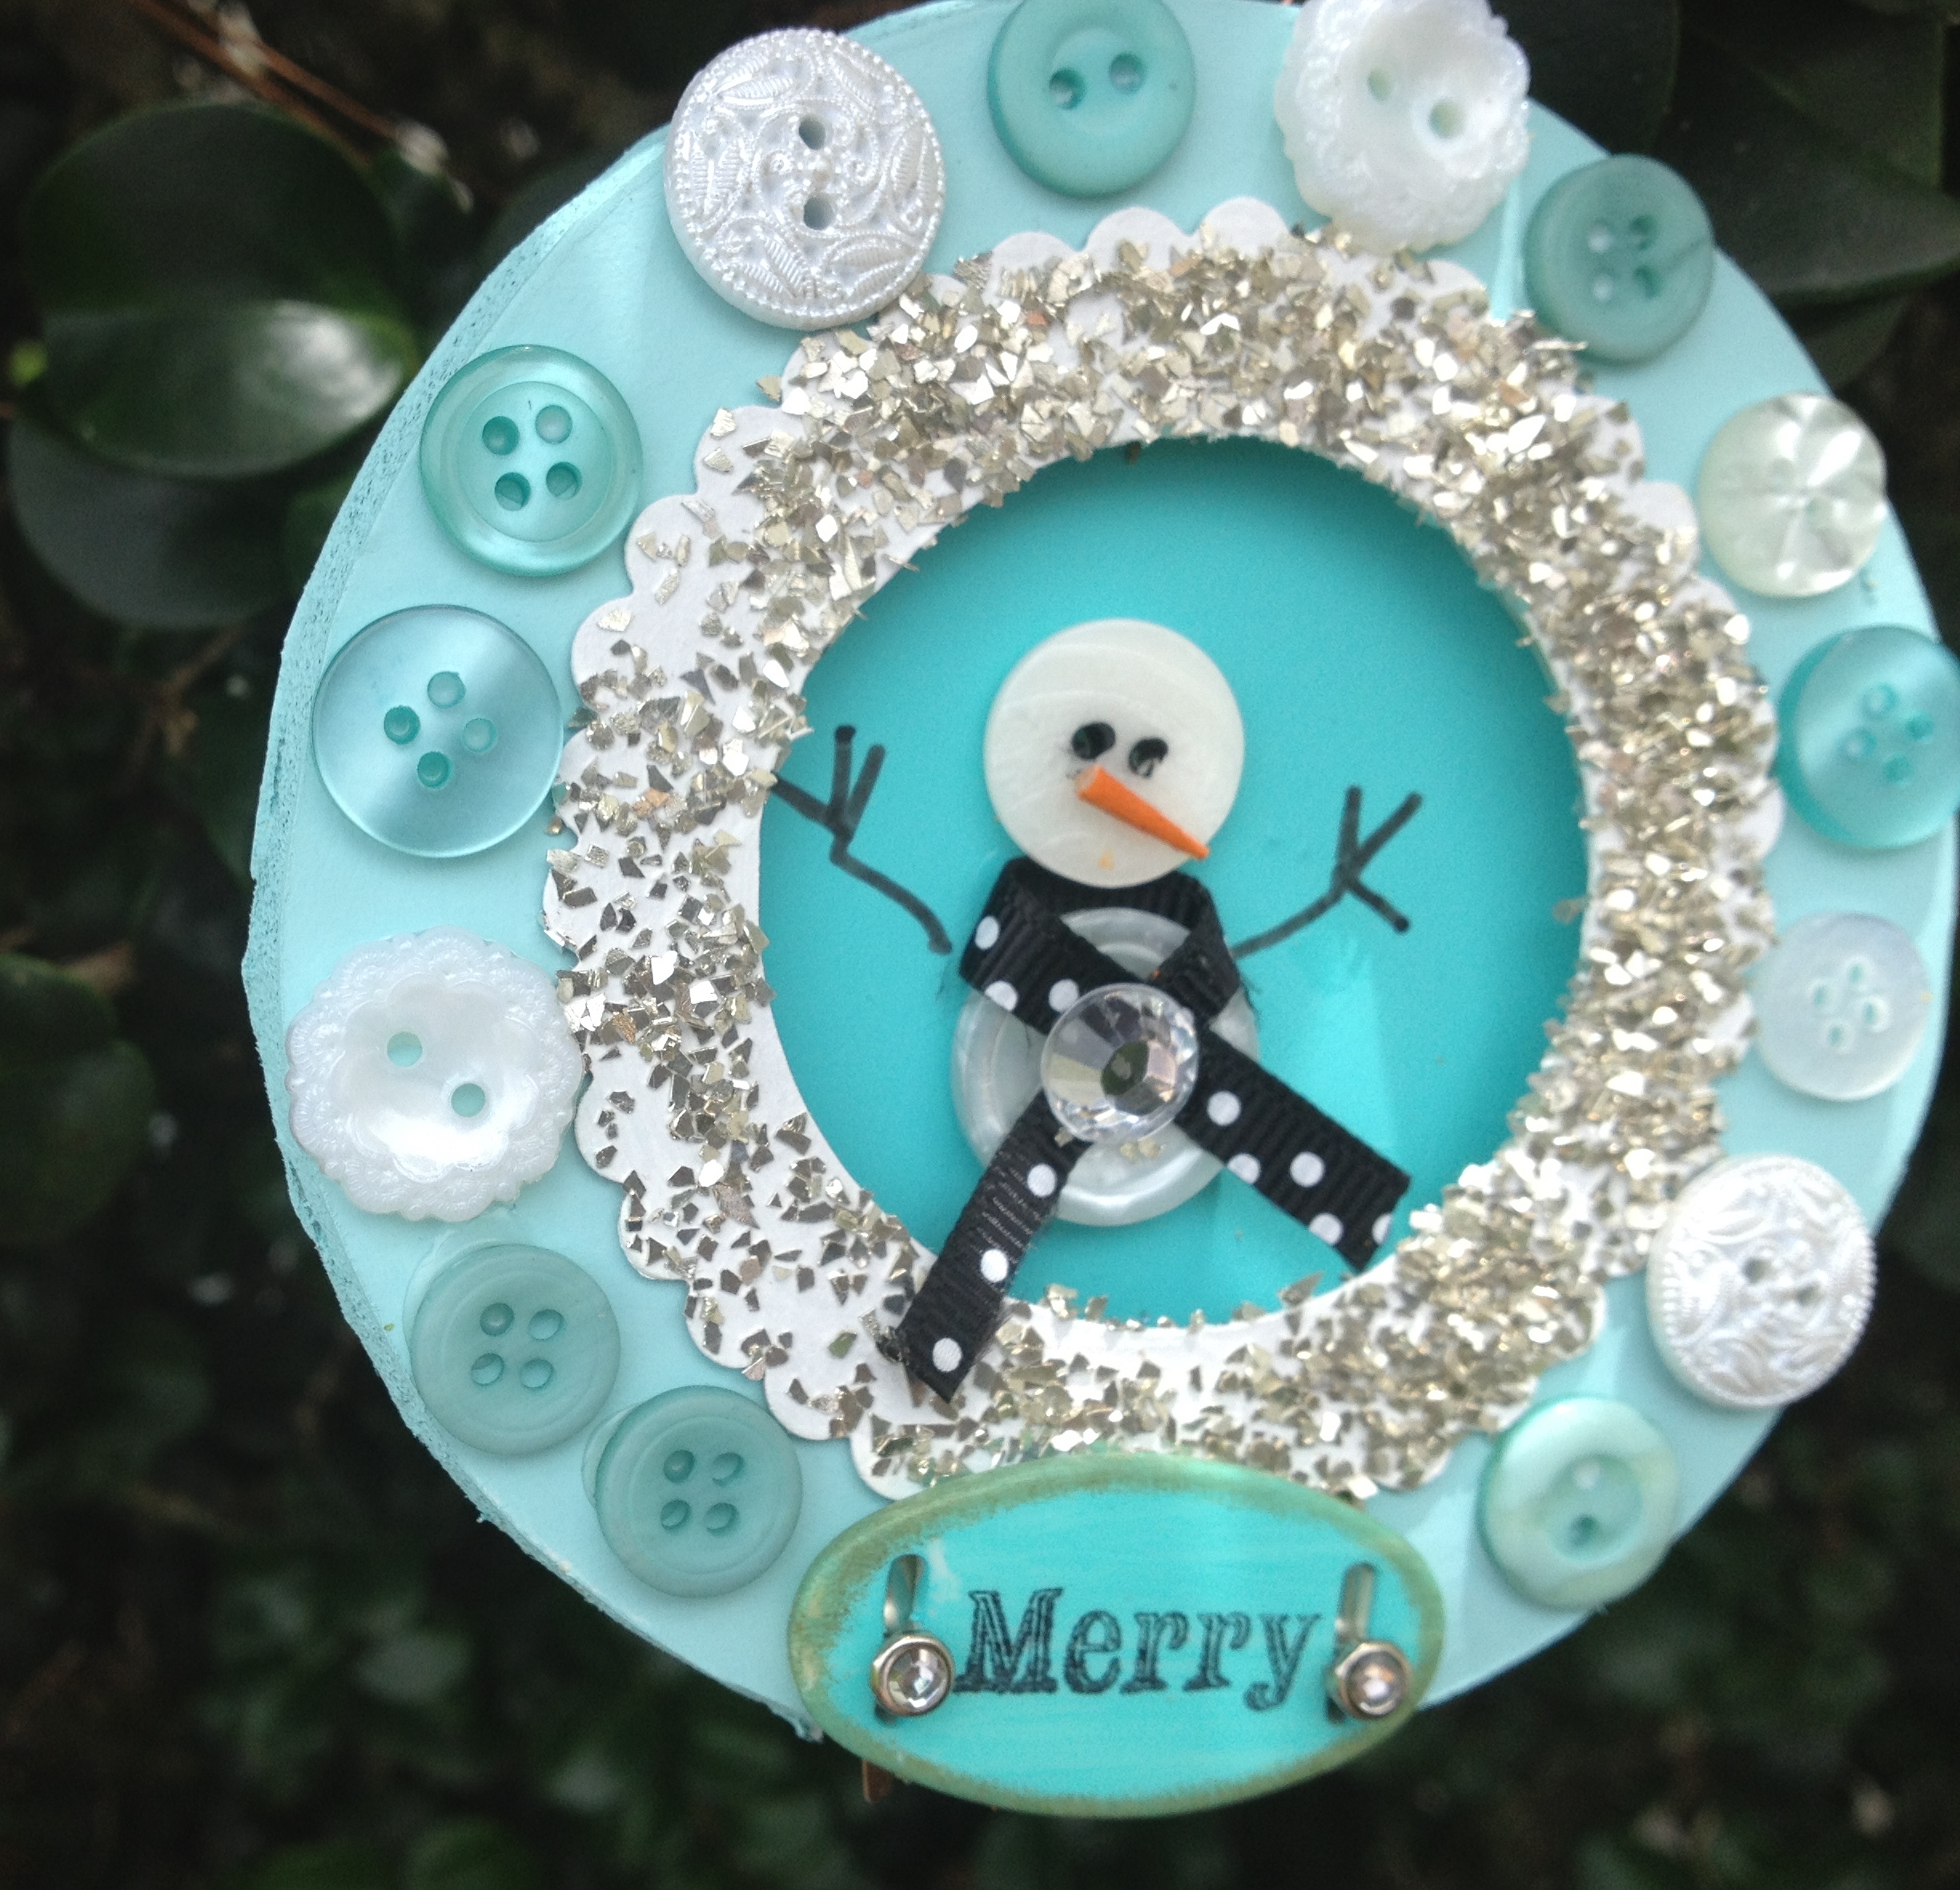
It seems like its never too early to be thinking about Christmas crafting. When I was asked to do a set of Christmas ornaments using Styrofoam and buttons from Buttons Galore and More, I asked if I could use foam core instead. Lately, I have become somewhat of an addict to manipulating the craft knife to cut various shapes. For these ornaments, I challenged myself to cut circular shapes rather than my usual safe square or rectangular shapes.
 To make Button OrnamentsFirst I created cardstock circle templates in three different sizes. One for the back, one for the front and one to use to cut a circle in the center of the large circle. I used Elmers Foamboard for this project.
 Now for the hard part. Use a very sharp craft knife with and a self healing cutting mat to cut the circles out. First, score lightly along the traced line, then pass the knife back through cutting almost to the other side. Use a third and/or fourth pass to cut the circle all through way through. This is referred to as the “three pass rule” and when used with patience, will result in perfect cuts. If you do end up with stray bits of foam core, use a sanding block or file to smooth the edges.
Trace a circle in the center of the cut circle and cut out with knife. Cut a slightly larger circle to enclose the back of the ornament to create a shadow box effect.
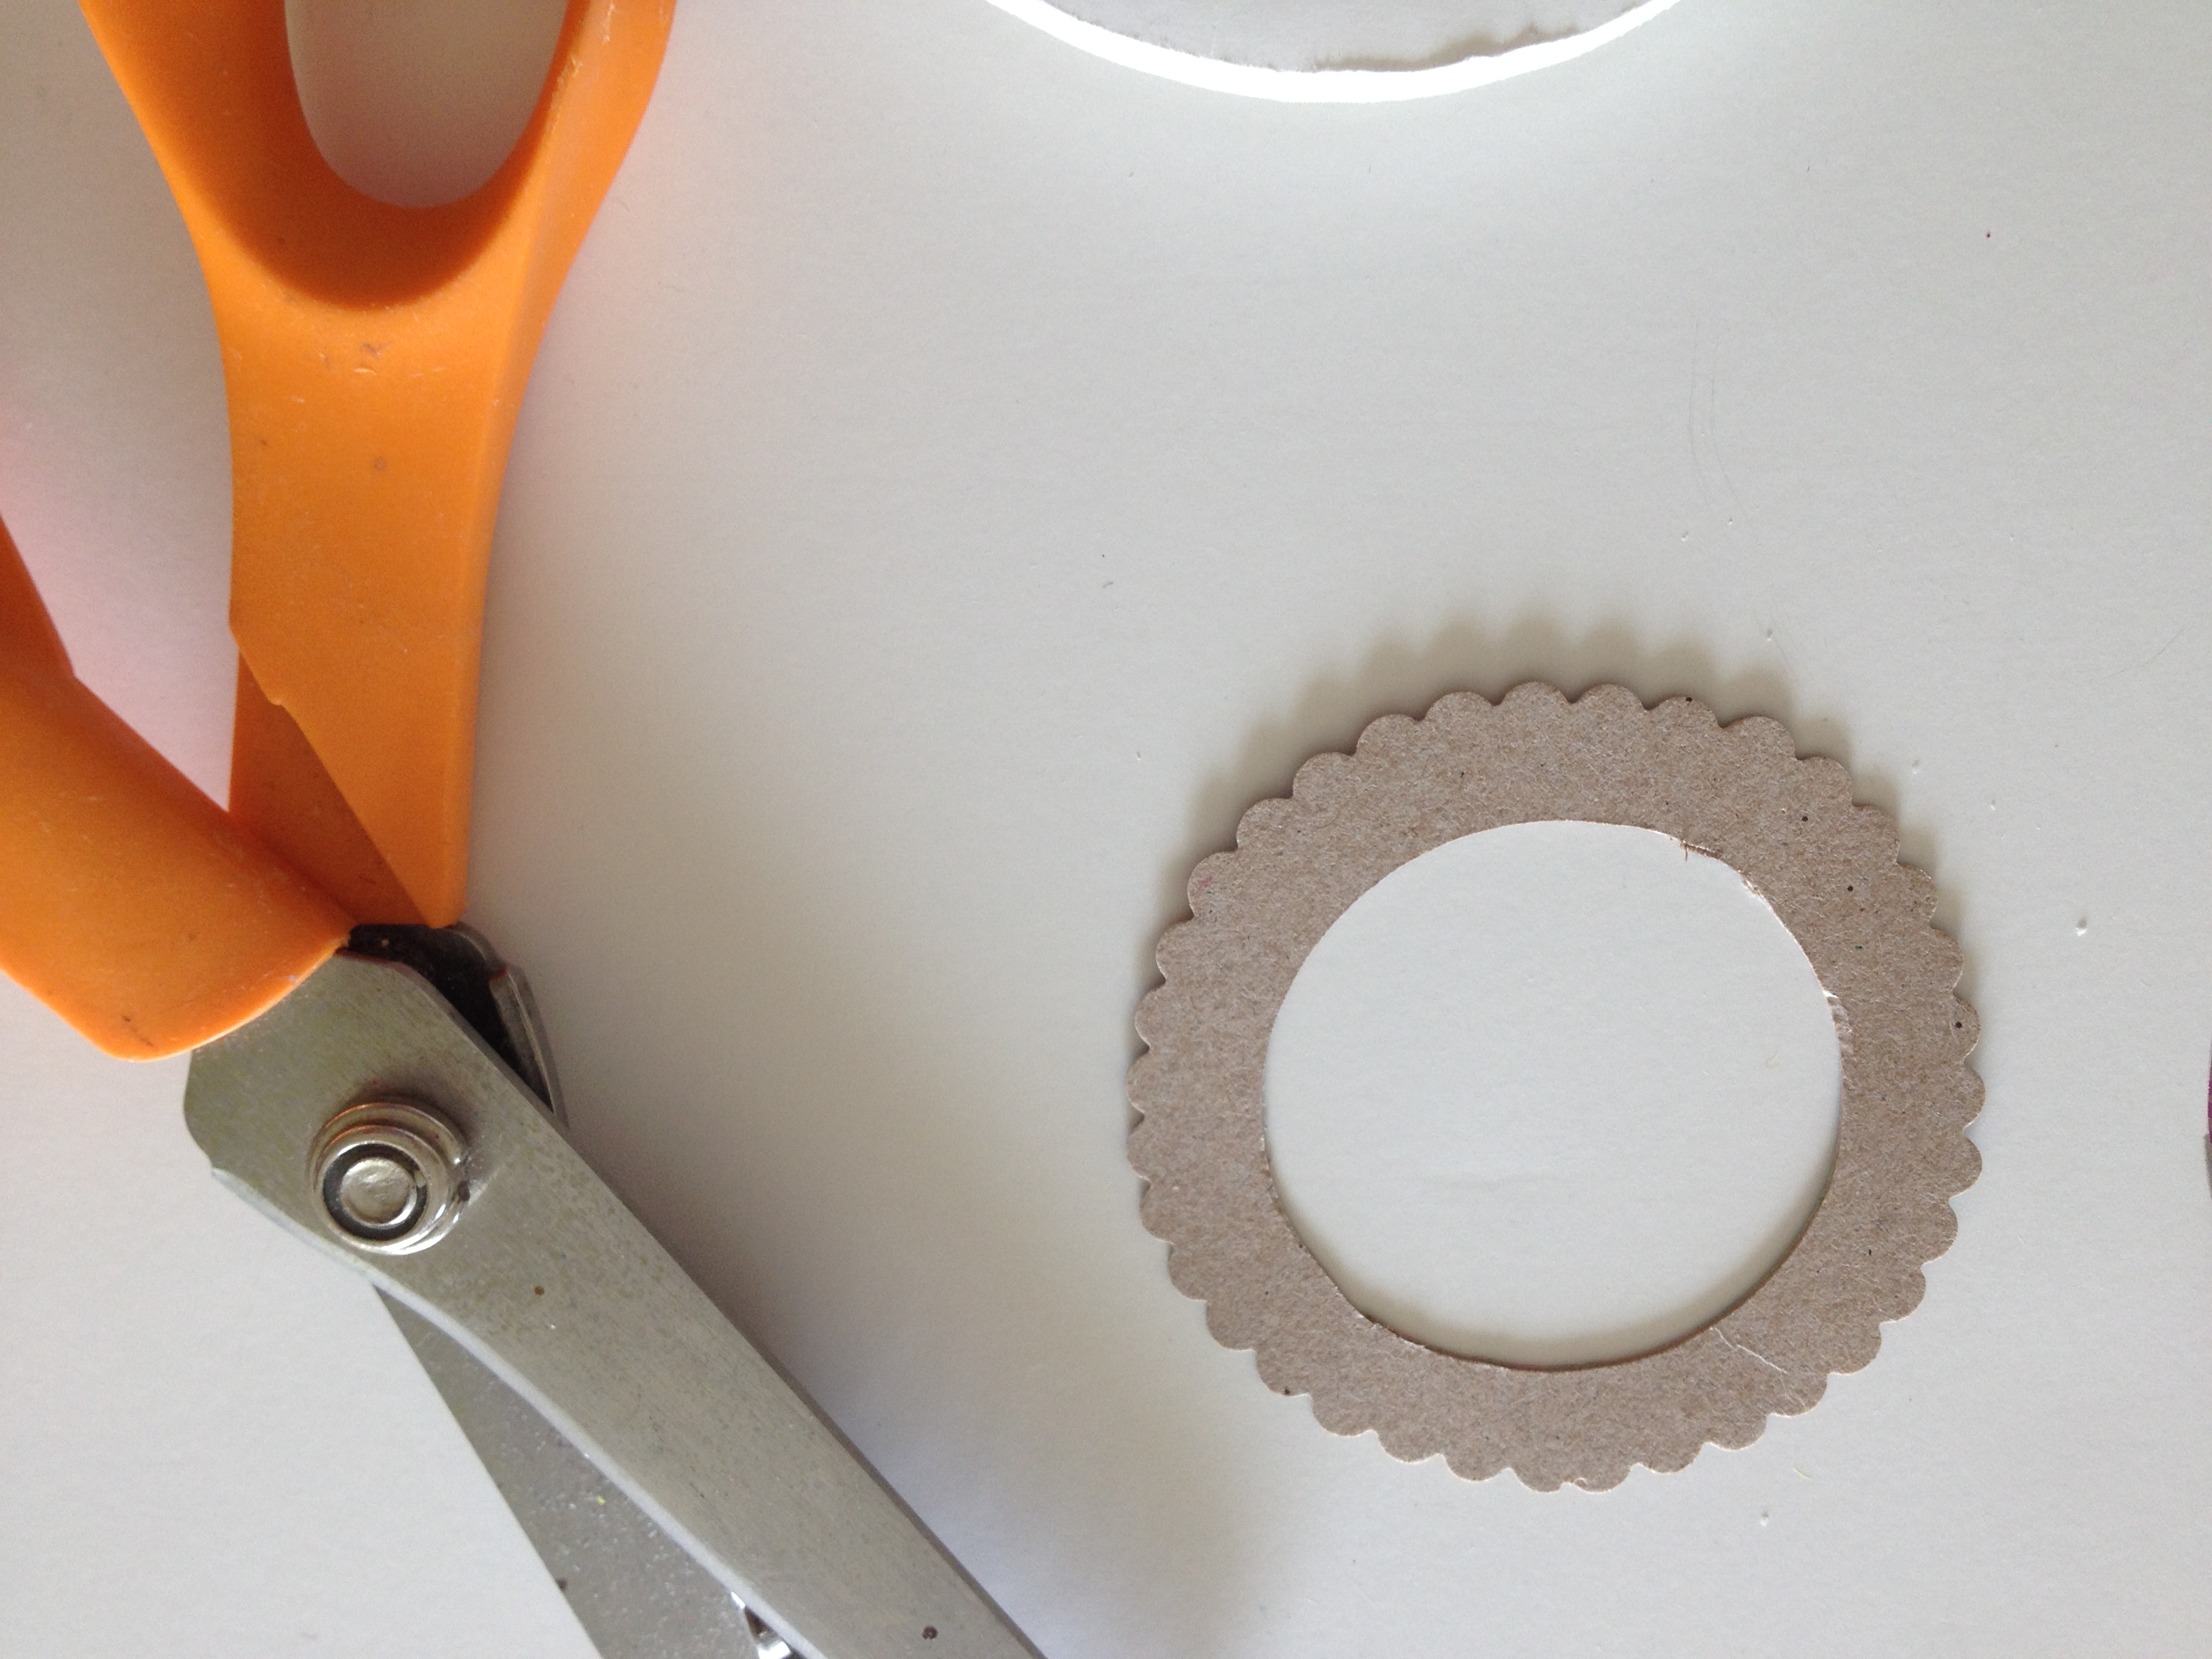
Trim the edges of the circle with scalloped edged scissors.

Paint the pieces of the foam board and cardboard with acrylic paint. I choose coordinating colors of DecoArt’s Americana Acrylics.
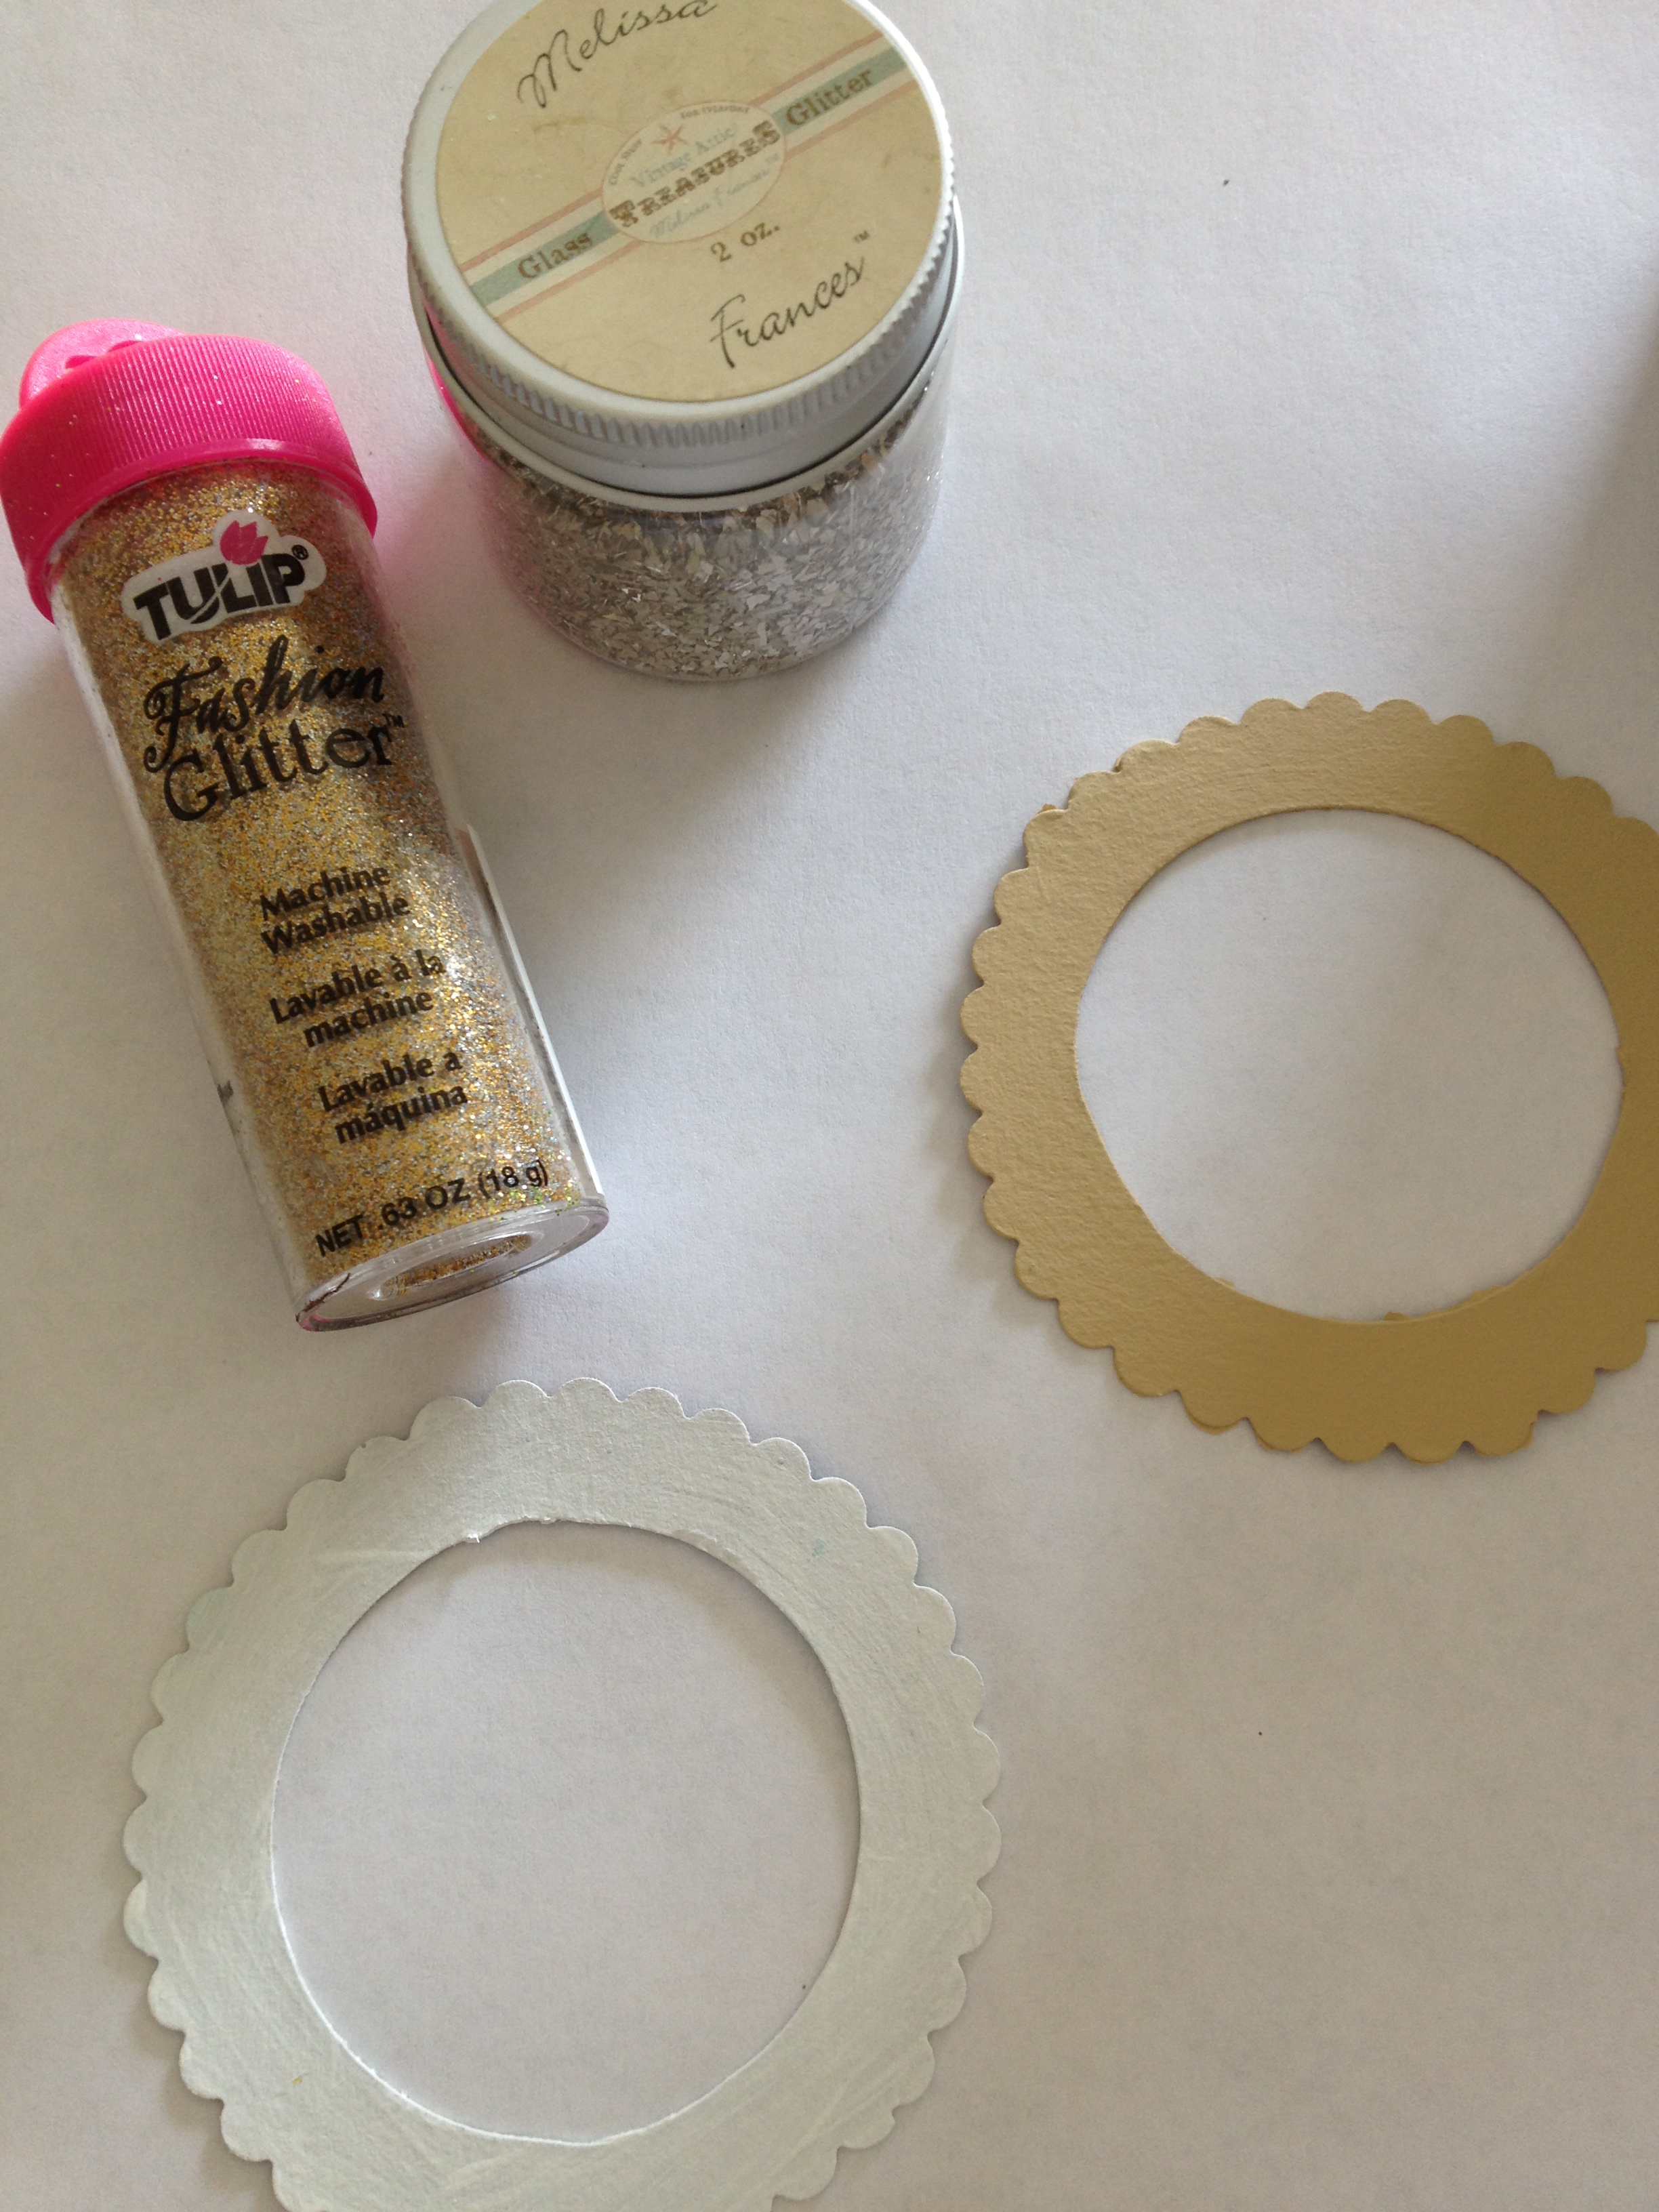
Spray the cardboard circle with a sealer and coat with glitter.
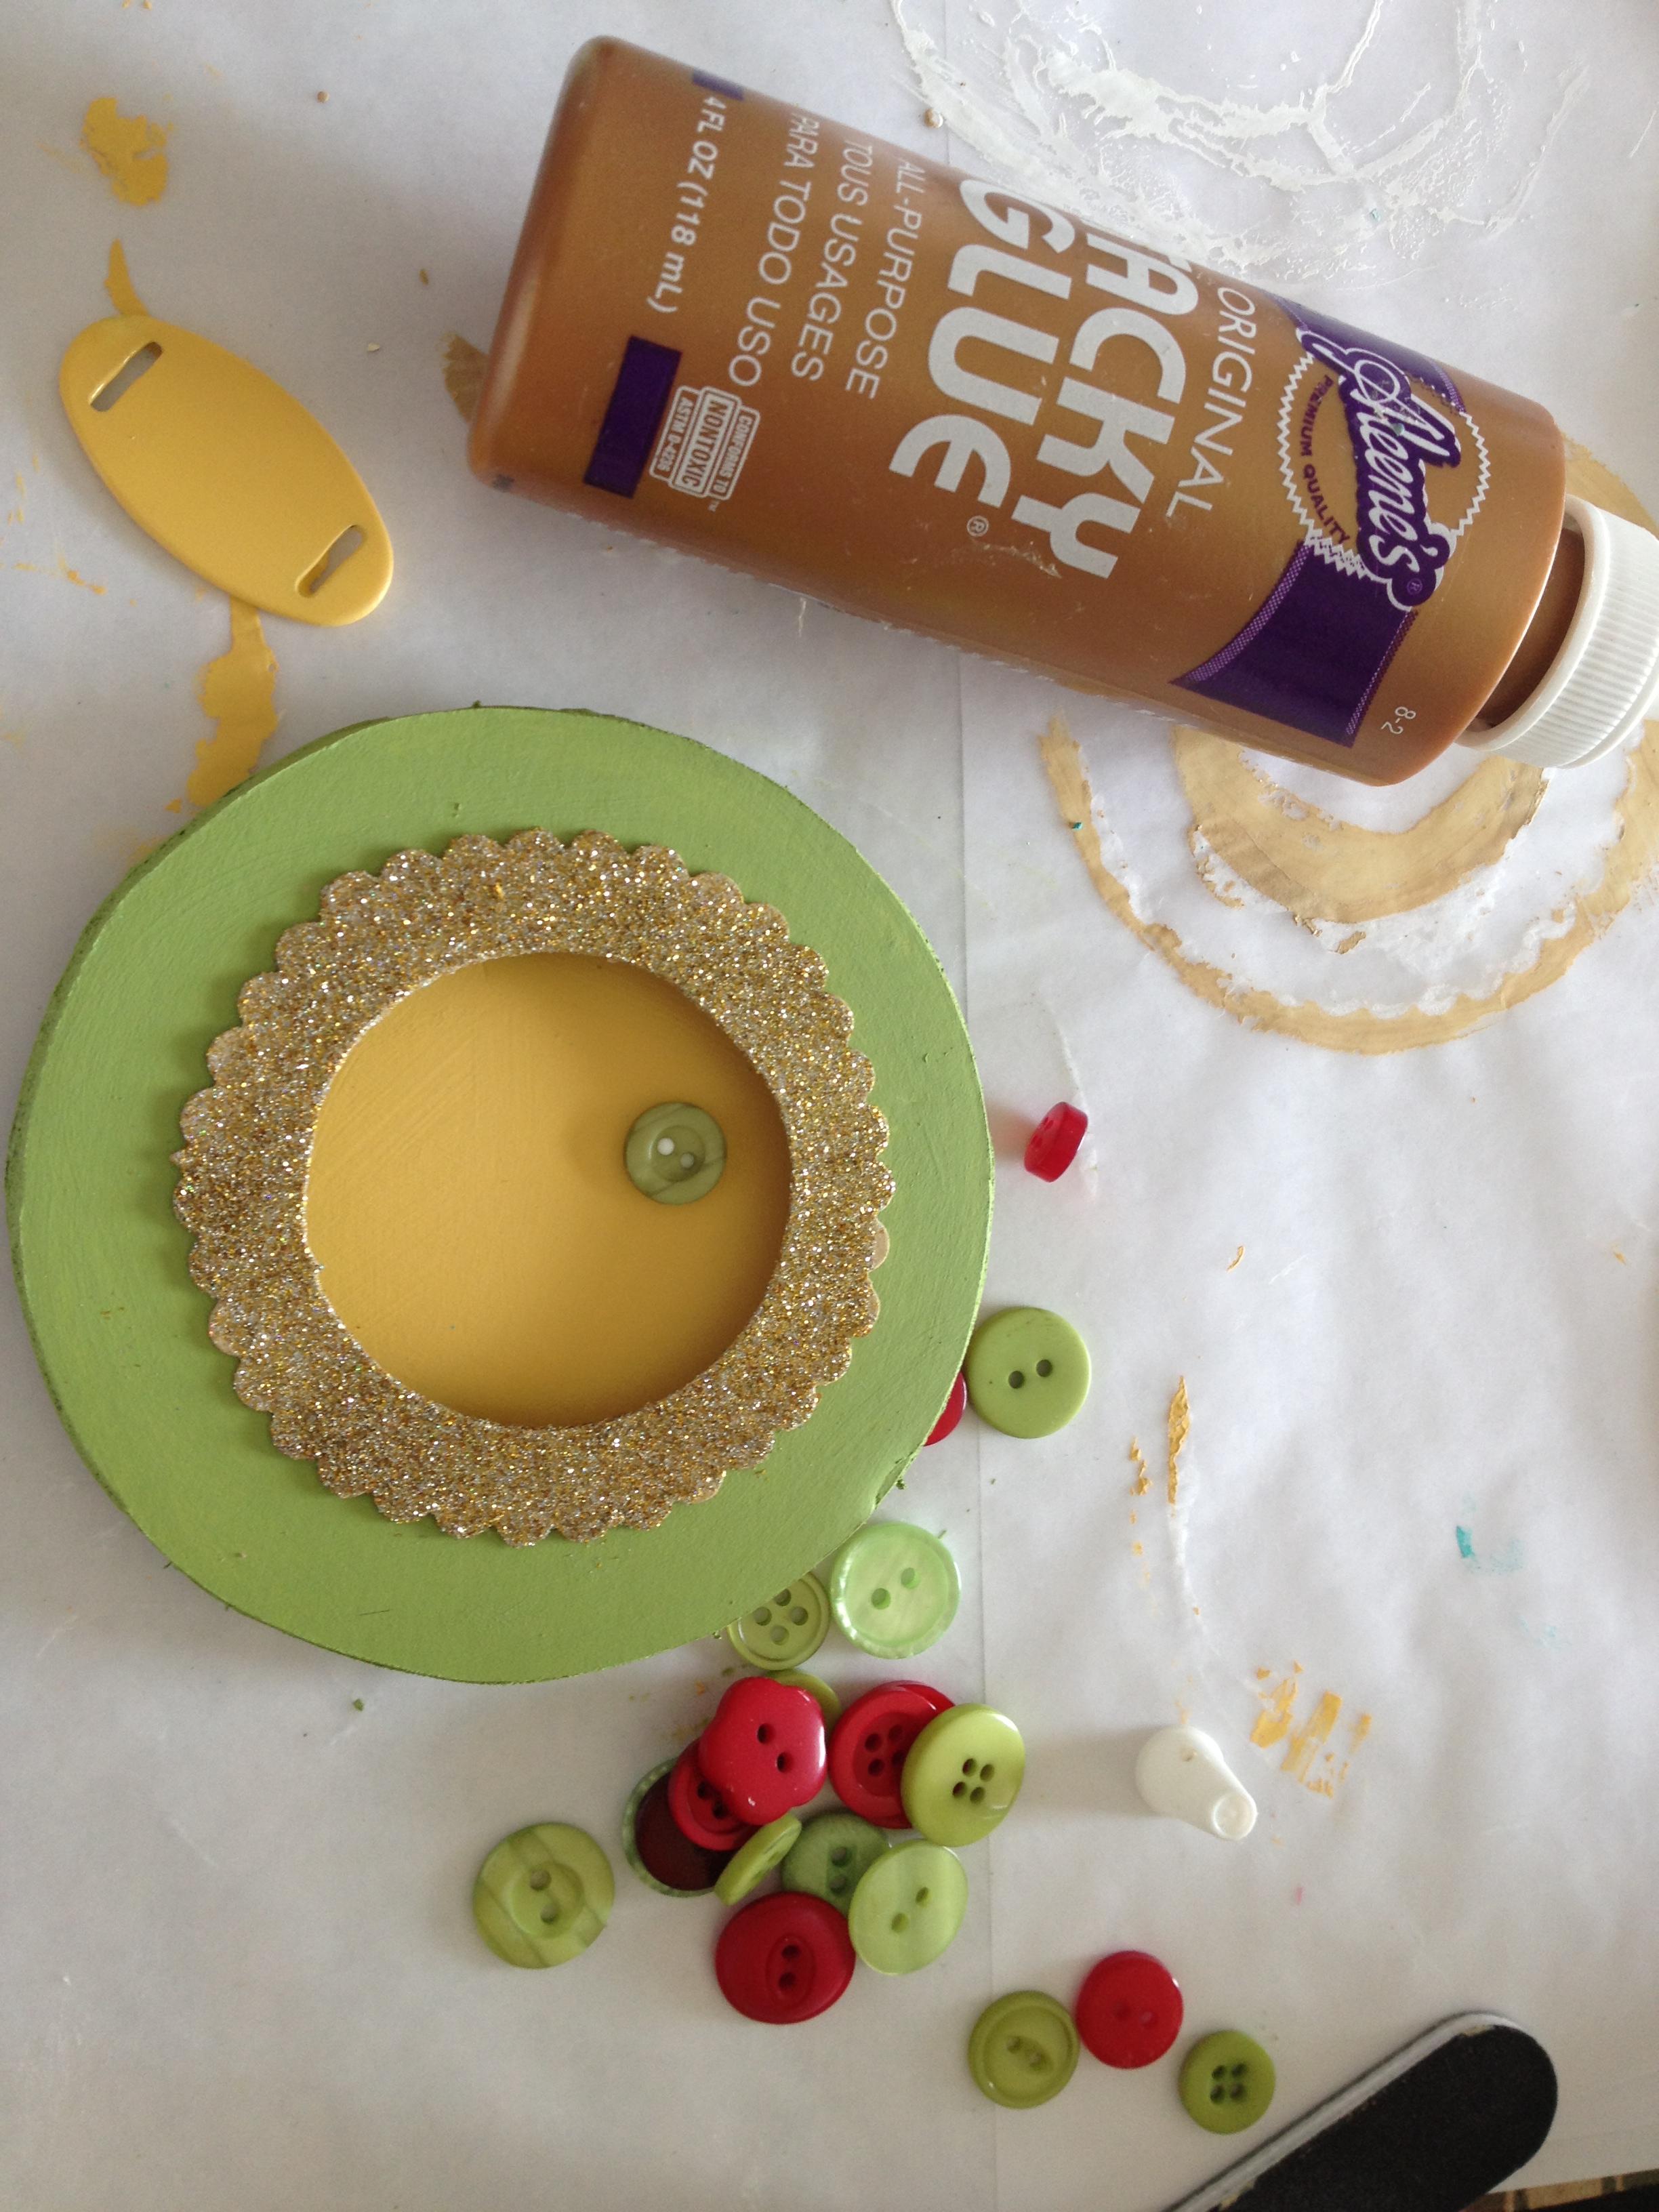
Next, assemble the ornament with a strong tacky glue.
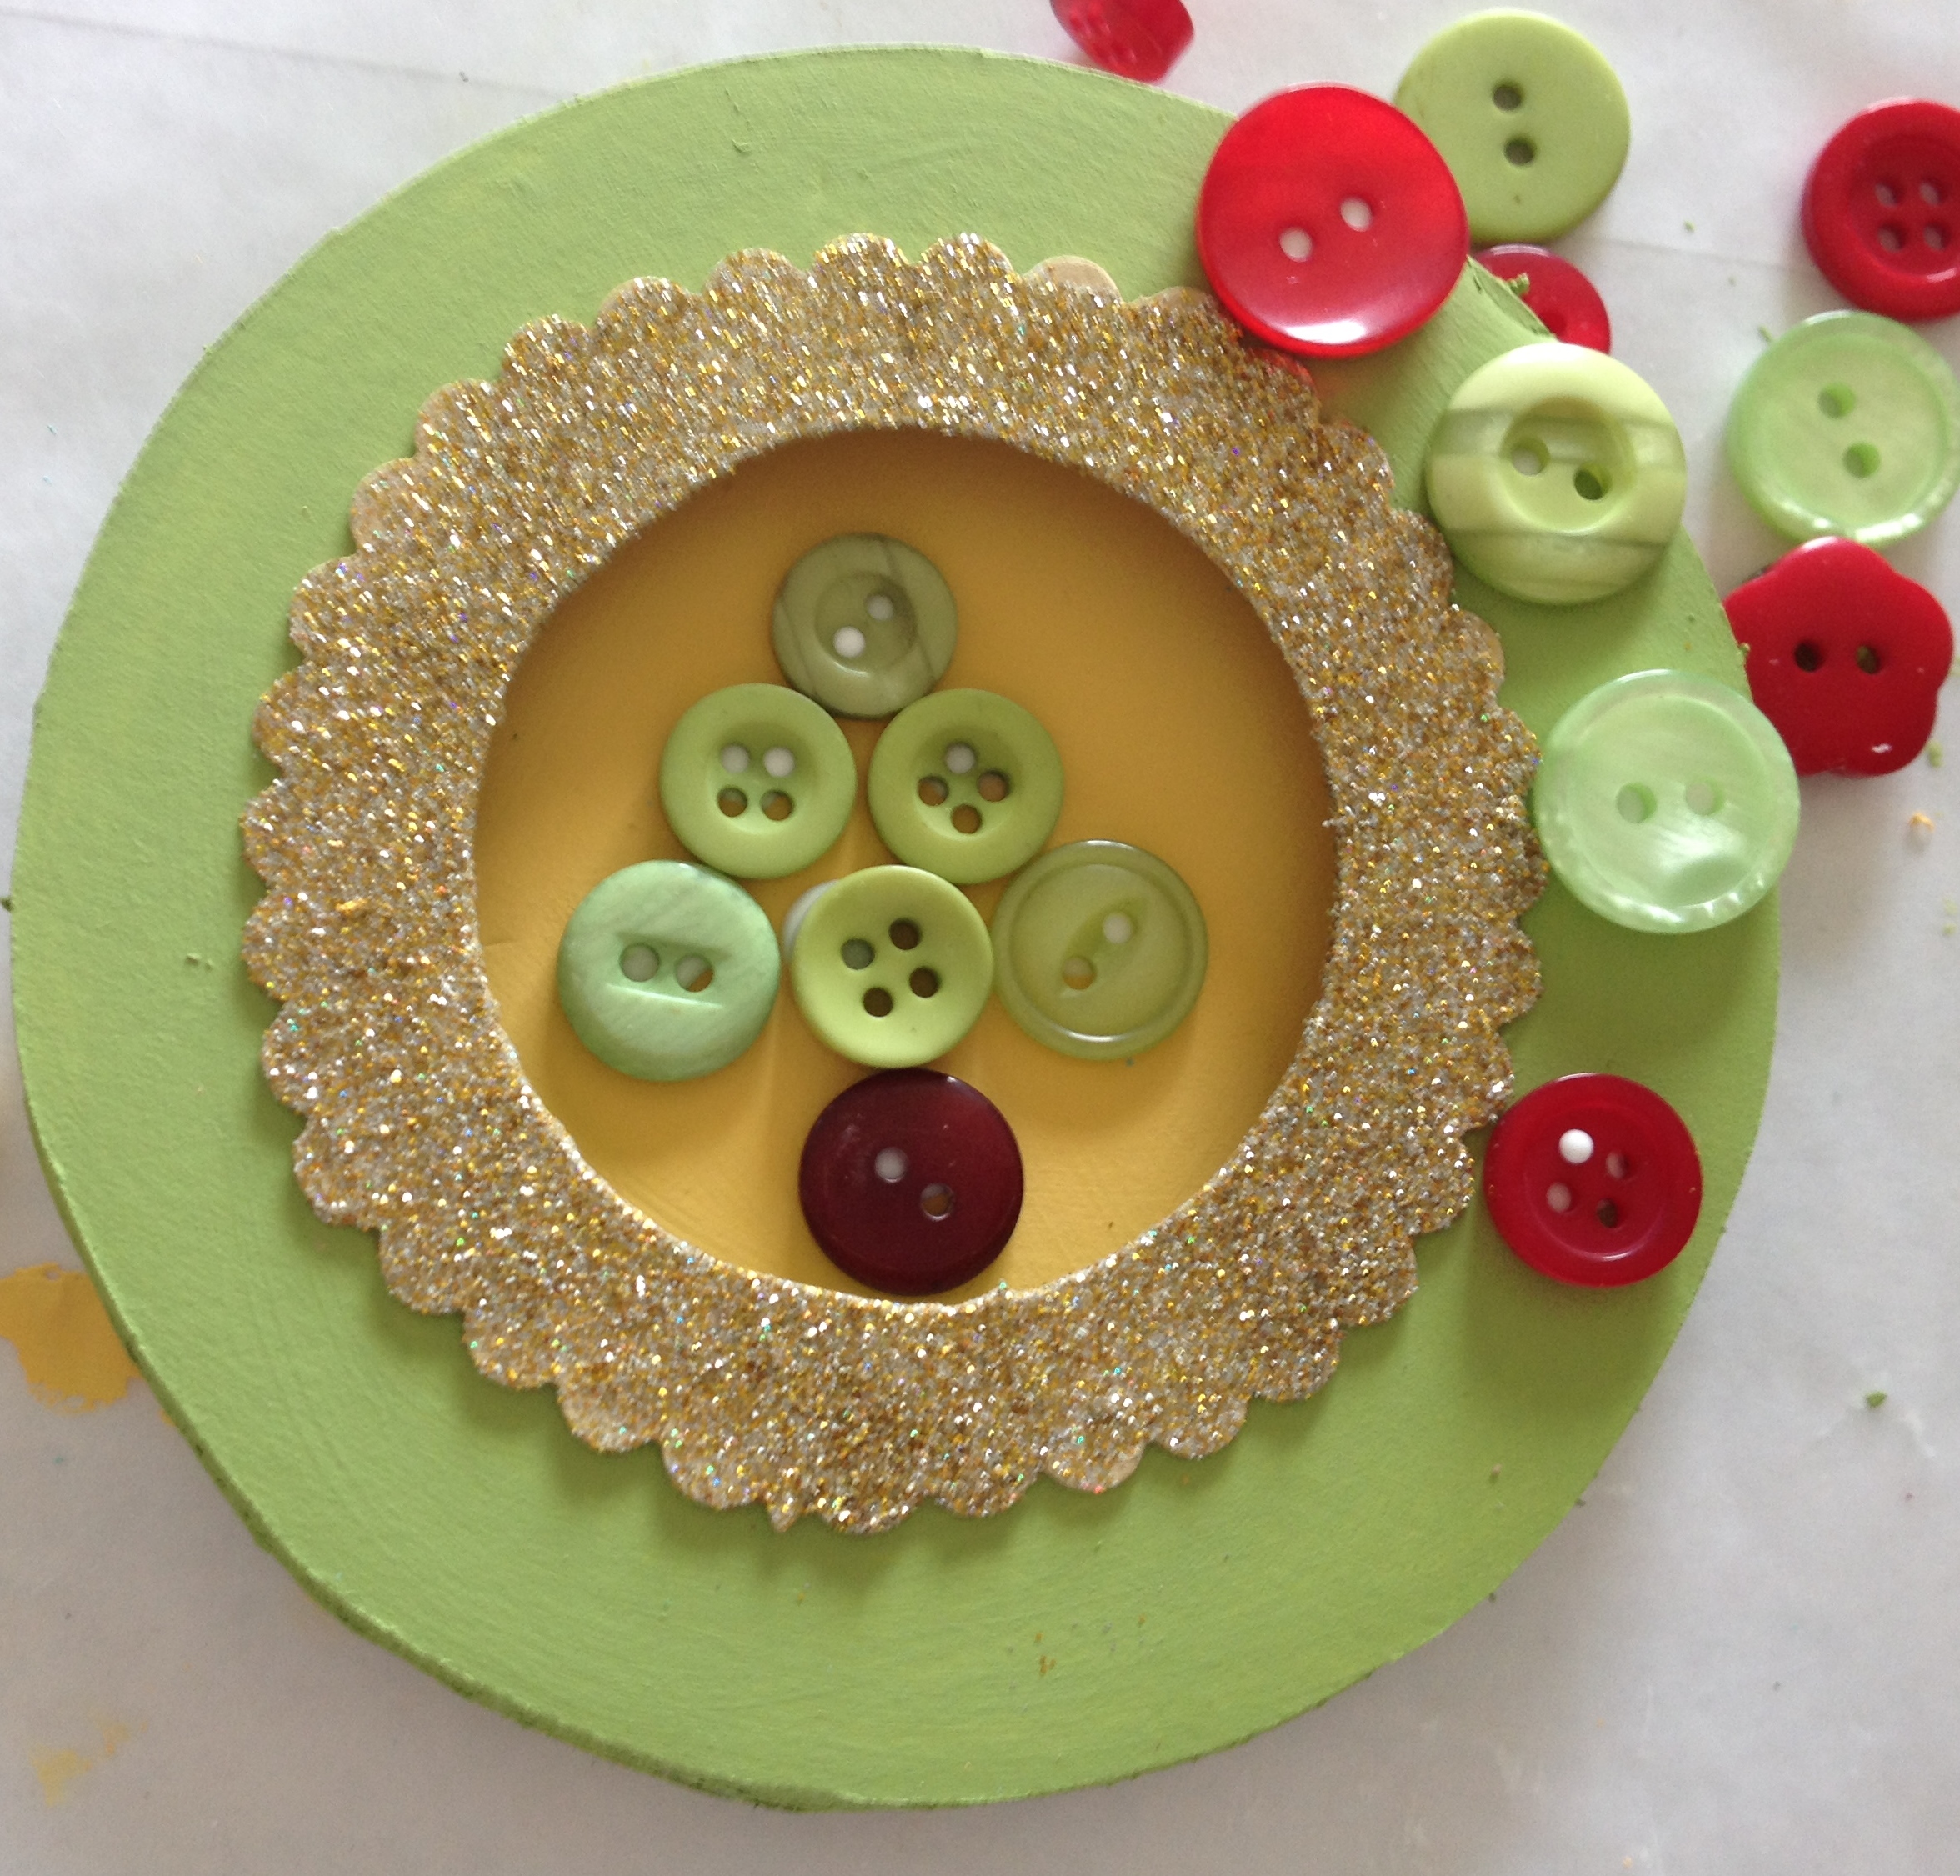 For the green and yellow ornament, I formed a tree shape in the center of and used green and red buttons to decorate the edges.

Paint and stamp blank craft shapes with a holiday sentiment and attach it to the front of the foam core.
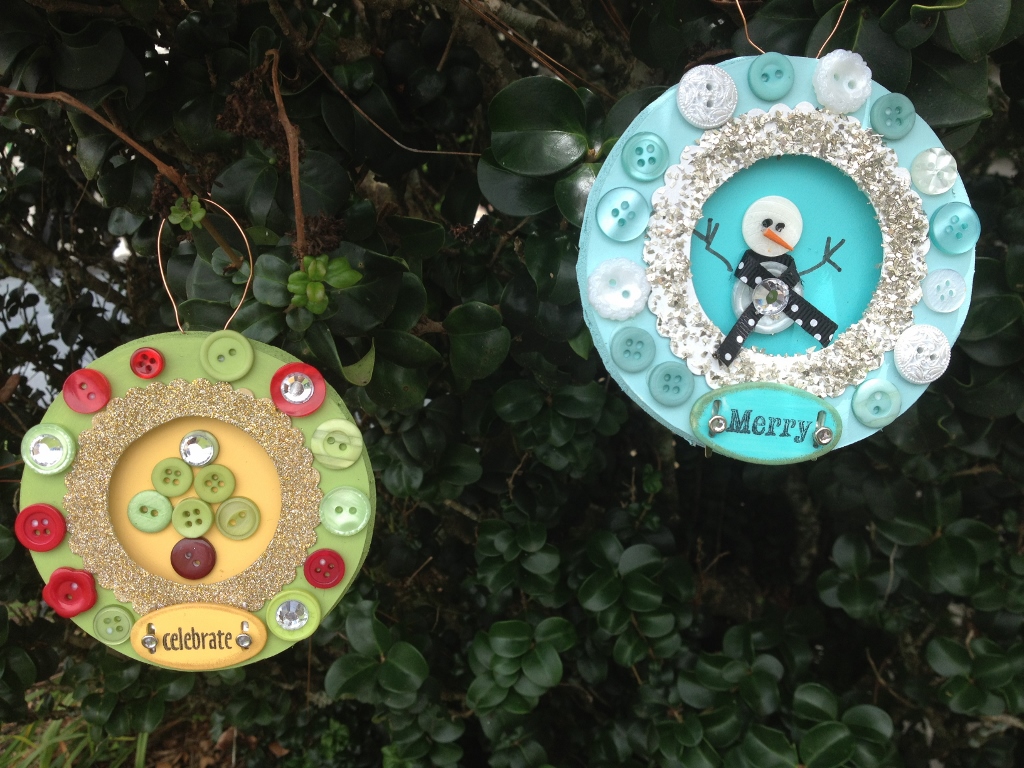
I hope I have inspired you to try your own Shadow Box Button Ornaments! Choose from an array of inspirational buttons from Buttons Galore and More to come up with your own themes and designs. Start now and you will have plenty of these budget friendly creations ready by the holidays for your tree and to give as gifts.
Live Life Creatively,
Melony
Sew a button and burlap pencil case for the guy in your life. It’s just right for the high school graduate who is heading off to college in the Fall or it would also be a great Father’s Day gift.
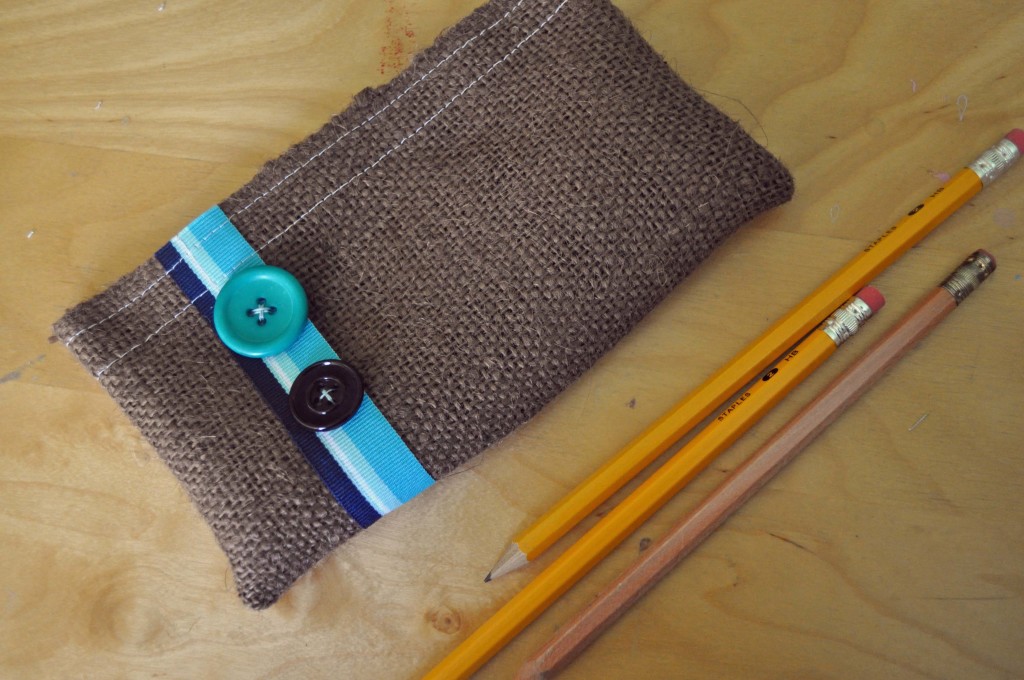
I know I’m always trying to keep my husband organized and he’s always looking for pens and pencils. Do you think there’s any chance a button and burlap pencil case is going to help? Naw, I don’t think so either, but it’s fun to make!
1. Sew ribbon onto burlap parallel to the side that measures 8″. Place it approximately 1.25″ from the edge of the burlap.
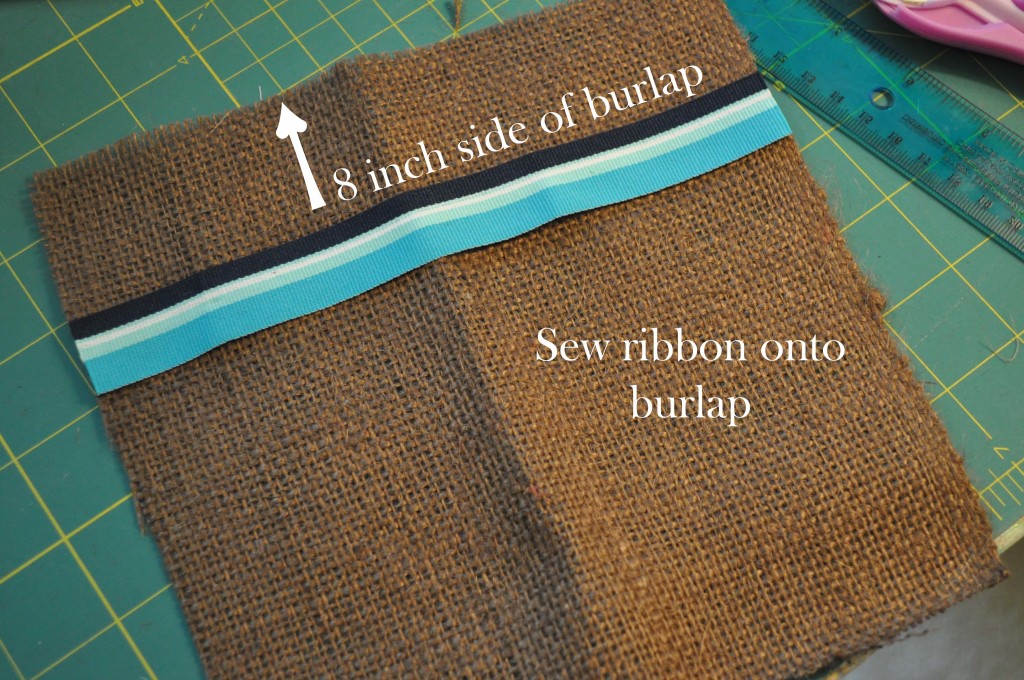
2. Sew the Velcro (R) Brand fasteners onto the 7.5″ inch sides. (These will be perpendicular to the ribbon.) I like to leave the top of the case without finishing it. The rough edge gives it a more masculine touch!
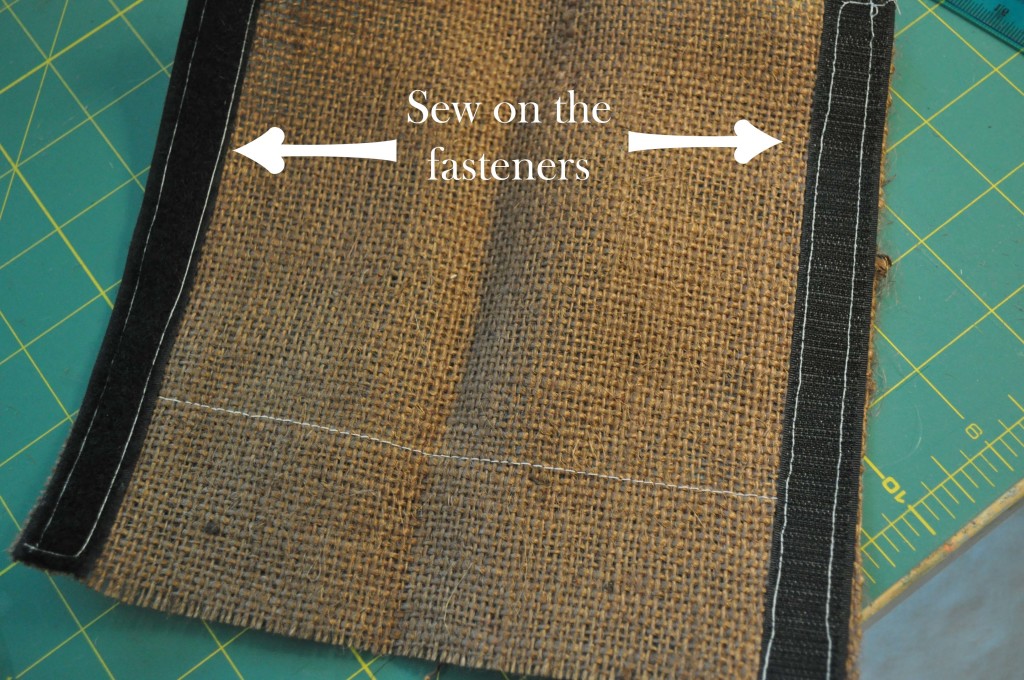
3. Fold in half, right sides facing (the side that you sewed the ribbon onto is the “right” side). The 7.5″ edges should be even. Press with an iron.
4. Sew the short sides closed.
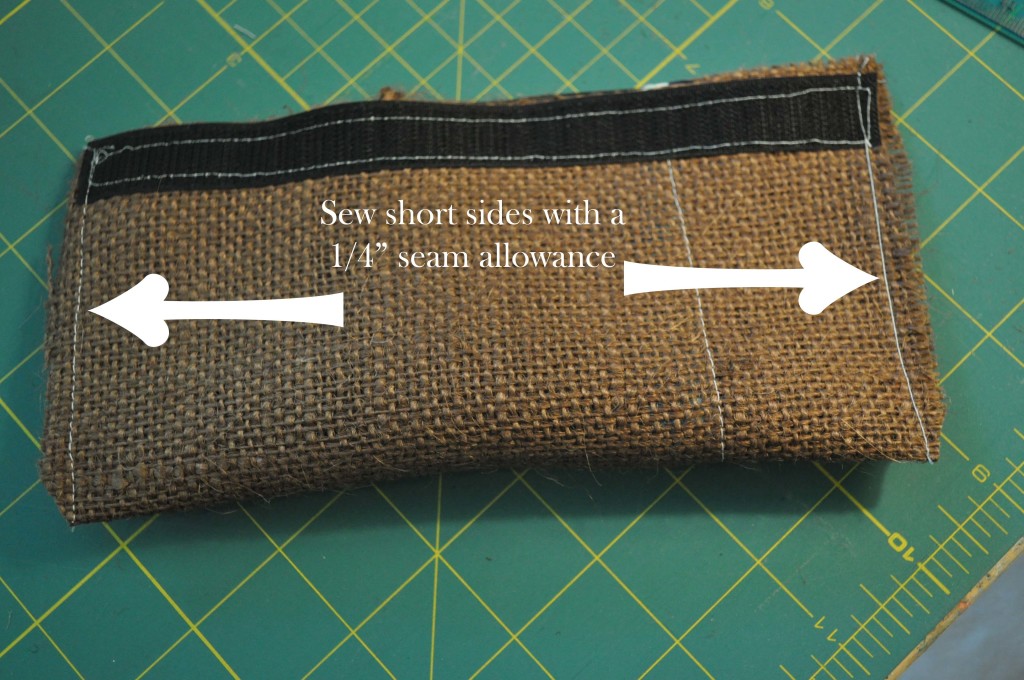
5. Clip the corners and turn the bag right side out.

6. Sew buttons onto ribbon. I know it’s a bit harder to sew them on when the case is sewn, but it’s best to leave this step for last, so you can see the best placement for them.
![]()
I love decorating empty cans and turning them into something fun and useful again. All those canned beans and soup can really be a DIY project waiting to happen. Add some fabric, ribbon and brightly colored buttons and you have yourself a whole slew of possibilities. For today’s project I decorated a can with patriotic colors and turned it into a pretty little flower vase, perfect for adding to the table for July 4th.
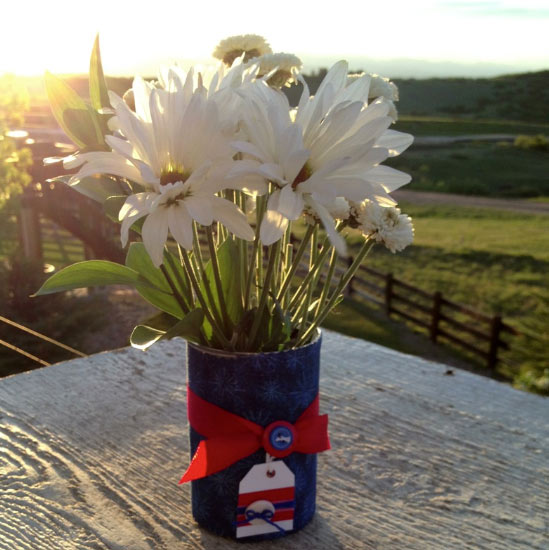
Red White and Blue flower vase
Materials:
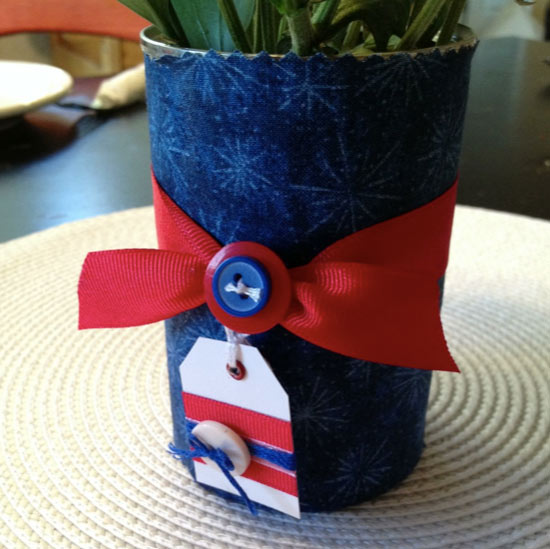
Patriotic flower vase DIY
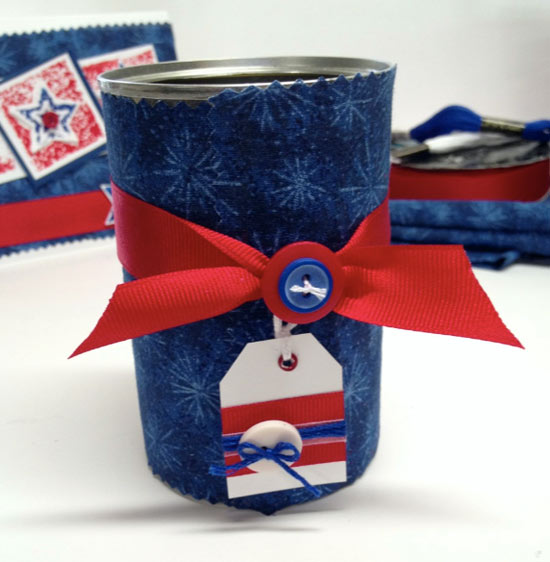
Recycled can to patriotic vase
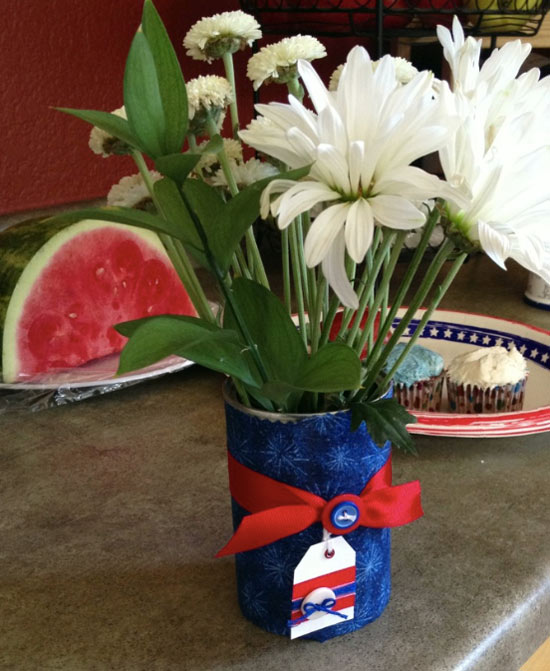
Simple patriotic flower vase
You can make a bunch of these patriotic flower vases to decorate for your July 4th festivities. I use these same kind of decorated cans as utensil holders and pencil/marker holders for parties. You can add a little sparkle by using glitter or rhinstones to the tag and ribbon wrap. You can even add buttons all around the can. Get creative and make your own fun patriotic decorations!
It is that time of year, the red…white…and blue time that is! Here is a quick and easy way to up-cycle an old t-shirt into a festive masterpiece fit for the grandest of parades. It is shown in patriotic style but could be done in any color theme for any occasion.
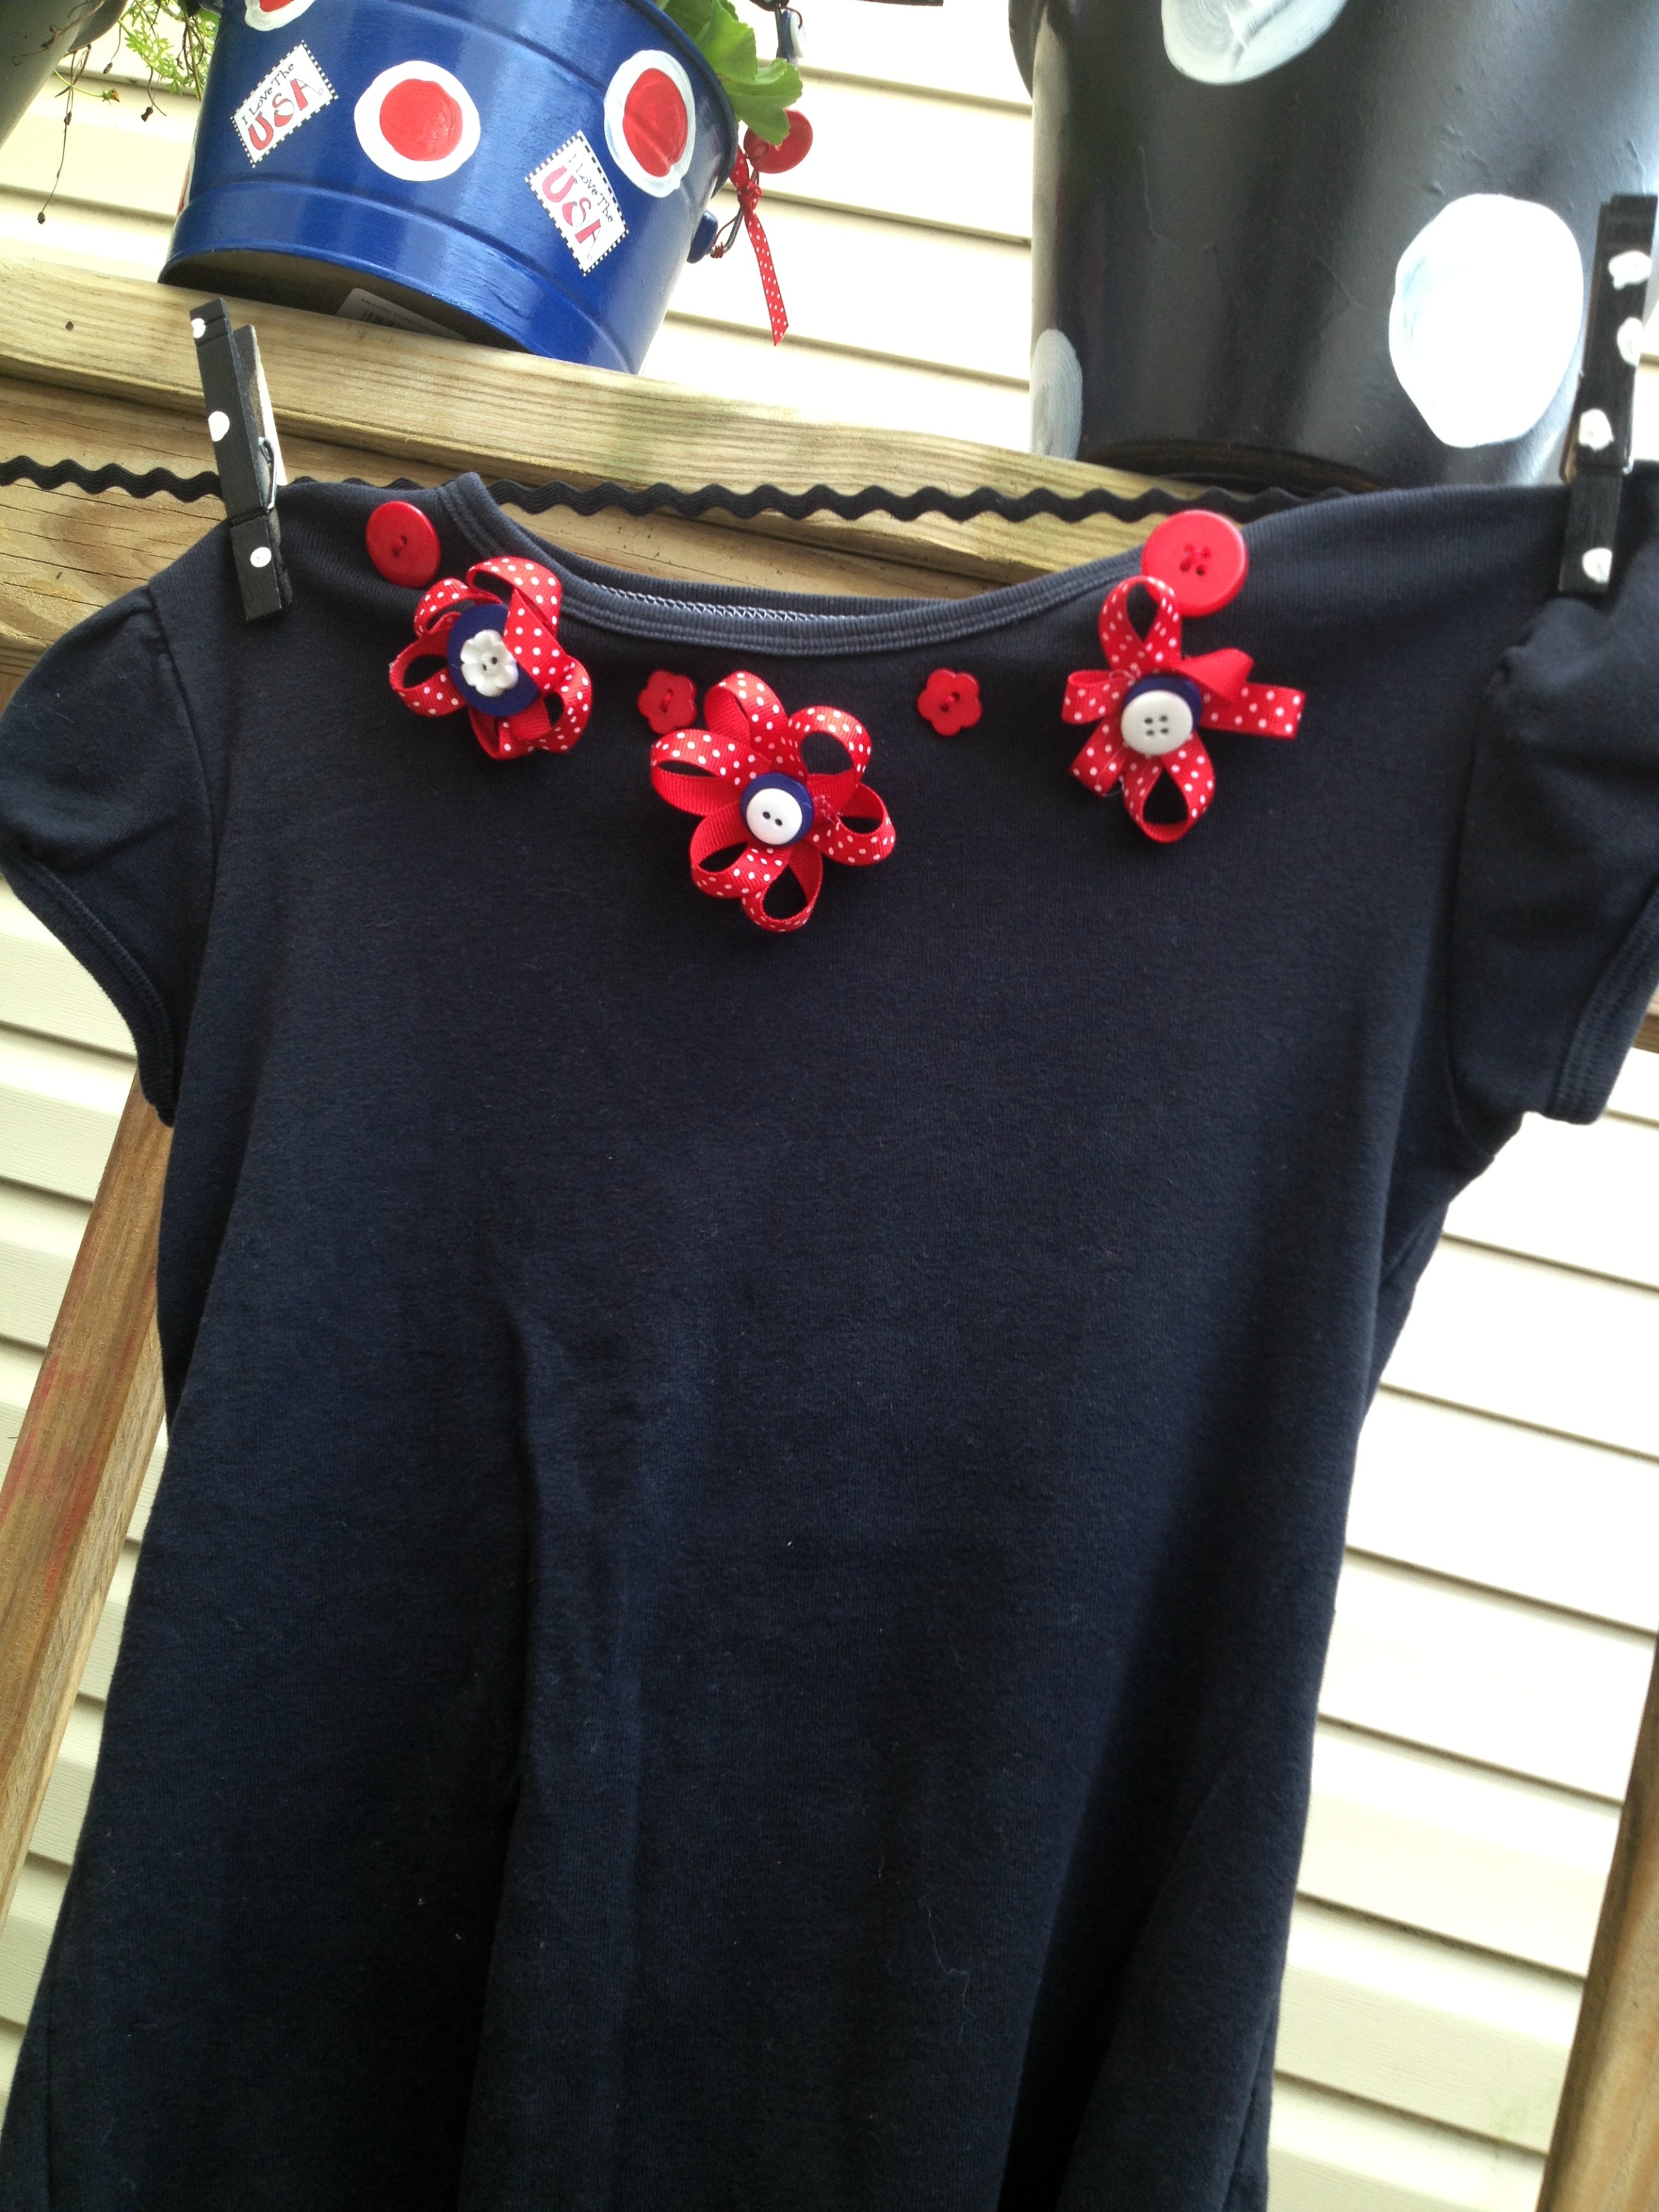
You only need a few things…buttons (Laura Kelly’s patriotic mix is best), embroidery floss (Coats and Clark is my favorite), HOT glue (Ad-tech of course) and ribbon.

Make the ribbon flowers with button centers using your HOT glue. It works best to do the ribbon part first and then add the buttons at the end. Then sew them and additional buttons around the neck of the shirt. If you want to go button crazy, you can sew red, white and blue buttons all of the shirt to look like polka dots.

If you like the shirt and you want an additional patriotic button craft idea to upcycle these denim shorts, visit Laura on her blog for directions.
If you want to win this prize, (buttons in an awesome Viewtainer, Beacon Zip Dry, and a Laura Kelly notepad with a Sharpie, go like Laura on her Facebook page or post a comment on this blog and you will be entered!

Happy Creating using BUTTONS, imagination and LOVE.
Cheers,
Laura
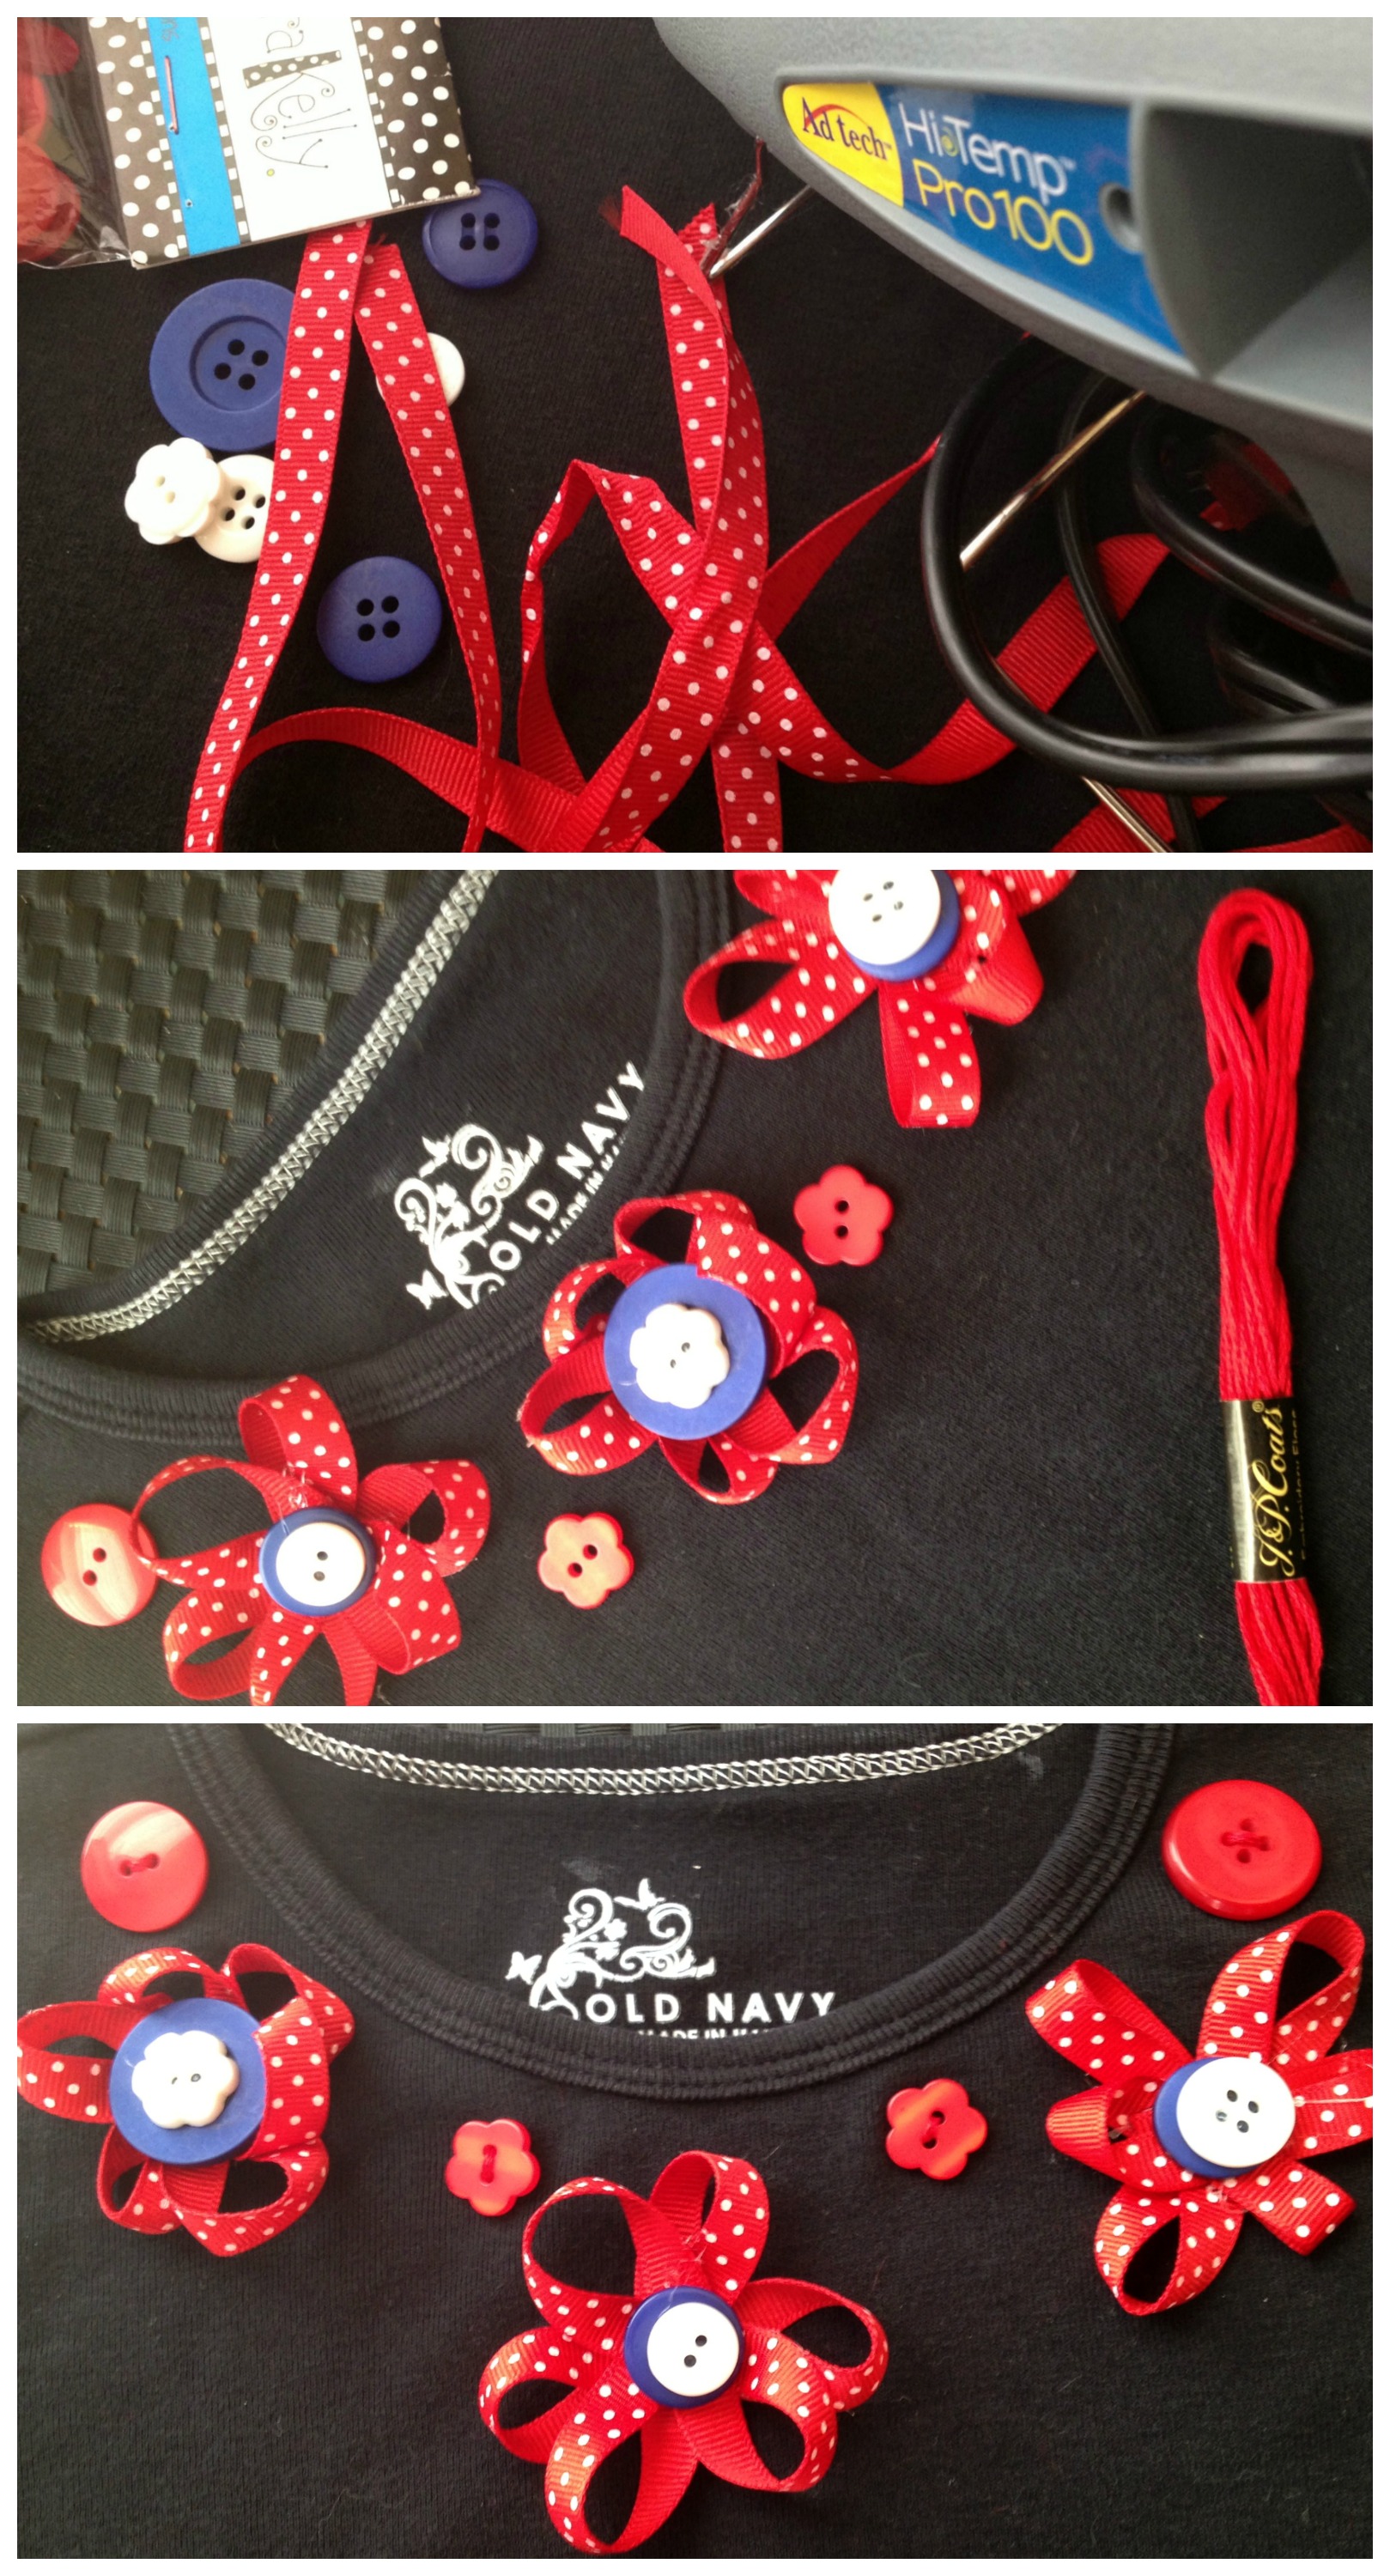
Today’s crafty inspiration is this red, white and blue altered canvas featuring fabric from Laura Kelly Designs and of course buttons! It’s an easy to create project for your home or for a gift.
All of the July 4th celebrations are fast approaching. So that means get out your Red, White and Blue, and get crafting.
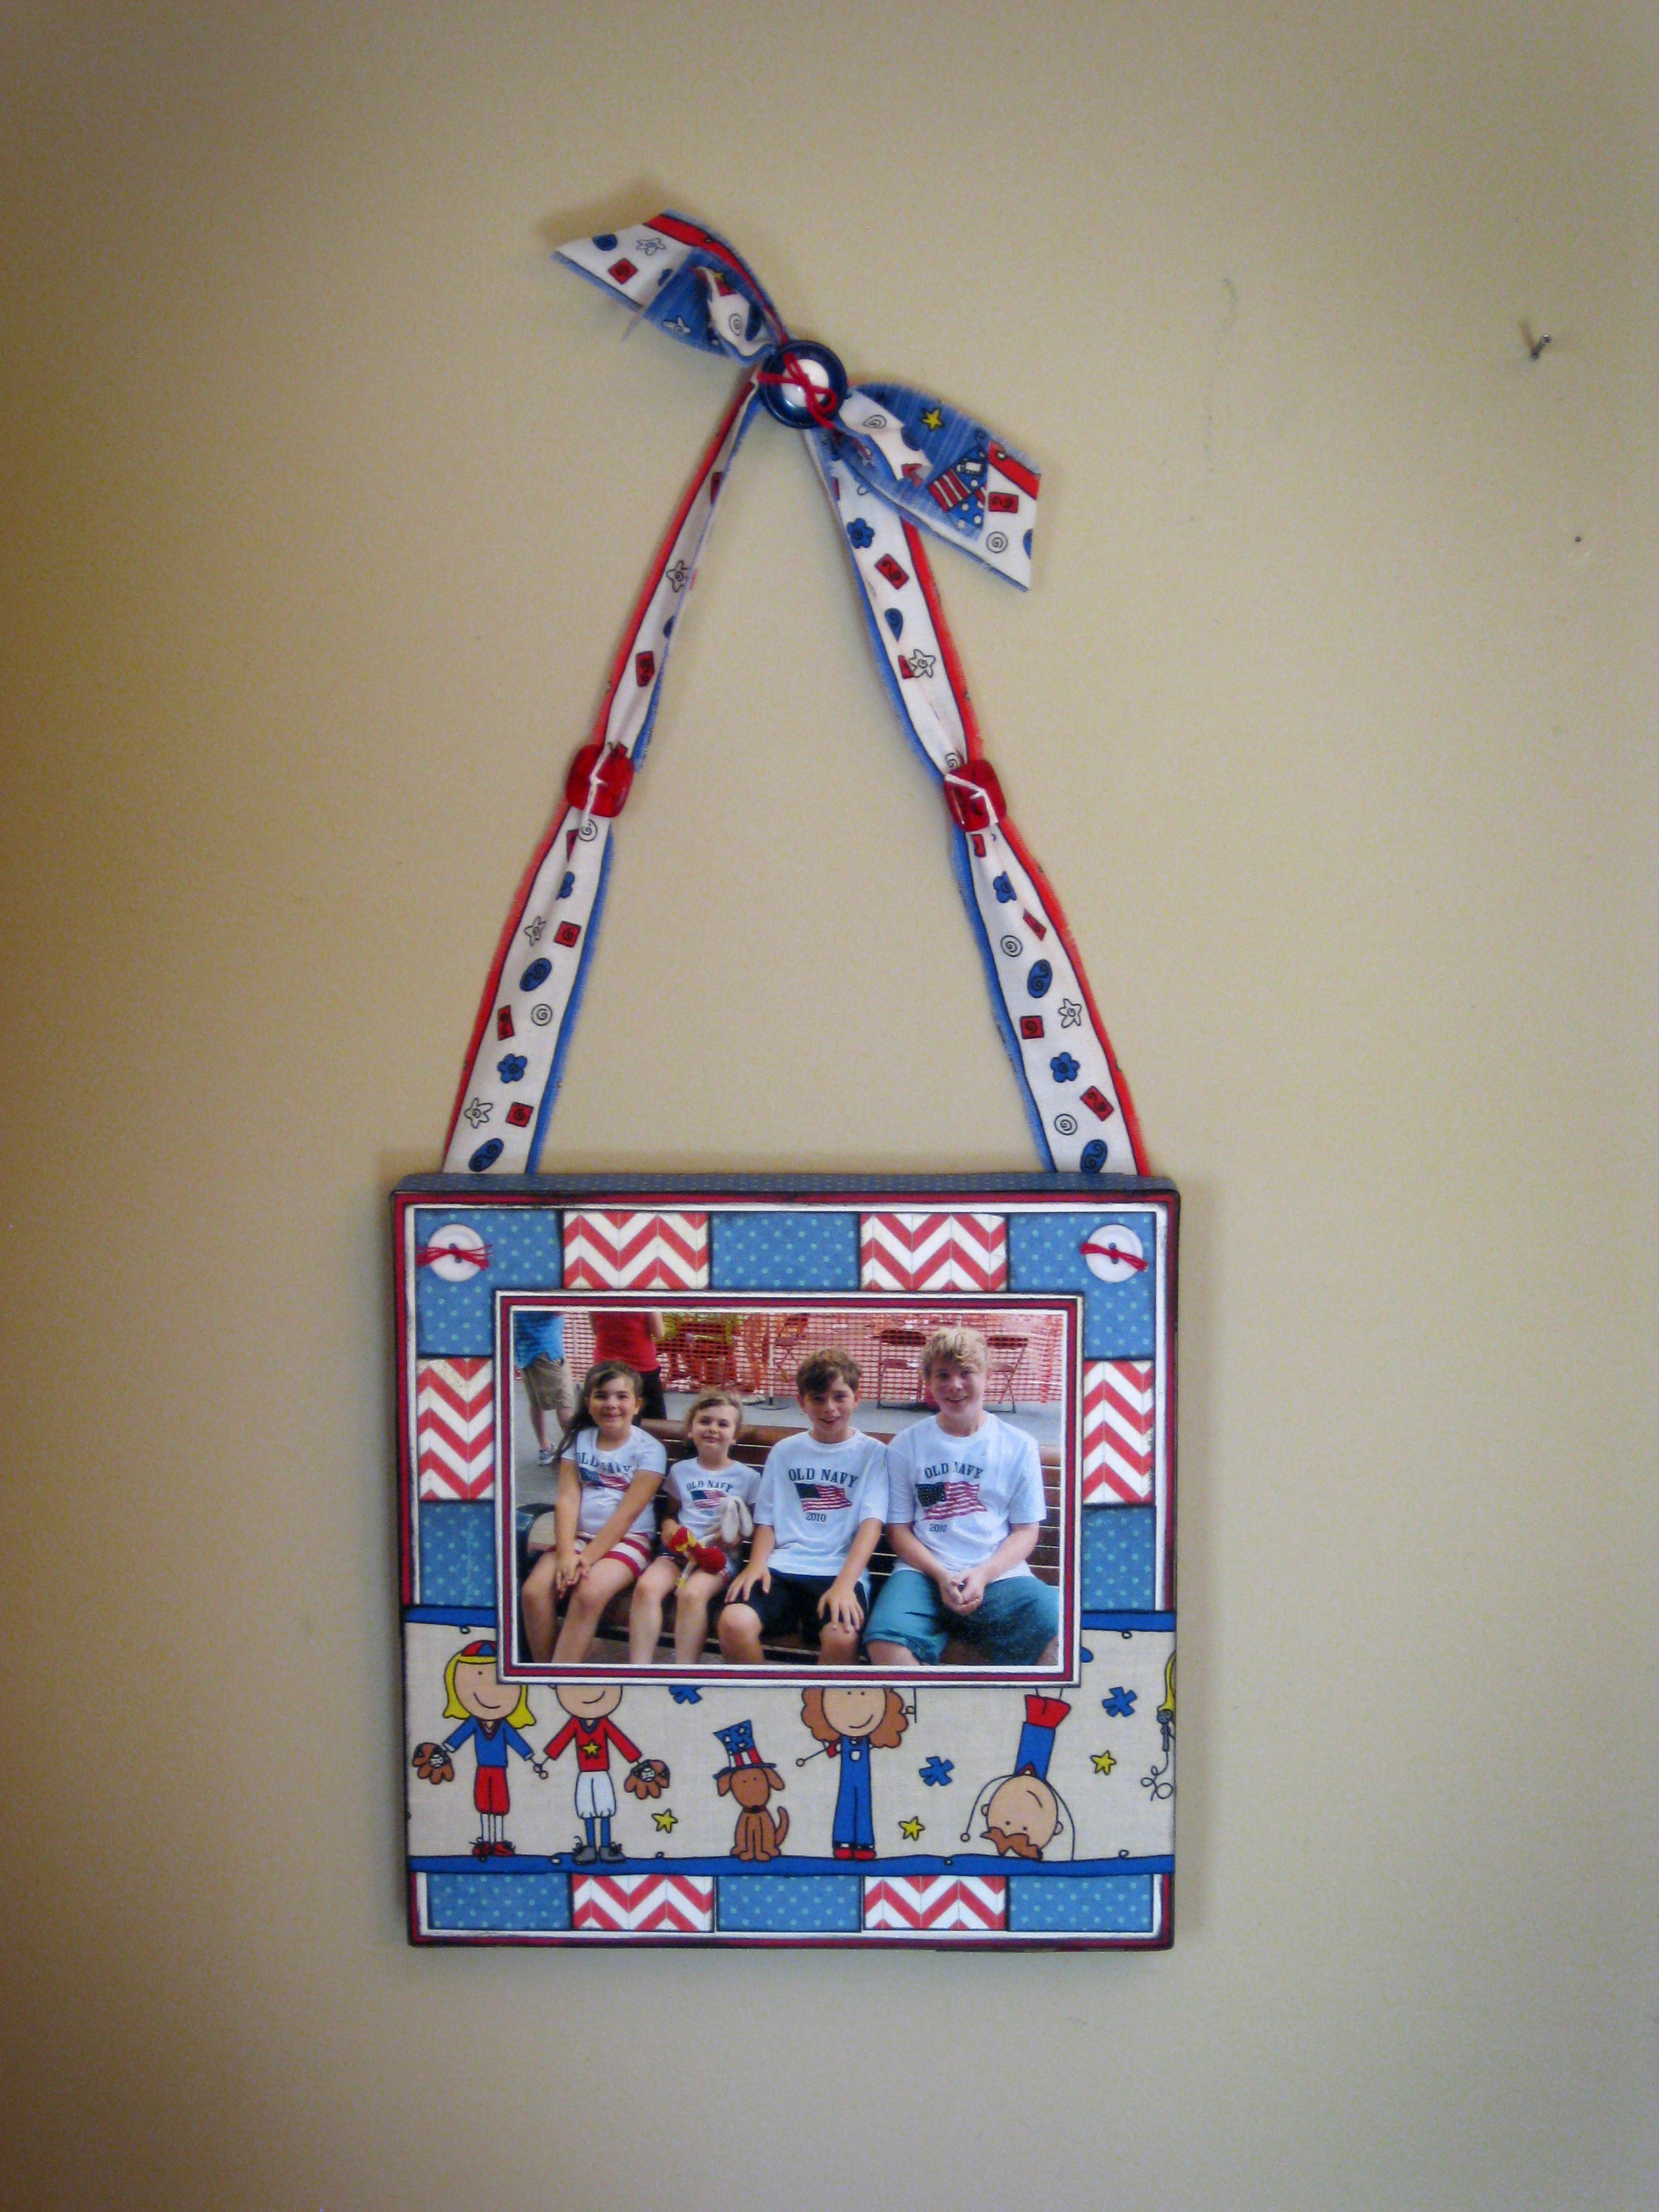
I started with and 8×8 canvas that I covered in cardstock and patterned paper. Tip: Make sure you use a strong adhesive that you trust for altered projects to ensure your paper will stay attached to your canvas.
Other Products Used:
Make sure to cover the sides of your altered canvas as well. I like to cover all surfaces that can be seen with patterned paper, ribbon or fabric.
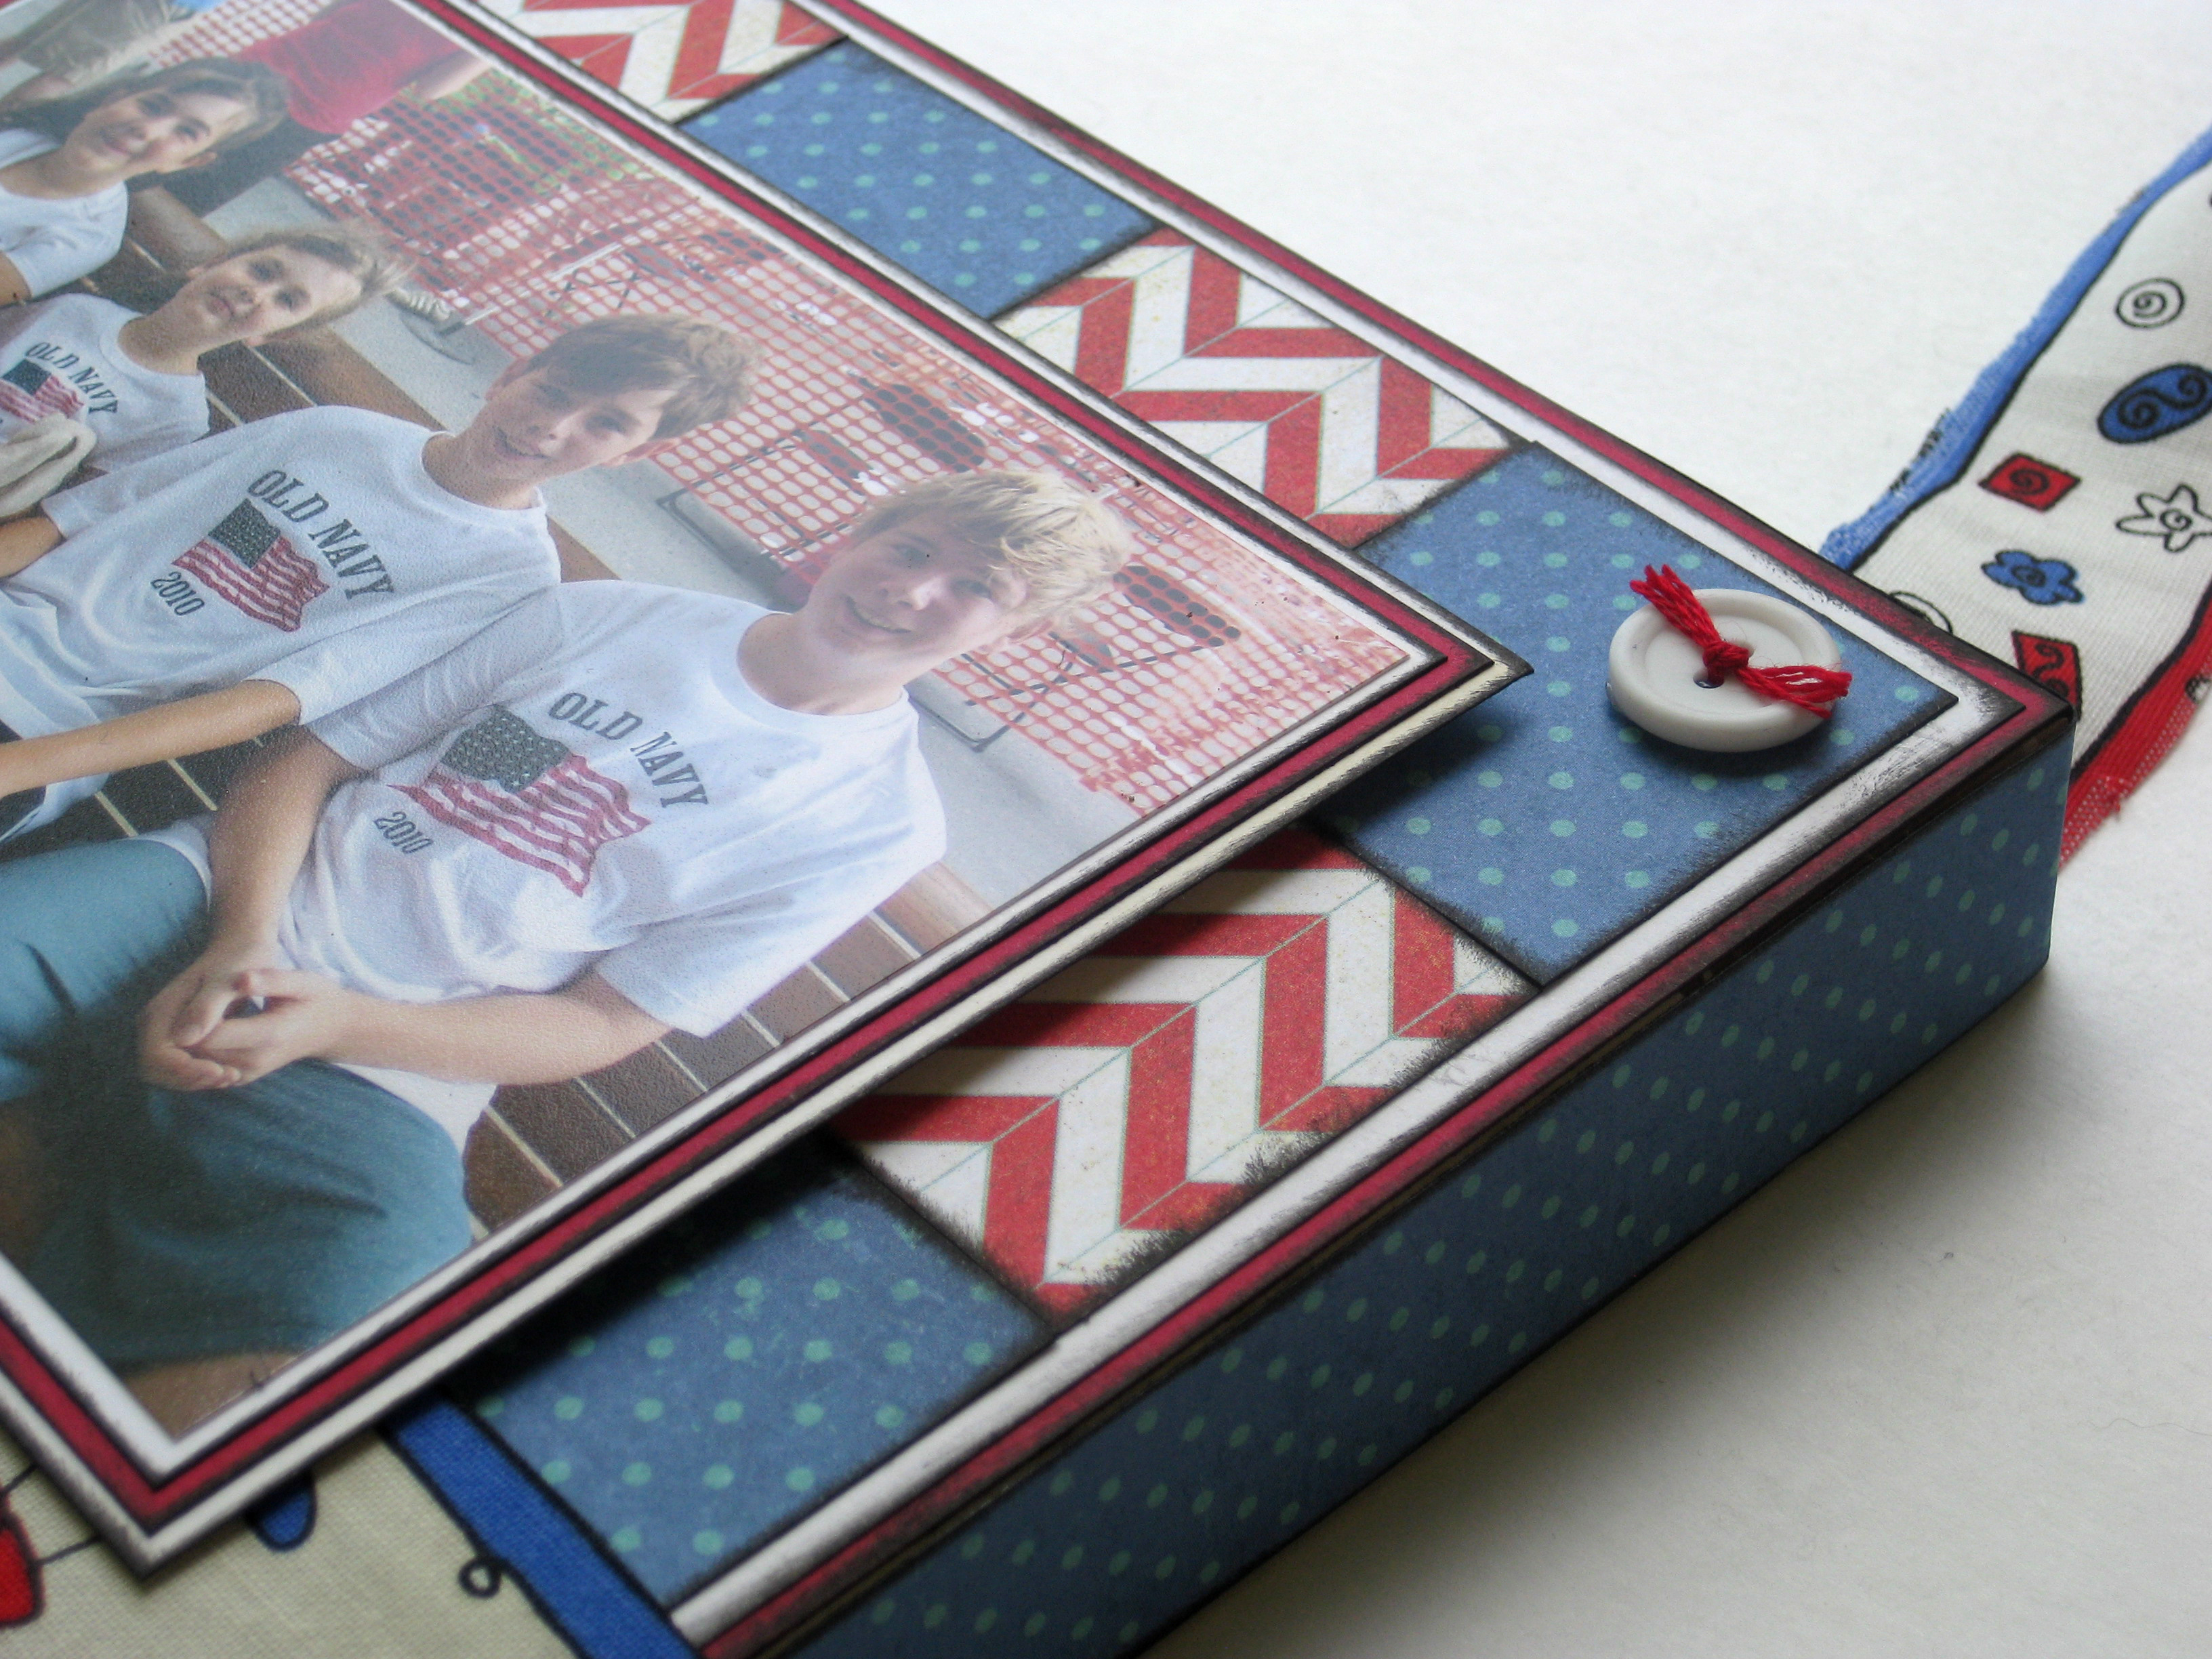

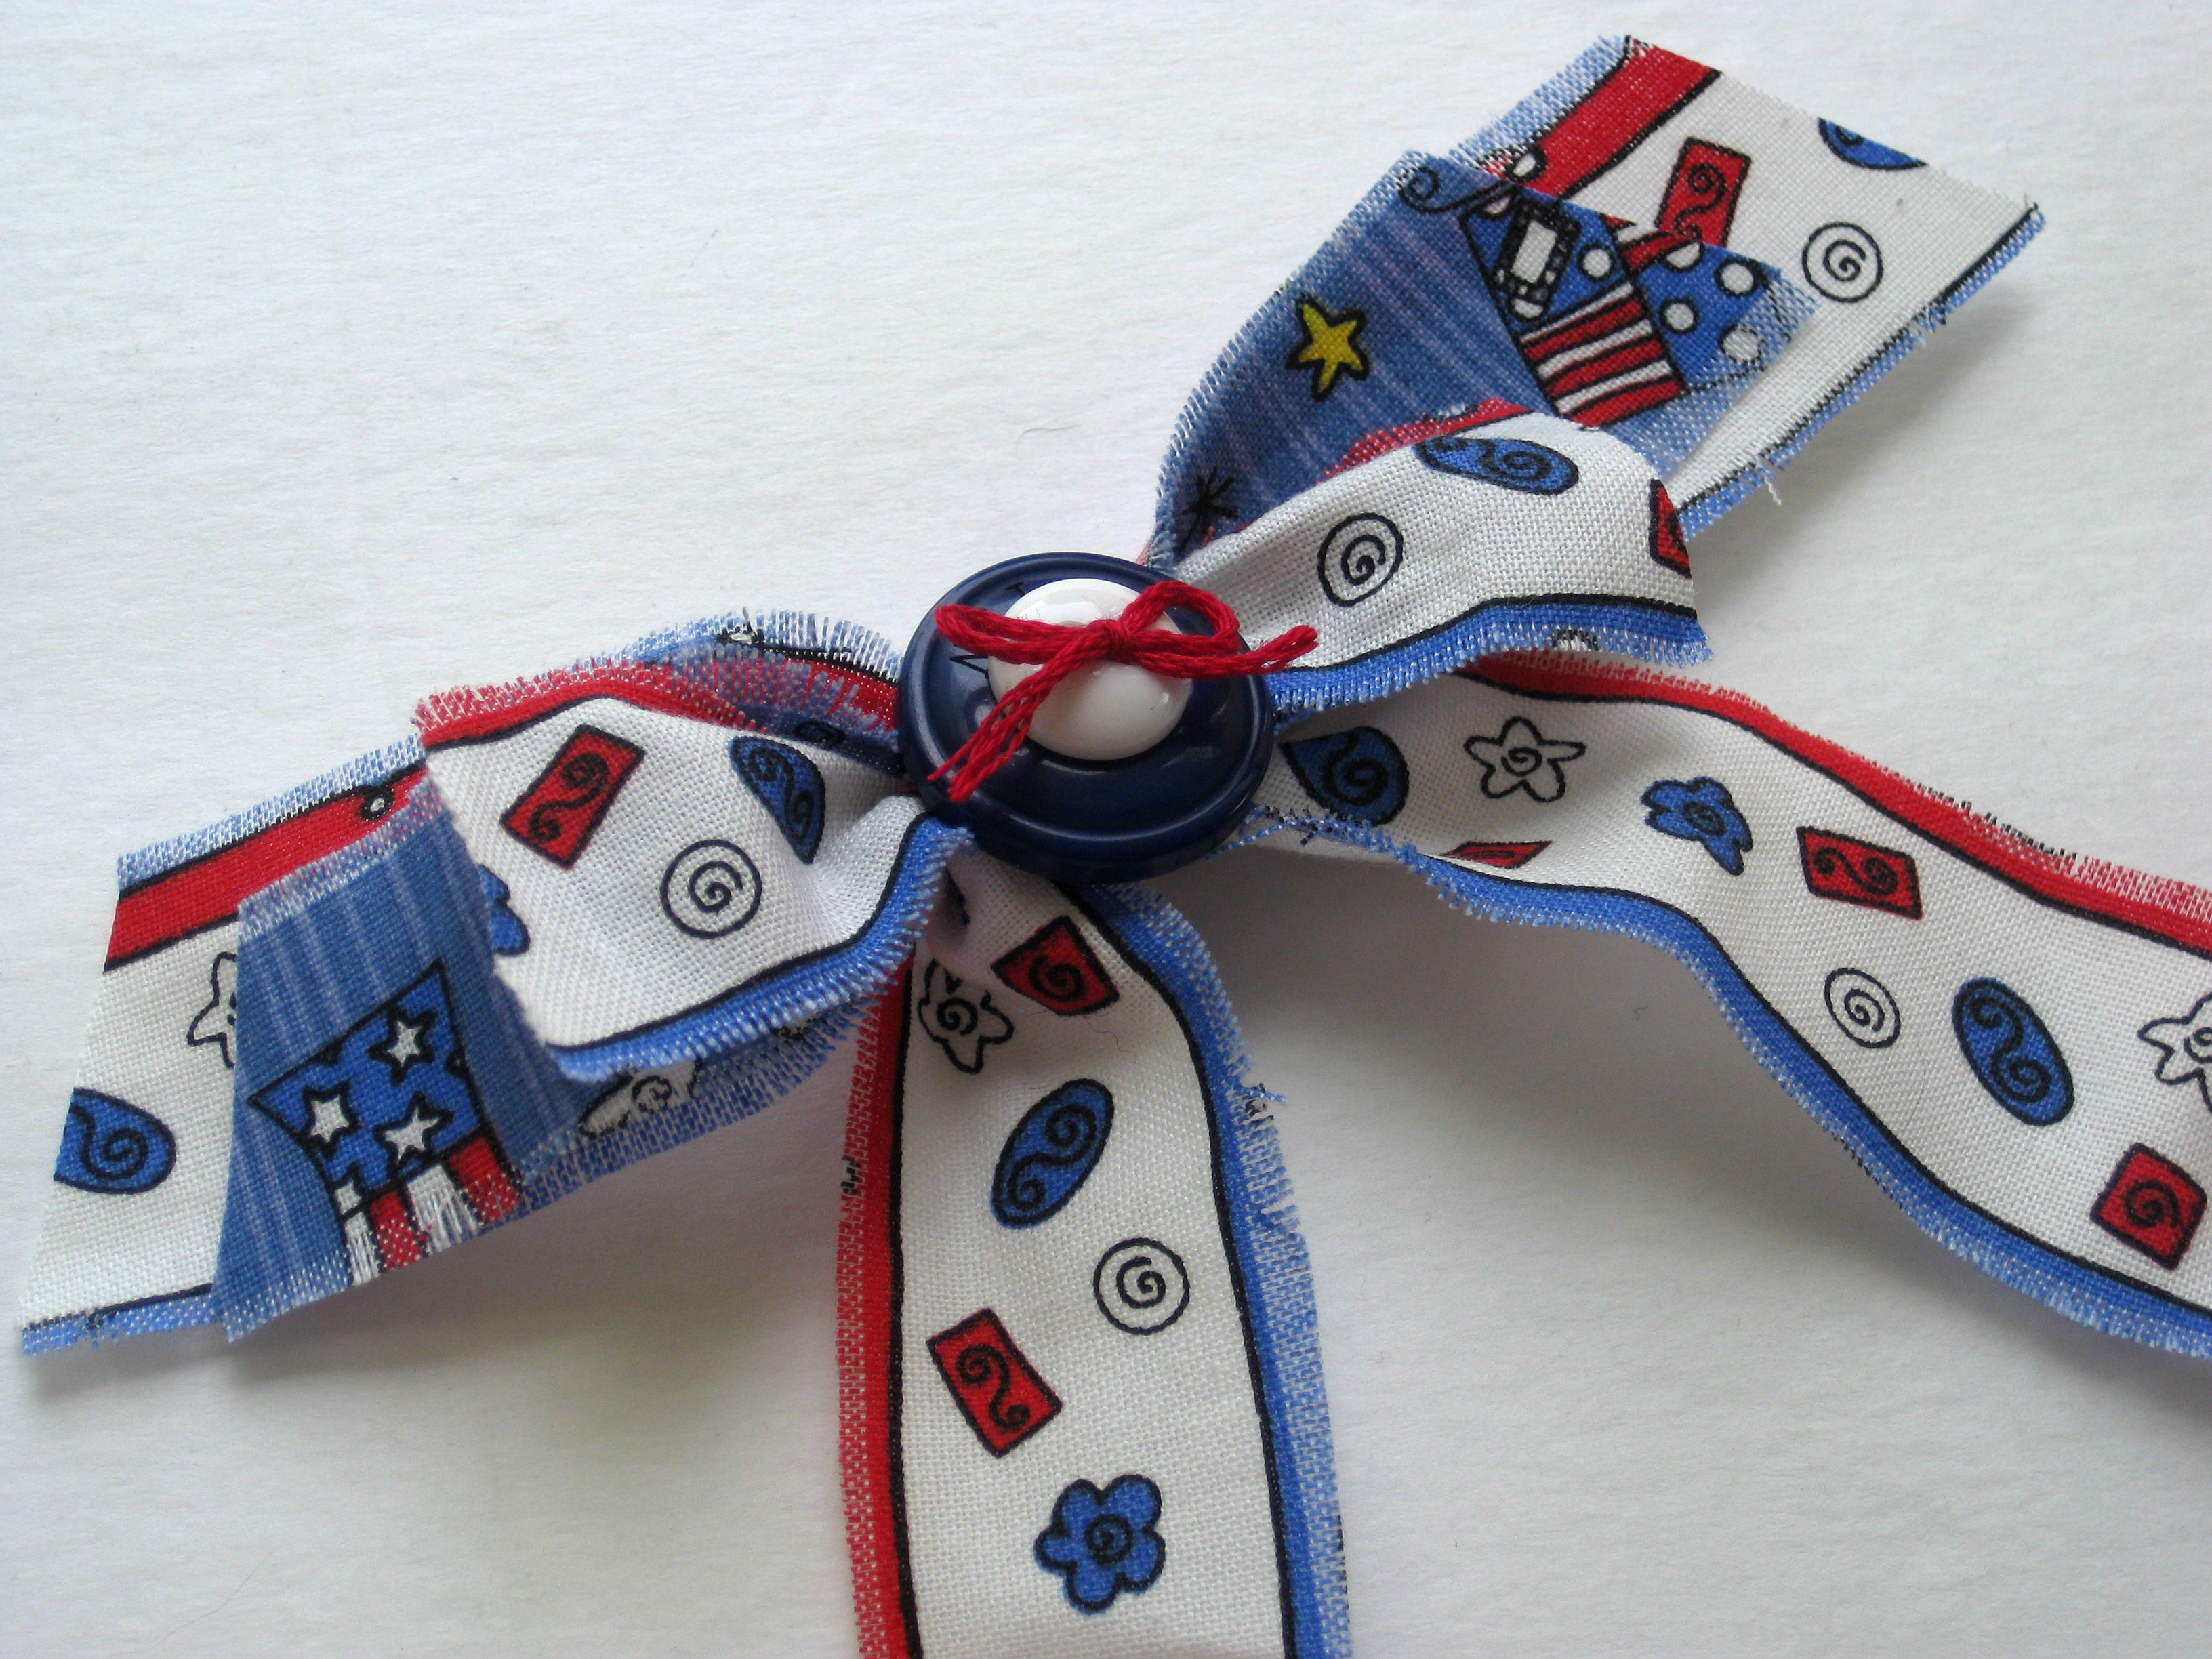
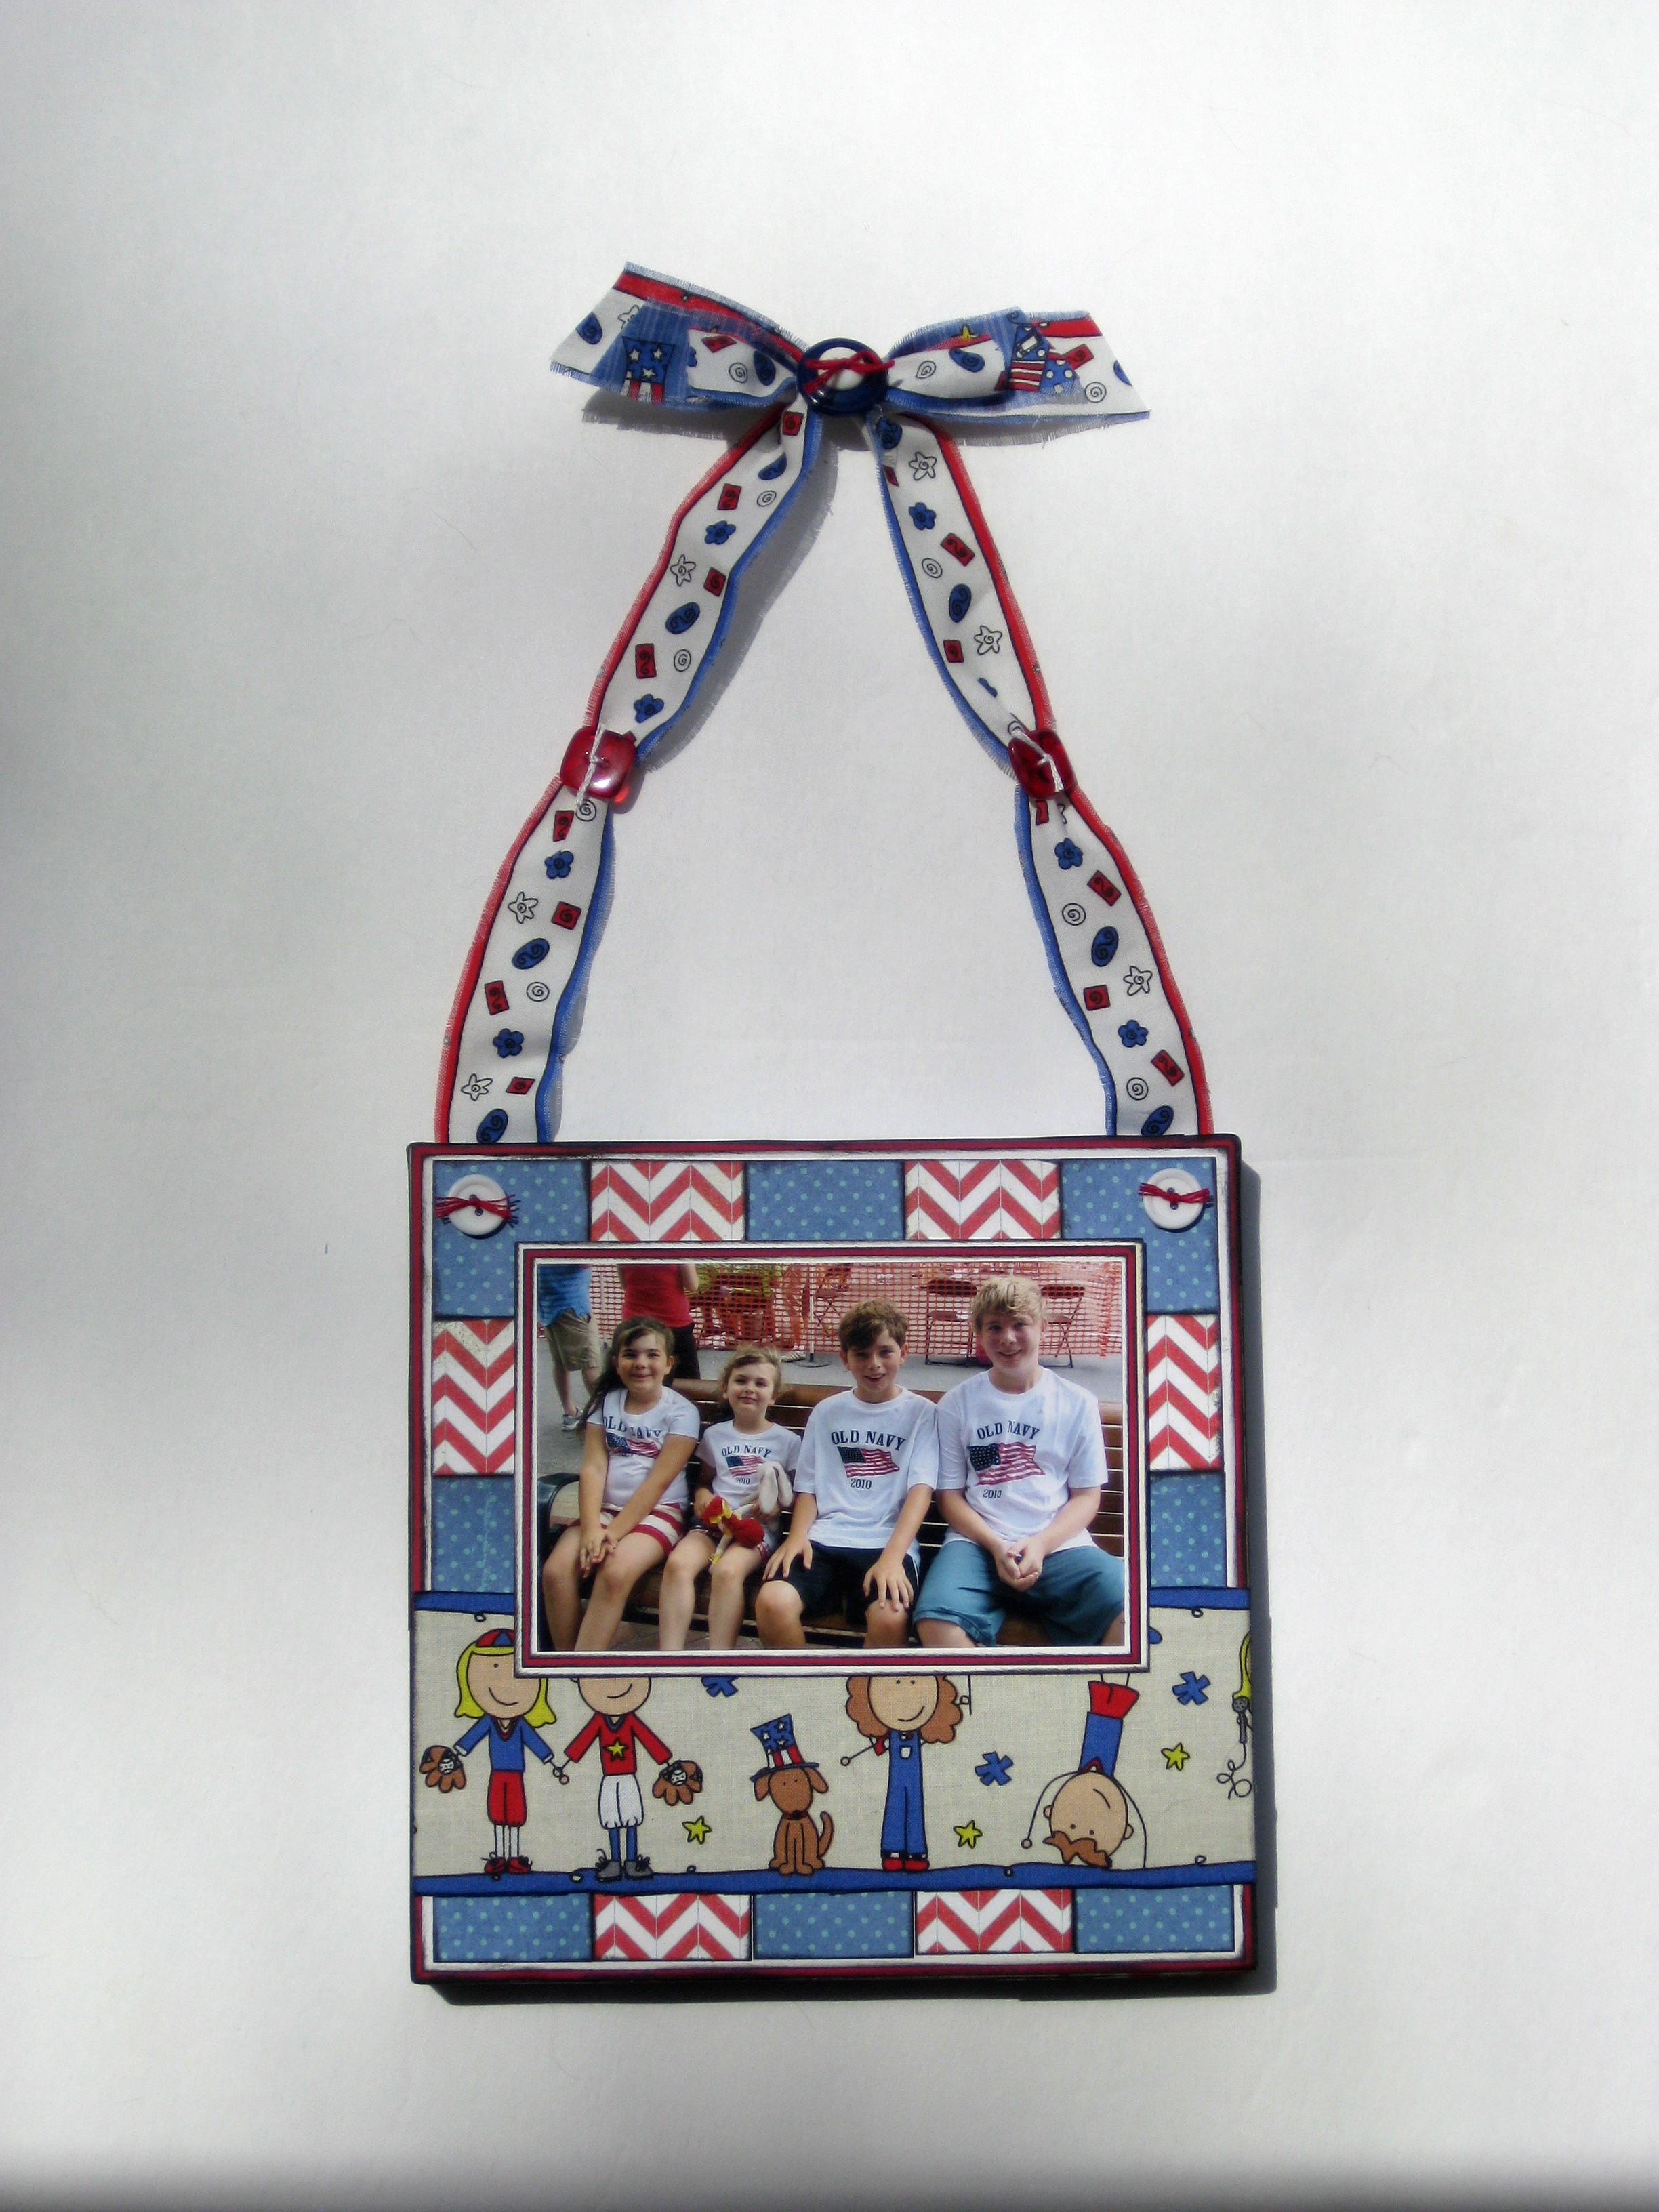
An altered canvas makes a great gift or display for your own home. Thank you so much for stopping by and I hope your 4th of July celebration is full of red, white and blue craftiness. A celebration to remember!
Having a BBQ on the 4th of July is as American as apple pie. But who wants to get their cute summer clothes stained with BBQ sauce? Here’s how to make a BBQ apron. It’s perfect for either a guy or gal, depending on who is the BBQ master in your house.

Supplies:
Directions:
1. Cut a piece of fabric into a 6 1/2″ x 5 1/2″ rectangle. This will be the body of your flag.

2. Place the fabric on your apron. Pin it and sew it down. I left my edges raw for more of a folk art look. Laura Kelly’s 4th of July Fabric already has stripes. You can slice up the stripes and sew them down individually or just sew down the entire rectangle and then go back and quilt along the stripes.
3. Cut a 3″ x 2 3/4 inch rectangle from the felt. Pin in place in the top left corner of your flag and stitch down.
4. Arrange white buttons in the felt rectangle to represent stars and sew them on.

5. Add red & white buttons by the top ties of the apron.
Wishing all my fellow Americans a Happy Fourth of July!
![]()
It’s Red, White & Blue season, the perfect colors for this Snap Happy Card. Will you be taking lots of pictures on the 4th?
Every week we share fresh card making ideas using buttons. This week we’re using my absolute favorite Heart Novelty Buttons. I made a card with a gift card inside that’s good for some prints at one of our local stores. What family doesn’t print a ton of pictures?
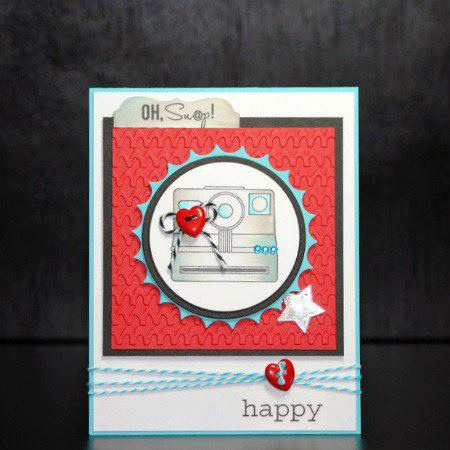
Buttons – two Heart Novelty Buttons – Buttons Galore and More
Stamps – Gina K Designs
Cardstock – DiscountCardstock.com
Embellishments – Turquoise Rhinestones – Want2Scrap; Twine – Doodlebug Design; Stickers – SRM
Tools: Dies (Inverted Scalloped Circles, Star, Circles – Spellbinders Paper Arts; Labels – My Favorite Things) ; Embossing – Sizzix
Adhesive: Hot Glue – Adtech; Dimensional Foam Tape – 3M; Scor-Tape – Scor-Pal
Other: Ink – Tsukineko; Markers – Copic; Flashing Tape – available at most Home Improvement Stores
Thanks for stopping by today. To see more of my art, please visit me at My Card Party. I’ll see you on Thursday with some new Button Jewelry.
Until then, keep creating!
If you visit my house during the month of July this seasonal door wreath will welcome you at my front door. I decided to go big and bright this year using festive patriotic ribbon, painted stars, and red, white & blue buttons from Buttons Galore. I love the nostalgic look of the dimensional stars and the traditional Americana design.

I’m a sucker for wreaths. It’s a rule in my house to have a seasonal wreath on my door at all times. Of course, if I made a new wreath for every season, I’d have a lot of them to store. My husband wouldn’t like this very much either. I have a little secret to share when it comes to my seasonal wreaths. I don’t make a new wreath – I just recycle this grapevine wreath into something new every season.
My secret is to use a heat gun to melt off the hot glued embellishments. It works great every time!

Paint Paper Mache Stars with Plaid Craft Paints
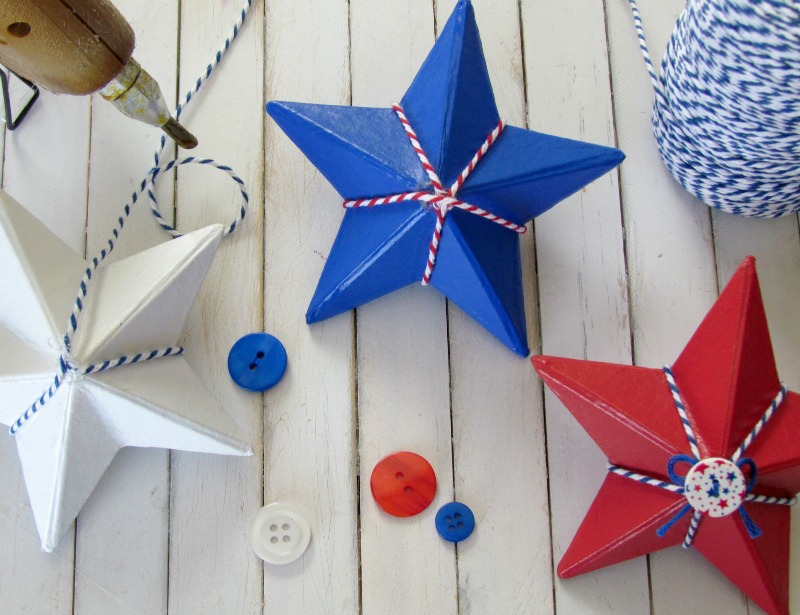
Add a dab of hot glue onto each side of star and wrap twine around
Add festive button from Buttons Galore to center.
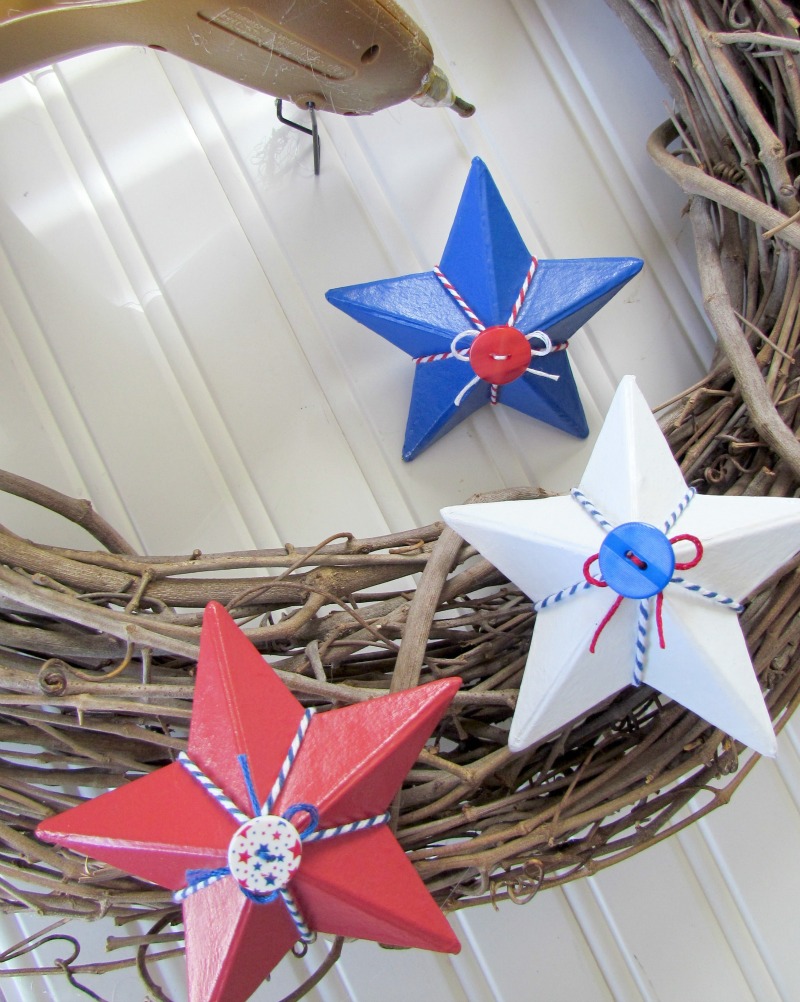
Hot glue painted stars onto a grapevine wreath

Add stacked buttons to the center of your patriotic bow.
I hope my idea of recycling the same wreath for the seasons inspires you to creative you own festive wreaths to welcome visitors at your door. Seasonal door wreaths are a nice festive touch.

Like Me on Facebook!
Are you looking for Americana decorations for the 4th of July for your home? This buttons and stars garland is the perfect solution. A great way to combine the red, white, and blue for a patriotic display that your family and guests will love.

1) Cut stars from your styrofoam sheet as shown above. You could also substitute wood stars if you can find them. I used a Styro Cutter to cut my foam.
2) Cut fabric into squares leaving at least a couple of inches around your star.
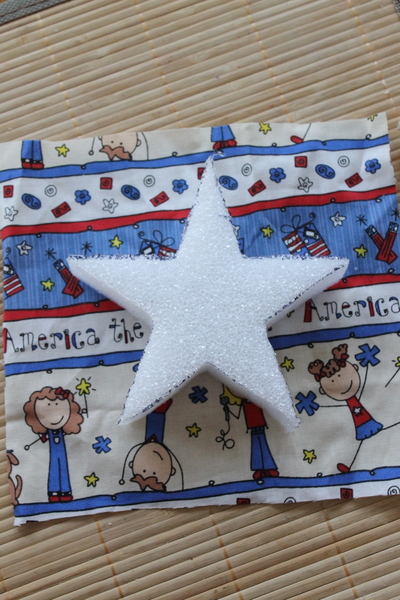
3) Cut into the square to the points on your star.

4) Use Mod Podge to adhere the fabric to the star as shown below. Trim away any excess fabric.

5) Cover the outer edge with ribbon and use Mod Podge once again to adhere it to your star.

6) Twist your red, white, and blue embroidery thread together to form one string. Add your stars and buttons to the string using hot glue. I assembled this garland right on my mantle.
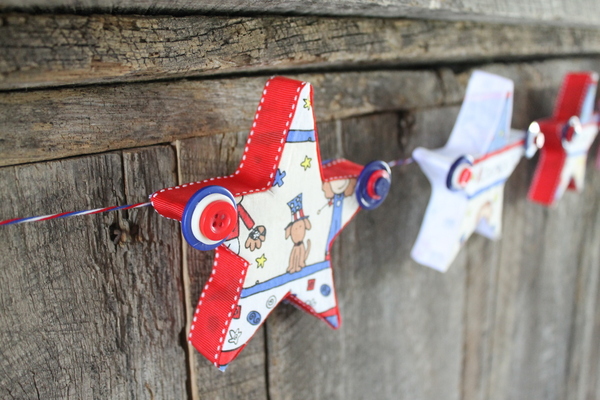
All that is left is to step back and enjoy your creation. A wonderful addition to your 4th of July decor. This buttons and stars garland will be the hit of your Americana decorations this year.

Hi, Allie here and I’m sharing my Patriotic Craft – a Country Chic Flag. We are your LAST stop on the I Love the USA Blog Hop today. Are you hopping with us for this amazing Patriotic Craft Party? You should arrive here via Jen Hadfield’s Tator Tots & Jello Blog.
*******If you’re just getting started – be sure to visit Laura Kelly at Laura Kelly Designs so you don’t miss a SINGLE project! (Also, this is where you enter for the great prizes)******
The designers have worked long and hard to bring you patriotic inspiration. We have gathered top name designers in their respective fields such as: sewing, scrapbooking, card making and many more. We hope you can share in their pride and enthusiasm for all that America stands for and the beautiful country that she is.


designed by Allie Gower for Buttons Galore
Materials needed:
I’ve used lots of Patriotic Buttons along with Laura Kelly’s Beautiful America Fabric. (click the links to purchase) We really appreciate you hopping with us today. Are you inspired to create something patriotic?
If so please share your projects with us on our Facebook page or on Pinterest or even Twitter using hashtags #ilovetheusabloghop #craftpatriotic #laurakellyart
Four more days left of the I LOVE THE USA BLOG HOP… so, keep hopping. Don’t forget to share your crafts too. We really do love seeing what you all create. Comments are always welcome. We all like a little love now and then, right? From all of us at Buttons Galore and More, we wish you a creative, happy and safe Flag Day and 4th of July too! Keep crafting!!!
To enter the I love the USA BLOG HOP, enter the -> a Rafflecopter giveaway
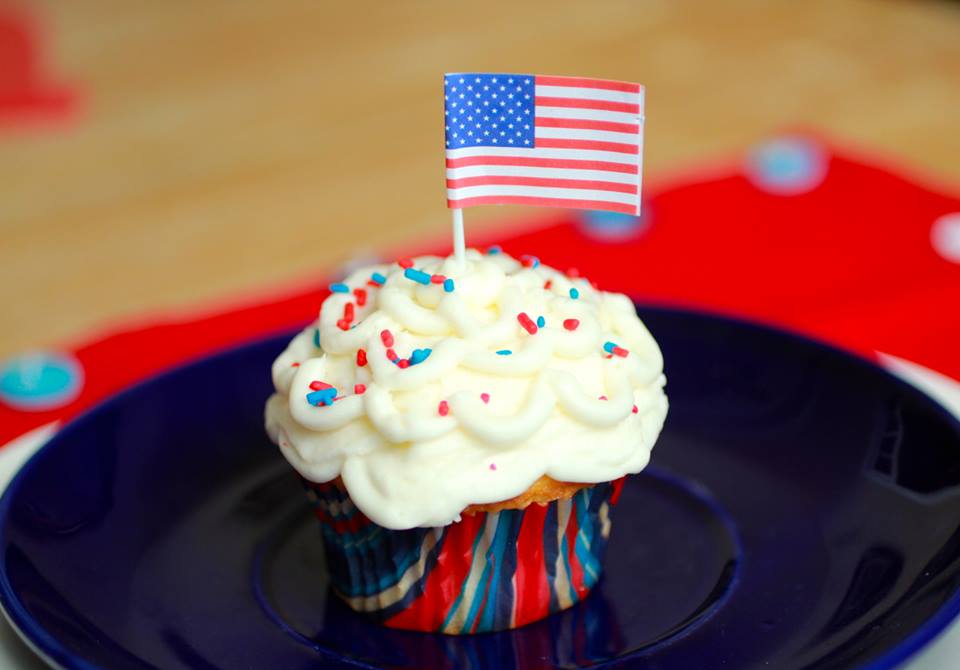
Cupcakes say PARTY! You’re invited to a Patriotic Craft Party!
28 Fabulous Artists – scrapbookers, cardmakers, seamstresses and more joining forces to take your patriotic crafts soaring to new heights. Join our Hostess Artist Laura Kelly Walters and Jen Goode and a parade of sponsors including Laura Kelly “America the Beautiful” General Fabric for Jo-Ann’s Craft Stores, Coats & Clark, Plaid, Fiskars, and Buttons Galore.
Check out this ALL STAR Line Up for the Blog Hop!
Join us! If you want to follow along with hashtags and share your projects with us on our Facebook, Pinterest or even Twitter use hashtags #ilovetheusabloghop #craftpatriotic #laurakellyart
Do you keep a calendar on the fridge? When my kids were little we would keep our calendar on the fridge and mark special days with a holiday magnet.
I used an Inky Antics stamp set to make my ears and face for this project, but you could EASILY cut some and draw your own face! This is a fun magnet that can be used on the fridge. You could easily swap the magnet for a pin back and have a holiday pin.
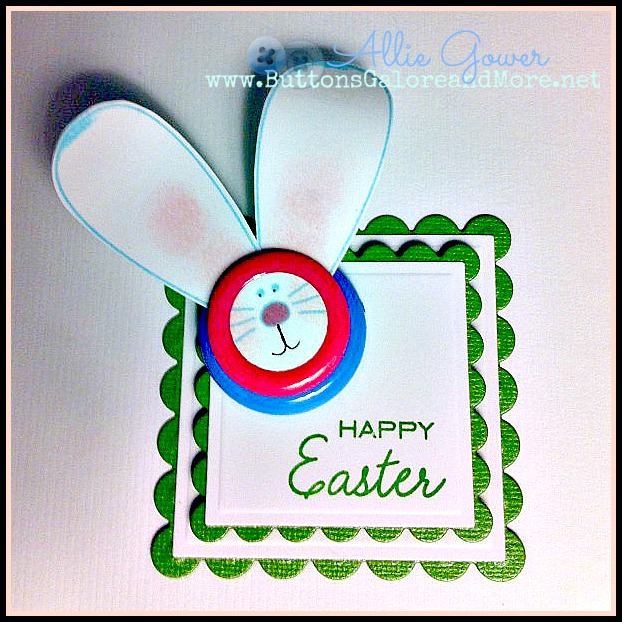
I slid a small disc of metal under the top square, so that the magnet could stay in place and be removed easily. This is also how I wear the magnet.
Use felt scraps and buttons to create cute little felt Easter eggs with a hidden surprise. Each little egg is actually a pouch. Each has a pocket in the back so you can put a little treat. You can make your eggs whatever size you like, I made these just big enough to hide a single little chocolate kiss. Add buttons to accent each egg, complimenting colors and adding a little bit of cute fun to each piece. If you want to make them larger to hold a gift card you can.
Fiesta buttons are perfect for this Easter project! It’s a nice mix of spring colors you can mix and match with purples, greens, blues and yellows too. You can find the full tutorial to this project on my site. Learn how to make your own Mini felt Easter egg pouches.
Hi everyone, here is a fun and easy to make card using Buttons Galore Rose Garden buttons. The card itself is 5 1/2 ” x 6″ and I was thinking of colors that blended well with my Buttons Galore and More Rose Garden buttons. As, I was shopping at Hobby Lobby two weeks ago, I went on a paper matching mission and the mission was to buy paper that would blend well with my gorgeous buttons from Buttons Galore and More. Well, I think I succeed, because the Authenique’s Collections matched up very well.
As, I created my card this past week, I wanted something that was going to say I love you whether it was Easter, Valentine’s or whatever holiday it was! I wanted colors that were springy. The paper collection I chose for this card is from Authenique Anthologie collection and it blended extremely well with my Rose Garden buttons.
Regardless of what holiday it maybe, a simple card could warm up anyone’s day.


I used several things to create this lovely card, and if you like to play with different materials this card will be a perfect card to create. I love distressing things, now I’m not saying that you have to distress everything you create, but I generally do. Whether you are using lace, ribbon, or bling no card can’t be complete unless you have your Buttons Galore & More buttons. The buttons are just so darn cute that you can’t help yourself!
Thank you for stopping by today, I hope you enjoyed this Rose Garden Buttons Love U Card that is perfect for any occasion.
Let’s Create an EASY Ombre Easter Card. Ombre is a Spanish word that simply means graduated colors. I really wanted to make a simple, sweet Easter card, and I did not want to use traditional colors. These blues are calm and happy to me. I like the tone on tone bunnies on the blue strips, and the bunnies and button eggs add a little bit of fun. I used a paint sample as my inspiration. This simple construction allows you to make a lot of cards, without a lot of work.
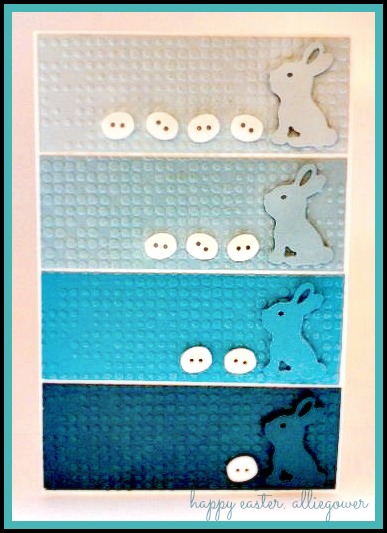
Buttons Galore Product used:
I also used:
I hope you enjoyed this Ombre Easter card. When I’m making a lot of cards, I love to do something simple, but different. You can get a lot of strips out of each piece of blue card stock, and cut all your bunnies out of the scraps. When my kids were little we used to have their friends over and make fun cards for friends and family.
Thanks for stopping by.
Allie
When I lived in Ohio, I remember all too well covering up my beautiful Easter outfit with a heavy winter coat. The way the weather has been going lately, I’m thinking this Easter might be the same so I created a piece of unique Easter Jewelry to pin to your coat.

If the weather clears up (let’s hope it does) you can pin it onto an Easter basket or tote bag, or you can even hang it on the wall.

1. Using the Quick Grip glue, attach buttons to the wood rectangle. I visually split the wood in half and filled the top in with the blue, Mint Cooler buttons and the bottom with the green, Candy Apple buttons to represent the sky and grass.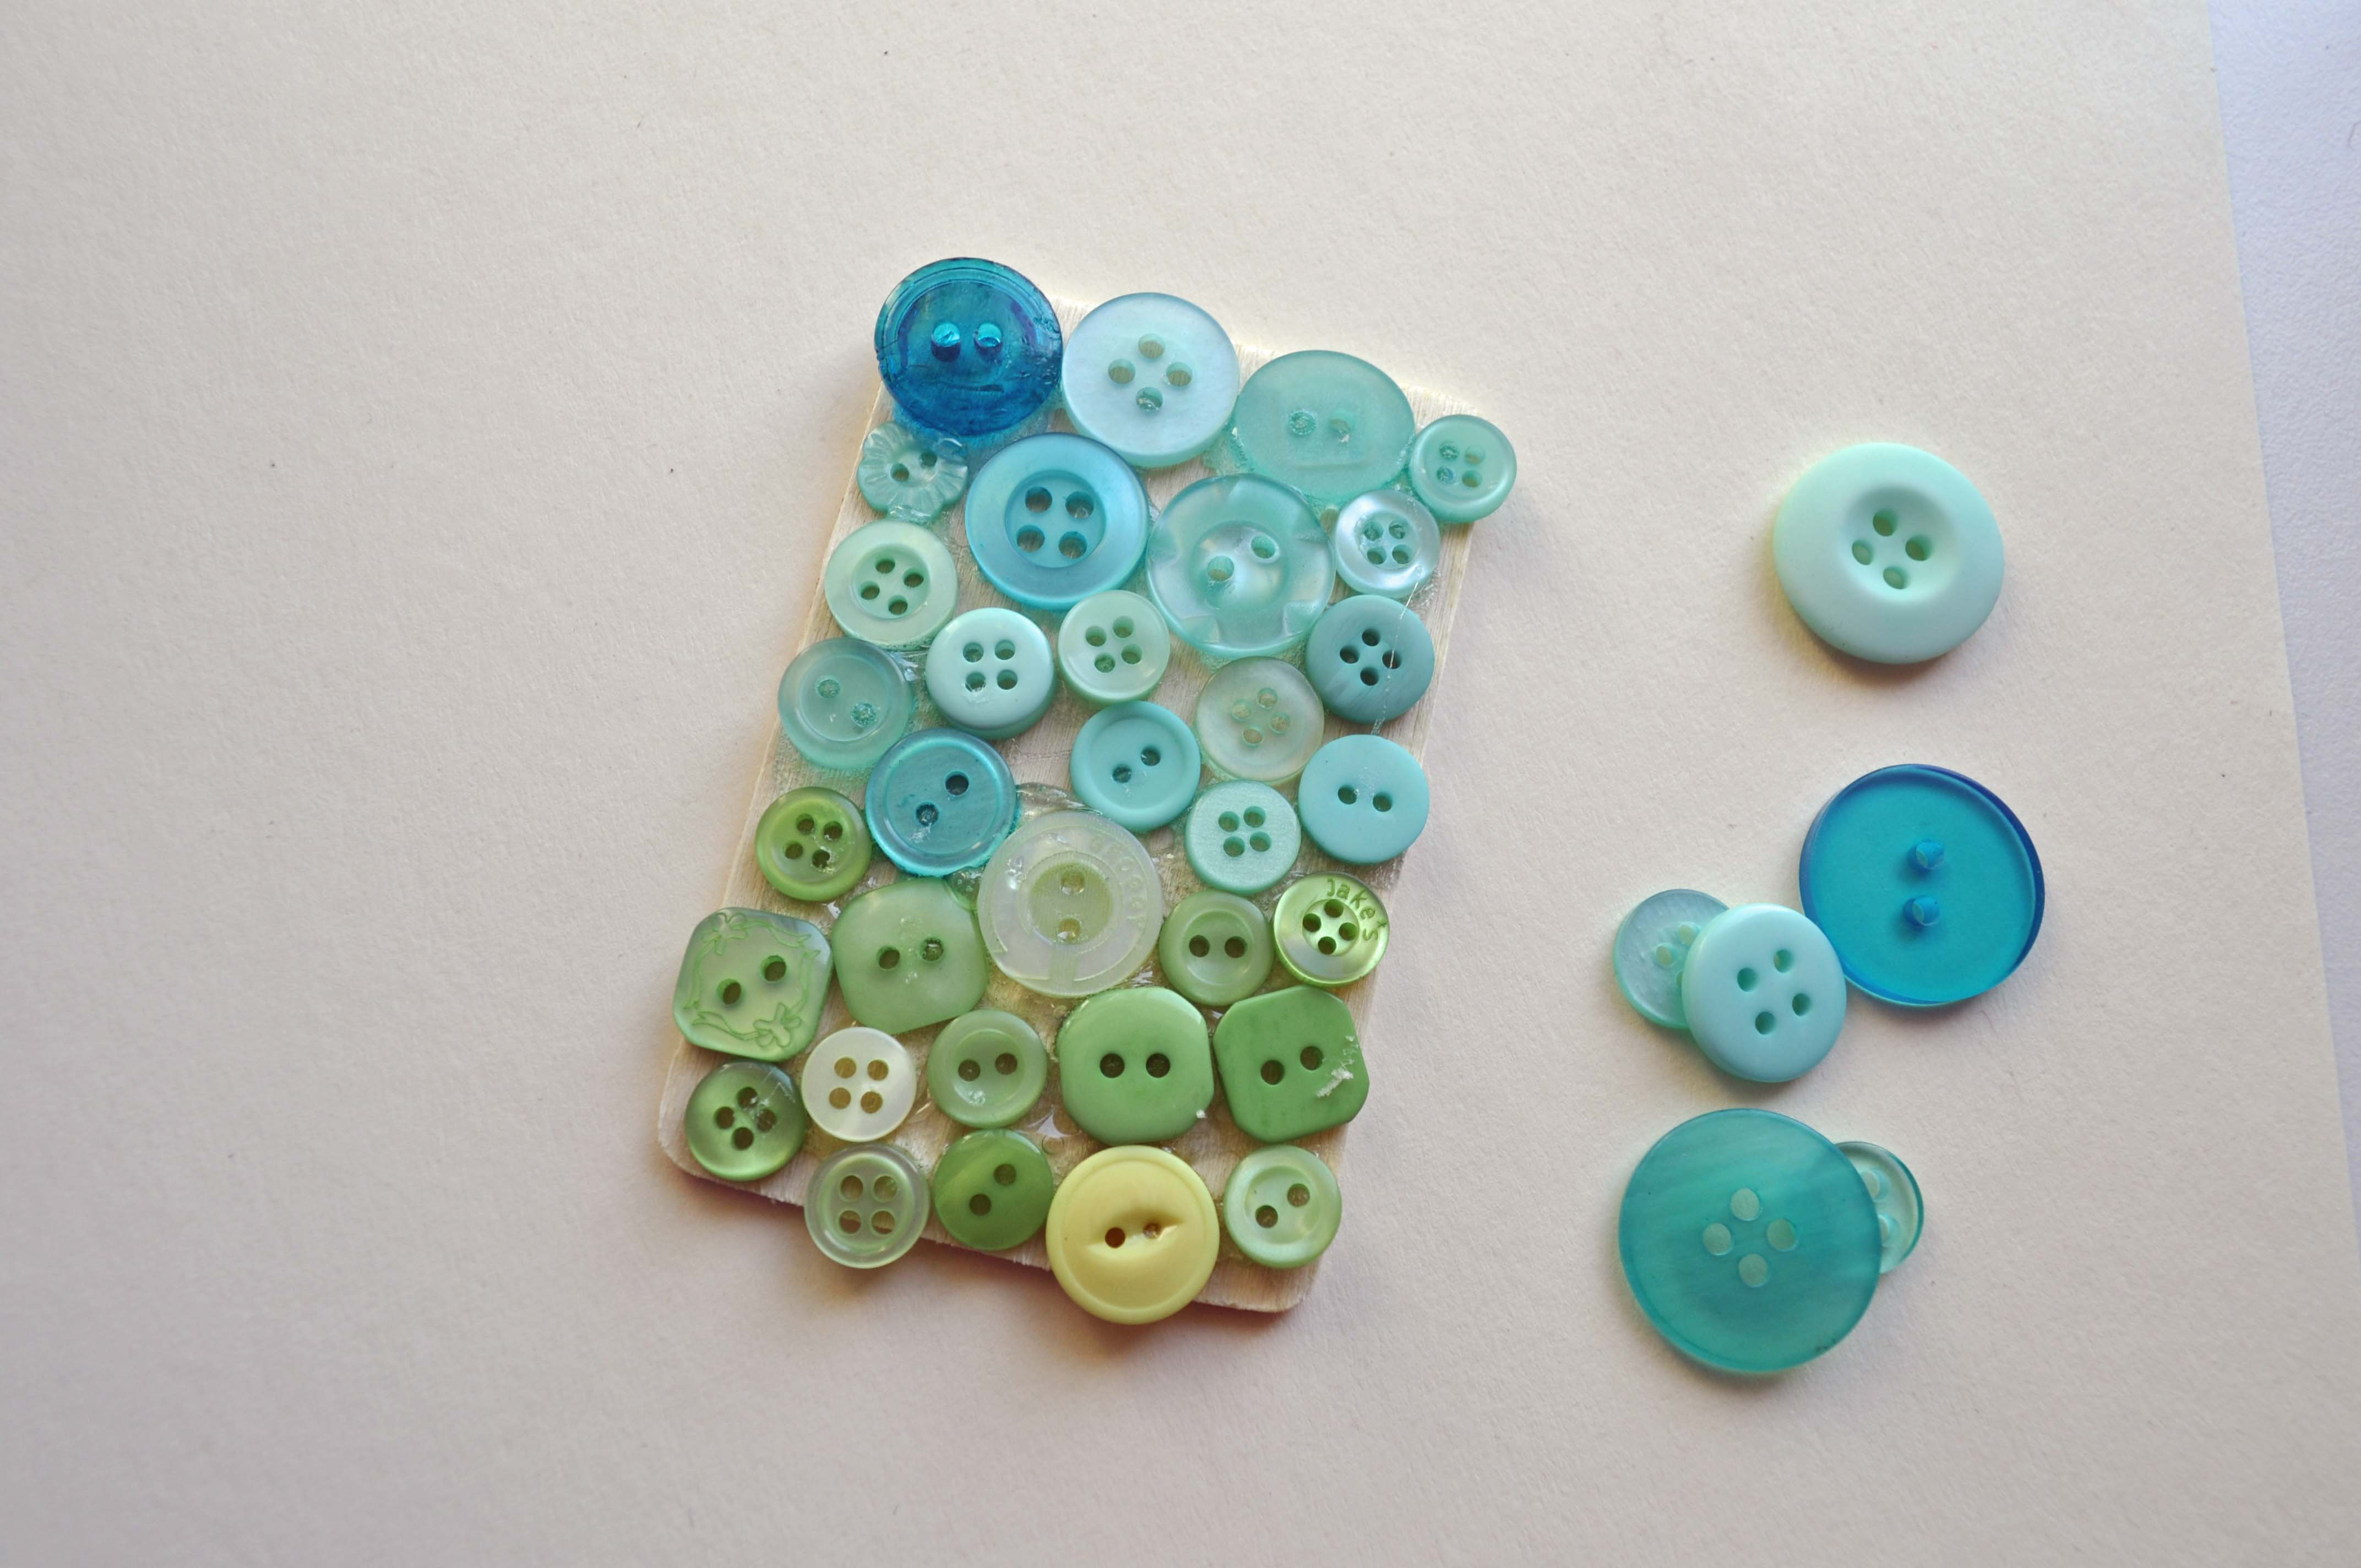
2. Glue the lamb onto the center of the piece, on top of the buttons.
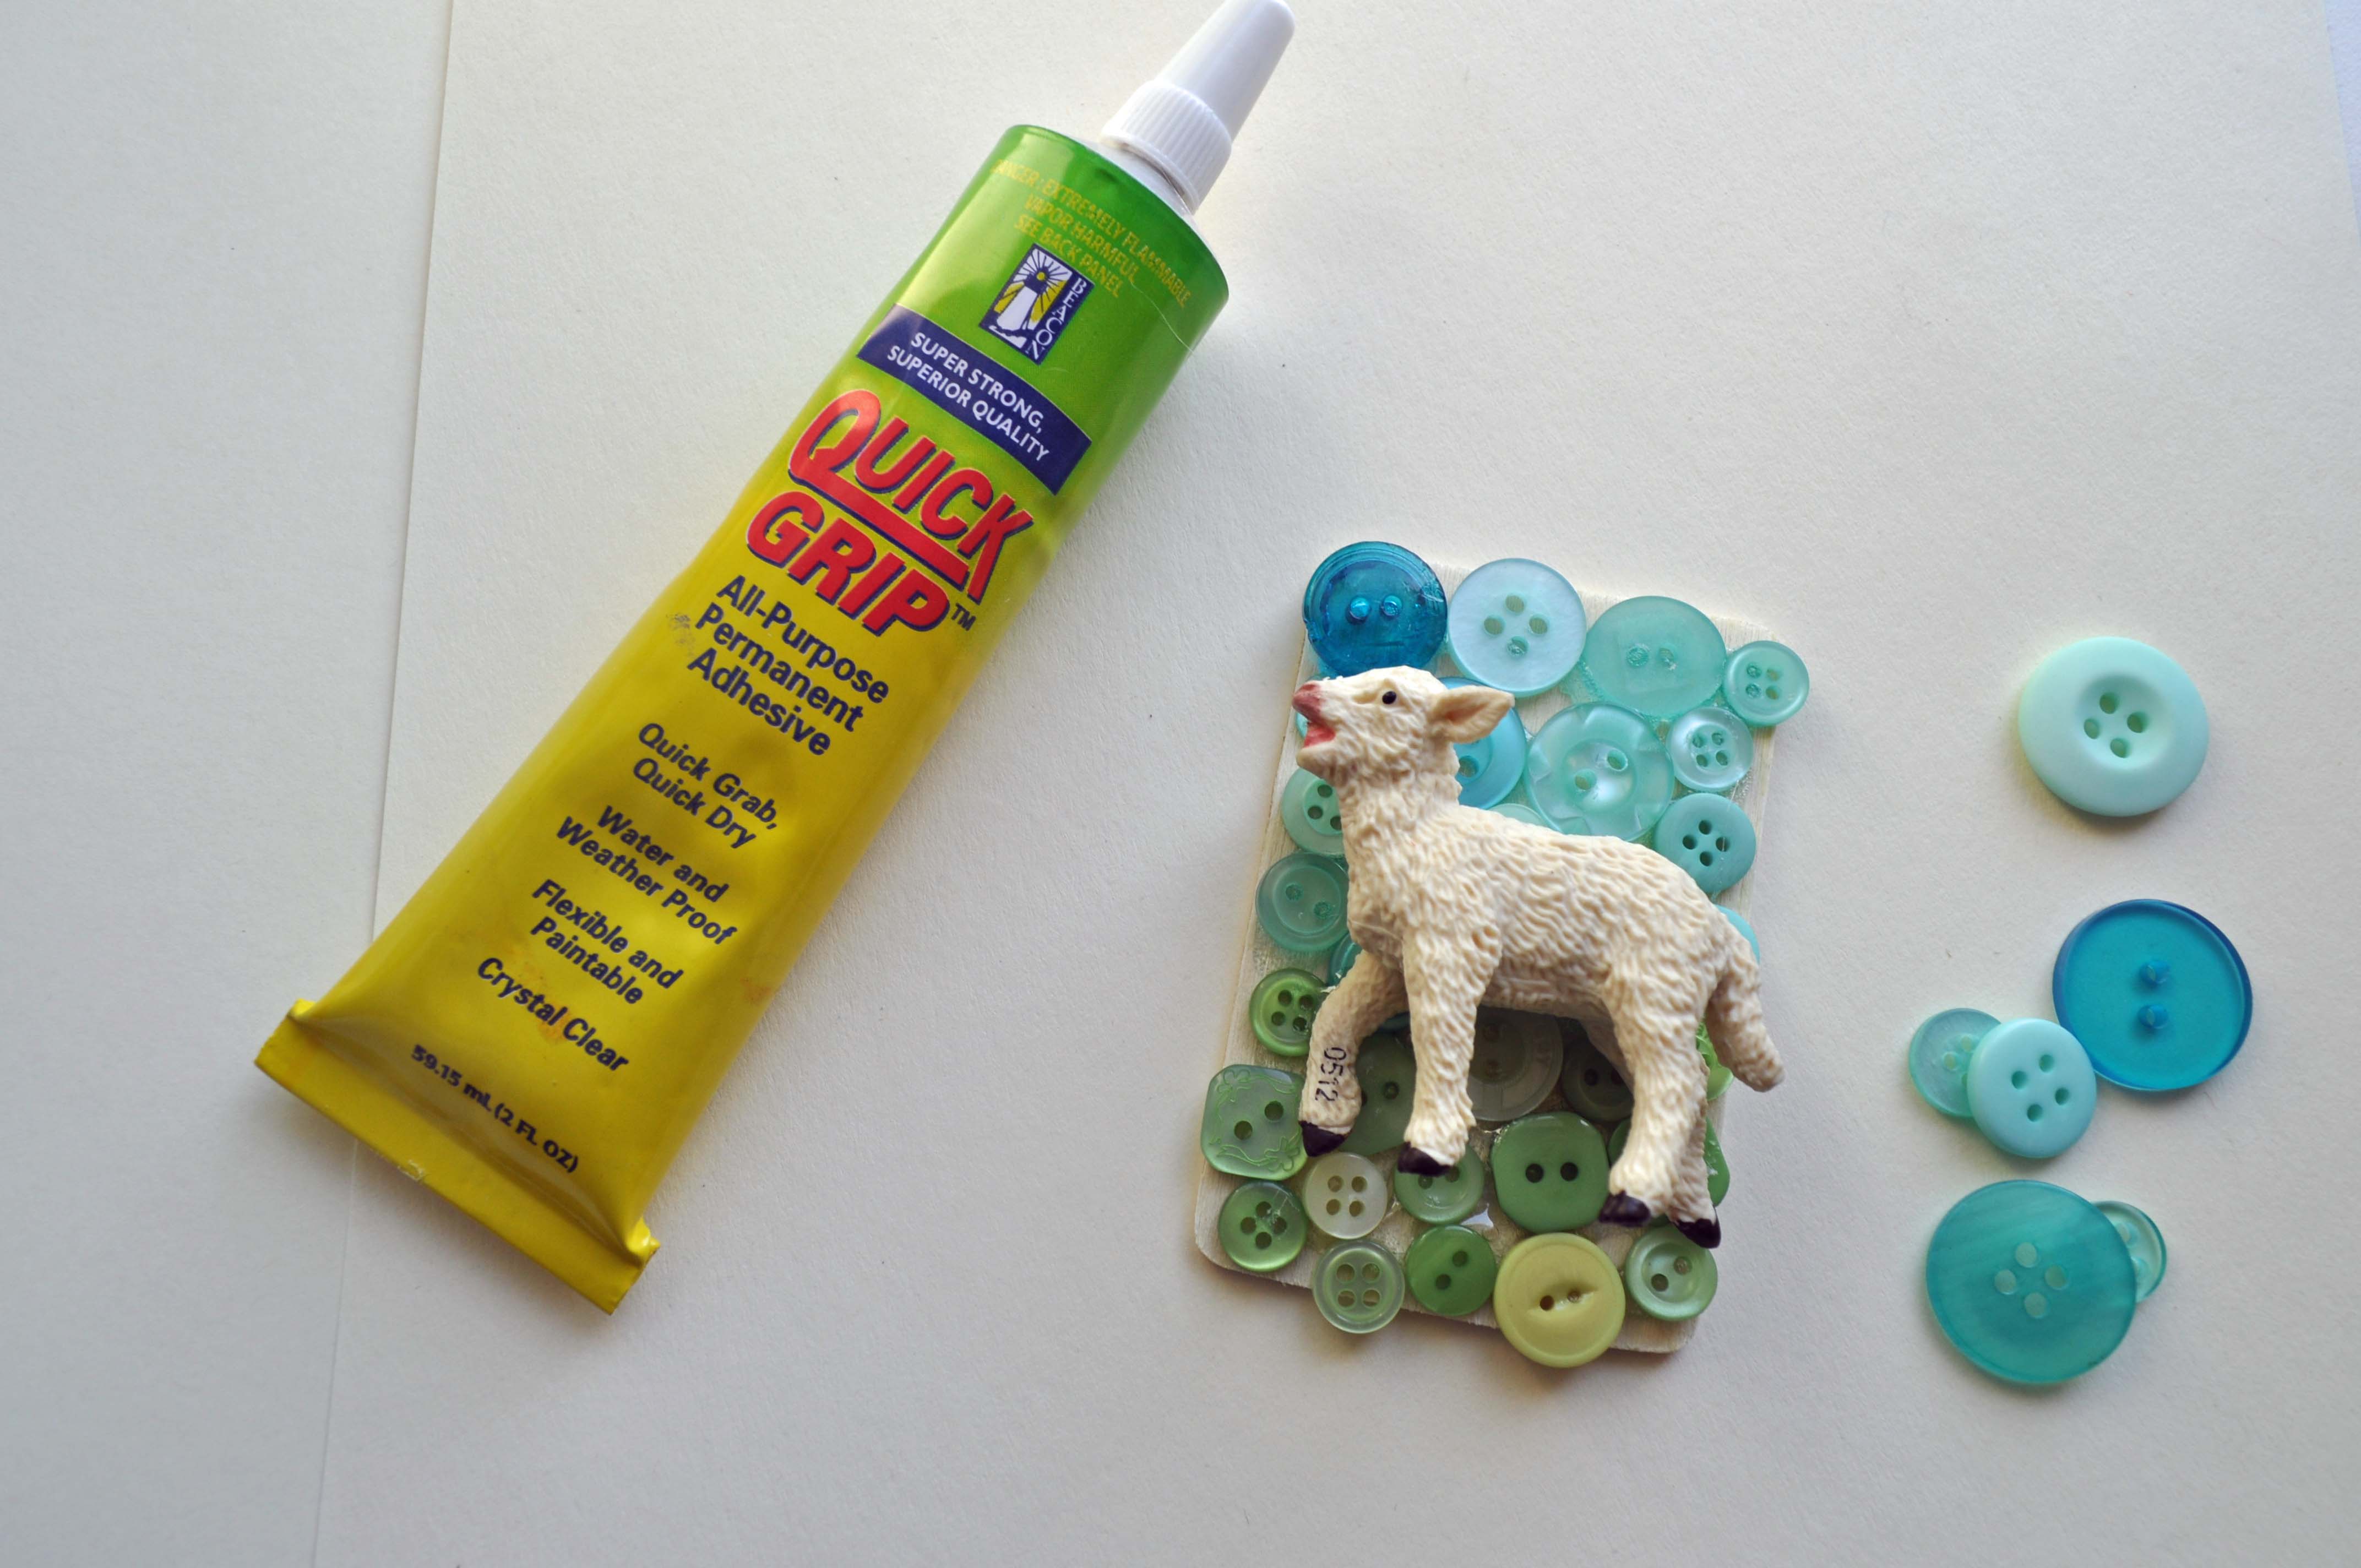
3. To add some dimension, glue more buttons on top of your original button layer. Don’t completely fill it in this time. You want to have different levels of buttons in the background.
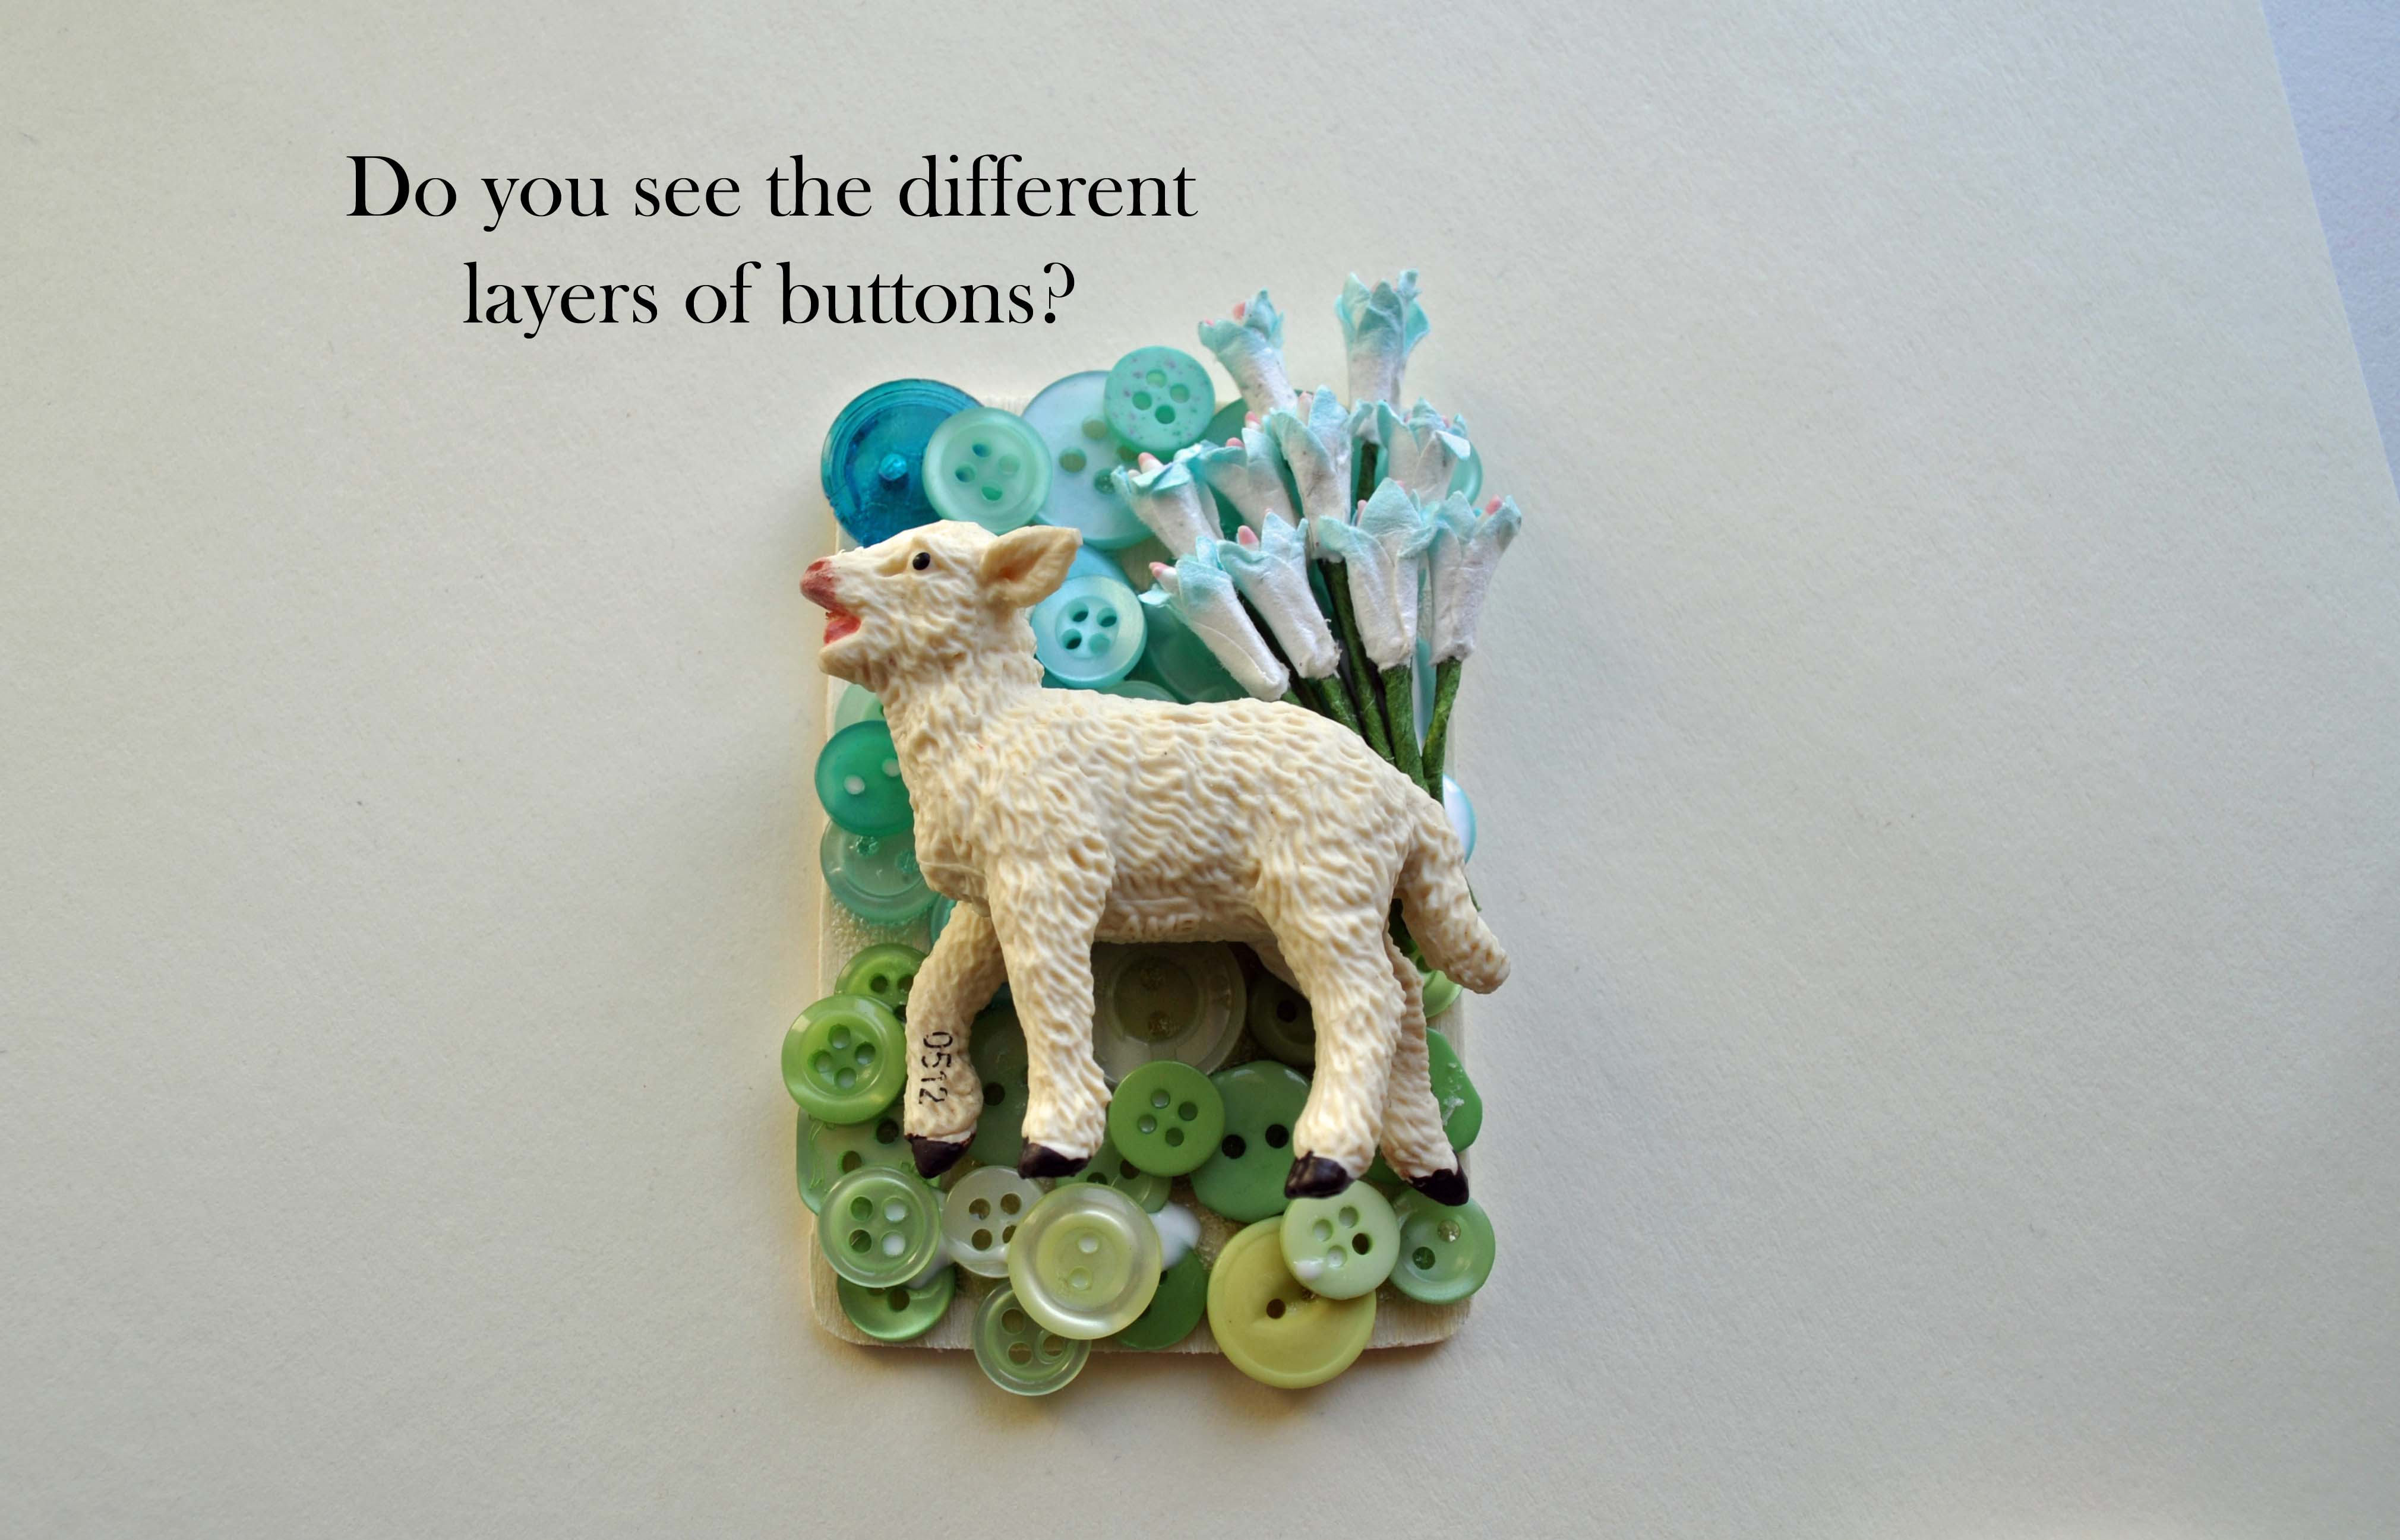
4. Glue the flower embellishments on to the piece.

5. Turn the piece over and glue the pin back on.
It’s actually a very easy project, that gives you really impressive results. I hope you’ll wear your pin proudly on Easter Sunday-no matter what the weather may bring!

![]()
Teacher Appreciation Gifts are pondered often in this house. You want something they can use and need. Being a former teacher I know it is not another apple themed gift. Well, this quick, bright and happy project really measures up! Just in time for Teacher Appreciation Week. With the loop on the end it is easy to hand and even easier to find. The bright buttons really make a difference.

You will need a wooden ruler (or a yardstick), Laura Kelly colored buttons, a 6 inch piece of ribbon and HOT GLUE (My fave is Ad tech)!
While your hot glue gun is warming up, lay out your buttons in the pattern that you want to use in the length of the ruler. You can stack them a bit if you like the depth.
One at a time, glue, the buttons to the ruler, straight down the middle so the numbers can still be read.
Once your button are securely adhered, create a loop with the ribbon and glue it to the back to create a way to hang it up. If you want to cover the ribbon with more buttons, go for it. I did. :)
You can also line the ruler with ribbon first and then add buttons. It makes cute Teacher Appreciation Gifts too.
Happy Celebrating Teacher Teacher Appreciation. Celebrate with gifts for Measuring for Accuracy and Simply Creating Bright & Fun Things!
Today I am going to show you some Easter table decor in the form of a handmade utensil pouch. Your Easter table will never look better once you make this table decor. These utensil pouches are perfect for your Easter celebration. Plus they are easy to make and will really impress your guests. Learn the basic technique of creating these then put your own spin on the front for a personalized table for any holiday.
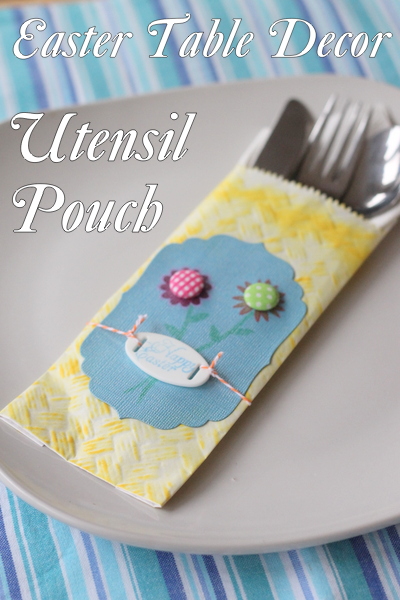
I used a cookie bag that I purchase in bulk for the base of my utensil pouch. You should be able to find something similar in a party supply store or online. I ran it through with the Spellbinders embossing folder and was happy to see that the embossing looked wonderful! I wanted a punch of color on the plain white bag however so I went over lightly with the chalk ink from Clearsnap in Yellow Citrus. Just allowing the embossing to really come to life.
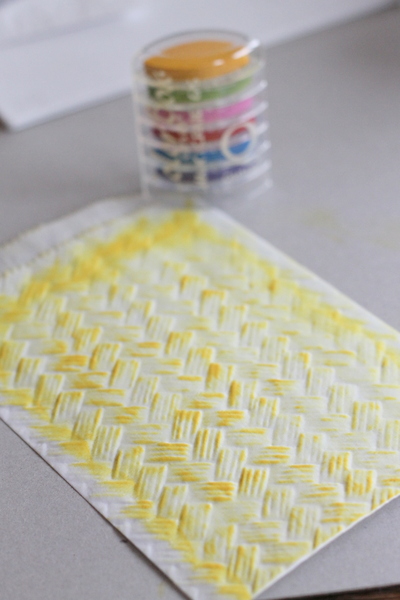
The cookie bags are actually a little wide to be used for a utensil pouch. I used the utensils as a guide and then folded over the excess on both sides. I used Mod Podge to adhere the excess on the back of the pouch.
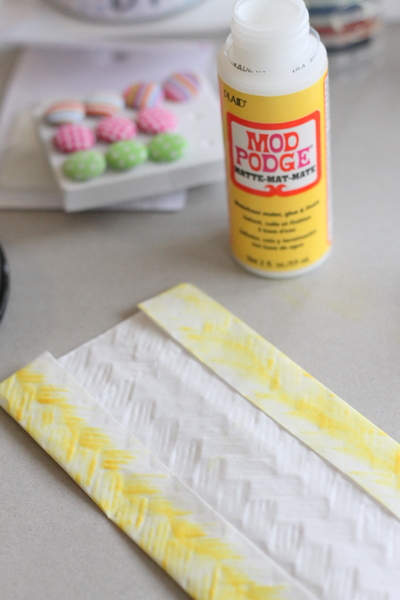
Now let’s work on the decoration for the front. I cut a shape from card stock using the Spellbinders dies. I then used some flower stamps to add two flowers. I used fine line craft markers to color in the stamps then added the button brads to the center of both flowers.
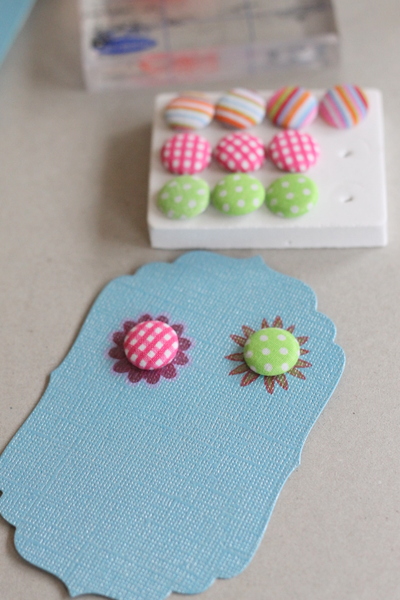
I then drew stems and leaves on my flowers using the same set of fine line craft markers. I stamped “Happy Easter” onto a small oval slider using the Colorbox Ink.
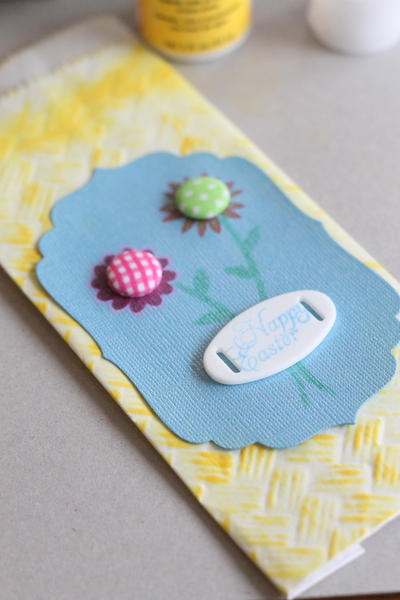
The cardstock shape was applied to the bag using Mod Podge. I then used hot glue to attach the slider to the front. I tied baker’s twine to one side of the slider, ran it around the back, and tied the other end to the opposite side of the slider. Make the twine taught but don’t cinch your pouch.
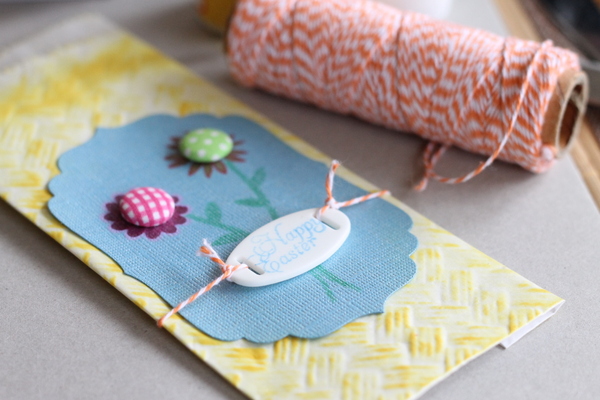
Add a napkin and your utensils for a festive addition to your Easter table. I think the basket weave emboss is perfect for spring but you could incorporate other emboss folders you have to put your own unique spin on this idea.
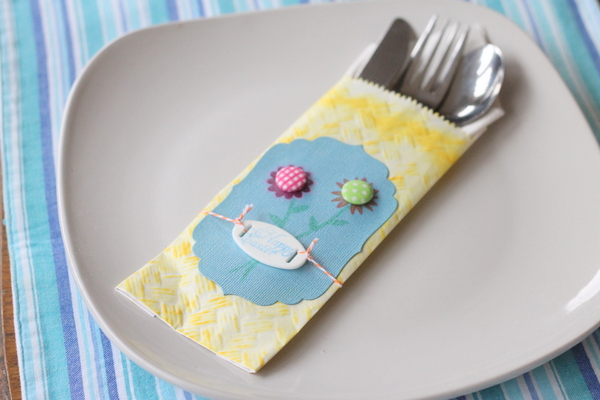
Make your Easter table decor extra special with the addition of personalized utensil pouches. A perfect way to set your table in style.
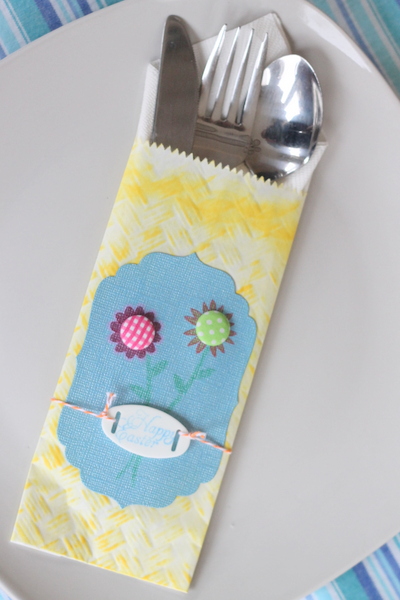
As an Irish lass, I just HAVE to share another St. Patrick’s Day Card.
Sometimes I like to make easy cards. Other times, I like to pull out lots of toys and tools, and for this card, I got out sandpaper, my scor-board and all kinds of goodies.
Let’s get started!
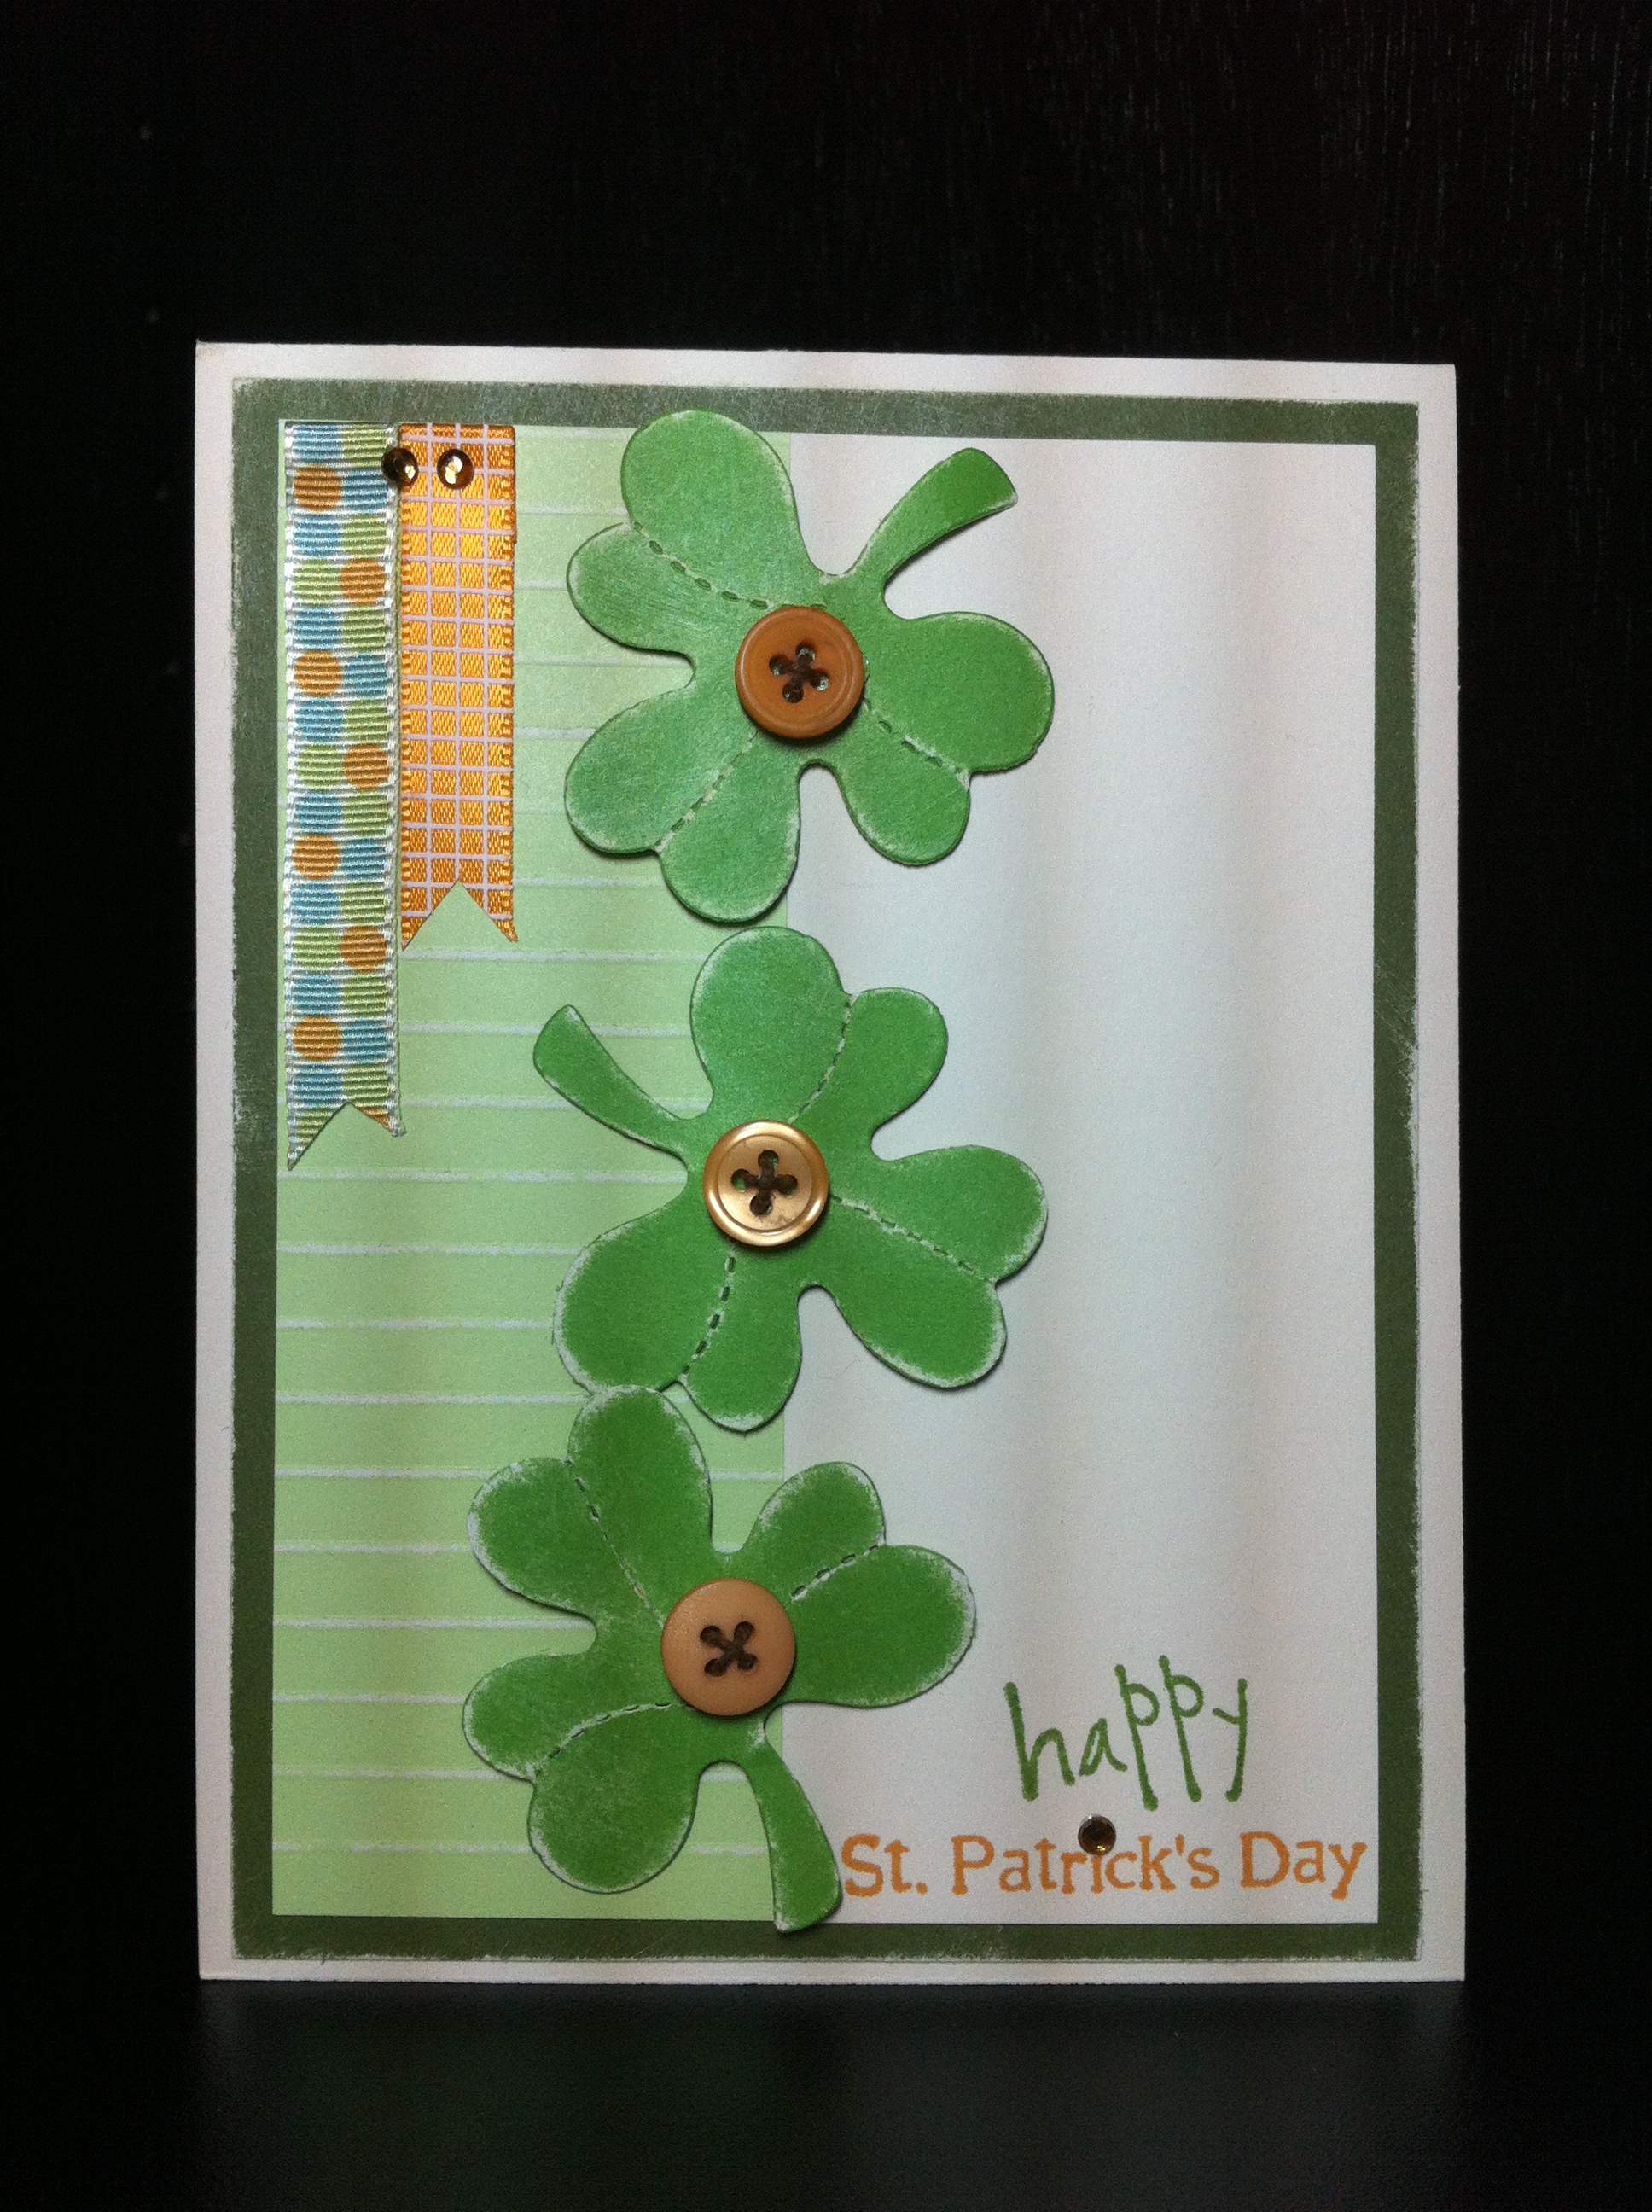
We had a lot of fun using tools, but it wasn’t hard… Was it? Grammar Note – the plural of clover really is clovers, I researched it. It sounds wrong, doesn’t it?
Thanks for stopping by today. I hope your St. Patrick’s Day is filled with luck to last you through the year.
I’m always on the look-out for unique Easter basket ideas. I have found that the easiest way to put together an Easter basket is to start with a theme and a basket with a button theme is sure make a sewer, or even a paper crafter, hop up and down for joy. It’s also a great way to use up all those plastic eggs you’ve been saving!

1. Glue buttons onto basket. Add a fabric yo-yo, bird and other embellishments. Fill the basket with grass
2. Glue ribbon bows and buttons onto plastic eggs.

3. Fill eggs with buttons. I coordinated the color of the eggs with the buttons inside. Tuck the eggs into the basket.

![]()
Mini Easter Egg Art is fun to make. Combine paint and buttons to create a pretty vintage look when decorating this Easter. Create your own mini Easter egg art in just a few steps. You can make a whole pile of these cute little art canvases and use them to accent your Easter decor throughout the house, just change the design and alternate the colors and you’ve got a new art piece.
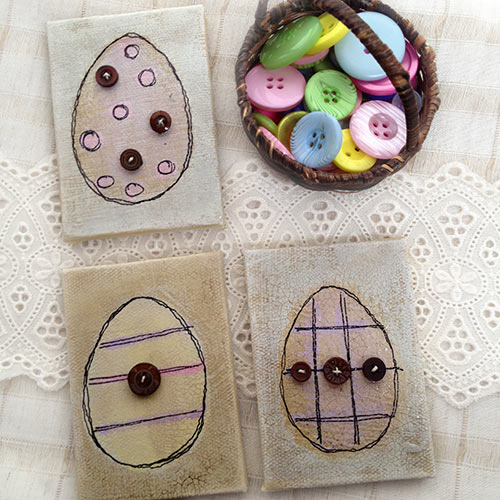
Easter Egg canvas art by Jen Goode
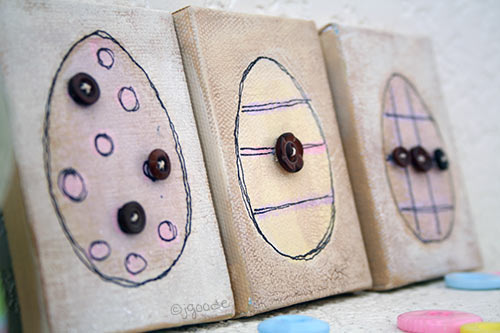
Easter Egg canvas art with buttons
Allow materials to dry between applications.
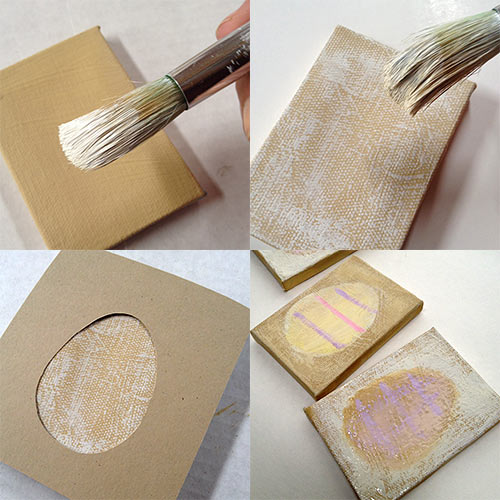
paint canvases
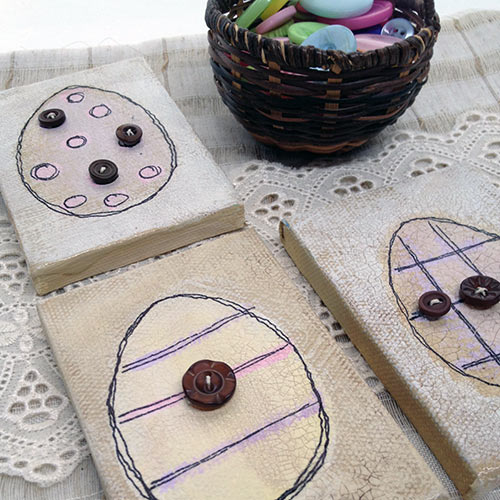
close up of Easter Egg art

Easter egg button art by Jen Goode
Tip: Use colorful Spring buttons in mini Easter baskets to accent your Easter decor instead of jelly beans. Just make sure not to leave the buttons where young children can reach them. Have a Happy Easter!
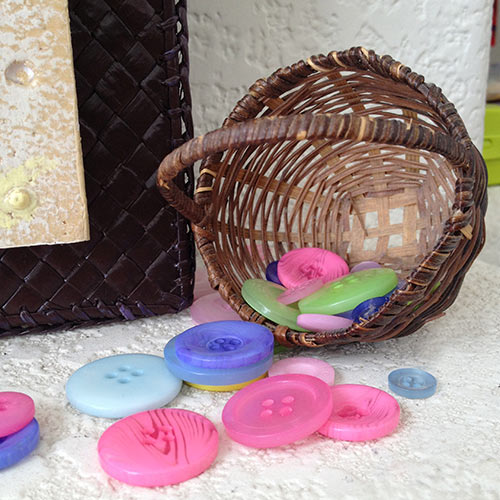
Basket with spring buttons

Embellished hand towels are one of my favorite home decor crafts. I think little holiday touches, throughout the house, make everyone smile and turns an ordinary day into something special. Today, I have a DIY project for an embellished Hand Towel. It’s simply a matter of embellishing a store-bought hand towel with ribbons and buttons. You’ll be amazed by how easy the project is and how cute your guest bathroom will look when you hang this cute, embellished hand towel in it!

2. Fold the towel in half in order to establish the center mark of the towel. Place a button on top of the ribbon at the center mark and stitch in place.

3. Sew buttons on either side of the center button.
It’s best to gently hand wash the towel once it has been decorated. Alternately, go ahead and drive your family crazy by telling them the towel is only for decoration and not to be used.
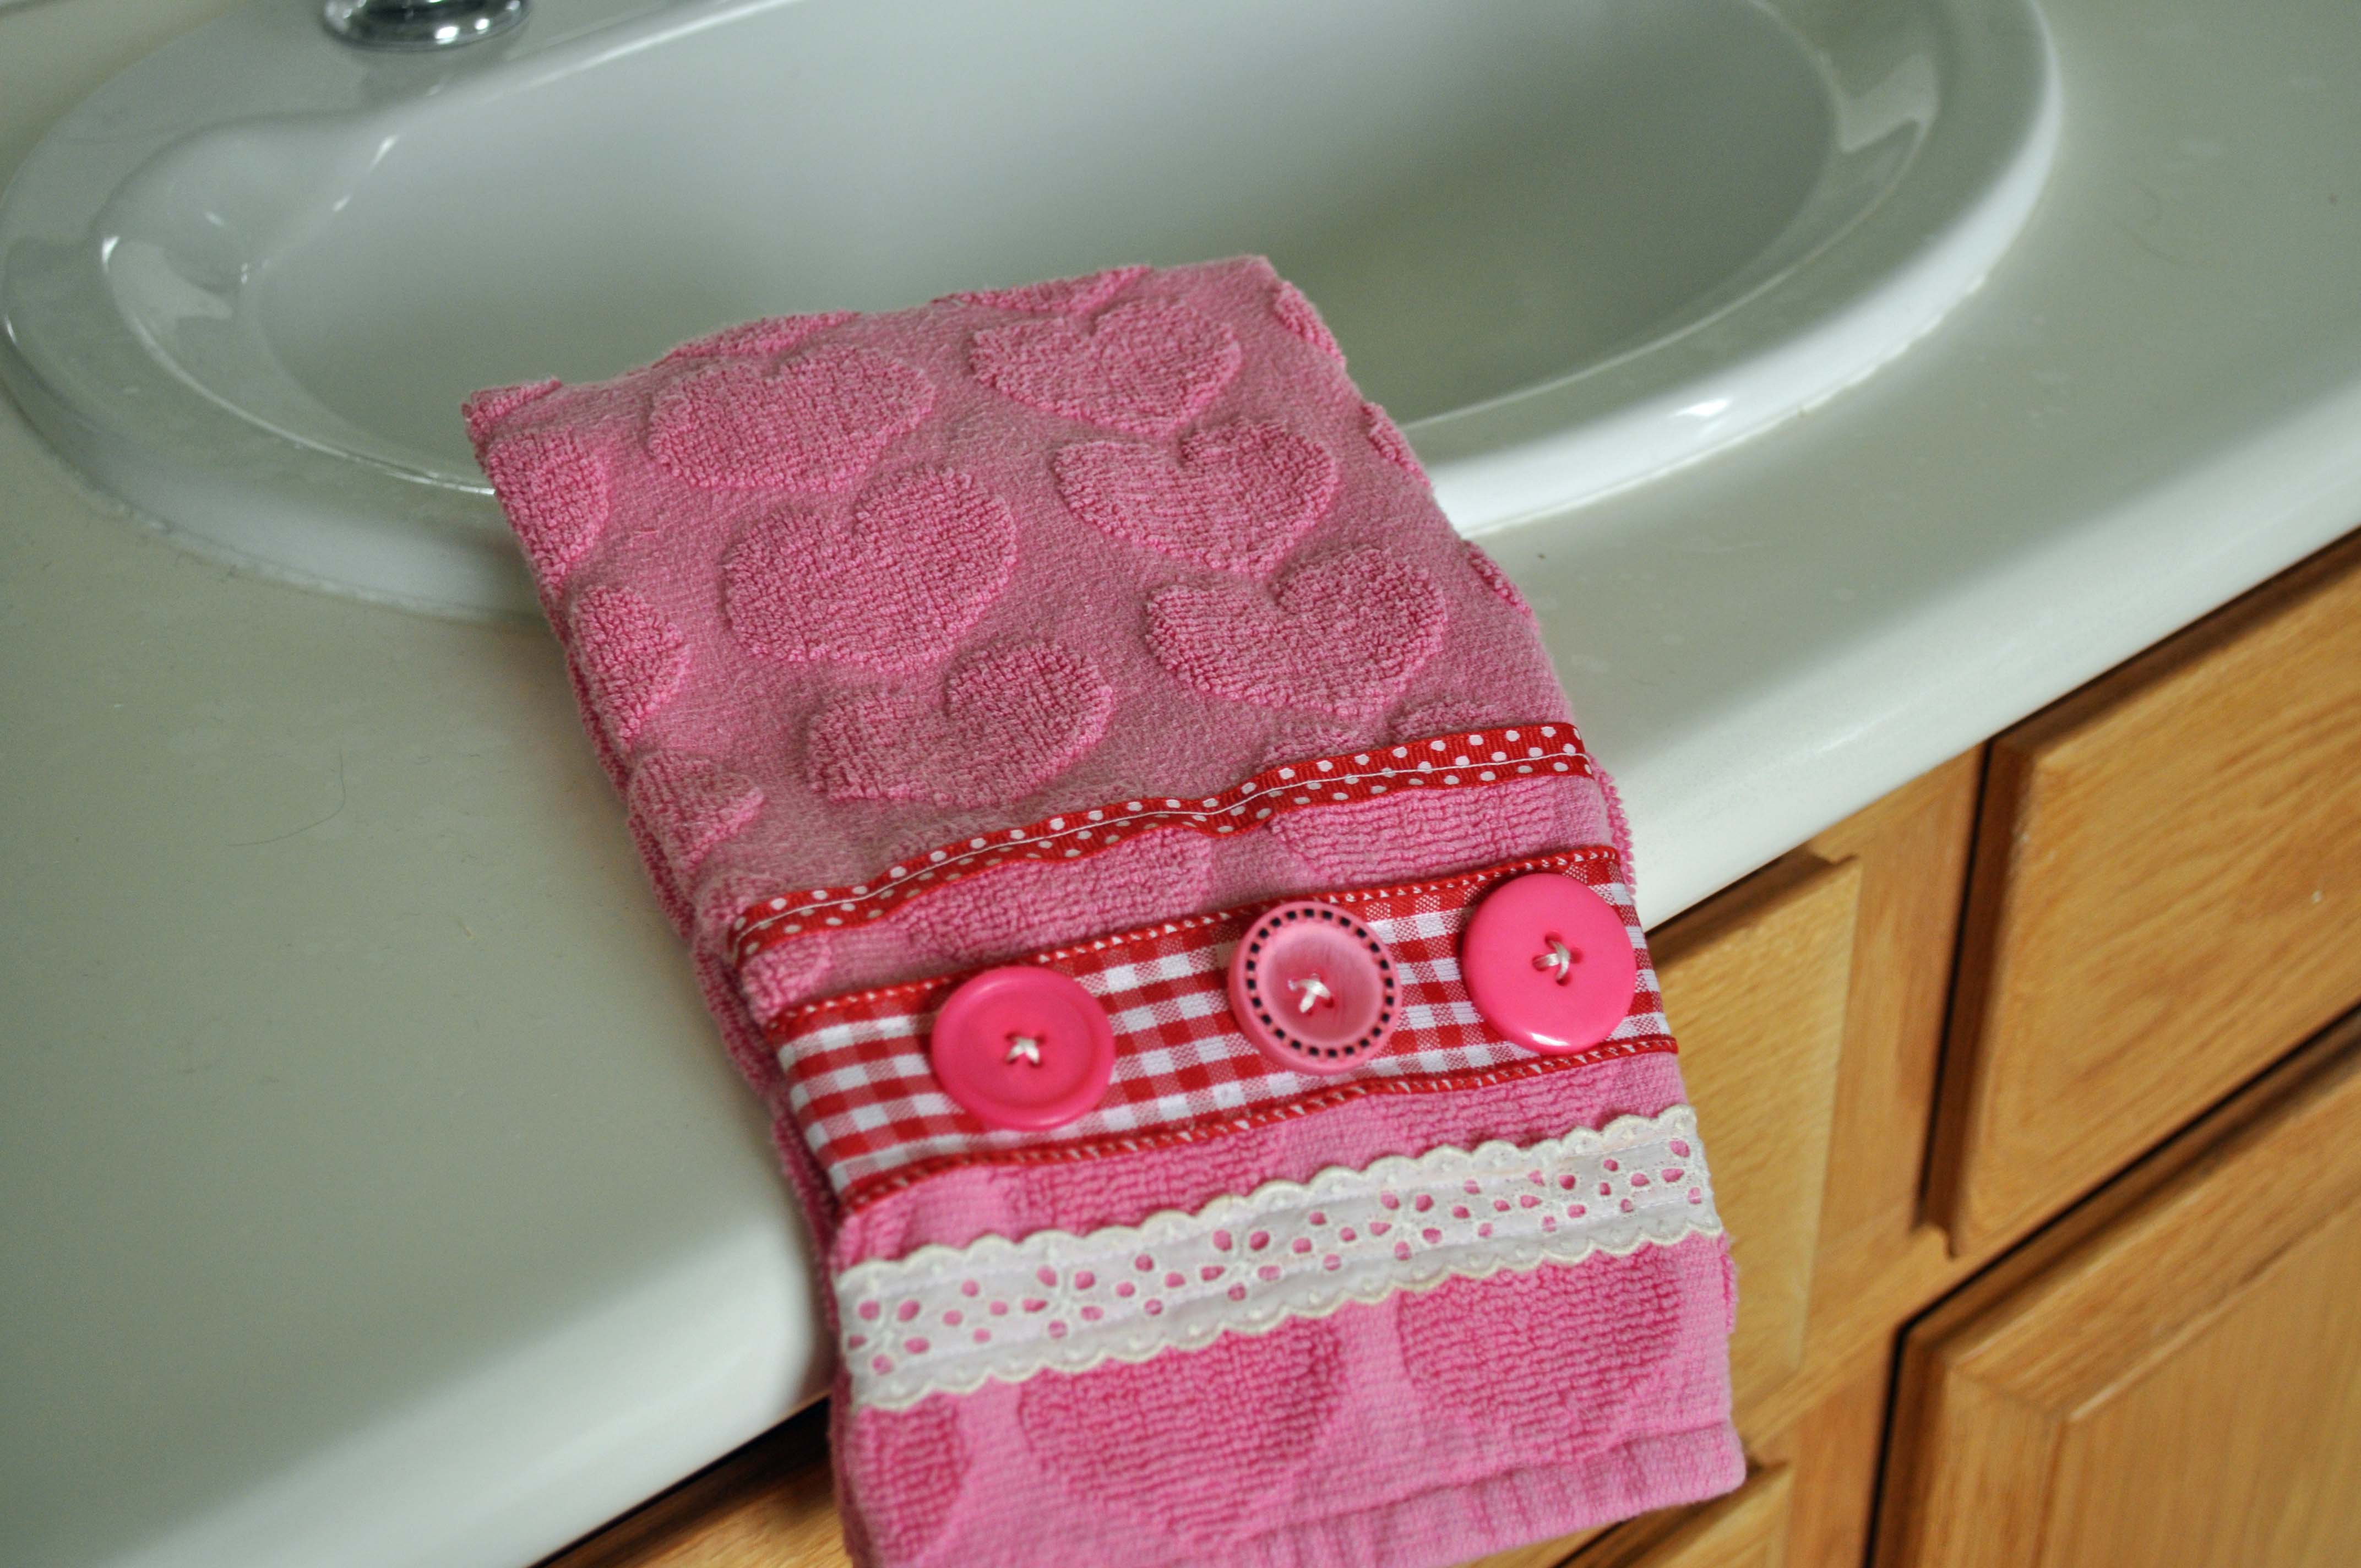
![]()
Window Cards are cool. Have you ever wanted to make a window card? Have you ever had to make a BUNCH and wanted them all to be the same?
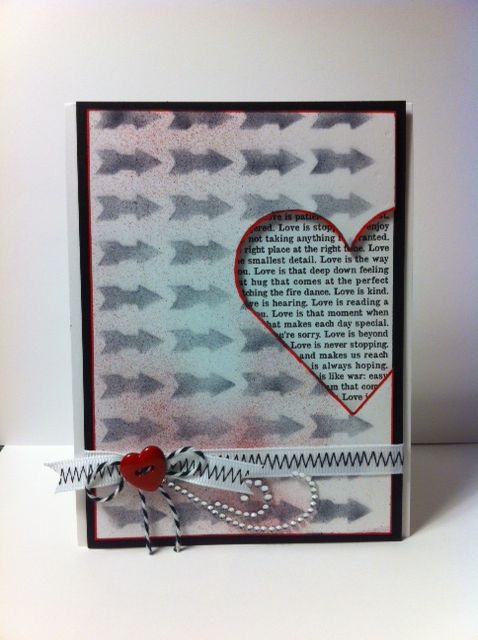
I have a Grand Calibur from Spellbinders, but this should work in any machine. You need repositionable tape – I use Tissue Tape – as you can see! You will also need two post it notes.
Start by making an outline of your card, so that you know where to place each card front.
You also want to tape down the die. You will cut through the tape – no worries, just put tape all over it and really rub it down. Then, you are ready to die cut your panels. Use some post it notes to hold it in place. These will really stick after running through your machine, but won’t leave any residue.
Rinse. Lather. Repeat. Just kidding. Keep going, just line up your panel and secure with post – its. Before you know it, you’ll have a nice neat stack of card fronts.
My card fronts were created with an arrow stencil. This is a new stencil that Donna Salazar designed for Want2Scrap. It worked great. I used my trust post its to hold it in place, and airbrushed some black ink. Afterwards, I sprayed on a little red ink, and outlined the card.
I finished the card off with ribbon, a Red Heart Button and some twine, and a rhinestone flourish.
Behind the opening is some cardstock. I raised up the card front with some dimensional adhesive. The card front is matted on black, and then adhered to the card base.
If you have to make several cards, or even just one – this easy technique will help you get it right – the first time, and every time.
Buttons Galore Supplies Used to Make the Window Card:

Would you like me to send this card to you? I will be sending it to one lucky winner.
Simply leave a comment and Pin this card!
Thanks for joining me, I’ll be back next Sunday with a fun Card Making Tutorial for you featuring, of course, fabulous BUTTONS!
Do you like puns? There is nothing cuter than OWL LOVE. I think this card would work well for Valentine’s Day, or any day with the simple HELLO!
This card is not difficult, but it’s got a little cutting and some die cutting and punching.
I started with Spellbinders Labels 20 and cut two green shapes and embossed them. I though these worked well for bushy foliage. I also die cut a branch from the Spellbinders BUGS set, and I also embossed it and added some ink for added contrast.
I stamped the Owl with some Crystal Blue ink from Close To My Heart – the owl is a Stamp of the Week from Unity Stamp Company. I have a love for owls, and some of my close friends call me Owlie – it’s even the name of my character on the Wii. It’s okay to laugh! I fussy cut the owl – not as hard as SOME shapes. I doodled around his feet and gave him some eyelashes with a Copic multiliner. I stencilled on his nose – I stamped a second owl and cut out the nose. I colored and outlined. An owl can be blue and sit in a tree, but a blue nose – never! I added some metal brads for his eyes.
I punched a heart using a Fiskars punch. The paper is from Canvas Corp and has all kinds of love words on it. I added a Red Heart Button. I tied a little bow with some Doodlebug Design Twine. At the bottom, I stamped “hello” from the same stamp set. I colored in the heart with a Copic Marker and added some Turquoise Rhinestones from Want2Scrap.
I did a little rounding at the bottom of the card and on the sentiment.
That’s it!
I hope you will love this card.

Buttons Galore Supplies used to make the OWL LOVE YOU Card:
Additional supplies used to make the OWL LOVE YOU Card:
Do you want this OWL to love you forever?
I will send him to a lucky winner.
Leave a comment and PIN him. I know, you were going to do that anyway. Good luck and I’ll see you all next week.
Are you giving a Gift Card to your Valentine this year? Gift cards are great, but they rarely come in a cute package. Am I right?
This is easy peasy. You will be ready to present those gift cards in style, for every occasion.
Ready? Here we go!
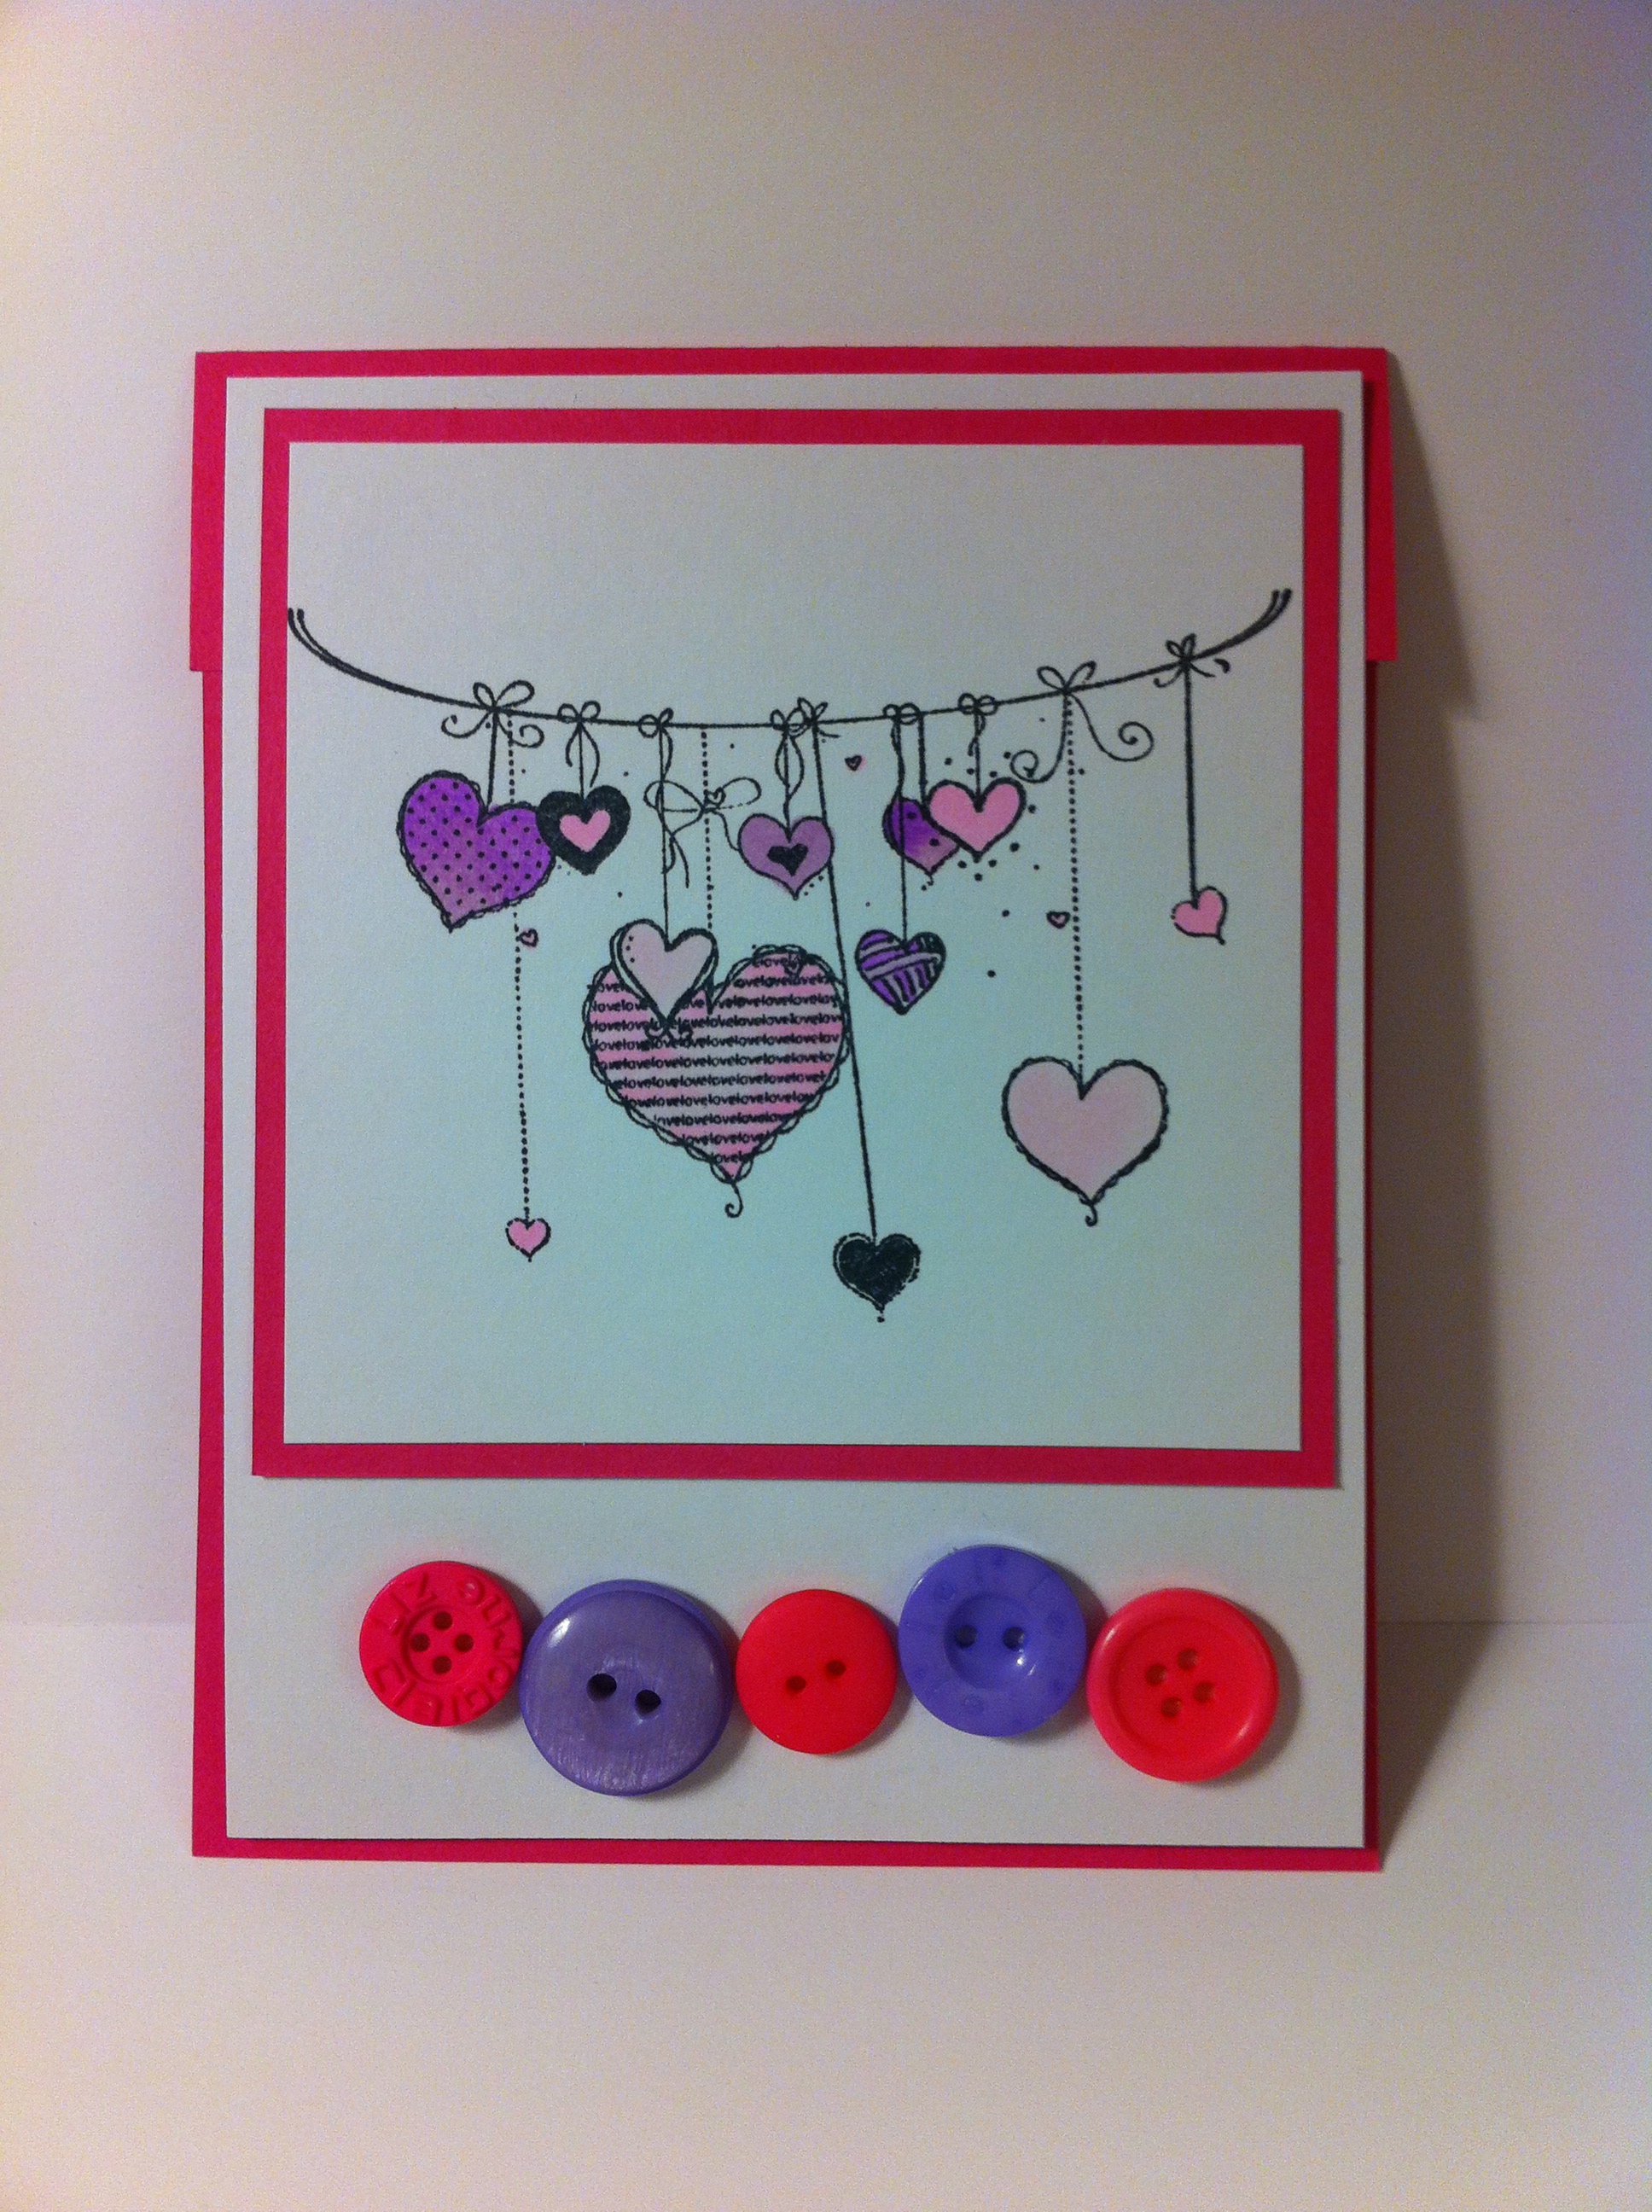
I’ve mad a standard card. A2 – 4.25 x 5.5 – inside though, I added a flap. Above, I’ve stamped and cut and matted, and added a row of glorious Buttons in Laura Kelly Walters fabulously bright colors. Easy peasy, right?
I like to stamp a lot of images and keep them in a baggy so when I’m bored, yes, like that ever happens. What I mean is when I have time, I can sit down and color. Then, when I need a card, I already have images ready to go. This cute set of stringing hearts is from the Unity Stamp Company’s Kit of the Month. I stamped with Tuxedo Black Memento ink from Tsukineko/Imagine Crafts and colored with a few Copic Markers.
Shall we head inside?
Below, I added the flap. I stamped and fussy cut my hot cup of steamy cocoa and the sweet sentiment sentiment. Inside the flap, I stick on my cards with a Glue Dot. If you prefer, you can tape up the sides and make a pocket.

Buttons Galore and More Supplies Used to Make This Valentine Gift Card:
Additional Supplies Used to Make This Valentine Gift Card:
I hope you enjoyed this EASY PEASY Gift Card lesson.
This card could be for you! Leave a comment and Pin the card and a lucky winner will be chosen.
Join me again next week – hope you like OWLS!
Wire heart hangers can be made quickly and I am going to show you how. This week the quick-to-make and adorable craft is something you can use for Valentines Day next week or any other day that you want to spread some love.

Happy Creating and Lots of Love!
Have you ever wanted to hide a sweet surprise in a Valentine card?

This is a standard Easel Card Valentine with a sweet surprise.
If you’ve never created an Easel Card, here is a very easy tutorial. On my Valentine, I’ve made the size a little larger – the card is 6×6.
The sweet surprise is that in the bottom half of this Valentine, I’ve wrapped a Hershey Bar.
I added a panel of black cardstock, and scored it to make a little sleeve for the candy bar. I didn’t glue it, so the card doesn’t have to be destroyed to enjoy the candy. Apparently, no one wants to rip up the card to get to the goods! Nothing stops me from getting to chocolate.

Sometimes people ask about the buttons and other dimensional items, and if it makes the cards hard to mail, or expensive.
Once you get a certain size, you’re paying a premium anyway, so I just pop my cards in a bubble mailer or a small box, and grin and bear the cost of mailing. My only other option is to hand deliver, which I love to do! I don’t want to hold back on my creativity – so I say layer it on, and on, and on.
Buttons Galore and More Supplies Used to Create this Valentine:


Chocolate Covered Strawberries
Additional Supplies Used to Create this Valentine:
Paper – Authentique
Stamps – Gina K Designs
Ink – Close to My Heart
Dies – Spellbinders
Bling – Want2Scrap
Thanks for checking out my Valentine.
If you have any questions, just leave me a comment below.
I’d like to send this card to someone! Leave a comment here, and PIN the photo for a chance to win.

I hope you made it through the list of great projects. Valentine’s day craft ideas do not have to take a lot of time. It is the thought that counts. So go make someone a Valentine’s Day gift.
Sweet sweet Valentine hearts! Little buttons are so fun to work with. This project is so simple and so adorable that it is a Valentines Day must –do!
Using sharp fabric scissors, cut felt hearts measuring approximately 2 inches wide and 2 inches tall.

I like Kunon felt because it is thick and soft. Stack several buttons on each felt heart and sew through the holes from top to bottom and back up through to the top. Tie a knot on top of the button stack to secure the buttons. For a more colorful effect, use different colored floss from the top button in the stack.
These sassy little button/felt hearts make a great addition to any valentine treat. You can use them in many fun ways including a decoration on a treat box or bag. To adhere them to your surface of choice, choose the glue that works the best for that surface. I recommend Aleene’s Tacky Glue for most crafting projects that work with felt.

If you really love stitching, you can turn a piece of felt into an envelope with a few quick stitches up each side and add a felt heart button stack to close up a love letter with a special touch. I added ribbon to mine too! You can also add one to a little clothespin and attach to a Valentine’s Day Treat! This pretzel treat is super yummy. You can get the recipe on Laura’s Inklings.
Red, Pink and White Buttons (Laura Kelly’s Bright Colors), Red, Pink and White Embroidery Floss, Red and Pink Felt, Embroidery Needle and Scissors.
I really hope you enjoy making the sweet valentine heart as much as I did.
I’ve recently started making little fabric ornaments using just plain canvas or linen fabric and embellishing with different materials. It’s an inexpensive material that you can paint, glue and sew with and using colorful buttons you can great a whole variety of different looks. So today I’m going to show you how I made these pretty little pink fabric hearts embellished with fabulous pink buttons. Don’t fret if you don’t sew, just use a fabric glue instead! You can do it.

Fabric heart ornaments with buttons
Materials you need to make Fabric Hearts:

Materials for making button hearts

Stitch buttons into place

Add a hanging loop to the top of the heart
Optionally, if you choose to use fabric glue in lieu of sewing, glue the buttons on first and allow to dry. Then glue heart pieces together, leaving a space to stuff and then seal closed.
You can add extra embellishments, decorative stitching and other accents to create a look that’s all your own.

Pretty button heart ornament
You can make a whole pile of these fun fabric heart buttons. Make each one unique by choosing from a wide array of red and pink buttons in all kinds of shapes and sizes.
I’m back with a Sunday Cardmaking project. This week we’re making Snowman Treat Bags. I made a couple of quick, simple snowman thank you cards, and wanted something nice to put them in. Snowman Treat Bags are perfect!
Let me walk you through the process. It’s not hard at all!
Directions for making Snowman Treat Bags
I started with two 8.5 x 11″ sheets of cardstock from My Favorite Things and cut a piece 6 x 11″. I scored from left to right at 1″, 6″, and 7″ and folded them, and then adhered them together. For the bottom of the bag I used a piece of cardstock that was 3 x 6″ and I scored it to create three one inch folds. I attached that at the bottom. The handle at the top is 1 x 11″ and it’s held in place with two brads and some adhesive.
I stamped my image on cardstock and colored with Copics, and stamped again on patterned Authentique paper – cutting out the scarf and part of the hat. I used a Copic Marker to highlight some of the shadows. I cut a panel out of the same patterned Authentique paper sized 5.25″ square. I colored the edges of the bag and the mat with a Copic marker to match the patterned paper. The paper edges are inked in the same color using the broad tip. I embellished the stamped image with Polar White Flower Soft and some red pearls from Want2Scrap. I painted the snowman with Smooch. He doesn’t sparkle much in the photo, but after a few coats, he was twinkling in person.
I tied a bow around the bag to hold the cards in place and cinched the bow with some Doodlebug twine and a Wild White Button topped with a Brilliant Blue Button anchored by a snowflake brad. I placed the stamped image on the bag with some dimensional foam tape. Five holes were punched at the top, and I placed five Wild White Buttons held in place by brads. You can simple spread the “legs” on the brads a little to go through the holes, then squeeze them back together to attach to the paper. I used 3 in 1 Craft Glue just to help them stay put.
Buttons Galore Products Used
Promotional Products Used
Additional Products
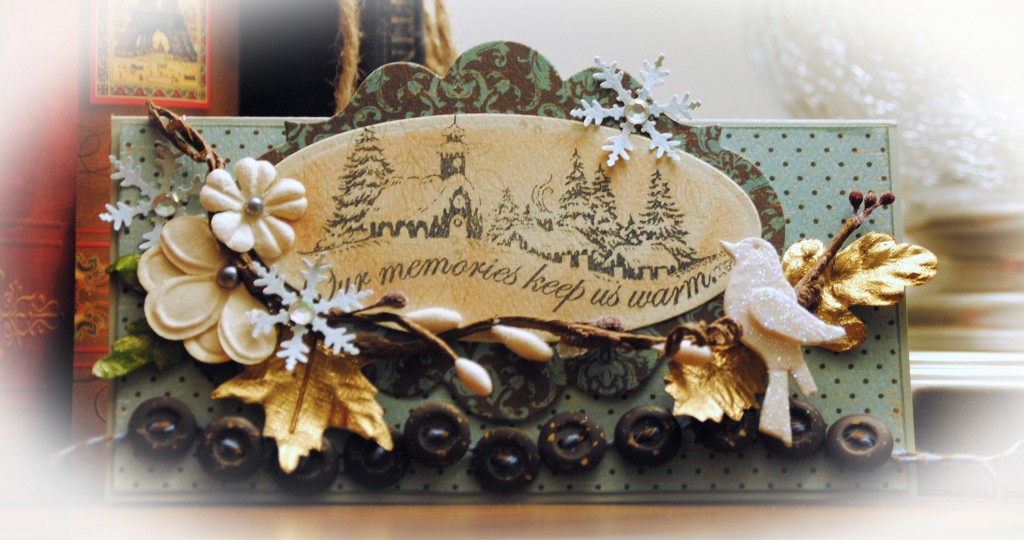
I’m back with more winter card ideas. I had some holiday pictures to mail off, and I thought this was a fun card to create, to accompany those pictures.
Let me walk you through the process. It’s not hard at all!
WINTER CARD IDEAS
Directions for making Winter card
I started with an 8.5 x 11″ sheet of cardstock from My Favorite Things and cut a piece 6″ square and folded it in half. I chose this size, because inside, I added a Caribou gift card, just a little after the holidays treat! I just stuck it on with a Memory Book Dot ‘n Go glue dot.
A piece of patterned Authentique paper sized 2.75 x 5.75″ was added. I colored the edges of the card with a Copic marker to match the patterned paper. The paper edges are inked in the same color using the broad tip. I stamped the image on cardstock with Memento ink and then taped my die in place using Washi tape to hold it in place. When I removed the die and paper, I left the tape, and sponged on some Close to My Heart ink to distress it.
I placed some white chipboard on a Wacky Tape Sheet and die cut a bird and wing. The bird was then glittered with some Clearsnap Sugar Shimmer.
I bent the vine in the shape I wanted and adhered it with 3 in 1 Craft Glue. I threaded some Rustic Coconut Shell Buttons using some twine, and adhered the buttons using Memory Book Dot ‘n Go glue dots and a few foam squares for added dimension. I added the rest of the embellishments using 3 in 1 Craft Glue and Memory Book Dot ‘n Go glue dots.
Buttons Galore Products Used
Promotional Products Used
Additional Products
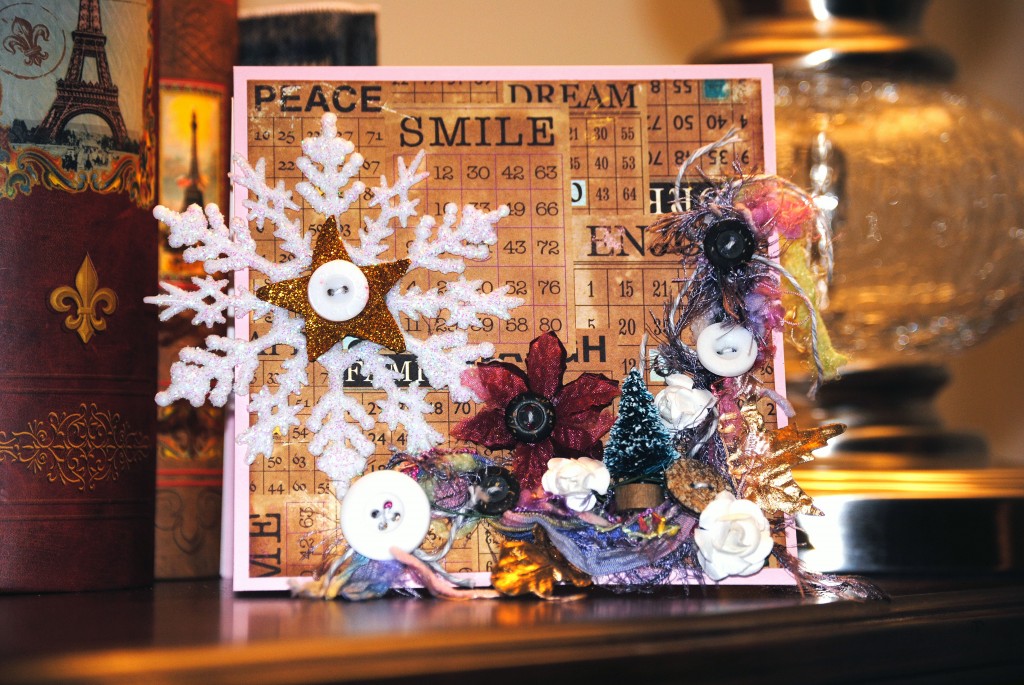
I’ve got a shabby chic card for today’s Sunday Cardmaking post – and it is very easy. It’s for a friend that loves all things shabby chic.
Let me walk you through the process. It’s not hard at all!
I started with an 8.5 x 11″ sheet of cardstock from My Favorite Things and cut a strip 5.5 x 11″ and folded it in half. A piece of patterned Authentique paper sized 5.25″ square was added. I placed some plain cardstock on a Wacky Tape Sheet and die cut a star. The star was then glittered with some Clearsnap gold glitter. I adhered the large snowflake and glittered star and button with 3 in 1 Craft Glue.
I gathered the fibers and ribbons. I cinched them together with Wild White Buttons and Rustic Coconut Shell Buttons using some twine. I punched two small holes in the cardstock behind each button, and tied the ribbon to the card. The rest of the embellishments were adhered using 3 in 1 Craft Glue and Memory Book Dot ‘n Go glue dots.
Once everything was dry, I placed the card, along with a few small gifts, in a bubble mailer. It’s a little late for Christmas, but it’s a nice winter card, too. Don’t you think?
Promotional Products Used
Additional Products
Large White Glittered Snowflake and Christmas Tree – Michael’s, Poinsettia and Gold Leaves – Prima, Assorted Fibers – Basic Grey, White Flowers – unknown
Thank you for joining us this Sunday and my shabby chic card. I’ll be back next Sunday with another winter card idea.
Gingerbread House ideas are as diverse as their makers. This gingerbread house is made with a paper mache house. You can get them at your local craft stores or at an online craft retailer. If you are super crafty you can make your own out of a cardboard box. Me? I am going with the pre-made and ready to decorate.

I used gumdrop buttons with their shanks removed for the roof of this gingerbread house. After adding texture to the paper mache house and painting it with a distressed brown finish, I decided to add fake snow. The Decoart Snow Writer was the perfect thing to use. The fine tip allowed me to get in all the crevices. It dried quickly and I was able to add multiple layers of it. Just like real snow.
For added accents I placed a star on the chimney. I made a tree with two tree buttons and I added poinsettia to the windows along with some snow that looks like it accumulated there.
The simplicity of this design makes it an easy Christmas craft for kids of all ages. If you wanted a more elaborate house you could add to this one, buy a bigger one or make a village out of a bunch of small ones. With this craft being non-edible and the snow hardening it will store away easily and be ready for next year. So start you gingerbread house village collection today with these fun and kid friendly gingerbread house ideas.
Create this cute country chic Christmas ornament for your tree this year as they are so quick and easy to make! The would be perfect for a handmade ornament exchange. They look great and are easy to make with minimal costs involved.


Tear a strips of fabric 3/4″ by the following lengths 3 1/2″, 3″ and 2″. The more fringe along the edges the better. If your fabric does not fringe well, you can make fringes by hand and pull the threads at the edges. Knot each piece in the middle. This will create three symmetrical bows
Glue fabric onto green pine pieces. Allow to dry and then apply glue to the back and press onto twig. You might want to hold them in place for a few seconds to allow the glue to dry. It is okay to be generous with the glue as long as you do not let it show. The ornaments get a lot of handling in our house.
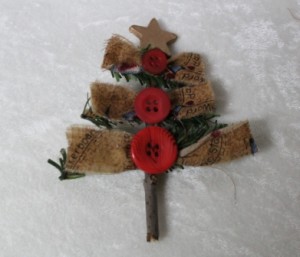
Glue buttons over knots of fabric. Cut a string or ribbon of your choice to the top. Glue star on top of that and allow to dry. There you have it a cool country chic Christmas tree ornament for your tree.
Button and bead bracelet is so quick and easy to make you will want to whip up several pieces to have on hand for holiday gifts! They do not have a clasp so they are great for people with wrist and hand problems and also for children. You can also use different novelty themed buttons to make them for other seasons.
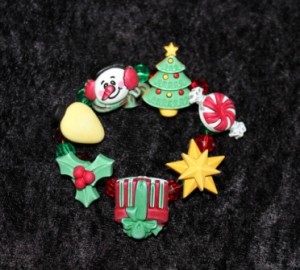
How cool would it be to give one for Valentine’s day made from heart buttons, an Easter piece with eggs and bunnies. I think there are novelty buttons for almost every holiday or event you could imagine in the Buttons Galore and More store.

When I received the new winter themed buttons I knew immediately they would be perfect for jewelry.
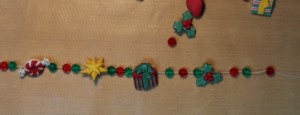
I got out some red and green faceted beads to place in between the buttons so the buttons and started stringing them onto elastic cording alternating with three beads between each button.
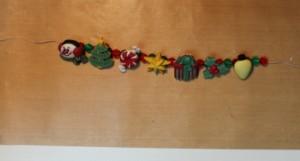
I checked the placement and once I was happy with it…..
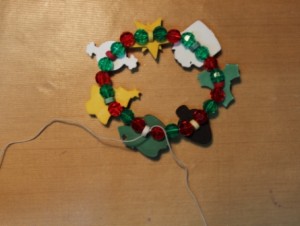
I tied it off and placed a dab of Beacon Adhesives Tacky Glue on the knot, let it dry and trimmed the ends.
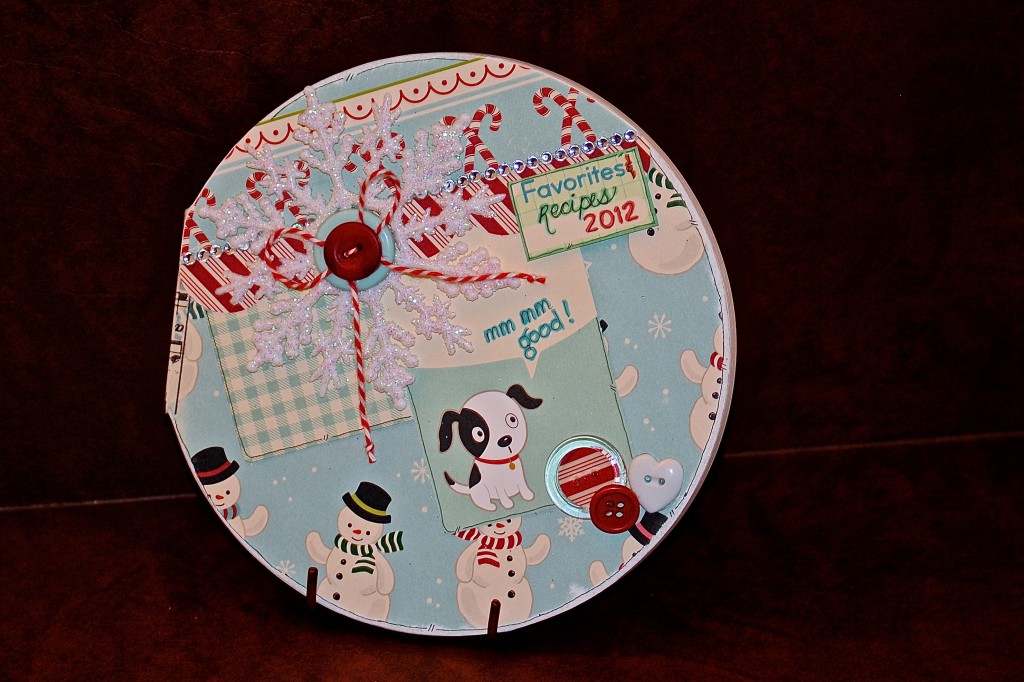
Recipe books make great gifts. They are fun to create and pass down to younger generations. I created a fun Holiday recipe book using a Blank Board 7″ Circle Book from the Altered Arts Section at C&T Publishing.
Every year, we try new recipes or crafty tricks, or a new tradition. This year, we’ll be keeping track by making notes and taking clippings to add to this fun book. C&T Publishing was kind enough to provide us with a sample of their products, and I had a lot of fun playing.
This book is covered with paper from October Afternoon, then embellished with matching journaling cards, a die cut scalloped border from My Favorite Things and a bling border from Want2Scrap. A glittered snowflake ornament was adorned with some buttons from Laura Kelly tied together with some Baker’s Twine. When height doesn’t matter, I love to layer buttons! In the bottom right corner, there is a cluster of buttons from the Clear Button Grab Bag, a bulk package of Ivory Buttons, and Valentine Hearts. A small circle was punched from matching patterned paper and placed behind the clear button. It’s fun to match clear buttons to your project!
I found that Beacon’s 3-1 Adhesive worked best to hold on the elements. I also used some Glue Dots.
Thanks for looking, I hope your holidays are filled with lots of favorites and yummy goodness you’ll also want to cherish. Make your own holiday recipe book
Buttons holiday cards tied with twine are the perfect embellishment. The buttons give the card some dimension, while the twine adds a natural element. I used bright red buttons from the Christmas Button Bonanza pack, green twine, and other partner products to give a festive look to this card.
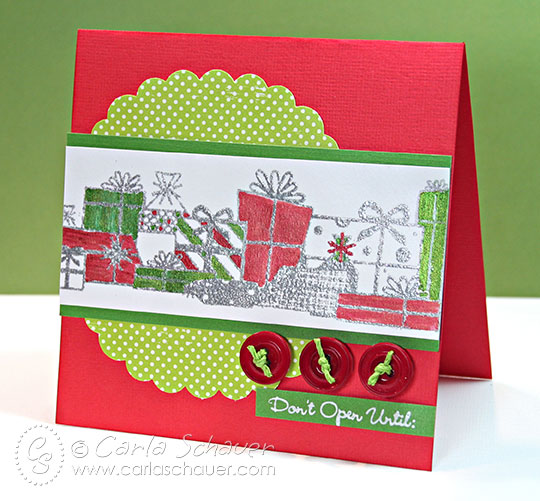
Partner Products:
Other Supplies:
I used the “Gifts Galore” Jumbo Rollagraph Wheel, Watermark ink, and Sterling Silver embossing powder to create the line of gifts on white cardstock, then colored in some of the designs using Smooch. The white cardstock strip was matted on a slightly larger strip of green cardstock and layered over a large scalloped circle of dotted green paper.
I tied each of the red Button Bonanza buttons with green twine and glued them in place under the “Gifts Galore” design. A sentiment stamped in white pigment ink (heat dried) on green cardstock was glued under the tied buttons to add to the gift theme.
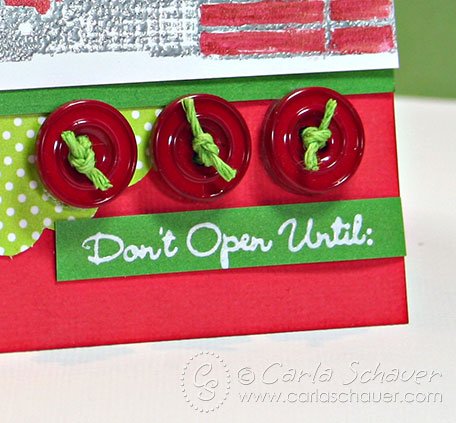
Thanks for stopping by and enjoy the Twine-Tied Button Holiday Card
Carla Schauer
I love to make holiday trees with buttons and Styrofoam cones. It’s such an easy project and the possibilities are endless! This year I created some merry and bright trees using brightly colored felt and buttons (and a little glitter of course!) You can make the trees in any color combination, to coordinate with your decor.
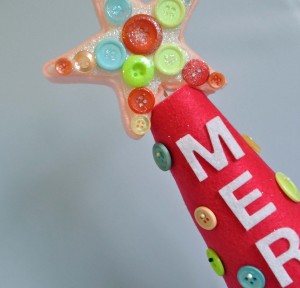 Supplies to make holiday trees:
Instructions

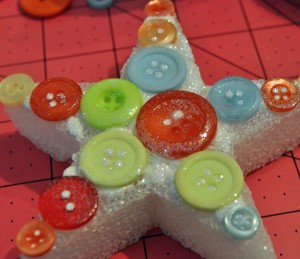
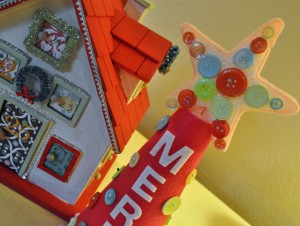
![]()
I hope you make holiday trees for your home.
Make your own sparkly Christmas tree ornament with a cute candy twist using our gumdrop buttons. You can make a whole pile of these glittery ornaments and personalize them for each gift recipient. Make little Christmas trees that are multi-colored or use a single gumdrop color to make each ornament unique. I included a mini gift tag with this ornament to show you could easily personalize.

Gumdrop button ornament by Jen Goode
To make the gumdrop Christmas tree ornament …
Materials you need:

Christmas tree ornament using gumdrop buttons

Christmas tree star with button

Mini gift tag
To make the mini gift tag…
Materials you need:
How to make a mini gift tag for your ornament:

Fun Christmas ornament using gumdrop buttons
You can make so many variations of this same project just by changing the colors of the fabric and embellishments you use. Try using a red velvet with green sparkle ribbon or a blue satin fabric with hemp ribbon that you doodle on yourself. You can make a cute gumdrop Christmas tree ornament gift for each of your friends with these simple materials!
Button snowman gift tags with buttons and felt are easy to make. These cute gift tags will take your gift giving to the next level and when the gifts are unwrapped, the tags can be used as tree ornaments. I love it when things can be multi- purpose. The nice thing about a button snowman is that he can be used past Christmas.
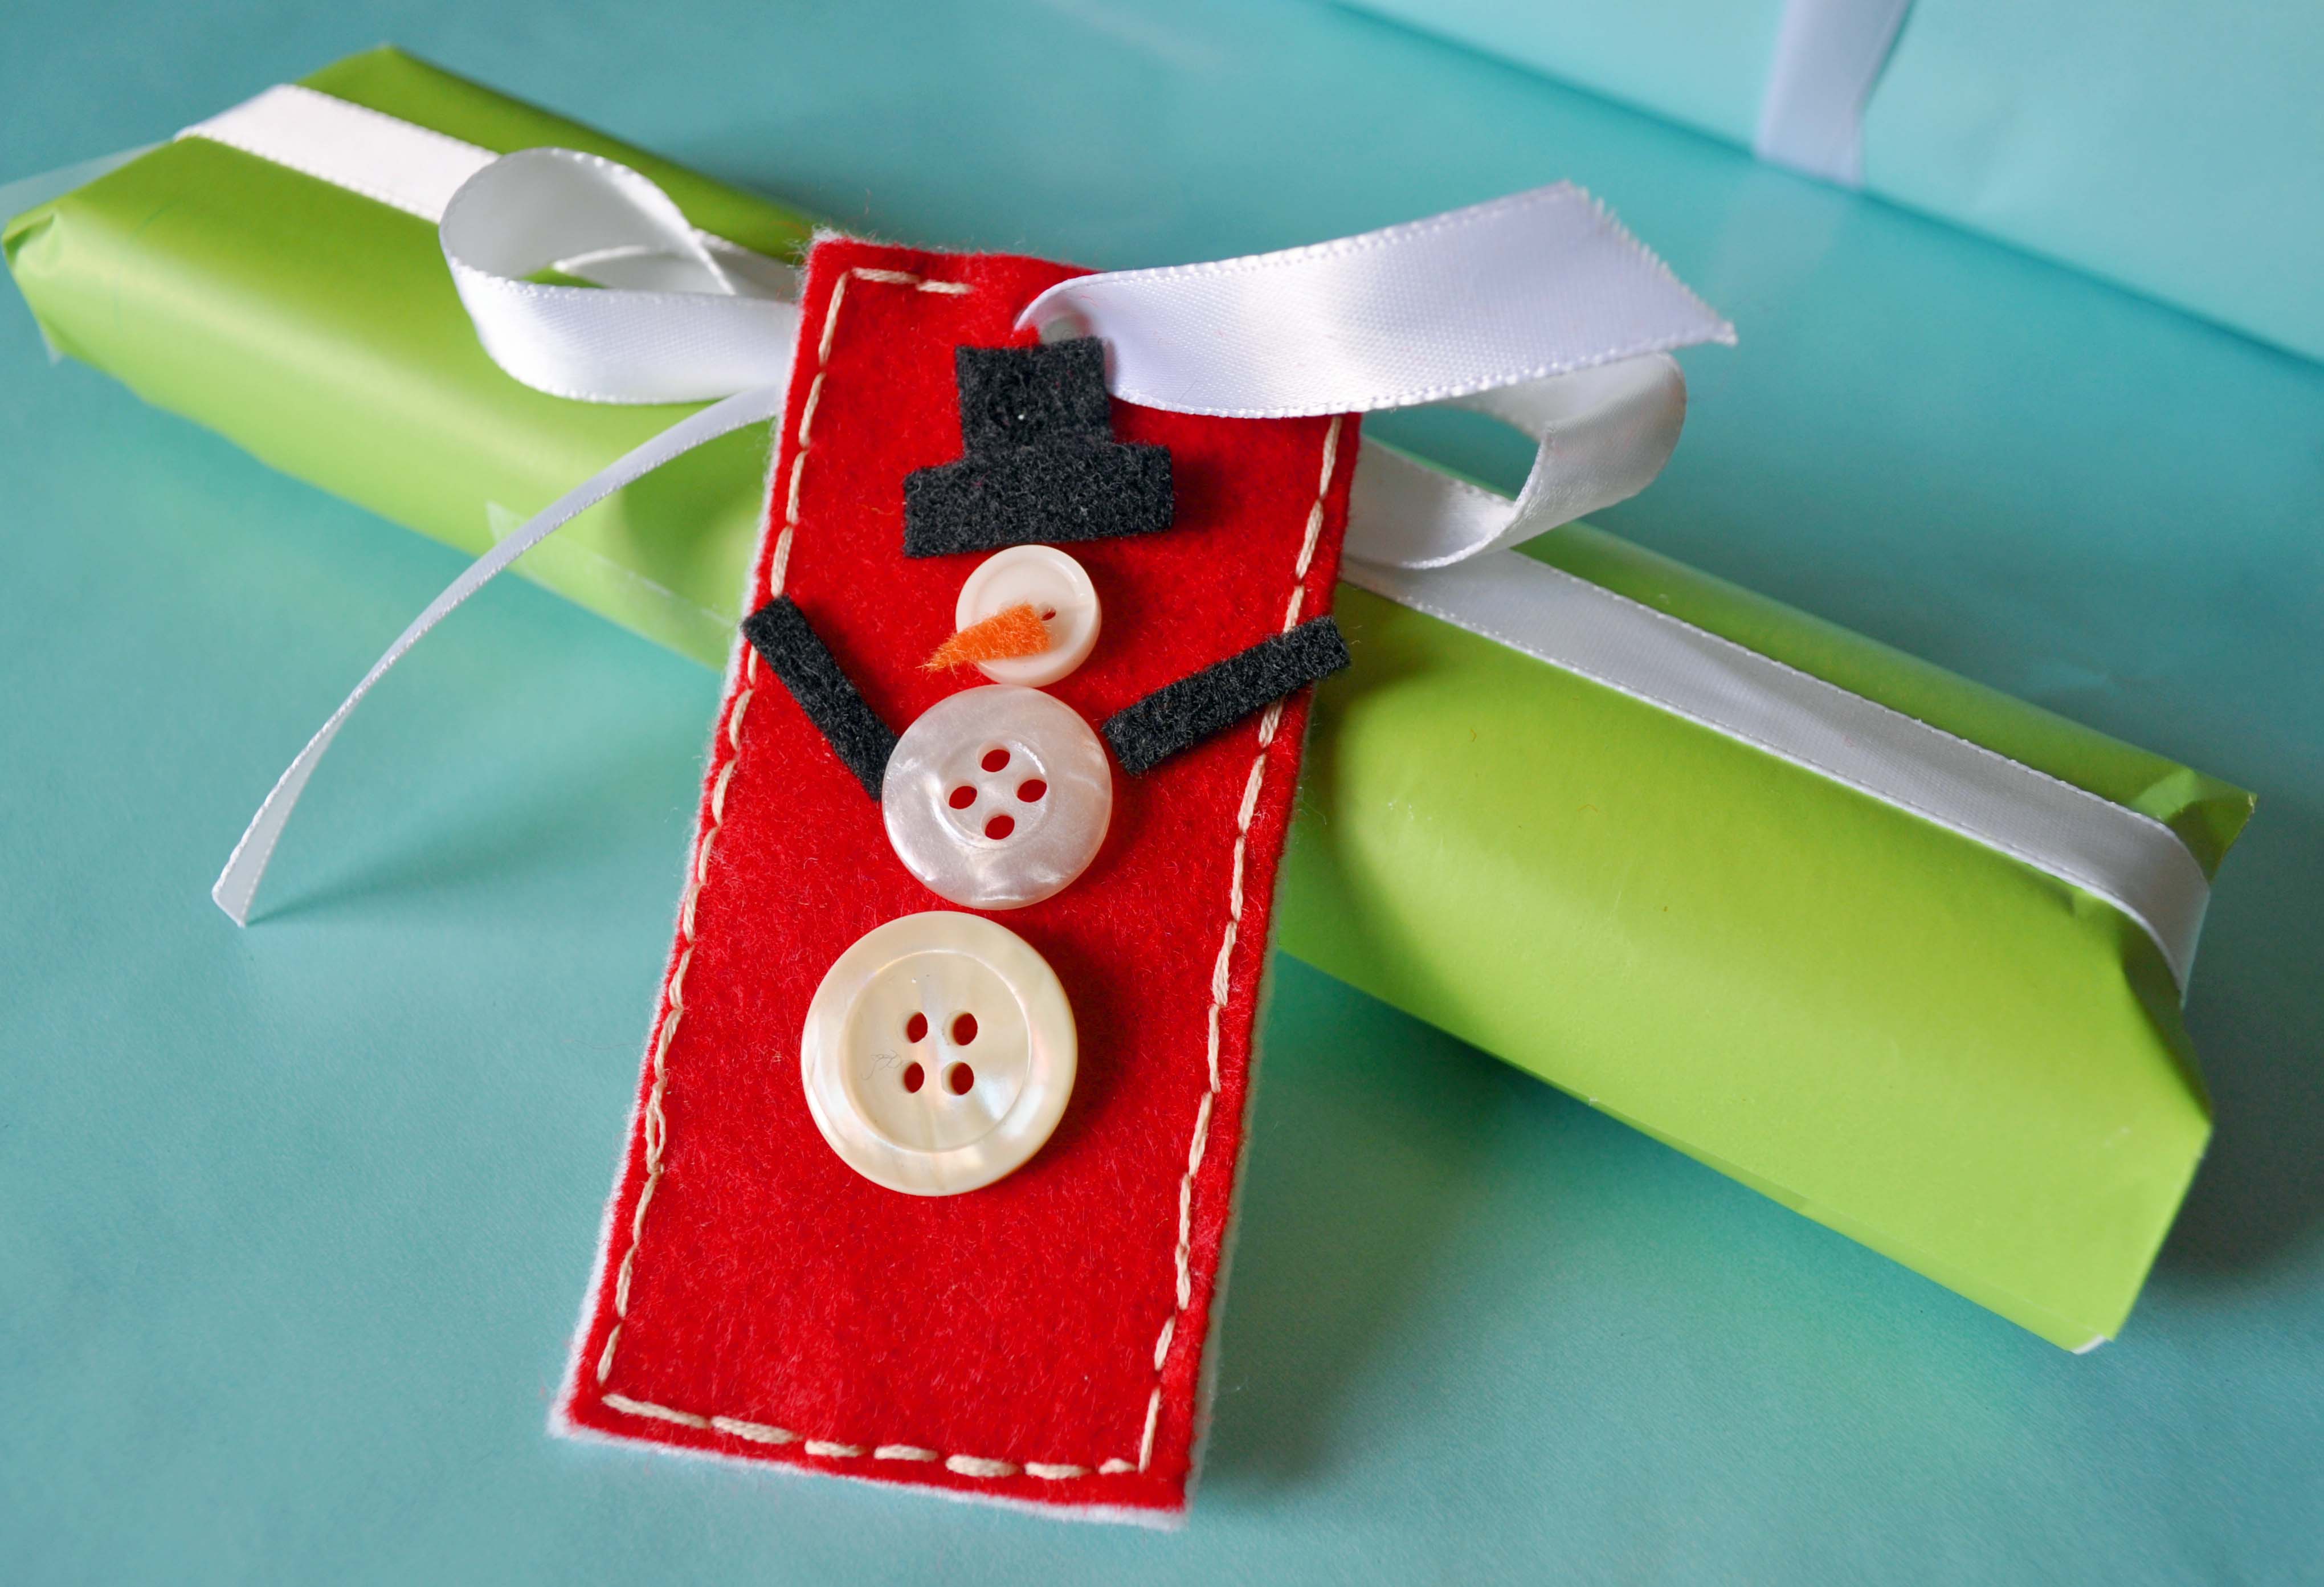

After making the button snowman gift tags, I came up with a few other tag ideas:
Ric Rac and green buttons make a cute Christmas Tree tag.

Isn’t the back cute?

Some garland really makes this Christmas Ornament gift tag sparkle!

Have fun and let your holiday spirit take control!
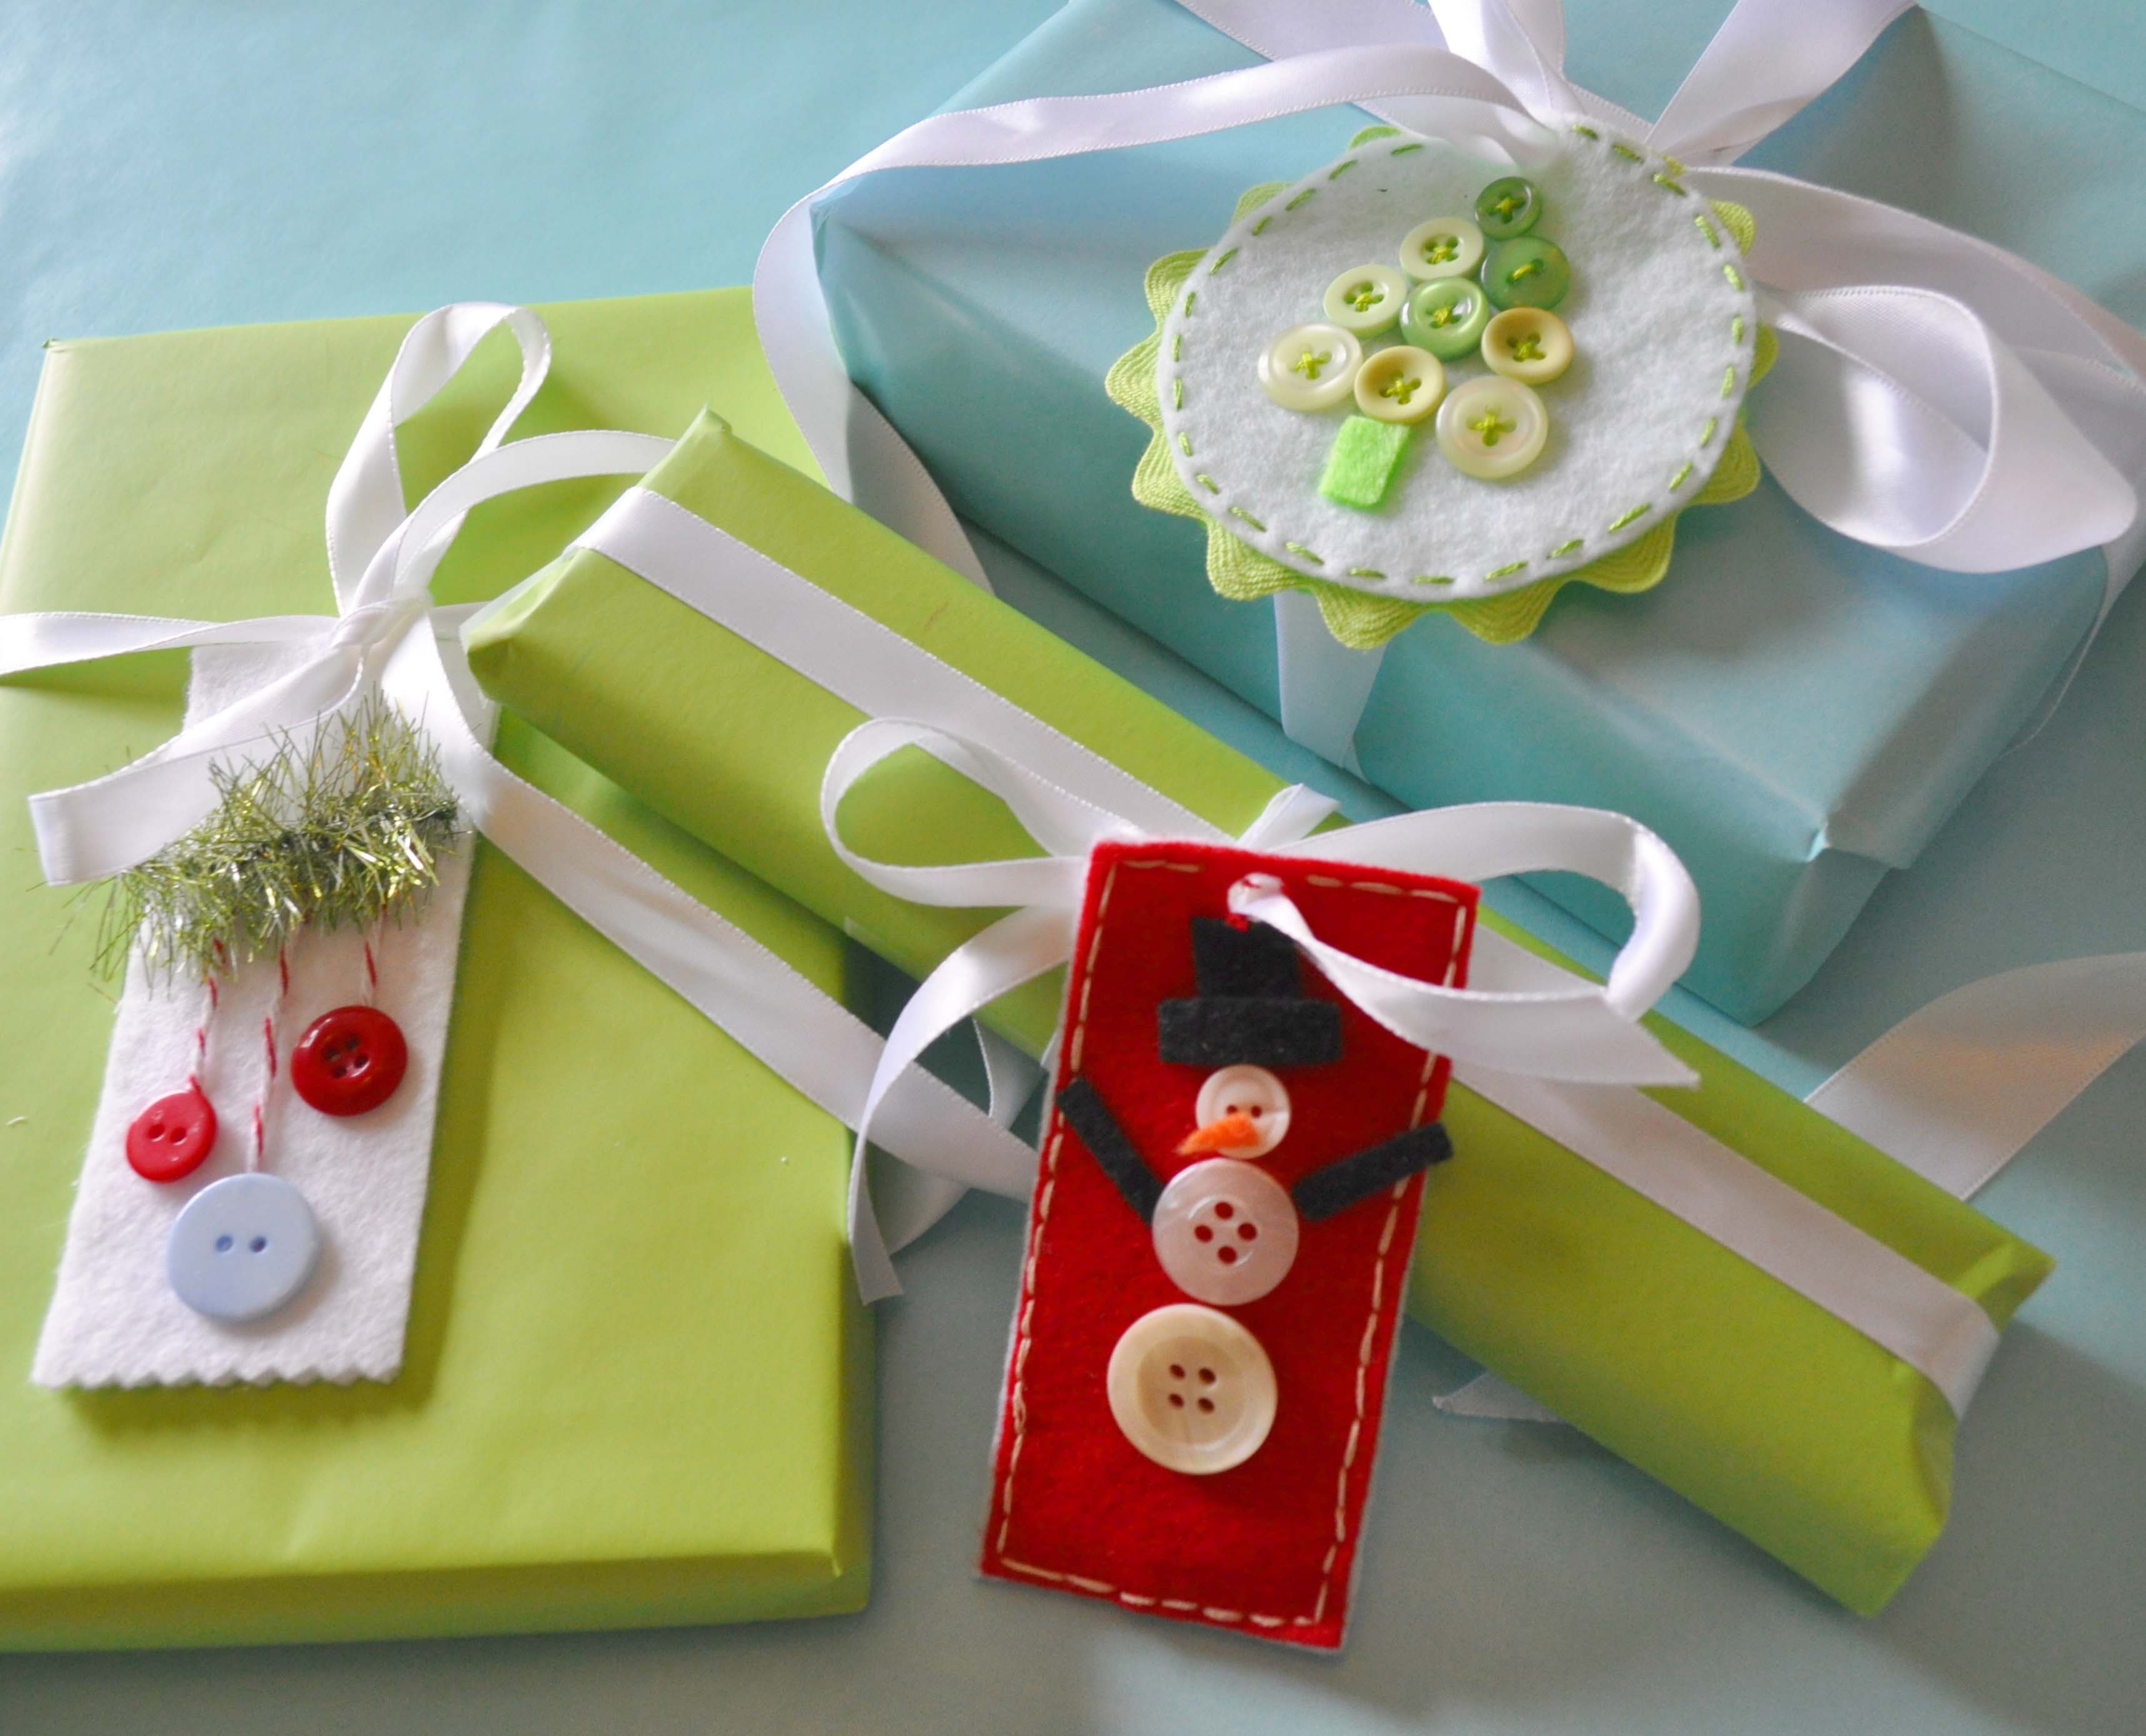
Thanks for taking the time to look at the button snowman gift tag and the other ideas too.
![]()
The Christmas season is getting closer, and along with the season comes cookie baking. Giving baked goods as a gift becomes even more festive when delivered in a handmade gift box embellished with themed Christmas buttons.
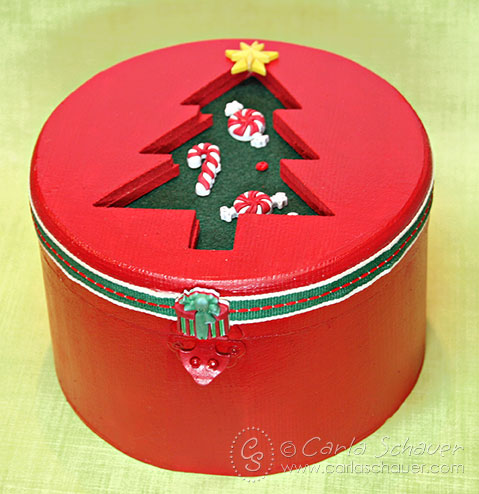 Directions to make a gift box with Christmas buttons:
I began with an unfinished wooden box I purchased at a craft store, and painted using “Santa Red” (how appropriate!) on the inside of the lid and the outside of the box. I also painted the inside of the box base a dark green to match the felt.
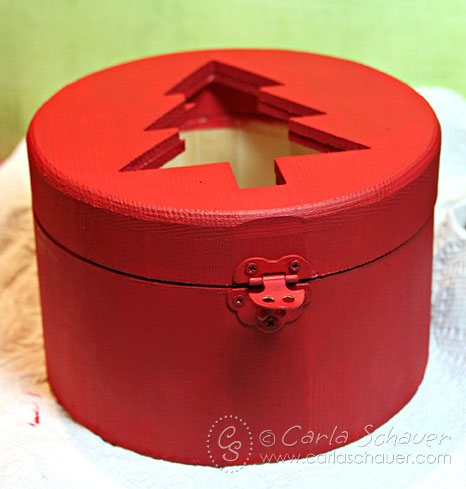
I lined the lid of the box with a circle cut from dark green felt, glued in place using Fabri-Tac Adhesive. The dark green showing through the tree cut-out in the top of the box made the perfect showcase for the Christmas buttons.
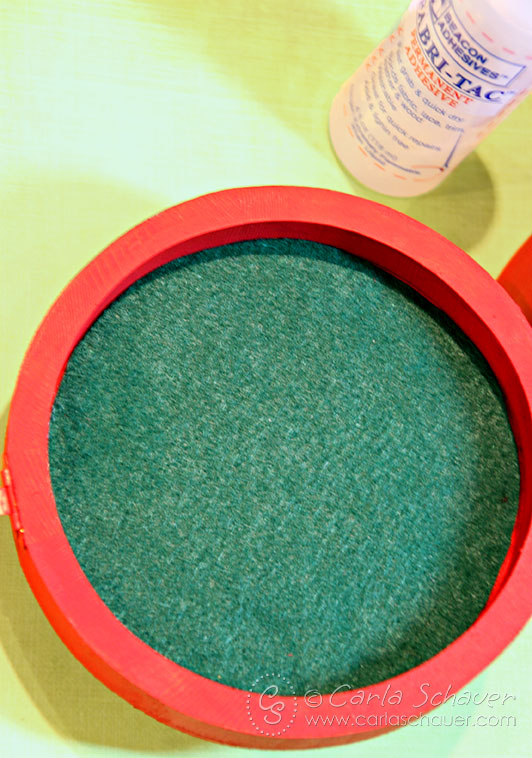
To embellish the felt tree using the Christmas buttons, I began by removing the shanks from the candy cane and peppermint swirl candy buttons using the Button Shank Remover and gluing them to the felt using the Fabri-Tac Adhesive. I also glued on three of the micro buttons to simulate ornaments. I glued the star to the tree top without removing the shank, since it fit nicely into the cut out area.
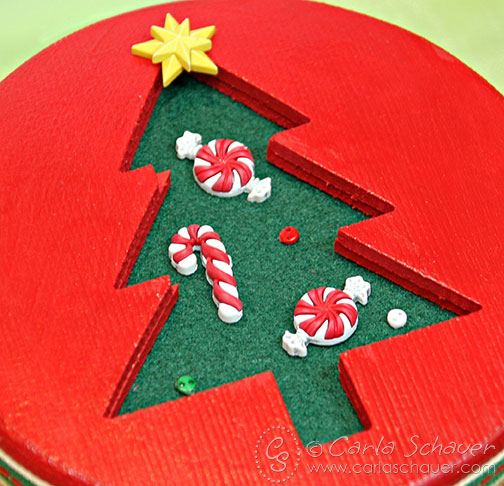
A red and green stitched grosgrain ribbon glued around the lid added another touch of texture to the wooden gift box, and I used a gift-shaped Christmas button as a final accent and to cover the ribbon ends.
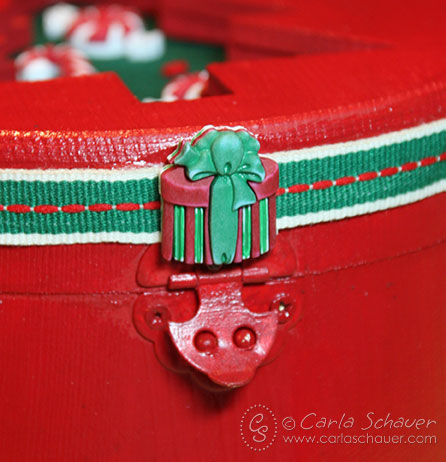
With a little paint, some felt, and some Christmas buttons, you can make a gift of goodies even more personal. Make several at a time before the holiday season is in full swing, so they’re ready for y0ur fresh baked holiday gifts.
Thanks for stopping by,
Carla
Napkin rings are essential to the holidays. Button napkin rings are even better. I created a quick and easy holiday craft using Rustic Coconut Shell Buttons. These beautiful buttons have a wonderful natural feel and I thought they would be perfect for a Fall table.

This is really a simple project. I’ve shown some of my steps above. I use 3-in-1 Glue from Buttons Galore. In addition to being inexpensive and lasting a long time, 3-in-1 Glue holds well and dries relatively fast. When dry, it’s completely clear.
I will share a tip, before gluing, I laid out the buttons until I had them layered the way I wanted them, and then I adhered them to a paper circle. I just punched out some cardstock. In the photo, I’ve shown the buttons on a white circle simply so you can see it. In my completed project, I inked my circle brown so that it wouldn’t be shown.
Once my buttons were dry, I attached the piece to a ring of grungepaper that I had covered in lace [My Mind’s Eye]. I accented it with the leaves [Prima] and bits of bling [Want2Scrap].
I think napkin rings would be a great craft to do with kids. The button centerpiece would be fun on a pin or bracelet, too. Imagine the options with these rustic flower buttons. They would not only make great napkin rings, but a broach, a hair clip, a scarf holder and so much more. You could make giant ones for curtain tie backs.
Christmas button craft ideas have been overflowing from my mind lately. I love so many of the buttons from the Christmas Holiday section at Buttons Galore and More that I had a difficult time deciding which to use first.
I used a Christmas Tree from this fun set and a gift button from this set.
I made a quick and cute ornament using paper scraps. I think this would be fun to hang on a Kraft bag, place on top of a box, or hang on your Christmas Tree. I simply took strips of scrapbook paper and made a simple design, adding a button from the Star of Wonder set.
Here I took some more scraps and created a bow and box, embellished with a button from the Christmas Presents set in the center. I took two additional strips and glued them to the scalloped circles to create the tiny gift box. I would love to make lots of these, attach some magnets and use them on my fridge to create an Advent Calendar – I have such fun crafting with the little ones I babysit.
My preferred adhesive is Beacon’s 3-1 Adhesive, available on the Buttons Galore & More site. It sets quickly, but gives you time to reposition, and it dries clear. Buttons Galore & More has many additional adhesives to choose from. Additional supplies used include Paper – October Afternoon, Scalloped Circle Die – Spellbinders Paper Arts, Circle Punch – Marvy Uchida
Thanks for joining me today. use up your stash and add some fun new elements. Please use these Christmas button craft ideas. I hope you enjoyed these simple, inexpensive ideas for the Holidays.
Wall hangings for Christmas? Sure! Make these little wall hanging decor pieces using the new Christmas buttons from Buttons Galore and More. You can make them as gifts or wall art yourself. They’re also a great craft to do with the kids, no sewing required! If you like to sew, stitch everything together instead of using glue.

Pretty little Christmas button wall hanging decor by Jen Goode
Materials you need:


Hi there! I have a quick no-sew fleece pillow idea for you. It’s quick it’s easy and so festive! You will want to make a no-sew fleece pillow for each season
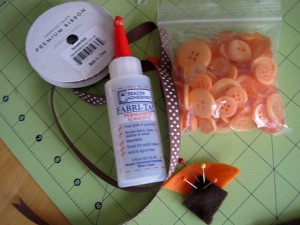
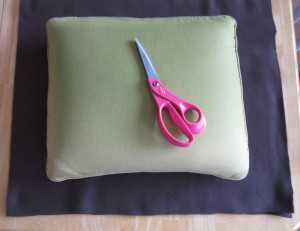
Cut two layers of polar fleece material approximately 3-4″ wider then the pillow you plan to cover. No need to be exact, this project is really forgiving
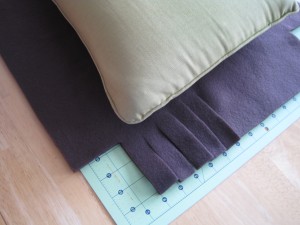
Cut away the corners of the fabric and cut strips all the way round the outside edge approximately one inch thick.
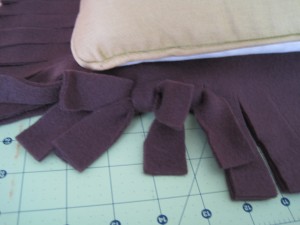
Once everything is cut, tie the top and bottom matching strips together in a double knot creating the fun fringe look. Don’t forget to insert your pillow before you tie your pillowcase closed.
Embellish your pillow front with fleece scraps cut into shapes representing your theme. I free-handed a maple leaf shape for fall. Glue on fleece shapes and other embellishments like ribbon and buttons to complete the no-sew fleece pillow.
Enjoy your new festive pillow! Not only is it fun to look at but it’s cozy too!
This is a great project for kids!
Thanks for stopping by!
Ribbon Wreaths are trendy right now, with photos appearing on blogs and Pinterest. This tied ribbon version with button accents is a great way to get autumn colors and textures in a wreath that is easy to create.
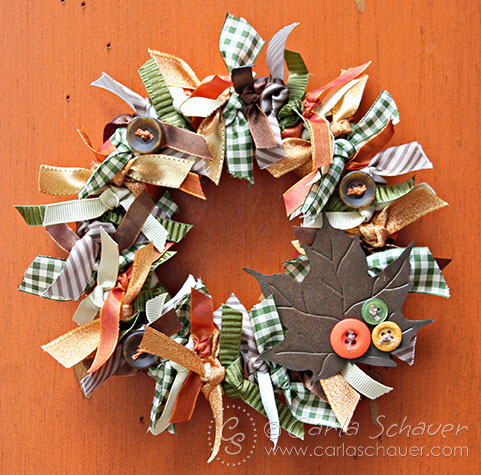
Making a ribbon wreath is a straightforward process that begins with a simple wreath form. For this wreath, I used a STYROFOAM Brand Foam wreath form approximately 8″ in diameter. I painted the front of the wreath using a foam brush and orange acrylic paint to camouflage the form in case it happened to peek through the ribbons.
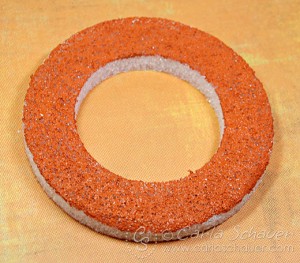
While the painted wreath form is drying, I gathered my ribbons and cut several lengths of each. My form required around 50 pieces, each 10″ long. Widths ranged from 1/2 to 1″.
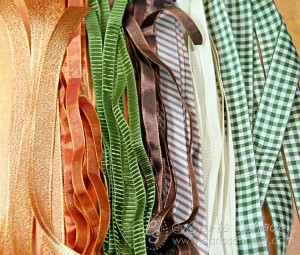
Once the form was dry and the ribbons cut, I tied the pieces around the form. I began with the wider ribbons, and filled in the spaces with the narrower pieces, adjusting the location of the knots as necessary.
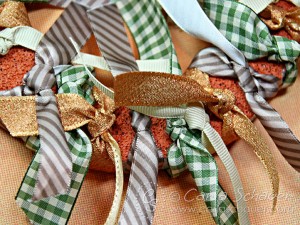
Once all the ribbons were tied around the wreath form, the whole project looked pretty scary. It resembled a big autumn-colored ribbon Medusa.
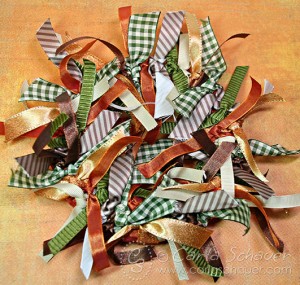
But once all the ribbon ends had been trimmed to approximately 1.5 inches long (use sharp fabric scissors for clean edges), scary Medusa transformed into a pretty tied ribbon wreath ready for embellishing.
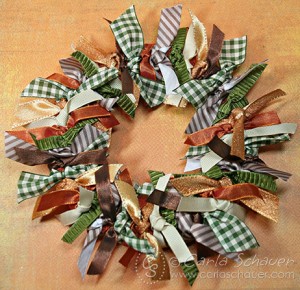
I added thick marbled dark brown buttons from the Natural Grab Bag tied with orange embroidery floss, and a large aged metal leaf as an accent. Three additional buttons from the Autumn Grab Bag tied with cream floss top the leaf for additional coordinating color and texture.

With no time or labor-intensive techniques to deal with, this tied ribbon wreath can be assembled quickly and easily. Dive into your ribbon stash and make one today!
Thanks for stopping by!
Carla
Put down the mop and dusting cloth! Button-bodied Halloween SPIDERS are fun to make and should become a welcome addition to your Halloween arsenal of ghoulish home decor!
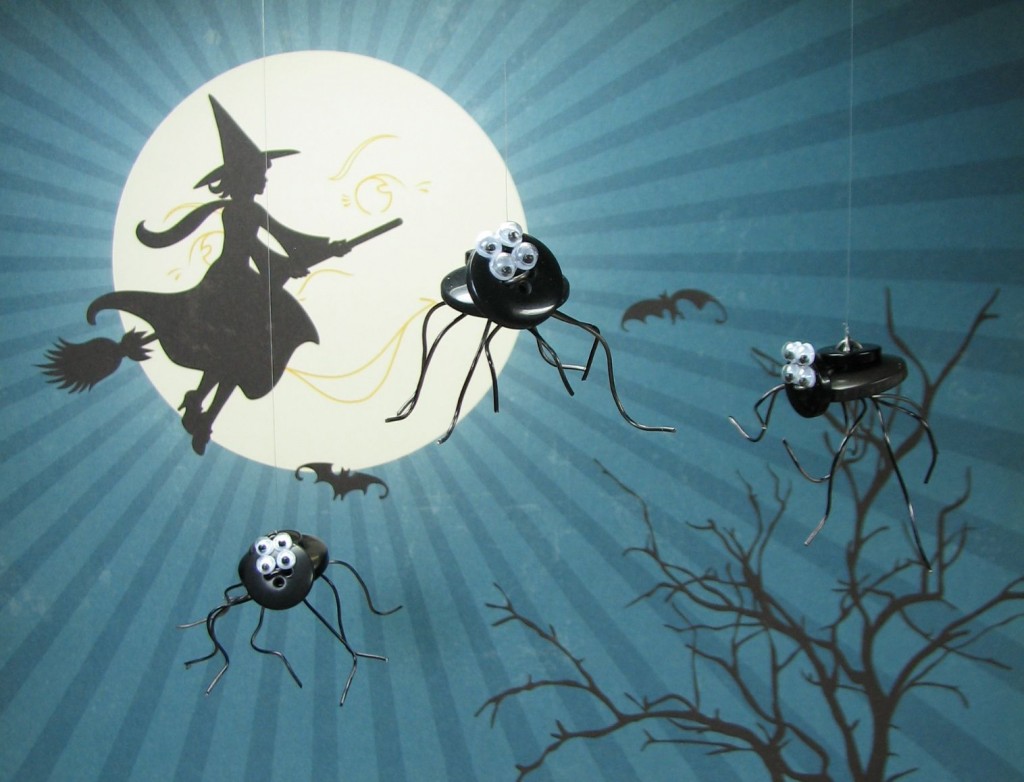
I just ADORE creating “life” with buttons!
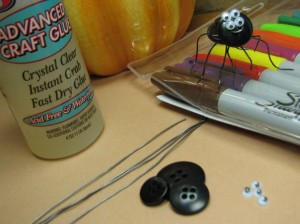
It doesn’t TAKE much…. to make your EYES bulge with joy seeing these Halloween Spiders!
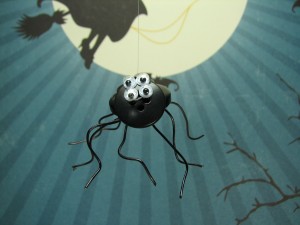
Buttons Galore & More Buttons (3 per spider, small, medium & large)
Craft Wire
Google Eyes
Wire cutters
Clear thread – if you want to hang them!
1) Cut craft wire into 4 pieces of 4 – 5″ lengths.
2) Take one, fold in half and thread through medium sized button.
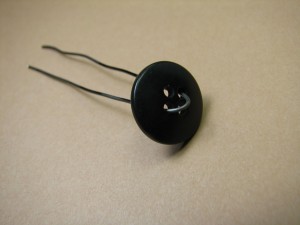
3) Thread ends (with medium button attached), through large button, adjusting smaller button to sit on the edge of the large button, so that there is approximately 1/4″ slack between medium button and where the wires thread through the holes of the large buttons.
4) Twist the legs or “ends” of the wire, to lock it into position.
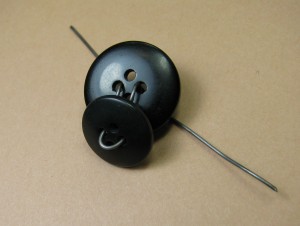
5) Repeat step #2 with the smallest button and second piece of wire.
6) Thread the wire ends from the smallest button into the holes of the largest button, so that it covers the “slack” of the wire.

7) Fold in half and add the remaining wires, criss-crossing through the button holes, so that the spider now has 8 legs.
8) Arrange legs to your liking, cutting off excess as needed.
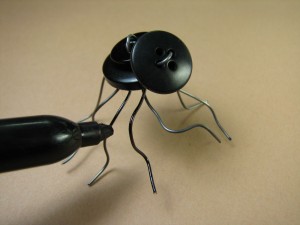
9) Color wire legs with Sharpie markers.
10) Adhere eyes with Beacon 3 in 1 adhesive.
11) Using clear thread, tie through the central wire in the “body” of spider to create spider web string.
Embellish Halloween scenery and your home as needed!
Ya see! There are SO many ways to use Buttons Galore & More buttons, it’s SCARY!
Happy HAUNTING!
Halloween table decorations
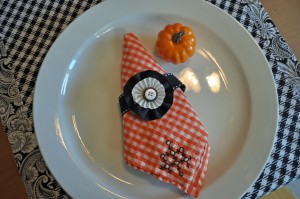
Here’s a quick and easy tutorial for creating a unique Halloween table decorations. In fact, I think this is the easiest tutorial I’ve ever done for Buttons Galore and More! Now, I’ll admit, I’m not a huge fan of Halloween. It just doesn’t appeal to me visually, but now that I have a little girl, I must play along and decorate our house and table for Halloween. I’ve found that the elegance of an all black and white table satisfies my aesthetic and still gives my daughter the full Halloween experience.
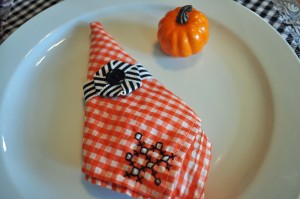
Materials:
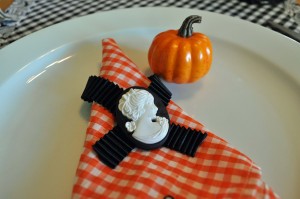
That’s all you need to do to create stunning Halloween table decorations! If you want to, you can take it even further and use the same Trim Collage Kit to decorate candles, vases and pumpkins for your table.
![]()
Good Morning! Today I have a stepped up version of a no sew tutu tutorial from a great DIY blog called – Skip To My Lou. I followed all of her steps but where she stops is where I picked up to make this fun and oh so seasonally perfect button embellished tutu! Here’s how I just kicked her’s up a notch – Enjoy!

Find an adorable little girl who you can transform into an Autumn Forest Nymph!!

Follow tutorial found on Skip To My Lou’s Blog (http://www.skiptomylou.org/2011/11/01/no-sew-tutu-tutorial/) but cut away the excess elastic.

Add a bit of superglue to the knot to be sure it is held securely.

Wrap the ribbon around your finger to measure out how much ribbon will be needed to fit round the knot and still have plenty of room to pass the other length of ribbon through.

Wrap the ribbon around the knot and hot glue in place.

Be sure to keep edges of ribbon even and hold end of ribbon in glue until glue cools.

Pass the ribbon through the loop and tie into a perky little bow.

Embellish the center of the bow with a large button that has a bow of hemp tied through the center.

Gather a few different colors of Autumn colored felts.

Cut felt into approximately 2″ x 3″ rectangles.

Fold rectangle in half and cut a half leaf shape on fold.

Open to reveal leaf shape.

Repeat with additional colors of felt until you have a good assortment of felt leaves.

Place leaves all over tutu before gluing into place to be sure you have a good mix of colors and spacing.

CAREFULLY adhere using hot glue. Be careful as the glue will go right through the tulle if you aren’t careful!

Using either heavy duty scissors or a button shank remover tool, remove the button shanks from as many buttons as you glued leaves.

Carefully adhere a button to the top of each leaf on the tutu.

Finish gluing a button to each leaf to finish embellishing the entire tutu.
Find an adorable little girl who you can transform into an Autumn Forest Nymph!!
I hope you have enjoyed this no sew tutu tutorial /Autumn Forest Nymph Tutu. It was fun and easy to make and my daughters love it.
This project will keep the kids busy and help the environment! Upcycle your empty food cans into containers for various storage and use buttons to create a fresh, fun look. You can create any kind of pattern or look with just a few easy-to-find materials. I created a pencil holder out of a spaghetti sauce can.
First, I covered it with some fabric. Then I embellished the top edge with a swag design of pink and purple buttons. (Optionally, you can line the inside of the can as well.) I’ve created a number of different pencil and school supply containers using fabric or paper, so whichever you like best will work great!

upcycled can to pretty pencil holder

glue twine to can

create a scalloped swag design with twine

add buttons to twine

add more buttons

make a bow out of twine and glue on the can – I got a little too much glue on my fingers
The best part about upcycling empty cans is that they are small. This allows you to use your left over craft scraps to make some neat, decorative containers. Mix and match your scraps with your favorite button colors to create a whole collection of pretty pencil holders and other organizing containers. Plus these are easy enough that your kids can make their own too!
 Make 14 fun Christmas crafts with buttons
14 fun Christmas crafts with buttons, that is right… 14. Take some time and check out the links below to see all of our crafts with buttons. Our creative team worked hard in July to bring you some fun new inspiration and there will be even more fun Christmas crafts with buttons coming in October.
Styrofoam and buttons Christmas Money Tree
Vintage style Christmas Decorations
Styrofoam Christmas Ornament
I hope you enjoyed looking at the wide variety of Christmas crafts with buttons. Stop by the store if you would like to purchase the button, ribbon and glue supplies used in these projects. We have daily deals and weekly coupons. Stop by often as there are new items on the way.
A country chic Christmas wreath can be made in an afternoon and used for years to come. We have a screened in porch and use it almost year round. Since it gets so much use I like to decorate it for the seasons as well as our front porch. This country chic Christmas wreath would need to be displayed in a sheltered area.


The poinsettias are made using the Sculpey Polymer Clay Flower Mold. I thought yellow buttons made a great center for the flower. It gives them an extra little pop of color. To make the poinsettias follow the directions in the manufacturers packaging. If the clay sticks in the mold use a little cornstarch. It washes off easily. Once the pieces are dry, paint a coating of white paint on the top. Then remove excess with a paper towel. Seal if you would like with Sculpey Glaze in matte or glossy.

The red buttons make perfect buttons and the leaves are made of polymer from the same mold.
Cut the burlap into three inch strips. Adhere one end to the wreath with a dollop of FabriTac. Hold it in place with a straight pin until dry. Repeat this step until your wreath is covered completely. Wrap the jute cording in one direction and then the other to achieve the diamond pattern. Secure the ends with FabriTac. Adhere the buttons and leaves around the wreath and then secure the poinsettias with a generous amount of FabriTac. I think this country chic Christmas wreath would look great in other colors too. If your decor is less earthy and more pastel, you could make the poinsettias in off white and the burlap in natural or blue.
Money doesn’t grow on trees!!!….or does it? Check out this fun and easy way to give a money tree gift in a creative way.
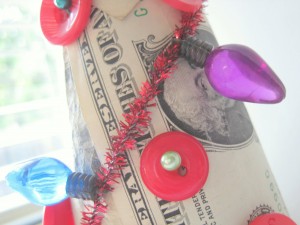
Today I am excited to use a Styrofoam plus BUTTONS from Buttons Galore! Check out the supplies…
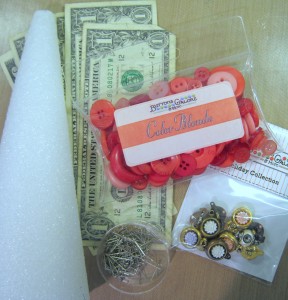
Begin by wrapping your cone in bills and securing the corners with sequin pins. Once you have all of the foam covered you can embellish to your heart’s content with buttons, colorful seamstress pins, tinsel chenille and more! Important to note that non of the items were adhered with adhesive because in the end this money tree is meant to be harvested so make it easy for the recipient to wrap and just use pins.
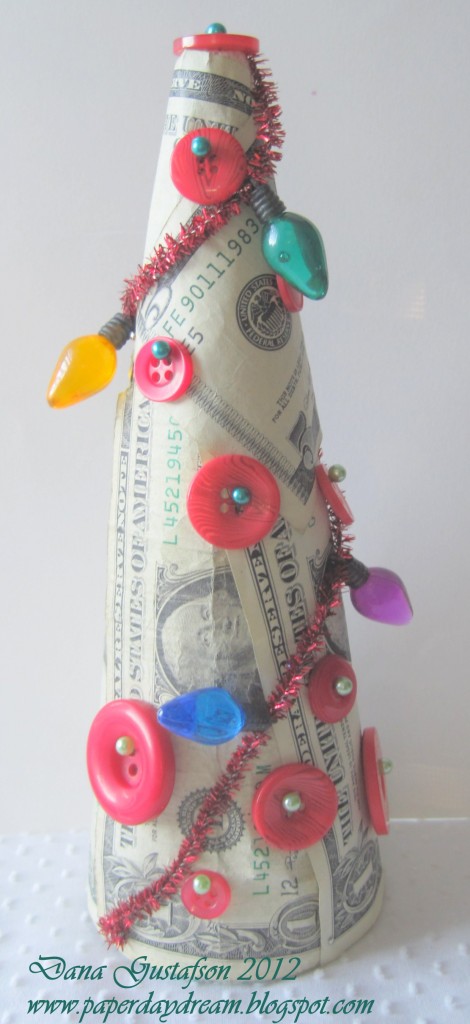
I love the glow on the “lights”!
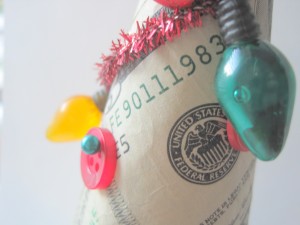
Thanks for joining me today! I hope you will make a money tree for your next gift. No matter if it is a Christmas money tree, birthday money tree or a graduation money tree, the recipient will surely love a tree made of money. I know I would.
 Supplies Needed: STYROFOAM Cone, Two Tones of Butt ons, Acrylic Paint and Paint Brush, Glitter, Hot Glue, wood circle for trunk or other trunk material.

Begin by placing a pool of paint onto a piece of scrap paper as a palette for easy clean up.

Apply a full coverage layer of paint to entire surface of cone.

While the paint is still wet, liberally cover surface with glitter.

Find a button the same size as the top of the cone.

Build a stack of buttons in graduating size and hot glue together to be a "tree topper".

Once the paint has fully dried, hot glue the topper to the top of the cone.

Randomly glue buttons all along the outside of the cone in various sizes and shades of green.

Glue a line of large Ivory buttons along the bottom edge.

Hot glue the piece of cut tree limb to bottom as a tree trunk.

Ahhh your brand new hip and happening home decor project ready for the mantle, table top or anywhere else in your home!
I would LOVE to see your home decor pieces! Please share a link here so I can come to your blog and see how you decorate for the holidays!!! And hey if you happen to have a great button project that is just a HUGE BONUS! :) Enjoy!
I love the blank canvas of a brown kraft gift bag! While keeping it simple is a great way to go with the brown bag, going a little fancy and fabulous is pretty fun too! Follow me as I upcycle a brown gift bag by adding a fun handmade rosette to add a punch of color to this gift wrapping staple!

Nothing like the summer skies to inspire a bright pop of yellow and blue! Today’s project uses the following supplies:
Let’s get started!

I began with a piece of burlap, approximately 5×10 inches.
Cut burlap with a metal ruler and rotary cutter into 1×5 inch strips.
Loop and glue strips of burlap around a scrap of paper that will serve as the base for our rosette. Continue gluing and layering paper strip, doily, flowers, ric rac and buttons until you get a fun rosette that can be added to your brown bag like this….
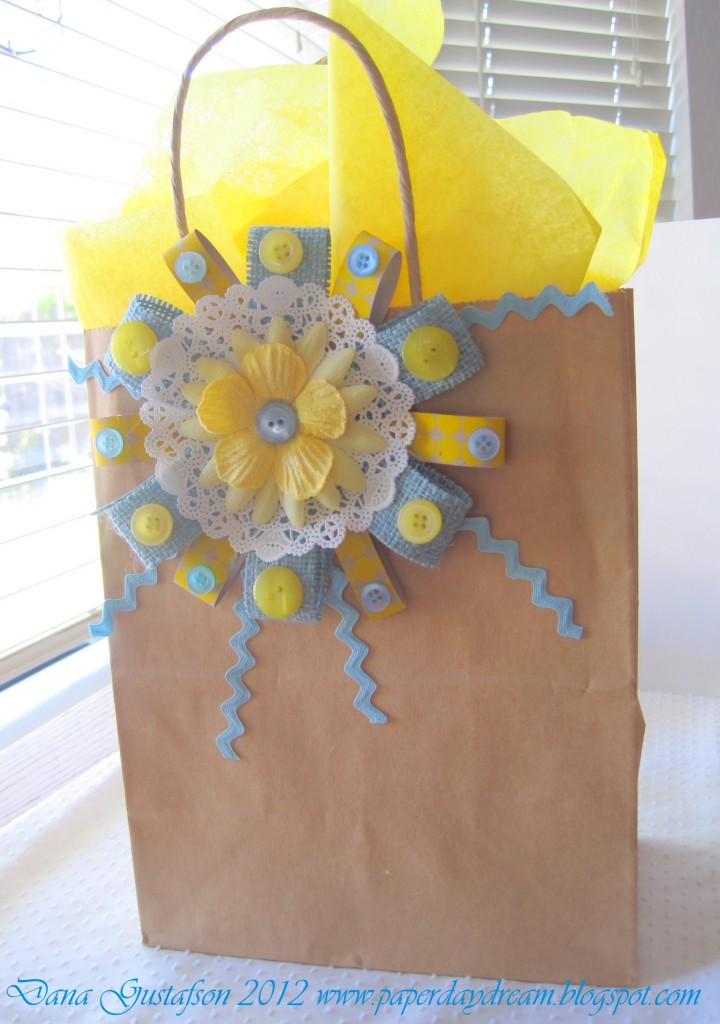
Hello sunshine! We just went from drab to fab with a very simple addition to this bag!
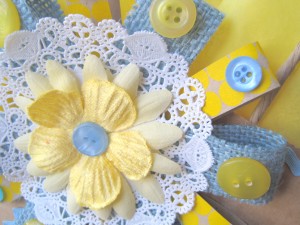
Thanks so much for joining me! I hope you’ll try fancy-ing up your gift bags with burlap, buttons and other craft supplies!

Today I bring you a Christmas Craft for your home. The Vintage Christmas Cube has an old world Christmas feel.
I love digging through my Buttons Galore buttons. I selected several from the Color Bulk buttons. This is a tree I purchased at a hobby shop (for train landscape). I simply adhered tiny buttons with Mini Glue Dots.

This is the full project.
I used a styrofoam cube from the Styrofoam Corporation. It’s about 3×3. I cut some papers (Authentique) 2 3/4″ square and applied them with Buttons Galore’s Beacon 3-in-1 glue. I’ve decorated some chipboard letters (Want2Scrap) with some sharpies that I received in my DT box. I then coated those with a layer of adhesive and some glitter from Donna Salazar. I finished the project off with a little bling (also Want2Scrap) and a Christmas tree that is decorated with what else … BUTTONS, using some mini dots, also from Buttons Galore. There are also some buttons held in place with a fancy pin (Maya Road).
It’s Christmas in July with Buttons Galore & More and STYROFOAM Brand Foam! I used my buttons and STYROFOAM Disc to create a holiday needle felting project. Styrofoam is a wonderful base for needle felting, since the wool roving can be felted directly onto the surface, and if the piece is thick enough, no pad is needed. I used a non-traditional color scheme of light blue, raspberry, and lime. This color scheme can go up before Christmas and last through January.
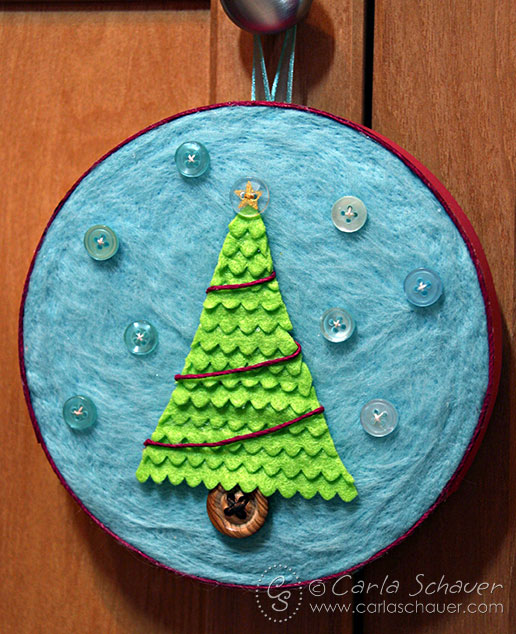
Supplies:
Buttons: Sea Glass, Clear, Wood
Styrofoam Disc, 6×1”
wool roving, light blue
Clover needle felting tool
ric-rac, lime green
cardstock, raspberry
hemp twine, raspberry and dark brown
ribbon, light blue
accent ink, Smooch (Clearsnap)
thread, white
scissors
Beacon Adhesive
heat tool, optional
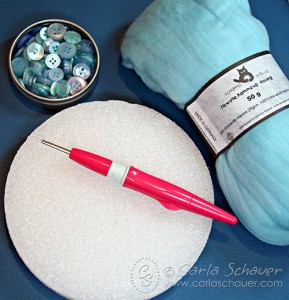
Instructions:
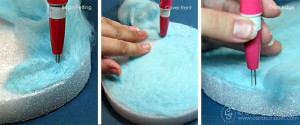
 Use scissors to trim into desired tree shape. Wrap raspberry twine around tree to create “garland”
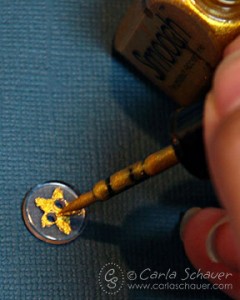
Try this holiday project with the tree, or create your own winter scene with Buttons Galore & More!
Thanks for stopping by!
http://www.buttonsgaloreandmore.com/product/HAB106.html
 Christmas in July? With much of the United States suffering through a massive heat wave, I think we could all use an escape to something cool! When challenged by Styrofoam and Buttons Galore and More to create Christmas decorations, I’ll admit to struggling, but one look at the cool, aqua of the Mint Cooler Color Blends buttons, and all I could think about was ice. The great thing about this wreath is that it can be used for Christmas or Hanukkah. It could even just be used throughout the entire winter season. I few snow men and you have a Winter Wonderland!
Supplies:
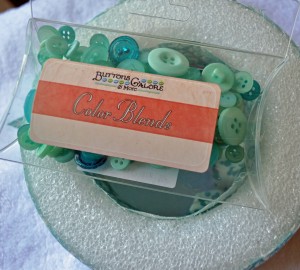
Directions:
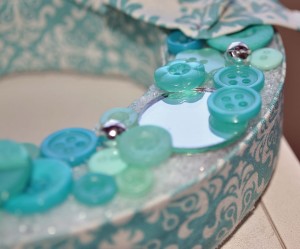
So there’s your super quick, holiday project! If you get started now, you’ll have your holiday decorating “buttoned” up before you know it!
Craftily yours,
Laura Bray
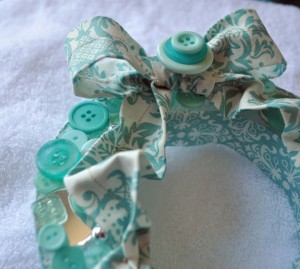
Winter Wonderland Wreath by Laura Bray
July is a great month to get a head start on those Christmas decorations and using BUTTONS in your creations is always FUN! For this project I am using a Styrofoam Ball, Glitter, Kreinik Thread, Beacon Adhesives and beautiful BUTTONS!
Supplies:
Instructions:
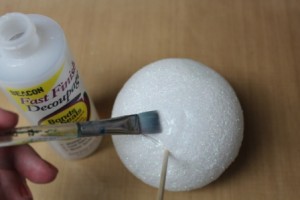
Apply Fast Finish Decoupage to entire Styrofoam Ball
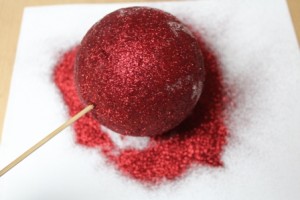
Place Styrofoam ball onto skewer. Sprinkle Glitter to cover; let dry. Apply second coat of Fast Finish Decoupage; let dry.
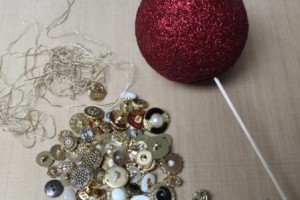
Choose thread of choice and buttons.
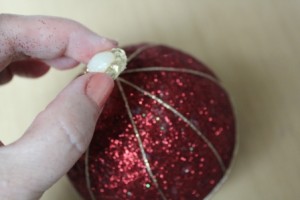
Wrap thread around ball making 8 sections, then around center to create 16 sections. Glue white and gold buttons at the top and bottom of ball where all threads meet. Glue gold buttons around center where threads meet; let dry.
You have a beautiful ornament for your tree or a gift….Enjoy!
I really love tiny decor pieces. You can put then in small spaces and it’s like finding a little treasure when you look around the house. This month’s challenge is to use Styrofoam and create a Christmas themed item, so I tied in my love for tiny things and recycled materials and came up with these tiny packages.

Materials you need:

I found that the packages were so small, they didn’t stand up like I wanted when setting out to decorate. To fix this problem, you can hot glue each package to a small piece of balsa wood or cardboard. You could also stack your mini gifts and hold in place by using floral wire or toothpicks between each box. Decorate as desired.
I don’t do as much decorating for the patriotic holidays as I’d like. I do have quite a few family members in the military, so I think I get more caught up in remembering their service than I do decorating. This year I wanted to change that, so when I was challenged with using burlap in a button project, I knew right away what I wanted to do…

paint burlap and button American flag decor by Jen Goode
Make an American flag decor sign using buttons and burlap. Using some paint on the burlap, it’s easy to get that rustic look with lots of fun texture and interest without having to create a super detailed piece. This project can easily be created in just a couple hours. I used Decoart craft paints for this project. Feel free to use what you have on hand.

Burlap and button project supplies
Materials you need:

Tie twine and glue buttons for faux sewn look

Welcome patriotic wall art
Step by Step instructions
Tips:

Patriotic wall decor using buttons and burlap
Taking time to recognize all the wonderful fathers out there is important & not just once a year, but the entire year through!
For this card I simply wanted to design something that my husband would love. I happen to love the colors kraft, red & blue together, no matter what the shades.
For the sentiment I had the notion to use a chipboard letter from Want2Scrap in place of the printed “F” but still use the fun swirls that come with that uppercase letter. To achieve this I opened a file in Photoshop, created a total of three layers, one for each word I was planning on using. I made the word “Father’s” larger than both of the other words. I then made sure that the “F” was even larger than the rest of the word. Finally, I created another layer. Then using the rectangular selector tool I created a selection over top of the “F” and filled it with white but kept the swirls that were coming off. My last step was to arrange the layers so that the sentiment was placed together so that there would be room to add the chipboard “F” as I had planned. I then printed the sentiment and die cut around it using Spellbinders Labels Four. To finish off my sentiment panel I simply inked the chipboard “F”, applied glue to the entire surface and applied red glitter to really give it “POP!”.
After that it was simply a matter of putting the card all together as you see here. I again used the Lumiere 3-D to adhere the buttons and fill the “naked” button holes, just like I did on my scrapbook layout earlier this month.
What a fun texture the strips of buttons add beneath the main focal image, don’t you think? Enjoy!

Supplies:
Sentiment: Duetica – Woodwynds Font
Cardstock: Bazzill: Red, White & Light Teal
Stamps: Gina K Designs – Vintage Backgrounds
Ink: Clearsnap Fluid Chalk Ink – Creamy Brown, Lipstick Red
Glitter: Clearsnap – Ruby Slippers
Ribbon: Really Reasonable Ribbon – White Seam Binding
Buttons: Buttons Galore & More – Button Tin in Sea Glass, red
Chipboard Letter & Gems: Want2Scrap
Other: Jacquard Lumiere 3D (To adhere buttons and fill button holes)
Linda enjoyed the Collage Trim Kit so much that she couldn’t stop with just the wallhanging! So, she created a layout to share using the same paper collection and leftover buttons from the supply list on the Patriotic Wall Art from last week. She was able to chaperone her youngest daughter’s recent class trip to the NH State House, and took a bazillion photos!

Materials Used –

If you would like to know more about Linda you can read her bio below or check out her blog. I know you will find so much more inspiration there!
About Linda:
Hi! I’m Linda Auclair, and I live in New Hampshire with my husband and daughters, Brigid and Aileen. My son Jonathan is away attending grad school at UPenn this year. I’ve been a papercrafter forever, and in the past decade, I have had the good fortune to work for a variety of companies, such as Fiskars, Creative Imaginations, Epiphany Crafts, and my current Design Team post at Echo Park Paper, as well as a number of online retailers. I have had my work published in magazines and eZines, and have been guest blogger/designer for a number of manufacturers. I am an active blogger, and love to share my designs, along with tips and tricks I have discovered, with my readers at http://elendae.wordpress.com/

Here in the U.S. we will be celebrating Memorial Day at the end of May. We also celebrate Independance Day on the 4th of July. Today I am sharing a simple way to show pride in your country with handmade lapel pins.
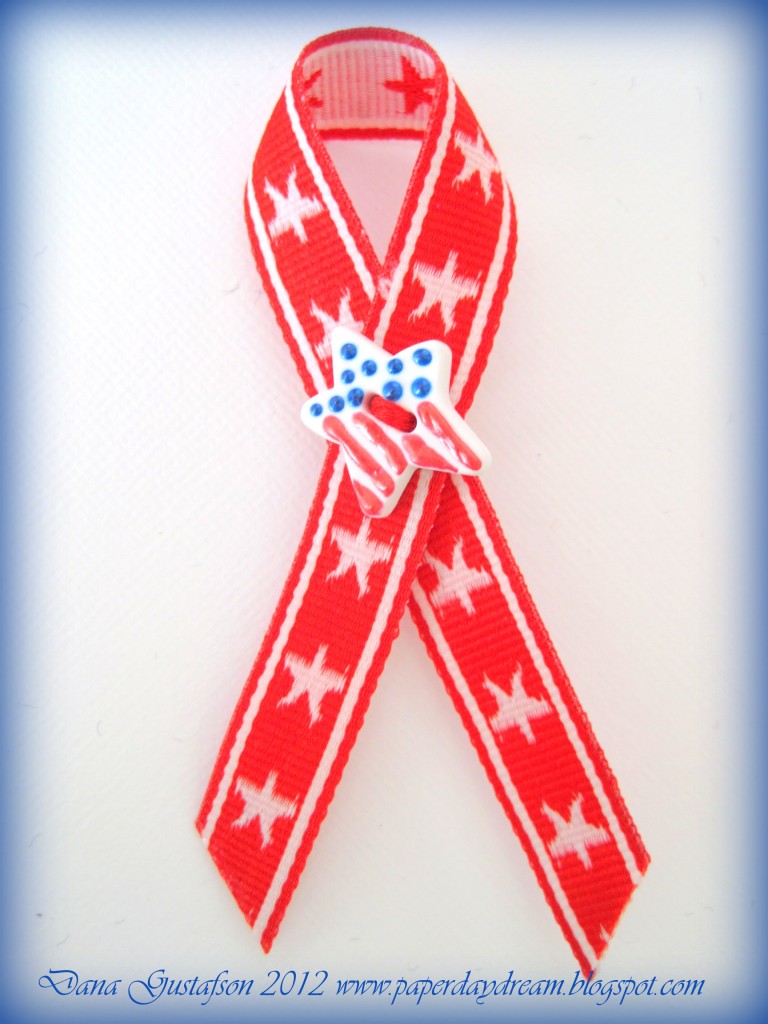
Gather a few simple supplies…
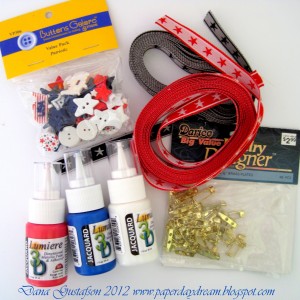
Supplies:
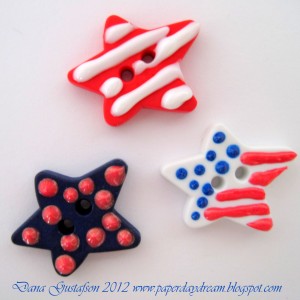
I chose to decorate the stars in the value pack using dimensional paint from Jacquard. Free handing dots and stripes is a breeze with the fine tip applicators on the bottles. Let the dimensional paint dry completely before the lapel pin assembly steps.
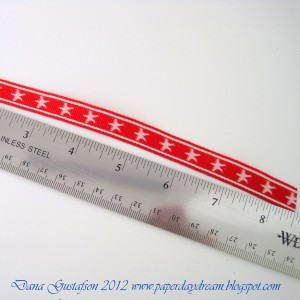
Prep your ribbons by cutting at approximately 8 inches long.

Using a contrasting color of embroidery floss, sew the lapel pin together with the looped ribbon between the pin back and the embellished button.
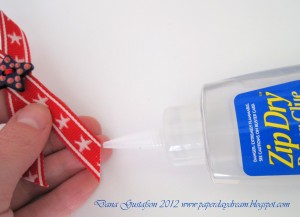
Run a fine detail glue like Zip Dry along the edges of the cut ribbon to prevent fraying.
These are a snap! Make a few and share them with your friends and family. Not a lapel pin wearer? I’ve pinned these on the side of canvas tote or they would look cute on a hat too. Thanks for stopping by! Have a great one!

PLease welcome this weeks guest designer – Linda Auclair. Linda is an avid paper crafter who is know for her prolific work and her fantastic use of embellishments. She is a natural pairing with Buttons Galore and More. She does such fun and timely work that we are going to feature today and next week too. Both projects have a patriotic flair and are perfect to display for Memorial Day and the 4th of July. If you would like to view more of her lovely work please visit her blog.
Materials used –
NicoleCrafts wooden décor heart (purchased at AC Moore)
Echo Park Paper’s “4th of July” Mini Theme Collection Kit http://www.parttimesally.com/
HAB602 Nautical Trim Collage Kit http://www.buttonsgaloreandmore.com/product/HAB602.html
DF93 Patriot Matte Round buttons http://www.buttonsgaloreandmore.com/product/DF93.html
CH34 Star Charms http://www.buttonsgaloreandmore.com/product/CH34.html
Tattered Angels chipboard alphabet
Jillibean Soup Alpha Beans alphabet stickers in Roma Red
The Twinery Twine in Marachino and Denim http://thetwinery.com/
Stickles Glitter Glue (Ranger)
Mod Podge Decoupage Medium (Plaid)
Folk Art acrylic paint in Brilliant Ultramarine (Plaid)

Instructions:


Can you believe Mother’s Day is quickly approaching? It is right around the corner and I love to make a handmade gift.
I want to share this artistic canvas made just for “Mom” using vintage doilies from around the house.
For this Canvas use an 8×10 canvas, and paint it with a sand colored acrylic paint.
After allowing the canvas to dry, take a craft spritz and carefully spritz canvas in random places. Set aside to dry for 10 minutes.
Using coordinating ink color, ink edges or canvas.
Take a pencil with eraser and dab into coordinating paint or ink, ink or paint onto canvas as shown in photos.
Adhere vintage doilies.
Grab some packages of beautiful Buttons’ Galore & More Vintage Gold buttons and apply buttons between doily stitches using hot glue.
Using rub-ons, carefully apply rub-ons in desired locations.

Using shank & pearl keepsake buttons, adhere over rub-on using hot glue gun.
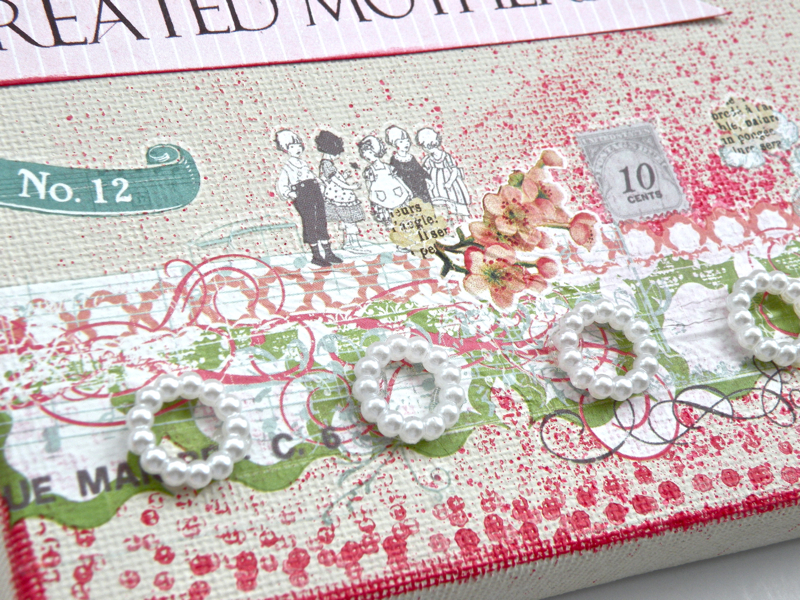
Set canvas aside.
Choose a lightly colored patterned paper, using home printer, print quote onto page.
Trim out words and hand cut pennant edging.
Ink edges.
Adhere quote to canvas.
Wrap it up and give with love.
I hope you enjoyed the post today- Pinky: Buttons Galore & More Design Team
Hello there! Today I am bringing you a super simple tablescape idea for spring using buttons, ribbon and clear glass jars…a “button-scape” if you will! I’m willing to bet we all have a hodge podge of glass containers around the house (mason jars are one of my favorites) along with small spring and Easter themed nic-nacs. Why not pull them together and make them a cohesive tablescape with the unifying ingredients of buttons, jars and ribbon?
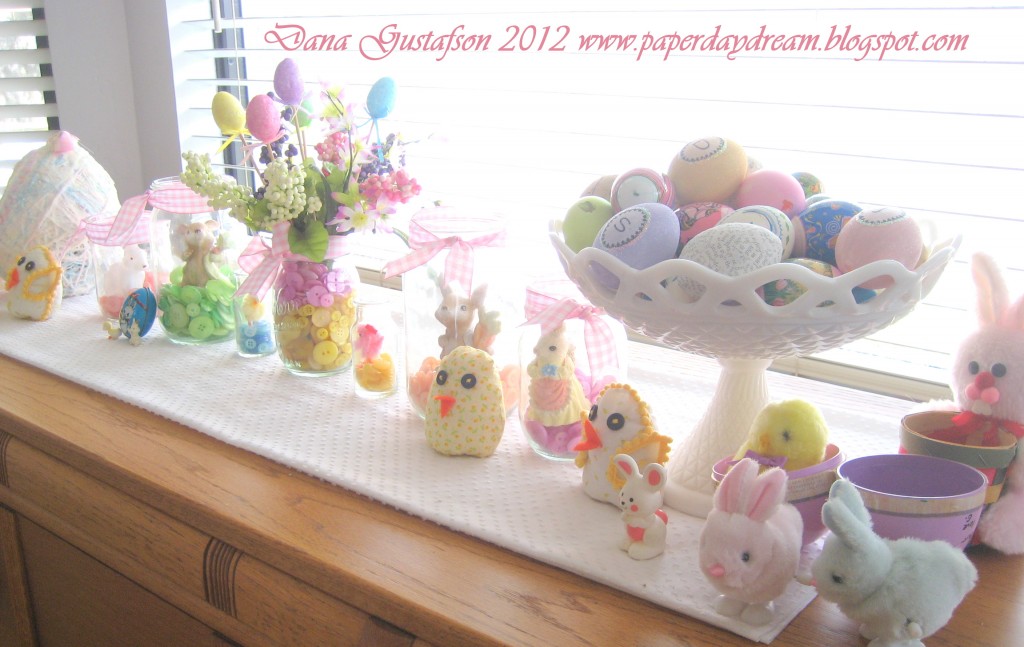
Materials from Buttons Galore and More:
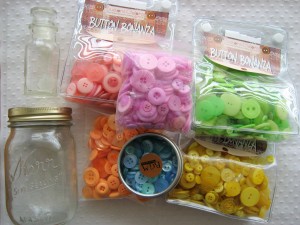
Other items needed:
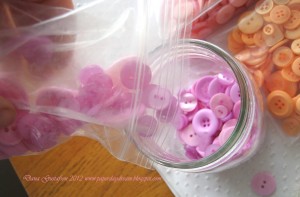
Are you ready for the super complicated directions???? Just kidding, this process is simple.
Check out the various items I used in my tablescape…
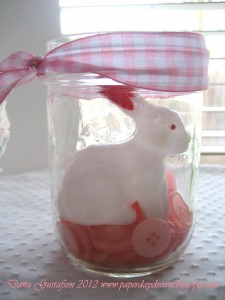
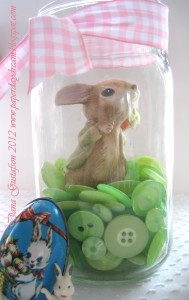
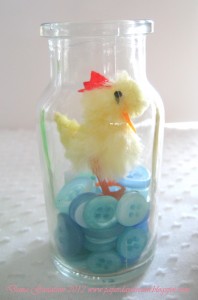

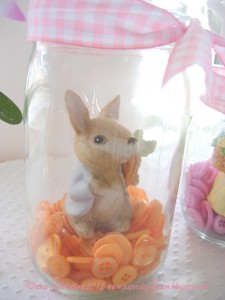
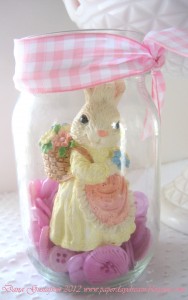
I loved the glass domed effect of the jars on my little treasures and the buttons are just the perfect pretty stage to show them off with!
Thank you for hopping by my post today! I hope it inspires you to put your buttons to work this spring!
Pinterest is the most amazing visual candy. If you are not familiar with pinterest… you really should be. But I must warn you that pinterest can be a tad bit addictive. Okay, not at tad bit, PINTEREST IS HUGELY addictive. We are starting a new segment with a pinterest pin of the week. We want to share some of the great ideas that are out there on pinterest. These pins might not use our button products, they might be created from a personal button stash, or from a grandmother or aunties button jar. But, no matter where the buttons originated from we find the projects inspiring. If you need an invitation to pinterest leave a comment in the comment section with your email and we will invite you. If you click Pinterest it will take you to the pinterest page where the items is located for more information.

Pinterest Pin of the week 3-22-12
We also found this easter egg button art similar to the above. If you want to order buttons similar to the buttons used on a this project click HERE.
If you are looking for spring buttons they are on special this week for $1.15 – check them out.

Spring Garland button art by Laura Bray
Has Spring arrived where you live? If not, why not whip-up a few Spring Fling Button Garlands to drape around the house until the real thing makes its appearance? Or use the garlands for your Spring holiday decor.

Spring Button Garland by Laura Bray
This project is versatile as you can be completely in charge of how you make it based on your skill level and materials available. It’s all about the flowers. The most important thing to remember is that this garland looks best with felt flowers and button embellishments, but you can create the flowers however you want. I used my die cut machine to create the felt flowers and layered a couple of different sizes and colors together. My color inspiration came from Buttons Galore & More’s Citrus Button Jar. I just pulled some buttons out of the bag that inspired me and then matched my felt accordingly. You can also just buy some felt flowers and then bring them up a notch with buttons. Because buttons make everything cuter!
Supplies:
Instructions:
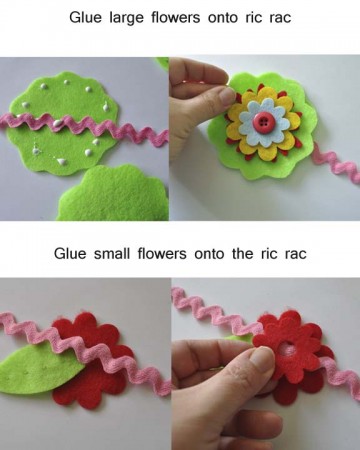
5. Using the same technique, attach a smaller flower to the right of the large flower. Space the flowers approximately 3″ apart. Make sure you glue all the flower fronts to the same side of the ric rac!
6. Continue attaching flowers, to either side of the large, middle flower until you reach the ends of the garland. Remember the pattern is to keep alternating large and small flowers.
Hang your garland and enjoy!
Project Designed by Laura Bray.

Handmade love notes are not just for Valentine’s Day. I’m sharing a little trash to treasure project with you using heart buttons and a paper box. The box hada little accident. I have several other boxes like it that I’ve decorated with my favorite Authentique papers, and this was my last box, so I wanted to use it for something special.
I took pictures along with way. A little love, a lot of tape, some heart buttons (of course) and other Doo-Dahs, and I think it outshines all my other boxes. There is a funny little story about embellishments below too.
Do you love, love, love Clearance? When my kids were little, they thought Clearance was a person. We regularly visit Uncle Clarence to see what he’s got for us. [insert chuckle here]
Anyway, I got the beautiful chunky glitter encrusted flower on clearance. It’s from Prima. The bad news, if it was on clearance, maybe they don’t make them any more? Sorry! Any gorgeous flower will do, and you could always add your own glitter.
Do you love those crocheted flowers? My friend Linda Weber makes them. I make things or send her stuff I don’t need, and she sends me hand made flowers. It’s a sweet barter system.
I added a small leaf underneath the rose, it’s from Creative Impressions. To the centers of the handmade flowers I added yes, a favored heart button, and a button from my Buttons Galore and More stash and used Beacon’s to glue it all down.
Supplies:
Additional Supplies

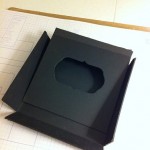
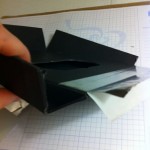
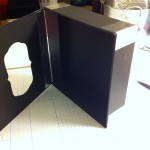
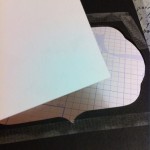
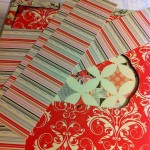
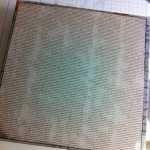
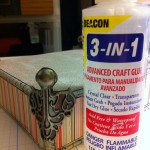
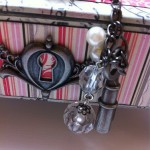
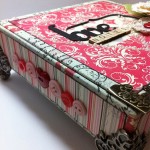
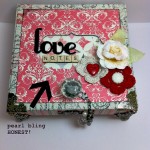
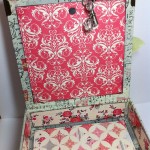
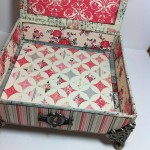
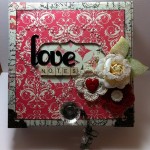
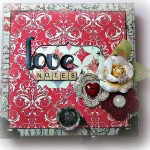
Make your own hand stitch shamrock button pin with scrap fabric and some green buttons. I used 3 different buttons from the Luck button tote for my pin project, you can mix and match however you’d like. Using some fabric glue and stitching with embroidery floss, you can make a whole variety of shamrock button pins to decorate or give away for St. Patrick’s Day.
For this piece I used denim, felt and linen. I pulled out threads on both the denim and linen to give more of a rough, frayed edge. However, you can finish the edges of your pins however you like. Coordinate your embroidery thread colors or create a contrasting look. You can make so many different variation of this simple pin with just a few different supplies.

Shamrock Button Pin by Jen Goode
Materials needed to make a shamrock button pin:
How to make your own shamrock button pin:
You can either glue your buttons on to the piece or stitch, these instructions I’m going to use the stitch method.

Make a fun shamrock button pin

Shamrock button pin back

Make your own shamrock button pin with green buttons
Making your own shamrock button pin is a fun and quick craft you can also make with kids. If you’d rather just glue the whole thing together, try using fabric markers to draw your thread marks. Use embroidery thread to create the tied look to the buttons before you glue the buttons to the fabric. Mix up the button sizes, embroidery thread colors and fabric you use for extra looks.
I’d love to see what fun you have with this St. Patrick’s Day button project!
Jen
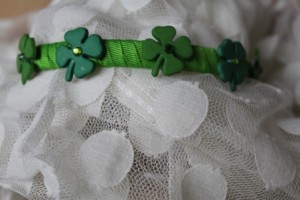
St Patrick’s Day Headband
Make this Quick & Easy St Patrick’s Day Headband today and wear it this evening….using “Match Ups” makes it so easy to do!
Supplies:
• Match Ups Spring Collection #2133 (5 clovers)
• Thin White Headband
• 2 yards ¼” Green Grosgrain Ribbon
• Beacon’s 3 in 1 Glue
• 5 Rhinestones
Scissor
Instructions:
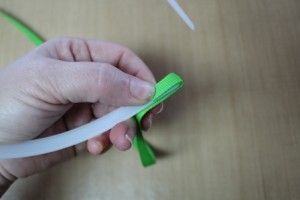
Glue small piece of ribbon onto ends of headband
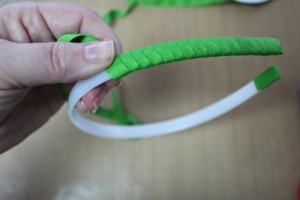
Then glue one end of ribbon at the end of headband and wrap around at an angle until headband is covered, glue end; let dry.
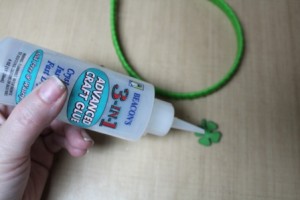
Glue rhinestones onto center of clovers.
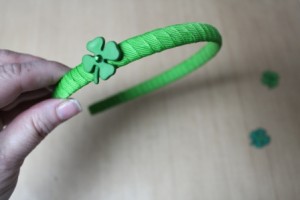
Glue clovers to headband starting on one side; you can stop with just one clover or
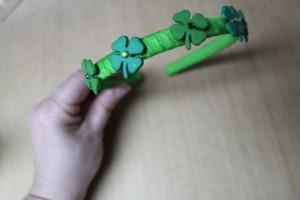
Glue the rest of the clovers onto headband as shown.

Luck of the Irish Key Fob
I’m 50% Irish and I make sure everyone knows it on St. Pat’s Day! Today’s project is a “Luck of the Irish” Key Fob. Put it on your key ring for a little extra luck. Who doesn’t need that on the roads today?
Luck of the Irish Key Fob
Supplies:
Instructions:
These would also make cute gift tags or luggage tags (you would always be able to spot your suitcase at the airport).
Happy St. Patrick’s Day!

St. Patrick's Day button wall decor
Hello, and happy thoughts of Spring, Shamrocks and Button Crafts!
I have a well buttoned, St. Patty’s Day themed project, and some cool instructions for creating packing tape transfer to use with Button’s Galore & More, wonderful Start Up’s line. Get ready to do a jig, sip a pint and get crafty!
Armed with a fine, spring-like bounty of buttons, start up shapes, printed designer paper and good old packing tape, this simple wooden mirror can easily become the canvas for some festive button craft that will have your friends and family green with delight!
In order to complete a simple packing tape transfer, suitable for enticing even the shyest of Leprechauns, you will only need to follow these simple steps:
1.) Select some printed paper (ink jet prints will not work) with designs appealing to your project and tag, or in this case, designer paper plus stamped image.
2.) Cover desired image with packing tape.
3.) Burnish the image.
4.) Cut out the selection and soak in a bowl of warm water. Soak for several minutes, or until paper becomes soft.
5.) Gently roll off the paper, by rubbing with your fingers, exposing the tape with the image embedded in the transfer material.
6.) Let dry, and then add color, if desired, with a permanent marker.
Here’s a shot comparing the printed paper, plus the Leprechaun that I stamped in solvent based ink and let dry, prior to adding the tape for the transfer. To the left is a transfer I made using just printed designer paper. I just love the magic of the transparency created by this simple technique. Below is a photo from a Christmas project I made, here, where I used images from designer paper to match up with some of our wonderful Christmas designs in the Start Ups line:
![]()
There’s SO much possibility in these fabulous shaped platforms for custom created embellishments. I could have a truck load and never run out of ways to use them!

Meanwhile, back at the jumpin’ shamrock, here’s my stamped, transferred, glued and completed Start Up piece, in it’s sparkly home – kinda makes ME want to do a jig…
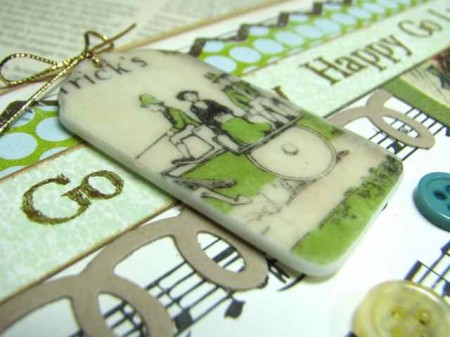
Also, here’s a shot of the way-simple, fun and darling Start Up tag I made directly from a scrap of paper! I sanded the edges a bit, after it was glued with clear adhesive, to give this gem a true vintage treasure feel. This is NO blarney – Start Ups are bushels of fun!
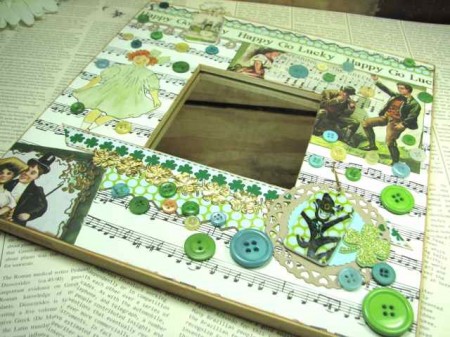
I know I’ll be grinnin’ mighty wide when I look upon this button-embellished frame – I’ll certainly be feelin’ the luck of the Irish! But don’t you be green with envy – you can make one TOO! Here’s hopin’ that you do, and that the wind is always at your back! Happy buttoning!

Button Bon Bons by Laura Bray
I love Valentine’s Day, but my hips don’t. If you give me a box of chocolates, I will eat it! So I whipped-up some calorie-free, faux chocolates. Tucked into an old chocolate box (of which I have more than a few, ahem), they make a darling Valentine vignette. Or pack up a few as party favors. Here’s the recipe:

Button Bon Bons
Ingredients:
Instructions:

Button Bon Bons for Valentine's Day
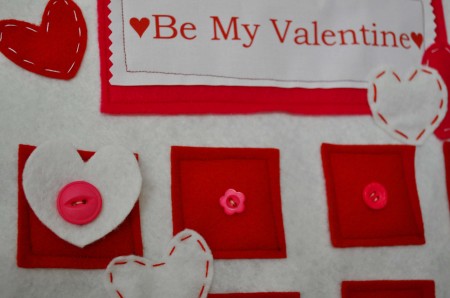
If your little one is anything like mine, you pretty much start looking forward to Valentine’s Day right after Christmas. I created this felt and button Valentine’s Day Countdown Calendar to channel some of my daughter’s excitement.
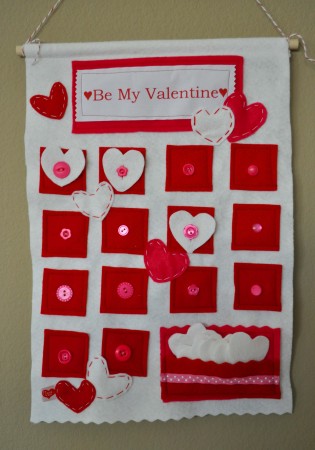
Supplies:
Instructions:
You are done! Store your white hearts in the pocket. As each day dawns, allow your child to button a heart onto one of the red squares. When the all the squares are full, it’s Valentine’s Day! Use the now empty pocket to store a few Valentine’s and enjoy your calendar for a couple of extra days after the holiday.
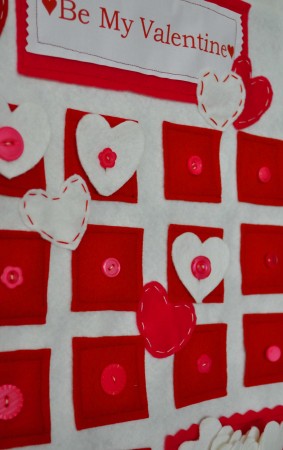
Valentine Countdown Calendar by Laura Bray
I know this calendar is a lot of work, but I was able to get mine done in about 3 hours total. I think it’s worth the work-after all it’s a heirloom item.

Just in time for Valentine’s Day crafting I found this lovely Heart Canvas mixed media piece over on Shari Carroll’s blog. I hope it’ll inspire you in your Valentine’s Day crafting. Be sure to look at several pages on Shari’s blog as she has LOTS of great projects! :)
There are two posts for this project here and here.

Haberdashery Button Heart by Laura Bray
I love, love, love the Haberdashery Trim Collage Kits by Buttons Galore and More. Just the word “haberdashery” makes me feel all happy & old-fashioned. And the goodies included in the kit? Well, once I started brainstorming for a Valentine project, I couldn’t stop myself. There are a million ways to use this kit. You could even buy a few, invite your friends over for a Valentine tea, and make these hearts. They’ll make great Valentine’s Day gifts, but would also be sweet in a baby’s nursery.
Haberdashery Hearts
Supplies:
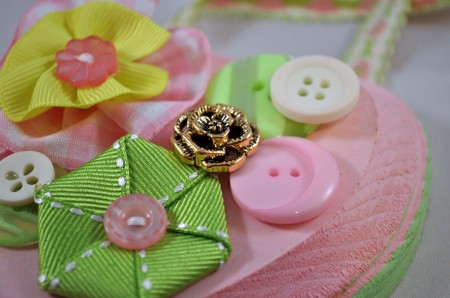
Heart Plaque by Laura Bray
Instructions:

Isn’t this a sweet, simple decoration for Valentine’s Day? Or a baby girls’ room?
It’s a little time consuming but not very hard to make. Let me show you how…

First off you’ll need a 14 inch extruded foam wreath, some fleece and Fabri-Tac from Beacon Adhesives.

Cut the fleece in a long strip wide enough to wrap around the foam wreath and to meet at the edge. Glue the fleece around the wreath as shown. Scrunch the fleece together to make it kind of wrinkly.
TIP: When I’m using Fabri-Tac to “sew” I often use pinch clothes pins to hold the fabric together while the glue dries!

Next grab yourself some yo yo makers from Clover. I used a large circle, large heart and medium circle.

I made about 24 yo-yos with four different fabrics. I have to say, that I love the yo yo makers. They made it really easy!
This part of the project is perfect for crafting while watching television!


Then sew buttons in the center of the yo yos. The Button Bonanza in Bubblegum is PERFECT for this!

Next, lay the yo yos out on the wreath in a pleasing pattern and then take small pins and pin them in place.

I used a bone folder to tuck the pins down in deep so that you can’t see them in the finished wreath.
You can either fill in the whole wreath or only fill in a portion of it like I did. And of course, it doesn’t have to be in pinks.. it can be any colors you choose! :)

Cute Button and Ribbon Valentine by Jen Goode
You can make pretty little button Valentines for your true love, or with the kids for their class using buttons and felt. I created these three pieces using scraps of felt and ribbon and a bit of glue, that’s it! You could use fabric scraps, paper or cardstock. You could even paint a background and use the buttons to access the art.
This is a great Valentine’s Day project to do with the kids. Cut shapes for the little ones and let them glue everything together.Easy peazy, right? Tip: lay out everything before adding glue. Then put glue in the shape where buttons will be placed, example: I make a heart outline using glue and then placed all the buttons on the glue.
Supplies you need:
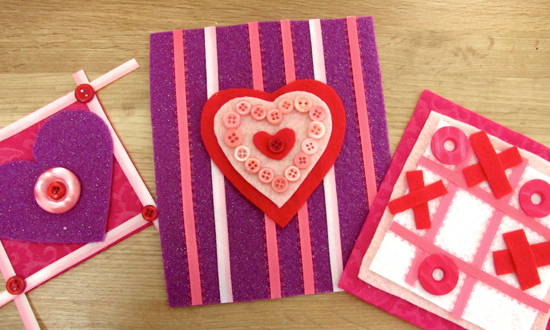
Button Valentines by Jen Goode
Mix and match your supplies with different layouts to create a wide selection of Valentines using your buttons. If you have a little frame, you could even turn these pieces into pretty Valentine’s Day art. Gotta love the buttons!

In case you didn’t get enough wrapping, tags and holiday goodness, last month… It’s onward and FORWARD: Valentine’s Day is just around the corner!
Good thing Buttons Galore & More has SUCH a wide assortment of buttons and lovely bits to get the imagination and crafty thoughts flowing.

With some simple supplies and a splash of colorful fun, a button embellished Valentine’s candle seems is the perfect project for a little post-Christmas togetherness time. Gather a willing, crafty kid, and LOVELY buttons from Buttons Galore & More. The wee-child in your life might just be heading back to school with some Valentine’s teacher gifts “in the can”, as it were. Move to the head of the class… AND have fun!

With satisfying crafty abandon, have the child pin buttons to the outside of a pillar candle, using half inch stick pins.

We had A LOT of fun with the pins! Use as many or as few as desired – you MAY want to remove them when decorating is complete.

Once button layout is complete, prepare 3 – 4 feet of wax paper, folded in half. Fold in half, again, and insert candle.

On a hard surface, with a heat resistant mat, heat the candle with heat gun, through the wax paper, until very hot. {This is where “parent” supervision kicks into high gear – I recommend a good heat glove for the first go-round} Going “horizontal” sections at a time, heat until the wax is visibly melting beneath the sheet of wax paper. Firmly roll and press the candle so that the warmest, meltiest section is then pressed, firmly, onto the hard surface. Repeat this step until entire candle has been well heated/melted and then remove wax paper. Buttons should appear sunken, and possibly covered with wax. When satisfied, pins can be removed, if desired.

Embellish base with cardboard, baker’s twine and wonderful button/accessory goodness from Buttons Galore & More.

Prepare a paper bag for presenting teacher Valentine’s gift, and finish with stamped Start Up tag, using solvent based permanent ink.

Save the chocolate {for YOURSELF!} and help YOUR child gift teacher, with a Valentine’s keepsake that will surely LIGHT up the heart! Enjoy!

It has long been established that nobody likes a skinny Santa, so make him regal and utterly unforgettable with some festive button embellishing!
Suitable for framing – I’m so excited to share with you a super craftilicious project, beckoning for buttons and a place of importance in your seasonal decor!

Armed with some of my favorite Buttons Galore & More products, and a smattering of extras, then this project is READY for fun…

In case you’ve never par taken in the mini canvas WRAP – {OMG! So FUN!} Here’s a quick breakdown of how to do, exactly that:
1.) Prepare to wrap a mini canvas by facing the “opening” or backside of the canvas, to the blank, or backside, of desired decorative paper.
2.) Score fold lines around the edge of canvas and cut flaps, so that the ends can be glued onto the “traditional” front surface of the canvas.
3.) Glue flaps down so that paper fits snug and clean around the edges. (The desired printed side should be exposed)
4.) Using a ruler guide, make a small “x” opening across the solid paper, exposing the recession from the original back of canvas.
5.) Crease and work edges so that paper will wrap snugly. Glue flaps to exposed wood and canvas.
6.) Using two sewing pins at opposing points, push from the inside of opening, so that the pin tip comes through at the two opposing corners.
7.) Cut 1.5′ length of embellishing wire and thread through, following the pin holes, from the inside of canvas “box”, out. This will be the spine of the ornament.
8.) Cut a small square of coordinating paper to fit inside opening and glue. Finish the inside lip of the box with decorative tape or paper. Fill with snowflakes, etc.
9.) Cut a matching acrylic square to fit on top of the entire front of the ornament. Using clear glue, adhere. Use clamps, if desired, to make a secure seal.

Glue Santa image to the top of the acrylic and embellish edges with buttons, shanks removed, from Buttons Galore & More, Gold and Silver Grab Bag.

Create a ribbon flower to embellish ornament:
1.) Cut a length of red and white gingham ribbon, sew the ends together to create a cuff.
2.) Sew a running stitch around one end of the cuff. Tie off and cut excess.
3.) Tighten ribbon to create bloom. Tie not and cut excess.
4.) Embellish with transparent button and bakers twine.
Enjoy! {But WAIT – there’s more!}

1.) Make a pretty angel “dangly” for ornament using two Start Up – Angels.
2.) Add color using alcohol ink and a blank alcohol ink pen, to add color directly to Start Up material. {No sanding required!}
3.) Sketch out angel robe in color of choosing.
4.) Add accent values, but allow ink to “do it’s thing”, making sure each color is dry before adding more ink.
5.) Change color by merely wiping pen onto scratch paper, until color doesn’t transfer, then change color.
6.) Build face, hair and suggestion of song book and wing definition. If results don’t please you, simply wipe surface with alcohol blending solution and let dry.
7.) Don’t overwork – just let the angle appear!
8.) Repeat steps for second angel and sandwich over wire with glue and glue dots, so that painted angels will be visible from both sides of ornament.

Embellish wire with beads of your choosing. Tie a festive ribbon from Buttons Galore & More Red and White Gingham Ribbon and thread through wire, so that it sits on top of the ornament. Add more beads or desired accents to the top of the ornament.

When complete, add ornament to your tree or use in window display to let the big man you’ve been VERY good this year!
Happy Holidays!
Buttons Galore & More products used:
Gold and Silver Buttons – Grab bag
Red and White Gingham Ribbon – 1″

I can’t begin to tell you how much I love these small brightly colored ornaments! Kristin at Urban Paisley shows you how to create a colorful table top tree to chase away any overcast winter day doldrums in her Tiny Button Ornament post.
Do you think I could get away with keeping this one out until Spring?

I know this is a little “patting myself on the back” but I thought I’d share a project I recently made and have posted on my blog at vickiodell.com.
There is a Mrs. Claus too and I’m thinking I might go back and add buttons to her dress.
You’ll find all the buttons you need for this project on our website at www.buttonsgaloreandmore.com.
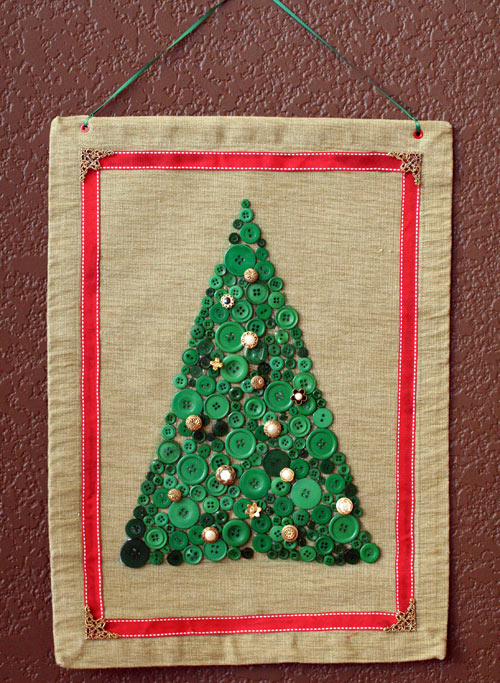
Christmas Tree Button Collage by Jen Goode
Make your own pretty Christmas Tree decor with buttons. You can add any extras you like including button ornaments and mini garland. I created this holiday button decor using an old placement that I recycled to create the background piece. I love it when a project is completed without sewing a single thing!
Materials you need:
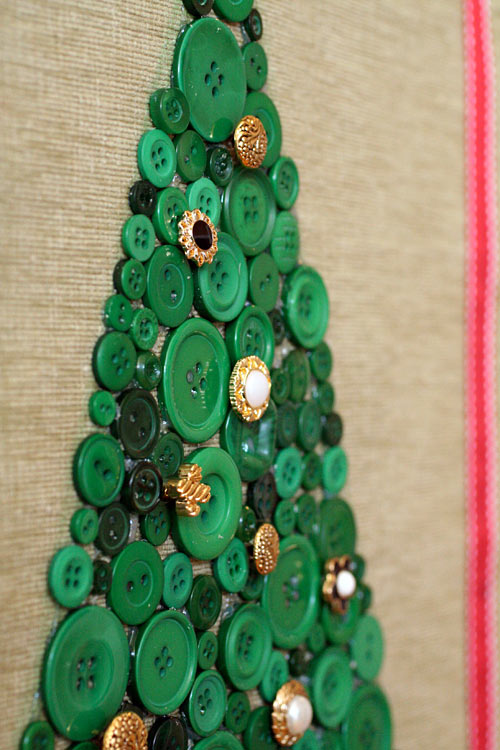
Christmas Tree Button Collage - close up
How to make this Button Collage Christmas Tree holiday decor

I recently made a video that is a great project for quick and easy Christmas gift giving; Crochet Dishcloth Embellished with a Useful Button.
Useful button? How does THAT work? Well, you’ll just have to watch the video to find out! :)
PS. This video started out as a “Freebie” project to our new facebook fans. To get all of the special goodies we offer on facebook please visit our FACEBOOK PAGE
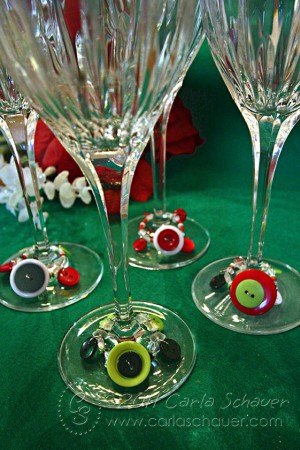
As holiday party season rapidly gets underway, one of the tasks the party host(ess) needs to consider is how guests can keep track of their drink glasses. One of the best ways to accomplish this is by using drink charm. Plus, it looks fancier than the plastic cup/black marker method.
I started by using a coil of memory wire, cut into 4 rings with wire cutters. With a couple jewelry tools, some frosted beads, and my Buttons Galore & More buttons, I had my charms made in no time at all.
Supplies and Instructions:
Buttons Galore & More buttons (Christmas Button Bonanza, Rainforest Button Bonanza, Winter Holiday Micros, and Rainforest Mix Micros)
Frosted and clear star and bicone-shaped beads
Red seed beads
Silver jump rings
Silver wire
Round nose jewelry pliers
Wire cutters
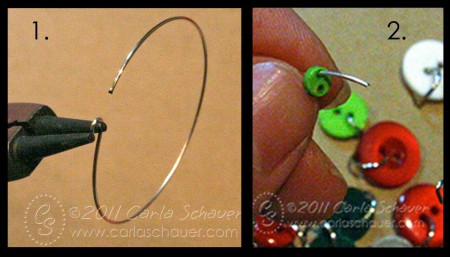
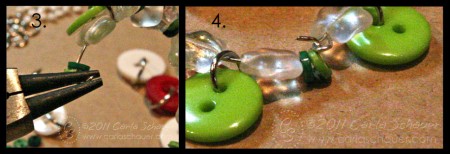
Each charm has a different combination of buttons and beads, and each has a unique focal button set. I used fairly traditional Christmas colors in this set, but the charms can be made to coordinate with any party theme.

Our Design Team Member Laura Bray needed a little inspiration for using up some gold and silver buttons from our Gold and Silver Grab Bag … so she grabbed a can of spray paint and created some adorable wall art. You can read all about how she did it in her blog post Button Decor.
I think that one or two buttons in a small frame would be an excellent idea for an ornament too, don’t you?

About this time of year, my kids get the itch to start making gifts for friends, teachers, and grandparents. I came up with a kid-friendly craft that will enable them to give a gift they’ll be proud of- and it’s a great way to share those wallet-size photos from school pictures!
I used a manual die-cutting machine for this (the Spellbinders Grand Calibur) because my kids, ages 6 and 10, know how to use it independently and frankly the results are great! But you can use hand punches if you like, instead.
Supplies:
First, have your kids cut large circles in 3 1/2″ or 4″ size for the bases. Then, cut the “wreath” portion by positioning the 3″ or the 3 1/2″ die and centering the 2″ die into the middle. Use a piece of painter’s tape to keep it from shifting around while you run it through the machine.

Save that area that is punched out- we’ll use it on the back!
Next, cut a piece of ribbon at least 6″ long and glue it to the base.

Take your wallet-size photos and position them so the face is centered in the middle. Cut away the excess with scissors. use a dab of glue to secure the photo to the wreath, then add more glue to the entire thing and glue it to the base.
Now to decorate! Use a little more ribbon to make a bow, and add a decorative button. Then glue little buttons around the wreath as ornaments.
While that’s setting up, write the child’s name and year on the Angel Start-up and glue it to that center from the first step. Lastly, glue that to the back of the ornament so that both sides are festive.

You’ll have such a good time crafting together as a family, and the kids will be so proud that they made the gifts themselves!

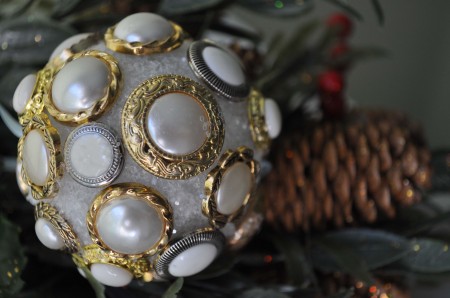
Button Snowball by Laura Bray
These super simple snowballs, made of buttons, are perfect for a romantic Christmas decor theme. Hang them in your tree, stack them in a bowl, tuck them into a wreath or give them as gifts.
Supplies:
Instructions:
Tip:
If you want to use the snowballs as ornaments, thread a ribbon through the ball, using a long doll needle. Be sure to add the ribbon before gluing on the buttons!
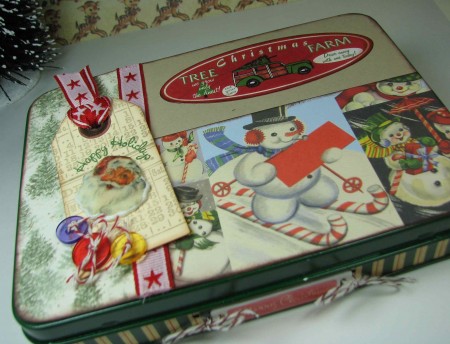
The buttons are OUTSIDE of the box, friends! {And… inside, too!} For your creative consideration, I’ve mixed things up with a crafty menagerie of buttons, Start Ups, Ribbon and more!
Buttons Galore & More products used:
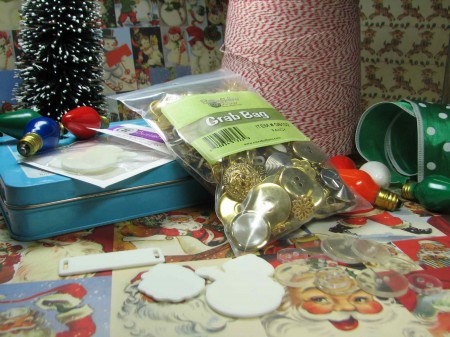
Just to help set the Christmas mood, I created a “beyond the box” scrapbook project, within… {wait for it…!} a darling altered box! The PERFECT assignment, to help stimulate crafty projects to give this season… {or KEEP for yourself!} Armed with assorted materials from Buttons Galore & More, and miscellaneous extras, just kicking around the craft room… I made this fun, interactive memorabilia box to share with all of you!
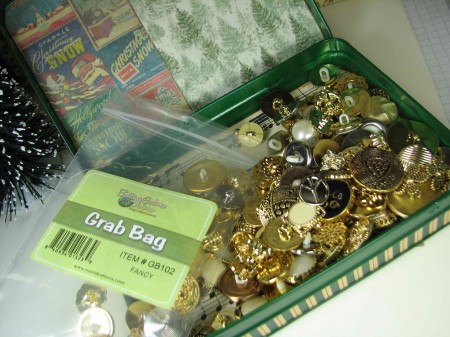
Spray paint and embellish metal box with color and papers of choice. Contemplate BUTTONS!
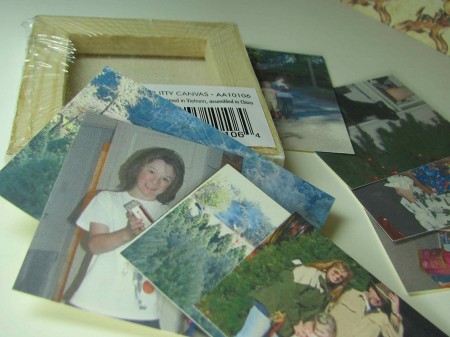
Reduce and print photos on a small scale to create accordion album to fit into mini canvas. Choose several photos to highlight your subject and print at normal scale.
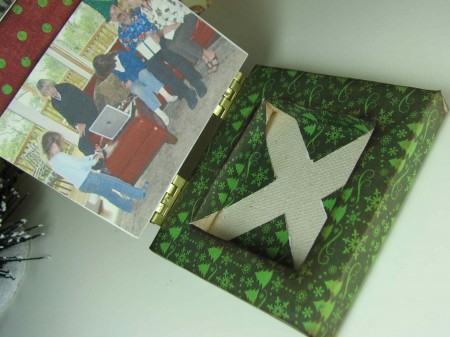
Wrap mini canvas so that the backside is covered completely by the paper. Glue flaps to the front of the canvas, as tightly as possible. Using a sharp blade, score an “x” across the covered backside of the canvas, exposing the inside. Fold triangular flaps down and secure with glue to create an open box type of frame. Cut a piece of chipboard to cover the entire frame and screw two sets of hinges to the front of the chipboard, after it’s been decorated, to create a “lid”.
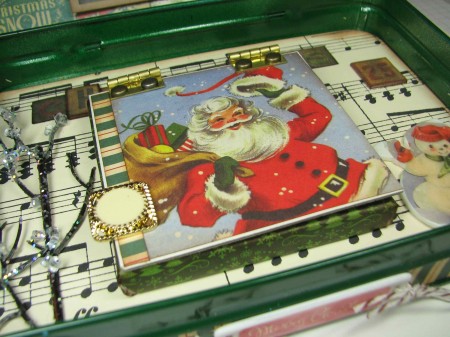
Embellish cover of canvas box with a stunning button of your choosing!
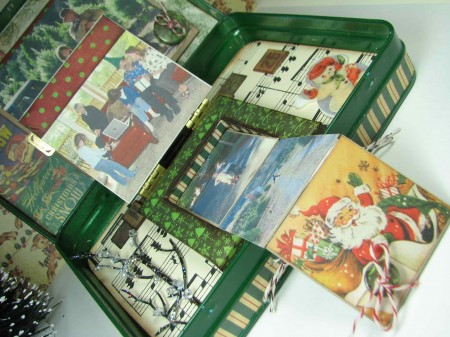
Acclimate small scale pictures to work in an accordion motion. Secure with glue and tape. For opening, pull attachment, add button, glued and sewn with clear thread, for strength.
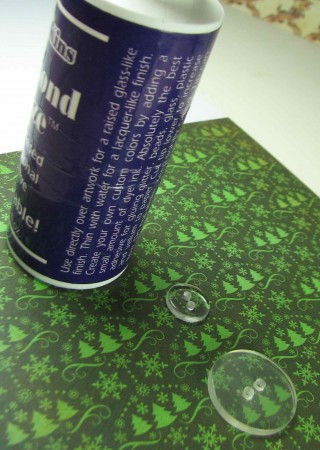
Customize clear buttons with clear, dimensional glue and decorative paper. Cover underside of button with glue, place on desired pattern from paper and gently push the excess glue out from under the button, then let dry. Once dry, cut the excess paper away from the button, re-poke the holes and embellish with baker’s twine.
![]()
Create packing tape transfers with desired printed images to fit onto Start Up shapes. Apply directly to Start Ups with clear glue and let dry.
![]()
Embellish box, as desired.
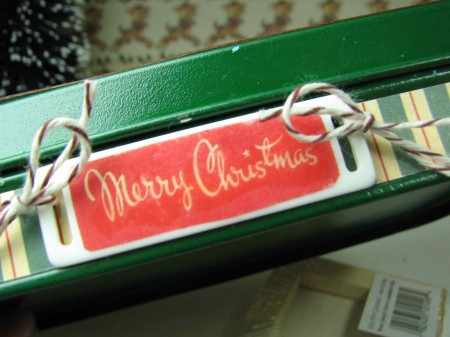
Yes, indeed! I’ll say the Holidays are off to a mighty happy start! Let the CRAFTING begin!
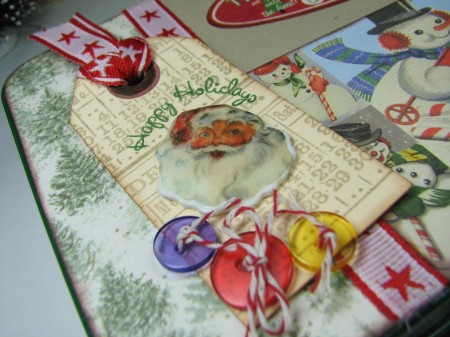
Thanks for letting me share this joyfully button festooned project with you!
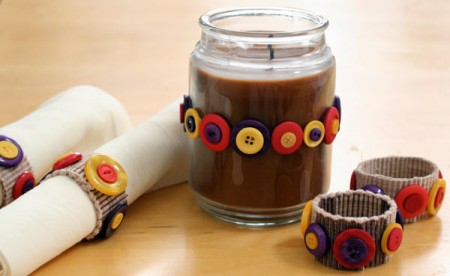
Autumn button napkin rings and candle by Jen Goode
Buttons are such a great embellishment for your table settings. Grab yourself a bag of Autumn colored buttons and make a center piece and some festive napkin rings and let the family gatherings begin! I made this set of 4 button napkin rings and embellished a glass candle holder with the same button set.
Materials you need:
How to make fall button napkin rings:
To embellish the candle jar, simply use the craft glue and place buttons as desired. Hold the jar sidewise for a few minutes to prevent the buttons from slipping before the glue has a chance to dry.

Autumn button napkin ring detail Jen Goode

I spotted these super adorable chenille stem flower ornaments on Pinterest recently and KNEW I had to share them with you. They were created by the super talented Diane Gilleland of Crafty Pod.
Not only are they ornaments but they could be turned into a brooch or ring to wear or even lovely package and card embellishments. Sooo many uses for such an adorable project!
Learn how to make your own Chenille Flower Ornaments with Diane’s complete tutorial and pick up a Button Bonanza Christmas Bag to make plenty of Chenille Flowers for everyone!
Want a chance to win a free Button Bonanza Christmas Bag? Just leave a comment on this post by Wednesday 11/2/2011 at 5pm for a chance to win one package. We will draw a random comment and announce the winner on our Facebook page Wednesday evening.
To see some of the photos Buttons Galore and More pins please visit our Pinterest Profile.

Making holiday gift tags is a great way to personalize gift wrapping using Buttons Galore & More buttons along with leftover bits and pieces from other projects. I used 2 larger paper scraps, die-cut and misted with Clearsnap Smooch Spritz, as the bases for these tags.
For this tree-themed tag, I used Haberdashery Collection Wood Buttons. It’s easy to change the color of the wood buttons using dye ink. I love that the buttons almost have a “stained” look to them. I just pressed the buttons into the ink pad until I was satisfied with the color and let them dry a few minutes. After gluing the buttons in a tree shape, I tied a ribbon and an embroidery floss scrap to finish the tag.

I used the Snowman Parts buttons from the Holiday Collection to make the second gift tag. I edged 3 white circles (1.5, 1, and .75″) in light blue ink and used them to build the snowman base on the left side of the tag. Then the addition of the hat, black buttons, mittens, and sign Snowman Parts gave him his dimension. A face and arms drawn with Clearsnap Smooch, and a scrap piece of dotted ribbon completed the scene.
Have fun with your button stash this year and add some whimsy to gift packaging!
Thanks for stopping by!

Button Snowman Ornament
Need and ornament for a gift, package topper or an ornament exchange? Why not make your own this year. Button Ornaments are a great and inexpensive solution. I made a few dozen while catching up on my favorite tv shows. The buttons I used come in a great storage jar that also makes it easy to craft on the go. For me on the go is not in my crafting cave. I also made a cute wreath using green and red buttons. Stop by http://365daysofcrafts.com after Halloween to check it out.
To make this cute and simple snowman you will need:
a wire cutter
14-20 guage wire. approx. 24 inches
one orange bead ( barrel or bicone)
two brown or black beads for mittens
Various size black buttons (5- 8)
White buttons ( 18-26)
I used buttons from a jar in the Portrait Collection
Directions
Cut a 12 in piece of wire. Make a loop or add a crimp bead at the bottom. Stack white buttons on to desired height. Wrap a six inch piece of wire around to form arms. Attach beads for mittens and cut off any excess. Cut off a3 inch piece of wire and attach orange bead as the nose. Stack on more white buttons and then add largest black button to form brim of hat. Stack on more black buttons to make hat. Use the remaining wire to form a loop as shown.
Tada! A snowman button ornament. If you would like to see more of my work please visit http://365daysofcrafts.com
Toodles, Niki

Our own Design Team member Beth Watson recently posted this project on her blog Beth Watson Design Studio.
Super adorable!
Please visit her blog here to get the instructions!

Are you looking for a little something special to wear to celebrate Halloween? A bead and button bracelet might be just what you are looking for!
There is a video Button Bracelet for you to see the basics of how this goes together.

And I used the Button Bonanza packs in Black and Orange along with a strand of coordinating beads.

This is a close up of the bracelet about half way done.

Now all you need is your favorite Halloween candy!

Candy Corn Treat Cups
Halloween is one of my favorite holidays each year! I love to make little gifts and treats for the kids’ friends, co-workers, teachers, etc. These cute as a button Candy Corn Treat Cups are fun and easy to make in an afternoon with the kiddos!

You probably have most of the supplies needed already around your house. I used White Buttons from the Noel Button Tote plus Yellow and Orange Buttons from the Scary Button Tote. I like to spearate my buttons by color and organize them in these cute plastic jars I found at the craft store, that way whenever I need a specific color it is right in reach. The Button Totes have a great variety of sizes, which makes them perfect for this project. The rest of the supplies needed are: Americana Paints from DecoArt in White Wash, Jack-O-Lantern Orange and Moon Yellow, peat pots (or small terra cotta pots), a hot glue gun, red line double sided tape, black crepe paper streamers, a chenille stem and ribbon.

Paint a 1″ wide stripe of White Wash at the bottom, a 1″ wide stripe of Moon Yellow at the top and a 2″ wide strip of Jack-O-Lantern Orange in the center of each cup. Lay your buttons out on your work surface and glue them on to each painted stripe in a random pattern.

Poke a hole in either side of your cup along the top edge. Insert each end of the chenille stem in to each hole, twist to secure.
Place a 10″ length of double sided red line tape down on your work surface (I work on a cutting mat so the red line tape won’t stick permanently) and remove the red line backing. Pleat your crepe paper streamers along the entire length – you will use about 20″ of streamer to make the pleats nice and full. Remove from work surface and adhere to inside top edge of cup. Tie several lengths of ribbon to handle, fill with treats and give as a gift!
Happy Halloween Crafting & Thanks for stopping by – Beth Watson
Hold on to your buttons – this might scare ya!
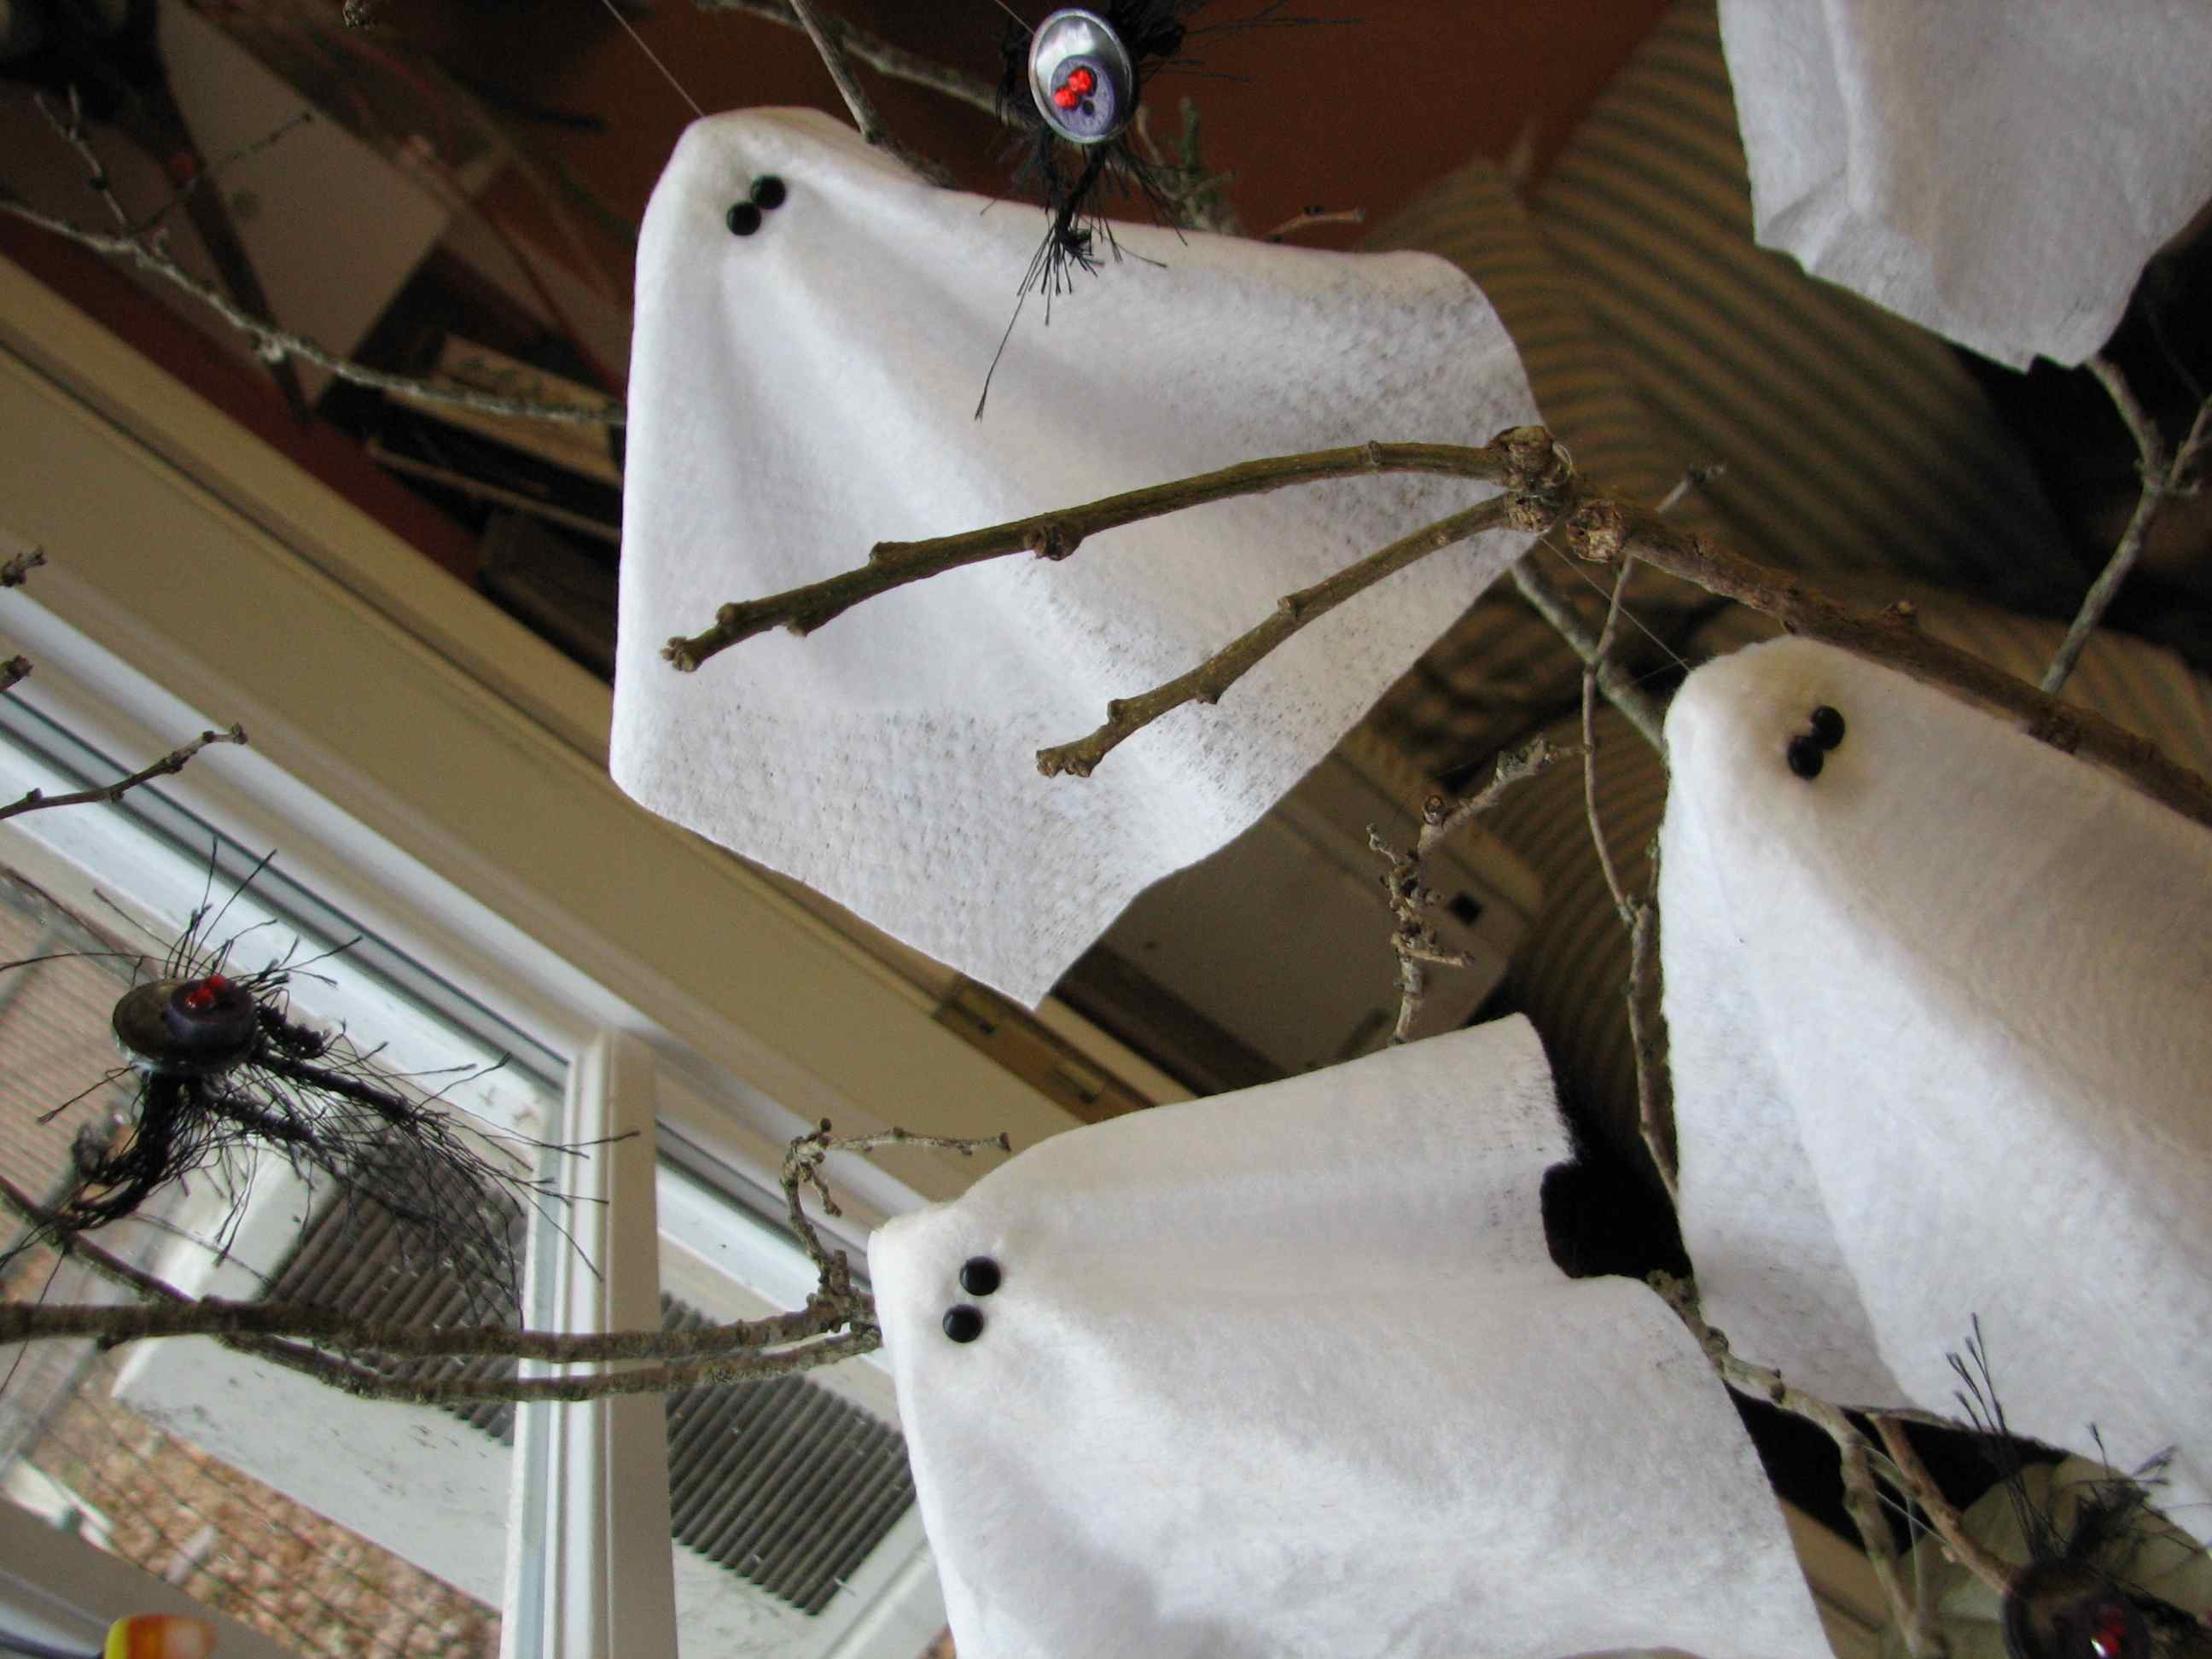
It’s just a given – holidays are more fun, with buttons!
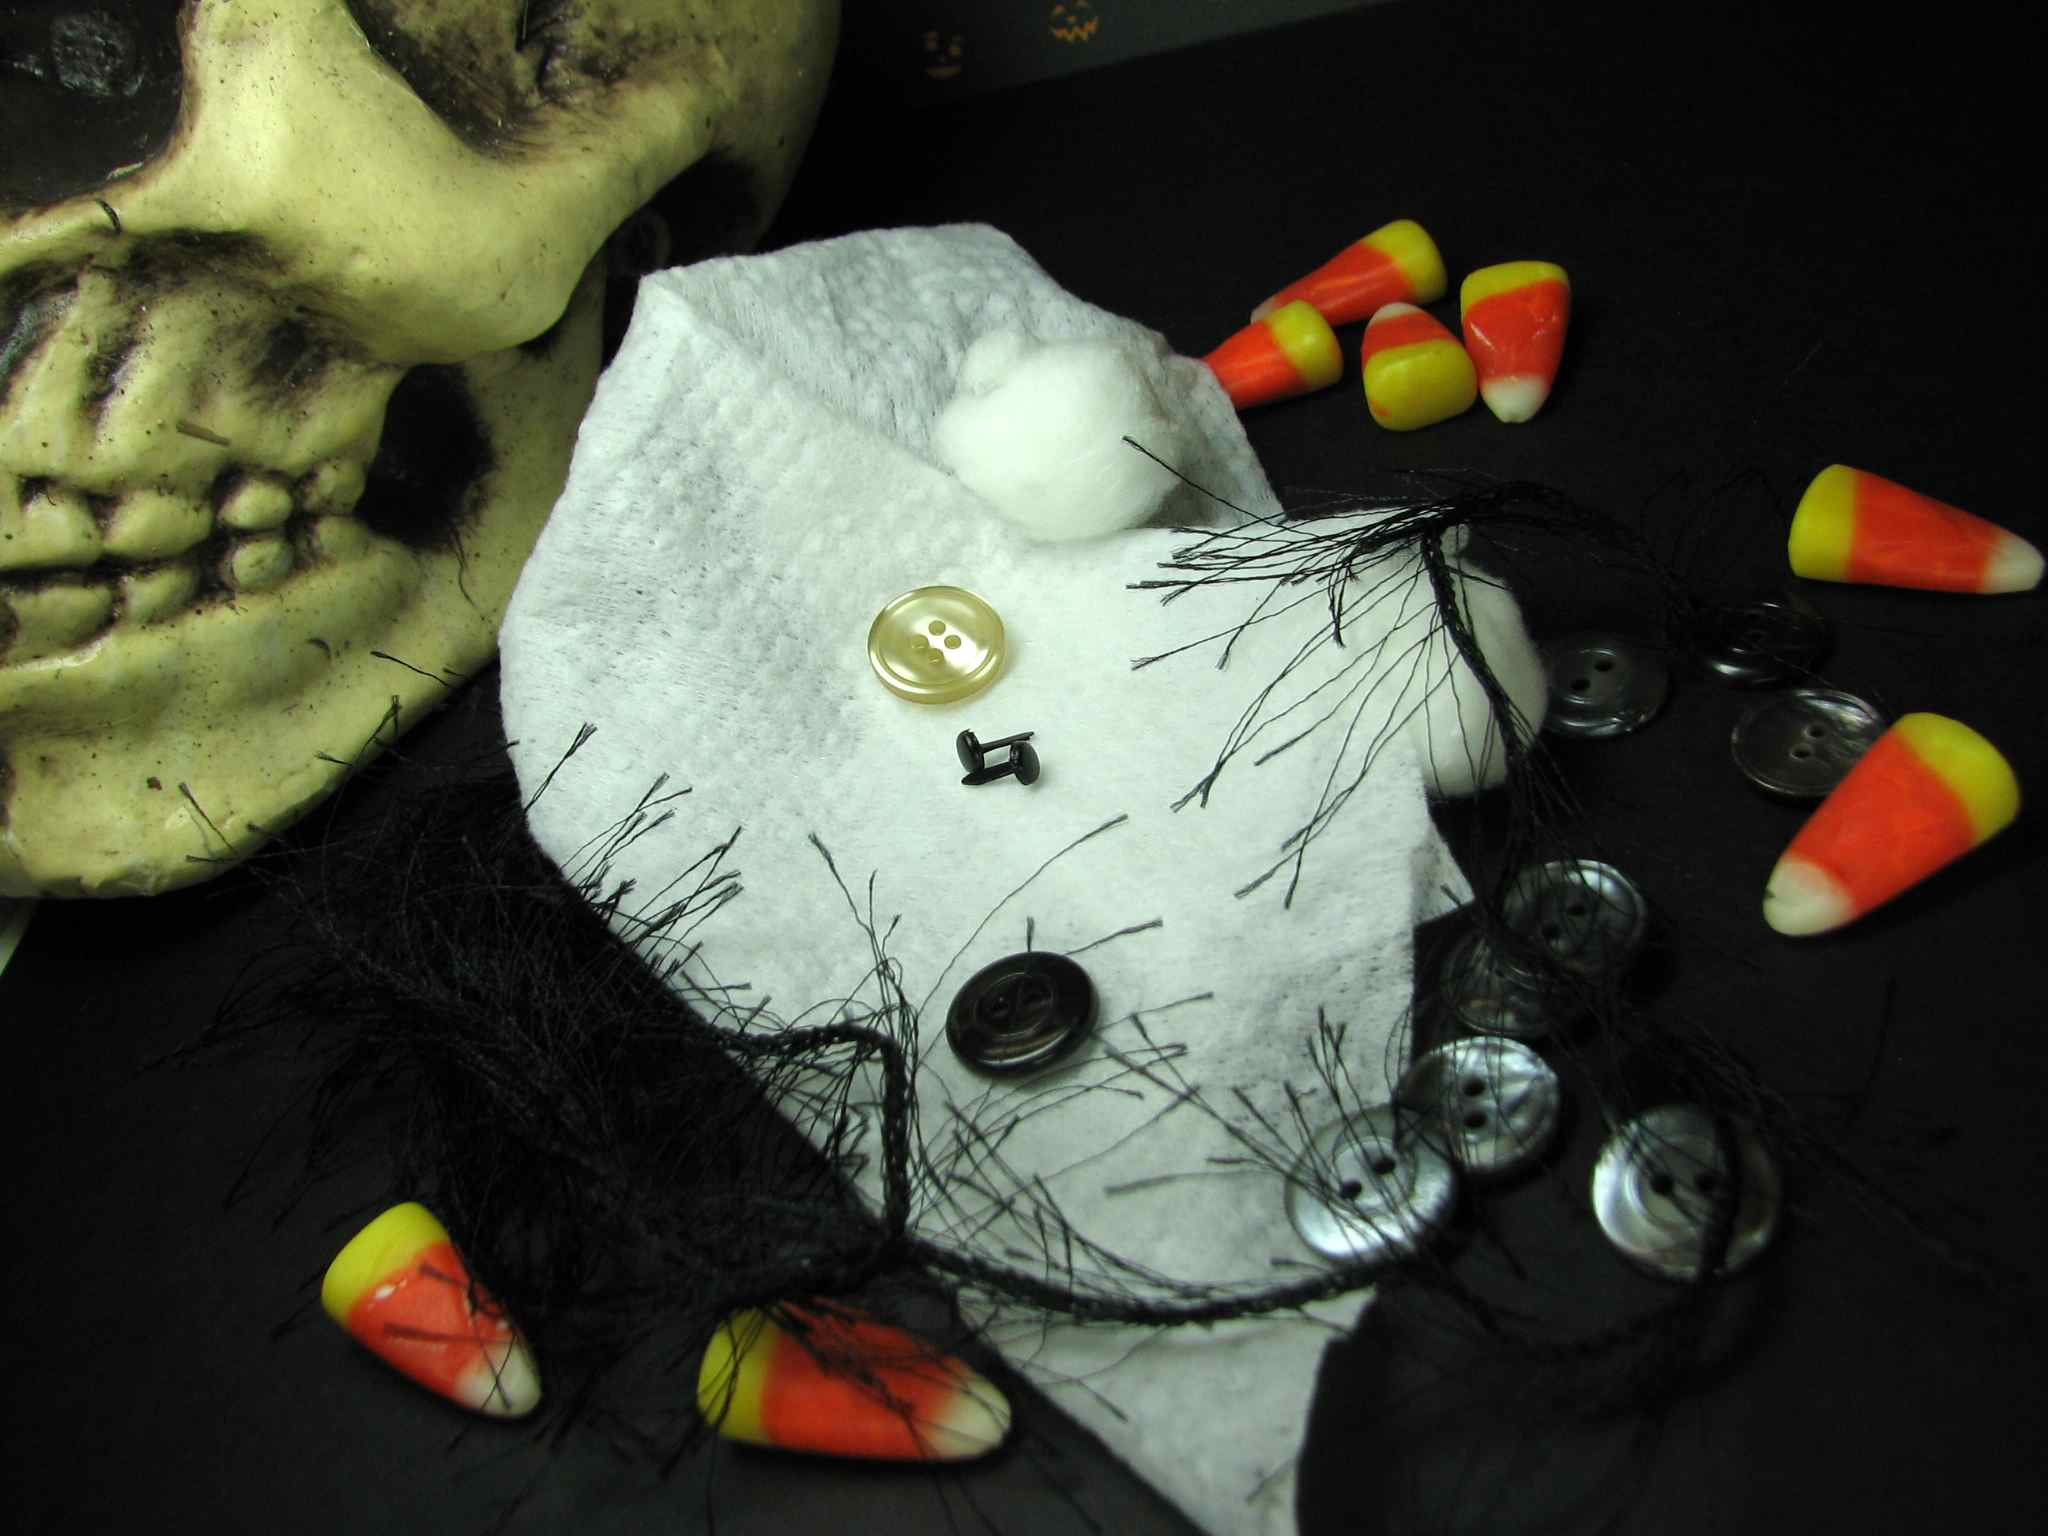
And we’re looking right down the barrel of one of the BEST holidays to get your buttons into the spirit – HALLOWEEEEEEEN! Don’t be afraid, to let inspiration take hold of you!
The spirits told me to grab a dried baby wipe {for CRAFTING! Doh!} and let it drape over a shimmery pearl button from the Wedding collection… for a VERY haunting exploration….

Festooned with small black brads, poke through the front of wipe, and THROUGH the button holes…
…then secured from the back, but under the drape of the baby wipe.

Glue half of a firm cotton ball over the bent ends of the brads with Fabri Tac and let dry.

Spooky! Right?
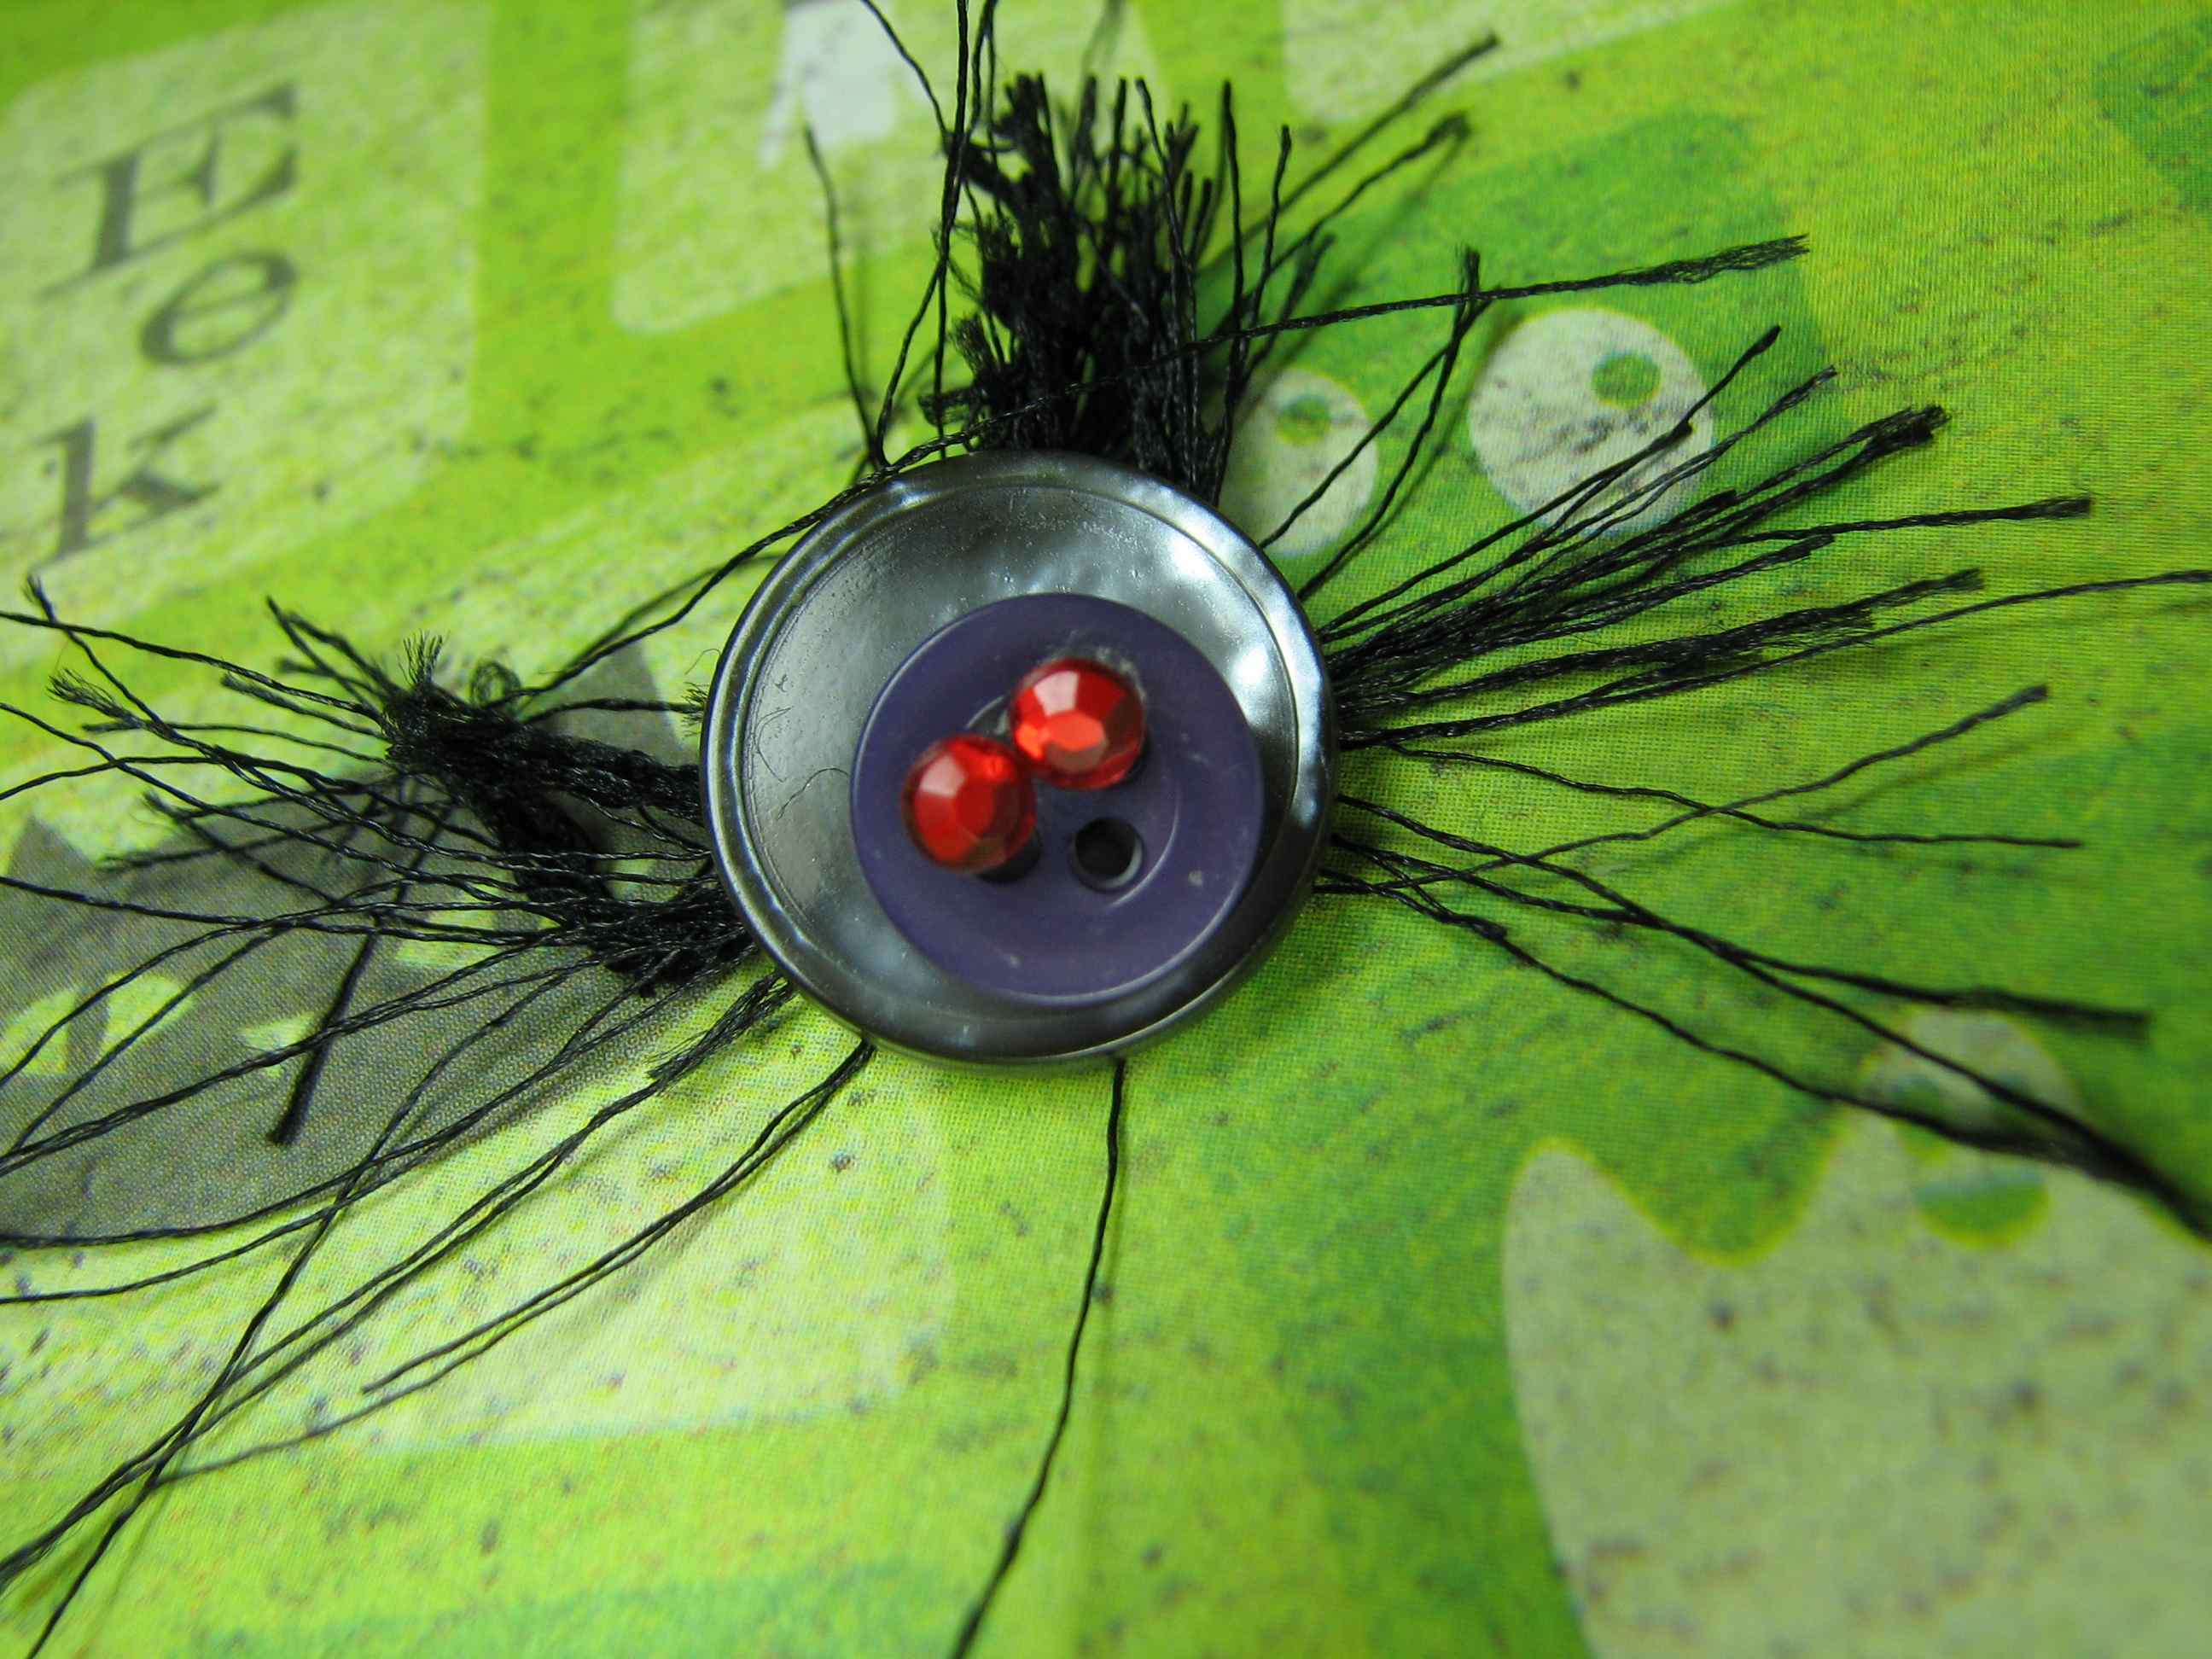
Ohhhhh, noooooo! Spooky button ghosts don’t like to haunt alone… So I made some FRIGHTENING button spiders to go with!
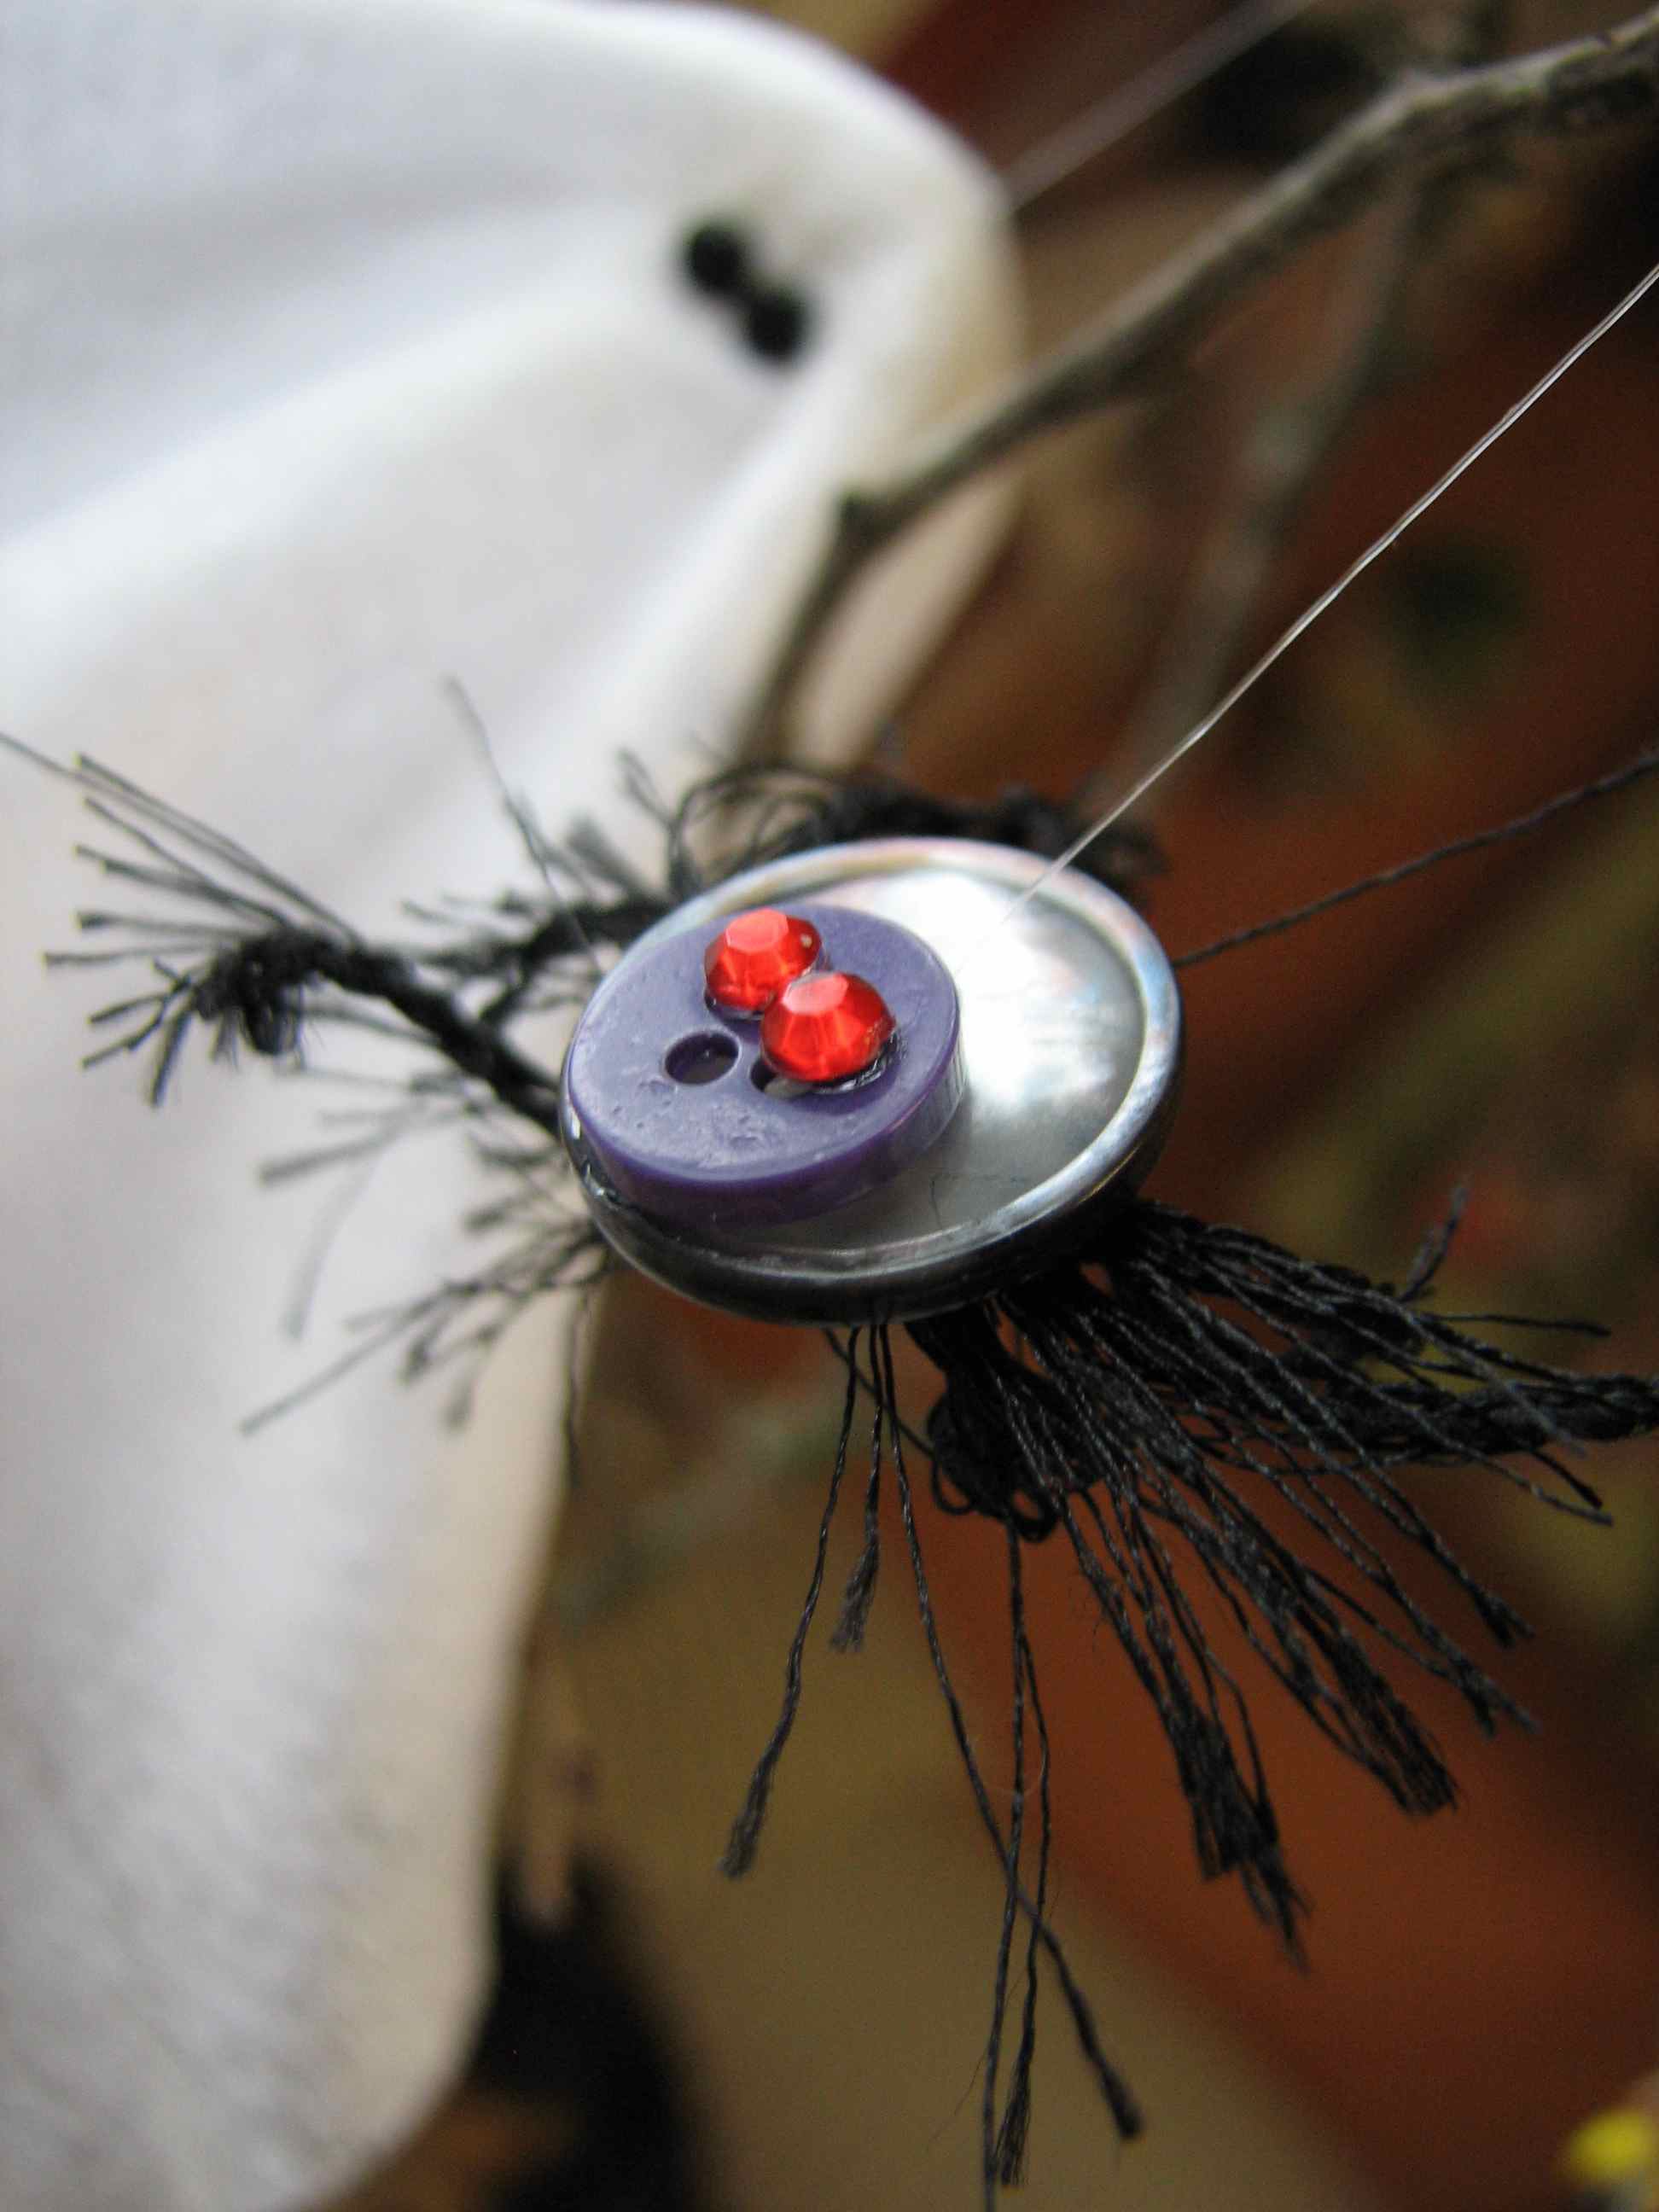
Sew three, 1.5 inch sections of your favorite “spider leg” twine to the middle holes of a button. Attach bling eyeballs to smaller button, so that one hole shows below the eyes for a ghoulish expression… Glue it to the larger button, near the edge. Can you hear it? “Ooooooooooowwww!” {Muwah ha ha!}
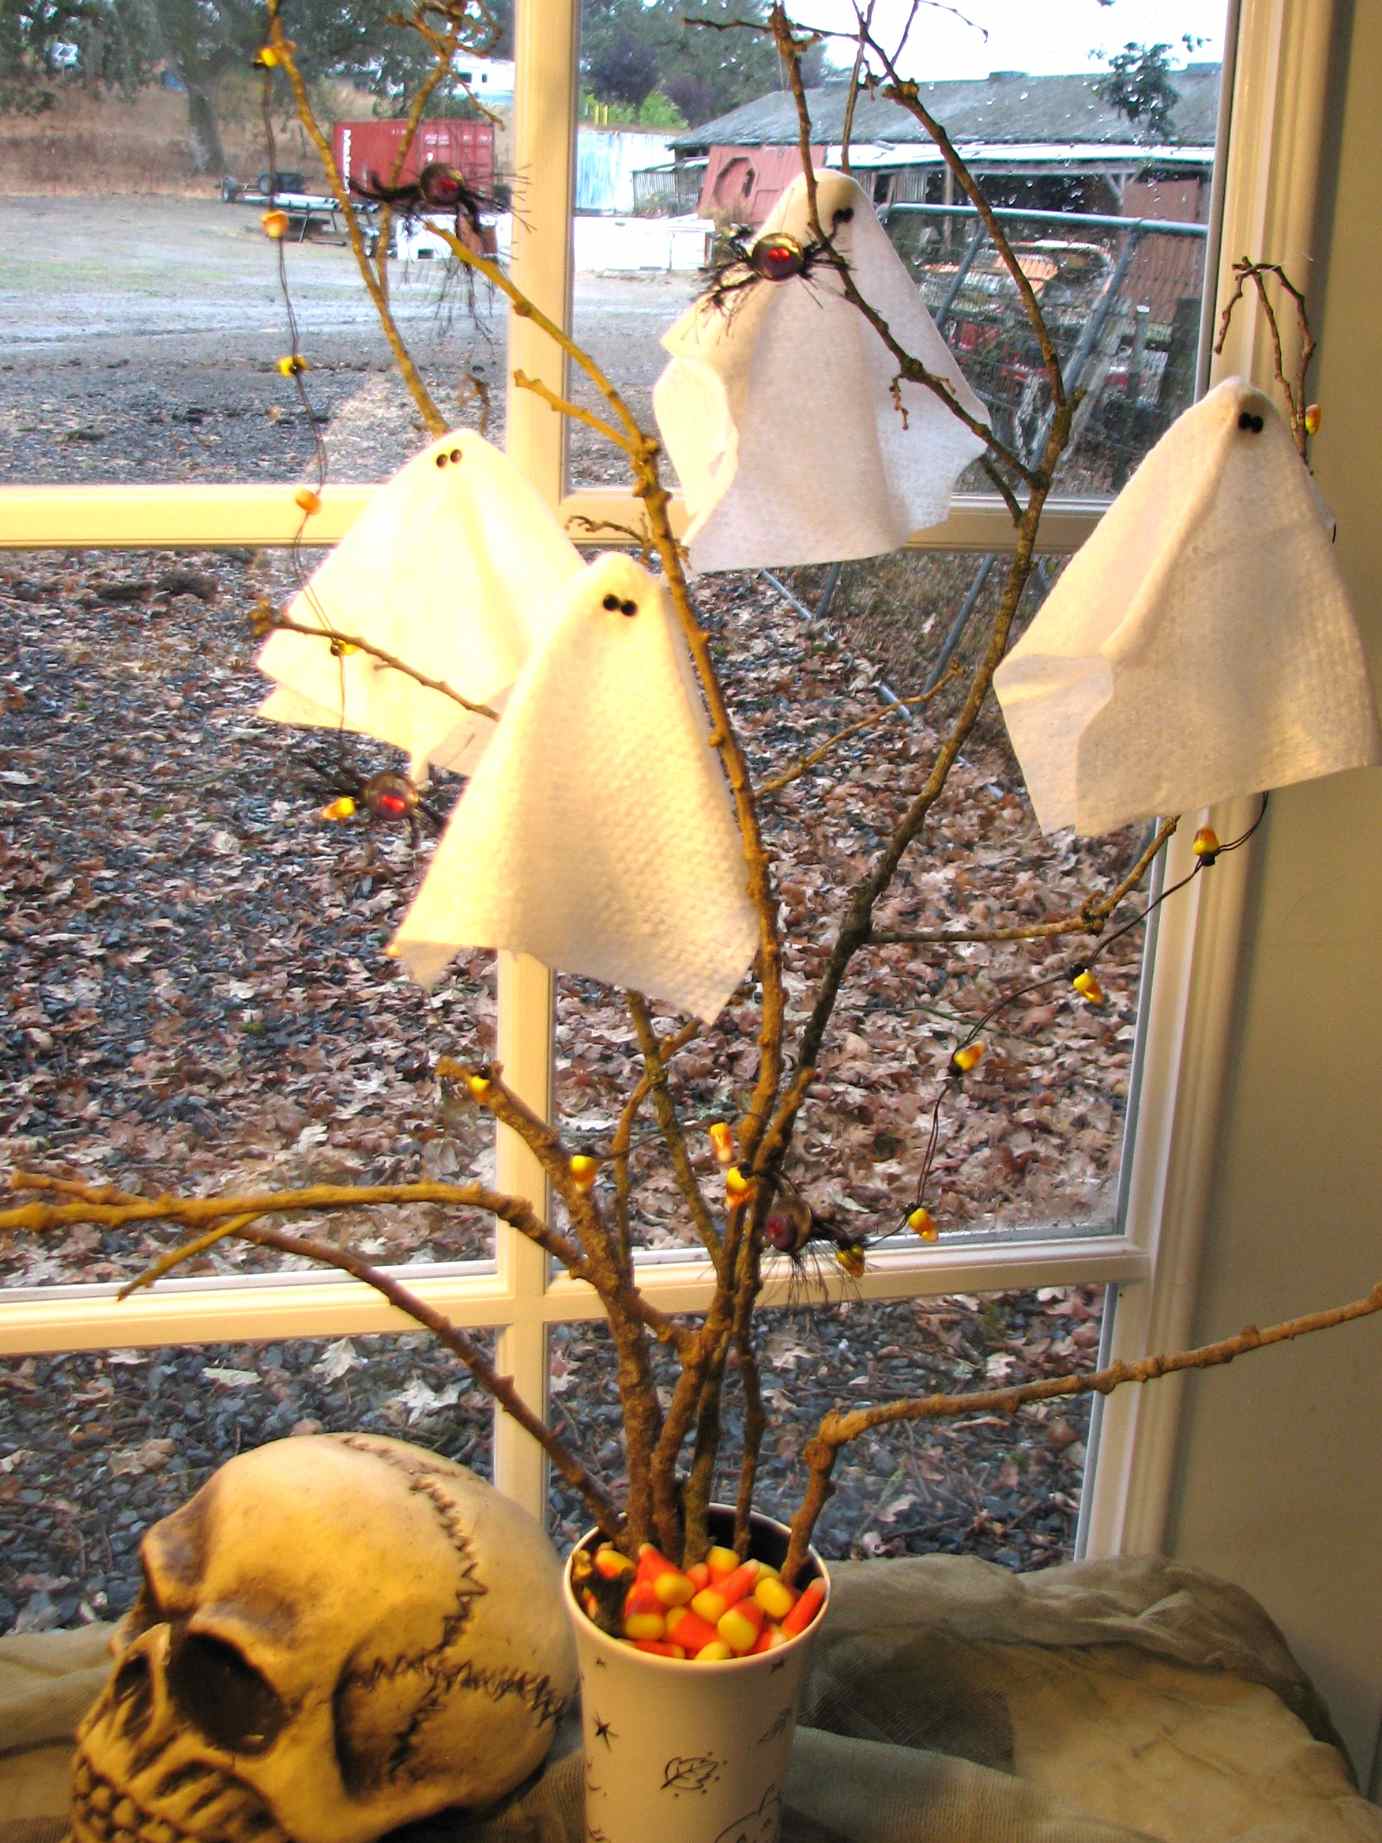
Thread all creatures with clear thread and dangle from a well balanced, dried branch. Place in a weighted cup or pot. The perfect cup-o-thrills and ghoulish delight, to adorn your favorite window sill or table top! Happy CRAFTIN’!
 Halloween Medley
Because it’s the end of the month.
Because we have 666 followers on facebook and I have a goal to get to 700 by the fist of September .

Jack O' Lanterns
Because Halloween isn’t so far off.

Halloween Treats
And just because I like you so much!!
Buttons Galore and More will give away these THREE, super fun, and brand spankin’ new Halloween Themed Button Packs!!
These are brand new for Halloween 2011. You can bet the lady next to you at the crop doesn’t have these yet!! :)
How to Enter:
Go like us on FACEBOOK and come back here and leave a comment saying you did.
That’s it!
I will choose a winner on Thursday September 1st in the afternoon and announce the winner here! :)
GOOD LUCK!!

By Elle Price - from Flickr
I know, I know. The grill is still hot from the 4th of July and I’m posting a photo of a Christmas project.
But really, can’t you just see pouring all of your left over Button Bonanza bags into a large bowl and making this little cutie to use up the buttons you have hanging around?
Unfortunately there weren’t any instructions with the photo but it’s a great inspiration project. In fact, I can think of a lot of reasons to make a mini wreath with buttons. Can’t you?
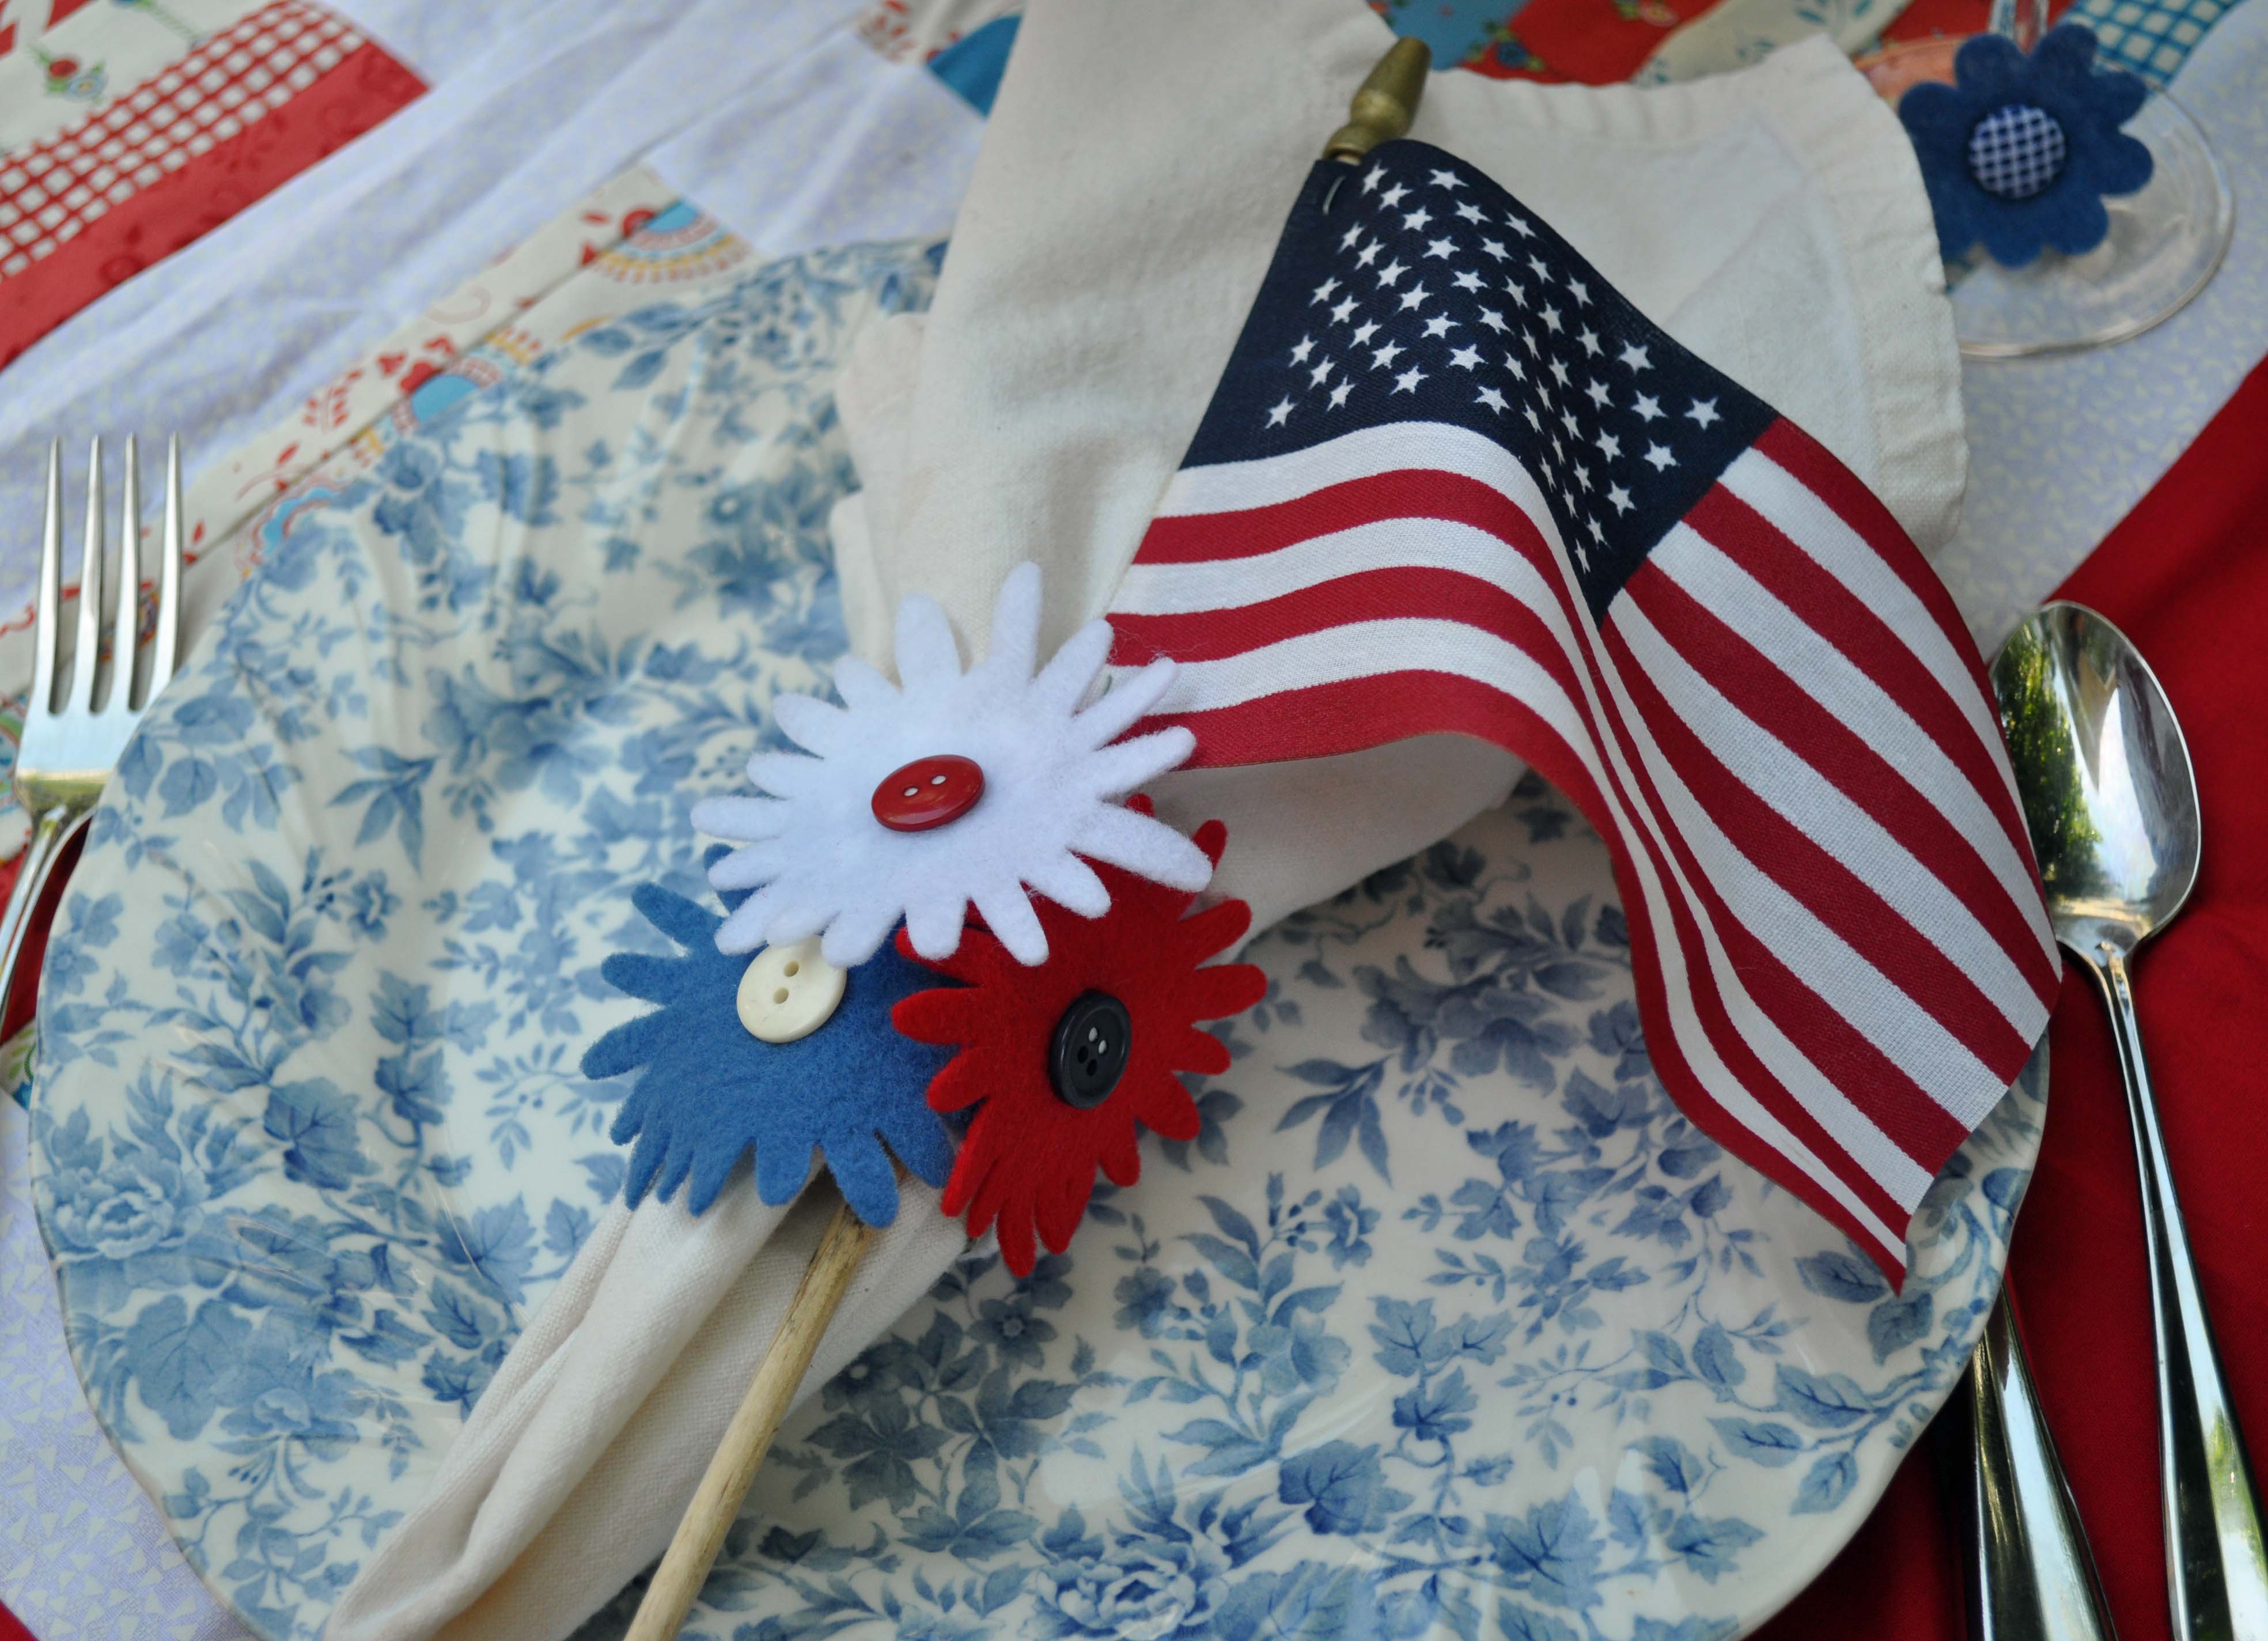
Happy Fourth of July to all our U.S. readers! Today, I thought I would share a cute tutorial for festive napkin rings. They are so easy you can probably whip-up a set for this afternoon’s BBQ!
Supplies:
Instructions:
Now, slip a napkin and maybe a little flag into the ring and you’ve got a party!
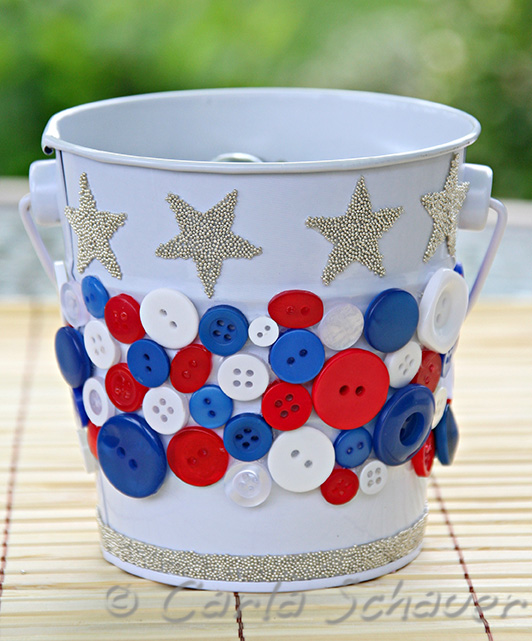
The 4th of July weekend is the perfect reason for a celebration barbeque in the backyard. Use these $1 white metal buckets and Button Bonanza All American Mix by Buttons Galore & More to make patriotic décor perfect for the party!

Here’s a special gift for Dad- a handmade frame with a photo of someone who loves him!
For my first blog post here on Buttons Galore… I chose my new obsession. Art quilting. I can eat, sleep and breathe it (and I used to be a paper girl ). It’s fun to go out of your comfort zone to test your creativity and try something new! Give it a try.

Easter Egg Crafts with Buttons- NIki Meiners
Creating simple Easter decorations does not have to be a chore. You can create easy DIY home decor with a few simple materials. You can customize the colors to your taste.

Aren’t these adoable? I think they would look great at Easter brunch place settings or mixed in with other decor down the center of a Easter dinner table.
Click the link to find out how to make these super cute Button Adorned Easter Egg decorations.
Oh! And if you like these eggs you must check out Lynda’s other egg craft; Easter Sewing Basket.
Did your little one just tell you that you need to make party favors for school on St Patricks day? No worries, Laura Kelly has you covered.
Cut a large shamrock out of dark green felt and a smaller shamrock out of light green felt. Laura used pinking shears to give her shamrock a decorative edge.
Sew buttons (or glue them) onto the light green felt and then glue the smaller shamrock onto the larger one.
Attach the finished shamrock to a ribbon or whatever you might have on hand and attach it to the treat bag.
Make someone you love feel special this Valentines Day! Reuse some empty and clean jars as funky containers for goodies and gifts.

Using craft paints (I used Glass Gallery and Apple Barrel-both from Plaid), paint some hearts and polka dots onto the glass.

While the paint is drying (Gallery Glass takes a while), wrap some red and pink buttons up in wire to create handles for the jars. A great place to buy buttons is Buttons Galore. When the paint is dry you can add another layer of paint decor then add red and pink buttons to the jars with Aleene’s Tacky Glue.
 Let the jars dry completely before handling them to add the button wire. Twist the wires around the jar rims in whatever way you like. I made an extra one to decorate a wine bottle!
 THEN, fill the jars up with candy goodies and you are all set to lay out a SWEET Valentine display of love! Please share other ideas of things to put in the jars. Sharing is a nice thing to do.

Here is a beautiful Christmas Greeting Card made buy Turid Sandén of Sweden. Turid embellished with snowmen ( 4702 Brrr “Buddies ) and snowflake ( 4698 White Out ) buttons.


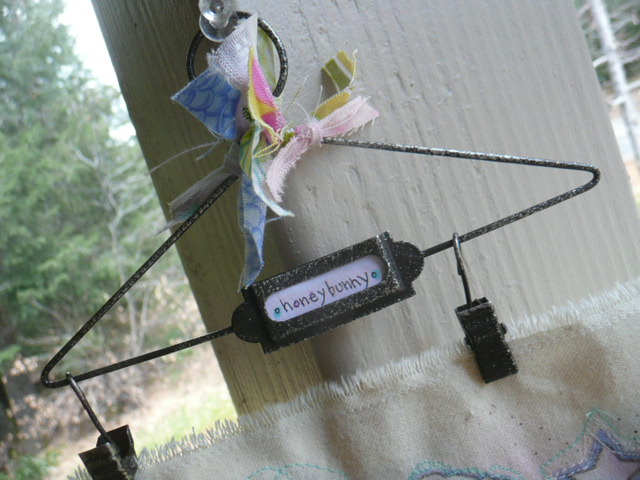