Header

Tag Archives | Autumn

Decorate Your Home Inside or Out with This Fun Fall Wreath!

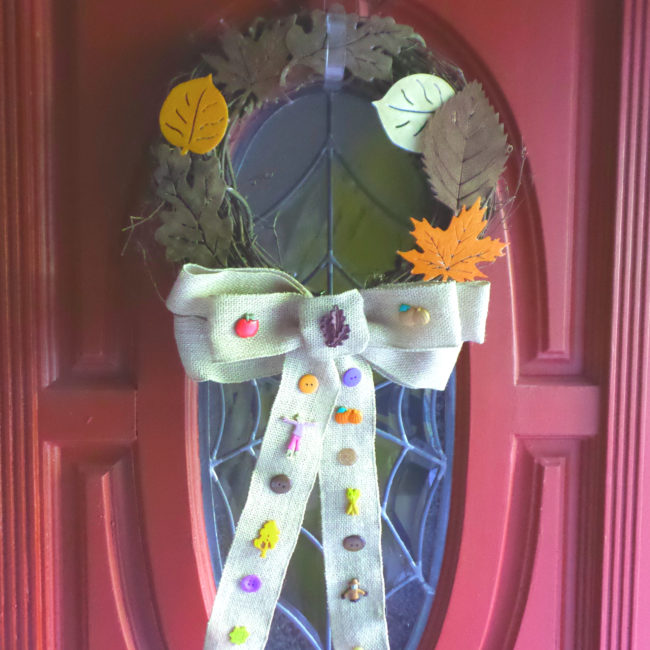
Hi everyone! It’s Lorrie here with a fall wreath featuring autumn-themed buttons from Buttons Galore & More! This fall wreath will look great on your front door to greet visitors, or on the wall inside your home to add some seasonal flair.

To make this easy fall wreath, I started with a grapevine wreath and a plain burlap bow that I picked up at my local craft store. I decorated the wreath itself with some plastic leaves that I painted in beautiful autumn colors. But the real fun starts with the bow! Continue Reading →

1

How to Make DIY Pom Pom Pumpkins with 28 Lilac Lane

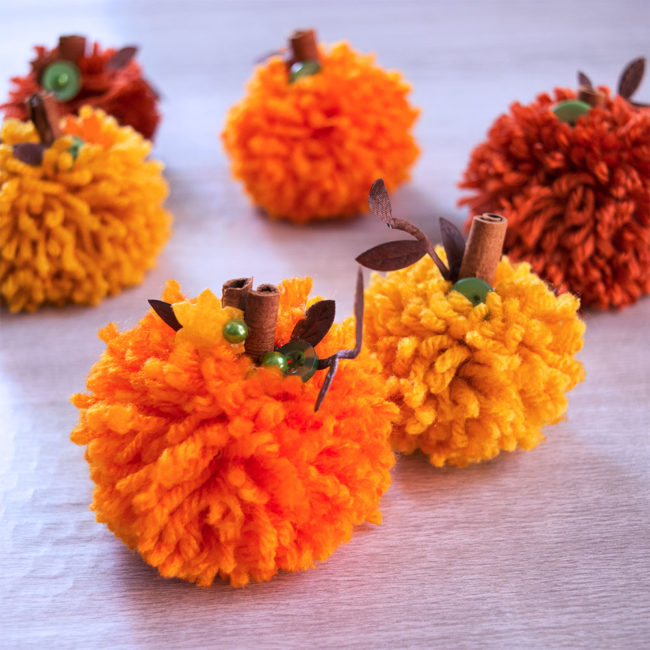
28 Lilac Lane Autumn Afternoon Pom Pom Pumpkins
The weather here has started to cool down this week and so I’ve decided it’s time to bring out those pretty autumn colors. Pumpkins are my favorite seasonal decoration in the fall – I love using both fresh pumpkins and artificial pumpkins in my decor. Yarn pom poms are such a fast and easy craft to make. They can add a bit of whimsy to any decor. I wanted to make some DIY pom pom pumpkins to add to my fall decorations, and the beautiful Autumn Afternoon Embellishment Kit from the 28 Lilac Lane collection was the perfect addition to finish off these cute little poms! Continue Reading →

0

Reversible Halloween & Thanksgiving Fall Countdown Calendar

It’s hard to believe it, but fall is creeping upon us and with Fall comes holiday after holiday. Here is a fun and fairly easy fall countdown calendar project to count down the days till Halloween and/or Thanksgiving using some easy to find craft materials and of course…buttons!

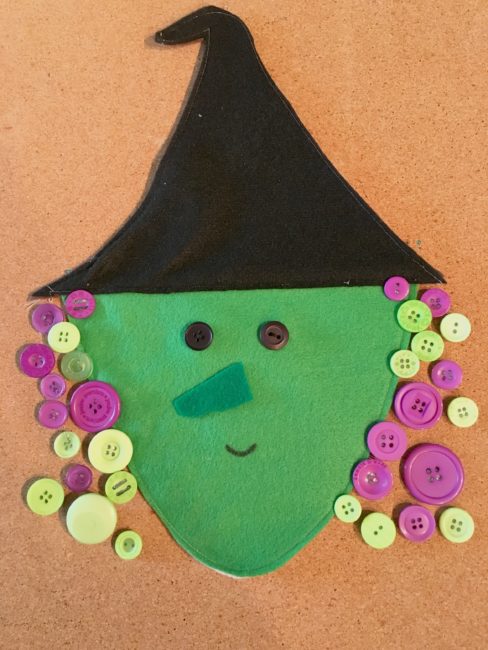
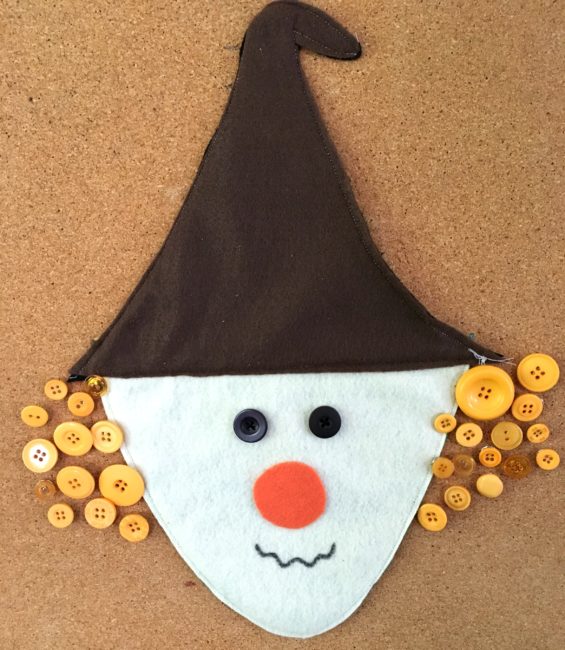
Here’s what you need to make this fun, reversible witch and scarecrow fall countdown calendar.

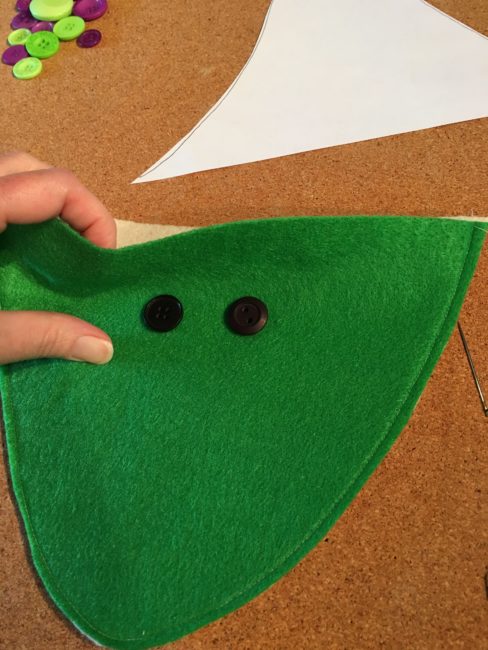
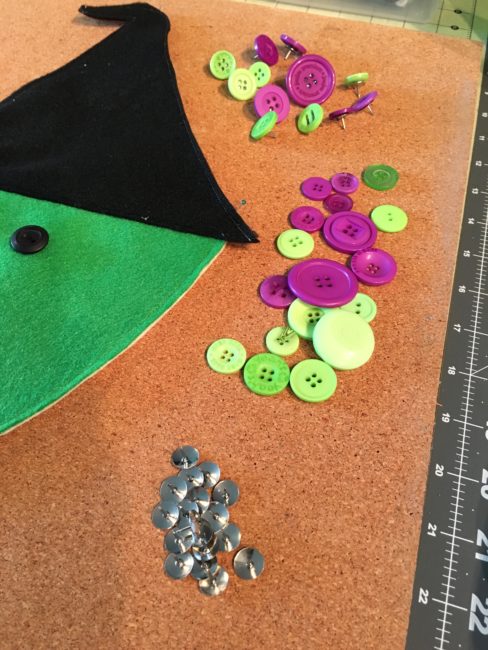
First, print out your patterns and cut out the felt according to the directions on the patterns. You will have 1 brown hat, 1 black hat, 1 green face and 1 tan face. If you are sewing your project together, go ahead and sew around the curved part of the face. Don’t forget to leave the top open! You will then need to sew your black button eyes onto the green face and onto the tan face.

If you are gluing your project, go ahead and glue the two faces together and then glue the black buttons for eyes onto each face. Let dry well before going on to the next step.

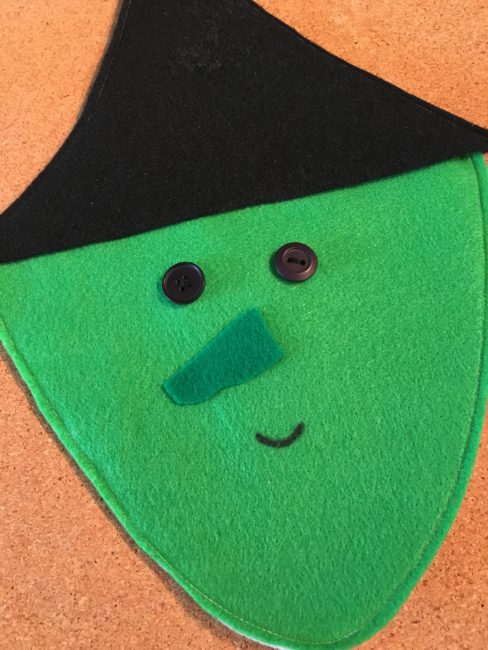
Cut out a wiggly, carrot shaped nose for your witch, along with a circle nose for your scarecrow. Attach them to your faces with craft glue. Use the black permanent marker to draw a mouth for each.

Next, if you are sewing your hats together, sew up and around the two sides, leaving the straight edge of the hat open. Then slide your face inside the two pieces of your hat and sew together; making sure to sandwich all the layers of the felt together when you are sewing.

If you are gluing, glue the hat pieces together and then slide the face inside the hat. You can attempt to glue these parts together, but I would recommend leaving them unattached. They will appear one piece when you attach it to the cork board.

Heat up your hot glue gun and while it’s heating, separate your button pack. The witch hair uses 31 of the purple and green buttons and the scarecrow uses 28 of the orange  from the Trick or Treat Button Basics BCB129. Glue the buttons on the thumb tacks and let them cool off.

And there you have it! Attach your witch to your cork board with straight pins and either start out with all 31 buttons, taking one off each day until Halloween arrives, or add a button each day as it gets closer! Whichever you prefer!

Once Halloween is past, flip over your witch and start counting down the days till Thanksgiving!

fall countdown calendar

Thanksgiving and Halloween are coming fast…make your fall countdown calendar today!

0

Create Fall Wood Coaster Wall Decor with 28 Lilac Lane

If you’re like me, you just can’t wait for the temperatures to drop. Now is the perfect time to get started on some fun and simple projects for fall. Today, I’m going to show you how to use the Autumn Afternoon embellishment kit by 28 Lilac Lane to create an awesome fall wood coaster wall decor piece for your home.

fall wood coaster wall decor by Anaya Whye for 28 Lilac Lane

Supplies needed to create Fall Wood Coaster Wall Decor:

Instructions to create Fall Wood Coaster Wall Decor:

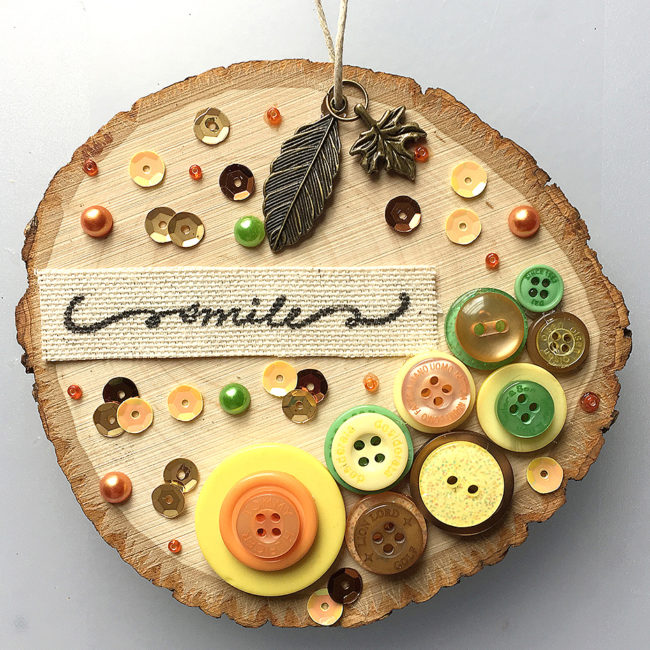
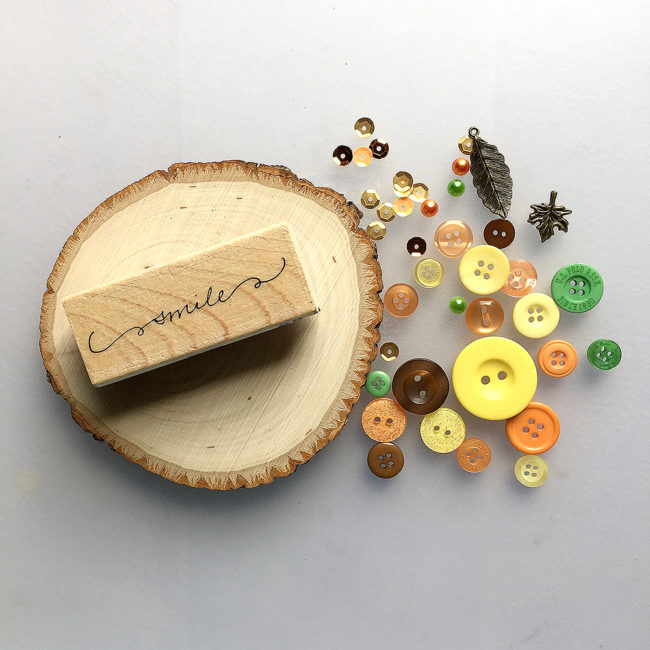
The first thing you need for this project is a wood surface. I’m using a 4 1/2″ round wood coaster that is about 1/2″ thick. Next, you will need to find a stamp with a word or phrase that expresses the perfect sentiment. I have selected a “smile” stamp. Smiles are always in season! You can of course go with something specifically related to fall. Most importantly, ensure that anything you choose will fit nicely onto your coaster.

fall wood coaster wall decor by Anaya Whye for 28 Lilac Lane

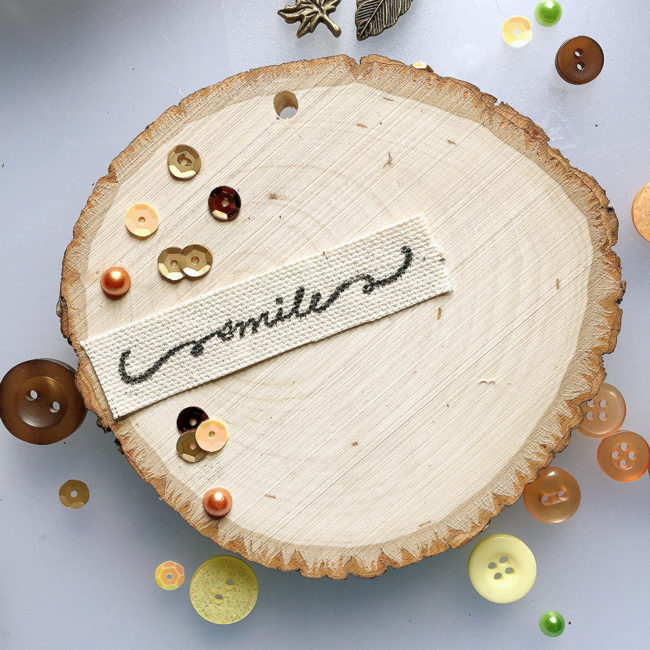
I have drilled a hole in the top in order to attach a string, but you may be able to find one that is pre-drilled for crafting. On a scrap piece of duck cloth I have stamped the word “smile” in black ink and then glued the fabric to the coaster’s surface. Then I used a clear-drying glue to begin adding pearls and sequins.

fall wood coaster wall decor by Anaya Whye for 28 Lilac Lane

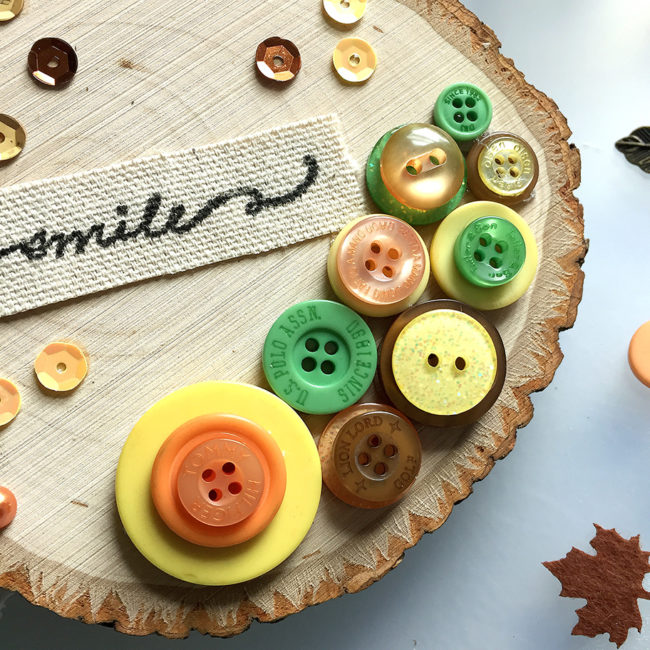
Don’t forget to leave room for buttons! Using a glue gun, I arranged the buttons closely together near the bottom edge and stack a few for extra dimension.

fall wood coaster wall decor by Anaya Whye for 28 Lilac Lane

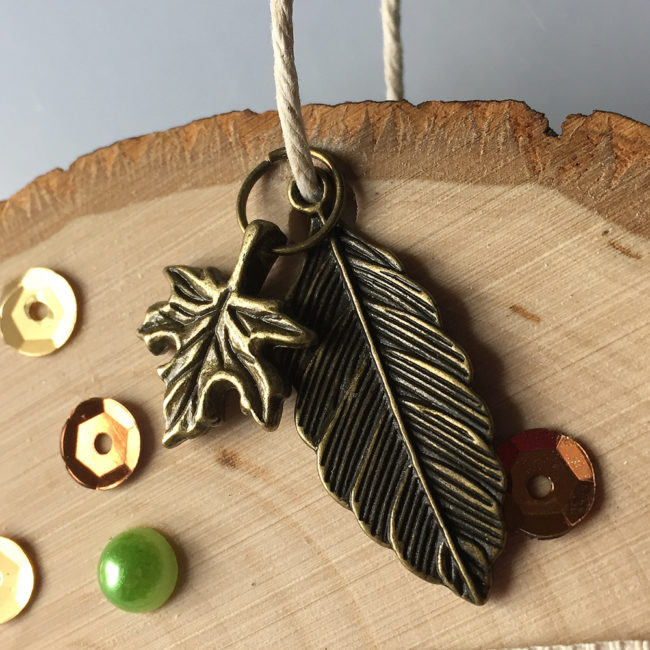
The kit includes leaf and feather pendants in bronze that look great hanging and add just the right touch for the season. I looped the cord through the wood coaster and each pendant. I used a 7″ length of hemp cord. After I attached the pendants, I just tied a knot in the cord to finish it off.

fall wood coaster wall decor by Anaya Whye for 28 Lilac Lane

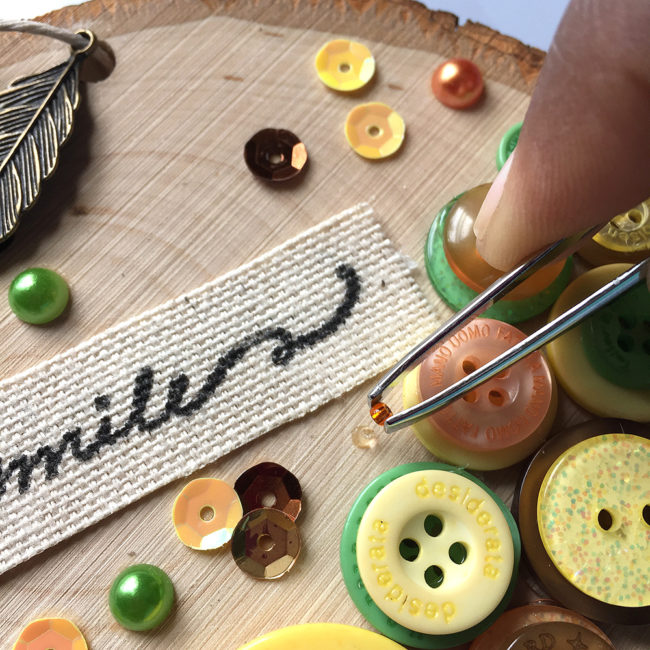
For the last step, I applied a few seed beads using the tiniest dab of glue. Using tweezers will assist in applying the beads exactly where you want them. As we all know, glue can at times get messy!

fall wood coaster wall decor by Anaya Whye for 28 Lilac Lane

And its just that easy! Your newly embellished fall wood coaster wall decor is complete.

fall wood coaster wall decor by Anaya Whye for 28 Lilac Lane

0

Celebrate Fall with Button Vase Fall Canvas Wall Art

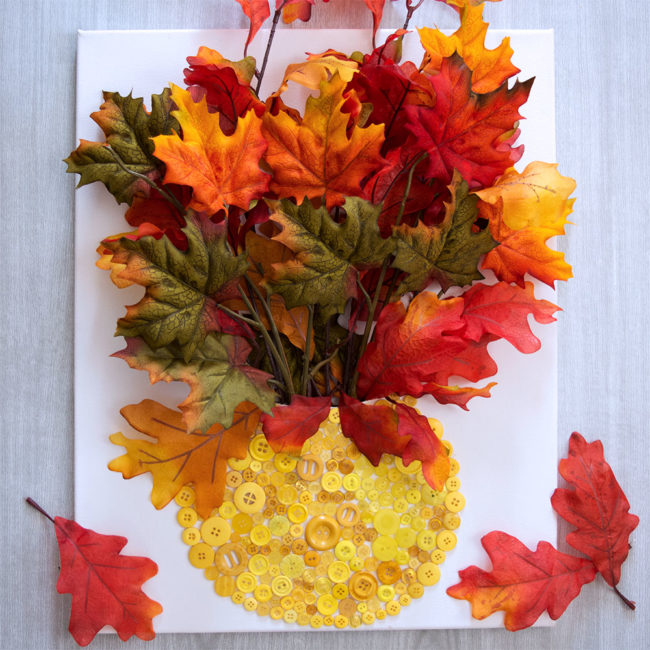
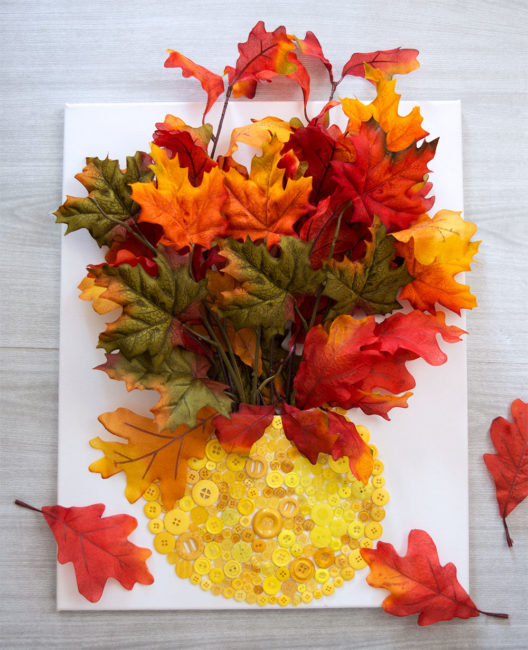
Autumn is one of my very favorite seasons. I love the cooler (but not cold) temperatures and the gorgeous bright colors that appear in nature. This Button Vase Fall Canvas wall art is the perfect project when you’re short on table space but want to add those beautiful fall colors to your home.

Button Vase Fall Canvas Wall Art

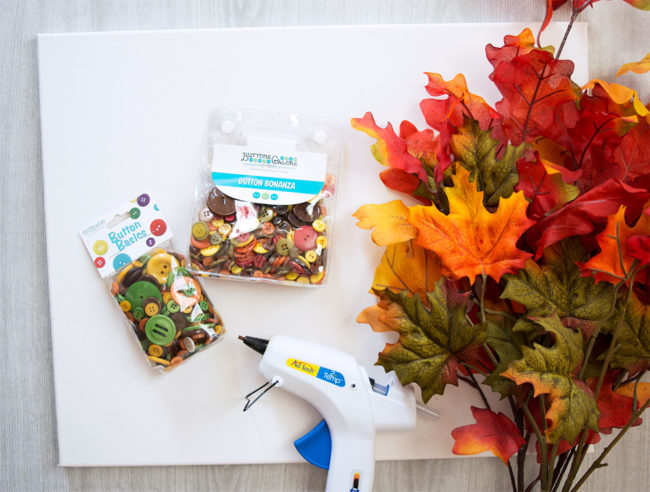
Supplies needed to make a Button Vase Fall Canvas Wall Art:

How to make a Button Vase Fall Canvas Wall Art:

Autumn Canvas Button Vase Supplies

Step one:

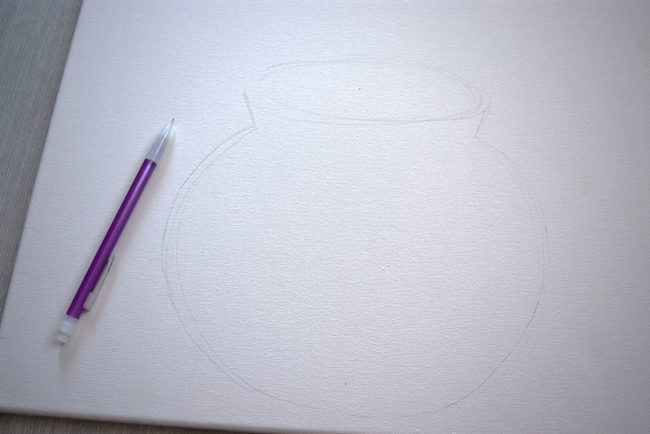
Use a pencil to draw (or trace) a simple vase shape to the bottom half of your blank 16×20 canvas.

Pencil Sketch Vase

It doesn’t need to be perfect, just a rough outline so that you know where to place the buttons for the button vase. The buttons will cover up any pencil marks. I drew a round vase, but you can make it any shape you want. Whichever shape you use, make sure to keep it on one end of the canvas.

Step two:

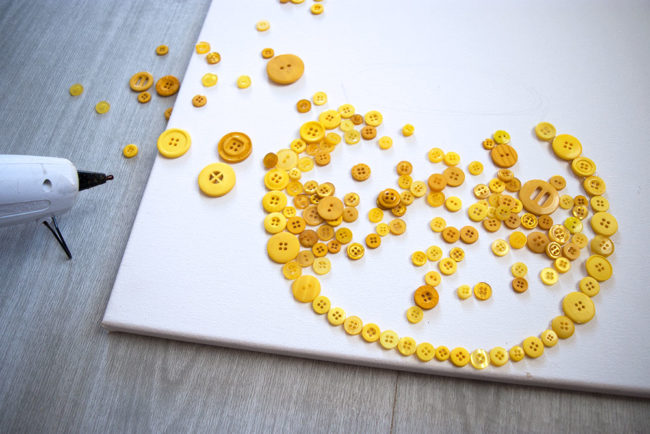
Glue buttons to the outlined vase you drew on the canvas.  I used a hot glue gun to attach the buttons.

Hot Glue Buttons

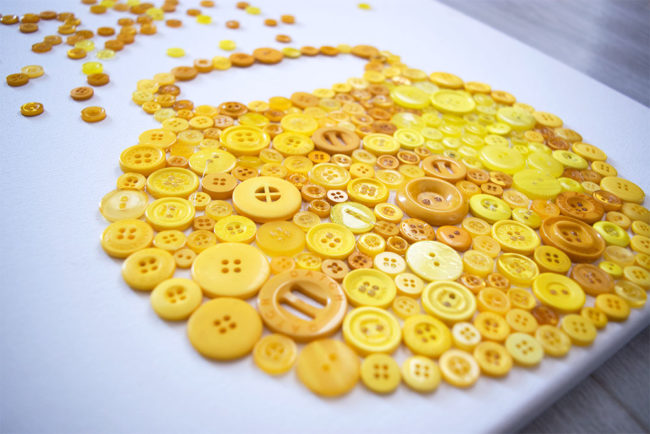
Because I was using Silk Autumn Leaves in my vase with beautiful red and orange colors, I made my vase Yellow to complement them. I used every yellow button in the Harvest and Fall Festival button sets to fill my round yellow vase. I liked that the shades of yellow in these two sets were in line with the yellow you’d actually see on fall leaves.

Yellow Button Vase on Canvas

Don’t glue buttons inside the mouth part of the vase at the top but fill the rest of the vase.

Step three:

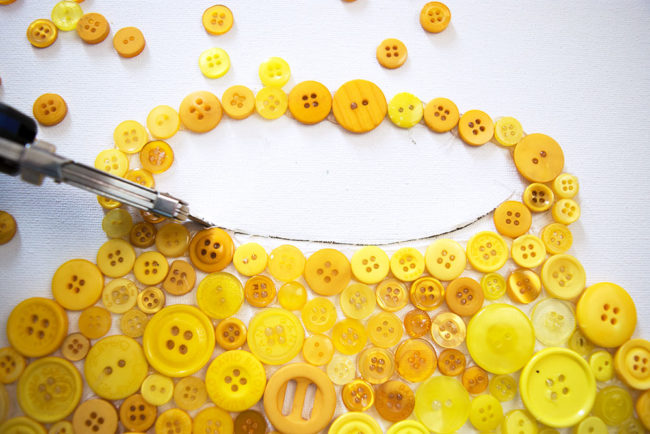
Use a sharp craft knife to cut a line in the canvas just above the buttons in the mouth of the vase.

Vase Opening

Step four:

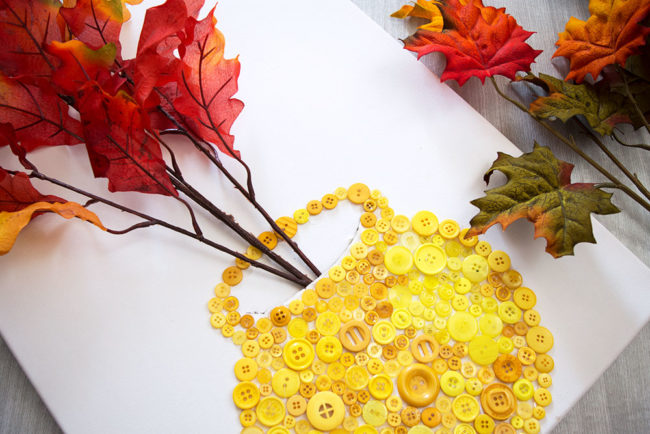
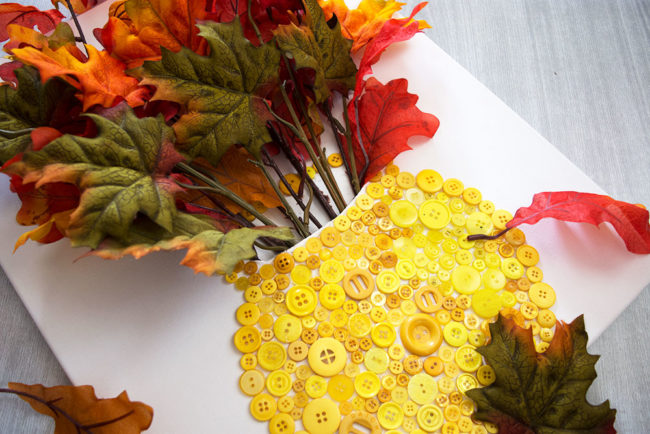
Insert your Autumn Silk Florals or Leaves through the hole in the canvas. Arrange them however you like.  I find that the canvas vase looks best when it’s full. I used four Silk Leaf stems to fill my vase.

Button Vase with Leaf Stems

Step five:

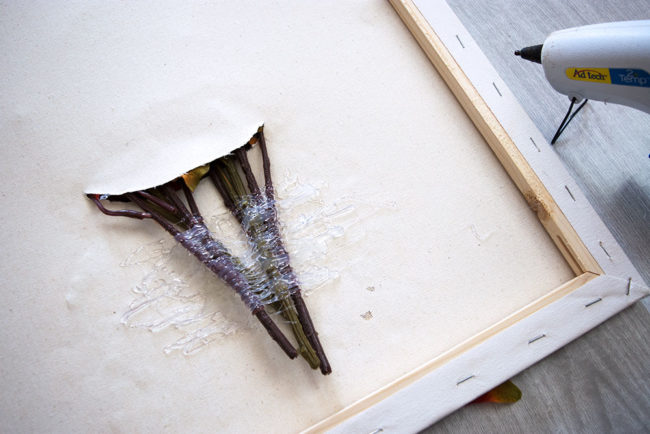
Turn your canvas over, and use hot glue to secure the stems in place for added stability.   I used an entire small glue stick to fix my stems in place.

Secure Leaf Stems

Step six: 

Use single leaves to fill in any blank spaces or gaps at the base of the stems.  Secure them in place with hot glue.

Single Leaves

If you have some unruly leaves on the stems that aren’t laying quite right, a dot of hot glue can help secure them to the canvas in a more pleasing way.

DIY Button Vase Fall Canvas Wall Art

Hang your canvas on the wall, or prop it up on a table for a beautiful bright pop of autumn colors! I think that I will take a slightly smaller canvas and use the red buttons in the Fall Festival and Harvest button packs to make a smaller red vase with some pretty silk sunflowers! The pair will look great together with my fall decor. The possibilities are endless if you just change the color of the buttons for your vase to complement the flowers or leaves you have! Happy Fall Crafting!

1

Learning To Sew with Buttons on a Fall Hoop Project

I’ve had the joy of teaching sewing in our community for the past few years to children of all ages. When people discover that I teach sewing to children, the first question they always ask is “what is a good beginner project?” This little hoop project is always my number one go-to project for anyone who has never used a needle and thread and wants to learn to sew. Even better, including buttons in the project ensures that they will also walk away with a great life skill for those days when a button pops off their shirt at the most inopportune time – and you know we’ve all been there!
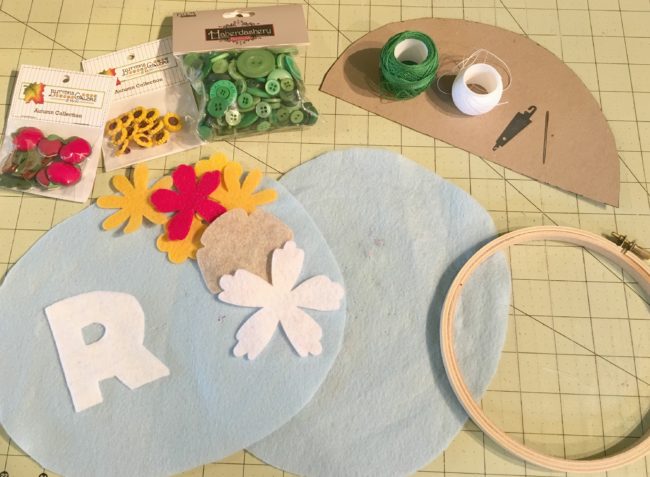
learn to sew with a fall hoop project

First up, let’s talk supplies. You will need the following to complete the two hoops:

Now that you’ve gathered up all your materials, let’s get started and learn to sew! First, you need to find something to make a roughly 8-inch circle. Find a bowl or something round to trace around and cut your blue felt into two circles.

Next up, let’s set them in your embroidery hoops. This is often the most daunting thing for new stitchers, but all you need to do is make an embroidery hoop “sandwich”! Unscrew the bolt just a little and separate the hoops into two parts. Take the part without the bolt and lay it on your workspace. Then lay your blue felt circle on top of the bolt-less hoop and sandwich them all together by setting the hoop with the bolt outside the bottom hoop and the felt. Tighten up the screw and pull on the edges of the felt just a little to make everything tight.
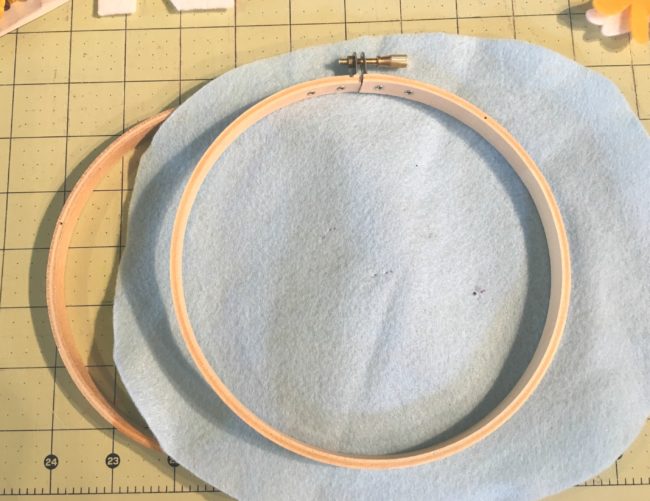
learn to sew fall hoop project

Now, print out the pattern page with your initial on it and cut out the correct initial for you. Use the paper pattern to cut out your initial with whatever color felt you would like. Then gather up your Sunflower buttons, the felt flowers, and your initial. Lay them all out on top of the hoop in whatever design you like best.
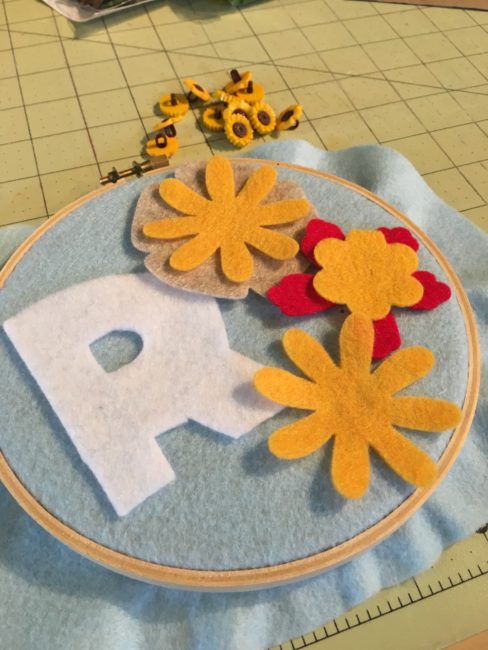
learn to sew fall hoop project

Now it’s time to stitch down your initial. Take your white thread and needle. Thread your needle and make sure to put a knot on the end! We are going to stitch down our initial with a running stitch.
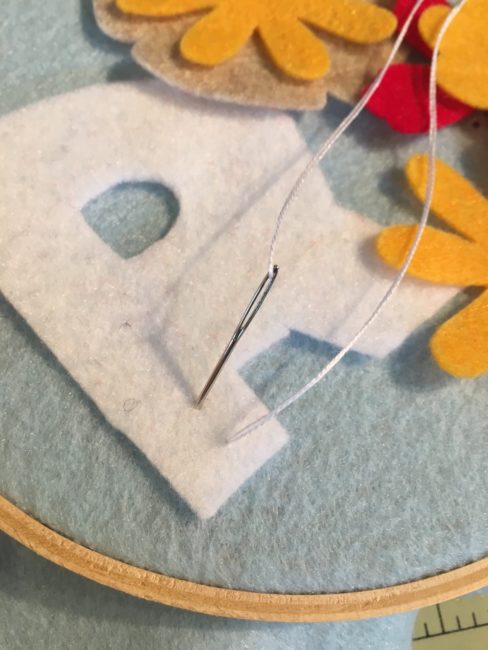
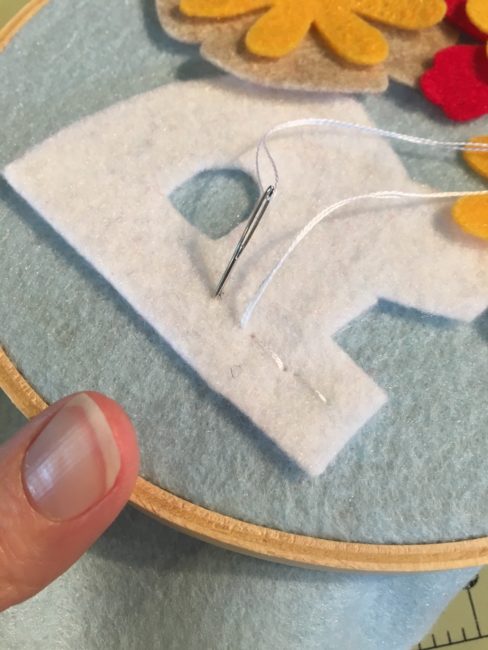
learn to sew fall hoop project

learn to sew fall hoop project

First up, bring your needle up from the bottom and pull gently until your knot stops the thread. Don’t pull too hard or you will pull your knot all the way through! Then bring your needle back down about a pinky finger width from where you started and pull the thread all the way through. Then bring your needle back up and then down as you stitch along the middle of your initial letter. Always remember to “follow your thread” and stitch with a rhythm of up and down.
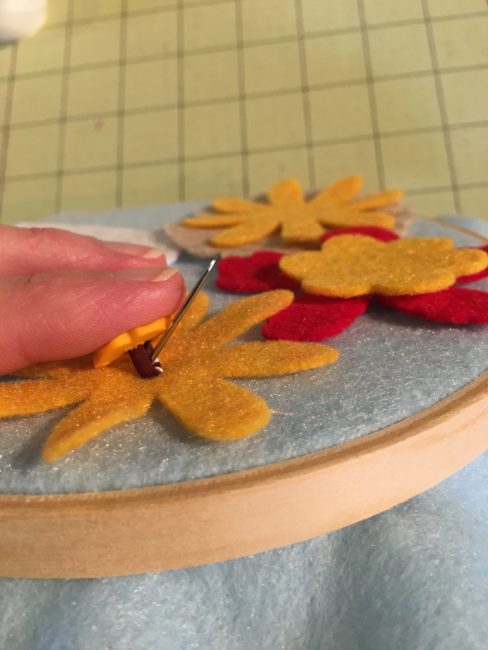
learn to sew fall hoop project

Lastly, grab your Sunflower buttons and lay them on top of your felt flowers. These are shank style buttons and can be a little more tricky for little hands to sew. Start out by bringing your needle up from the bottom and pull it all the way through till the knot stops you. Then take your button shank and thread it onto the needle and thread. Let it fall all the way down and then put your needle back through the top of the felt, pulling the button tight to the felt as you pull the thread from underneath. Continue to sew the button on a few more times and then move down to the next flower.

To finish off my hoops, I like to take a hot glue gun and glue the rim of extra felt around to the inside of the back. But sometimes I like to leave it open like a little ruffle fringe! Your choice!

Put a pretty ribbon through the top and you are done!
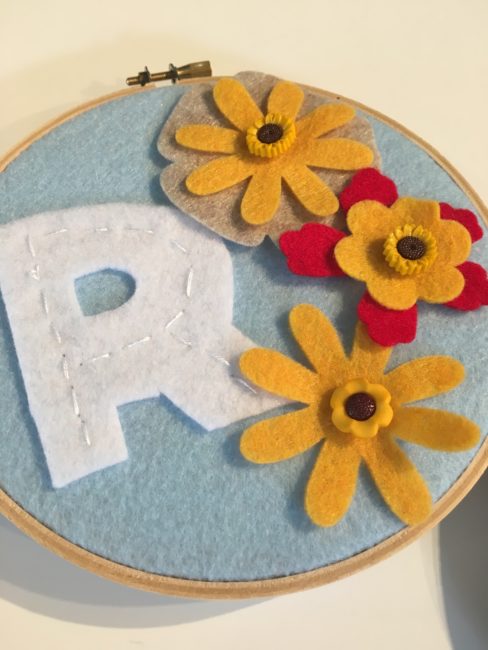
learn to sew fall hoop project

To make the tree, gather up a scrap of brown felt and cut out a little tree trunk. You have the option of sewing down your tree trunk with a running stitch or you can use some craft glue to glue it down.
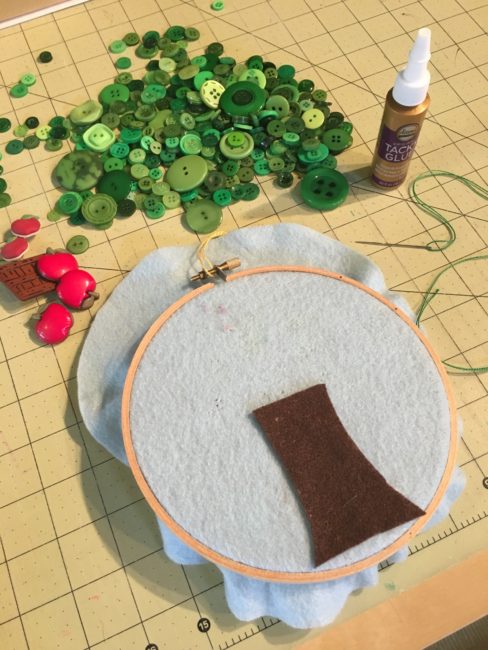
learn to sew fall hoop project

After gluing down the trunk, grab your green thread, a needle and the Apple Pickin buttons from the pack and stitch those down in random spots above your tree trunk. These are the same shank style as the sunflowers. Next, pour out your bag of Green Haberdashery buttons and choosing those that fit best, stitch down green buttons around your apples to fill in the tree.
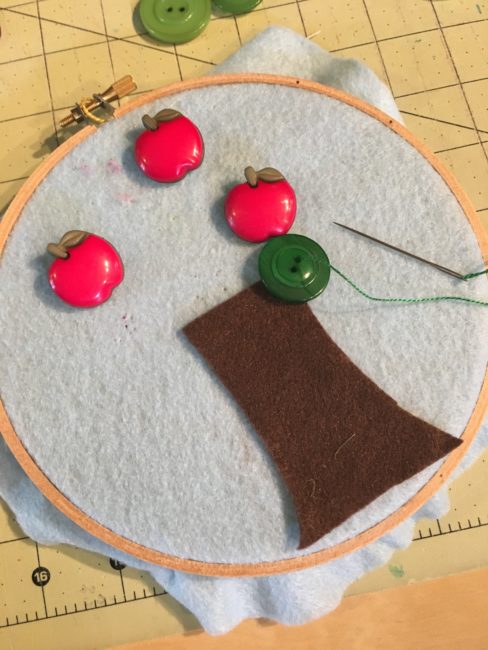
learn to sew fall hoop project

After you sew all the button “leaves” down, take your apple basket and apples and stitch those down near the bottom of the tree. Add a little ribbon for hanging, finish the back by gluing the felt edge to the back or leave it like a ruffle.
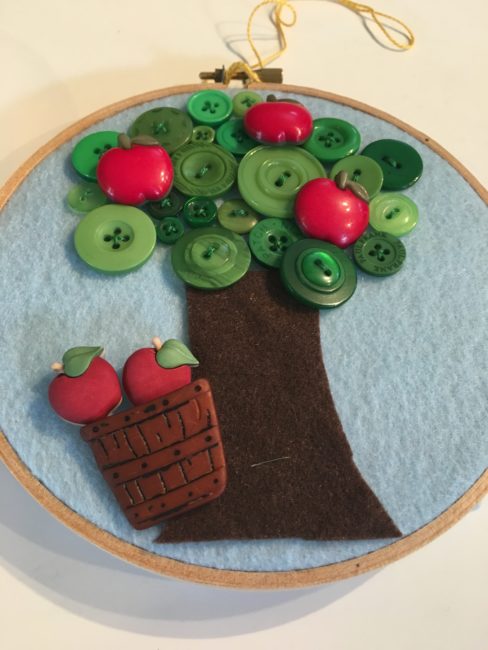
learn to sew fall hoop project

And there you go, two little Fall inspired hoops – these are perfect projects for beginning stitchers!
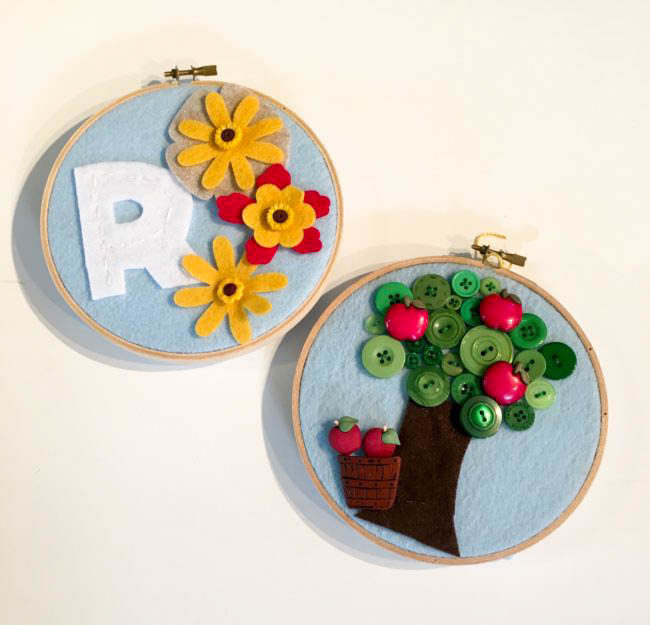
learn to sew fall hoop project


SaveSave

1

Announcing…New 28 Lilac Lane Premium Collection Sequin Tins!

We have an exciting announcement today for fans of our beautiful sequins: New 28 Lilac Lane Premium Sequin Tins by designer May Flaum are available now on our web store! This new collection of six sequin tins includes fun sequin options for fall and winter holidays, as well as for vacation and everyday.
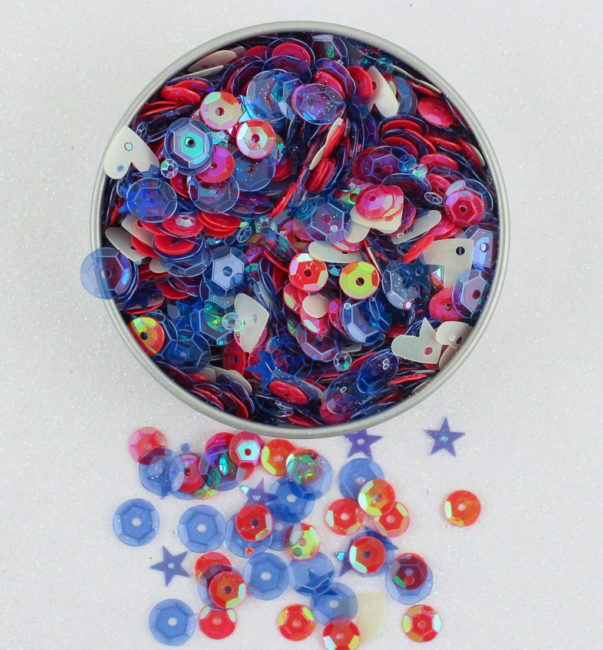
First, let’s take a look at Bon Voyage…a red, white and blue mix that includes 5 different kinds of sequins and features blue stars and white hearts! Use it for patriotic projects, scrapbooking trips to national monuments, and many other things!

28 Lilac Lane LL318 Bon Voyage sequin tin

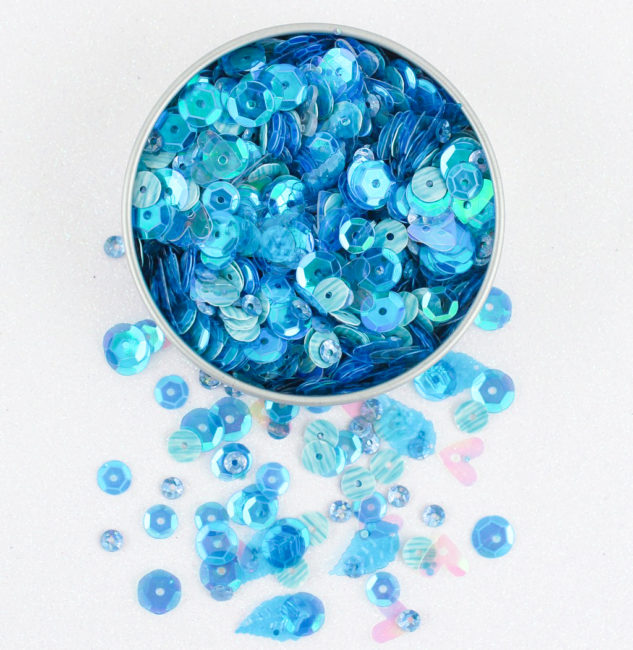
Next up is Mermaid Tale! In beautiful shades of turquoise blue, Mermaid Tale features pretty leaf shapes and stunning white sequins with blue tiger stripes. This mix is perfect for those beach or pool themed projects. (Or mermaids, of course!)

LL319 Mermaid Tale sequin tin

Pet lovers will love the new “Happy Place” sequin tin! This new sequin mix features red heart sequins, large gold sequins and a mix of brown sequins. Happy Place will be perfect for your pet projects, celebrating your love of autumn, or sending greetings to your favorite guy!
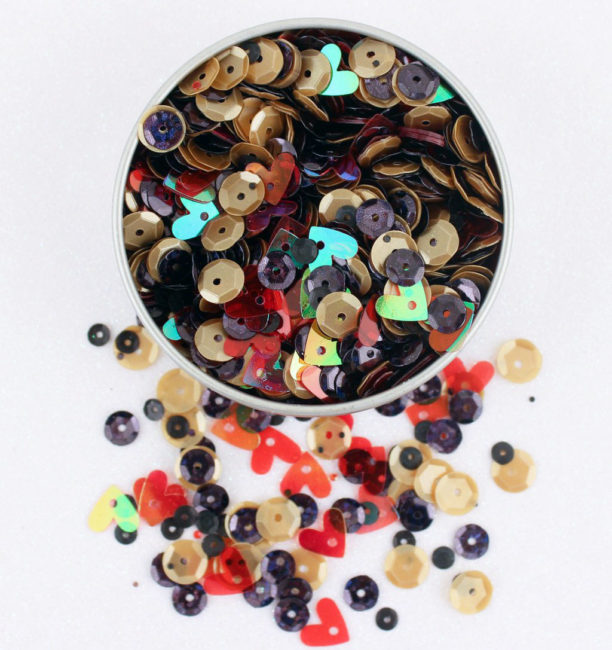
LL320 Happy Place sequin tin

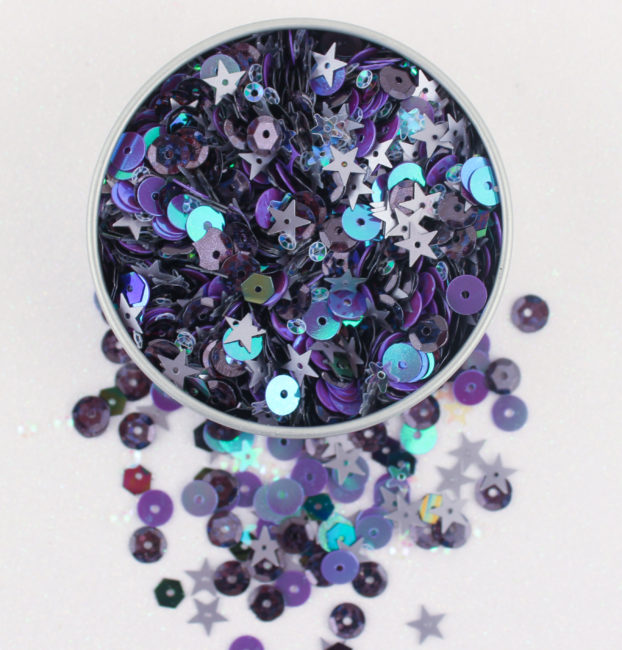
Halloween is coming fast, and we’ve got the Haunted House sequin tin for that! In a trendy purple and silver palette for Halloween, its clear and silver stars are paired with several shapes and sizes of purple sequins to create a mix that will give your projects the perfect spooky touch!

LL322 Haunted House sequin tin

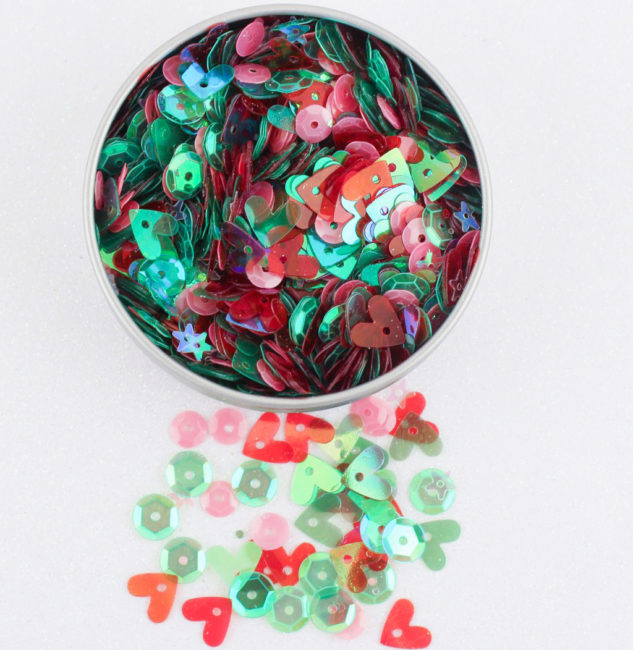
Of course, before we know it the Christmas tree will be going up…and you’re going to love the Retro Holiday sequin tin! This festive Christmas sequin tin features red and green hearts, clear stars, green sequins, and pink sequins (this year’s hot Christmas color!).

New 28 Lilac Lane LL321 Retro Holiday sequin tin

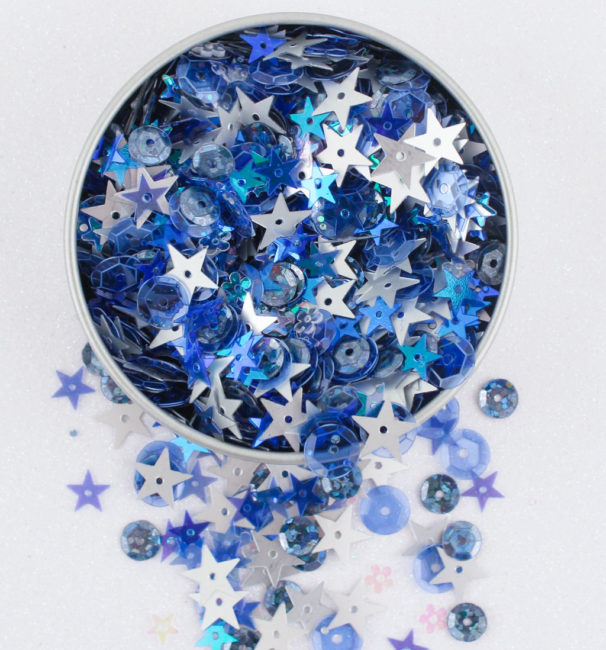
But just one holiday collection isn’t enough, so we’ve also got the shimmering Festival of Lights! This mix includes three different star sequins (silver, blue, and clear), clear flowers, and two types of blue sequins (large clear and deep blue metallic). This mix is perfect for many winter holidays (such as Christmas, Hanukkah, and New Year’s Eve).

New 28 Lilac Lane LL323 Festival of Lights sequin tin

All of these new premium sequin tins come packaged in a brush metal tin containing 30 grams of sequins, and are available now from our online store. Don’t miss out!

0

Oh Sweet Autumn with 28 Lilac Lane Autumn Afternoon!

I’m dreaming of shorter days and weather cool enough to wear sweaters! This summer has been so hot and rough – I’m ready to be done with it! Oh, and it probably has something to do with fall being my favorite season as well.

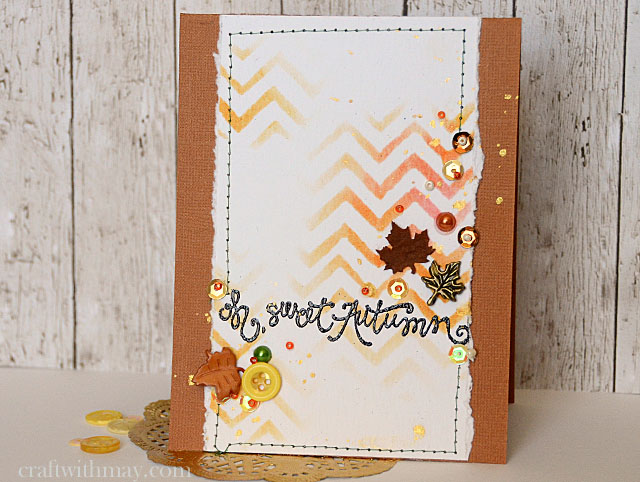
Today I’ve got a card to share that features my fall inspired Autumn Afternoon embellishment kit from my 28 Lilac Lane line. Here is a look at the finished card:

sweet-autumn-card-by-may-flaum

The process to make this card is simple!

  1. Place a stencil on white cardstock and use assorted colors of dye ink with a chevron stencil, skipping some parts and going lighter in some areas.
  2. Use embossing ink to stamp the sentiment, and then coat it in black embossing powder and heat set.
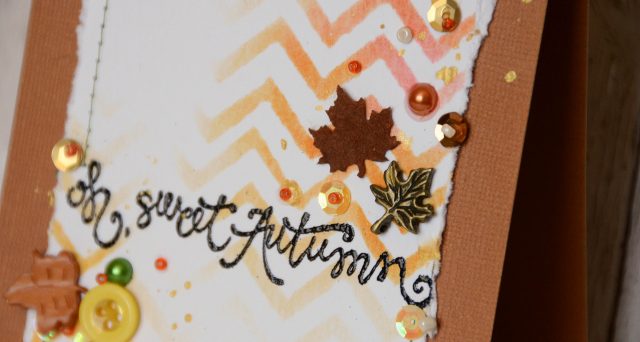
  3. Stitch the background to a blank card, and then embellish! I used the stencil design and a general sweep across the card to find places for the leaves and details.

It is really that easy!

sweet-autumn-card-close-up

Now I’m back to dreaming of autumn, cocoa, and ending these triple digit days!

Autumn Afternoon isn’t the only fall-themed 28 Lilac Lane kit…don’t miss out on the 28 Lilac Lane Limited Edition Fall Mix that is only available in the Buttons Galore online store!  Looking for some inspiration of what to do with my fall limited edition mix? Check out these bloggers! Ashli Oliver, Libby Hickson, Maura Hibbitts, and Rebecca Vick all have outstanding posts up. Enjoy!

0

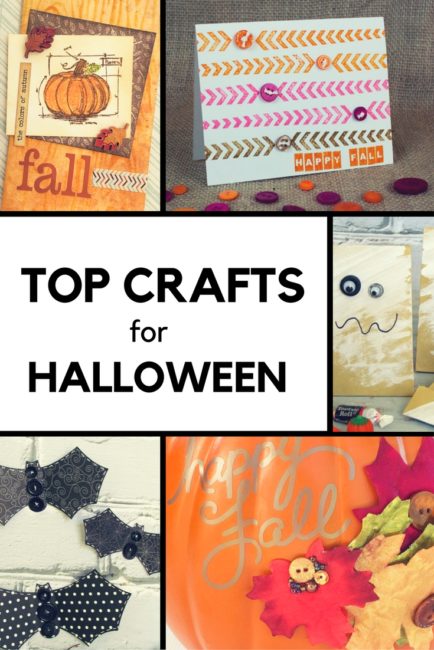
Top 6 Halloween Crafts to Make with Buttons!

The calendar is about to turn October, and most of us are in full-speed Halloween crafting mode! In case you are still in need of some Halloween crafts inspiration, here’s a round-up of our favorite Halloween crafts using our favorite crafting embellishment – buttons, of course!

Top Halloween Crafts for Halloween using buttons from Buttons Galore

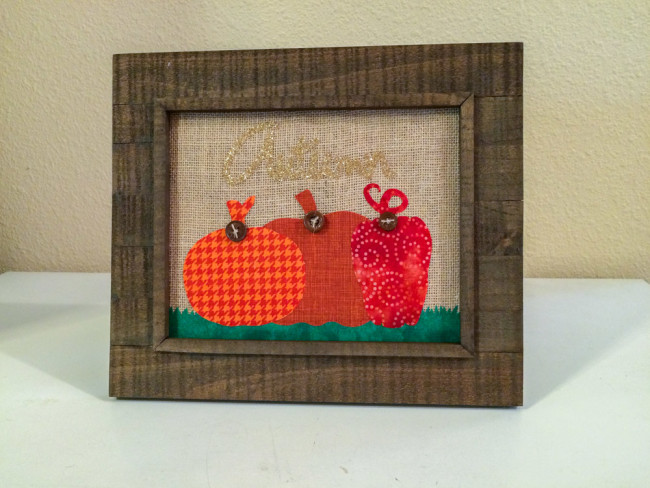
Our autumn frame is super easy to make with no sewing, and will make a great addition to your home decor or your buffet of candy treats. And it’s a great way to use up those fabric scraps!

Autumn Frame

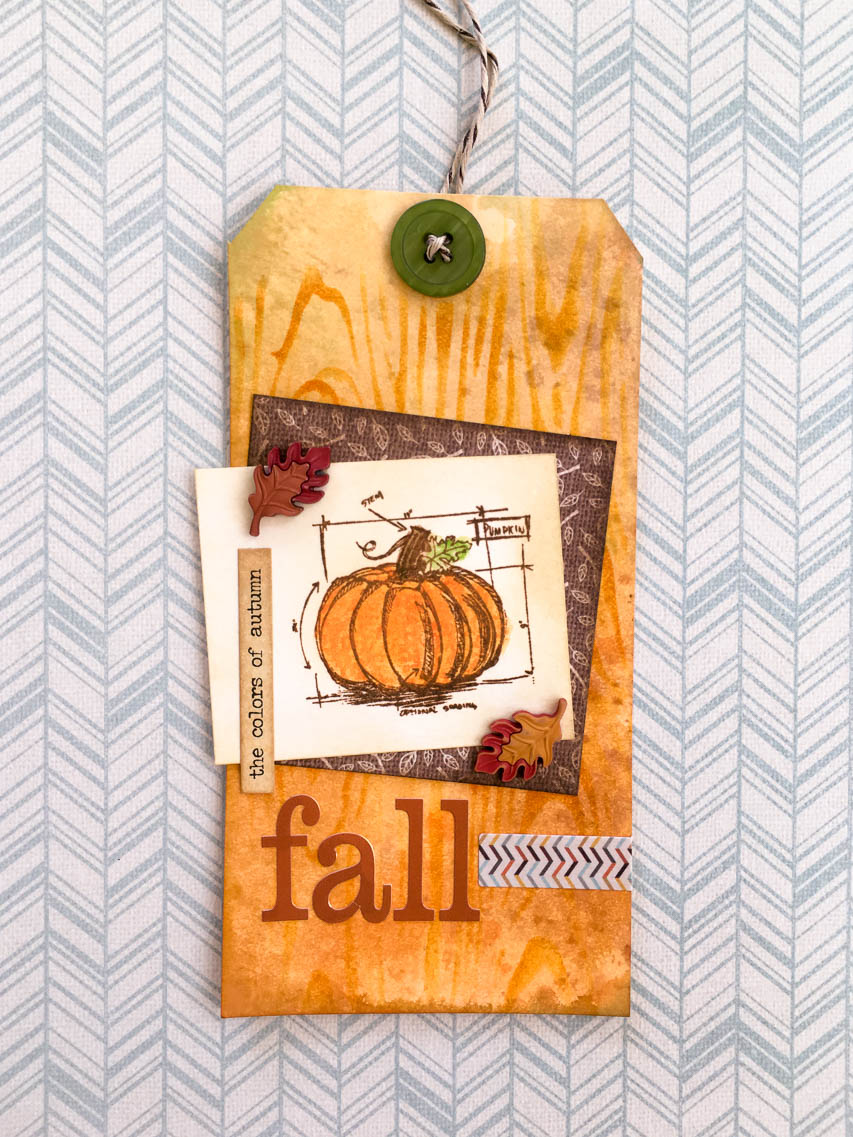
Whether you are planning a hospitality gift for your party hosts, or dropping some fresh baked pumpkin spice brownies at the neighbor’s, this fall pumpkin tag is a warm and friendly way to say “hello” to someone special!

Fall tag

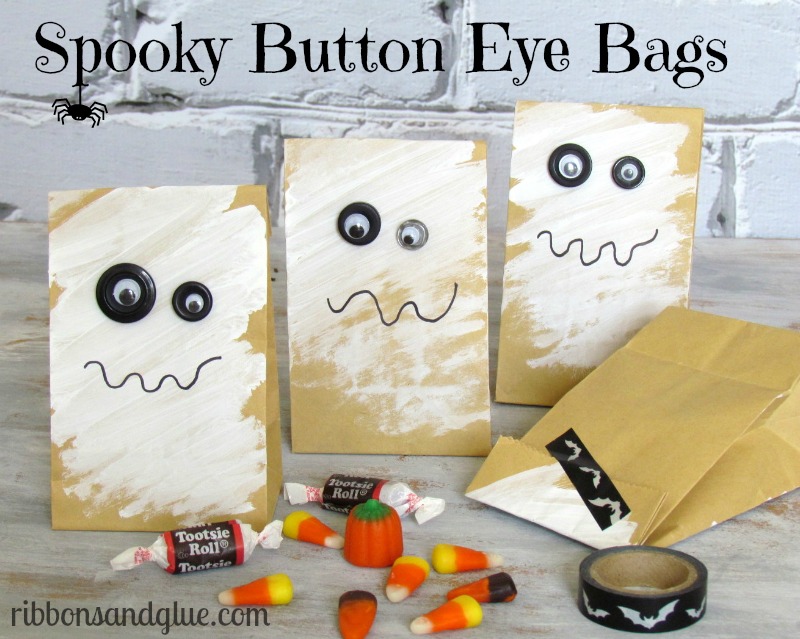
When it comes time to hand out candy, our spooky button eye bags will be the talk of the neighborhood or your kids’ classroom! They are so simple to make that the kids can help!

Spooky Button Eye Ghost Bags - great for Halloween Treat Bags

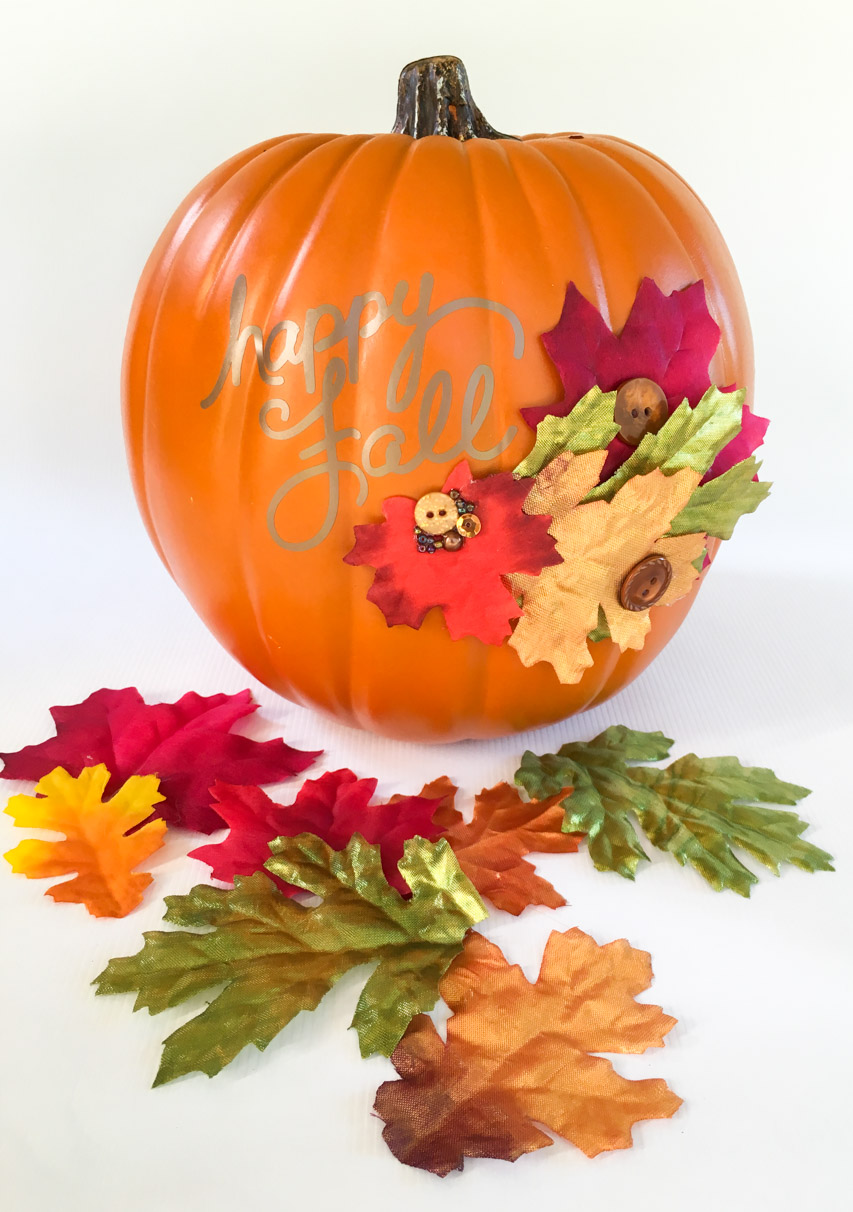
Pumpkins are seasonal decor that can go from early fall all the way through to Thanksgiving. This decorative pumpkin will add a beautiful touch to your home or porch all season!

Happy Fall pumpkin

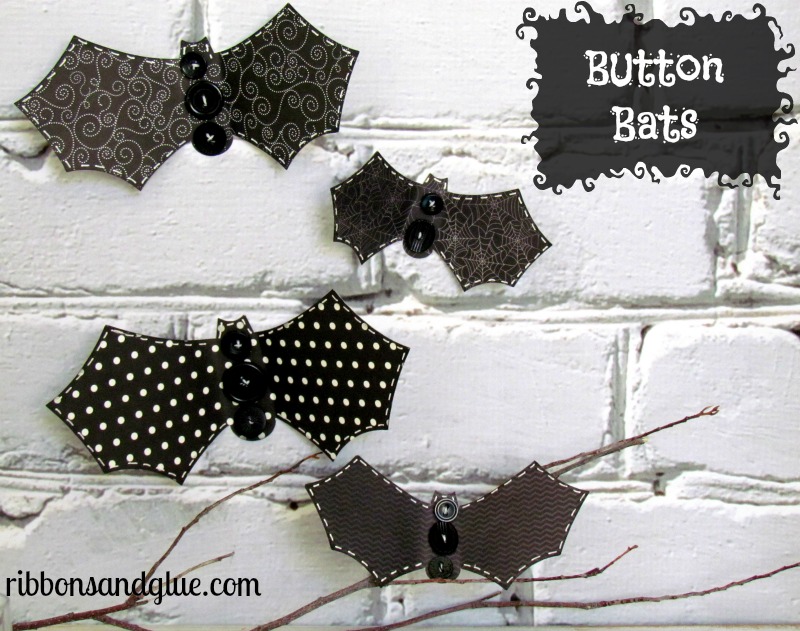
Halloween wouldn’t be complete without some bats! These button bats are more cute than spook, and will look great hanging from the ceiling, staked into a plant, or stuck to a wall.

Halloween Button Bats

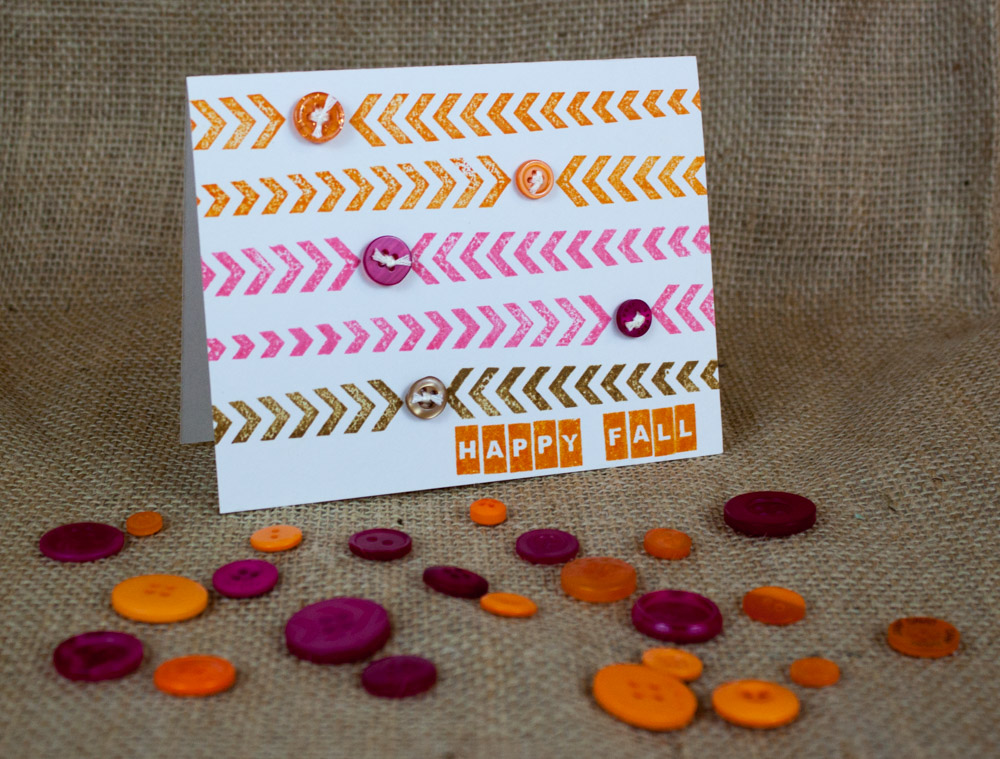
If you aren’t quite ready to give up all the color in your world for the browns of fall, we’ve got the perfect card for you! This fall card brings nice bright pink and orange to a cheery “happy fall” sentiment.

Happy Fall card

Looking for buttons for your Halloween projects? Don’t miss our brand new Scary Button Bonanza, Trick or Treat Button Basics, and Fall Festival Button Basics!

0

Introducing…New Button Basics Collections for Halloween & Christmas!

The new product introductions keep coming! Today we’re introducing 6 new colorways of Button Basics, our button candy bags that are just the right size for making fun projects. The new additions to the Button Basics line-up include two seasonal offerings for fall and Halloween, two blue assortments for winter and Christmas, and two new trend-based color groupings.

Button Basics Family

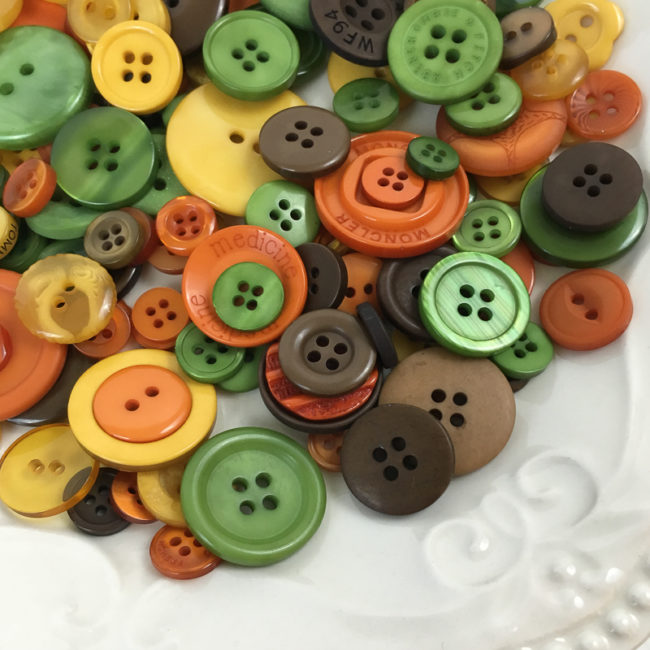
First, let’s take a closer look at Fall Festival! This beautiful assortment of browns, leaf green, rusty orange, and mellow yellow will have you yearning for a cup a cider and the crunch of leaves under your feet.

Fall Festival Button Basics by Buttons Galore

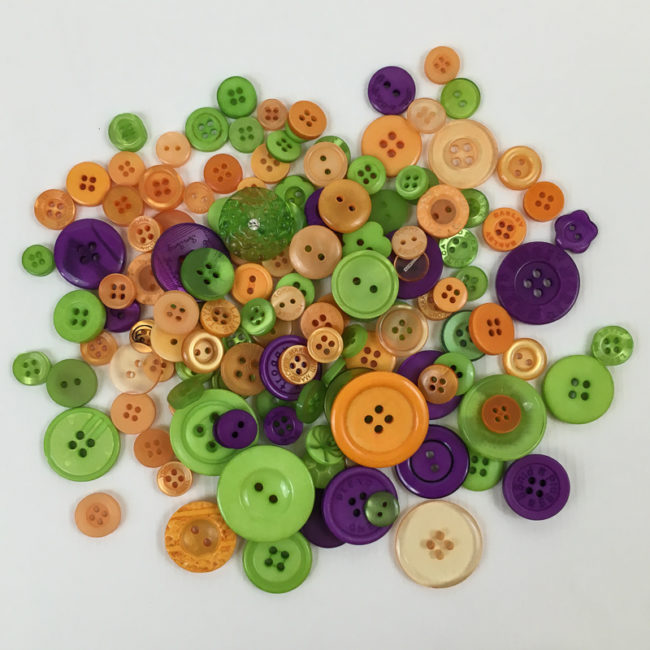
For Halloween, we think you’re never too old to love to Trick or Treat! Shades of light orange and green combined with pops of bright purple make this the perfect collection for the cutest Halloween projects on your block.

Trick or Treat Button Basics by Buttons Galore

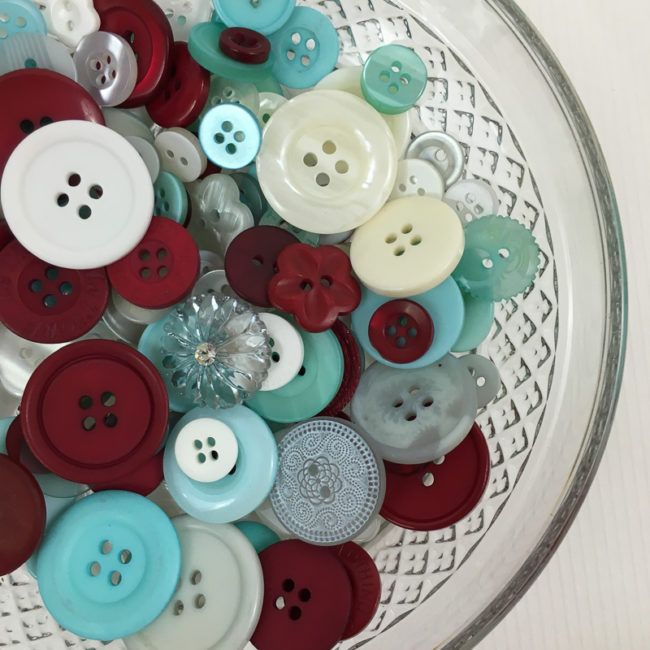
Blue is a hot color for Christmas, and we’re bringing it to you with Cool Winter! This mix adds a sophisticated shade of red to a cool mix of pale blue and white to create an elegant mix that will work for cards, ornaments – and even holiday party wear.

Cool Winter Button Basics by Buttons Galore

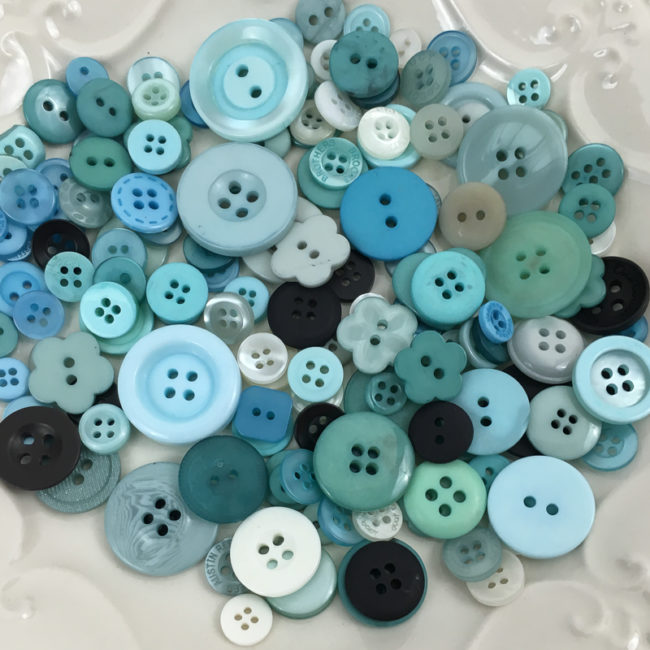
Are you “blue” this Christmas? Then Winter Flurries is the collection for you! Not content with just on shade of blue, this collection gives you an entire range of shades from deep midnight to pale ice to choose from so you’ll be able to find exactly the shade you need for your festive Christmas or winter project.

Winter Flurries Button Basics by Buttons Galore

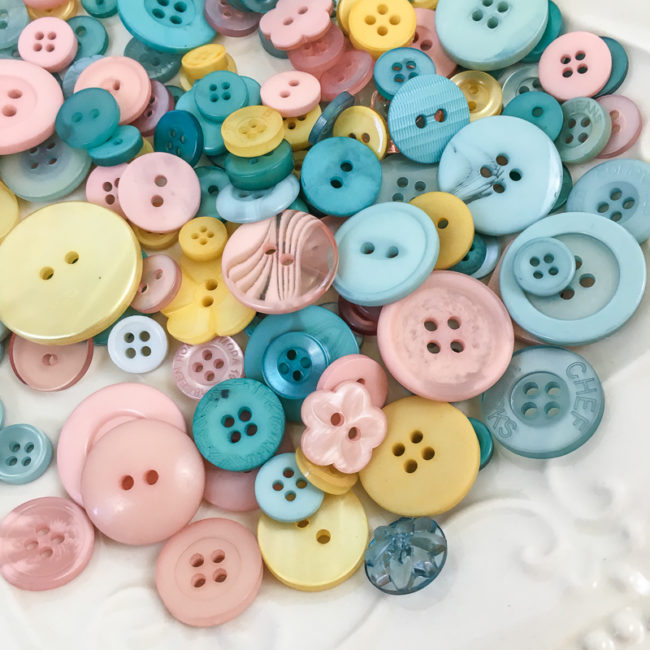
If you are a fan of heathered pastels – especially the colors of the year for 2016 – then you’ll love our new trend mix Bohemian Style. With rose pink, blue, and a pop of sunshine yellow, this trend mix matches well with current home decor, fabric and fashion color trends so you can create up-to-date looks.

Bohemian Style Button Basics by Buttons Galore

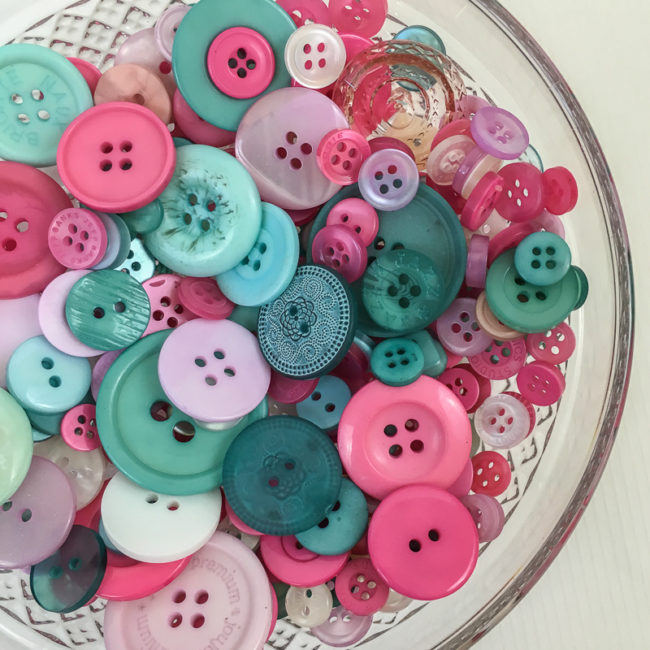
And finally, we have Party Time! This bright and happy combination of teal and bright pink with touches of white is perfect for parties, fashion, and everyday papercrafting projects.

Party Time Button Basics by Buttons Galore

Which of the new Button Basics is your favorite? You can get all of these new Buttons Basics on sale for $1 off from now until September 10th. That’s a great deal at $5.99 each! Why choose just one? Get yours now!

0

Celebrate Fall with Painted Leaves on Slate!

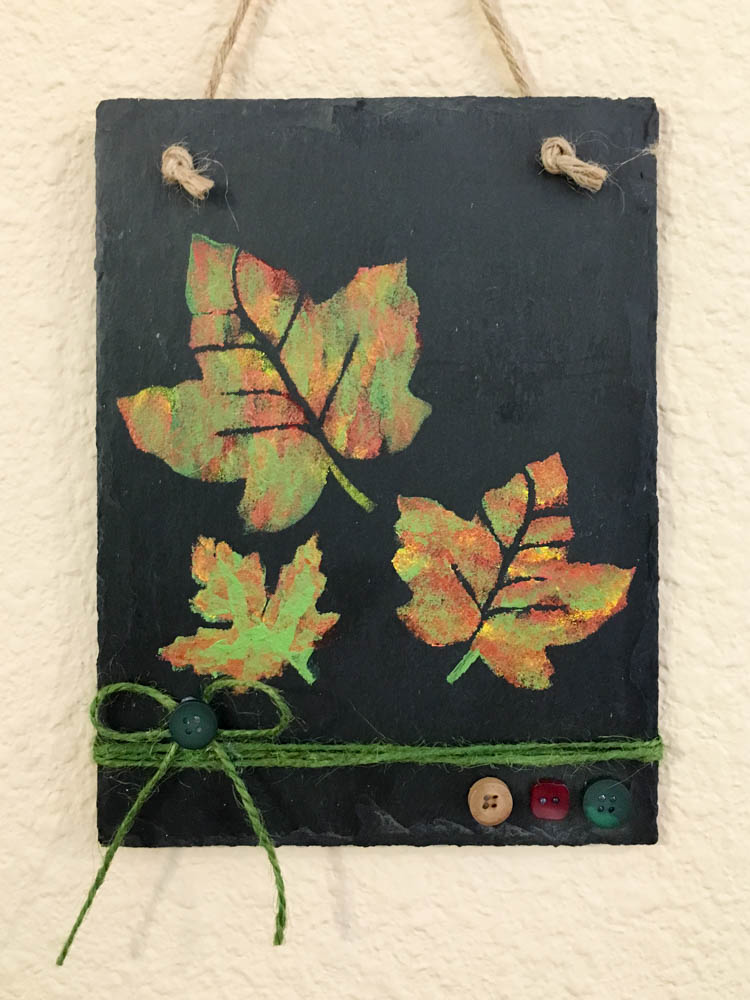
School is starting in many parts of the country, and that means that cooler temperatures – and changing leaves – can’t be far behind! Today’s project is a piece of slate wall decor with painted leaves that will bring fall colors inside so you can enjoy them where it is warm!

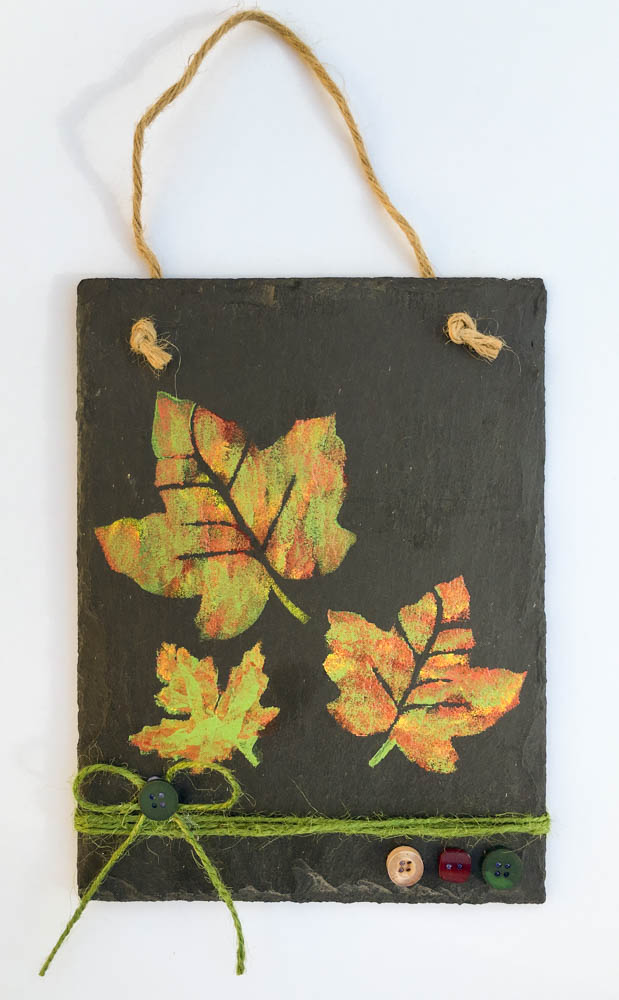
Painted Leaves on Slate

Supplies:

(For my paint selections, I used Delta Ceramcoat “Ranchero”, Delta Ceramcoat Select “Light Foliage Green”, Folkart “Cardinal Red” and “Daffodil Yellow”, and Martha Stewart Crafts Metallic Acrylic in “Rust”. But the exact shades aren’t as important as getting a light green, a red, an orange, a yellow, and a metallic.)

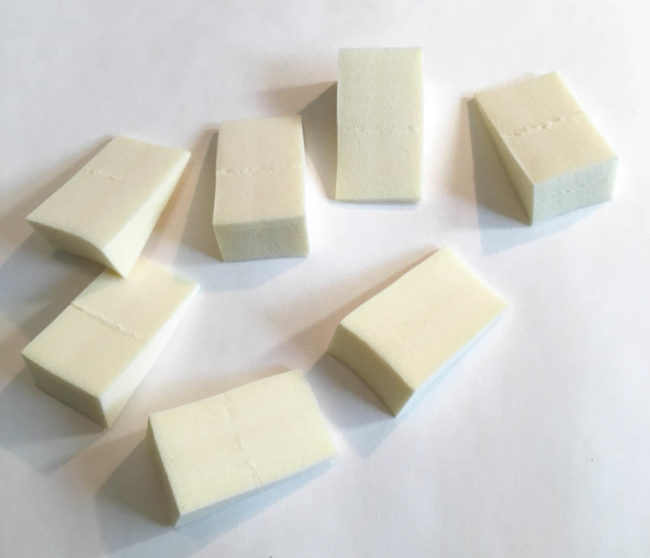
Cosmetic Sponges

The paint effect looks complex, but the technique is actually really simple. The secret to it is using disposable make-up sponges to apply the paint with a “dabbing” motion, instead of a brush. It’s so simple that even young children can do it!

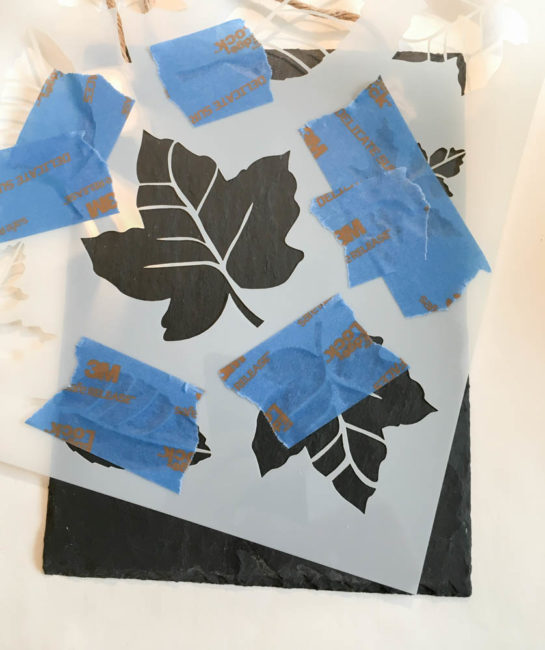
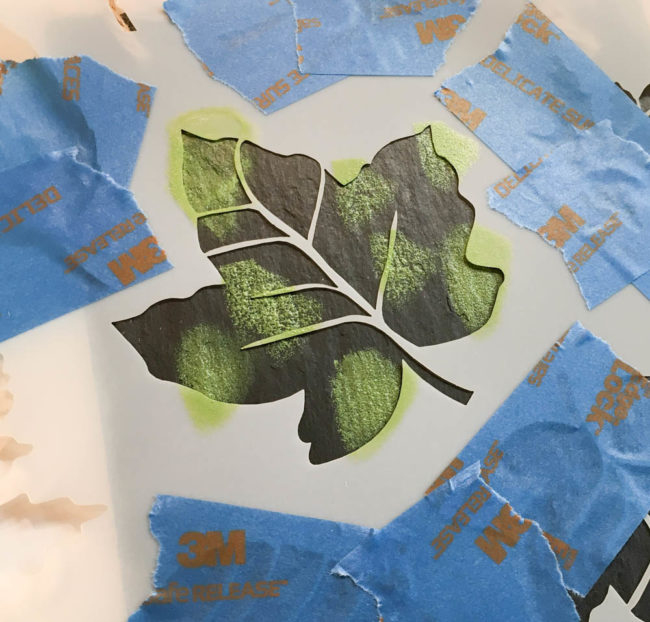
Leaf Stencil

Taping down the stencil, and using tape to cover all of the nearby open areas that I don’t want to paint, helped to ensure that I got a perfect impression from my stencil.

Painted Leaves in progress

I started with the light green color of paint, using one of the cosmetic sponges. I dabbed one of the end edges of the sponge into the paint, and then dabbed most of the paint off on the palette that I was using. I then used the damp sponge to dab blotches of color onto the stencil. I repeated this process with each color (except the metallic), filling in the whole stencil area.

Then I used the metallic color and dabbed it heavily over the top of the stencil, but not filling in quite completely. I wanted small areas to peek out from underneath. Then I repeated a layer of the light green paint, but not quite as heavily as the metallic.

Sometimes when applying new paint over paint that is still wet your colors might mix and blend a bit. As long as the sponges aren’t too wet, the colors shouldn’t shift too much.

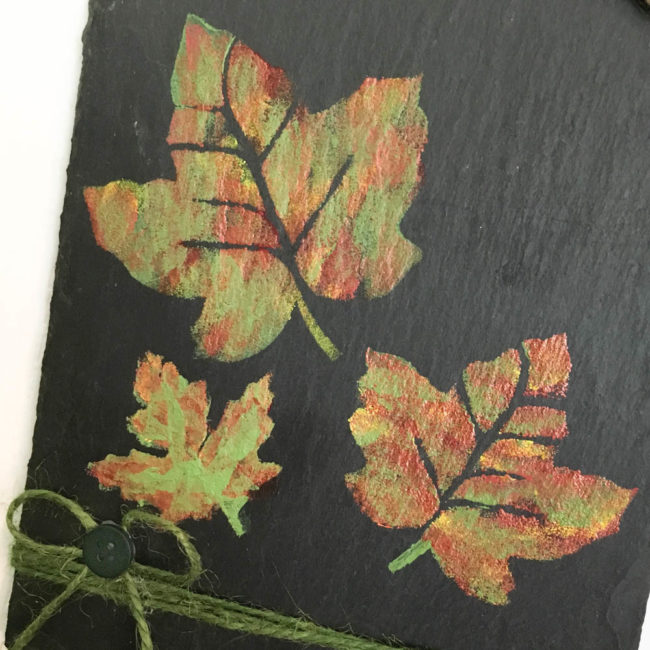
Painted Leaves

The finished effect will look something like this – a mix of metallic and green with hints of other colors like red and yellow peeking through. Just like with leaves in nature, no two painted leaves will come out the same!

Painted Leaves on Slate Tile

The painted leaves are pretty on their own, but the slate doesn’t really look finished without some dimension on it. I wrapped jute string around the bottom of the slate and secured it on the back with hot glue. The string provides “ground” that the leaves are falling to. Then I made a bow by twisting some string and attached it with some hot glue. I attached a button to hide the hot glue making the bow. Buttons are great concealers for glue and seams! Then, finally, in the bottom corner, I attached three more buttons. I like the repetition of the three leaves as three buttons for balance, and it provides a visual anchor for the other end of the string.

Argyle Button Tote

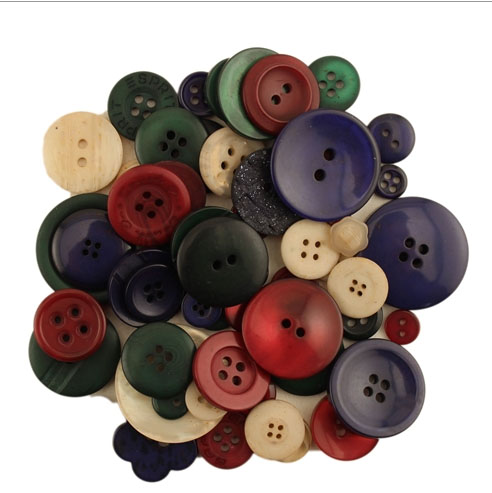
The buttons I used are from our “Argyle” Button Tote. With deep reds and greens, trendy navy, and neutral cream and black, the Argyle mix is a great selection to have in your creative toolbox for the holidays in the last part of the year! What will you use Argyle for?

0

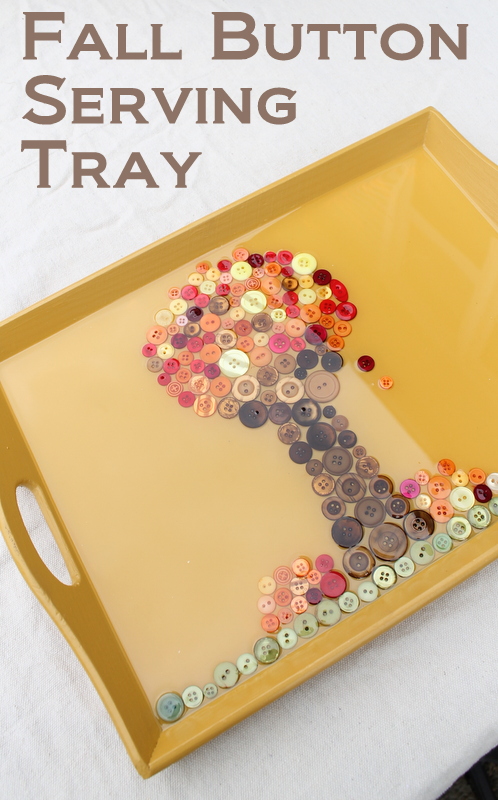
Fall Button Serving Tray

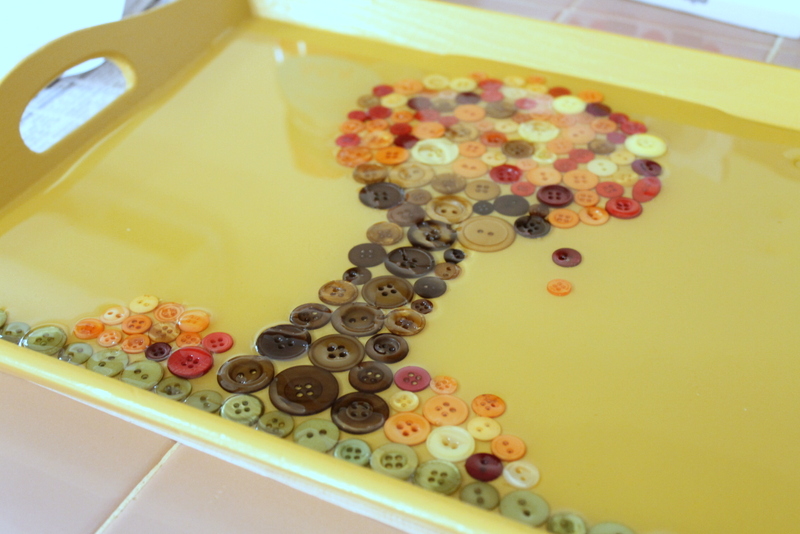
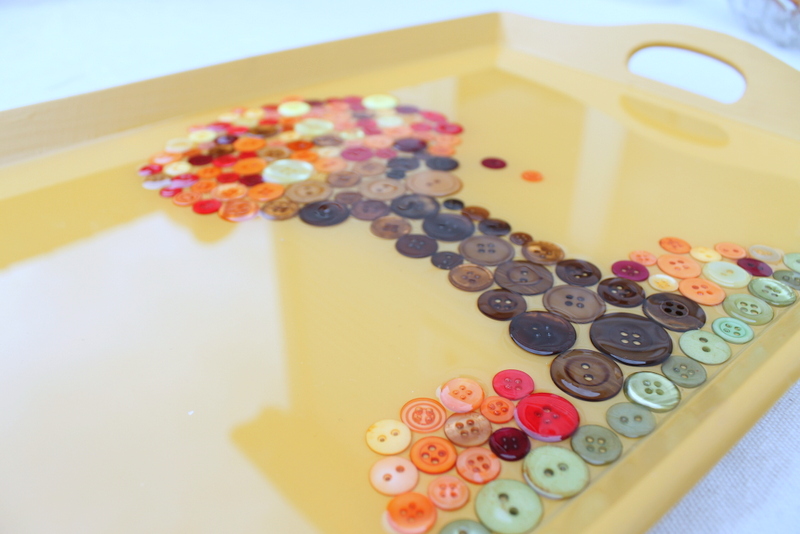
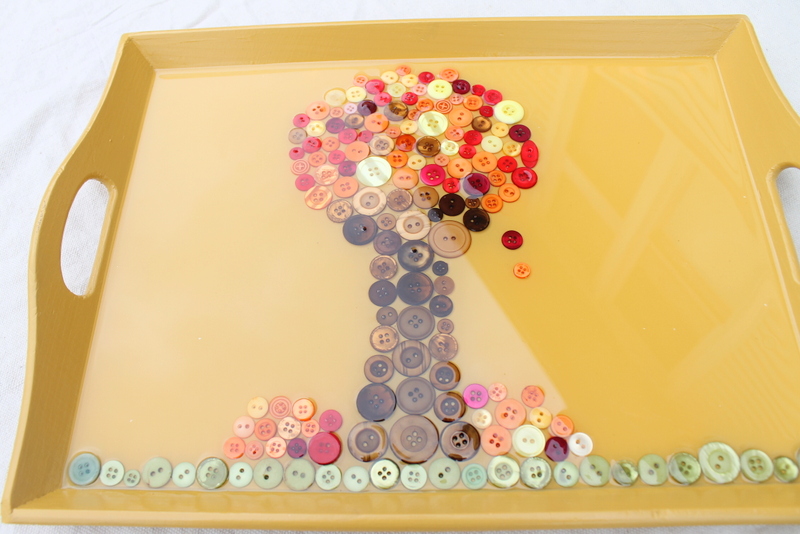
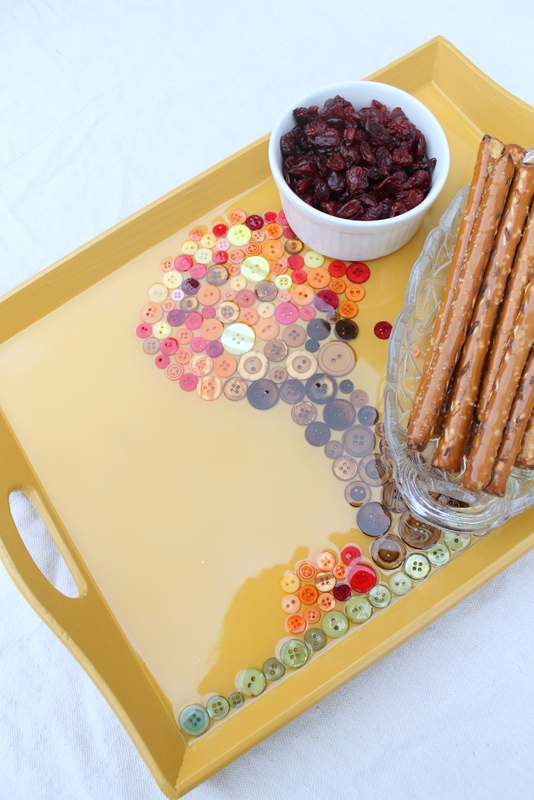
My fall button serving tray is one of my favorite buttons projects I have ever made.  Plus it is easy to make which is a win win right?  Grab your buttons and a thrift store tray to get started making your own version.  Don’t need a serving tray for fall?  Maybe use this same idea with a button ornament in the center for Christmas?  Or a heart in the center for Valentine’s Day?  I can think of all sorts of different tray designs for all seasons of the year.

Fall Button Serving Tray -- an idea to spruce up a plain thrift store serving tray for all of your fall parties.

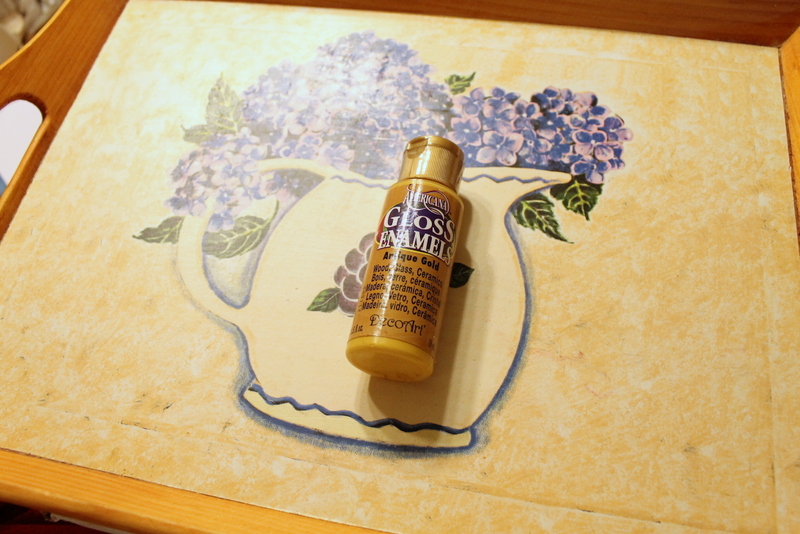
I started with a tray from the thrift store for 99 cents and a bottle of Americana gloss enamels in Antique Gold.

Fall Button Serving Tray -- an idea to spruce up a plain thrift store serving tray for all of your fall parties.

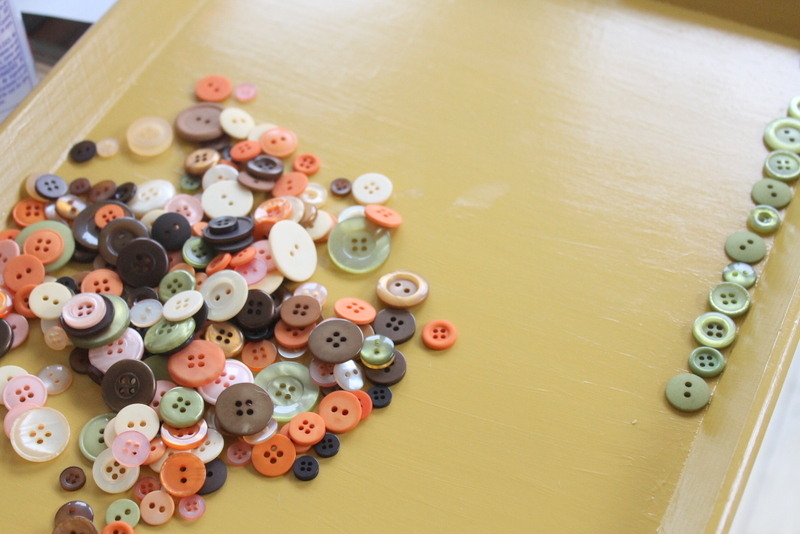
I painted my entire tray with 2 coats of the paint then grabbed some fall themed buttons from Buttons Galore and More.

Fall Button Serving Tray -- an idea to spruce up a plain thrift store serving tray for all of your fall parties.

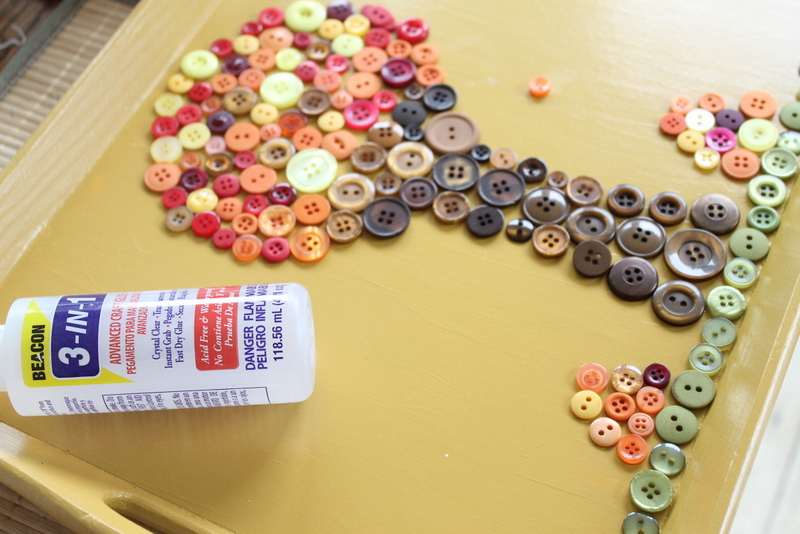
I laid the buttons out on my tray until I was happy with the arrangement.  I then used my 3 in 1 Beacon adhesive to glue them directly to the tray.

Fall Button Serving Tray -- an idea to spruce up a plain thrift store serving tray for all of your fall parties.

Once the glue was completely dry, I mixed a two coat epoxy to make my tray nice and smooth.  Don’t be afraid of epoxy!  Just mix and pour according to the package directions.  I spent quite a bit of time using a flame to pop bubbles that come up from the epoxy itself and the buttons.  Yes my finished project still has a few bubbles but overall it looks amazing.  The buttons seem to create more bubbles than is normal with an epoxy project.

Fall Button Serving Tray -- an idea to spruce up a plain thrift store serving tray for all of your fall parties.

Allow your epoxy to dry for a nice long time before you touch it (don’t be tempted to touch!!).  You will be left with a glossy flat serving tray with buttons in it!  Now some of my buttons stick up just slightly out of the epoxy (there is a slight hump in the epoxy).  This can easily be fixed with a second epoxy pour however the bumps do not really bother me for my needs so I am leaving them.  You could also be extra careful when choosing buttons for your design and choose only the flattest buttons to include.

Fall Button Serving Tray -- an idea to spruce up a plain thrift store serving tray for all of your fall parties.

Just so you can see my entire button fall scene here is a picture of the entire tray.

Fall Button Serving Tray -- an idea to spruce up a plain thrift store serving tray for all of your fall parties.

It is so darn cute I could eat it up.  Speaking of eat it up, use your fall tray to serve snacks to the kids or for a wonderful addition to your Thanksgiving and fall themed parties.  Want more buttons on your Thanksgiving table?  Be sure to check out my rustic burlap napkin rings as well.

Fall Button Serving Tray -- an idea to spruce up a plain thrift store serving tray for all of your fall parties.

Will you be adding buttons to a tray anytime soon?  Don’t let that epoxy pour scare ya!  My fall button serving tray will make an appearance at our Thanksgiving meal and many snacks in the meantime.

4

Mini Autumn Gift Bags

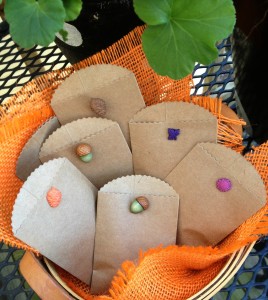
I am getting ready for a DIY Autumn Craft Night at my studio and I have these super cute little Halloween trinket tokens, lucky pumpkins!  I wanted to wrap them up in a festive way for favors and this is what I came up with…mini autumn gift bags.  I really like them because the buttons can be part of the favor as they can be reused on projects that my guests make when they get back to their studios and homes.

AutumnGiftBags

To create them, I used the Autumn Potpourri collection, a hole puncher and little bit of wire.  I punched a hole in the mini treat bag (from Canvas Corp) then pushed the button through the hole.  On the other side, I slid a short piece of wire through the button and twisted it.  This is so easy and created such a fun little collection of favor bags.

AutumnGiftBags_Steps

This same method could be used to attach the autumn (or any) buttons through fabric and ribbon too.  I have some really fun Christmas ones that I am going to try next with some gift wrap ribbon.  Yes, I will share when I do it.

Happy Autumn,

Laura

0

Ribbon Wreath with Button Accents a DIY that is easy to make

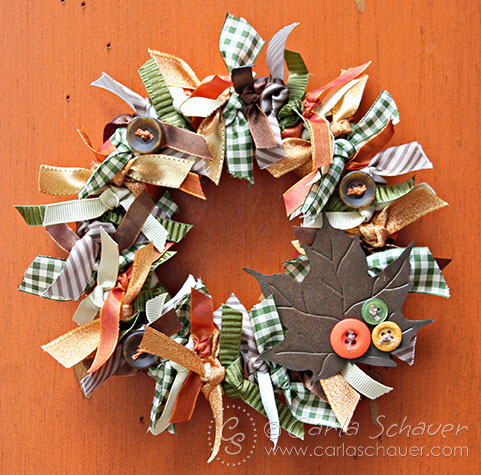
Ribbon Wreaths are trendy right now, with photos appearing on blogs and Pinterest.  This tied ribbon version with button accents is a great way to get autumn colors and textures in a wreath that is easy to create.

Fall Ribbon Wreath with Button Accents

 Directions to make a Ribbon Wreath:

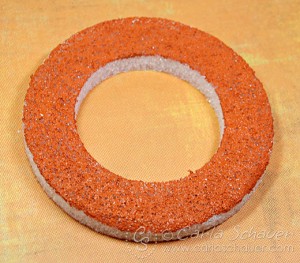
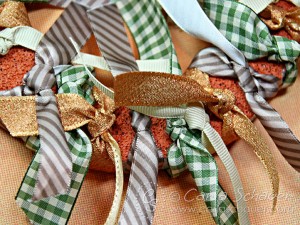
Making a ribbon wreath is a straightforward process that begins with a simple wreath form.  For this wreath, I used a STYROFOAM Brand Foam wreath form approximately 8″ in diameter.  I painted the front of the wreath using a foam brush and orange acrylic paint to camouflage the form in case it happened to peek through the ribbons.

Ribbon Wreath STYROFOAM base

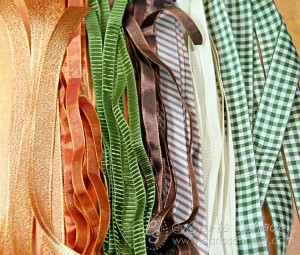
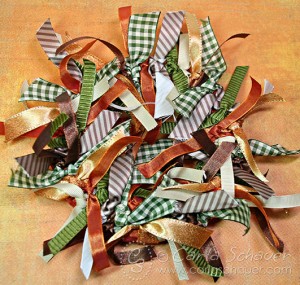
While the painted wreath form is drying, I gathered my ribbons and cut several lengths of each.  My form required around 50 pieces, each 10″ long.  Widths ranged from 1/2 to 1″.

Cut Ribbons for Ribbon Wreath with Buttons

Once the form was dry and the ribbons cut, I tied the pieces around the form.  I began with the wider ribbons, and filled in the spaces with the narrower pieces, adjusting the location of the knots as necessary.

Tying Ribbons onto Ribbon Wreath with Buttons

Once all the ribbons were tied around the wreath form, the whole project looked pretty scary.  It resembled a big autumn-colored ribbon Medusa.

Ribbons tied on Ribbon Wreath with Buttons

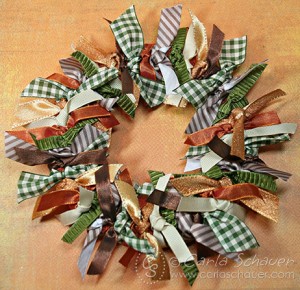
But once all the ribbon ends had been trimmed to approximately 1.5 inches long (use sharp fabric scissors for clean edges), scary Medusa transformed into a pretty tied ribbon wreath ready for embellishing.

Making Tied Ribbon Wreath

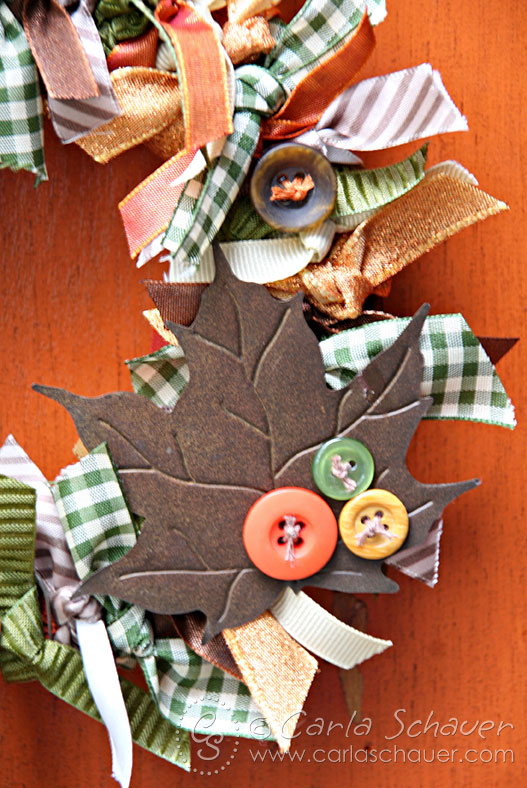
I added thick marbled dark brown buttons from the Natural Grab Bag tied with orange embroidery floss, and a large aged metal leaf as an accent.  Three additional buttons from the Autumn Grab Bag tied with cream floss top the leaf for additional coordinating color and texture.

Button Accents on Ribbon Wreath

With no time or labor-intensive techniques to deal with, this tied ribbon wreath can be assembled quickly and easily.   Dive into your ribbon stash and make one today!

Thanks for stopping by!

Carla


2

Button Napkin Rings for Autumn


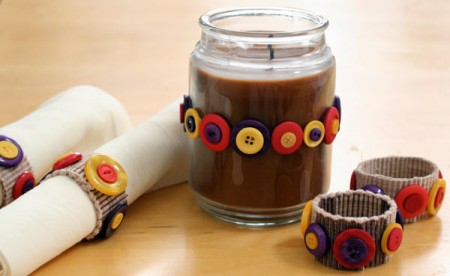
Autumn button napkin rings and candle by Jen Goode

Autumn button napkin rings and candle by Jen Goode


Buttons are such a great embellishment for your table settings. Grab yourself a bag of Autumn colored buttons and make a center piece and some festive napkin rings and let the family gatherings begin! I made this set of 4 button napkin rings and embellished a glass candle holder with the same button set.


Materials you need:

How to make fall button napkin rings:

  1. Cut your fabric to the length and height you prefer. Glue the ends together to make the ring.
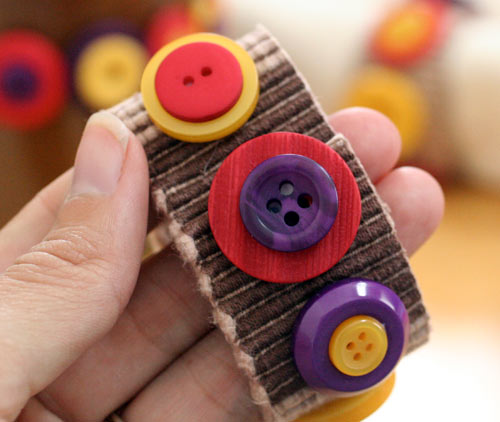
  2. Add buttons as you’d like, attaching with fabric glue. Add additional layers of buttons on top of buttons for added interest using the craft glue.

To embellish the candle jar, simply use the craft glue and place buttons as desired. Hold the jar sidewise for a few minutes to prevent the buttons from slipping before the glue has a chance to dry.


Autumn button napkin ring detail Jen Goode

Autumn button napkin ring detail Jen Goode


2

Powered by WordPress. Designed by WooThemes