Header

Archive | Scrapbooking

ARRR! Scrapbook a Pirate’s Life with 28 Lilac Lane

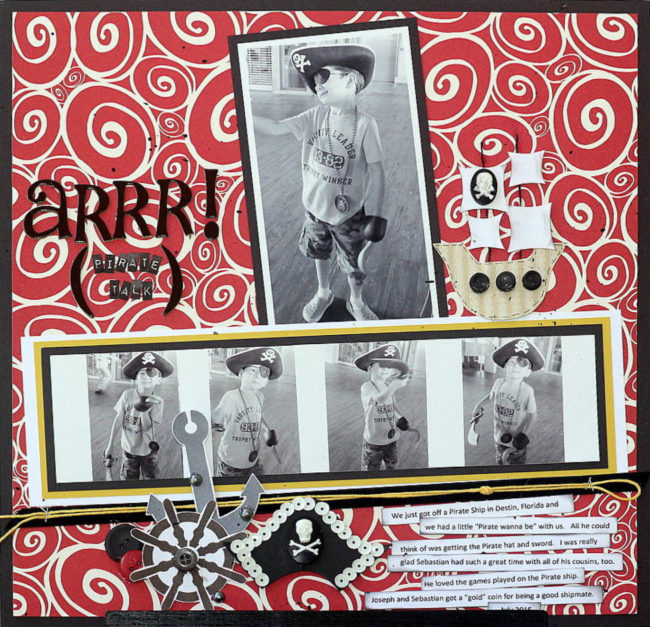
Hi, Connie here hosting the Buttons Galore and More blog today!  I have a really cute scrapbook page to share using the Pirate’s Life Embellishment Kit by 28 Lilac Lane. This was such a fun kit to create with and couldn’t have been more perfect to create a scrapbook page with for the photos that I had.

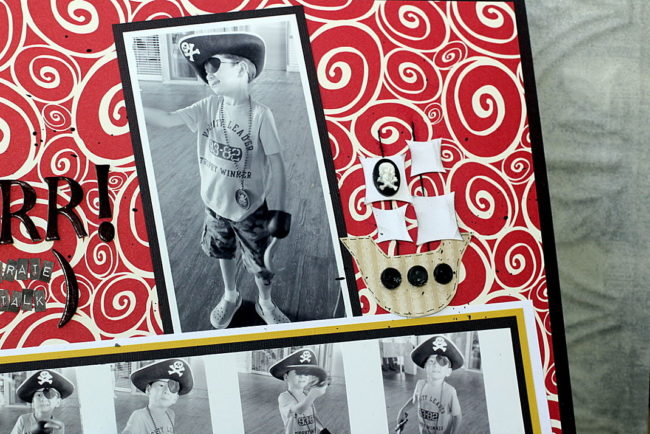
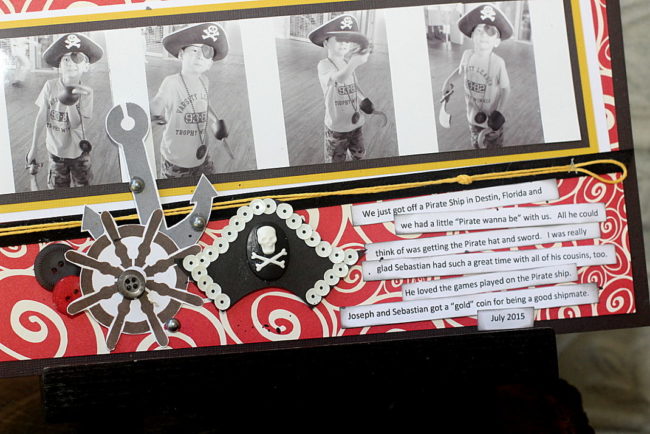
A Pirate's Life scrapbook layout

The Pirate’s Life embellishment kit by 28 Lilac Lane includes buttons, sequins, velvet trim, a charm, small seed beads and pirate skull embellishments. I used the Pirate’s Life kit to create my page accents and it was really fun. I looked up pictures of pirate images. Then I hand drew them out on cardstock, cut them out, and embellished them with the contents in the Pirate’s Life kit.

Pirate's Life scrapbook pageThe first embellishment I created was the pirate ship. Drawing a pirate ship can be kind of scary when you’re not sure what one looks like to begin with.  When you have a picture in front of you, it’s not so hard at all! Once the pirate ship was created from pattern paper and buttons, it was ready to put in place on the scrapbook page. It’s amazing what can be created with paper and buttons!

A Pirate's Life scrapbook layoutThe next embellishment to be created was the pirate’s hat. I traced the outline of the hat on cardstock and then embellished it with sequins and the pirate skull from the 28 Lilac Lane “Pirate’s Life” kit.  The embellishment cluster was enhanced with grey pearls from the kit as well. The black velvet trim was added below the film strip of black and white photos and I tucked in a few large buttons in the bottom pirate cluster also. Next, the journal text was created and added to the side of the Pirate cluster.

I hope you are encouraged to create unique, one-of-a-kind embellishments for your craft projects using the embellishment kits by 28 Lilac Lane!

Supplies used:

Thanks for stopping by~

Connie Mercer/DT Member

1

Scrapbook by Embellishing Pre-Designed Paper with 28 Lilac Lane Kits!

There’s many papers available for scrapbooking that are pre-designed to look already partially “done” as a layout. But how do you take those from looking flat to looking fantastic? The secret to fabulous scrapbook layouts is embellishing pre-designed paper with your 28 Lilac Lane embellishment kits! And I’m going to show you exactly how to do it with this easy scrapbook layout from my recent trip to Paris.

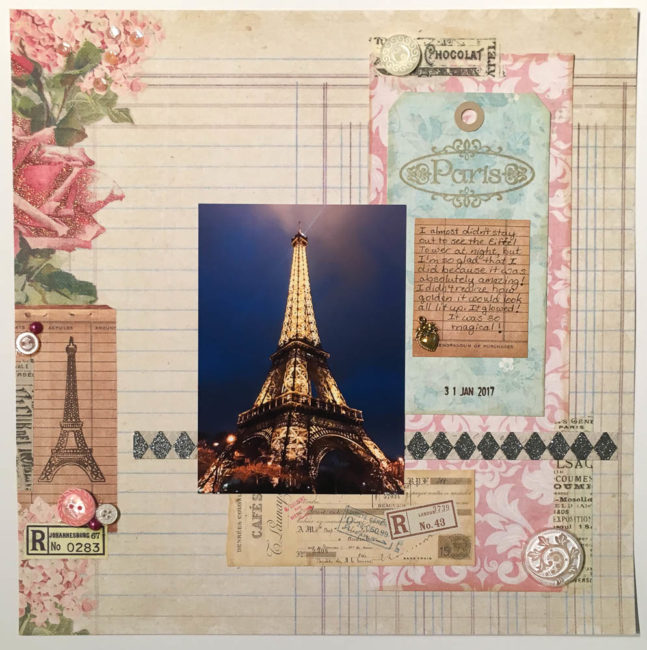
Paris Scrapbook Layout

Supplies:

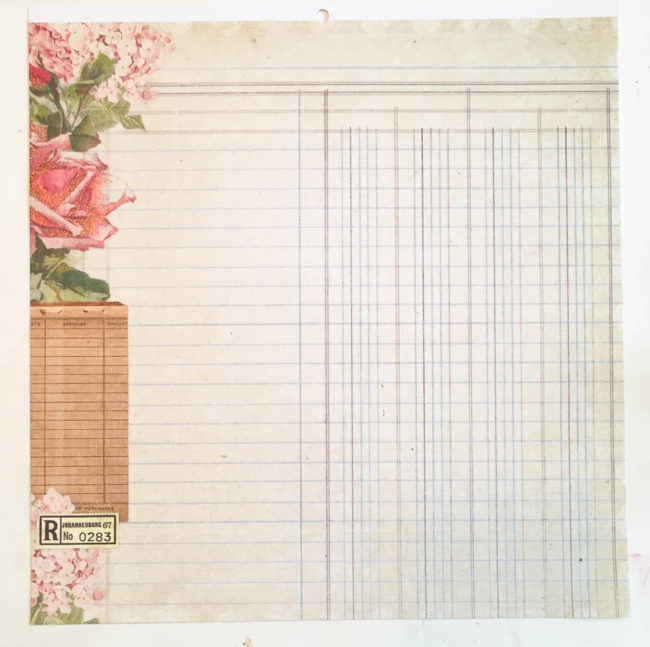
I started with a pre-designed background paper from DCWV. It is designed to look like a piece of ledger paper that has florals and several vintage elements layered on top of the left edge to frame it.

Because this paper comes from a paper stack, I was able to create practically the entire layout using pre-coordinated items from the stack. All of the paper items on the layout are cut from sheets in the same stack.

pre-designed paper background

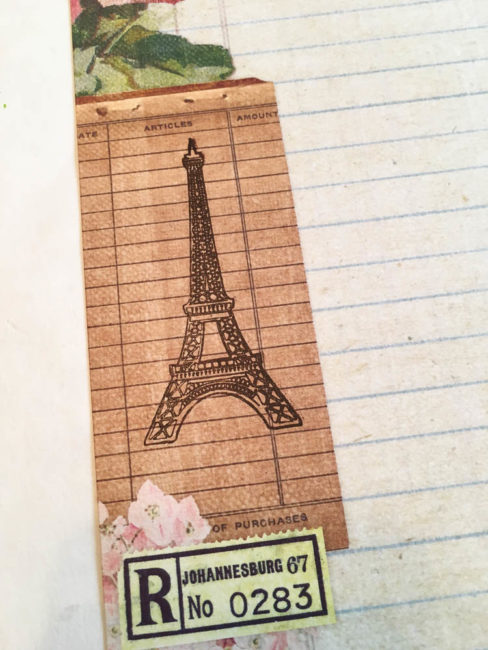
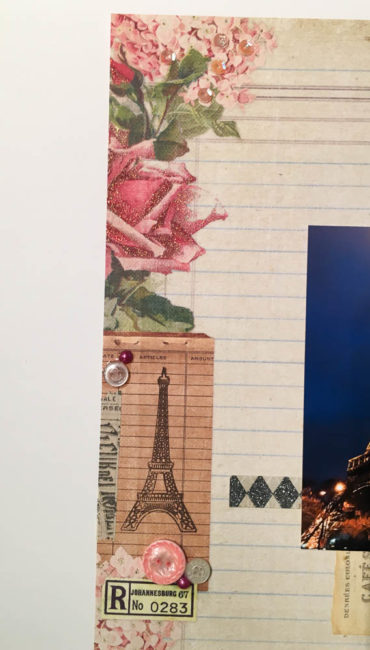
That large brown vintage receipt ephemera was white space that was just begging to be filled! It was the perfect place to put my Eiffel Tower stamp, stamped in dark brown pigment ink to continue the vintage theme.

eiffel tower stamp on paris scrapbook layout background

But of course, a stamp is still flat – and I wanted to add some dimension to this area. So I grabbed my 28 Lilac Lane embellishment kits, which are perfect for embellishing pre-designed paper! A few buttons and flat back pearls from the “Love Story” embellishment kit (along with a strip of tissue tape) were the perfect addition to finish off the area where I’d just stamped my Eiffel Tower.

At the very top edge of the page, I dabbed clear glue in the center of a few of the pink flowers and dropped a few pearl sequins on them to add a bit of shine and dimension to the flowers.

embellishing pre-designed paper

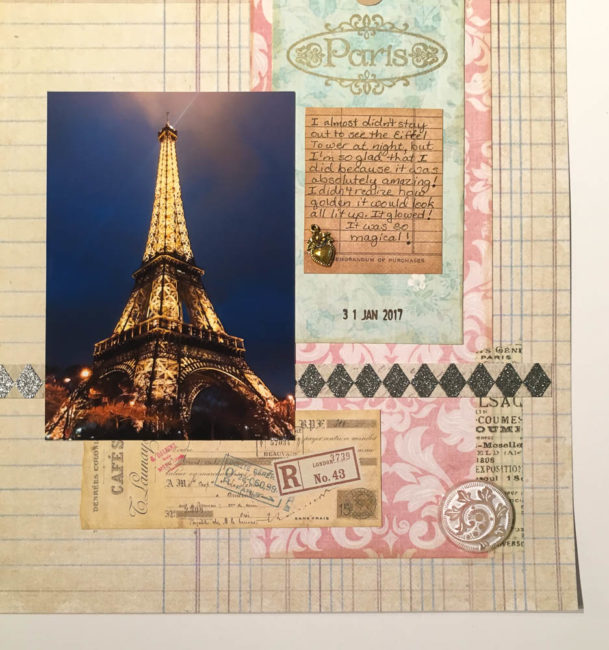
On the other side of the layout, I cut and arranged all of the paper elements. I stamped the Paris stamp with Shimmer ink, and used black pen to write my journaling (leaving room to put the charm on).

Once all the paper elements and the photo were in place, I tore and stuck down two pieces of tissue tape along the edges of the large pink block. These pieces served as grounding for my buttons.

I used button shank removers to cut the shank off of the large white filigree button from the Attic Findings kit, and glued it in place at the bottom of the layout. Then I selected a cream colored button from the same kit and adhered it at the top of the layout. Finally, I glued the heart charm from the “Love Story” kit onto the journaling block.

embellishing pre-designed paper

Having a selection of 28 Lilac Lane embellishment kits on hand makes it so easy to scrapbook by embellishing pre-designed paper. Select a paper, grab the kit in the coordinating color scheme, and in minutes you can have a beautiful layout!

0

Make an Adorable Layout with Guest Laura Vegas!

Today Buttons Galore is excited to welcome guest blogger Laura Vegas, who is sharing with us an adorable layout and also a card. These fun projects are made with our Button Basics in Sky Blue, Candy Apple Green, Cotton Candy, and Lemon Yellow.
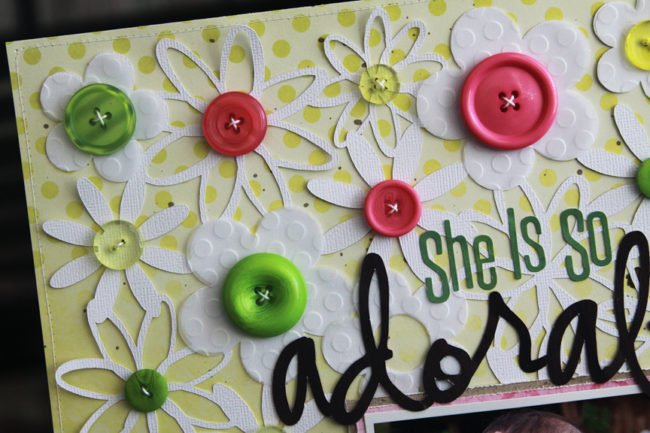
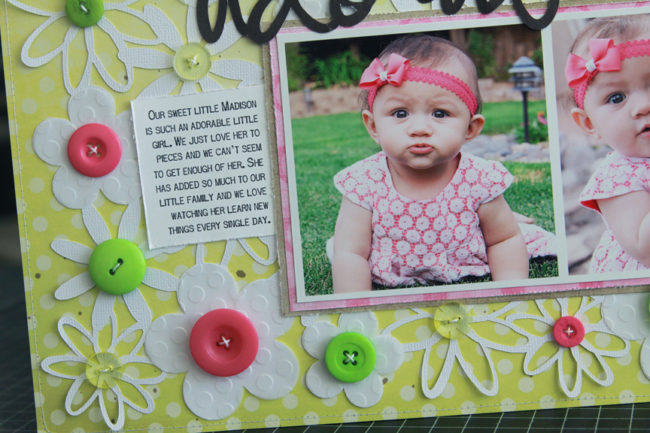
lauravegas_bg_sheisadorable
Hey everyone, it’s Laura Vegas here. I’m so excited to be here guesting on the Buttons Galore blog, and have created two projects to share with you all today. Buttons are one of my absolute favorite embellishments! I have a massive button collection, and yet I can never pass up adding more colorful buttons to my stash. They just speak to me!
lauravegas_bg_sheisadorable_detail1
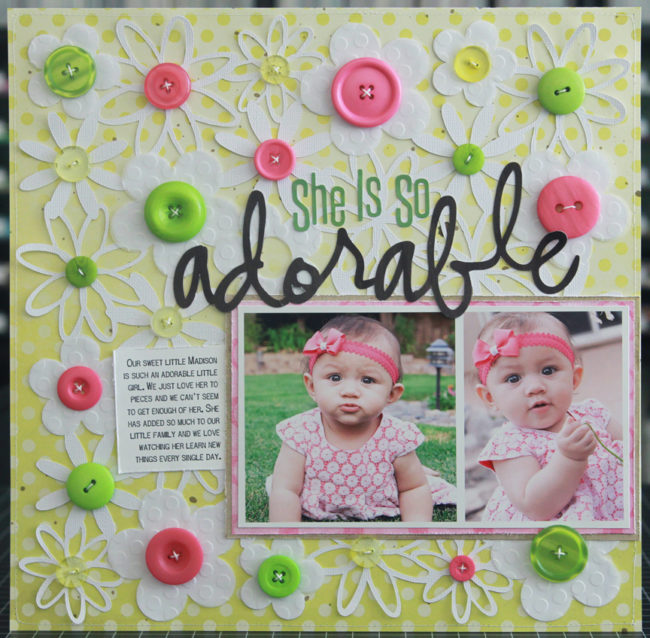
One of my favorite ways to incorporate buttons onto my projects is to add them to the centers of shapes. I tend to use a lot of flowers, circles, and stars on my layouts, and buttons are the perfect addition to any of those shapes. For this layout, I started by die cutting a floral background piece from white cardstock, using my Silhouette Cameo die cut machine. I love that it had lots and lots of flowers to embellish with my buttons!
lauravegas_bg_sheisadorable_detail2
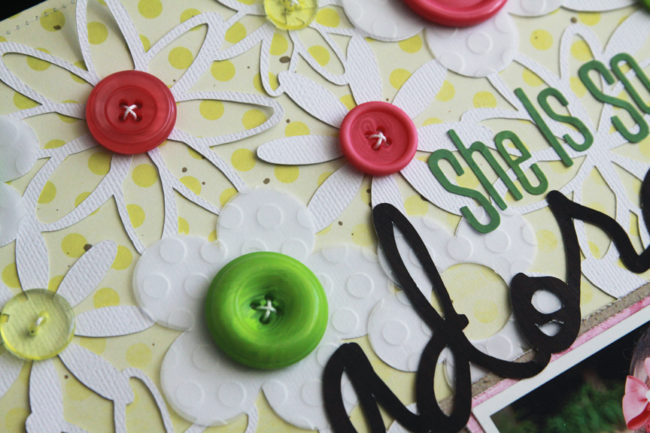
I wanted to add some subtle interest to some of the flowers on the background piece, and vellum came to mind. I was able to find an individual flower cut file that matched one of the flowers on the background piece. I sized the flower numerous times to match up with the flowers on the background piece, and then cut them all from a sheet of vellum. To add some texture, I ran each vellum flower thru a dotted embossing folder before layering them over the background flowers.
lauravegas_bg_sheisadorable_detail3
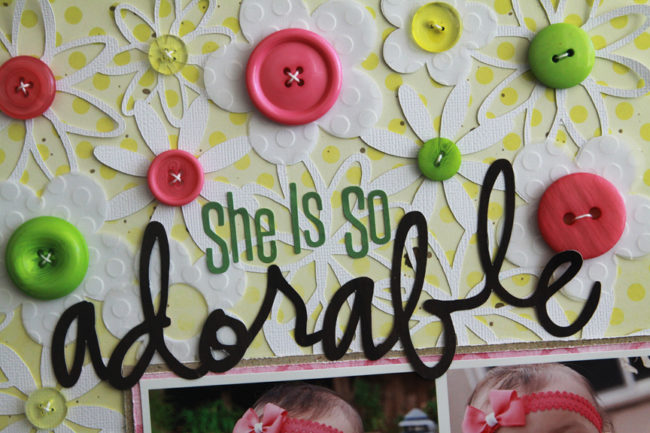
Personally, I always thread my buttons when using them on layouts and cards. I don’t like to have any “naked” buttons on my projects ;) My go-to way to adhere my buttons, is to thread my string through the button holes, and then laying the string ends flat against the button, I add a glue dot (or sometimes two if it’s a larger button) right over the string. This holds the ends in place, and I can them simply adhere my button to where it needs to go.
lauravegas_bg_sheisadorable_detail4
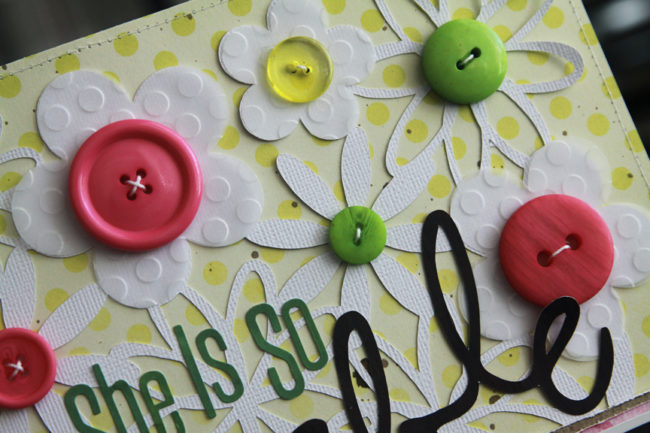
The exception to this rule, is when I’m working with clear buttons. I don’t want those strings and glue dot to show through the clear button. So for those buttons, I will take the extra time to use a needle and stitch my button directly onto the page.
lauravegas_bg_sheisadorable_detail5
I tend to be a more simpler scrapper, in that I keep my embellishments more on the simpler side. So I am always turning to buttons, as well as basics like brads and enamels. Oftentimes, they are all I need to finish off a project mostly made up of photos, cardstock, and patterned paper.
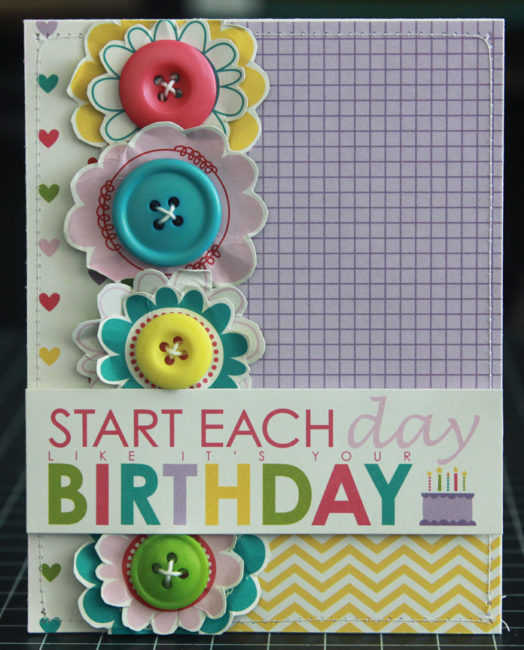
lauravegas_bg_itsyourbirthdaycard
I wanted to whip up a quick card to share with you as well, using the same idea of adding buttons to the center of flowers. This time I fussy cut some flowers from a sheet of patterned paper to create this easy birthday card.
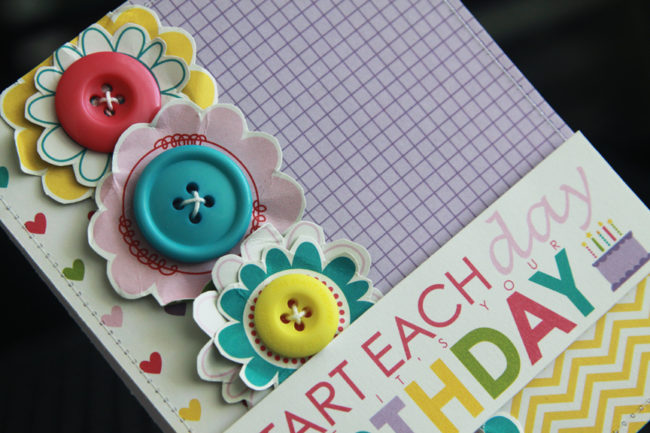
lauravegas_bg_itsyourbirthdaycard2
A fun, and super simple, way to add texture to paper flowers (whether die cuts or fussy cut from patterned paper), is to crumble them up really good. You can even lightly mist the paper with water to make it easier to work with. Then you simply un-crumble your flower, flattening it out as much or as little as you like. Add a threaded button to the center of each flower, and you’ve got the most adorable little flowers to add to your projects!
I’ve had so much fun creating these projects, and I hope you enjoyed them too! Thanks Buttons Galore for the opportunity to guest design for you and create with your colorful buttons!

laura vegas headshot
Learn more about today’s guest blogger, Laura Vegas: Hi there! I’m Laura Vegas, from Northern California, where I live with my husband Joe, and my two daughters, Alyssa (20) and Sarah (17). I have been scrapbooking for well over 22 years now. I scrapbook mostly about my girls and our family, but like to mix it up now and then by scrapping photos and stories about my daycare kids and family friends as well. I have been fortunate enough to design for some amazing manufacturers in the industry over the last 11 years, and have also had my work published in a variety of publications for the last 10 years. I was honored to be a member of the 2010, 2011 and 2012 Creating Keepsakes Dream Team and the 2013, 2014 and 2015 Scrapbook & Cards Today design team. I just recently left my position as Creative Team Coordinator for Bella Blvd after 5 years, and am currently designing for Kerri Bradford Studio.
0

Embellish Your December Album of the Holidays with Buttons!

In only a few weeks, December will be upon us! For many scrapbookers, that means recording our December holiday celebrations in special page-a-day pocket scrapbooks. Our 3D buttons are a fun and simple way to add embellishment to your December album!

December Album Cards

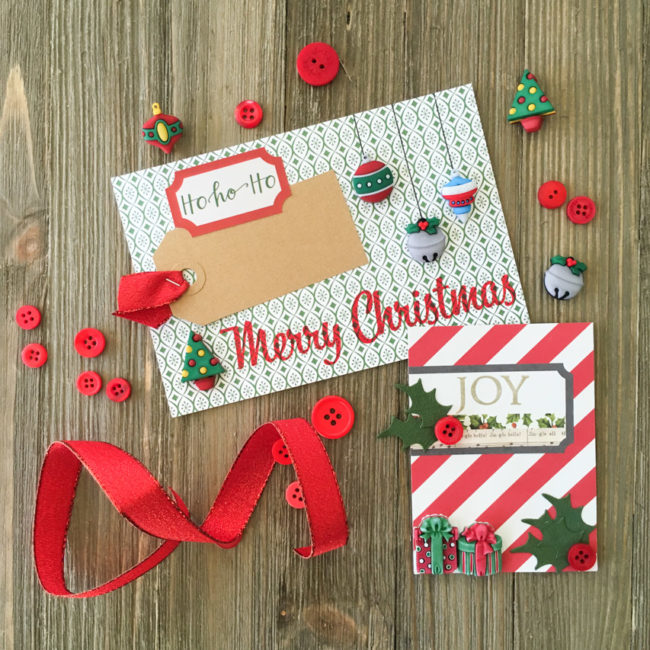
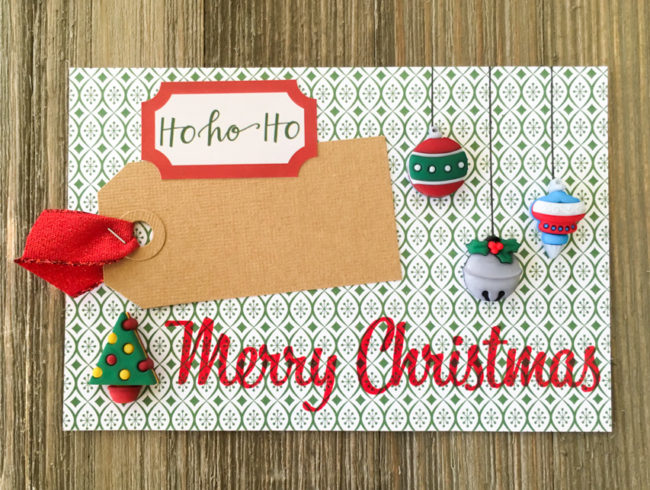
Most of us using pocket scrapbooks for our December album will have at least a few 4×6 cards in our album to highlight important topics or days. This journaling card could hold very large number stickers to put focus on a special date (such as #25) or the kraft colored tag could be used for journaling space!

December Album 4x6 card

Supplies:

To make this card, I cut a 4″ x 6″ piece of patterned paper. Then I stamped “Merry Christmas” on the bottom right and embossed it with clear embossing powder. After I die cut the tag from cardstock, I looped ribbon through the hole, and secured it with a staple. I adhered the tag in place and laid the sticker in place on top of it.

The buttons were the final touch. These buttons are shank buttons, so I had to use button shank removers to give them a flat back. Before gluing them down, I used a pen to draw “strings” from the top of the card to the locations of the baubles that I wanted hanging. Then I glued all three buttons down on top of the drawn strings, and also added the Christmas tree in the bottom left corner.

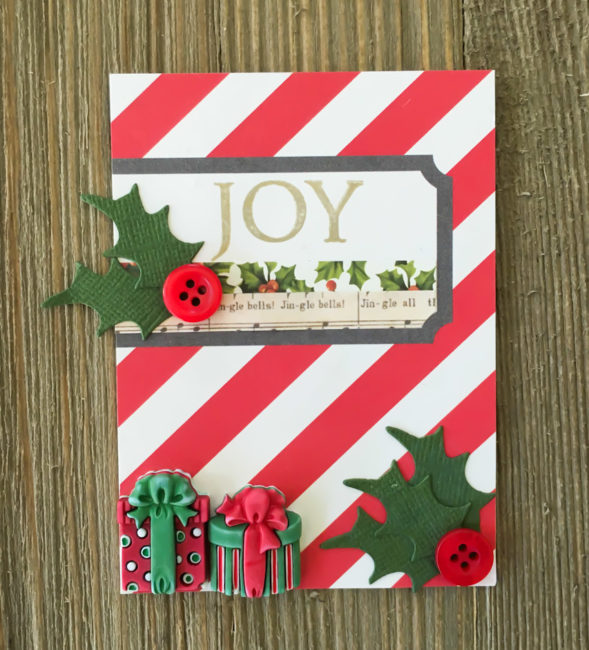
December Album 3x4 card

Supplies:

I also started this 3×4 card by stamping the sentiment in the upper part of the white box. Then I added the washi strips in the bottom part of the box, trimming them so they fit the decorative shape of the bottom corner. I die cut the small holly leaves and adhered them, adding small red buttons as berries. Finally, I cut the shanks off of two 3D present buttons and glued them down in the bottom right corner using PPA Matte adhesive.

Whether you are using a kit or doing it yourself, we’ve got the perfect buttons for your December album. Visit the Christmas category on our website, or our new section to see our latest releases to find great options for your album!

0

Create an Easy & Fun Button Title with Becki Adams!

Buttons Galore is delighted today to welcome blogger and designer Becki Adams to share her tutorial for a button title using some of her favorite Buttons Galore products! Becki’s impressive resume of design teams includes work with Carta Bella Paper, American Crafts, Bella Blvd, Elle’s Studio, Imaginisce, Pebbles, and many others. To learn more about her, visit her blog.
becki-adams-profile
Hey Buttons Galore friends and fans, I’m Becki. I’m thrilled to be here on the Buttons Galore blog today. I’ve been a crafter for years. And through those years many supplies have come and gone. Buttons, however, have always remained a staple in my stash. I always keep buttons! I am a scrapbooker/memory keeper. I chose to use lots of these buttons and sequins to create a scrapbook layout with a button title.

becki-adams_read-to-me_5

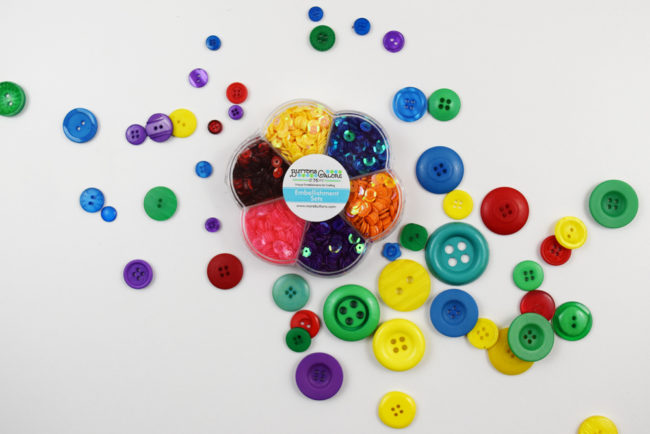
 When I sat down to create with such an awesome array of primary colored buttons and sequins, I wanted them to make a big impact on my layout. I chose to make a button title “read to me” with a huge emphasis on the word “read”.
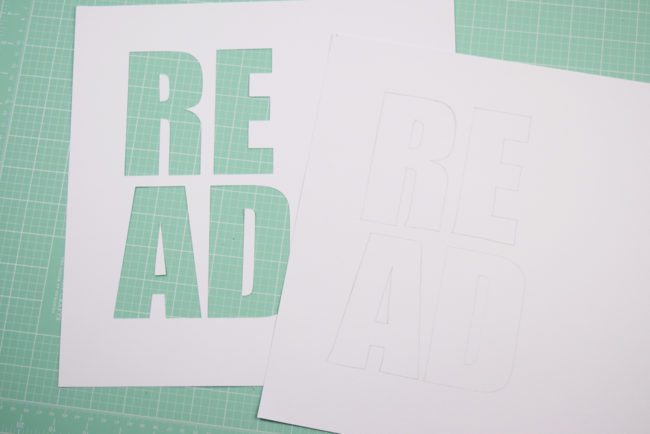
becki-adams_read-to-me_4I started by cutting my title with an electronic die cut machine. I cut the “read” portion of the title out of white cardstock with large block letters. Using a pencil, I traced the cut portion of the title onto another piece of white cardstock. I used this as a template for adhering the buttons and sequins.
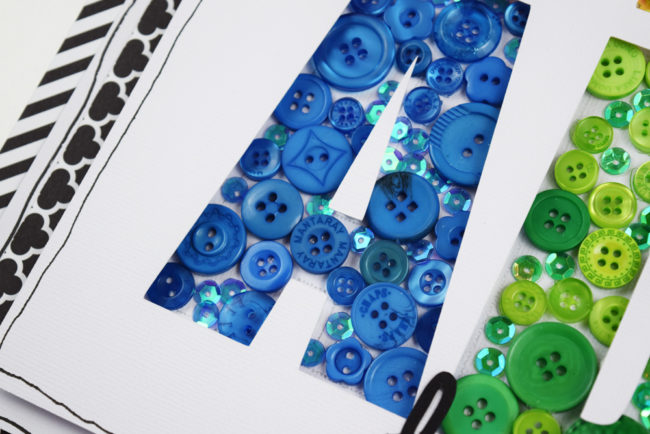
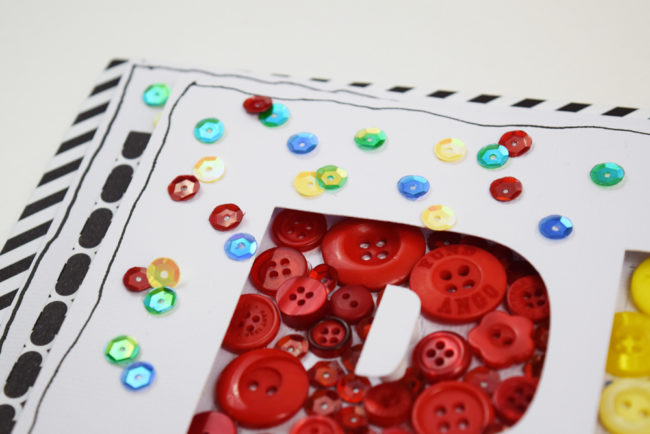
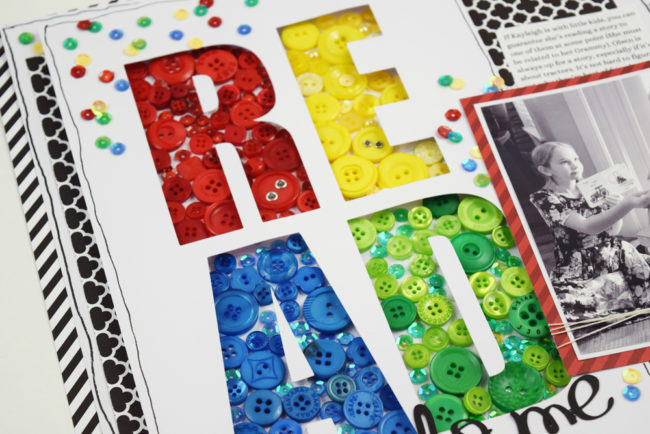
Becki Adams button title

For this portion of the project, I turned on Netflix and started gluing buttons and sequins in place. I started adhering the larger buttons first and then filling in the gaps with smaller buttons and sequins. I would recommend using a strong adhesive for this technique as the cardstock can buckle under the weight of the buttons.

Becki Adams button title

When I had all the buttons and sequins adhered to the background cardstock I used foam pop dots to adhere the die cut “read” on top of the button/sequin layer to create this awesome button title.
becki adams button titleI finished the layout by adding my photo, journaling, and a few more sequins on the top layer.
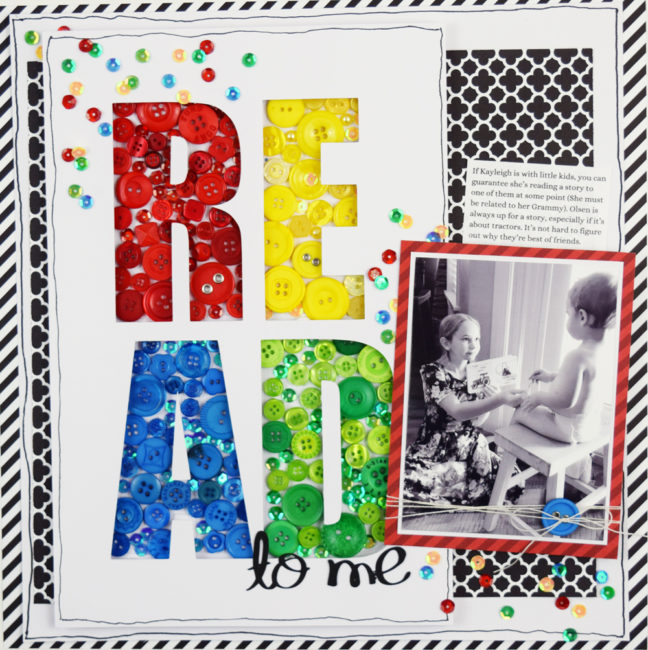
Read to Me scrapbook layout by Becki Adams featuring a button title for www.buttonsgaloreandmore.net

The buttons and sequins made this layout stand out with TONS of bright colors and textures. I can’t wait to use this button title technique again! Thank you for stopping by the Buttons Galore blog today! I’ll see you again soon!

white cardstock
black and white patterned paper
glue dots
liquid adhesive
dimensional foam adhesive
0

5 Ways to Use Buttons for Scrapbooking + NSD Sale!

Happy (Inter)National Scrapbook Day! Buttons are a perfect match for scrapbooking. They are a quick and easy way to add a pop of color and dimension to any layout design!

Five ways to scrapbook with buttons


Today, in honor of scrapbooking’s special day, we’re going to share with you our favorite examples of the wide variety of ways that buttons can be used on layouts.

Buttons & Burlap

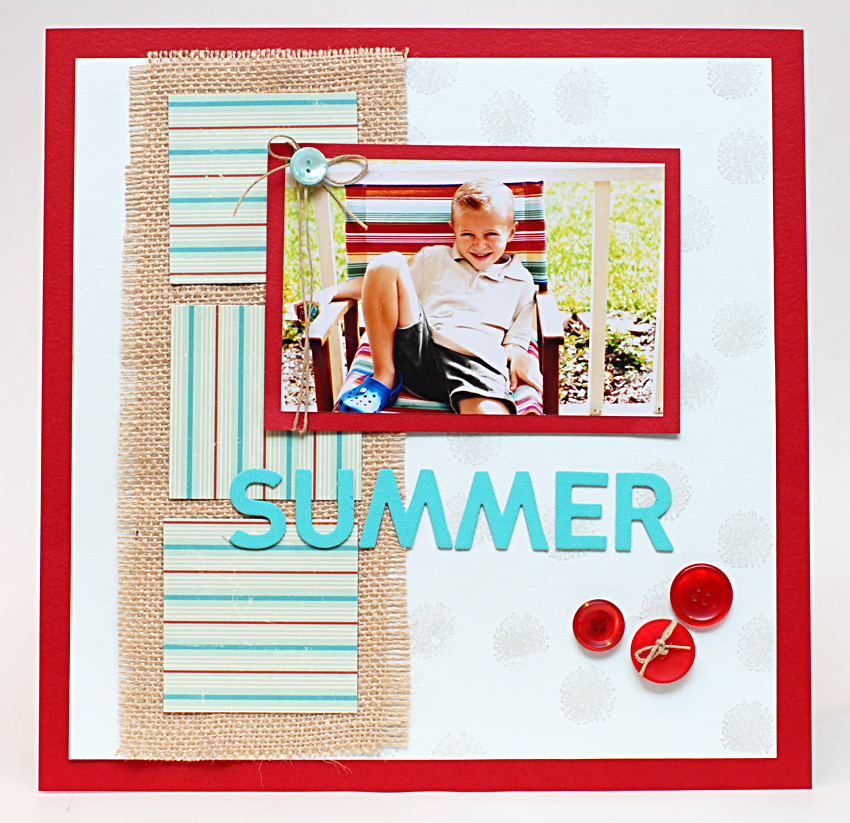
Buttons and burlap are always a good pair, especially on a scrapbook layout. Keri Lee Sereika paired them with bright red and crisp turquoise for this brilliant summer layout of her son.

Buttons & Burlap Scrapbook Page - Keri Lee Sereika

Brown & Blue

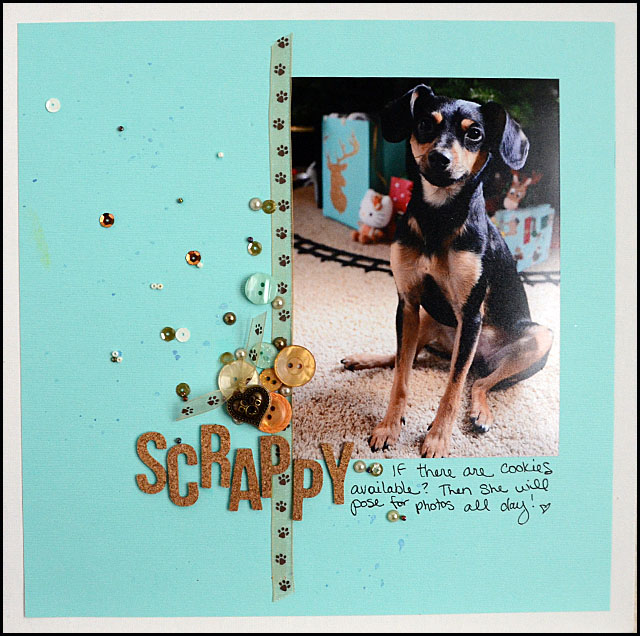
If you like the combination of turquoise and brown, but burlap isn’t your thing…try using brown buttons! Designer May Flaum used her 28 Lilac Lane Paws & Pets kit to make some brown elements pop out of a solid turquoise background to highlight her Scrappy pup!

Scrappy layout by May Flaum using 28 Lilac Lane

Handmade

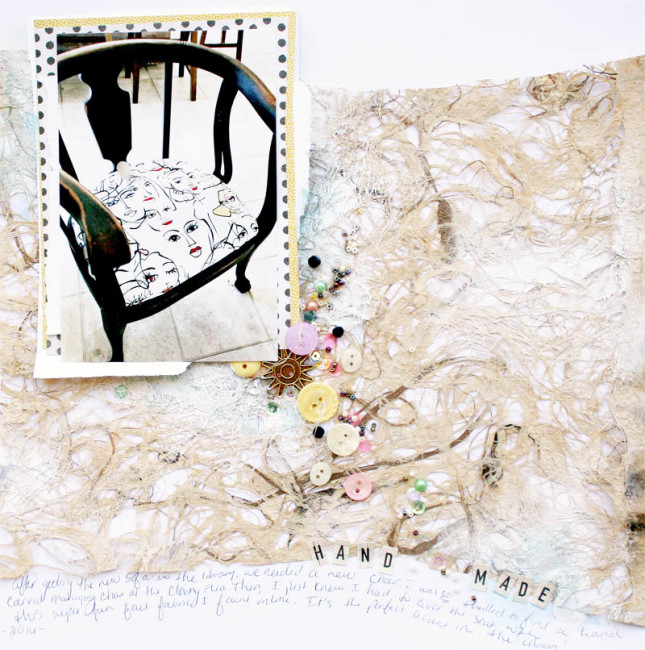
Natural materials (like the cork letters above) are a great combination with buttons. Ashli Oliver decided to extend the natural and handmade look to the paper on her layout, pairing her 28 Lilac Lane buttons with a rustic handmade paper. The contrast between the smooth, hard buttons and the rough, wild paper is perfect!

Handmade paper and buttons layout by Ashli Oliver

My Girls

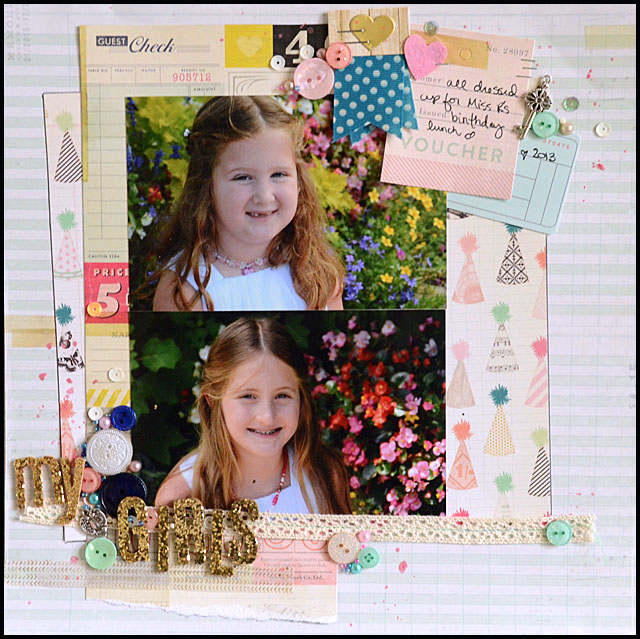
We’ve seen lots of button clusters so far, but May Flaum showed us in her My Girls layout how to use buttons scattered as 3D trinkets alongside ephemera as well. She scattered some of her 28 Lilac Lane Attic Findings and Just Peachy buttons – as well as the coordinating sequins and pearls – to prove that a few buttons can pack a design punch as well.

28 Lilac Lane with Crate Paper

Good Morning Sunshine

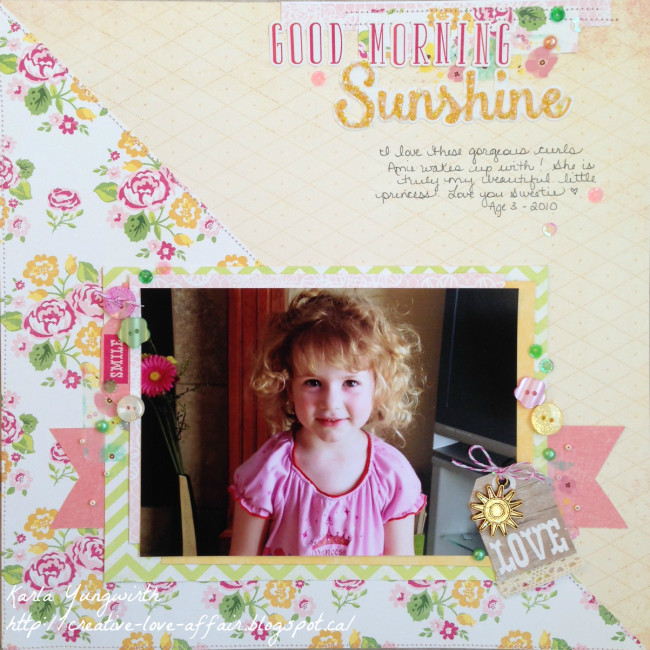
Guest blogger Karla Yungwirth took the scattering to a new level of delicacy! Her gorgeous pastel layout, with just a touch of one or two buttons dabbed here and there for a spot of color, shows how buttons (and sequins and pearls) can have an impact while still being subtle.

Sunshine scrapbook layout using 28 Lilac Lane embellishment by Karla Yungwirth

But wait, there’s more…a sale! We’ve got 20% off on our entire website to celebrate National Scrapbook Day! So you can save while stocking up on all the buttons and embellishments that you need to put the perfect finishing touches on your scrapbook layouts! Use code NSD20 at checkout and save now!

NSD20 FACEBOOK

0

Good Morning Sunshine Layout with 28 Lilac Lane

Today, the Buttons Galore blog is pleased to welcome Karla Yungwirth as guest blogger to share this beautiful scrapbook layout with us.

Sunshine scrapbook layout using 28 Lilac Lane embellishment by Karla Yungwirth
I am so excited to share a layout with you today that I’ve created with the new collection from 28 Lilac Lane by May Flaum! I am so in love with these amazing embellishments – the kits are full of beautiful sequins and lovely buttons, along with an amazing assortment of goodies that just make you need to create something gorgeous with them!
Title with 28 Lilac Lane embellishmentsI wanted to create a light, spring-like look to my page, so I started off by using some of the white and yellow beads over my Sunshine title sticker, gluing them on with matte medium liquid adhesive. They give such a cool effect over the sticker!
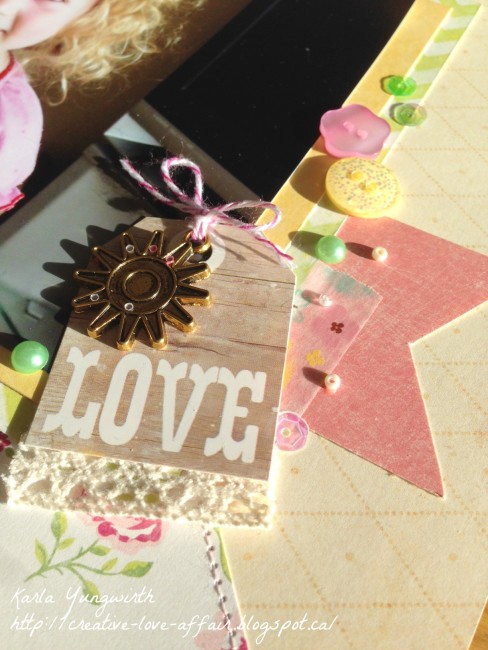
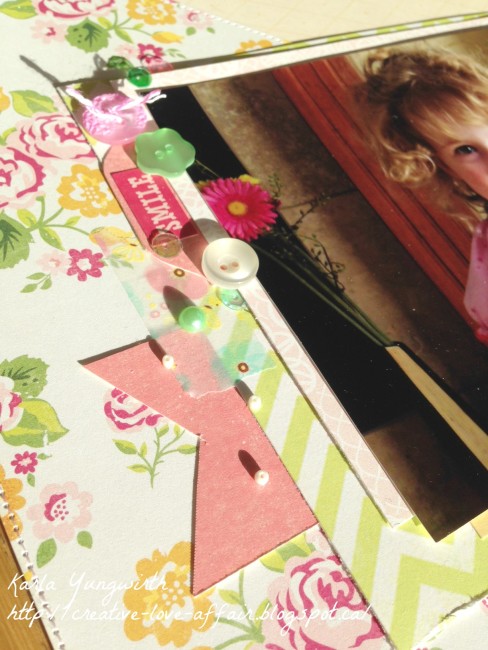
Scrapbook layout embellishment close-up
 I layered my photo and some coordinating papers over a diagonal paper arrangement, which I stitched on using my sewing machine. The pretty buttons, beads, sequins and pearls created lovely clusters on each side of my photo. The pink and white bakers twine, included in the Tropical Twist Embellishment kit, was perfect to tie through a pink button and my Love tag. I even added some of the lovely lace, which you can find in the Attic Findings kit, on the bottom of the tag along with the golden sun charm from the Tropical Twist kit!
Scrapbook layout embellishmentI scattered sequins around my page and near my title and stitched paper strips at the top of my page, along with another pretty pearl. It’s amazing how the embellishments in these kits can really make a layout pop! I had so much fun creating this layout, and I have so many more ideas that I can use these pretty embellishments kits on! Wishing you a happy, crafty and creative day!

Supplies used:


Karla YungwirthAbout Karla: I’m Karla Yungwirth, a Canadian mom to 3 beautiful girls, a wife of an amazing man, a scrapbooker, a card maker, a lover of gorgeous paper, a boo-boo kisser, a master Lego builder, a baker of lopsided birthday cakes. I have been crafting for as long as I can remember. My grandmothers taught me to sew, knit and crochet, and my mom was always repurposing to create something wonderful and magical – before recycling was even cool! I love being creative – it’s what makes my soul sing and my heart happy. You can find me on my blog at http://creative-love-affair.blogspot.ca//, on Facebook, and on Instagram.
2

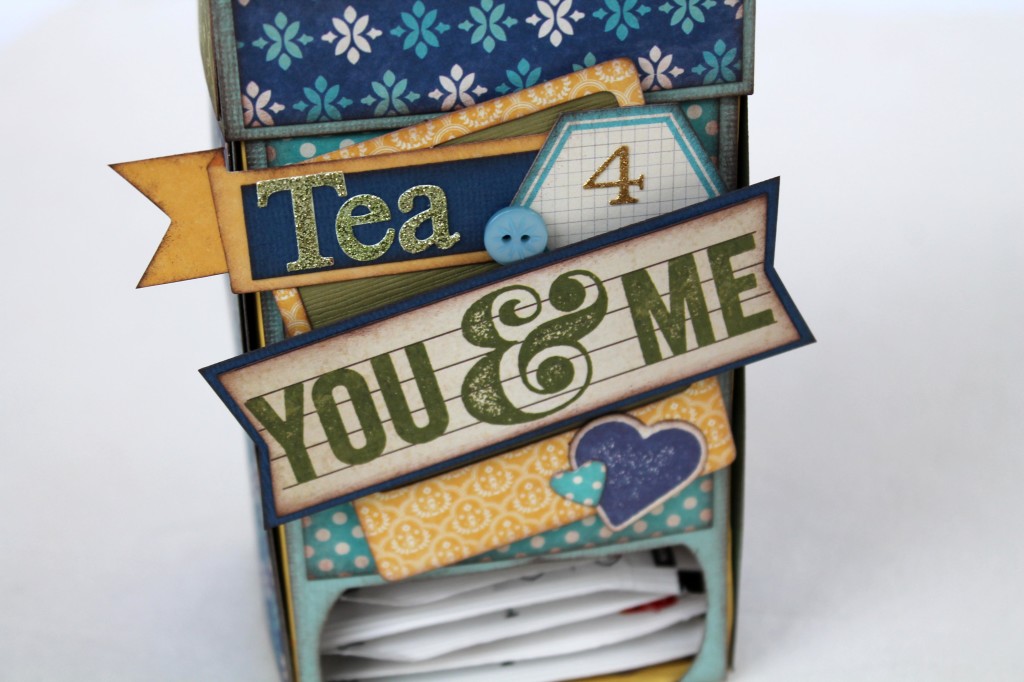
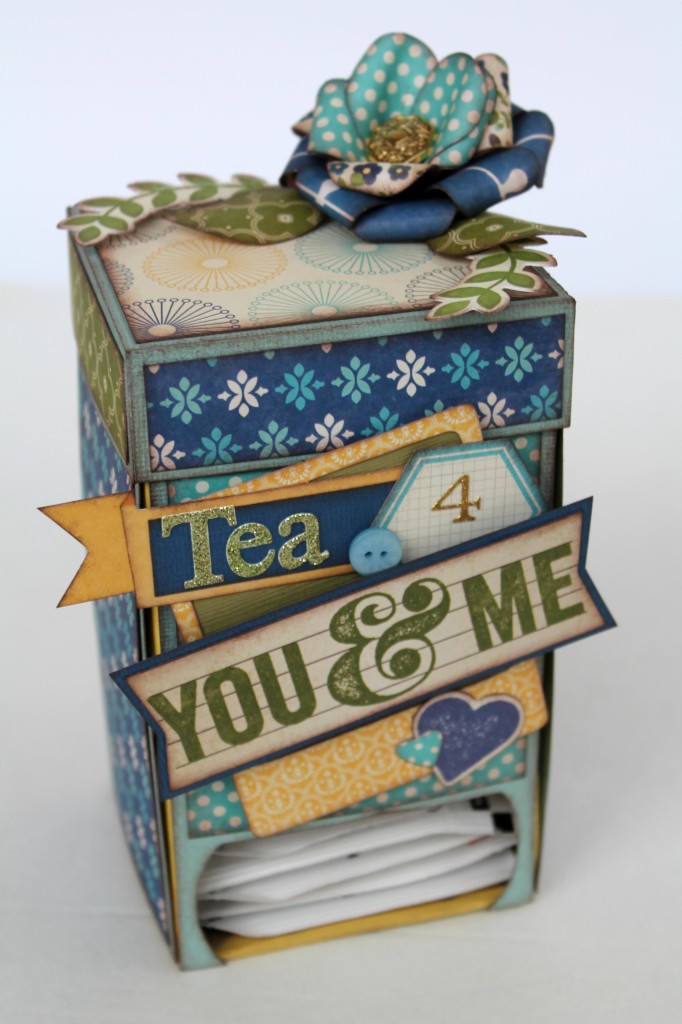
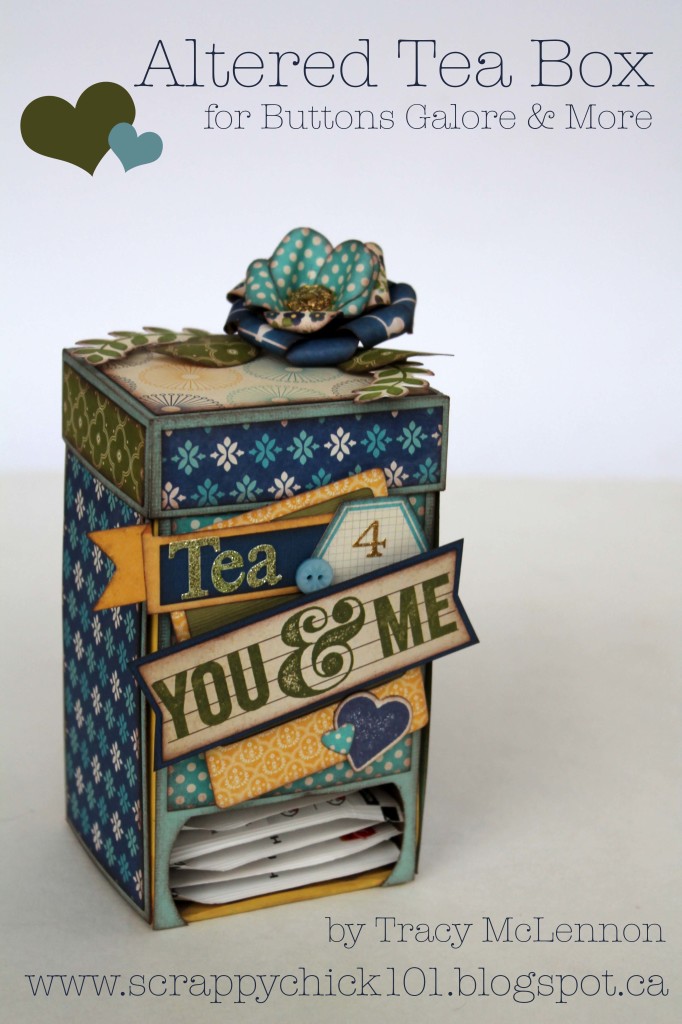
Altered Tea Box

Warm up someone specials day with this Altered Tea Box.

It’s something that many of you out there may see everyday, a simple tea box filled with that glorious beverage that soothes as you drink it. Why not take this simple drinkable pleasure and make it into a pretty and inexpensive gift to brighten someone’s day.

Altered Tea Box

I covered this Altered Tea Box with patterned papers and embellishments by JilliBean Soup, Cold Avocado Soup Collection.

The beautiful gold button is from the Vintage Gold Button pack by Buttons Galore & More.

IMG_8670

Covering the Altered Tea Box was fairly simple, just use a ruler to measure all dimensions and cut accordingly.

Altered Tea Box Project Recipe:

IMG_8664

An Altered Tea Box would make a brilliant gift for so many occasions. Get Well, Just to Brighten Your Day, Missing You, Mother’s/Father’s Day, House Warming, or a Hostess Gift.

IMG_8679

Thank you so very much for stopping by and checking out my Altered Tea Box, check out some more great gift ideas while you’re here.

0

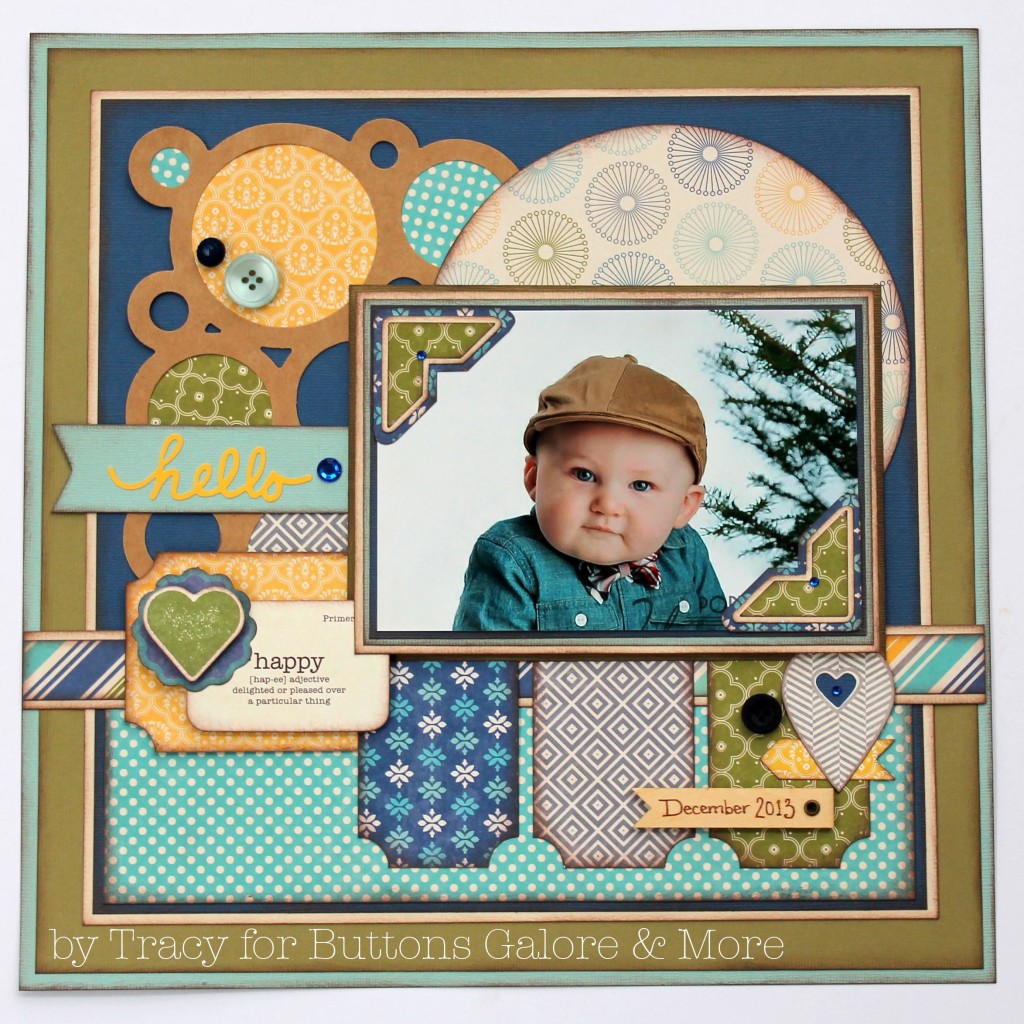
“Hello” Scrapbook Layout

This adorable photo was the inspiration for this “Hello” Scrapbook Layout.

When I sit down to craft, I let the subject be my inspiration. Who wouldn’t want to showcase this handsome little fellow on a Scrapbook Layout. Once I have chosen a photo, then I choose the papers and embellishments accordingly. Some find it a little harder to embellish a little boy or more masculine page, buttons are where I ALWAYS turn. They add texture and dimension without being feminine or too distracting.

Hello Scrapbook Layout

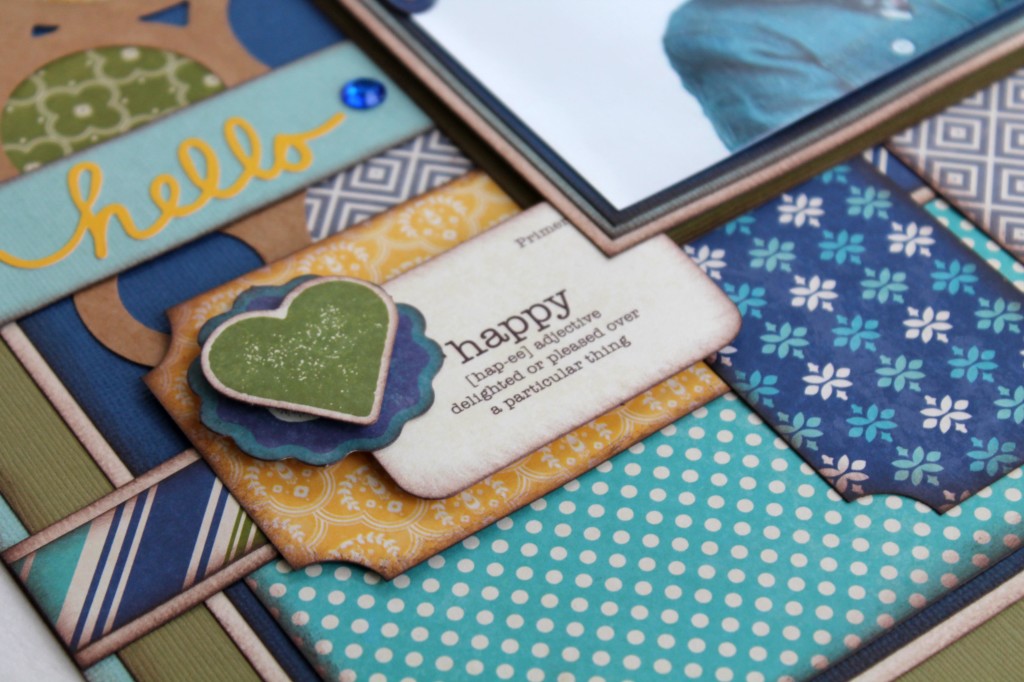
The patterned papers and embellishments are from JilliBean Soup were the perfect match for the photo on this project. The blue buttons from the Nautical button value pack and the bling from Want2Scrap finished it up nicely.

Hello Scrapbook Layout Close Up

Scrapbook Layout Project Recipe:

Hello Scrapbook Layout

Thank you so much for stopping by to check out my “Hello” Scrapbook Layout. Take a peek at some more of our crafty inspiration while you’re here!
0

Winter Button Layout

A Winter Button Layout to get your crafty juices flowing for 2014.

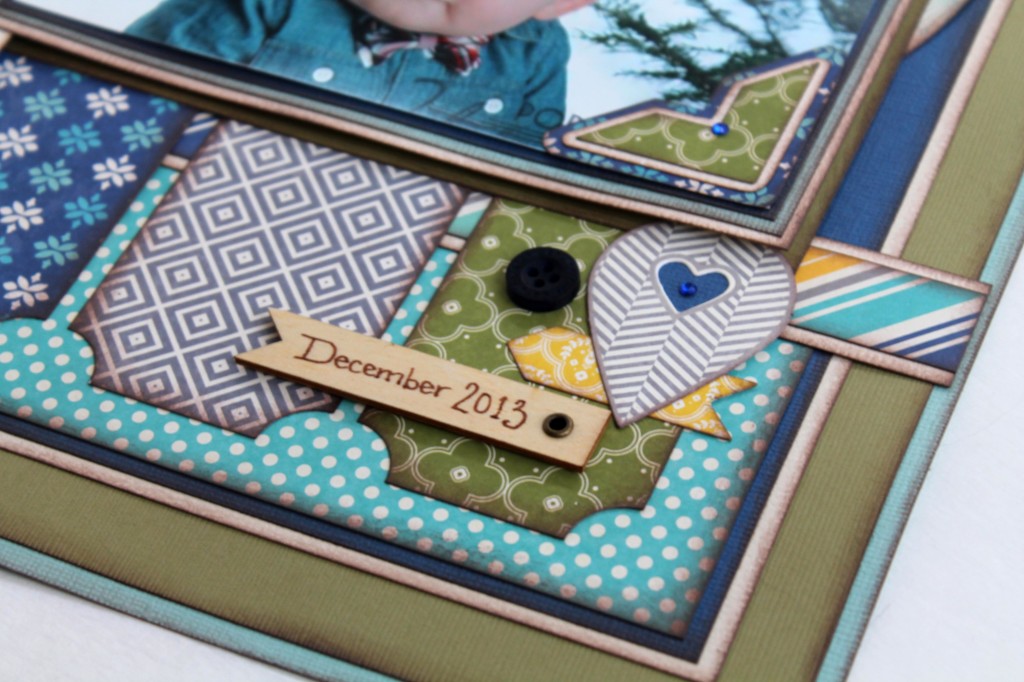
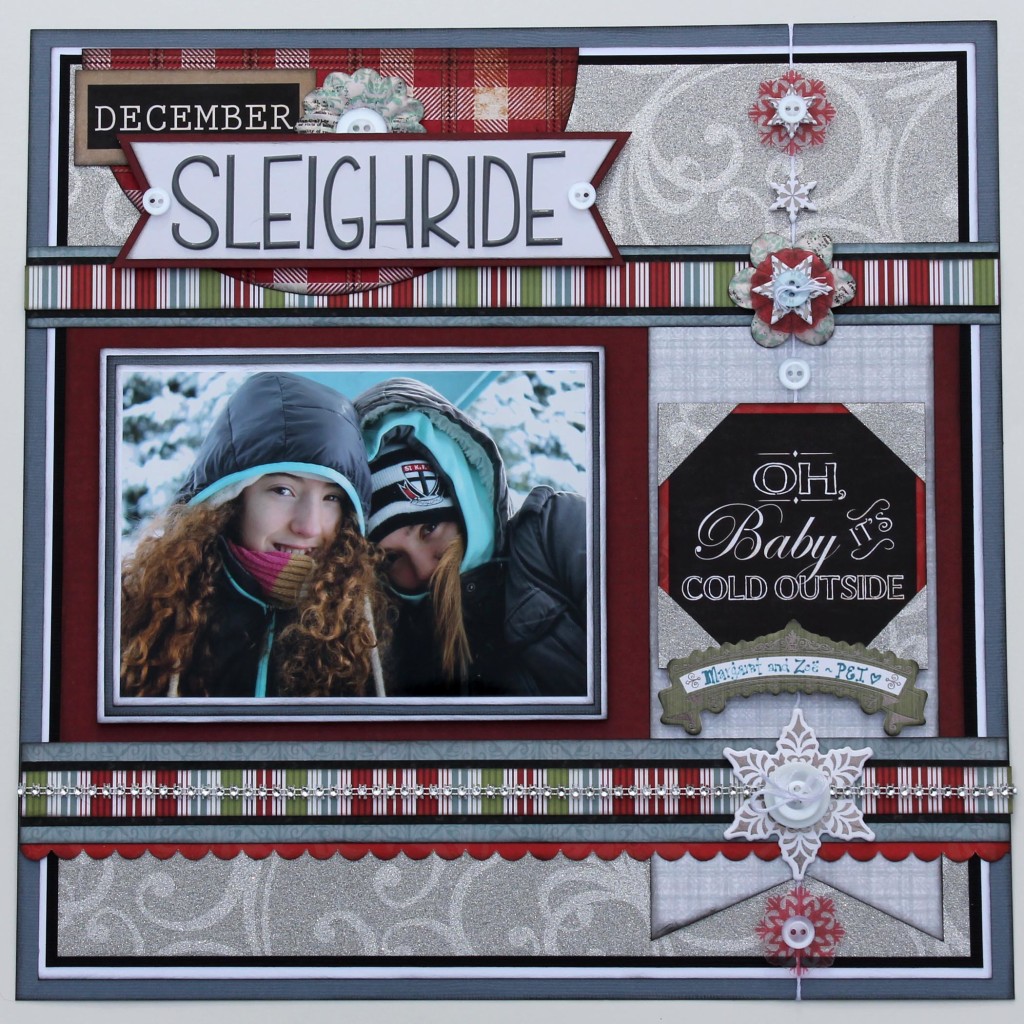
Now that the hustle and bustle of the holiday season has gone for another year, it might be time to get a start on scrapbooking your holiday photos. My photo was the inspiration for this layout. Taken during our 2013 Christmas break while visiting family in PEI. A winter wonderland this time of year, begging for lots of cozy, bundled up photos to be taken. That is what inspired this Winter Button Layout.
IMG_8471

I used a variety of sizes of white and blue buttons that coordinated with this winter collection of papers by SEI.

IMG_8475

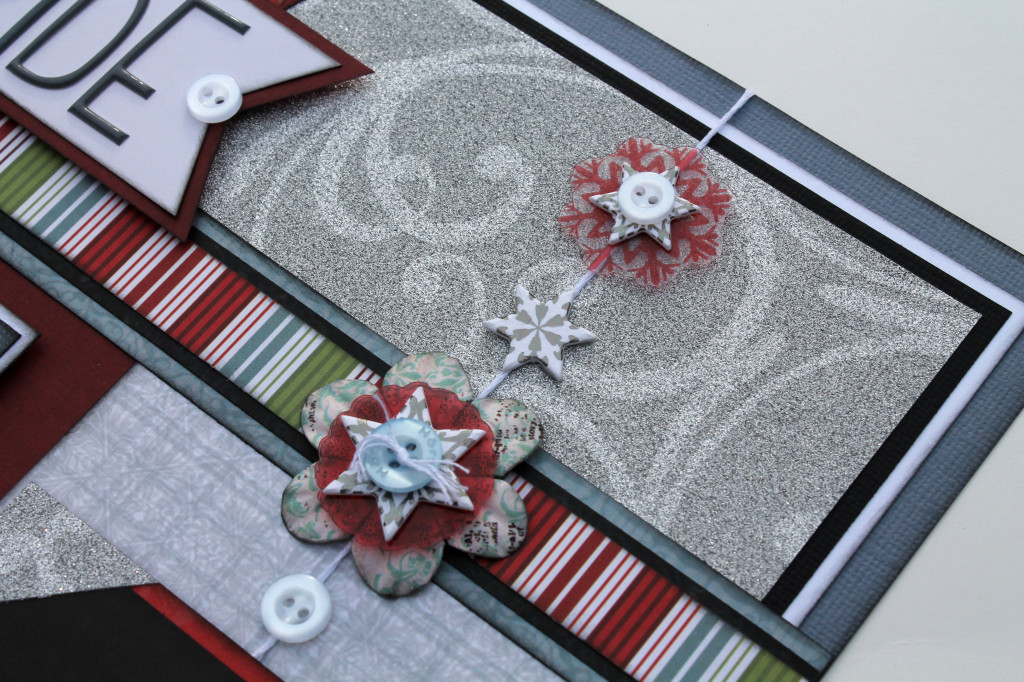
I created a look of strung buttons for my border on the Winter Button Layout. I attached a piece of embroidery floss the full length of the layout. Then added the separate pieces all the way down. Each piece is a little different consisting of buttons, flowers, chipboard snowflakes and clear plastic snowflakes. I tied floss through some of the buttons.

IMG_8476

The title is created using Thickers stickers and a coordinating die cut from SEI. The buttons become the perfect accent for the title of this Winter Button Layout.

IMG_8478

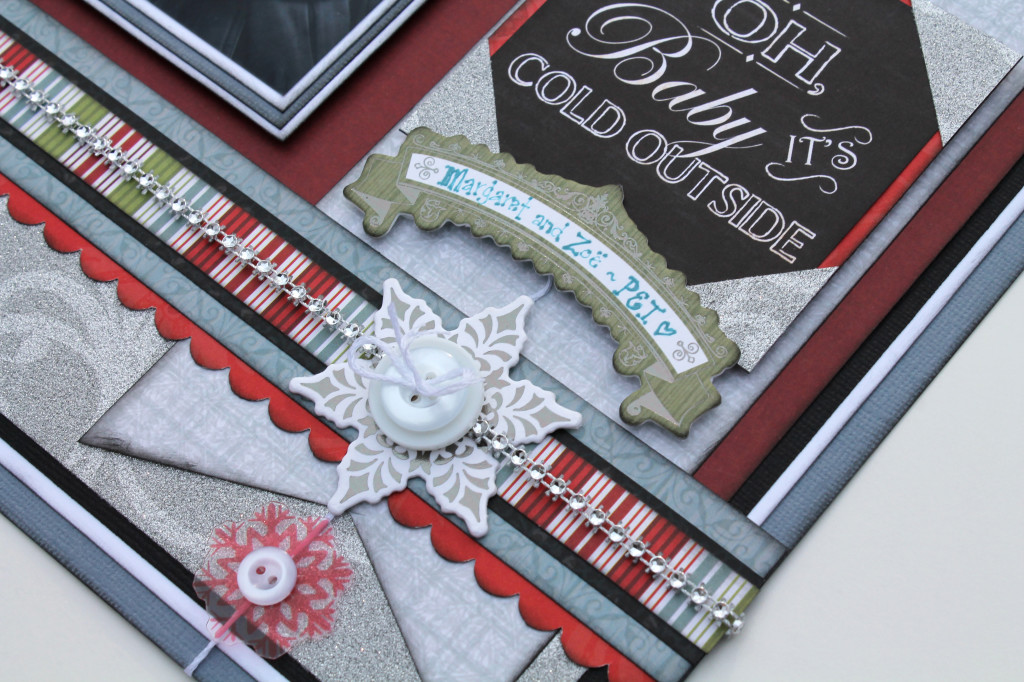
For the largest snowflake, I layered 2 buttons on top of the chipboard snowflake. Tied together with white embroidery floss from Plaid.

IMG_8481

Thank you so much for stopping by to check out my Winter Button Layout. I hope that your 2014 is a crafty one!

0

Buttons Clay Scrapbook page idea

Buttons Clay Paper?

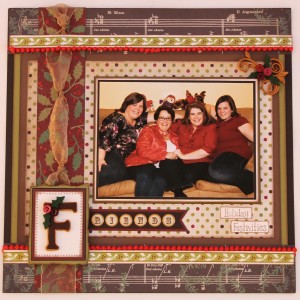
Who says you can’t use Buttons and Clay on a scrapbook layout?  I was up for the challenge and decided to create this holiday themed layout that features buttons and clay as embellishments.

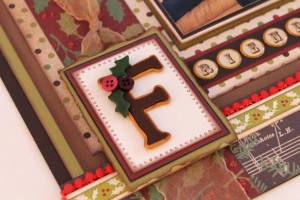
I have LOVED creating with Sculpey clay the last few weeks, and creating this Buttons and Clay embellishment for this layout was fun and easy. My embellishments were created by hand and the use of my Sculpey Essential Tool Kit.


IMG_7885


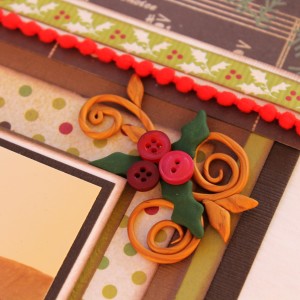
I created the “F” and the holly leaves and baked the Sculpey clay as per the instructions. I added the buttons once cooled with some Mini Glue Dots. I did the same with the holly and scrolls. The buttons were all from a nice red mix from Buttons Galore.

scrapbook page ideas with buttons

Button Clay Paper Project Recipe:

sweet, simple embellishments using buttons and clay. DIY embellishments with red buttons.

Thanks for stopping by to check out this Buttons and Clay Layout and I hope you have a Happy Crafty Holiday Season!

0

Autumn Button Border Layout

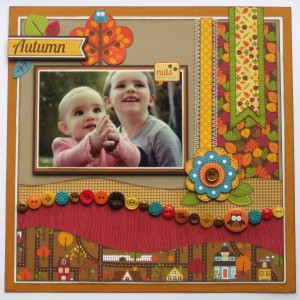
This Autumn Button Border Layout shows so vibrantly exactly why I love the season….the stunning colors! I knew from the start of this creation that I wanted the embellishment focal point to be the Autumn Button Border.

IMG_7562

Here is what you will need to create this Autumn Button Border layout.

Project Recipe:

  • DoodleBug Designs- Happy Harvest Collection

IMG_7565

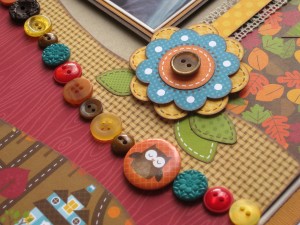
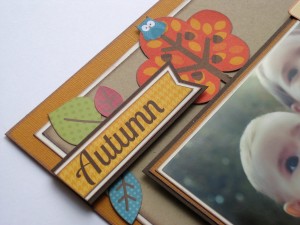
I wanted a true mixture of all of the rich colors of this paper collection, when creating this Autumn Button Border. I think the combination of the buttons and the coordinating embellishments from the paper collection were a perfect match.

IMG_7566

Thank you so much for stopping by. If you would like to check out more of my button and paper crafting creations, please check out my blog Scrappy Chick Designs.

1

Beautiful Button Butterfly

This Beautiful Button Butterfly is the perfect accent on this sweet and whimsical scrapbook layout.

When I create a scrapbook layout I always try and keep the photo as the main focus of the page. This stays true when I choose embellishments. The buttons that I chose for the Button Butterfly were shades of colors already in the layout. That way they do not stand out or take away from the photos that I was showcasing. The Button Butterfly is then a true accent.

IMG_6054

The buttons that I used for the Button Butterfly layout all came from a Spring Mix by Buttons Galore & More.

IMG_6056

Beautiful Button Butterfly Materials:

The punches that I used are all by EK Success:

  • 2″ Scallop Circle
  • 1.5″ Scallop Circle
  • Oval
  • Scallop Oval
  • 1″ Circle
  • 2″ Heart

IMG_6057

IMG_6058

IMG_6054

Thank you so much for stopping by and a hope a sweet little Button Butterfly makes it to a layout of yours very soon.

0

Buttons and Brads Layout

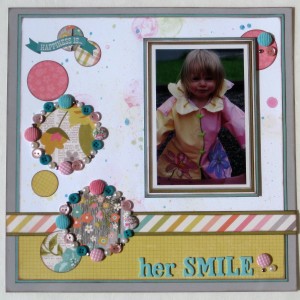
It’s hard to pinpoint where my inspiration for this sweet and pretty Buttons and Brads layout started. It could have been the sweet smile from my niece in the photo. It could have been the bubbles and Rit Dyes background that I created. It could have been how well the patterned papers and the Buttons and Brads coordinated together. Either way this Buttons and Brads layout is just too cute!

In this post I will give you some tips and tricks on how to create one for yourself.

IMG_6046

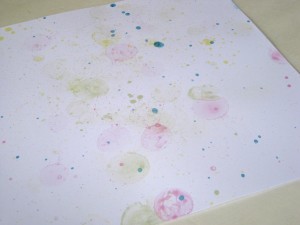
I started with a plain piece of white cardstock. I actually had 4 sheets of white cardstock out on my back deck. I added liquid dyes by Rit to regular bubbles. It’s trial and error to find the perfect mixture. Too little and the color won’t be dark enough. Too much and the bubbles will no longer form correctly.

Then I just blew bubbles and tried my best to have them land on the white cardstock I had spread out. When they land and burst, they created a really great splatter design.

IMG_6045

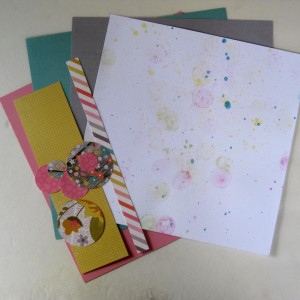
I had chosen dye colors to match the patterns I wanted to use. The patterns were chosen for how well they coordinated with the photo that I wanted to use.

IMG_6042

Here is what I used to create the Buttons and Brads layout:

  • Simple Stories Patterned Papers
  • 1″, 1&3/4″, and 3″ Circle Punch by EK Success
  • Rit Liquid Dyes and bubbles
  • Silver Brads
  • Amy Tangerine Teal Letter Stickers
  • Pearl Embellishments

IMG_6050

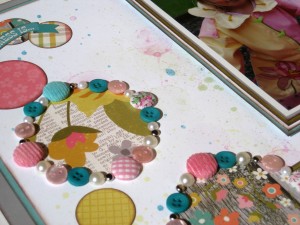
I simply added the pearls, Buttons and Brads around the large circles.

IMG_6052

IMG_6053

Thank you for stopping by and I hope you’ve been inspired to get out some Buttons and Brads and get crafty.
IMG_6046


BIG HALLOWEEN EMBELLISHMENT SALE!!!


FREE SHIPPING TO USA!!! ( On Orders Over $30 )


BRAND NEW 3D HALLOWEEN BUTTONS


This button line is HOT!!!. Add a special touch to your Halloween cards, crafts, decorations or clothing by simply embellishing with these unique 3D Halloween buttons. Best of all, you can save 20% for a very limited time. EnterCode 20HAL. Offer ends October 11, 2013.

 www.buttonsgaloreandmore.com


0

ScrapFest Samples – Create a Disney Style Embellishment

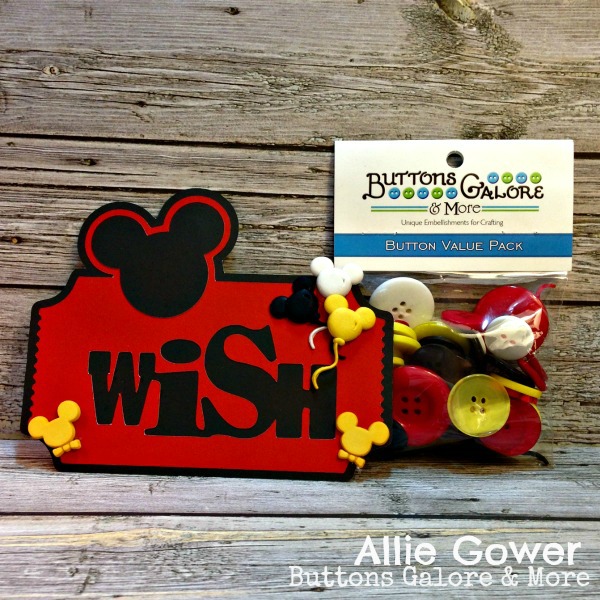
Allie Gower has created a fun and happy Disney Style Embellishment using the Vacation Button Assortment, an Archiver’s Exclusive.

ScrapFest – Disney Style Embellishment Sample

Archivers Logo

Buttons Galore is heading to Archivers Mall of America for ScrapFest 2013.

Join us for fun make and takes each day of ScrapFest.

Create a Disney Style Embellishment for your Scrapbook page with Vacation Buttons.

Supplies for ScrapFest – Disney Style Embellishment

  • Vacation Assortment – Archiver’s Exclusive
  • Cardstock  – Archiver’s
  • Wish Ticket – Silhouette Online Store – adapted to include a mat and mouse ears
  • Adhesive – Scotch Quick Dry Adhesive

Directions for Creating Card

  1. Modify Wish Ticket and cut all appropriate pieces. Assemble.
  2. Add Vacation Assortment buttons.

Please note that all of these supplies used to make the ScrapFest projects are readily available in your local Archivers, and many of them are available in the Archiver’s Annex Online. Projects will be on display in the Archiver’s at the Mall of America.
See more of Allie’s work at her blog, My Card Party.
0

Button Balloon Layout
Who doesn’t love a hand made Button Balloon as an accent for a layout?

I adore the whimsical look of a hot air balloon. I think everyone at some point has pictured themselves taking a hot air balloon ride. From the freedom of the open air to the romance that is normally associated with a sunset balloon ride. Recently in the paper crafting world I have noticed hot air balloons popping up in design. So I thought I would create my own using pretty patterned paper and some fantastic coordinating buttons. This is my Button Balloon Layout.

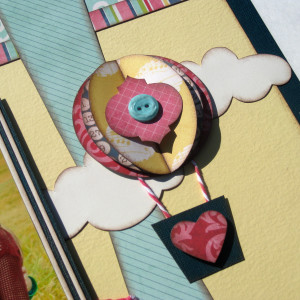
The button balloon is created using a large circle punch and some 3D foam dots for dimension. The punched shape and single button turns out to be the perfect accent for my Button Balloon Layout.
IMG_5886

IMG_5889

I hand cut the clouds for this Button Balloon Layout.

IMG_5893

I used a variety of buttons to coordinate with my patterned paper to create the Button Balloon Layout.

IMG_5896

Thank you for stopping by

2

Button and Twine Medallion Tutorial

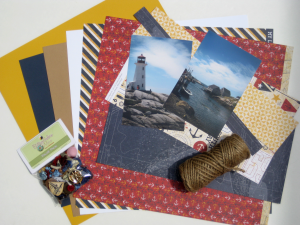
Join me for a step by step tutorial where we will make Button and Twine Medallions to use as embellishments for a seaside themed scrapbook layout. Nothing says seaside or nautical like red, white and blue with the texture of rope incorporated.

Products used to create this layout with Button and Twine Medallions:

IMG_5706

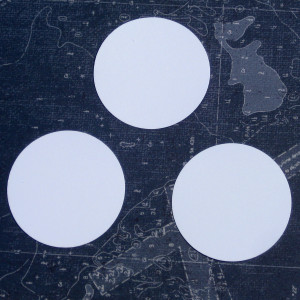
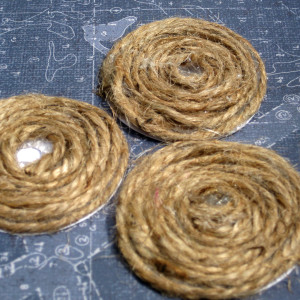
You want to start with cutting out circles from cardstock. This is going to be what you create your Button and Twine Medallions on. So make sure you use a punch that is the size you would like the embellishment to be.

IMG_5709

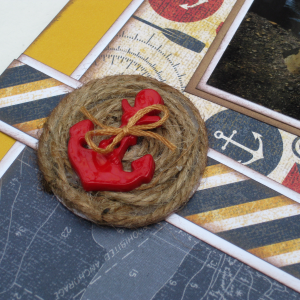
I then used hot glue to start adhering the twine to the outside of your cardstock circle.

IMG_5710

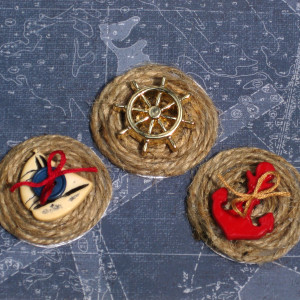
I left a small space in the middle of each of my medallions. That way if you have chosen buttons that have shanks, then you should be able to still just hot glue the buttons to the medallions.

IMG_5712

Here are the buttons that I chose from the Nautical Value Pack for my Button and Twine Medallions.

IMG_5714

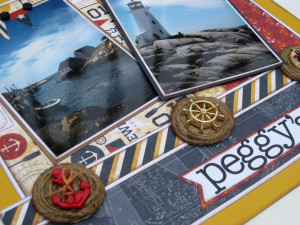
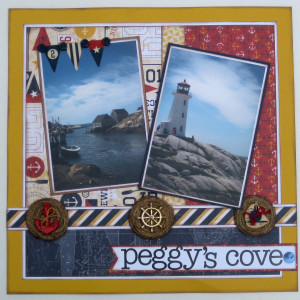
I added my Button and Twine Medallions to the border of my scrapbook layout.

IMG_5722

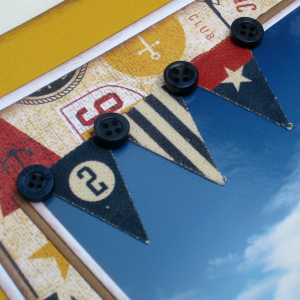
I added a few more buttons from the Nautical Value Pack along with some canvas stickers to the top of one of my photos.

IMG_5723

IMG_5725

Here is my completed scrapbook layout with the Button and Twine Medallions as the perfect accent to my photos from the stunning Peggy’s Cove, Nova Scotia.

Thank you for stopping by and I hope these Button and Twine Medallions make it to your next nautical themed craft project.IMG_5720

1

Keepsake Frame

Create a Keepsake Frame for someone special in your life.

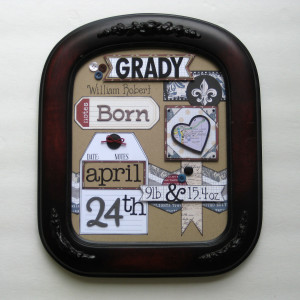
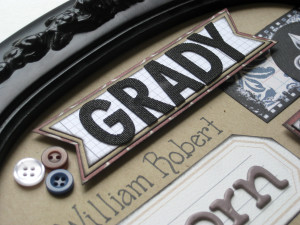
I had a special little person come into my life recently and I wanted to create something special, a Keepsake Frame, for he and his family. Something that they could keep for years to come. A Keepsake Frame can incorporate as much or as little information as you would like. It could even accommodate memorabilia you may have as well. This is the Keepsake Frame that I created for handsome little Grady.

To start with you need a frame that is large enough to hold all of the information that you would like to include. My Keepsake Frame is an 8×10.

IMG_5693

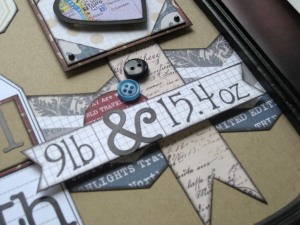
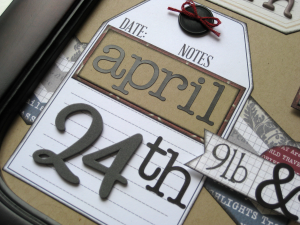
A closer look at the details of Grady’s Keepsake Frame.

IMG_5697

I used a mixture of my own writing and an assortment of letter stickers throughout the project. The mixture of fonts makes the project interesting to the eye.

IMG_5699

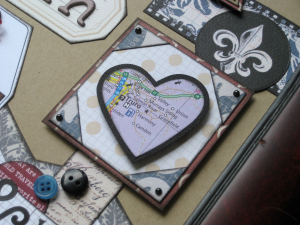
I used a large heart punch, and cut out the place where Grady was born from a map I had laying around.

IMG_5701

Products Used for the Keepsake Frame:

IMG_5703

Thank you for stopping by and I hope we have inspired you to create a Keepsake Frame for someone special in your life very soon.

IMG_5693


0

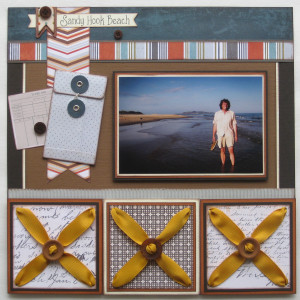
Make a Ribbon and buttons masculine scrapbook page layout


Ribbon and buttons are something that all scrapbookers should have on hand. The simple combination of the two can add so much texture and dimension to an otherwise simple layout.

One of the things I hear most often from other scrapbookers, is how hard they find it to scrapbook their more masculine photos. Whether it is little boy layouts or those of grown men. Adding flowers, gems or anything that glitters often comes easier to us. Making embellishing a masculine layout often a little harder to do. Adding ribbon and buttons is one of those easy ways to add dimension and texture.

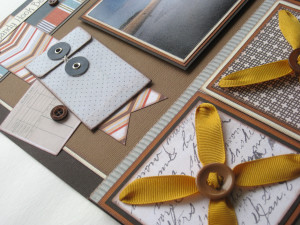
This is a simple layout that I created using the Fancy Pants collection called Swagger, a great masculine line.

Ribbon and Buttons Scrapbook Page Layout

Directions to make a Ribbon & buttons masculine scrapbook page layout:

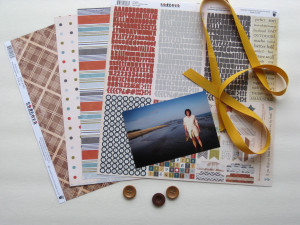
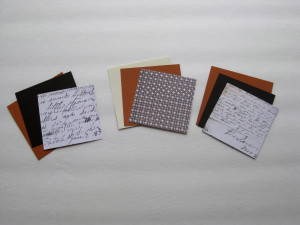
Here are a few of the patterns and embellishments from the collection and the buttons and ribbon I chose to use with it.IMG_4714

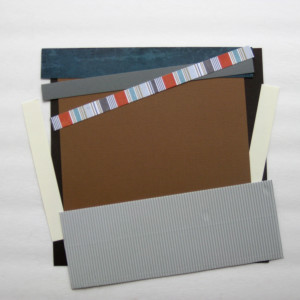
I decided on the patterns and cardstock that I wanted to use as the base of my layout and cut them accordingly.IMG_4717

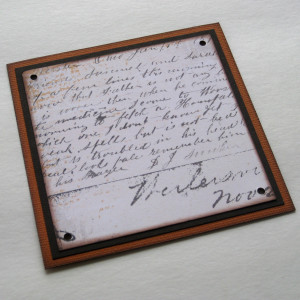
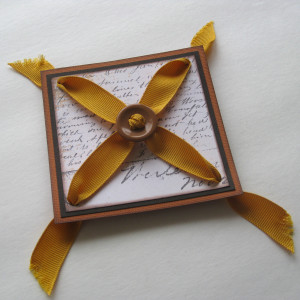
At the bottom of my layout I have 3 layered squares. The largest layer is 4″. I inked and adhered all my layers together.IMG_4718

Then I punched small holes in each of the 4 corners of all of your squares.

IMG_4722

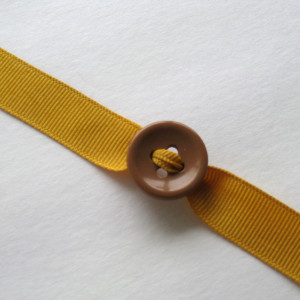
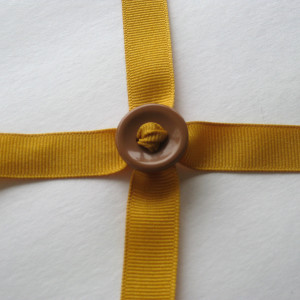
I cut 6 pieces of ribbon, all about 7 inches long. Start by feeding one piece through 2 opposite holes in your button.IMG_4728

Take a second piece of ribbon and feed it through the other 2 holes in your button. Repeat this for the other 2 squares.IMG_4730

Then you’re going to feed the ends of the ribbon through the holes in your squares. You want to keep the button as close to the middle as possible. I then just taped the ragged ends of ribbon in behind the squares.

IMG_4733

At this point you are ready to assemble your layout. Add a few more DIY embellishments and a few more small buttons. Plus a triple matted photo and you’re done.
IMG_4740

Products use to create this ribbon and buttons layout:

  • Brown Buttons
  • Patterned Paper and Coordinating Embellishments: Swagger by Fancy Pants
  • Dark brown, light brown and cream cardstock
  • Yellow ribbon
  • 1/8″ hand punch
  • Mini Glue Dots

IMG_4744

1

Brown Button Border Layout

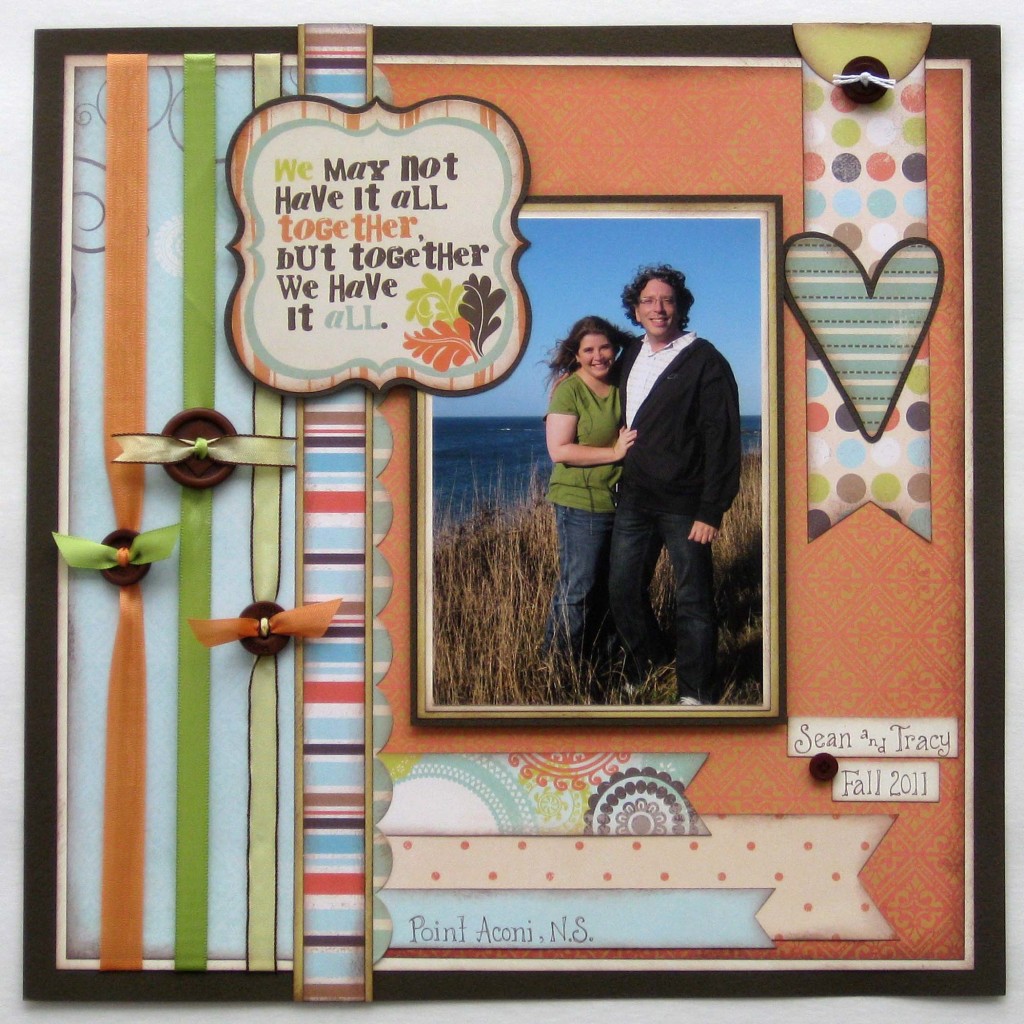
I have always loved to use buttons on my layouts as the perfect accent or as part of a border, like in this layout. But my process doesn’t start there. When I create a layout I always start with the photo. Everything from that point on should accentuate your photo. In this tutorial you will see step by step, the process that I go through when I create a layout.

The photo is of my husband and I, taken in Point Aconi Nova Scotia. When you look at a photo to scrapbook, you must choose what it is that you want to bring out. In this case I wanted to bring out he and I. So when I chose the patterned papers I made sure I have something that pulled the green in my shirt, and the his dark jacket. Black was a little too harsh to add to this layout, so I chose a chocolate brown instead. The other colors in the pattern also bring out the background.

scrapbook page idea with button border

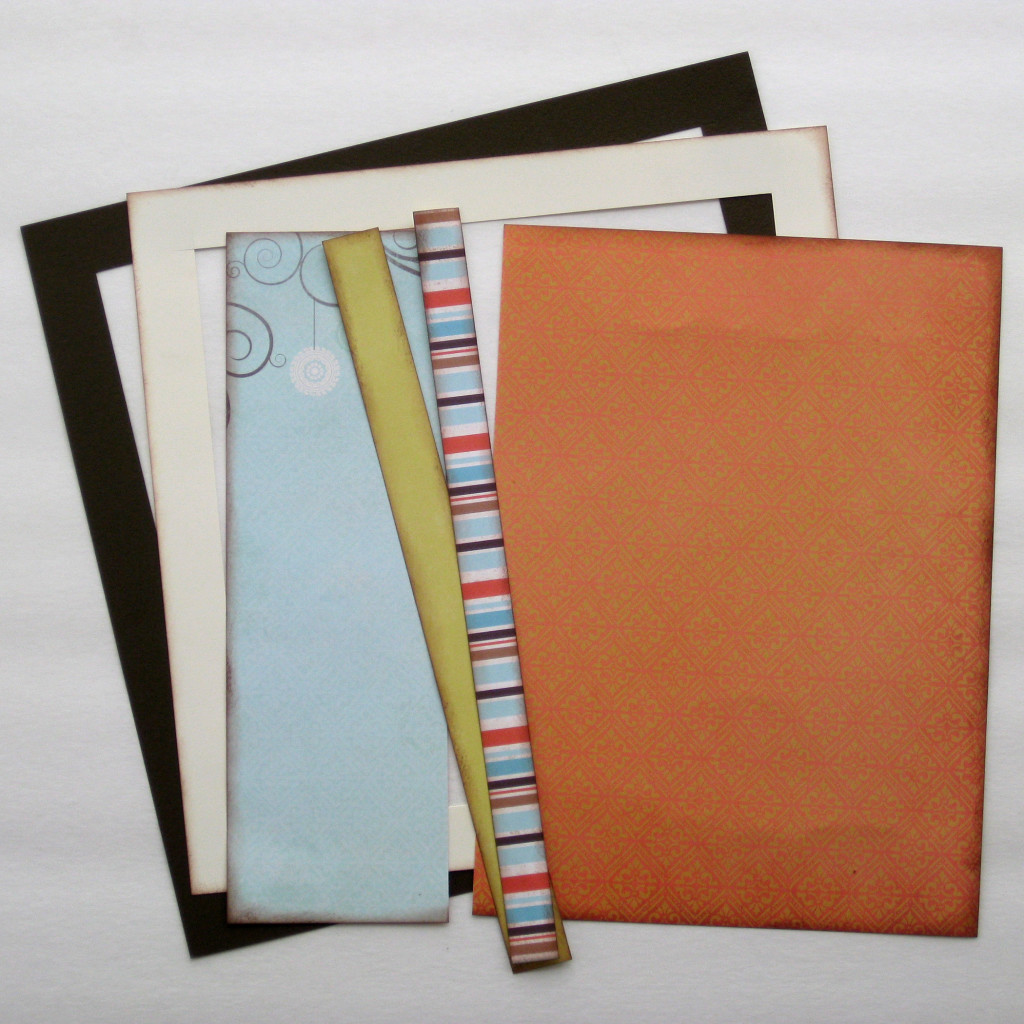
So here is a look at the papers I chose for the background, all cut and ready to go. Another trick that you may notice in the photo below, is that when I can, I will cut the middle out of the large pieces of paper. I like such a layered look, that I felt like I was wasting paper all the time. Paper that can be used for matting photos, titles or journal blocks.

IMG_4469

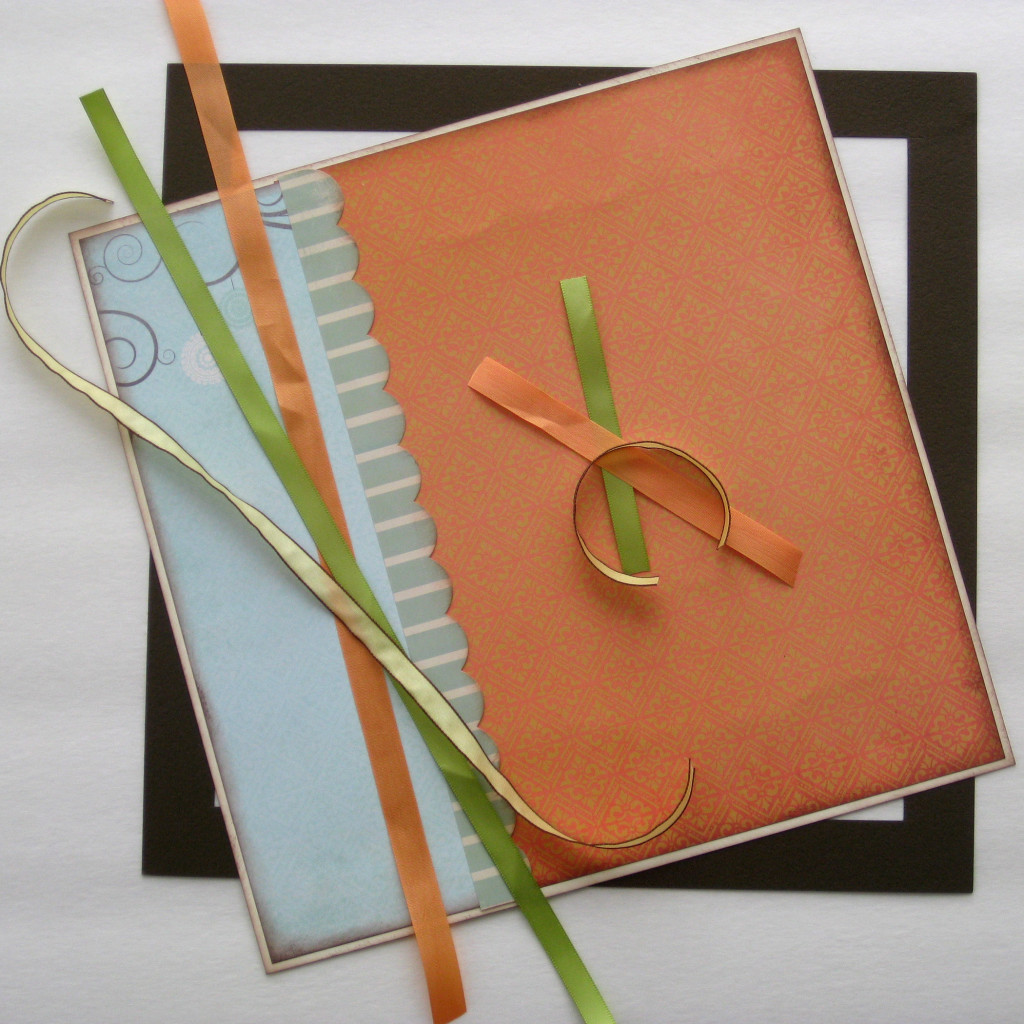
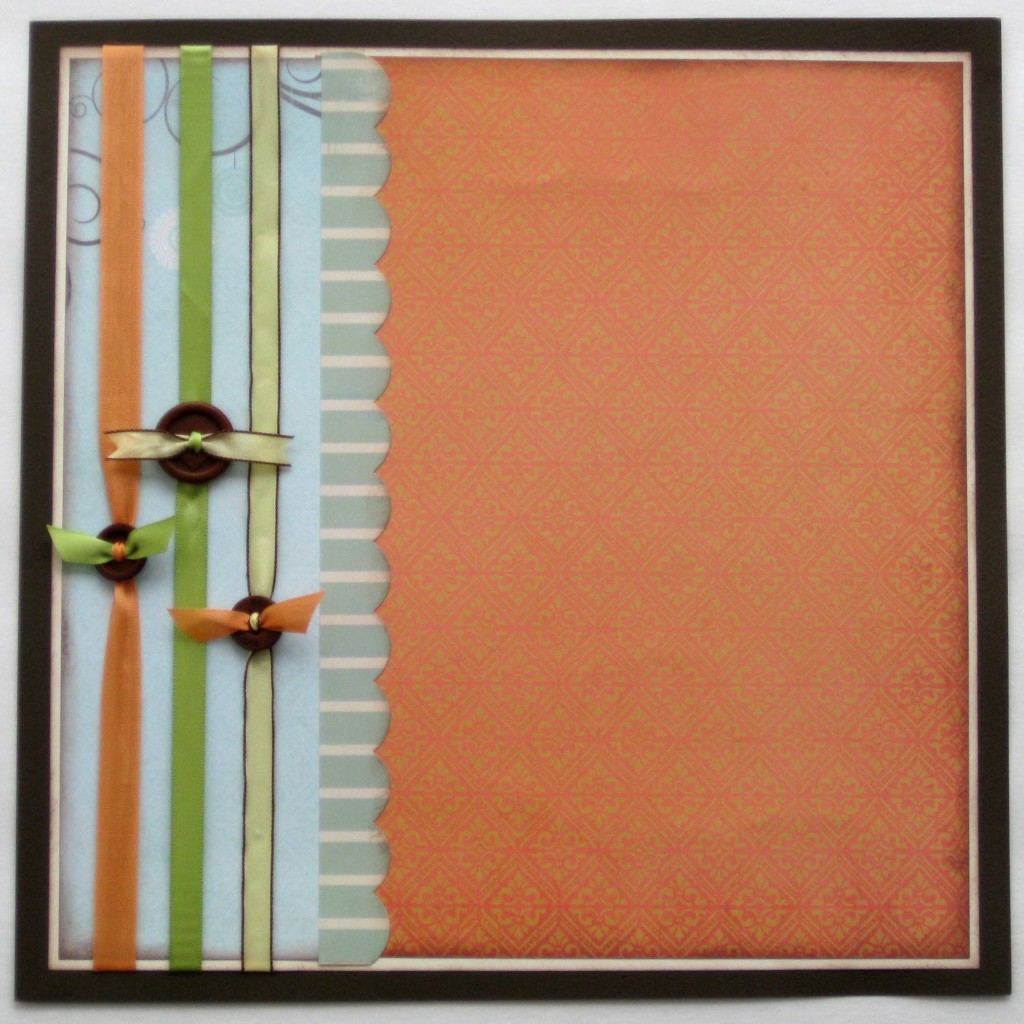
In this next photo you will see that I have adhered some of the layers together, but not all of them. I have also cut my pieces of ribbon that are going to be used to create your button border. You will need 3 strips that are about 14″ long, and 3 shorts pieces that are about 4″ long.

IMG_4473

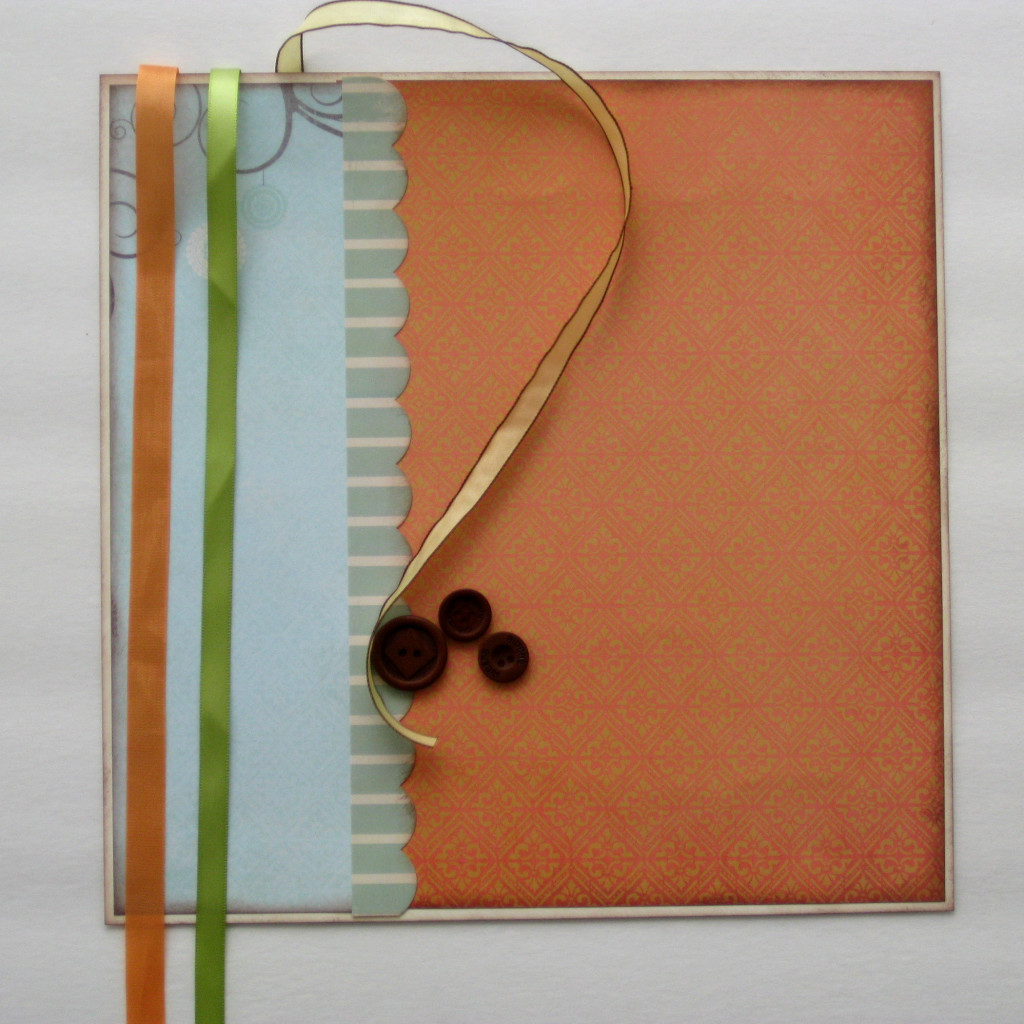
You are going to adhere the 3 long pieces of ribbon in back of your layout. I tried to get them an equal distance apart. Then you are going to string your chosen buttons, one on each ribbon.

IMG_4476

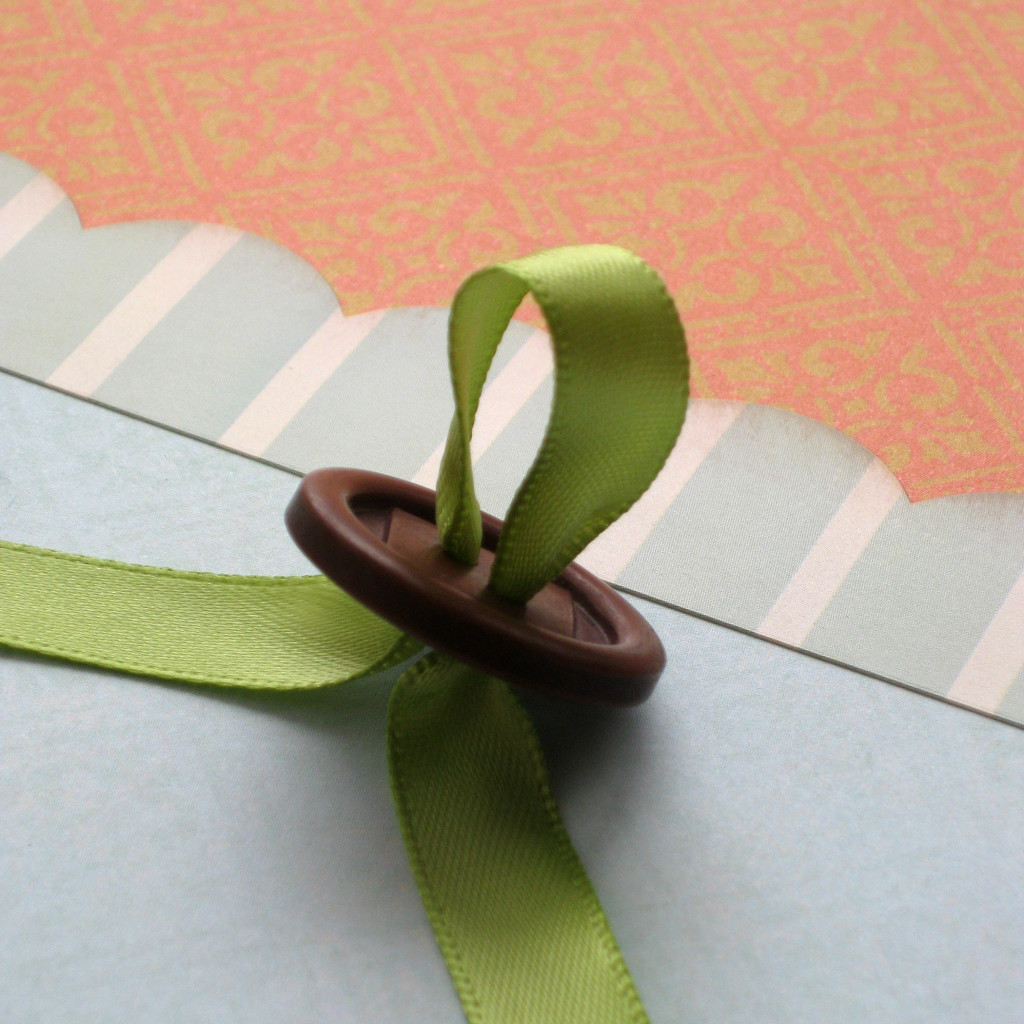
Here is a close up image of the ribbon strung through the button. Bring the button to the approximate area that you would like it to end up when you are finished. As in the photo, leave the ribbon loose in the front.

IMG_4481

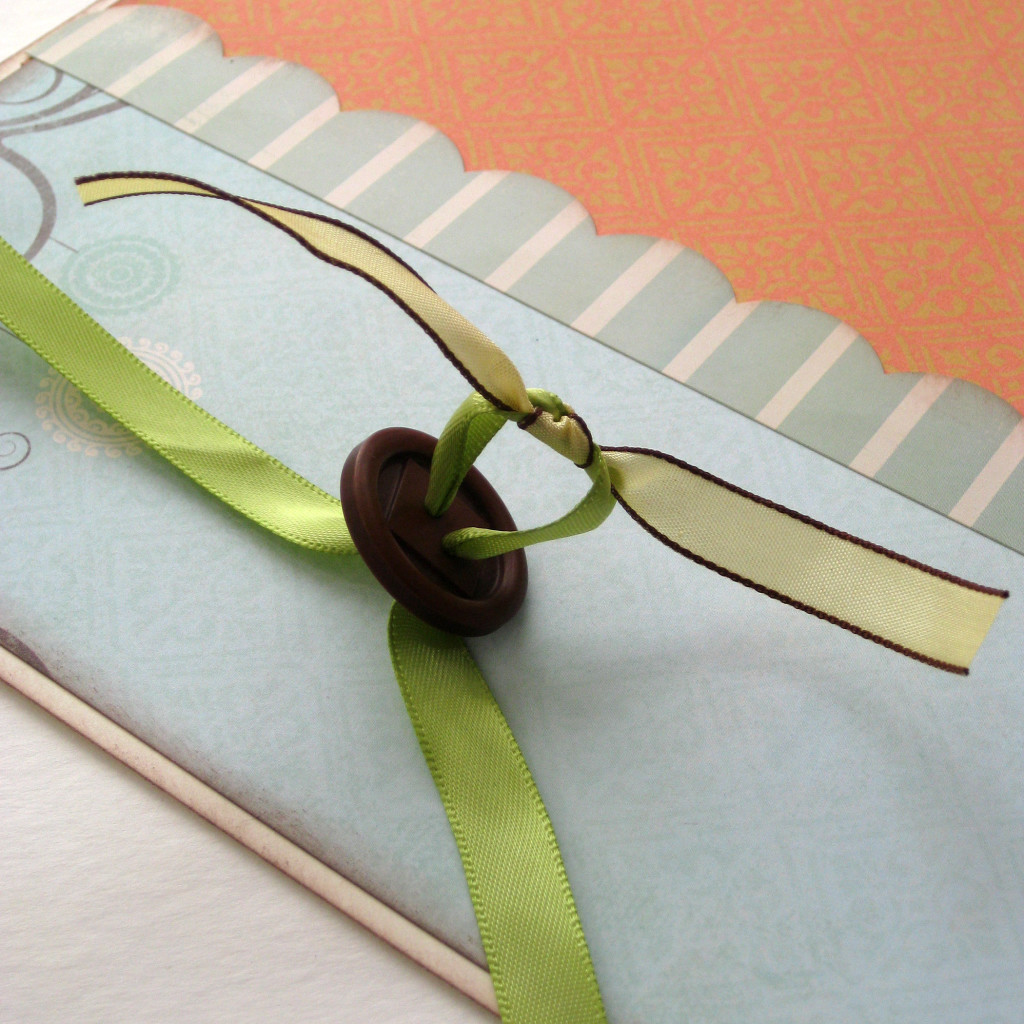
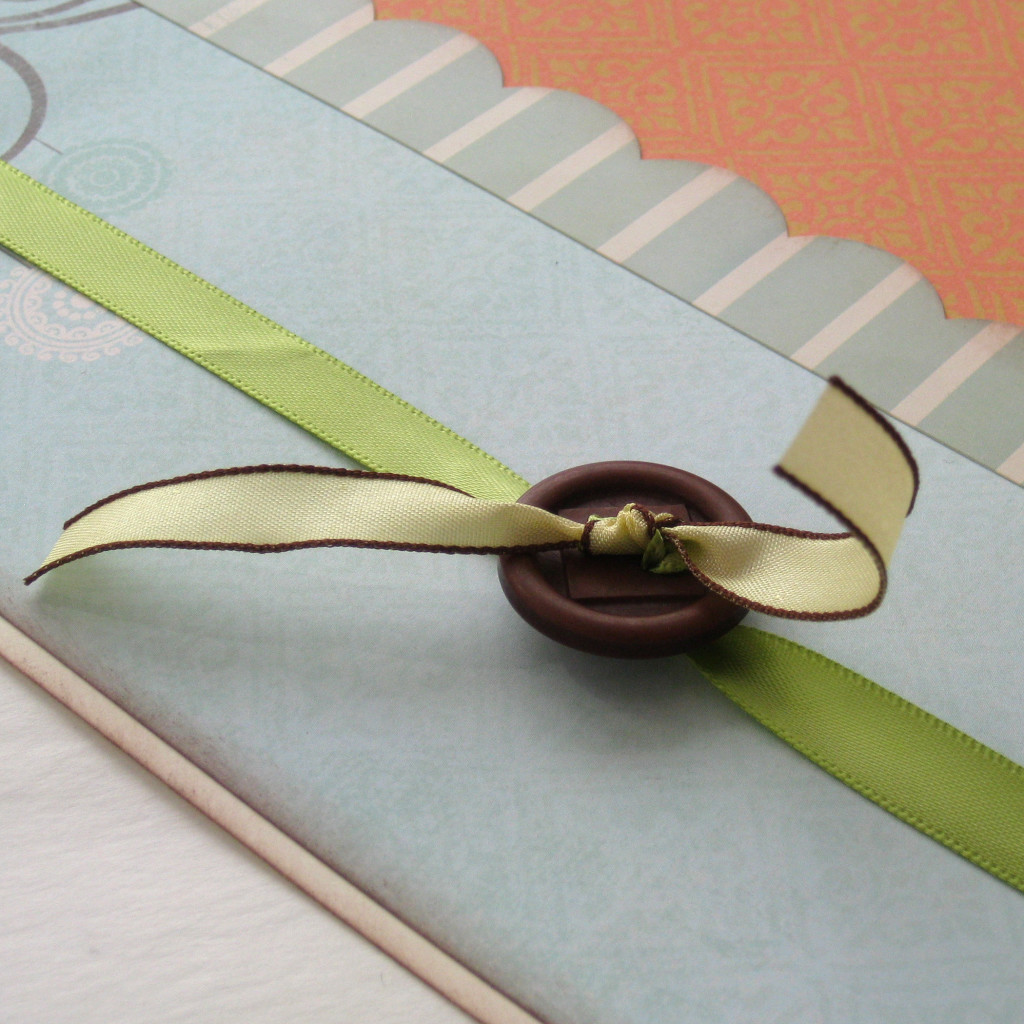
Take one of your smaller pieces of ribbon and tie it in a knot to keep it in place. This can be done without tying the small piece in a knot. I did end up untying the knot in the end before trimming so that the green ribbon showed over top of the yellow.

IMG_4486

Pull the ribbon tight, untie if you’d like and I also adhered the back of the button to the layout to keep it in place. Repeat this for the other 2 ribbons and buttons.

IMG_4488

Once you have your ribbon and buttons in place you can add that back layer of cardstock. I also trimmed the small pieces of ribbon to clean them up a bit.

IMG_4492

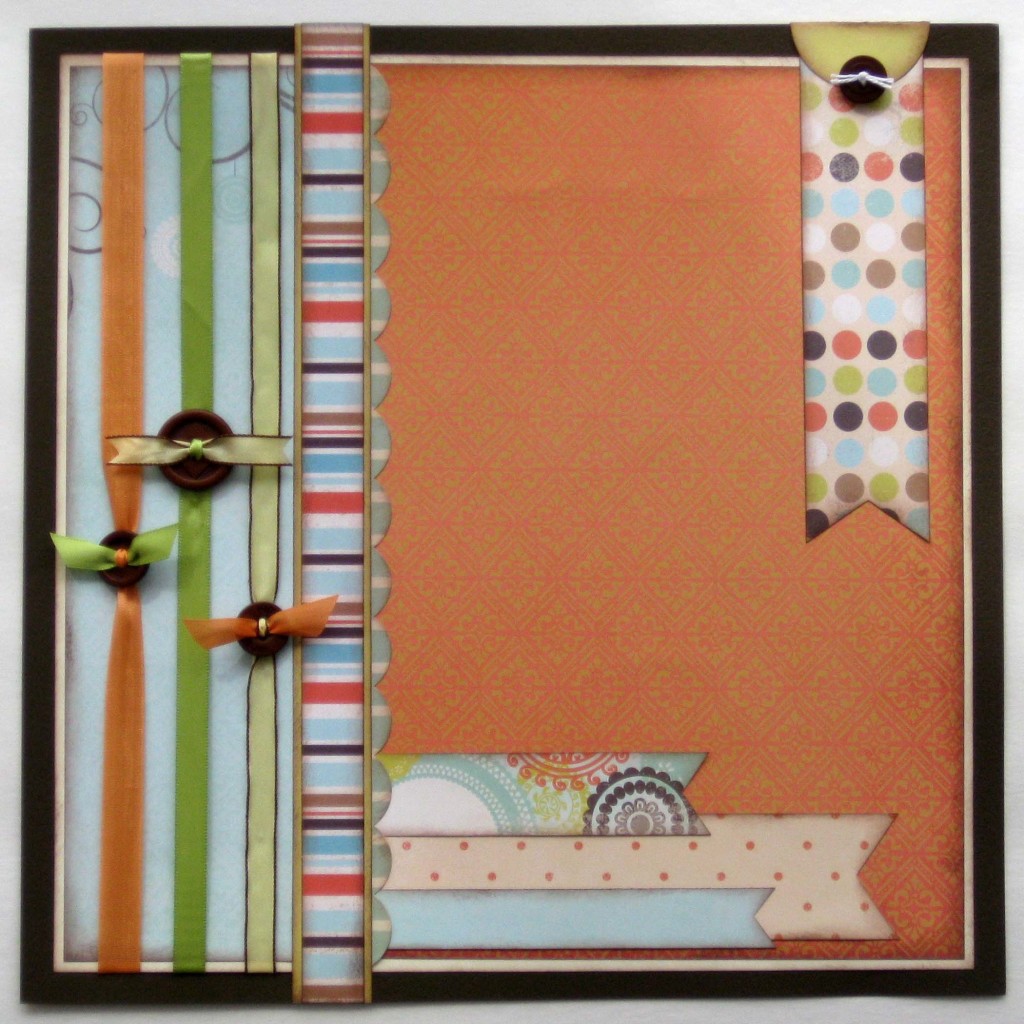
In my next step, I added some more pattern accents. I added the layered strip border up the same side as the ribbons. I also added simple flag accents to the bottom of the layout and the top right hand corner. I used a 1.75″ circle punch for the half circle at the top of the polka dot flag. I also added one more chocolate button with just a simple twine tied through it.

IMG_4494

Now to add the final elements. My photo is matted 3 times, in cream, green and brown. I used 3D pop dots to adhere the photo to the layout. I then added the title, which happened to be a coordinating stick embellishment. I matted it in brown cardstock and adhered it to the layout, slightly overlapping onto the photo. I also added a couple of tiny journal strips and the heart embellishment.

scrapbook page idea with button border

The patterned papers and coordinating embellishments I used are by Fancy Pants, the Summer’s End Collection.

2

button scrapbook page layout – cute as a button


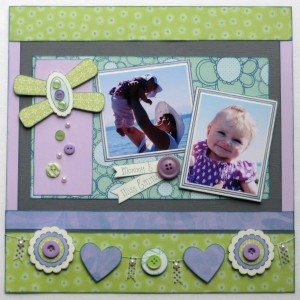
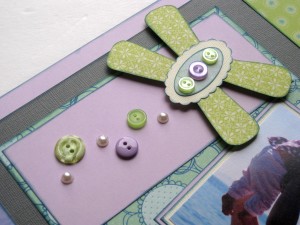
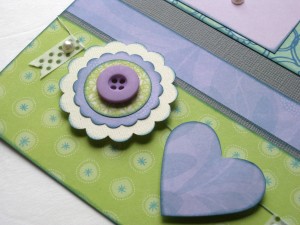
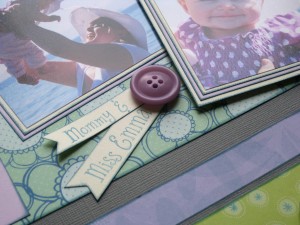
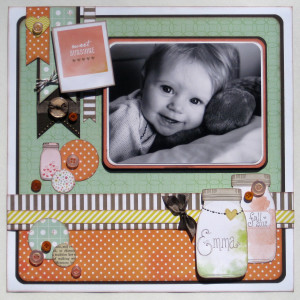
Button scrapbook page layout is well, “Cute as a Button” and it doesn’t even start to describe how sweet and adorable little Miss Emma is.  Yes, I am a little biased.   I love the happy expression on her sweet face.  To accent the sweet little face I chose the soft muted tones of the patterned papers and button embellishments made the photo pop. My scrapbook style often is defined by many layers, mixing patterns and texture.

Cute as a Button Layout

IMG_4267

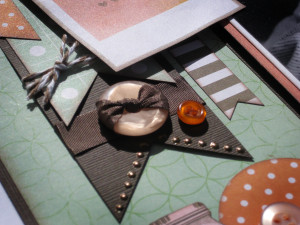
The patterned papers are from the Dear Lizzy Collection by American Crafts. The perfect accent to the papers are  Nana’s Curtains buttons , some simple brown and white twine and brown ribbon. I also added some chocolate colored Liquid Pearls.

IMG_4271 button scrapbook page idea

Products Used for Cute as a button scrapbook page:

  • Orange Buttons
  • 1 3/4″ Circle Punch
  • 1″ Circle Punch
  • Martha Stewart Crafts Heart Punch
  • Corner Rounder

I hope you enjoyed the ideas in this button scrapbook page layout.  Scrapbooking lets me be very creative and also preserve out families memories.  If you are interested in seeing more button scrapbook page ideas, you should check out my blog too.

1

Create Personalized Monogram Home Decor using Buttons, Brads & Beads

It’s time to get busy making something to freshen up the house! We have been busy all summer and as the Autumn season fast approaches having a few handy tutorials on how to make personalized gifts and hand made home decor just seems fitting. So today I have a Personalized Monogram Home Dec project to share with you. Enjoy!

Supplies Needed: Buttons, Brads, Micro Beads, Gem Tac (R), Scrapbook Paper, Hot Glue Gun, Scissors, Frame


Print letter of your choice as large as you would like finished monogram to be. Place beneath paper and put against a well lit window to serve as a light box. Then trace onto scrapbook paper.


Outline one third of the traced letter with Gem Tac.

Fill in the area fully with Gem Tac.


Place as many buttons as fit onto the glue covered area.


Quickly cover the entire surface with micro beads.


Remove excess beads before moving onto next step.


Continue covering the entire traced area a bit at a time following the steps above.


Cut the prongs off of the brads using strong sharp scissors.


See how much flatter brads lie once the prongs have been removed?


Hot glue the altered brads to the surface of the monogram randomly. Here I chose to hide "barren spots" with the brads. :)

Once your piece has fully dried, place in a frame and you are ready to enjoy your brand new PERSONALIZED home decor!!!


I would love to see what you make! Please leave a comment with a link to your personalized home decor projects! :) I will be sure to pop over and leave you some love on your project!! :)


1

Scrapbook Page with Buttons – Internet Inspiration

One of our  Creative Team member Designs for Duetica.  While I was checking out her work I saw a scrapbook page that was loaded with buttons and wanted to share.  I printed repetitive words using the Duetica Mandolyn font. I love how crisp and clean this font is but still has a flowing feminine feel at the same time. I love how Keri Lee used all the names her mom has answered to in her life time….Marilyn, Mon, Mom, Kiddo, Momma, Mommy, Mother, Mimi etc…

0

Buttons & Burlap Summer Scrapbook Page Idea

Summer, when you hear that word what images does it conjure up in your mind? For me I think of the heat, the BRIGHT colors and RELAXING! I love Summer. I know a ton of people who just hate the heat, but being a gal who’s always got cold fingers and toes, I love that during the summer month’s my body feels WARM all over, all day long! Bright colors, well I love those too! Wearing them, creating with them, you name it, I love it! And relaxing…well let’s just say there’s a well loved, well worn hammock in my backyard that my kids and I all enjoy piling into and having a good snuggle time in. I can relax with the best of them, and in STYLE to boot! LOL

For my project today you can see each of these elements we are talking about have been captured perfectly! From the bright sunshine, the bright colors of the porch chair and the slouchy posture of my sweet Elliott, this scrapbook layout just screams SUMMER. Pairing up bright buttons & bright papers with a nice wide swath of burlap helps to give this layout rest amongst the busyness. Now, while I was creating I got to the point where everything was on the layout EXCEPT the title. And I was STUCK…I mean the page was cute, but needed something…but what….that was when I emailed a photo of the layout and then called our DT Lead Niki Meiners and said “What’s wrong with this page..I am stuck” As if on cue she replied “Oh just add a title to the page – SUMMER” “Where??? Where would I even put a title??” I replied. “Ummm right there under the photo overlapping the patterned paper, burlap and above the cluster of red big buttons…” And you know, she hit the nail on the head!!! It was JUST what this layout needed. Talk about a friend being a help just when you need it!!!  So now you tell me…who do you call if you get stuck or just can’t seem to “make it all workout” in your creative process??

0

How to Watercolor using Lumiere 3-D, a shimmery way to paint!

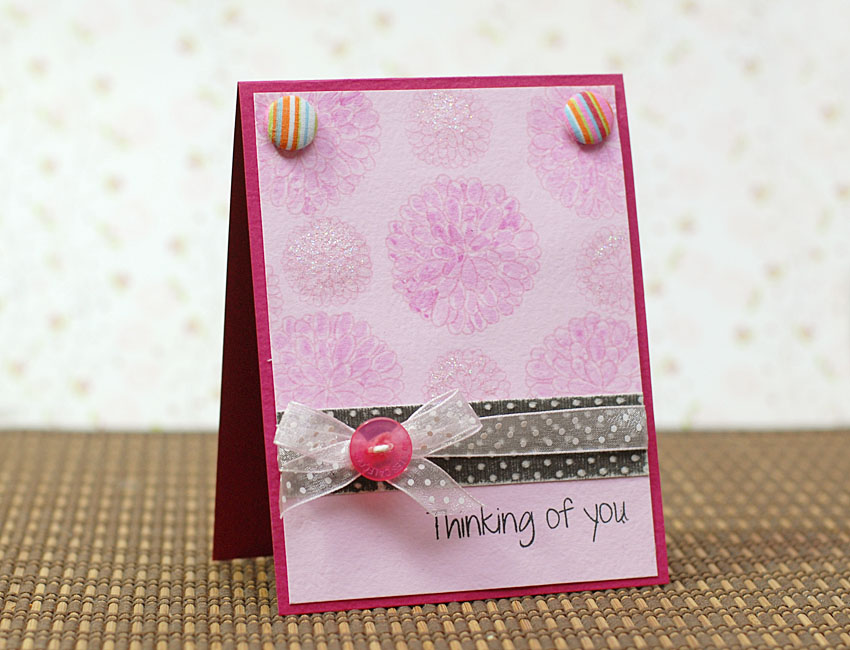
Today I thought I would share a quick tutorial on how to use Lumiere 3-D one more way! :) I had used this technique on my “Mother” scrapbook layout earlier this month but didn’t really showcase it so I figured it would be a great way to end the month here… :) I hope you enjoy!

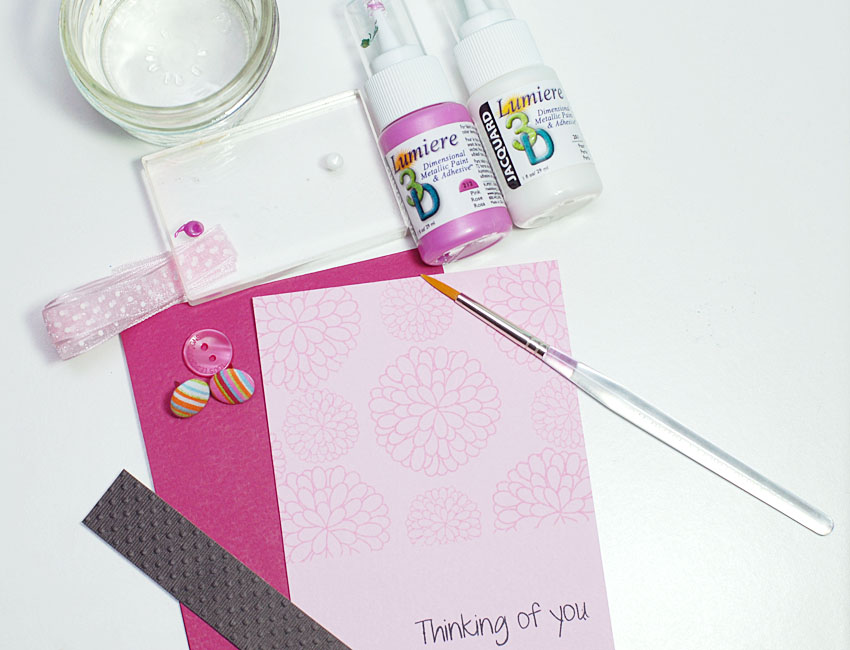
Supplies Needed: Cardstock, Stamps, Ink, Lumiere 3-D in Pink & Pearl, ButtonsPretty Girl Cozy Brads, Ribbon, Watercolor Brush, Small Container of Water, Palette for mixing on


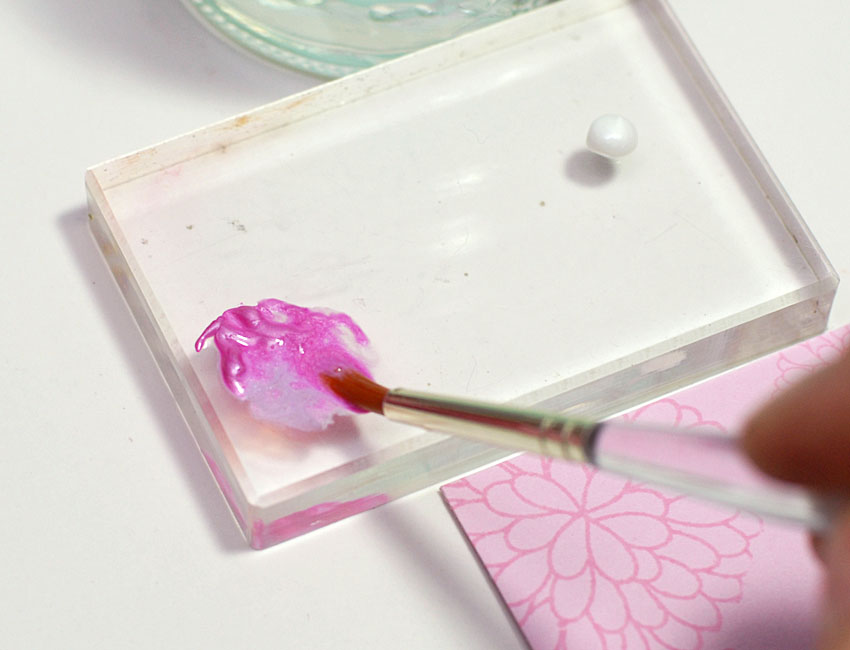
Dip tip of watercolor brush into water then into Lumiere 3-D to thin.


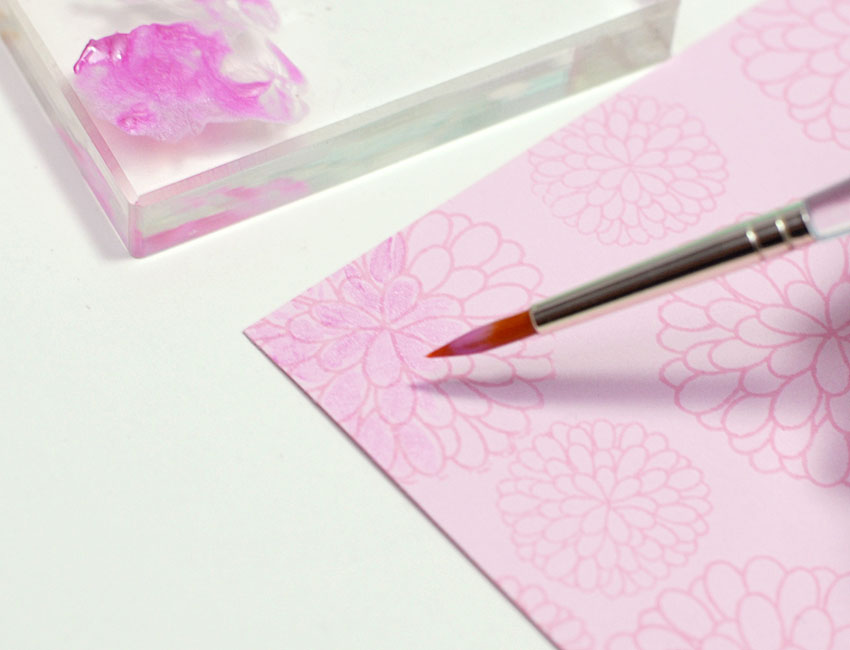
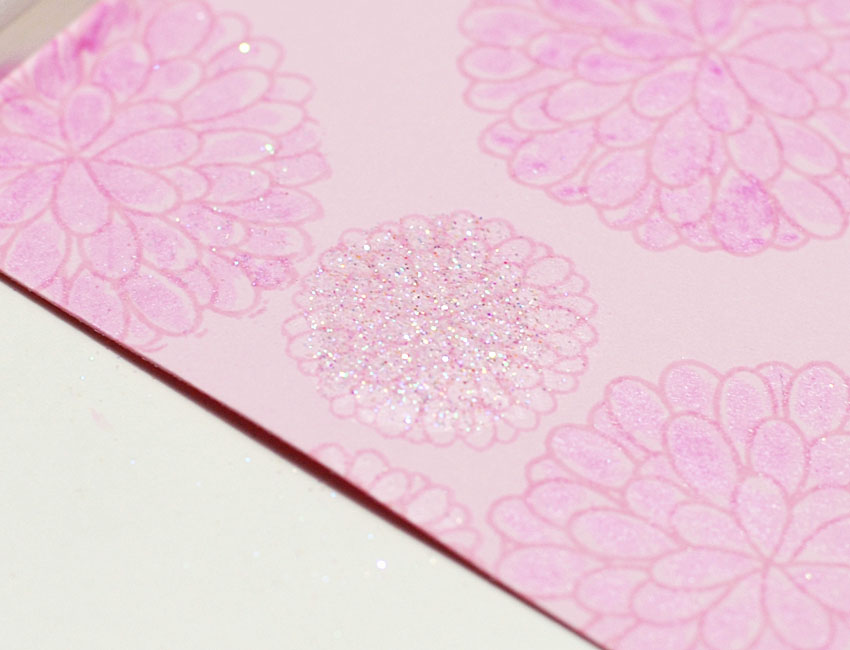
Apply water thinned Rose Lumiere 3-D to each petal individually


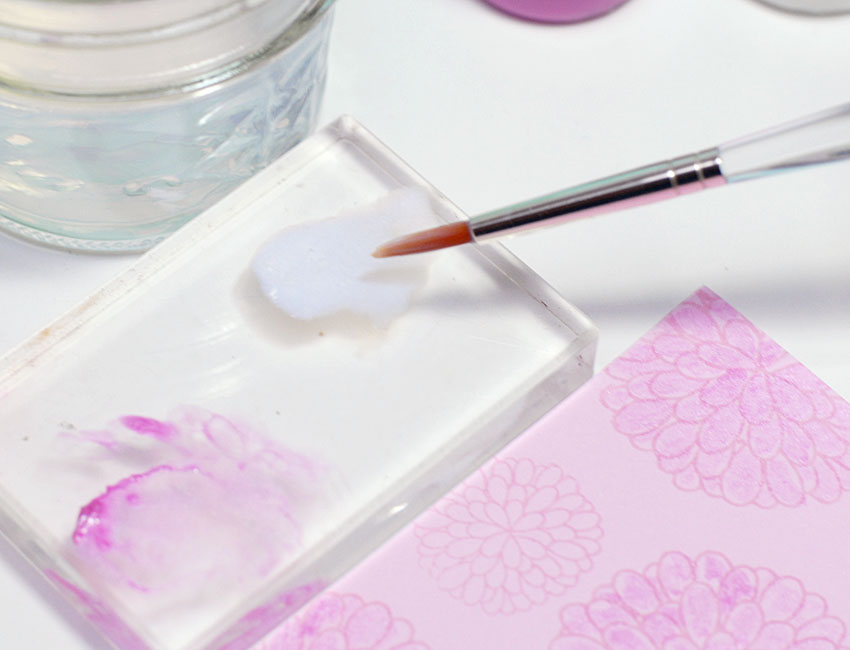
Repeat steps one & two with Pearl colored Lumiere 3-D, Only this time just paint the entire surface of the flower image.


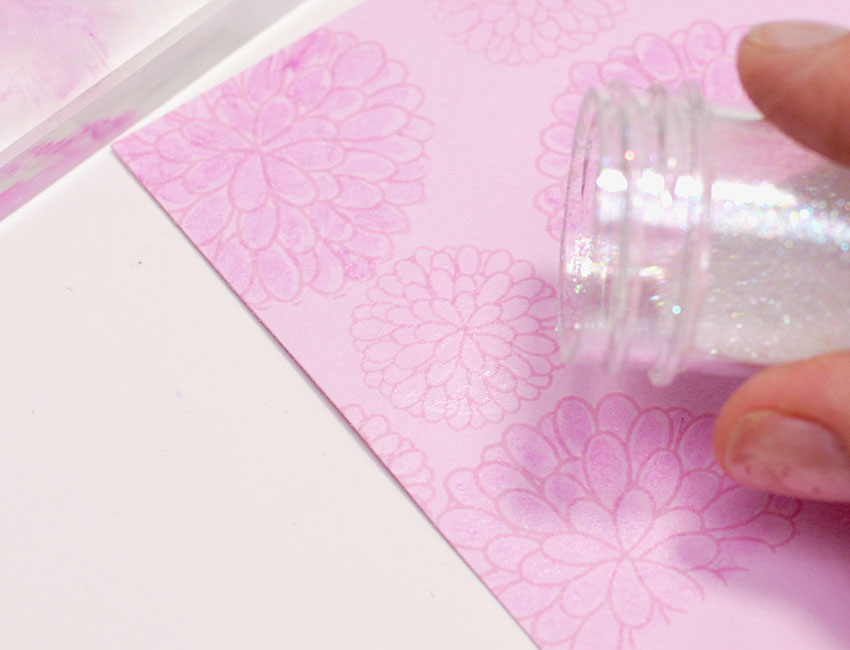
Before the painted surface has time to dry, apply a light dusting of ultrafine glitter to the surface of the Pearl painted flowers if desired.


Remove the excess glitter from the surface of the paper and then finish the card using your watercolored panel.


Here’s the finished card once assembled. The gentle shimmer is so subtle yet so pretty, I only wish I could have caught it in the photo as it really appears in real life.
2

How to use Lumiere 3D with buttons in a new and different way


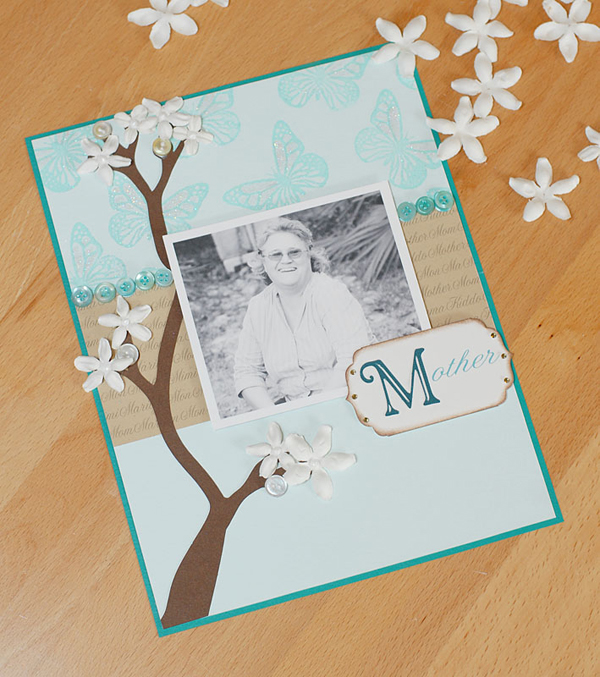
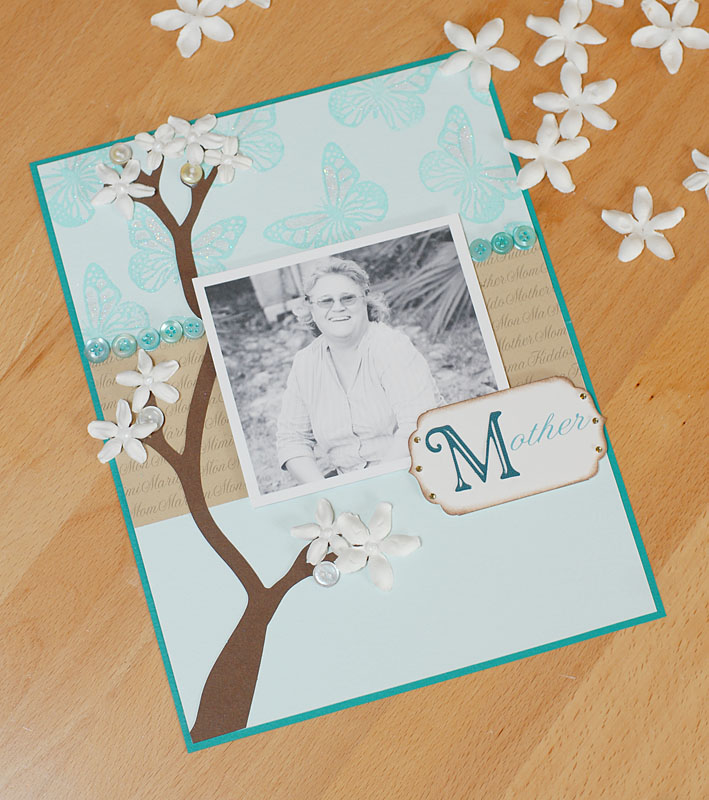
I love my mom. She’s a wonderfully fun person who everyone loves! She has a joyful spirit that just oozes to all those around her. This week I decided it would be fun to scrap a layout with her as the subject! :) If any of you have followed my work you know I love stamping, I love paper, I love ink, I love all things “crafty”…and here on this project I went all out and decided to not use any patterned paper but instead to get creative and make my own backgrounds.

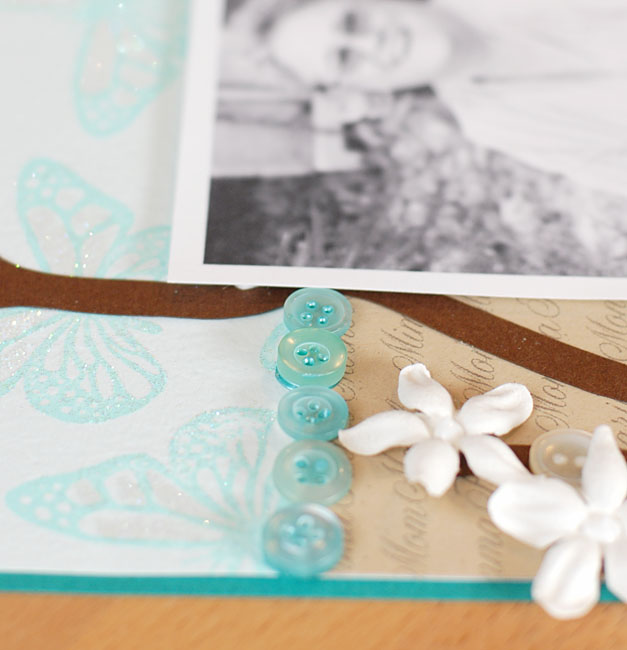
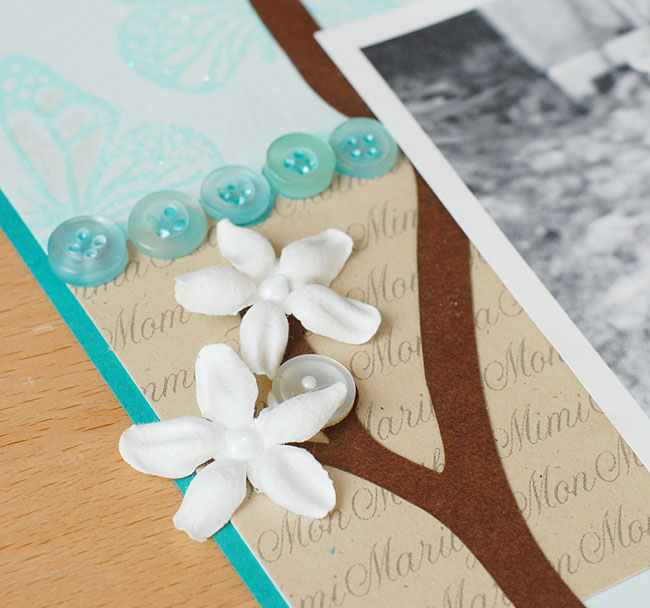
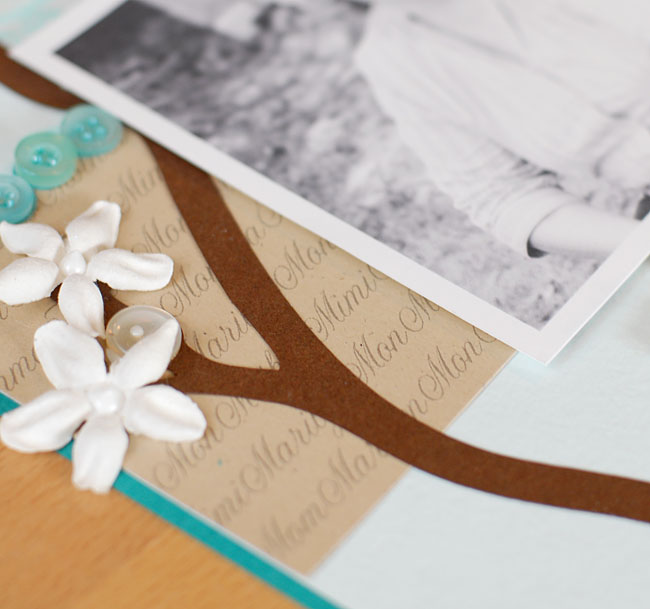
I really wanted there to be attention to all the fine details on this layout  so as you can see I used buttons as a border. Nifty Tip: Jacquard Lumiere 3D can be used to adhere buttons to your project AAAAAND it doesn’t leave you with “naked” button holes (personal preference of mine is to NOT have naked buttons!!!). The Lumiere 3D fills in the holes as well as adheres the buttons right where you want them to stay! The Lumiere 3D Turquoise is a dead match for the buttons in our Sea Glass Tin.

I also found that the Pearl Lumiere 3D was just right for holding my little white mother of pearl buttons from the Genuine Vintage Tin right where I needed them for the “buds” on my tree branch as well as for creating perfect domed centers for all my flowers.


As you can see here I have printed repetitive words using the Duetica Mandolyn 1 Font. I love how crisp and clean this font is but still has a flowing feminine feel at the same time. I decided it would be cute to make a list of all the names my mom has answered to in her life time….Marilyn, Mon, Mom, Kiddo, Momma, Mommy, Mother, Mimi etc…I then just repeated the list over and over and printed in a light gray on Kraft cardstock to make the background strip beneath the photo.


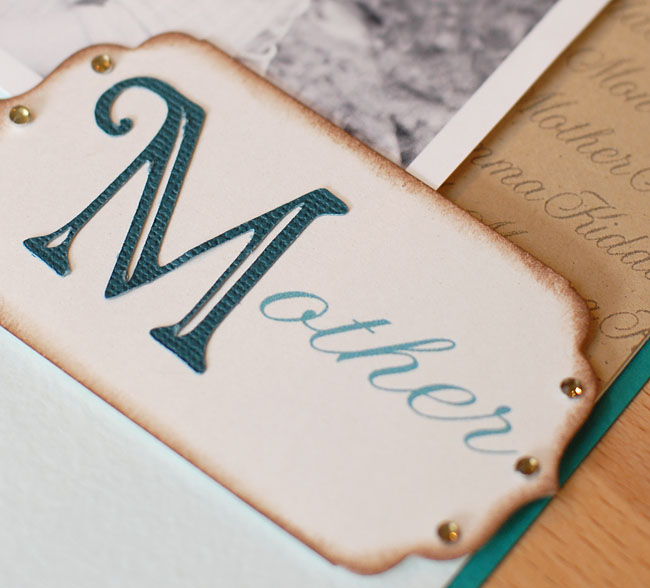
Then for my title I again used the Duetica Mandolyn1 Font in a larger point size and a cool teal color. One of the best things I am finding when working with the Duetica fonts is that I can customize EVERYTHING about them, the way they type out, the colors I print in, the size, the layout…you name it, you do it! :) Since we just celebrated Mother’s Day now is a great time to get out that photo of your mother and treasure that memory as you create a keepsake scrapbook layout…

Supplies:

Buttons: Buttons Galore & More – Sea Glass, Genuine Vintage
Jacquard – Lumiere 3D: Pearl & Turquoise
Duetica Font: Mandolyn 1 & Adobe Photoshop
Cardstock: Prismatics & Coredinations
Cricut Electronic Cutting Machine, Serenade & Winter Wonderland Cartridges
Stamp: Layers of Color – Fairy Wishes
Ink: Clearsnap Colorbox Pigment Ink – Glacier Ice
Glitter: Ultrafine Iridescent
Rhinestones: Want2Scrap
Flowers: Prima “e!” line
Die: Spellbinders Labels Four Nestabilities

4

Patriotic Scrapbook Layout by Linda Auclair

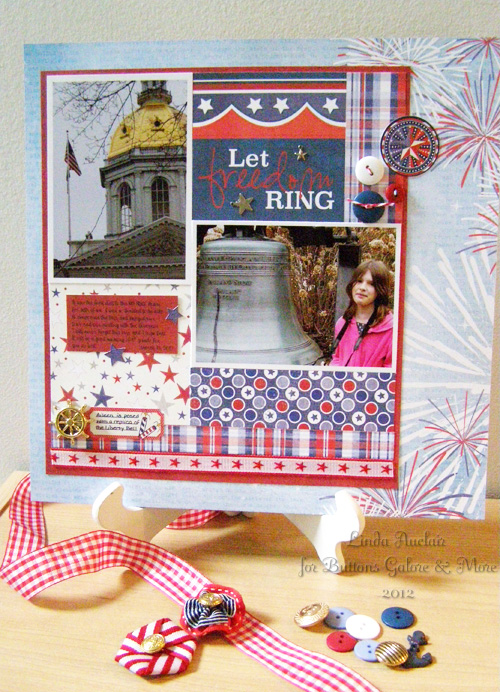
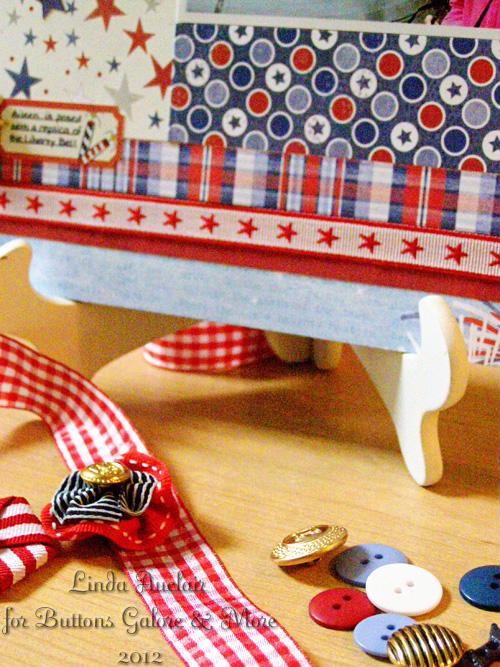
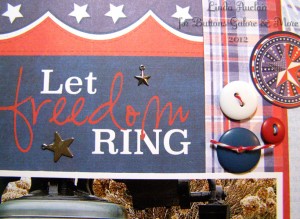
Linda enjoyed the Collage Trim Kit so much that she couldn’t stop with just the wallhanging! So, she created a layout to share using the same paper collection and leftover buttons from the supply list on the Patriotic Wall Art from last week. She was able to chaperone her youngest daughter’s recent class trip to the NH State House, and took a bazillion photos!

Materials Used –

If you would like to know more about Linda you can read her bio below or check out her blog. I know you will find so much more inspiration there!

About Linda:

Hi! I’m Linda Auclair, and I live in New Hampshire with my husband and daughters, Brigid and Aileen. My son Jonathan is away attending grad school at UPenn this year. I’ve been a papercrafter forever, and in the past decade, I have had the good fortune to work for a variety of companies, such as Fiskars, Creative Imaginations, Epiphany Crafts, and my current Design Team post at Echo Park Paper, as well as a number of online retailers. I have had my work published in magazines and eZines, and have been guest blogger/designer for a number of manufacturers. I am an active blogger, and love to share my designs, along with tips and tricks I have discovered, with my readers at http://elendae.wordpress.com/

3

National Scrapbook Day -Button giveaway alert

It is National Scrapbook Day.  In honor of the day, we want to do a giveaway.  Share a scrapbook related project here on this post in the comment section, by Mondayday at midnight and we will do a random drawing for a either a tin of GENUINE VINTAGE buttons or a SPRING BUTTON TOTE.  You can pick which one.

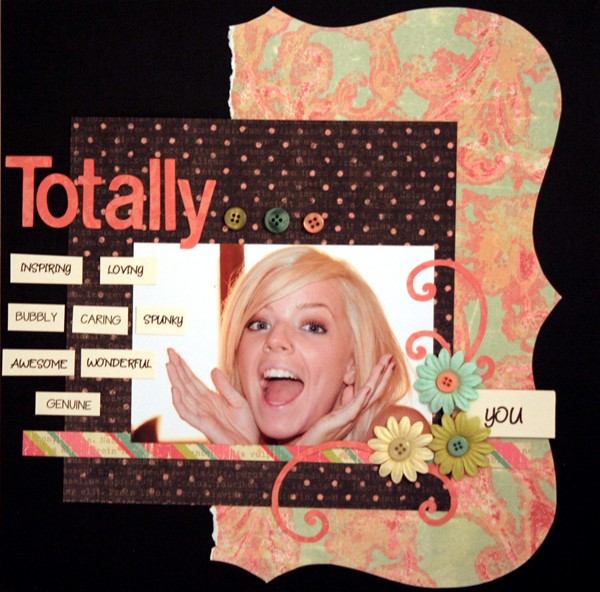
Below is a page that one of our contributors made last year for National Scrapbook Day.  We look forward to seeing what you share.

totally - buttons on a scrapbook page


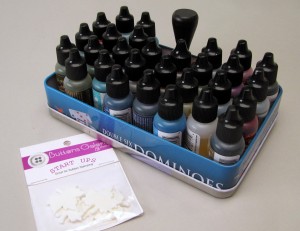
Start Ups – Maple Leaves and Alcohol Ink

Start Ups - Maple Leaves and Alcohol Ink

It may be a little early to start thinking of fall leaves… but maybe not.

Last week I introduced you to Start Ups here and I made an easy “metal” piece to put on all sorts of Mixed Media or Scrapbooking projects.

Start Ups - Maple Leaves and Alcohol Ink

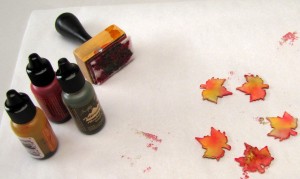
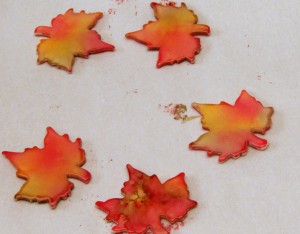
This week I used the Start Up Leaves and my trusty collection of Ranger Alcohol Inks to create multi-colored fall leaves.

Start Ups - Maple Leaves and Alcohol Ink

The colors I used were Oregano, Butterscotch and Red Pepper.

Oh, the possibilities!

What would YOU use Start Up Leaves on?

2

Envelope Booklet Hostess Gift

Make an Envelope Booklet to hold coupons, photos, or stationery.

I love little gifts that I can make with items that I’ve got on hand and give as hostess gifts, thank you tokens, and teacher’s presents. Usually it’s on short notice- and I can whip up one of these Envelope Booklets in an hour. WIN!

Continue Reading →

1

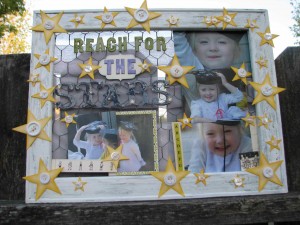
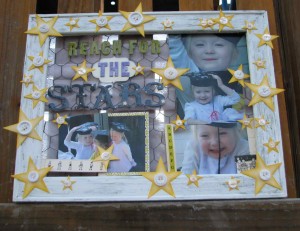
Reach for the buttons!

And you’ll land amongst the stars!

This time of year, many fine folks are spreading their wings and moving up in the world. This project goes out to all of the graduates out there, large and SMALL!

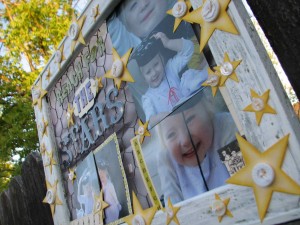
Here’s a hybrid home dec/scrapbook memorabilia collection to get your buttons sparkling for attention – check out my quickie forgotten fine art canvas makeover!

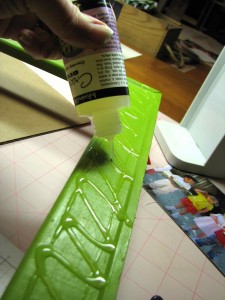
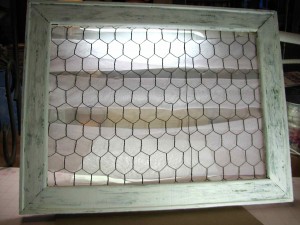
Old canvas was stripped from this frame.  The frame was then painted with acrylic paint.

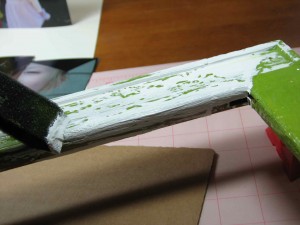
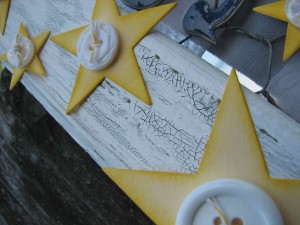
Once dry, crackle medium was applied and spread, generously.  Let dry, at least until tacky.

Spread 2nd color over crackle medium.   (The 2nd coat doesn’t have to be perfect.) Let dry for several hours.

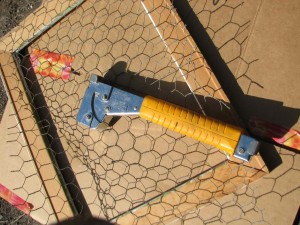
Once dry, attach chicken wire to the backside with strong staple gun.

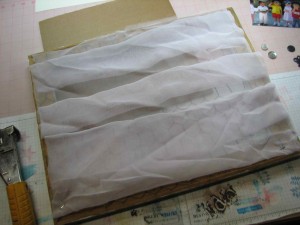
Drape fabric onto the back of chicken wire and attach.

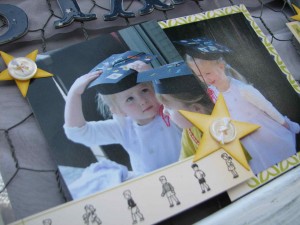
Cut stars from card stock and embellish with baker’s twine embellished buttons from Buttons Galore & More.

Lay out pictures and embellishments, memorabilia, etc.

Secure with glue, tape or clips, as desired.

Give the grad in your world a big hug and blessings to REACH FOR THE STARS!

3

Powered by WordPress. Designed by WooThemes