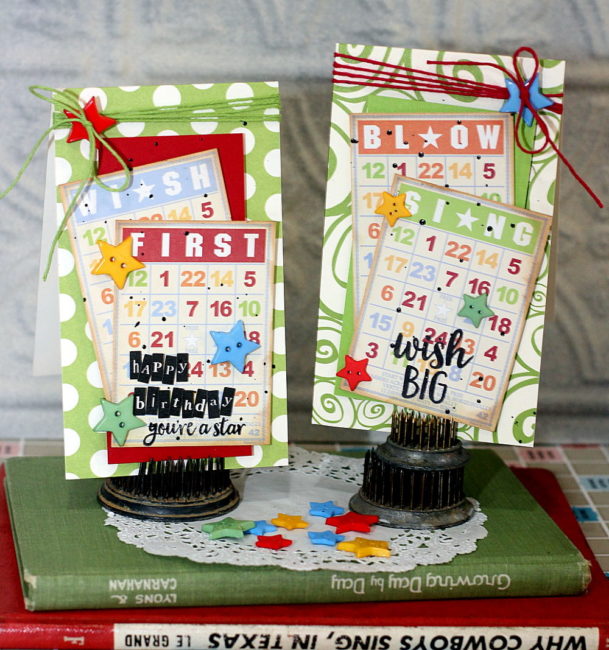
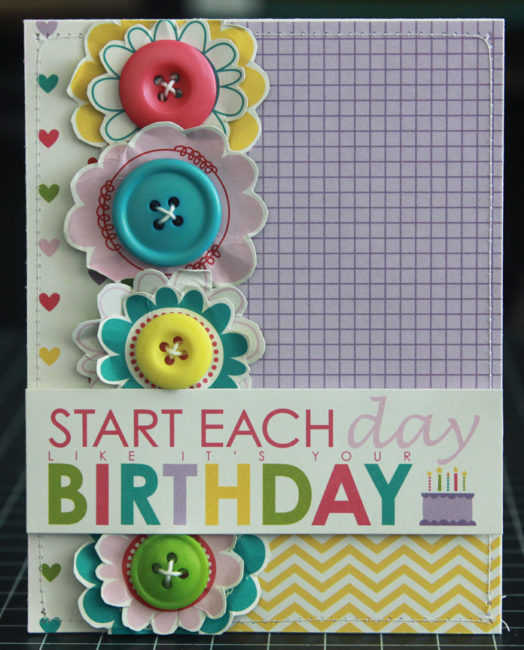
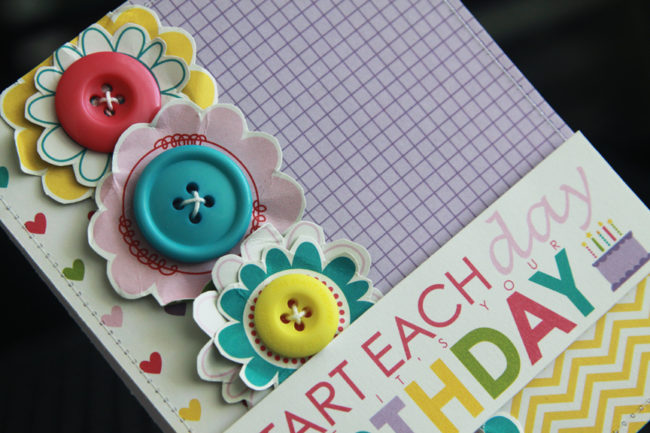
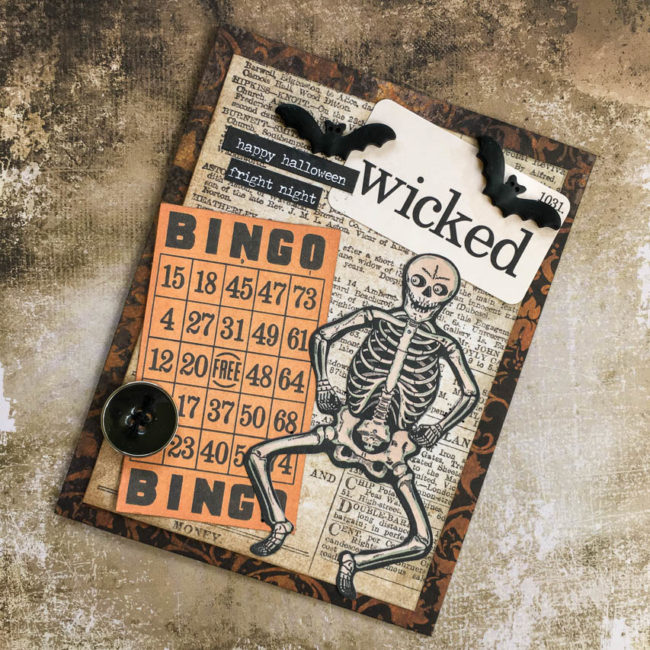
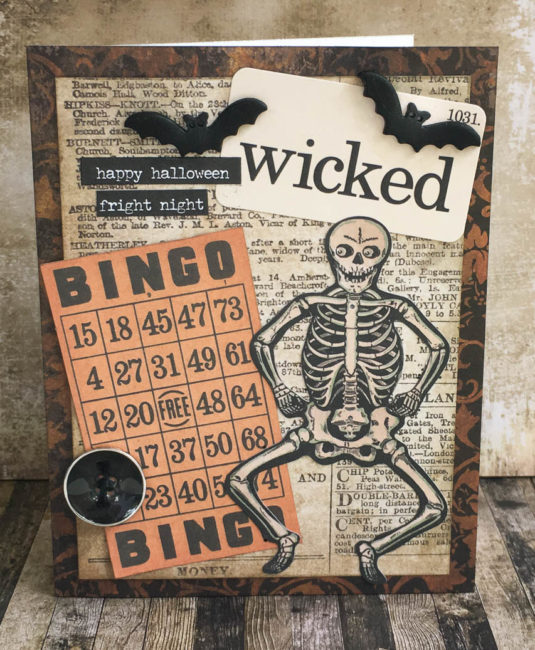
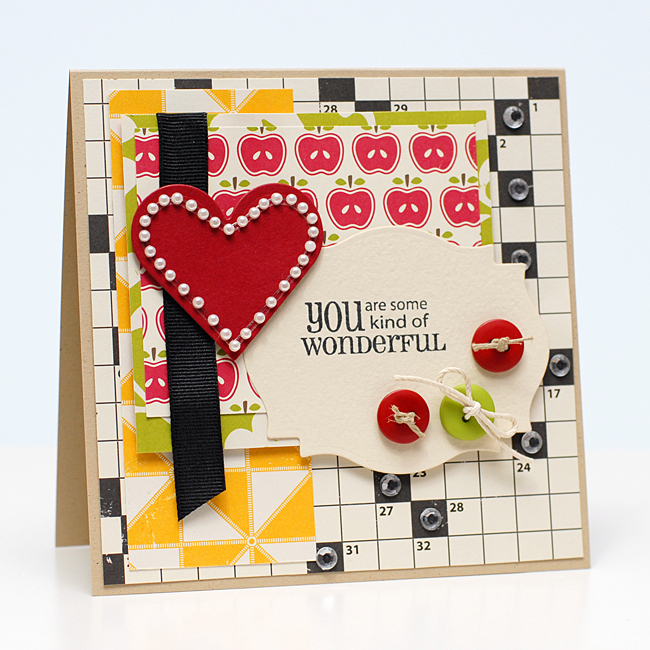
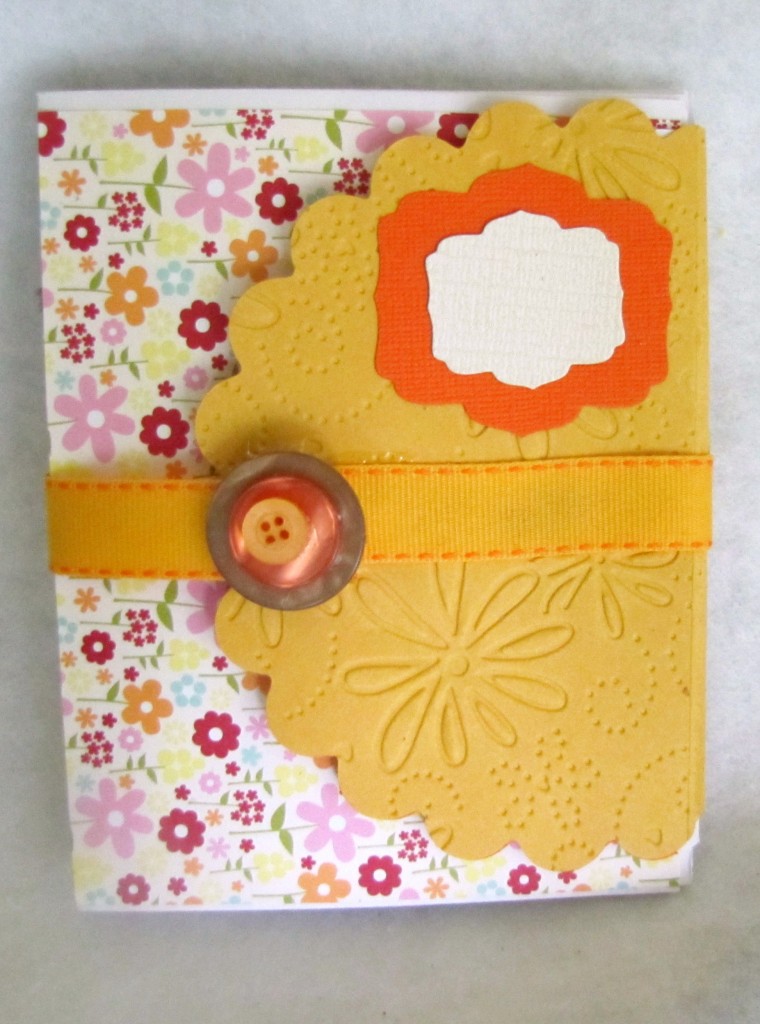
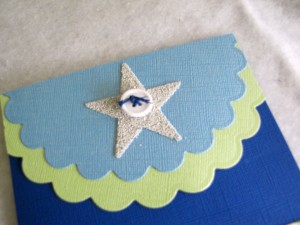
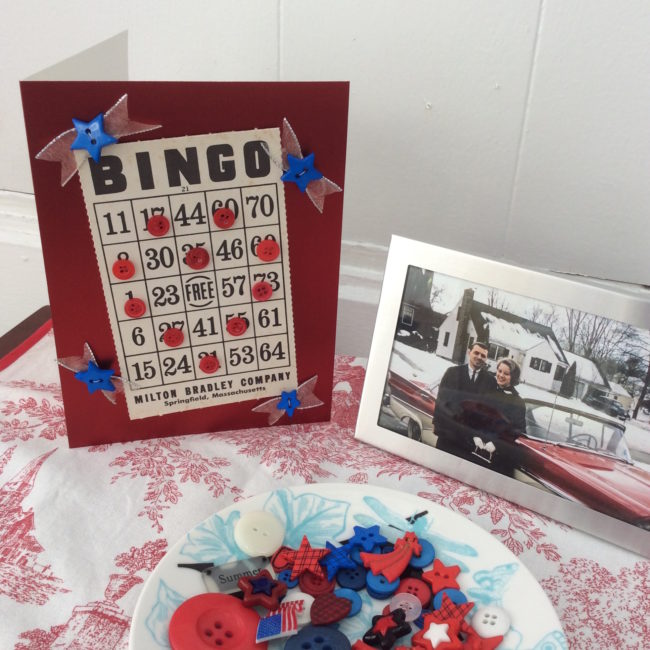
Vintage Bingo cards can be so fun to embellish with buttons. The grid makes a perfect surface to create patterns such as a heart outline. Our family tradition to play Bingo on the holidays and mu Dad is always the number caller. This card is for him.
Tag Archives | card making
Fill an Easy Christmas Shaker Card with Buttons!
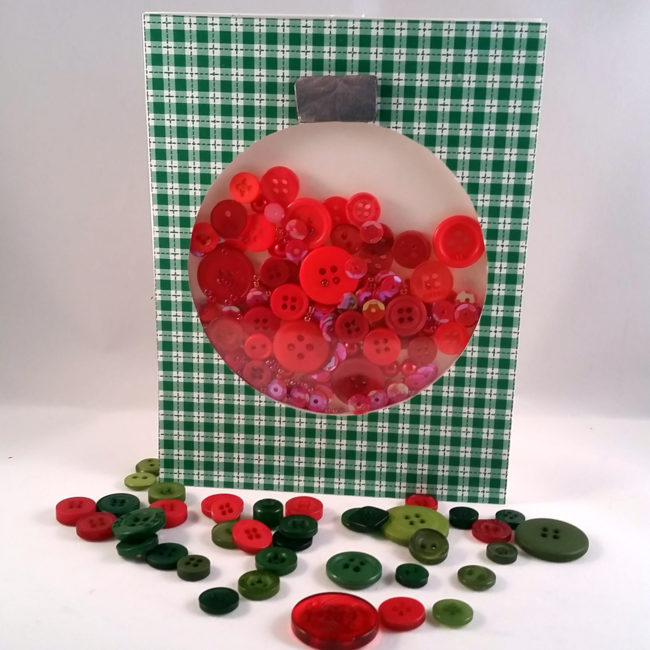
There are few card styles out there that are more impressive or fun than the shaker card. The 28 Lilac Lane Embellishment Bottles made this easy Christmas shaker card beautiful!
I made this easy Christmas shaker card using the 28 Lilac Lane Embellishment Bottle in “Dragon Fire”. The gorgeous red tones of the buttons, sequins, beads, and pearls are perfect for Christmas cards, and they all come together in one adorable little bottle! Continue Reading →
Celebrate a Star with this Handmade Birthday Card!
Hi, it’s Connie here today with the Buttons Galore & More design team sharing a handmade birthday card design using the themed buttons “Stars” by Buttons Galore & More. These star buttons come in four different colors – green, yellow, blue and red – plus two sizes. They are perfect primary colors, great for creating crafty projects with kids or for special occasions! Continue Reading →
Send Festive Flurries with a “Let It Snow” Christmas Card!
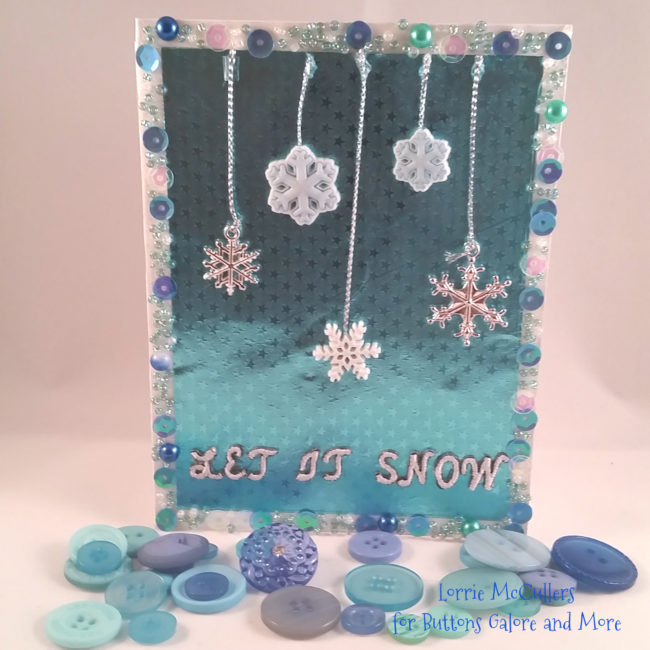
Nothing says Christmas like a flurry of snowflakes! Using adorable buttons and a beautiful sequin mix from Buttons Galore and More, I am getting into the Christmas spirit with this Let It Snow Christmas card. Continue Reading →
Make a Fun Coffee Gift Card Holder for National Coffee Day!
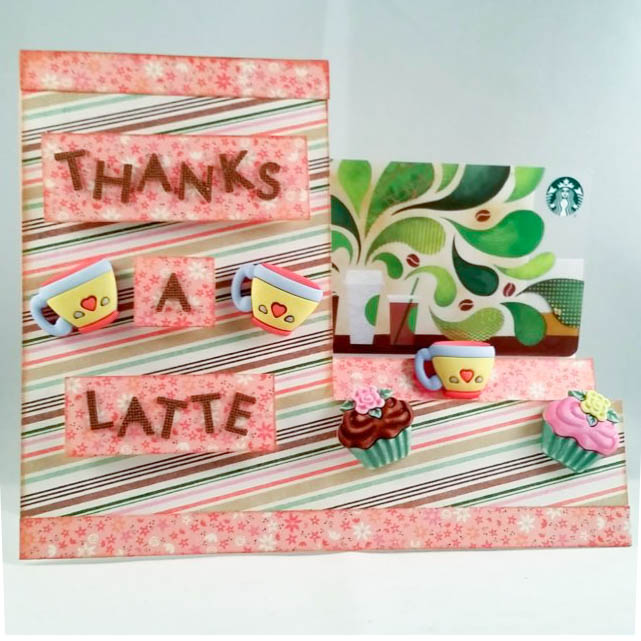
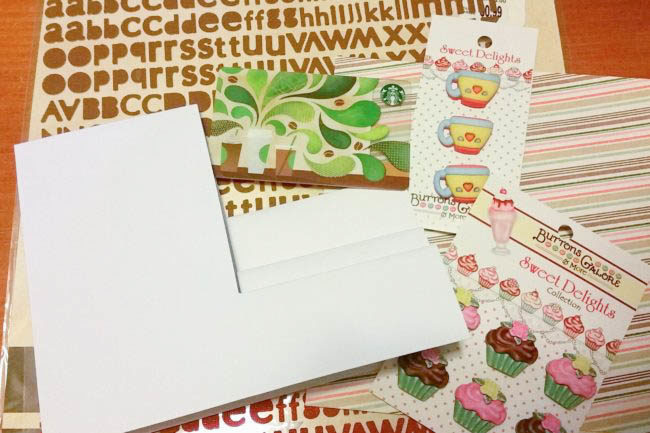
It’s National Coffee Day, and what better way to celebrate than with a gift card to your favorite coffee shop? Using 3D buttons from our Buttons Galore Sweet Delights collection, you can make a sweet card that doubles as a gift card holder!
Supplies Needed to Make Coffee Gift Card Holder:
- Buttons Galore “Sweet Delights: Coffee Cups” 3D buttons
- Buttons Galore “Sweet Delights: Gourmet Cupcakes” 3D buttons
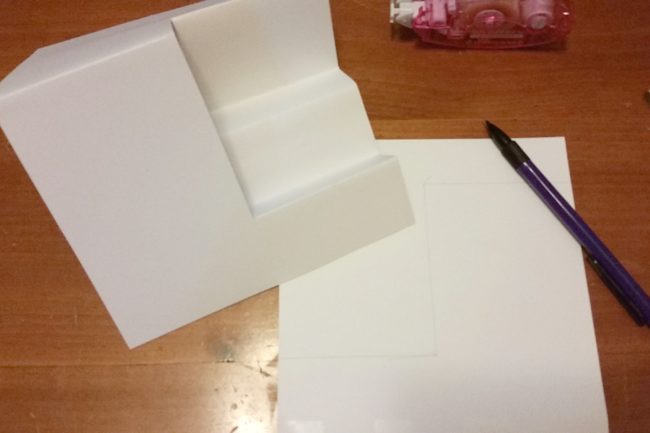
- Side stepped card
- 2 – 6″x6″ sheets of coordinating patterned paper
- alphabet stickers
- scissors
- paper trimmer
- pencil
- tape runner
- foam pop dots
- red line tape
- ink
- button shank remover
- gift card
Instructions for Making Coffee Gift Card Holder:
- Trace front of side stepped card onto the back of one sheet of patterned paper. Cut out with scissors and adhere to front of the card. Ink edges of paper if desired.
- Cut two 3/4″ strips from the second sheet of paper. Ink edges if desired. Adhere one strip to the bottom of the card. Cut the other strip in half. Adhere one piece to the top of the card, and adhere the other on the second “stairstep” of the card.
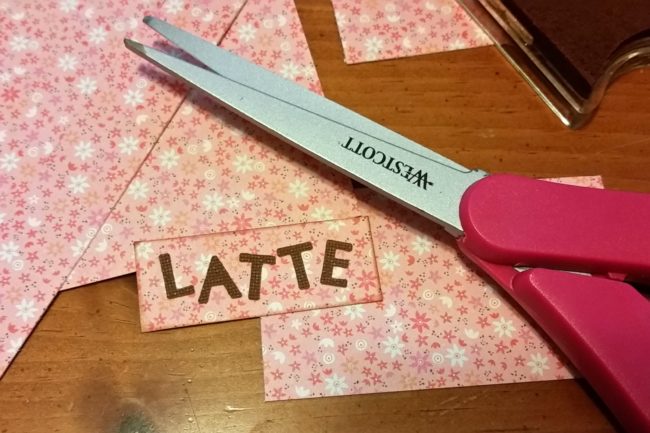
- Spell out “Thanks a Latte” by placing stickers onto leftover pieces of the 2nd sheet of paper and then cutting out rectangles around the words. Inks edges if desired. Adhere to card with foam pop dots to add dimension to the card!
- Remove shanks from back of “coffee cup” and “cupcake” buttons with a button shank remover. Adhere to card using red line tape.
- Adhere gift card to the last step of the stepped card using red line tape.
SaveSave
Embellish a Fiesta Birthday Card!
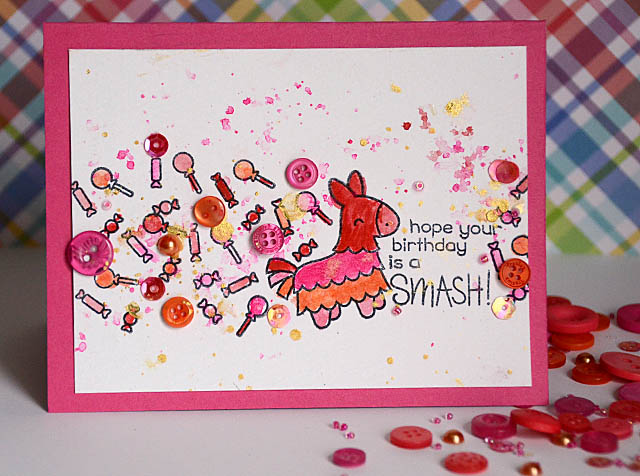
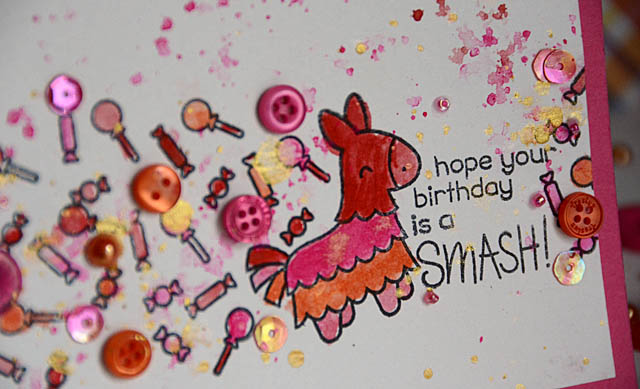
We’ve got birthdays on the brain around here in May. 28 Lilac Lane designer May Flaum was inspired to make her celebration a fiesta, with a card that features a watercolor pinata and a shower of 28 Lilac Lane embellishments!
Wondering what supplies May used? Here’s a look at her list:
- 28 Lilac Lane “Fruity Fun” embellishment bottle
- PPA Matte adhesive
- Lawn Fawn Fiesta stamp set
- watercolors
- gold spray ink
- black inkpad
- white and pink cardstock
This fiesta birthday card by May is so fun and easy to make – for the complete how to, check out her video tutorial below!
Did you notice that something was missing from the video? Here’s May’s explanation for that step that you don’t see in the video…
I did add the pink splatter you see here after filming. Intentional? Not quite… I was cleaning up spilled a bit then said oh to heck with it and went wild! Just a reminder you can always make it work.
Yes, even the fabulous May Flaum has crafting accidents! But as she proves with this cute fiesta birthday card, you can go from “whoops” to wonderful if you just are flexible and think creatively.
This fiesta birthday card uses the pink and orange tones of the “Fruity Fun” embellishment bottle. But with a change of background cardstock and by using different colors of watercolors, you could make this design work with almost any of the 28 Lilac Lane embellishment bottles. How about the pink and green of Savannah Stroll, or the red, turquoise blue and green of the appropriately named Fiesta? Pick your favorite colors and make May’s fiesta birthday card your own!
Use Trendy Circles for Making an Easy Birthday Card!
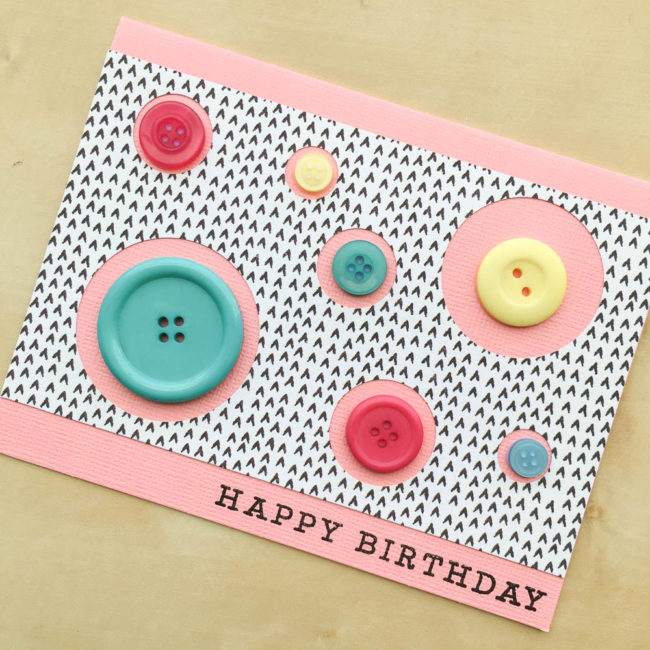
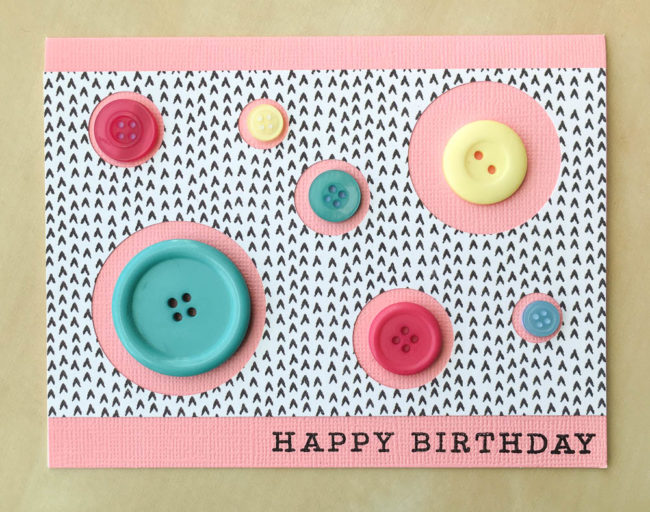
Circles are trendy right now – and they are a perfect match for buttons! This five minute card project pairs circles, buttons and a retro style patterned paper to create a look for an easy birthday card that is quirky and fun!
Supplies Needed:
- Buttons Galore “Summertime” Button Bonanza
- PPA Matte adhesive
- blank card base
- black ink
- Hero Arts “Many Everyday Messages” clear stamp set
- Crate Paper “Chasing Dreams” 6×6 paper pad
- assorted circle punches (.5″, .75″, 1″, 1.5″, 1.75″)
To make this easy birthday card, select a blank card base and use black ink to stamp a sentiment in the lower right hand corner. I chose a birthday sentiment for my card, but this card design is really suitable for a variety of occasions: hello, cheer, thank you, and many others. Simply choose a sentiment suitable for your desired occasion!
Cut a piece of paper to 5 1/2″ by 3 3/8″. Get out your circle punches and punch about a half dozen random holes in it. Adhere it across the card front, just above the sentiment.
Select buttons that fit in each of the circles and glue them down with a clear drying white glue such as PPA Matte. Try to pay attention to color balance when selecting your buttons – don’t choose too many large buttons the same color or use too many buttons close together in one area of the card that are the same color.
When the glue dries, your card is ready to be put in an envelope and delivered! This easy birthday card project would also be great for doing with kids to make teacher thank you cards for the end of the school year, And the color scheme possibilities are as endless as our Button Bonanzas…check them out and get inspired!
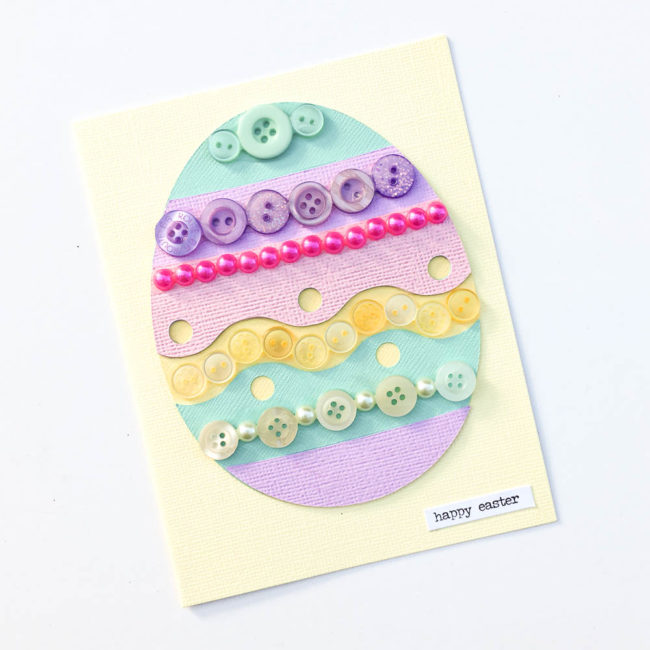
Embellish an Easter Egg Card with 28 Lilac Lane
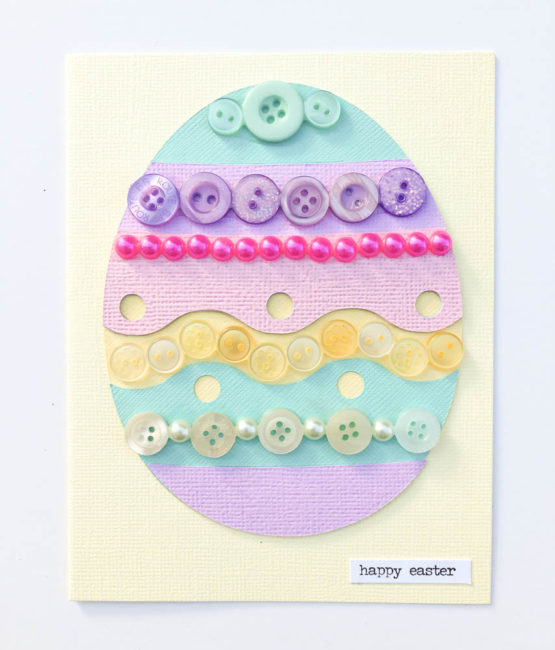
Embellishing an Easter egg card is a great reason to get out your 28 Lilac Lane embellishments and go crazy with color. The flat back pearls and buttons in our embellishment bottles will have your Easter egg card shining like a jewel!
supplies needed:
- 28 Lilac Lane “Birds of a Feather” embellishment bottle
- 28 Lilac Lane “Pretty Princess” embellishment bottle
- 28 Lilac Lane “Winter Wonderland” embellishment bottle
- 28 Lilac Lane “On Lilac Lane” embellishment bottle
- 28 Lilac Lane “Hello, Sunshine” embellishment bottle
- PPA Matte adhesive
- Cricut Explore machine
- cardstock scraps
- blank card base
- Tim Holtz “Small Talk – Occasions” stickers
One of the great things about having a large selection of 28 Lilac Lane embellishment bottles on hand is the ability to mix and match them to create colorful projects like this Easter egg card! By combining small amounts from five different bottles, I was able to create a jeweled effect on my Easter egg that allows the egg to stand as the entire design of the card.
How to Make An Embellished Easter Egg Card
Locate a decorative Easter egg design in your die cut machine software. (If your machine doesn’t have this particular design, it will certainly have a similar design that can be embellished in the same manner. Look for a design with lots of straight lines or wide spaces that can be filled with embellishments.)
Cut the Easter egg design out of cardstock scraps, and assemble with glue. Then glue the assembled Easter egg to the front of a coordinating blank card base.
Using 28 Lilac Lane embellishments that coordinate with each area of the Easter egg card design, add rows of embellishments to the card with a liquid adhesive like PPA Matte.
Finish the card with a sentiment sticker in the lower right.
This is a great project for kids and grown-ups to do together….make the cards and then let the kids do the decorating!
Embellish a Spring Butterfly Card with 28 Lilac Lane
It’s officially spring, so let’s use some 28 Lilac Lane to create a butterfly card to send some spring greetings with!
Supplies needed:
- 28 Lilac Lane “Love Story” embellishment kit
- PPA Matte Adhesive
- card base
- smooth cream cardstock
- foam adhesive
- Ranger Tim Holtz Distress Ink in Abandoned Coral, Weathered Wood, & Peeled Paint
- Graphic 45 “Nature’s Sketchbook” 6×6 paper pad
- Hero Arts “Many Everyday Messages” stamps
- Hero Arts “Newsprint Butterfly” stamp
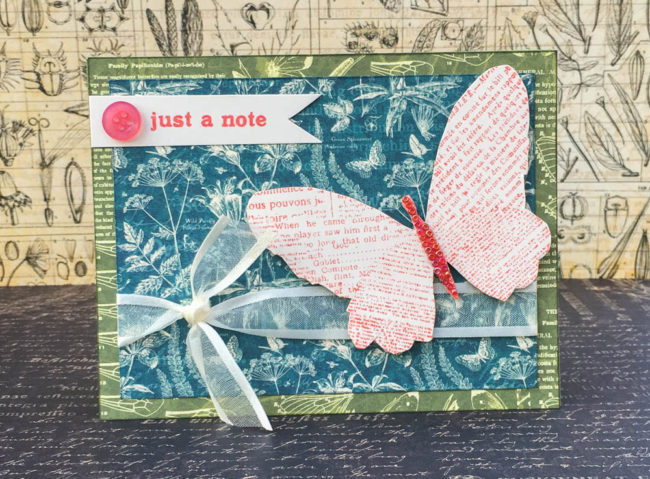
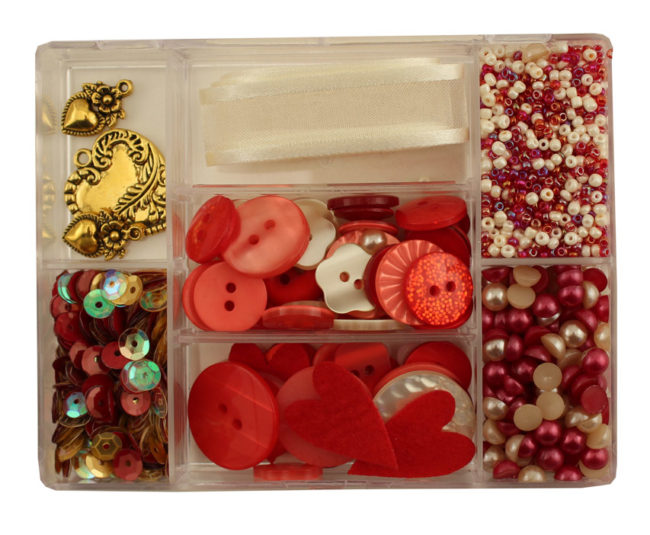
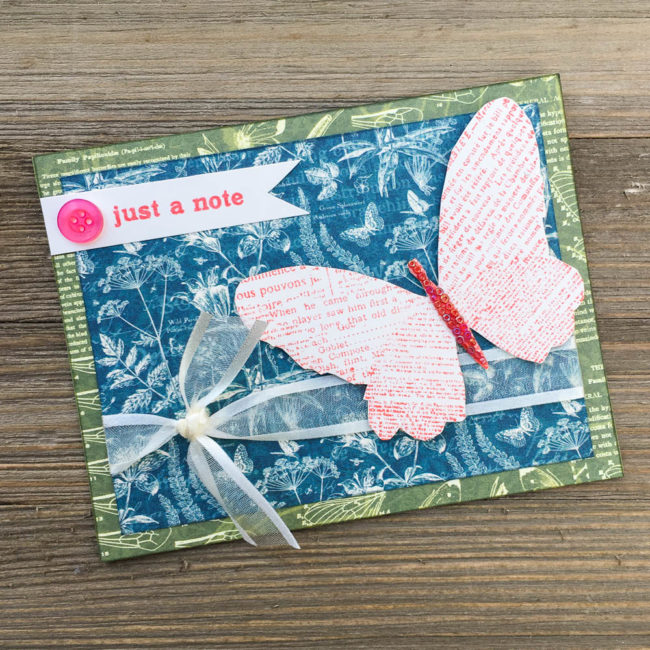
This butterfly card uses the “Love Story” kit by 28 Lilac Lane. With cream ribbon, heart charms, and embellishments in shades of red, pink & white, this kit is as versatile as it is gorgeous! Although at first glance this kit is a Valentine’s Day, wedding, or “I love you” themed kit, projects like this one are a great reminder to look at the kits for the colors of their contents as well as their themes.
To start making this butterfly card, cut a piece of green patterned paper to 4.25″ by 5.5″, ink the edges, and adhere it to the card base.
Cut a piece of blue patterned paper to 3.75″ by 5″ and ink the edges. Tie the ribbon ends together, and then secure the ribbon around the back side of the blue patterned paper. Adhere the blue patterned paper panel to the card front.
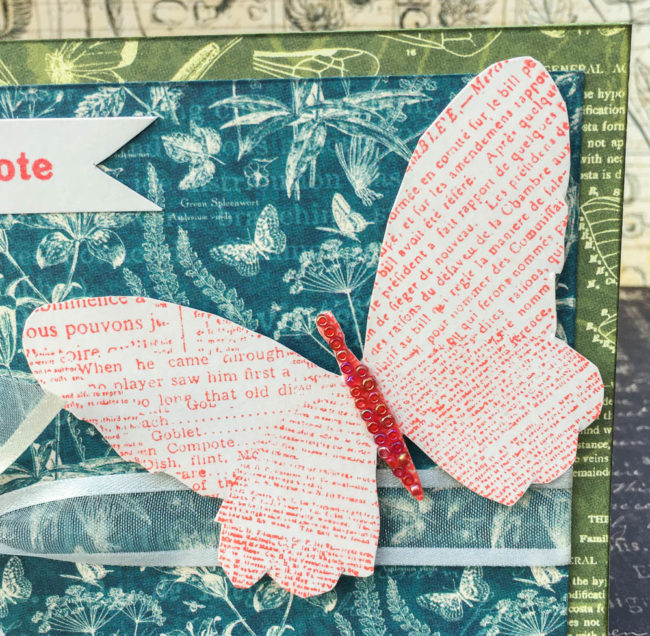
Stamp the butterfly and card sentiment on cream cardstock. Cut out the butterfly. Trim the sentiment into a 5/8″ wide strip, and snip the ends to make a banner.
Adhere the sentiment banner to the top left of the card front, and glue a button on top of it.
Squeeze a strip of glue down onto the body of the butterfly, and then layer seed beads on top of it. Once the glue is dry, use foam adhesive to attach the butterfly to the card front.
And your butterfly card is all finished, except to choose someone special to send it to!
Say “hello” with an Embellished Butterfly Card!
Today is “send a card to a friend” day. What better way to celebrate someone special in your life “just because” than with a sparkly embellished butterfly card?
Supplies:
- 28 Lilac Lane “Birds of a Feather” embellishment bottle
- PPA Matte Adhesive
- Graphic 45 Nature’s Sketchbook (6×6 paper pad & decorative chipboard)
- Indigo Blu MegaFlake Starter Kit & Flutterby Dinkie stamp
- Blank card (blue)
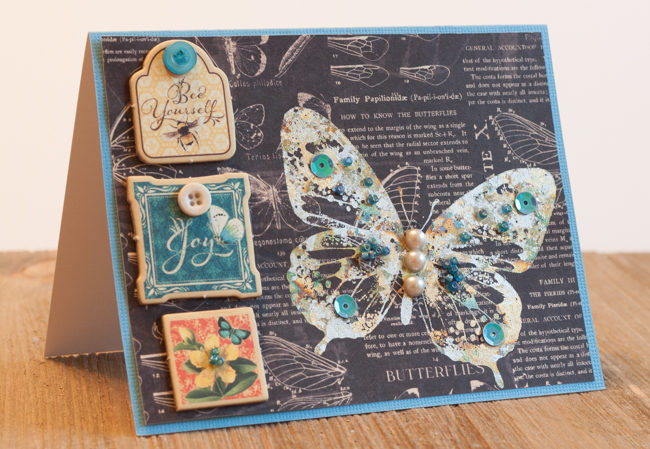
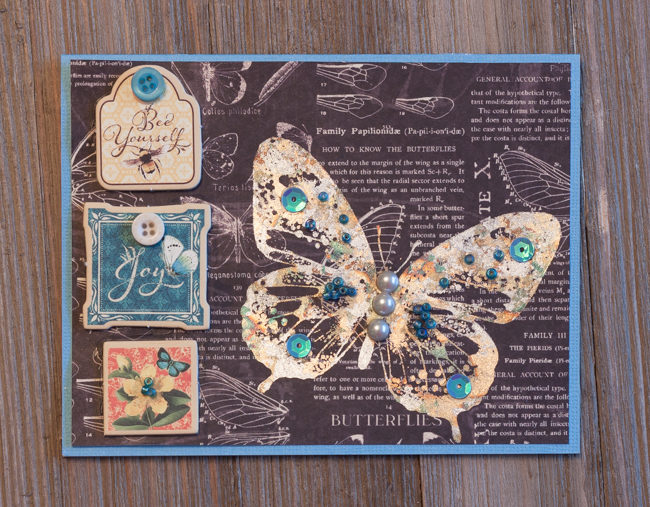
One of my favorite things about creating with the 28 Lilac Lane embellishment bottles is that they come in an entire rainbow of colors. This means that there is always the perfect bottle for whatever paper collection I’m in love with at the moment. For this new Graphic 45 collection called Nature’s Sketchbook, I reached for “Birds of a Feather”. It’s a perfect match for the blue tones in the papers, and a great way to add pops of colorful sparkle to my metallic butterfly!
This metallic butterfly was created with a glue and metallic flake stamping technique from Indigo Blu. It creates an opaque image even on dark paper, perfect for creating visual pop.
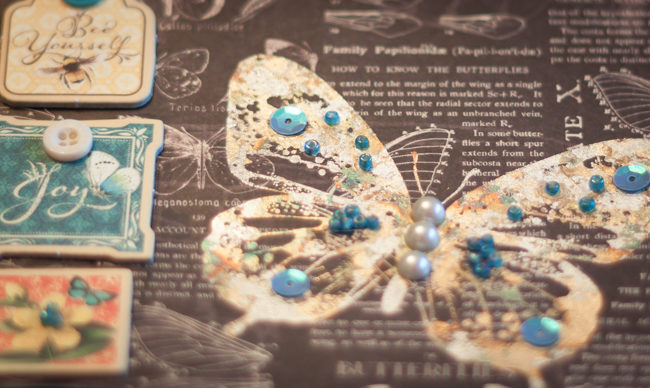
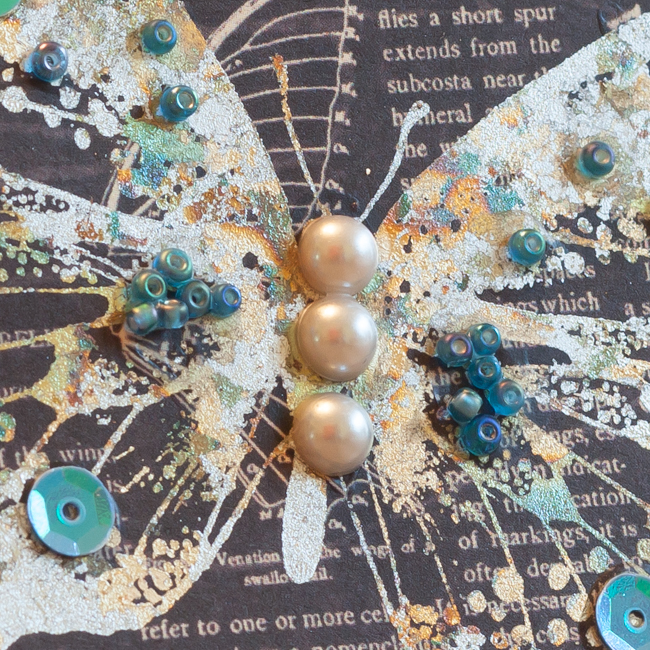
The butterfly is gorgeous on its own but it needed some more color to make it coordinate better with the chipboard. Also, it needed more dimension so it wasn’t overwhelmed by the chipboard elements. The blue sequins and seed beads from “Birds of a Feather,” along with the white pearls, provide just the right touch to take the butterfly from simple to gorgeous!
A few buttons from the bottle finish off the holes on several of the chipboard elements, and the whole thing is tied together beautifully! By mounting the black background on a blue card background, it keeps all of the embellishment contained and coordinated.
Who do you know that would love a blue and gold butterfly greeting? Flutter an embellished butterfly card their way!
Craft a Button Collage Heart to Send Valentine’s Wishes!
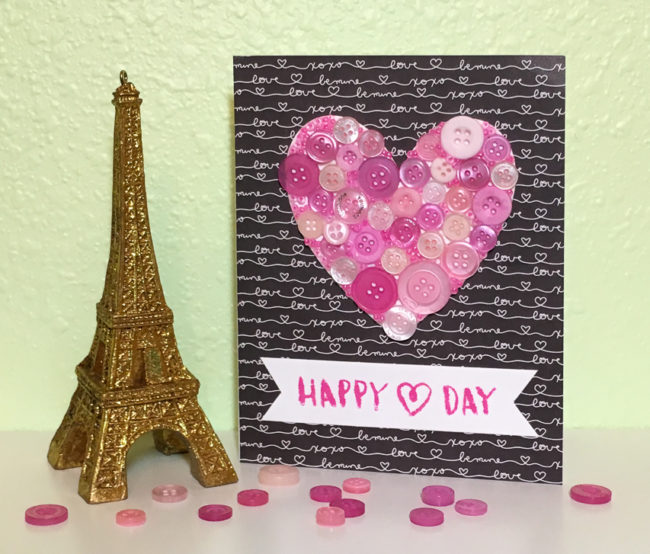
I love making button collages on small items – you may remember my button collage apple on my teacher tag awhile back. Collaged die cuts are a fun and simple way to add some dimension and detail to a design. Today, I’m falling in love with a button collage heart for Valentine’s day!
Supplies Needed:
- Buttons Galore Strawberry Cheesecake Color Blends (online store, Amazon)
- 28 Lilac Lane Pretty Princess embellishment bottle (online store)
- PPA Matte Adhesive (online store)
- Simple Stories “Love & Adore” 6×6 paper pad
- white cardstock
- white card base
- Cricut Explore machine
- Ranger Tim Holtz Distress Ink in Picked Raspberry
- Crate Paper “Heart Day” stamps
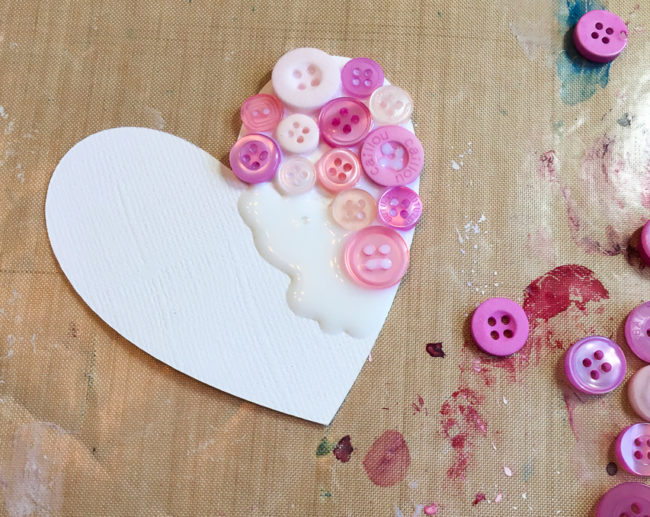
I started this card by cutting my 3″ high heart out of plain white cardstock on my Cricut Explore using the software’s basic shape tool. Then, starting in the upper right corner, I gradually spread white liquid adhesive (PPA Matte) over small areas and filled them in with the Strawberry Cheesecake buttons.
While my glue was drying on my button collage heart, I cut my background paper to the size of the card front and adhered it. Then I stamped the sentiment on a strip of the white cardstock. Once the ink was dry, I snipped the ends to create a banner look for the sentiment strip.
The button collage had white spaces showing through between the buttons after the glue was dry. To fill these in, I dropped spots of glue on them, and pushed seed beads from the Pretty Princess bottle down into them. Some of the white edges also weren’t entirely covered, so I ran beads of glue along those areas and pressed beads into there as well.
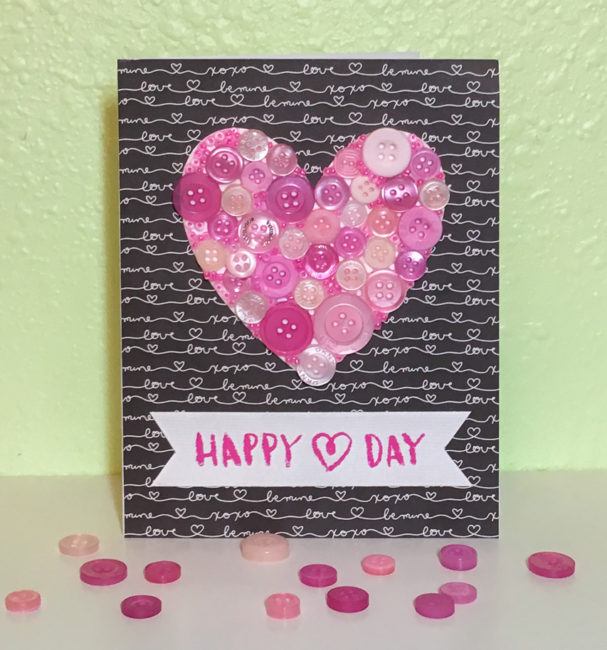
After all the glue was dry, I simply attached my heart and my sentiment strip to the front of the card. This simple design has a lot of “pop” from the color contrast and the button detail. I can’t wait to share it with someone special!
Make a Geo Heart Valentine Card for Someone Special!
Are you feeling the love? It’s time to start thinking Valentine’s Day! This geo heart valentine card is trendy, fun, and best of all…oh so easy to make!
Supplies:
- 28 Lilac Lane “Love Story” embellishment kit
- Simple Stories “Love & Adore” 6×6 paper pad
- white smooth cardstock
- white card base
- Neat & Tangled “Heart of Gold” stamp set
- Ranger Tim Holtz Distress Ink in Black Soot & Embossing
- Ranger Super Fine Detail Gold Embossing Powder
- embroidery floss
- foam adhesive
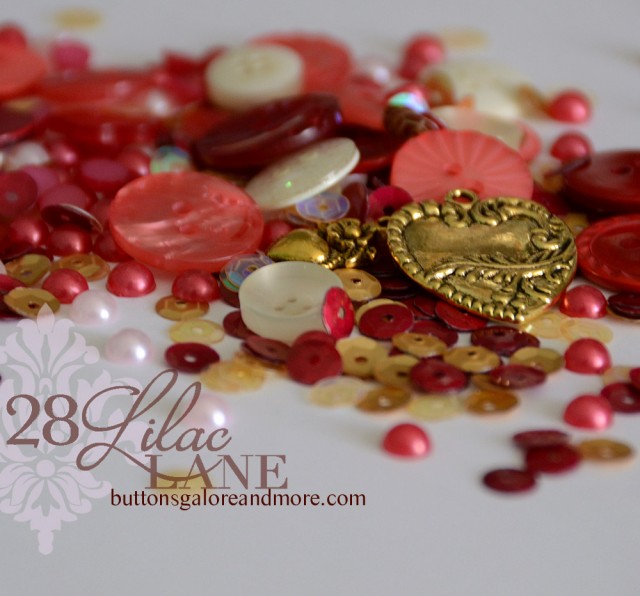
Valentine’s Day is the perfect time to use our 28 Lilac Lane embellishment kit called “Love Story”. This kit is packed full of beautiful rose and white buttons and seed beads, along with gold and rose pearls and sequins. For those extra-special greetings, there’s even a few charms and some ribbon, too. Love Story will make loads of valentines for the ones you love!
One of my favorite things to do with my 28 Lilac Lane embellishments is to customize my stamps with them. I love stamps, but it can be difficult to create different looks using the same image repeatedly to get value out of it. Adding buttons, sequins, pearls, or beads over an image can help make it look like an entirely new design!
This clean and simple geo heart valentine card design is very quick and easy to make with only a few basic supplies. It truly is only a ten minute project! Or it can turn into twenty minutes if your cat gets up on your work table and knocks over your entire container of beautiful “Love Story” embellishments so you have to clean them up. (Let’s not talk about how I know that…)
How to make a geo heart valentine card:
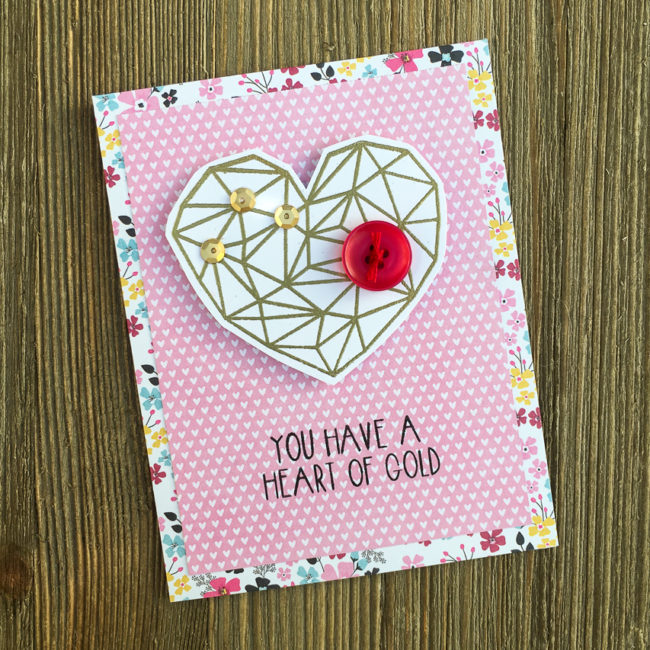
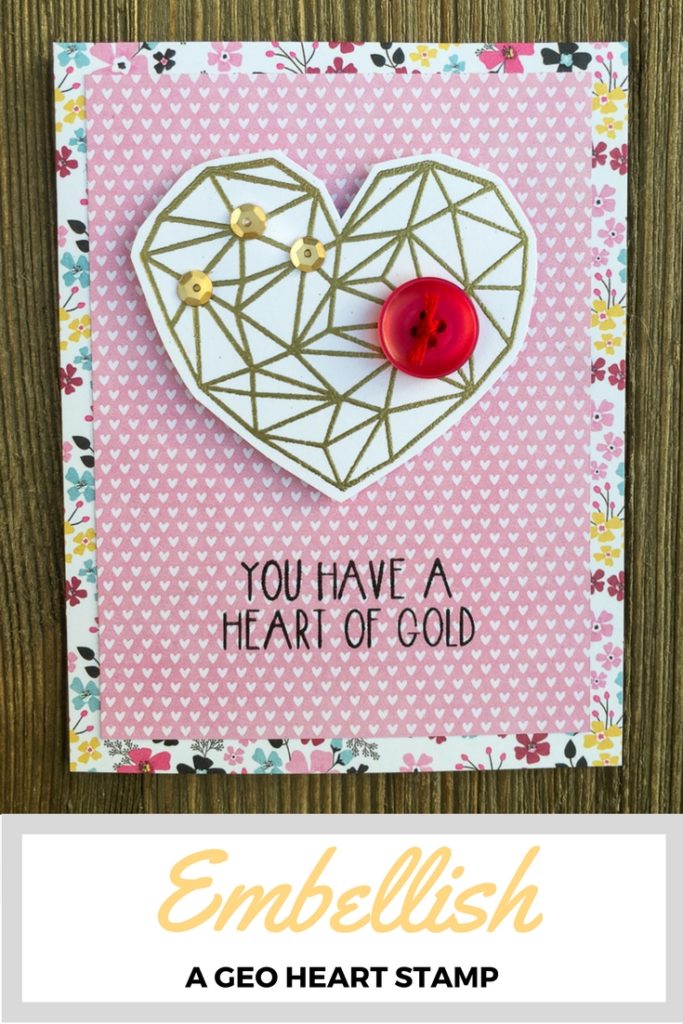
To make this geo heart valentine card, I cut my floral paper to the size of the card front. Then I glued it down to the blank white card base. I cut the heart print paper a half inch smaller each direction, and glued it centered on top of the floral paper. To finish preparing the card base, I stamped the sentiment in black ink on the center of the bottom of the card front.
I stamped the geo heart design on white paper with embossing ink, and then heat embossed it with gold embossing powder. I used fine pointed scissors to cut out the heart. Don’t worry if your hand cutting skills aren’t the best! Since this heart doesn’t have super smooth curves, it’s quite easy to hand cut.
To embellish the heart, I glued a few gold sequins at the intersections of lines in the geo heart. Then I chose a nice big rose button for a big pop of color, and then tied it off with matching embroidery floss before gluing it down. Finally, I used foam dot adhesive to attach the heart to the card front.
Get Extra Life from your Stamps with Embellishments!
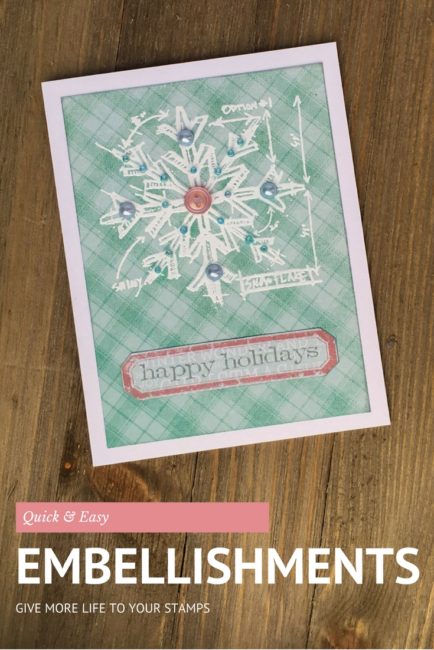
Stamps are a great investment because they are a tool that can be used over and over again. However, using them over and over again can quickly get boring…so how do you spice things up and put the fun back in your stamps again? 28 Lilac Lane has the answer!
Supplies Needed:
- 28 Lilac Lane Cotton Candy Embellishment Bottle
- PPA Matte Adhesive
- My Mind’s Eye “Sugar Plum” 6″ x 6″ paper pad
- White cardstock
- Ranger Tim Holtz Distress Ink in Iced Spruce, Victorian Velvet, and Embossing
- Ranger White Embossing Powder
- Stamper’s Anonymous by Tim Holtz “Simple Sayings” stamps
- Stamper’s Anonymous by Tim Holtz “Christmas Blueprint” stamps
One of my favorite ways to make my old stamps look new again is to embellish them! And with the 28 Lilac Lane embellishment bottles, I have the choice of seed beads, sequins, flat back pearls, and buttons to embellish my stamps.
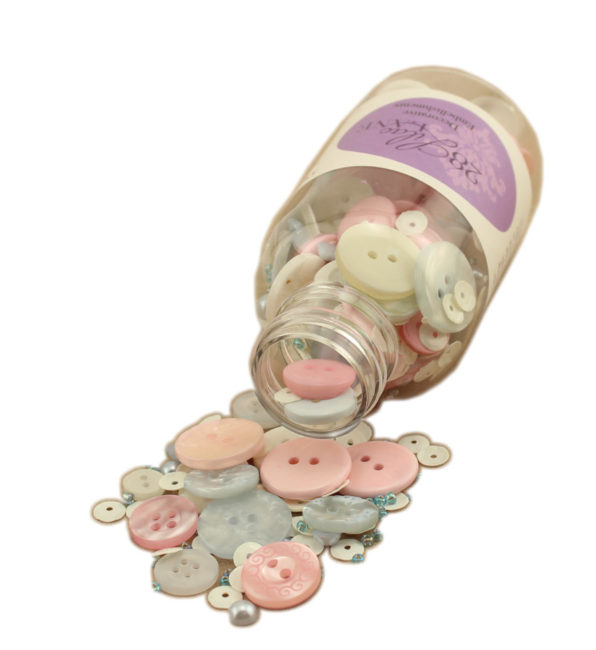
I chose the Cotton Candy bottle because it matched my paper pad. [The 28 Lilac Lane “Cotton Candy” embellishment bottle is available at the our online store, Scrapbook.com, A Cherry On Top, Ellen Hutson, Simon Says Stamp, Create for Less, and others, or check your local retailer].
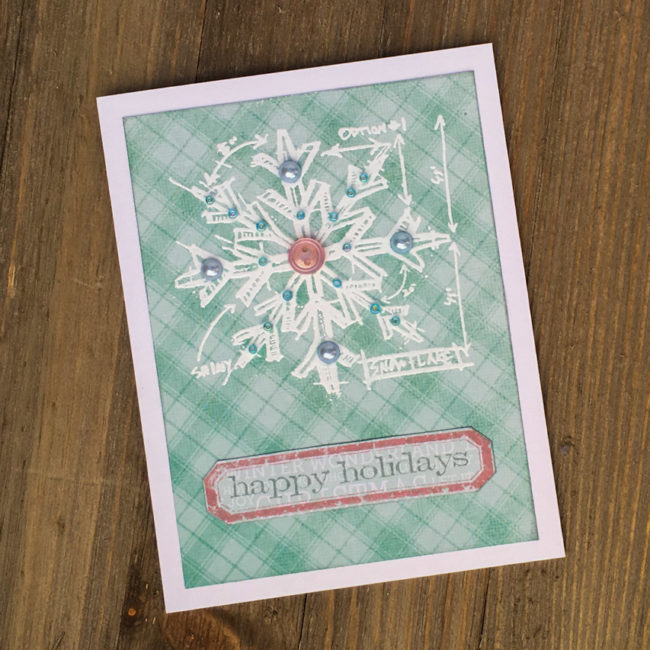
To create this card, I first made a card base by folding a half sheet of letter sized cardstock. Then I cut a 3.75″ by 5″ piece of the blue plaid paper, and inked the edges in Iced Spruce before adhering it in the center of the card front.
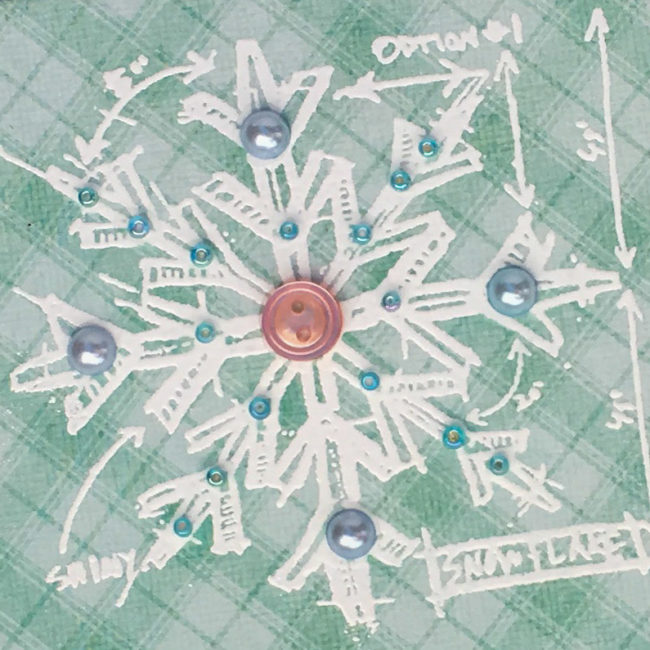
Next I used embossing ink to stamp the snowflake design on the top of the card front, and heat embossed it with white embossing powder. Once the heat embossing was cool, I selected embellishments from the Cotton Candy bottle and adhered them with small dots of clear drying white glue.
The sentiment on the bottom of the card front was created by first stamping the label outline in Victorian Velvet on the pale turquoise patterned paper. Then I cut out the label using scissors, close to the edge of the stamped label. I stamped the sentiment in Iced Spruce, and adhered the label to the card front.
What stamps do have that could be given new life with embellishments?
Send a Retro Merry Christmas Card Wish!
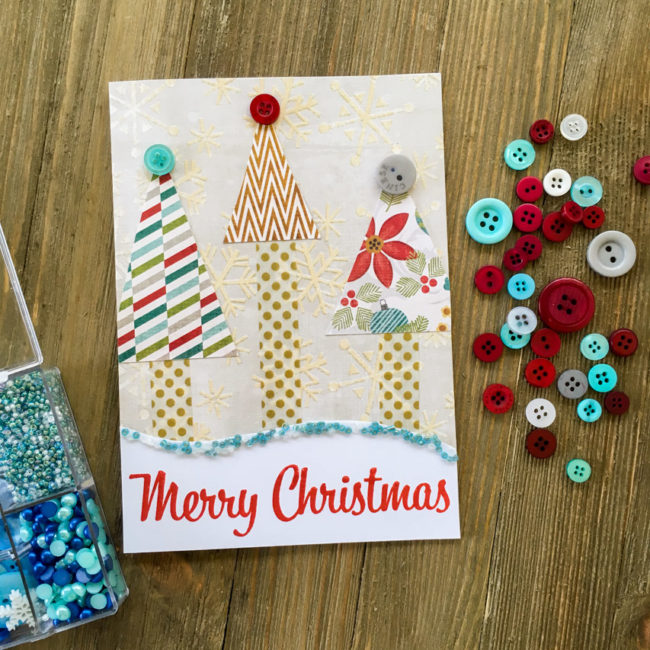
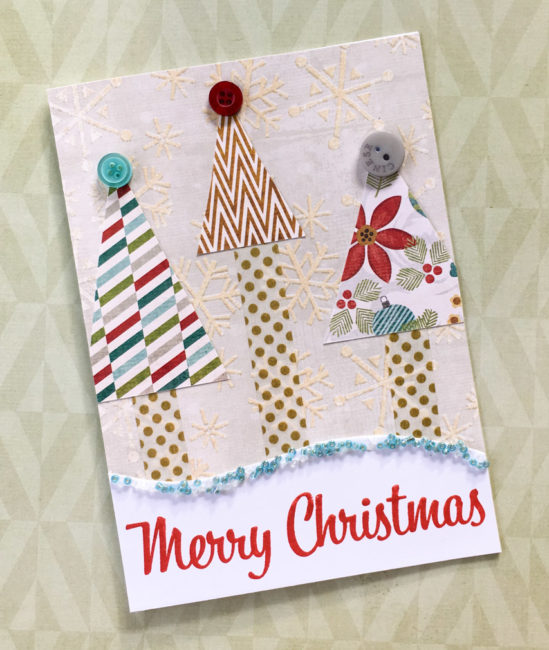
Tis the season to be jolly! Today I’m here to show you how to combine two of our holiday products that have a turquoise toned blue in their palette to make a fun retro Merry Christmas card!
Supplies Needed:
- patterned paper
- washi tape (or patterned paper)
- red ink
- Merry Christmas stamp
- white cardstock
- clear drying glue (such as PPA Matte Adhesive)
This project pairs seed beads from our beloved 28 Lilac Lane “Let It Snow” embellishment kit with buttons from our new “Cool Winters” Button Basics. With similar tones of blue, these two coordinate together beautifully to add a pop of trendy color to holiday projects of all kinds.
This card is 5″ by 7″, so to start my retro Merry Christmas card I cut the snowflake background paper to that size.
Next, I cut a 5″ wide strip of white cardstock that was a few inches tall. I stamped “Merry Christmas” on it with red ink, centering the image near the bottom. Then I used scissors to cut the top of the sentiment block into a wavy design.
To create the beaded edge, I started by spreading a bead a white glue along the edge. Then I sprinkled seed beads over the glue until it was covered, and set the sentiment block aside to dry.
Cutting the trees is easy! I simply used three scraps of paper and cut them into various sizes of triangles. The tree “trunks” are made from washi tape (but could also be made from strips of paper). Some of the tree triangles hung over the edge, so I just snipped them off. Once those elements were adhered in place, then I used liquid glue to adhere three buttons as toppers for the trees.
Once the glue holding the seed beads was dry, then I adhered the sentiment block across the bottom.
To finish my card, I used white cardstock to make a blank card and then adhered the finished card front onto it.
I hope this cheery little retro Merry Christmas card greeting will help you brighten the holidays of someone special!
Make a Watercolor Card with new Coral Reef embellishments!
A few weeks ago we introduced you to our six new 28 Lilac Lane embellishment bottles. Candy Corn, Winter Wonderland, Yuletide Greetings, Savannah Stroll, Through the Woods, and Coral Reef embellishments bottles are currently shipping, just in time for holiday projects and stocking stuffers!
Today, I’m here to show you an up close look at a project by 28 Lilac Lane designer May Flaum! This project uses the gorgeous and versatile 28 Lilac Lane Coral Reef embellishment bottle, a blend of coral pink and shades of green that is seasonal year round.
The delicate tones of Coral Reef are perfect for using with watercolors. With its natural floral color palette, Coral Reef works beautifully for watercolor floral cards! In the video below, designer May Flaum shows how she paired her 28 Lilac Lane Coral Reef embellishment bottle with a stamp to create a quick and easy floral greeting!
Here’s a closer look at May’s finished card…just a sprinkling of Coral Reef embellishments takes this card from simple to simply fabulous! It’s simple, quick, and easy to do, but makes all the difference in the finished card.
Check with your Buttons Galore local retailer or visit our online store to get your 28 Lilac Lane Coral Reef embellishments today!
Make an Adorable Layout with Guest Laura Vegas!
Use 3D Buttons for a Quick Snowflake Card!
World Cardmaking Day is coming soon, and that means lots of crafters will be starting to think about making Christmas cards! Today’s holiday card idea uses 3D buttons to create dimension on a snowflake card that only takes minutes to make!
Supplies:
- Buttons Galore “Christmas Sparkle” 3D Buttons
- Buttons Galore “Cool Winter” Button Basics
- PPA Matte Adhesive
- Button Shank Remover
- Hero Arts “Stunning Snowflake” background stamp
- Hero Arts “Holiday Sayings” clear stamps
- White Acrylic Paint Dabber
- Dark Blue Ink
- Cardstock (Light Blue, Dark Blue, White)
- Card Base
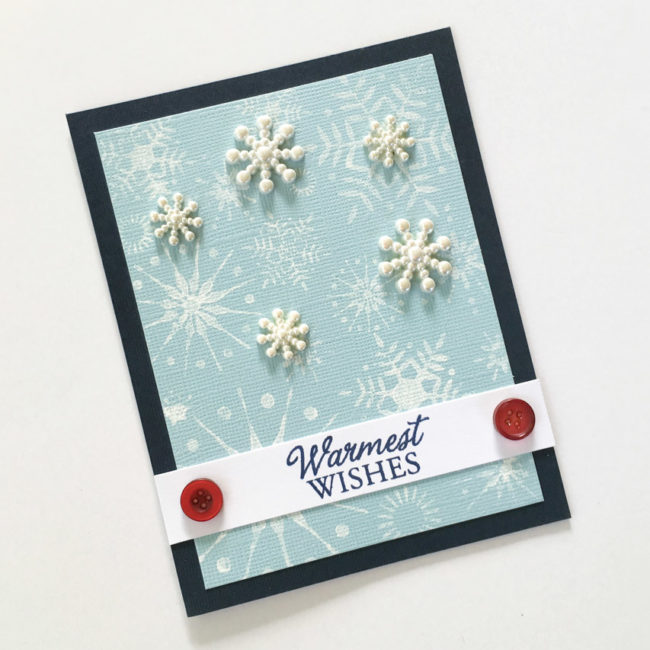
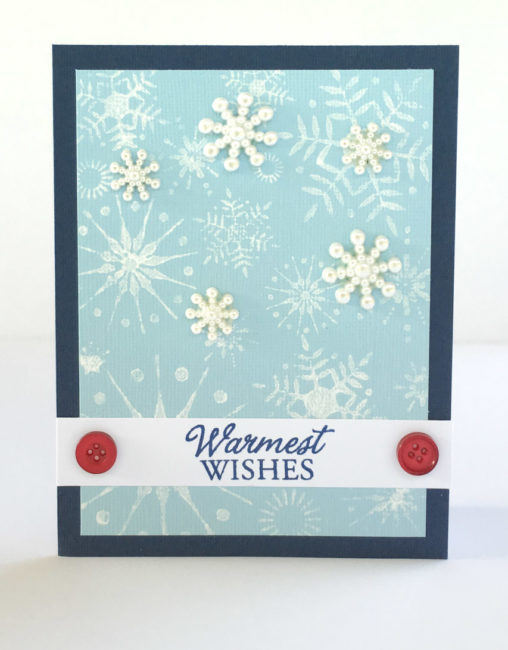
The key elements of this card’s design are very simple – a snowflake background stamp, stamped with acrylic paint, and 3D snowflake buttons. Layered together, these elements create a design this is simple, elegant, and dimensional.
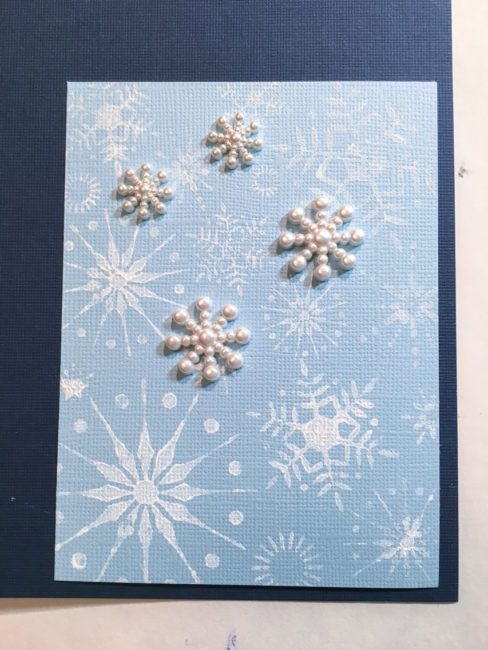
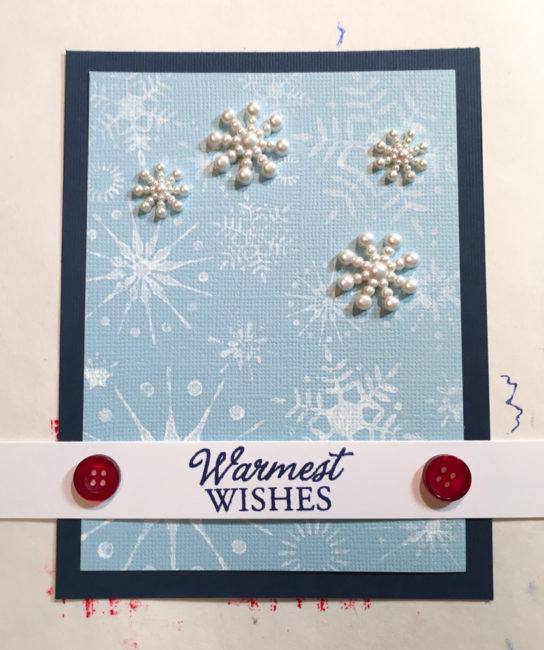
To begin your card, cut a 5.5″ x 4.25″ background for the card from dark blue cardstock. Then cut a 5″ by 3.75″ layer of the light blue cardstock. Paint the snowflake stamp with the acrylic paint dabber, and stamp it onto the light blue cardstock. One dry, adhere the light blue cardstock layer on top of the dark blue layer.
For the sentiment strip, cut a 3/4″ strip of white paper. If you stamp in the middle of that strip and then adhere it before snipping off the ends, it is easy to get your sentiment perfectly centered on the card front. Then you can arrange the red accent buttons around the edges of the sentiment strip and they will also be perfectly spaced!
For the final touches on your card, remove the shanks from the 3D buttons using a button shank remover. Then adhere the the snowflakes with liquid glue in random places on the card front. You can choose to place them to accent a specific stamped snowflake (as I did in the upper right of my card) or randomly in open areas between the stamped designs.
This holiday snowflake card is quick and easy to make. If you’d like to produce this card in volume for your holiday card list, these pearl snowflake buttons are also available in bulk via custom order from our customer service department.
Make a Wicked Halloween Card with 3D Bat Buttons!
That September chill is in the air, and that means pumpkin spice, apple cider…and Halloween on the horizon! Our 3D buttons make great accessories for your themed cards, and I’m here today to share an idea you can make with bat buttons from our Halloween Value Pack.
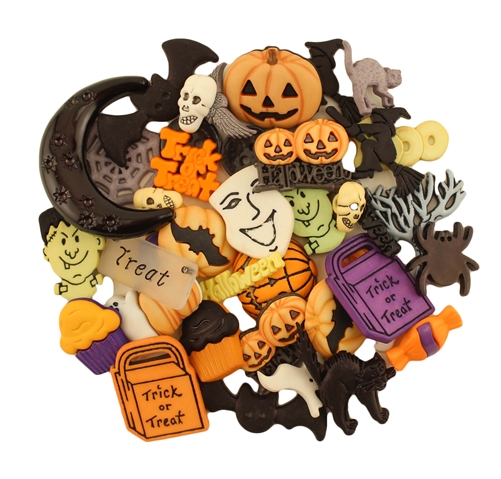
Our Halloween Value Pack includes approximately 50 assorted buttons. The buttons range from 1/2″ to 7/8″ in size and include shank and sew-through buttons. Designs include fun options like pumpkins, monsters, spiders, bats, and everything you need for your Halloween-themed projects!
Supplies:
- Buttons Galore Halloween Value Pack
- PPA Matte Adhesive
- Tim Holtz idea-ology “Materialize” 8×8 paper pad
- Tim Holtz idea-ology “Curiosities” Ephemera
- Tim Holtz idea-ology Small Talk Occasions stickers
- Ranger Tim Holtz Distress Ink (Pumice Stone)
- Blank Card Base
- Embroidery floss (black)
To create the base of the card front, cut a 4.25″ by 5.5″ piece of the black and orange paper. Adhere to the front of the card base. Cut a 3.75″ by 5″ piece of the text paper, and adhere it centered on top.
Select the bingo card and wicked flashcard from the ephemera pack, and adhere them angled in the corners of the card front. Adhere the skeleton ephemera on top of them.
Tie embroidery thread through the large black button from the Halloween Value Pack and glue it on top of the bingo card using PPA Matte Adhesive. Use the PPA Matte Adhesive to also attach the bat buttons from the Halloween Value Pack on top of the “wicked” flashcard.
To finish the card, select some sentiment stickers from the Small Talk sticker set and stick them down in the upper left corner underneath one of the bat buttons.
This quick and easy card is a fun way to say “boo!” to someone for Halloween! Who do you want to send a friendly scare to this year?
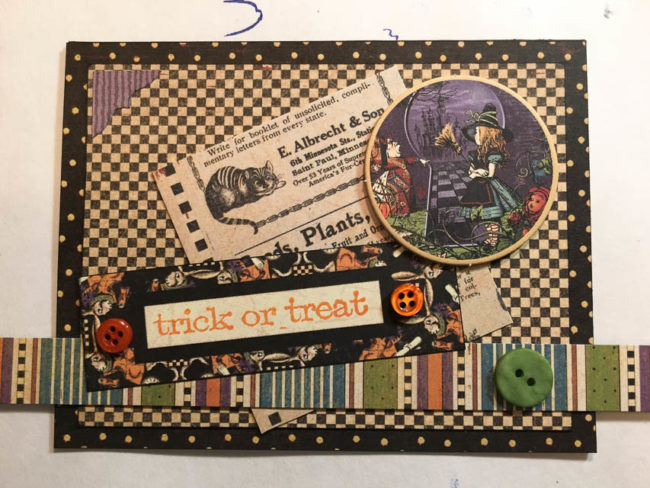
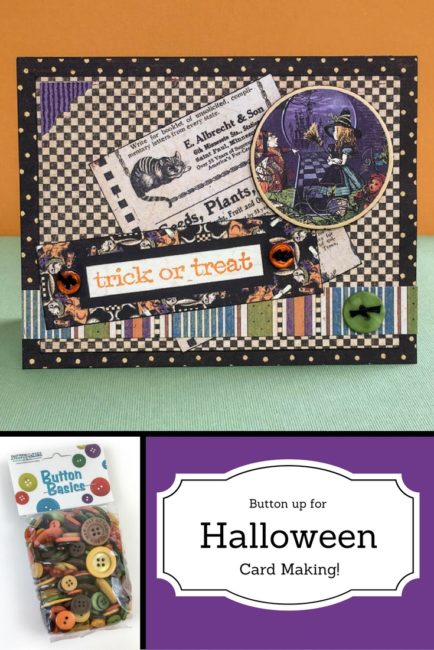
Make a Halloween Card with Fall Festival Button Basics!
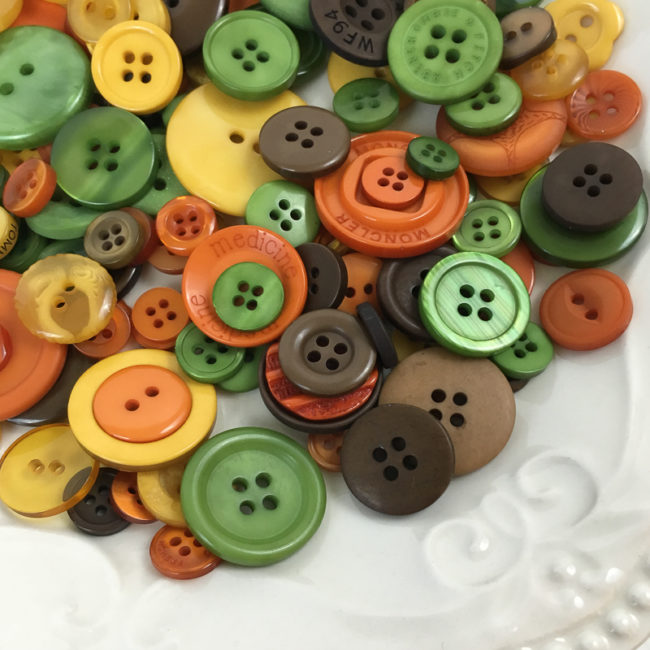
This week, we’re introducing you to six new Button Basics assortments! One of the new assortments is a vintage fall palette called Fall Festival, perfect for making fall, Halloween, and Thanksgiving projects.
Fall Festival is a mix of brown-tinged tones of green, orange, and yellow, along with coffee shades of brown.
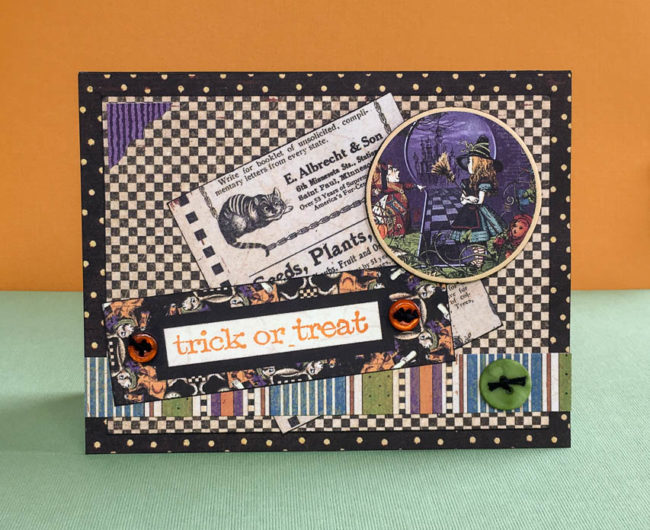
I decided to pair Fall Festival with Graphic 45’s new Halloween in Wonderland collection to make a retro fun Halloween card!
Supplies Used:
- Buttons Galore Button Basics in Fall Festival
- Graphic 45 Halloween in Wonderland collection
- Stamper’s Anonymous by Tim Holtz “Simple Sayings” stamps
- Colorbox Fluid Chalk Ink in Blackbird & Harvest
- Black embroidery floss
- PPA Matte liquid adhesive
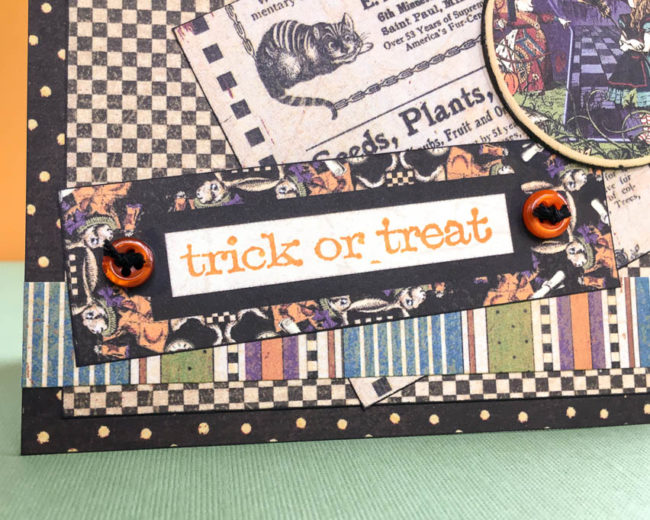
I used tiny orange buttons from Fall Festival, to visually “attach” the faux bookplate that is printed on the label from one of the cut out sheets in the Graphic 45 “Halloween in Wonderland” collection. The buttons highlight it as the sentiment block for my card, and Fall Festival’s color tones coordinate beautifully with the paper collection.
All of my buttons on this card are attached with PPA Matte adhesive, my favorite liquid adhesive for working with buttons and embellishments. It’s just the right consistency – thick enough to hold an embellishment in place, but not so thick that you can’t move it around to get it where you want it. It holds securely, and dries perfectly clear so there’s no need for anxious moments it a little spreads out from underneath your embellishment!
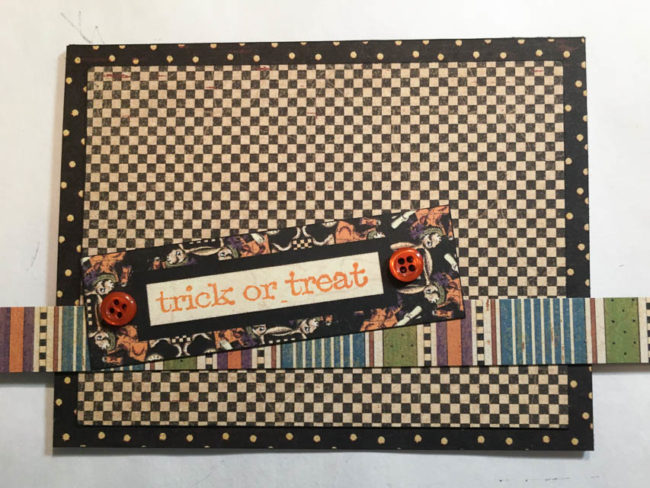
When making a project like a card, I frequently like to start with the most important elements of the design first, and then build around them. That means that I often am starting with elements that will be on top – like this sentiment block – and then working down in my design as I fill in around it. To do this, I lay pieces out without adhering them as I work.
I started by creating my background, and then putting in place the sentiment and the border that I wanted to anchor it. This of course, left me with a lot of open area made up of that super busy tiny checkerboard pattern. It overwhelmed my sentiment so I needed to tone it down.
To fix this, I cut a block of a lighter, larger pattern and inserted it behind the sentiment block. Then I used a piece of decorative chipboard from the “Halloween in Wonderland” collection to fill a bit more of the space and add some color. A purple striped corner frame sticker completed the design.
I did all of that without adhering anything except for the purple sticker! So what do you do when you have everything arranged just how you want – but nothing is adhered? I grab my phone and just snap a picture like the one above. Then I can take the design apart to glue everything down, and use the photo as a guide to get everything back how I wanted it! It’s just another way we can turn the camera that is always in our pocket into a creative tool.
Make A Thank You Card with new 28 Lilac Lane Fall Mix!
This week, we’re introducing a special Limited Edition 28 Lilac Lane “Fall Mix” embellishment kit by May Flaum! This kit is only available from the Buttons Galore online store – and stay tuned to the end to learn how to get a special introductory discount!
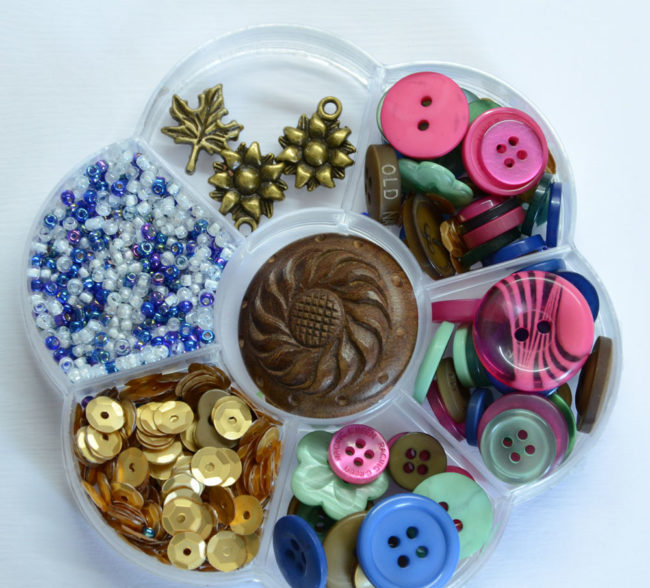
With jewel tones, soft green, brown – and gold! – this color mix by 28 Lilac Lane designer May Flaum is perfect for embellishing gorgeous fall projects that aren’t quite right for the traditional rust and orange tones of fall.
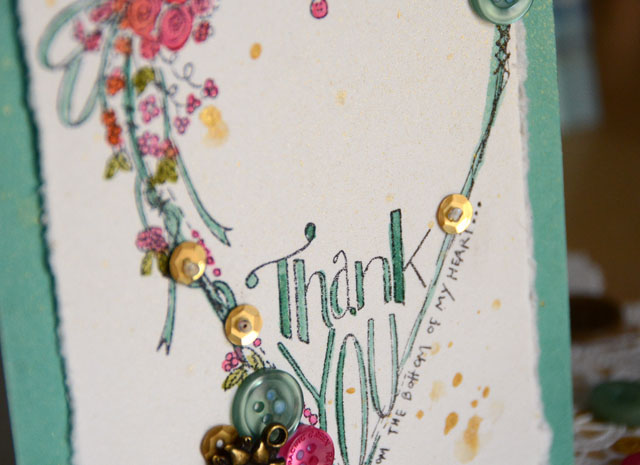
Here’s a peek of a thank you card that May created with the new 28 Lilac Lane Limited Edition Fall Mix, using a stamp from Tammy Tutterow:
For the full how to tutorial about the card, check out the video below!
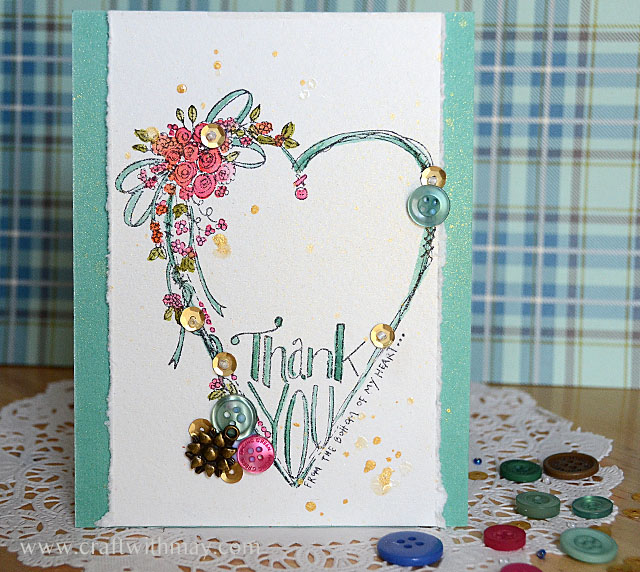
And finally, here’s May’s finished thank you card. The stamp is pretty by itself, but embellished with a few sequins, buttons and charms, it is extra special! This beautiful card makes the perfect thank you for any occasion.
The new 28 Lilac Lane “Fall Mix” designed by May Flaum is a limited edition, so make sure to get it while it lasts! Use coupon code “LL400” until 11:59pm eastern time on Friday to get $1.00 off. Better yet, this coupon can be stacked with the Beat the Clock sale going on sitewide now through Saturday. The sooner you order, the more you save!
And don’t forget that orders over $30 get free U.S. shipping! We’ve got the entire collection of 28 Lilac Lane embellishments in stock, as well as six fabulous new Button Bonanza collections (including seasonal blends for Halloween and Christmas) as well as our perennial favorites like our Button Basics, 3D buttons, and Haberdashery collections. Stock up now for Halloween and Christmas projects and save!
Send an Extra Big Thank You Card!
It’s always a good idea to have some thank you cards on hand to share your gratitude with others. This big thank you card featuring 28 Lilac Lane products will make an impact at a full 6″ by 6″ in size!
Supplies Needed:
- 28 Lilac Lane “A New Leaf” embellishment kit
- Button Shank Remover
- PPA Matte Adhesive
- White Smooth Cardstock
- Stencil One stencil (Mum)
- Tim Holtz Distress Ink Pads (Squeezed Lemonade, Mustard Seed)
- Tim Holtz Mini Ink Blending tool
- Black Ink
- Simple Stories “I am” paper (Thankful)
- Pink & Main stamps (Many Thanks)
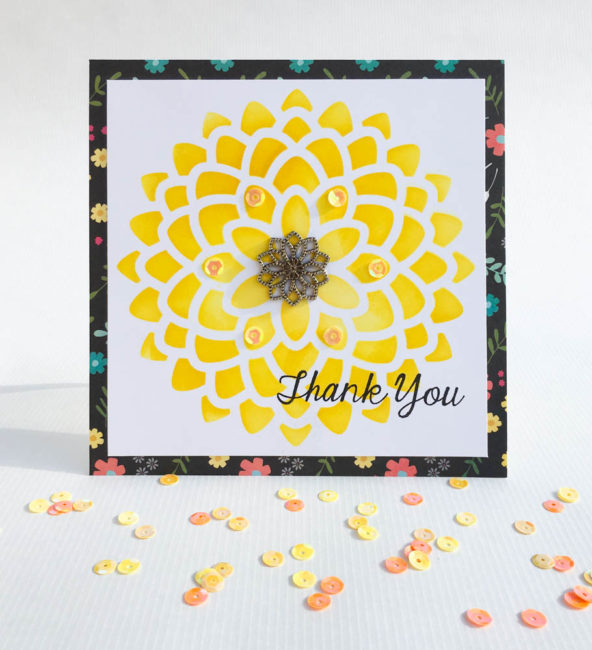
When I was making this, I knew that I wanted a button to decorate the center of this design but wasn’t sure what until I saw this rosette button in the “A New Leaf” kit while I was creating my card. It’s very ornate, but it matches almost perfectly the mum design! The visual repetition that it creates is perfect. I could also have taken a regular button and tied it on with contrasting thread for some pizzaz.
I also like using sequins that are the same color as the background that I place them on as an embellishment! This technique adds a bit of shine and dimension to the design without the sequins being too garish. On this card, I used the sequins to create a sun kissed circle of highlight around the center of the flower.
To begin making your extra big thank you card, cut a piece of white smooth cardstock that is 6″ x 6″. Center the stencil on the cardstock. Holding firmly, begin to scrub the lighter color of ink (squeezed lemonade) into the design with the ink blending tool. A circular motion blends best.
Work the Squeezed Lemonade into the center half of the design and then switch to the darker color (Mustard Seed) for the outer half of the design. Once all of the design has been inked, switch to a clean blending foam and begin to rub in a circular motion to blend the colors together where they meet.
Once the ink is dry, trim the white cardstock so that it is just slightly larger than the stenciled mum design. Cut a piece of matching patterned paper that is 6″ x 6″ in size. Adhere the stenciled design on top of the patterned paper and attach them both on top of a card base. (The card base can be made by folding a 6″ x 12″ piece of paper in half.)
Stamp the sentiment in the bottom corner of the card. Cut the shank off of the featured button and glue it into the center of the stenciled design with PPA Matte adhesive. This adhesive is great for working with our buttons – it will hold the button in place but will dry clear and invisible if it leaks out around the edges of the button or through the holes in the button!
For the finishing touch on your big thank you card, select a few yellow sequins from the assortment in the 28 Lilac Lane “A New Leaf” embellishment kit, and glue them onto the design around the center of the flower using PPA Matte.
Floral design cards are great for many occasions. Instead of “thank you” consider substituting sentiments for birthdays, housewarming, or other occasions. This easy card will bring a smile to someone’s face!
Batter Up for a Baseball Father’s Day Card!
Is the dad in your life a sports fan? This baseball Father’s Day card may be the perfect way to send your love on Father’s Day!
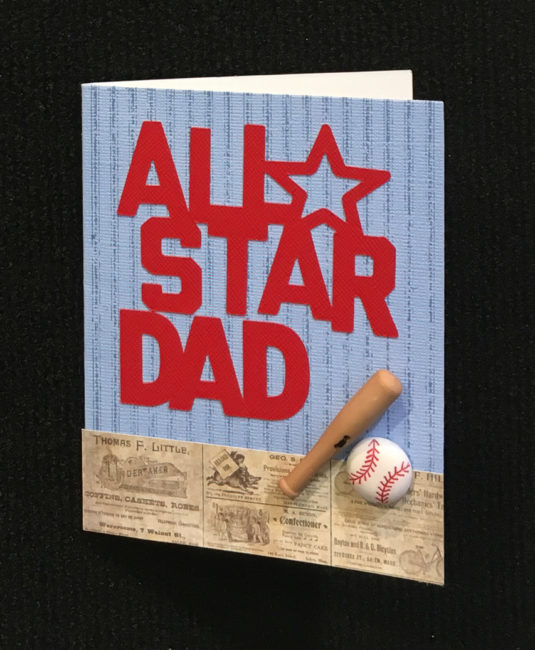
This simple Father’s Day card is based on only two main elements: a die cut and some of our fun 3D buttons!
A plain blank card takes on a baseball pinstripe look with the help of a background stamp. The texture of the blank card keeps it from stamping completely perfectly, giving it a vintage distressed look. A strip of patterned paper also helps to create a vintage vibe, which is perfect since baseball is a sport with such a strong sense of history. The die cut is cut from a red cardstock that matches to stitching on the baseball, and which creates a nice contrast to the blue. Once that is done, all that is needed is to attach the buttons. (The bat is attached with some embroidery floss, and the ball is glued.)
This baseball father’s day card could easily be themed for another sport with only a few changes. Simply change out the baseball buttons for other Buttons Galore sports themed ones such as basketball, soccer, or football, and then change the background stripes for stars!
Supplies:
- Buttons Galore #4065 Baseball 3D buttons
- Hero Arts Large Canvas Stripes Background stamp
- Tim Holtz Distress Ink in Faded Jeans
- Cricut Explore machine & cut file
- Bazzill cardstock (red)
- Blank card (blue)
- Tim Holtz “Crowded Attic” Paper Stash
- embroidery floss (brown)
Send a Happy Button Rainbow Card!
I spent the weekend creating new storage for my buttons that has them arranged in rainbow order. After playing with a giant rainbow of buttons for hours, it left me in the mood to create a button rainbow card for my project today!
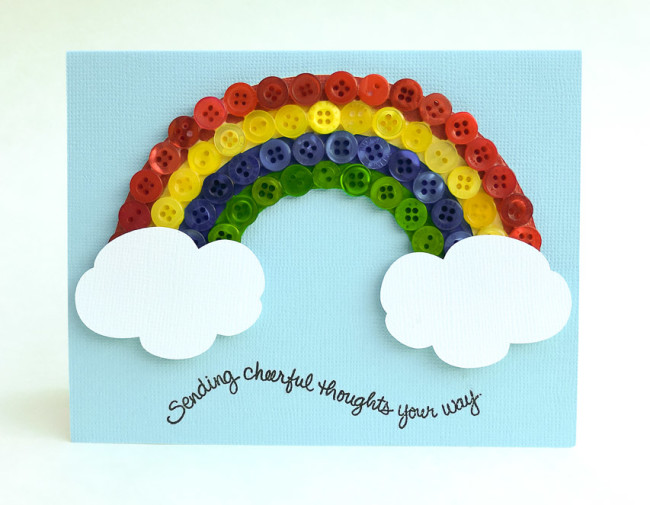
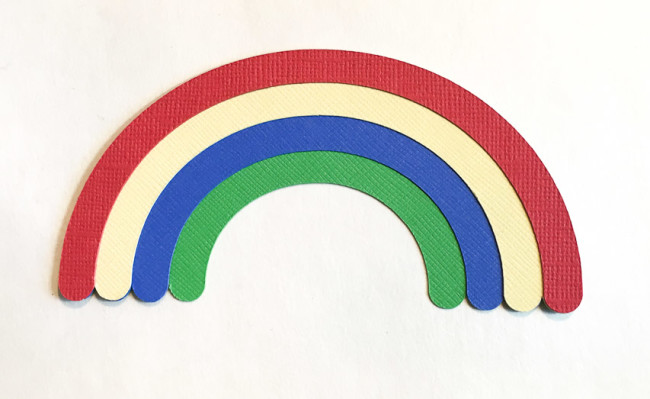
A rainbow like this is just a simple button collage. The trick is to get the curves lined up and space correctly. I made that simple for this project by using a die cut as a basis for the collage. Because I cut the die cut from cardstock that matched my buttons as closely as possible, the cardstock background will “fill in” visually between the buttons.
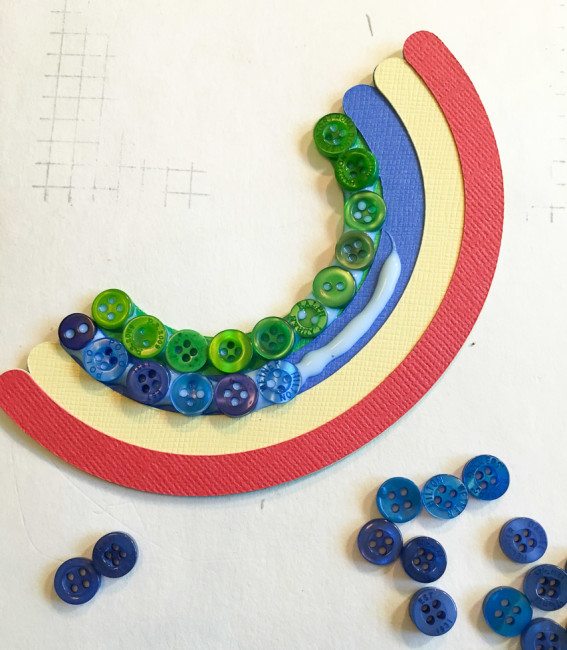
Assembling the button collage is simple. Working one row at a time, I placed a line of glue along the row for each color. Then I selected small buttons to place along the row. It helped if the buttons were somewhat alternated in position from the previous row, since then I could put a slightly larger button into the gap created by the curves. I let each row dry until it was adhered firmly before beginning the next row to make sure that I didn’t accidentally displace the previous row adhering the new one.
Once the rainbow was completed and dry, I adhered it to a blank card after first stamping the sentiment on the card. It was important to do the stamping first since the thickness of the button rainbow could make it difficult to get the stamp in position after it is adhered.
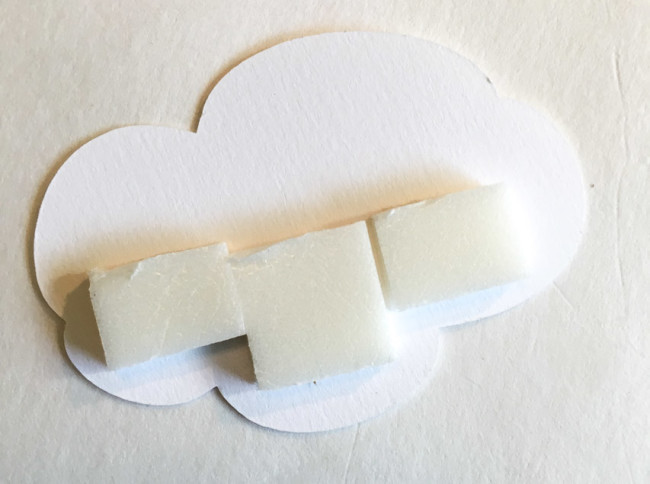
The final step was to adhere the clouds using 3D foam squares. I lined the squares up along the bottom of the clouds so they created a line across the center of the clouds. This edge butted right against the bottom edge of the rainbow when I adhered it. The top of the cloud doesn’t need adhesive because it is supported by the rainbow.
Supplies:
- Cardstock (red, yellow, blue, green & white)
- Card Blank
- Cricut Expore machine and cutting files
- Stampendous “Thoughtful Wishes” stamps
- Black Pigment Ink
- Therm-o-Web 3D adhesive squares
- PPA Matte Adhesive glue
- Buttons Galore Button Bonanza in Primary (BB43)
I hope you enjoy my button rainbow card! It’s an easy way to send some cheer to someone you care about!
Make A Watercolor Floral Mother’s Day Card
Mother’s Day is just around the corner, and what better way to tell Mom how much you appreciate her all year through than with a handmade card?
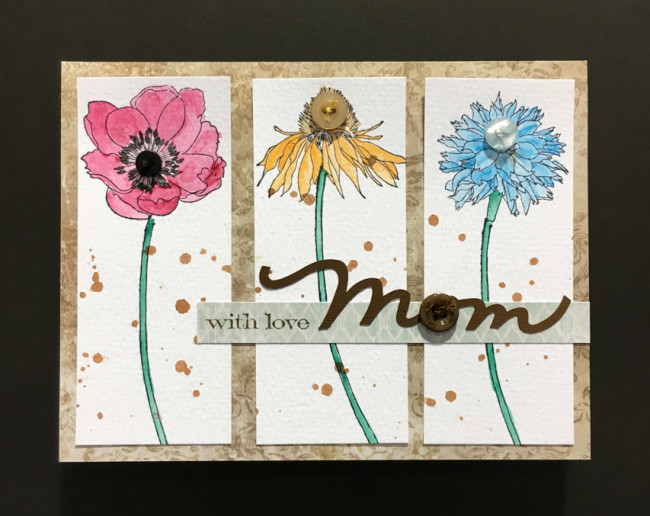
This fun and easy watercolor floral Mother’s Day card will show mom just how much you care!
Start by stamping the flowers on watercolor paper with permanent ink. Paint with watercolors. Remove the lid from the ink spray and use it to drop ink splatters onto the watercolor paper. Finish the flowers by adding button centers to them.
Cut and fold the cardstock to make a card base. Cut a piece of patterned paper to cover the front. Attach the flower elements on it.
Cut a patterned paper strip. Stamp “with mom” at one end of it, and adhere it across the card front. Use the die cutting machine to cut out the word “mom”, and attach it over the strip. Finish it with a button covering the “o”.
Supplies:
- Ranger Watercolor Paper
- Ranger Archival Ink in Jet Black
- Tim Holtz for Stamper’s Anonymous “Flower Garden” stamps
- Tim Holtz for Stamper’s Anonymous “Simple Sayings” stamps
- Ranger Dylusions Ink Spray in Melted Chocolate
- Sakura Koi Pocket Field Sketch Box Watercolors
- Tim Holtz “Wallflower” Paper Stash
- Ranger Tim Holtz Distress Ink in Ground Espresso
- Cricut Explore machine and cut file
- Cardstock sheets in brown and white
- Buttons Galore Button Bonanza in Black
- Buttons Galore “Pet Store” Button Basics
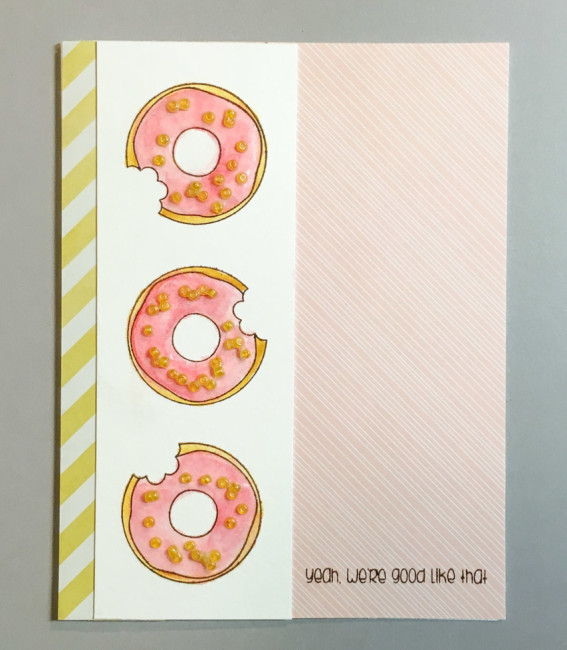
Send a Sweet Greeting with a Donut Card!
Sometimes you just want to send a card to say “hi” to someone special. This adorable donut card is a sweet way to do the job!
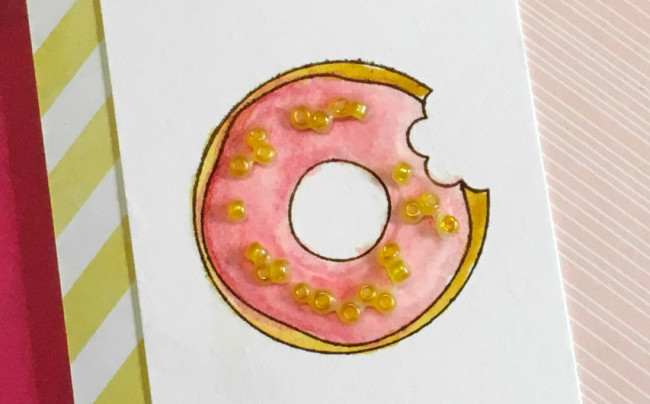
The new 28 Lilac Lane embellishment kits are now shipping, and they are perfect for cardmakers: buttons, sequins, trim and charms. They also contain seed beads, something unfamiliar to some cardmakers. In addition to making great shaker boxes, seed beads can be combined with glue to make great shiny embellishments. On this donut card, they give the appearance of sprinkles (or nuts).
Supplies:
- Simple Stories “Life in Color” 6×6 paper pad
- Pink & Main “Good Like That” stamp set
- Blank Card
- Watercolor Paper
- Ranger Archival Ink in Potting Soil
- Water Brush
- Sakura Koi Pocket Field Sketch Watercolors
- Artquest PPA Matte Adhesive
- 28 Lilac Lane by Buttons Galore Embellishment Kit – Tropical Twist
Instructions
Cut pink striped paper to fit card front. Adhere. Cut 1″ strip of yellow stripe and attach along fold of card.
Cut a strip of water color paper that is 1 7/8″ wide and the same height as the card front.
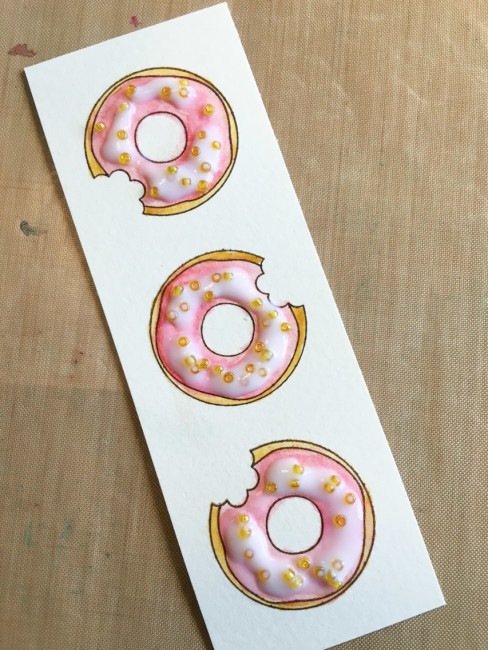
Using Archival ink, stamp three donuts on the watercolor paper.
Paint the donuts with the watercolors.
Spread a thin layer of white glue (I use Artquest PPA Matte) on the donut frosting. Scatter yellow seed beads from the Tropical Twist kit in the glue. Add a second layer of glue on top of the beads (above).
When dry, the glue will largely disappear. Any remnants that remain visible (as around some of the beads in the photo above) will just look like donut glaze!
Adhere the donut strip over the seam between the two patterned papers on the card front.
Stamp the sentiment in the lower right corner of the donut card front.
The new 28 Lilac Lane products are now shipping to stores! Look for them in a store near you!
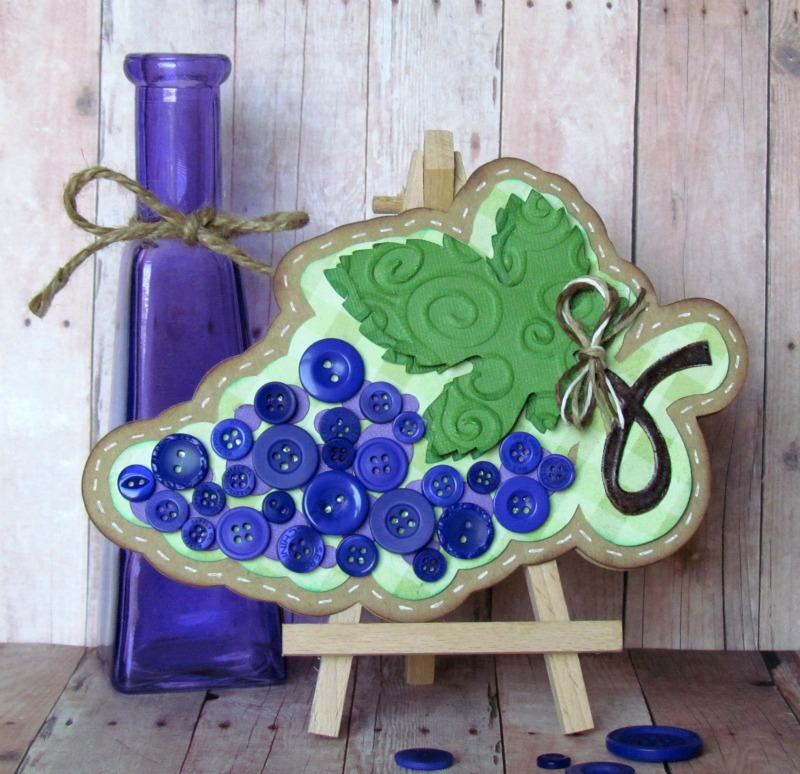
Button Grapes
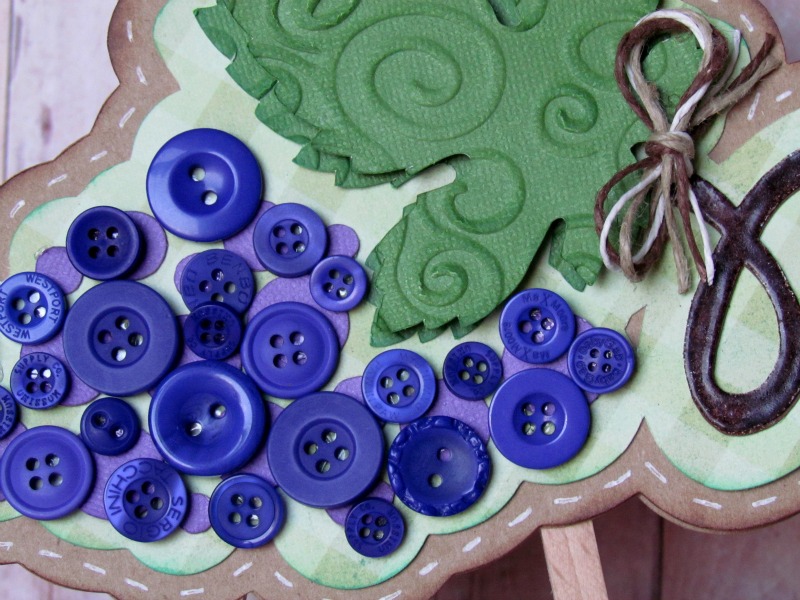
When I received my package of Laura Kelly’s pretty Purple Possibilities buttons (say that 3 times), I knew instantly, I was gonna create a card with a cluster of button grapes.
Cluster of Button Grapes Card
To make my grape card, I used a Sarah Bailey Grape cut file then adhered Laura Kelly’s Purple Possibilities buttons over the grape die cuts. Aren’t those grapes just poppin’ out at ya now?
Add buttons to cards for dimension
Adding buttons to a card really is an easy way to provide that fun pop of dimension.
Buttons Galore Supplies:
Supplies Used to make Button Grapes Card:
- Kraft Paper & Green Cardstock
- My Mind’s Eye Paper
- Mini Glue Dots
- Ultra Thin Glue Dots
- Sizzix Swirls Embossing Folder
- Colorbox Ink
- Brown Embossing Powder
- White Gel Pen
Like Me on Facebook!
Quick and Easy Gifts – Make a handmade note card set
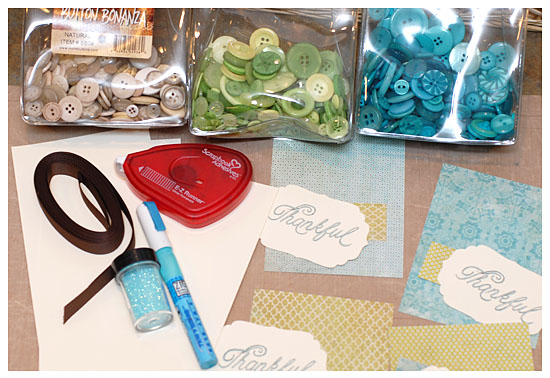
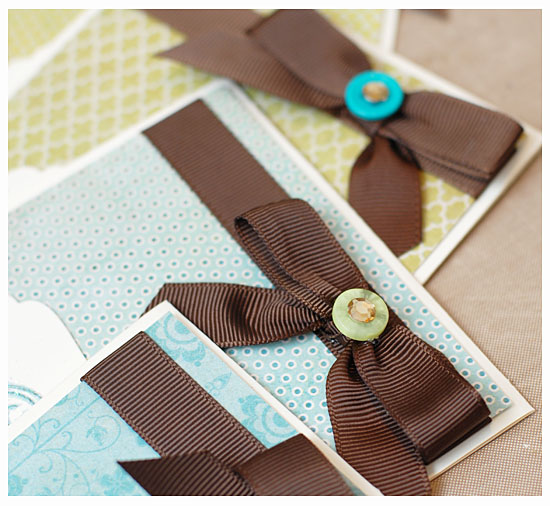
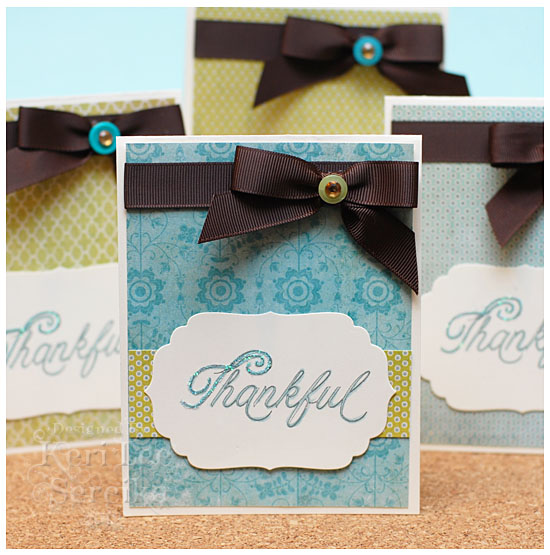
It’s that time of year where we all start looking for quick and easy gifts. Being able to make them homemade is a bonus!!! Why not make a handmade note card set? Mine is not Christmas themed, or Fall themed…I like generic…it works well when I am in a pinch! I can just grab & go! BUT I do like to make my gifts in good seasonal colors. So for this set I thought I would show you my “thought process” on how to make a set of cards in a quick and easy assembly fashion. :) Just add in your papers, matching buttons, ribbon and bling of your choice and you are all set and ready to get creating your very own quick and easy gifts!
Gather up supplies. I generally like to pick my papers first, then cardstock, ribbon and embellishments. As you can see, I have chosen three different colors of Button Bonanza Bags just to be sure I have the perfect color when the time comes for embellishing. You can also see I have printed out my sentiments panels using Duetica Lettering Arts Studio’s Mandolyn Font in the Outline feature then colored it in using my Copic markers. Another neat trick to PERFECTLY matched sentiments that say JUST what you want in just the perfect size for your project. :) Once I was done coloring them in I die cut each sentiment panel using Spellbinders Nestabilities and I was all set!
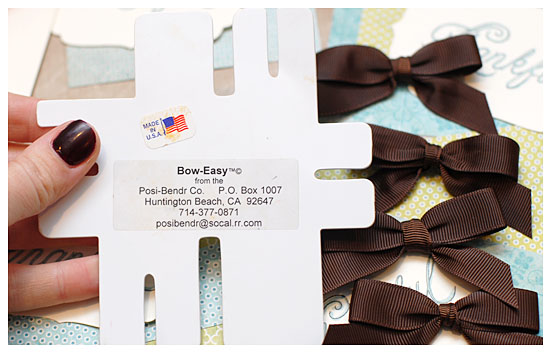
Using a Bow Easy Ribbon Tool REALLY helps make the set look polished, all of my bows look exactly alike!
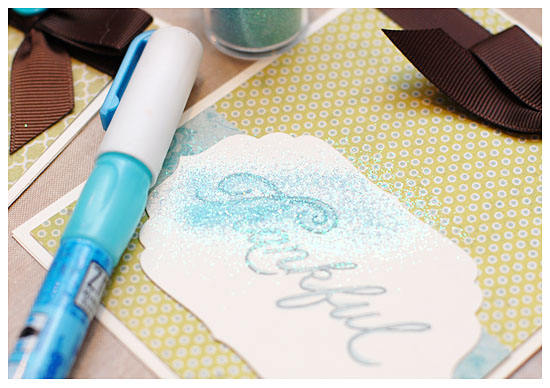
Add an extra touch by outlining the first letter using a glue pen then shake on a bit of coordinating glitter.
Another great touch that really doesn’t take too long is to embellish the embellishments! I love to add a bit of bling to the center of my buttons.
And here you have it! A cute set that took less than an hour start to finish! Not bad….
altered buttons make great embellishments!
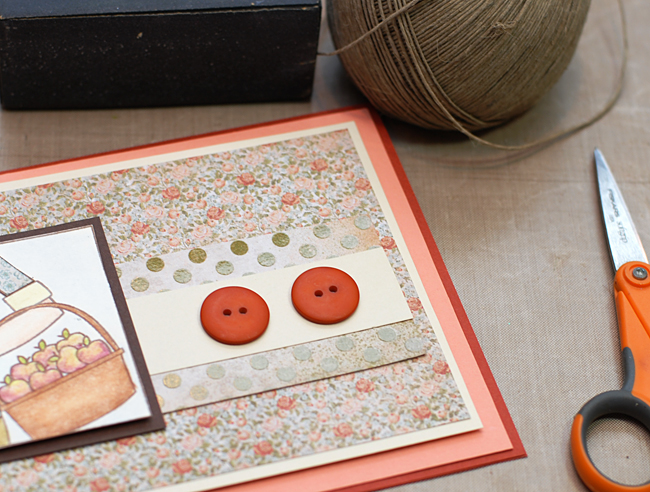
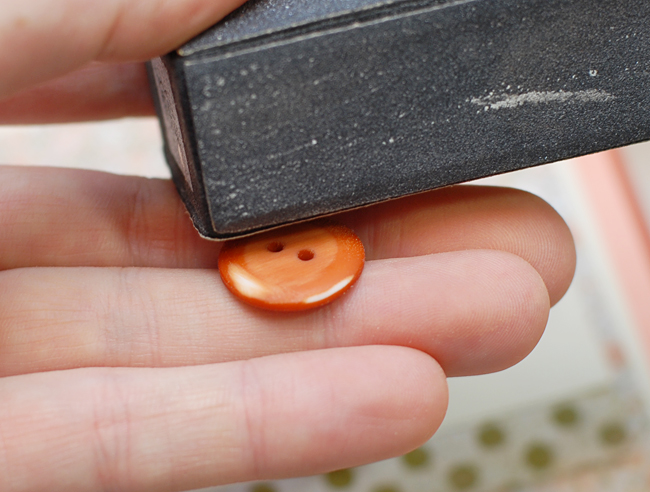
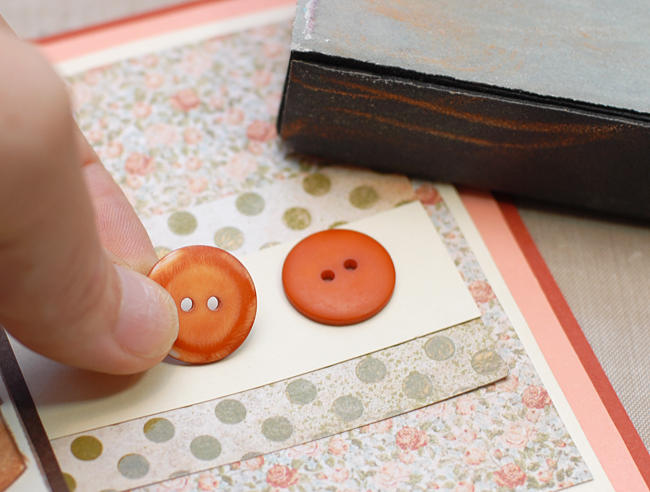
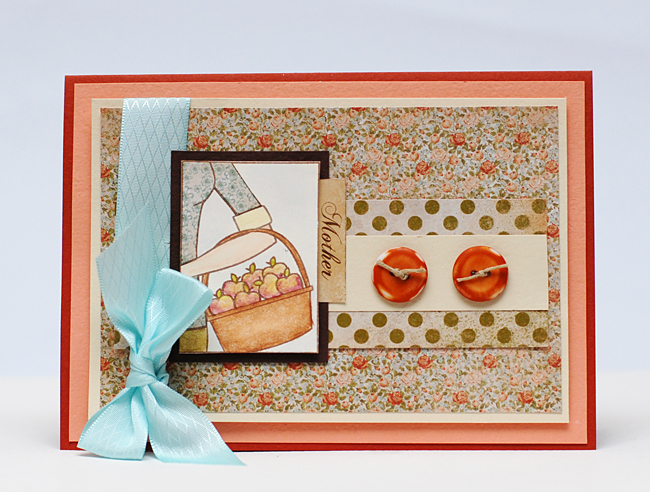
Today I thought I would bring you an Autumn themed card and share a few tips on how to alter buttons for embellishments. I know it is hard to believe Summer is passing and we are moving into the Autumn season? Creating distressed or altered buttons is not a new concept, that I know. But sometimes being reminded that creating handmade embellishments isn’t feasible and that altering embellishments is the next best thing! Here I will share with you one way I like to alter my button embellishments that takes just a few quick strokes of sandpaper in two different grits and you have an entirely new and interesting look to your buttons! I started with two buttons of the same size and color from the Gingerbread Assortment and then went to town!
The buttons I chose to use from the Gingerbread Assortment matched perfectly with my color palette however,
I thought they’d look good with a little “character”.
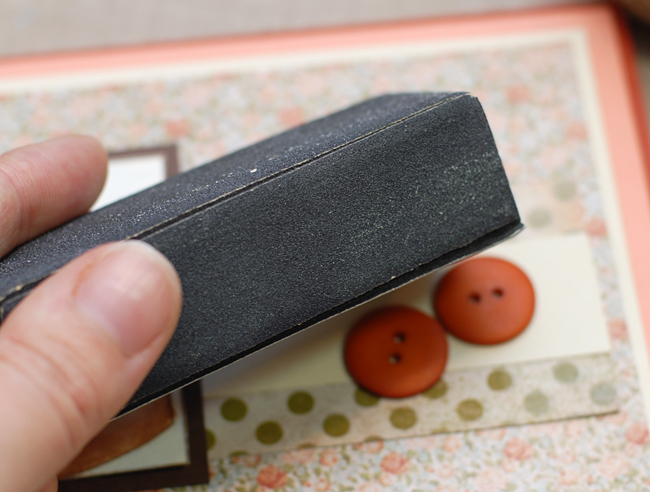
Starting with a rough grit side of the sanding block, sand the edges.
Next using a less rough grit, sand the surface of the face of the button to lightly distress it.
Notice the difference? It’s just a few simple steps to really personalize your button embellishments.
And the finished result!
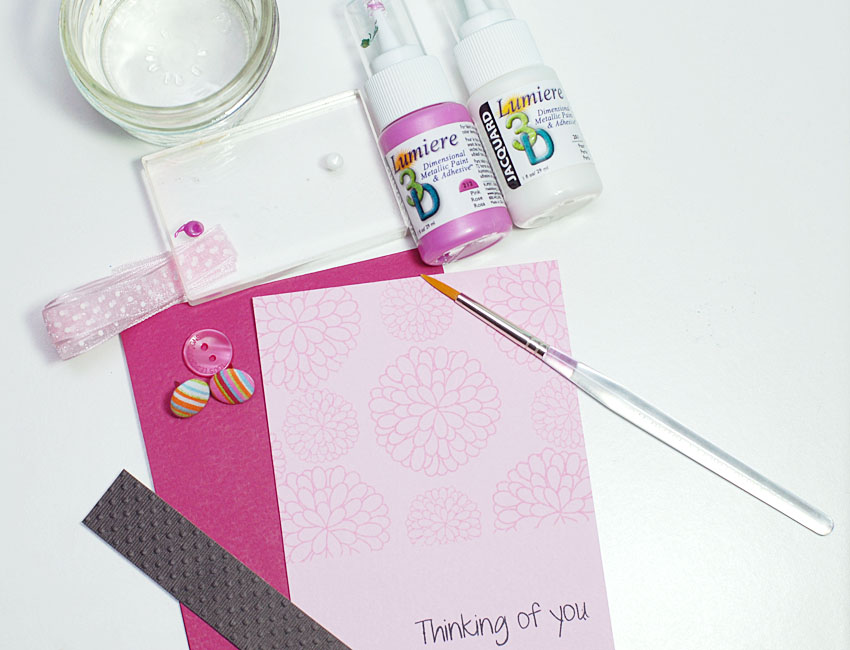
How to Watercolor using Lumiere 3-D, a shimmery way to paint!
Today I thought I would share a quick tutorial on how to use Lumiere 3-D one more way! :) I had used this technique on my “Mother” scrapbook layout earlier this month but didn’t really showcase it so I figured it would be a great way to end the month here… :) I hope you enjoy!
Handmade Cards for All Skill Levels
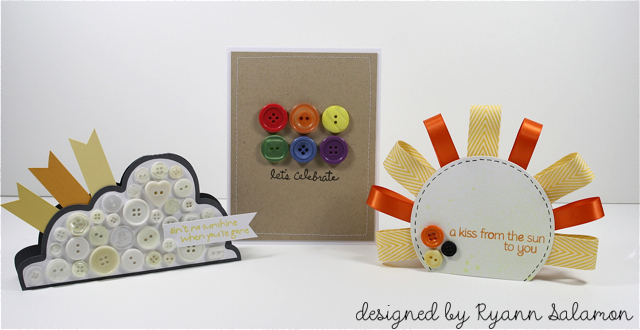
Hi all! Ryann here with my first Buttons Galore & More design team post and I couldn’t be more thrilled to be here with you today! I have a fun handmade card set to share with you today in a weather theme using lots of buttons! Now I know not everyone makes cards so I thought it would be neat to have a project for each type of card maker. So whether you are a beginner, intermediate or more seasoned card maker, there is a project here for you!
Supplies used:
Cloud card: cardstock, ink, stamps, Neutrals buttons
Rainbow card: cardstock, ink, stamps, sewing machine, thread, Primary buttons
Sun card: cardstock, ink, stamps, ribbon, marker, circle die, yellow spray mist, Harvest buttons, Tuxedo buttons
Cloud Card Directions:
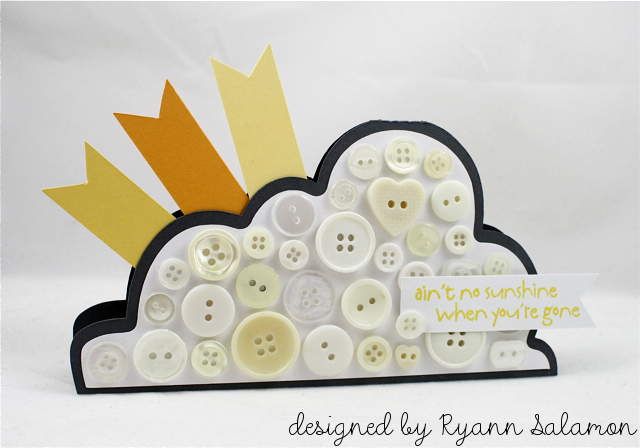
1. Sketch out the shape of your card onto a piece of sturdy cardstock and then cut out. This will be your template to trace onto your gray card base and white mat layer.
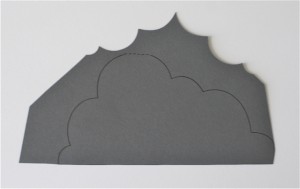
2. Trace the cloud shape onto your card using the template. The top of the template should match up to the top of your card (at the fold). Cut out and set aside. (Note: You’ll notice the template is backwards from the card pictured. When you turn it around, your trace lines will be on the backside of your card, so they won’t be visible when decorating!)
3. Trace the cloud shape onto white cardstock using the template. Draw a cloud just a little bit smaller than the cloud you traced. Use the traced cloud as your guide. Cut out the inside cloud. This piece will be the layer you adhere the buttons to.
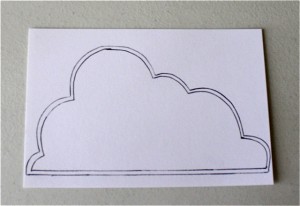
4. Turn over your white cloud so the trace lines are on the back and adhere to your cloud shaped card base. Adhere buttons onto card.
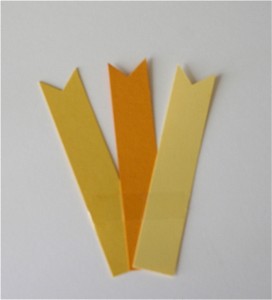
5. Cut out three long strips of yellow/orange shades of cardstock. Notch the ends to look like banners and arrange them how you want them to be placed behind the cloud. Adhere the three strips together using scotch tape. Adhere the sun rays behind the card front panel, NOT the backside of the card.
6. Stamp sentiment onto strip of white cardstock and adhere onto card base. Notch end of strip hanging off side of card.
Rainbow Card Directions:
1. Create A2 card from white cardstock.
2. Cut kraft cardstock to measure 4″ x 5-1/4″. Sew along edges of kraft panel then adhere onto card base. (Note: If you don’t have a sewing machine, faux stitching made with a marker will look just as good!)
3. Stamp sentiment onto card, then adhere buttons in rainbow pattern.
Sun Card Directions:
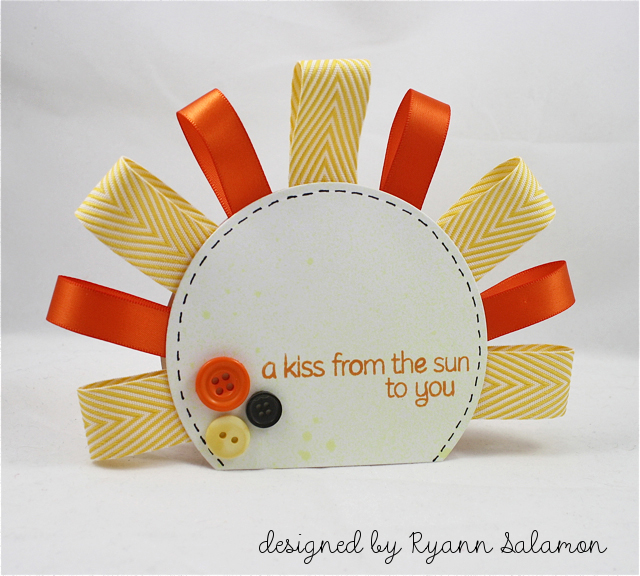
1. Cut out two circles. Place them on top of each other and cut off a small section that will be the bottom of your card. Set one circle aside.
2. Stamp sentiment onto circle (card front) and create faux stitching along edges using marker. Spray with yellow mist.
3. Turn card front over and begin creating your sun rays from ribbon. Create a loop from a small length of ribbon with your fingers and secure onto backside of card front.
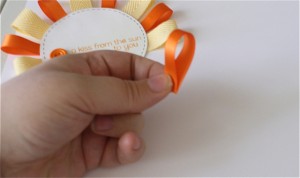
4. Alternate ribbons going along the edge of your card front, securing as you go.
5. When done, use a piece of foam tap at top of your card, on the backside, to adhere your card front and back together. Turn over and adhere buttons onto the card.
I hope this handmade card set has inspired you to get crafting today! Thanks for joining me in my first post with Buttons Galore and More. We’ll see you again tomorrow for more crafty button inspiration!!
Signing off,
Ryann
How to make a statement by using a grouping
A few weeks ago I was stuck. I had to make my weekly card for Card Positioning Systems and I had everything but the finishing touch just wasn’t working. The sentiment I wanted to use was too small for the label die cut I was working with and I really wanted to use THIS SENTIMENT. You know how you can just get stuck with the image in your mind and nothing else works?? Yeah I was there…so I decided to embellish my main image…and not just with one, not two, but THREE fun buttons. Here you can see I chose some buttons from the Girly Button Pack. They were JUST THE RIGHT COLORS to go with my chosen patterned papers. So I kinda played around with the color balance and felt the two reds and one green was just what I needed. To spice things up I decided to use natural colored hemp in the red buttons, tied in a knot and snipped short. For the green button to add balance and interest I tied white twine, tied a big loopy bow and snipped the tails a bit longer. I felt it gave the card fun whimsy! If you’d like more info feel free to pop over to my blog Pink Lemonade. Enjoy!!
How to Alter Shanked Buttons to Create a Sweet Papercrafted Garden
Have you ever been in the middle of a project and felt you needed just the “right touch” but couldn’t really put your fingers on what that “right touch” was? Well I thought I would share my card that shows just such a moment.
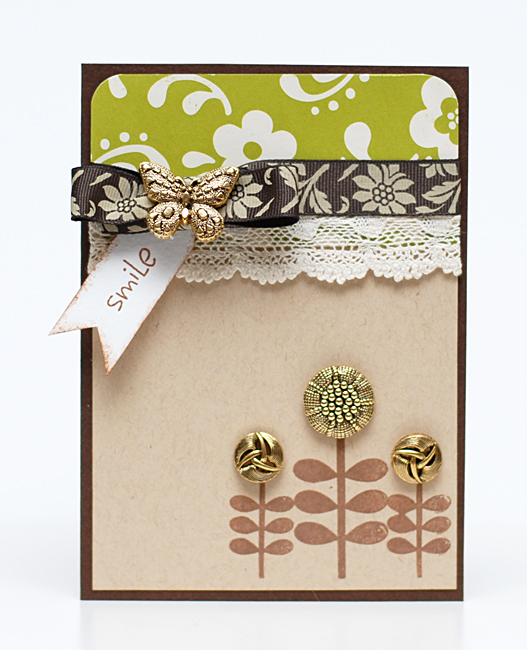
I had this cute little stamp that was the flowers’ “stems & leaves” and I wanted to go 3-D with the flowers themselves…so I put my thinking cap on~ I sorted through my fun Gold Buttons and found three that were JUST THE RIGHT THING!!! So I snipped the shank off the back using some Hefty Duty Scissors….the shanks are plastic so you will not need wire snips or anything but I certainly recommend that you use a good strong pair of scissors!!! (And eye protection is a good idea too because the shanks can kinda take off on you! LOL)
Anyway, here’s my card…can you spot my BONUS HAPPY FIND? Yep! That is right, the butterfly on the knot of the ribbon is ALSO one of the buttons I found while pecking through my Gold Buttons! If you’d like more details about this card just pop over to my blog Pink Lemonade…enjoy your day!
Handmade Little Boy Card – Pinterest Inspiration
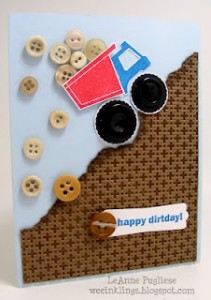
Browsing for little boy card ideas is not an easy task. There are tons of little girl cards, teen girl cards and feminine cards to be found almost everywhere. Handmade masculine cards start appearing around graduation and Father’s Day, but handmade little boy cards that are designed well are few and far between. WeeInklings.blogspot.com has this adorable card pinned on pinterest and I love it. It is cute, creative and perfect for a little boy. Her pin board is http://pinterest.com/source/weeinklings.blogspot.com/ and she has some fun stuff.
Button Craft Ideas – Internet Inspiration
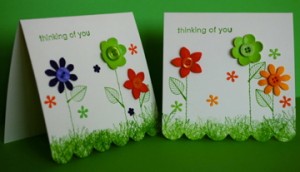
Tuesdays Button Craft Idea is a handmade card from Made in a Muddle. When I came across her handmade cards the clean lines, bright colors and placement caught my eye. Her blog has a nice blend of crafts, food, repurposing and humor Her cute as a button card and supplies she used can be found here.
DIY Sweet Treat Notecards
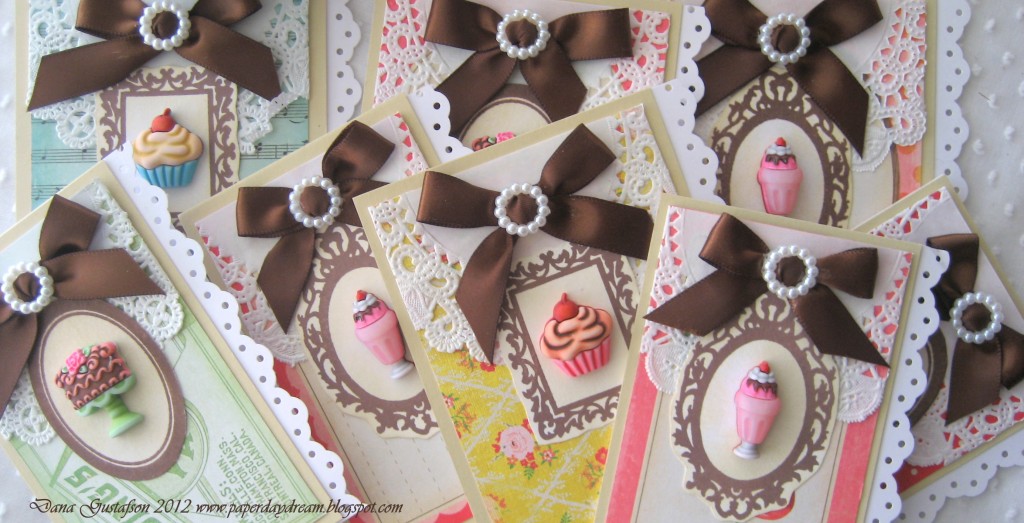
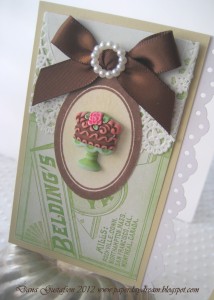
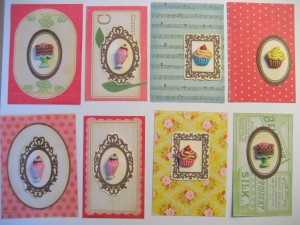
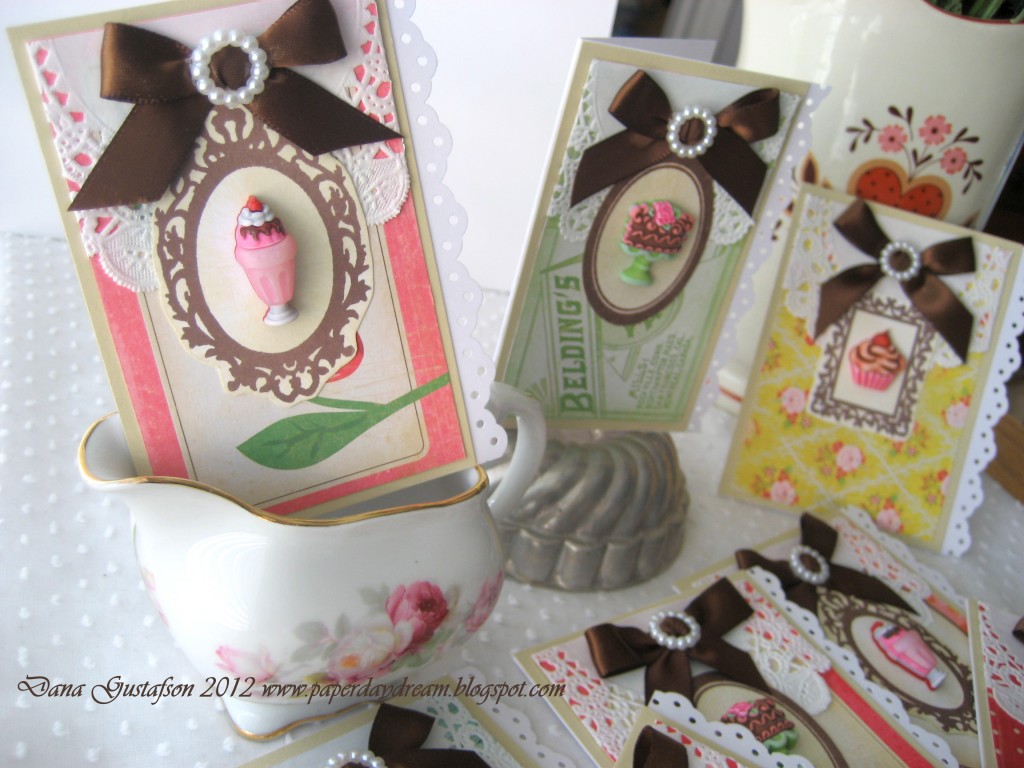
Sweet treats and tea time come to mind today with this mini notecard set that highlights some adorable themed buttons from Buttons Galore and More! Perfect for quick birthday notecards, party invitations or a great giftable set for the sweet tooth in your friendship circle! A few simple ingredients and you have the makings for a sweet greeting!
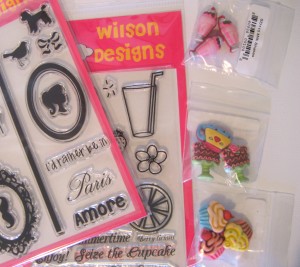
Buttons Galore and More Product:
-
Stamps from Wilson Designs
-
Cardstock from Papertrey Ink and designer papers from Crate Paper
-
Ink from Stampin Up!
-
Paper Punch from Stampin Up!
-
Other Craft Supplies: Ribbon, paper doilies, wire cutters
With a few simple products from Buttons Galore and More and some other card making items, I was on my way to a stack of cute notecards.
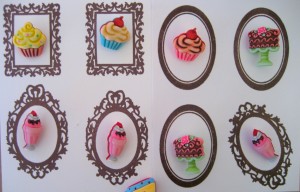
I first paired up my buttons in the Sweet Delights Collection with some stamps that had frame options as well as sentiments if I should choose to add a simple sentiment to the inside of the card.
I stamped out eight frames with chocolate ink on white cardstock and then paired up the buttons with the frames that fit each one the best.
These are “shank” buttons, meaning there is a small loop at the back of the button for sewing/tying onto your project. In this case, I was going to need a flat back to my buttons so a simple clip of the shank with a pair of pliers was all that was needed.
First a clip just to remove a portion of the shank….
After that first clip, the button layers come apart and you can trim the shank even shorter so it will be flush with the back once reassembled.
Before re-assembling the button layers, apply a bit of craft glue to make the layers stick.
Re-assemble and pinch together so the liquid glue adheres well.
Once all of the buttons are prepared and the stamped frames are trimmed from the cardstock, adhere the buttons to the frames and start matching them with various colorful scrapbooking papers…scraps will work fine. My papers range in size but are around 3″x4″ each, give or take a slice of the paper trimmer.
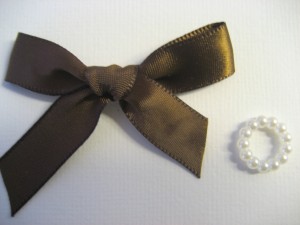
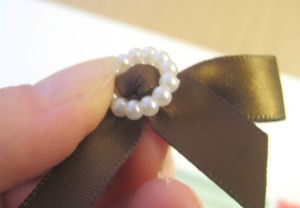
I decided these needed some ribbon and pearl pretties. Tie small satin bows, one for each card and apply a Classic Circle.
Each classic circle has a touch of liquid adhesive on the back and is placed upon the knot of the bow.
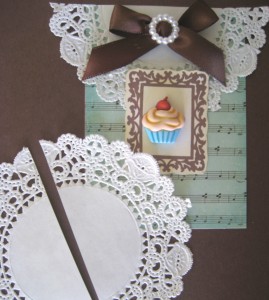
Small paper doilies from the bakery section of the craft store have been cut in half to help set a backdrop for the treat-adorned frames.
Anyone hungry for dessert now!??? Thanks so much for checking out my sweet treat notecard idea!
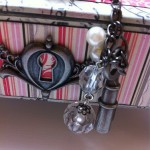
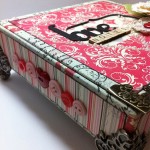
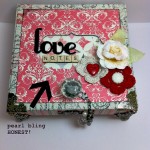
Novelty Heart Button Love Notes
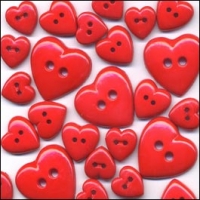
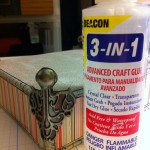
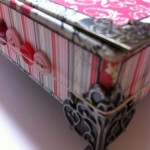
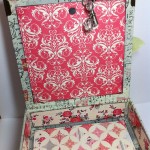
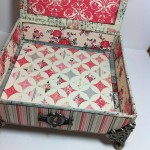
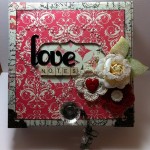
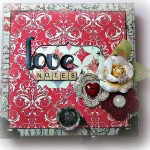
Handmade love notes are not just for Valentine’s Day. I’m sharing a little trash to treasure project with you using heart buttons and a paper box. The box hada little accident. I have several other boxes like it that I’ve decorated with my favorite Authentique papers, and this was my last box, so I wanted to use it for something special.
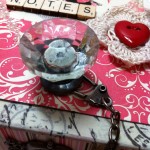
I took pictures along with way. A little love, a lot of tape, some heart buttons (of course) and other Doo-Dahs, and I think it outshines all my other boxes. There is a funny little story about embellishments below too.
Do you love, love, love Clearance? When my kids were little, they thought Clearance was a person. We regularly visit Uncle Clarence to see what he’s got for us. [insert chuckle here]
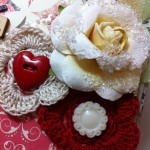
Anyway, I got the beautiful chunky glitter encrusted flower on clearance. It’s from Prima. The bad news, if it was on clearance, maybe they don’t make them any more? Sorry! Any gorgeous flower will do, and you could always add your own glitter.
Do you love those crocheted flowers? My friend Linda Weber makes them. I make things or send her stuff I don’t need, and she sends me hand made flowers. It’s a sweet barter system.
I added a small leaf underneath the rose, it’s from Creative Impressions. To the centers of the handmade flowers I added yes, a favored heart button, and a button from my Buttons Galore and More stash and used Beacon’s to glue it all down.
Supplies:
Additional Supplies
- Additional Buttons – from my stash
- Papers – Authentique
- Embellishments (Knob, Trinket Pin, Crystals and Pearls, Key Hole and Key, Feet, Corners) and Tissue Tape – Tim Holtz for Advantus, the Ideaology line
- Rose – Prima
- Crocheted Flowers – handmade by my good friend Linda Weber,
- Bling – Nestabling from Want2Scrap
- Ink – Black Ink from Close To My Heart
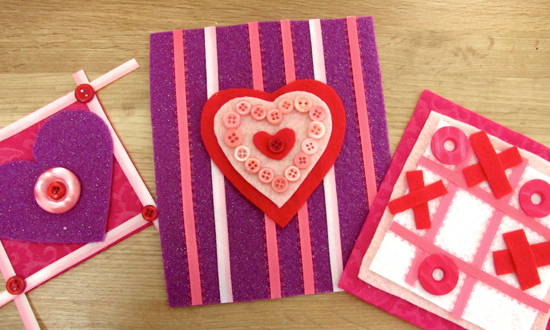
Easy Button Valentines
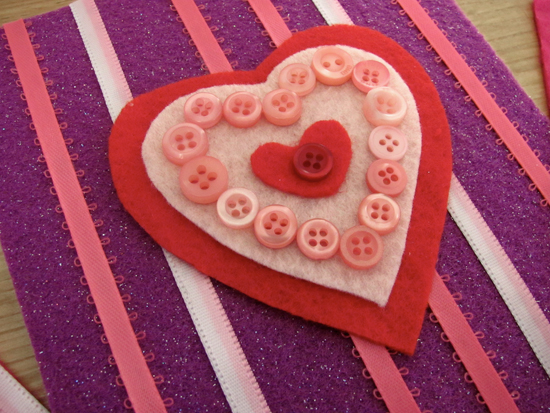
You can make pretty little button Valentines for your true love, or with the kids for their class using buttons and felt. I created these three pieces using scraps of felt and ribbon and a bit of glue, that’s it! You could use fabric scraps, paper or cardstock. You could even paint a background and use the buttons to access the art.
This is a great Valentine’s Day project to do with the kids. Cut shapes for the little ones and let them glue everything together.Easy peazy, right? Tip: lay out everything before adding glue. Then put glue in the shape where buttons will be placed, example: I make a heart outline using glue and then placed all the buttons on the glue.
Supplies you need:
- Button Bonanza in Pink
- Button Bonanza in Bubblegum
- Felt assortment
- Ribbon assortment
- Craft glue
- Scissors
Mix and match your supplies with different layouts to create a wide selection of Valentines using your buttons. If you have a little frame, you could even turn these pieces into pretty Valentine’s Day art. Gotta love the buttons!
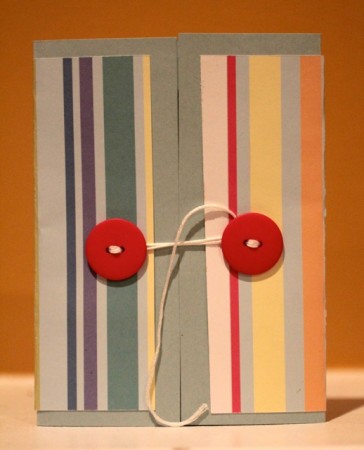
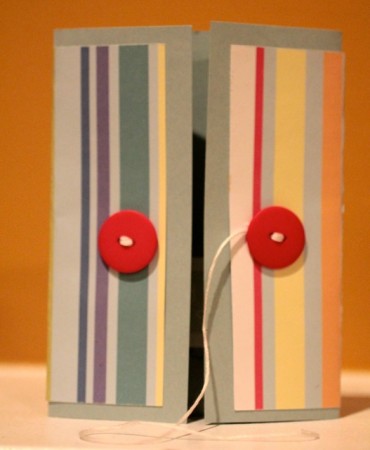
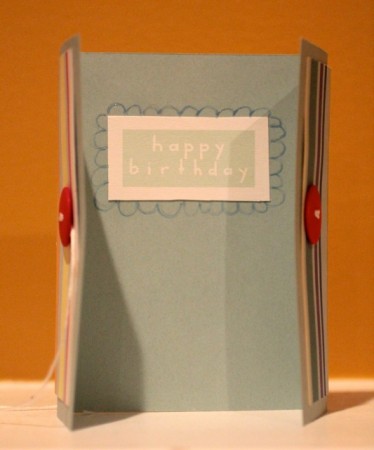
How to Make a Button Closure for Card Makers
Create a cool closure for your handmade cards by sewing on two buttons. The card above is a a birthday card. You can use this technique for any occasion. Very few tools are involved and little skill is needed. It is quick and easy yet it makes the card feel extra special.
Tools:
Needle with large opening
Embroidery floss in color of your choice
Paper cutter
Mouse pad
Material:
Contemporary Christmas Button Jar
12 x12 Cardstock of your choice
Pattern Paper of your choice
Rubber stamped sentiment of your choice
Adhesive
Directions:
1. Cut paper to 6×12. Make a score line 3 inches from each end. Fold flaps in so that they meet in the middle.
2. Trim pattern paper to 5.5 x 11.5 and adhere to card.
3. Stamp sentiment and add to center of card.
4. Measure in one inch on each flap. Place card open on mouse pad and use needle to make holes for floss.
5. Using floss sew on one button. Tie knot to secure and trim off excess.
6. For the second button cut a generous piece of floss. Sew on button and tie a knot. Do not trim off excess. Use it to fasten the card closed
Vintage Party Favors
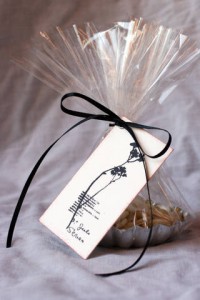
I love this party favor idea from Melody Nuñez. Simple yet sophisticated.
Please visit the Vintage Party Favor Tutorial to find out how to make them for your own gifts or party favors!
Victoriana Fabric Party – Row 5 and Give Away
The instructions for row 5 are up on the Fabric Party page here.
And as always there is a give away that includes School Days buttons from Buttons Galore and More!! WhooHoo! :)
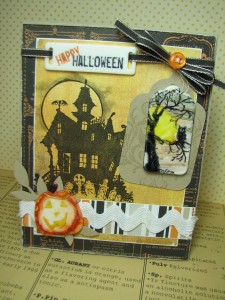
Start Ups: Some HALLOWEEN Crafting!
Let’s face it, the light is changing, shadows are deeper and FALL is a comin’!
TIME to get your HALLOWEEN on! And what a send off: HAVE YOU SEEN the START UPS? NOT even exaggerating – they are AWESOME!
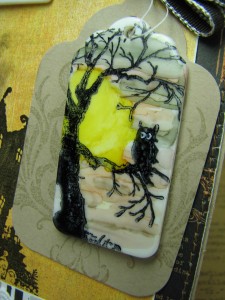
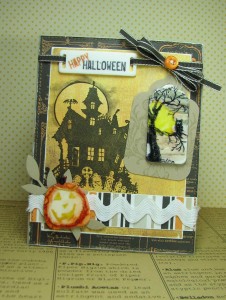
How could I resist these ADORABLE lil’ pumpkins?
Some materials just have PERSONALITY!
It’s up to US crafty folks – to RELEASE it!
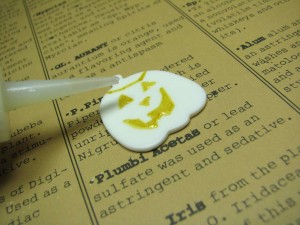
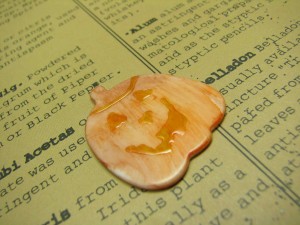
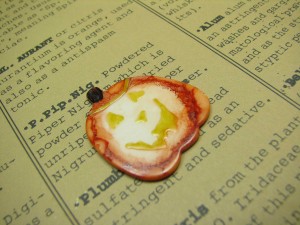
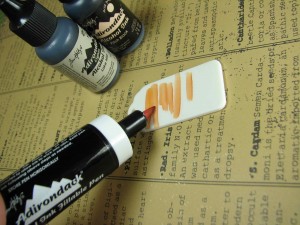
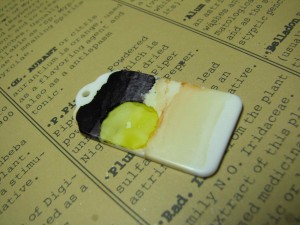
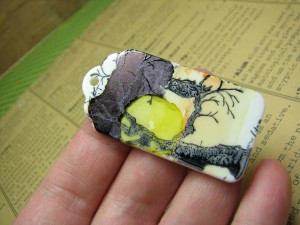
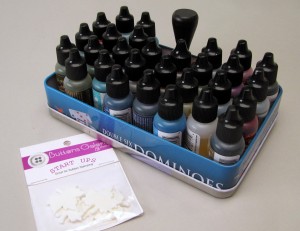
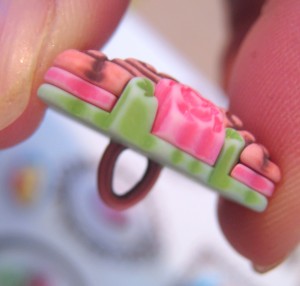
Start Ups are stampable, alterable and ADORABLE! With permanent marker for face accents, some dimensional glaze to preserve the “glow” factor, and some alcohol ink for all over color – THIS darling pumpkin character is ready to greet the world! Mwah ha ha!
Solvent based inks STAMP like a dream on these babies!
Alcohol ink provides a plethora of crafty magic on Start Up material! Aren’t these tags darling? The material for Start Ups is like DOMINO ingredients – BECKONING to become a keepsake! I could get LOST in these babies!
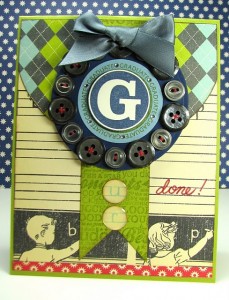
So, I got busy, creating a LITTLE SCENE! {I LOVES me a little scene!}
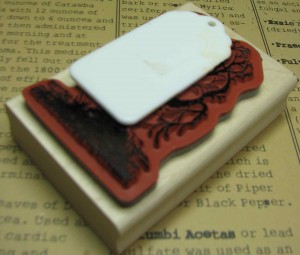
Easy to stamp, but for my detailed ambition, I pressed this tag shape DIRECTLY to a well inked stamp for ultimate control…
If you’re not happy with your results, clean Start Up with alcohol blending solution and PLAY again! BOTH sides are ready for love, so you REALLY cannot make a mistake!
Bust OUT the candy corn, Pumpkin Spice Lattes and START UPS!
Let the CRAFTY season begin! THANKS for letting me share the wonders of the season and BUTTONS GALORE AND MORE!
Supplies –
C/S – Stampin’ Up!; D/P – Echo Park & Basic Grey; Stamps – Stampin’ Up!; Ric Rac – Brytex; Die Cut leaves – Sizzix; Ribbon – Stampin’ Up!; Button – Buttons Galore & More; Start Up Shapes – Buttons Galore & More;
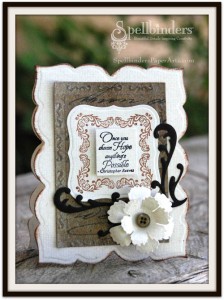
Vintage Shaped Card from Spellbinders
Here is a very pretty card from the designers at Spellbinders. See how to make one here.
Start Ups – Maple Leaves and Alcohol Ink
It may be a little early to start thinking of fall leaves… but maybe not.
Last week I introduced you to Start Ups here and I made an easy “metal” piece to put on all sorts of Mixed Media or Scrapbooking projects.
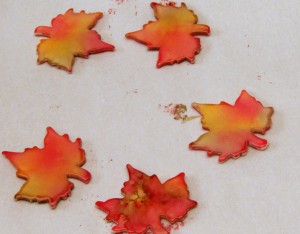
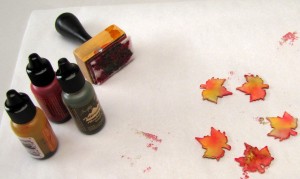
This week I used the Start Up Leaves and my trusty collection of Ranger Alcohol Inks to create multi-colored fall leaves.
The colors I used were Oregano, Butterscotch and Red Pepper.
Oh, the possibilities!
What would YOU use Start Up Leaves on?
Start Ups: Metal Look ID Tag
“Amazing Plastic Crafty Goodness” is what they really ought to be called! :)
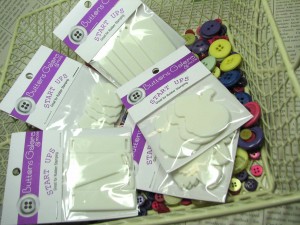
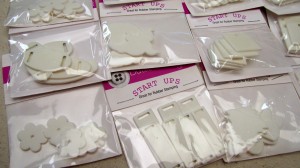
What are Start Ups? They are small, white plastic shapes. Perfect blanks for lots of scrapbook, mixed media and even jewelry projects.
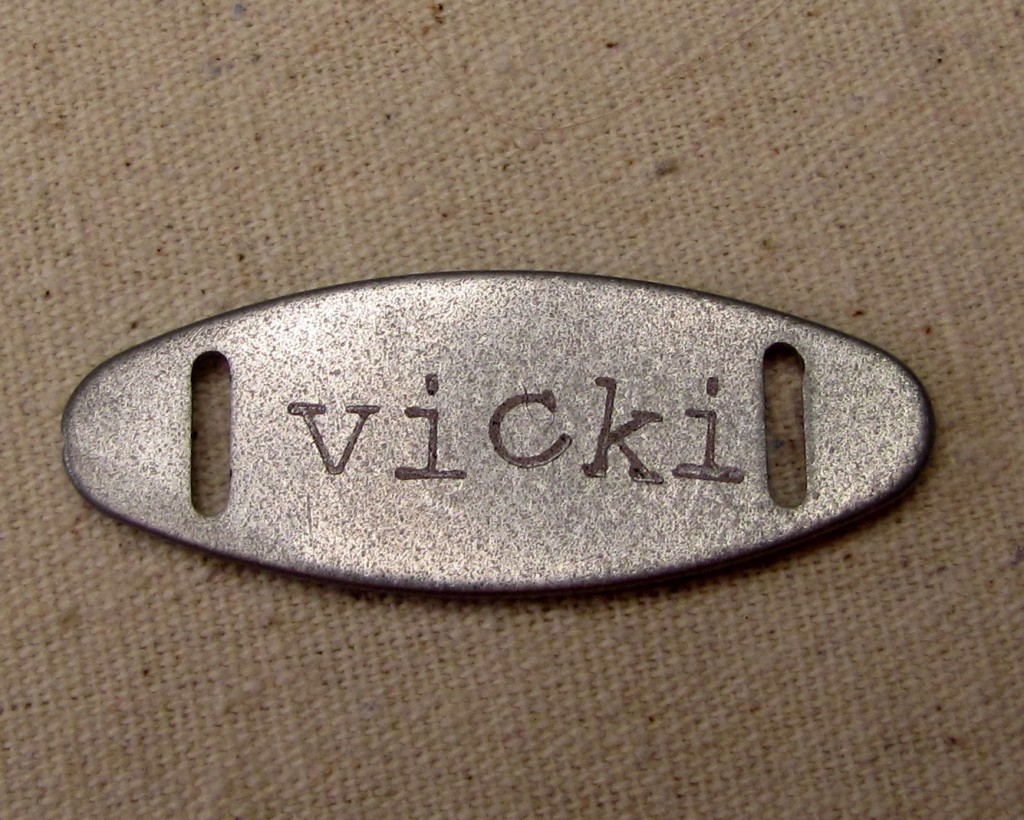
My very first Start Ups project. :)
I spray painted the blank silver and let it dry, then I rubbed my thumb over it to take out some of the shine. I stamped VICKI with a small set of alphabet stamps and Staz On ink in black. Finally, I gave it a quick spray with a Matte Sealer and it’s all ready to go on… well, WHATEVER I want to make! I love that it looks like an old piece of metal. Cool!
Keep checking back as I continue to explore all of the crafty fun to be had with these little gems!
And click HERE to see the available shapes of Start Ups that Buttons Galore and More Carries!
Envelope Booklet Hostess Gift
I love little gifts that I can make with items that I’ve got on hand and give as hostess gifts, thank you tokens, and teacher’s presents. Usually it’s on short notice- and I can whip up one of these Envelope Booklets in an hour. WIN!
Studio De-Stash – Party Favors
All around the web I’m seeing that fellow crafters, designers and artists seem to be taking time out to clean up their creative spaces.
It’s also a GREAT time to be thinking of little gifties and gift tags that you could use the rest of the year. Don’t think so? Read the rest of this post that was originally published on my blog. (You can visit my NEW blog here: www.vickiodell.com)
Felt Button Thank You Card
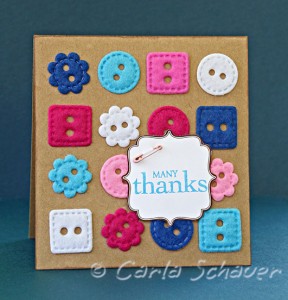
I love a simple grid arrangement when creating a quick card. In this case, the grid combined with a neutral kraft cardstock really lets the texture and color of the Fiesta Felt buttons take center stage. Tie embroidery thread through button holes, or leave them open as I did to make the card even more quickly.
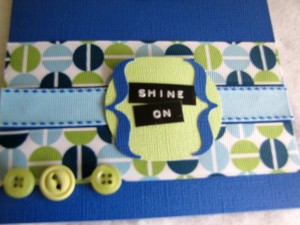
Shine On! (A Card of Encouragement)
Recently, my son participated in an Invention Convention- and when he didn’t win a prize, I could tell he took it kinda hard. So I whipped up this little card to encourage him to “Shine On” and not get discouraged.
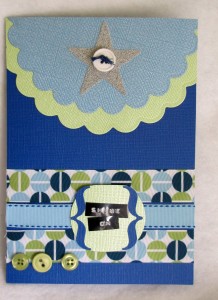
To make it, I cut 2 circles from Core’Dinations cardstock Gemstones Collection and mounted them at the top of the card. Then I applied a Wacky Tacky Tape star shape and sprinkled silver microbeads on top. I finished it off with a white button threaded with a little embroidery floss, held in place with a mini Glue Dot.
To create the texture at the bottom, I “stacked” three rows of patterned and solid ribbon from the Retro Blue Button & Ribbons collection and adhered it with Zip Dry. I made a text block and brackets with more cardstock and used my trusty Dymo Label Maker to create the words. A few more coordinating buttons finished off my design.
I really love this color scheme, and it would be lovely for either a boy or a girl…and could easily stand in for a graduation card, too! Now wouldn’t it be a lovely card to send to someone who needs a little “pick-me-up?”
To see another card using another color scheme and a flower/ladybug motif, visit my blog, CraftTestDummies.com.
Graduation Card Idea
Here is another AMAZING card from our design team member Elise!
If you’d like to read about how it was made please visit her blog at Mamacow Creations.
Send Cards to the Troops-Patriotic Card
Patriotic Card Idea
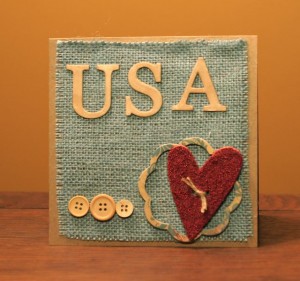
The traditional patriotic colors on this card get a warm vintage feel with softer colors and the use of burlap. Using wood buttons instead of white buttons also adds to the warm feel. The micro-beads give it a touch of shimmer. The card is a 6×6 with a craft card stock base.
Cameo Mother's Day Card
UPDATE: 5/11/11 We are pleased as punch to say that the original photo needed to be removed because our incredibly talented Elise Durenburger will have her card published in Cards Magazine in October 2011. Congrats Elise!
Isn’t this card beautiful? Look at all of the layers and texture. Seriously, click on the photo and see the larger image.
I’ll wait.
If there are two things I love they are texture and layers. And who doesn’t love a beautiful silhouette or cameo? Of course a Buttons Galore and More button is the cherry on top! :)
To learn more about this card and how it’s made please visit Mamacow Creations.
PS. Elise is one of our design team members… aren’t we lucky!?!?
Nosey?
Isn’t this little bunny simply adorable? This card is by Amy over at Pickled Paper Designs. She has a serious talent for card making. You really should check out her blog. Even if you don’t think you are into card making I’m sure her beautiful work will make you want to make a card or two!
Oh! And to learn more about how to make this card visit Amy here.