Header

Tag Archives | Card

Celebrate a Star with this Handmade Birthday Card!

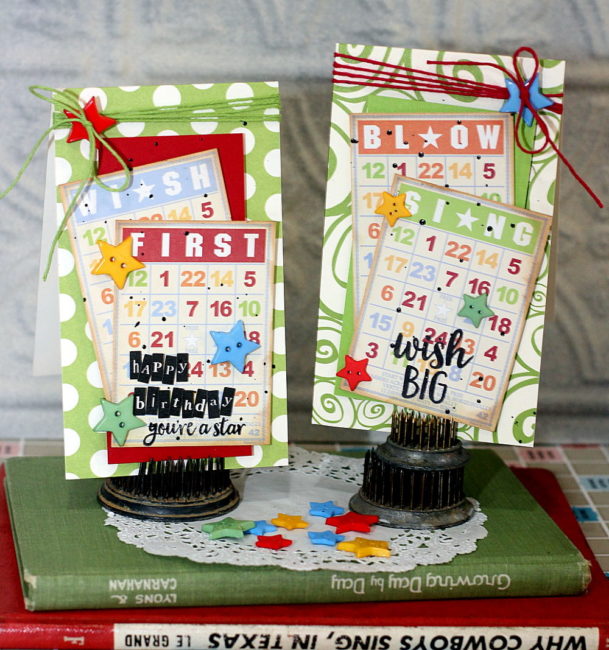
handmade birthday card

Hi, it’s Connie here today with the Buttons Galore & More design team sharing a handmade birthday card design using the themed buttons “Stars” by Buttons Galore & More. These star buttons come in four different colors – green, yellow, blue and red – plus two sizes. They are perfect primary colors, great for creating crafty projects with kids or for special occasions! Continue Reading →

0

A Crazy Bird Told Me…It’s Graduation Time!

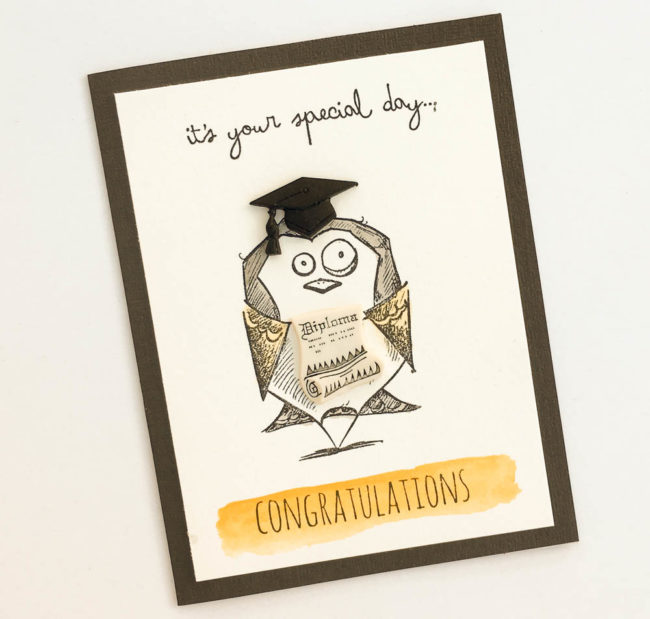
Graduation season is here! Just because the big day is a formal affair, that doesn’t mean that the cards can’t have some fun. Our 3D buttons dress up this bird so he’s ready for the walk across the stage!

Crazy Bird Graduation Card

Supplies Needed:

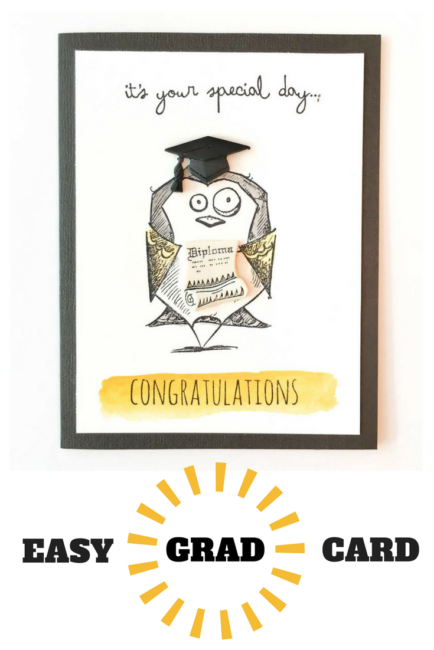
This card uses our 3D buttons as accessories for some crazy stamped characters! This character gets a whole new dimension – literally – with a fun button graduation hat and his own button diploma.

To make this card, select a card base in one of the graduate’s school colors. (You’ll want to choose the darker of the two school colors for the card base.)

Cut a 3.75″ by 5″ piece of watercolor cardstock and adhere it centered on the cardfront. Use watercolors in the lighter of the two school colors to paint a block along the bottom of the paper. Stamp the sentiments at the top and bottom in waterproof ink, and then stamp the bird in the middle.

Crazy Bird Grad Card close-up

Use the watercolors to paint in the bird. (I used the yellow school color for the bird’s wings to hold the diploma.) Then cut the shanks off of the graduation hat and diploma buttons, and adhere them to your bird.

This bird will put a smile on the face of your special grad while bringing your good wishes to them! Happy Graduation, Class of 2017!

Easy Graduation Card using 3D buttons from www.buttonsgaloreandmore.com

0

Make a Pretty Button Flower Card for Mother’s Day!

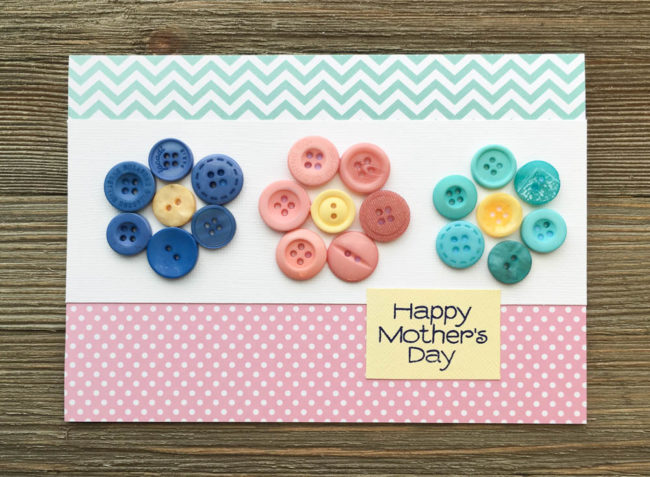
The spring flowers are in bloom, and Mother’s Day will be here before you know it! So why not combine the two to make a pretty button flower card for mom for Mother’s Day?

Button Flower Card for Mother's Day

Supplies Needed:

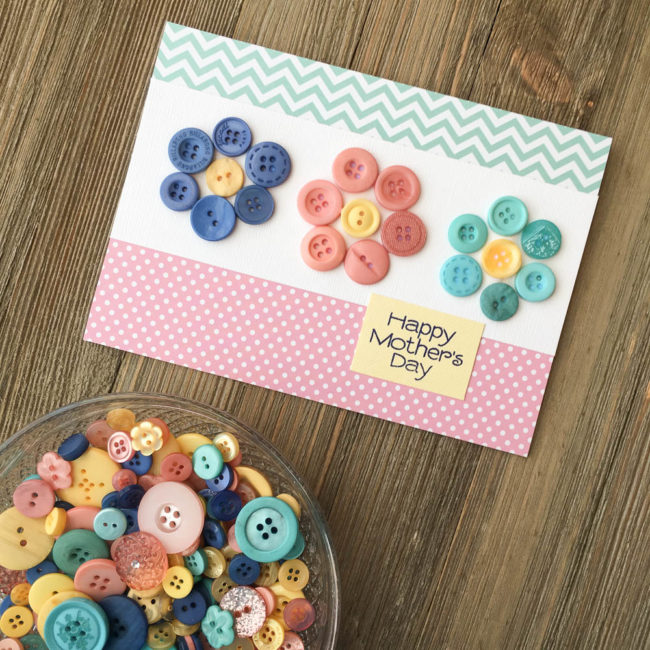
This 5″ by 7″ button flower card is super simple to make but so cute! And it’s so easy to make that it would make a great kids’ project for the holiday.

To start this card project, cut a 10″ by 7″ piece of white cardstock and fold in half along the 10″ edge to create your card base.

Cut a 2.5″ by 7″ piece of cardstock from the scraps of the white sheet. Select buttons from the Glam Girl Button Bonanza to make your button flowers with. Then, using the PPA Matte Adhesive, adhere the buttons in place using dots of glue. Set the flower strip aside to dry.

While the glue dries, cut a 1.5″ by 7″ strip of paper for the top of the card, and a 2″ by 7″ strip of paper for the bottom. Adhere them in place along the top and bottom of the card front.

Stamp “Happy Mother’s Day” on a yellow cardstock scrap in dark blue ink. Trim the cardstock to slightly larger in size than the sentiment.

After the glue on the flowers is dry, adhere the flower strip in place across the card front. Glue the sentiment block down on the right side of the card front, over the seam between the flower strip and the bottom patterned paper.

Button Flower Card for Mothers Day

This card design is so versatile! Just by changing the sentiment, the design could also be used for a thank you card, or for a birthday, or for a variety of other occasions. It’s a classic that you can use over and over! To create a smaller card, just use smaller sizes of buttons. With theGlam Girl Button Bonanza bag, you can make this beautiful button flower card over and over!

0

Say Congratulations with a Button Balloon Card!

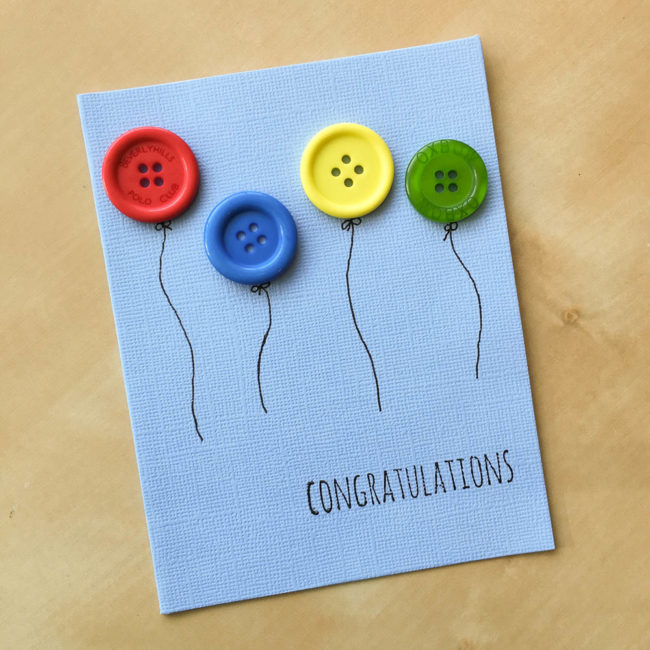
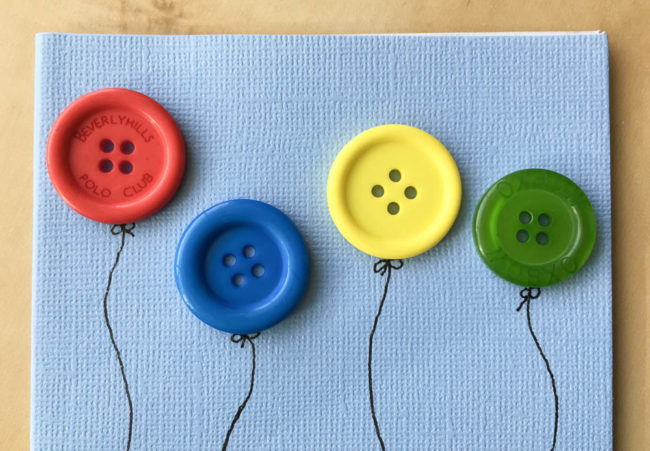
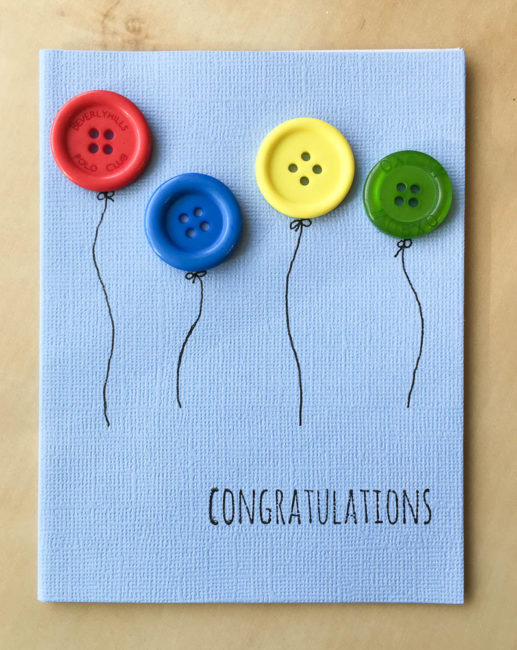
This time of year means graduations, and all sorts of other occasions for which congratulations are in order. Running out of time to make cards for all of them? Just dive into your Button Bonanza bags and dig out some of the largest buttons to make balloons!

Congratulations Button Balloon Card

Supplies:

I used the “primary” Button Bonanza bag for this but the beauty of a simple design like this is that you could use any color scheme that works for your occasion. For a graduation or sports-related occasion, use school colors! Recent graduate got a new job? Make your balloons the recipient’s favorite colors or their new employer’s corporate colors. With our huge palette of Button Bonanza colors, the options are endless!

Button Balloon Card

To make this card, select the buttons that you want to use and arrange them to make a row of “balloons”. Before you glue them down, nudge them up just slightly to get a pen in to draw your “string” lines and bows. Then use clear drying adhesive like PPA Matte Adhesive to glue the buttons down so that it looks like the strings are tied to their bottoms.

For the final step, get out a handwritten sentiment stamp (or a pen if you are braver than I am) and use black ink to stamp the sentiment in the lower right corner of the card front.

Button Balloon Card

Send some button balloons to someone special!

0

Embellish an Easter Egg Card with 28 Lilac Lane

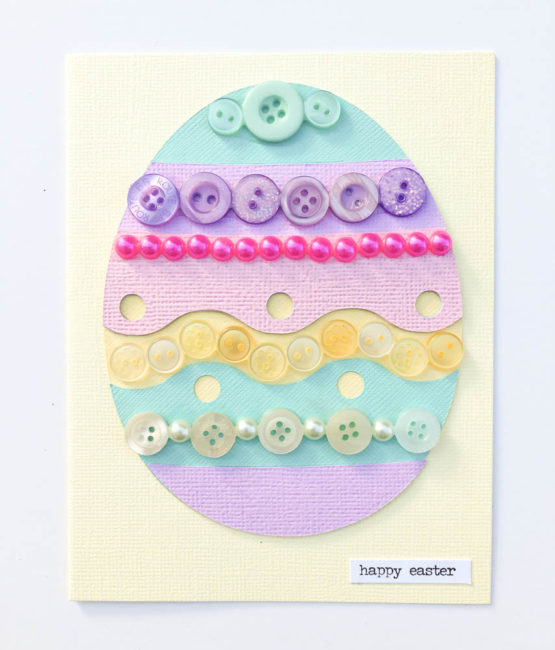
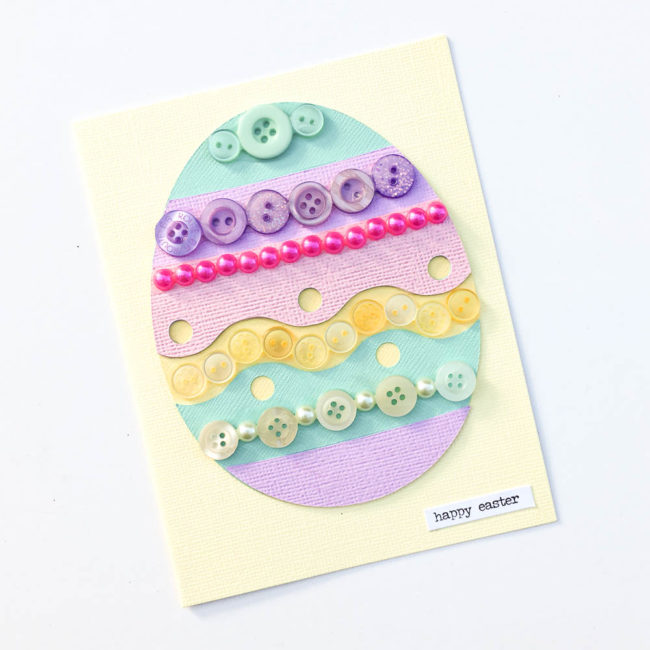
Embellishing an Easter egg card is a great reason to get out your 28 Lilac Lane embellishments and go crazy with color. The flat back pearls and buttons in our embellishment bottles will have your Easter egg card shining like a jewel!

Easter Egg Card

supplies needed:

One of the great things about having a large selection of 28 Lilac Lane embellishment bottles on hand is the ability to mix and match them to create colorful projects like this Easter egg card! By combining small amounts from five different bottles, I was able to create a jeweled effect on my Easter egg that allows the egg to stand as the entire design of the card.

How to Make An Embellished Easter Egg Card

Locate a decorative Easter egg design in your die cut machine software. (If your machine doesn’t have this particular design, it will certainly have a similar design that can be embellished in the same manner. Look for a design with lots of straight lines or wide spaces that can be filled with embellishments.)

Cut the Easter egg design out of cardstock scraps, and assemble with glue. Then glue the assembled Easter egg to the front of a coordinating blank card base.

Using 28 Lilac Lane embellishments that coordinate with each area of the Easter egg card design, add rows of embellishments to the card with a liquid adhesive like PPA Matte.

Finish the card with a sentiment sticker in the lower right.

Easter egg card

This is a great project for kids and grown-ups to do together….make the cards and then let the kids do the decorating!

0

Embellish a Spring Butterfly Card with 28 Lilac Lane

It’s officially spring, so let’s use some 28 Lilac Lane to create a butterfly card to send some spring greetings with!

Butterfly Card

Supplies needed:

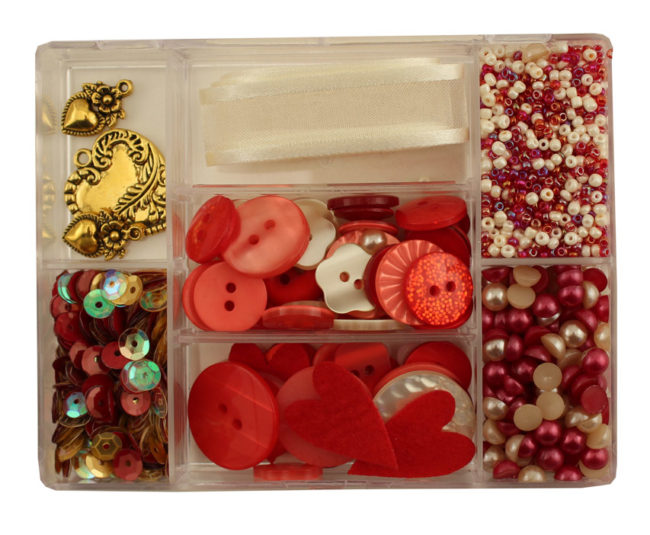
  • 28 Lilac Lane “Love Story” embellishment kit
  • PPA Matte Adhesive
  • card base
  • smooth cream cardstock
  • foam adhesive
  • Ranger Tim Holtz Distress Ink in Abandoned Coral, Weathered Wood, & Peeled Paint
  • Graphic 45 “Nature’s Sketchbook” 6×6 paper pad
  • Hero Arts “Many Everyday Messages” stamps
  • Hero Arts “Newsprint Butterfly” stamp

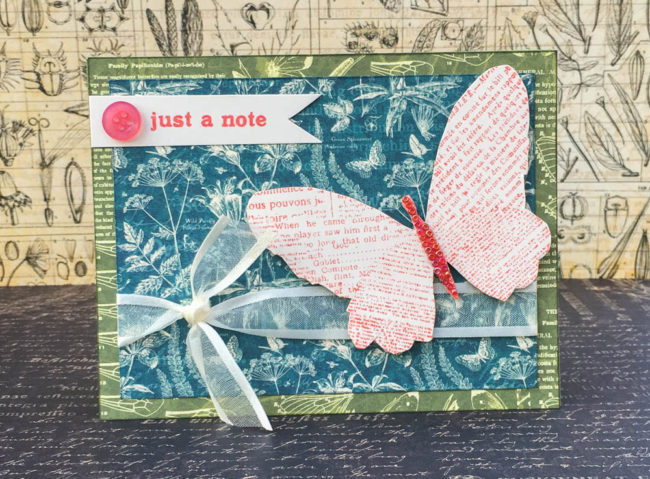
This butterfly card uses the “Love Story” kit by 28 Lilac Lane. With cream ribbon, heart charms, and embellishments in shades of red, pink & white, this kit is as versatile as it is gorgeous! Although at first glance this kit is a Valentine’s Day, wedding, or “I love you” themed kit, projects like this one are a great reminder to look at the kits for the colors of their contents as well as their themes.

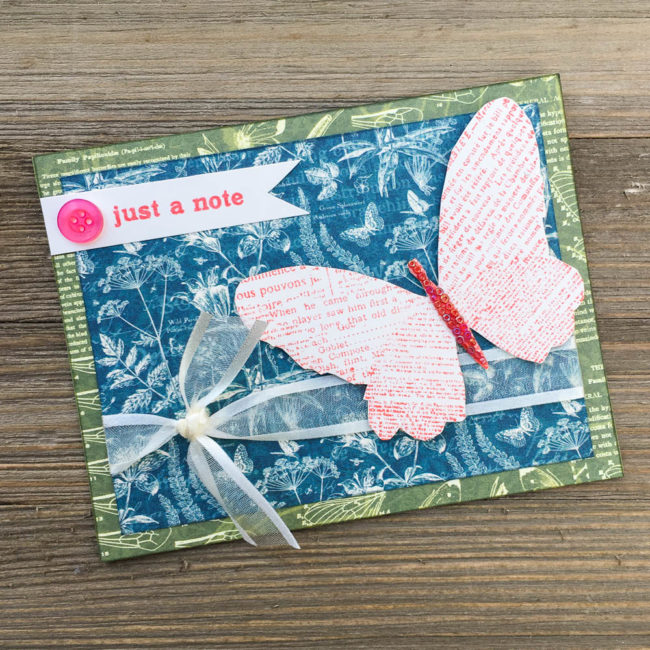
28 Lilac Lane Love Story embellishment kitTo start making this butterfly card, cut a piece of green patterned paper to 4.25″ by 5.5″, ink the edges, and adhere it to the card base.

Cut a piece of blue patterned paper to 3.75″ by 5″ and ink the edges. Tie the ribbon ends together, and then secure the ribbon around the back side of the blue patterned paper. Adhere the blue patterned paper panel to the card front.

Butterfly Card close-up

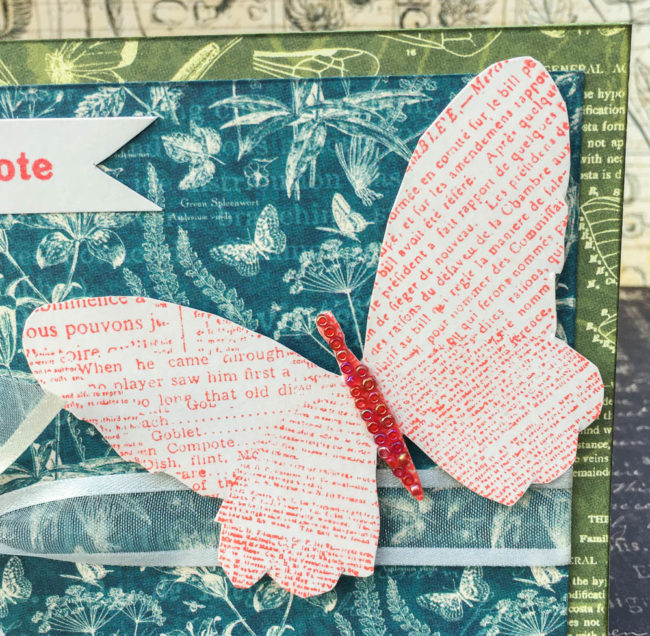
Stamp the butterfly and card sentiment on cream cardstock. Cut out the butterfly. Trim the sentiment into a 5/8″ wide strip, and snip the ends to make a banner.

Adhere the sentiment banner to the top left of the card front, and glue a button on top of it.

Squeeze a strip of glue down onto the body of the butterfly, and then layer seed beads on top of it. Once the glue is dry, use foam adhesive to attach the butterfly to the card front.

Butterfly card

And your butterfly card is all finished, except to choose someone special to send it to!

1

Make a Wreath Card with Wisteria Hues Mix!

I’m so excited to tell you that the new 28 Lilac Lane products are shipping now – and are available in online shops like Ellen Hutson and Simon Says Stamp, as well as local stores!

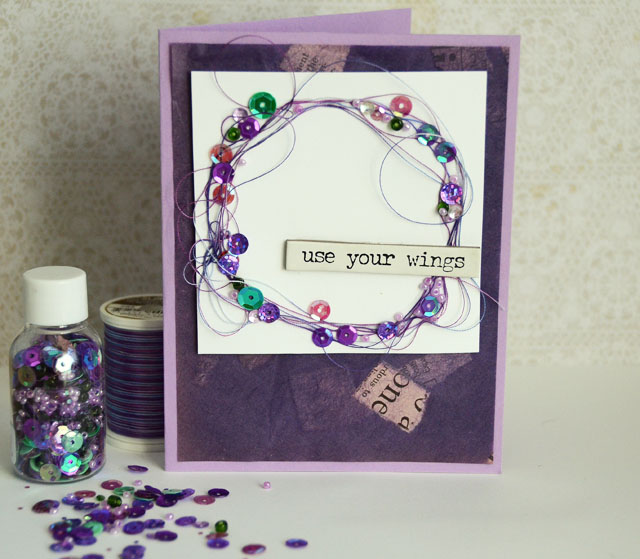
Use Your Wings Card by May Flaum using 28 Lilac Lane Bead & Sequin Mixes

Today I’m playing with one of my personal favorites from the new products- the Wisteria Hues Bead & Sequin Mix!

My inspiration for creating this Wisteria Hues mix was my backyard wisteria, but the arrival of Mardi Gras season got me in the mood to choose this mini bottle to use first of the new ones. I love this particular mix and I’m excited to share it – and all of the rest – with 28 Lilac Lane fans.

Despite the name mini, there really isn’t anything “mini” about how much is packed into these bead & sequin bottles! They’re a great value, and so easy to travel with that you’ll want to collect them all!

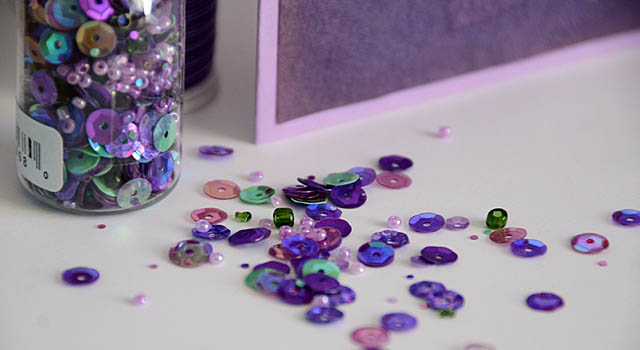
Wisteria Hues Bead and Sequin Mix

This ‘messy wreath’ is so quick and easy- and so much fun to create! Watch the video below to see the steps of exactly how I made it.

0

Say “hello” with an Embellished Butterfly Card!

Today is “send a card to a friend” day. What better way to celebrate someone special in your life “just because” than with a sparkly embellished butterfly card?

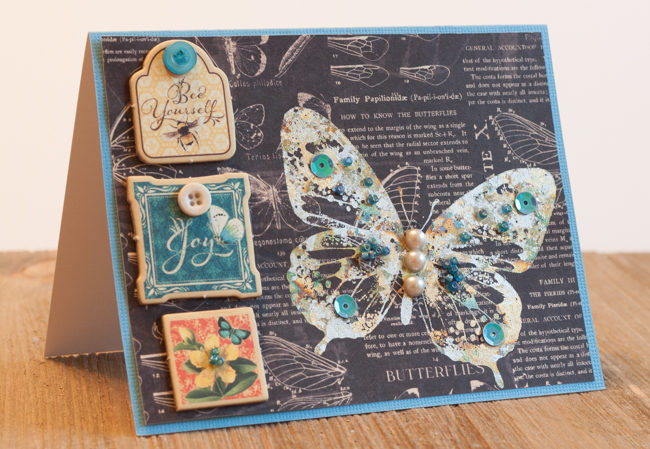
Embellished Butterfly Card

Supplies:

One of my favorite things about creating with the 28 Lilac Lane embellishment bottles is that they come in an entire rainbow of colors. This means that there is always the perfect bottle for whatever paper collection I’m in love with at the moment. For this new Graphic 45 collection called Nature’s Sketchbook, I reached for “Birds of a Feather”. It’s a perfect match for the blue tones in the papers, and a great way to add pops of colorful sparkle to my metallic butterfly!

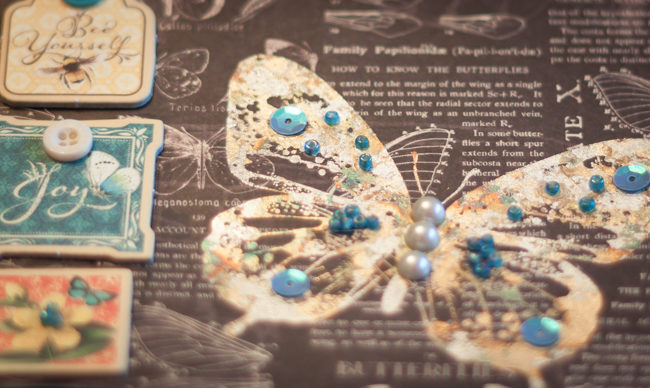
Embellished Butterfly card close-up

This metallic butterfly was created with a glue and metallic flake stamping technique from Indigo Blu. It creates an opaque image even on dark paper, perfect for creating visual pop.

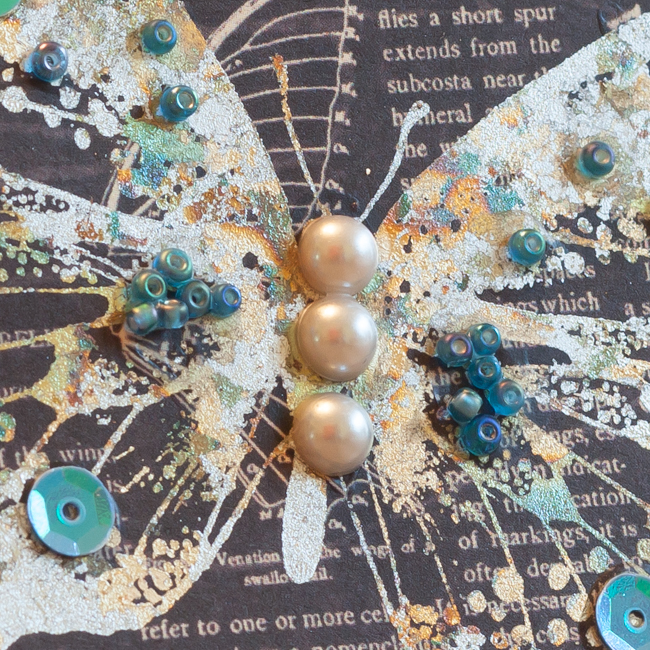
The butterfly is gorgeous on its own but it needed some more color to make it coordinate better with the chipboard. Also, it needed more dimension so it wasn’t overwhelmed by the chipboard elements. The blue sequins and seed beads from “Birds of a Feather,” along with the white pearls, provide just the right touch to take the butterfly from simple to gorgeous!

Embellished Butterfly card detail

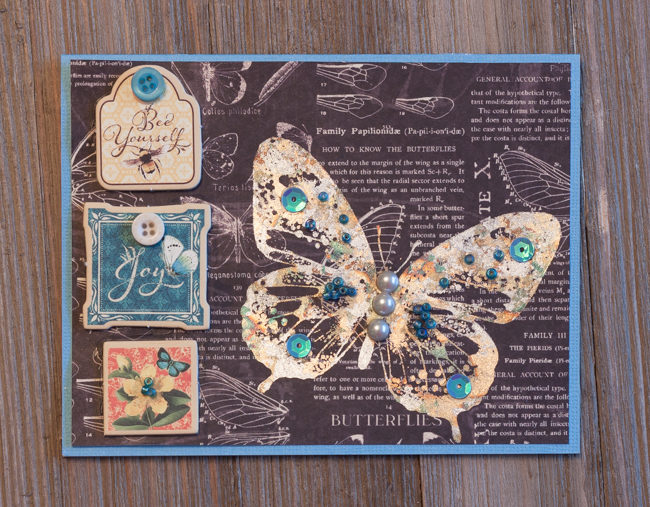
A few buttons from the bottle finish off the holes on several of the chipboard elements, and the whole thing is tied together beautifully! By mounting the black background on a blue card background, it keeps all of the embellishment contained and coordinated.

Embellished Butterfly Card

Who do you know that would love a blue and gold butterfly greeting? Flutter an embellished butterfly card their way!

0

Craft a Button Collage Heart to Send Valentine’s Wishes!

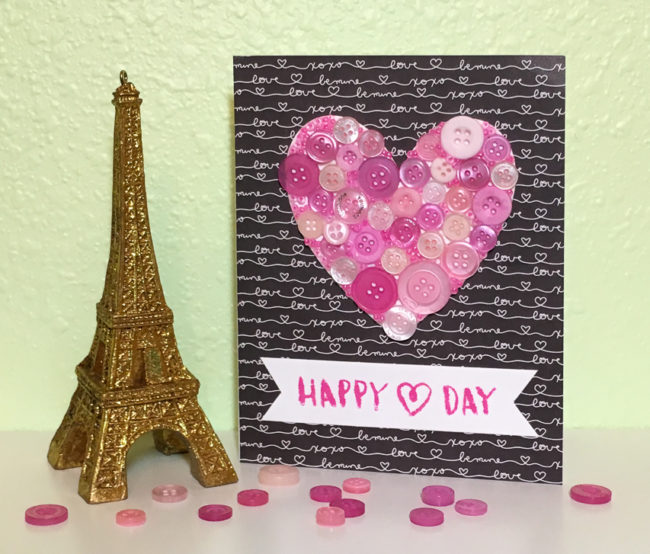
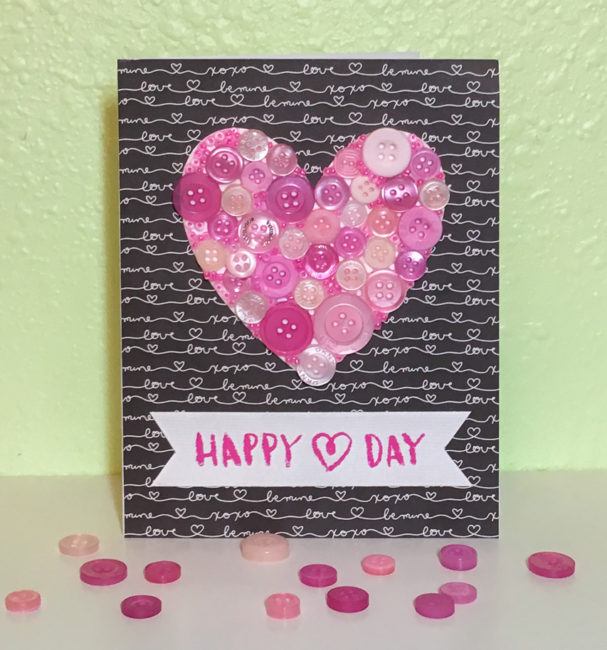
I love making button collages on small items – you may remember my button collage apple on my teacher tag awhile back. Collaged die cuts are a fun and simple way to add some dimension and detail to a design. Today, I’m falling in love with a button collage heart for Valentine’s day!

Button Collage Heart Card

Supplies Needed:

  • Buttons Galore Strawberry Cheesecake Color Blends (online store, Amazon)
  • 28 Lilac Lane Pretty Princess embellishment bottle (online store)
  • PPA Matte Adhesive (online store)
  • Simple Stories “Love & Adore” 6×6 paper pad
  • white cardstock
  • white card base
  • Cricut Explore machine
  • Ranger Tim Holtz Distress Ink in Picked Raspberry
  • Crate Paper “Heart Day” stamps

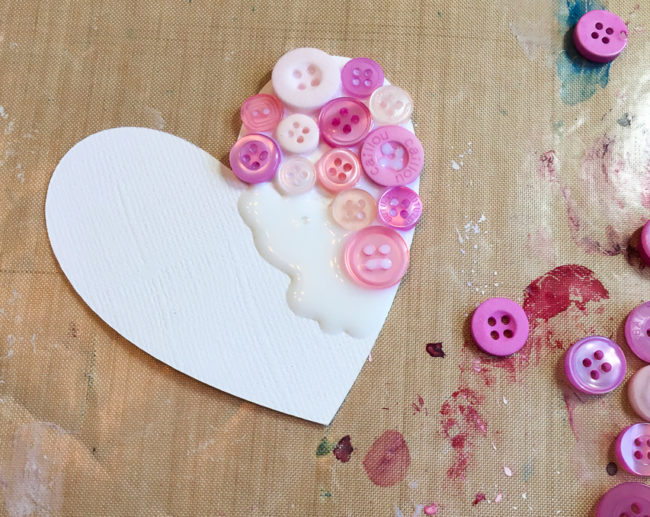
I started this card by cutting my 3″ high heart out of plain white cardstock on my Cricut Explore using the software’s basic shape tool. Then, starting in the upper right corner, I gradually spread white liquid adhesive (PPA Matte) over small areas and filled them in with the Strawberry Cheesecake buttons.

Constructing Button Collage Heart

While my glue was drying on my button collage heart, I cut my background paper to the size of the card front and adhered it. Then I stamped the sentiment on a strip of the white cardstock. Once the ink was dry, I snipped the ends to create a banner look for the sentiment strip.

The button collage had white spaces showing through between the buttons after the glue was dry. To fill these in, I dropped spots of glue on them, and pushed seed beads from the Pretty Princess bottle down into them. Some of the white edges also weren’t entirely covered, so I ran beads of glue along those areas and pressed beads into there as well.

Button Collage Heart Card

After all the glue was dry, I simply attached my heart and my sentiment strip to the front of the card. This simple design has a lot of “pop” from the color contrast and the button detail. I can’t wait to share it with someone special!

3

Make a Geo Heart Valentine Card for Someone Special!

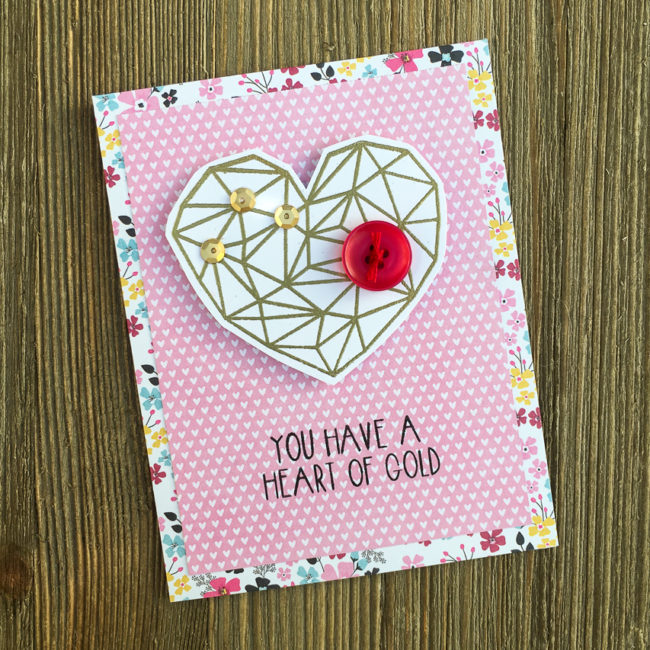
Are you feeling the love? It’s time to start thinking Valentine’s Day! This geo heart valentine card is trendy, fun, and best of all…oh so easy to make!

Make a golden geo heart Valentine card for someone special!

Supplies:

  • 28 Lilac Lane “Love Story” embellishment kit
  • Simple Stories “Love & Adore” 6×6 paper pad
  • white smooth cardstock
  • white card base
  • Neat & Tangled “Heart of Gold” stamp set
  • Ranger Tim Holtz Distress Ink in Black Soot & Embossing
  • Ranger Super Fine Detail Gold Embossing Powder
  • embroidery floss
  • foam adhesive

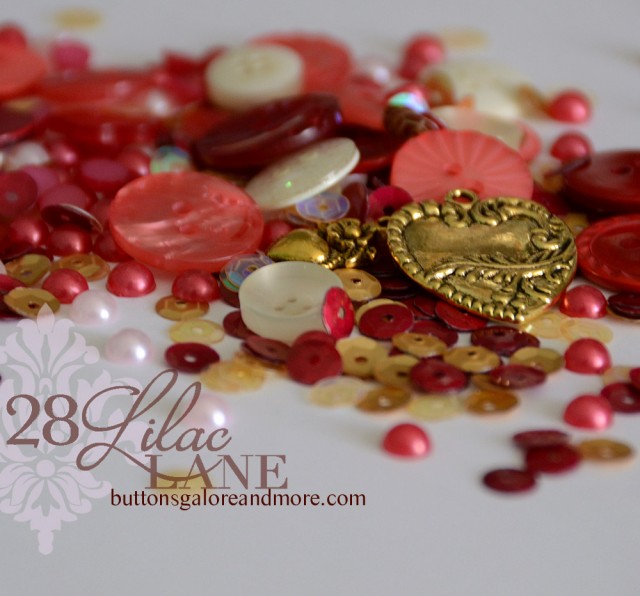
Valentine’s Day is the perfect time to use our 28 Lilac Lane embellishment kit called “Love Story”. This kit is packed full of beautiful rose and white buttons and seed beads, along with gold and rose pearls and sequins. For those extra-special greetings, there’s even a few charms and some ribbon, too. Love Story will make loads of valentines for the ones you love!

28-lilac-lane-love-story

One of my favorite things to do with my 28 Lilac Lane embellishments is to customize my stamps with them. I love stamps, but it can be difficult to create different looks using the same image repeatedly to get value out of it. Adding buttons, sequins, pearls, or beads over an image can help make it look like an entirely new design!

This clean and simple geo heart valentine card design is very quick and easy to make with only a few basic supplies. It truly is only a ten minute project! Or it can turn into twenty minutes if your cat gets up on your work table and knocks over your entire container of beautiful “Love Story” embellishments so you have to clean them up. (Let’s not talk about how I know that…)

How to make a geo heart valentine card:

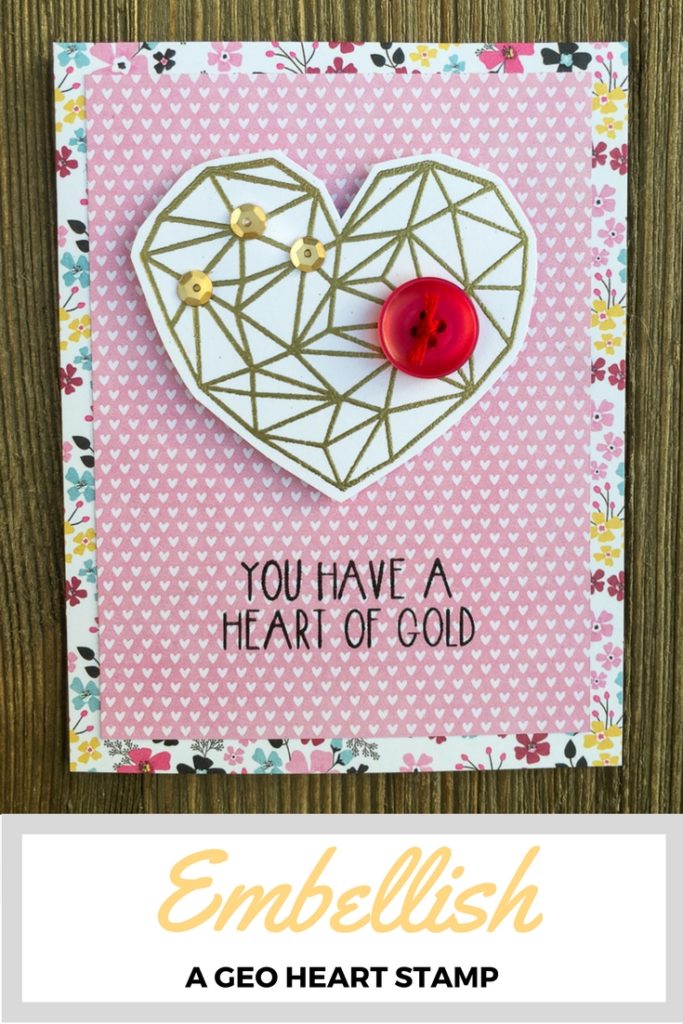
To make this geo heart valentine card, I cut my floral paper to the size of the card front. Then I glued it down to the blank white card base. I cut the heart print paper a half inch smaller each direction, and glued it centered on top of the floral paper. To finish preparing the card base, I stamped the sentiment in black ink on the center of the bottom of the card front.

I stamped the geo heart design on white paper with embossing ink, and then heat embossed it with gold embossing powder. I used fine pointed scissors to cut out the heart. Don’t worry if your hand cutting skills aren’t the best! Since this heart doesn’t have super smooth curves, it’s quite easy to hand cut.

To embellish the heart, I glued a few gold sequins at the intersections of lines in the geo heart. Then I chose a nice big rose button for a big pop of color, and then tied it off with matching embroidery floss before gluing it down. Finally, I used foam dot adhesive to attach the heart to the card front.

embellish a geo heart with 28 Lilac Lane

1

Get Extra Life from your Stamps with Embellishments!

Stamps are a great investment because they are a tool that can be used over and over again. However, using them over and over again can quickly get boring…so how do you spice things up and put the fun back in your stamps again? 28 Lilac Lane has the answer!

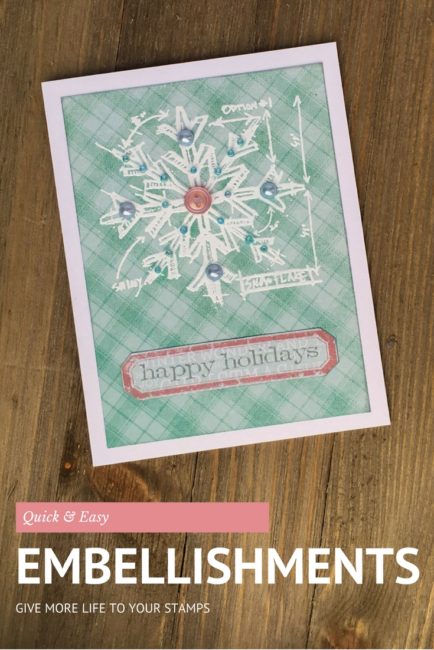
Snowflake Happy Holidays Card

Supplies Needed:

  • 28 Lilac Lane Cotton Candy Embellishment Bottle
  • PPA Matte Adhesive
  • My Mind’s Eye “Sugar Plum” 6″ x 6″ paper pad
  • White cardstock
  • Ranger Tim Holtz Distress Ink in Iced Spruce, Victorian Velvet, and Embossing
  • Ranger White Embossing Powder
  • Stamper’s Anonymous by Tim Holtz “Simple Sayings” stamps
  • Stamper’s Anonymous by Tim Holtz “Christmas Blueprint” stamps

One of my favorite ways to make my old stamps look new again is to embellish them! And with the 28 Lilac Lane embellishment bottles, I have the choice of seed beads, sequins, flat back pearls, and buttons to embellish my stamps.

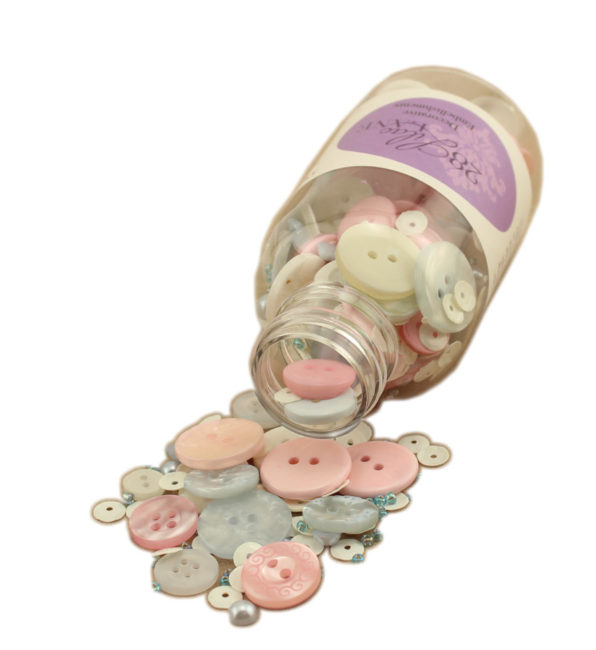
Cotton Candy Embellishment Bottle

I chose the Cotton Candy bottle because it matched my paper pad. [The 28 Lilac Lane “Cotton Candy” embellishment bottle is available at the our online store, Scrapbook.com, A Cherry On Top, Ellen Hutson, Simon Says Stamp, Create for Less, and others, or check your local retailer].

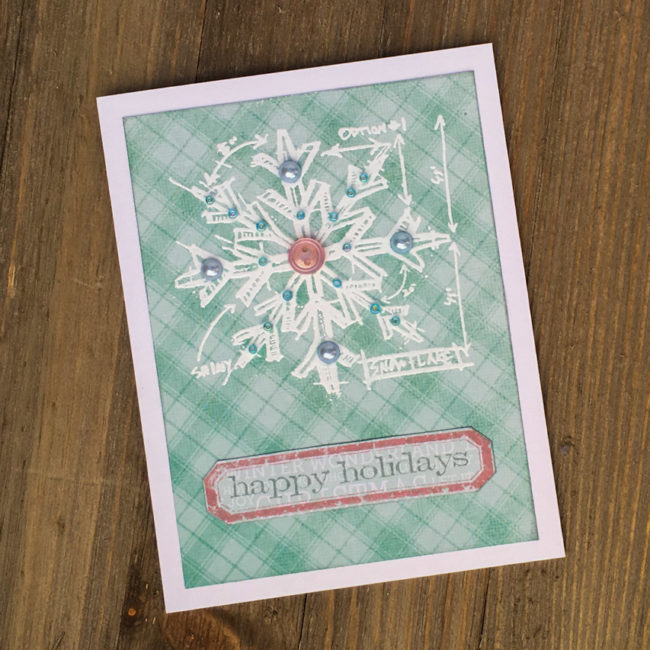
To create this card, I first made a card base by folding a half sheet of letter sized cardstock. Then I cut a 3.75″ by 5″ piece of the blue plaid paper, and inked the edges in Iced Spruce before adhering it in the center of the card front.

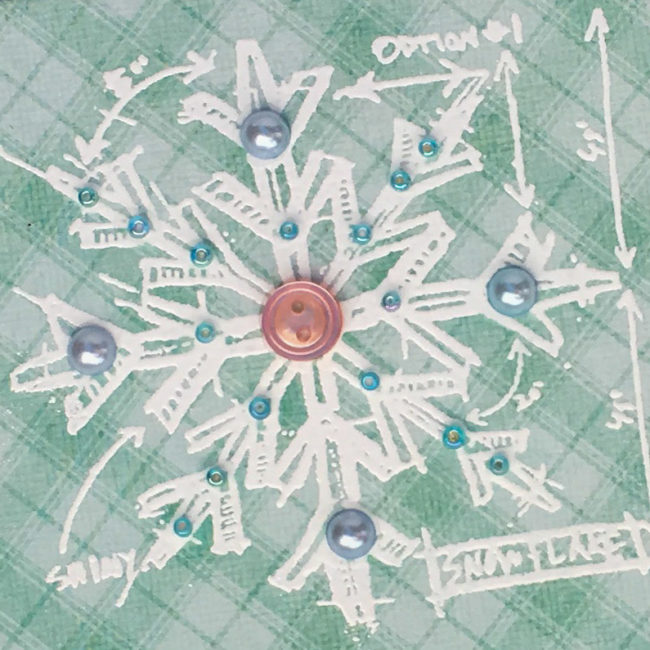
Next I used embossing ink to stamp the snowflake design on the top of the card front, and heat embossed it with white embossing powder. Once the heat embossing was cool, I selected embellishments from the Cotton Candy bottle and adhered them with small dots of clear drying white glue.

Embellishments on stamped image

The sentiment on the bottom of the card front was created by first stamping the label outline in Victorian Velvet on the pale turquoise patterned paper. Then I cut out the label using scissors, close to the edge of the stamped label. I stamped the sentiment in Iced Spruce, and adhered the label to the card front.

get-more-life-from-your-stamps-with

What stamps do have that could be given new life with embellishments?

0

Button Up an Ugly Christmas Sweater Card!

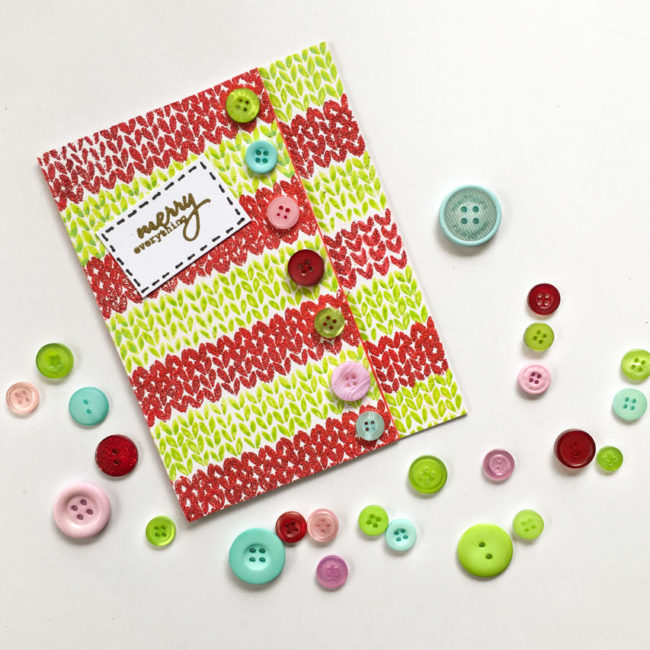
Nothing’s more fun at Christmas than an ugly Christmas sweater. So why not send one to a friend in the form of an ugly Christmas sweater card for the holidays?

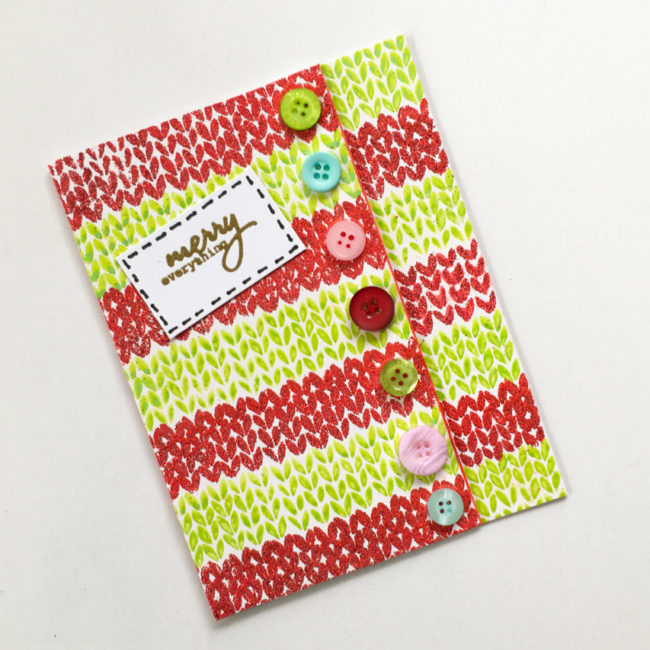
Ugly Christmas Sweater Card by Nancy Nally for Buttons Galore

Supplies Needed:

  • Buttons Galore “The Merriest” Button Bonanza
  • PPA Matte Adhesive
  • White cardstock
  • Pinkfresh “Oh Joy” Stamp Set
  • Ranger Tim Holtz Distress Embossing Ink
  • Ranger Tim Holtz Distress Ink in Twisted Citron
  • Ranger Embossing Powder in Clear Super Fine Detail, Gold, & Red Tinsel
  • Black pen
  • Ranger Tim Holtz Distress Marker in Candied Apple (optional)

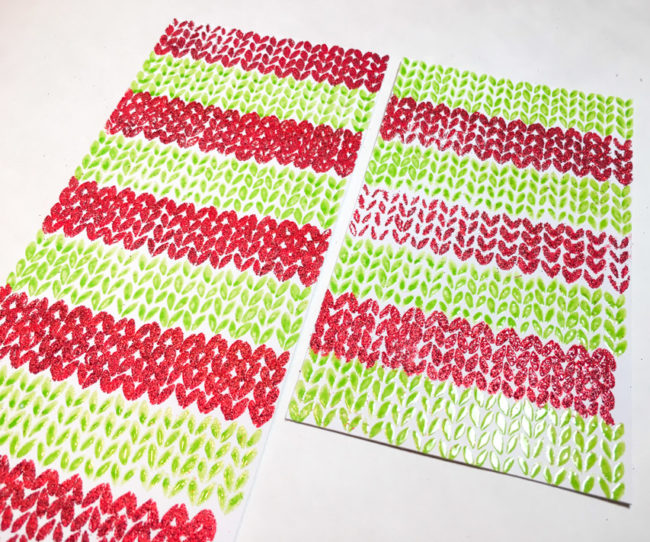
This card’s technique is simple – just creating two strips of paper by stamping the sweater knit stamp over and over, alternating the color and embossing it. The Twisted Citron ink is embossed with clear embossing powder, and the red is clear embossing ink that is heat embossed with Red Tinsel powder. The strips need to alternate to create the effect on the front of the card.

Ugly Christmas Sweater Card construction

Doing all that stamping and embossing while changing colors takes a bit of time, but the result is a great effect!

Once strips are made, they can be adhered to a card base. Start by attaching the one on the right side of the front. Position it, glue it down, and then trim off any excess. The front is layered, with the left side overlapping the right panel, so there’s no need to worry about how wide the panel is on the card front.

To emphasize the layered effect and create bulk in it as if it really is a sweater placket, adhere two inch wide strips of paper underneath the right edge of the left panel before attaching it to the card front. This will slightly raise the area under the buttons up, creating depth and shadow that look like a true sweater! For a little extra shadow, run a dark red pen or inkpad along the paper edge where the pieces overlap as well.

Ugly Christmas Sweater Card by Nancy Nally for Buttons Galore

Now that your sweater has a placket, it needs buttons to fasten it! “The Merriest” Button Bonanza has red and green shades that match the card base. Adding in the the pink and blue shades that are also in the assortment looks a bit random on top of all of that red and green, and is the perfect way to “ugly” up your ugly Christmas sweater card. Glue your buttons down with a clear drying adhesive like PPA Matte Adhesive.

The finishing touch is the “patch” that has the sentiment on it. Just stamp and emboss the sentiment, and then draw stitching lines around it with a pen. Adhere it at a jaunty angle to your sweater’s “front” and you are done!

Who do you know that needs an ugly Christmas sweater card? Send them one today!

0

Send a Retro Merry Christmas Card Wish!

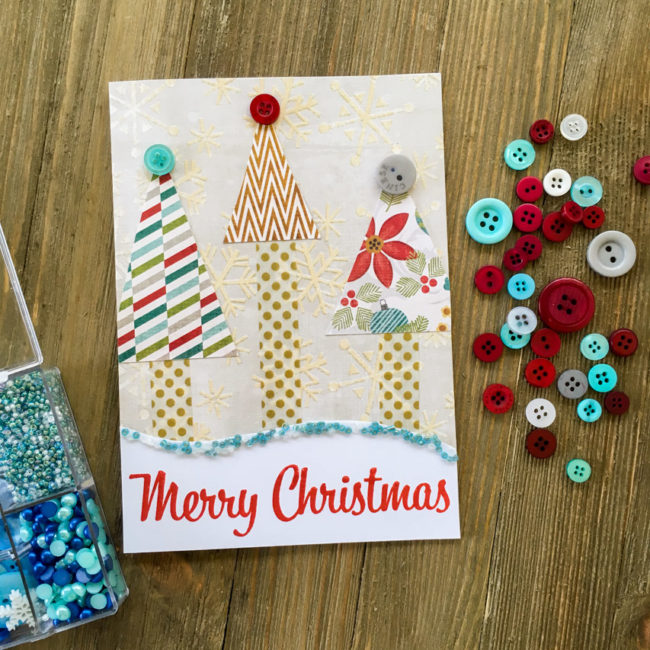
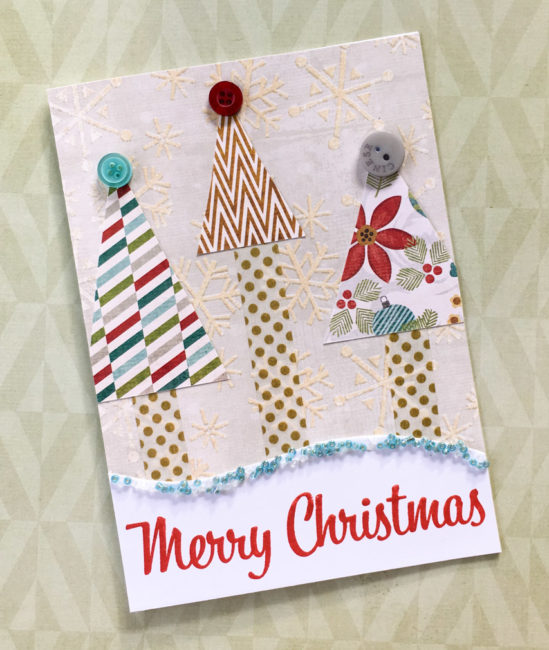
Tis the season to be jolly! Today I’m here to show you how to combine two of our holiday products that have a turquoise toned blue in their palette to make a fun retro Merry Christmas card!

Retro Merry Christmas Card by Nancy Nally for Buttons Galore

Supplies Needed:

  • patterned paper
  • washi tape (or patterned paper)
  • red ink
  • Merry Christmas stamp
  • white cardstock
  • clear drying glue (such as PPA Matte Adhesive)

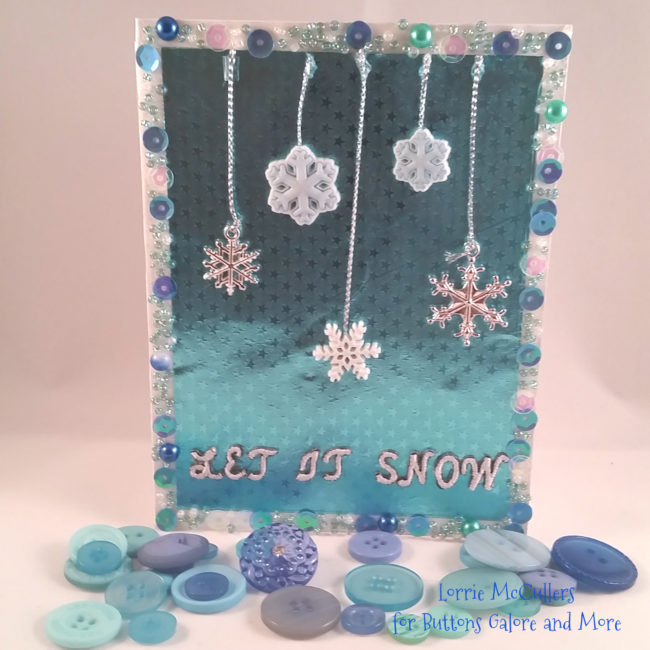
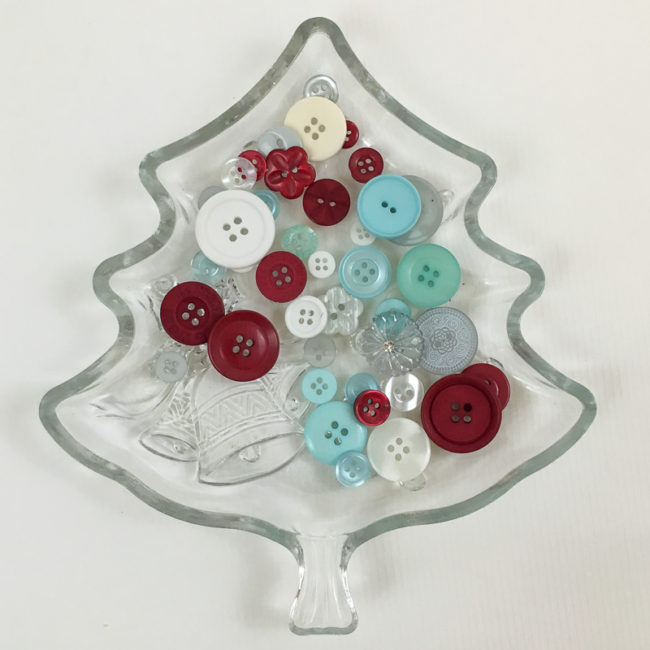
This project pairs seed beads from our beloved 28 Lilac Lane “Let It Snow” embellishment kit with buttons from our new “Cool Winters” Button Basics. With similar tones of blue, these two coordinate together beautifully to add a pop of trendy color to holiday projects of all kinds.

Winter Flurries Button Basics

This card is 5″ by 7″, so to start my retro Merry Christmas card I cut the snowflake background paper to that size.

Next, I cut a 5″ wide strip of white cardstock that was a few inches tall. I stamped “Merry Christmas” on it with red ink, centering the image near the bottom. Then I used scissors to cut the top of the sentiment block into a wavy design.

To create the beaded edge, I started by spreading a bead a white glue along the edge. Then I sprinkled seed beads over the glue until it was covered, and set the sentiment block aside to dry.

Cutting the trees is easy! I simply used three scraps of paper and cut them into various sizes of triangles. The tree “trunks” are made from washi tape (but could also be made from strips of paper). Some of the tree triangles hung over the edge, so I just snipped them off. Once those elements were adhered in place, then I used liquid glue to adhere three buttons as toppers for the trees.

Once the glue holding the seed beads was dry, then I adhered the sentiment block across the bottom.

To finish my card, I used white cardstock to make a blank card and then adhered the finished card front onto it.

Retro Merry Christmas Card by Nancy Nally for Buttons Galore

I hope this cheery little retro Merry Christmas card greeting will help you brighten the holidays of someone special!

0

A 28 Lilac Lane Card with Watercolor!

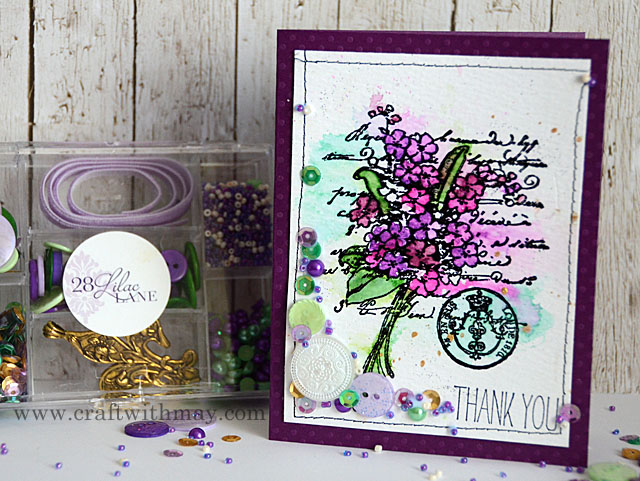
I could not be more excited that 28 Lilac Lane is now shipping to stores! I can’t wait to see what everyone creates – there is a whole world of crafty possibilities awaiting inside each and every kit. One of my favorite ways to play with the line is to accent a single stamped and colored image on a card, tag, or small canvas décor piece.

28 Lilac Lane card with watercolor

Today I have a video tutorial for a 28 Lilac Lane card featuring some lilac coloring and one of my favorite 28 Lilac Lane kits, French Quarter. My tip for keeping your embellishments in a tight cluster is to begin with the largest elements, and work smaller. This lets me fill in the gaps and create clusters almost effortlessly! Thanks to the variety of sizes in the kits from bigger buttons down to tiny seed beads, I’ve always got something that works!

I hope that you’ve enjoyed this 28 Lilac Lane card video tutorial and that I’ve inspired you to do a bit of coloring as well as some fun embellishing. Happy Crafting!

0

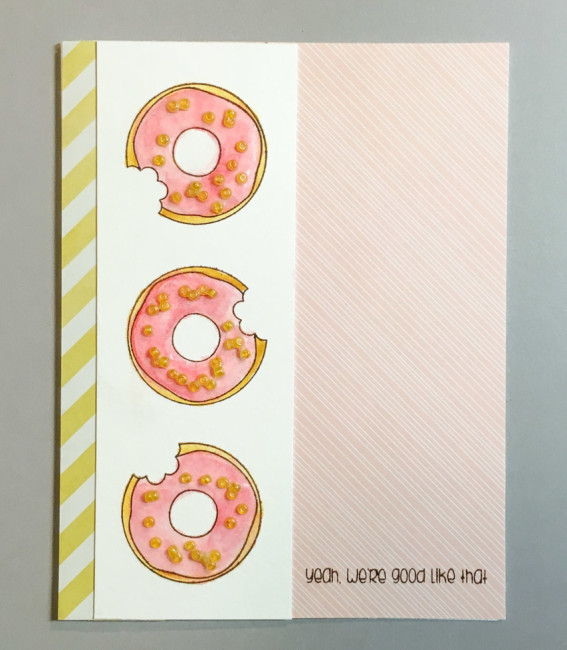
Send a Sweet Greeting with a Donut Card!

Sometimes you just want to send a card to say “hi” to someone special. This adorable donut card is a sweet way to do the job!

The new 28 Lilac Lane embellishment kits are now shipping, and they are perfect for cardmakers: buttons, sequins, trim and charms. They also contain seed beads, something unfamiliar to some cardmakers. In addition to making great shaker boxes, seed beads can be combined with glue to make great shiny embellishments. On this donut card, they give the appearance of sprinkles (or nuts).

donut card

Supplies:

Instructions

Cut pink striped paper to fit card front. Adhere. Cut 1″ strip of yellow stripe and attach along fold of card.

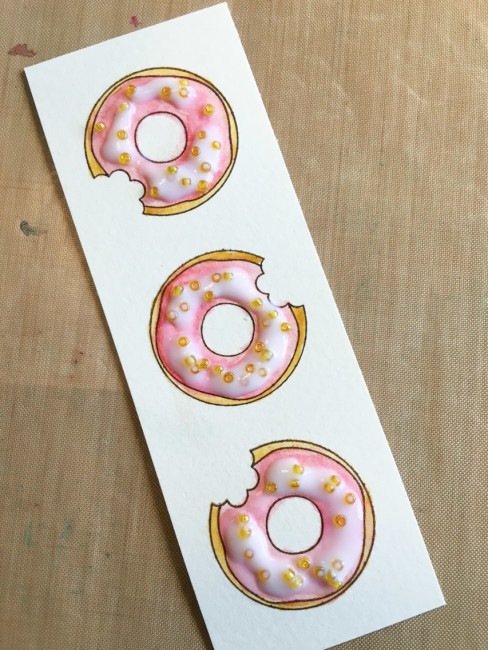
Cut a strip of water color paper that is 1 7/8″ wide and the same height as the card front.

Using Archival ink, stamp three donuts on the watercolor paper.

Paint the donuts with the watercolors.

Donut Card gluing

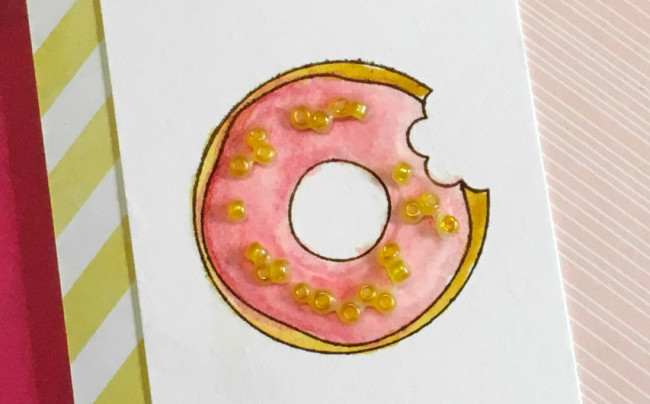
Spread a thin layer of white glue (I use Artquest PPA Matte) on the donut frosting. Scatter yellow seed beads from the Tropical Twist kit in the glue. Add a second layer of glue on top of the beads (above).

donut card close-up

When dry, the glue will largely disappear. Any remnants that remain visible (as around some of the beads in the photo above) will just look like donut glaze!

Adhere the donut strip over the seam between the two patterned papers on the card front.

Stamp the sentiment in the lower right corner of the donut card front.

The new 28 Lilac Lane products are now shipping to stores! Look for them in a store near you! 

0

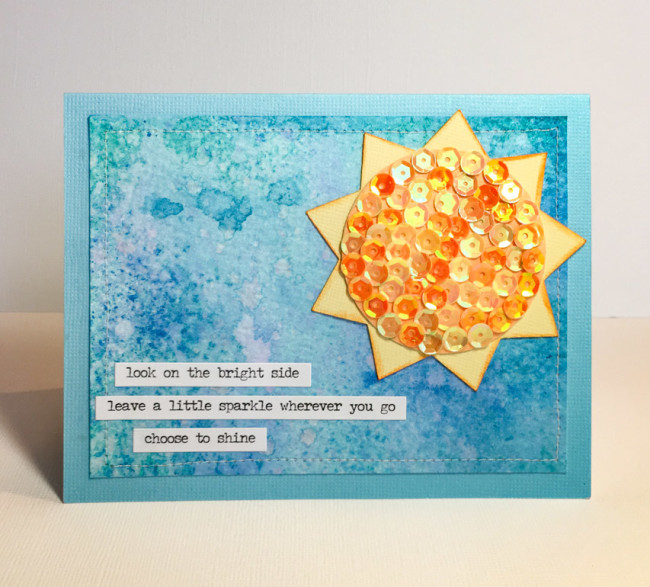
A Sunny Sequin Card with 28 Lilac Lane

As a northerner transplanted to the south, I remember all too well the dark days of February in the cold part of the country. This time of year it seemed that winter would never end! So today, I’m here to bring a blast of sunshine to February, with some help from the new sequin tins from 28 Lilac Lane.

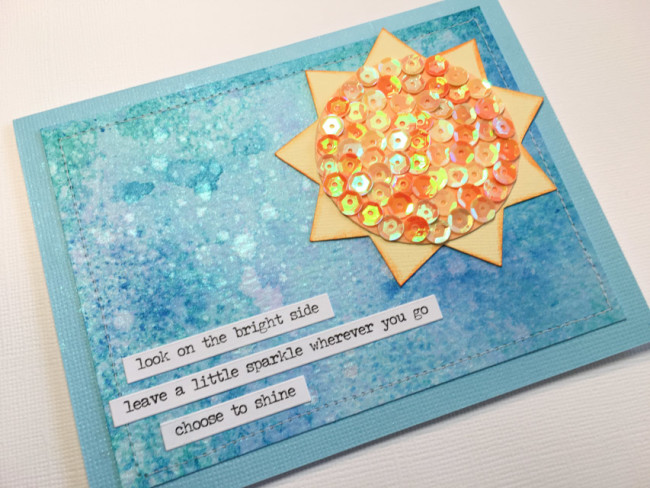
This mixed-media inspired sequin card is very simple to make. By simply changing up the sentiment stickers, it can be perfect for providing cheer on a variety of occasions.

Bright Side Card

Supplies:

  • Blank Card
  • Cardstock (yellow, orange, blue)
  • Tim Holtz Distress Watercolor Cardstock
  • 28 Lilac Lane by Buttons Galore Yellow and Orange sequin tin
  • Tim Holtz idea-ology Small Talk stickers
  • Cricut Explore machine
  • Cricut Design Space cutting file
  • Ranger Tim Holtz Distress Ink (Carved Pumpkin)
  • Ranger Dylusions Spray Ink (Vibrant Turquoise, London Blue)
  • Ranger Dylusions Mica Spray (Vibrant Turquoise)
  • Sewing Machine

Instructions:

  1. Spray the two spray inks randomly on a sheet of the watercolor cardstock. Spritz with water and blot to blend. Repeat until satisfied with color blend. (Check out this video for tips.)
  2. Trim a half inch off of each direction of the cardstock. Stitch cardstock down to the front of the blank card.
  3. Spray the card front with Mica Spray.
  4. Cut the sun element from yellow and orange cardstock on the die cutting machine.
  5. Ink the edges of the sun element with the Carved Pumpkin ink.
  6. Spread white glue on the center of the die cut, and place sequins. Let dry.
  7. Assemble two parts of sun die cut together. Adhere die cut to front of card.
  8. Adhere phrase stickers to card.

Bright Side Sequin Card

The sequins will shine on their own in this sequin card, of course, but the Mica Spray enhances the card’s overall shine and brings out the sequins’ shine. And the orange ink will make the darker toned sequins in the yellow sequin blend really pop!

The 28 Lilac Lane sequin tins will be shipping soon – don’t miss out on the entire collection of all six color blends!

1

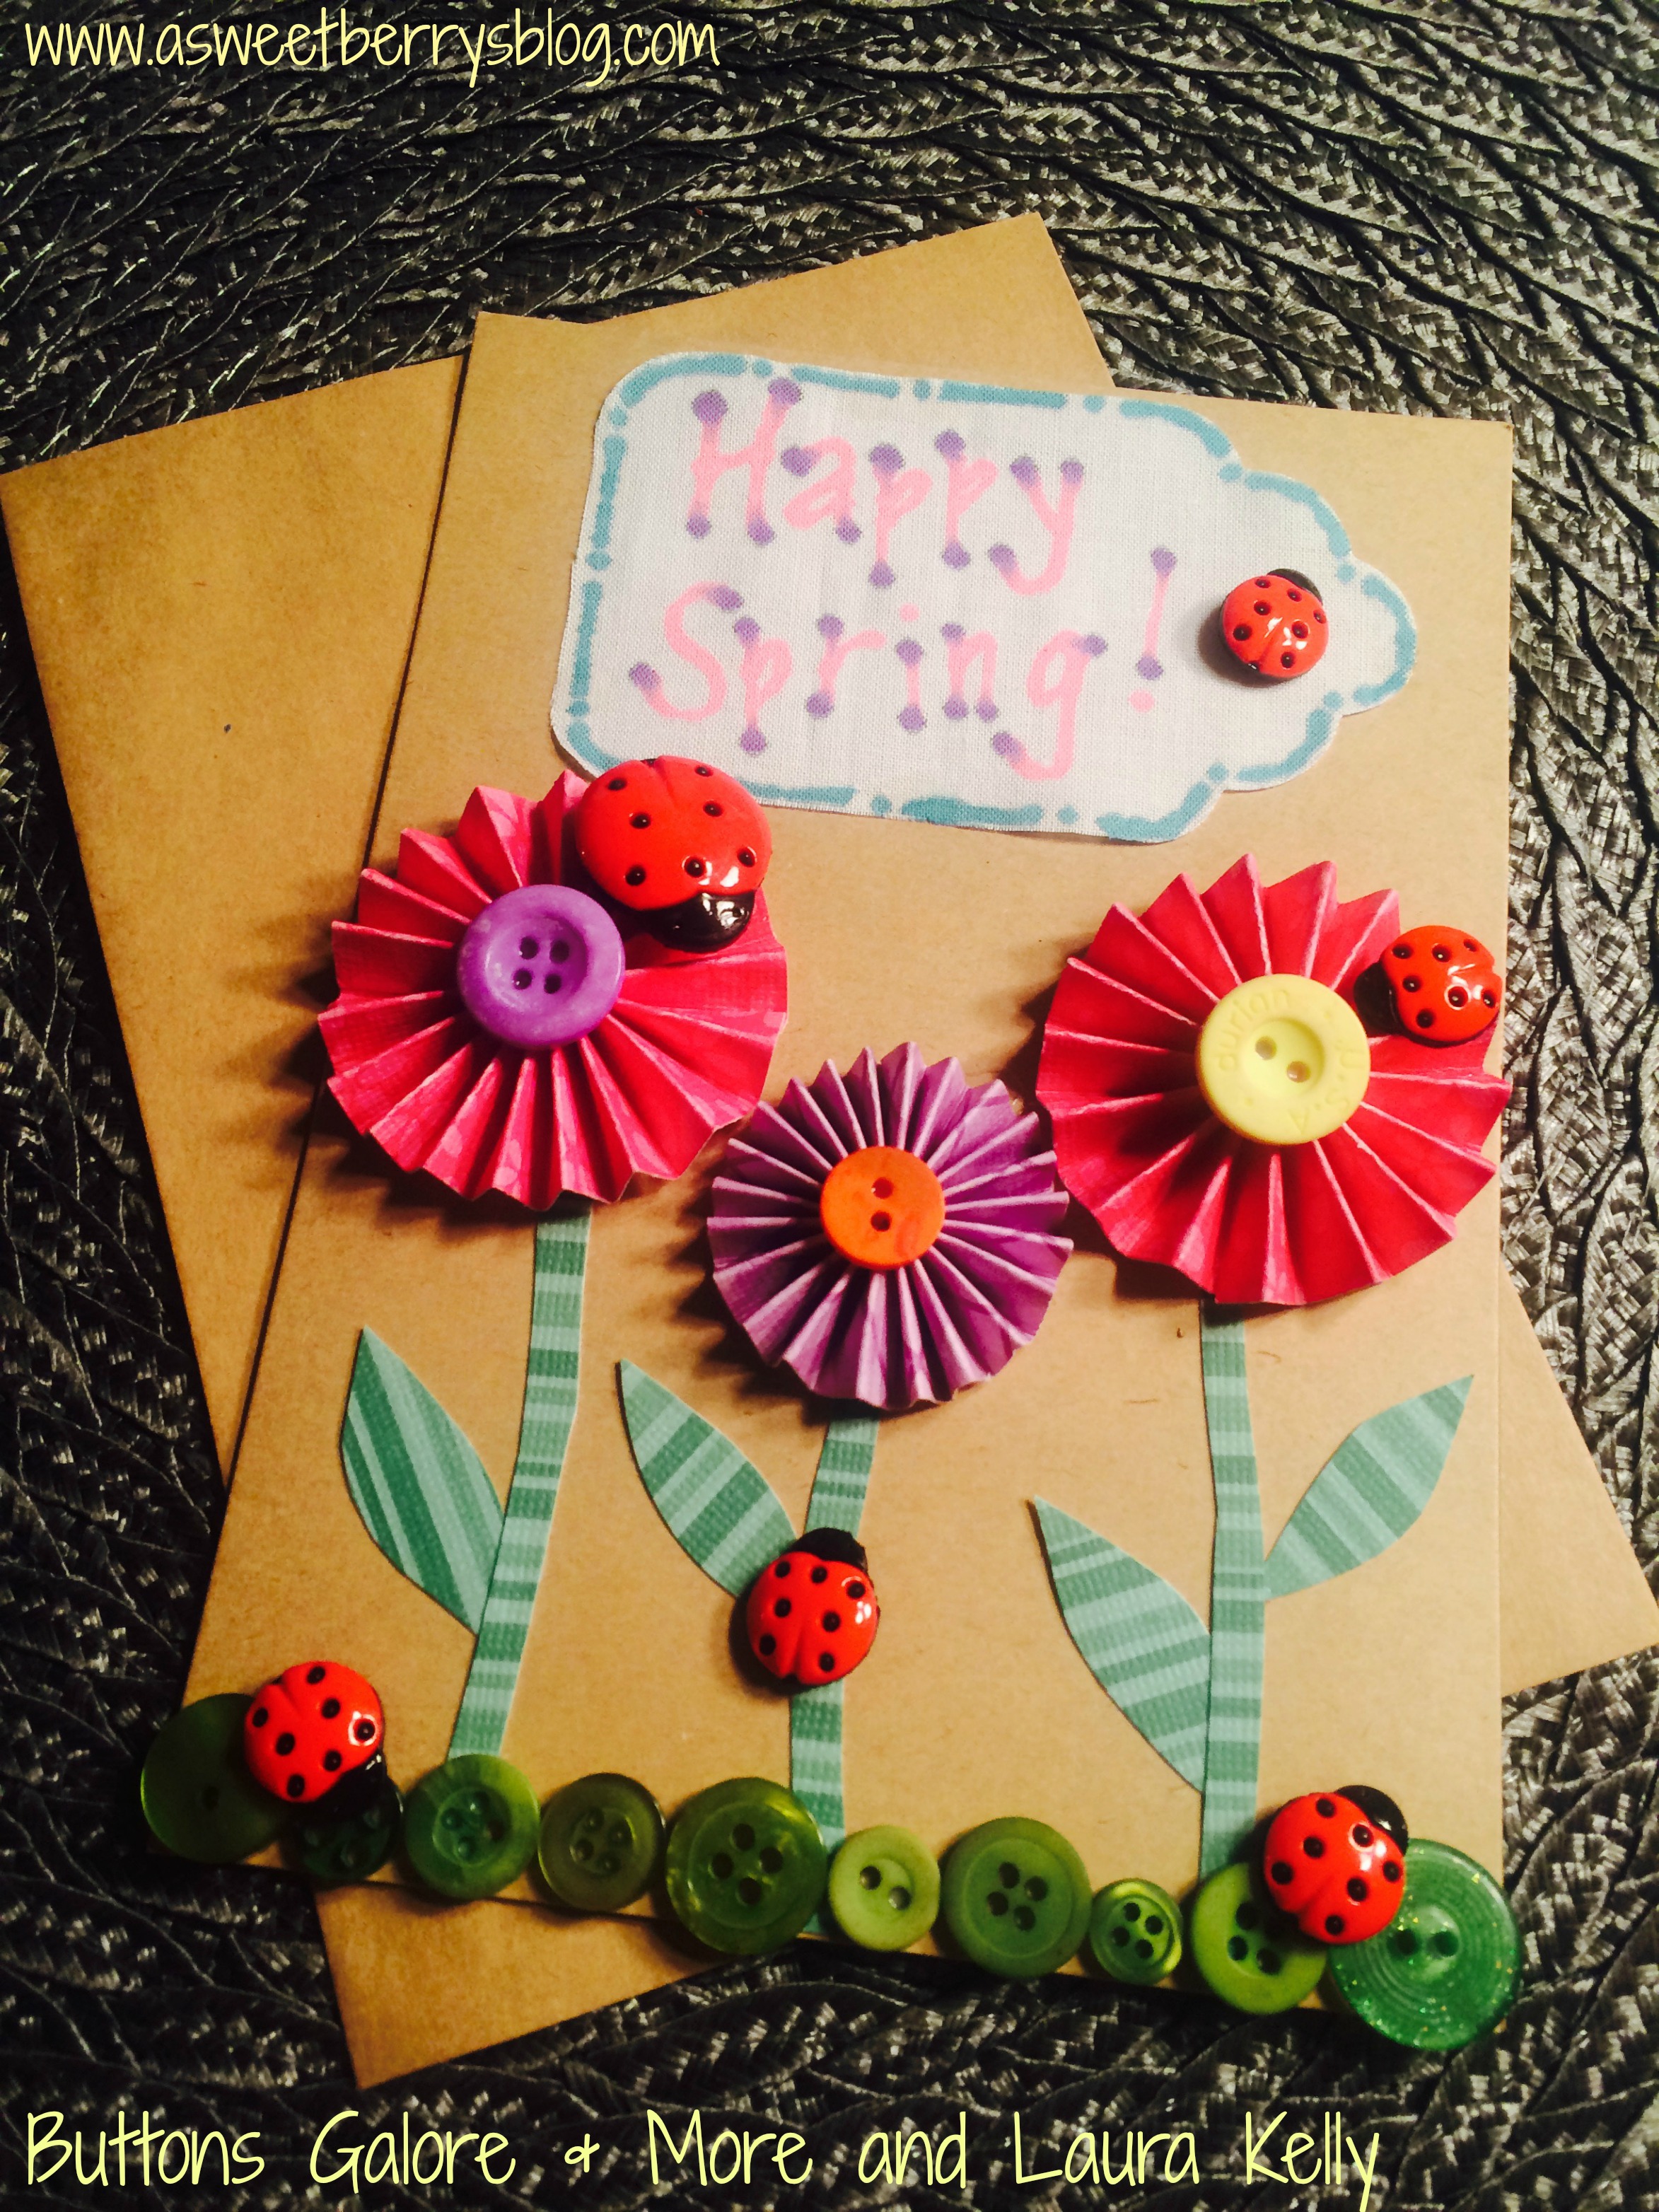
Ladybug Button Card

Yay for Fifteen MINUTE Friday!  The weeks just go by so quickly.  Katie from A Sweet Berry’s Blog created this adorable springtime Ladybug Button Card.  She is one of my best friends and super creative and fun.

ladybug card

It looks like creating this masterpiece was a lot of fun!

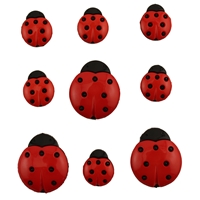
ladybugs

If you want more information about how she created this card, you can hop over to her blog here and find out.

The ladybug buttons are super cute to use while paper crafting and also adorable when sewn on to projects.  You can buy there HERE or by clicking on the photo below.

4247-2T


Happy Springtime and Happy Crafting,

Laura

0

Mother’s Day Card

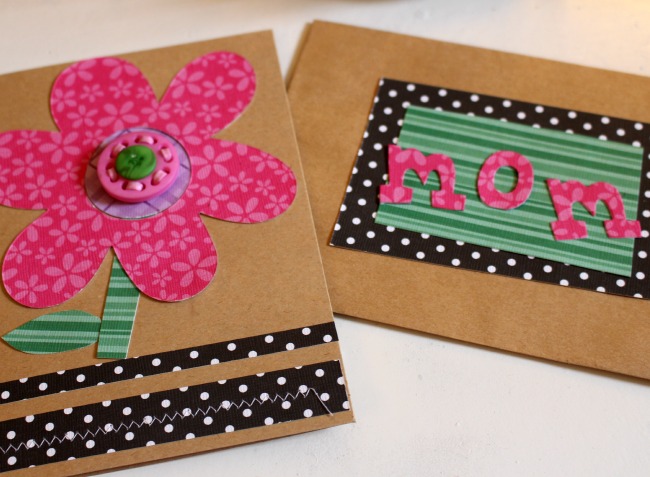
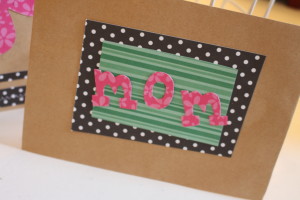
This adorable card was made by Laura Neiman from Housewife Hellraiser using simple and fun paper crafting techniques.  It is the perfect card that can be made quickly which makes this a great project for Fifteen MINUTE Friday!

Mom_Card_Sizzix_BGM

She used papers and a card/envelope combination from Darice and buttons from the Laura Kelly BRIGHTS collection along with adhesives from iLovetoCreate.

You can find out the details on her blog HERE.

IMG_3224

There are so many great ways to create handmade cards with buttons.  Browse the blog and you will be totally inspired!

Cheers,

Laura


0

A Noteworthy St. Patrick’s Day Card

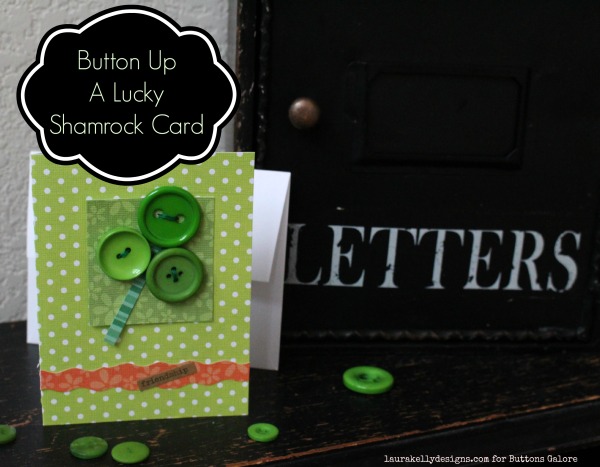
Sending cards for the little holidays is not only fun but also very special.  I mean come on, who doesn’t LOVE to get a note in the mailbox these days.  This hand made card is not only adorbale but sure to spread luck and friendship for St. Patrick’s Day.  Three cheers for Fifteen MINUTE Friday!

Label Card

You will need the following:

Supplies

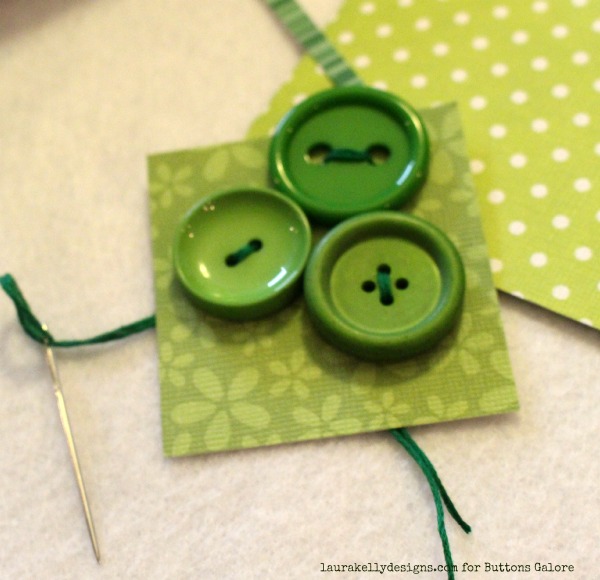
Cut a fold over card to fit your envelope.  This one is 8.5 x 4.25 to fit in an A2 sized envelope.  Cut your other decorative papers to add color to your card front.  Stitch your buttons to a piece of pre-cut card stock to form a shamrock.  Knot it in the back.

Stitch

Adhere your pieces to the front of the card with Aleene’s Always Ready.  Add a sticker message if you would like.  You can also write your message with a marker or a pen.

Message

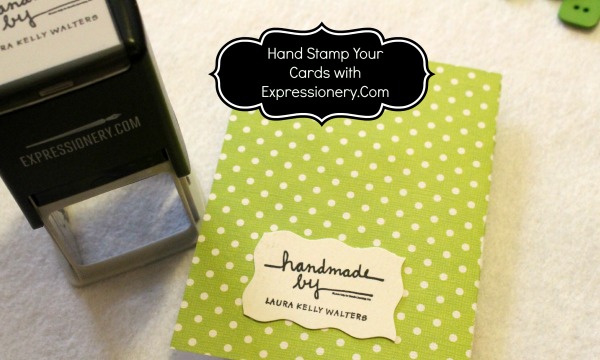
I hand-stamped the back of my card too with my self-inking stamp from Expressionery.Com.  I think this makes it a little more special.

Stamp

And now you are ready to write a for real, noteworthy, hand written letter to a friend!

SHamrock Button Card Final

Happy Creating,

Laura

0

Little Pumpkin Button Cards for Fifteen MINUTE Friday

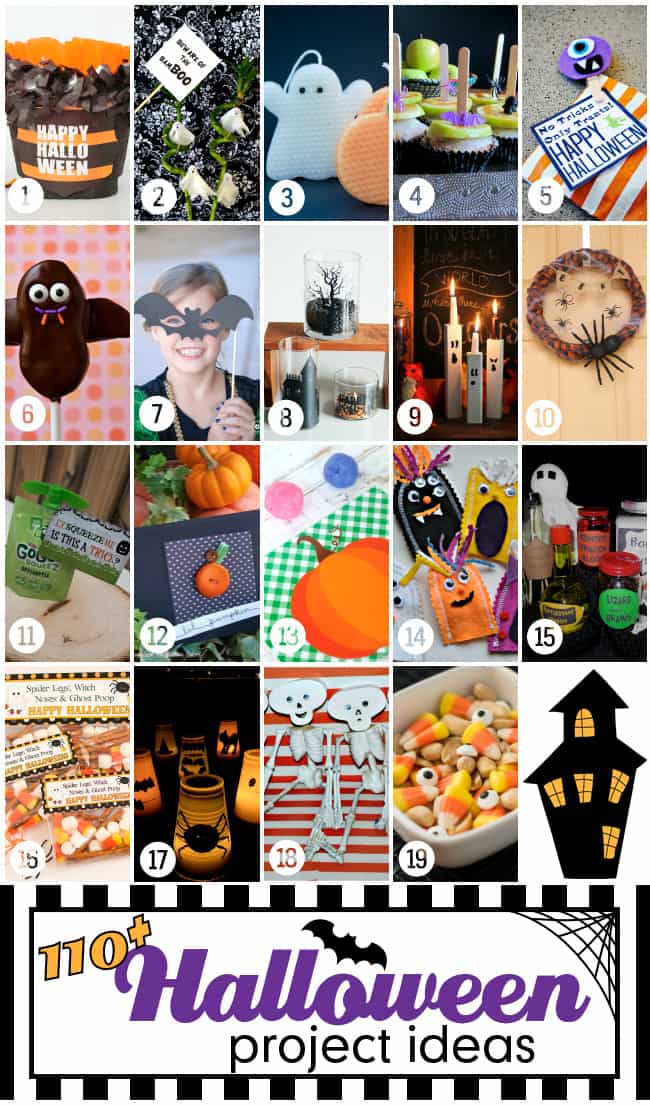
Halloween is absolutely one of my FAVORITE holidays and to celebrate I pulled together the creative minds of some of my talented blogging friends to bring you over 110 fabulous Halloween ideas! From costumes to parties, crafts and home decor, recipes and free printables, we have so many fun ideas to share! I guarantee you’ll find a project (or 10!) that you would love to incorporate into your Halloween festivities. All week (Monday through Saturday) myself and my blogging friends will be sharing our fun creations with all of you. Each day will include approximately 20 Halloween projects and you can “hop” from one blog to another to check them all out.

It’s Friday and day 5 of our Halloween Bash blog hop! Glad you could join us on this fabulous Friday for more Halloween ideas from me and my talented blogging friends!

These are so super cute and easy peasy to create!

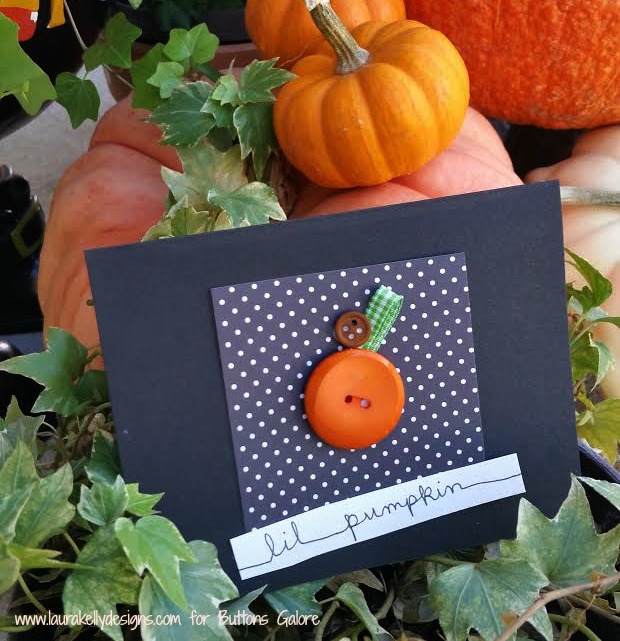
Pumpkin Card

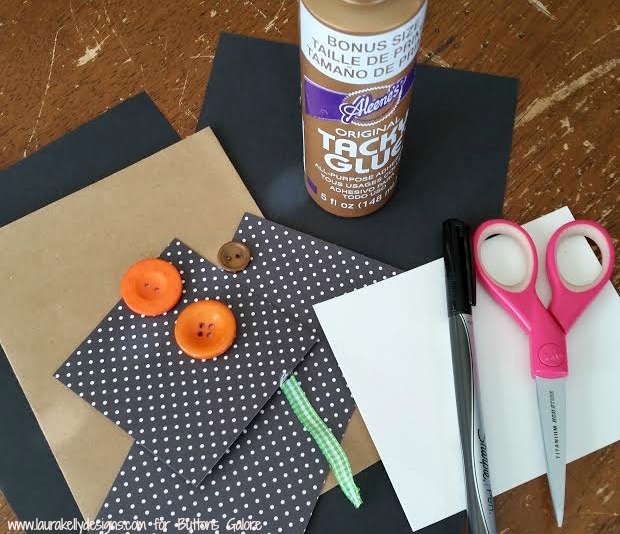
You will need just a few things…paper, Outrageous Orange buttons and Aleene’s Tacky Glue.

Supplies

Cut out your decorative paper and attach it to your card with Aleene’s then add a BIG orange button for a pumpkin.  I added a little brown button for a stem and green ribbon for the vine.

TA DA!  So adorable and simple and fun!

But the fun ideas don’t stop here! Continue checking out the creative Halloween projects my blogging friends have created for our blog hop by clicking on each of the links below, for the Halloween projects you’d like to see in more detail and it’ll take you right to that post with additional information and photos on how to create it. Have fun and pin away!

Over 110 fun & fabulous Halloween projects & ideas! #halloweenprojects #halloween #diyhalloweenideas

1. Happy Halloween Treat Bucket
2. Beware of the Bam-BOO
3. Halloween Beeswax Candles
4. Caramel Apple Cupcakes
5. Halloween Treat Bag Tags – Free Printable
6. Halloween Cookie Pops ~ Nutter Butter Bats & Mummies
7. Halloween Photo Booth Props
8. Halloween Candle Jars
9. Ghost Candles
10. Dollar Store Spider Halloween Wreath
11. Healthy Halloween Class Treat
12. Little Pumpkin Button Cards
13. Pumpkin Playdough Mats
14. Craft for Kids: Finger Puppet Monsters
15. Creepy Halloween Jar Labels
16. Halloween Party Favor and Printable
17. Kids Halloween Lanterns
18. Candy Box Head Skeletons
19. Sweet & Salty Halloween Treat

Follow our Fabulous Halloween Ideas Pinterest board for even more inspiration!

Follow Design Dazzle’s board Fabulous Halloween Ideas on Pinterest.

Be sure to come back tomorrow for another 20 awesome Halloween ideas!

Thanks to all 110+ fabulous bloggers participating! We’d love for you to visit their blogs and see what else they’re up to!

100 Directions || 365daysofcrafts || a girl and a glue gun || A Prudent Life || Addicted 2 DIY || Albion Gould || Ashlee Marie || Atta Girl Says || Bakerette || BD Design || BellaGrey Designs || Black and White Obsession || Bloom Designs Online || Blue i Style || Bombshell Bling || bumblebreeblog || C.R.A.F.T. || Celebration Lane || Clean and Scentsible || Clearsnap || Confetti Sunshine || Crafts by Courtney || Creations by Kara || Creative Juice || Cutesy Crafts || Design Dazzle || Dress It Up Crafts || Echoes of Laughter || Everyday Party Magazine || Eye Candy Creative Studio || Fairfield World || Fearlessly Creative Mammas || Five Heart Home || Fizzy Party || Free Time Frolics || Frenchie || FrugElegance || Glued To My Crafts || GreatStitch || Happiness is Homemade || Here Comes the Sun || Home Maid Simple || Honeybear Lane || hoopla palooza || Hydrangea Hippo || I Dig Pinterest || ICE Resin || inkhappi || Insitefull Living || It’s Sew Lorine || Jaco’lyn Murphy || Jen A. Street || Just My Little Mess || Just Us Four || Katarina’s Paperie || Kiki and Company || Laura Kelly’s INKlings || Let’s Eat Grandpa || Let’s Go Junking || Liz on Call || Love The Day || Made by a Princess || Made From Pinterest || Made to be a Momma || Major Hoff Takes A Wife || Make Life Lovely || My Craftily Ever After || My Daylights Blog || My Insanity || Nature’s Knockout || Not Just A Mommy || One Creative Mommy || Organize & Decorate Everything || Our Thrifty Ideas || Paleo Priests || Persia Lou || Pink Cake Plate || PinkWhen || Play. Party. Pin. || Practical Parenting || Reclaim Yourself Retreat || See Vanessa Craft || She’s Crafty || Simple Sojourns || Simply Designing || Soiree Event Design || Sowdering About || Splendid Design || Stuffed Suitcase || Super Simple with Terri O || Suzys Sitcom || Sweet and Simple Magazine || Swish Printables || Sypsie Designs || That’s What Che Said || The Benson Street || The Cards We Drew || The Gunny Sack || The Happy Scraps || The Life of Jennifer Dawn || The Scrap Shoppe || The Things I Love Most || Tikkido || Two Thirty~Five Designs || Wait ‘Til Your Father Gets Home || Walnut Hollow Blog

Happy Crafting,

Laura

Over 110 fabulous Halloween Ideas shared by bloggers. #halloweenideas #halloween


3

Sunday Card Tutorial: Make a Window Card

Window Cards are cool.  Have you ever wanted to make a window card? Have you ever had to make a BUNCH and wanted them all to be the same?
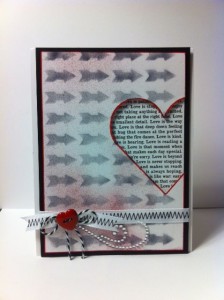
Window Card by Allie Gower


Materials to make Window card:

I have a Grand Calibur from Spellbinders, but this should work in any machine. You need repositionable tape – I use Tissue Tape – as you can see! You will also need two post it notes.

Start by making an outline of your card, so that you know where to place each card front.
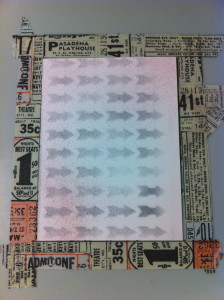
Making the Perfect Cut


You also want to tape down the die. You will cut through the tape – no worries, just put tape all over it and really rub it down. Then, you are ready to die cut your panels. Use some post it notes to hold it in place. These will really stick after running through your machine, but won’t leave any residue.
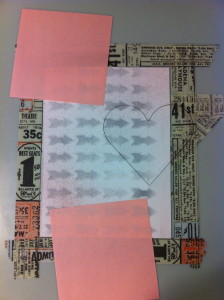
Making the Perfect Cut


Rinse. Lather. Repeat. Just kidding. Keep going, just line up your panel  and secure with post – its. Before you know it, you’ll have a nice neat stack of card fronts.
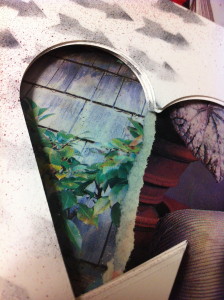
Making the Perfect Cut


My card fronts were created with an arrow stencil. This is a new stencil that Donna Salazar designed for Want2Scrap. It worked great. I used my trust post its to hold it in place, and airbrushed some black ink. Afterwards, I sprayed on a little red ink, and outlined the card.

I finished the card off with ribbon, a Red Heart Button and some twine, and a rhinestone flourish.

Behind the opening is some cardstock. I raised up the card front with some dimensional adhesive. The card front is matted on black, and then adhered to the card base.

If you have to make several cards, or even just one – this easy technique will help you get it right – the first time, and every time.

Buttons Galore Supplies Used to Make the Window Card:


Additional Supplies Used to Make the Window Card:

  • Cardstock – My Favorite Things Replenishments
  • Patterned Paper – Canvas Corp.
  • Stencil and Flourish – Want2Scrap
  • Die – Classic Heart from Spellbinders
  • Ink and Airbrush System – Copic
  • Ribbon – American Crafts
  • Twine – Doodlebug Design

Would you like me to send this card to you? I will be sending it to one lucky winner.

Simply leave a comment and Pin this card!


Thanks for joining me, I’ll be back next Sunday with a fun Card Making Tutorial for you featuring, of course, fabulous BUTTONS!


Sunday Card Making: A Valentine that Holds a Gift Card

Are you giving a Gift Card to your Valentine this year? Gift cards are great, but they rarely come in a cute package. Am I right?
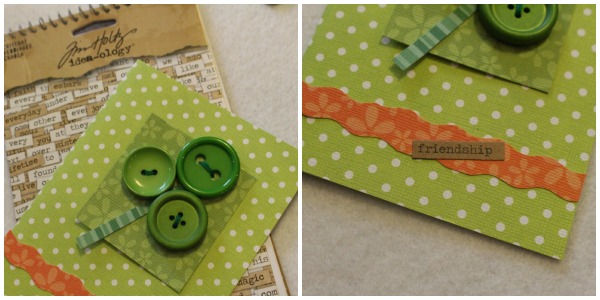
This is easy peasy. You will be ready to present those gift cards in style, for every occasion.
Ready? Here we go!

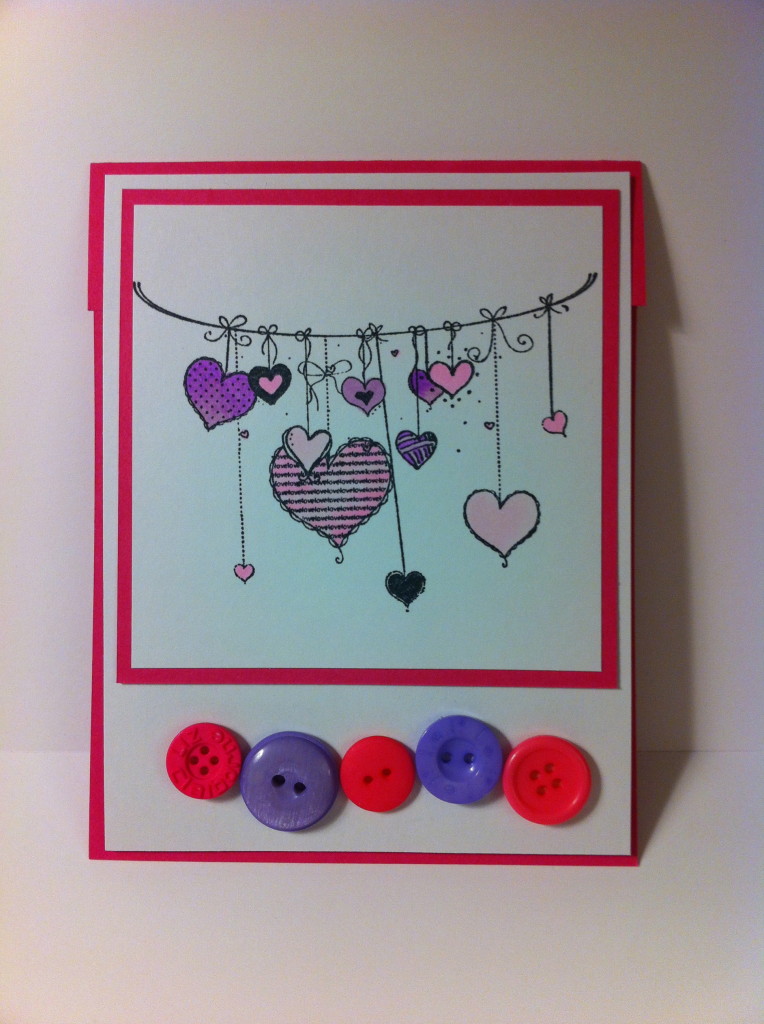
Valentine for Gift Card


I’ve mad a standard card. A2 – 4.25 x 5.5 – inside though, I added a flap. Above, I’ve stamped and cut and matted, and added a row of glorious Buttons in Laura Kelly Walters fabulously bright colors. Easy peasy, right?

I like to stamp a lot of images and keep them in a baggy so when I’m bored, yes, like that ever happens. What I mean is when I have time, I can sit down and color. Then, when I need a card, I already have images ready to go. This cute set of stringing hearts is from the Unity Stamp Company’s Kit of the Month. I stamped with Tuxedo Black Memento ink from Tsukineko/Imagine Crafts and colored with a few Copic Markers.

Shall we head inside?

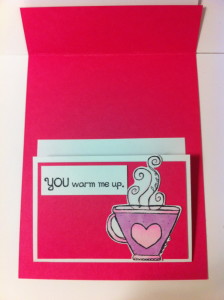
Below, I added the flap. I stamped and fussy cut my hot cup of steamy cocoa and the sweet sentiment sentiment. Inside the flap, I stick on my cards with a Glue Dot. If you prefer, you can tape up the sides and make a pocket.


Valentine Gift Card Flap


Buttons Galore and More Supplies Used to Make This Valentine Gift Card:

Additional Supplies Used to Make This Valentine Gift Card:

  • Cardstock – My Favorite Things Replenishments
  • Ink – Tsukineko Memento in Tuxedo Black, Copic Markers
  • Stamps – Unity Stamp Company Kit of the Month Set.


I hope you enjoyed this EASY PEASY Gift Card lesson.

This card could be for you! Leave a comment and Pin the card and a lucky winner will be chosen.

Join me again next week – hope you like OWLS!


4

Powered by WordPress. Designed by WooThemes