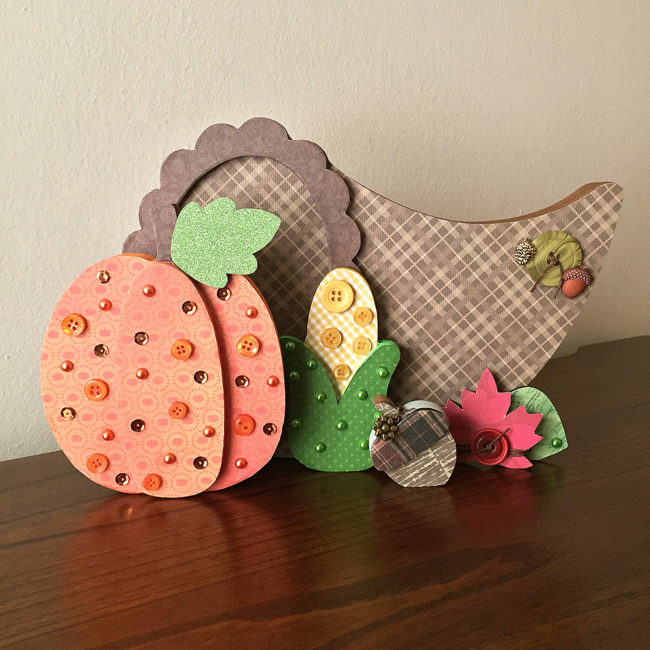
Thanksgiving will be here soon and the house will be full of relatives and friends. Why not create something to show off before dinner with this DIY thanksgiving cornucopia home decor set? Continue Reading →

Thanksgiving will be here soon and the house will be full of relatives and friends. Why not create something to show off before dinner with this DIY thanksgiving cornucopia home decor set? Continue Reading →
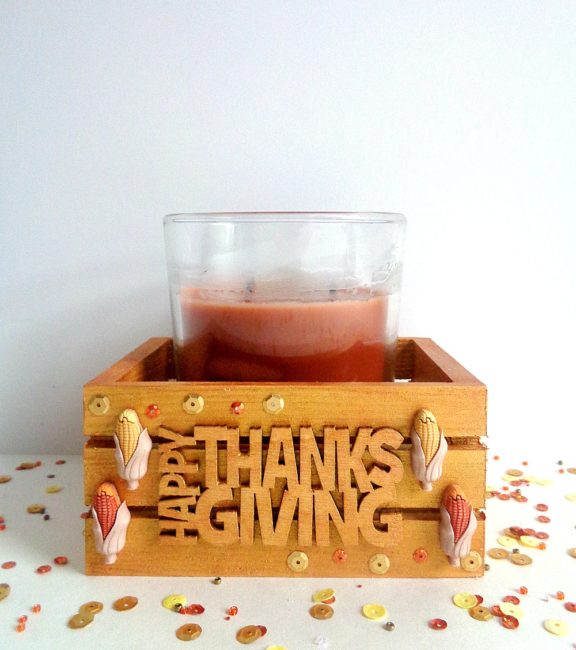
Hello Everyone! This is Katie from the Buttons Galore & More Design Team and today I will be showing you how to make a Thanksgiving candle holder for super easy decoration for your Thanksgiving!
Making decorations for Thanksgiving Day may not be on your radar, simply because you are most likely too worried about making Thanksgiving Day dinner. However, making some type of decoration for Thanksgiving does not have to be difficult or time-consuming. To prove it, today I am going to be showing you how to make your own Thanksgiving Candle Holder! Continue Reading →
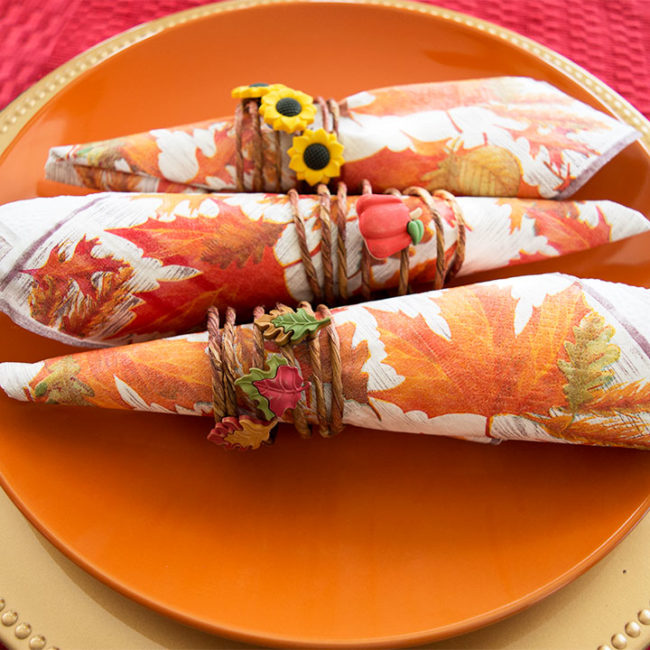
With Thanksgiving right around the corner, I’ve been thinking about how to dress up my holiday table a little bit more this year. I’ve never actually used napkin rings before, and I thought it might be a fun addition to my Thanksgiving table. These easy Thanksgiving napkin rings only take about 10 minutes to make. Thanksgiving table decor couldn’t get any easier! I love the fun fall vibe they add to the table. And the buttons from our super adorable Fall Friends button collection were so perfect for the project! Continue Reading →
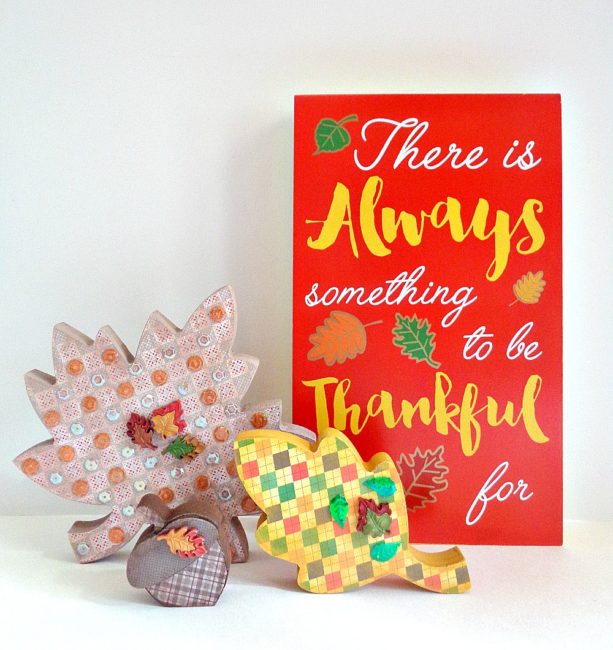
Hello Everyone! This is Katie from the Buttons Galore & More Design Team and today I will be showing you how you can decorate a new product available from Buttons Galore and More!
If you haven’t noticed, Buttons Galore & More has a new area on their website which is dedicated to home décor. This home décor is a new line of wooden products which are super easy to embellish and decorate. The nice thing about the new line is that you have tons of options for different holidays, themes, or seasons. Continue Reading →
It’s hard to believe it, but fall is creeping upon us and with Fall comes holiday after holiday. Here is a fun and fairly easy fall countdown calendar project to count down the days till Halloween and/or Thanksgiving using some easy to find craft materials and of course…buttons!
Here’s what you need to make this fun, reversible witch and scarecrow fall countdown calendar.
First, print out your patterns and cut out the felt according to the directions on the patterns. You will have 1 brown hat, 1 black hat, 1 green face and 1 tan face. If you are sewing your project together, go ahead and sew around the curved part of the face. Don’t forget to leave the top open! You will then need to sew your black button eyes onto the green face and onto the tan face.
If you are gluing your project, go ahead and glue the two faces together and then glue the black buttons for eyes onto each face. Let dry well before going on to the next step.
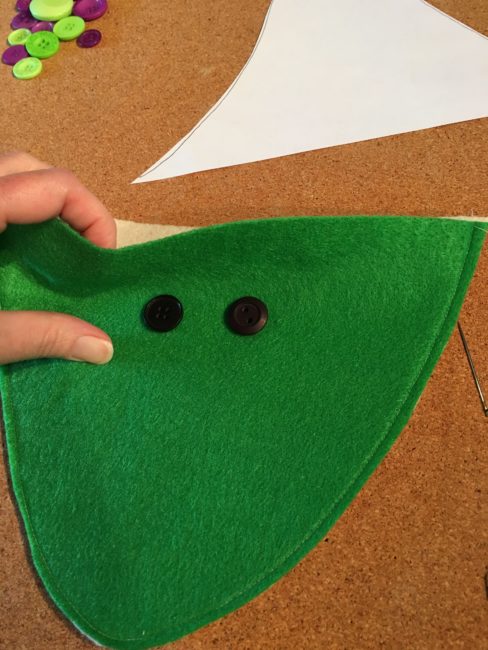
Cut out a wiggly, carrot shaped nose for your witch, along with a circle nose for your scarecrow. Attach them to your faces with craft glue. Use the black permanent marker to draw a mouth for each.
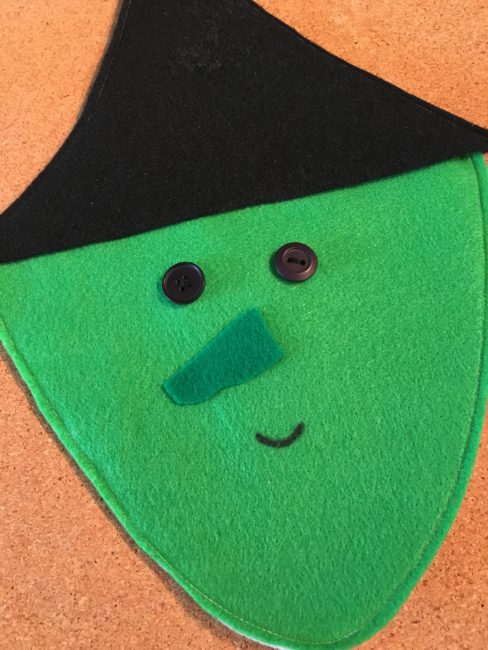
Next, if you are sewing your hats together, sew up and around the two sides, leaving the straight edge of the hat open. Then slide your face inside the two pieces of your hat and sew together; making sure to sandwich all the layers of the felt together when you are sewing.
If you are gluing, glue the hat pieces together and then slide the face inside the hat. You can attempt to glue these parts together, but I would recommend leaving them unattached. They will appear one piece when you attach it to the cork board.
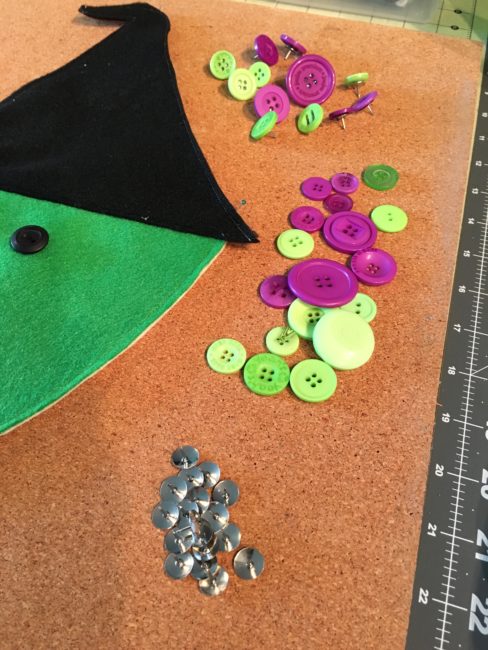
Heat up your hot glue gun and while it’s heating, separate your button pack. The witch hair uses 31 of the purple and green buttons and the scarecrow uses 28 of the orange from the Trick or Treat Button Basics BCB129. Glue the buttons on the thumb tacks and let them cool off.
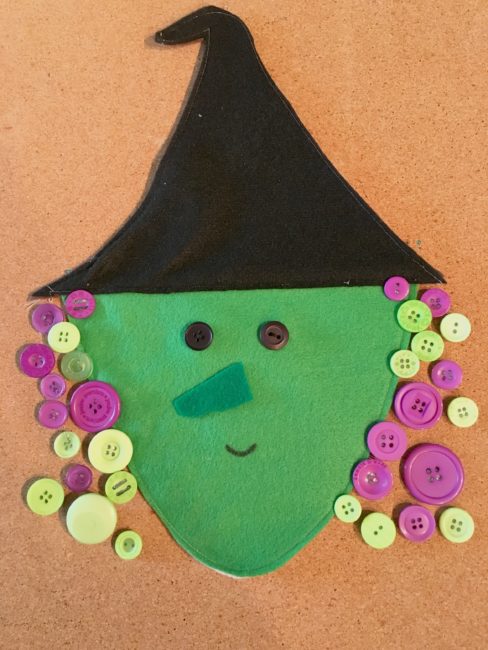
And there you have it! Attach your witch to your cork board with straight pins and either start out with all 31 buttons, taking one off each day until Halloween arrives, or add a button each day as it gets closer! Whichever you prefer!
Once Halloween is past, flip over your witch and start counting down the days till Thanksgiving!
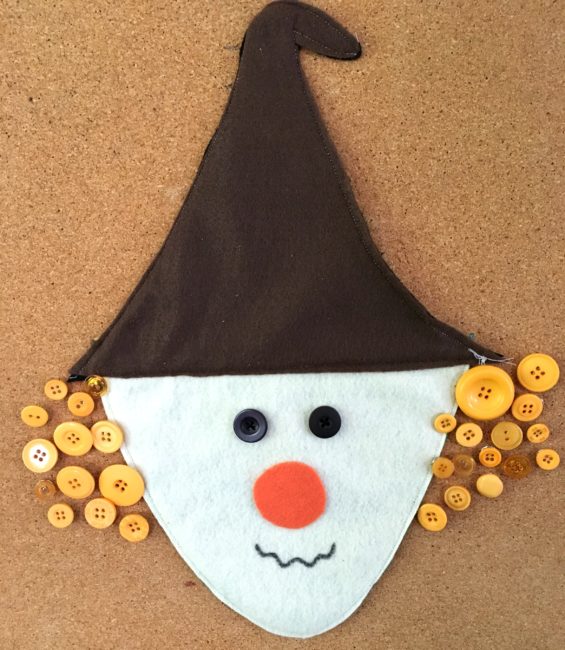
Thanksgiving and Halloween are coming fast…make your fall countdown calendar today!
If you’re like me, you just can’t wait for the temperatures to drop. Now is the perfect time to get started on some fun and simple projects for fall. Today, I’m going to show you how to use the Autumn Afternoon embellishment kit by 28 Lilac Lane to create an awesome fall wood coaster wall decor piece for your home.
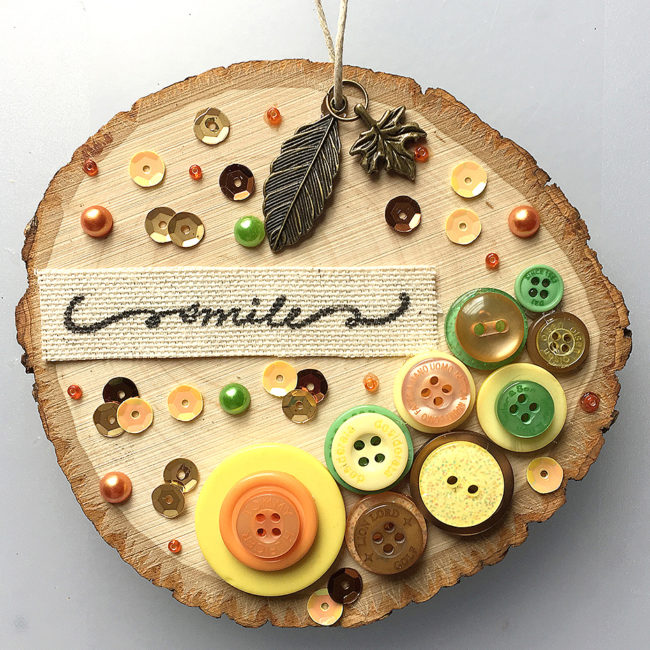
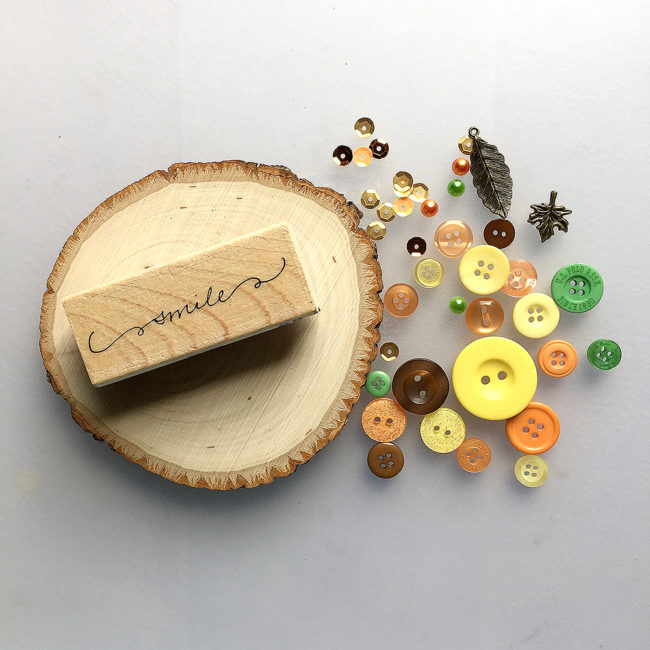
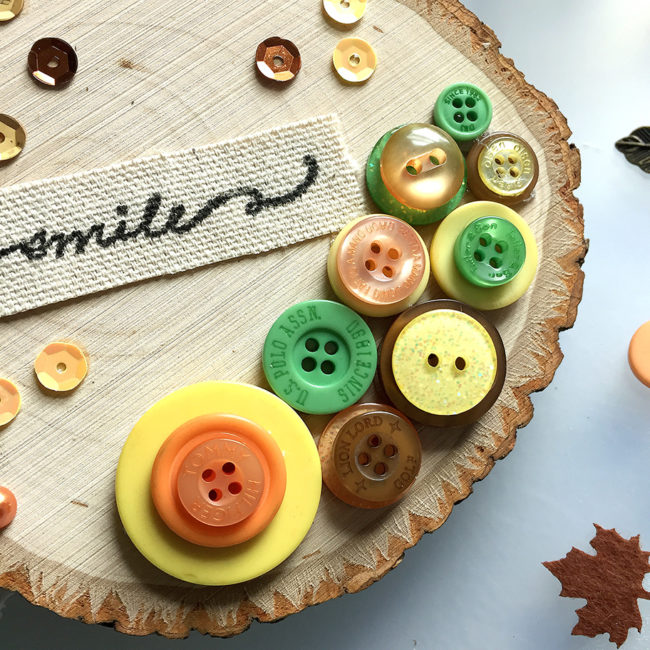
The first thing you need for this project is a wood surface. I’m using a 4 1/2″ round wood coaster that is about 1/2″ thick. Next, you will need to find a stamp with a word or phrase that expresses the perfect sentiment. I have selected a “smile” stamp. Smiles are always in season! You can of course go with something specifically related to fall. Most importantly, ensure that anything you choose will fit nicely onto your coaster.
I have drilled a hole in the top in order to attach a string, but you may be able to find one that is pre-drilled for crafting. On a scrap piece of duck cloth I have stamped the word “smile” in black ink and then glued the fabric to the coaster’s surface. Then I used a clear-drying glue to begin adding pearls and sequins.
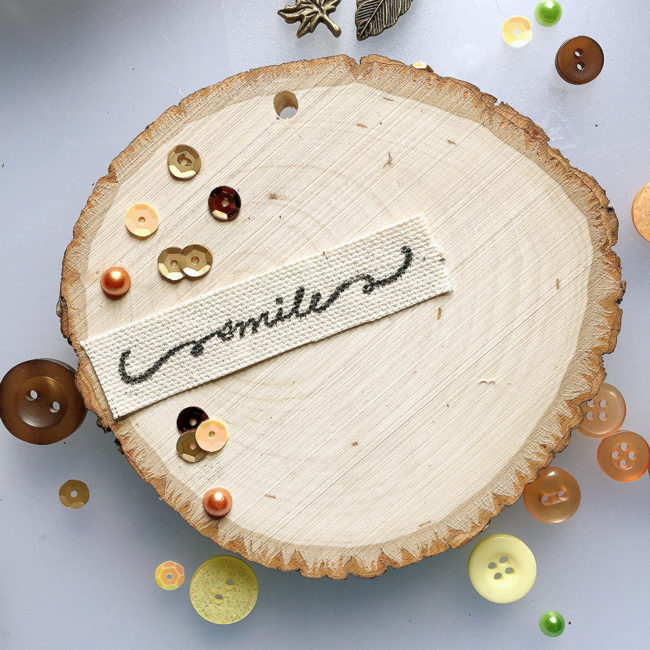
Don’t forget to leave room for buttons! Using a glue gun, I arranged the buttons closely together near the bottom edge and stack a few for extra dimension.
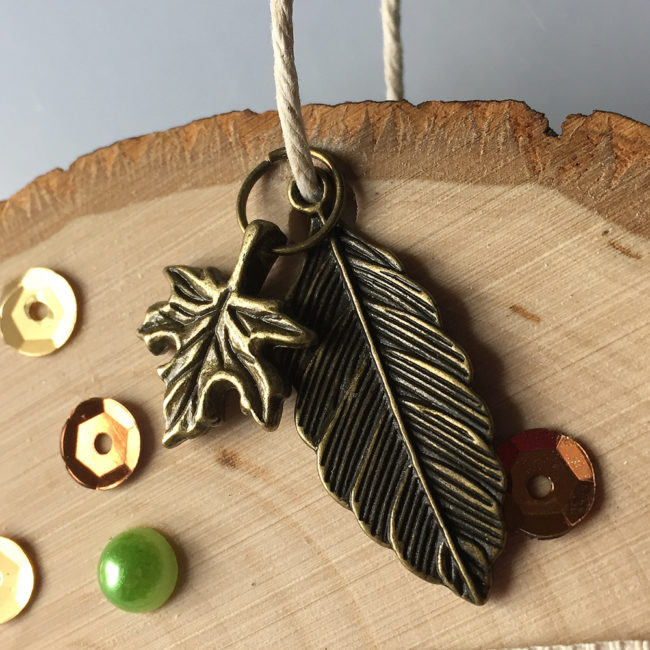
The kit includes leaf and feather pendants in bronze that look great hanging and add just the right touch for the season. I looped the cord through the wood coaster and each pendant. I used a 7″ length of hemp cord. After I attached the pendants, I just tied a knot in the cord to finish it off.
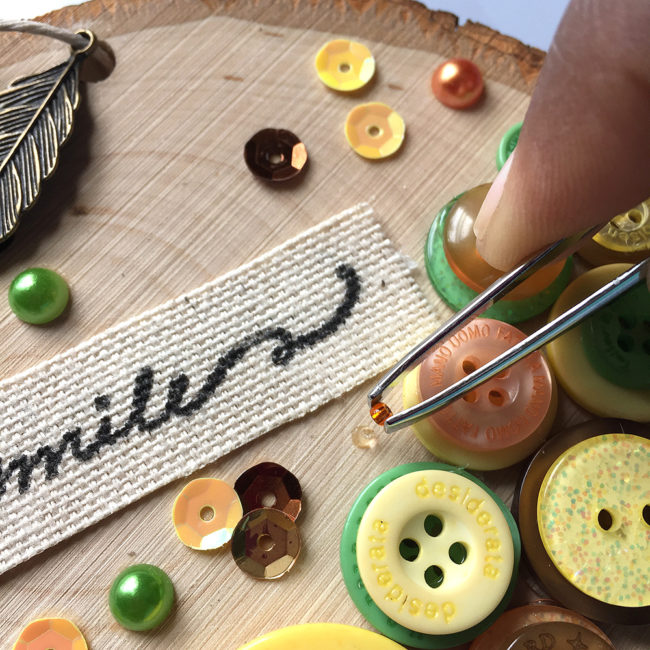
For the last step, I applied a few seed beads using the tiniest dab of glue. Using tweezers will assist in applying the beads exactly where you want them. As we all know, glue can at times get messy!
And its just that easy! Your newly embellished fall wood coaster wall decor is complete.

Hello Everyone! This is Katie from the Buttons Galore & More Design Team, and today I have a fun button pumpkin wall hanging project to get you in the mood for fall decorating!
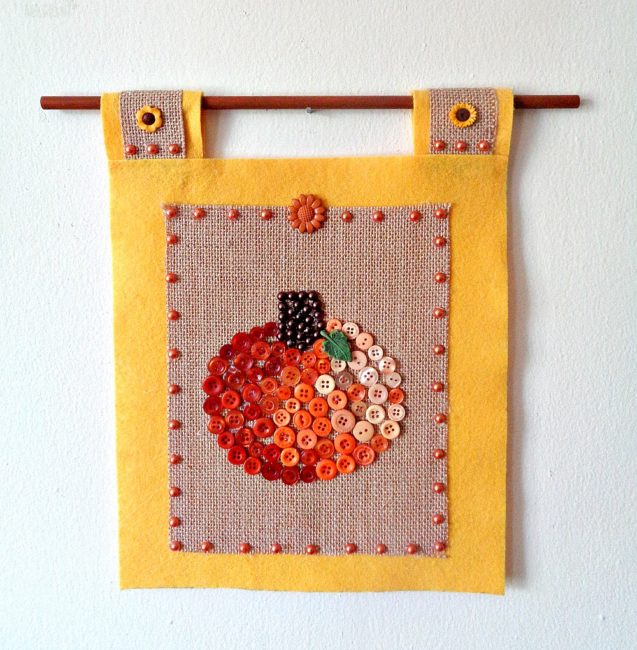
This project is perfect to make if you are looking for an easy and inexpensive way to spice up your home décor for fall, halloween, and thanksgiving. I got the idea for this project when I saw a felt wall hanging designed for the 4th of July. However, instead of a pumpkin, the original wall hanging had a heart shaped flag made from felt and a few buttons. Personally, I thought the idea was cute but could be recreated in a simpler way. In today’s project, the whole DIY is only 3 steps and does not involve any sewing tools!
To decorate my button pumpkin wall hanging, I used two button sets for a majority of the project. Those two button sets were the 28 Lilac Lane ”Pumpkin Spice” Embellishment Bottle and the Buttons Galore Autumn Value Pack. Both of these button sets provided a wide variety of harvest/fall style buttons and worked really well together. My personal favorite out of both of these sets was definitely the 28 Lilac Lane ‘”Pumpkin Spice” Embellishment Bottle because you received a ton of beautiful orange colored buttons.
So, to find out how to make your own pumpkin button wall hanging, keep reading below!
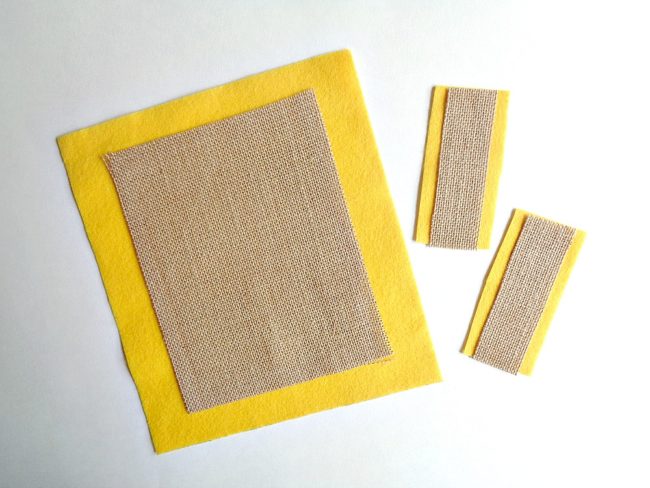
Step 1: Cut one piece of felt that measures 9 inches by 10 inches and two smaller pieces of felt that measure 2 inches by 3 ½ inches. Then cut out one piece of burlap that measures 6 ½ inches by 8 inches and two smaller pieces that measure 1 inch by 3 ½ inches.
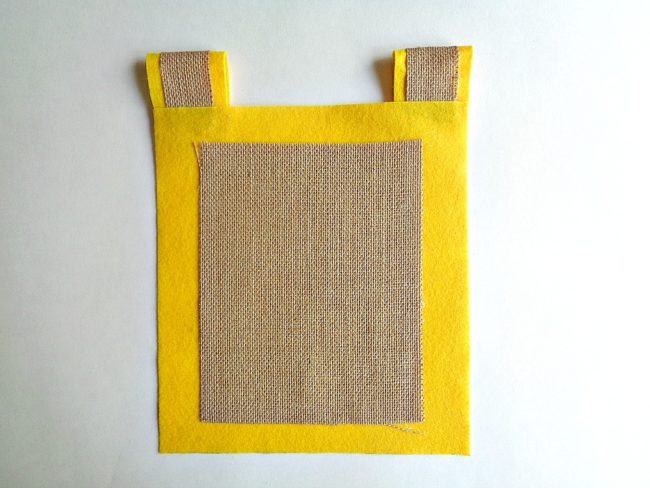
Step 2: Layer the larger piece of burlap centered onto the larger piece of your felt and glue it into place with your hot glue gun. Then layer the smaller pieces of burlap centered onto your smaller pieces of felt and glue them into place. Finally, create loops for your wall hanging by folding over the smaller pieces of felt/burlap and glue them in the corners of your larger felt piece.
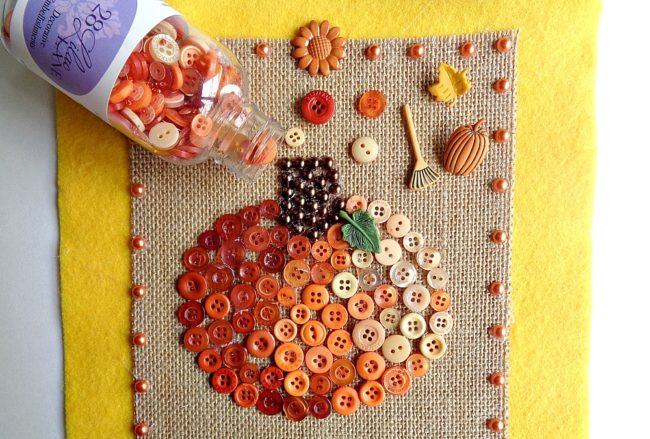
Step 3: Now take your pen and draw the outline of a pumpkin onto your burlap. Then begin gluing on your buttons around the outside of your pumpkin to create an outline and then fill in the middle with more buttons. For my pumpkin, I decided to go from dark to light buttons and then use shimmering half pearl flat backs for the stem. Finally, use the rest of your normal buttons and decorative buttons to decorate the rest of your wall hanging.
For my button pumpkin wall hanging I used the following:
Once you are happy with how your button pumpkin wall hanging looks, you are ready to hang it on the wall by sliding a dowel rod or wooden stick through the two loops!
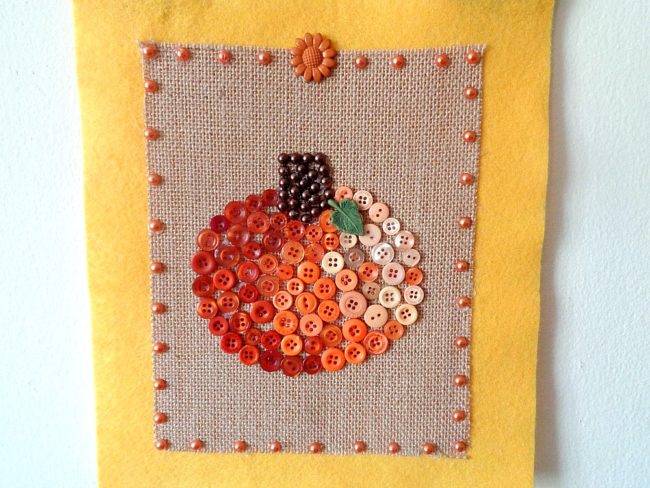
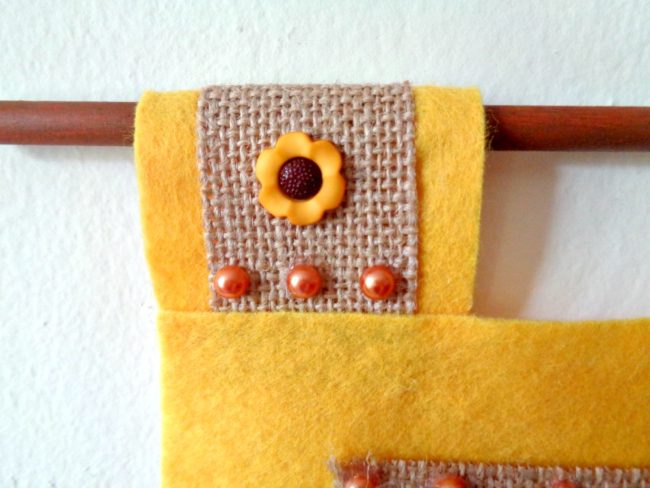
I loved how this pumpkin button wall hanging turned out and I think it would look so cute as part of a gallery wall!
While creating this project, I did free hand the design of the pumpkin. However, if you are not comfortable drawing your own pumpkin (in step 3), you can always google ”pumpkin template” and print out a template to trace around. With that being said, if pumpkins are not your thing, you could always change the main image to be something else. For example, I think a leaf created from the 28 Lilac Lane “Toasted Graham” Embellishment Bottle would look really pretty.
If you made this pumpkin button wall hanging, what 28 Lilac Lane items would you use?
Editor’s Note: Today we welcome back former design team member Laura Bray as a guest designer to share a project for embellished Thanksgiving napkins that are an easy way to make your holiday table beautiful!
Hi Button Lovers! It’s Laura Bray. Some of you may remember me when I was on the design team for Buttons Galore & More. I still use my BGM buttons on my craft projects and I’m so excited about the 28 Lilac line of buttons – the kits and bottles make it so easy to make a pretty, coordinated craft.
It’s almost Thanksgiving, so I wanted to show you how you can turn a plain, cloth napkin into beautiful, boutique-style table décor for the holidays.
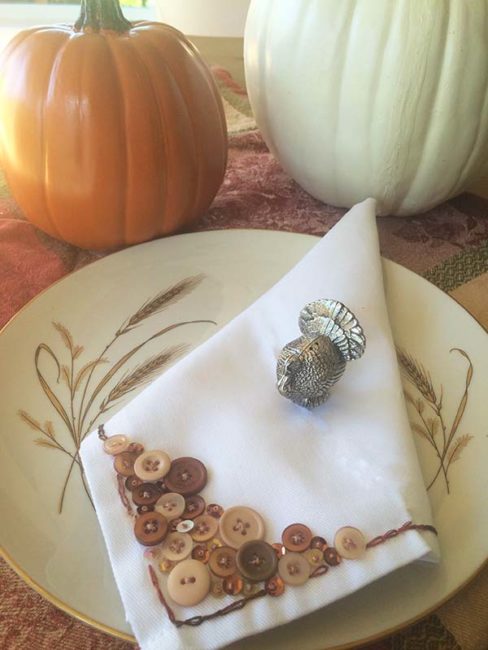
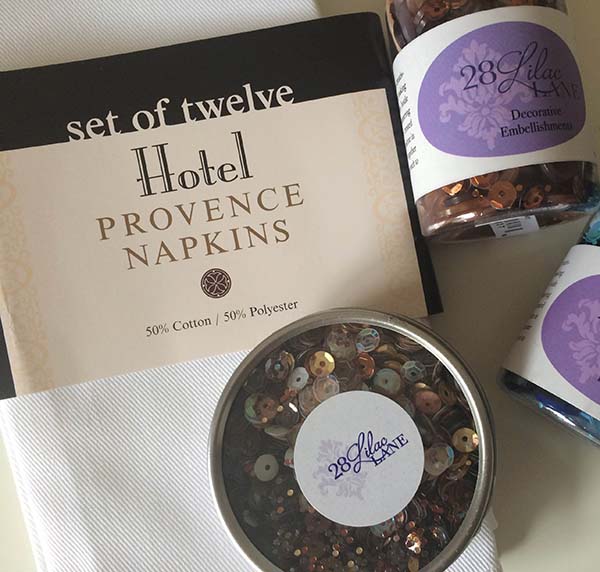
Supplies:
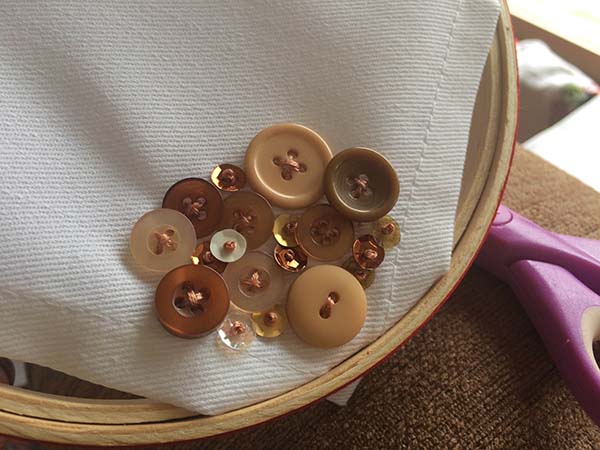
Pick a corner to embellish, then begin stitching on buttons of varying sizes and sequins onto the napkin randomly. Not a sewer? You can also use fabric glue!
To clean your napkins, hand wash and try to avoid submersing the embellished corner in water.
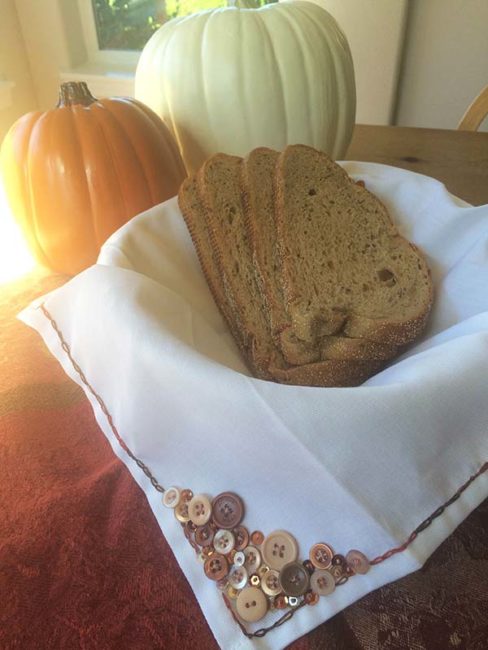
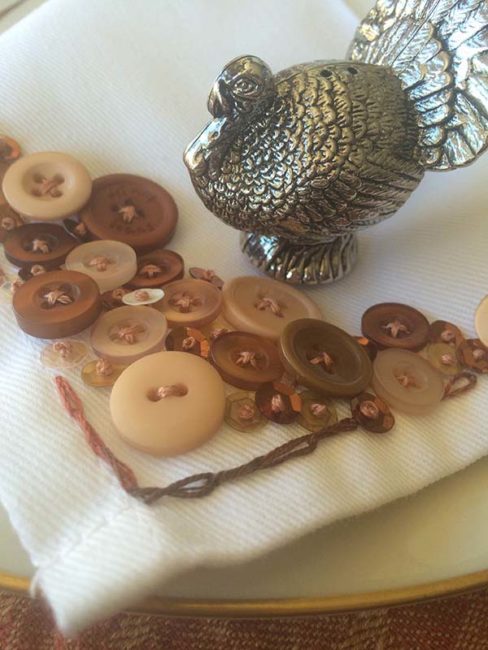
These look so stunning they will probably become family heirlooms!
Utilizing basic supplies and everyday items in my crafting, and finding usefulness in even the simplest things is something I enjoy tremendously. With a few beautiful caramel buttons, some ink, and a little creativity I quickly came up with a fun card design that is perfect for any season.
Step 1: Take a circle object such as a cookie cutter or cup and tap with black ink. “stamp” onto your paper several times, creating a wreath shape. Repeat with brown ink.
Tip: Roll the cookie cutter or disposable cup around instead of stamping flat. This will give you more control of your lines.
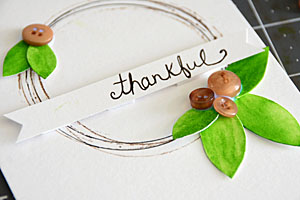 Step 2: Use scissors to cut out leaf shapes and color with green watercolor or ink. Place these in three spots along your wreath, and add small caramel buttons as well. At this time you should also cut out a ½” high strip of cardstock for your sentiment, and notch the ends to fit.
Tip: instead of handwriting you could use a computer font or alphabet stamps.
Step 3: Add the finishing touches to your card. Ink the edges of the sentiment banner, add some gold paint or ink to highlight the circle shape and around your buttons, and add any other details you would like.
Tip: Want even more: Use a pen to add flourishes and dots, as I did here with a brown pen.
When it comes to Thanksgiving I don’t do a lot of home decorating, but I do enjoy creating cards for a few special people. This card is a lot of fun to make with fabric scraps, though using patterned paper would work just as well. The harvest Button Bonanza bag is perfect for all your fall crafting needs and just screams Thanksgiving to me.
Supplies Needed: Felt, fabric with iron-on backing, word stickers, thread (hand or machine stitch), liquid adhesive, and harvest Button Bonanza bag
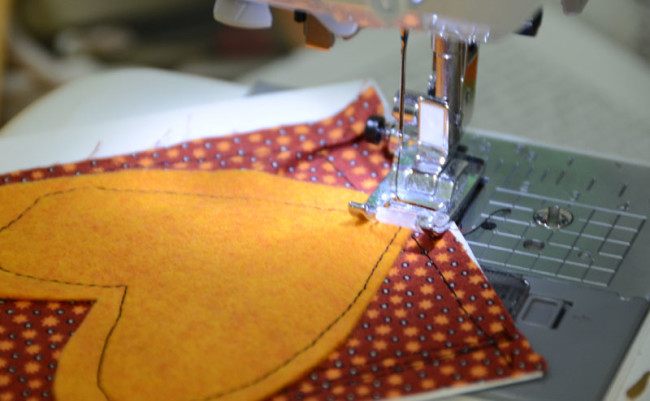
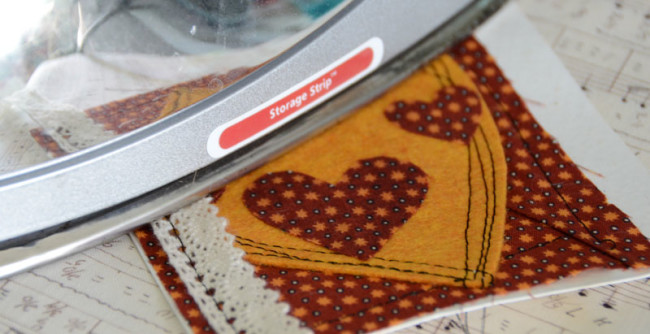
Beyond Thanksgiving, this simple card would be great for any holiday or occasion – and is a lot of fun to make! Don’t forget that you can create this design with either fabric or patterned paper.
A simple Thanksgiving Centerpiece – I made up in about 15 minutes using Buttons Galore Carved Wood Buttons and supplies I already had stashed. It seriously does pay off to hoard craft supplies.
This centerpiece happens to coordinate nicely with my Thanksgiving Dessert Table Decor that was featured on the Buttons Galore Blog recently too.
If I need to make up some quick and simple centerpieces, I always turn to making rosettes or finding something fun that can be stuck on a stick.
For this simple Thanksgiving Centerpiece, I added pines cones to a dollar store vase, made a 3″ rosette, added a BGM Carved Wood Button to the center then used my Silhouette to cut out a Turkey cut file.
If you don’t have access to die cutting machine, you could easily add more Fall rosettes in various sizes to your centerpiece along with Fall leaves or any other festive decor you like.
Everything just looks better on a stick right, right? Plus, Buttons Galore Carved Wood Buttons ties the Fall decor together nicely.
For more Fall inspiration head over to my blog Ribbons & Glue.
Like Me on Facebook!
Thanksgiving is my favorite holiday. Not only is the ultimate holiday for foodies, but it’s also a time to gather with loved ones and enjoy each other’s company without the distraction of gift giving. I host 12-14 people at my house every year. I love preparing the meal, but I also love coming up with a great table setting. The easiest way to set a table is to come up with a theme and then build on it. This year, I’m thinking Feathers and Buttons just might be my theme for 2013. Here are two Thanksgiving place card ideas for your table.
This place card idea reminds me of childhood trips to the Natural History Museum. I loved to peer into the glass cases and see the natural collections. These simple place cards bring back those special memories of learning about nature.
Supplies:
Instructions:
Supplies:
Instructions:
Thanks for joining me today. If you would like to get a free printable, Thanksgiving planner, come and visit me on my blog, Laura Bray Designs.
Holly here from Ribbons & Glue sharing a simple Thanksgiving Dessert Table Decor using Tiny Buttons from Buttons Galore that’ll add some glitz and sophistication to your Holiday table this year.
When I think of Holiday gatherings, the first thing I think of is food and of course the yummy, rich desserts are the most important part. Show off those yummy desserts you’ve slaved over by creating this simple dessert table decor.
Like Me on Facebook!
For more Fall inspired crafts, visit my blog www.ribbonsandglue.com
My fall button serving tray is one of my favorite buttons projects I have ever made. Plus it is easy to make which is a win win right? Grab your buttons and a thrift store tray to get started making your own version. Don’t need a serving tray for fall? Maybe use this same idea with a button ornament in the center for Christmas? Or a heart in the center for Valentine’s Day? I can think of all sorts of different tray designs for all seasons of the year.
I started with a tray from the thrift store for 99 cents and a bottle of Americana gloss enamels in Antique Gold.
I painted my entire tray with 2 coats of the paint then grabbed some fall themed buttons from Buttons Galore and More.
I laid the buttons out on my tray until I was happy with the arrangement. I then used my 3 in 1 Beacon adhesive to glue them directly to the tray.
Once the glue was completely dry, I mixed a two coat epoxy to make my tray nice and smooth. Don’t be afraid of epoxy! Just mix and pour according to the package directions. I spent quite a bit of time using a flame to pop bubbles that come up from the epoxy itself and the buttons. Yes my finished project still has a few bubbles but overall it looks amazing. The buttons seem to create more bubbles than is normal with an epoxy project.
Allow your epoxy to dry for a nice long time before you touch it (don’t be tempted to touch!!). You will be left with a glossy flat serving tray with buttons in it! Now some of my buttons stick up just slightly out of the epoxy (there is a slight hump in the epoxy). This can easily be fixed with a second epoxy pour however the bumps do not really bother me for my needs so I am leaving them. You could also be extra careful when choosing buttons for your design and choose only the flattest buttons to include.
Just so you can see my entire button fall scene here is a picture of the entire tray.
It is so darn cute I could eat it up. Speaking of eat it up, use your fall tray to serve snacks to the kids or for a wonderful addition to your Thanksgiving and fall themed parties. Want more buttons on your Thanksgiving table? Be sure to check out my rustic burlap napkin rings as well.
Will you be adding buttons to a tray anytime soon? Don’t let that epoxy pour scare ya! My fall button serving tray will make an appearance at our Thanksgiving meal and many snacks in the meantime.
Here are two really simple to make Thanksgiving card ideas using buttons from my collection with Buttons Galore. They are so much fun that you might want to gobble gobble about them after you create your own! I used pre-cut note cards and envelopes from my local craft store. They come in all kinds of colors. I also used trims that I had on hand and glue dots along with a downloadable doodle design sheet.
To make them you can draw your own pie and turkey background or you can download the template for free on my website in another Thanksgiving post that shares ideas of ways to use buttons to create some Thanksgiving fun. You can click here to get to my blog post to get the downloadable printable or on the picture below.
Either way, when you have you backgrounds drawn or printed, color them in and cut them out. The next step is to use Glue Dots to add a border of some sort using whatever trim or ribbon you have on hand. You could also use washi tape. Then Add your cutouts either directly or mounted on colored card stock and add buttons to create the 3-D effect. The colors I used are Outrageous Orange, Radically Red, Black Beauty, and Bold Brown.
If you want to add words to your cards you can, or you can leave them with your crafty design to speak for itself. If you are hand delivering, add a heart and a button to the back of the envelope. I am in love with the turkey doodle card. Gobble Gobble.
Happy Preparing For Thanksgiving,
Laura
Ribbon Wreaths are trendy right now, with photos appearing on blogs and Pinterest. This tied ribbon version with button accents is a great way to get autumn colors and textures in a wreath that is easy to create.
Making a ribbon wreath is a straightforward process that begins with a simple wreath form. For this wreath, I used a STYROFOAM Brand Foam wreath form approximately 8″ in diameter. I painted the front of the wreath using a foam brush and orange acrylic paint to camouflage the form in case it happened to peek through the ribbons.
While the painted wreath form is drying, I gathered my ribbons and cut several lengths of each. My form required around 50 pieces, each 10″ long. Widths ranged from 1/2 to 1″.
Once the form was dry and the ribbons cut, I tied the pieces around the form. I began with the wider ribbons, and filled in the spaces with the narrower pieces, adjusting the location of the knots as necessary.
Once all the ribbons were tied around the wreath form, the whole project looked pretty scary. It resembled a big autumn-colored ribbon Medusa.
But once all the ribbon ends had been trimmed to approximately 1.5 inches long (use sharp fabric scissors for clean edges), scary Medusa transformed into a pretty tied ribbon wreath ready for embellishing.
I added thick marbled dark brown buttons from the Natural Grab Bag tied with orange embroidery floss, and a large aged metal leaf as an accent. Three additional buttons from the Autumn Grab Bag tied with cream floss top the leaf for additional coordinating color and texture.
With no time or labor-intensive techniques to deal with, this tied ribbon wreath can be assembled quickly and easily. Dive into your ribbon stash and make one today!
Thanks for stopping by!
Carla
