Header

Tag Archives | Jewelry

DIY Flower Button Brooches for Fall Fashion Cheer!

DIY Flower Button Brooch

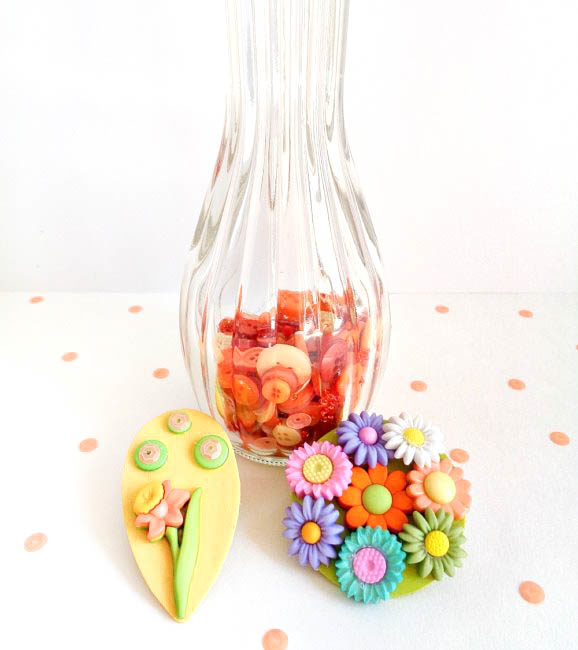
Hello button lovers! This is Katie from the Buttons Galore & More Design Team, and today I have a fun DIY flower button brooches project if you are someone who is just not ready to make that transition into the fall season!

Now, as a fall season girl at heart, I know making flower button brooches sounds a bit weird in September. However, there are those folks who just love spring and summer. If this is you, then these flower button brooches should make the fall season a bit more bearable and make those warm cardigans a bit cuter! Continue Reading →

0

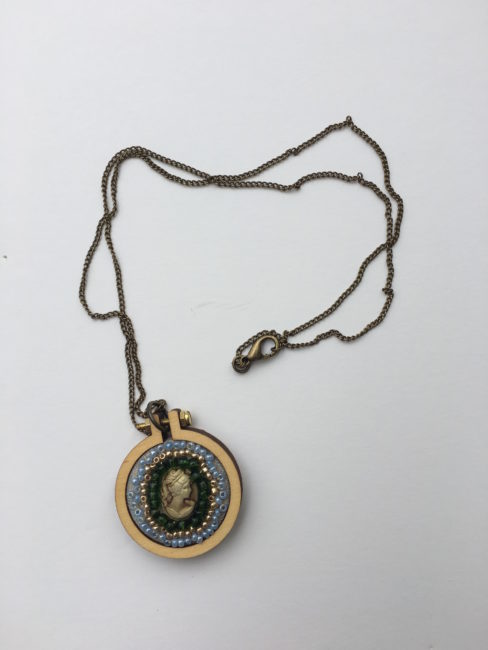
Gift A Beautiful Beaded Pendant

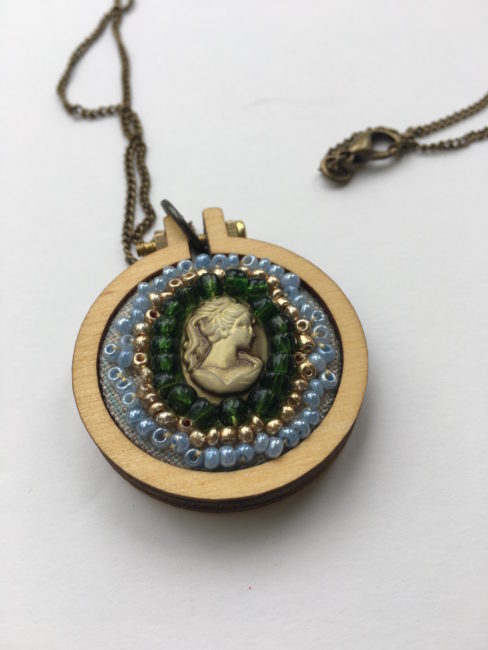
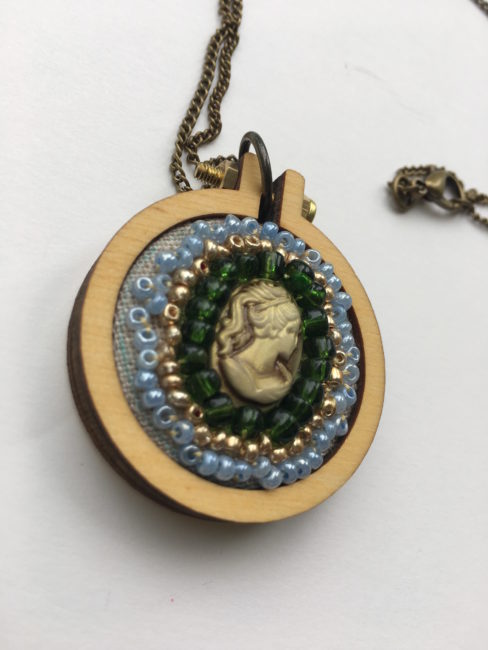
My project today is a sweet little pendant necklace that comes together pretty quickly and makes a great gift.

Don’t be daunted by the idea of sewing on the beads! It’s true that sewing beads can be a little fiddly because of their tiny size, but once you get the hang of it, it’s a great beginner project for jewelry making.

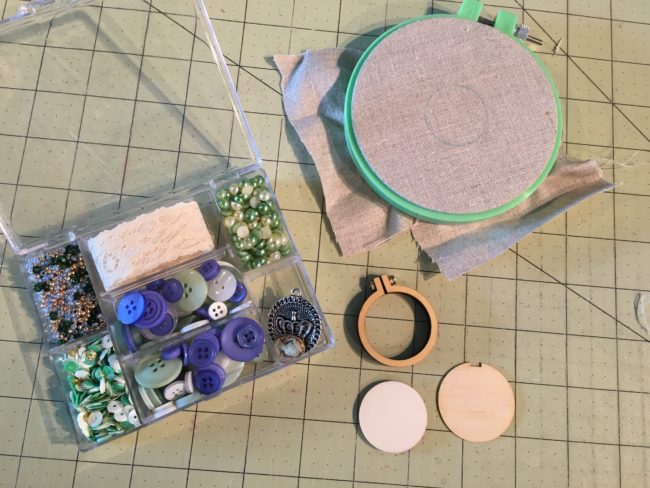
Here’s what you need to make this little beaded pendant necklace:

Put your scrap of fabric inside your embroidery hoop for sewing and outline the inside circle of the mini embroidery hoop with a pencil onto your fabric. Using the little cameo from the 28 Lilac Lane set, use craft glue to glue this to the center of the circle you just outlined. Let dry completely before moving on.

After your cameo is completely dry and securely attached to your beaded pendant, take a small plate (or use the lid of the Tea Time set) to pull out the beads. From your divisible embroidery floss, pull out one thread strand and thread your needle, making sure to leave a knot in the end. Sew a row of the larger green beads around the edge of the little cameo. Then repeat with the gold beads and then the blue beads.

To finish your beaded pendant, position the mini hoop on your design and draw a cutting line approximately 1/2 inch around the hoop. Cut it out. Place the cut design on the center plate. Then place the mini hoop on top and push it down to secure it. Flip it over and using a hot glue gun, place the glue around the inner edge. Push the fabric down in a circular motion. Add glue to the backing piece on the inner edge. Position it on the back of the hoop with the notch top and center.

You can either add a jump ring to your beaded pendant for your necklace chain to go through or thread the chain through the bolt in the center of the hoop.

Voila! You have a sweet little beaded pendant necklace ready to wear on a fun night out or to gift to a friend!

0

Accessorize with an easy DIY Button Brooch!

Hi, Connie here with Buttons Galore & More design team! Today I will be sharing an idea using the Toasted Graham Embellishment Bottle by 28 Lilac Lane. The contents of the bottle remind me of graham crackers, buttons in rich brown tones along with seed bead and sequins. Taking beautiful embellishments and adding them to clothing to accessorize is a favorite project of mine. Making a DIY button brooch, to add to a denim shirt or straw hat, is where I started!
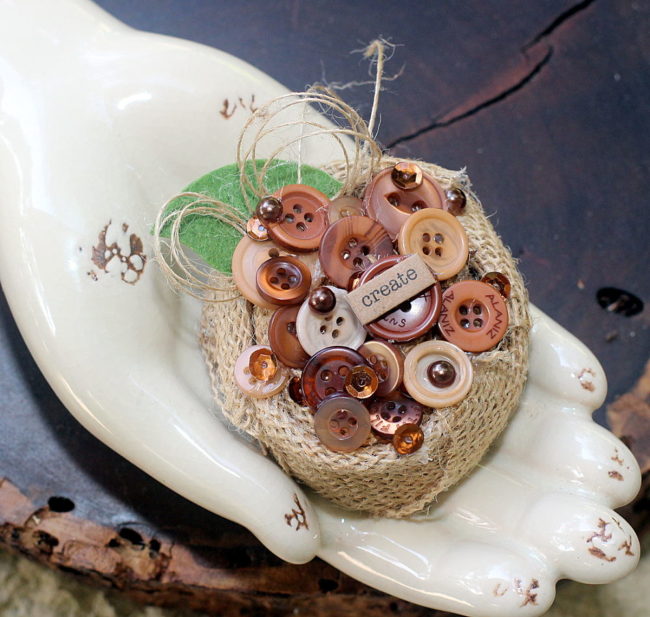
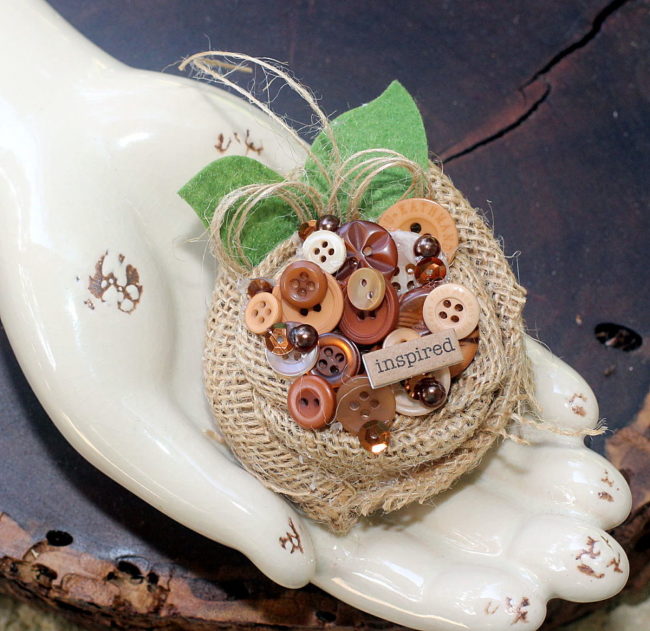
Take a small piece of burlap and twist it, to make an easy to create rose flower to serve as the base of the brooch. Coat the ends with a strong glue to keep them from fraying, and mount the burlap flower on a circle of felt, so the flower will not unravel.
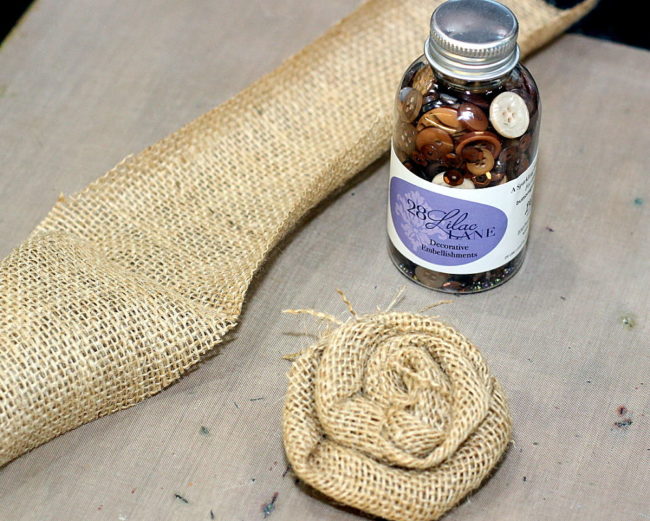
Now comes the fun part! Pour the contents of the Toasted Graham embellishment bottle on a dish (so you can see all of the pretties that are in it), and start selecting the buttons for the center of the DIY button brooch.
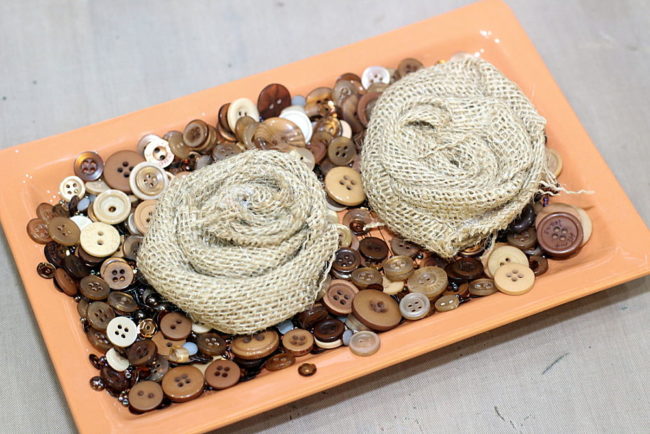
Using a strong glue, start gluing down buttons, sequins, pearls and beads onto the brooch. Overlapping the buttons and tucking in the sequins under the buttons will make a beautiful looking brooch. Add felt leaves and twine to finish off the brooch. Glue a pin onto the back of the brooch, making it easy to attach to a shirt or hat.
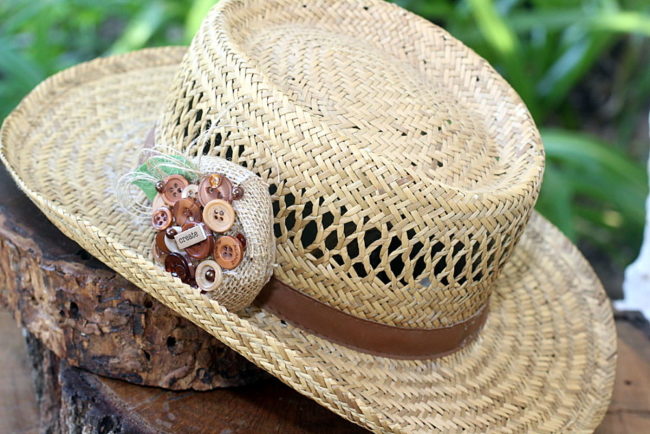
I love how the “create” brooch looks on this straw hat. It’s such a fabulous look for the fall season! Just attach it to the hat, using the pin that was glued to the back of the brooch.
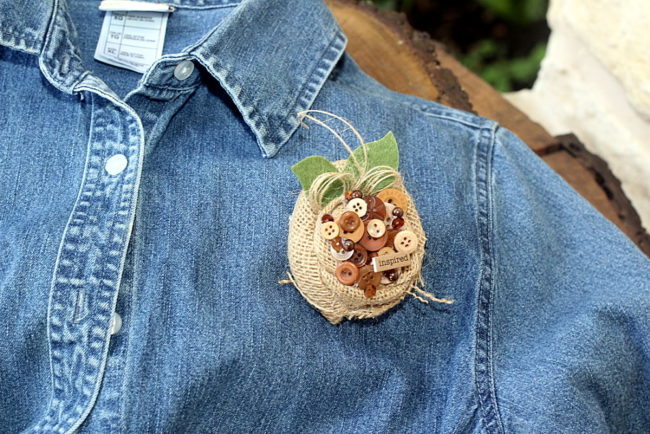
Here is the”inspire” brooch on the denim shirt.  I love this look!

I hope you will give the 28 Lilac Lane embellishment bottles a try and create something to add to those hats, sweaters and shirts like I did!

Supplies Used:

28 Lilac Lane “Toasted Graham” Embellishment Bottle

Felt (leaves and back of brooch)

burlap

strong glue

word sticker

twine

Thanks for stopping by~

Connie Mercer/DT Member
0

Sew Crafty Brooches Make Great Gifts for Crafters

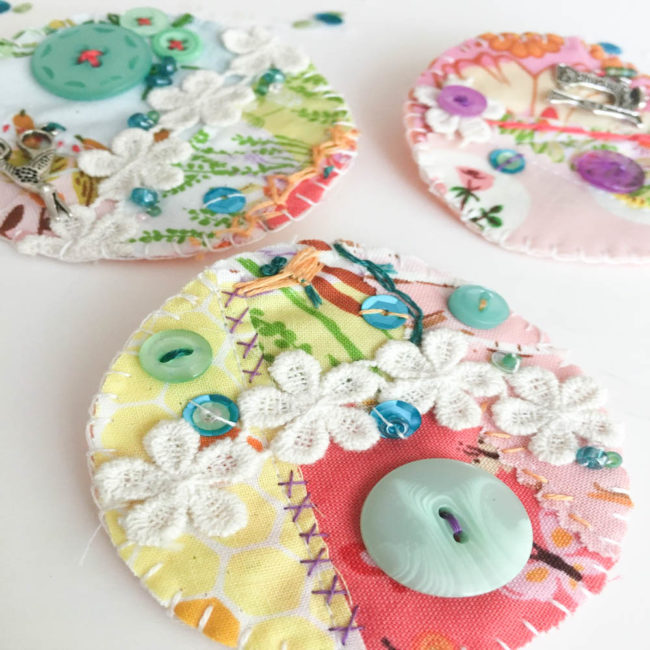
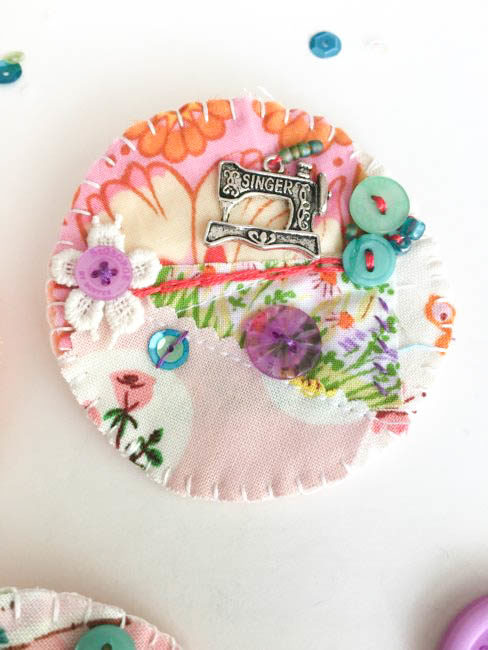
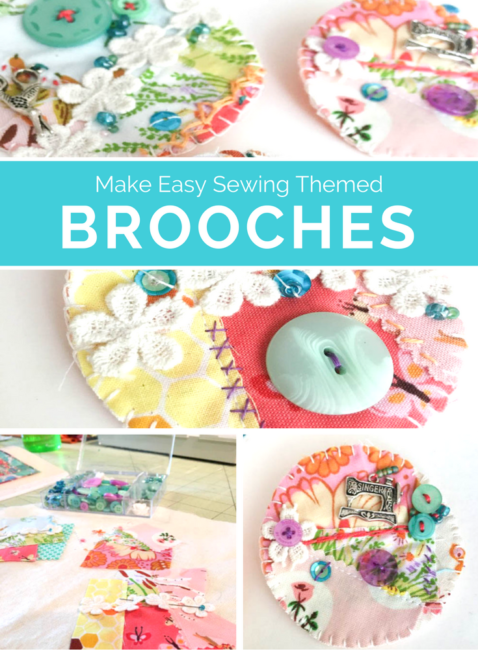
These little crafty brooches make a great quick and easy gift for the lady in your life who loves to sew and create. Use up some scraps of fabric, spread your creative wings and add some bling with a sweet 28 Lilac Lane embellishment kit.

sew crafty brooches

sew crafty brooch

Here’s the supplies you will need:

  • 28 Lilac Lane “Sew Crafty” embellishment kit
  • scraps of fabric
  • wool felt (for the backs)
  • cotton fabric (for the tops)
  • pins (Wonderclips are also super helpful)
  • sewing needle
  • embroidery floss (various colors)
  • jar lid (or something 2-3″ round to trace)
  • a sewing machine (not required, but helpful)
  • safety pin or jewelry pin backs

sew crafty brooch construction-4

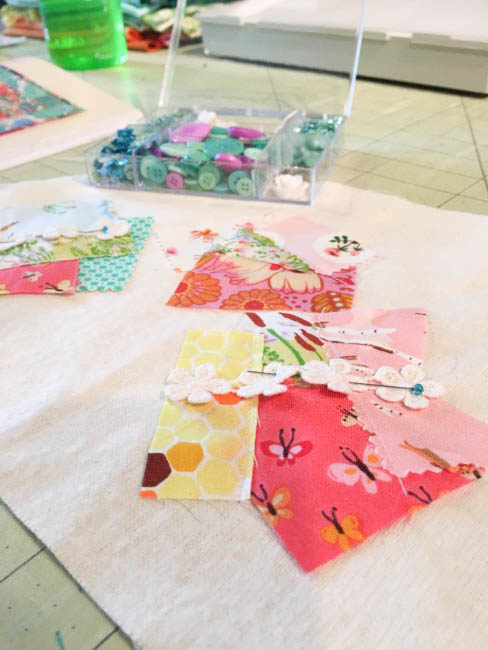
First, I laid out my backing fabric (I used a thicker cotton muslin that I had in my stash, but just a general cotton or even felt would work fine too). With a jar lid I had, I traced an outline of my circles onto the top of the fabric. Then I gathered up some various scraps of fabric and laid them out within the outlined circle. I used my sewing machine to sew down a few of the seams, but this could easily be done by hand with just a back stitch using a single strand of embroidery floss.

sew crafty brooch-2

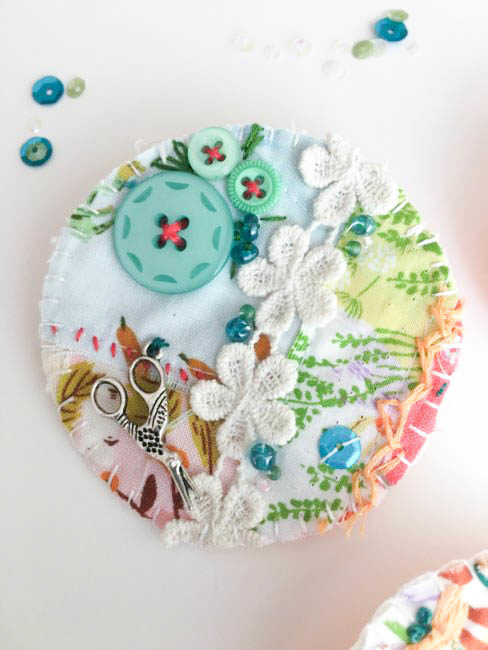
Next up, I laid out different elements from the 28 Lilac Lane “Sew Crafty” embellishment kit. The kit includes some trim, sequins, beads, buttons and a few charms. The trim lends itself greatly to being used as a typical trim or even cutting off each flower individually. This is where you can be creative and every brooch you make will be different!

crafty brooch 2


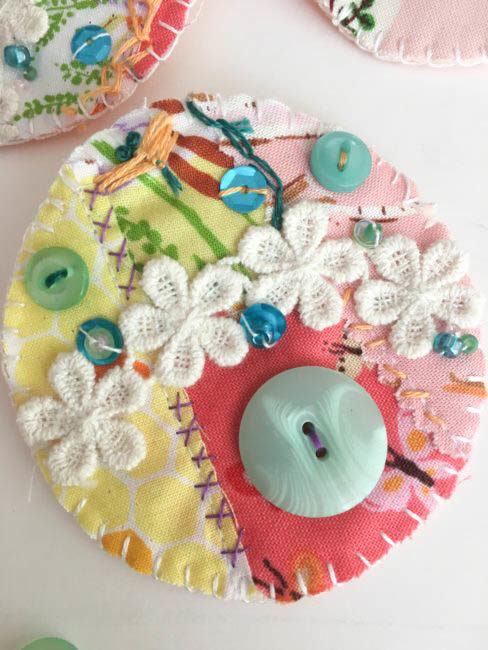
On a few of the seams I chose to add some simple embroidery stitches. I used two strands of divisible embroidery floss for all of my stitching. I made simple X’s, seed stitches, and a chainstitch. I sewed down the trim with a single strand of white embroidery thread and just stitched down on the flowers where the stitches won’t be seen.

pinback on crafty brooch

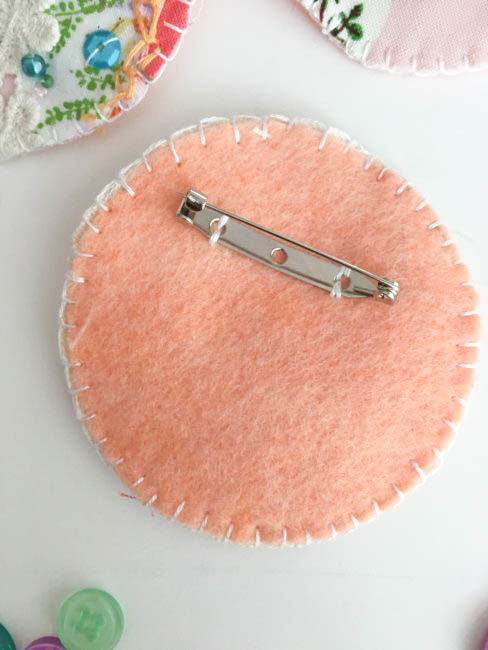
To finish out my crafty brooches, I took some felt and using the same jar lid cut out the felt and the brooch circles. The pin backs I used can be either sewn or glued down. I sewed down the pin back onto the felt.

Finally, I matched the top and backs of the brooches with wrong sides together. The brooches were sewn together using a buttonhole stitch to stitch the two layers together around the edge.  There you have it!! Sweet little crafty brooches ready to wear!

sew crafty brooches


0

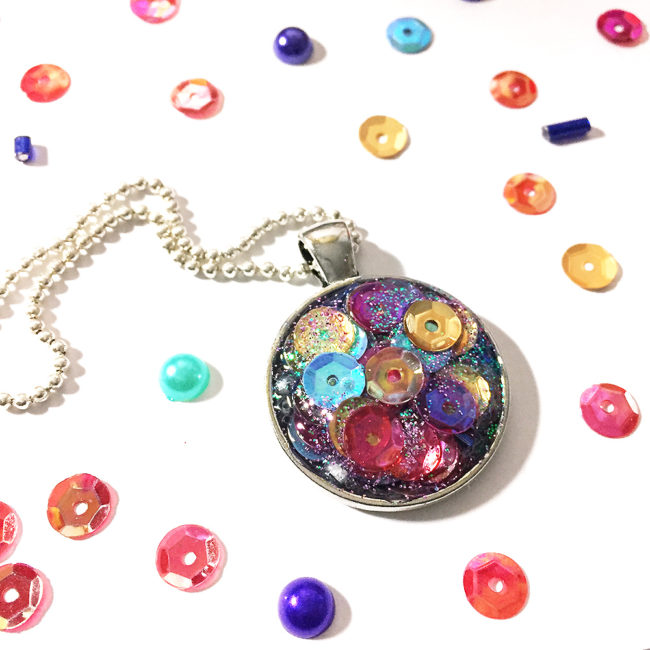
DIY Holiday Gift | Mixed Media Locket with 28 Lilac Lane

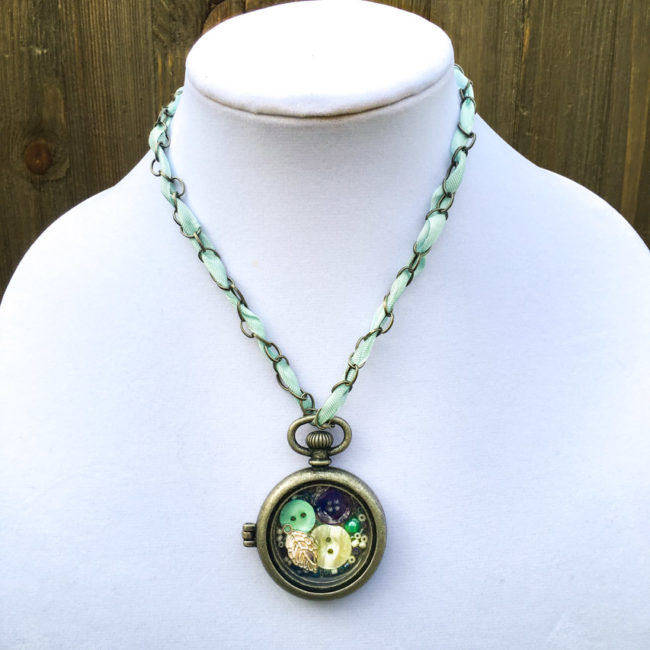
Christmas shopping time has arrived…and so has Christmas gift crafting time! A custom piece of jewelry is the perfect DIY holiday gift for a friend or family member…and with 28 Lilac Lane embellishments, a surprisingly easy one!

DIY Holiday Gift Jewelry

Supplies:

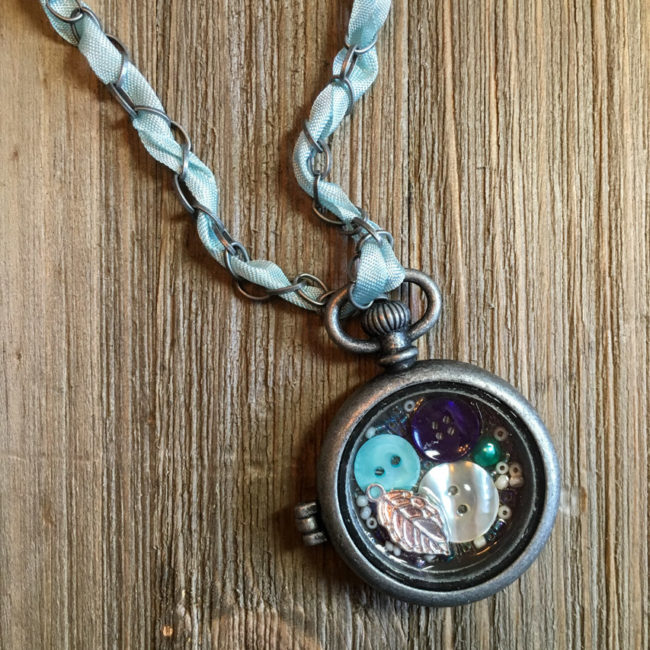
This locket is built using a very simple process. Fill the bottom of the locket with a single layer embellishments. Start with the large items (the buttons) and then fill in around them with the small items like the beads and pearls. Vary the color and placement of the items. Select a charm but don’t place it in the locket just yet!

Once you are satisfied with the placement of your bottom layer of embellishments, get out your Ice Resin. Following the directions on the package, use the Ice Resin to fill in a layer of epoxy on top of the layer of embellishments. Stop filling when the layer is just slightly covered. Before the resin dries, press the charm that you saved earlier into the top of the epoxy. It should just be slightly embedded, protruding out the top of the epoxy layer.

DIY Holiday Gift Jewelry close-up

To create the ribbon embellished chain, thread a large needle (or a knitting darning needle) with the ribbon. Then weave it in and out of every other link the chain so that it is threaded into it. Tie the ribbon off to the chain at each end.

The fun thing about these DIY holiday gift lockets is that they can be created for any theme or color scheme, to perfectly match the recipient it is intended for! To see a different interpretation of this project in a pink color scheme, check out our previous mixed media locket article.

0

Burlap and Buttons Cuff

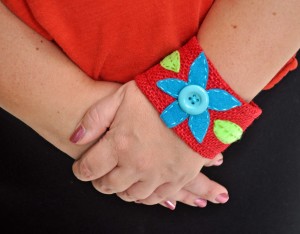
Short-sleeved, summer tops demand a good burlap and buttons cuff, don’t you think?  Create this simple and rustic burlap cuff for your next walk on the beach.  It’s hip and cool and so easy to make!

Cuff Beauty Shot

Supplies:

  • Burlap cut to 10″ by 6″
  • Assorted colors of felt scraps
  • Buttons
  • Embroidery floss & thread

Instructions to make a burlap and buttons cuff:

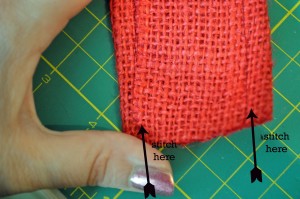
1. Fold the burlap into thirds to create a long strip measuring 10″ x 2″.  Pin in place and stitch along the edges.

Putting Cuff together

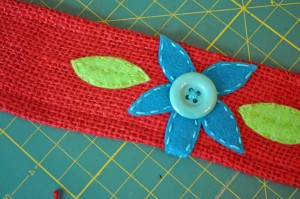
2. Using felt scraps, cut out petals and leaves to form a flower.  Arrange in the center of the burlap rectangle and using embroidery thread, stitch them into place.

3. Stitch buttons into place.  Use them for the center of the flower.  You can really go crazy and add more into the design. (I strongly believe you can never have too many buttons on a project!)

Sew on felt pieces and buttons

4.  Once the design is stitched in place, use embroidery thread to attach the two short ends of the cuff together.

Note: I measured my wrist at the beginning of the project and made sure that I could slip the cuff on and off.  If you prefer a tighter fitting cuff, measure your wrist size and then use a hook & loop, snap, or BUTTON closure to secure the cuff on your wrist.

Thanks for getting crafty with me today!  For more button crafts, stitching and lifestyle ideas visit me on my blog at www.laurabraydesigns.com.

www.laurabraydesigns.com

1

Alter a Wood Button

Step One – Alter a Wood Button

Step Two – Create an Anklet with the Altered Wood Button.

First off, I love to alter things – so to alter a wood button was not outside my comfort range. At first, I was nervous but it just adds such a nice touch, and really accented the beads perfectly.

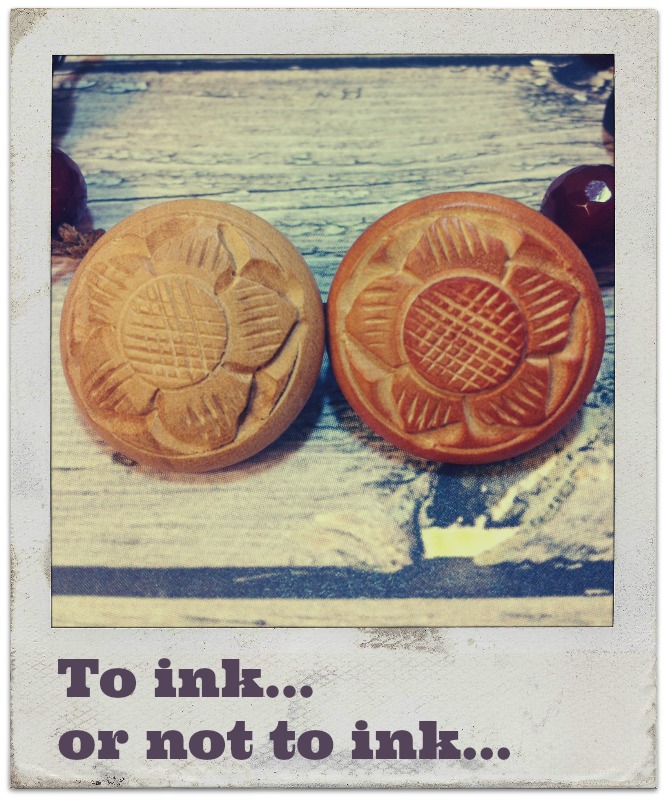
Do you really need to ask the question, to ink or not to ink? I mean really, don’t you just want everything to have your personal touch, a little added color?  Buttons Galore has a variety of Carved Wooden Buttons and they are just little canvasses, waiting for you to create.

Before and After Photos of Wooden Buttons


Supplies for Altered Wooden Button Anklet

You will need a Carved Wooden Button  and some Rustic Coconut Shell Buttons.

Additional supplies include hemp and beads, as well as ink, glaze, and applicator (Tsukineko/Imagine Crafts). The beads I used are faceted Carnelian beads.

Directions

Altering the Wooden Button

  1. Dab Stazon Ink on button with an Ink Blusher. You really need to use a permanent ink that will not run or bleed. I like to buff off any excess with a paper towel.
  2. Seal the button with a finishing glaze. I used Creative Medium. This doesn’t get tacky – it’s perfect.

Altered Wooden Button on an Anklet

Creating the Ankle Bracelet

  1. Measure your ankle so that you can determine how large you want your anklet. Triple this measurement.
  2. Double your hemp and place the folded end through your Carved Wooden Button shank slightly. Pull the loose ends through this loop. Give yourself about 1/4″ of space and make a knot.
  3. Add a bead. Knot.
  4. Add a Coconut Shell Button. I take one of the strands and go up from underneath the button, then I take the other strand and go down through the top. This secures the button and prevents it from twirling around.
  5. Repeat until you have reached your desired length.
  6. Finish off with a loop. Make sure this look is large enough to accommodate the diameter of your Wooden Button.
  7. I like to wrap a segment of the bracelet with the remaining length. I loop around the bracelet and bring the end through the loop, doing this several times, then  tie a knot in the end of each strand – just to secure everything. You can also put a little nail polish on the ends of the knots.

I hope you enjoyed this tutorial. With some different beads and buttons, you could really create so many different styles. With a little ink and glaze, you can really create a perfect match for any outfit.

See more of my creations on my own blog, My Card Party.

Thanks for joining me today. Since today is Independence Day, I want to wish all my American friends a safe and happy fourth. There is nothing quite like celebrating your freedom with the ones you love.

Allie Gower


0

Mixed Media Necklace

I created a mixed media necklace to share with you today. Mixed media to me means having fun. It’s more about the journey, and not so much about the results.

I like to incorporate elements that have meaning to me, or to the person I’m creating for. I love butterflies. They are all about change.

Mixed Media Necklace

Supplies for creating a mixed media necklace

Note – this is what I used – use what YOU love. But of course, include some fun buttons! You don’t need everything on this list – you could play with paint, beads, remake an old necklace… The sky is the limit. Enjoy the journey!

  • buttons – Shop by color at Buttons Galore
  • chain and jump rings (Fire Mountain Gems)
  • shrinky dinks
  • napkin
  • dies (Spellbinders)
  • craft metal (Ten Seconds Studio)
  • glitter and liquid adhesive (Art Glitter)
  • copic markers and an ABS (air brushing system)

Here’s a fun little video showing some close ups and tips.

animoto_high_res

Thanks for joining me today. Please share something you make with buttons, I’d LOVE to see it.

You can find me at My Card Party.

0

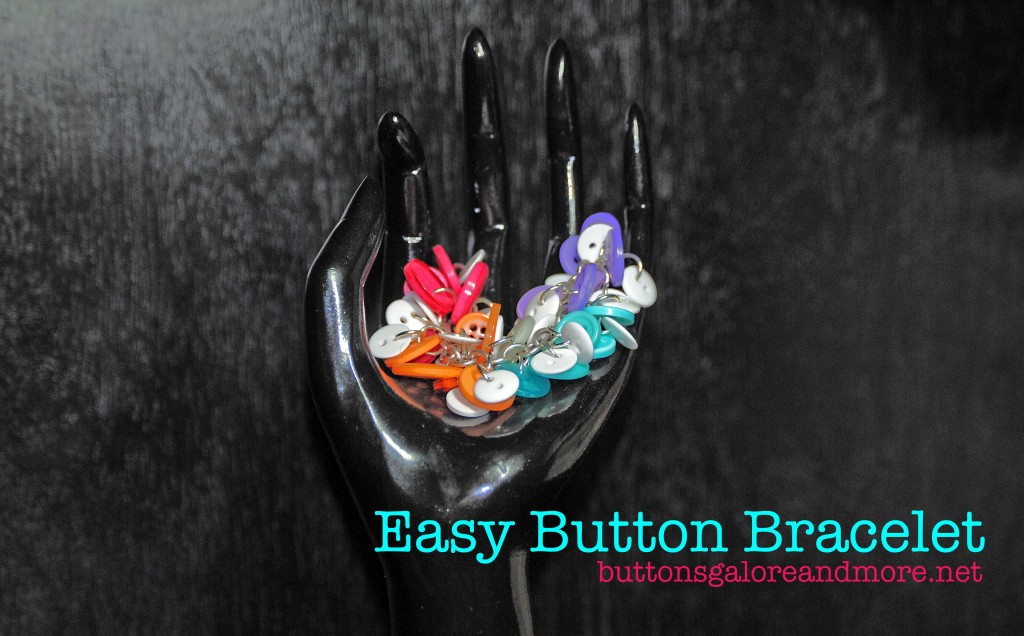
Easy Button Bracelet DIY


Easy Button Bracelet Tutorial by Allie Gower

Easy Button Bracelet by Allie Gower


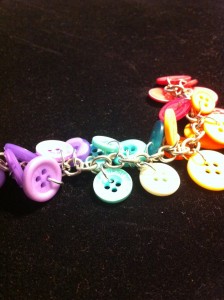
Ready for a fun and easy Button Bracelet DIY project? This bracelet is put together very easily. I used a variety of buttons, some fun Turquoise Bulk Buttons, along with Orange, Pink and Purple buttons from a bag of Color Bulk Buttons in fun sizes and shapes, and used Tiny, two holed White Buttons for a little more jiggle and dimension. On the colored buttons, I had to just sample and try to see which ones fit the jump rings I had on hand. It’s so nice to have a variety to choose from.

Directions for the Button Bracelet DIY

I attached colored buttons by jump rings to a chain segment, one per link. I attached a white button via a second jump ring to each of the colored buttons. Toggles are added to each end.

Button Bracelet in Progress

Note: be sure to take into account the size of your closure in the measurement of your bracelet, and add a little room for bulkier bracelets

Buttons Galore Products Used:

Additional Supplies needed:

You’ll need two sets of pliers, I use Half Round Flat Nose – these are lined with nylon so they don’t scratch up some of the softer metal jump rings. Chain nose pliers would be fine too. If you’ve never worked with jump rings before, Fire Mountain Gems has some great tutorials. This article “All About Jump Rings” is a great start.

  • 48 jump rings
  • 48 buttons ( I used 6 each of the blue, pink, purple and orange, and 24 white)
  • chain – most wrists are 7.5″
  • closure

I hope you enjoyed this easy Button Bracelet DIY – give some jewelry a try!

3

More Handmade Button Rings…”variety is the spice of life”, right?

Well I hope you enjoyed my ring tutorial yesterday. I really enjoyed putting it together. I especially love when people try out my tutorials and then let me know how it worked for them! :)

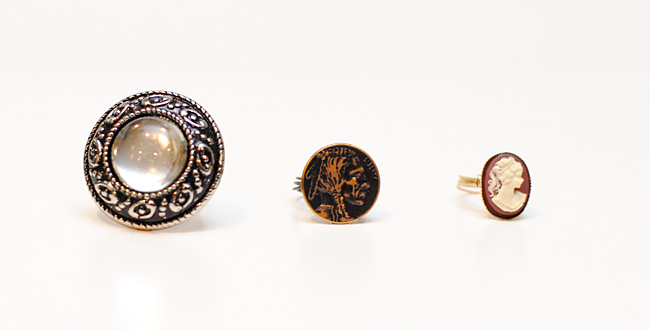
Today I just have a quick post to share with you. Here I wanted to show you a few more button rings I have made. First I will show you all three, then I will expound on them just a bit for you.


Here you can see that you can use buttons of all shapes and sizes. There’s no “right size” button for making a ring!

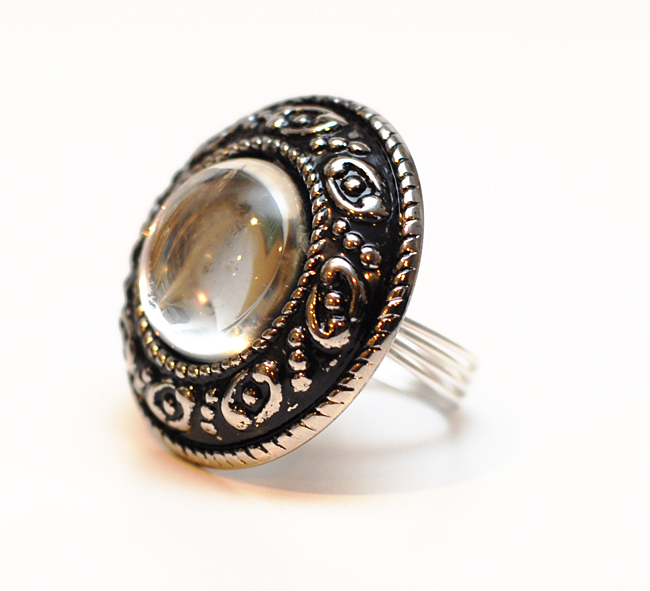
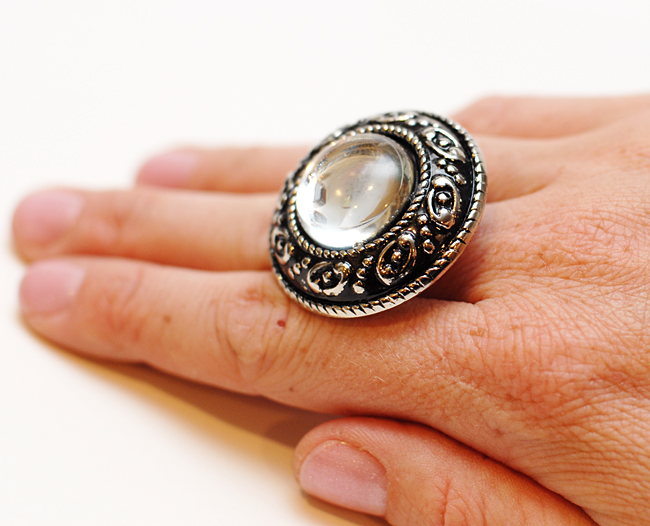
When I found the first one on the left in the Gold Bulk Button Pack I was thrilled that it wasn’t GOLD! LOL I was so excited to see it was silver because I am generally a “silver/copper/bronze” kinda gal… the only gold I typically wear is my wedding band and engagement ring. This button measures almost an inch and three quarters at the widest part!!! Suuuuch a fun “cocktail ring” size.

Here it is on my hand. Fun right??

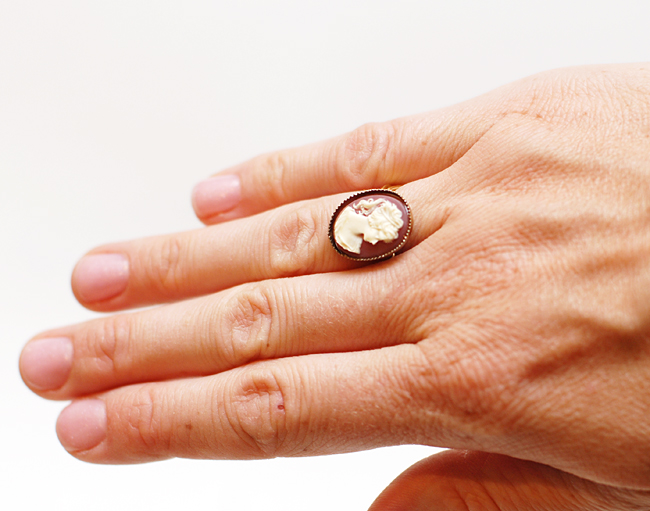
Well then I thought I would also make one from the sweet dainty little Cameo Button in the Genuine Vintage Button Tin. It’s just so little and cute compared to the ginormous one in the picture above, isn’t it?
I have some really cute colored buttons that I plan on doing another ring soon with…I hope you will come on back to see them! Please be sure to comment with a link to your button ring creations. I would love to see what you have done either on your own or using the tutorial I created! Have a great day!

P.S.  Be sure to check out our “Pin it to Win it Contest” that runs all the way through April 27th!!!

0

Powered by WordPress. Designed by WooThemes