Header

Tag Archives | Craft

DIY Gift Wrapping with Buttons

Here is a fantastic way to create custom  DIY gift wrapping in fifteen minutes (or less) using buttons, fabric markers and glue.  Check it out!  Yay, it’s Fifteen MINUTE Friday!!!

Tulip_Fabric_Markers_Gift_2


A tip for buttons and fabric if you are not up for sewing…super tacky adhesives work best!  I love the Fast Grab Tacky from Aleene’s because it holds the buttons right away and keeps them in place until totally dried.  You can see in the next picture that the buttons are in place and the glue is still wet.  I love that!

Tulip_Fabric_Markers


You can get more ideas and the full tutorial over on my blog HERE.


0

Little Pink Ribbon Pins

October is the month that we as women remind each other that we love, care and honor ourselves.   The sisterhood of women strengthens this month as we stand together to bring awareness to breast cancer and what it means in our lives.  I don’t think there is a life untouched by breast cancer.  This little ribbon is a crafty project that you can make and wear to participate in not only the awareness aspect but also the celebration of the sisterhood of women.  I glued it together with Aleene’s Max Tacky Adhesive.  I used pink buttons of course.  I attached it to a pillow for the Hands-on-Heart pillow drive.

Pillow

Here are a few other crafty breast cancer awareness projects that you might like.  This button ribbon was created with buttons and glue!

Button Pink Ribbon

This tie dyed pillowcase fits perfectly in the tote bag that was created with the pink ribbon stamp from ClearSnap by Jen Goode.  You can see lots of great things that were made with her stamp on 100 Directions.

BCA_DyedPillow


Pink buttons can make a difference I think!  What do you think?

Cheers,

Laura

0

Little Pumpkin Button Cards for Fifteen MINUTE Friday

Halloween is absolutely one of my FAVORITE holidays and to celebrate I pulled together the creative minds of some of my talented blogging friends to bring you over 110 fabulous Halloween ideas! From costumes to parties, crafts and home decor, recipes and free printables, we have so many fun ideas to share! I guarantee you’ll find a project (or 10!) that you would love to incorporate into your Halloween festivities. All week (Monday through Saturday) myself and my blogging friends will be sharing our fun creations with all of you. Each day will include approximately 20 Halloween projects and you can “hop” from one blog to another to check them all out.

It’s Friday and day 5 of our Halloween Bash blog hop! Glad you could join us on this fabulous Friday for more Halloween ideas from me and my talented blogging friends!

These are so super cute and easy peasy to create!

Pumpkin Card

You will need just a few things…paper, Outrageous Orange buttons and Aleene’s Tacky Glue.

Supplies

Cut out your decorative paper and attach it to your card with Aleene’s then add a BIG orange button for a pumpkin.  I added a little brown button for a stem and green ribbon for the vine.

TA DA!  So adorable and simple and fun!

But the fun ideas don’t stop here! Continue checking out the creative Halloween projects my blogging friends have created for our blog hop by clicking on each of the links below, for the Halloween projects you’d like to see in more detail and it’ll take you right to that post with additional information and photos on how to create it. Have fun and pin away!

Over 110 fun & fabulous Halloween projects & ideas! #halloweenprojects #halloween #diyhalloweenideas

1. Happy Halloween Treat Bucket
2. Beware of the Bam-BOO
3. Halloween Beeswax Candles
4. Caramel Apple Cupcakes
5. Halloween Treat Bag Tags – Free Printable
6. Halloween Cookie Pops ~ Nutter Butter Bats & Mummies
7. Halloween Photo Booth Props
8. Halloween Candle Jars
9. Ghost Candles
10. Dollar Store Spider Halloween Wreath
11. Healthy Halloween Class Treat
12. Little Pumpkin Button Cards
13. Pumpkin Playdough Mats
14. Craft for Kids: Finger Puppet Monsters
15. Creepy Halloween Jar Labels
16. Halloween Party Favor and Printable
17. Kids Halloween Lanterns
18. Candy Box Head Skeletons
19. Sweet & Salty Halloween Treat

Follow our Fabulous Halloween Ideas Pinterest board for even more inspiration!

Follow Design Dazzle’s board Fabulous Halloween Ideas on Pinterest.

Be sure to come back tomorrow for another 20 awesome Halloween ideas!

Thanks to all 110+ fabulous bloggers participating! We’d love for you to visit their blogs and see what else they’re up to!

100 Directions || 365daysofcrafts || a girl and a glue gun || A Prudent Life || Addicted 2 DIY || Albion Gould || Ashlee Marie || Atta Girl Says || Bakerette || BD Design || BellaGrey Designs || Black and White Obsession || Bloom Designs Online || Blue i Style || Bombshell Bling || bumblebreeblog || C.R.A.F.T. || Celebration Lane || Clean and Scentsible || Clearsnap || Confetti Sunshine || Crafts by Courtney || Creations by Kara || Creative Juice || Cutesy Crafts || Design Dazzle || Dress It Up Crafts || Echoes of Laughter || Everyday Party Magazine || Eye Candy Creative Studio || Fairfield World || Fearlessly Creative Mammas || Five Heart Home || Fizzy Party || Free Time Frolics || Frenchie || FrugElegance || Glued To My Crafts || GreatStitch || Happiness is Homemade || Here Comes the Sun || Home Maid Simple || Honeybear Lane || hoopla palooza || Hydrangea Hippo || I Dig Pinterest || ICE Resin || inkhappi || Insitefull Living || It’s Sew Lorine || Jaco’lyn Murphy || Jen A. Street || Just My Little Mess || Just Us Four || Katarina’s Paperie || Kiki and Company || Laura Kelly’s INKlings || Let’s Eat Grandpa || Let’s Go Junking || Liz on Call || Love The Day || Made by a Princess || Made From Pinterest || Made to be a Momma || Major Hoff Takes A Wife || Make Life Lovely || My Craftily Ever After || My Daylights Blog || My Insanity || Nature’s Knockout || Not Just A Mommy || One Creative Mommy || Organize & Decorate Everything || Our Thrifty Ideas || Paleo Priests || Persia Lou || Pink Cake Plate || PinkWhen || Play. Party. Pin. || Practical Parenting || Reclaim Yourself Retreat || See Vanessa Craft || She’s Crafty || Simple Sojourns || Simply Designing || Soiree Event Design || Sowdering About || Splendid Design || Stuffed Suitcase || Super Simple with Terri O || Suzys Sitcom || Sweet and Simple Magazine || Swish Printables || Sypsie Designs || That’s What Che Said || The Benson Street || The Cards We Drew || The Gunny Sack || The Happy Scraps || The Life of Jennifer Dawn || The Scrap Shoppe || The Things I Love Most || Tikkido || Two Thirty~Five Designs || Wait ‘Til Your Father Gets Home || Walnut Hollow Blog

Happy Crafting,

Laura

Over 110 fabulous Halloween Ideas shared by bloggers. #halloweenideas #halloween


3

Recycled Cereal Box Button Initials

Okay, so this is really cute don’t you think?  It was wayyyyy easy to make and creates awesome decor initials with recycled cereal boxes.  Yipp, it’s Fifteen MINUTE Friday!

BGM Letter L Buttons 2

Cut your favorite letter out of the cereal box.

Fruit Loops L

Cover it in Aleene’s Max Tacky Glue.  This works best because it is thick so it won’t run and won’t get your cardboard soggy AND it is strong.  Cover the letter with buttons.  I used the Laura Kelly BRIGHTS collection.

Glueing Buttons

Add layers if you would like.  I added some Embellishment Buttons to make my L for Laura super fun.  I used the Retro Embellishment Set!

Glueing Buttons

Let it dry completely then find a great place to display it.

BGM Letter L Buttons 2

Happy Quick Crafting with Buttons,

Laura

0

Button Up a Scarecrow Decoration This Fall

Check out this awesome project for the changing of the seasons!  Creating crafty decorations with kids is so super fun and this is a great one for just that!  This is especially awesome because it can be done in 15 minutes and left to dry which makes it perfect for a school or party activity.

CP_Sept

You will need popsicle sticks, glue, yarn, felt, buttons and google eyes (or whatever fun crafty things you have around the house).

Glue your sticks together to create a scarecrow head and let them dry.

CP_Sept2

Then add your decorations with glue and let dry before you use it as a decoration.

CP_Sept3

That’s all!  HAPPY Fall Y’all!


Laura

0

Patriotic Pail for USA Fun

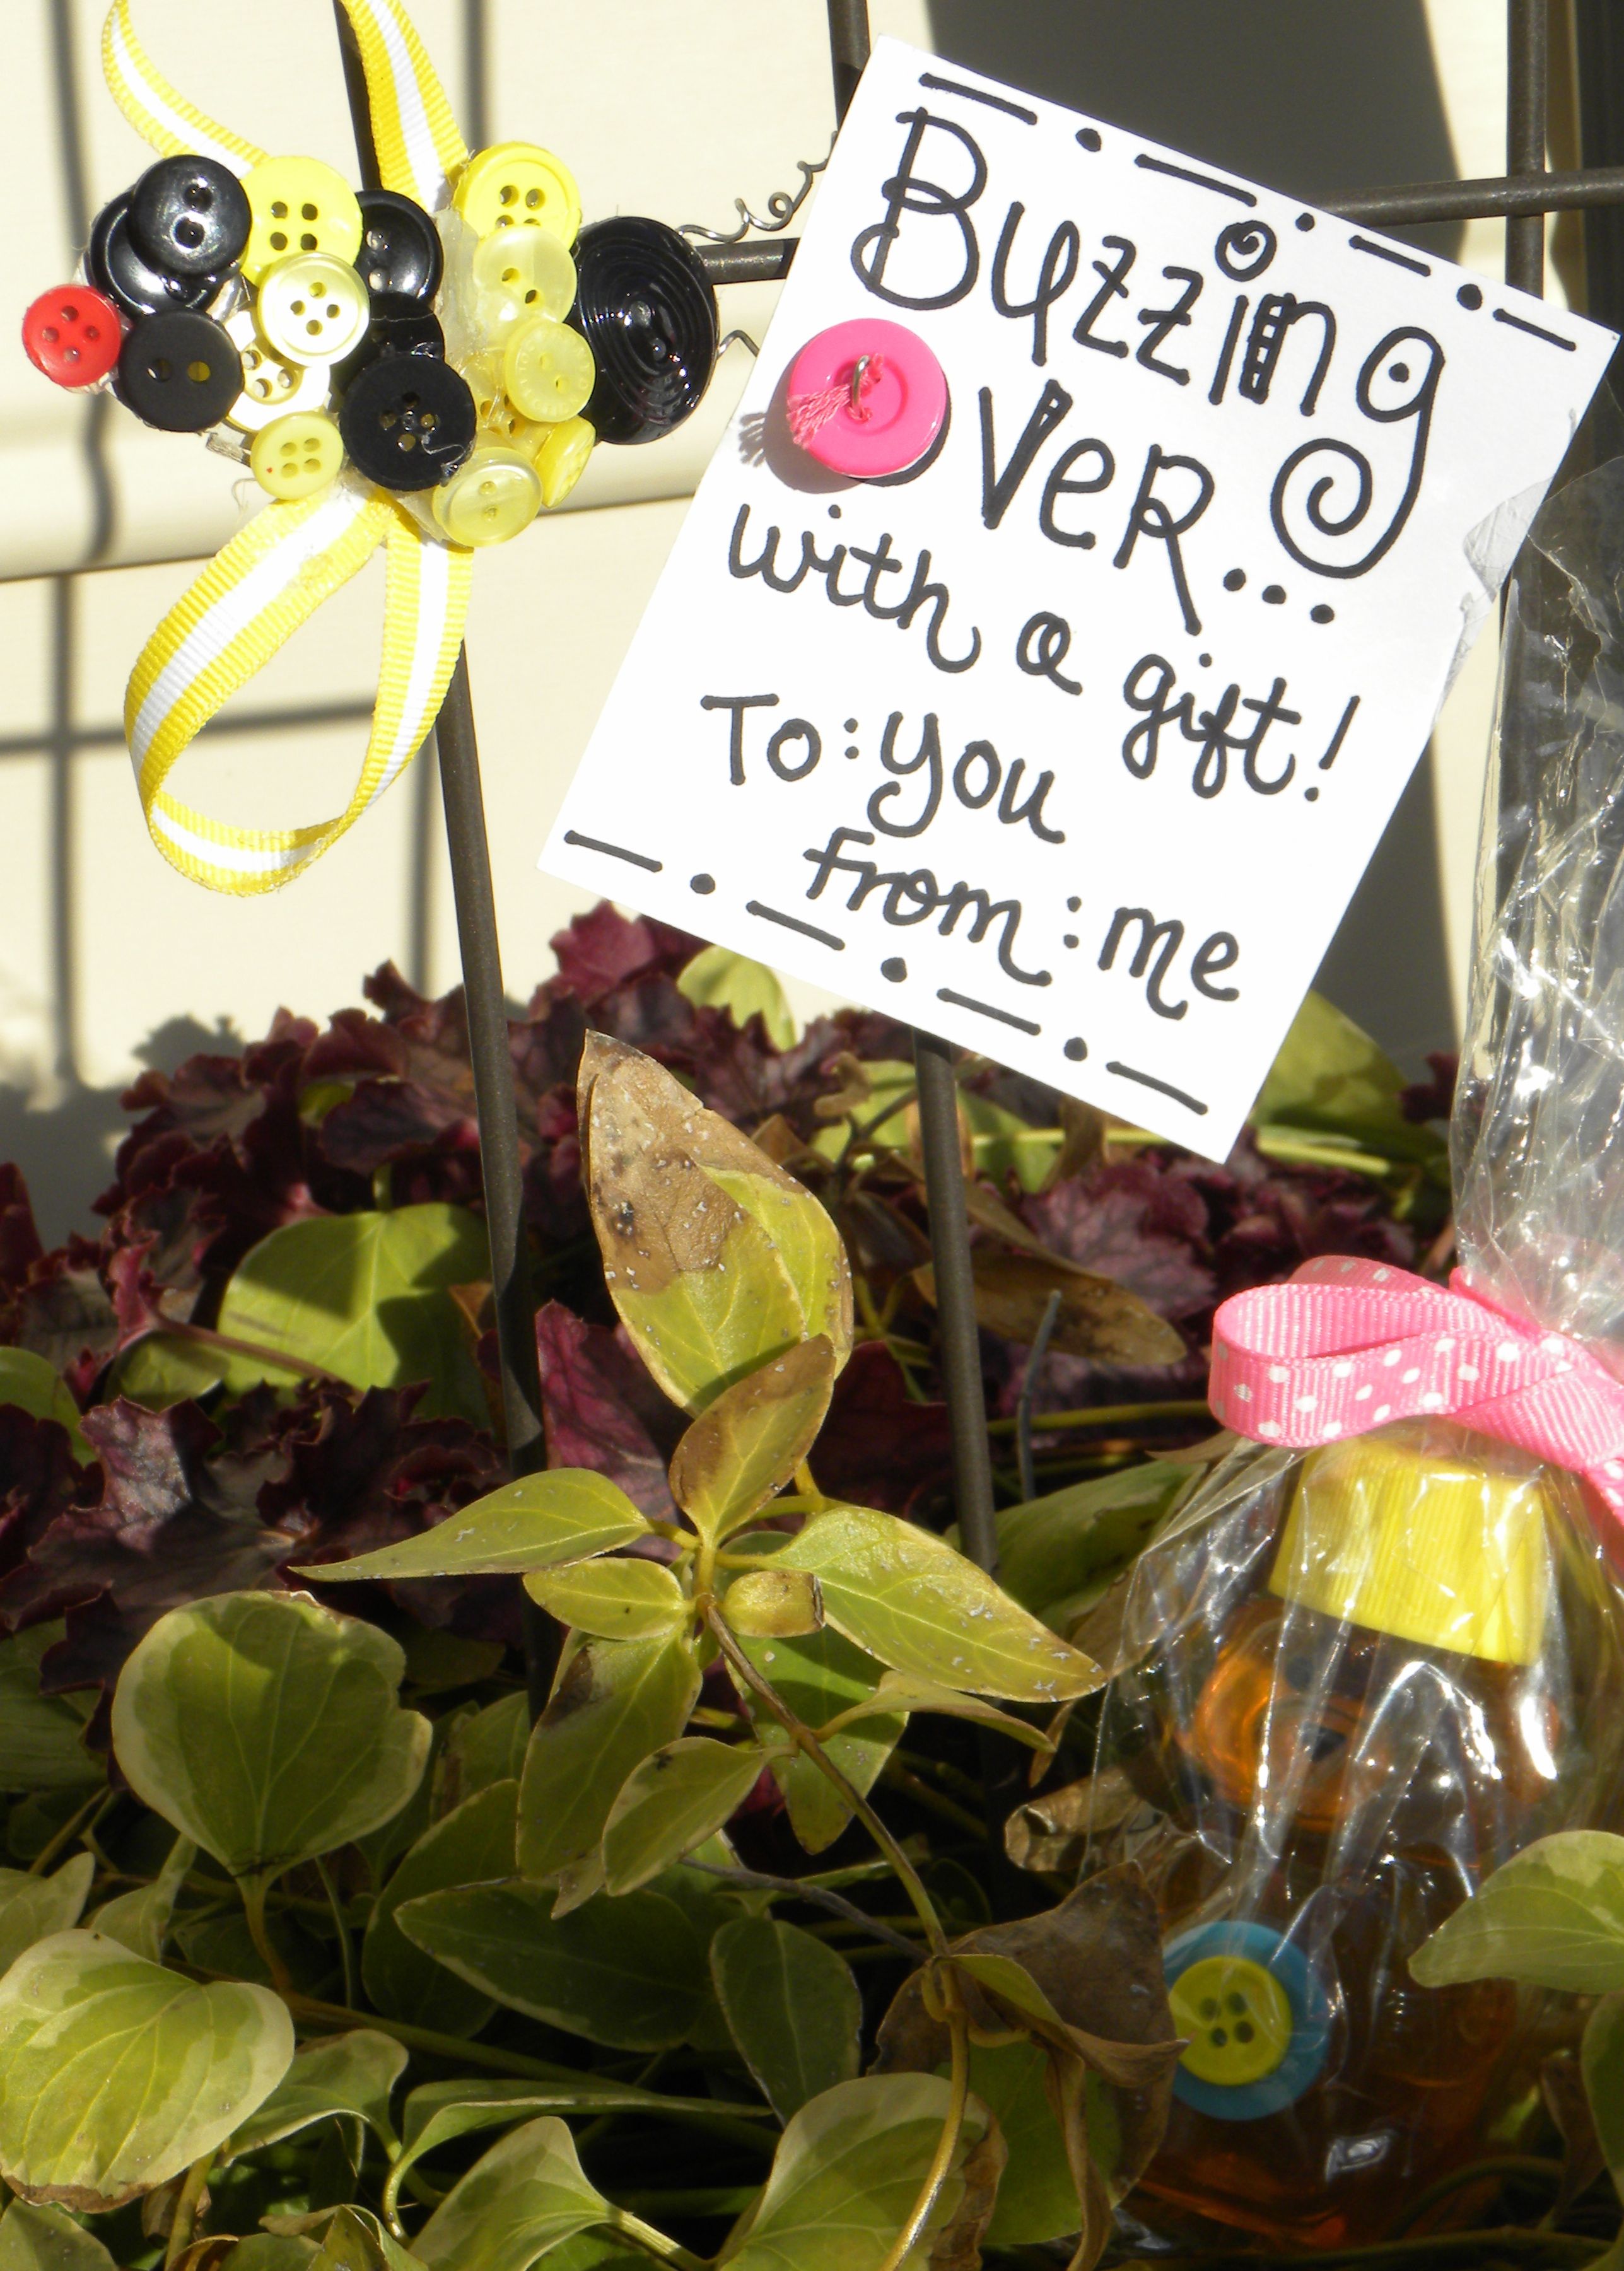
Here is a festive, fun and simple to make PATRIOTIC PICNIC PAIL, great for holding snacks, silverware, candles, etc. and totally useable for Memorial Day, 4th of July and Veterans’ Day too!

PatrioticTinPail

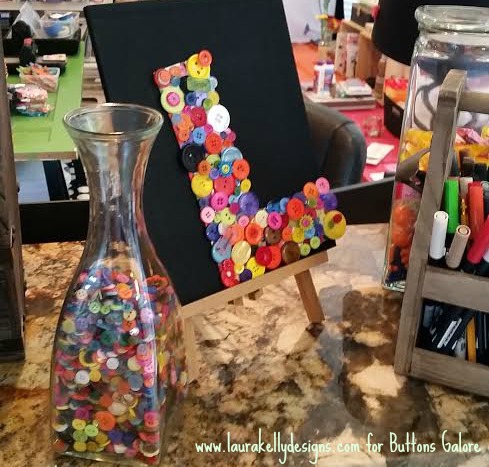
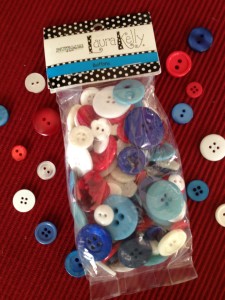
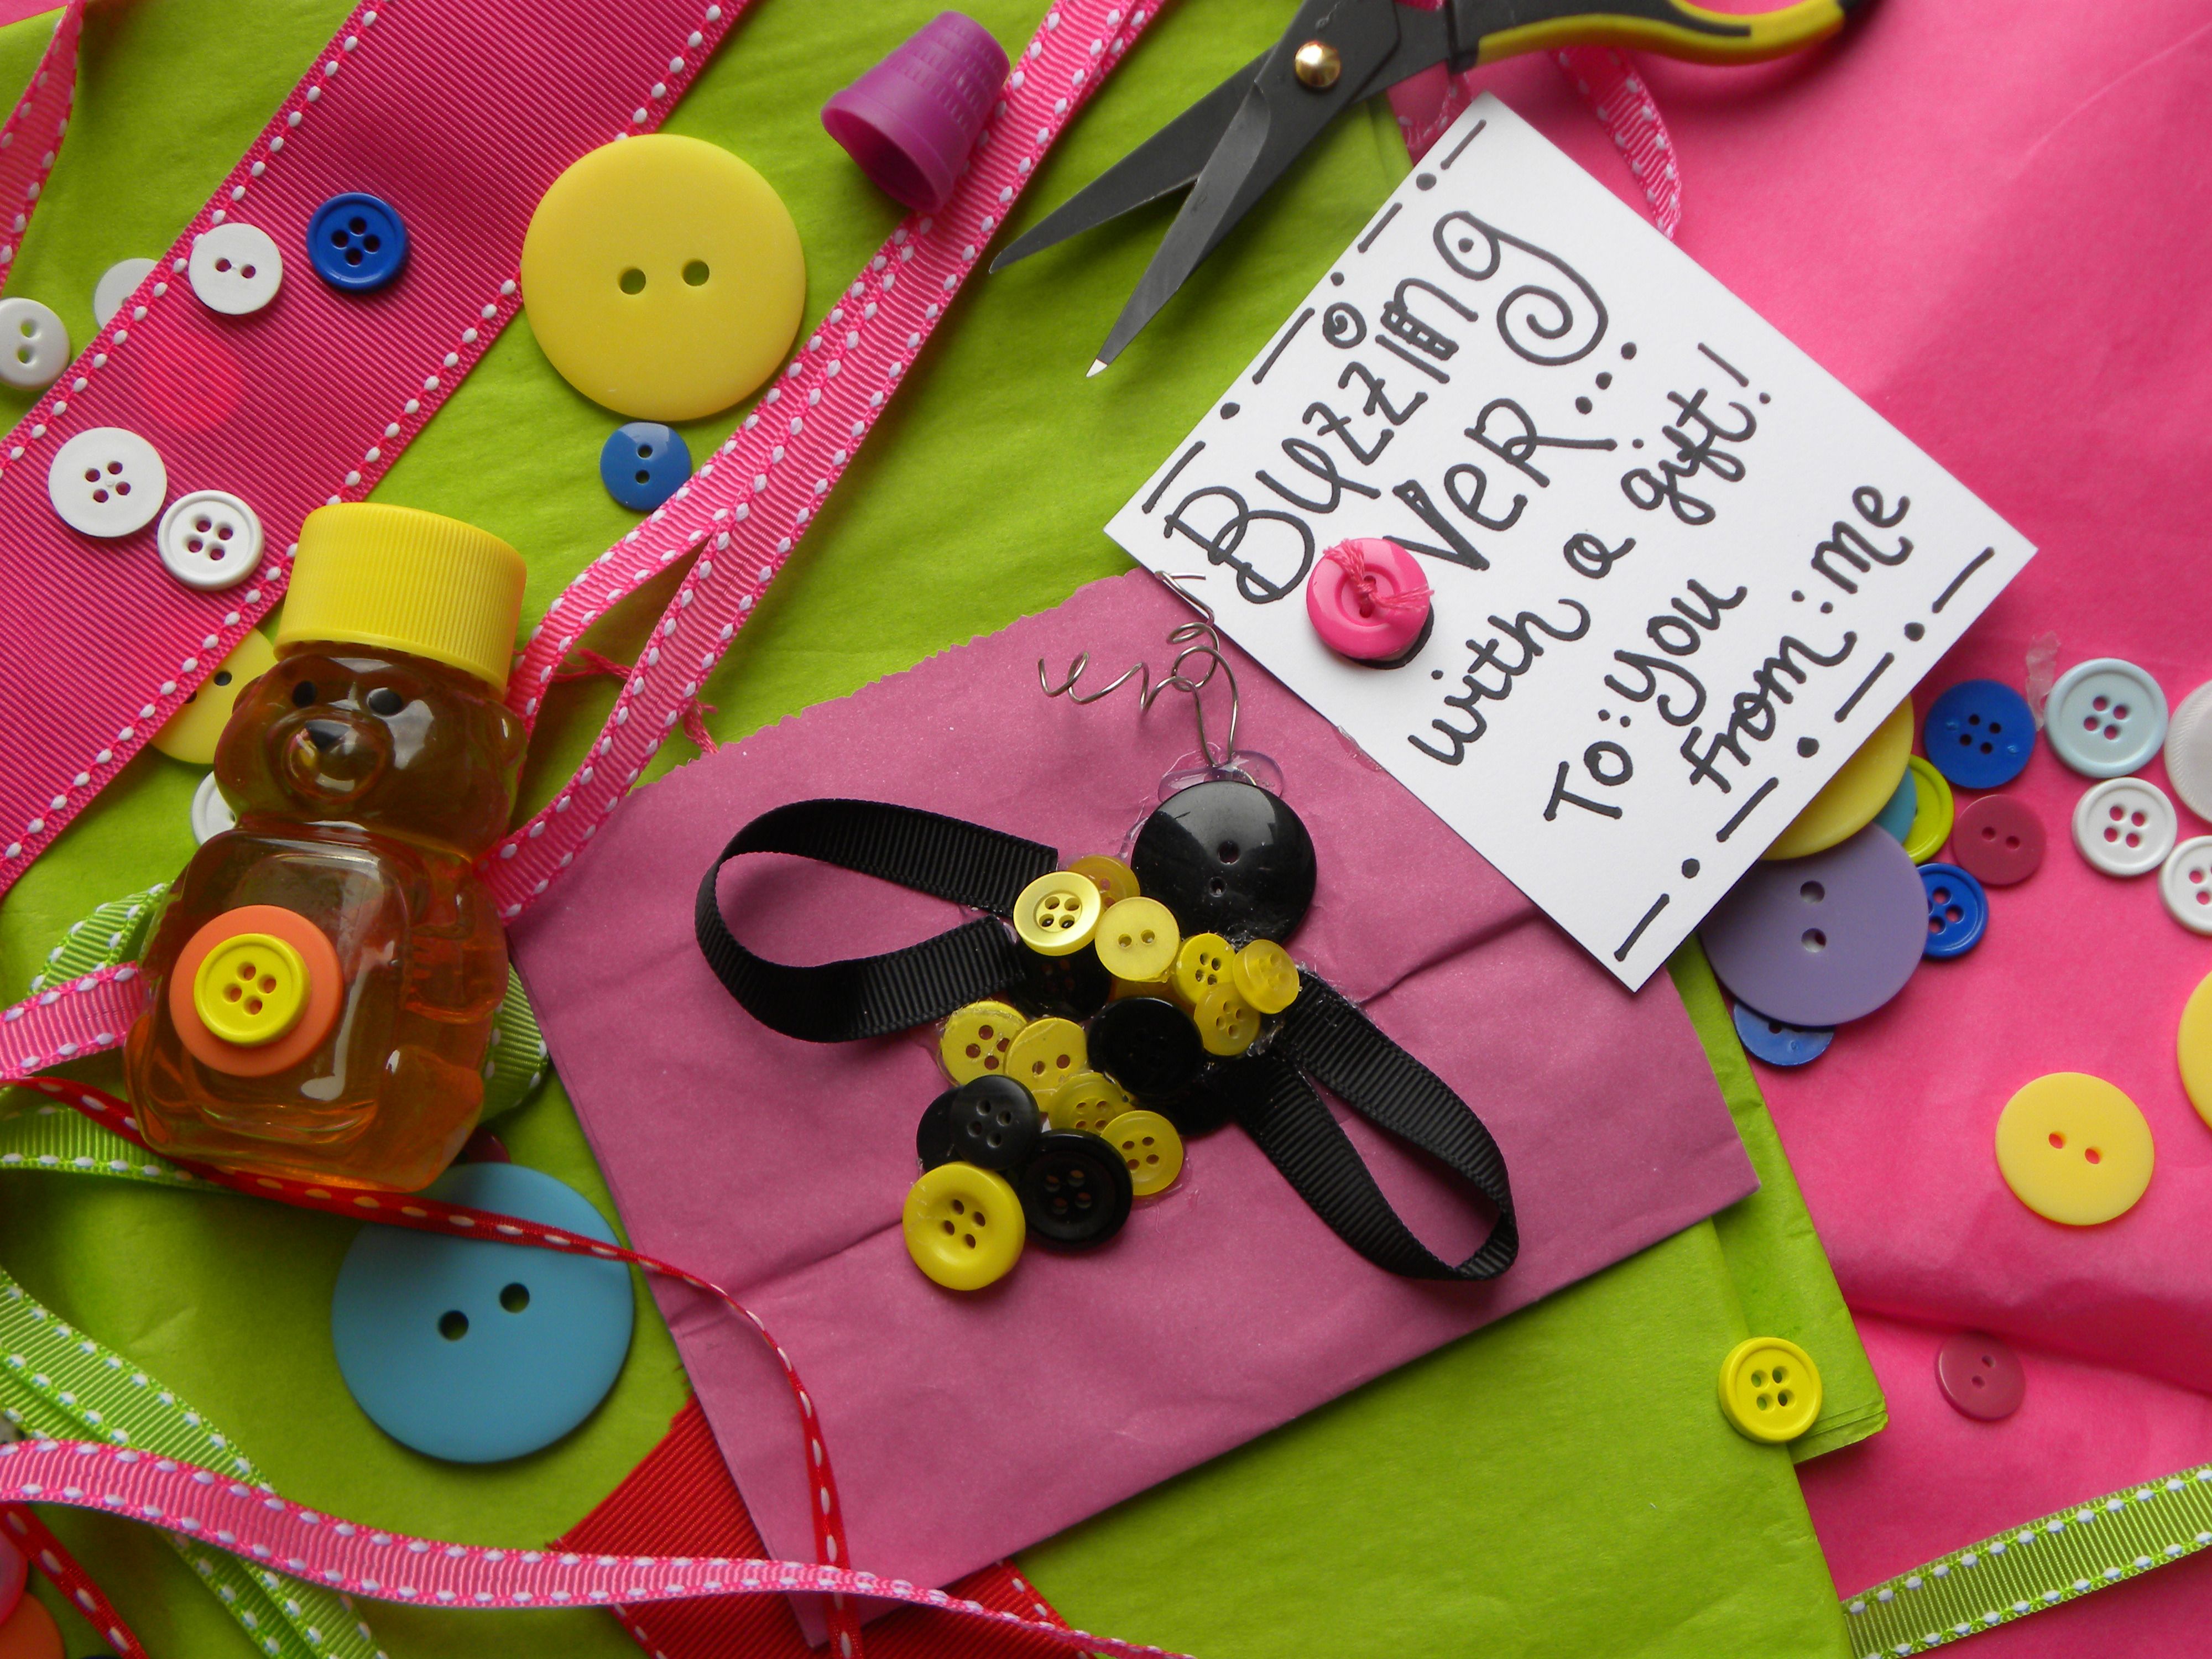
I gathered the products and materials I would need first.  You can get my patriotic mix of buttons from Buttons Galore and save yourself from having to buy all of the colors individually.

LK_PatrioticButtonMix

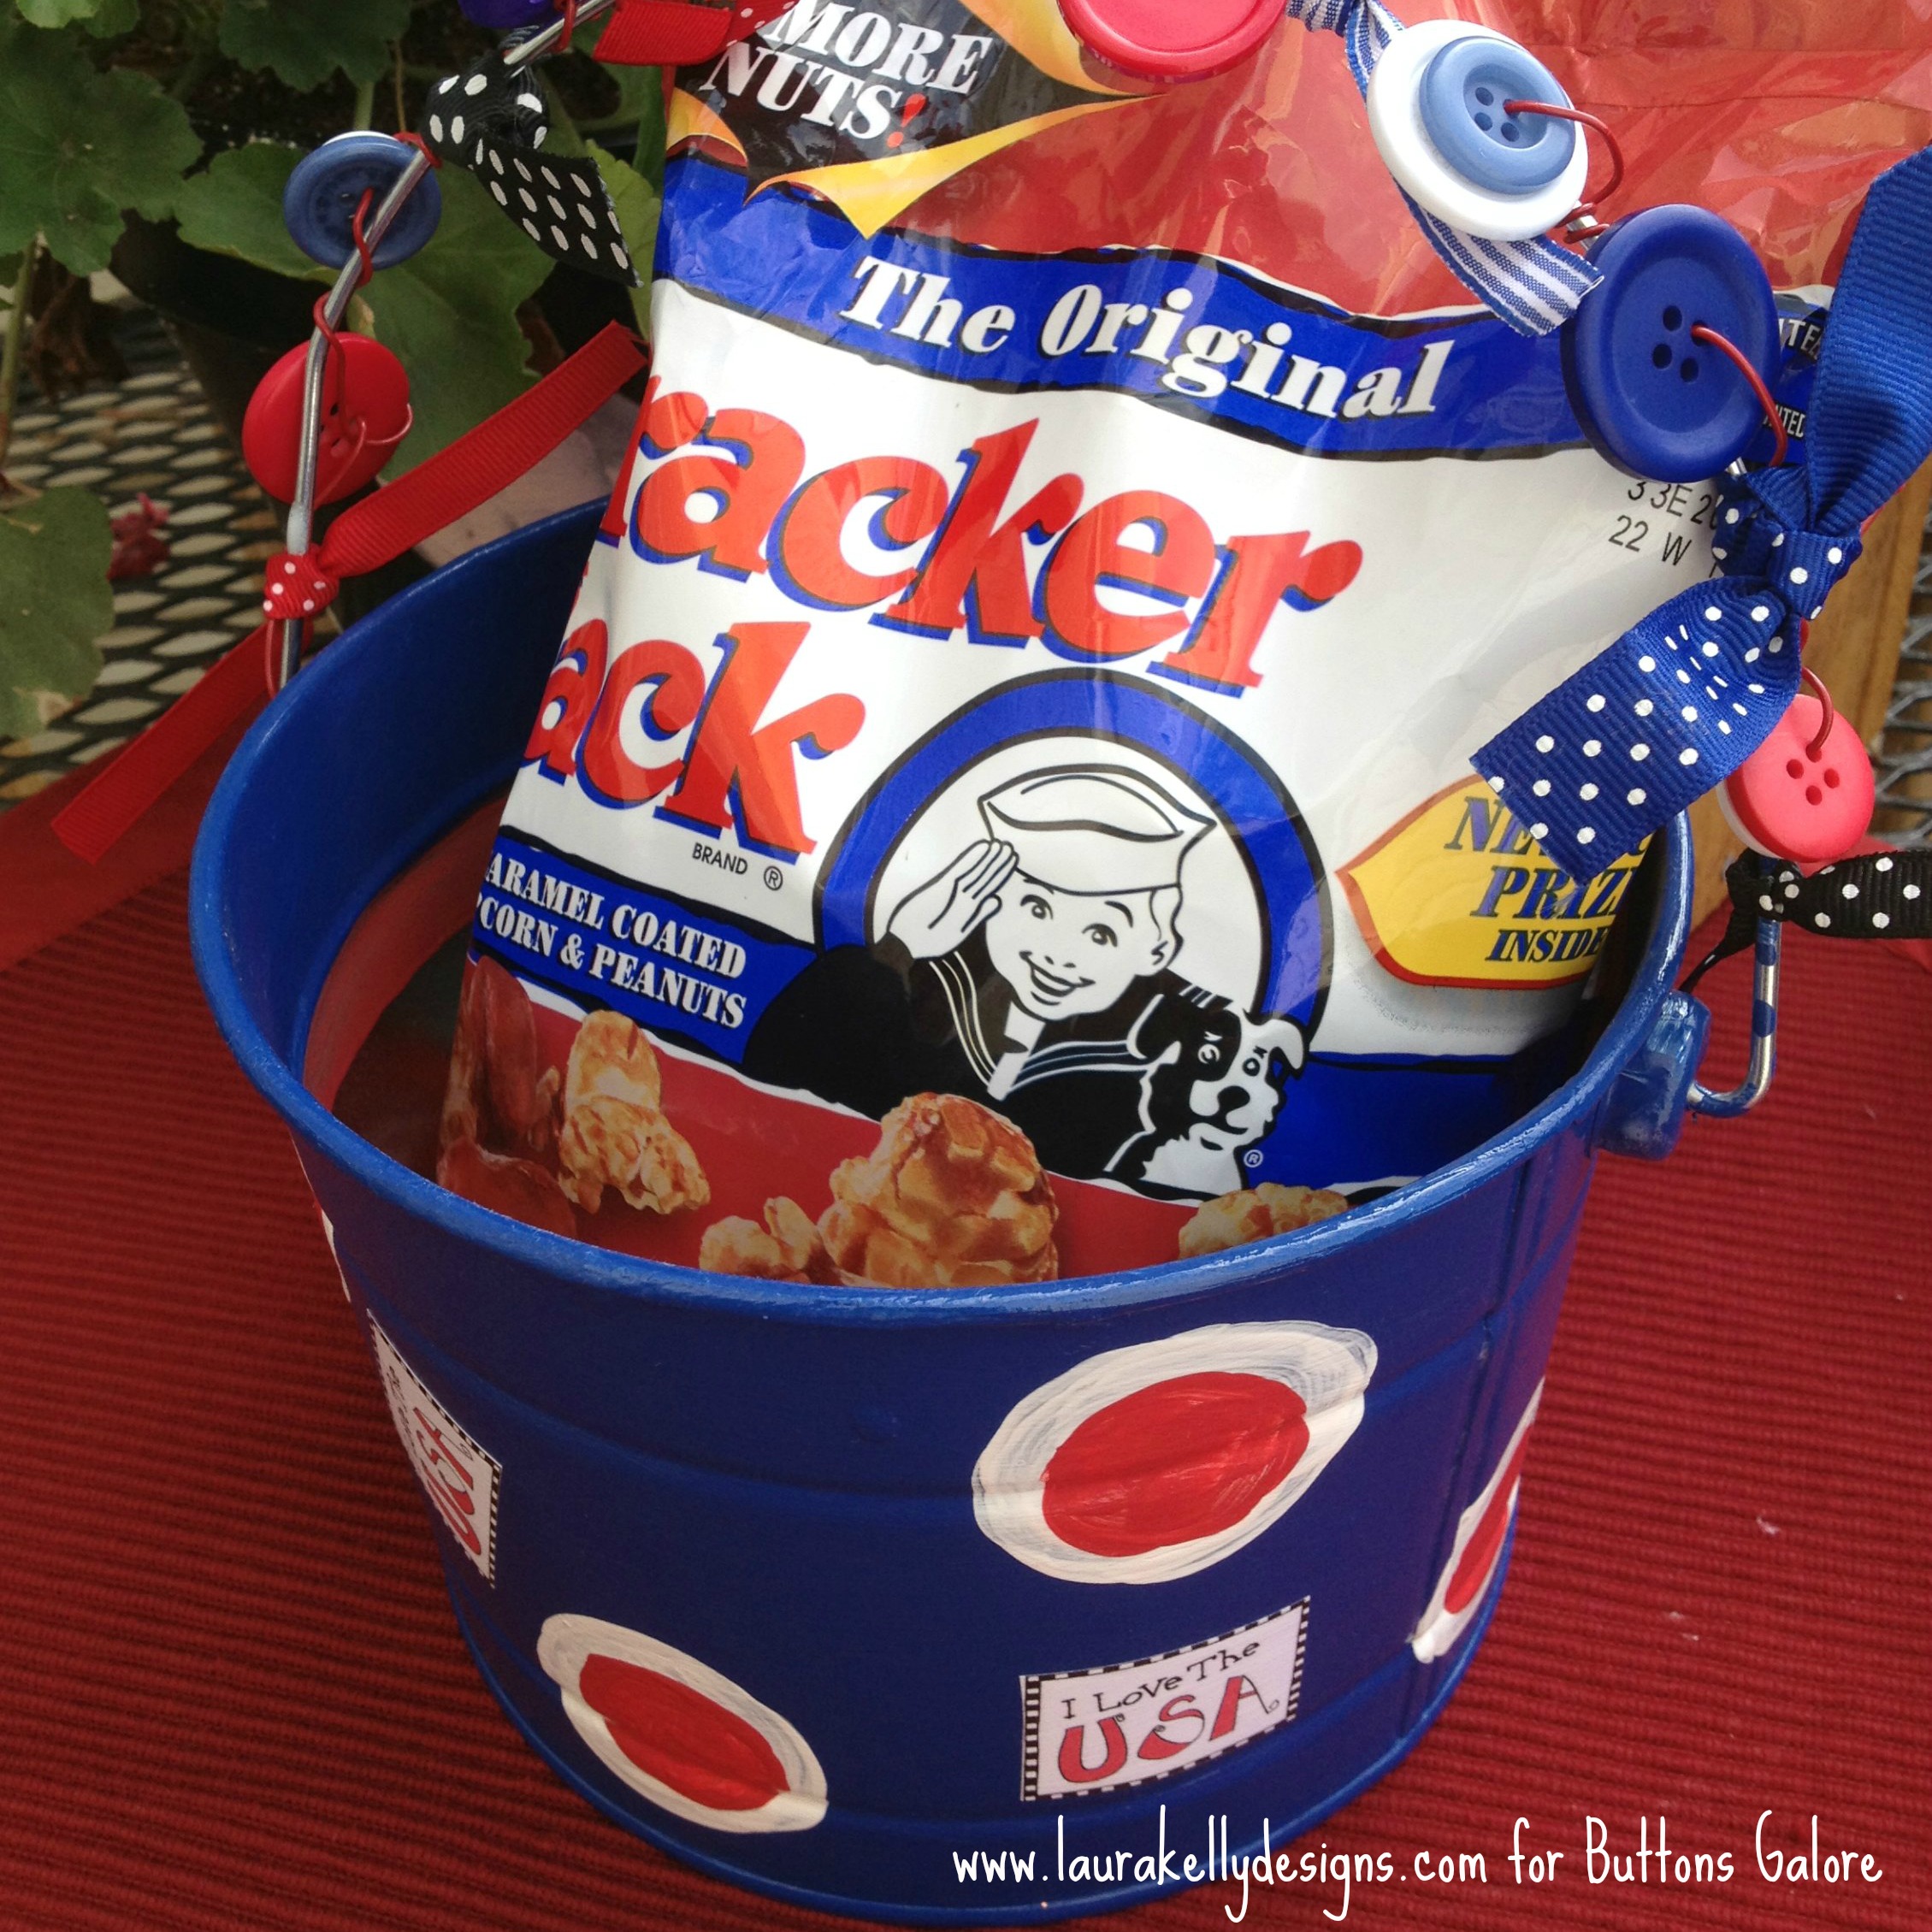
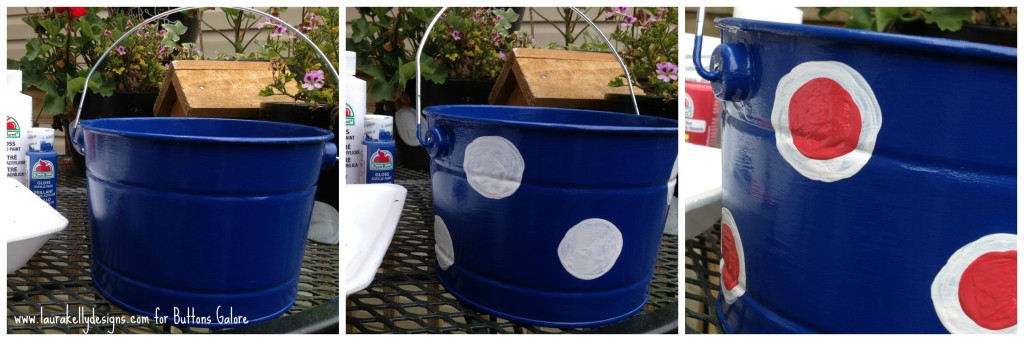
I painted the tin pail with blue paint, applying three coats to get it bright and covered completely.  Then I added polka dots with white, applying two coats.  To complete the painting, I added polka dots inside the white ones with red, again applying two coats.  I also painted inside of the bucket.

Paint

When the paint was totally dry, I used decopauge to add a few “I Love the USA” additions.  I printed them out on the computer and cut them first.  My favorite choice here is Matte Collage Pauge from I Love to Create.

Collage Pauge

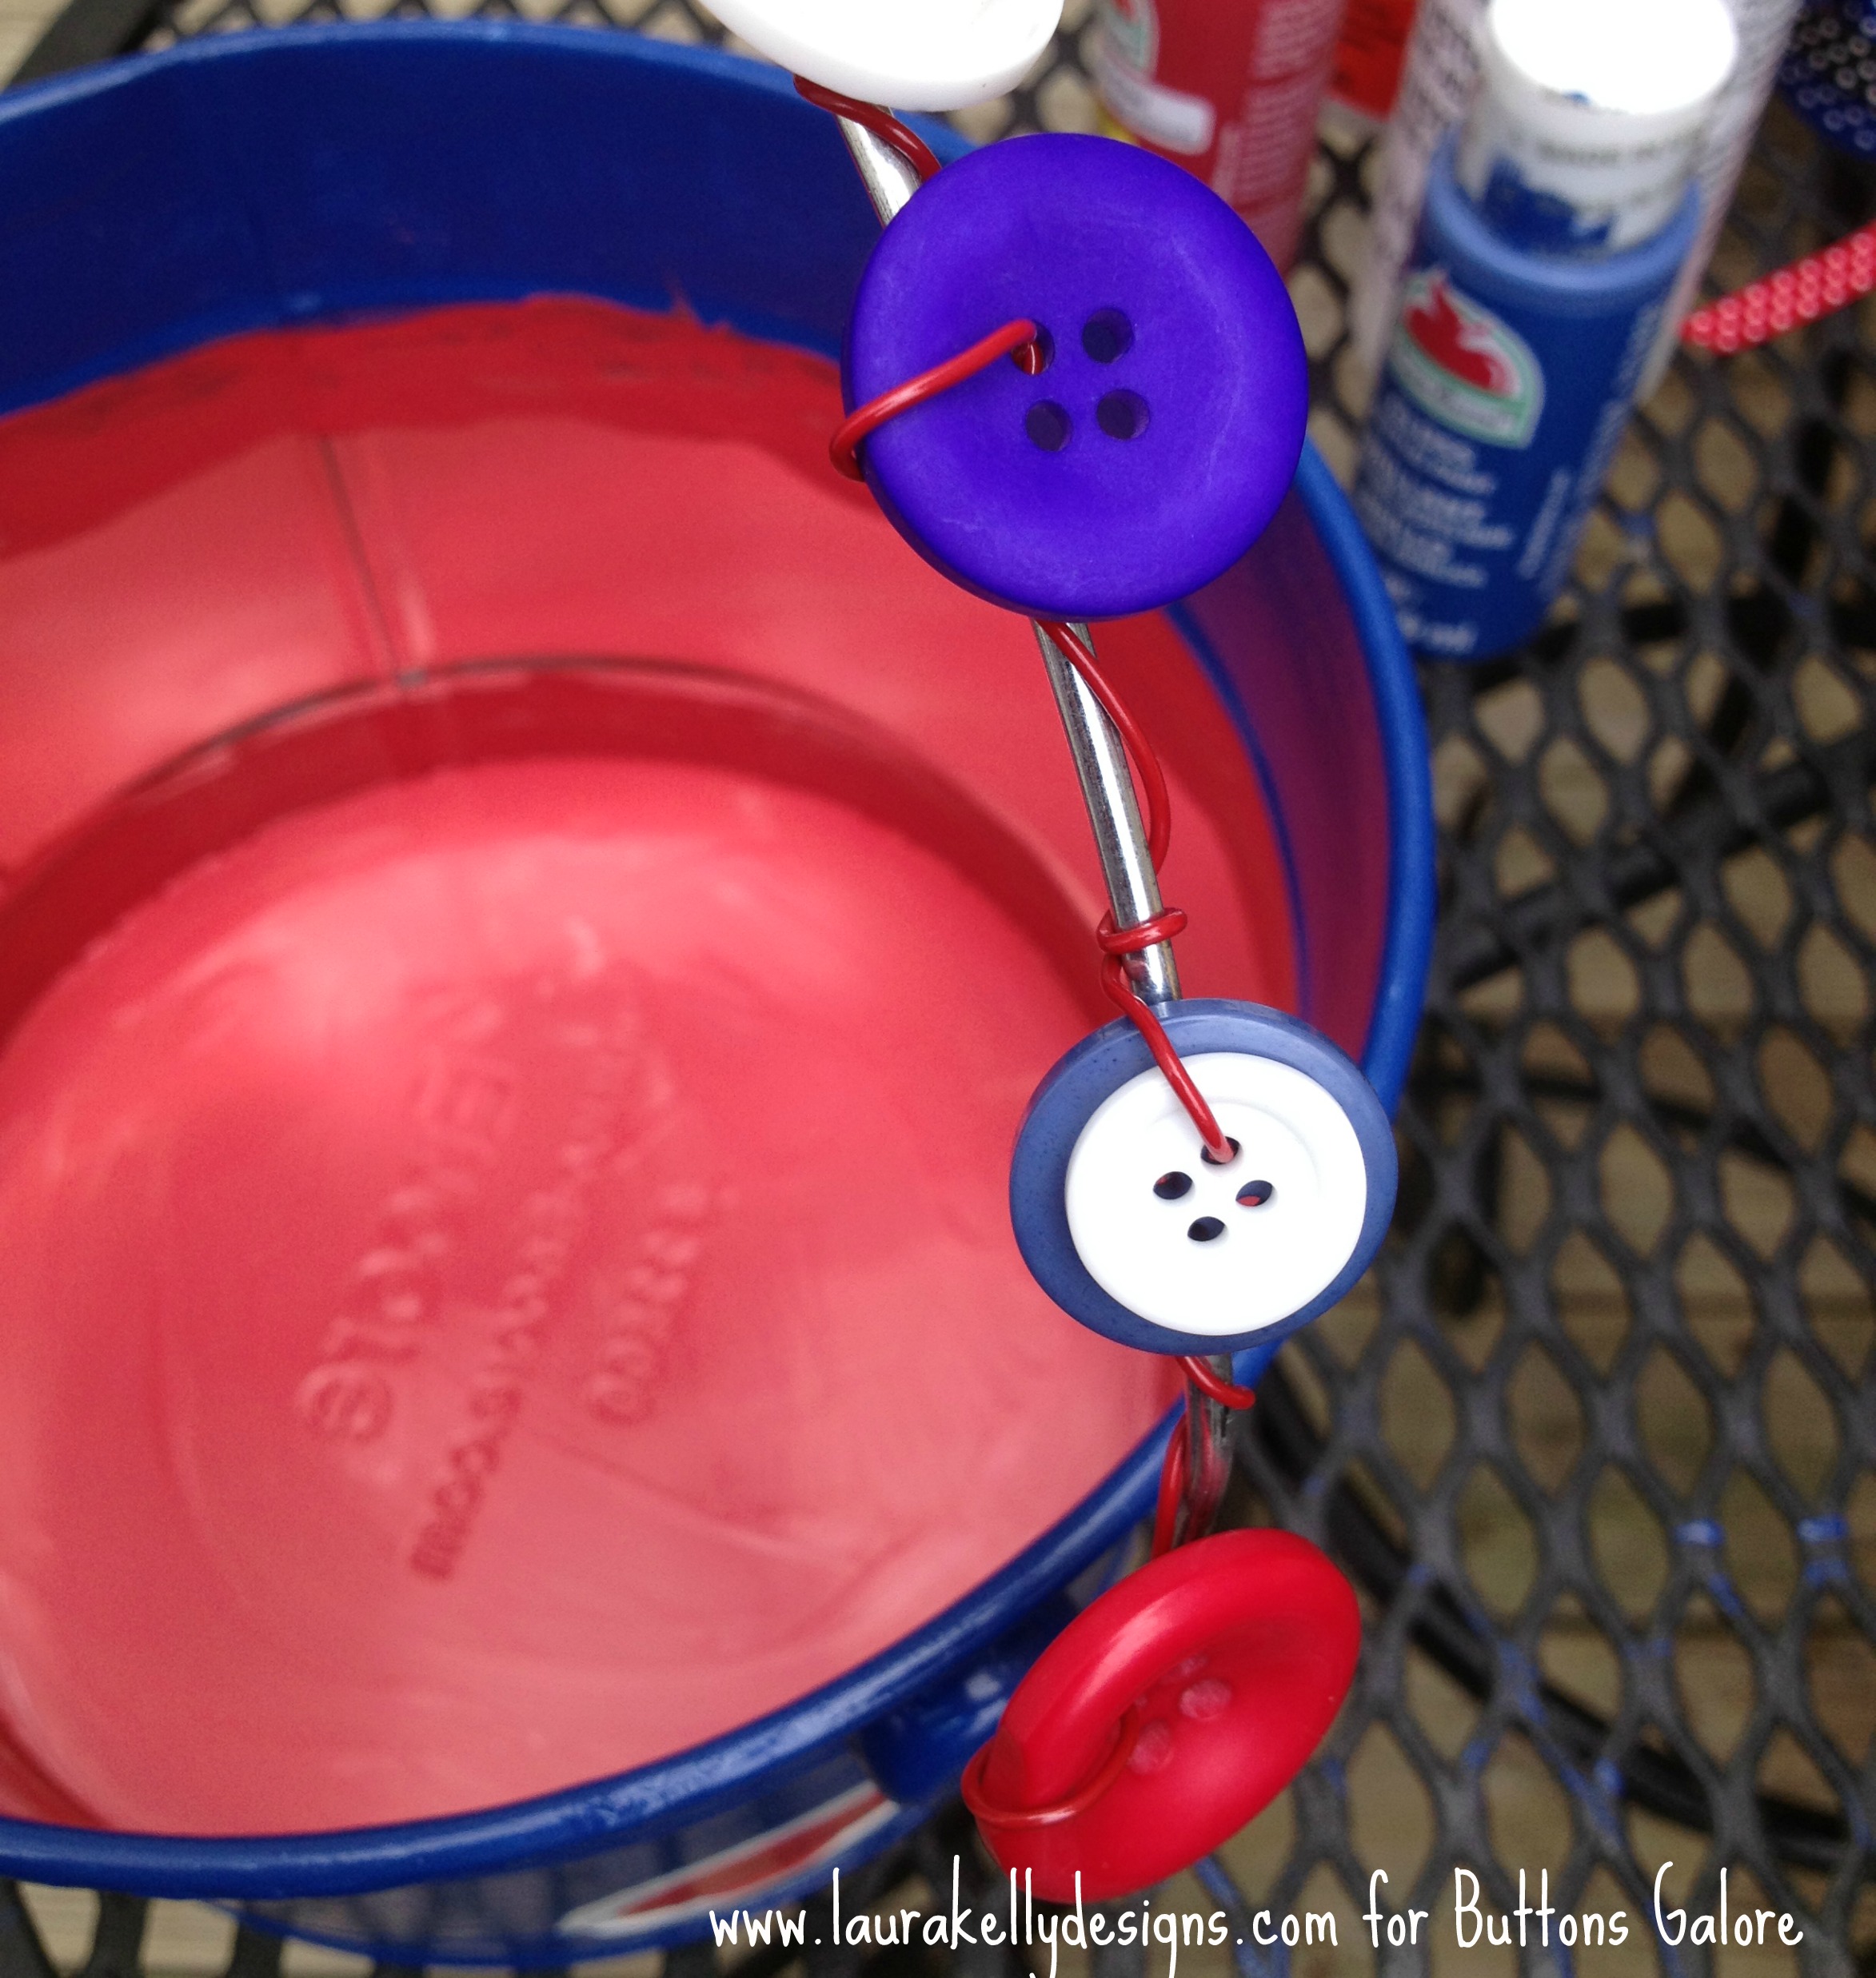
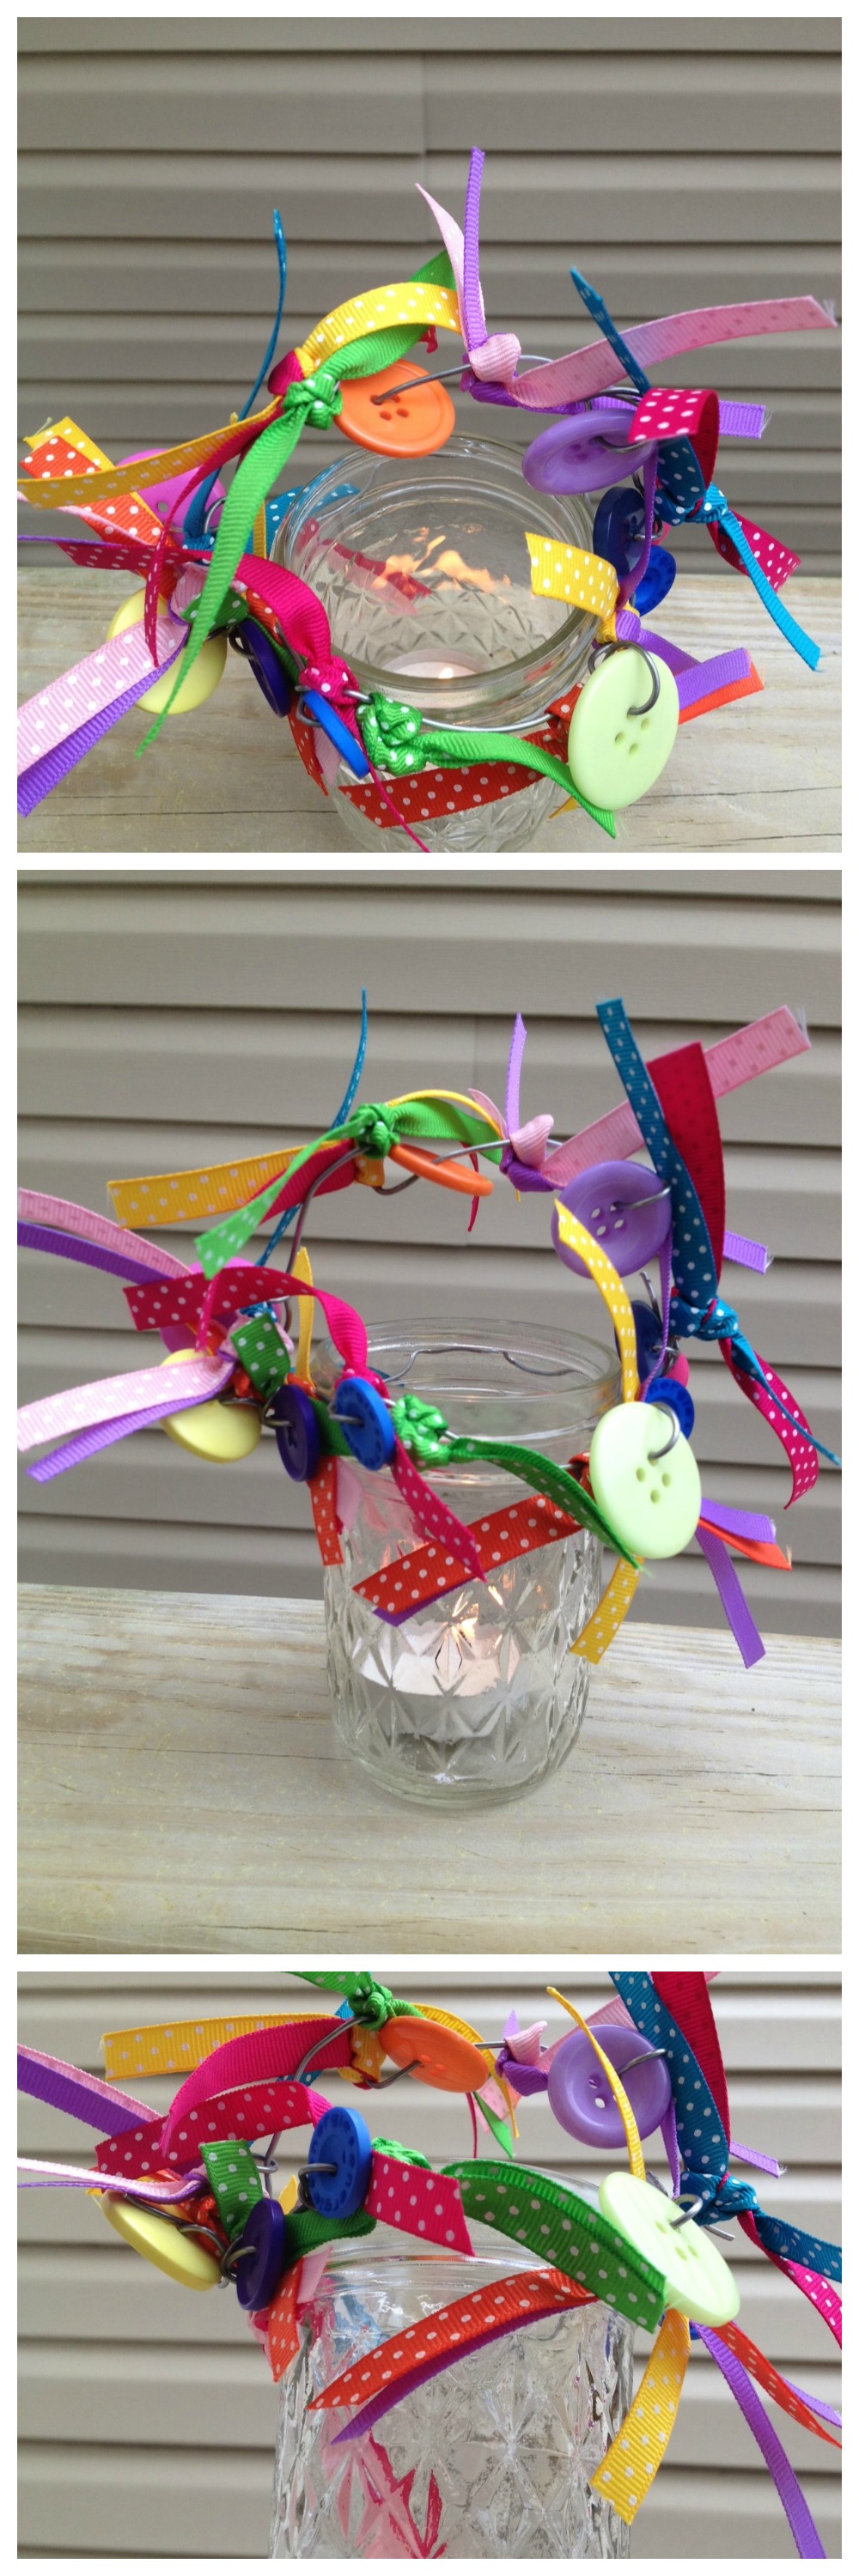
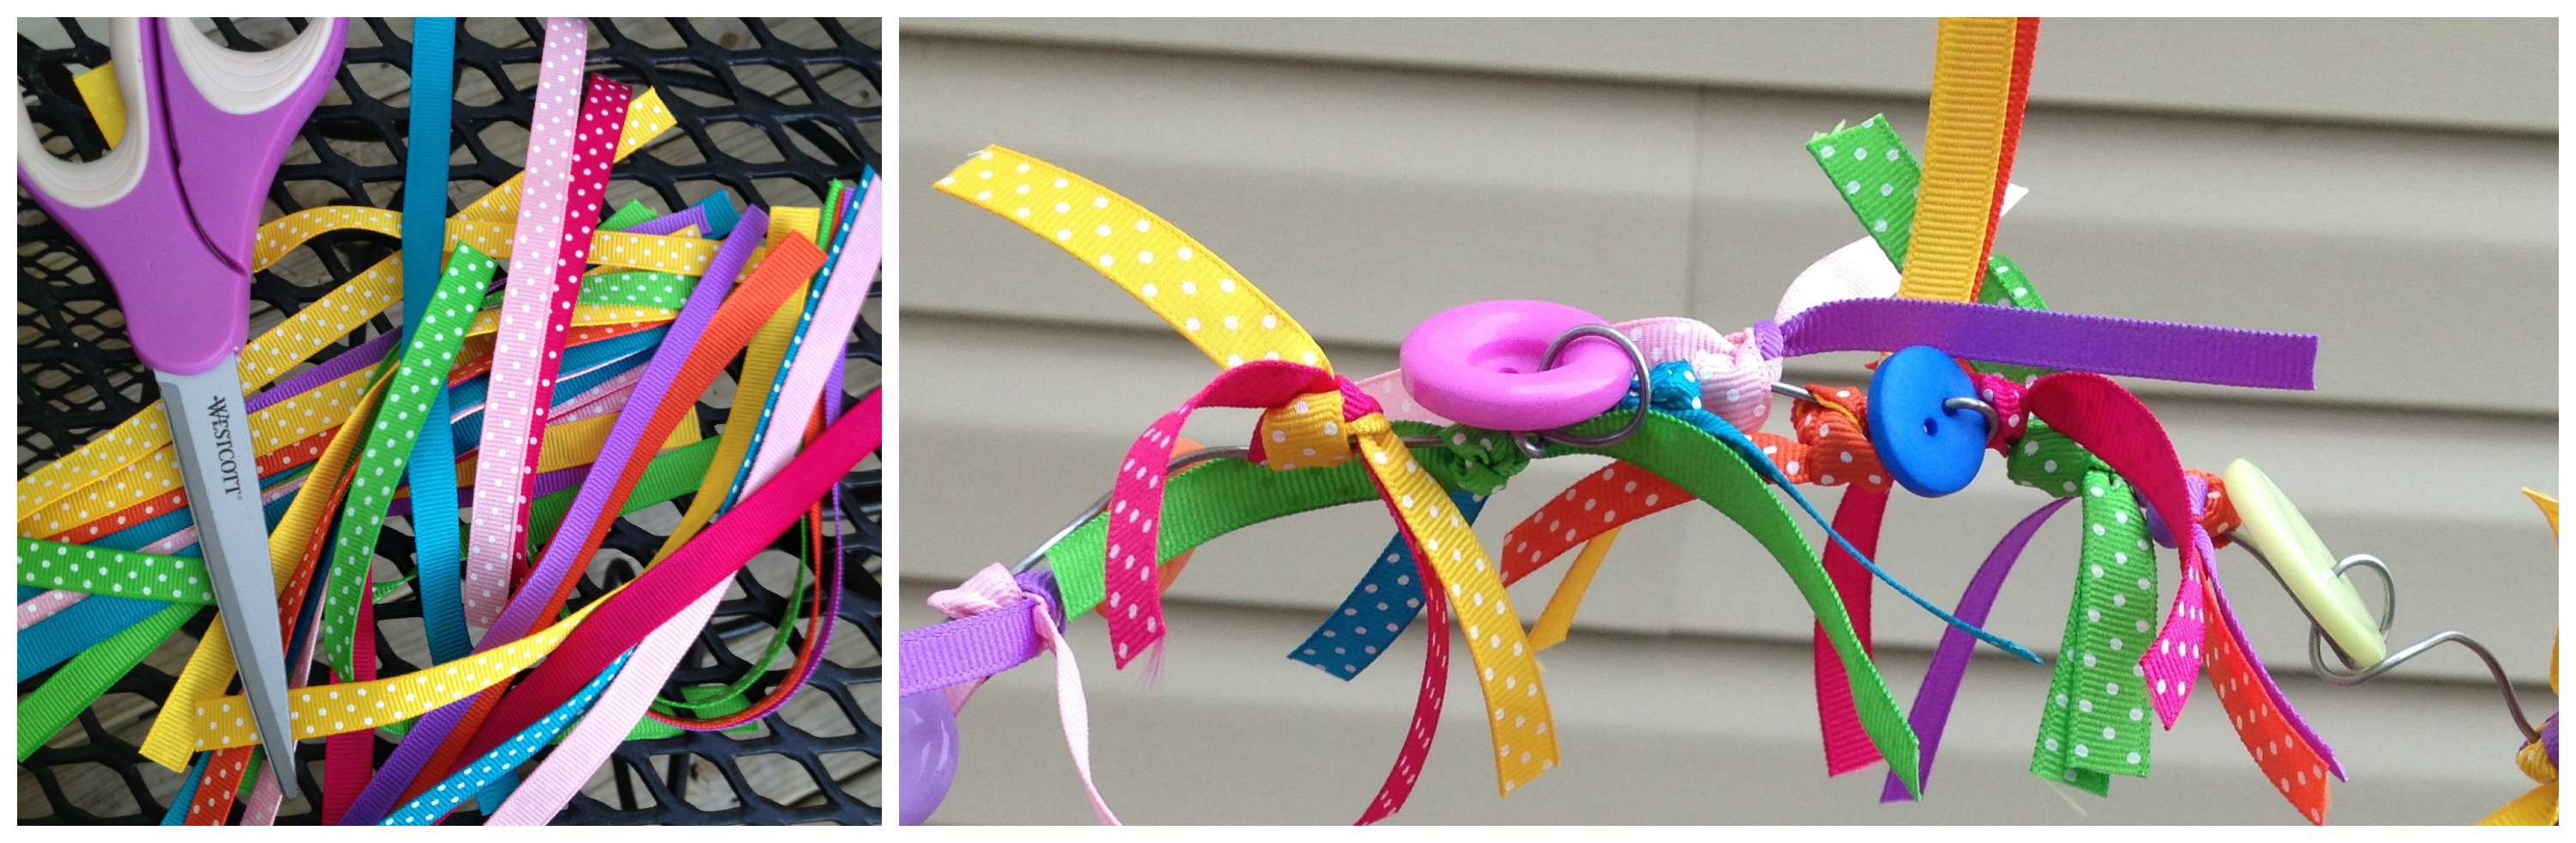
To decorate the handle, I added buttons from my Patriotic Mix from Buttons Galore by threading them onto red wire and twisting in onto the handle as I went from one end to the other.  I added a few ribbons tied in knots.

Button Handle

Then I added my favorite red, white and blue packaged snack to complete the project and turn it into a great hostess gift!

Happy Celebrating the USA and Creating with BUTTONS,

Laura


0

Lucky Felt and Button Four Leaf Clover

This quick craft creates a mini masterpiece that can be used to tie around a gift or use as a tie around a napkin for a table decoration.  It’s a quick, fun festive way to celebrate St. Patrick’s Day around your home.

material needed for the felt four leaf clover:

  • Green Felt in 2 Shades (Kunin makes the best!)
  •  Green Buttons
  • Needle/Green Thread (or embroidery floss)
  •  Ribbon

Directions for Lucky Felt and button four leaf clover. 

 1.  Cut a four leaf clover from the felt about 2 inches in diameter.  I used pinking shears.

Felt Clover

2. Cut another four leaf clover from the other shade just a tad larger.

3.  Sew green buttons through the smaller felt shamrocks tying knots in the tops between each one.

DSC00598

4.  Sew the ribbon through both layers of felt hiding the stitches behind a button or two.  Use a length or ribbon that will go around your gift or rolled napkin.

FeltButtonClover

Ta Da…a mighty green little decoration that is bound to bring someone a little luck!  As tiny bit of Irish information- when making a toast, the Irish say “Slainte”.   Slainte is a well wish litterally translated – to your health.

3

Button Up A Clay Wreath

This week’s project is extra special because it was created by a KID.  It is also a speedy fun craft for the holidays that is a project for the awesome blog party known as Craft Lightning!

Zoe used Pluffy Clay by the makers of Sculpey to create the wreath.  She rolled up little balls of clay then put them together and pressed down to get the to attach.

Zoe_Wreath


She used the red in the package to create the bow then we baked it for a few minutes to get it to harden.

wreathbeforebaking

When it came out of the oven, we used hot glue to add a few Laura Kelly Radically Red buttons and wah-lah…an adorable wreath ornament.

WreathFinal

Happy Crafting for The Holidays,

Laura

0

Button Up Ornaments to “Dye” For

Creating Christmas ornaments that are handmade and created with a personal touch have never been easier.  With the pre-cut shapes that are available in all of the craft stores and buttons, here are ornaments you can make quickly that are to dye for – as in dye with Rit Dye that is.

MittenFinalBG

It is so incredible simple that you can make them in fifteen minutes or less.  To do it, paint the wood with dye directly from the bottle.  If you want it darker, heat it up first.  It dries pretty quickly but if you are in a hurry, you can stick it in the microwave for 30 seconds to speed it up.

MittenPaint

Then you add your buttons and embellishments to make it into something special.  I used an Laura Kelly Candy Apple Green button on this ornament.  Before I added it with hot glue, I went over the snowflake with a white paint pen a little bit.

Button

Here are some that were created with a group of fabulous attendees at a crafting event last week.  I had a blast leading the workshop and am amazed at how awesome their ornaments turned out.

Ornaments

Happy Getting Ready For the Holidays,

Laura

1

Mini Flowerpot Card Holders

It is always nice to have a personalized touch when celebrating special times.  These little flowerpots turned place card holders add that special touch and they are really simple to make.  You only need a few things to make them (spray paint, mini terracotta pots, clothespins, buttons (Radical Red and Black Beauty were used on these pots, hot glue).

Spray paint the pots a solid color.  I used Krylon’s Cherry Red to match the picnic basket set.

Krylon_CherryRed

Glue on the clothespin upside down to hold the cards.  You can paint it the same color or make it different.  Add a button (or more) and you are ready to personalize.

PicnicBasket_Lake

I filled the pots with my husband’s favorite organic mints for our picnic outing.  There are so many creative things you could put in the pots, even flowers!  For more ways to create a picnic basket ensemble, you can find in a previous Fifteen Minute Friday the project for the napkins.

PICNIC_Napkins

You can also visit my blog today today for directions on making the recycled glass jar heart candle.

Happy Friday,

Laura


0

DIY Simple and FUN Picnic Napkins

Picnics are such a great way to connect with family and friends.  From creating the yummy contents in the basket to making the decorations for the outing, it is just good old fun!  While some people spend lots of time on the meal in the basket, others prefer to spend time creating the parts of the picnic that create the atmosphere.

PICNIC_Napkins

Here are some REALLY simple napkins that you can make from any fabric scraps (including outgrown clothing, towels, sheets or pillowcases) in a  matter of minutes.  You will need the fabric, pinking shears (I love Fiskars), buttons and embroidery floss (Coats and Clark for me).  They are really fun to make out of bright colored towels for kids and holidays if you are looking for a twist on this simply button project.

Napkin_Materials

Cut the fabric into 16 x 16: inch squares.  Pick a corner for each and add a few stitched on buttons.  Voila!  You have adorable, creative and festive picnic napkins.

Napkins_Buttons

If you prefer, you can fold them in squares and make cocktail napkins.

Napkins_Folded

If you love the festive RED picnic basket, place card pots and tall jar votive, check out my blog to find out how I got them such an awesome color.  (hint: Krylon).

Happy Creating with Buttons,

Laura


0

Take a Doodle Picnic and Create Some Button Fun Cards

DoodlePicnicPacking

It summertime…a great time to picnic…creative style.  I packed up my bag and headed to the nearby creek to create.  This is what I came up with.

IMG_5877 IMG_5895

I doodles a few flowers and the framed them in and colored them with my Tombow markers and cut them out.I used Power Adhesive Tabs to mount them to pre-cut note cards with envelopes then added buttons from the Laura Kelly collection of bright colors to make them “pop”!

TombowDoodleFlowerCards

If you want to know what goes in a Doodle Picnic Bag to ensure the most successful outing, visit Laura’s blog for those details!

Happy SUMMER!

1

Button Up a Decorative Monogram

Initial_C

For a quick and personalized gift, cover a monogram in buttons and add a bow to hang it up.  You can use letters made from wood or cardboard.  They are sold in all kinds of sizes at the craft stores.  The best way to adhere buttons to them is with Ad-tech hot glue and a glue gun.

This letter “C” (for Chloe) is covered in buttons from the Laura Kelly collection.

Happy Creating!

1

Flower pot Flowers

It is springtime and that means gardening, planting, flowers and sunshine.

Polkadot Flower pot Flowers

If you are working towards creating a colorful flowerpot garden, here is a fabulous QUICK and easy way to add bright colors.

IMG_4378

To make the Flower pot Flowers :

grosgrain ribbon, bright Laura Kelly colored buttons, hot glue (I use ad-tech high temp) and wooden skewers!

Use grosgrain ribbon loops to create petals and then hot glue gun buttons to the centers to add color and hold them together then hot glue the to the non pointed end of the skewer.  Flip them over and hot glue a button to the backside so that if they turn around in your garden they will still look cute.

RibbonButtonFlowers

What a fabulous way to create color in fifteen minutes.  These flowers withstand the weather and last all season long.  Of course they are pretty indoors too.  You could even make a whole pot of just these and never have to water.

RibbonFlowers

If you want to know where the polka dotted flower pots came from, hop over to my blog and find out.

Happy Fifteen Minute Friday with Flowerpot Flowers!

1

gifts for guys blog hop

Join the Button Bevy and the Glue Dotess in a “Gifts for Guys” blog hop on May 7th-9th 2013. 20 great inspirational projects for the men in your life – from Dads to Grads and babies to boys. Two prizes, one from each company. Join us.

Gifts for Guys blog hop Buttons and Glue Dots

 Gifts for Guys  May 7th-9th 2013

from Dads to Grads and babies to boys. Two prizes, one from each company.

0

Scrap Paper & Button Gift Tag

Some times it is so much fun to create ways to use scrap paper and miscellaneous bright buttons.  This project is one that is worth “picking”, kind of like a pretty flower.

FlowerTag1

Materials for the scrap paper gift tag:

You will need scrap paper , Mod Podge (I used the washable kind for kids), a brush, black Sharpie marker, Laura Kelly buttons and ad-tech hot glue to create the flower.  You can buy a tag already to go or make one yourself.

Directions for the scrap paper gift tag:

Cut your paper into petals of any size and shape, whatever works for the tag size you are making.  Mine are about 2 inches long.  Cut another piece into a circle about an inch in diameter.  Using Mod Podge, brush a heavy coat on the circle then add the petals, brushing new layers of Mod Podge liberally between each petal.  Apply a final coat over the entire flower.  Set it aside to dry.  Cut a stem and leaves from your scraps and use the Mod Podge to apply them to your tag using the same technique.  Add the flower with Mod Podge and let it all dry.  To finish your project, use your ad-tech hot glue to apply several buttons in a stack in the center of the petals.  If you want to add the black decorations around the outside, you can’t beat the black Sharpie permanent marker.

PaperFlowerTag5

There are lots and lots of ways to use these paper flowers to create masterpieces.  You can visit Laura’s blog to find more ideas if you have more than fifteen minutes to create!


2

Mason Jar Fairy Lanterns

BG_FairyLantern

Spring sprang and summer is on the way which means warmer weather and more time outdoors…whether playing, celebrating or entertaining.  This little recycled mason jar acts as a great fairy lantern that can be used as a candle jar, party decoration or a jar to be filled with goodies for favors.

To make it you will need assorted Laura Kelly buttons, wire that it easily bendable (I used electrical fence wire from the garage) and feeds through the button holes and pieces of ribbon (5 inches long) and a mason jar without the lid.

FairyLanternRibbonKnots

To make it simply feed the wire through the buttons twisting and turning to create bright and colorful design then tie the ribbon pieces in knots along the wire.  Twist the wire to go around the top of the jar then use the remaining length to create a handle, twisting the wire through the piece that went around it to secure.

It is simple, fun and easy and makes for a great quick project that you can complete in around fifteen minutes!  It is one of those creations that has lots of great uses and ways to spread bright joy and light.

0

Festive Button Votive

BG_CandyVotive Festive button

This quick craft is festive and FUN!

Materials needed for festive button votive:

Directions for festive button votive:

1.  Create 5-10 button stacks.  To create the stacks by using hot glue  gun to adhere the buttons to one another. **Please use caution when using a hot glue gun. **

Each stack should have no more than 3 or four buttons.

Once the button stacks are cool, carefully adhere them to a glass votive with the hot glue.

Place a candle in the votive and you are ready to let that little light shine some joy in the world.

1

Button Bumblebee BZZZZZZ

Button Bumblebee is Buzzing over with another fabulous craft!  You can create this cute little creature in no time.  It makes a perfect package topper for all your spring time gift giving needs. Not only could you use it as a package topper, it could make a magnet, place it on a close pin to hold papers or even as an accent on a headband.

For the Button Bumblebee will need:

Button Bumblebee

Directions to make the Button Bumblebee:

1.  Use the yellow and black buttons to design a striped bumble bee, using a large black button for the head.

2.  Use a hot glue gun to adhere them to any surface I used felt) then add a few smaller buttons to the stripes for the stacked effect.

3.  Cut a piece of bendable wire into a 5 inch piece.  Bend it in the middle and them spiral each side around a pencil to get the antennas.

4.  Adhere the antennas with hot glue above the large black button head.

5.  Cut two pieces of black gross grain ribbon into 5 inch pieces and glue them to the body to make wings.


Button Bumblebee

I think the Button Bumblebee makes a very  cute decoration for a plant or a gift tag for some yummy local honey.

Happy Buzzing Around and Creating Button Fun!

1

Wire Heart Hanger

Wire heart hangers can be made quickly and I am going to show you how.  This week the quick-to-make and adorable craft is something you can use for Valentines Day next week or any other day that you want to spread some love.
Wire heart hanger


Materials for Wire heart hanger :

  • skinny bendable wire
  • buttons
  • ribbon

Directions to make wire heart hanger:

  1. Cut a piece of bendable wire 10 inches long.
  2. Put one end of the wire through a button, slide it  about an inch in and wrap  the wire around the button.
  3. Add another button about a half inch from the first by putting the wire through one hole of the button and out another.
  4. Fill the wire up using these two methods, twisting and bending as you like and then shape it into a heart.
  5. Add ribbon to make a hanger.

Happy Creating and Lots of Love!

0

Sweet Valentine hearts with little buttons and BIG Love!

Sweet sweet Valentine hearts!  Little buttons are so fun to work with.  This project is so simple and so adorable that it is a Valentines Day must –do!

Directions to make sweet Valentine heart:

Using sharp fabric scissors, cut felt hearts measuring approximately 2 inches wide and 2 inches tall.

sweet valentine heart buttons

I like Kunon felt because it is thick and soft.  Stack several buttons on each felt heart and sew through the holes from top to bottom and back up through to the top.  Tie a knot on top of the button stack to secure the buttons.  For a more colorful effect, use different colored floss from the top button in the stack.

These sassy little button/felt hearts make a great addition to any valentine treat.  You can use them in many fun ways including a decoration on a treat box or bag.  To adhere them to your surface of choice, choose the glue that works the best for that surface.  I recommend Aleene’s Tacky Glue for most crafting projects that work with felt.

Valentine Felt Buttons Pkg

If you really love stitching, you can turn a piece of felt into an envelope with a few quick stitches up each side and add a felt heart button stack to close up a love letter with a special touch.  I added ribbon to mine too!  You can also add one to a little clothespin and attach to a Valentine’s Day Treat!  This pretzel treat is super yummy.  You can get the recipe on Laura’s Inklings.
Felt Button Heart BG

Materials needed sweet Valentine heart:

Red, Pink and White Buttons (Laura Kelly’s Bright Colors), Red, Pink and White Embroidery Floss, Red and Pink Felt, Embroidery Needle and Scissors.

I really hope you enjoy making the sweet valentine heart as much as I did.

1

Powered by WordPress. Designed by WooThemes