Header

Tag Archives | Cardmaking

Make a Fun Coffee Gift Card Holder for National Coffee Day!

coffee gift card holder

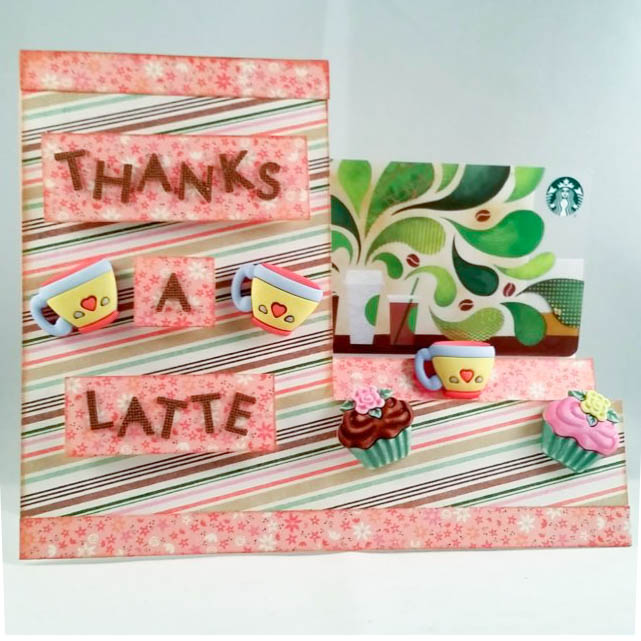
It’s National Coffee Day, and what better way to celebrate than with a gift card to your favorite coffee shop? Using 3D buttons from our Buttons Galore Sweet Delights collection, you can make a sweet card that doubles as a gift card holder!
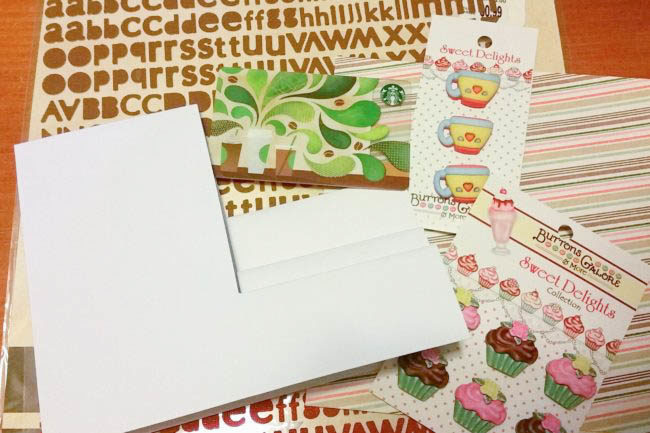
Supplies Needed to Make Coffee Gift Card Holder:

Instructions for Making Coffee Gift Card Holder:

  1. Trace front of side stepped card onto the back of one sheet of patterned paper. Cut out with scissors and adhere to front of the card. Ink edges of paper if desired.
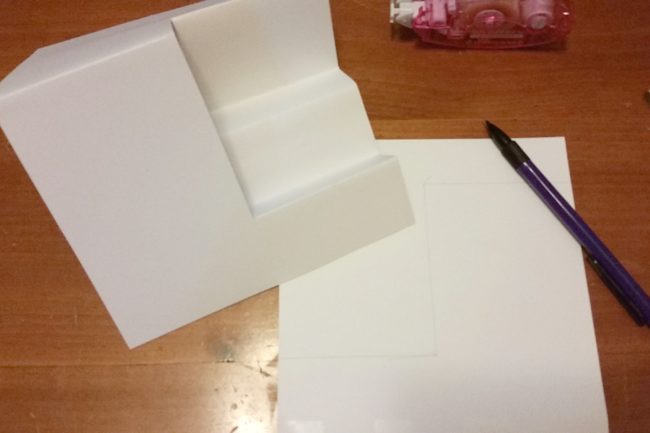
  2. Cut two 3/4″ strips from the second sheet of paper. Ink edges if desired. Adhere one strip to the bottom of the card. Cut the other strip in half. Adhere one piece to the top of the card, and adhere the other on the second “stairstep” of the card.
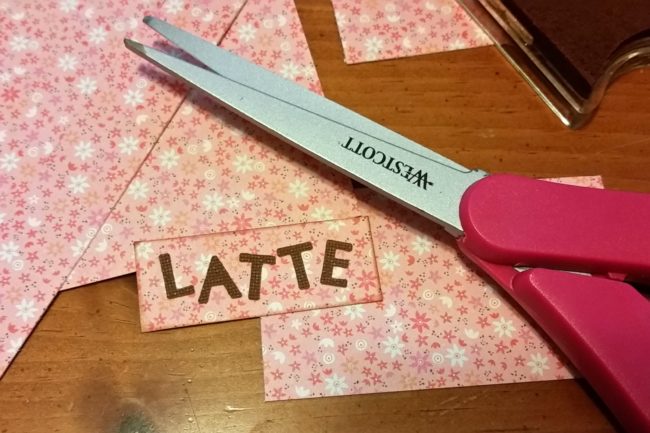
  3. Spell out “Thanks a Latte” by placing stickers onto leftover pieces of the 2nd sheet of paper and then cutting out rectangles around the words. Inks edges if desired. Adhere to card with foam pop dots to add dimension to the card!
  4. Remove shanks from back of “coffee cup” and “cupcake” buttons with a button shank remover. Adhere to card using red line tape.
  5. Adhere gift card to the last step of the stepped card using red line tape.

SaveSave

1

A Crazy Bird Told Me…It’s Graduation Time!

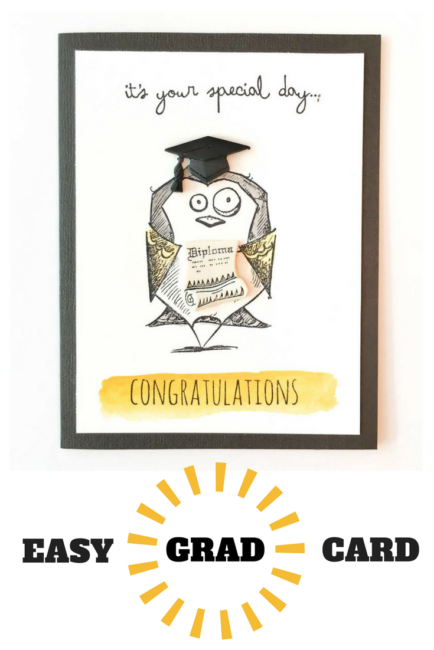
Graduation season is here! Just because the big day is a formal affair, that doesn’t mean that the cards can’t have some fun. Our 3D buttons dress up this bird so he’s ready for the walk across the stage!

Crazy Bird Graduation Card

Supplies Needed:

This card uses our 3D buttons as accessories for some crazy stamped characters! This character gets a whole new dimension – literally – with a fun button graduation hat and his own button diploma.

To make this card, select a card base in one of the graduate’s school colors. (You’ll want to choose the darker of the two school colors for the card base.)

Cut a 3.75″ by 5″ piece of watercolor cardstock and adhere it centered on the cardfront. Use watercolors in the lighter of the two school colors to paint a block along the bottom of the paper. Stamp the sentiments at the top and bottom in waterproof ink, and then stamp the bird in the middle.

Crazy Bird Grad Card close-up

Use the watercolors to paint in the bird. (I used the yellow school color for the bird’s wings to hold the diploma.) Then cut the shanks off of the graduation hat and diploma buttons, and adhere them to your bird.

This bird will put a smile on the face of your special grad while bringing your good wishes to them! Happy Graduation, Class of 2017!

Easy Graduation Card using 3D buttons from www.buttonsgaloreandmore.com

0

Make a Pretty Button Flower Card for Mother’s Day!

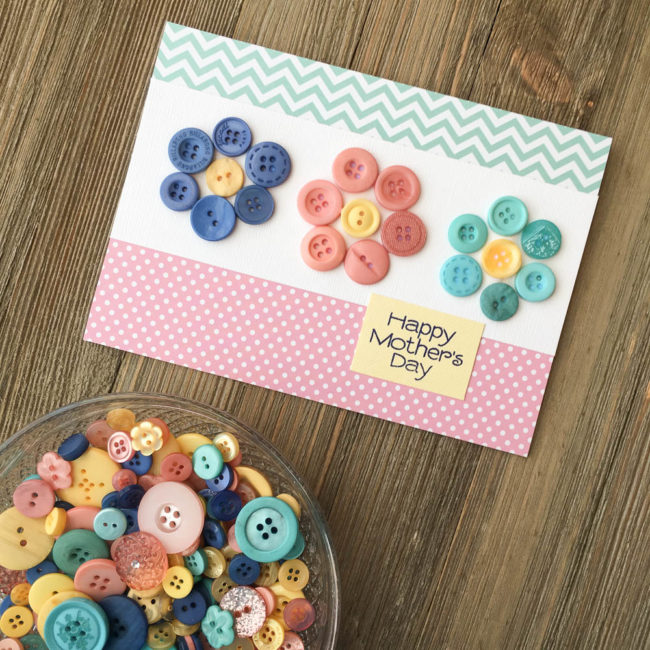
The spring flowers are in bloom, and Mother’s Day will be here before you know it! So why not combine the two to make a pretty button flower card for mom for Mother’s Day?

Button Flower Card for Mother's Day

Supplies Needed:

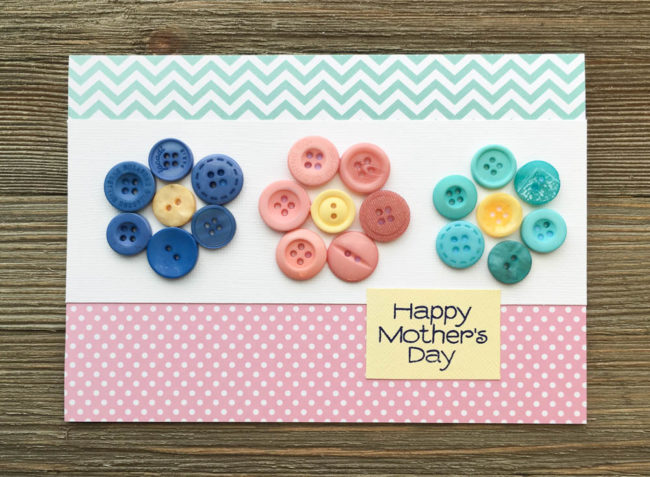
This 5″ by 7″ button flower card is super simple to make but so cute! And it’s so easy to make that it would make a great kids’ project for the holiday.

To start this card project, cut a 10″ by 7″ piece of white cardstock and fold in half along the 10″ edge to create your card base.

Cut a 2.5″ by 7″ piece of cardstock from the scraps of the white sheet. Select buttons from the Glam Girl Button Bonanza to make your button flowers with. Then, using the PPA Matte Adhesive, adhere the buttons in place using dots of glue. Set the flower strip aside to dry.

While the glue dries, cut a 1.5″ by 7″ strip of paper for the top of the card, and a 2″ by 7″ strip of paper for the bottom. Adhere them in place along the top and bottom of the card front.

Stamp “Happy Mother’s Day” on a yellow cardstock scrap in dark blue ink. Trim the cardstock to slightly larger in size than the sentiment.

After the glue on the flowers is dry, adhere the flower strip in place across the card front. Glue the sentiment block down on the right side of the card front, over the seam between the flower strip and the bottom patterned paper.

Button Flower Card for Mothers Day

This card design is so versatile! Just by changing the sentiment, the design could also be used for a thank you card, or for a birthday, or for a variety of other occasions. It’s a classic that you can use over and over! To create a smaller card, just use smaller sizes of buttons. With theGlam Girl Button Bonanza bag, you can make this beautiful button flower card over and over!

0

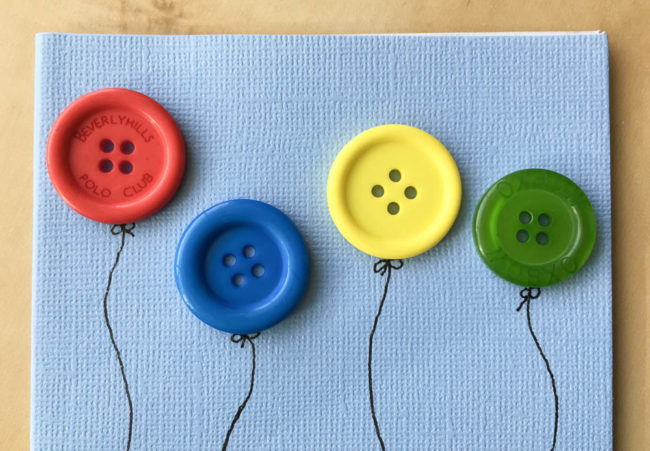
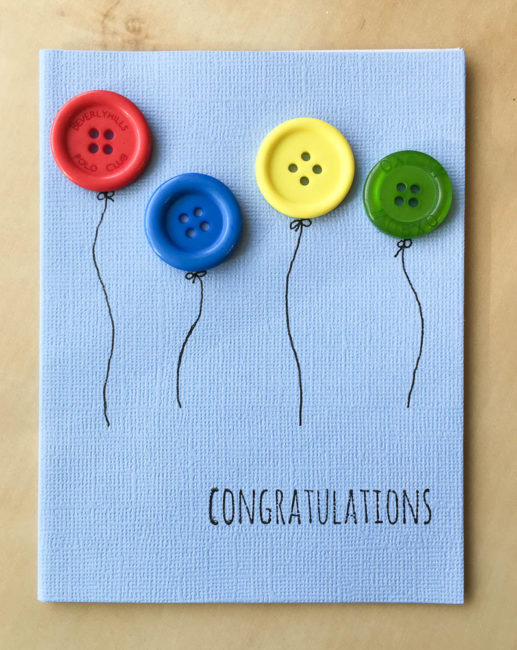
Say Congratulations with a Button Balloon Card!

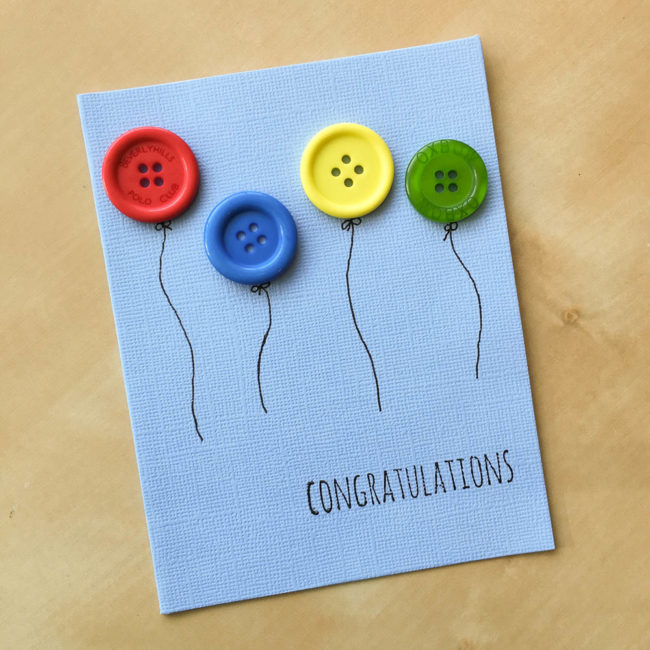
This time of year means graduations, and all sorts of other occasions for which congratulations are in order. Running out of time to make cards for all of them? Just dive into your Button Bonanza bags and dig out some of the largest buttons to make balloons!

Congratulations Button Balloon Card

Supplies:

I used the “primary” Button Bonanza bag for this but the beauty of a simple design like this is that you could use any color scheme that works for your occasion. For a graduation or sports-related occasion, use school colors! Recent graduate got a new job? Make your balloons the recipient’s favorite colors or their new employer’s corporate colors. With our huge palette of Button Bonanza colors, the options are endless!

Button Balloon Card

To make this card, select the buttons that you want to use and arrange them to make a row of “balloons”. Before you glue them down, nudge them up just slightly to get a pen in to draw your “string” lines and bows. Then use clear drying adhesive like PPA Matte Adhesive to glue the buttons down so that it looks like the strings are tied to their bottoms.

For the final step, get out a handwritten sentiment stamp (or a pen if you are braver than I am) and use black ink to stamp the sentiment in the lower right corner of the card front.

Button Balloon Card

Send some button balloons to someone special!

0

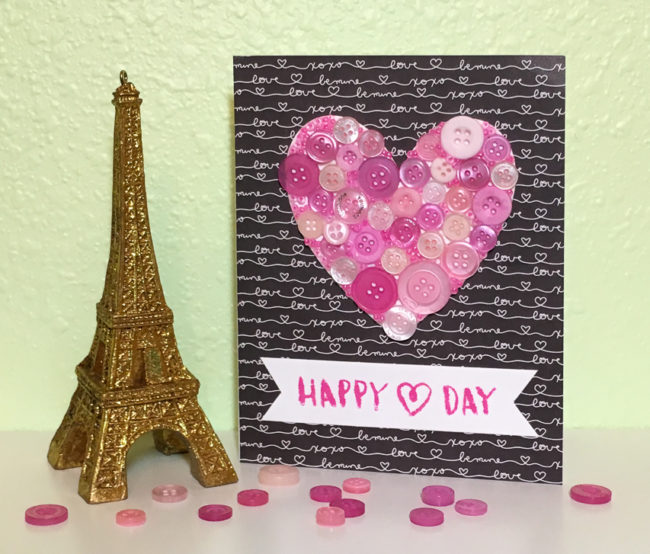
Craft a Button Collage Heart to Send Valentine’s Wishes!

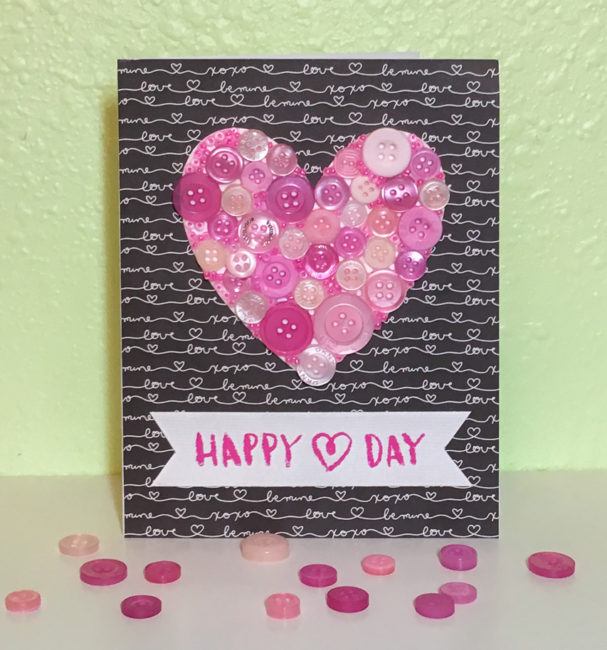
I love making button collages on small items – you may remember my button collage apple on my teacher tag awhile back. Collaged die cuts are a fun and simple way to add some dimension and detail to a design. Today, I’m falling in love with a button collage heart for Valentine’s day!

Button Collage Heart Card

Supplies Needed:

  • Buttons Galore Strawberry Cheesecake Color Blends (online store, Amazon)
  • 28 Lilac Lane Pretty Princess embellishment bottle (online store)
  • PPA Matte Adhesive (online store)
  • Simple Stories “Love & Adore” 6×6 paper pad
  • white cardstock
  • white card base
  • Cricut Explore machine
  • Ranger Tim Holtz Distress Ink in Picked Raspberry
  • Crate Paper “Heart Day” stamps

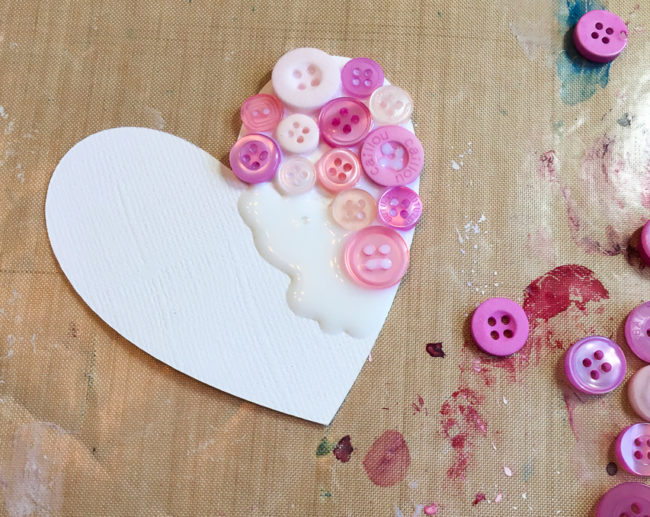
I started this card by cutting my 3″ high heart out of plain white cardstock on my Cricut Explore using the software’s basic shape tool. Then, starting in the upper right corner, I gradually spread white liquid adhesive (PPA Matte) over small areas and filled them in with the Strawberry Cheesecake buttons.

Constructing Button Collage Heart

While my glue was drying on my button collage heart, I cut my background paper to the size of the card front and adhered it. Then I stamped the sentiment on a strip of the white cardstock. Once the ink was dry, I snipped the ends to create a banner look for the sentiment strip.

The button collage had white spaces showing through between the buttons after the glue was dry. To fill these in, I dropped spots of glue on them, and pushed seed beads from the Pretty Princess bottle down into them. Some of the white edges also weren’t entirely covered, so I ran beads of glue along those areas and pressed beads into there as well.

Button Collage Heart Card

After all the glue was dry, I simply attached my heart and my sentiment strip to the front of the card. This simple design has a lot of “pop” from the color contrast and the button detail. I can’t wait to share it with someone special!

3

Make a Geo Heart Valentine Card for Someone Special!

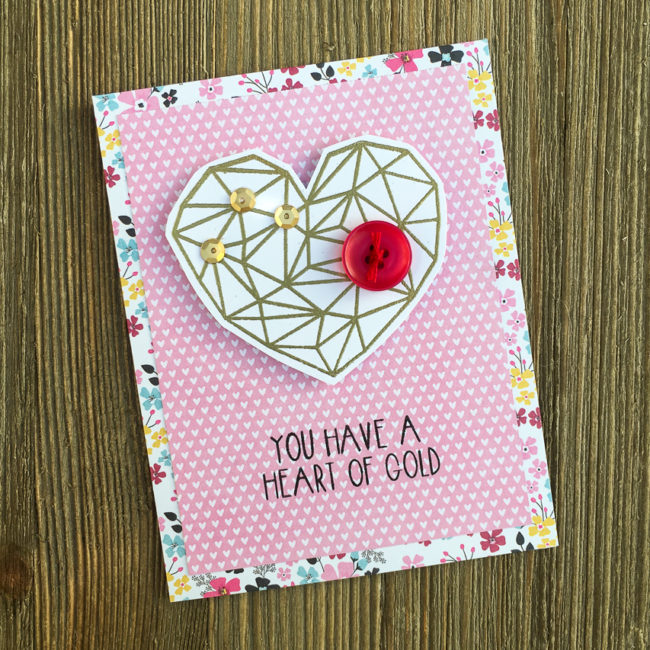
Are you feeling the love? It’s time to start thinking Valentine’s Day! This geo heart valentine card is trendy, fun, and best of all…oh so easy to make!

Make a golden geo heart Valentine card for someone special!

Supplies:

  • 28 Lilac Lane “Love Story” embellishment kit
  • Simple Stories “Love & Adore” 6×6 paper pad
  • white smooth cardstock
  • white card base
  • Neat & Tangled “Heart of Gold” stamp set
  • Ranger Tim Holtz Distress Ink in Black Soot & Embossing
  • Ranger Super Fine Detail Gold Embossing Powder
  • embroidery floss
  • foam adhesive

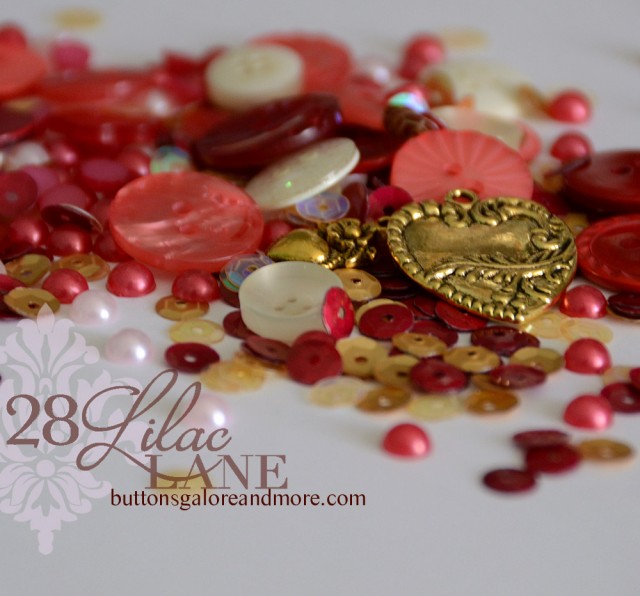
Valentine’s Day is the perfect time to use our 28 Lilac Lane embellishment kit called “Love Story”. This kit is packed full of beautiful rose and white buttons and seed beads, along with gold and rose pearls and sequins. For those extra-special greetings, there’s even a few charms and some ribbon, too. Love Story will make loads of valentines for the ones you love!

28-lilac-lane-love-story

One of my favorite things to do with my 28 Lilac Lane embellishments is to customize my stamps with them. I love stamps, but it can be difficult to create different looks using the same image repeatedly to get value out of it. Adding buttons, sequins, pearls, or beads over an image can help make it look like an entirely new design!

This clean and simple geo heart valentine card design is very quick and easy to make with only a few basic supplies. It truly is only a ten minute project! Or it can turn into twenty minutes if your cat gets up on your work table and knocks over your entire container of beautiful “Love Story” embellishments so you have to clean them up. (Let’s not talk about how I know that…)

How to make a geo heart valentine card:

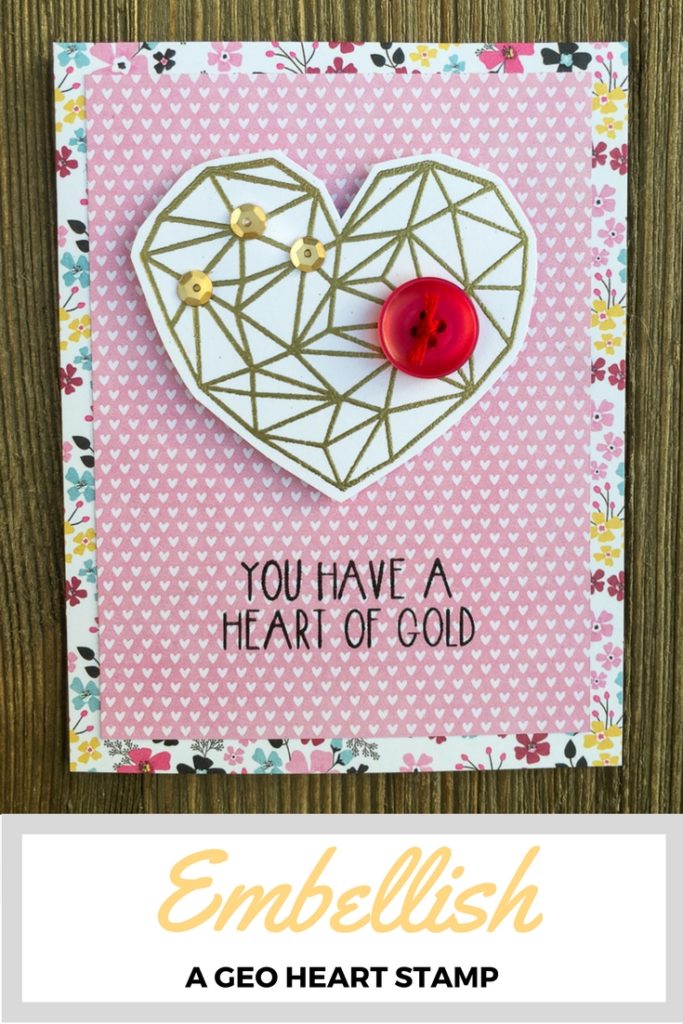
To make this geo heart valentine card, I cut my floral paper to the size of the card front. Then I glued it down to the blank white card base. I cut the heart print paper a half inch smaller each direction, and glued it centered on top of the floral paper. To finish preparing the card base, I stamped the sentiment in black ink on the center of the bottom of the card front.

I stamped the geo heart design on white paper with embossing ink, and then heat embossed it with gold embossing powder. I used fine pointed scissors to cut out the heart. Don’t worry if your hand cutting skills aren’t the best! Since this heart doesn’t have super smooth curves, it’s quite easy to hand cut.

To embellish the heart, I glued a few gold sequins at the intersections of lines in the geo heart. Then I chose a nice big rose button for a big pop of color, and then tied it off with matching embroidery floss before gluing it down. Finally, I used foam dot adhesive to attach the heart to the card front.

embellish a geo heart with 28 Lilac Lane

1

Button Up an Ugly Christmas Sweater Card!

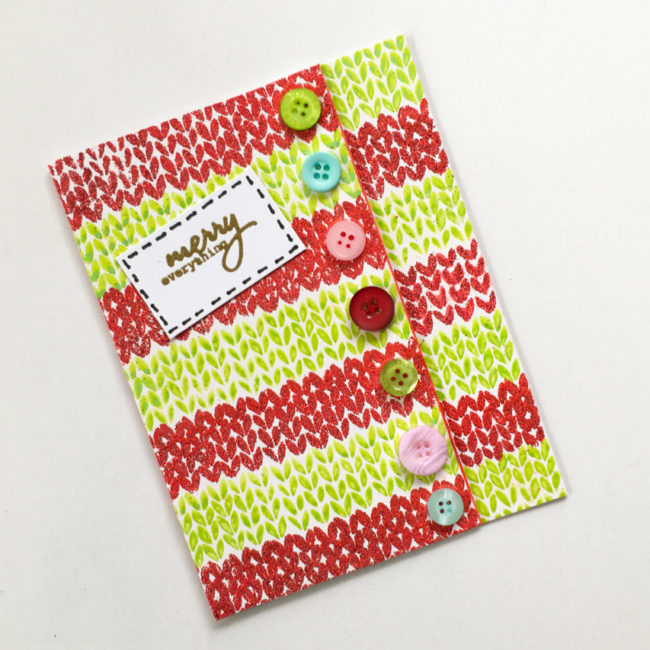
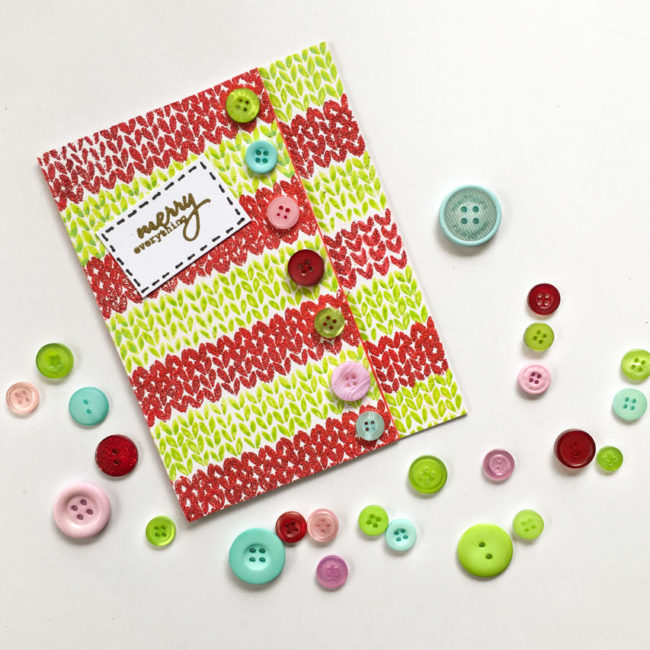
Nothing’s more fun at Christmas than an ugly Christmas sweater. So why not send one to a friend in the form of an ugly Christmas sweater card for the holidays?

Ugly Christmas Sweater Card by Nancy Nally for Buttons Galore

Supplies Needed:

  • Buttons Galore “The Merriest” Button Bonanza
  • PPA Matte Adhesive
  • White cardstock
  • Pinkfresh “Oh Joy” Stamp Set
  • Ranger Tim Holtz Distress Embossing Ink
  • Ranger Tim Holtz Distress Ink in Twisted Citron
  • Ranger Embossing Powder in Clear Super Fine Detail, Gold, & Red Tinsel
  • Black pen
  • Ranger Tim Holtz Distress Marker in Candied Apple (optional)

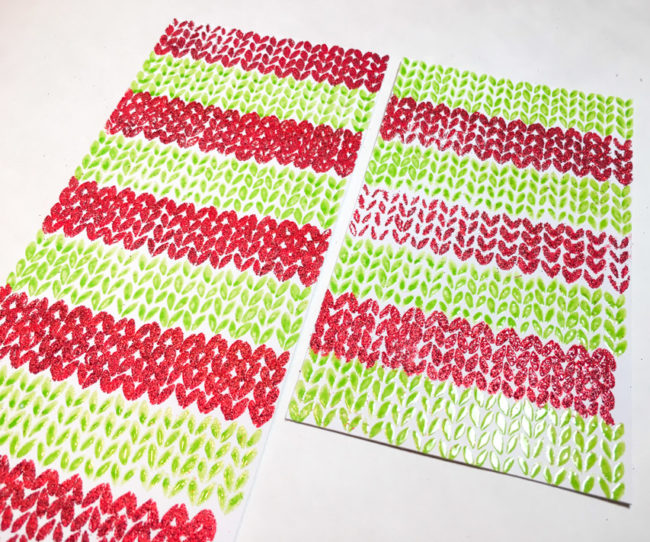
This card’s technique is simple – just creating two strips of paper by stamping the sweater knit stamp over and over, alternating the color and embossing it. The Twisted Citron ink is embossed with clear embossing powder, and the red is clear embossing ink that is heat embossed with Red Tinsel powder. The strips need to alternate to create the effect on the front of the card.

Ugly Christmas Sweater Card construction

Doing all that stamping and embossing while changing colors takes a bit of time, but the result is a great effect!

Once strips are made, they can be adhered to a card base. Start by attaching the one on the right side of the front. Position it, glue it down, and then trim off any excess. The front is layered, with the left side overlapping the right panel, so there’s no need to worry about how wide the panel is on the card front.

To emphasize the layered effect and create bulk in it as if it really is a sweater placket, adhere two inch wide strips of paper underneath the right edge of the left panel before attaching it to the card front. This will slightly raise the area under the buttons up, creating depth and shadow that look like a true sweater! For a little extra shadow, run a dark red pen or inkpad along the paper edge where the pieces overlap as well.

Ugly Christmas Sweater Card by Nancy Nally for Buttons Galore

Now that your sweater has a placket, it needs buttons to fasten it! “The Merriest” Button Bonanza has red and green shades that match the card base. Adding in the the pink and blue shades that are also in the assortment looks a bit random on top of all of that red and green, and is the perfect way to “ugly” up your ugly Christmas sweater card. Glue your buttons down with a clear drying adhesive like PPA Matte Adhesive.

The finishing touch is the “patch” that has the sentiment on it. Just stamp and emboss the sentiment, and then draw stitching lines around it with a pen. Adhere it at a jaunty angle to your sweater’s “front” and you are done!

Who do you know that needs an ugly Christmas sweater card? Send them one today!

0

Tis the Season to make a Christmas Cat Card!

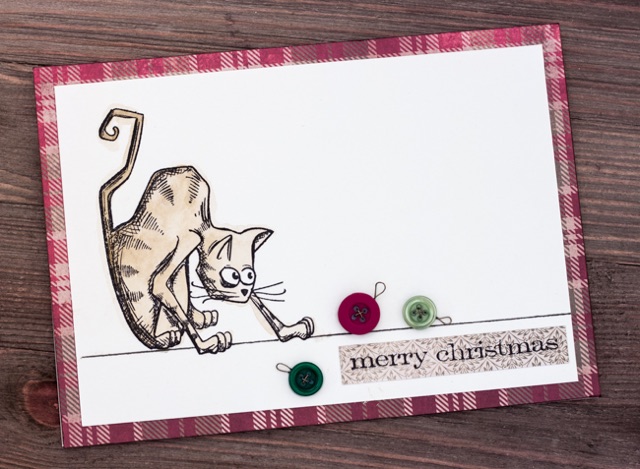
We’re cat owners at our house, and as anyone who owns a cat knows…it makes Christmas decorating extra, well, interesting. We decorate, the cat un-decorates. So today, my project is a Merry Christmas cat card that celebrates that annual feline-human war of December!

Christmas Cat Card by Nancy Nally for Buttons Galore

Supplies:

  • Buttons Galore “Tis the Season” Button Bonanza
  • PPA Matte Adhesive
  • watercolor paper
  • Tim Holtz for Stamper’s Anonymous “Crazy Cats” stamps
  • Tim Holtz for Stamper’s Anonymous “Simple Sayings” stamps
  • Ranger Archival Ink in Jet Black
  • Ranger Tim Holtz Distress Crayon in Vintage Photo
  • Ranger Tim Holtz Distress Ink in Vintage Photo
  • Water brush
  • Black Pen
  • Tim Holtz idea-ology “Yuletide” paper
  • 26 gauge German style wire (antique brass)
  • Cream colored cardstock

This Christmas cat card has a very simple design. It’s featured embellishments are Christmas ornaments made from buttons from the “Tis the Season” Button Bonanza that is brand new for this holiday season. Featuring deep red and green tones that are accented by a light sage green shade, “Tis the Season” is a versatile button mix for almost any holiday craft project.

Tis the Season Button Bonanza by Buttons Galore

Instructions: 

Cut a piece of watercolor paper to 4.5″ by 6.5″. Use Archival ink to stamp the Crazy Cat.

Use a ruler and the black pen to draw the line across the bottom underneath the cat. Don’t draw through the cat’s paws!

Scribble on a scrap piece of watercolor paper with the Distress Crayon. Using your waterbrush, pick up some of the color and use it to watercolor the cat.

Cut a piece of patterned paper to 5″ by 7″ and ink the edges. Adhere the watercolor paper centered on it. Cut a piece of cardstock to 7″ by 10″. Fold in half to make a 5″ by 7″ card, and adhere card front to it.

Cut a strip of patterned paper 1/2″ wide. Stamp the sentiment on it, and trim the ends. Adhere to bottom right of card.

Select three buttons to serve as your “ornaments”. Thread the holes on the buttons with German style wire. Use the tail of the wire to create a loop for the ornament’s “hanger” before snipping off the excess wire.

Use liquid glue like PPA Matte Adhesive to glue the button ornaments in place.

Since it mostly relies on bulk supplies like buttons and tools like stamps to make, this Christmas cat card could easily be made in quantity. Simply substitute cardstock or a variety of patterned paper for the paper used for the matted background and the sentiment strip. and you can make this card over and over with a Button Bonanza and your stamp! And since it is fast and easy to make, your cards will be done in no time!

0

Send an Easy Quilt Thank You Card!

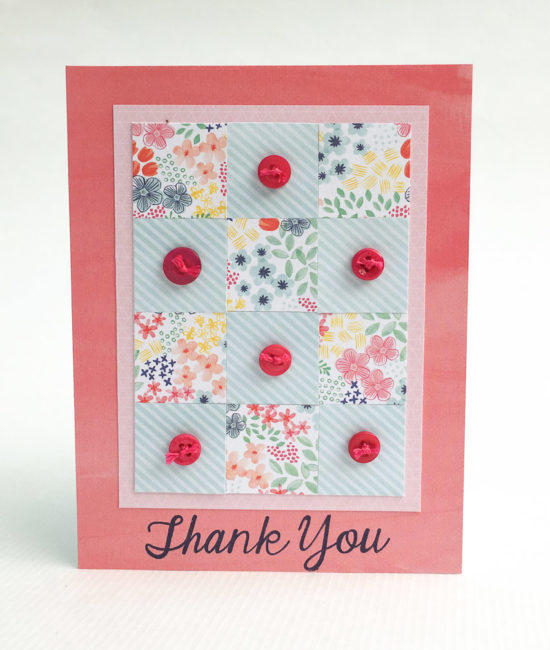
This quick and easy quilt thank you card is perfect to send to your favorite quilter, or create a set to give as a gift!

Quilt Thank You Card

Supplies:

To make this card, first cut a 3″ x 4″ piece of white cardstock. Cut 1″ squares out of two different patterned papers for the quilt squares. Arrange and glue them to cover the white cardstock backing.

Attach the quilted piece on top of the light pink patterned paper and trim to mat it with a small border.

Cut a 4.25″ by 5.5″ sized piece from the dark pink patterned paper. to use as the background of the card front. Attach the quilted piece to the card background, leaving a slightly wider border at the bottom.

Stamp the sentiment across the bottom of the card front. Fold a piece of cardstock to make a card base (or use a pre-made card). Attach the card front to the card base.

Select six small buttons from the “Summertime” Button Bonanza. Tie embroidery floss through the buttons, and adhere with glue.

This card design could easily be adapted to a variety of occasions. Change out the color scheme for blue and yellow, or pink and yellow, and you have a “welcome baby” card. And quilts go great with a fall chill in the air…made in browns and oranges, your quilt could wish someone a “Happy Fall!”

What occasion will you make a quilt card for?

0

Wrap up a Quick & Simple Father’s Day Card!

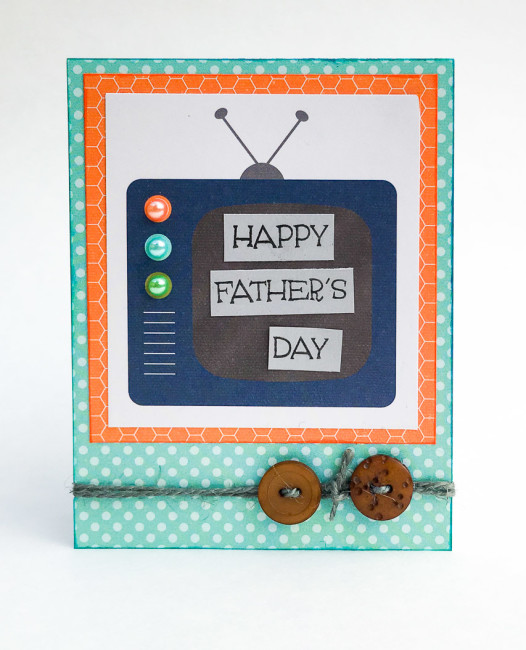
Father’s Day is almost here, and that means time to make cards for dads, grandpas, and other special men in our lives! This quick and simple Father’s Day card is easy to make, and has a fun orange and turquoise color scheme that will make kids and grown-ups happy!

Fathers Day card

The card design is based on a preprinted journal card cut from a sheet of Simple Stories patterned paper. To keep it from looking plain as the basis of the card, embellish it with pearls that match the TV’s printed dials. The “screen” of the TV is the perfect place to hold the card’s sentiment. Stamp the sentiment on cardstock and then cut it apart to fit onto the screen. Adhere.

Next mat the TV card on orange patterned paper, and then mount it onto the card front. Finally, attach the card front to a blank card to complete the layers.

To wrap the twine, poke a hold in the spine of the card. Using the hole, wrap the twine around the card twice. Finish with the ends on the front. Thread a button onto each end of the twine, and then tie the ends together. To make the buttons lay more flat, glue dots can be attached behind them.

Supplies:

This card is perfect for any of the favorite fathers (or father figures) in your life. Who would you give this quick & simple Father’s Day card to for Father’s Day?

0

Button Flowers Make a Cute Thank You Card!

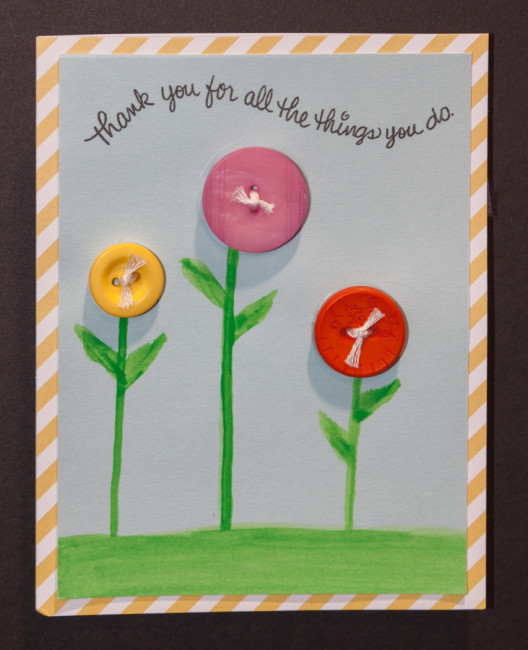
Thank you cards are one of the most commonly used cards that we reach for, so we can never have too many on hand for when we need them! This fun and simple project combines Sakura watercolors with our bright “Fiesta” Button Bonanza bag to create a bouquet of button flowers for you to send to someone special.

Cute thank you card with button flowers

Supplies:

Our Buttons Galore “Fiesta” Button Bonanza bag is full of bright colors that are perfect for making little flowers! To start your card, pick three buttons in different colors and sizes for making your button flowers. Then set the bag aside.

Buttons Galore Fiesta Button Bonanza

Next, cut a 4.25″ x 5.5″ piece of the yellow striped paper. Adhere to front of card blank.

Cut a 3.75″ x 5″ piece of Ocean Breeze cardstock.

Using watercolors & a water brush, paint green grass and three flower stems on the cardstock. Vary the heights of the stems, but make sure to leave enough room between the tallest one and the top for adding the buttons and the sentiment!

Stamp the sentiment across the top of the card.

To make the flowers, sew the buttons on to the ends of the stems with embroidery floss. Tie the knot in the front and snip ends so they will fray a bit to make a center for the flower.

Adhere the blue cardstock on top of the yellow striped paper.

Your card is done! Now it’s time to write a message of thanks inside and deliver a bit of sunshine and gratitude to someone special!

1

Make a Thank You Card with Tutti Fruity Buttons!

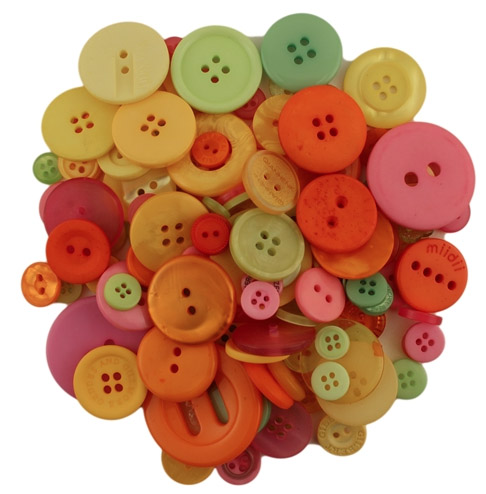
When I got my hands on this gorgeous Tutti Fruity Button Bonanza pack, it just called out for some card making. The beautiful yellow, orange, pink and mint green palette is so summer-y and happy!

Tutti Fruity Button Bonanza

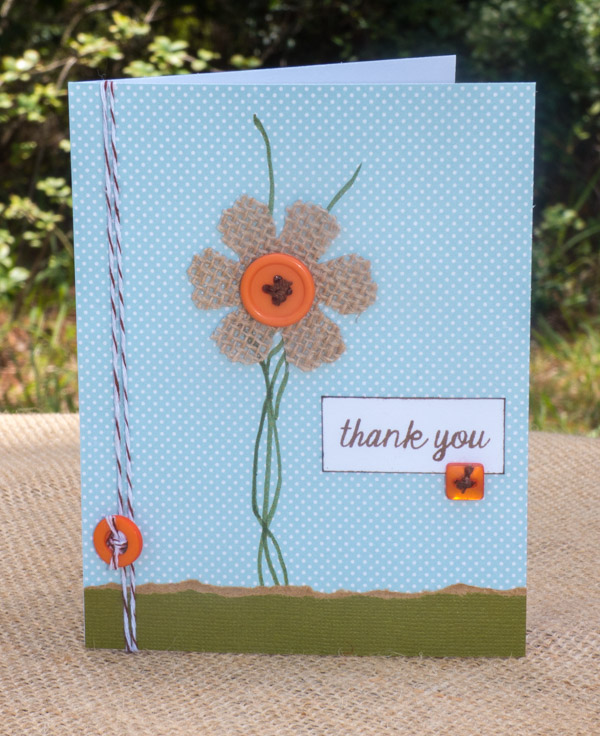
Probably the most frequent card I reach for out of my card stash is a thank you card. Paired with some burlap and a few other supplies, some orange buttons from the assortment give me a thank you card that is perfect for just about any occasion: baby, wedding, or everyday. It’s bright, a bit rustic, and very on trend with the burlap!

Thank You CardSupplies:

  • Tutti Fruity Button Bonanza
  • Burlap Sheet
  • Flower Die
  • Patterned Paper
  • Cardstock Scraps
  • Card Base
  • Brown Baker’s Twine
  • Brown Thread
  • Sentiment Stamp (sample is from Pink & Main)
  • Brown Ink Pad
  • Green Pen

A button makes a great cheat to perfectly finish off a wrap of baker’s twine – no more messy bows that just aren’t quite right, or knots that look messy! And a button is always a great substitute for the center piece of a flower.

The tiny square button on the sentiment block actually serves two purposes. It completes a visual triangle of orange highlights that lead the eye across the card, and it also “anchors” the text block to the background visually.

What kind of card are you inspired to make by Tutti Fruity Button Bonanza?

0

Cozy Brads + 15 minutes = cute handmade card!

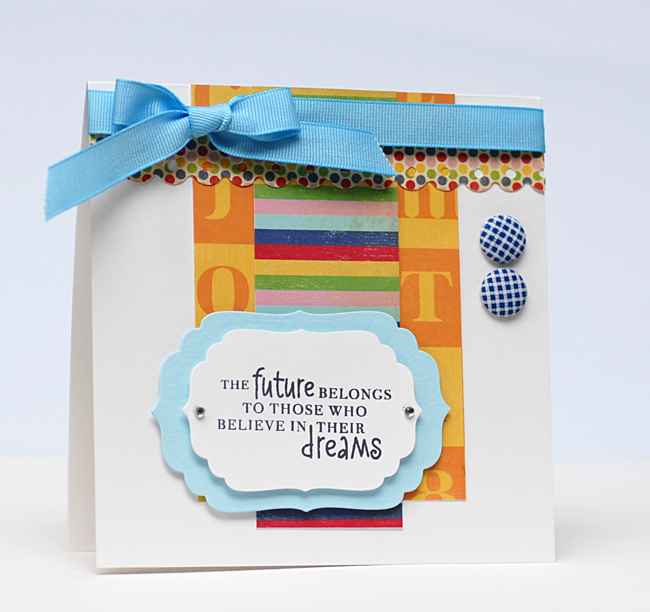
Good Morning! It’s a great day to encourage someone to reach up and go for their dreams….what better way to do that than with a handmade card??? And this one can be created in less than 15 minutes! I know for a fact because…..
Confession time: I should have had it done and up on the Card Positioning Systems blog, ready to run first thing on Tuesday morning, but totally spaced it and didn’t create it or load it!!! So I had to whip it up first thing and it took less than 15 mins start to finish. I just used the weekly sketch, threw in a mix of fun patterned papers, some ribbon and two fabulous Cozy Brads and BAM!!! Done! Enjoy!!


Supplies:

Stamps: Hero Arts – Anytime Messages
Ink: Tsukineko Memento Dye Ink – Tuxedo Black
Patterned Paper: Fancy Pants Designs – Childish 6×6 Paper Pad
Cardstock: Bazzill Basics
Brads: Buttons Galore & More – Cozy Brads: All Boy
Dies: Spellbinders Paper Arts
Ribbon: Generic Grosgrain
Punch: Fiskars Scalloped Punch

0

Powered by WordPress. Designed by WooThemes