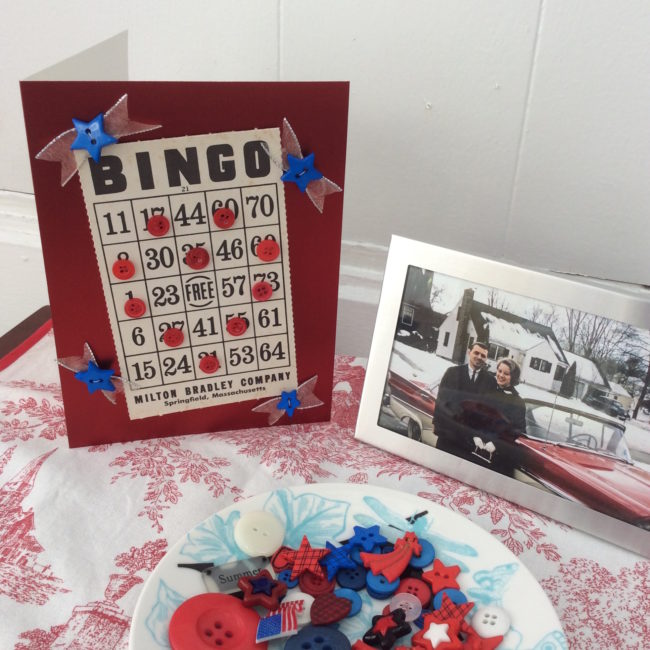
Vintage Bingo cards can be so fun to embellish with buttons. The grid makes a perfect surface to create patterns such as a heart outline. Our family tradition to play Bingo on the holidays and mu Dad is always the number caller. This card is for him.
Archive | Father’s Day
Batter Up for a Baseball Father’s Day Card!
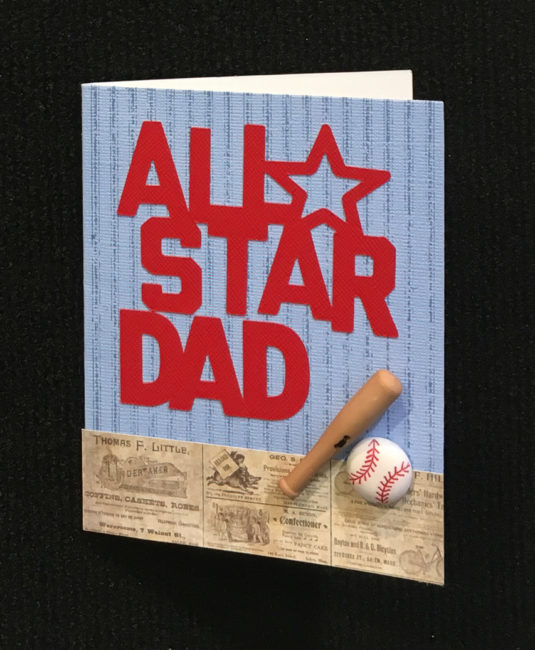
Is the dad in your life a sports fan? This baseball Father’s Day card may be the perfect way to send your love on Father’s Day!
This simple Father’s Day card is based on only two main elements: a die cut and some of our fun 3D buttons!
A plain blank card takes on a baseball pinstripe look with the help of a background stamp. The texture of the blank card keeps it from stamping completely perfectly, giving it a vintage distressed look. A strip of patterned paper also helps to create a vintage vibe, which is perfect since baseball is a sport with such a strong sense of history. The die cut is cut from a red cardstock that matches to stitching on the baseball, and which creates a nice contrast to the blue. Once that is done, all that is needed is to attach the buttons. (The bat is attached with some embroidery floss, and the ball is glued.)
This baseball father’s day card could easily be themed for another sport with only a few changes. Simply change out the baseball buttons for other Buttons Galore sports themed ones such as basketball, soccer, or football, and then change the background stripes for stars!
Supplies:
- Buttons Galore #4065 Baseball 3D buttons
- Hero Arts Large Canvas Stripes Background stamp
- Tim Holtz Distress Ink in Faded Jeans
- Cricut Explore machine & cut file
- Bazzill cardstock (red)
- Blank card (blue)
- Tim Holtz “Crowded Attic” Paper Stash
- embroidery floss (brown)
Wrap up a Quick & Simple Father’s Day Card!
Father’s Day is almost here, and that means time to make cards for dads, grandpas, and other special men in our lives! This quick and simple Father’s Day card is easy to make, and has a fun orange and turquoise color scheme that will make kids and grown-ups happy!
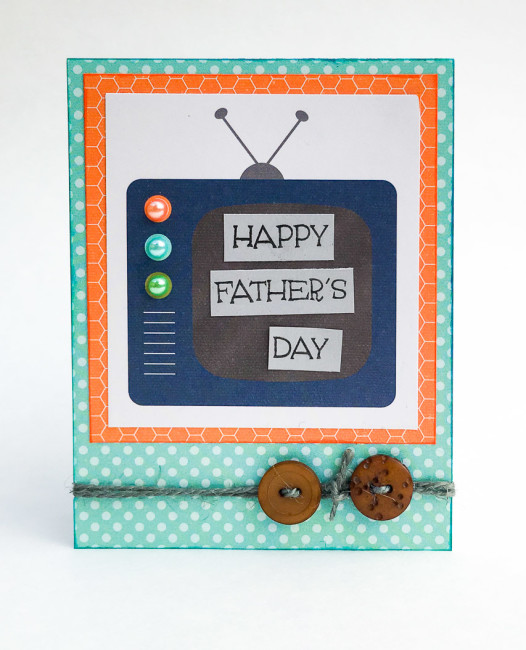
The card design is based on a preprinted journal card cut from a sheet of Simple Stories patterned paper. To keep it from looking plain as the basis of the card, embellish it with pearls that match the TV’s printed dials. The “screen” of the TV is the perfect place to hold the card’s sentiment. Stamp the sentiment on cardstock and then cut it apart to fit onto the screen. Adhere.
Next mat the TV card on orange patterned paper, and then mount it onto the card front. Finally, attach the card front to a blank card to complete the layers.
To wrap the twine, poke a hold in the spine of the card. Using the hole, wrap the twine around the card twice. Finish with the ends on the front. Thread a button onto each end of the twine, and then tie the ends together. To make the buttons lay more flat, glue dots can be attached behind them.
Supplies:
- Simple Stories “So Rad” collection
- Rad
- Orange Honeycomb
- Teal Dot
- Grey cardstock
- Blank card
- Hero Arts “Celebrate Everyday” stamps
- Colorbox Mini Pigment Ink (Black)
- Colorbox Petal Point Pad in Aurora
- Colorbox Stephanie Barnard Premium Dye Ink in Tangerine
- Tim Holtz idea-ology Jute Twine
- 28 Lilac Lane by Buttons Galore Paws & Pets embellishment kit
- 28 Lilac Lane by Buttons Galore Tropical Twist embellishment kit
- 28 Lilac Lane by Buttons Galore Let It Snow embellishment kit
This card is perfect for any of the favorite fathers (or father figures) in your life. Who would you give this quick & simple Father’s Day card to for Father’s Day?
Drink Charm Gift Idea for Father’s Day
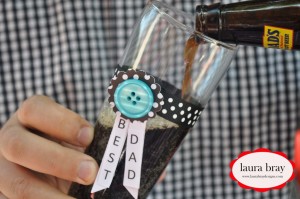
Today I am exited to share this awesome drink charm gift idea from Laura Bray. These adorable and simple drink charms are a fabulous idea for Father’s Day for those of you who want to create something magnificent in a short amount of time.
To get the tutorial and learn more about the amazing Laura Bray, visit her blog post here.
Happy Father’s Day Weekend,
Laura
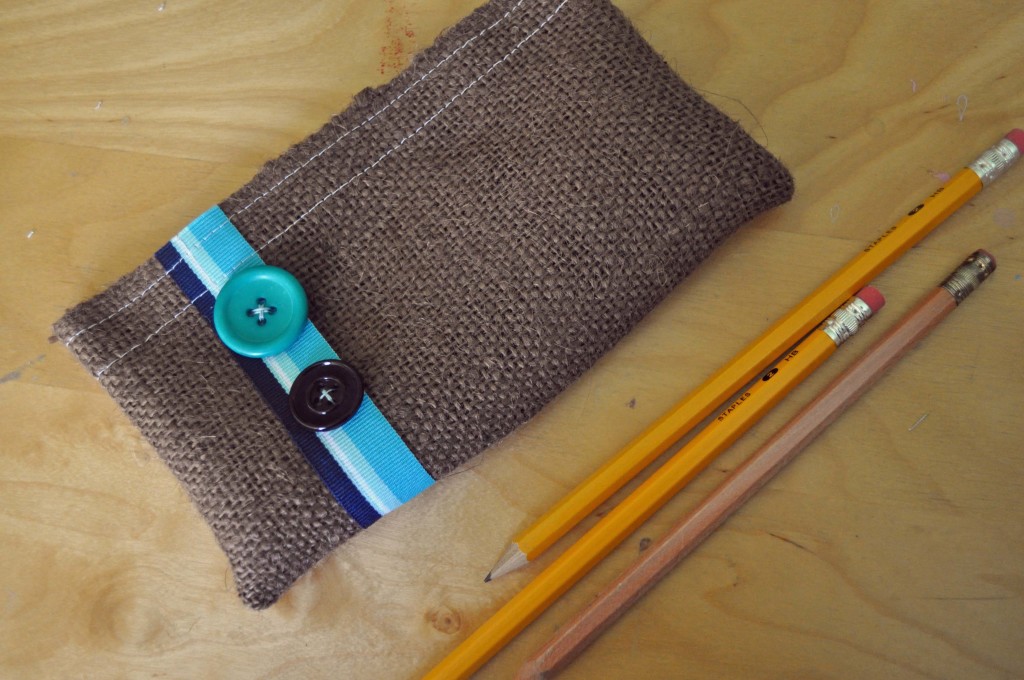
Sew a Button and Burlap Pencil Case
Sew a button and burlap pencil case for the guy in your life. It’s just right for the high school graduate who is heading off to college in the Fall or it would also be a great Father’s Day gift.
I know I’m always trying to keep my husband organized and he’s always looking for pens and pencils. Do you think there’s any chance a button and burlap pencil case is going to help? Naw, I don’t think so either, but it’s fun to make!
Supplies needed for a button and burlap pencil case
- Burlap cut to 7.5″ x 8″
- Velcro (R) Brand Sew-On Fasteners cut to 7″ long
- Ribbon cut to a length of 8″
- Buttons – the Haberdashery line has some great masculine colors!
- Basic sewing supplies
Instructions for sewing a button and burlap pencil case
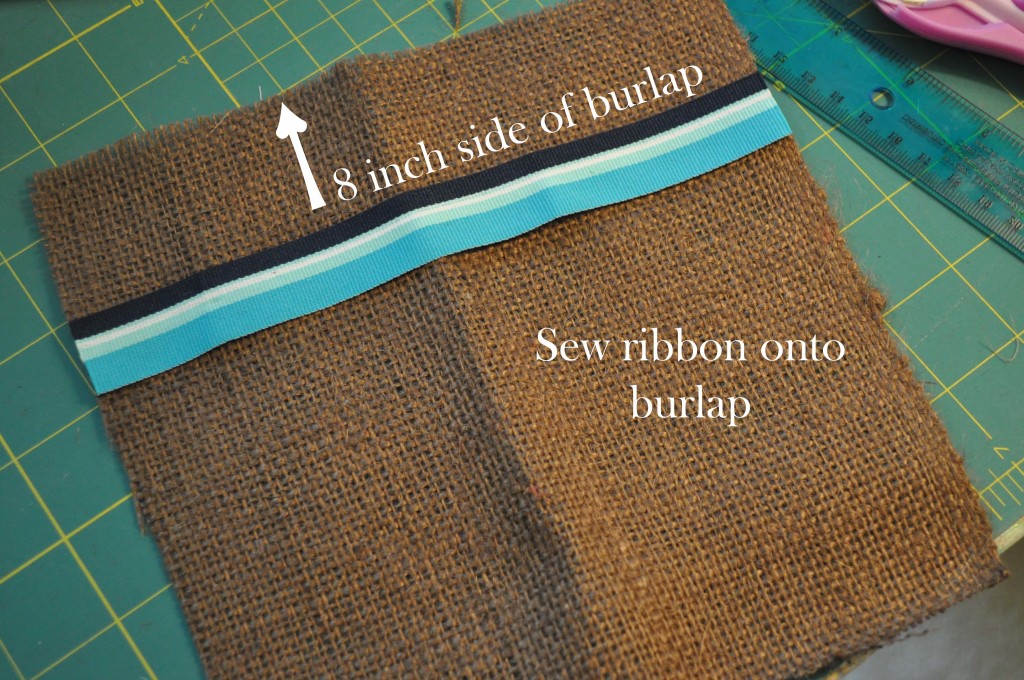
1. Sew ribbon onto burlap parallel to the side that measures 8″. Place it approximately 1.25″ from the edge of the burlap.
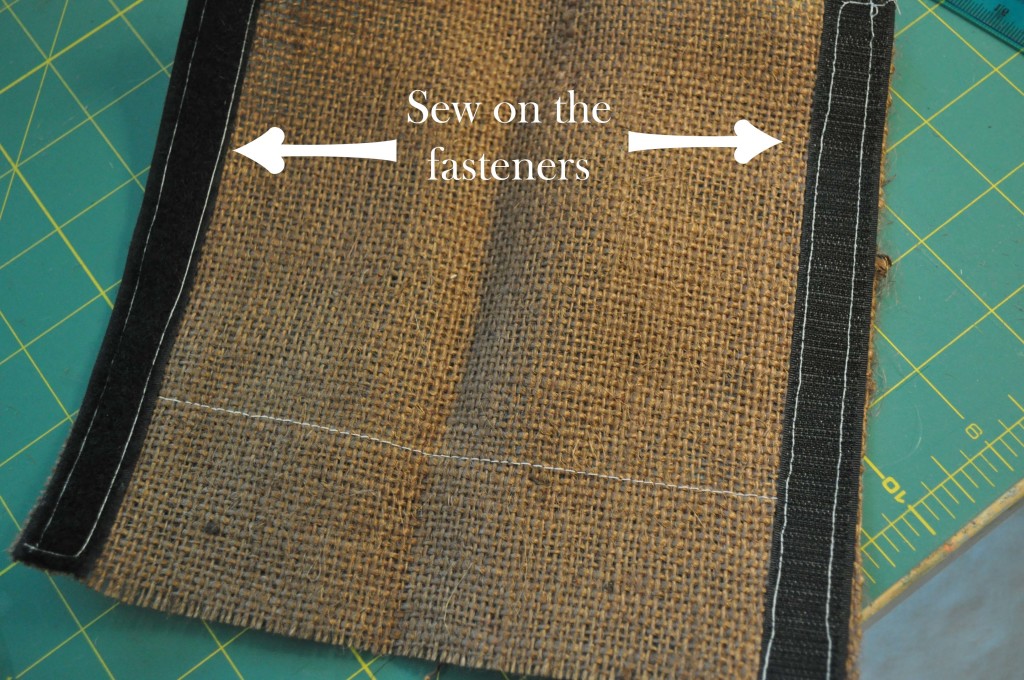
2. Sew the Velcro (R) Brand fasteners onto the 7.5″ inch sides. (These will be perpendicular to the ribbon.) I like to leave the top of the case without finishing it. The rough edge gives it a more masculine touch!
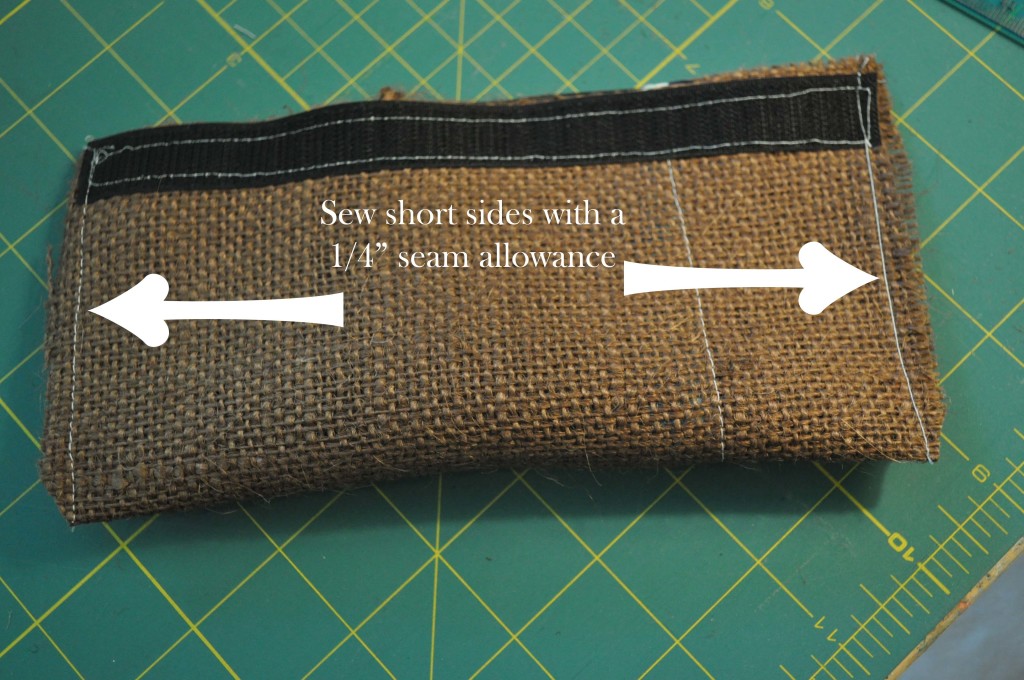
3. Fold in half, right sides facing (the side that you sewed the ribbon onto is the “right” side). The 7.5″ edges should be even. Press with an iron.
4. Sew the short sides closed.
5. Clip the corners and turn the bag right side out.
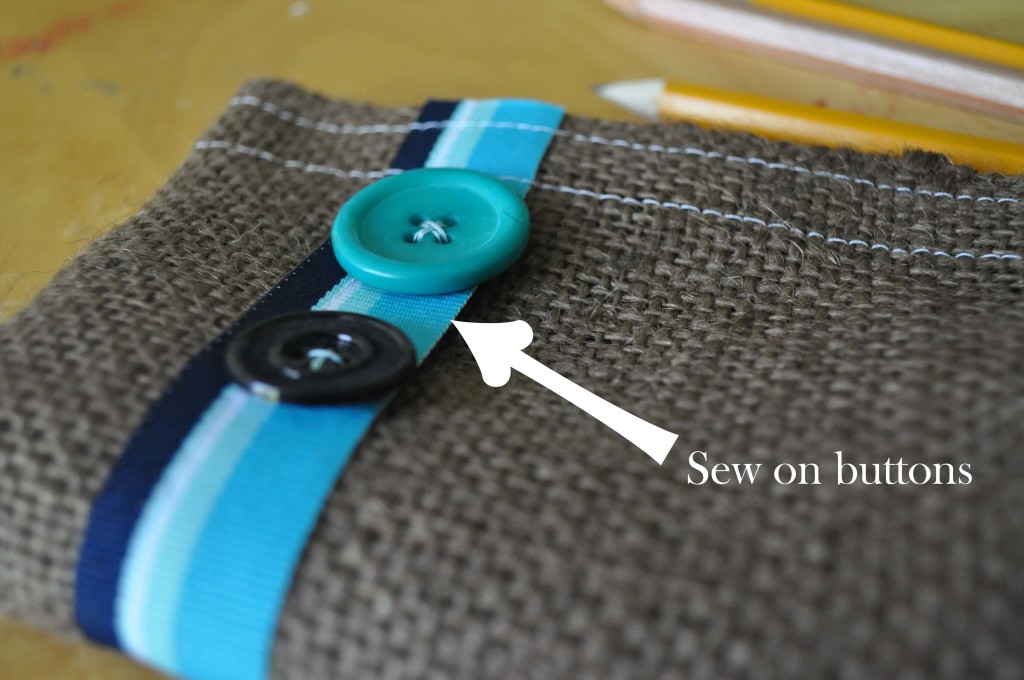
6. Sew buttons onto ribbon. I know it’s a bit harder to sew them on when the case is sewn, but it’s best to leave this step for last, so you can see the best placement for them.
Happy Father’s Day Card
Taking time to recognize all the wonderful fathers out there is important & not just once a year, but the entire year through!
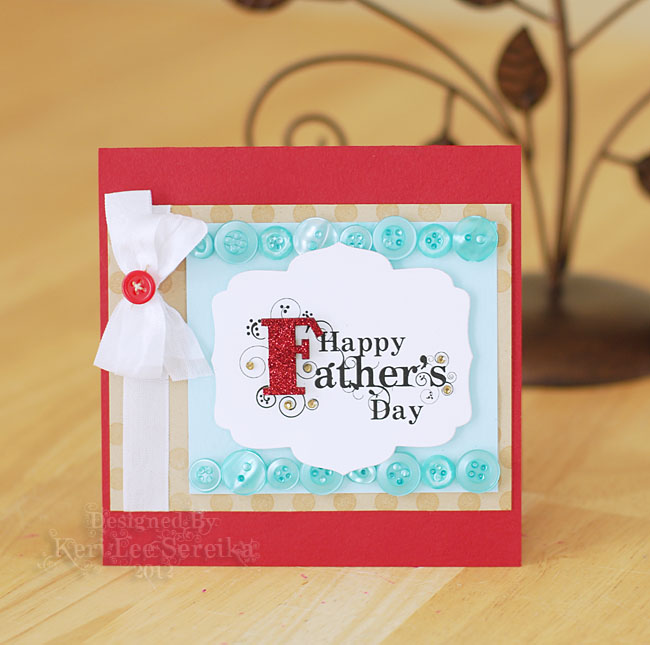
For this card I simply wanted to design something that my husband would love. I happen to love the colors kraft, red & blue together, no matter what the shades.
For the sentiment I had the notion to use a chipboard letter from Want2Scrap in place of the printed “F” but still use the fun swirls that come with that uppercase letter. To achieve this I opened a file in Photoshop, created a total of three layers, one for each word I was planning on using. I made the word “Father’s” larger than both of the other words. I then made sure that the “F” was even larger than the rest of the word. Finally, I created another layer. Then using the rectangular selector tool I created a selection over top of the “F” and filled it with white but kept the swirls that were coming off. My last step was to arrange the layers so that the sentiment was placed together so that there would be room to add the chipboard “F” as I had planned. I then printed the sentiment and die cut around it using Spellbinders Labels Four. To finish off my sentiment panel I simply inked the chipboard “F”, applied glue to the entire surface and applied red glitter to really give it “POP!”.
After that it was simply a matter of putting the card all together as you see here. I again used the Lumiere 3-D to adhere the buttons and fill the “naked” button holes, just like I did on my scrapbook layout earlier this month.
What a fun texture the strips of buttons add beneath the main focal image, don’t you think? Enjoy!
Supplies:
Sentiment: Duetica – Woodwynds Font
Cardstock: Bazzill: Red, White & Light Teal
Stamps: Gina K Designs – Vintage Backgrounds
Ink: Clearsnap Fluid Chalk Ink – Creamy Brown, Lipstick Red
Glitter: Clearsnap – Ruby Slippers
Ribbon: Really Reasonable Ribbon – White Seam Binding
Buttons: Buttons Galore & More – Button Tin in Sea Glass, red
Chipboard Letter & Gems: Want2Scrap
Other: Jacquard Lumiere 3D (To adhere buttons and fill button holes)