Header

Tag Archives | spellbinders

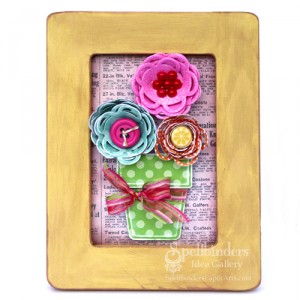
Walnut Hollow Wall Art

Walnut Hollow Wall Art

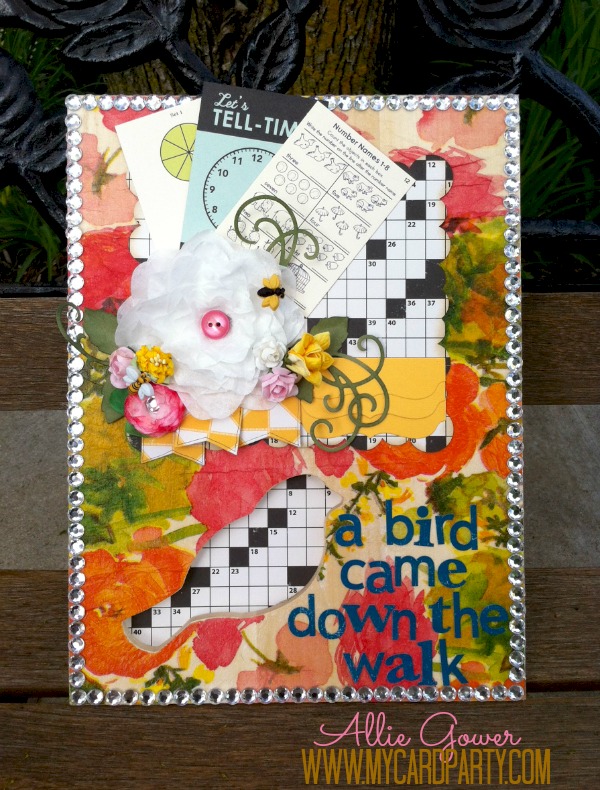
Allie here today making some Walnut Hollow Wall Art. This is really not hard, so colorful, and a lot of fun.

Walnut Hollow Wall Art

Supplies for my Walnut Hollow Wall Art:

  • Sweet Blush Buttons
  • Garden Bug Buttons
  • Board – Walnut Hollow
  • Bulk Bling – Want2Scrap
  • Fucschia Dye – Rit Dye
  • Crossword Puzzle Paper, Stickers and Vintage Cards – October Afternoon
  • Flowers – some are handmade using Spellbinders, additional flowers from Wild Orchid
  • Adhesives – Glue Dots, Adtech Hot Glue Gun and Glue Sticks, Plaid (Mod Podge)
  • Dies – Spellbinders, My Favorite Things, and Heartfelt Creations, Silhouette
  • Other – decorative napkin, coffee filters (for handmade flowers)

Instructions

  1. Decoupage a napkin onto the board and seal with Mod Podge.
  2. Cut main mat (Silhouette), flourish (Heartfelt Creations – Belle Rose Collection), tabs (My Favorite Things) and flowers (Spellbinders).
  3. Assemble large flower and add Sweet Blush Button center and Garden Bug accent. Assemble smaller flower (this flower was dyed with Rit Dye in Fuschia) and add Silver/Clear Bulk Bling Rhinestone.
  4. Add vintage cards and other paper embellishments. (Note – I doodled along the edges of some of these pieces.)
  5. Decorate edges with Bling.
  6. Add a sentiment using stickers. I chose a line from an Emily Dickinson poem. Note, stickers don’t stick well to the mod podge surface, so you may want to reinforce with adhesive.

Note – I lined the back of board with matching paper so that the crossword pattern would show through where the bird cutout is.

Thanks for joining me today.

See more of my creations at My Card Party.

2

Bugs and Kisses

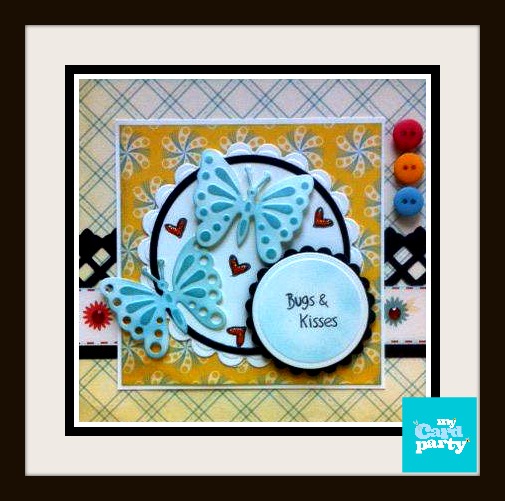
Bugs and Kisses. What’s cuter than that?

Sharing a fun and easy summer card. Do you have paper that you love, that you’ve used and used til you just have scraps, and none of the fun embellishments left to go with it? When you have buttons in every color, you don’t have to be afraid of not having anything to match! I love kitschy old retro papers. This is paper from my “retro” stash, and of course, I was able to find matching embellies, and make a few too!

Bugs and Kisses


Supplies for Bugs and Kisses Card

Buttons Galore – Satin Finish buttons from Orange, Blue and Fire Engine Red Bulk Collections

Other – Papers – Cosmo Cricket, Dies – Spellbinders Paper Arts, Ink and Glitter Glue – Ranger, Bling – Want2Scrap

Notes and Tips

  • Use Spellbinders dies to cut, emboss and stencil. Tape dies in place with repositionable tape and run through machine, repeat and emboss, then daub on ink. This is done on the butterflies and the sentiment circle.

Thanks for stopping by. See more of my creations at My Card Party.

Keep celebrating your sweet life with creativity.

Allie Blog Signature


2

Snap Happy

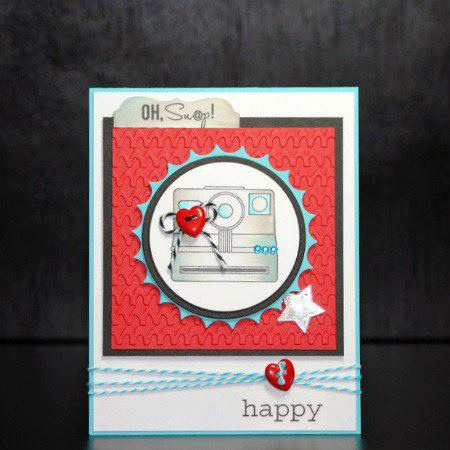
It’s Red, White & Blue season, the perfect colors for this Snap Happy Card. Will you be taking lots of pictures on the 4th?

Every week we share fresh card making ideas using buttons. This week we’re using my absolute favorite Heart Novelty Buttons. I made a card with a gift card inside that’s good for some prints at one of our local stores. What family doesn’t print a ton of pictures?

Snap Happy

Supplies for creating Snap Happy Card

Buttons – two Heart Novelty Buttons – Buttons Galore and More

Stamps  – Gina K Designs

Cardstock – DiscountCardstock.com

Embellishments – Turquoise Rhinestones – Want2Scrap; Twine – Doodlebug Design; Stickers – SRM

Tools: Dies (Inverted Scalloped Circles, Star, Circles – Spellbinders Paper Arts; Labels – My Favorite Things) ; Embossing – Sizzix

Adhesive: Hot Glue – Adtech; Dimensional Foam Tape – 3M; Scor-Tape – Scor-Pal

Other: Ink – Tsukineko; Markers – Copic; Flashing Tape – available at most Home Improvement Stores

Directions

  1. Create a Neenah Solar White cardstock base 4.25 x 11″. Score and fold in half.
  2. Cut your mats: Neenah Solar White mat 4 x 5.25″ – Black Licorice mat 3.5 x 3.5″ – Currant Red mat 3.25 x 3.25″ – Emboss Currant Red mat.
  3. Adhere mats to card with Scor-Tape.
  4. Die cut pieces: inverted circle from Lunar Blue Cardstock, a Black Licorice circle, and slightly smaller Neenah Solar White circle and label shape.
  5. Stamp and color image on Neenah Solar White circle. Stamp sentiment on label shape and attach to card.
  6. Embellish with Turquoise Rhinestones. Tie black and white twine through one Heart Novelty Button and glue to stamped image.
  7. Layer round pieces with Dimensional Foam Tape.
  8. Adhere Flashing Tape to scrap paper and die cut and emboss star. Adhere to card with Dimensional Foam Tape
  9. Wrap aqua and white twine around card and secure with second Heart Novelty Button.
  10. Add sticker sentiment to bottom of card.

Thanks for stopping by today. To see more of my art, please visit me at My Card Party. I’ll see you on Thursday with some new Button Jewelry.
Until then, keep creating!

2

Mixed Media Necklace

I created a mixed media necklace to share with you today. Mixed media to me means having fun. It’s more about the journey, and not so much about the results.

I like to incorporate elements that have meaning to me, or to the person I’m creating for. I love butterflies. They are all about change.

Mixed Media Necklace

Supplies for creating a mixed media necklace

Note – this is what I used – use what YOU love. But of course, include some fun buttons! You don’t need everything on this list – you could play with paint, beads, remake an old necklace… The sky is the limit. Enjoy the journey!

  • buttons – Shop by color at Buttons Galore
  • chain and jump rings (Fire Mountain Gems)
  • shrinky dinks
  • napkin
  • dies (Spellbinders)
  • craft metal (Ten Seconds Studio)
  • glitter and liquid adhesive (Art Glitter)
  • copic markers and an ABS (air brushing system)

Here’s a fun little video showing some close ups and tips.

animoto_high_res

Thanks for joining me today. Please share something you make with buttons, I’d LOVE to see it.

You can find me at My Card Party.
0

Wedding Card

Wedding Card

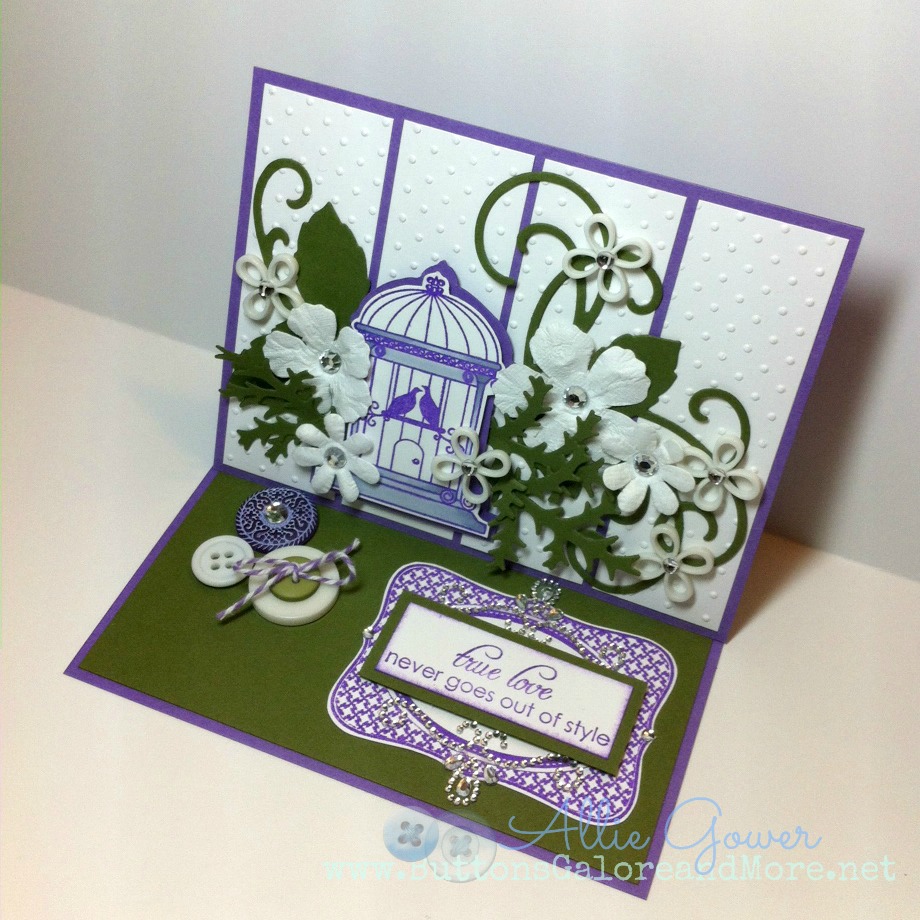
Make a lovely wedding card. Wedding season is upon us!

I love to use the colors chosen by the wedding party. By stamping and adding matching buttons, any card can become extra special to the bride and groom.
Wedding Easel Card

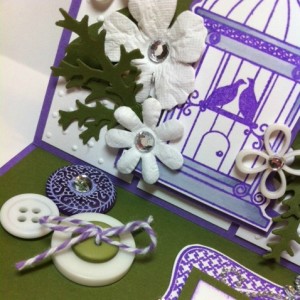
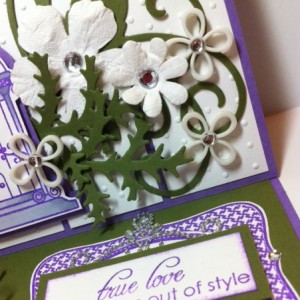
This is a simple easel card with a little bit of stamping with die cuts. It’s not difficult. The background is embossed panels – the folder is Swiss Dots. The swirls are die cut from the Belle Rose set from Heartfelt Creations. The sprigs are from a Spellbinders set called Foliage. When some were too big, I just cut them down. Make your dies work.

Button Embellishments

I stamped my bird cage and fussy cut it. I also cut a mat for it, so it would stand out in the business of the flowers. The buttons help the card stay open. To one I added a bling center, and then I took two buttons and tied them together with twine. The larger white button is actually upside down, so that the twine doesn’t touch the card.

Wedding Embellishments

I stamped and cut out the label. My sentiment was a tad too big, so I just matted it and accented it with some fancy bling.

The buttons are from the Valentino Collection, the flower buttons are blank Flower Shapes, and I added some bling to the centers. The flowers came with bling already attached.

Supplies Used:

Tool Used:

1

Sunday Card Making: Make a St. Patrick’s Day Card

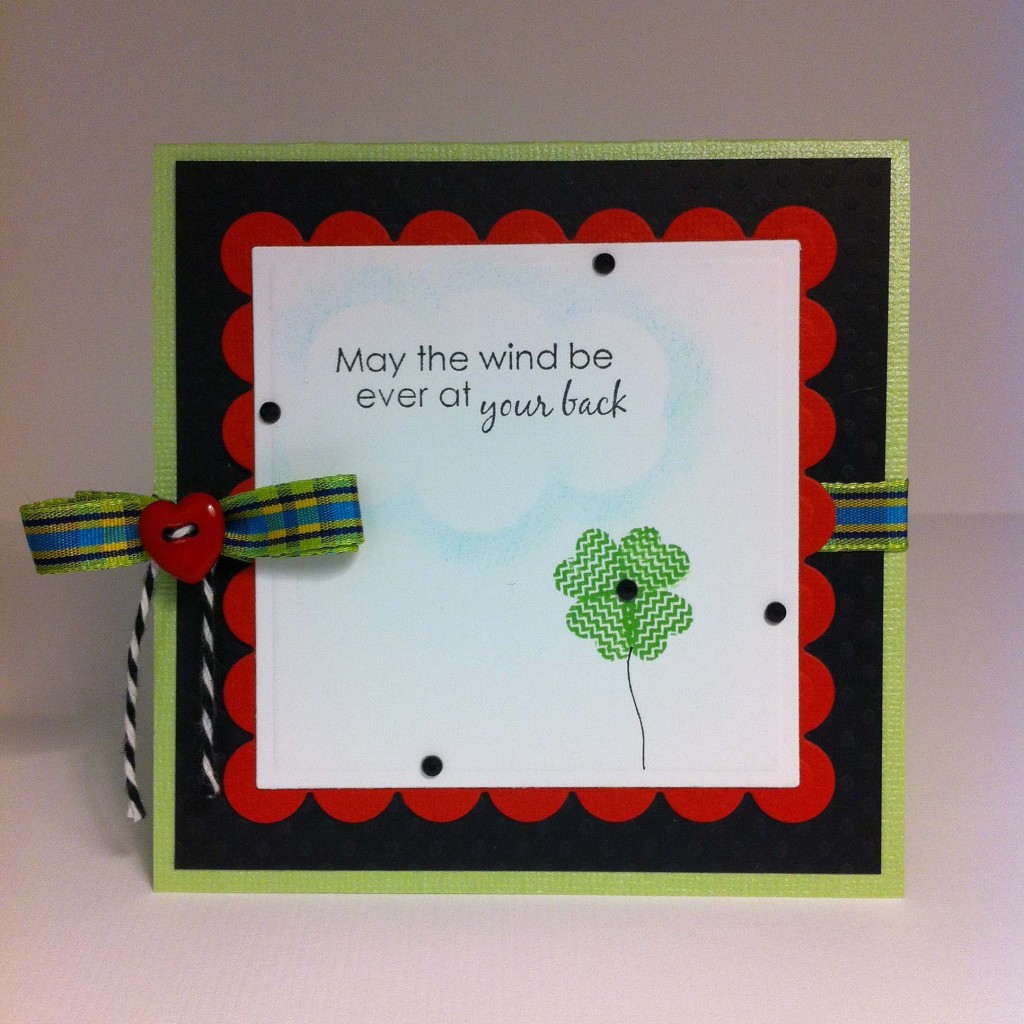
Make a St. Patrick’s Day Card with hearts. I found that I did not have many St. Patrick’s Day themed stamps and embellishments in my stash. I decided on an Irish styled saying and a clover made of stamped hearts. You can make a card any size you like. My card is 4×4″.

Buttons Galore celebrates St. Patrick's Day with Allie Gower

Material used to create St. Patrick’s Day card:

Buttons Galore Product used:

I also used:

In addition you will need:

  • Post-it Note
  • Circle punch or die
  • Finger Dauber or Sponge
  • Copic Multiliner ( for drawing stem )

Directions for making the St. Patrick’s Day Card:

  1. Create a card base by cutting a piece of cardstock 4×8″ and fold in half.
  2. Cut a mat – 3 3/4×3 3/4″ and adhered to card base.
  3. Tie ribbon around card base and attach button using twine.
  4. Die cut scalloped square and adhere to card.
  5. Die cut a classic square.
  6. Stamp sentiment on classic square. Stamp heart four times to create a shamrock, and hand draw a stem.
  7. To create the cloud around the sentiment, you can make your own stencil, as shown below. Attach a Post-it Note to some scrap paper and punch a circle out – near the sticky edge of the Post-it note. Remove sticky circle and place on card and gently sponge around it, moving as needed, to create a cloud shape.
  8. Adhere classic square to card and add bling.

create a cloud step onecreate a cloud step two create a cloud step three create a cloud

I hope you enjoyed this St. Patrick’s Day card and the quick cloud tutorial. May the wind be ever at your back!

Thanks for stopping by.
Allie

5

Sunday Card Tutorial: Make a Window Card

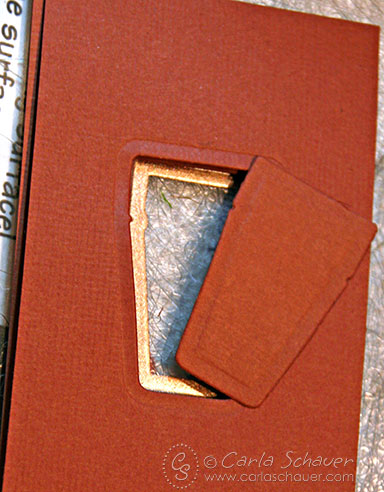
Window Cards are cool.  Have you ever wanted to make a window card? Have you ever had to make a BUNCH and wanted them all to be the same?
Window Card by Allie Gower


Materials to make Window card:

I have a Grand Calibur from Spellbinders, but this should work in any machine. You need repositionable tape – I use Tissue Tape – as you can see! You will also need two post it notes.

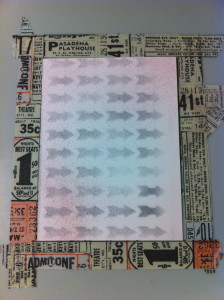
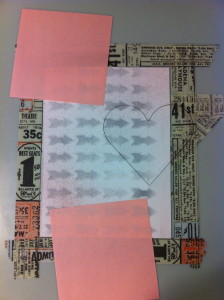
Start by making an outline of your card, so that you know where to place each card front.

Making the Perfect Cut


You also want to tape down the die. You will cut through the tape – no worries, just put tape all over it and really rub it down. Then, you are ready to die cut your panels. Use some post it notes to hold it in place. These will really stick after running through your machine, but won’t leave any residue.

Making the Perfect Cut


Rinse. Lather. Repeat. Just kidding. Keep going, just line up your panel  and secure with post – its. Before you know it, you’ll have a nice neat stack of card fronts.

Making the Perfect Cut


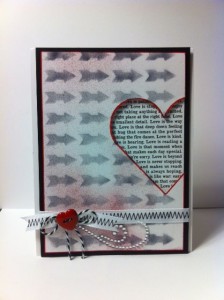
My card fronts were created with an arrow stencil. This is a new stencil that Donna Salazar designed for Want2Scrap. It worked great. I used my trust post its to hold it in place, and airbrushed some black ink. Afterwards, I sprayed on a little red ink, and outlined the card.

I finished the card off with ribbon, a Red Heart Button and some twine, and a rhinestone flourish.

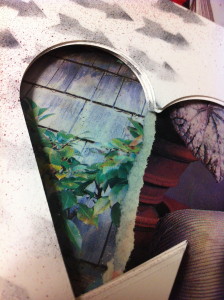
Behind the opening is some cardstock. I raised up the card front with some dimensional adhesive. The card front is matted on black, and then adhered to the card base.

If you have to make several cards, or even just one – this easy technique will help you get it right – the first time, and every time.

Buttons Galore Supplies Used to Make the Window Card:


Additional Supplies Used to Make the Window Card:

  • Cardstock – My Favorite Things Replenishments
  • Patterned Paper – Canvas Corp.
  • Stencil and Flourish – Want2Scrap
  • Die – Classic Heart from Spellbinders
  • Ink and Airbrush System – Copic
  • Ribbon – American Crafts
  • Twine – Doodlebug Design

Would you like me to send this card to you? I will be sending it to one lucky winner.

Simply leave a comment and Pin this card!


Thanks for joining me, I’ll be back next Sunday with a fun Card Making Tutorial for you featuring, of course, fabulous BUTTONS!


Sunday Card Making: Make an OWL LOVE YOU Valentine Card

Do you like puns?  There is nothing cuter than OWL LOVE. I think this card would work well for Valentine’s Day, or any day with the simple HELLO!

This card is not difficult, but it’s got a little cutting and some die cutting and punching.

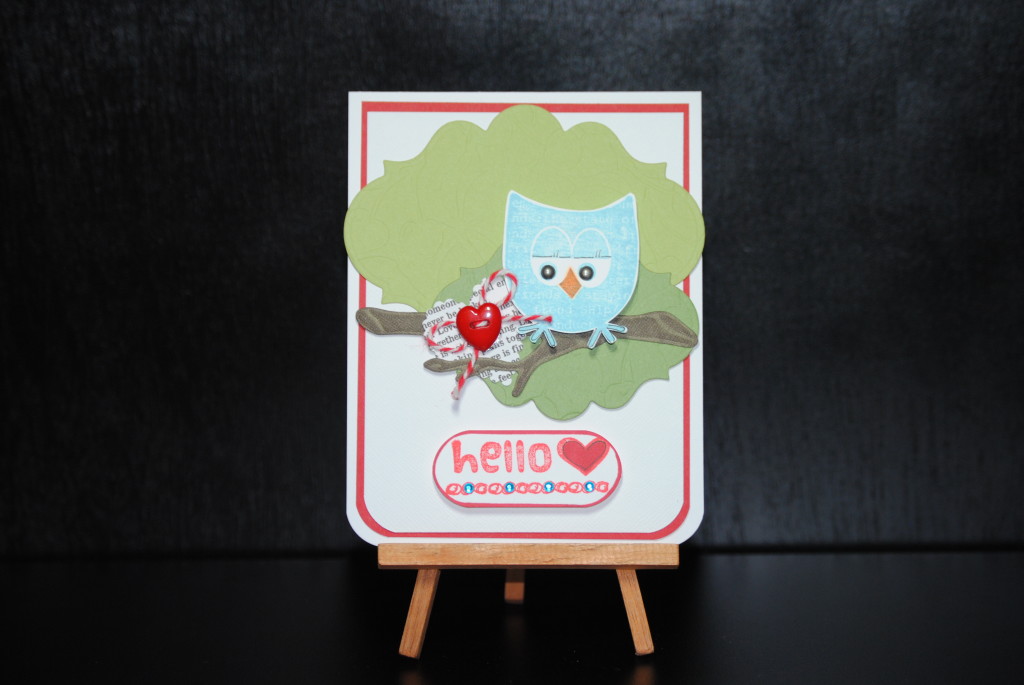
I started with Spellbinders Labels 20 and cut two green shapes and embossed them. I though these worked well for bushy foliage. I also die cut a branch from the Spellbinders BUGS set, and I also embossed it and added some ink for added contrast.

I stamped the Owl with some Crystal Blue ink from Close To My Heart – the owl is a Stamp of the Week from Unity Stamp Company. I have a love for owls, and some of my close friends call me Owlie – it’s even the name of my character on the Wii. It’s okay to laugh! I fussy cut the owl – not as hard as SOME shapes. I doodled around his feet and gave him some eyelashes with a Copic multiliner. I stencilled on his nose – I stamped a second owl and cut out the nose. I colored and outlined. An owl can be blue and sit in a tree, but a blue nose – never! I added some metal brads for his eyes.

I punched a heart using a Fiskars punch. The paper is from Canvas Corp and has all kinds of love words on it. I added a Red Heart Button. I tied a little bow with some Doodlebug Design Twine. At the bottom, I stamped “hello” from the same stamp set. I colored in the heart with a Copic Marker and added some Turquoise Rhinestones from Want2Scrap.

I did a little rounding at the bottom of the card and on the sentiment.

That’s it!

I hope you will love this card.


Hello by Allie Gower

Buttons Galore Supplies used to make the OWL LOVE YOU Card:

Additional supplies used to make the OWL LOVE YOU Card:

  • Cardstock – My Favorite Things Replenishments
  • Stamps – Unity Stamp Company (Stamp of the Week Program)
  • Dies – Spellbinders Labels 20 and Bugs
  • Punches – Scalloped Heart and Corner Punch from Fiskars
  • Twine – Doodlebug Design
  • Ink – Close To My Heart and Copic
  • Bling – Want2Scrap

Do you want this OWL to love you forever?

I will send him to a lucky winner.

Leave a comment and PIN him. I know, you were going to do that anyway. Good luck and I’ll see you all next week.

Sunday Cardmaking: Making a Valentine that Hides a Sweet Surprise

Have you ever wanted to hide a sweet surprise in a Valentine card?

Sweet Surprise Card by Allie Gower

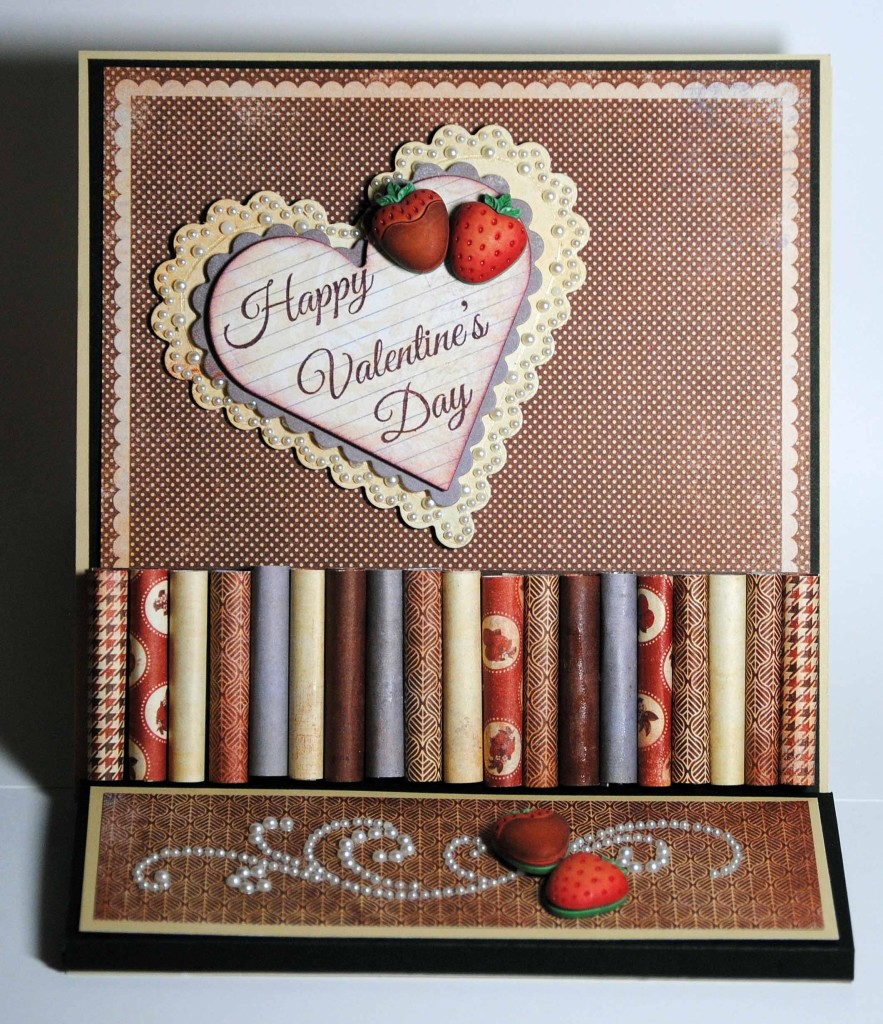
This is a standard Easel Card Valentine with a sweet surprise.

If you’ve never created an Easel Card, here is a very easy tutorial. On my Valentine, I’ve made the size a little larger – the card is 6×6.

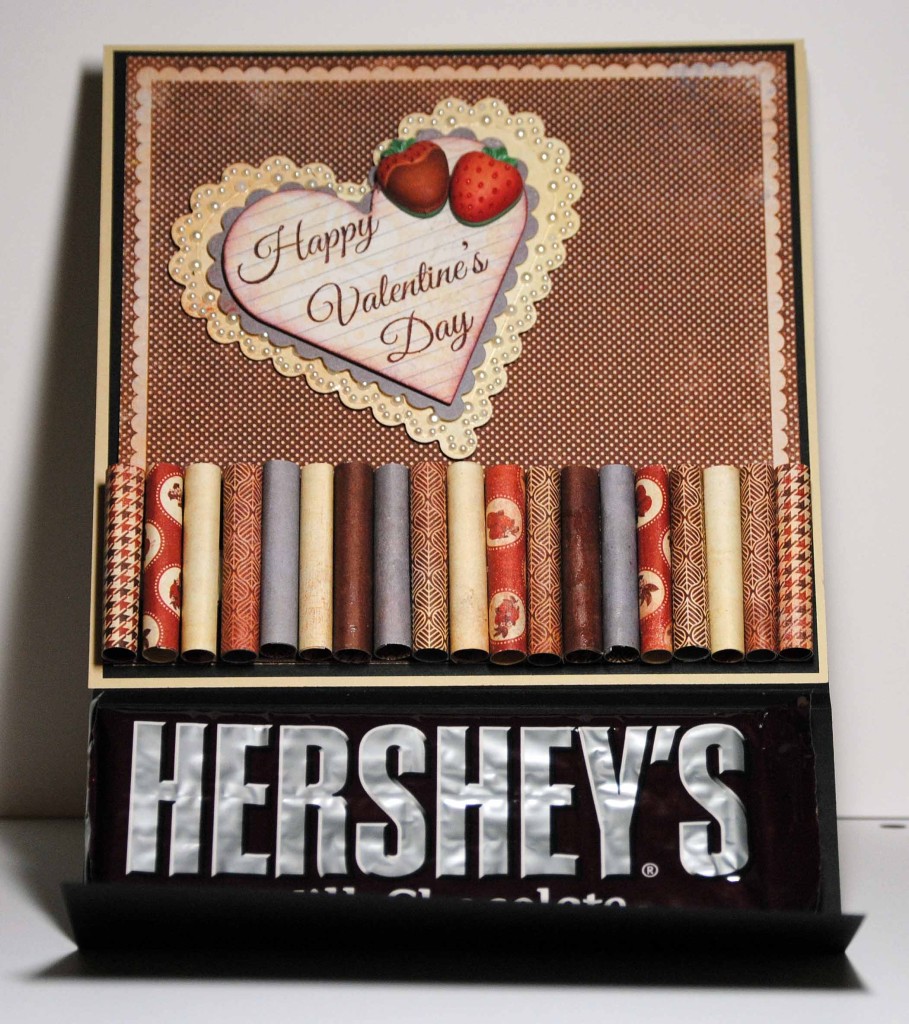
The sweet surprise is that in the bottom half of this Valentine, I’ve wrapped a Hershey Bar.

I added a panel of black cardstock, and scored it to make a little sleeve for the candy bar. I didn’t glue it, so the card doesn’t have to be destroyed to enjoy the candy. Apparently, no one wants to rip up the card to get to the goods! Nothing stops me from getting to chocolate.

Hershey Valentine

Sometimes people ask about the buttons and other dimensional items, and if it makes the cards hard to mail, or expensive.

Once you get a certain size, you’re paying a premium anyway, so I just pop my cards in a bubble mailer or a small box, and grin and bear the cost of mailing. My only other option is to hand deliver, which I love to do! I don’t want to hold back on my creativity – so I say layer it on, and on, and on.

Buttons Galore and More Supplies Used to Create this Valentine:

Chocolate Covered Strawberries

Strawberries

Mini Glue Dots

Beacon’s 3-in-1 Glue

Additional Supplies Used to Create this Valentine:

Paper – Authentique

Stamps – Gina K Designs

Ink – Close to My Heart

Dies – Spellbinders

Bling – Want2Scrap

Thanks for checking out my Valentine.

If you have any questions, just leave me a comment below.

I’d like to send this card to someone! Leave a comment here, and PIN the photo for a chance to win.

15

Christmas button craft ideas – Easy and simple DIY

Christmas button crafts ideas!

Christmas button craft ideas have been overflowing from my mind lately.  I love so many of the buttons from the Christmas Holiday section at Buttons Galore and More that I had a difficult time deciding which to use first.

 button crafts ideas materials:

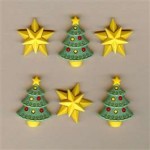
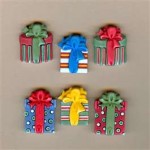
I used a Christmas Tree from this fun set and a gift button from this set.


Directions to easy Christmas button ornament:

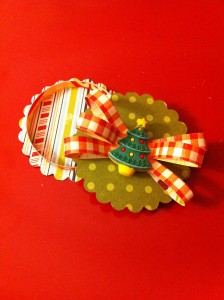
I made a quick and cute ornament using paper scraps. I think this would be fun to hang on a Kraft bag, place on top of a box, or hang on your Christmas Tree. I simply took strips of scrapbook paper and made a simple design, adding a button from the Star of Wonder set.


Directions for an easy  button craft ideas:

Here I took some more scraps and created a bow and box, embellished with a button from the Christmas Presents set in the center. I took two additional strips and glued them to the scalloped circles to create the tiny gift box. I would love to make lots of these, attach some magnets and use them on my fridge to create an Advent Calendar – I have such fun crafting with the little ones I babysit.

My preferred adhesive is Beacon’s 3-1 Adhesive, available on the Buttons Galore & More site. It sets quickly, but gives you time to reposition, and it dries clear. Buttons Galore & More has many additional adhesives to choose from. Additional supplies used include Paper – October Afternoon, Scalloped Circle Die – Spellbinders Paper Arts, Circle Punch – Marvy Uchida

Thanks for joining me today. use up your stash and add some fun new elements.  Please use these Christmas button craft ideas.  I hope you enjoyed these simple, inexpensive ideas for the Holidays.

1

Quick and Easy Gifts – Make a handmade note card set

It’s that time of year where we all start looking for quick and easy gifts. Being able to make them homemade is a bonus!!! Why not make a handmade note card set? Mine is not Christmas themed, or Fall themed…I like generic…it works well when I am in a pinch! I can just grab & go! BUT I do like to make my gifts in good seasonal colors. So for this set I thought I would show you my “thought process” on how to make a set of cards in a quick and easy assembly fashion. :) Just add in your papers, matching buttons, ribbon and bling of your choice and you are all set and ready to get creating your very own quick and easy gifts!


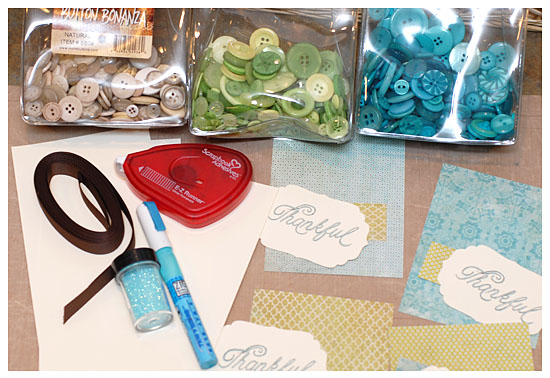
Gather up supplies. I generally like to pick my papers first, then cardstock, ribbon and embellishments. As you can see, I have chosen three different colors of Button Bonanza Bags just to be sure I have the perfect color when the time comes for embellishing. You can also see I have printed out my sentiments panels using Duetica Lettering Arts Studio’s Mandolyn Font in the Outline feature then colored it in using my Copic markers. Another neat trick to PERFECTLY matched sentiments that say JUST what you want in just the perfect size for your project. :) Once I was done coloring them in I die cut each sentiment panel using Spellbinders Nestabilities and I was all set!

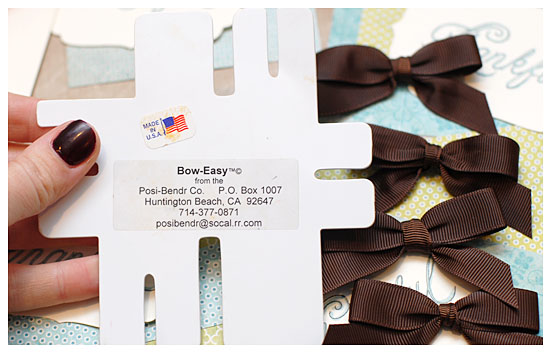
Using a Bow Easy Ribbon Tool REALLY helps make the set look polished, all of my bows look exactly alike!

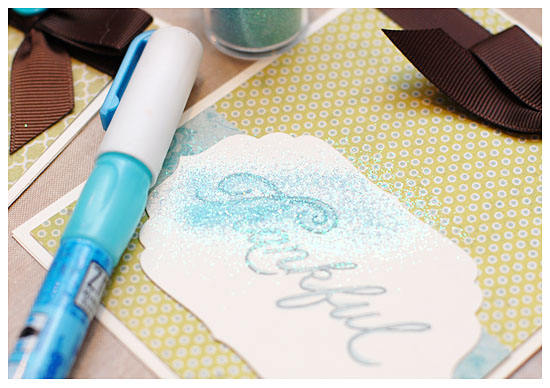
Add an extra touch by outlining the first letter using a glue pen then shake on a bit of coordinating glitter.

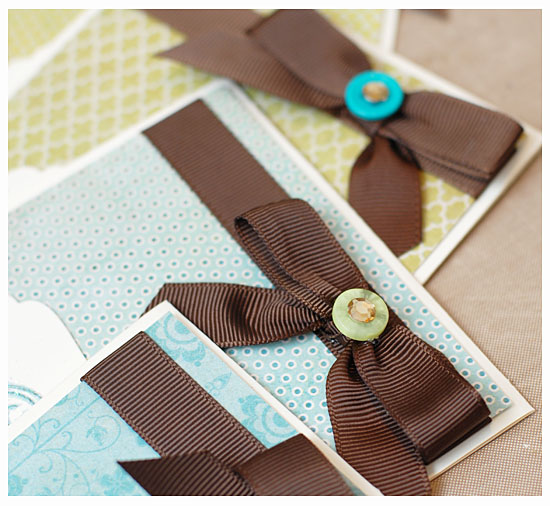
Another great touch that really doesn’t take too long is to embellish the embellishments! I love to add a bit of bling to the center of my buttons.


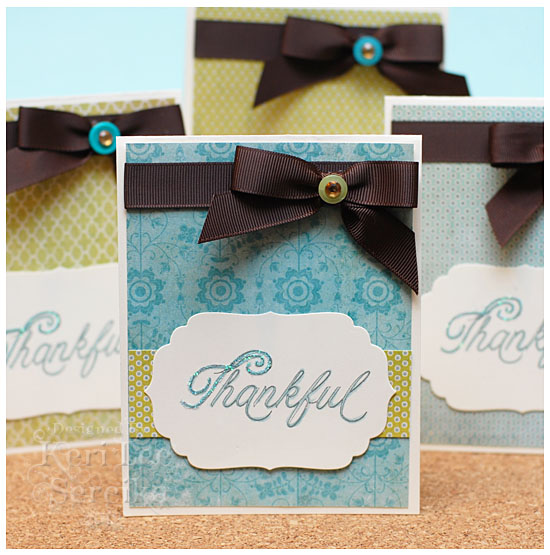
And here you have it! A cute set that took less than an hour start to finish! Not bad….


0

Button and Burlap Hostess Gift

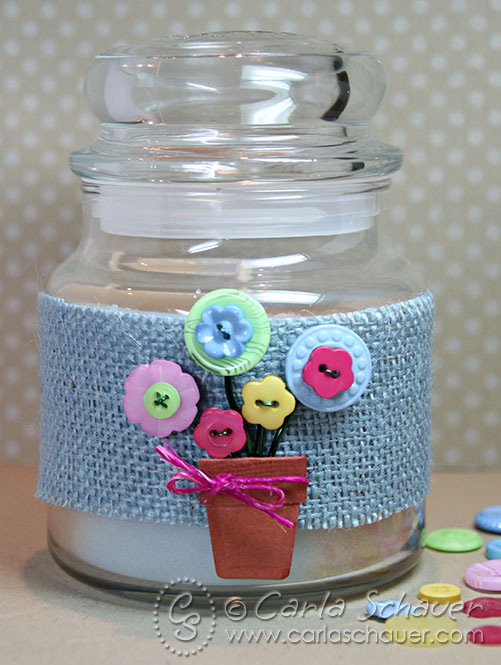
I have a hostess gift to share today using Buttons Galore and More buttons and a cute flowerpot die-cut shape. Of course I’ve included burlap to fit with our monthly theme!

Button flowerpot Candle hostess gift

I used the following materials:

  • Buttons from the Buttons Galore and More Spring Blossom Grab Bag
  • Nestabilities Flower Pots die from Spellbinders (smallest)
  • Raspberry Hemp Cording
  • Terra Cotta textured cardstock
  • 22 gauge and 16 gauge wire (kelly green)
  • Light blue burlap
  • Liquid Craft Glue
  • Double sided tape or adhesive dots
  • Wire cutters and round-nose pliers

Flowerpot Die from Spellbinders for button bouquet

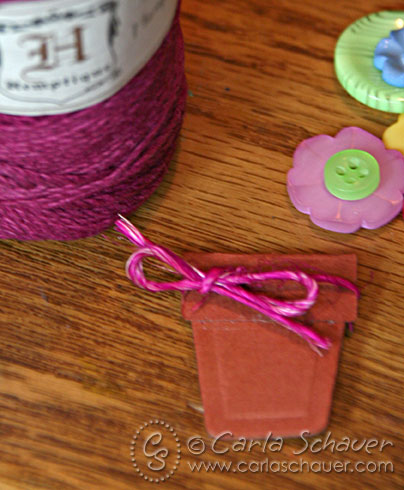
I started by cutting the smallest Flower Pot die from the Terra Cotta cardstock using my die-cut machine. The die embosses the cardstock at the same time as it cuts.

Button Flowers in flowerpot die-cut

Then I folded over and glued the top part of the die-cut to create the top of the pot, and tied a hemp cording bow. I selected flower-shaped and round buttons with interesting patterns in several colors from the Spring Blossoms Grab Bag for the flowers.

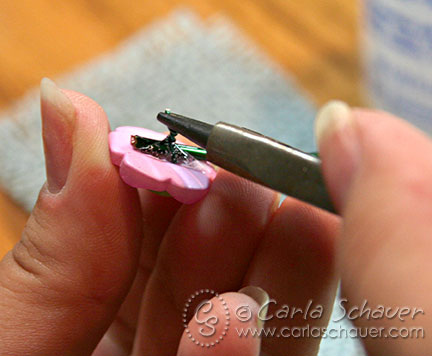
I cut 5 pieces of 16 gauge wire (smaller gauge numbers=thicker wire) to the lengths I wanted for flower stems, then set them aside. I cut 5 pieces of 22 gauge wire and threaded the thin wire through the buttons (connecting stacked buttons), with open ends toward the back of the button. I added a dot of glue to the back of the button, pressed the thick wire stem into the glue, and twisted the thin wire ends together securing the wire stem to the button flower.

Once all my flowers were secured to their stems, I arranged them on a 2″ strip of light blue burlap long enough to wrap around the glass candle jar and glued them in place. Once the flower pot was glued on top of the flower stems, I attached the wrap onto the jar using double sided tape. (Wrap must be removed before using candle, so make sure this adhesive isn’t permanent.)

This type of wrap also works well on vases for a fun summer home decor project. I’ll be using mine for a game night prize!

1

How to use Lumiere 3D with buttons in a new and different way


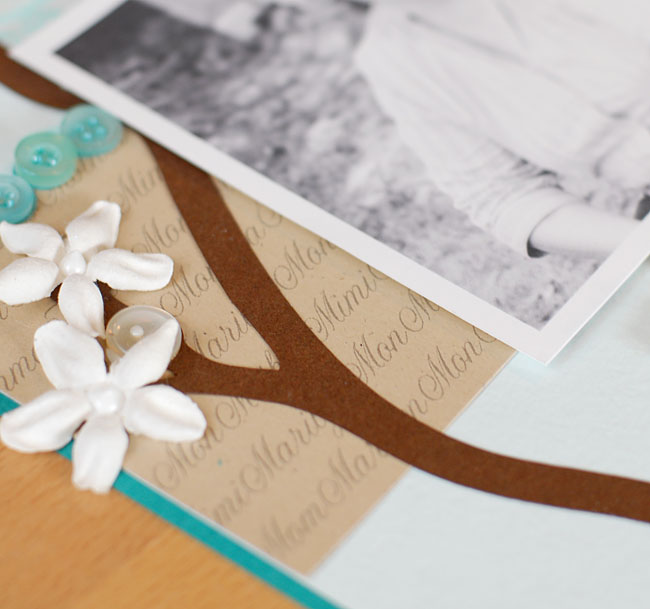
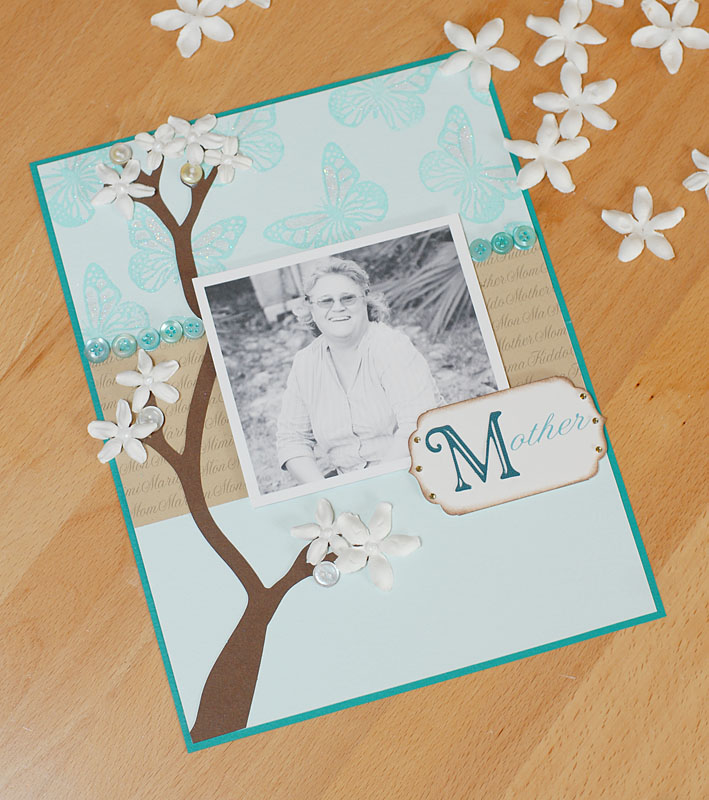
I love my mom. She’s a wonderfully fun person who everyone loves! She has a joyful spirit that just oozes to all those around her. This week I decided it would be fun to scrap a layout with her as the subject! :) If any of you have followed my work you know I love stamping, I love paper, I love ink, I love all things “crafty”…and here on this project I went all out and decided to not use any patterned paper but instead to get creative and make my own backgrounds.

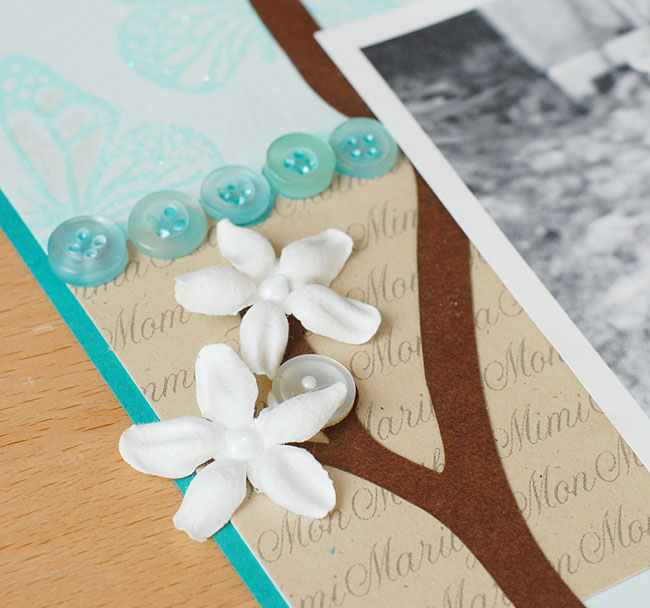
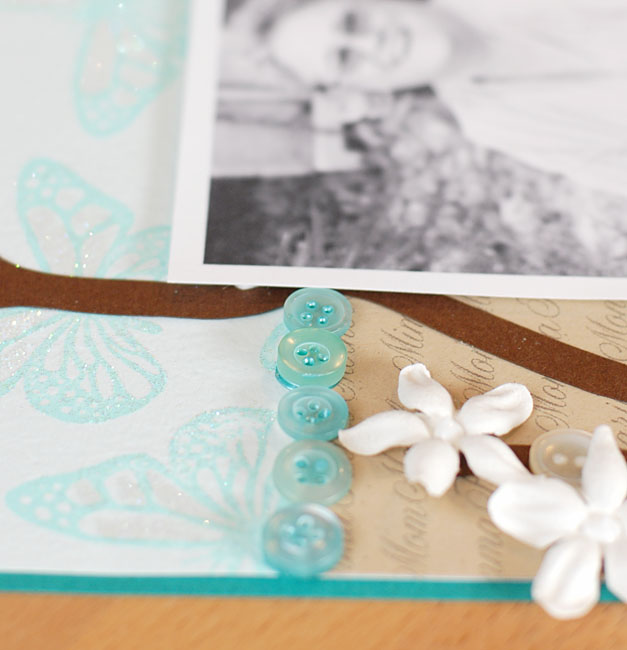
I really wanted there to be attention to all the fine details on this layout  so as you can see I used buttons as a border. Nifty Tip: Jacquard Lumiere 3D can be used to adhere buttons to your project AAAAAND it doesn’t leave you with “naked” button holes (personal preference of mine is to NOT have naked buttons!!!). The Lumiere 3D fills in the holes as well as adheres the buttons right where you want them to stay! The Lumiere 3D Turquoise is a dead match for the buttons in our Sea Glass Tin.

I also found that the Pearl Lumiere 3D was just right for holding my little white mother of pearl buttons from the Genuine Vintage Tin right where I needed them for the “buds” on my tree branch as well as for creating perfect domed centers for all my flowers.


As you can see here I have printed repetitive words using the Duetica Mandolyn 1 Font. I love how crisp and clean this font is but still has a flowing feminine feel at the same time. I decided it would be cute to make a list of all the names my mom has answered to in her life time….Marilyn, Mon, Mom, Kiddo, Momma, Mommy, Mother, Mimi etc…I then just repeated the list over and over and printed in a light gray on Kraft cardstock to make the background strip beneath the photo.


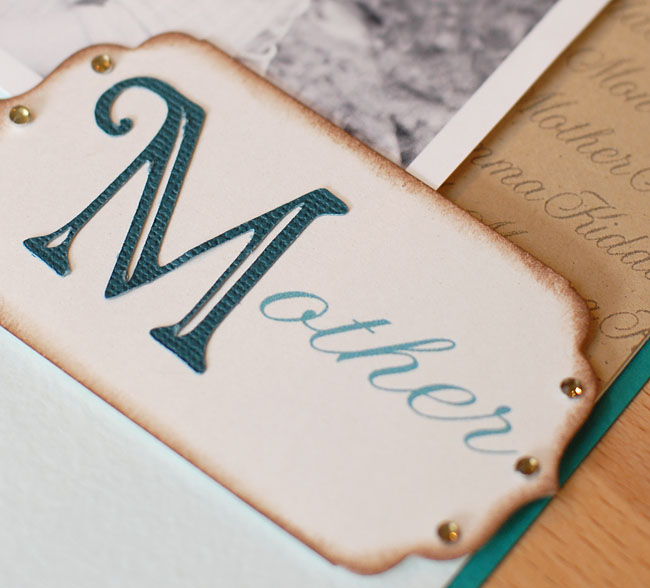
Then for my title I again used the Duetica Mandolyn1 Font in a larger point size and a cool teal color. One of the best things I am finding when working with the Duetica fonts is that I can customize EVERYTHING about them, the way they type out, the colors I print in, the size, the layout…you name it, you do it! :) Since we just celebrated Mother’s Day now is a great time to get out that photo of your mother and treasure that memory as you create a keepsake scrapbook layout…

Supplies:

Buttons: Buttons Galore & More – Sea Glass, Genuine Vintage
Jacquard – Lumiere 3D: Pearl & Turquoise
Duetica Font: Mandolyn 1 & Adobe Photoshop
Cardstock: Prismatics & Coredinations
Cricut Electronic Cutting Machine, Serenade & Winter Wonderland Cartridges
Stamp: Layers of Color – Fairy Wishes
Ink: Clearsnap Colorbox Pigment Ink – Glacier Ice
Glitter: Ultrafine Iridescent
Rhinestones: Want2Scrap
Flowers: Prima “e!” line
Die: Spellbinders Labels Four Nestabilities

4

How to make a statement by using a grouping

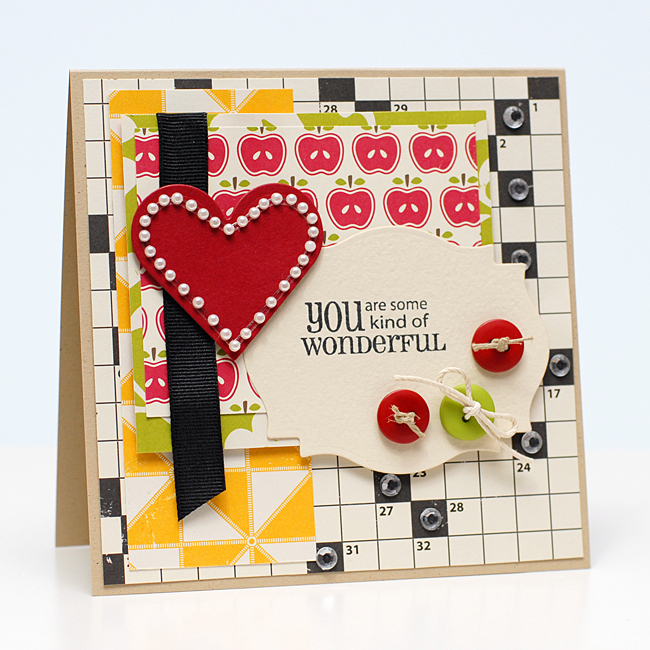
A few weeks ago I was stuck. I had to make my weekly card for Card Positioning Systems and I had everything but the finishing touch just wasn’t working. The sentiment I wanted to use was too small for the label die cut I was working with and I really wanted to use THIS SENTIMENT. You know how you can just get stuck with the image in your mind and nothing else works?? Yeah I was there…so I decided to embellish my main image…and not just with one, not two, but THREE fun buttons. Here you can see I chose some buttons from the Girly Button Pack. They were JUST THE RIGHT COLORS to go with my chosen patterned papers. So I kinda played around with the color balance and felt the two reds and one green was just what I needed. To spice things up I decided to use natural colored hemp in the red buttons, tied in a knot and snipped short. For the green button to add balance and interest I tied white twine, tied a big loopy bow and snipped the tails a bit longer. I felt it gave the card fun whimsy! If you’d like more info feel free to pop over to my blog Pink Lemonade. Enjoy!!

0

Embroidery Canvas Hoop Art from Spellbinders

Embroidery Canvas Hoop Art from Spellbinders

Embroidery Canvas Hoop Art from Spellbinders

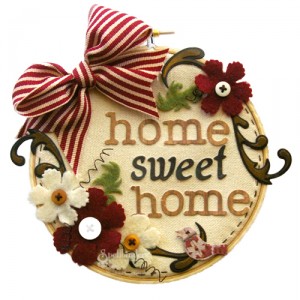
Buttons, Embroidery floss and and hoops are a few of my favorite mediums to use together.  This home decor project from the Spellbinders Paper Arts team show how well they work together.  The Spellbinders team often uses Buttons Galore and More buttons. Check out this adorable embroidery hoop project here for directions and a materials list.

1

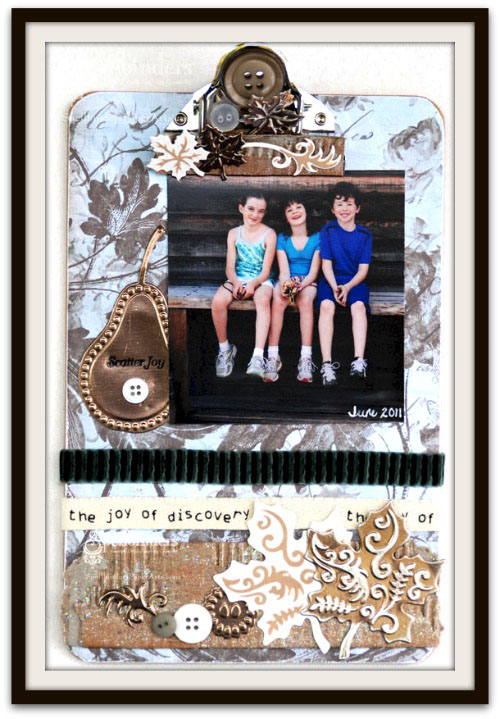
Fabulous Fall Clipboard from Spellbinders

Fabulous Fall Clipboard from Spellbinders

Fabulous Fall Clipboard from Spellbinders

The gals over on the Spellbinders blog have been making some very cute projects with Buttons Galore and More buttons.

Please visit the Spellbinders blog to see the instructions.

Oh! There are lots of cream and brown colored buttons for this project in our Confection button jar.

0

Powered by WordPress. Designed by WooThemes