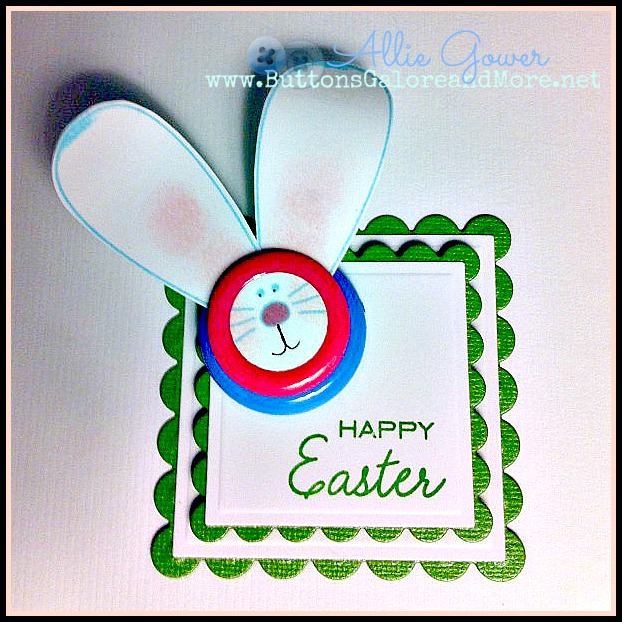
Make an Easter Magnet.
Do you keep a calendar on the fridge? When my kids were little we would keep our calendar on the fridge and mark special days with a holiday magnet.
I used an Inky Antics stamp set to make my ears and face for this project, but you could EASILY cut some and draw your own face! This is a fun magnet that can be used on the fridge. You could easily swap the magnet for a pin back and have a holiday pin.
How to Make an Easter Magnet:
- Stamp or draw and cut out ears. Stamp or draw a face and cut out with a circle punch.
- Sponge on pink ink on ears.
- Stack two Big Ol Buttons, nestling ears between them.
- Adhere a magnet to the back of the button bunny. I use Beacon’s Adhesive
- Die cut and emboss scalloped squares and classic squares.
- Stamp sentiment and assemble card.
I slid a small disc of metal under the top square, so that the magnet could stay in place and be removed easily. This is also how I wear the magnet.
Buttons Galore Supplies Used to make an Easter Magnet:
- Big Ol Buttons
- Adhesive: Beacon’s Adhesive, Red Liner Tape
Cross Promotional Products Used to make an Easter Magnet:
- Scalloped Square Dies, Square Dies – Spellbinders Paper Arts
- Ink – Clearsnap
- Stamps – Inky Antics
Additional Supplies Used to make an Easter Magnet:
- Sponge – Tsukineko/Imagine Crafts
- Cardstock – Bazzill
The following two tabs change content below.


Mom, Artist, Crafter, Fledgling Foodie in Minneapolis, MN.
Latest posts by Allie Gower (see all)
- Buttons Galore 2014 Valentine Round Up - February 1, 2014
- BeBunni Blue Birthday Card - December 26, 2013
- CHRISTMAS DIY: Colorful Buttons for Doll Stockings - December 10, 2013


No comments yet.