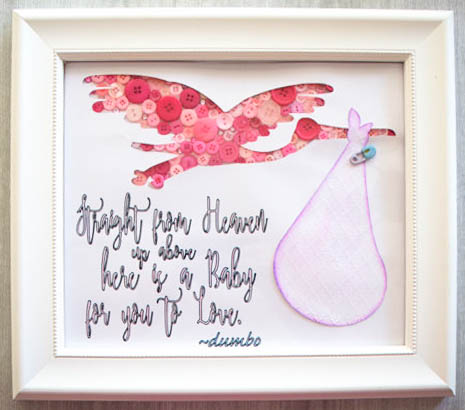
Hello! Kelli here. I am excited to share this sweet button nursery decor with you today! A dear family member is having her first baby soon – a girl! My family member is a Disney fanatic, and so I thought this sweet little project would be just right up her alley for nursery decor.
I wanted to create a button silhouette, but sometimes it can be difficult to get those round buttons to fit into a certain shape. I solved the problem and saved some time by using a cut out to go over the buttons, giving it nice crisp lines.
Supplies needed:
- Buttons Galore “Baby Girl” Embellishment Set
- Buttons Galore “Pastel Grab Bag” buttons
- Buttons Galore “Paradise” Apothecary Jar
- Buttons Galore “Baby Hugs – Diaper Pins” buttons
- “Straight from Heaven” PDF template (download below)
- heavy cardstock (3 sheets)
- scissors
- colored pencils or markers
- glue
- picture frame (I used a 10×12 frame)
Step one:
Start by printing out the design templates. I used three sheets of 12×12 cardstock. The heavier the cardstock is the easier this project will be. The first sheet you print should be the quote with the stork outline. The second sheet will be the bag cutout, and the third sheet will be blank.
You can download the PDF templates here:
Step two:
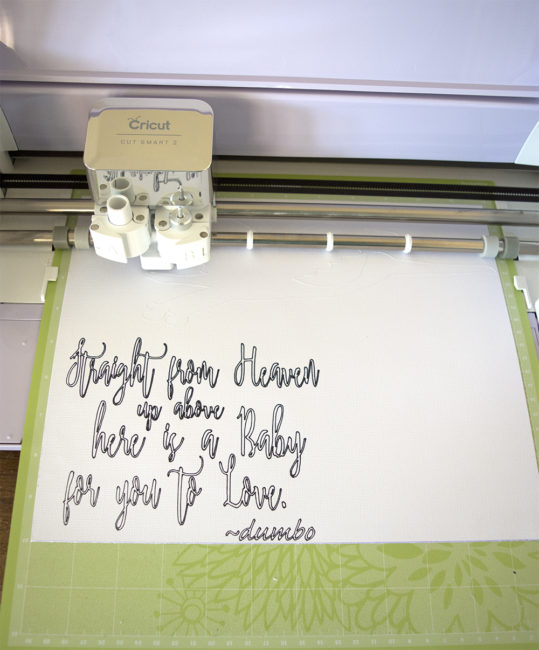
Cut out the stork outline. Use a sharp knife or the point of your scissors to poke a hole in the center of the stork, and then cut it out. Alternatively, if you have a Cricut or a Silhouette cutting machine, you can upload the template into the machine’s software and use the machine to draw the lettering and cut out the stork for you, which is what I did.
Step three:
Lay the sheet with the cut out stork on top of the blank sheet of cardstock. Use it as a template to trace the outline of the stork onto the blank sheet.
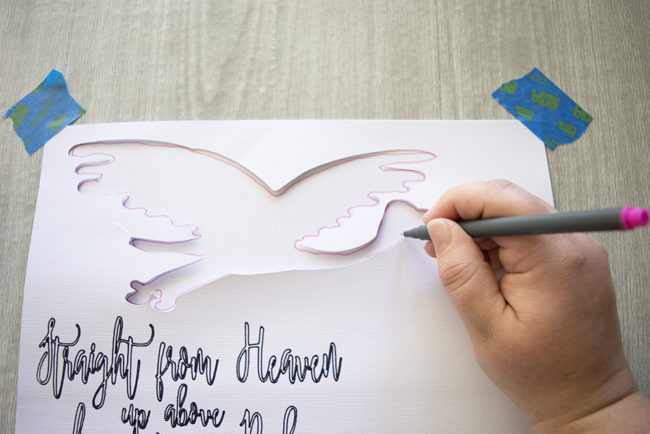
The outline will give you an idea of where the buttons need to be placed.
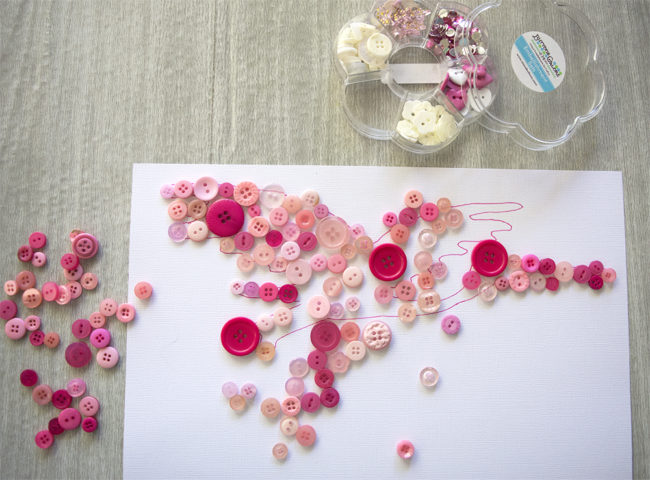
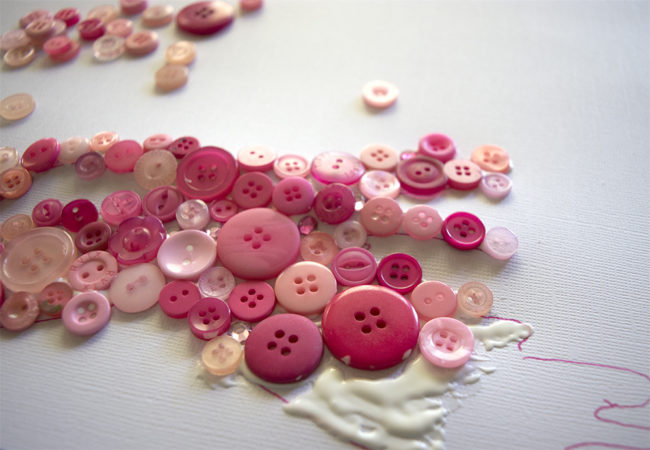
Glue pink buttons to the blank sheet of cardstock, filling in the stork outline. You don’t need to worry about going outside the lines with the buttons.
Step Four:
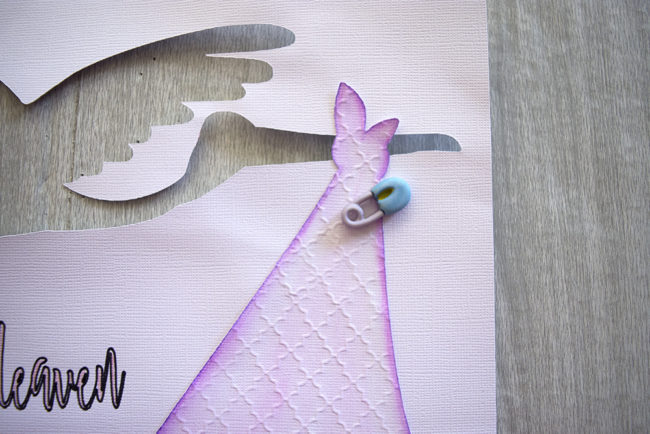
Cut out and color the stork’s bag. I ran it through my manual die cut machine with an embossing folder to give it a little bit of extra depth. Alternatively, you could use a patterned paper to print the bag template on for an extra something. Glue the stork bag onto the cardstock sheet with the cutout stork silhouette, making sure to line up the knot on the bag with the stork’s beak. Glue an adorable clothes pin button to the bag. (Cut off the shank first with scissors or a shank remover.)
Step five:
Layer the pages into your picture frame. First, the stork cutout sheet goes in face down.
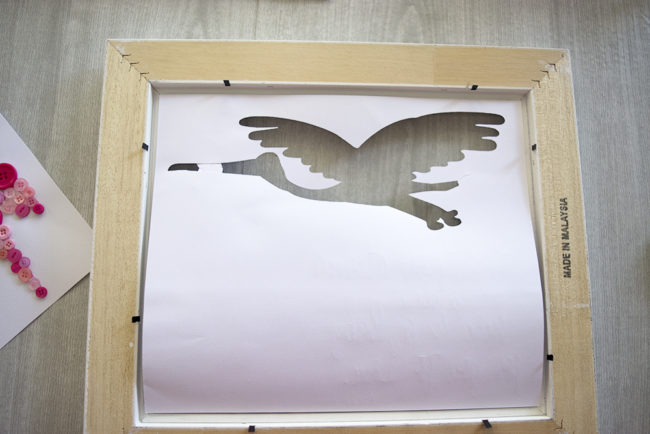
Lay the cardstock sheet with the glued buttons on face down on top of the first sheet, and line them up. Replace the frame back and you’re done!
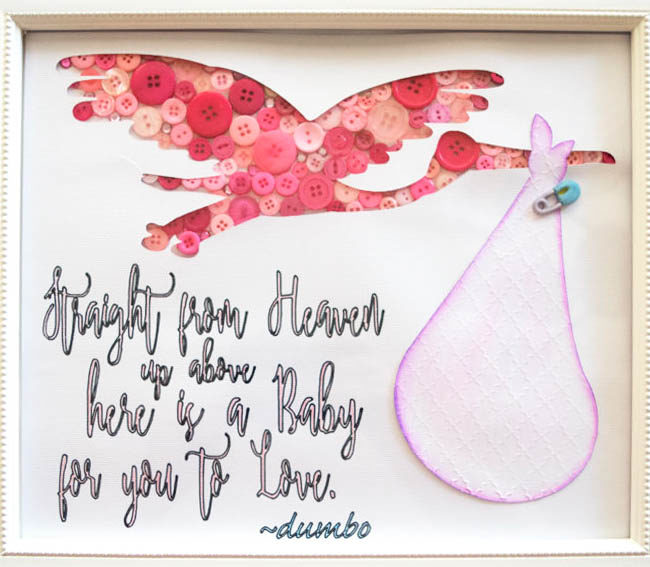
Now your buttons have a perfect silhouette line without any fuss, and you have some adorable nursery wall art for a sweet new baby. Change the pink buttons to blue ones for a boy (or yellow if you don’t know the baby’s gender), and it works for both!
Latest posts by Kelli Stradling (see all)
- Make a Simple Star Garland for a Mini Christmas Tree - November 20, 2017
- Make Easy Adorable DIY Candy Earrings - November 17, 2017
- DIY Easy Sequin Christmas Candy Cane Gift Tags - October 26, 2017


No comments yet.