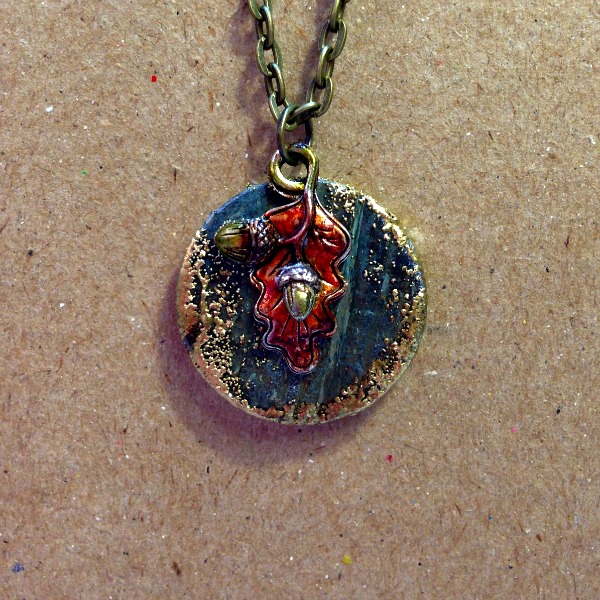
Last month I dyed some buttons using Rit Dye, and I had some left over so I’ve made this Dyed Button Necklace.
Supplies for Dyed Button Necklace
I used one large Coconut button and embellished it. I love that these buttons have an earthy, natural feel, and come in their own little tin with a clear top. This tin is great for storage, and great for using later for creating more fun!
Additional Supplies:
Rit Dye (Aquamarine), Imagine® Crafts/Tsukineko VersaMark ink and Gold Embossing Powder, and StāzOn™ Inks (in Olive, Forest Green, Rusty Brown, and Pumpkin for coloring charm – applied with Fantastix™ Applicators), 3-in-1 Glue, charm
Also: Jump ring, chain, pliers, heat tool (for melting embossing powder)
Instructions:
See Rit Dye for their Wood & Wicker Dyeing instructions. I had prepared dye in mason jars, and simply reheated it and added it to the button.
Make sure your button is dry before you try embossing. Sponge on ink and dip in embossing powder. Carefully heat set to melt. I did different areas separately, and used some tongs to hold the button.
I colored a charm with StāzOn™ Inks using Fantastix™ applicators and added a jump ring and chain, then adhered the charm to the button with 3-in-1 Glue.
I love the colors and how they all came together. Doesn’t fall have a beautiful assortment of colors to choose from? Fall is my favorite, no wait – I love snow, oh but spring flowers … Every season is lovely.
Thanks for joining me today for another project featuring button jewelry. Are you wearing your buttons? I’d love to see!
Latest posts by Allie Gower (see all)
- Buttons Galore 2014 Valentine Round Up - February 1, 2014
- BeBunni Blue Birthday Card - December 26, 2013
- CHRISTMAS DIY: Colorful Buttons for Doll Stockings - December 10, 2013


Beautiful work, Allie! Fabulous creation.
This is so cool and your such a talented lady.This would be fun to make and give as gifts.I need to remember ideas like this…So pretty and thanks for sharing.Where do you dream up so many ideas?Hugs and Loves:)