Header

Author Archive | Katie King

How to Make DIY Confetti Poppers for New Year’s Eve

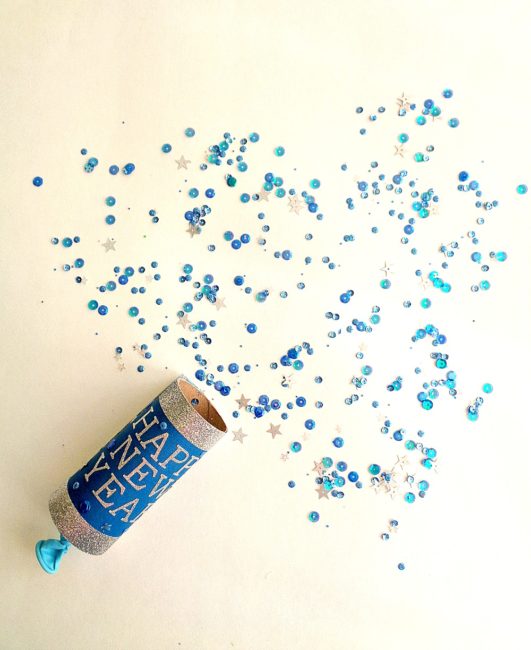
New Year's Eve DIY Confetti Poppers

Hello Everyone! This is Katie from the Buttons Galore & More Design Team, and today I will be showing you how to make a fun project to celebrate New Year’s Eve: DIY confetti poppers!

New Year’s Eve may not be on your mind right now, but that doesn’t mean you can’t start gathering up ideas for the big day. One idea that you can add to your list are these easy to make confetti poppers! You may have seen confetti poppers before and thought that they were too difficult or too time-consuming to make. However, today, I will be showing you how you can make a stylish confetti popper in only 3 steps. Continue Reading →

0

Gift a DIY Friendship Sign to Someone Special This Holiday!

DIY Friendship Sign

Hello Everyone! This is Katie from the Buttons Galore & More Design Team, and today I will be showing you how to make a fun handmade gift that can be given during the holiday season!

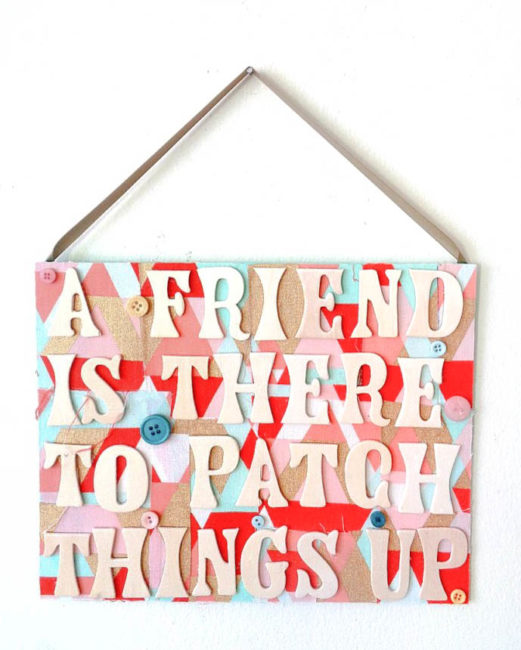
As a gift-giver, I have always loved making handmade signs for my friends and family. This is because handmade signs are super easy to make and are so fun to personalize. Also, from a gift-giving perspective, handmade signs can be very inexpensive to make if you are on a tight budget. With all that in mind and with the holidays fast approaching, today I am going to show you how to make a DIY Friendship Sign. Continue Reading →

0

Easy Thanksgiving Day Candle Holder Table Decor

Hello Everyone! This is Katie from the Buttons Galore & More Design Team and today I will be showing you how to make a Thanksgiving candle holder for super easy decoration for your Thanksgiving!

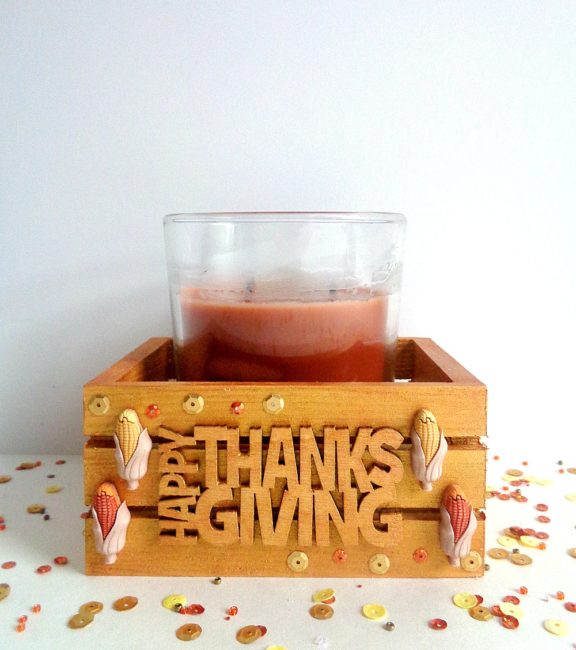
Making decorations for Thanksgiving Day may not be on your radar, simply because you are most likely too worried about making Thanksgiving Day dinner. However, making some type of decoration for Thanksgiving does not have to be difficult or time-consuming. To prove it, today I am going to be showing you how to make your own Thanksgiving Candle Holder! Continue Reading →

1

DIY Falling Leaves Home Décor

Hello Everyone! This is Katie from the Buttons Galore & More Design Team and today I will be showing you how you can decorate a new product available from Buttons Galore and More!

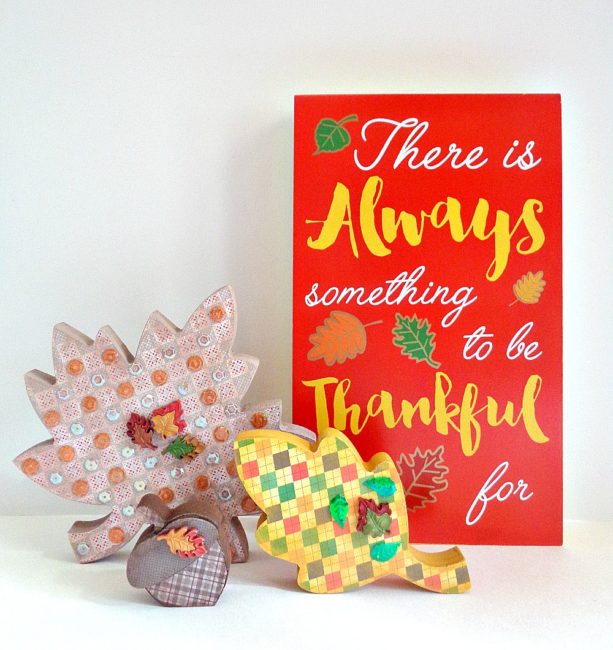
If you haven’t noticed, Buttons Galore & More has a new area on their website which is dedicated to home décor. This home décor is a new line of wooden products which are super easy to embellish and decorate. The nice thing about the new line is that you have tons of options for different holidays, themes, or seasons. Continue Reading →

1

DIY Flower Button Brooches for Fall Fashion Cheer!

DIY Flower Button Brooch

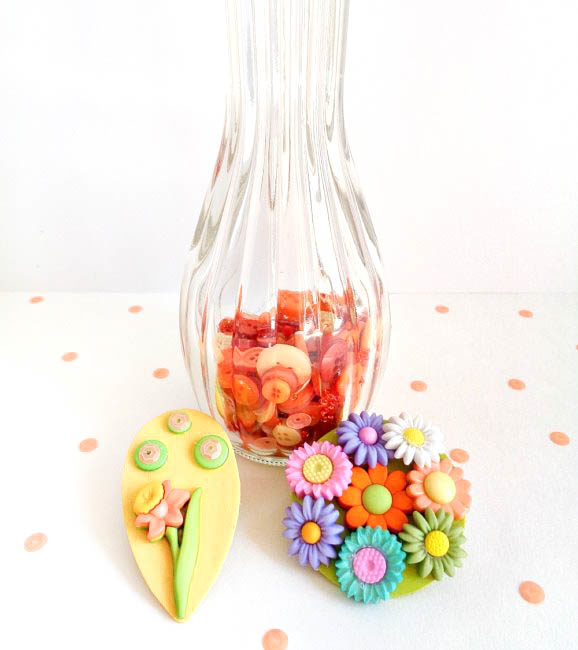
Hello button lovers! This is Katie from the Buttons Galore & More Design Team, and today I have a fun DIY flower button brooches project if you are someone who is just not ready to make that transition into the fall season!

Now, as a fall season girl at heart, I know making flower button brooches sounds a bit weird in September. However, there are those folks who just love spring and summer. If this is you, then these flower button brooches should make the fall season a bit more bearable and make those warm cardigans a bit cuter! Continue Reading →

0

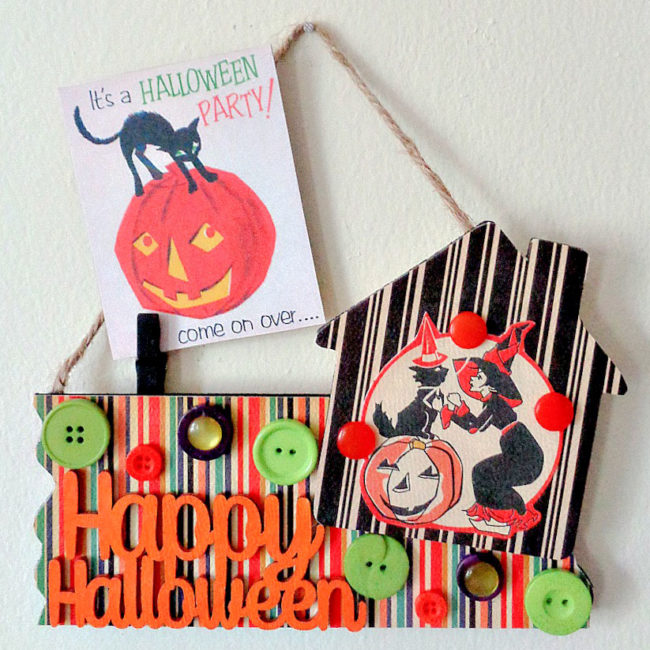
Decorate with a DIY Happy Halloween Photo Holder

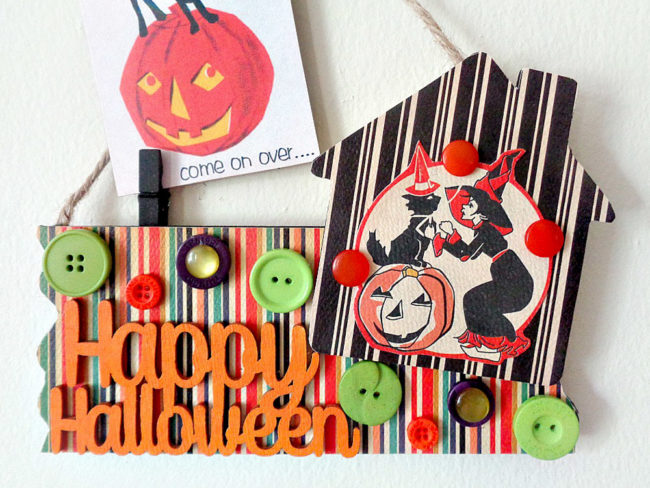
Hello, everyone! This is Katie from the Buttons Galore & More Design Team and today I have a fun Halloween Photo Holder project that you can make to display those Halloween photos or reminders!

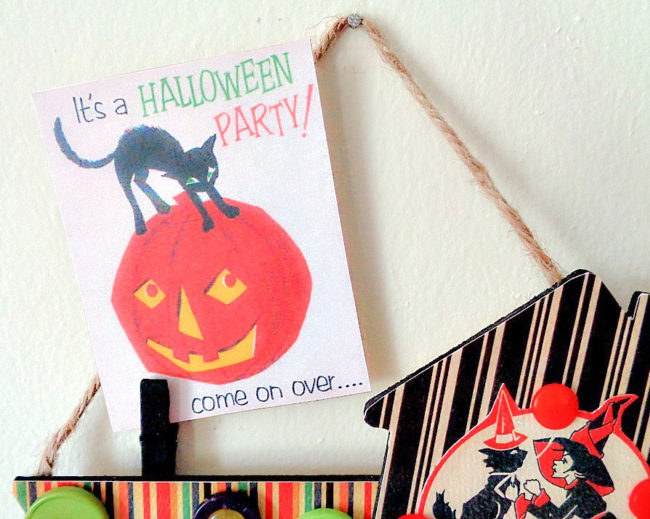
This Halloween Photo Holder is perfect for the Halloween season, due to all the pictures you will be taking during the holiday month. With that being said, even though I’m labeling this project as a photo holder, it could also hold other items as well. For example, it could hold notes, reminders, or that special Halloween party invitation.

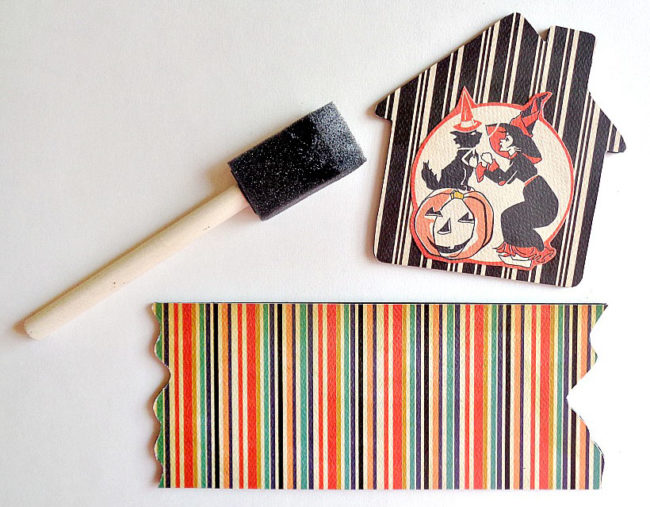
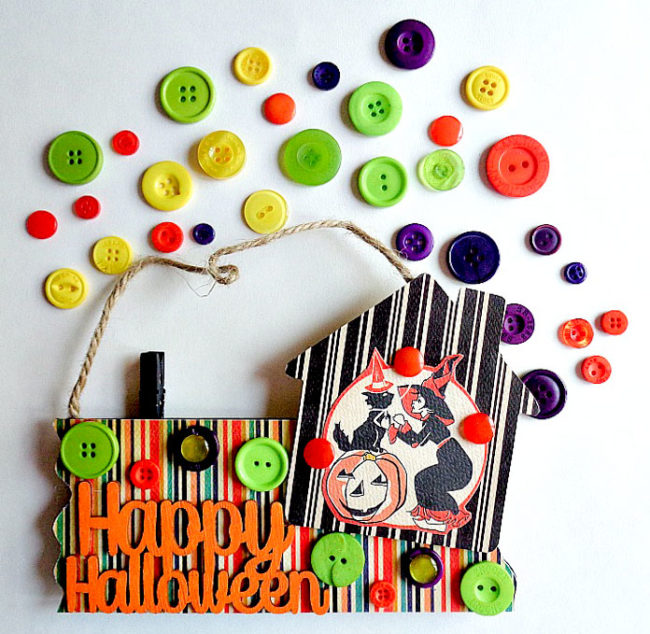
To decorate my Happy Halloween Photo Holder, I decided to go with a vintage Halloween look. I achieved this look by using scrapbooking paper that had a vintage Halloween theme and by using the Buttons Galore & More ‘’Scary’’ button tote. This particular button tote was a perfect color palette to use in this project because it included all of the main Halloween colors.  Besides the color selection being great, this pack of buttons also provides a wide variety of buttons in different styles and in different shades of those main colors. Overall, whether you like a vintage, modern, or spooky Halloween look, this button pack (I believe) could be used to achieve any number of styles.

So, to find out how to make your own Happy Halloween Photo Holder, keep reading below!

Supplies to make Halloween photo holder:

  • Buttons Galore & More “Scary” Button Tote
  • wooden sign
  • wooden house shape
  • wooden Happy Halloween phrase
  • small wooden close pin
  • Halloween scrapbooking paper (I used Carta Bella Trick or Treat collection)
  • paint
  • foam brushes
  • Mod Podge Glossy Decoupage Glue
  • scissors
  • twine
  • hot glue gun + glue sticks

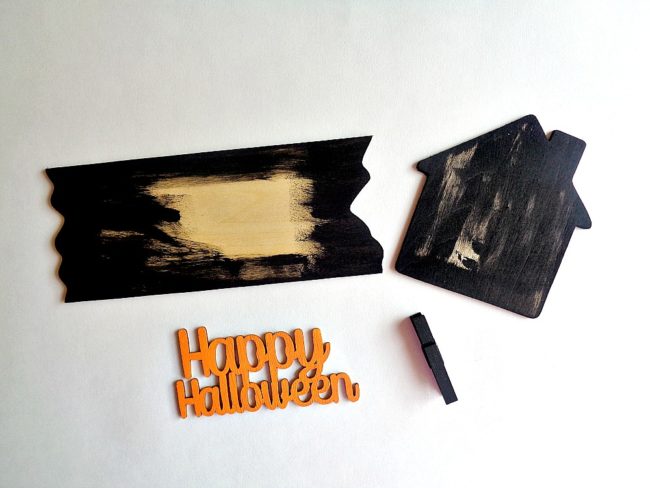
Step 1: Paint your wooden pieces in whatever colors you like and then set them aside to dry.

Step 2: Cut out pieces of scrapbooking paper that will fit on the front of your wooden sign and on the front of your wooden house shape. Then grab your Mod Podge and adhere those pieces of scrapbooking paper to your wooden pieces. Finally, set everything aside to dry.

Step 3: Grab your hot glue gun and begin assembling your photo holder! To do this, first glue on your ‘’Happy Halloween’’ phrase and your wooden house shape to the main wooden sign. Then have fun decorating the sign by adding all the buttons that you like! For my photo holder, I chose to use a variety of buttons from Buttons Galore & More ‘’Scary’’ button tote.

Once the front of your photo holder has been decorated, flip it over to the back. Then hot glue your close pin to the back of your sign with the clamp side facing up and sticking out over the edge of your sign. Finally, glue on a piece of twine to create a way to hang your photo holder.

Once you have added your twine you are ready to display your new Happy Halloween Photo Holder!

I love how this Happy Halloween Photo Holder turned out! It would look so cute hanging in an office or even on a simple cork board.

This design could be adapted for any holiday (such as Christmas) by changing up the buttons and paper. What holiday would you like to make it for?

SaveSave

SaveSaveSaveSave

0

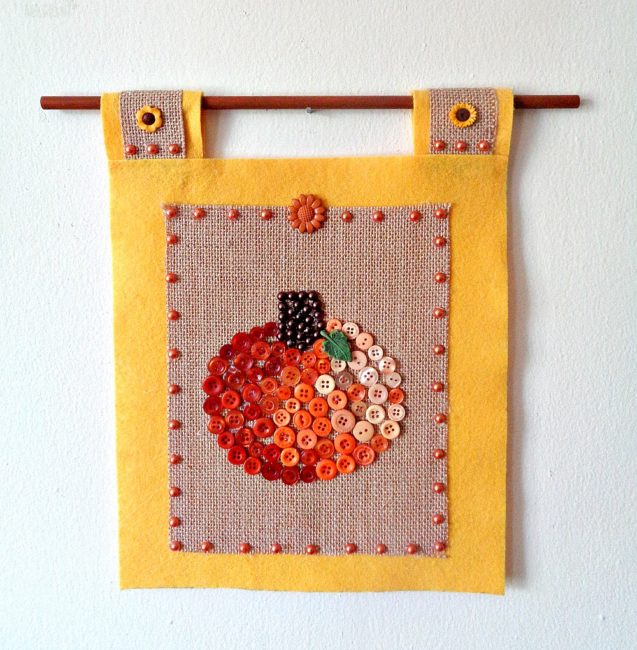
How To Make A DIY Button Pumpkin Wall Hanging

Hello Everyone! This is Katie from the Buttons Galore & More Design Team, and today I have a fun button pumpkin wall hanging project to get you in the mood for fall decorating!

button pumpkin wall hanging

This project is perfect to make if you are looking for an easy and inexpensive way to spice up your home décor for fall, halloween, and thanksgiving. I got the idea for this project when I saw a felt wall hanging designed for the 4th of July. However, instead of a pumpkin, the original wall hanging had a heart shaped flag made from felt and a few buttons. Personally, I thought the idea was cute but could be recreated in a simpler way. In today’s project, the whole DIY is only 3 steps and does not involve any sewing tools!

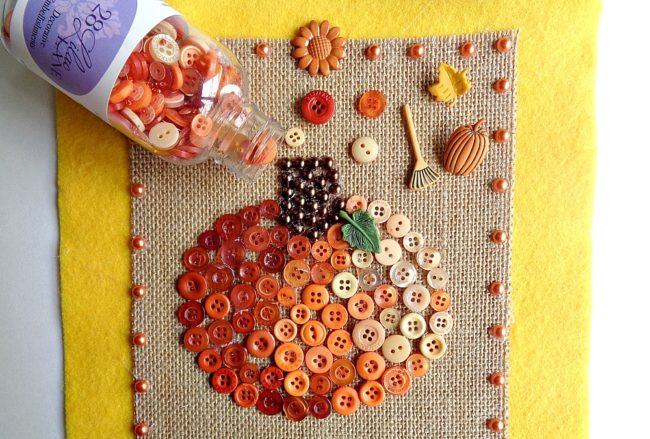
To decorate my button pumpkin wall hanging, I used two button sets for a majority of the project. Those two button sets were the 28 Lilac Lane ”Pumpkin Spice” Embellishment Bottle and the Buttons Galore Autumn Value Pack. Both of these button sets provided a wide variety of harvest/fall style buttons and worked really well together. My personal favorite out of both of these sets was definitely the 28 Lilac Lane ‘”Pumpkin Spice” Embellishment Bottle because you received a ton of beautiful orange colored buttons.

So, to find out how to make your own pumpkin button wall hanging, keep reading below!

Supplies for Making Button Pumpkin Wall Hanging:

How to Make a Button Pumpkin Wall Hanging

button pumpkin wall hanging

Step 1: Cut one piece of felt that measures 9 inches by 10 inches and two smaller pieces of felt that measure 2 inches by 3 ½ inches. Then cut out one piece of burlap that measures 6 ½ inches by 8 inches and two smaller pieces that measure 1 inch by 3 ½ inches.

button pumpkin wall hanging

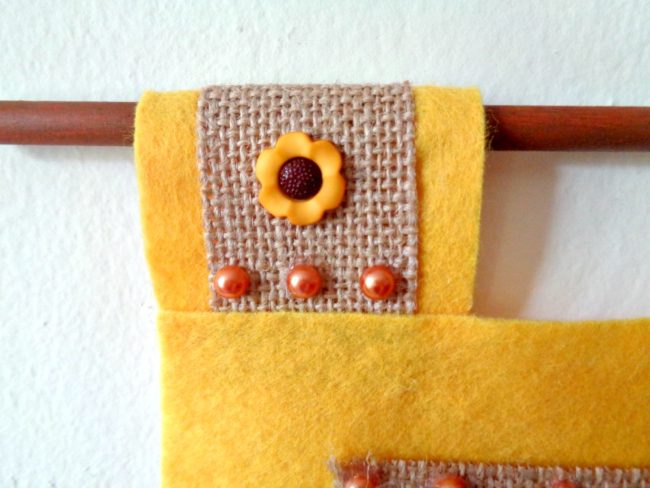
Step 2: Layer the larger piece of burlap centered onto the larger piece of your felt and glue it into place with your hot glue gun. Then layer the smaller pieces of burlap centered onto your smaller pieces of felt and glue them into place. Finally, create loops for your wall hanging by folding over the smaller pieces of felt/burlap and glue them in the corners of your larger felt piece.

button pumpkin wall hanging

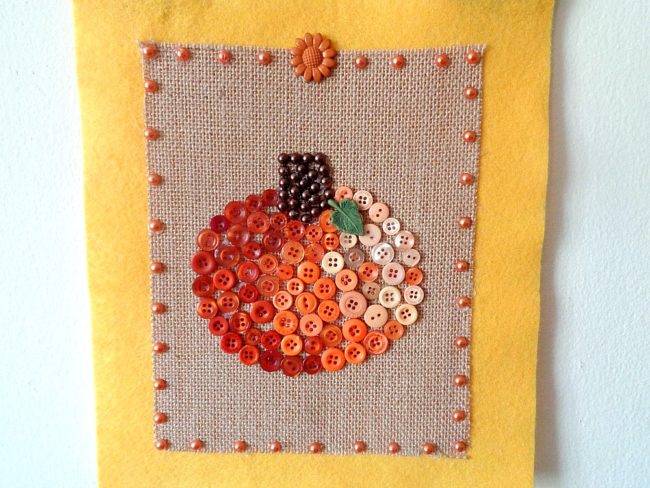
Step 3: Now take your pen and draw the outline of a pumpkin onto your burlap. Then begin gluing on your buttons around the outside of your pumpkin to create an outline and then fill in the middle with more buttons. For my pumpkin, I decided to go from dark to light buttons and then use shimmering half pearl flat backs for the stem. Finally, use the rest of your normal buttons and decorative buttons to decorate the rest of your wall hanging.

For my button pumpkin wall hanging I used the following:

Once you are happy with how your button pumpkin wall hanging looks, you are ready to hang it on the wall by sliding a dowel rod or wooden stick through the two loops!

button pumpkin wall hanging

button pumpkin wall hanging

I loved how this pumpkin button wall hanging turned out and I think it would look so cute as part of a gallery wall!

While creating this project, I did free hand the design of the pumpkin. However, if you are not comfortable drawing your own pumpkin (in step 3), you can always google ”pumpkin template” and print out a template to trace around. With that being said, if pumpkins are not your thing, you could always change the main image to be something else. For example, I think a leaf created from the 28 Lilac Lane “Toasted Graham” Embellishment Bottle would look really pretty.

If you made this pumpkin button wall hanging, what 28 Lilac Lane items would you use?

1

Make DIY Button Filled Christmas Ornaments with the Kids!

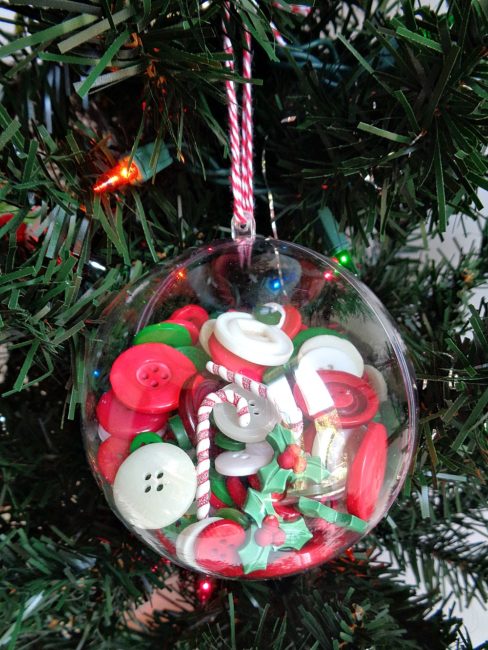
Hello Everyone! This is Katie from the Buttons Galore & More Design Team and today I have a fun button filled ornament project for you to make if you are loving Christmas in July!

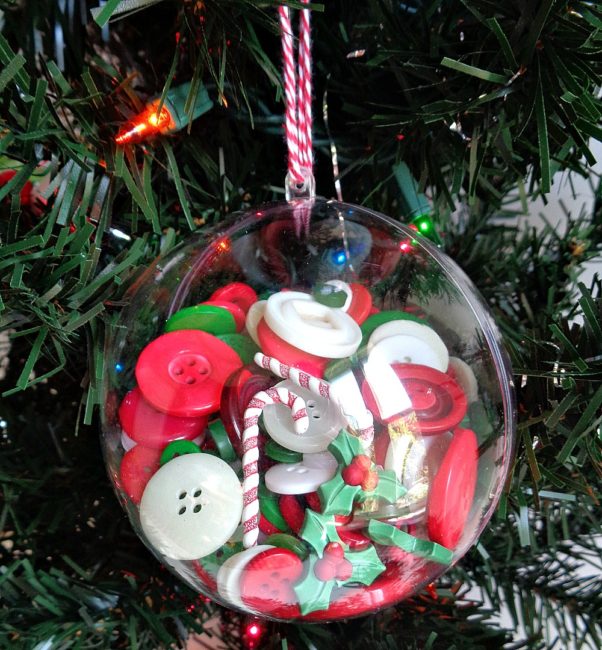
The great thing about this button filled ornament project is that it doesn’t involve any type of special tools or glue. Because of that, these button filled ornaments are super easy to put together and would be the perfect project to make with your kids. In addition, since this project requires no drying time and is only three steps, you can make a ton of these ornaments over the course of a weekend!

To decorate my ornaments, I used a combination of buttons and sequins. With that being said, I decided to stick with a traditional color palette of red, white, and green. So, in this tutorial, you will see buttons and sequins in those particular colors. But if you want to experiment with a more non-traditional palette, you could try using the The Merriest Button Bonanza, the Winter Wonderland Button Bonanza, the Contemporary Christmas Button Basics, or the Winter Flurries Button Basics.

So, to find out how to make your own button filled ornaments, keep reading below!

Supplies

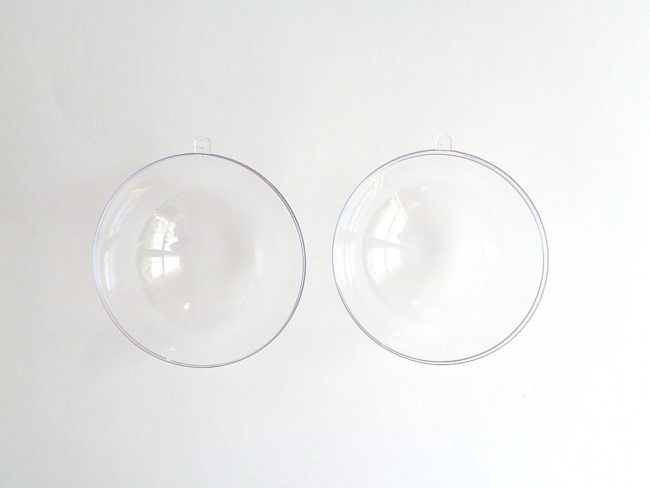
Step 1: Take apart the two sides of your clear ornament ball, and clean out both halves. (The reason why we are doing this is to make sure that there is no dust or small particles in your ornament.)

If you are using another type of clear ornament ball, simply take off the top and run it under some water to clean out the inside. But using the type of ball that separates into two halves is best as it lets you put larger items inside the ball.

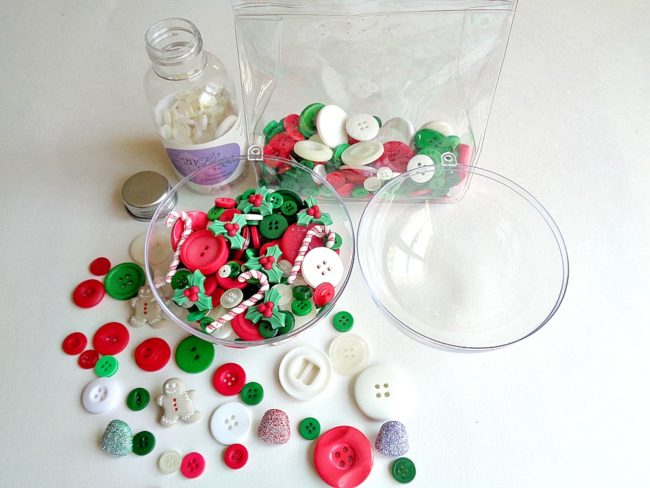
Step 2: Fill up your ornament with buttons, sequins, seed beads and whatever else floats your boat! In the ornament above, I used the following: “Christmas” Button Bonanza, “Holly” 3D Buttons“Sugarplum” 3D Buttons (I used the candy canes from the pack), and the 28 Lilac Lane ”Winter Wonderland” Embellishment Bottle.

When doing this step, I recommend filling up only one side of the ornament ball. Filling up only one side of the ornament will make snapping the two halves of the ornament back together much easier.

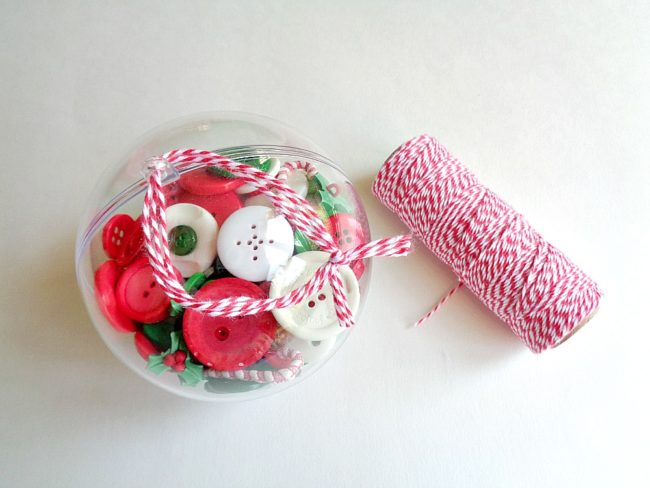
Step 3: Once your ornament has been filled, gently snap the two halves back together. Then tie on a string or ribbon to the top of the ornament.

Once you are happy with how your ornament looks, you are ready to hang it on the tree!

These button filled ornaments were so easy to make and were so much fun to put together! Creating this project actually got me really excited for Christmas!

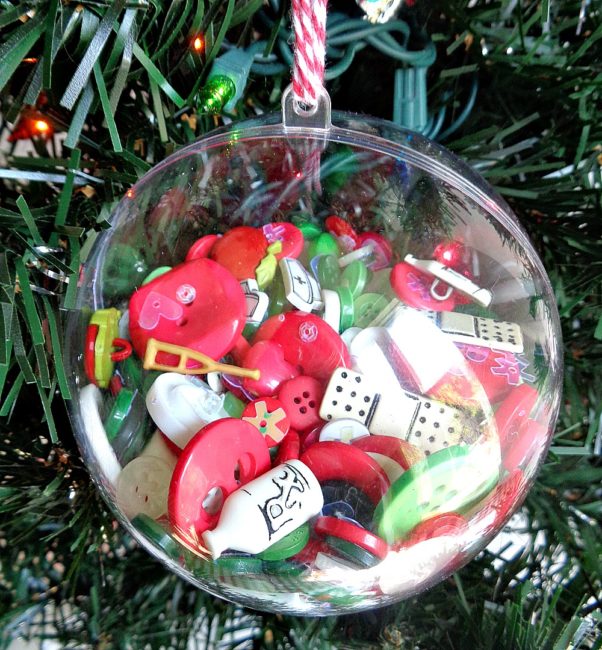
While creating this project, I started thinking about how these ornaments would make great gifts for co-workers, family, or friends. If this is something that you are considering, then you could personalize these ornaments even more by adding buttons related to that person’s career or hobby. For example (like shown in the last photo above), if you are giving this ornament to a nurse, you can mix in some buttons from Buttons Galore and More’s “Doctor Doctor” button set.

If you made these Button Filled Ornaments, what color or style of buttons would you use?

0

Make a fun DIY Sequin Coaster Set with the Kids

Hello everyone! This is Katie from the Buttons Galore & More Design Team, and today I have a super fun DIY Sequin Coaster Set that you can make with your kids!

DIY Sequin Coasters

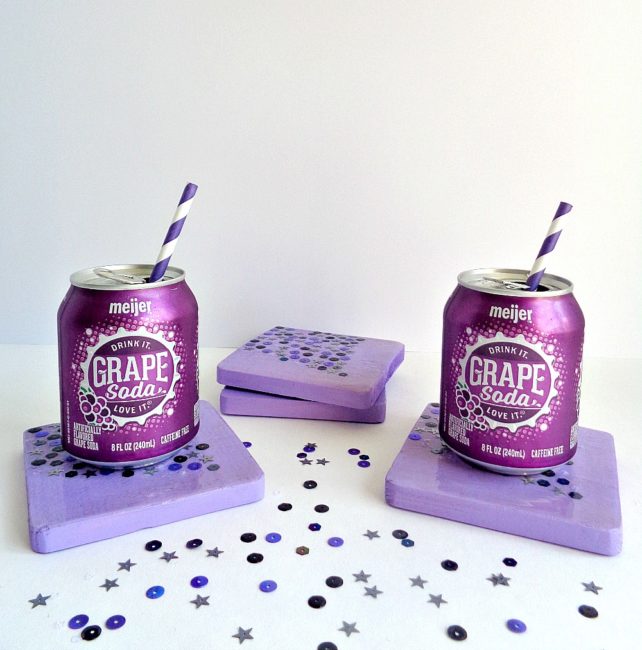
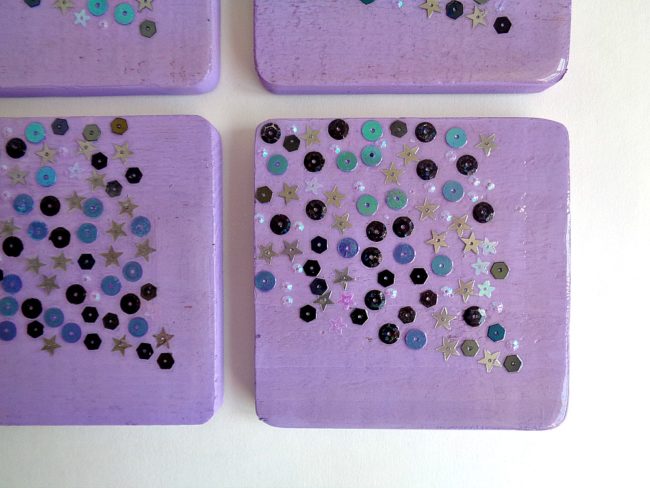
The project I will be showing you how to make today is a DIY Sequin Coaster Set! Now, you may be thinking that sequins and coasters don’t belong together. However, this DIY Sequin Coaster Set has a protective coating on top which seals in all the sequins and creates a barrier between your drinks and the actual coasters. In addition, this project is kid friendly and can be completed in just 3 easy steps!

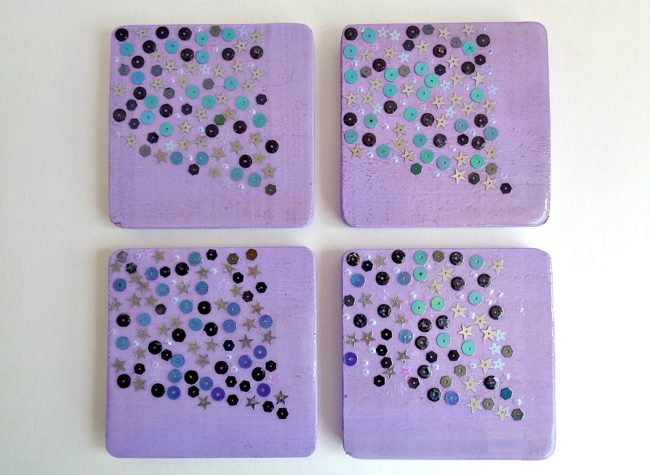
To decorate my sequin coasters, I decided to use the brand new 28 Lilac Lane Sequin Tin in Haunted House. Now, even though the haunted house name sounds like it’s made for Halloween, these sequins have a more holographic look to them. For example, the tin contains silver, purple, black, white, and hologram colored sequins. In addition, the sequins are round, hexagon, and star shaped.  For this particular project, I paired the sequins up with some purple paint. However, I think with the holographic look that they have could be paired with a variety of paint colors.

So, to find out how to make your own Sequin Coaster Set, keep reading below!

Supplies Needed:

DIY Sequin Coaster Set

Step 1: Paint your wooden coasters on the front and back. Then set each one aside to dry.

DIY Sequin Coaster Set

Step 2: Apply a layer of Mod Podge onto your coaster then begin adding sequins from the 28 Lilac Lane Haunted House Sequin Tin. While doing this step, you could add your sequins to your coasters in one of two ways. The first way would be to sprinkle the sequins onto the coaster and then spread the sequins out with a toothpick. The second way would be to add each sequin on by hand.

With that being said, no matter what method you use, you want to make sure that your sequins are lying flat on your coaster. This means that sequins should not be glued on top of each other and that each sequin should be lying flat by itself. Also, when making these coasters, I felt that that less was more. For example, I found that using a smaller amount of sequins (in a particular pattern) really gave the coaster a finished look. However, you can do whatever floats your crafty boat.

Once you are done adding your sequins, apply another thin layer of Mod Podge and set the coasters aside to dry.

DIY Sequin Coaster Set

Step 3: Now apply a thin coat of Dimensional Magic to the top of your coaster. When applying the Dimensional Magic you may want to have a tooth pick handy so you can pop any air bubbles. At first the top of your coaster may look ”cloudy” but that’s ok because it will dry completely clear. After you finish applying the Dimensional Magic set your coaster aside to dry for 24 hours.

Keep repeating this process with your other coasters.

When the Dimensional Magic is completely dry, you are ready to start using your new coaster set!

DIY Sequin Coaster Set

DIY Sequin Coaster Set

I loved how this DIY Sequin Coaster Set turned out! Now, I want to make a bunch of different coaster sets in different patterns and colors.

With that being said, this sequin coaster set would be a great summer project to make over the weekend with your kids. Personally, I made these coasters in the afternoon and was able to use them (after the Dimensional Magic had dried) the next day. Also, as coasters, they have held up really nicely with both hot and cold drinks.

This project could be customized with any color scheme that you’d like, of course. If you made this DIY Sequin Coaster Set, what new 28 Lilac Lane Premium Sequin Tin would you use?

SaveSave

0

DIY your Wedding Decor with a Diamond Ring Frame

Hello Everyone! This is Katie from the Buttons Galore & More Design Team and today I have a fun wedding decor idea!

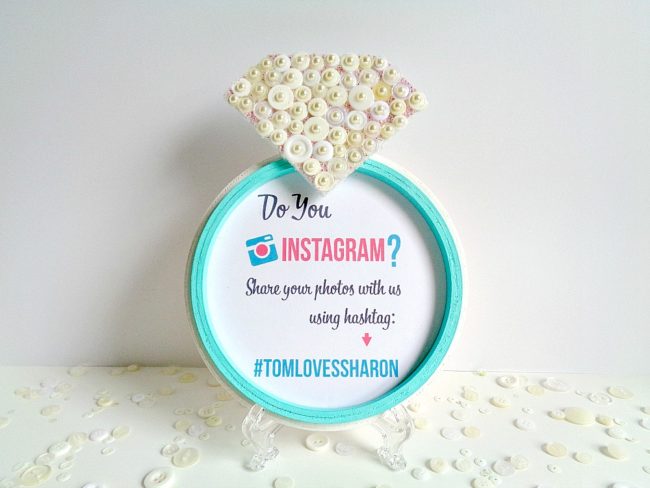
DIY Wedding Decor Diamond Ring Frame

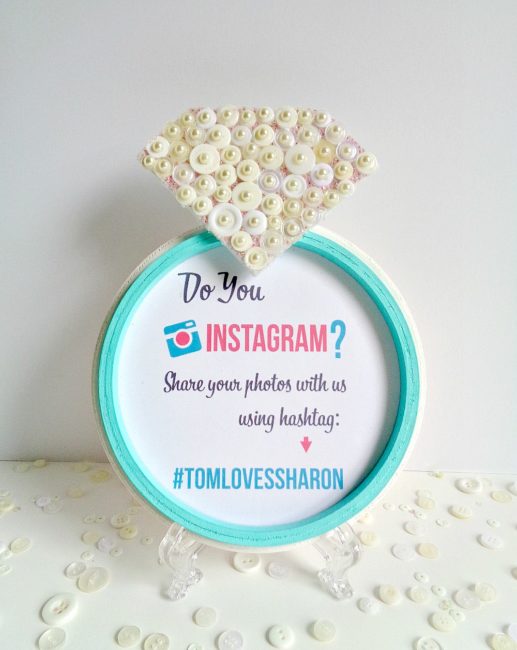
When I was given the task to make a wedding decor project, I wanted to create something that was cute, useful, and that could be saved in the long-run. With that in mind, I decided to create a diamond ring frame that could be customized to fit your wedding decor, be useful (since it’s a frame), and be saved by the bride. In addition, this project is super inexpensive to make because it’s made from a wooden plaque, an embroidery hoop, and a piece of foam board!

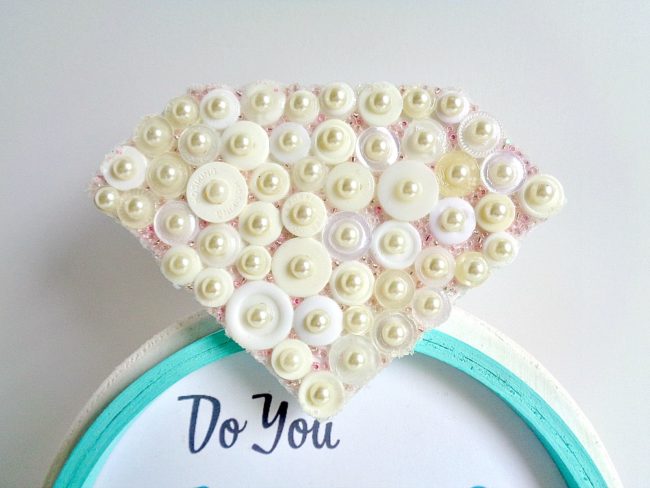
To decorate the diamond part of the ring, I decided to use the 28 Lilac Lane Embellishment Bottle in Winter Wonderland. Even though “winter wonderland” sounds wintry, this embellishment bottle could easily be used for wedding décor as well because the embellishment bottle contains several shades of white/cream colored buttons, along with seed beads and flat back half pearls. The flat back half pearls (in my opinion) really make this embellishment bottle perfect for wedding projects!

So, to find out how to make your own Diamond Ring Frame, keep reading below!

Supplies needed:

  • 28 Lilac Lane ”Winter Wonderland” Embellishment Bottle
  • wooden plaque (I used a 6 ½ inch plaque)
  • embroidery hoop (I used a 6-inch hoop)
  • DecoArt Americana Acrylic Paint: Snow (Titanium) White
  • DecoArt Americana Acrylic Paint: Sweet Mint
  • foam brushes
  • foam board
  • craft knife
  • Xyron 9’’ Creative Station (optional)
  • decoupage glue
  • hot glue gun
  • picture or image you want to use in your frame

Step 1: Paint your wooden plaque white and your embroidery hoop mint. Then set both items aside to dry.

Step 2: Grab your foam board and cut out a diamond shape. The diamond I cut out for my 6-inch embroidery hoop was 5 inches by 3 ½ inches.

Step 3: Grab your 28 Lilac Lane Embellishment Bottle in Winter Wonderland and start decorating your diamond cut out. To do this, simply brush on a layer of decoupage glue onto your diamond cut out and begin arranging your buttons. While doing this, I also sprinkled on seed beads to fill in the gaps between the buttons. Finally, as an extra touch, I glued on a flat back half pearl to each of the buttons.

Once your diamond has been decorated, set the whole thing aside to dry.

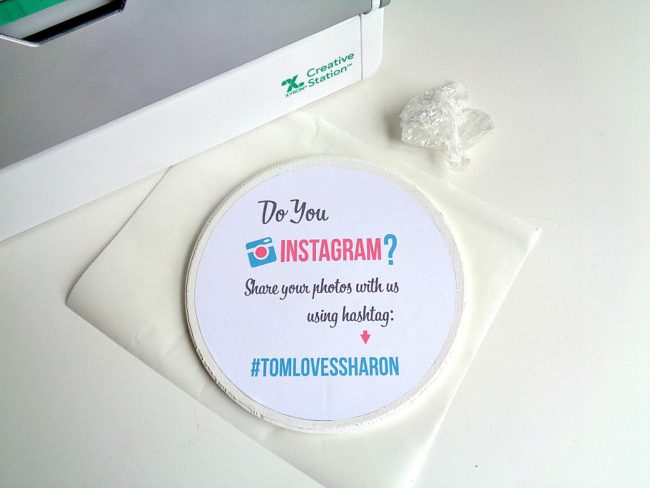
Step 4: Take your picture, sign, or image that you want to use for your frame and cut it down to size to fit on the inside of your embroidery hoop. Then take that image and run it through your Xyron 9” Creative Station. Once you have run your image through the Xyron Creative Station, rub the top of the sticker paper. Finally, peel the image off the sticker paper and adhere it to your wooden plaque.

DIY Wedding Decor Diamond Ring Frame

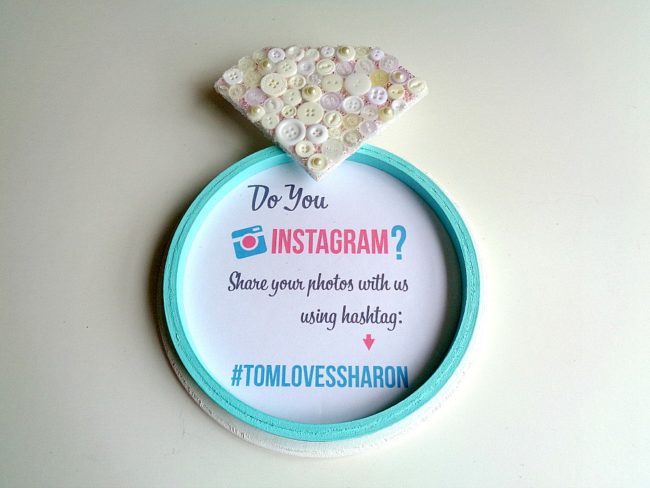
Step 5: Using a hot glue gun, glue on your embroidery hoop to your main wooden plaque and then glue your diamond on top of the embroidery hoop.

Once all your pieces have been glued on, you’re ready to display your new Diamond Ring Frame!

DIY Wedding Decor Diamond Ring Frame

DIY Wedding Decor Diamond Ring Frame

As you can see, I used my Diamond Ring Frame to hold a sign about taking Instagram photos during the wedding. However, this frame could be made to hold a variety of things. For example, the frame could hold photos, it could direct the guests to do something (like signing a guest book), or simply be used to display a favorite quote. Along those same lines, this Diamond Ring Frame does not have to be used at the wedding. It could also be used as a decoration for the bridal shower or bachelorette party instead!

What 28 Lilac Lane items would you use for your wedding or shower decor?

0

Get Festive with a Shaker Card Inspired Bag!

Hello Everyone! This is Katie from the Buttons Galore & More Design Team and today I have a unique but simple project for you guys to make this summer!
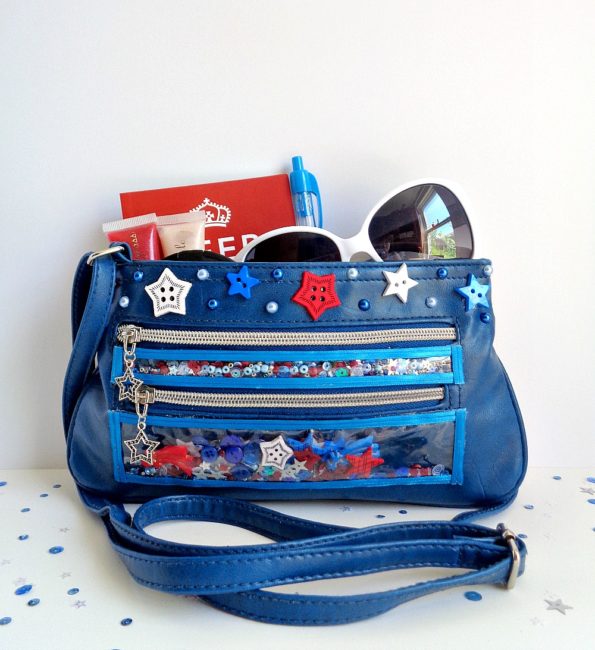
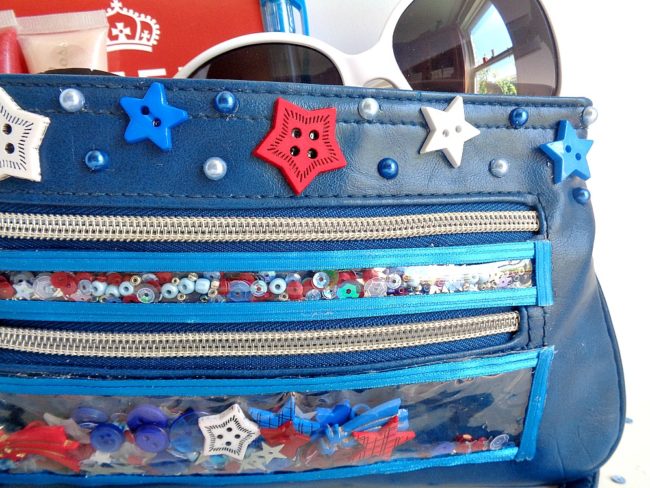
Today I will be showing you how to update an old crossbody bag by adding shaker elements onto the bag! What does that mean you ask? Well, if a shaker card and a crossbody bag got together, my project would be the final result. In today’s project, I will be showing you how to incorporate those shaker card elements into a bag. I will also be showing you how you can update a bag with items from the 28 Lilac Lane Embellishment Kit in Stardust.

In addition, I decided to go with a red, white, and blue theme for my crossbody bag. However, you can choose any type of theme and choose any type of bag style for this project. Just make sure that the bag doesn’t have any big embellishments on the outside and that the bag is cleaned (both inside and out) before you begin the project.

With all that in mind, below is the supplies that you will need to make this project!

Supplies Needed: 
Step 1: Determine where you want the shaker elements to be on your bag. When doing this you will want to look for a ”small area” which is flat and that doesn’t interfere which any other components of the bag.

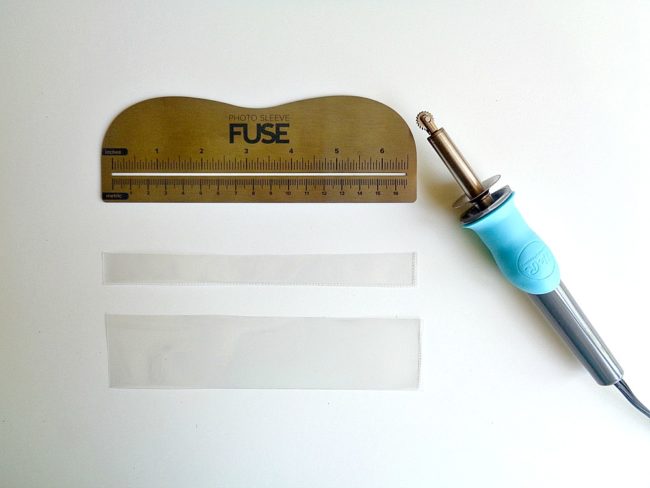
Once you have determined where you want the shaker elements to be, it is time to measure. Measure one area of the bag and then cut out 2 pieces of page protector which fit in that area. Then take your We R Memory Keepers Fuse Tool and fuse the sides and bottom of the 2-page protector pieces together. With that being said, make sure you leave the top of the page protector open.  When you’re done, you should have created a little shaker pouch.

Repeat this step if you are creating more than one shaker element for your bag.
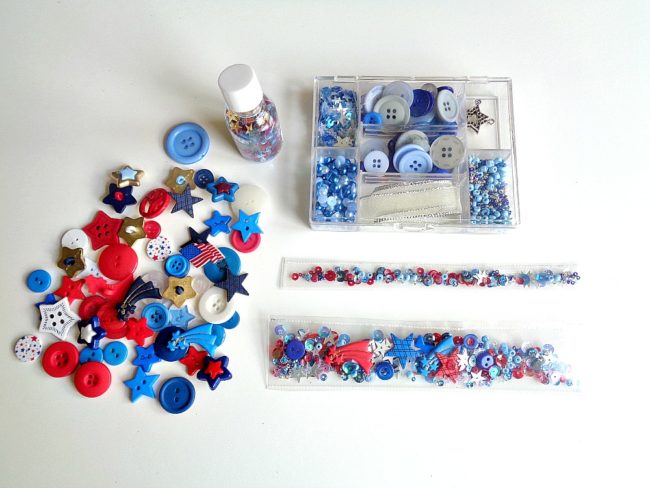
Step 2:  Fill up the shaker pouch that you created in step 1 with buttons, sequins, and seed beads. For my two shaker pouches, I filled them up with buttons, sequins and seed beads from the 28 Lilac Lane Embellishment Kit in Stardust. I also used buttons from the Patriotic Value Pack and sequins/seed beads from the 28 Lilac Lane Sequin & Seed Bead Mixes in Stars & Stripes.

Once you have filled up your shaker pouches, fuse the top together so all your buttons, sequins, and seed beads are sealed in.
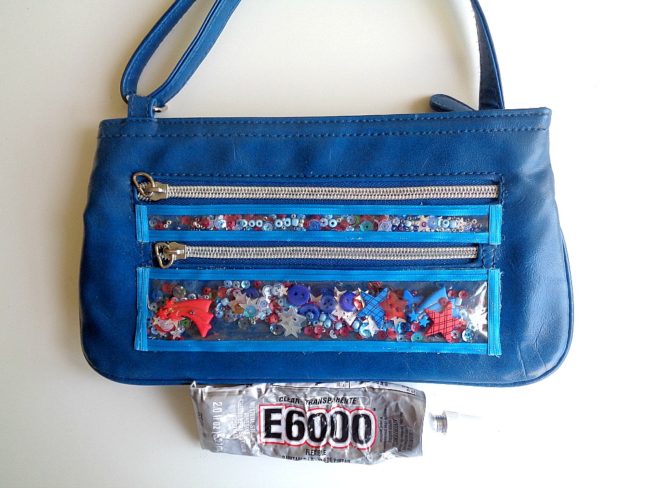
Step 3: Using some E6000, apply some glue onto the back of your shaker pouches and then adhere them to your bag. Then to cover up the edges of the shaker pouches, glue some ribbon around the edges of the pouch.

Once you are happy with the placement/look of your shaker pouches, set your bag aside to dry.
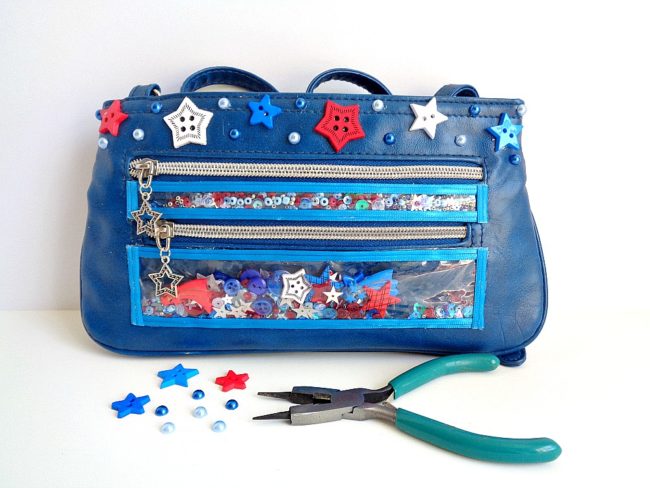
Step 4: Now it is time to decorate the rest of your bag! Grab all your different embellishments and begin playing around with how you want them to look on your bag. For example, I replaced the handles on my zippers with the star charms from the 28 Lilac Lane Embellishment Kit in Stardust. I also used the pearls from that kit to decorate the top of my bag along with some star buttons from the Patriotic Value Pack.

No matter how you decorate your bag, make sure you glue down your buttons with some E6000 and to set the bag aside to dry.

Once the glue on your bag has completely dried, you are now ready to wear it!
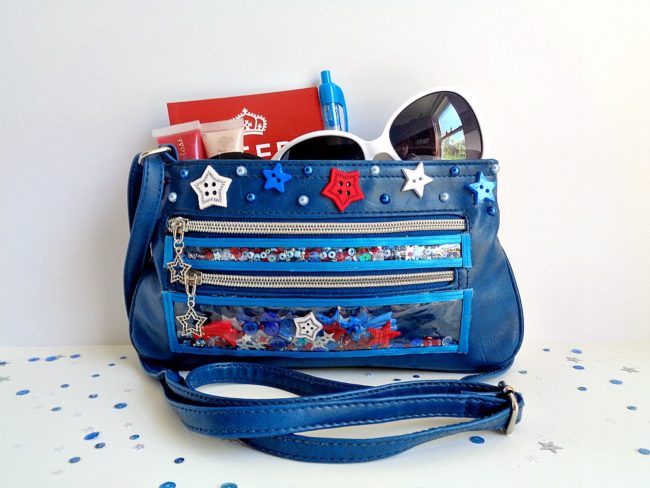
I loved how this bag turned out and think it would be so cute to wear to a barbecue! With that being said, I would recommend that you wear your shaker bag to functions which are more laid back. For example, a barbecue, going to the thrift store, and so forth.

If you made this shaker bag, what 28 Lilac Lane items would you use?
0

Powered by WordPress. Designed by WooThemes