Header

Author Archive | Carla Schauer

Button Topiary Trio for Spring

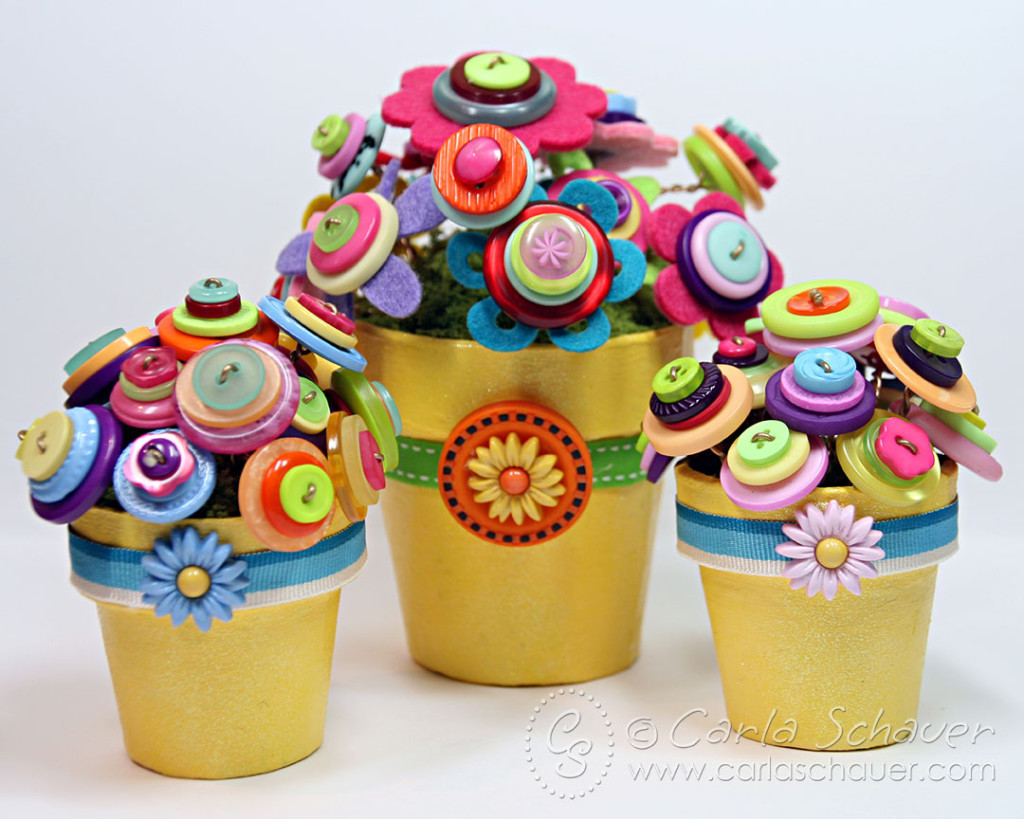
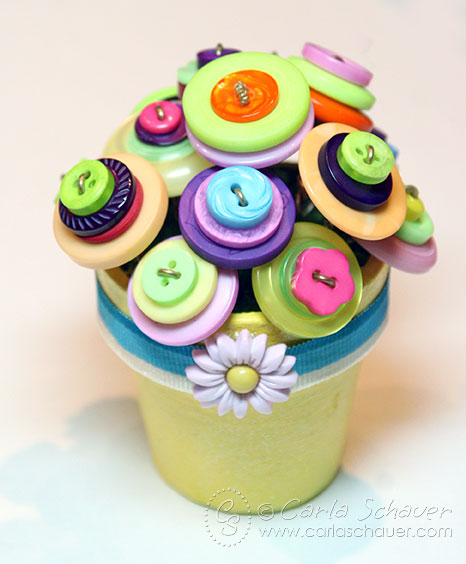
Make a button topiary.  As the Ohio winter lingers on, I find that I am incorporating more bright cheery decor into my home.  This trio of button flower topiaries fits the bill perfectly, adding a touch of Spring inside to hold me over until the snow melts and the daffodils peek through the ground again.  You can make the button topiary as large as you would like.  I chose to make a trio of small button topiaries.

Button Flower Topiary Trio


Material used to make Button Topiary:

Buttons Galore & More Products used:

I also used:

  • 3 Paper Mache’ Flowerpots (2 small, one medium)
  • Yellow acrylic and glitter paints (DecoArt)
  • 1″ Paintbrush
  • 22 gauge craft wire
  • needle nosed jewelry pliers
  • Styrofoam Foam balls, cut (diameter of pots)
  • felt flowers
  • Coordinating ribbon
  • Green surface material (like that used for models)
  • Beacon Fabri-Tac liquid adhesive

 Directions to make Button Topiary:

Paint and prepare flower pot for button topiary flowers

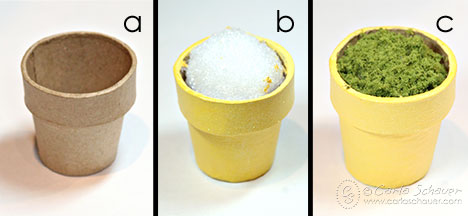
 First, paint each flowerpot using yellow acrylic paint.  Apply multiple coats as necessary.  Paint one coat of yellow glitter paint over acrylic paint and let dry completely.   Cut foam balls in half, placing one half in each painted flowerpot, and glue in place. (Steps a & b, above)  Spread glue over foam ball and press green model foliage into glue to secure (Step c).

Glue felt flower to button blossom

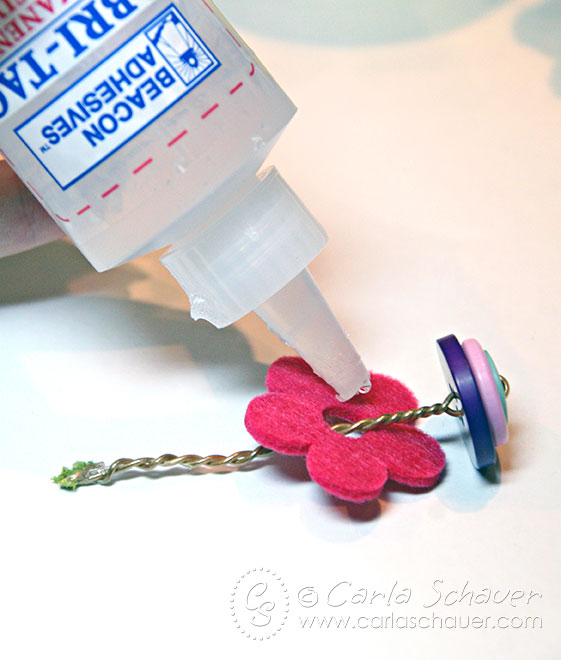
Cut 8″ length of craft wire.  Choose 3-4 buttons of various colors and sizes from Color Bulk Buttons, and thread one end of wire up through holes on buttons.  Bend wire in half using needle nose jewelry pliers and thread back down through button holes from top.  Twist wire ends together under button “blossom” to add strength.   Glue felt flower to back of several blossoms if desired (I added them to large button topiary only).

Push button stems into flower pot topiary

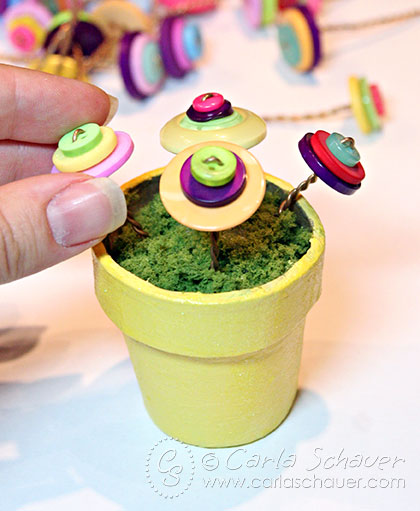
Once all the flowers are finished, start adding them to the flowerpots.  Add a small dab of glue to the ends of the wire stems and gently push into the foam ball to secure.   Fill in remaining spaces, bending wire stems as necessary to create arrangement.  Repeat for additional flowerpots.

Single button flower topiary

To complete the button topiary, wrap each flowerpot with coordinating ribbon and glue into place.  For small topiaries, remove shank from Daisy Delights button and glue over ribbon ends.  For large topiary, remove shank from Daisy Delights button and glue in center of Tangerine Stitched button.  Glue button stack over ends of ribbon.

Enjoy the touch of welcome Spring color of a button topiary !

Thanks for stopping by,
Carla

5

Twine-Tied Button Holiday Card idea

Button Holiday Card

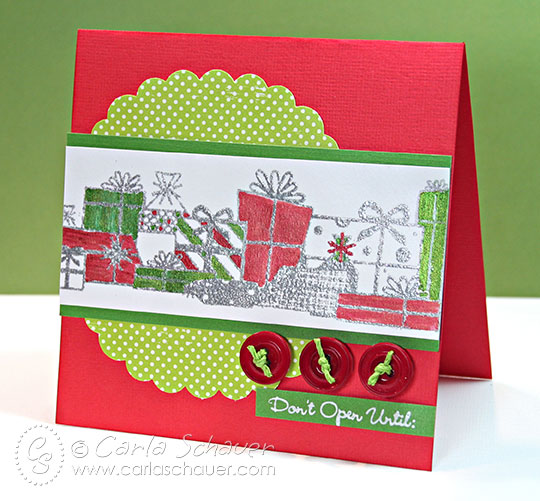
Buttons holiday cards tied with twine are the perfect embellishment.  The buttons give the card some dimension, while the twine adds a natural element.  I used bright red buttons from the Christmas Button Bonanza pack, green twine, and other partner products to give a festive look to this card.


Button embellished holiday card

 Supplies for Button Holiday Card:

Buttons Galore & More


Partner Products:

  • “Gifts Galore” Jumbo Rollograph Wheel, Watermark ink, embossing powder (Sterling Silver), Smooch, white ink–Clearsnap
  • Green Twine–The Twinery
  • “Wrapped in Love” stamps–My Favorite Things

Other Supplies:

  • cardstock (red and green)

I used the “Gifts Galore” Jumbo Rollagraph Wheel, Watermark ink, and Sterling Silver embossing powder  to create the line of gifts on white cardstock, then colored in some of the designs using Smooch. The white cardstock strip was matted on a slightly larger strip of green cardstock and layered over a large scalloped circle of dotted green paper.

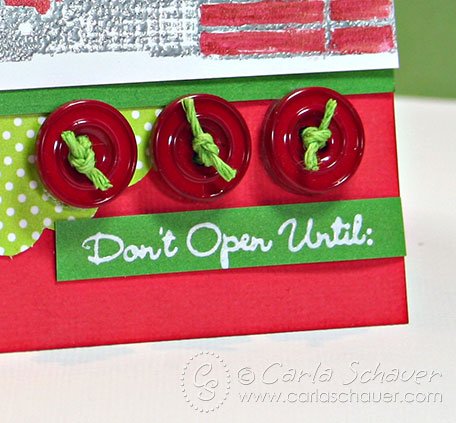
I tied each of the red Button Bonanza buttons with green twine and glued them in place under the “Gifts Galore” design.  A sentiment stamped in white pigment ink (heat dried) on green cardstock was glued under the tied buttons to add to the gift theme.


Twine-tied buttons on holiday card


Thanks for stopping by and enjoy the Twine-Tied Button Holiday Card

Carla Schauer

0

Holiday Gift Container Embellished with Christmas Buttons & GIVEAWAY!

The Christmas season is getting closer, and along with the season comes cookie baking.  Giving baked goods as a gift becomes even more festive when delivered in a handmade gift box embellished with themed Christmas buttons.

Holiday Candy Gift Container with Themed ButtonsDirections to make a gift box with Christmas buttons:

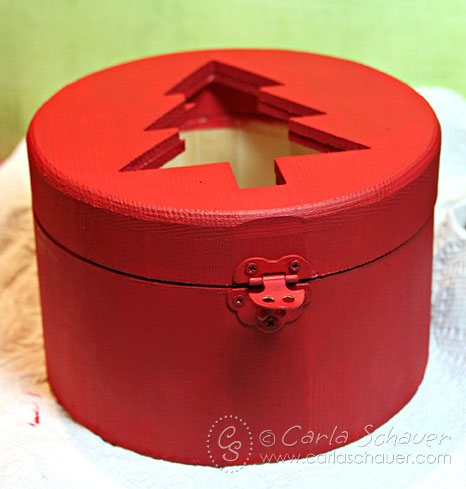
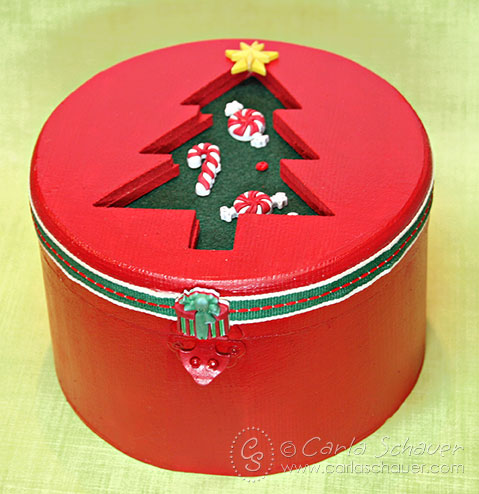
I began with an unfinished wooden box I purchased at a craft store, and painted using “Santa Red” (how appropriate!) on the inside of the lid and the outside of the box.  I also painted the inside of the box base a dark green to match the felt.

Red Painted Wood Gift Box with Holiday Buttons

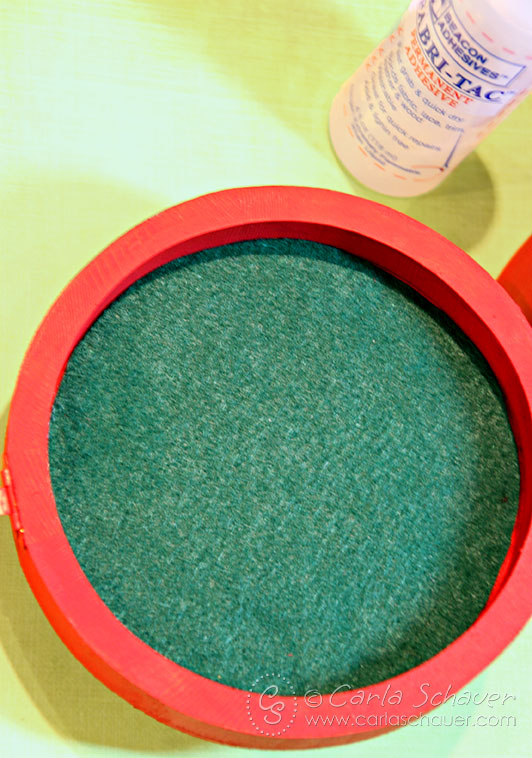
I lined the lid of the box with a circle cut from dark green felt, glued in place using Fabri-Tac Adhesive.  The dark green showing through the tree cut-out in the top of the box made the perfect showcase for the Christmas buttons.

Felt Lid Lining of Holiday Candy Gift Box with Buttons

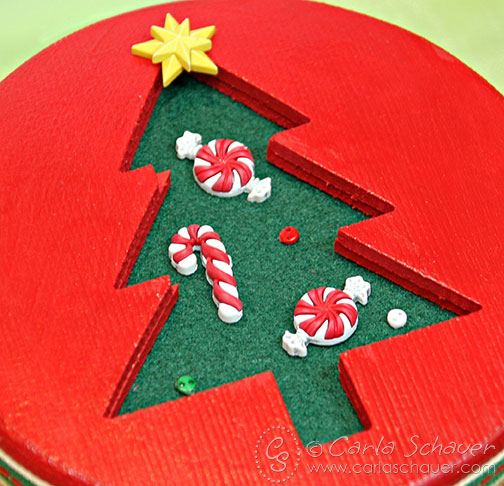
To embellish the felt tree using the Christmas buttons, I began by removing the shanks from the candy cane and peppermint swirl candy buttons using the Button Shank Remover and gluing them to the felt using the Fabri-Tac Adhesive.  I also glued on three of the micro buttons to simulate ornaments.  I glued the star to the tree top without removing the shank, since it fit nicely into the cut out area.

Button Embellished Holiday Gift Box Lid

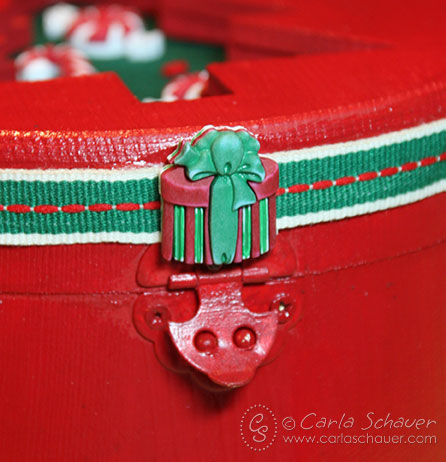
A red and green stitched grosgrain ribbon glued around the lid added another touch of texture to the wooden gift box, and I used a gift-shaped Christmas button as a final accent and to cover the ribbon ends.

Button Embellished Holiday Candy Gift Box Front


With a little paint, some felt, and some Christmas buttons, you can make a gift of goodies even more personal.  Make several at a time before the holiday season is in full swing, so they’re ready for y0ur fresh baked holiday gifts.

Thanks for stopping by,

Carla
November 16 is National Button Day.  Leave a comment here with your favorite button collection an you could win themed Christmas buttons.  Comments must be received by Sunday night at midnight est.


Ribbon Wreath with Button Accents a DIY that is easy to make

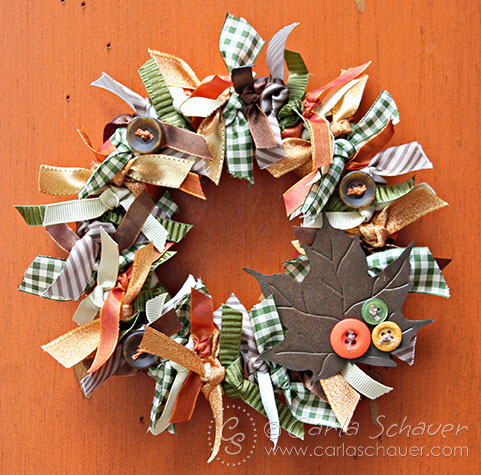
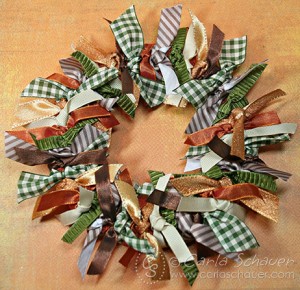
Ribbon Wreaths are trendy right now, with photos appearing on blogs and Pinterest.  This tied ribbon version with button accents is a great way to get autumn colors and textures in a wreath that is easy to create.

Fall Ribbon Wreath with Button Accents

 Directions to make a Ribbon Wreath:

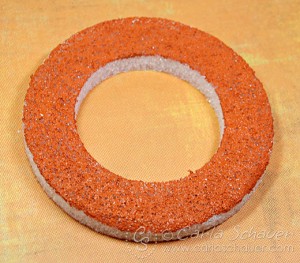
Making a ribbon wreath is a straightforward process that begins with a simple wreath form.  For this wreath, I used a STYROFOAM Brand Foam wreath form approximately 8″ in diameter.  I painted the front of the wreath using a foam brush and orange acrylic paint to camouflage the form in case it happened to peek through the ribbons.

Ribbon Wreath STYROFOAM base

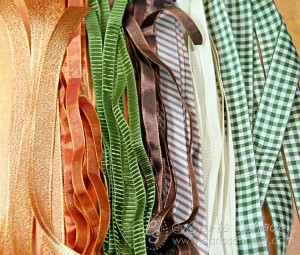
While the painted wreath form is drying, I gathered my ribbons and cut several lengths of each.  My form required around 50 pieces, each 10″ long.  Widths ranged from 1/2 to 1″.

Cut Ribbons for Ribbon Wreath with Buttons

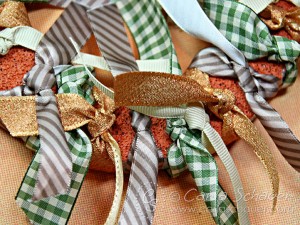
Once the form was dry and the ribbons cut, I tied the pieces around the form.  I began with the wider ribbons, and filled in the spaces with the narrower pieces, adjusting the location of the knots as necessary.

Tying Ribbons onto Ribbon Wreath with Buttons

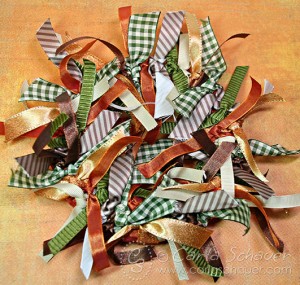
Once all the ribbons were tied around the wreath form, the whole project looked pretty scary.  It resembled a big autumn-colored ribbon Medusa.

Ribbons tied on Ribbon Wreath with Buttons

But once all the ribbon ends had been trimmed to approximately 1.5 inches long (use sharp fabric scissors for clean edges), scary Medusa transformed into a pretty tied ribbon wreath ready for embellishing.

Making Tied Ribbon Wreath

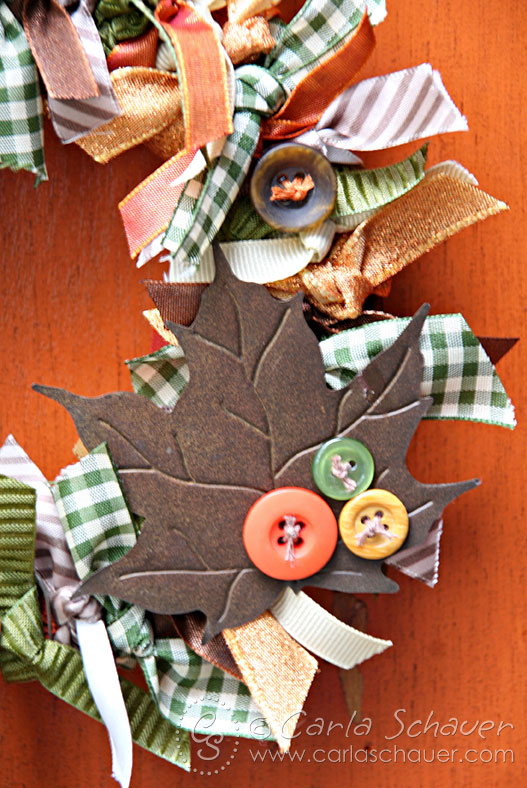
I added thick marbled dark brown buttons from the Natural Grab Bag tied with orange embroidery floss, and a large aged metal leaf as an accent.  Three additional buttons from the Autumn Grab Bag tied with cream floss top the leaf for additional coordinating color and texture.

Button Accents on Ribbon Wreath

With no time or labor-intensive techniques to deal with, this tied ribbon wreath can be assembled quickly and easily.   Dive into your ribbon stash and make one today!

Thanks for stopping by!

Carla
 

2

mini composition notebook with buttons

Personalize a mini-composition notebook with buttons.  With the recent beginning of the school year, composition notebooks are featured prominently in grocery and office supply stores.   After the first few weeks of school they are often deeply discounted.  It is a great time to stock up on these notebooks, which make a great surface for embellishing with buttons.


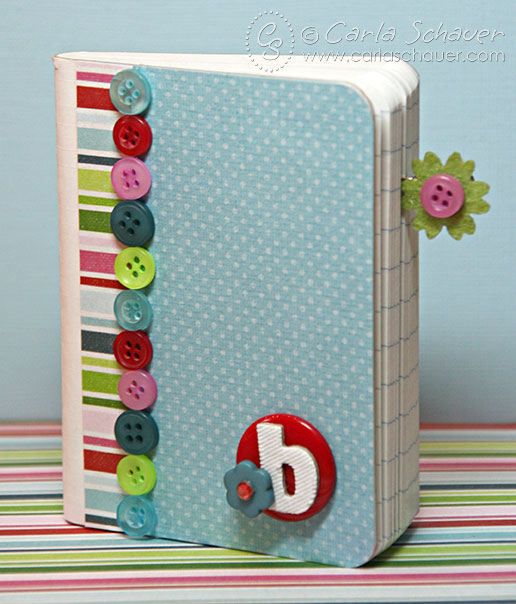
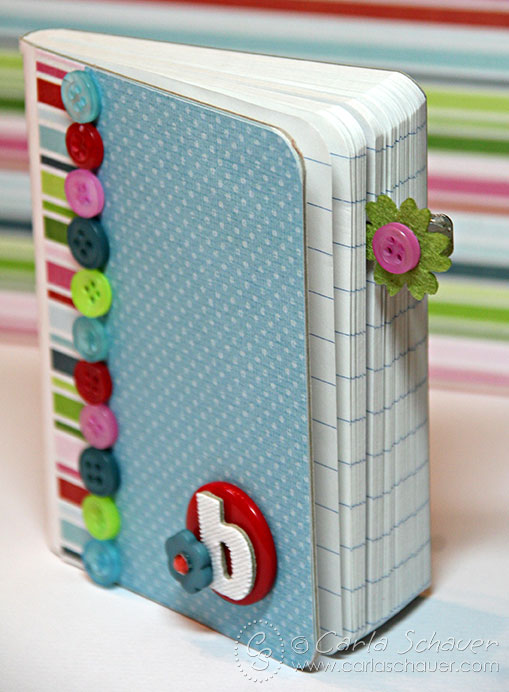
Button-embellished mini-composition notebook

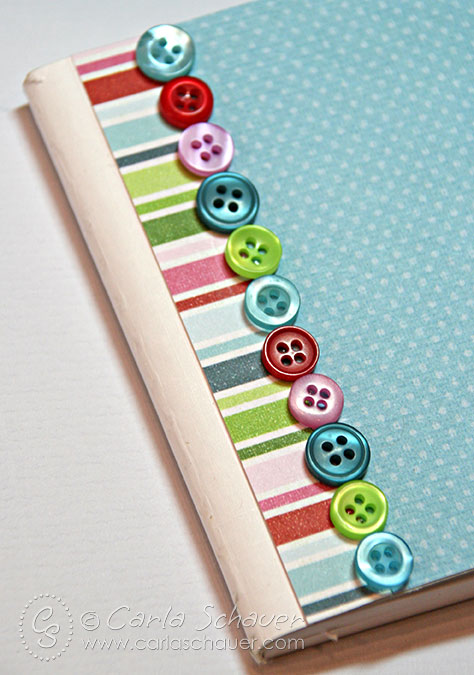
This button covered mini composition notebook happens to be one of the mini-sized versions.  This size is fun for kids to pop into backpacks without a lot of extra weight to carry around.  My daughter likes to use them as entertainment on her bus ride.

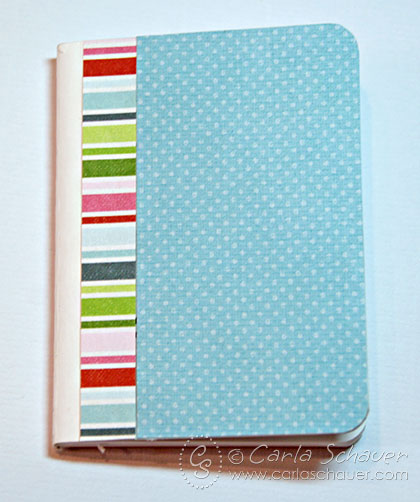
Covered mini-composition book

Directions for a Personalize a mini-composition notebook with buttons

First, cover the notebook with patterned paper, including a contrasting border along the side next to the binding.

Button border on embellished composition notebook

Then, use an all-purpose thick glue to attach small coordinating buttons in a pattern to cover the seam.  I used buttons from the Citrus Splash Grab Bag and Juke Box Button Bonanza from Buttons Galore and More.

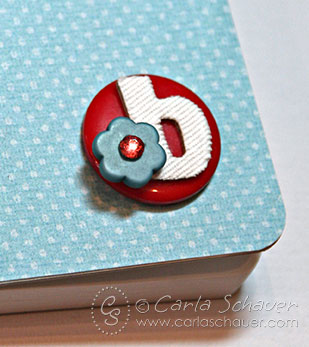
Button Monogram on Embellished Composition book

I added a fabric sticker letter to the top of a 7/8″  red button, and accented the monogram with a flower button from the Juke Box Button Bonanza (shank removed).

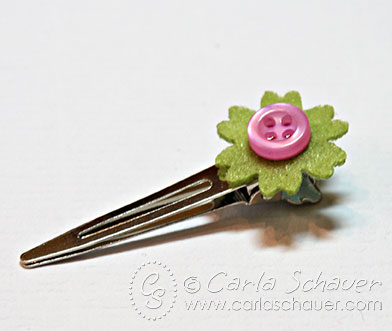
Button clip bookmark for mini-composition book

I created a fun bookmark using a premade felt flower and pink button glued to a metal, pinch-style hair clip.  The clips are easily moved, and don’t easily slip out of the book, making them easy for littler hands to use.

Bookmark for a mini-composition notebook with buttonsButton-embellished mini-composition notebook

Altered Composition notebook with buttons

Small and easily portable, button-embellished composition notebooks are a wonderful way to encourage writing and imagination in children, and are also easy to place in a purse or diaper bag for parents.  Personalize one for someone you know!

Thanks for stopping by!
Carla
1

Needlefelted Winter Scene

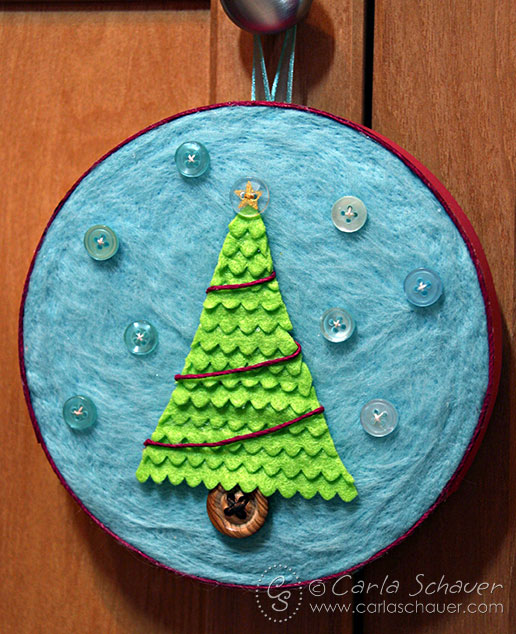
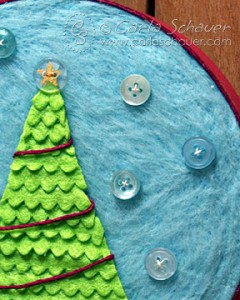
It’s Christmas in July with Buttons Galore & More and STYROFOAM Brand Foam!  I used my buttons and STYROFOAM Disc to create a holiday needle felting project.   Styrofoam is a wonderful base for needle felting, since the wool roving can be felted directly onto the surface, and if the piece is thick enough, no pad is needed.  I used a non-traditional color scheme of light blue, raspberry, and lime.  This color scheme can go up before Christmas and last through January.

Styrofoam and Button needlefelted scene

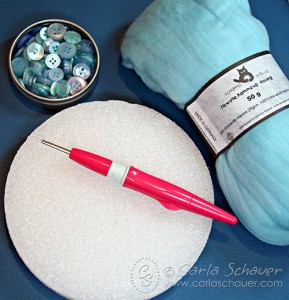
Supplies:

Buttons:  Sea Glass, Clear, Wood
Styrofoam Disc, 6×1”
wool roving, light blue
Clover needle felting tool
ric-rac, lime green
cardstock, raspberry
hemp twine, raspberry and dark brown
ribbon, light blue
accent ink, Smooch (Clearsnap)
thread, white
scissors
Beacon Adhesive
heat tool, optional
Needlefelting on Styrofoam supplies

Instructions:

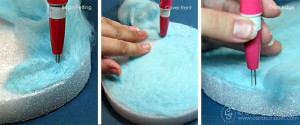
  1.  Needle felt wool roving onto STYROFOAM disc using needle felting tool until entire front is covered.  (Note:  fibers felt together with motion of felting tool.  Be sure to use straight up/down motion to keep needles from breaking.)
    Steps for Needlefelting on Styrofoam
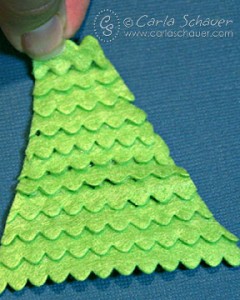
  2. Cut lime ricrac into pieces, each smaller than the last.  Layer smaller pieces over longer, and glue together.
    Making a tree with ricracUse scissors to trim into desired tree shape.  Wrap raspberry twine around tree to create “garland”
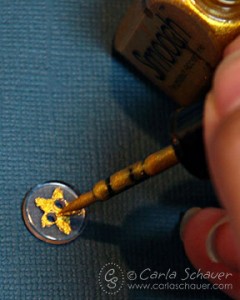
  3. Thread wood button with dark brown twine.  Glue into place as trunk, and glue tree over top of button.   Thread clear button with white thread.  Draw star on button using Smooch, covering thread.  Allow to dry (or use heat tool), and glue to top of tree.
    Drawing on clear button with Smooch Ink
  4. Thread Sea Glass buttons with white thread and glue to roving around tree for “snow”.
  5. Cut cardstock strips to cover sides of STYROFOAM disc and glue into place.
  6. Carefully apply thin layer of glue to raspberry twine and attach between cardstock sides and felted front of disc to create finished look.
    Needlefelted Styrofoam with buttons
  7. Cut length of aqua ribbon and attach to back of disc to form hanging loop.

Try this holiday project with the tree, or create your own winter scene with Buttons Galore & More!

Thanks for stopping by!


http://www.buttonsgaloreandmore.com/product/HAB106.html

0

Button and Burlap Hostess Gift

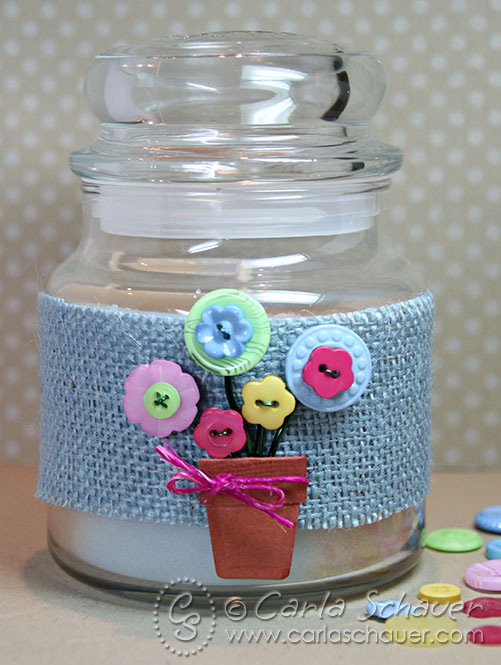
I have a hostess gift to share today using Buttons Galore and More buttons and a cute flowerpot die-cut shape. Of course I’ve included burlap to fit with our monthly theme!

Button flowerpot Candle hostess gift

I used the following materials:

  • Buttons from the Buttons Galore and More Spring Blossom Grab Bag
  • Nestabilities Flower Pots die from Spellbinders (smallest)
  • Raspberry Hemp Cording
  • Terra Cotta textured cardstock
  • 22 gauge and 16 gauge wire (kelly green)
  • Light blue burlap
  • Liquid Craft Glue
  • Double sided tape or adhesive dots
  • Wire cutters and round-nose pliers

Flowerpot Die from Spellbinders for button bouquet

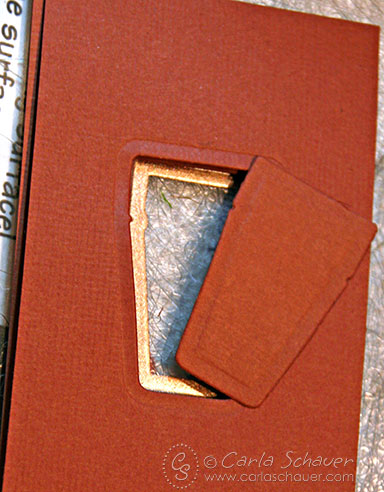
I started by cutting the smallest Flower Pot die from the Terra Cotta cardstock using my die-cut machine. The die embosses the cardstock at the same time as it cuts.

Button Flowers in flowerpot die-cut

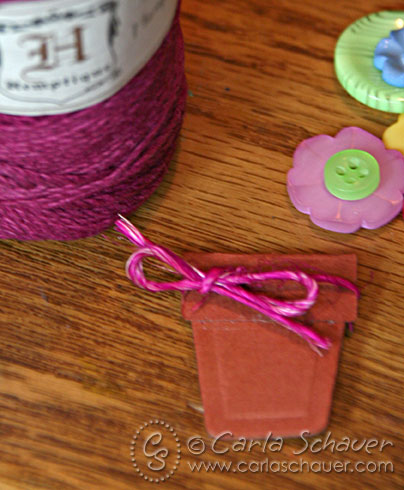
Then I folded over and glued the top part of the die-cut to create the top of the pot, and tied a hemp cording bow. I selected flower-shaped and round buttons with interesting patterns in several colors from the Spring Blossoms Grab Bag for the flowers.

I cut 5 pieces of 16 gauge wire (smaller gauge numbers=thicker wire) to the lengths I wanted for flower stems, then set them aside. I cut 5 pieces of 22 gauge wire and threaded the thin wire through the buttons (connecting stacked buttons), with open ends toward the back of the button. I added a dot of glue to the back of the button, pressed the thick wire stem into the glue, and twisted the thin wire ends together securing the wire stem to the button flower.

Once all my flowers were secured to their stems, I arranged them on a 2″ strip of light blue burlap long enough to wrap around the glass candle jar and glued them in place. Once the flower pot was glued on top of the flower stems, I attached the wrap onto the jar using double sided tape. (Wrap must be removed before using candle, so make sure this adhesive isn’t permanent.)

This type of wrap also works well on vases for a fun summer home decor project. I’ll be using mine for a game night prize!

1

Tween Baking Party Favors with Buttons

While I love throwing birthday parties for my children, I often struggle to think of fun party favors that are also useful.  With the popularity of baking-themed parties for the tween girl set, layered jar mixes are a perfect complement to the theme, and won’t become clutter later.

Layered Jar Baking Party Favors using buttons

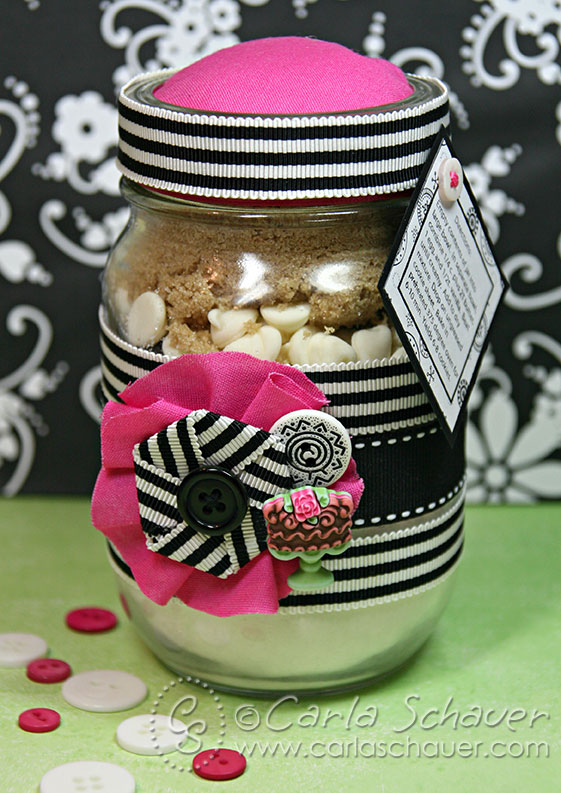
I focused on the Ebony & Ivory Trim Collage Kit to create most of this layered cookie jar, along with some bright pink fabric and the cake button from the Sweet Treats collection.  There are 12 yards of ribbon in this collage kit, so I could make several coordinating jars from one kit.

Materials:

Ebony & Ivory Trim Collage Kit
Sweet Treats Buttons
Precision Diagonal Craft Cutters
Pint canning jar with ring & lid, layered cookie mix (instructions found online try www.recipegolmine.com)
Bright pink fabric remnant (approximately 1-4”square and 1-12×1.5” strip for each jar)
Polyester fiberfill (or cotton balls)
Liquid glue
Fabric scissors
Computer printer or white cardstock and black pen
Black and white patterned paper
Black cardstock

  1. Cut circle of fabric approximately 4” diameter.  Place small amount of fiberfill (or 1 slightly pulled apart cotton ball) onto lid, and cover with fabric circle.  Add ring and screw on tightly.  Trim away excess fabric.
  2. Cut 1 length of striped ribbon, approximately 10” and glue around lid ring, trimming away excess.
  3.  Cut 2 pieces of striped ribbon and one piece of stitched ribbon long enough to fit around the jar, approximately 10.5 inches, and glue into place.  Trim excess ribbon.
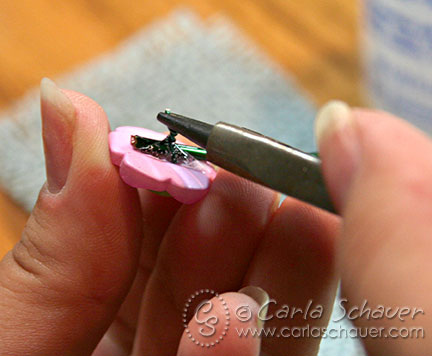
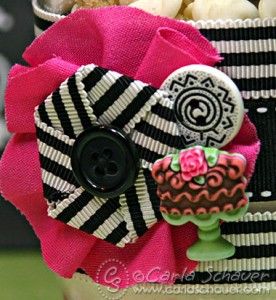
  4. Accordion-fold and glue a strip of pink fabric in a circle to create 2.5” diameter folded rosette.  Glue striped ribbon and button rosette from kit to center of pink fabric rosette.
    Layered jar cookie mix party favor with button decorations
  5. Remove shank from cake-shaped button using Precision Diagonal Craft Cutters.  Glue black and white pattern kit button to top right, and cake button to bottom right of rosette, and glue embellishment cluster to ribbons on jar base.
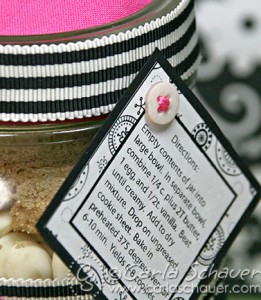
  6. Print cookie baking directions onto 1.5” square tag.  Mat directions onto patterned paper (I used my own design) and black cardstock.  Punch hole in tag corner.  Thread ¼” pink ribbon through punched hole, cross through holes of small white button, and thread back through punched hole.  Tie ribbon around jar ring to attach directions.
    Layered jar  mix party favor tag with button decorations

These baking jars are easy to make assembly-line fashion, and are a fun way to send an activity home with guests after a party.  Paired with a fun apron party craft, they make wonderful, useful party favors!

0

Holiday Glass and Bottle Charms

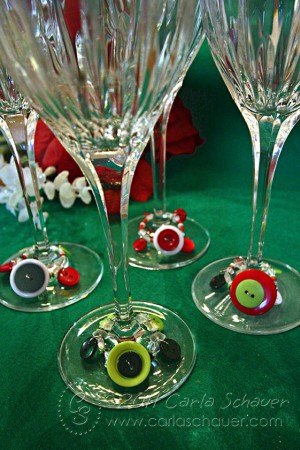
Button Wine Charms by Carla Schauer
 

As holiday party season rapidly gets underway, one of the tasks the party host(ess) needs to consider is how guests can keep track of their drink glasses.   One of the best ways to accomplish this is by using drink charm.  Plus, it looks fancier than the plastic cup/black marker method.


I started by using a coil of memory wire, cut into 4 rings with wire cutters.  With a couple jewelry tools,  some frosted beads, and my Buttons Galore & More buttons, I had my charms made  in no time at all.

Supplies and Instructions:

Buttons Galore & More  buttons (Christmas Button Bonanza, Rainforest Button Bonanza, Winter Holiday Micros, and Rainforest Mix Micros)

Frosted and clear star and bicone-shaped beads

Red seed beads

Silver jump rings

Silver wire

Round nose jewelry pliers

Wire cutters

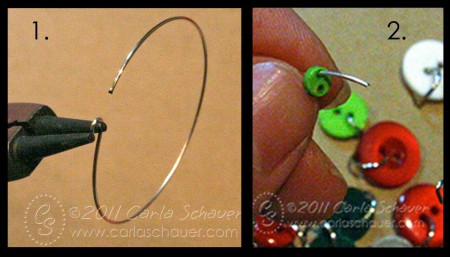
  1. Use round nose pliers to form loop on one end of each memory wire ring. (Photo 1)
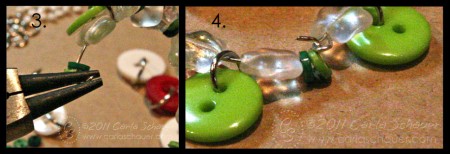
  2.  Attach medium buttons in lime, dark green, red, and white to jump rings.  Thread beads, micro buttons and jump rings with attached buttons in desired order half way around ring.  (note:  micro buttons  were threaded directly on memory wire.  Photo 2)
  3.  Layer large and medium buttons in contrasting colors and attach together with silver wire.  Twist on reverse side to secure, then use wire ends to secure layered buttons to charm ring. Continue threading remaining loop with buttons and beads.
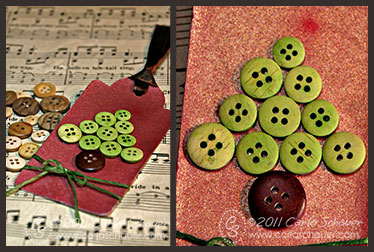
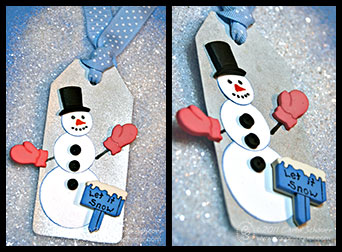
  4. Use round nose pliers to create loop in remaining end. (Photo 3).  Join loops together to connect ends.  (Photo 4)


button wine charms by Carla Schauer
Each charm has a different combination of buttons and beads, and each has a unique focal button set.  I used fairly traditional Christmas colors in this set, but the charms can be made to coordinate with any party theme.


1

Holiday Gift Tags: Embellish with Buttons

button tree gift tag by Carla Schauer
 

Making holiday gift tags is a great way to personalize gift wrapping using Buttons Galore & More buttons along with leftover bits and pieces from other projects.  I used 2 larger paper scraps, die-cut and misted with Clearsnap Smooch Spritz, as the bases for these tags.
For this tree-themed tag, I used Haberdashery Collection Wood Buttons.  It’s easy to change the color of the wood buttons using dye ink.  I love that the buttons almost have a “stained” look to them.  I just pressed the buttons into the ink pad until I was satisfied with the color and let them dry a few minutes.   After gluing the buttons in a tree shape, I tied a ribbon and an embroidery floss scrap to finish the tag.


button snowman gift tag by Carla Schauer


I used the Snowman Parts buttons from the Holiday Collection to make the second gift tag.  I edged 3 white circles (1.5, 1, and .75″) in light blue ink and used them to build the snowman base on the left side of the tag.   Then the addition of the hat, black buttons, mittens, and sign Snowman Parts gave him his dimension.  A face and arms drawn with Clearsnap Smooch, and a scrap piece of dotted ribbon completed the scene.

Have fun with your button stash this year and add some whimsy to gift packaging!

Thanks for stopping by!

Carla Schauer


1

Powered by WordPress. Designed by WooThemes