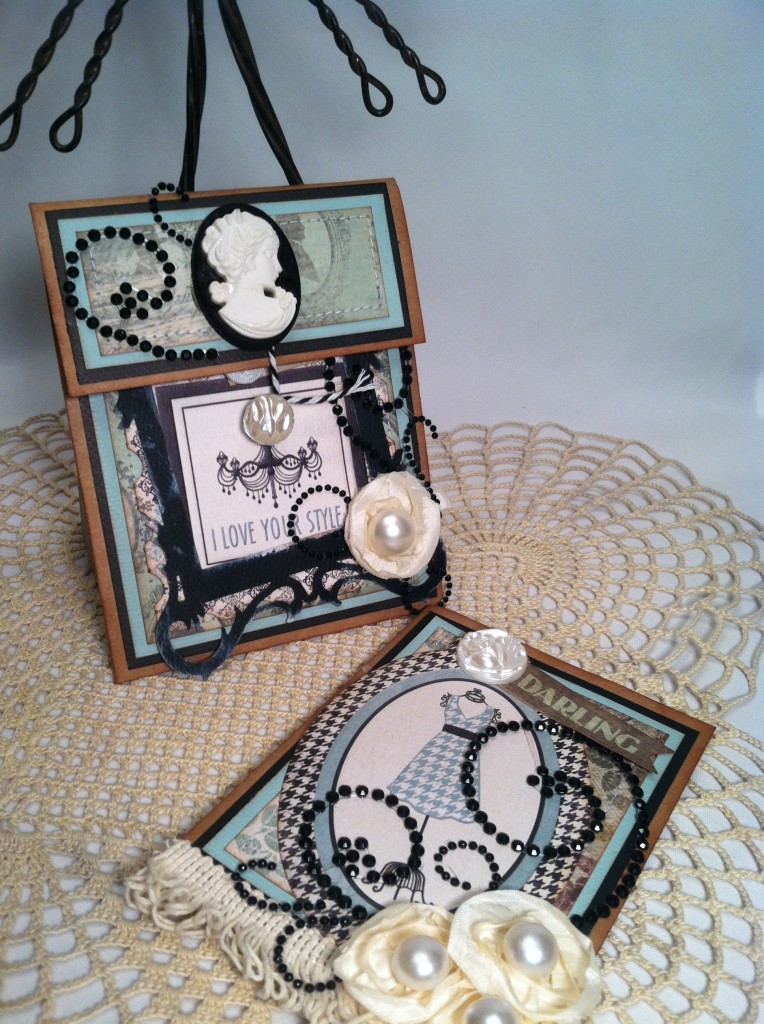
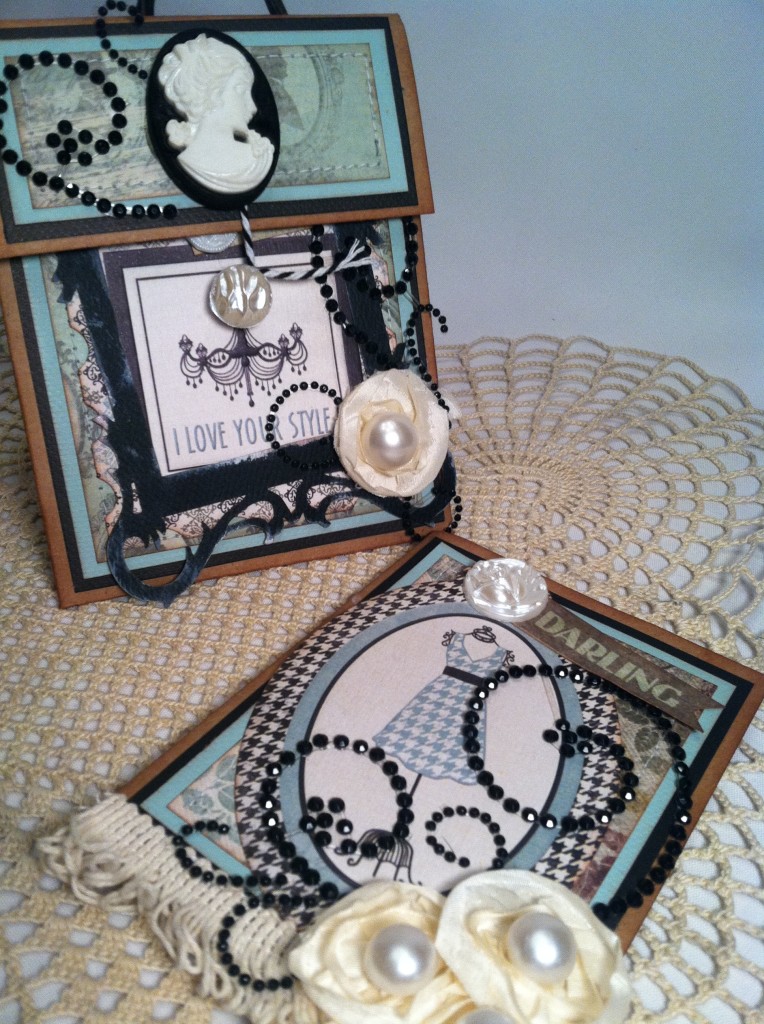
Create an Antique Chic Cameo Button Envelope and Card with a few easy steps.
Hi everyone, I’m Mai Larsen new Design Team member for Buttons Galore & More. I’m very excited to be a part Buttons Galore & More 2013 Design Team and even more excited to share with you my first project as a Design Team member.
Cameo Buttons are one of my favorite graphic image to work with.
There is so much you can create with Cameo Buttons. Honestly, the sky is the limit when it comes to buttons. The project that I created for you today is an envelope and card using Cameo Buttons as closures. Buttons Galore & More made this project super fun for me, because the Cameo Buttons and Haberdashery Buttons were gorgeous and I found the perfect paper to go with it from We R Memory Keepers “Antique Chic”. This paper collection went very well with the buttons.
Material used to make Cameo Button Envelope & Card:
Buttons Galore & More Products used:
Cross Promotional Products Used:
I also used:
- Kraft Paper
- We R Memory Keepers Antique Chic Paper Collection
- Hot Glue
- Maya Road Black Twine
- Tim Holtz Vintage Photo Distress Ink
- Scor Tape
- Want2Scrap Fancy Frame
- Want2Scrap Black Rhinestone Swirl
- Ad Tech Glue Runner adhesive
- Paper Studio Fibers
- Karlas001 Rosette Ribbon
- Sewing Machine
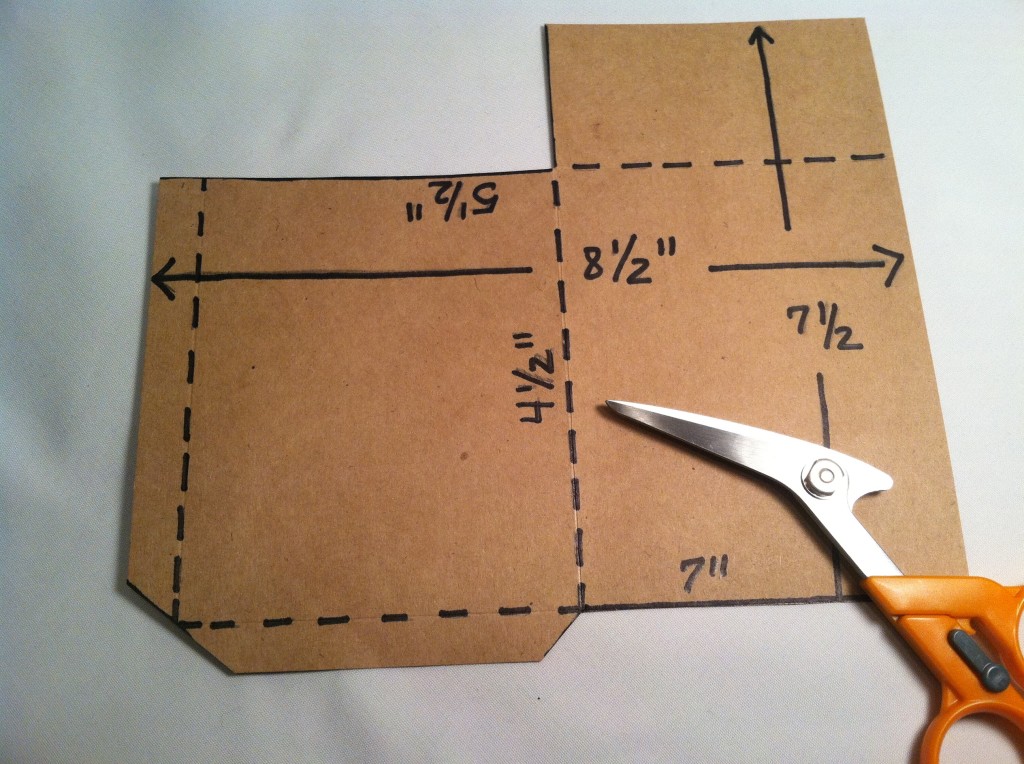
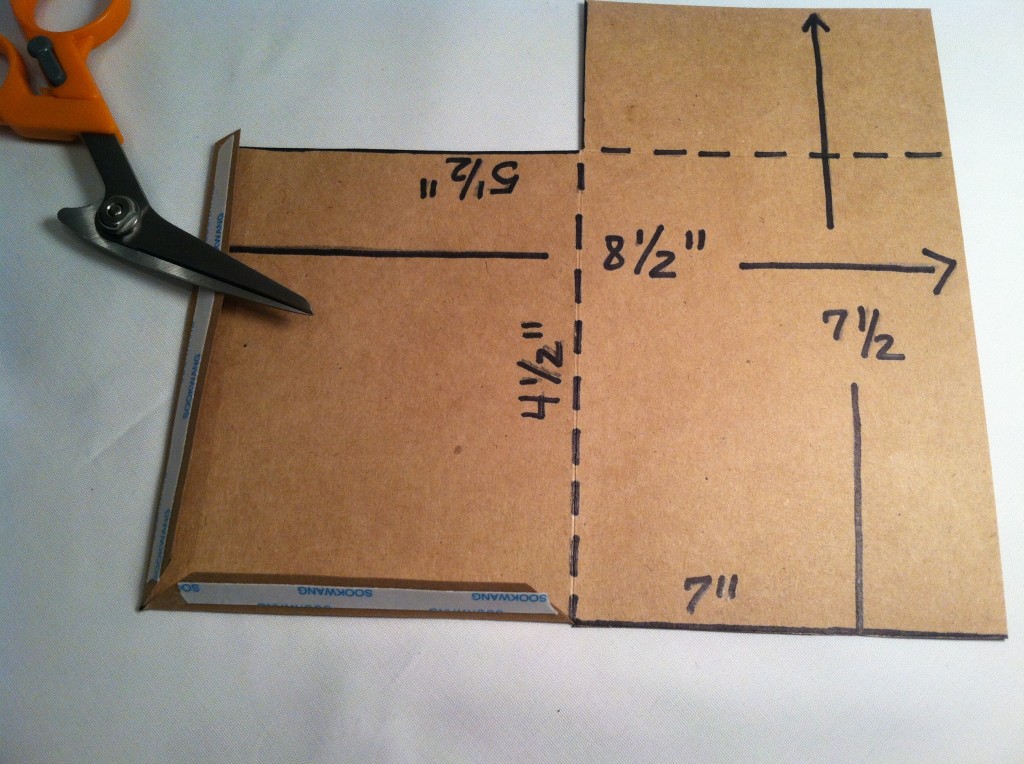
The envelope itself is 4 x 5″ and the card is 3 1/2 x 4 1/2″. To give it a more elegant look I used a sewing machine and stitched the layers. I hope you enjoy the video I created showing you how to create this beautiful envelope and card using Buttons Galore & More Cameo & Haberdashery Buttons. Be sure to visit Buttons Galore & More website for your buttons at www.buttonsgaloreandmore.com.
Directions for creating the Envelope and Card:
Step One:
Step Two:
Step Three:
Here is a link to my video tutorial check it out:
Buttons Galore & More Envelope & Card
Visit my blog and let me know what you thing at www.creandocondetalles.blogspot.com. I hope you enjoyed my first project!
Latest posts by Admin (see all)
- Ladybug Button Card - May 1, 2015
- Button Up a Teacher Gift in a Flash - April 10, 2015
- Don’t Get Pinched! Guest Blogger DIY Shamrock Accessory - March 2, 2015


A beauty of Draft Mai
que hermosura de trabajo, siempre lo diré tienes unas manos prodigiosas, gracias por compartir tus conocimientos, mil kriños y bendiciones desde Colombia.
Hermoso proyecto,como todos tus trabajos
Que belleza amiga, te felicito, trabajas hermoso
Hola Mai!!! Gracias por compartir tus conocimientos para con nosotras!!! Este sobre y tarjeta tiene una linda combinación de colores y elementos, el camafeo esta Precioso!!!!!!!!!
Beautiful project, Mai, I love it ! Thanks for sharing your wonderful tutorial!
Mai — This is so beautiful! I love the tutorial with all the measurements.
Mai, hermoso tu proyecto, gracias por compartir con nosotras tus conocimientos, un abrazo desde Colombia
Thank you ladies for your lovely comments! Gracias chicas por sus bellos comentarios. Las quiero todas por ser tan lindas y apoyar me.
Espectacular amiga, demasiado hermoso ese sobre y tarjeta, sabes q soy tu fan, q sigas cosechando muchos mas exitos, gracias por compartir las medidas, Dios te bendiga.
Que Belleza de sobre y tarjeta, gracias por el tutorial. Ya voy corriendo a visitar tu blog. Siemper Creando bellezas y compartiendo .
Saludos,
Mis Cinco Amores Scrap
TE QUEDO HERMOSISIMO EL PROYECTO MUCHAS GRACIAS POR TODA LA INSPIRACION QUE NOS DAS. BENDICIONES.
Este trabajo esta hermso,q el señor bendiga la creatividad y manos de quien lo creo.
Beautiful!