
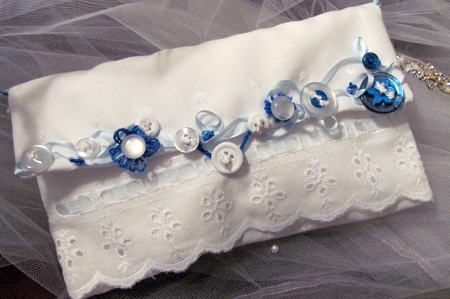
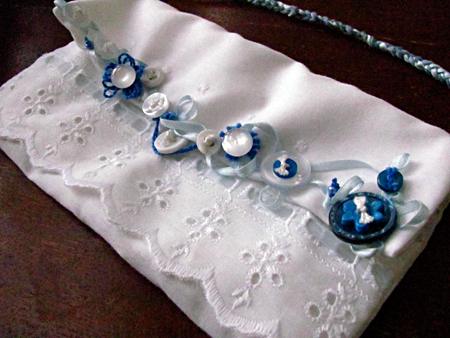
Button embellished bridal clutch by Jen Goode
Something borrowed, something blue this bridal clutch is the perfect accessory with a handmade touch. Use blue and pearl buttons along with delicate blue ribbon, eyelet fabric and faux satin, to create a pretty little purse fit for a wedding.
This idea was inspired by a little handbag my aunt made for me years ago from a wonderful little hankie originally owned by my great grandmother. You could adapt this clutch design using handkerchiefs and antique lace as well.
Materials you’ll need:
- Assortment of blue, pearl and white buttons
- Decorative eyelet fabric
- Standard eyelet fabric
- Faux satin fabric
- 1/8″ light blue ribbon
- Medium blue embroidery thread and needle
- Standard thread and needle
- pins
- Sewing machine (optional)
Directions:
1. First cut all fabric pieces as follows:
- 1- 4.5″ x 8.5″ decorative eyelet fabric
- 1 – 9″ x 8.8″ standard eyelet fabric
- 2 – 4.5″x8.5″ faux satin fabric pieces
- 1 – 5.5″x8.5″ stand eyelet fabric
- 1 – 5.5×8.5″ faux satin fabric
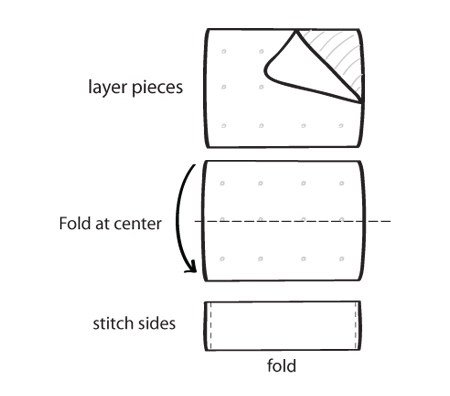
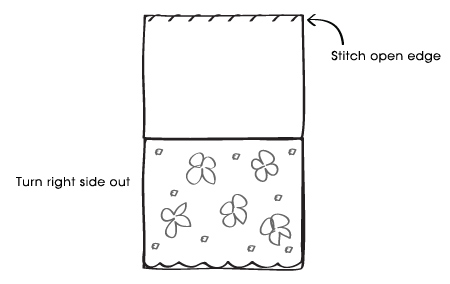
2. Layer top flap fabric, fold and stitch on sides leaving bottom open. Turn right side out.
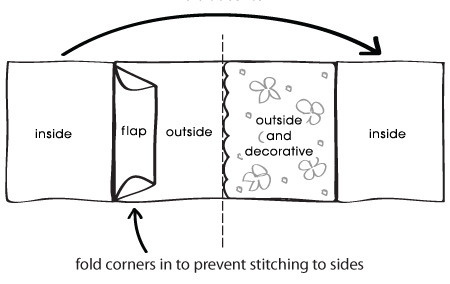
 3. Layer fabric pieces to include outside, decorative eyelet fabric piece, top flap and outside pieces, pin and stitch along edges as shown.

4. Stitch down seemed pieces to create a clean stitch line on inside pieces of fabric.
5. Fold at center, inside piece to inside piece, wrong side out. Stitch along sides leaving top edge of inside fabric open.
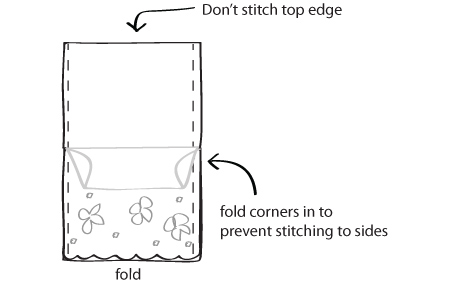
6. Fold right-side out through top opening. Fold opening inward to create a finished edge and stitch closed.
7. Tuck inside pocket into outer shell to create finished pouch and liner. Flap should now be at top and decorative eyelet fabric at front.
8. Place ribbon along flap and pin into place as desired. Stitch to secure using needle and thread. Take care not to stitch all the way through flap to ensure hidden stitching.
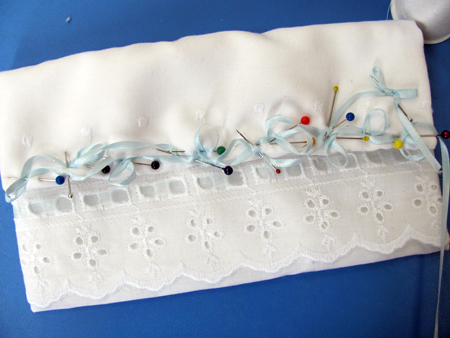
9. Using embroidery thread, attach buttons on top of threaded areas on ribbon. Tie and knot to secure.
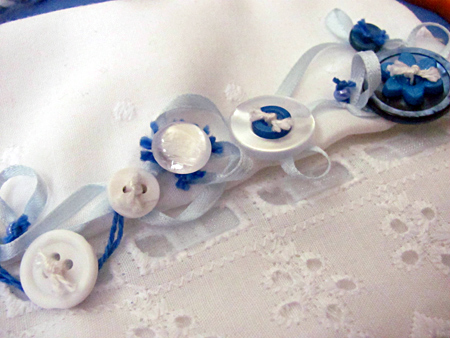
10. Repeat stitch to attach button on front for closure piece. Tie embroidery thread on flap to loop over closure button on front.
Optional: create a braided cord and attach on either side of clutch opening.
Latest posts by Jen Goode (see all)
- Red White and Blue Button Flower Vase - July 2, 2013
- Make an iPhone Purse with Duck Tape and Buttons - May 13, 2013
- Make Pretty Dragonfly Decor for your Wedding - April 10, 2013
This is SUCH a lovely project! Your tutorial is easy to understand and TOTALLY keep-able – I will definitely have to give this a try! Stunning use of button! *!*
Elise, thank you so very much, I’m glad you like it!