
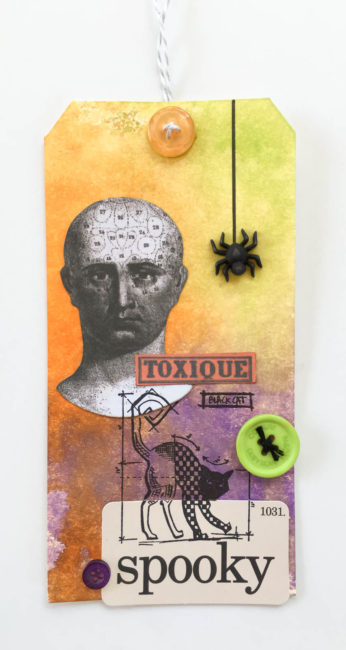
Today we’re taking a walk on the creepy side of Halloween, with a spooky Halloween tag that makes a great attachment for a treat bag or can be a unique holiday greeting by itself!
Supplies:
- Buttons Galore “Trick or Treat” Button Basics
- Buttons Galore Happy Halloween 3D Spider Buttons
- Button Shank Remover
- PPA Matte Adhesive
- #8 Manila Tag
- Ranger Tim Holtz Distress Spray Stain in Carved Pumpkin, Twisted Citron, and Wilted Violet
- Ranger Tim Holtz Distress Ink in Hickory Smoke and Fired Brick
- Ranger Tim Holtz Distress Marker in Black Soot
- Ranger Archival Ink in Jet Black
- Stamper’s Anonymous Tim Holtz Halloween #3 Mini Blueprint stamps
- Tim Holtz idea-ology “Curiosities” Ephemera Pack
- Black Embroidery Floss
- Doodlebug Designs Doodle Twine in Gray
1. Create the background of the Halloween tag by spraying the three colors of Distress Spray Stain in a triangle arrangement on a craft mat and then dragging the tag across the ink. Allow to air dry, or dry with a heat gun.
2. Ink the edges of the paper elements with matching ink to hide the white edges, and glue them in place.
3. Using Archival ink, stamp the creepy cat on top of the background and paper elements.
Tip: If the stamp image is incomplete where the paper layers meet, use the fine point end of the Distress Marker to fill it in!
4. Draw a line for the spider web in the upper right corner using the brush end of the Distress Marker and a ruler.
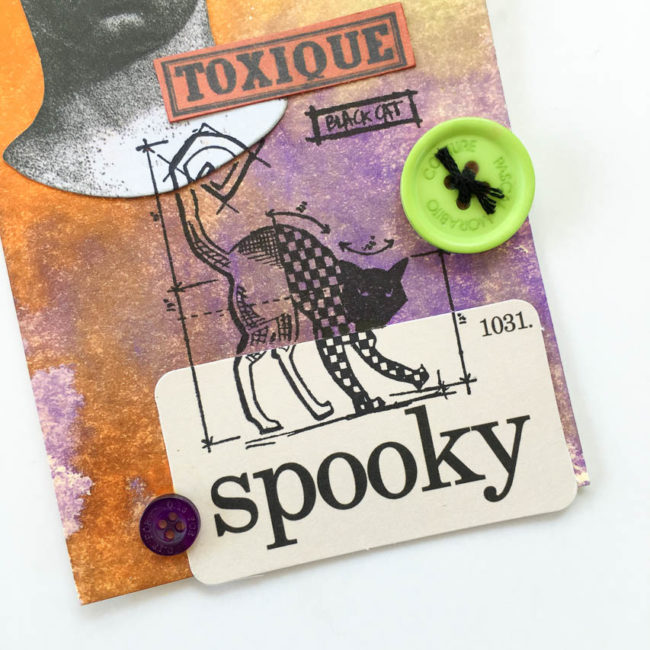
5. Thread black embroidery floss through the green button and tie off.
6. Use a button shank remover to cut the shank off from the back of a spider button.
7. Glue all of the buttons into place using the PPA Matte Adhesive. (Make sure to center the orange one over the hole in the tag.) Let dry.
8. Thread twine from the back through the button and ending at the back again, to tie off the tag.
9. Enjoy your Halloween tag!
Nancy Nally
Latest posts by Nancy Nally (see all)
- We’re blog hopping with Poppy Stamps! - September 28, 2017
- Announcing…New 28 Lilac Lane Premium Collection Sequin Tins! - June 30, 2017
- Announcing…the new Buttons Galore Design Team! - May 18, 2017
No comments yet.