
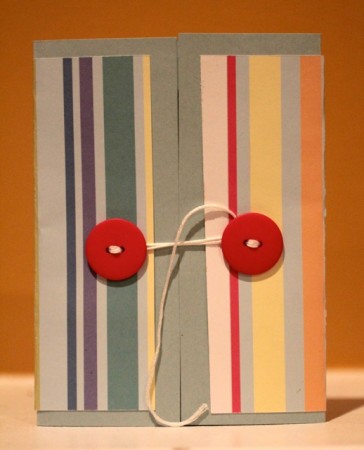
Button Closure
Create a cool closure for your handmade cards by sewing on two buttons. The card above is a a birthday card. You can use this technique for any occasion. Very few tools are involved and little skill is needed. It is quick and easy yet it makes the card feel extra special.
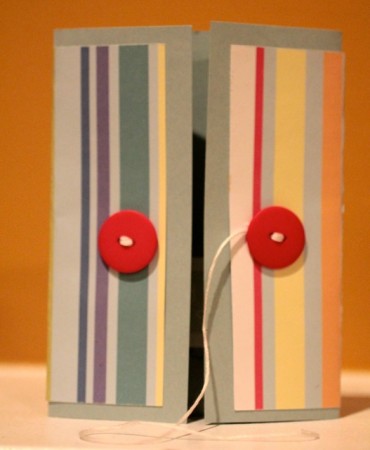
Button closure untied
Tools:
Needle with large opening
Embroidery floss in color of your choice
Paper cutter
Mouse pad
Material:
Contemporary Christmas Button Jar
12 x12 Cardstock of your choice
Pattern Paper of your choice
Rubber stamped sentiment of your choice
Adhesive
Directions:
1. Cut paper to 6×12. Make a score line 3 inches from each end. Fold flaps in so that they meet in the middle.
2. Trim pattern paper to 5.5 x 11.5 and adhere to card.
3. Stamp sentiment and add to center of card.
4. Measure in one inch on each flap. Place card open on mouse pad and use needle to make holes for floss.
5. Using floss sew on one button. Tie knot to secure and trim off excess.
6. For the second button cut a generous piece of floss. Sew on button and tie a knot. Do not trim off excess. Use it to fasten the card closed
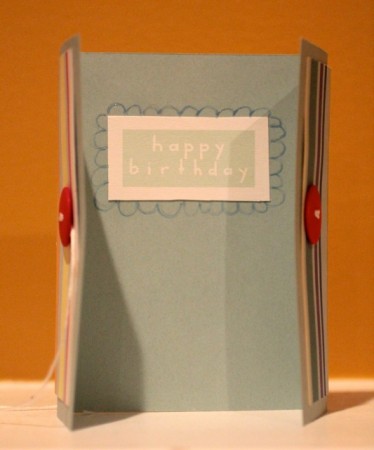
Inside of card
Latest posts by Admin (see all)
- Ladybug Button Card - May 1, 2015
- Button Up a Teacher Gift in a Flash - April 10, 2015
- Don’t Get Pinched! Guest Blogger DIY Shamrock Accessory - March 2, 2015
No comments yet.