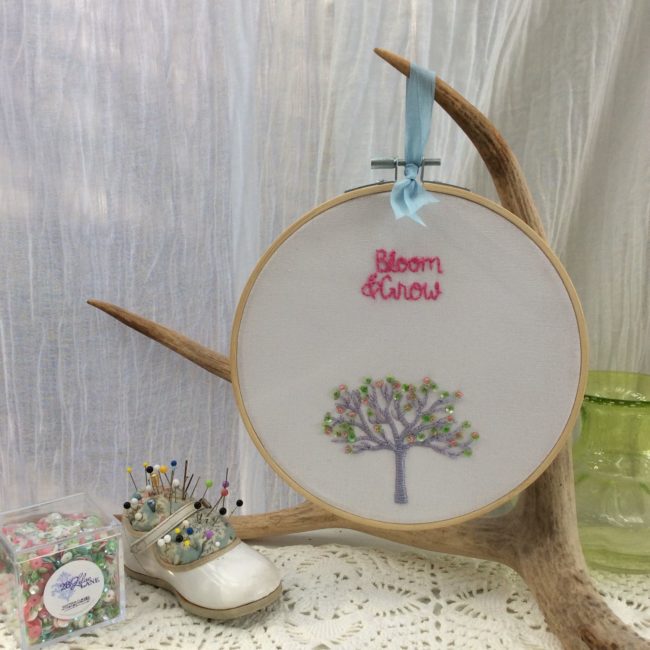
Tiny beads and sparkly sequins are the perfect companion to embroidery art.

Tiny beads and sparkly sequins are the perfect companion to embroidery art.
Hello Everyone! This is Katie from the Buttons Galore & More Design Team, and today I will be showing you how to make a fun handmade gift that can be given during the holiday season!
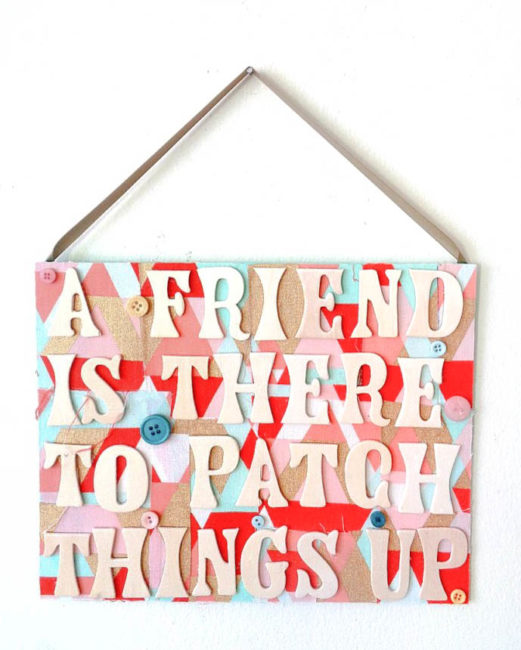
As a gift-giver, I have always loved making handmade signs for my friends and family. This is because handmade signs are super easy to make and are so fun to personalize. Also, from a gift-giving perspective, handmade signs can be very inexpensive to make if you are on a tight budget. With all that in mind and with the holidays fast approaching, today I am going to show you how to make a DIY Friendship Sign. Continue Reading →
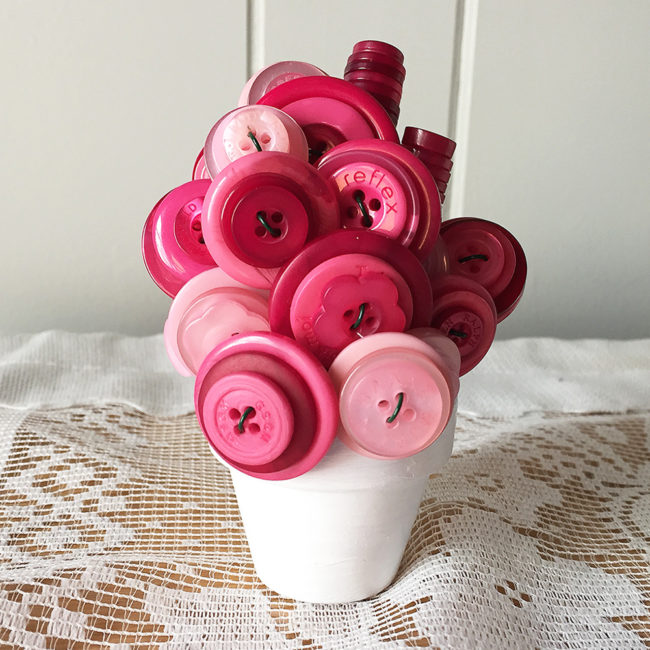
Flowers are pretty, but they are also expensive and don’t last very long. A button bouquet is affordable and simple to make and will add some vintage charm to your home, wedding, or shower – and never needs watering! Continue Reading →
Hey, y’all! Lorrie here with a fun new DIY decorated candle project that is super easy but makes a great gift!
I’ll admit it – I am a candle addict! I have a ton of them in my own home, plus they are my go-to gift for lots of different people: teachers, co-workers, friends, in-laws. You name them, and they have probably gotten a candle from me! Since I do love giving them, I am always on the lookout for deals on candles, because as much as I love them the one downside is that sometimes they are a little expensive. I have found that after the holidays, lots of stores have great prices on candles. I usually buy several to give throughout the year. But sometimes, those candles can be a little boring. They may be just a plain jar candle, or like I used for this project, just a 3-wick pillar candle. But with a little ribbon and some Pet Shop Button Basics buttons from Buttons Galore & More, these plain candles can go from “meh” to “wow” very quickly! Continue Reading →
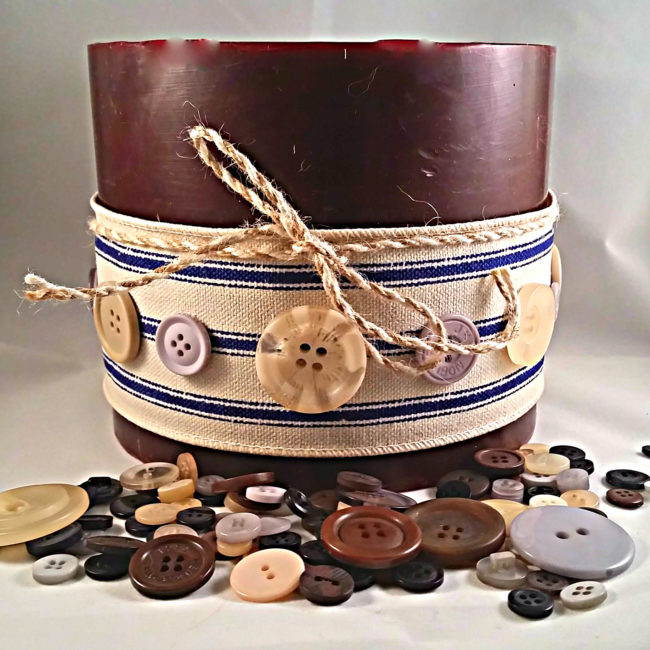
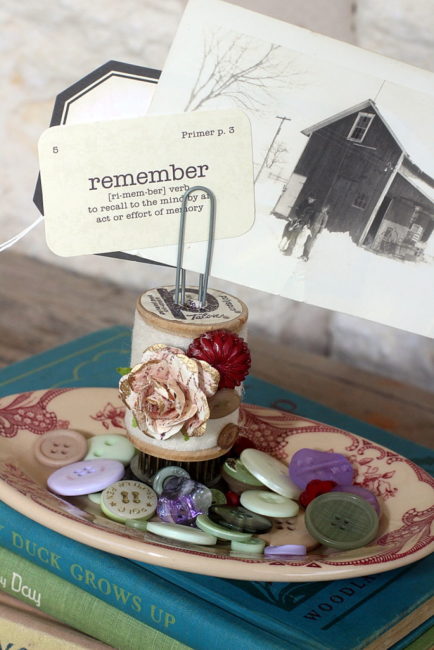
Hi, Connie here with Buttons Galore & More design team sharing a simple and cute (as a button) thread spool photo holder. I will be using the Buttons Galore “Winter Mist” Haberdashery button mix. The buttons are a beautiful mix of vintage greens, purple, burgundy and light tan.
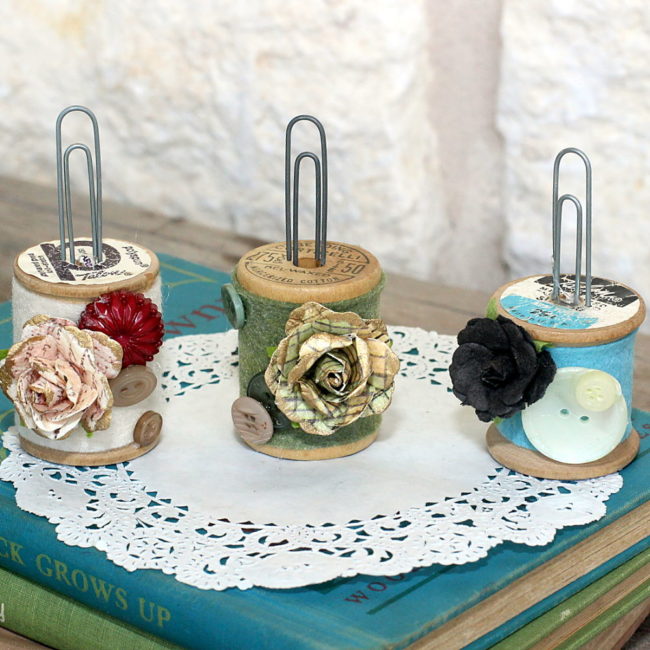
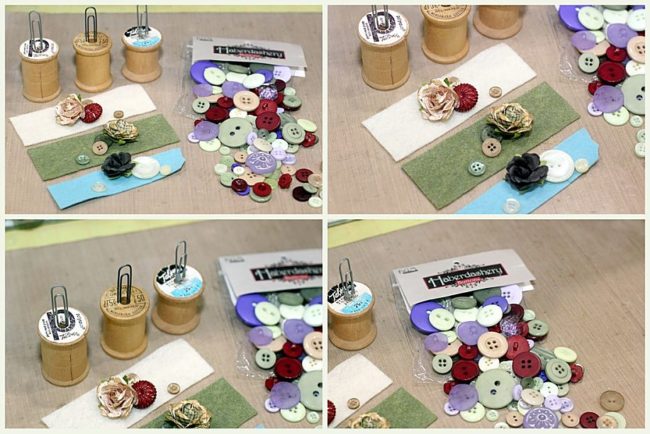
I created several of these thread spool photo holders using the supplies I had on hand. They can be enhanced many different ways to make them each unique. I wanted the original spool label to remain. I used felt to wrap around the center of the spool adding color to the project. (The spools could also be painted or pattern paper could be used.) The Winter Mist Haberdashery button pack comes with different size buttons and beautifully coordinated. You get a nice mix of color!
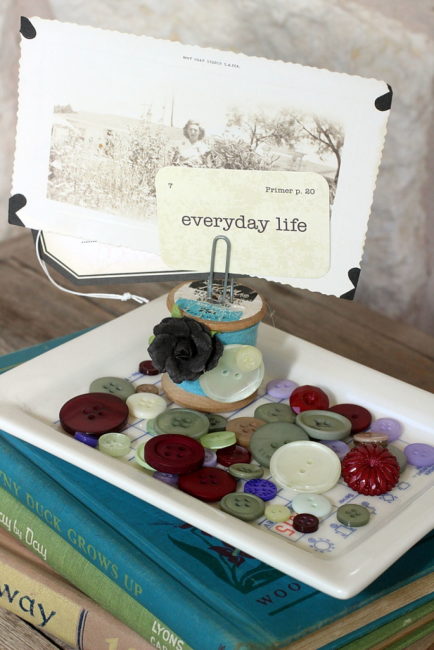
These thread spool photo holders can be used as teacher gifts, personalized place cards, displays for vintage photos, to show off a proud kid moment, and in many more ways. What about holding a favorite recipe? There’s so many ways for using these photo stands.
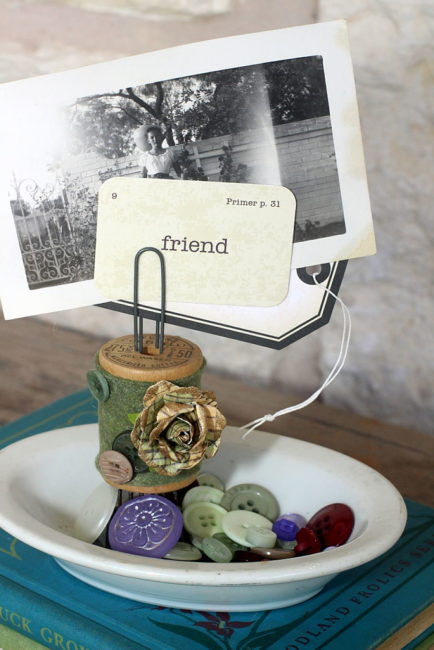
These thread spool photo holders are fun to make and the kids can join in too. Adding different elements can truly make them a “one of a kind” thinking of you gift. Buttons Galore & More have gorgeous buttons that would be perfect for this project! Thanks for stopping by today!
Hi, Connie here with the design team sharing a Victorian framed art piece using Victorian accents by Buttons Galore & More. The themed button selections were the perfect accent for this framed art piece. The beautiful thing about these Victorian accent buttons is that you can change the color so easily. Spray paint works great!
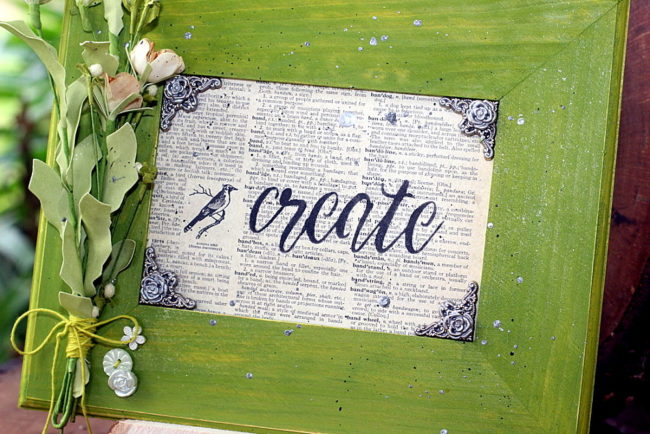
The frame was painted with acrylic paint and sanded to create a distressed finish for a vintage look and feel. The inside piece is vintage dictionary paper. I stenciled the paper with the word “create” in black acrylic paint. The silk flowers were wrapped with twine and then adhered to the side of the frame with strong glue.
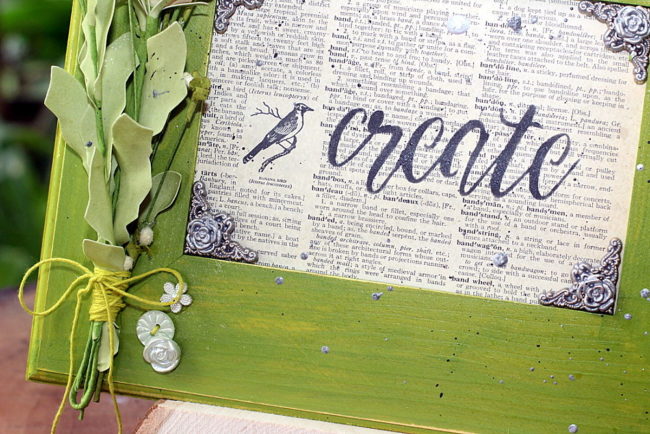 The Heirloom Keepsakes buttons were glued to the side of the flower cluster. They come in several different colors. I used the light green ones for this project.
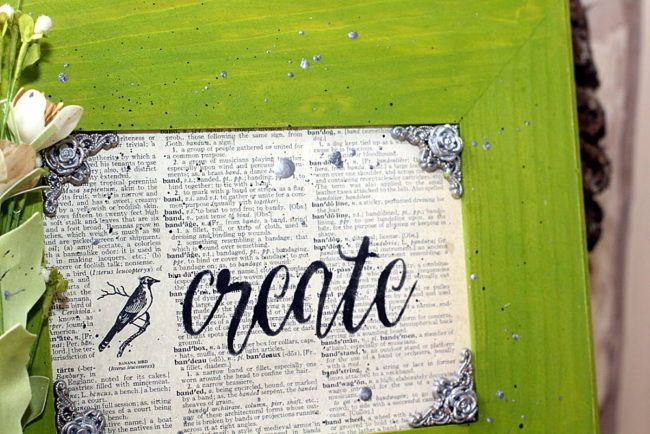
The Victorian Rose buttons and the Gold Filigree corners were spray painted a pewter color and adhered to each inside corner of the frame. The Filigree corner was attached first and then the Victorian Rose button next. The shanks were clipped off, using wire snips, to give a flat surface to adhere them.
To finish my Victorian framed art, the frame was splattered delicately with black and pewter paint. That process was achieved by spraying a puddle of paint, on a paper plate, and then using a toothbrush to splat the paint on the frame. It’s an old technique but still one of my favorites!
Supplies needed:
Thanks for stopping by~
Connie Mercer/DT Member
Hello everyone! This is Katie from the Buttons Galore & More Design Team, and today I have a super fun DIY Sequin Coaster Set that you can make with your kids!
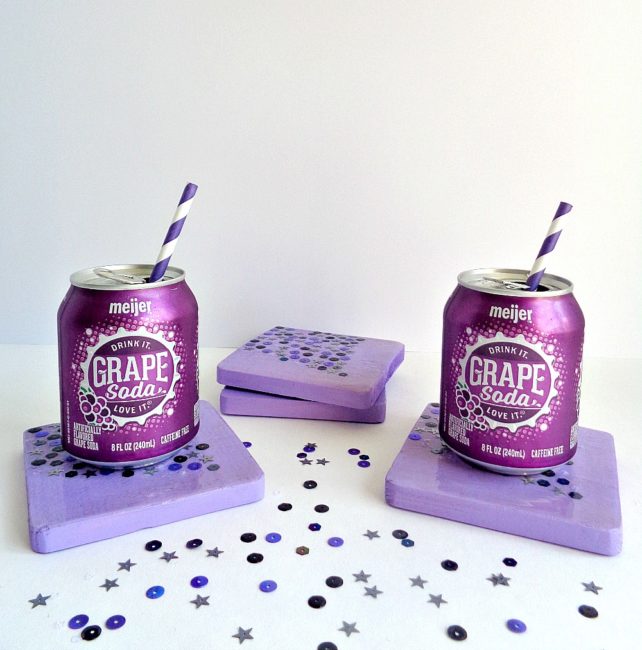
The project I will be showing you how to make today is a DIY Sequin Coaster Set! Now, you may be thinking that sequins and coasters don’t belong together. However, this DIY Sequin Coaster Set has a protective coating on top which seals in all the sequins and creates a barrier between your drinks and the actual coasters. In addition, this project is kid friendly and can be completed in just 3 easy steps!
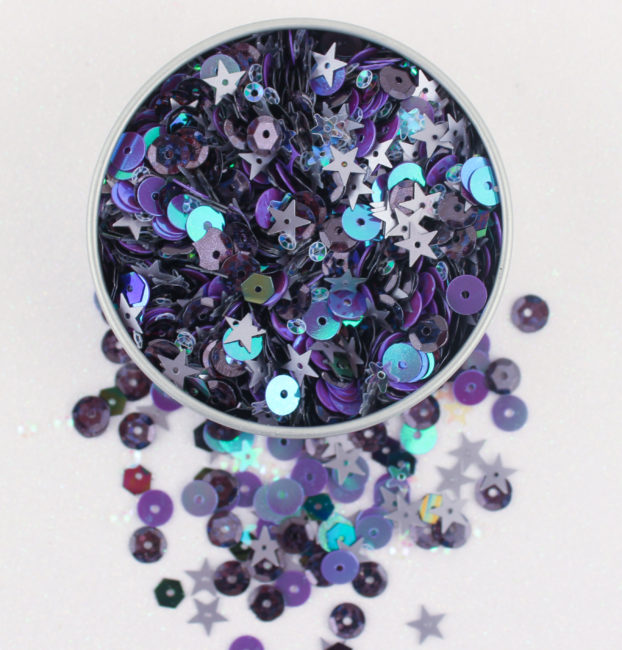
To decorate my sequin coasters, I decided to use the brand new 28 Lilac Lane Sequin Tin in Haunted House. Now, even though the haunted house name sounds like it’s made for Halloween, these sequins have a more holographic look to them. For example, the tin contains silver, purple, black, white, and hologram colored sequins. In addition, the sequins are round, hexagon, and star shaped. For this particular project, I paired the sequins up with some purple paint. However, I think with the holographic look that they have could be paired with a variety of paint colors.
So, to find out how to make your own Sequin Coaster Set, keep reading below!
Supplies Needed:
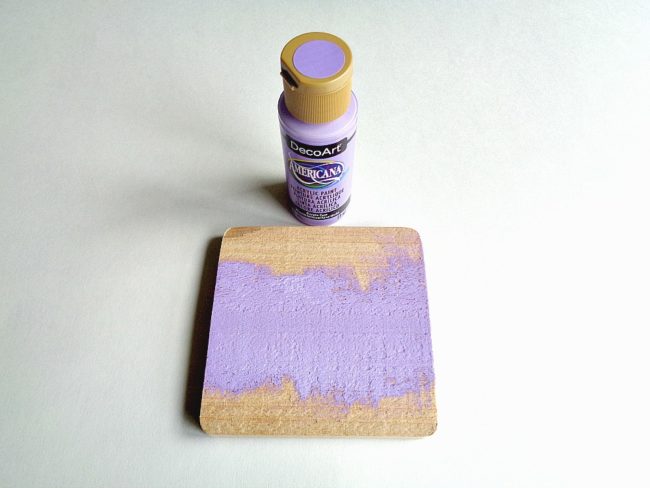
Step 1: Paint your wooden coasters on the front and back. Then set each one aside to dry.
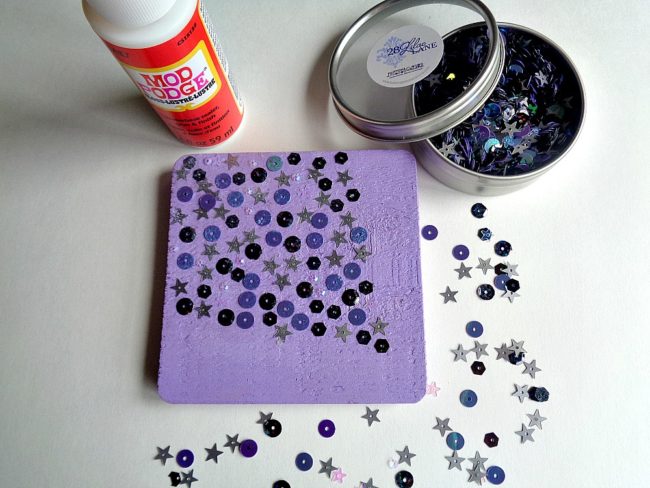
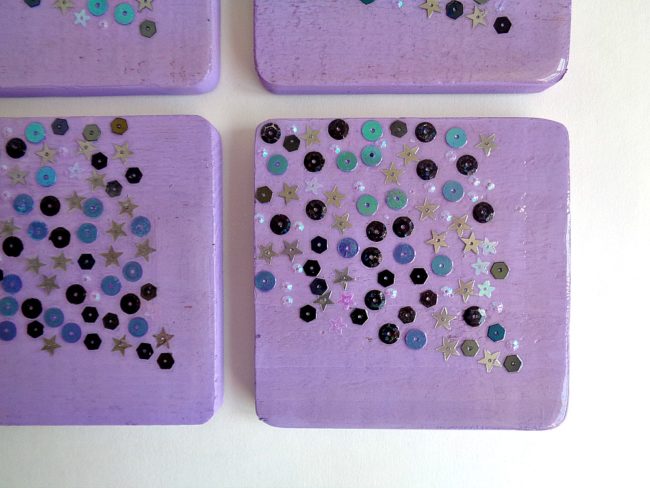
Step 2: Apply a layer of Mod Podge onto your coaster then begin adding sequins from the 28 Lilac Lane Haunted House Sequin Tin. While doing this step, you could add your sequins to your coasters in one of two ways. The first way would be to sprinkle the sequins onto the coaster and then spread the sequins out with a toothpick. The second way would be to add each sequin on by hand.
With that being said, no matter what method you use, you want to make sure that your sequins are lying flat on your coaster. This means that sequins should not be glued on top of each other and that each sequin should be lying flat by itself. Also, when making these coasters, I felt that that less was more. For example, I found that using a smaller amount of sequins (in a particular pattern) really gave the coaster a finished look. However, you can do whatever floats your crafty boat.
Once you are done adding your sequins, apply another thin layer of Mod Podge and set the coasters aside to dry.
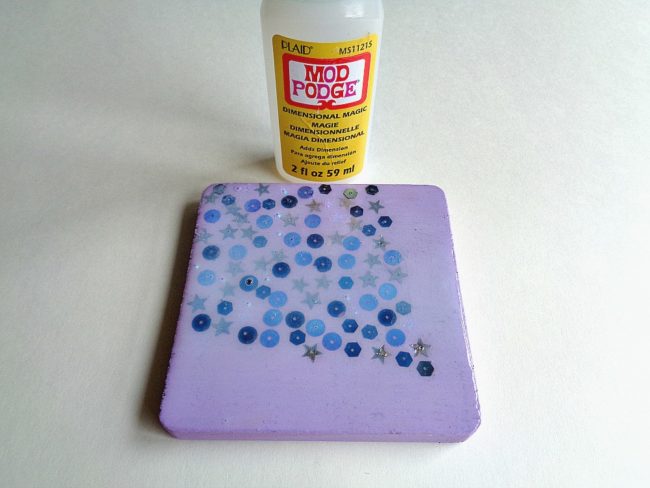
Step 3: Now apply a thin coat of Dimensional Magic to the top of your coaster. When applying the Dimensional Magic you may want to have a tooth pick handy so you can pop any air bubbles. At first the top of your coaster may look ”cloudy” but that’s ok because it will dry completely clear. After you finish applying the Dimensional Magic set your coaster aside to dry for 24 hours.
Keep repeating this process with your other coasters.
When the Dimensional Magic is completely dry, you are ready to start using your new coaster set!
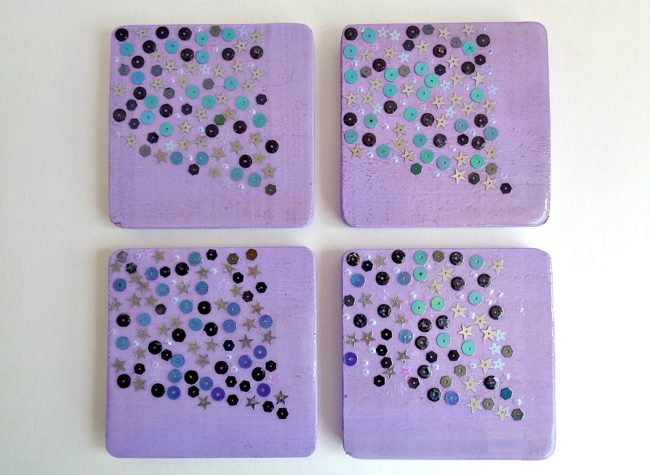
I loved how this DIY Sequin Coaster Set turned out! Now, I want to make a bunch of different coaster sets in different patterns and colors.
With that being said, this sequin coaster set would be a great summer project to make over the weekend with your kids. Personally, I made these coasters in the afternoon and was able to use them (after the Dimensional Magic had dried) the next day. Also, as coasters, they have held up really nicely with both hot and cold drinks.
This project could be customized with any color scheme that you’d like, of course. If you made this DIY Sequin Coaster Set, what new 28 Lilac Lane Premium Sequin Tin would you use?

This project combines two of my favorite things: coloring and sequins! Using a pre-printed canvas, markers, and new sequins from 28 Lilac Lane, I made a fun project that is an easy way to decorate an ocean-themed room. This project is so easy that even the kids can do it!
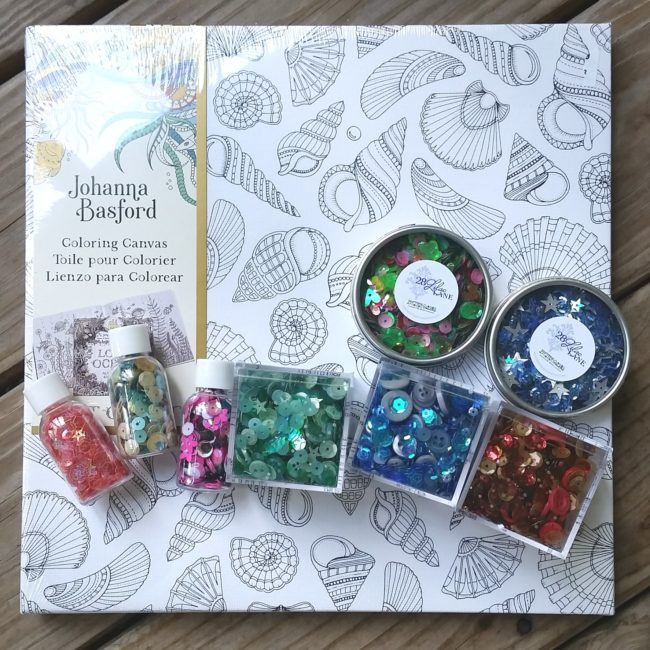
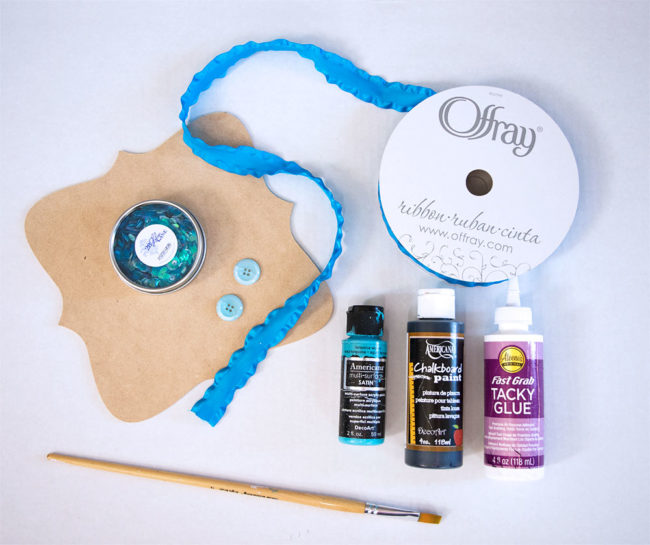
To make this project, you will need:
How to:
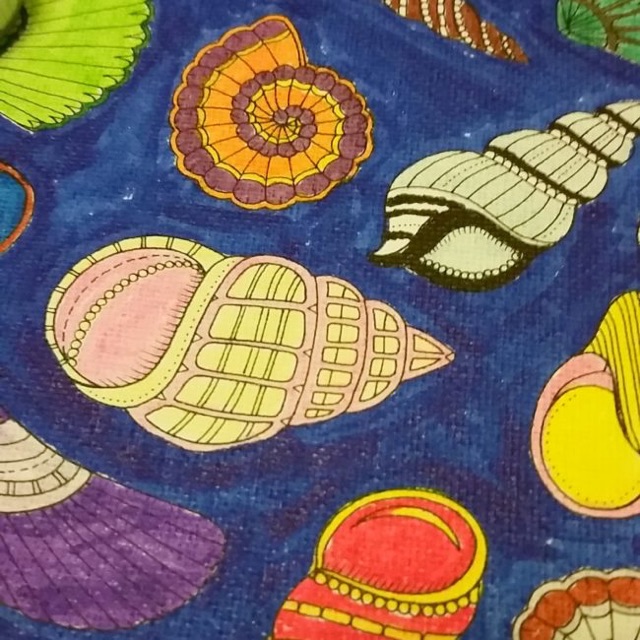
This canvas was so fun to make. I absolutely love to color so I really enjoyed getting out of coloring books and onto a canvas, and the addition of a little sequin bling just makes it even better!
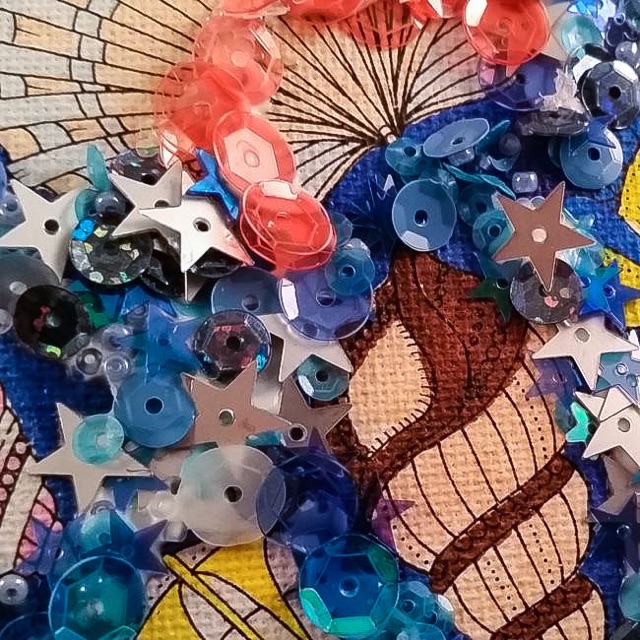
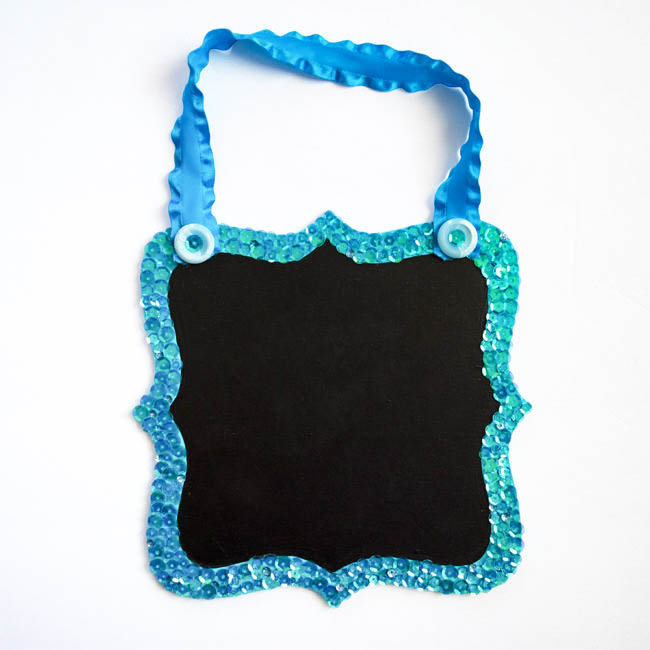
You don’t have to know how to sew to use sequins! Besides using them on cards, and in fun little shaker packs, you can glue sequins to just about anything for a fun shimmer and shine! I glued some gorgeous turquoise blue sequins from the new 28 Lilac Lane “Mermaid Tale” Premium Sequin Tin to a wood surface for a fun Mermaid Tale Sequin chalkboard. This craft is simple enough for a child to participate in as well!
Paint the wood bracket shape with the acrylic craft paint. (This is a perfect step for little hands to help with!) I painted the front and back of my shape. Let the paint dry completely.
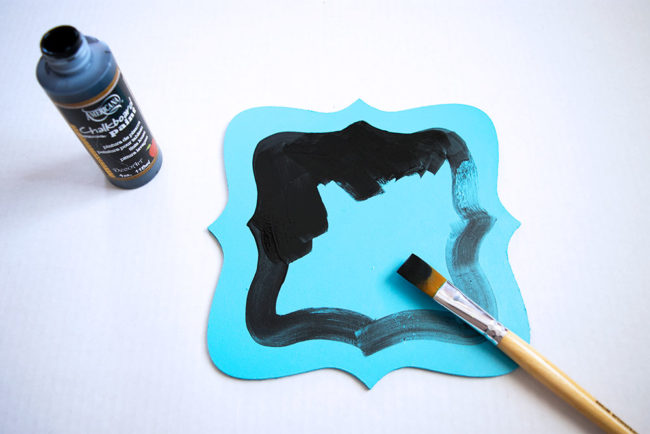
Paint the inside of the bracket-shaped board with black chalkboard paint following the instructions on your specific bottle. My chalkboard paint instructed to use two coats of paint and allow a relatively long cure time.
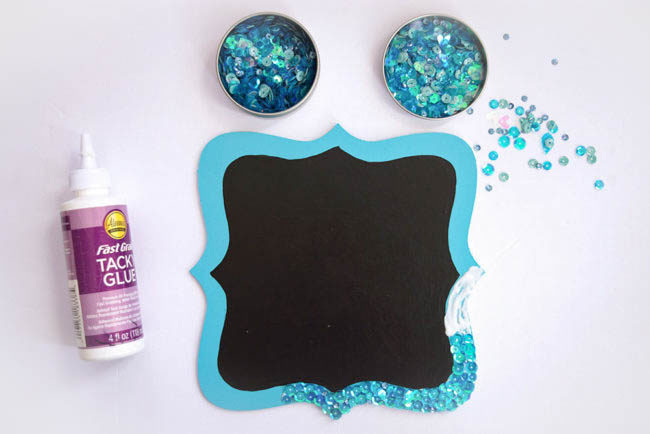
Glue the blue sequins from the 28 Lilac Lane “Mermaid Tale” Premium Sequin Tin around the outside edge of your bracket shaped board. I used three different size sequins from the tin all the way around the edge of the board. My kids had a lot of fun helping with this step! I had one helper finding the perfect sequins from the tin, and the other helper situating them just right on the glue I was spreading. In less than 30 minutes, we had the perfect Mermaid Tale border around our chalkboard!

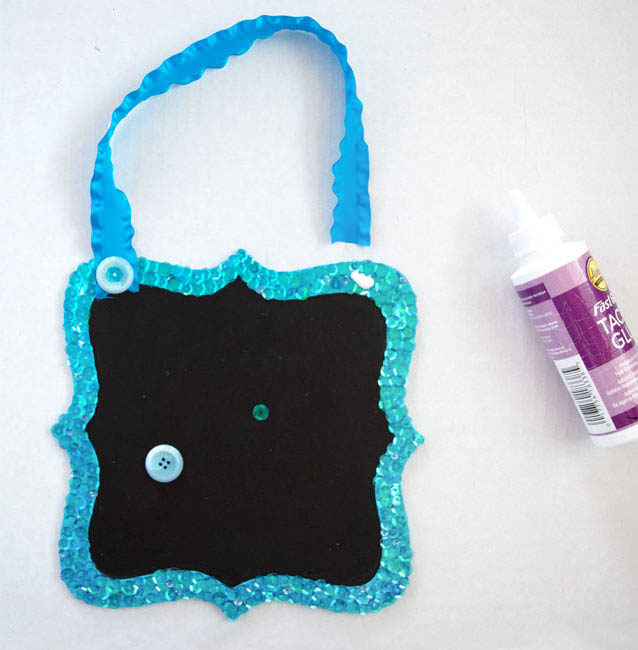
When your glue has dried completely, add a ribbon to hang your chalkboard. I cut a length of ribbon about 12 inches long. Add a dot of glue to the top of each side of the board, and add the ribbon. I glued a blue button to each end of the ribbon and added one more sequin inside each button (at the direction of my little helpers).
My daughter took the fun little chalkboard to hang in her room so she can write and draw her mermaid-y messages on it.
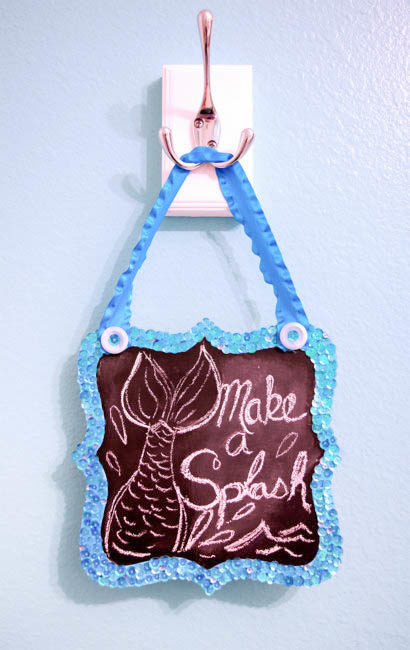
Using different sequin tins from the new 28 Lilac Lane Premium Collection could result in completely different little chalkboards. I want to make a house shaped Halloween themed one next, using the Haunted House Sequin Tin!
What shape and sequins would you use?
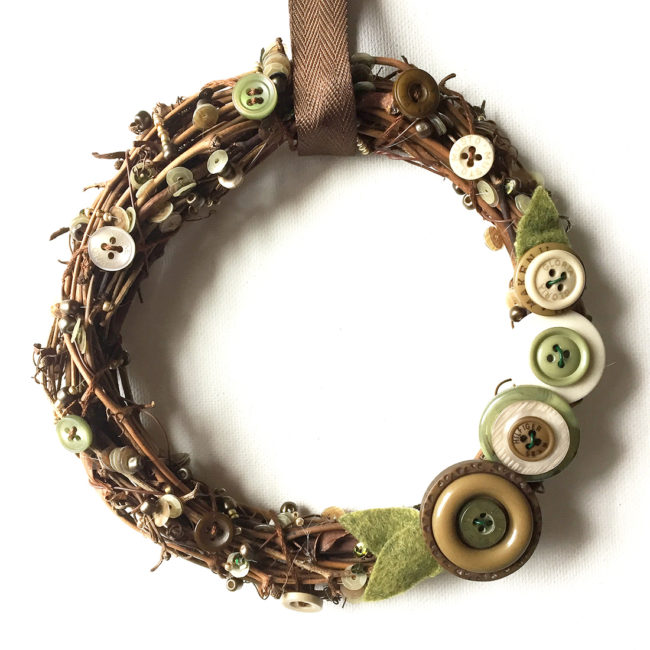
One of my favorite things to make are wreaths. There are so many ways to decorate them and endless opportunities to get creative. I put together this rustic vine wreath using the Victoria embellishment kit by 28 Lilac Lane.
Supplies needed:
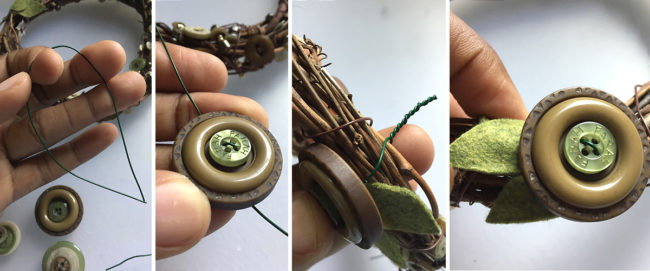
Start with the beading needle and invisible thread. Wrap the thread around the wreath and tie a knot to secure it. Stack beads and sequins onto the needle until you have about 1/2 inch or so on the needle. Wrap the thread around while keeping the majority of the beads and sequins in place on the front of the wreath.
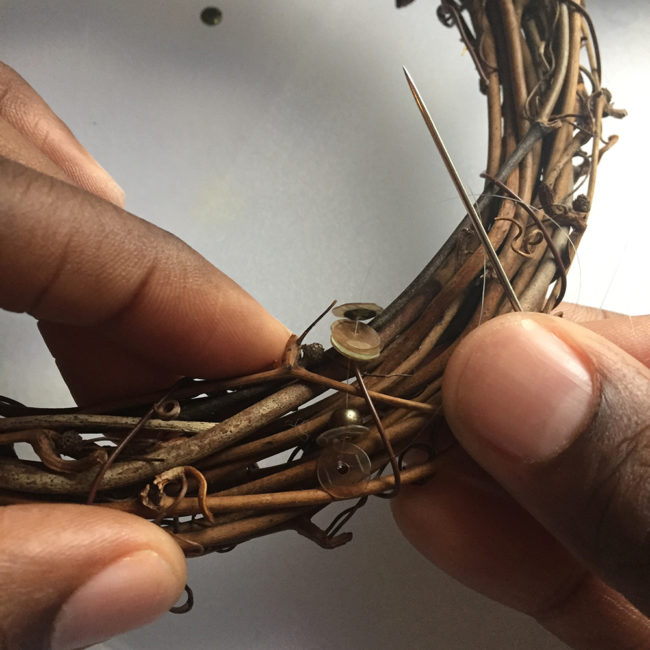
Continue wrapping the thread around the rustic vine wreath until you get back to where you started. You’ll get the best results if you wrap the thread no more than about 1/2″ inch apart.
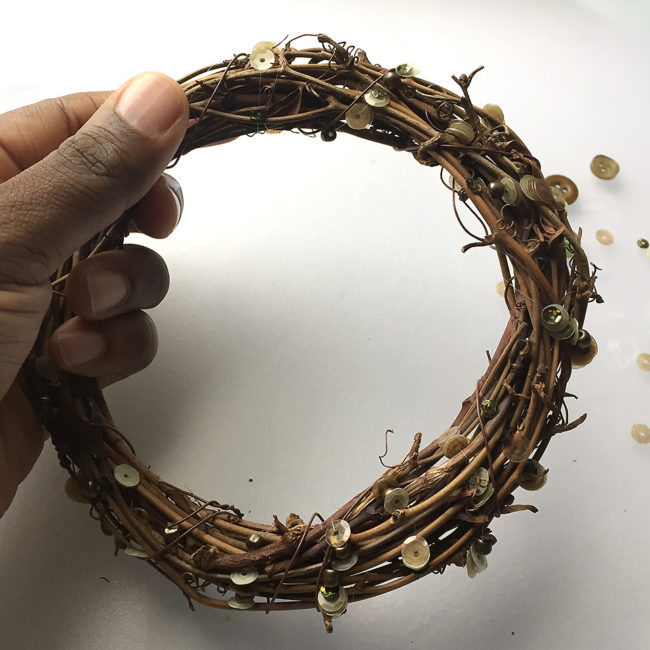
After adding the sequins and beads, I repeated the process with embroidery thread to add some little buttons.
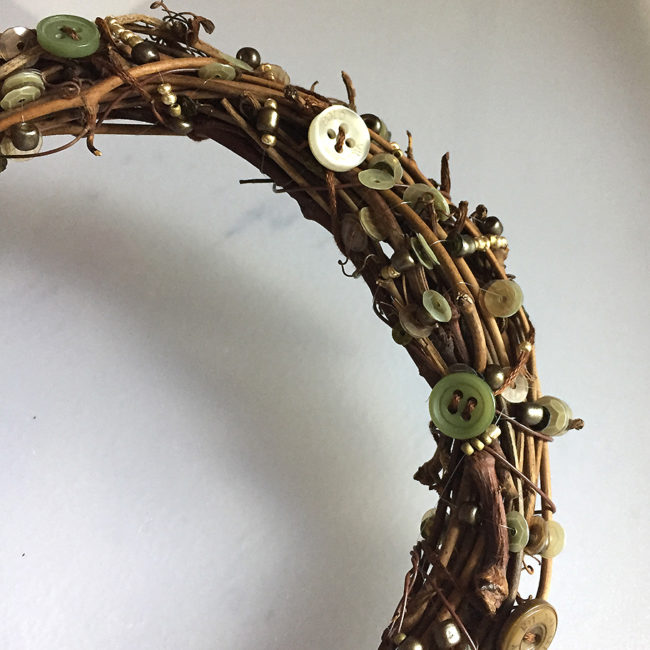
I cut a few pieces of felt to create leaves and attached them to the wreath with a glue gun, while leaving space for some buttons. Cut a length of wire long enough to wrap around the wreath. Stack 2-3 buttons and push wire through 2 holes in each of them. Wrap the wire around the wreath, twist, and cut the ends. Tuck the excess wire into the backside of the wreath so there are no sharp ends left sticking out.
After you have added as many buttons as you’d like, the last step is to tie a ribbon to hang your finished rustic vine wreath! I used a small 6 inch wreath for this project, but of course it can be done in a larger size. I find this to be a perfect size to decorate with inside the house. I often hang small wreaths around the house on the walls alongside my photos and even hang them in my work space at the office.
Looking for a wreath project but prefer a different style? Check out all our button wreath projects!
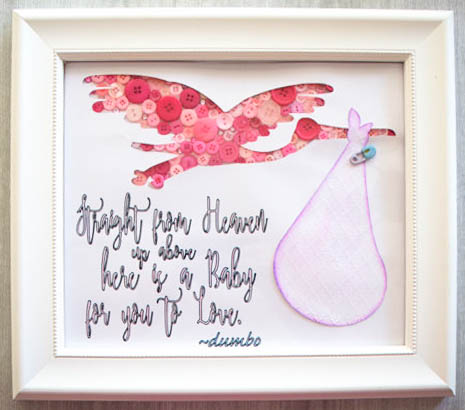
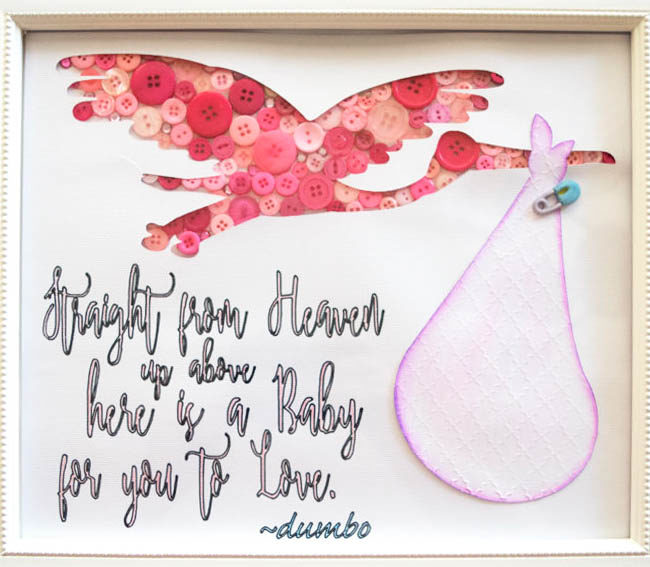
Hello! Kelli here. I am excited to share this sweet button nursery decor with you today! A dear family member is having her first baby soon – a girl! My family member is a Disney fanatic, and so I thought this sweet little project would be just right up her alley for nursery decor.
I wanted to create a button silhouette, but sometimes it can be difficult to get those round buttons to fit into a certain shape. I solved the problem and saved some time by using a cut out to go over the buttons, giving it nice crisp lines.
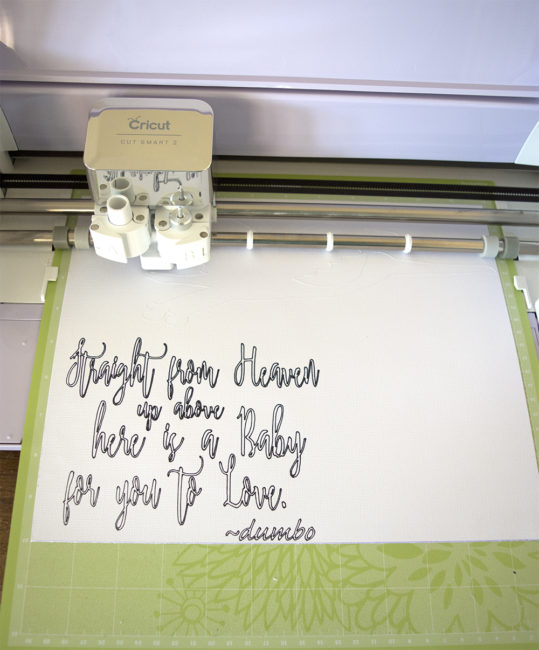
Start by printing out the design templates. I used three sheets of 12×12 cardstock. The heavier the cardstock is the easier this project will be. The first sheet you print should be the quote with the stork outline. The second sheet will be the bag cutout, and the third sheet will be blank.
You can download the PDF templates here:
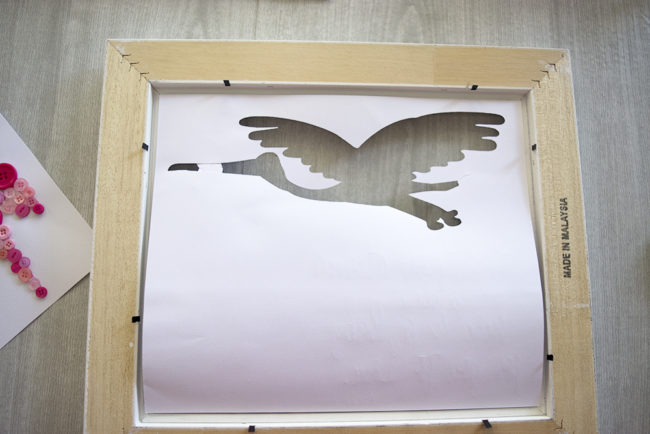
Cut out the stork outline. Use a sharp knife or the point of your scissors to poke a hole in the center of the stork, and then cut it out. Alternatively, if you have a Cricut or a Silhouette cutting machine, you can upload the template into the machine’s software and use the machine to draw the lettering and cut out the stork for you, which is what I did.
Lay the sheet with the cut out stork on top of the blank sheet of cardstock. Use it as a template to trace the outline of the stork onto the blank sheet.
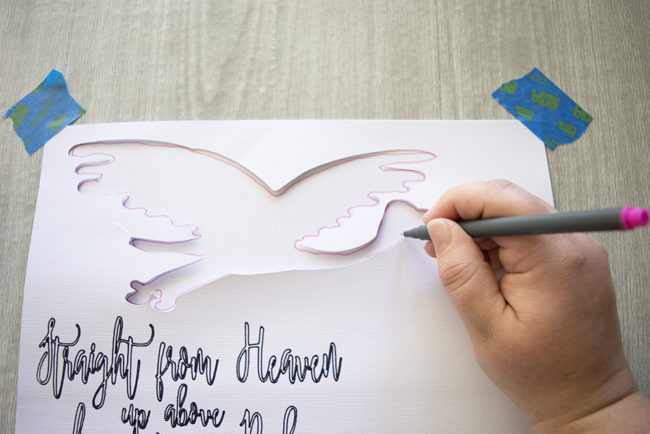
The outline will give you an idea of where the buttons need to be placed.
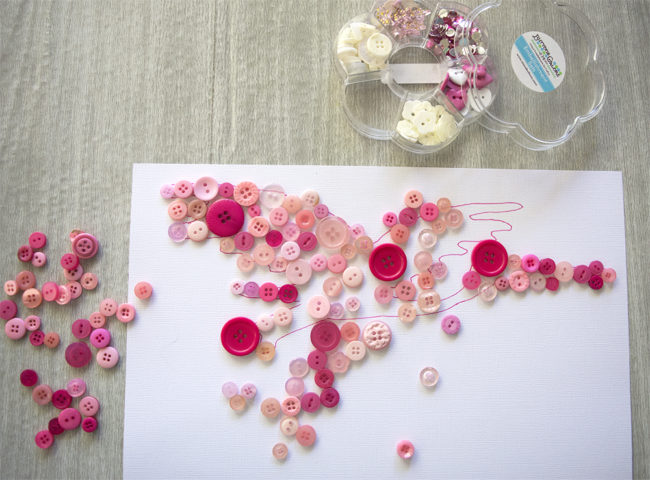
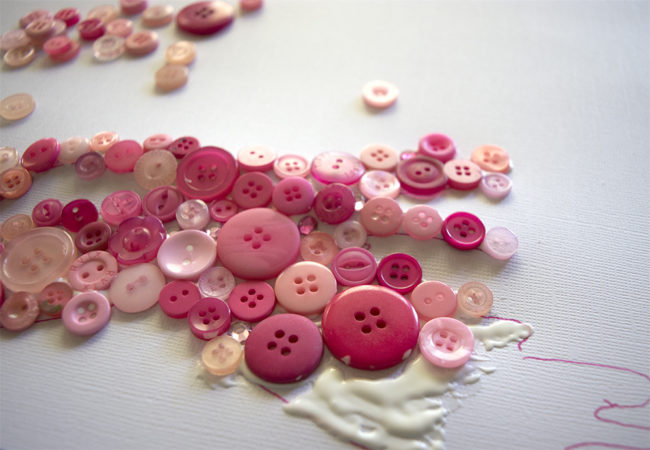
Glue pink buttons to the blank sheet of cardstock, filling in the stork outline. You don’t need to worry about going outside the lines with the buttons.
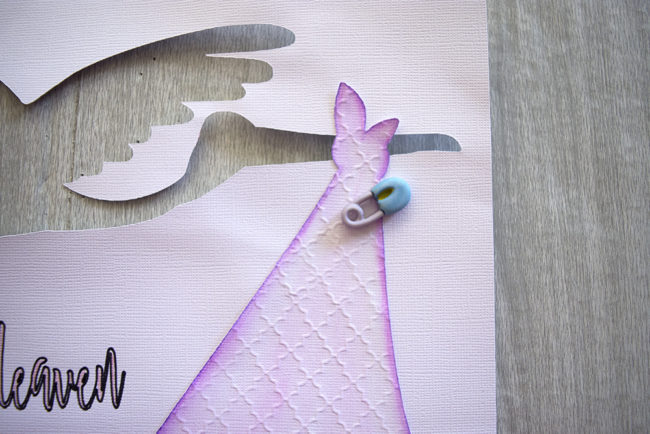
Cut out and color the stork’s bag. I ran it through my manual die cut machine with an embossing folder to give it a little bit of extra depth. Alternatively, you could use a patterned paper to print the bag template on for an extra something. Glue the stork bag onto the cardstock sheet with the cutout stork silhouette, making sure to line up the knot on the bag with the stork’s beak. Glue an adorable clothes pin button to the bag. (Cut off the shank first with scissors or a shank remover.)
Layer the pages into your picture frame. First, the stork cutout sheet goes in face down.
Lay the cardstock sheet with the glued buttons on face down on top of the first sheet, and line them up. Replace the frame back and you’re done!
Now your buttons have a perfect silhouette line without any fuss, and you have some adorable nursery wall art for a sweet new baby. Change the pink buttons to blue ones for a boy (or yellow if you don’t know the baby’s gender), and it works for both!
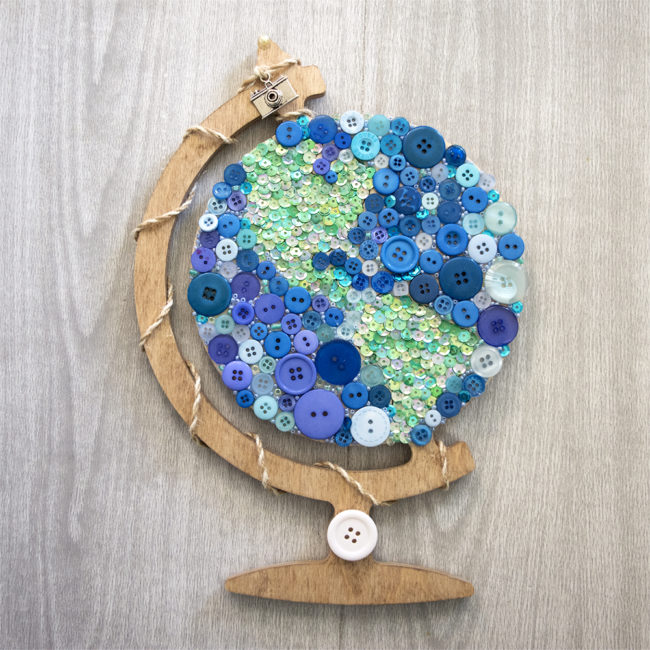
Hi! I’m Kelli, from the Craft Shack Chronicles blog and I’m so excited to be joining the Buttons Galore Design team! For my first project, I wanted to make a piece of home decor. I’m working on a gallery wall above my piano and I am having fun adding in lots of different colors and textures. You can easily add interesting depth and texture to your home decor pieces by using buttons and sequins to add color instead of paint. I used two 28 Lilac Lane kits to make this fun Button Globe Mosaic.

Draw the design outline onto the wood globe surface. You can trace it, transfer it, or freehand it. Draw the design onto the globe using a pencil. You won’t be able to see it when it’s covered in buttons and sequins so it doesn’t need to be perfect.
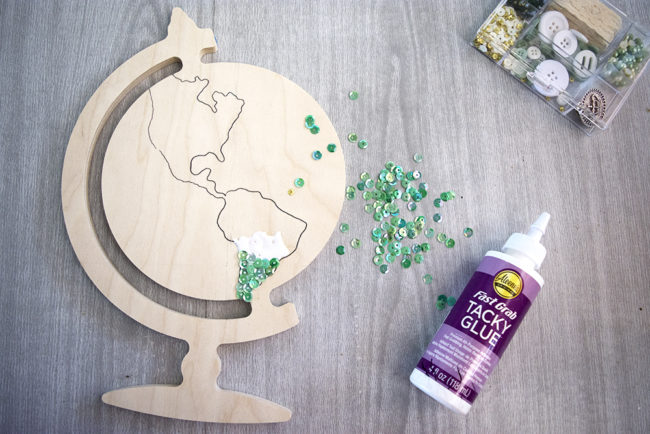
Use green sequins from both Lilac Lane kits to fill in the land shapes. Add a little bit of glue and spread it out. Drop the sequins onto the glue one at a time. I find it easy to use a toothpick to arrange the sequins in the glue but you could use whatever you have on hand.
The glue will dry clear, so you don’t need to worry if you get a little messy.
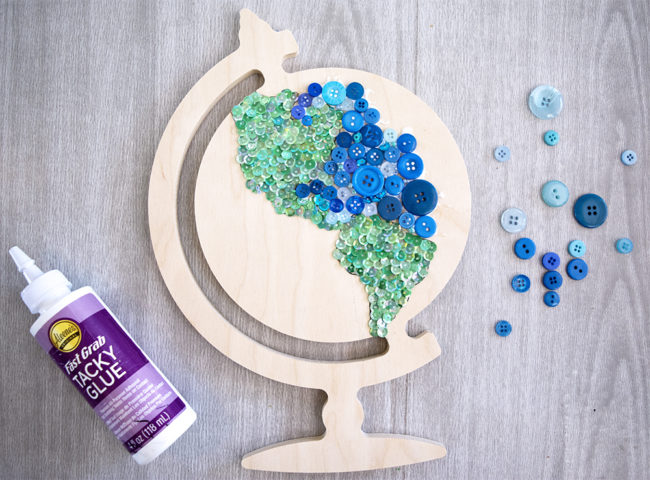
Fill the in the oceans with blue buttons. Try to mix large and small buttons into the mix to add interesting variations in the texture. The smaller buttons fit nicely in some of the small curves around the land, while the bigger buttons were easier to use further out in the ocean.
Cover the entire globe with buttons and fill in any gaps with seed beads, or blue sequins from the Lilac Lane Kits.
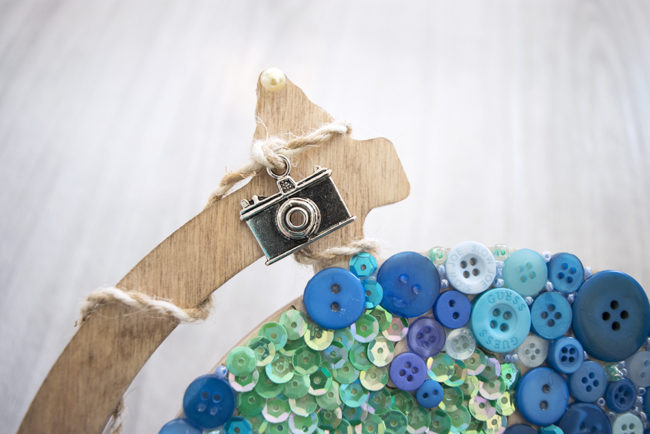
Use wood stain to finish the remaining wood part or fill it in with buttons that complement your home decor colors. Finally, use the beautiful rope trim from the Let’s Go kit to attach the camera embellishment from the same kit to the top of the globe. A big white button from the Tea Time kit was the perfect size to put on the globe base.
I’m thinking about adding a little red button heart in the general area where we live on the globe. Would you add it, or leave it as it is? I can’t decide! I’m so excited to hang my new Button Globe Mosaic on my gallery wall soon!
Hey y’all! It’s Lorrie here with my first project for the Buttons Galore team! Today I am sharing a cool wall hanging canvas featuring an embellishment kit from 28 Lilac Lane.

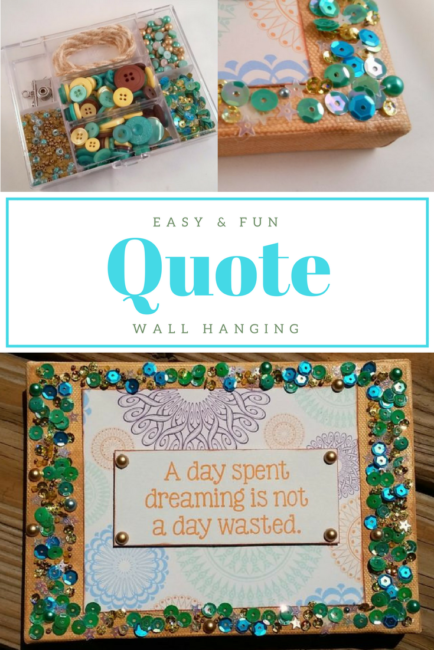
I had this cute quote that I loved and I wanted to show it off, so I decided to make a wall hanging using the quote and matching scrapbook paper on a 5″x 7″ canvas. Such an easy and fun project!
Supplies needed:
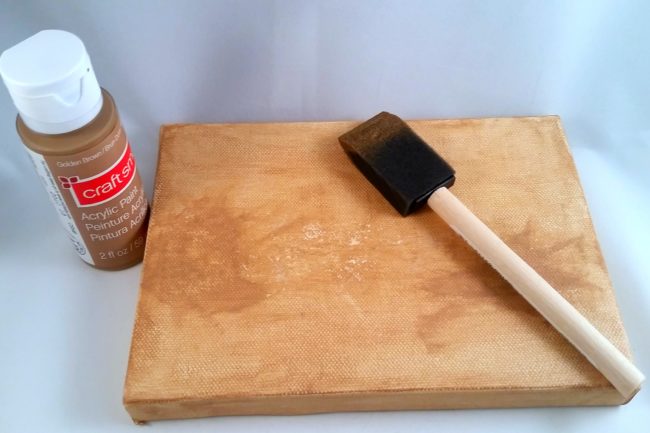
I started by painting the canvas using a light brown acrylic paint. I then cut out the quote and a 3″x 5″ piece of coordinating paper (the quote came from a sheet of quotes as part of a paper collection), and inked the edges.
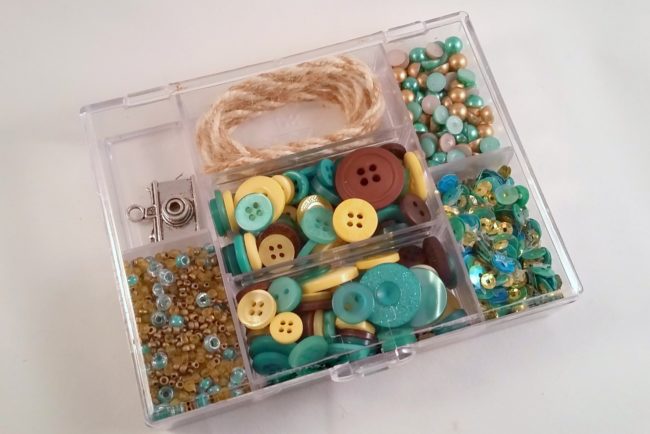
I attached the paper to the canvas using double-sided tape. Then I used adhesive foam dots to “pop up” the quote — this is an easy way to add dimension to your paper projects. Next came the fun part: adding the embellishments from this adorable “Let’s Go” embellishment kit by 28 Lilac Lane!
I will let you in on a little secret — I am not a big fan of liquid adhesives. I use them on projects, but they aren’t my favorite, mainly because here in the hot, humid south they take forever to dry. So to hold the sequins and beads from the embellishment kit onto my wall hanging, I used my not-so-secret weapon: red liner tape! Red liner tape is a double-sided tape that holds just about anything. It is the perfect alternative to liquid glues.
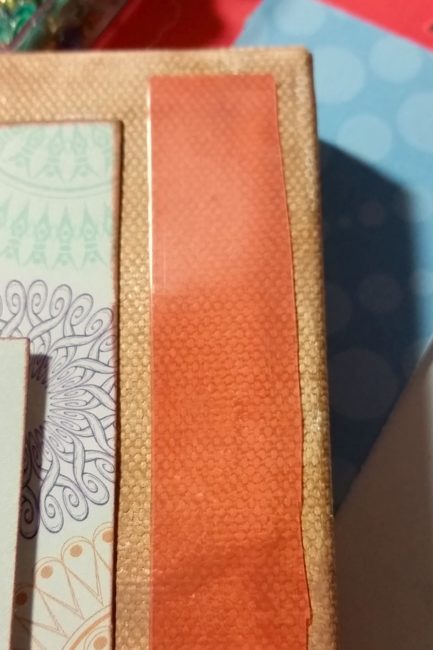
I applied red line tape to the edges of the canvas, and then sprinkled the sequin mix onto the tape. Just like when you’re using glitter, sprinkle the sequins liberally onto your project, then pick up and shake the item to remove the excess. Once most of the tape has been covered, fill in any empty spaces with the tiny seed bead mix and pearls from the kit.
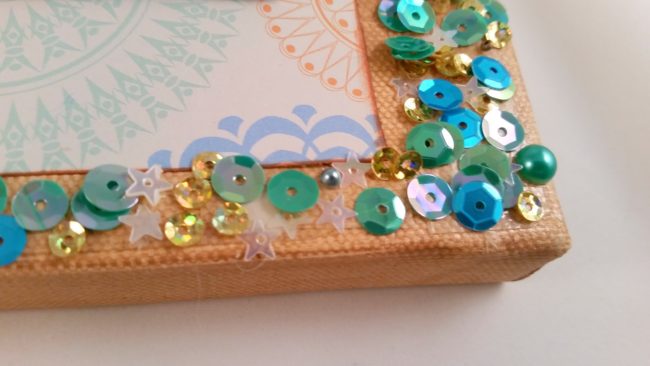
For the finishing touch, I placed gold pearls from the Embellishment Kit on each corner of the quote using mini adhesive dots.
Now you have a fun quote wall hanging that would look great on any wall in your home – and plenty of embellishments left over in your “Let’s Go” kit for lots more creative fun!
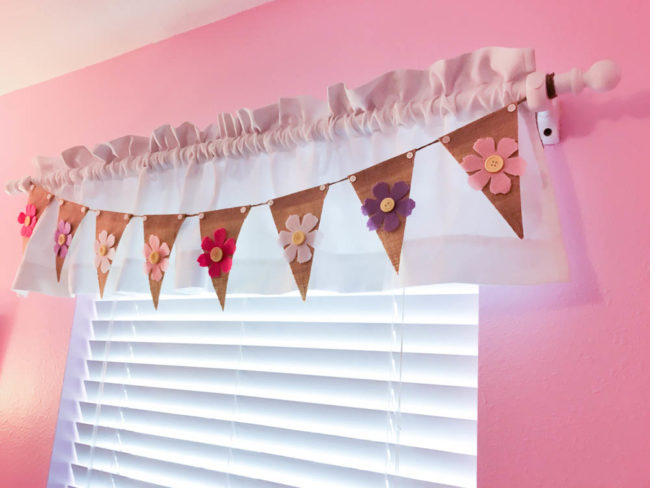
Buttons are a great way to add detail to home decor projects. This flower banner project uses them to finish off the flowers and banners that make a plain valance into a pretty accent for a girl’s room.
Supplies:
My daughter’s room has had this simple white valance since I first designed her nursery before she was born. She’s nearly 14 now, and it seemed time to change it up a bit. She loves everything with flowers, so I thought a flower banner would be an easy and fun way to add some more color to her room.
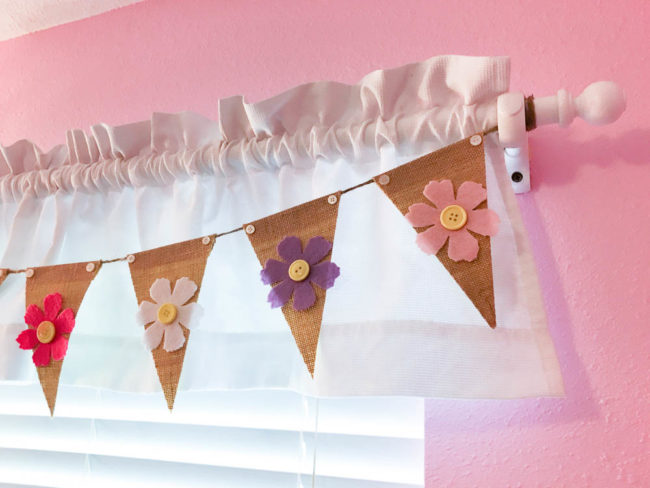
To make this flower banner, cut the number of triangle banners you think that you’ll need from burlap or cotton fabric. Die cut the flowers from felt and hot glue them to the front of the banners. Hot glue a button into each flower center to finish it.
Cut a length of jute twine that is long enough for your window. Fold over the top of each banner, lay the string into the crease, and hot glue the fold down. Once all of the banners are glued onto the string, finish each banner with two buttons.
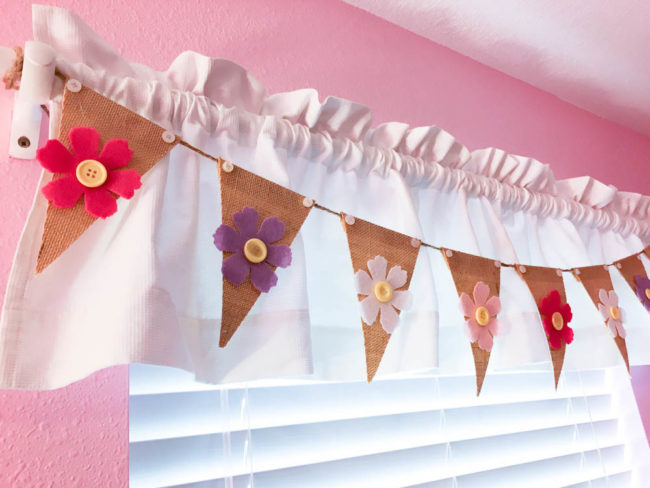
If you are decorating on a budget – or even if you aren’t – this is a great way to add some style to a simple valance. And because it isn’t permanent, it can be easily removed for washing the valance, or redecorating. Make one today!
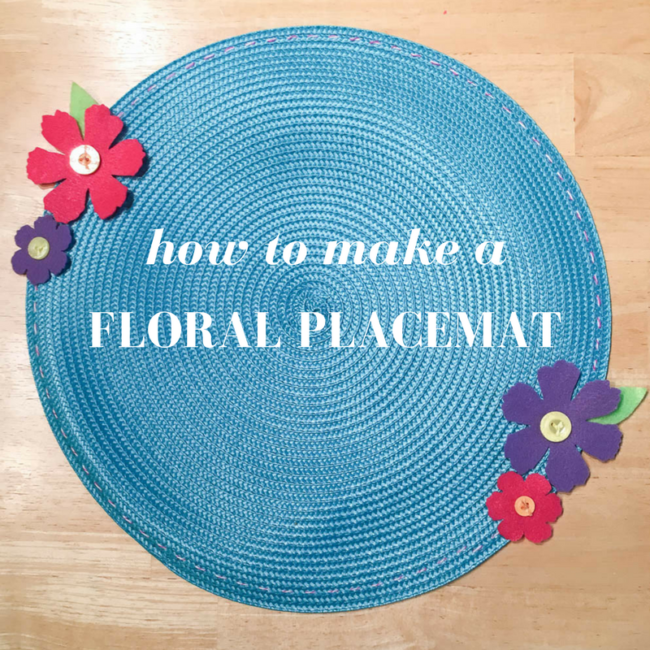
Spring means lots of special occasions! This flower placemat design is great for Easter, Mother’s Day, or for making a birthday girl feel extra special – and it’s super quick and easy to make!
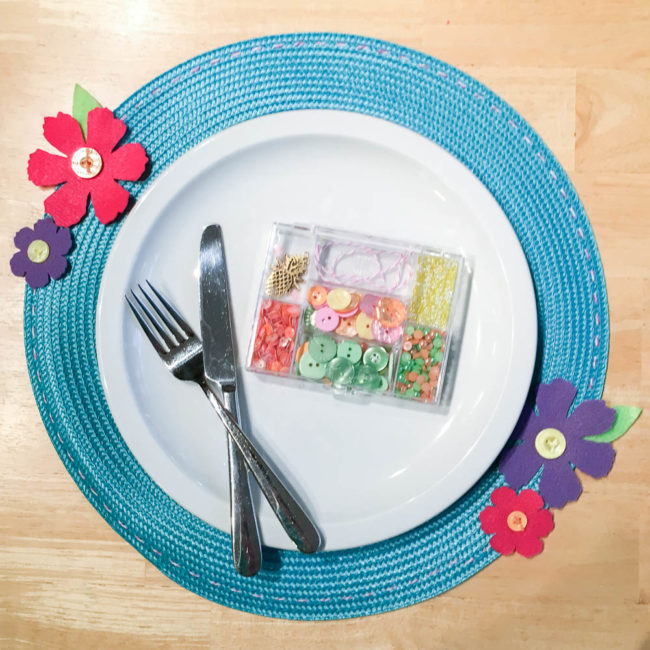
This flower placemat uses supplies from the popular 28 Lilac Lane “Tropical Twist” kit. You can tell that it’s definitely one of my favorites since many of the supplies are used from it! Although the name of this kit, and its themed charms, are definitely summer themed, this project is a great reminder to look at your kits not just as themes but as color palettes as well.
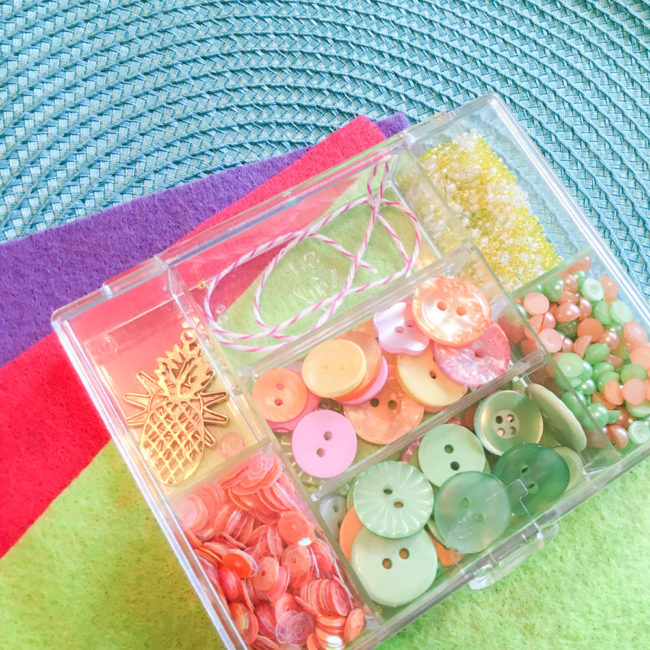
Supplies Needed:
To start making this flower placemat, get out a large needle. Thread it with the baker’s twine from the Tropical Twist kit, and stitch around the outside edge of the placemat. (I recommend doing this is several short lengths to avoid abusing your twine and for efficiency.) To make more than one placemat, use embroidery floss for this step as the kit only contains enough twine for one.
Next, use a flower die to cut flowers out of felt (or hand cut your own). Use scissors to hand cut the leaves.
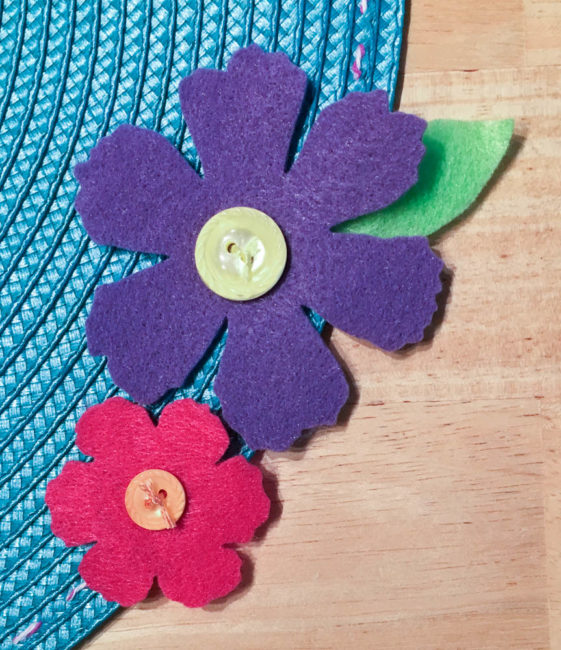
Position your flowers, and select buttons from the Tropical Twist kit to create their centers. Stitch through both the buttons and the flowers with a needle and embroidery floss to attach the flowers to the placemat. Use a needle and thread that matches the felt to stitch the leaves in place under the edges of the flowers as well.

Whether the occasion is Easter, Mother’s Day, or something else…this flower placemat will definitely brighten your spring table!
Buttons are a great embellishment for home decor projects – especially pillows! On my button heart pillow project, I used some gray buttons to create the third shape in a trio of hearts.
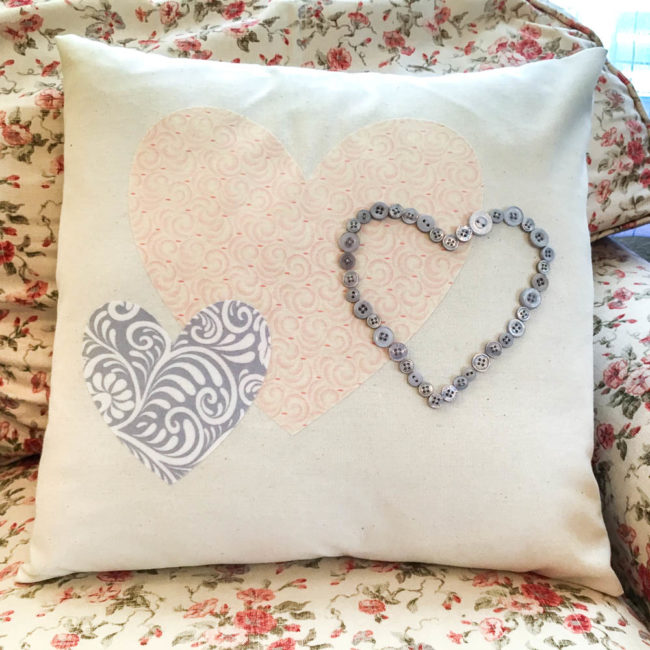
This button heart pillow project utilizes on of our versatile Button Basics bags of buttons. These bags contain approximately 150 two and four hole buttons between 1/2″ – 7/8″ in size, and come in a variety of colors. The beautiful color used today is Silver Gray, a lovely neutral shade of medium gray.
To start your button heart pillow, cut a piece of canvas fabric to 17″ by 36″ in size to serve as your pillow cover. This pillow cover is made using the envelope method, so it is removable to wash, clean, or to replace the pillow form.
Next select two fabrics, one for the large heart and one for the small heart. Cut the fabric to the sizes indicated in the supply list. Then, following the package instructions, iron the Therm O Web HeatnBond to the back of the two pieces of fabric. (Skip this step if you are going to hand cut your hearts and then sew them onto your pillow)
To cut out the heart shapes, there are two options. One is to create the hearts on your electronic die cutting machine and cut them out of the fabric that way. (That is what I did.) The other option is to draw them and cut them out by hand.
Place the hearts so the design they create is centered approximately vertically and horizontally on the canvas fabric. Iron them to adhere with the iron on adhesive. (Or pin in place and then sew them on if you are using that method.)
Next, draw or die cut and trace a third heart shape to serve as the outline for the button heart. Using a fabric marking pencil, trace that heart onto the pillow cover. This heart will serve as the lines to follow for placing buttons.
Hand sew buttons along the line of the heart design, keeping them centered on the traced line. Use smaller buttons at the angled parts of the heart, to avoid the buttons being too close together and making the lines indistinct.
After the buttons are completed, fold over and hem the short sides of the fabric so that the raw edge of the fabric is on the side away from the hearts. Lay the fabric out with the design facing up. Measure 15.5″ across the front of the design on the long axis of the fabric, centering the measurement on the design. Put a pin in the fabric on each side of the design where the 15.5″ extends to.
Using the pins as your fold lines, fold the long edges of the pillow in over the design to make a square. They should overlap, forming the opening that will let the pillow form in and out. Pin and then stitch a 3/4″ seam along the raw edges.
Clip the four corners, and turn the pillow cover right side out. Insert a pillow form and you are done!
(If you need more instruction on how to assemble an envelope pillow cover, there are plenty of great tutorials available for searching on Pinterest.)
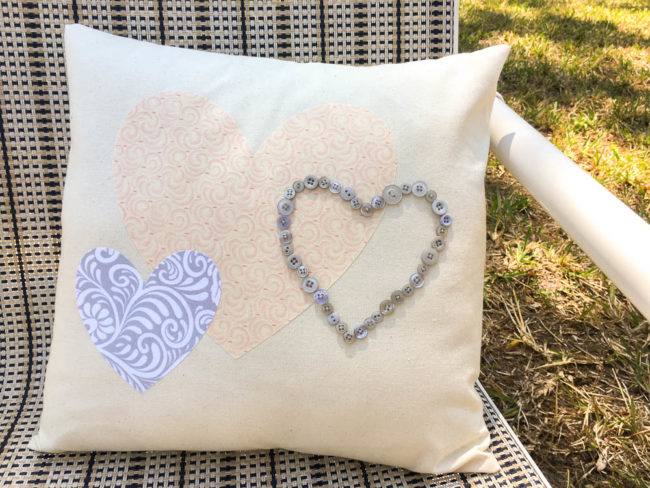
This simple design can be adapted to plenty of decor styles and colors! In bright colors, it would be perfect for a teenage girl’s room. Do it in Valentine’s Day colors for a seasonal look. What will you heart doing with a button heart pillow?
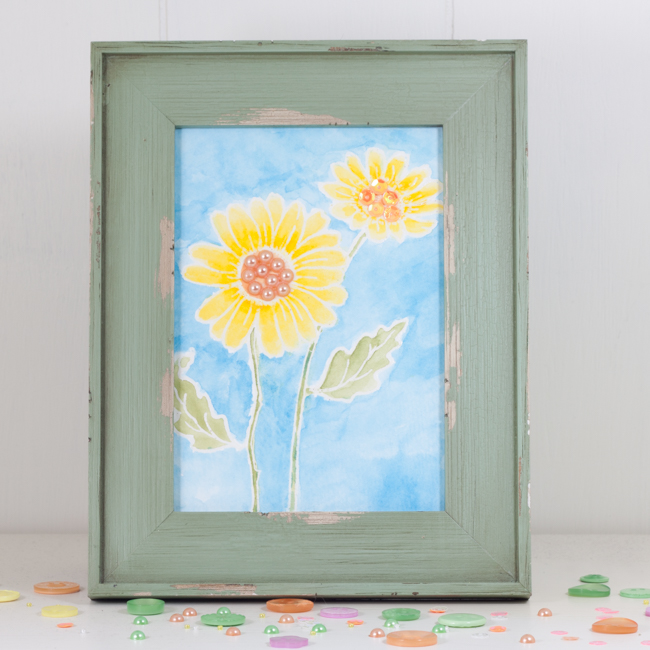
Spring has sprung. Watercolor spring flowers embellished with beautiful touches of 28 Lilac Lane are a perfect home decor project.
Supplies:
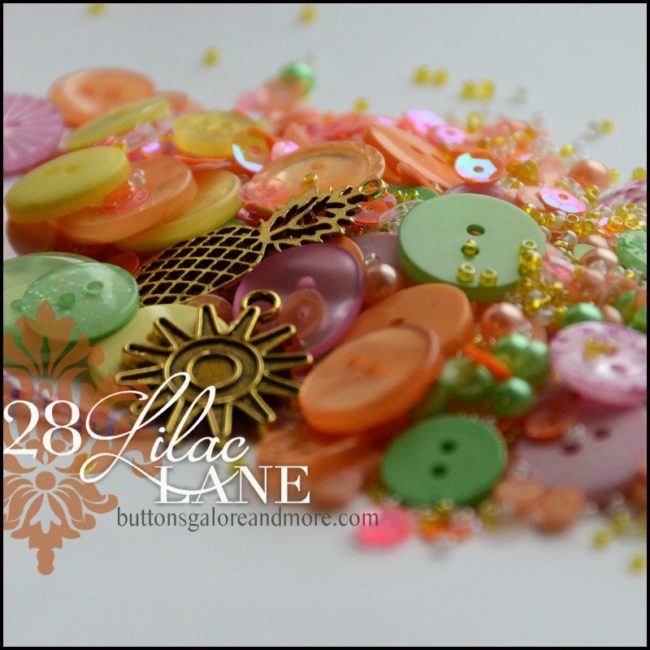
This watercolor spring flowers project uses tangerine colored flat back pearls and sequins from the 28 Lilac Lane “Tropical Twist” embellishment kit. Tropical Twist is a summery blend of yellow, orange and green citrus shades, with some delightful flamingo pink accents! With all of the seed beads, pearls, sequins, buttons, trim and charms, Tropical Twist is sure to have the perfect touch to make your project hot, hot, hot!
This project looks complex but is super easy to make thanks to a shortcut: stamps. To create this design, simply use flower stamp sets to stamp your desired design in clear embossing ink on watercolor paper. Then heat emboss the design with clear embossing powder.
Once the design is embossed, you have a virtually foolproof way of making your own watercolor painting! Simply use a fine detail water brush to color in the design with your watercolors, following the embossed lines as a guide. Any color that gets on the embossed lines can be simply wiped away to keep them clean!
After filling in the design of your watercolor spring flowers, switch to a large water brush to fill in the background with some watery color.
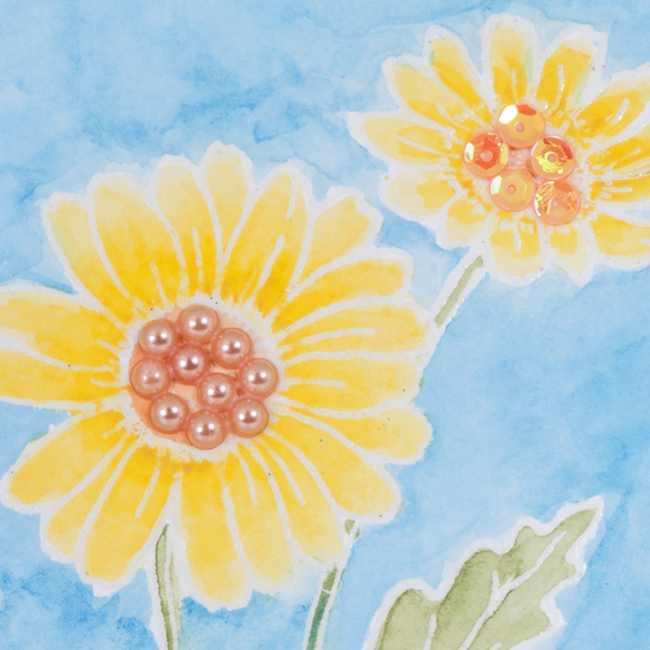
For the finishing touch on your watercolor spring flowers, add some 28 Lilac Lane embellishments to the center of them with a clear drying glue like PPA Matte adhesive. Using flat back pearls or sequins as “tiles” to fill a small area of a design is a great way to get some extra pop on a project. Our kits and embellishment bottles come with plenty of sequins and pearls, so there’s no worry about running out mid-project, either!
This winter has dragged on too long. Get out those watercolors, stamps and embellishments and craft it away with some watercolor spring flowers! (And don’t forget the Tropical Twist, too!)

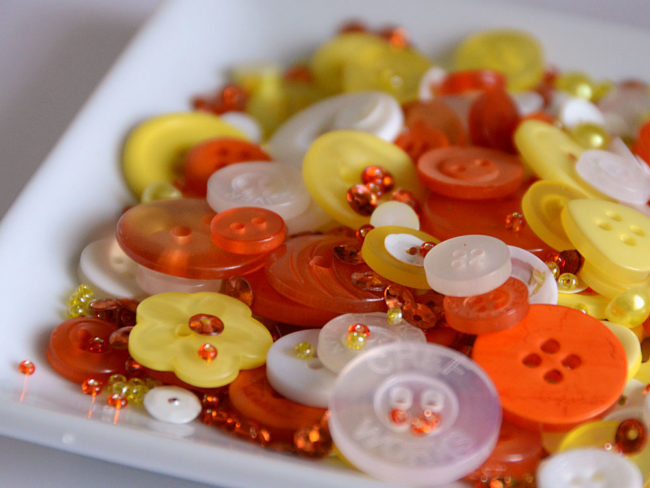
Today we’re sharing another project from our booth at Creativation. This button mosaic sun that I created brought a little bit of my home in the sunshine state to the show floor in rainy Phoenix!
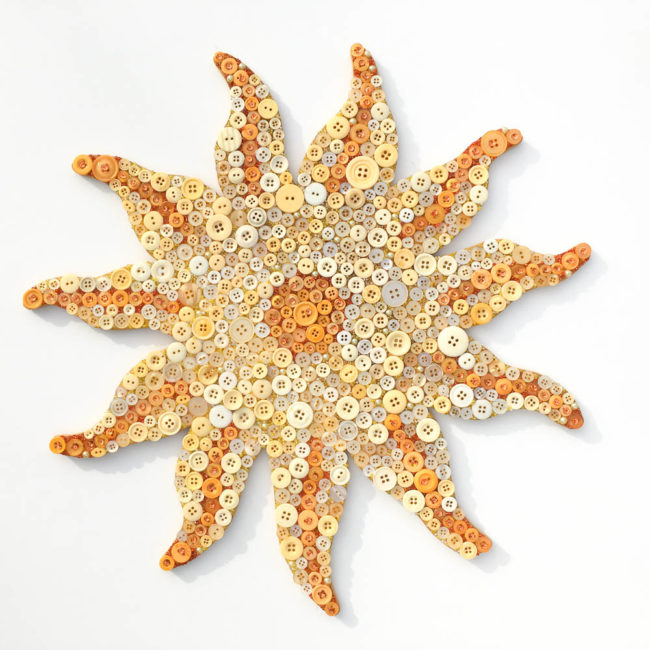
This sun looks yellow, but we call it….mango! It’s made with our “Mango Madness” color blend of buttons. This blend of delightful shades of orange and yellow is perfect for sunshine-y projects of all kinds.
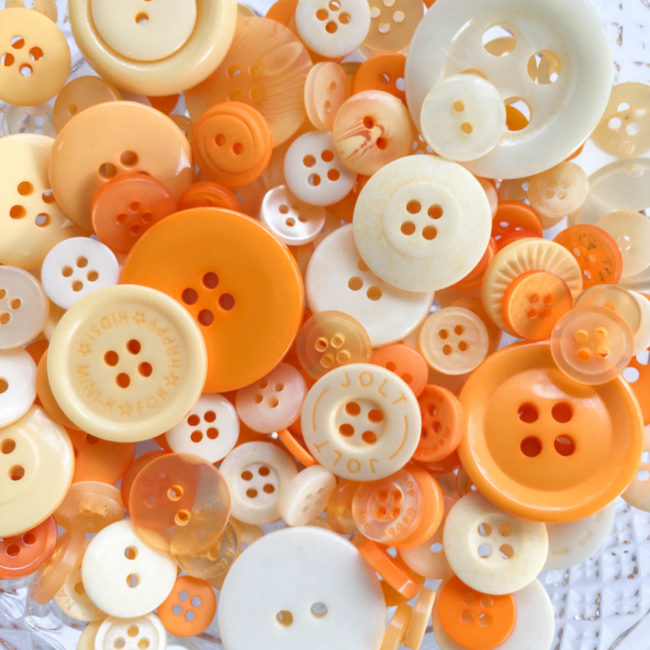
Although they don’t look at first like they are at all the same color palette, I combined the Mango Madness color blend with a 28 Lilac Lane embellishment bottle called “Candy Corn“. I only used seed beads. flat back pearls, and sequins from the Candy Corn bottle. Used in small doses with these tiny items, the colors work well together.
 Button mosaics (or collages) are such a fun way to use buttons, and this one creates a beautiful piece of wall art home decor when you are done!
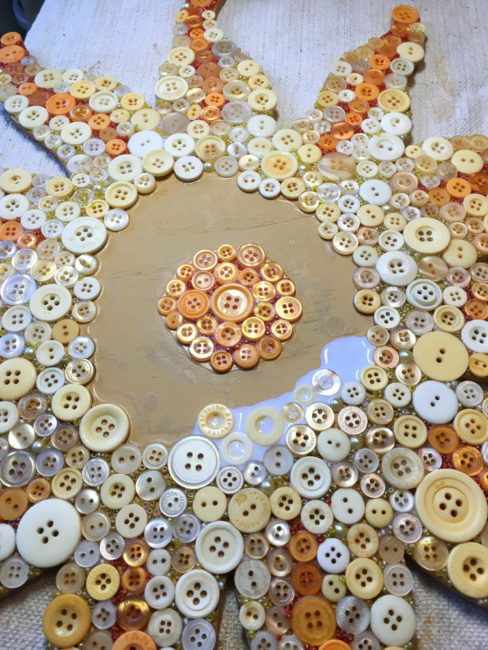
To get the full tutorial on how to make this piece of sunny wall art (or learn how to adapt this technique to make your own design), visit my website Craft Critique.
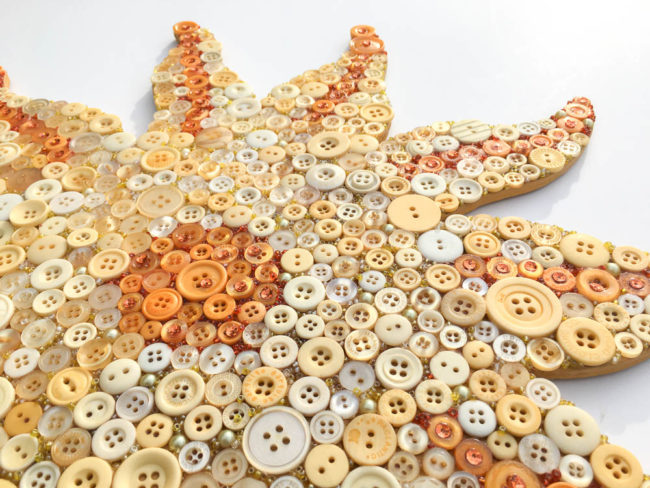
This project can be adapted to a lot of different shapes…how about an apple for teacher? Or a heart or flower for a tween room? The possibilities are endless! What will you make?
It’s time to share more of our Creativation booth projects! Chicken wire is so trendy right now and, paired with a button collage, it makes a gorgeous memo board!

This bright and fun button collage memo board is great decor for a kid’s room or nursery, a craft studio, or for displaying old family photos at a wedding or baby shower!
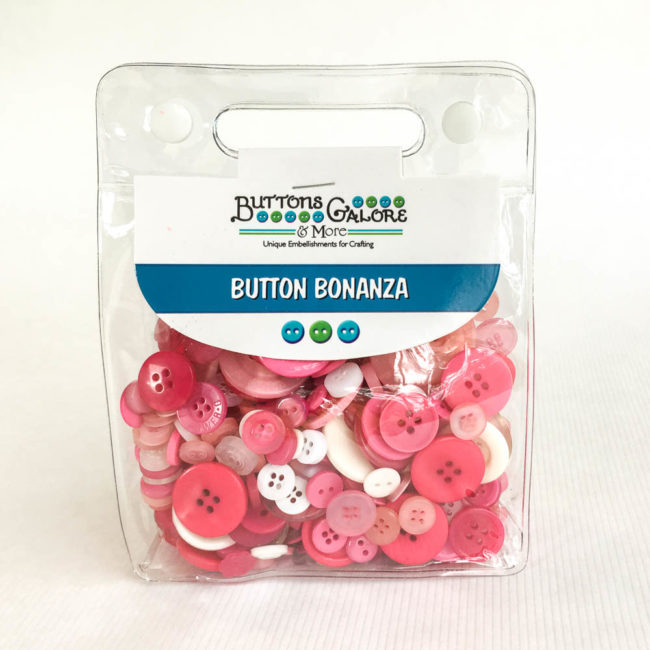
To make this heart memo board, which is about 17″ tall, it only takes two bags of our “Bubblegum” Button Bonanza buttons! This fun mix includes several shades of pink from pastel to brilliant fuchsia mixed with some white buttons. It’s perfect for everything from little girl projects to spring flowers – and of course, hearts!
The shades of pink in “Bubblegum” make a beautiful button collage on this heart memo board. The shades create a wonderful visually textured look on the frame – and there’s no worry about color matching since the shades are already pre-coordinated!
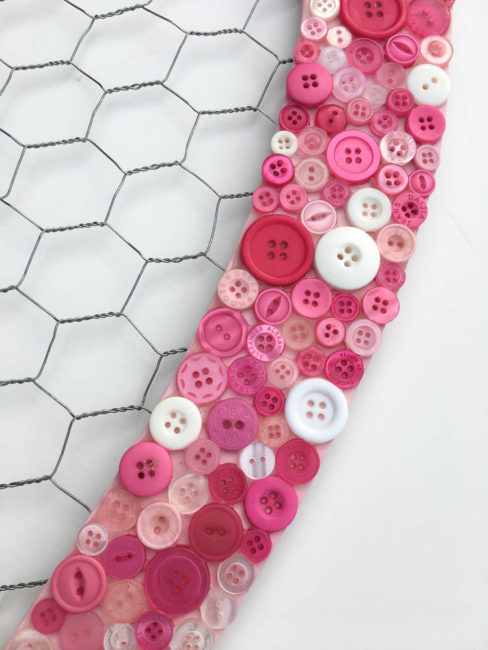
This memo board was created completely from scratch, starting with a piece of 1/4″ birch plywood. But it’s easier than you think to make, with only a few basic tools and techniques. To get the full tutorial, click here!
One of our favorite things about attending shows is the chance for our staff and some talented craft designers to show off in our booth the beautiful range of possibility that can be created with Buttons Galore products. So today, for those who weren’t at Creativation, we’re going to give you a peek into our booth at the show to see all of the gorgeous inspiration we shared!
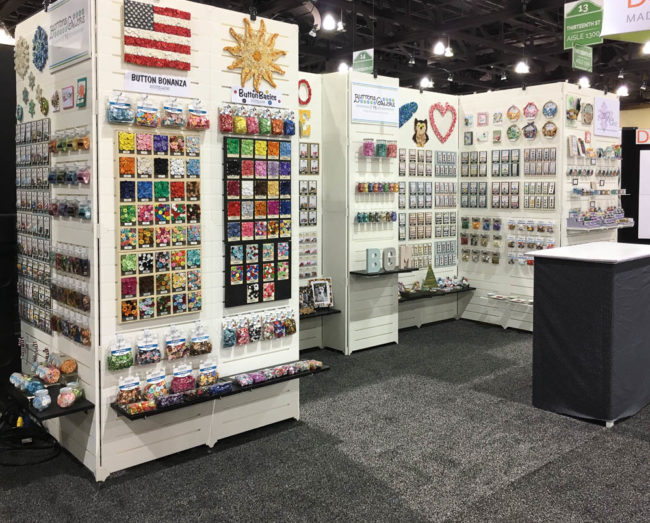
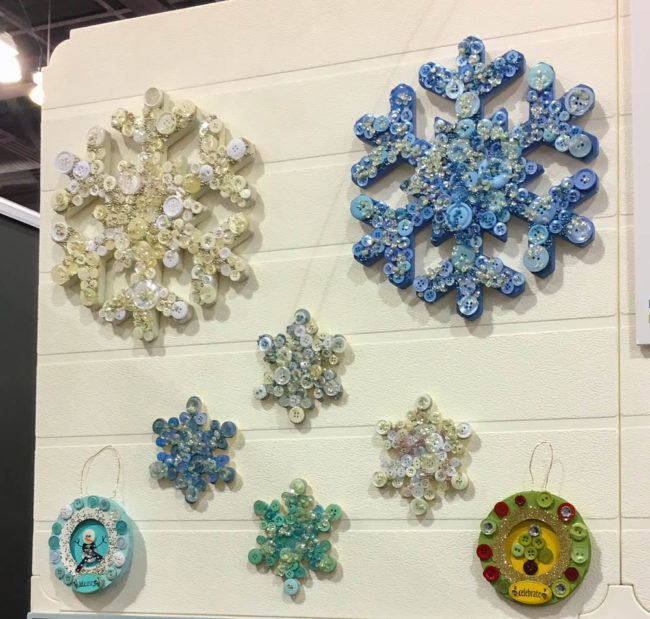
It may have been warm in Arizona, but inside the convention center it was snowing a blizzard in our booth! These snowflakes, created by Buttons Galore staff, show that buttons make gorgeous snowflakes of all sizes from tree ornaments to wall art.
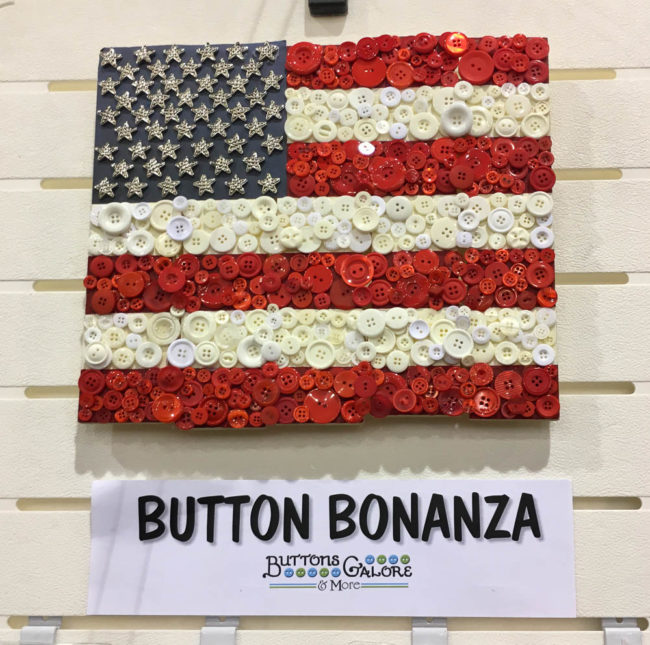
This American flag wall art piece, also created by Buttons Galore staff, combines our bulk buttons with our 3D decorative star buttons. It’s perfect for holiday decor for occasions like July 4th, or leave it up all year round for a patriotic touch of homespun decor.
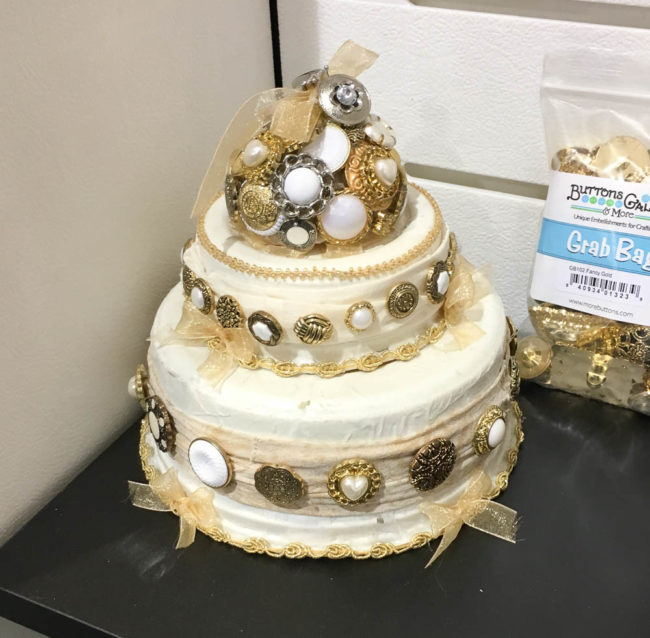
Speaking of special occasions, our decorative button grab bags are a beautiful and affordable option for creating decor for events like showers and weddings! This button cake, created by designer Jen Goode, is perfect for decorating a buffet table.
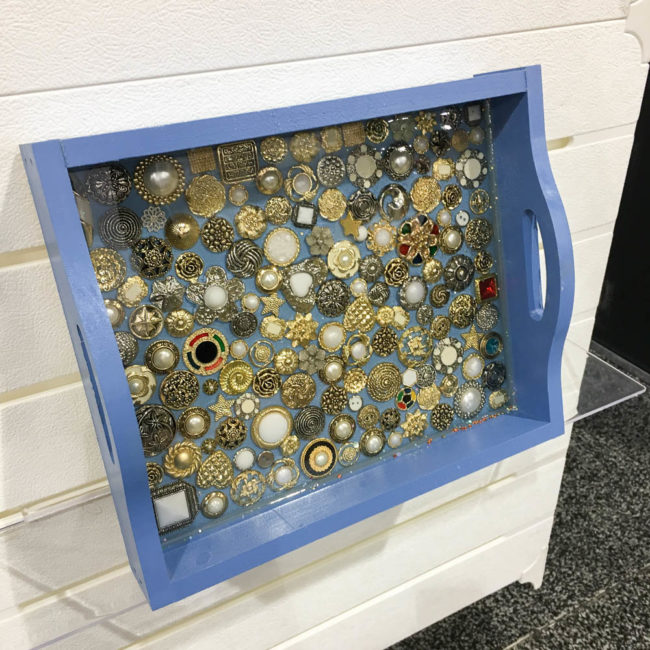
Love to entertain? Our decorative 3D buttons will make your tea time, cocktail hour, or coffee break oh so elegant! This tray project, by Buttons Galore staff, is quick and easy, too!
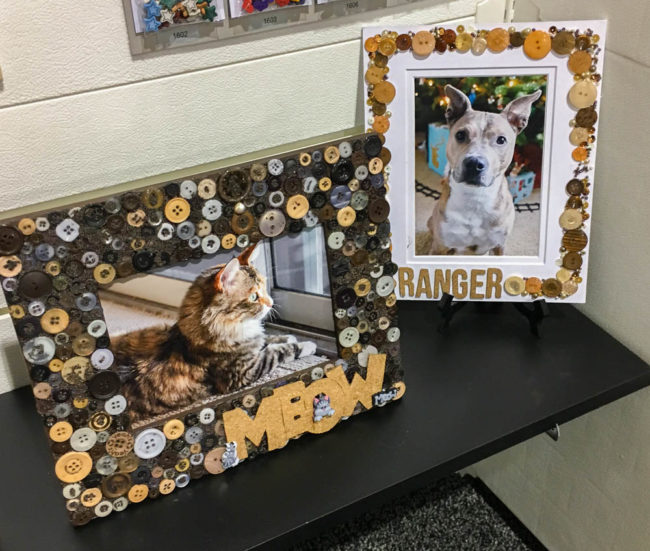
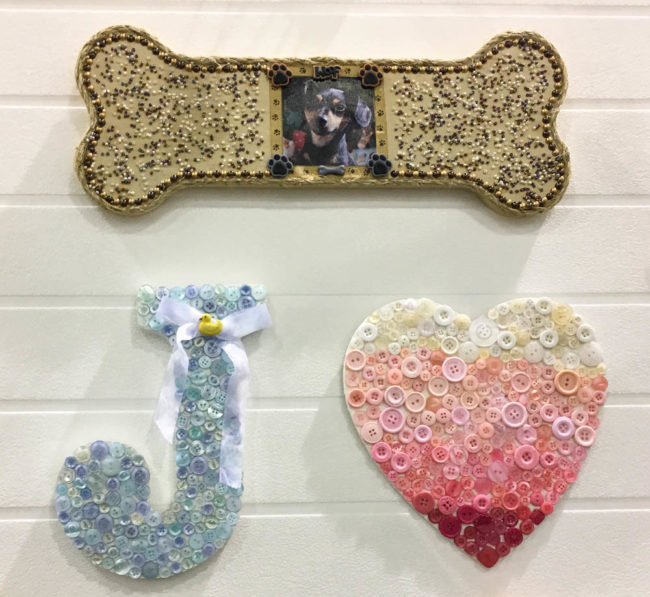
And let’s not forget our furry family members! Our booth went to the cats and dogs with these fun frames to display your favorite picture of your pet cat (by me) or dog (by 28 Lilac Lane designer May Flaum). For the instructions for the cat frame, click here.
If you’d rather hang your pet photo on the wall, try out this dog bone wall art project by Buttons Galore staff!
This button monogram is easy to make and perfect for a nursery or kids room! (Click here for instructions.) Or create an ombre heart wall art piece for someone special to remember you by. (Click here for instructions.)
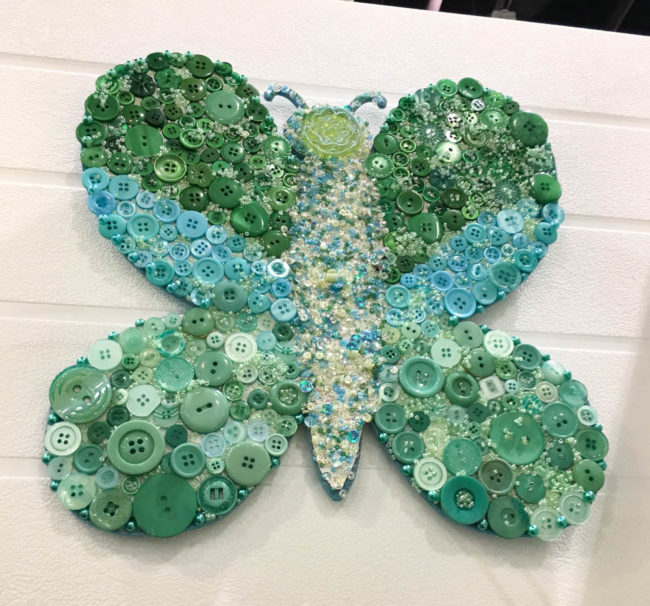
It seems everyone is in love with butterflies this season, and we agree! Our wall art butterfly, made by Buttons Galore staff, is great decor for a kid’s or teen’s room.
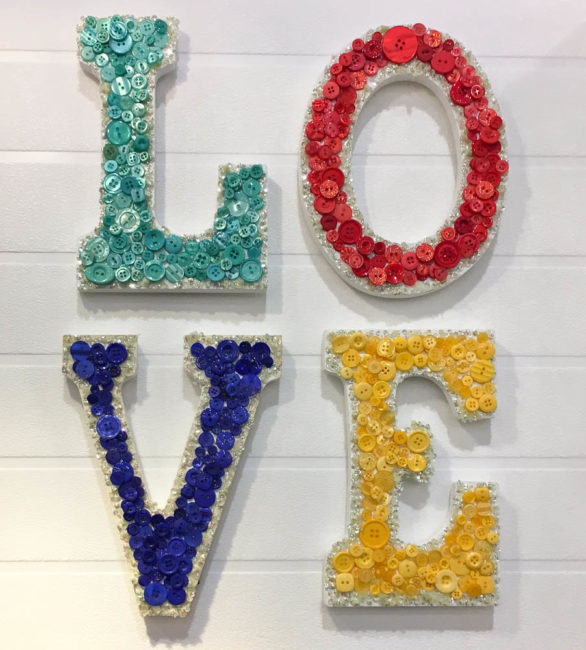
Text as wall art is very hot in home decor, and our staff decided to pay tribute to the greatest sentiment of all: love! These easy to make letters could be made in any colors to coordinate with the decor of a nursery or a shabby chic home decor.
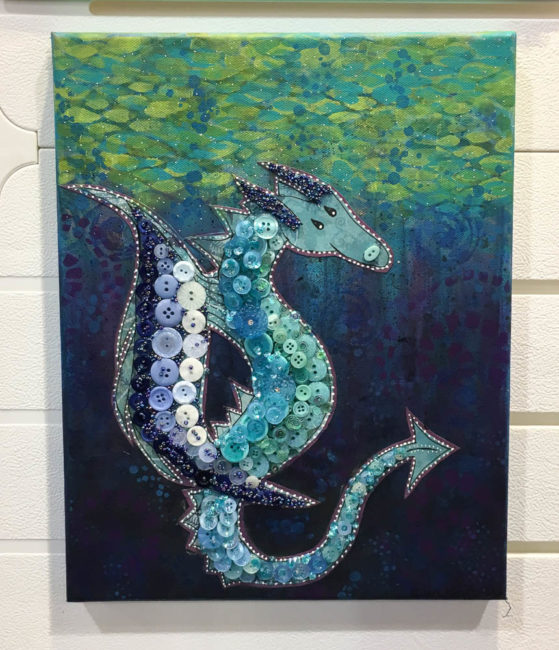
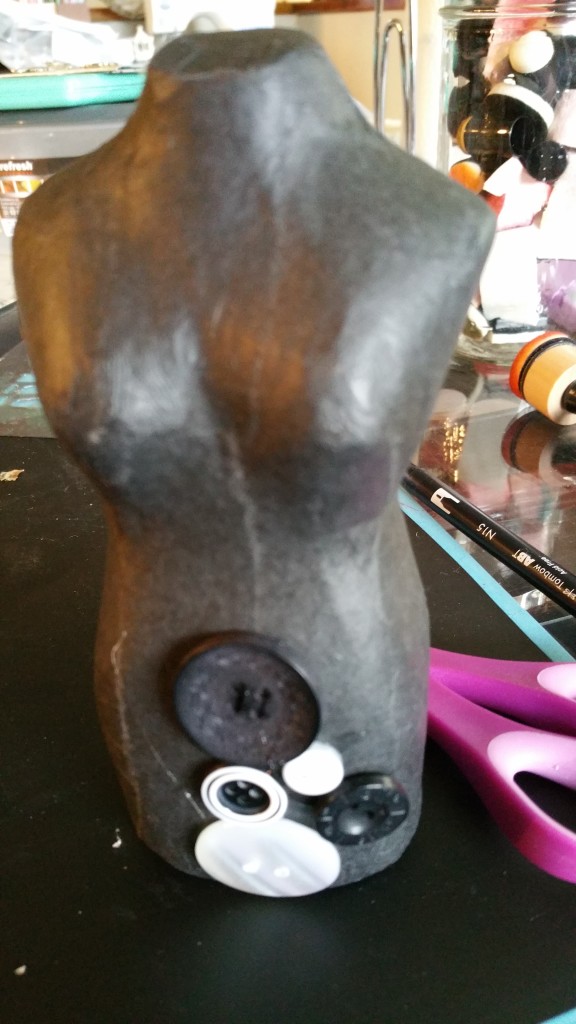
Our buttons are fabulous for working in mixed media, and designer Maura Hibbitts took them to canvas for us! This whimsical sea monster is full of texture and color!
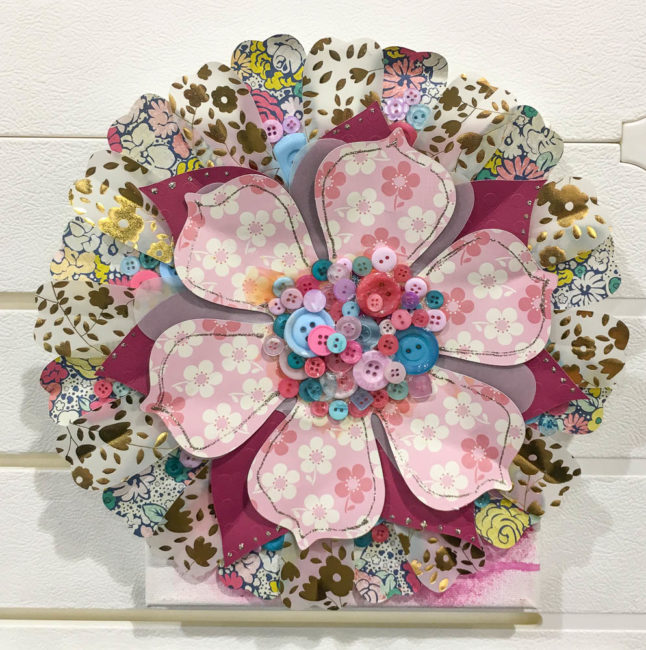
Last but not least, 28 Lilac Lane designer May Flaum shared her take on the 3D paper flower trend in our booth. Accented with a center of buttons, this flower will bring color and pattern to your walls or your party decor!
We hope that you enjoyed this peek at some of our booth projects from Creativation! Thanks to all of you who visited to see them in person!
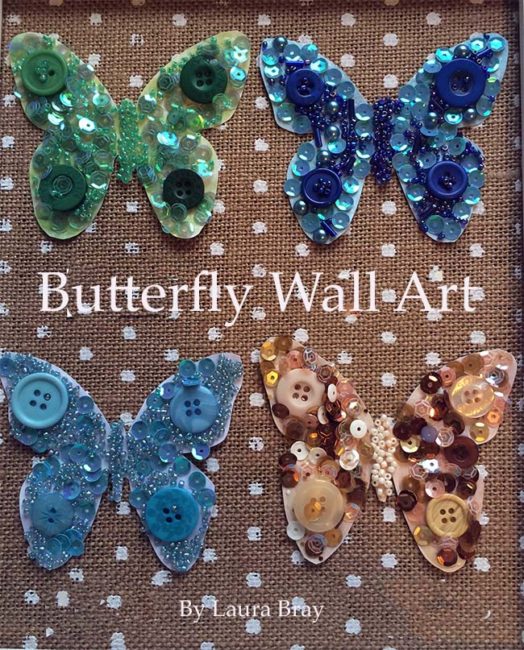 Hi! It’s guest designer, Laura Bray. Are you in need of a little spring joy during this long winter? How about creating some cute, button encrusted butterflies to be used in wall art? These would also be really cute on gift wrap, pins, or hair clips too! Here’s how to make them…
Supplies:
• Embellishment bottles and kits in the colors of your choice.
• Cardstock paper in colors that match your buttons colors.
• PVC glue
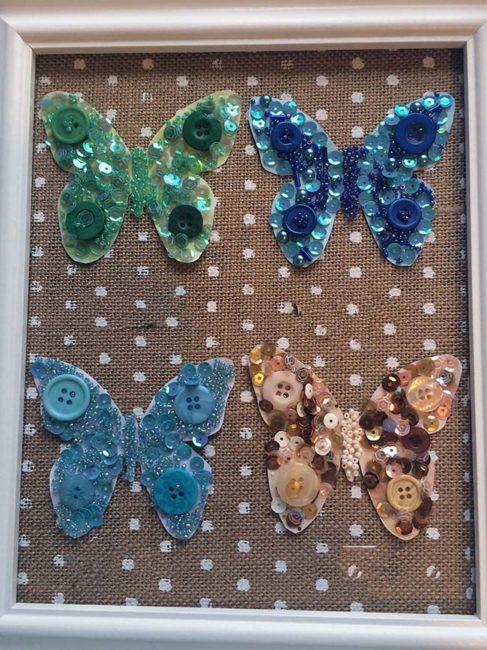
For framed artwork:
• White 8” x 10” frame
• Decorative scrapbook paper
• PVC glue
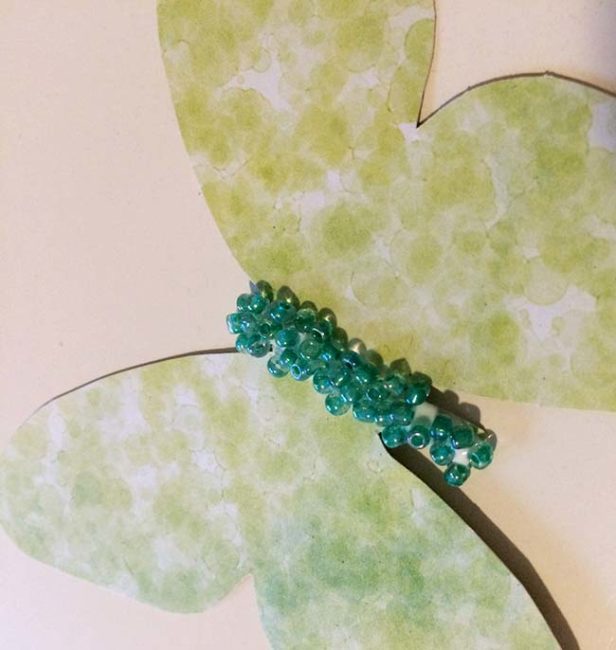
To create butterflies:
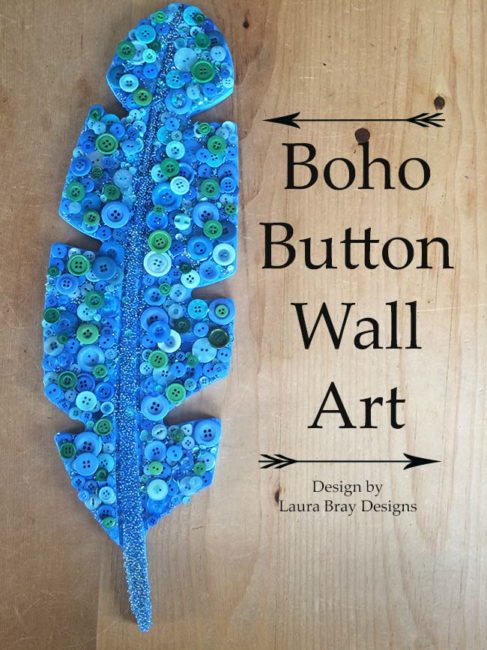
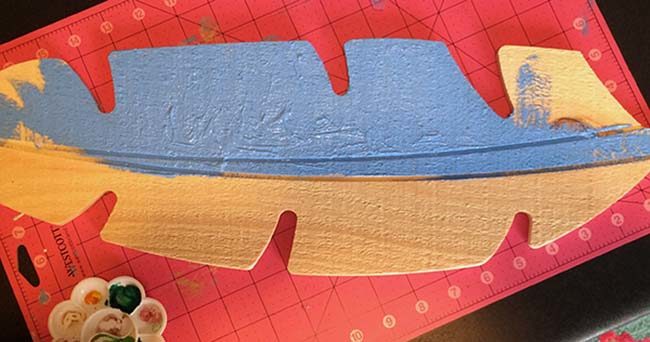
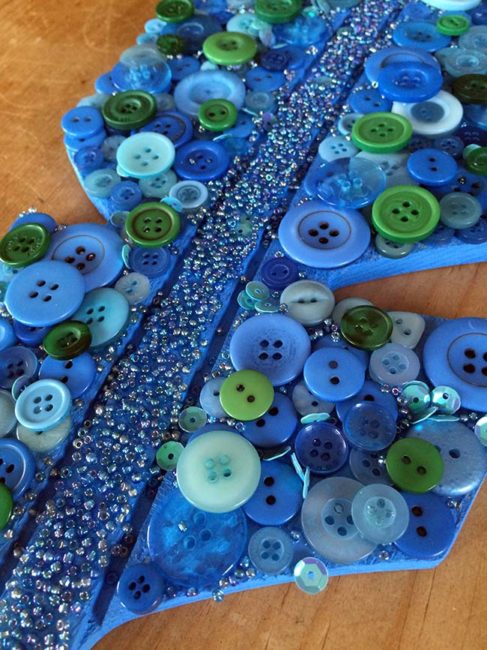
Hi! It’s Laura Bray with another fun, button-themed guest blog post! The “Boho” trend is still going strong and feathers are still the rage, so for today’s project, I thought I would show you how to create this unique, button-encrusted feather plaque.
Supplies:
• Winter Blues Embellishment Bottle
• Rustic Feather by Walnut Hollow
• Blue craft paint
• PVC glue
Instructions:
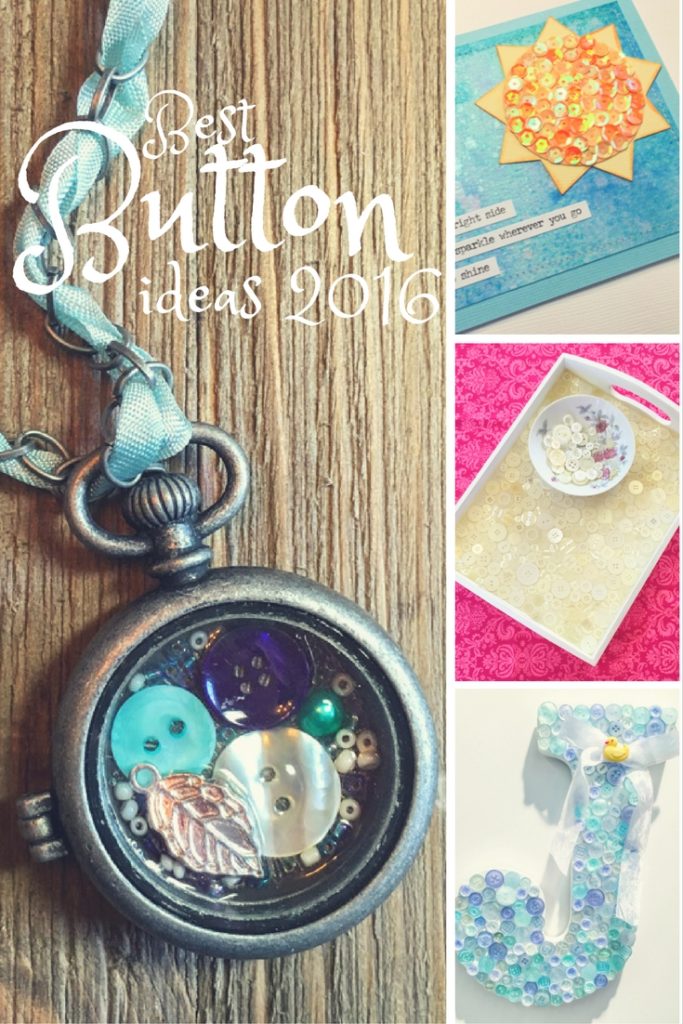
2016 is coming to an end, and it’s time to take a look back at the best of our button (and sequin) projects for the year. We hope you enjoy taking a look at the year’s highlights, and find some things you missed – or forgot how much you loved the first time!
A monogram is just the thing for baby’s room, and buttons add just an extra touch of cute to one. Use traditional pink or blue, or choose a color to coordinate with baby’s nursery for home decor style.
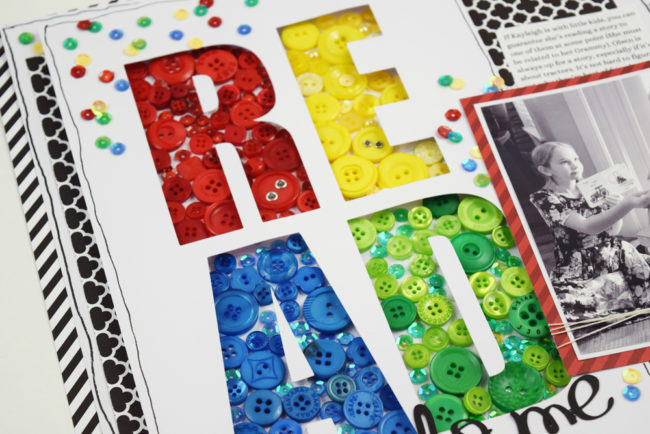
Guest artist Becki Adams used primary colors to create a giant title out of buttons and sequins on an adorable layout about her children reading. Paired with a bold black and white color scheme, the colors really pop!
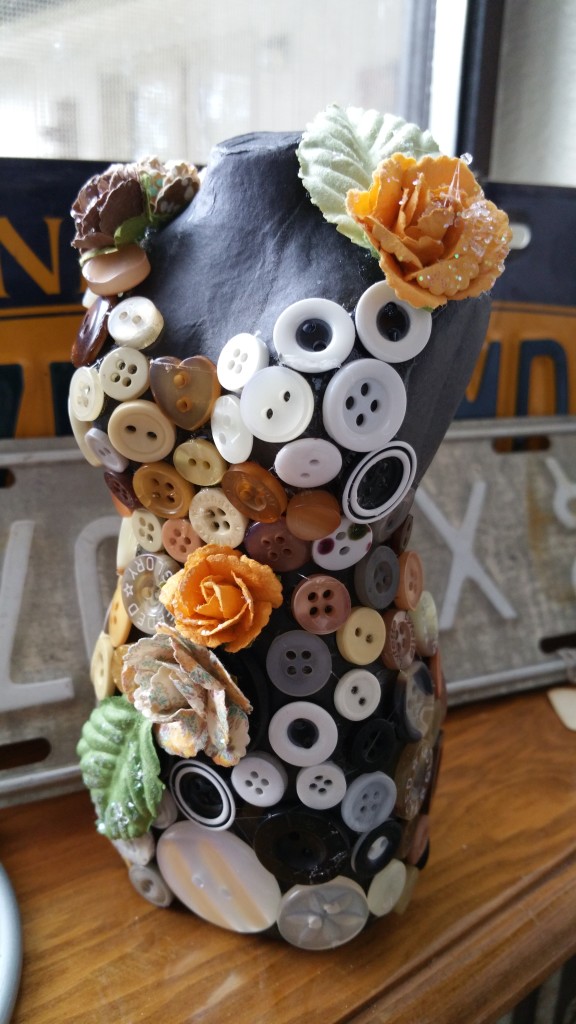
Guest artist Candy Rosenberg used buttons to dress up her signature design icon – a dress form. Using a palette of neutrals along with pale green and peach, Candy created an eye popping “dress” that is at once vintage and modern. This beautiful lady will be at home in your home decor or decorating an art studio!
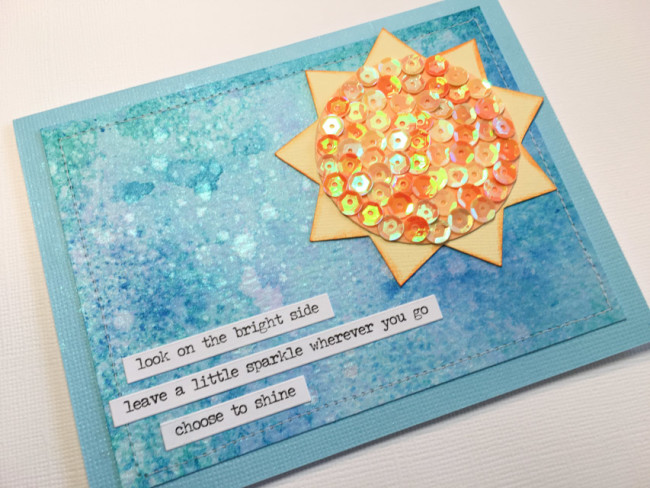
A little sparkly sunshine is always seasonal! This simple sequin collage card using our 28 Lilac Lane sequins will have someone special looking on the bright side of life, and let them know you are thinking of them.
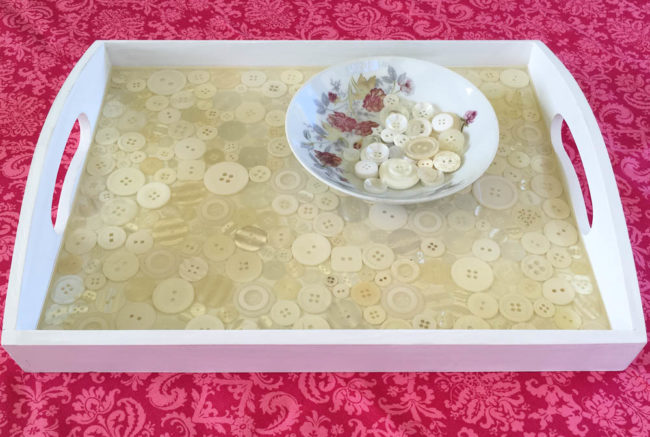
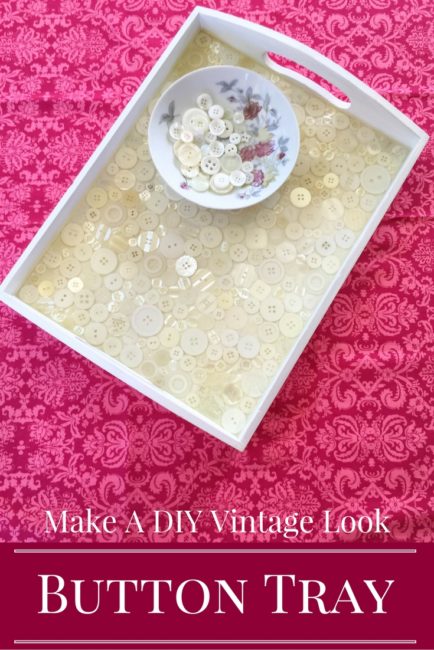
Buttons make a big impact in a big collage. Encase them in resin, and you’ve got a surface that is both practical and pretty. Creating a collage of ivory and pearl buttons gives a gorgeous vintage look to this wooden tray, creating a project that will decorate your party or wedding.

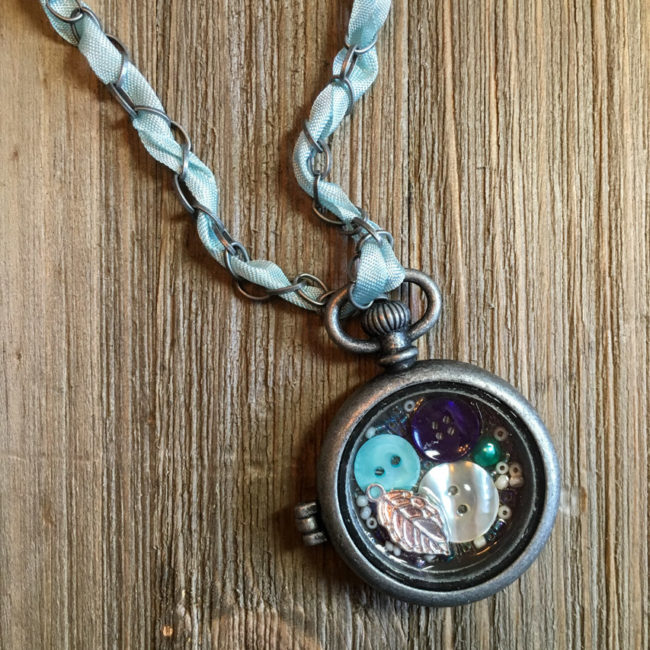
Our 28 Lilac Lane embellishments are so pretty, you’ll want to wear them – and you can, in this mixed media locket project! Layer charms, buttons and beads to create a one of a kind piece of jewelry. The options are as endless as our 28 Lilac Lane color palette!
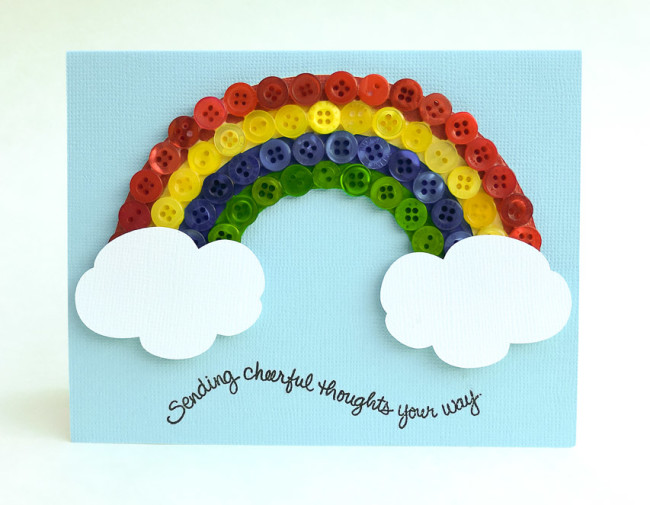
What is cheerier than a rainbow? Creating this bright button rainbow card to bring some cheer to someone you care about is surprisingly easy. Learn how we did it!
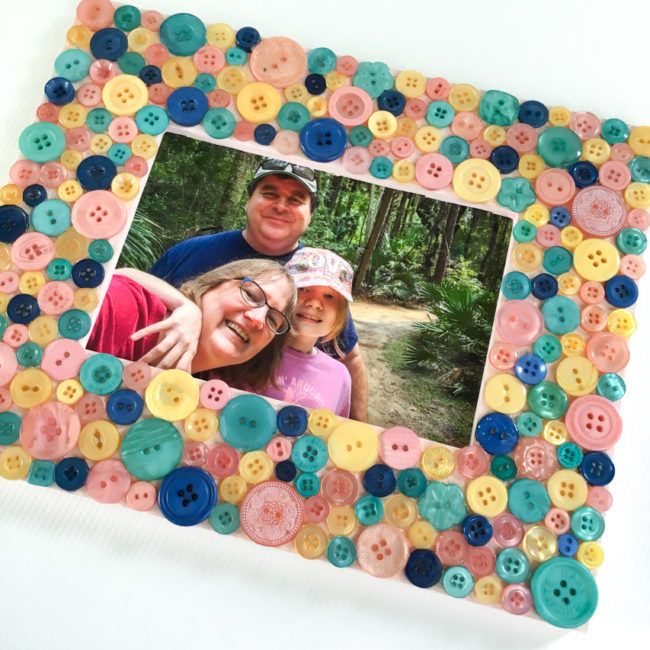
With our huge selection of colors, a button collage can be customized to any decor. This project utilized our trendy new Glam Girl Button Bonanza to make a button collage frame that is perfect for a kid’s room – or a grown-up room, too.
We hope you enjoyed our walk down memory lane of the best of button projects of 2016! We can’t wait to share more beautiful things – and products – with you in 2017!
Whether you are looking for a last-minute gift idea, or to brighten your home decor for the new year…this mixed media wall art project by 28 Lilac Lane designer May Flaum is just the thing for your walls. It’s an easy home decor canvas that can be completed in just a few minutes, but packs a visual punch!
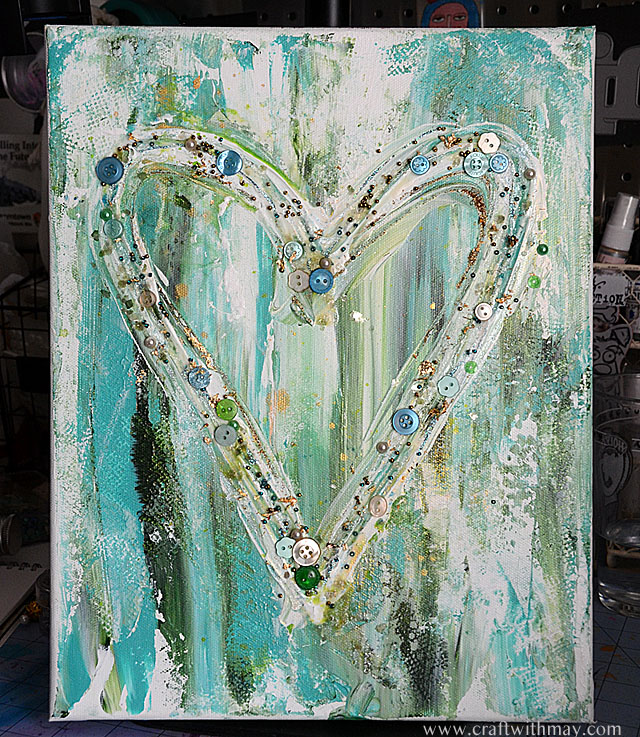
easy home decor canvas by May Flaum
Only a few basic supplies are needed for creating this project:
The mixed media technique for this easy home decor canvas is messy and random looking – and therefore very forgiving and difficult to screw up! Just smear the shades of paint in one direction across your canvas – and remember to make sure it is nice and thick for a beautiful textured look.
Next, use your palette knife to smear a shape into the paint. Use liquid adhesive to add your embellishments and gold leaf on top of the smeared shape. Finally, spritz with gold mist for an extra touch of shine!
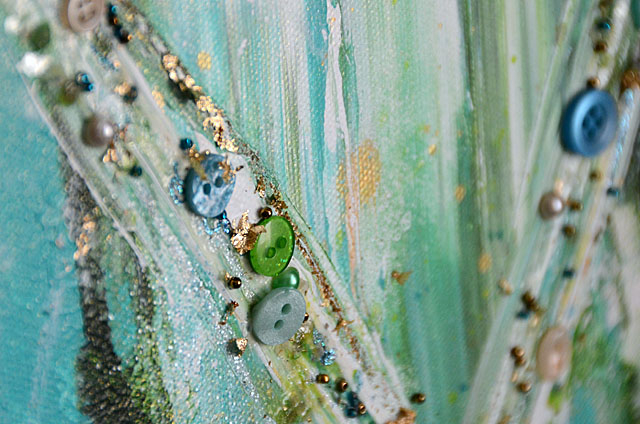
easy home decor canvas by May Flaum
It’s that simple to create beautiful wall art! And don’t forget that May’s mixed media technique on this easy home decor canvas can be adapted very simply to many color schemes and shapes. Try the 28 Lilac Lane Hello Sunshine bottle with shades of yellow and white paint to create a beautiful moon for a nursery wall. Or create a heart in shades of pink using Pretty Princess to add a touch of artsy elegance to a dorm room. The possibilities are as endless as our color palette of 28 Lilac Lane embellishment bottles!
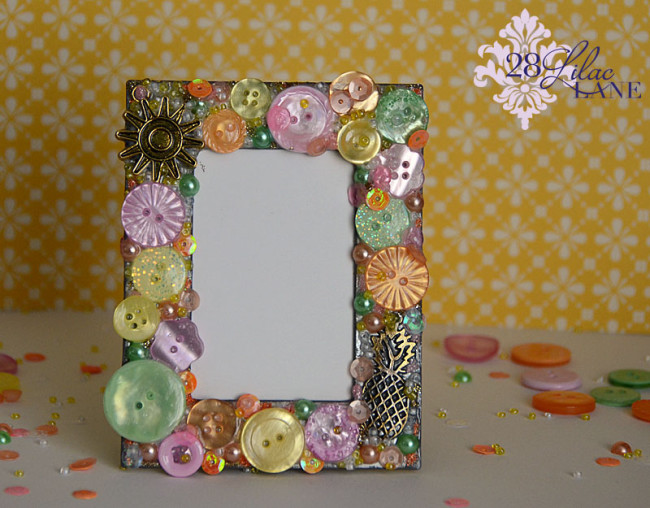
We recently announced six new Button Bonanza assortments for fall – great mixes of colors that are seasonal and trendy. Today I’m here to show you a beautiful button frame project with what is probably my absolute favorite of the new mixes: Glam Girl!
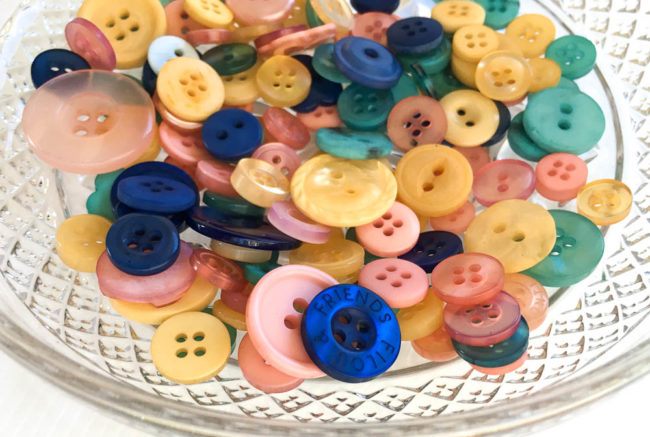
This lovely assortment of pink, turquoise, butter yellow, and dark blue is oh-so-trendy and so versatile for a variety of projects!
This button frame project would make a gorgeous addition to the decor in a teen/tween’s room (and it’s easy enough for them to make themselves). Or it could add a pop of color to a flea market decor in a living room or bedroom!
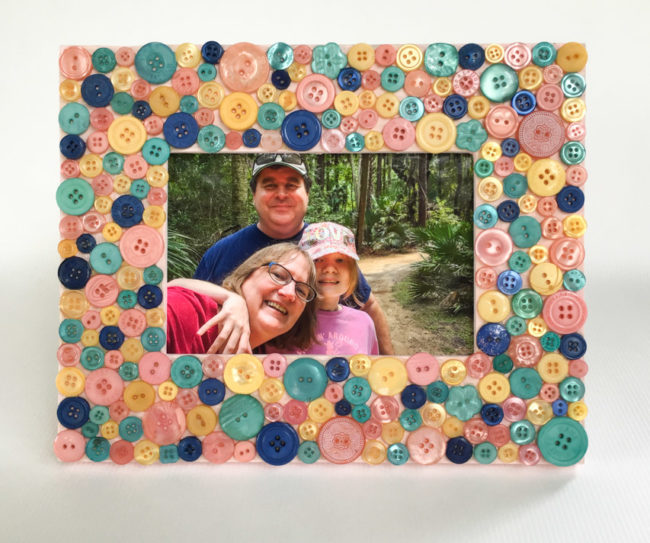
The steps to completing this project are super simple.
To begin this project, paint the unfinished wood frame with the Pink Dogwood paint. The soft pink color provides a delicate background to fill in between the buttons in the collage, and coordinates beautifully with the shades of the Glam Girl buttons.
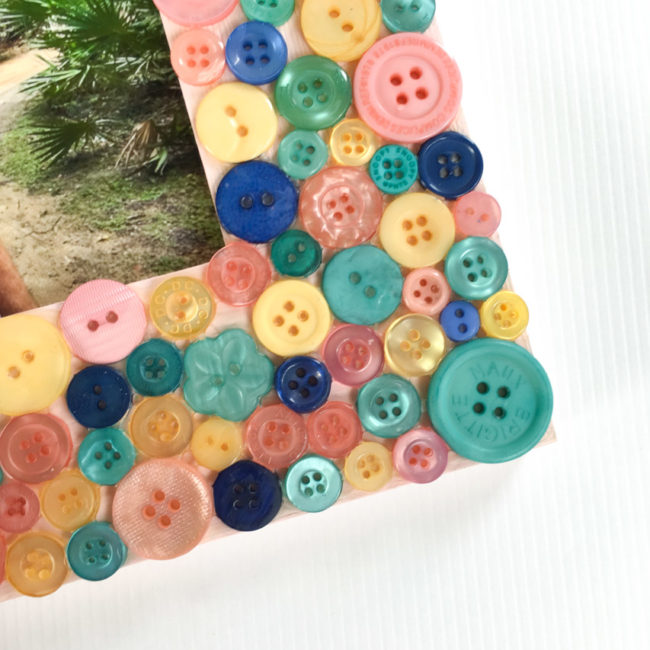
Once the paint is dry, then it is time to start the button collage! My tip for doing this is to work in sections laying down an inch or two long section of the white glue and filling it in with buttons. Once it is dry, then start the next section. This technique prevents a huge mass of buttons that are sitting in still-wet glue from accidentally being shifted as you work your button collage into place.
The key to a nice balanced button collage is to spread out the larger buttons, and to try to avoid placing the same colors next to each other too much. With only four colors, it’s not possible to avoid it entirely, but I mostly managed to avoid more than two that were connected to each other of the same color.
Creating a button frame collage like this can be a bit time-consuming, but also a relaxing and fun project! And the end result is a button frame that will be enjoyed for years to come!
Supplies:
Most of what we do here on the Buttons Galore blog are simple, fast projects. But occasionally, we like to bring you a more complicated project that really shows how amazing – and beautiful – buttons can be. Today we’re sharing one of those projects, a vintage-look button tray that will look perfect in a farmhouse, shabby chic, or vintage french country style decor.
Supplies:
To start my button tray, I painted the unfinished tray with two coats of chalk paint. I sanded with fine grit sand paper in between coats, and also after the top coat.
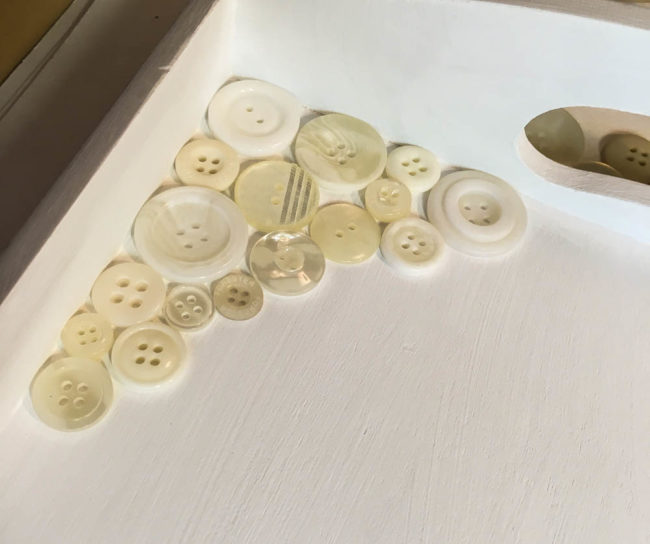
The next step is tedious work, but one I actually enjoy because I find it a very zen process. I dumped my various packages of buttons out of the surface of my work table and painstakingly began selecting ones to fill in the bottom of the tray. It’s like putting together a jigsaw puzzle that you don’t have a picture for!
Note that this step is just a “dry fitting” process with no adhesive involved. (Make sure that kids and pets are kept at a safe distance where they can’t disturb your work!) The buttons will be held in place by the epoxy resin.
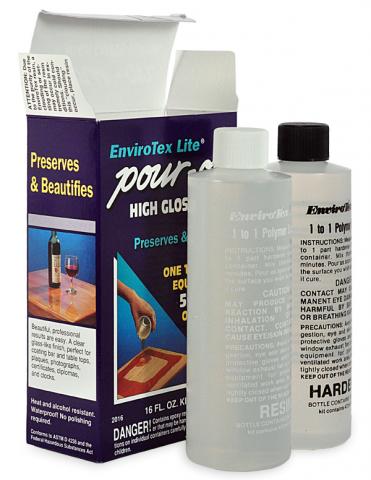
To seal the buttons into the bottom of the tray and provide a flat cover over them, you’ll need an epoxy resin product. I used EnviroTex Lite Pour Over. It comes in two bottles that are poured together into a mixing container and stirred to make the resin, which is then poured over the tray. I used the 16oz package size and used almost all of it to fill my tray to the bottom of the handle cut-outs.
The trick to getting a perfect surface on your resin is to use a handheld kitchen torch to pop the bubbles that come to the surface of the resin as it hardens in the early stages. (The bubbles are caused by the mixing of the resin.)

After that, it just takes some patience to let your resin harden and after about two days you’ll have a beautiful button tray that can be used for serving or display!
In this close-up look, you can see how the resin floats over the buttons and provides a solid glass-like surface in the bottom of the tray. I poured the resin to the bottom edge of the handle cut-outs. A few buttons shifted from the pouring of the resin, and one was even sticking up though the top of the resin. I just used a disposable chopstick to nudge them back into the correct position.
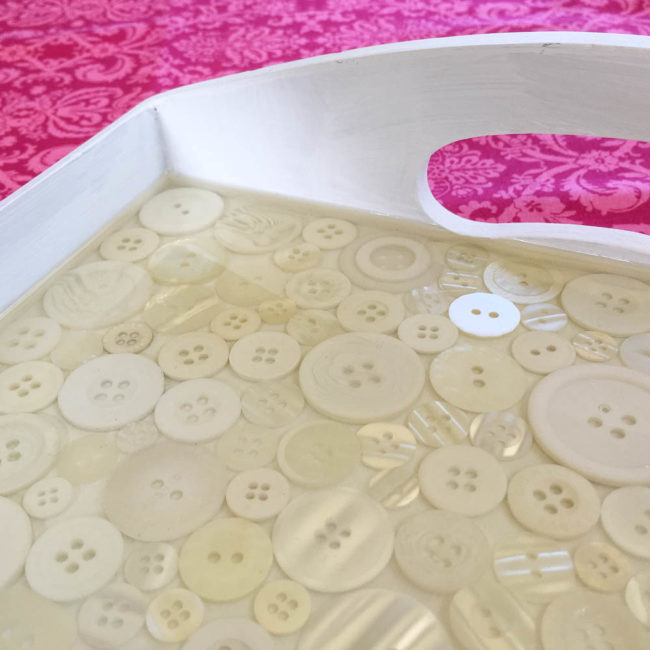
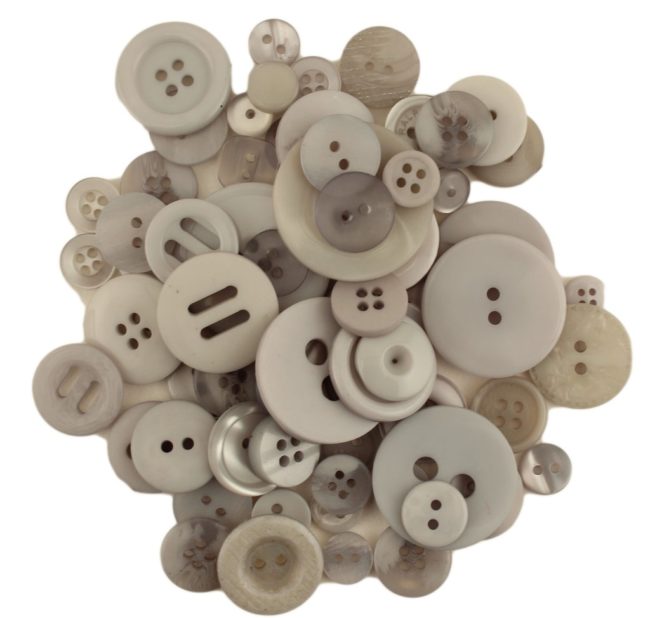
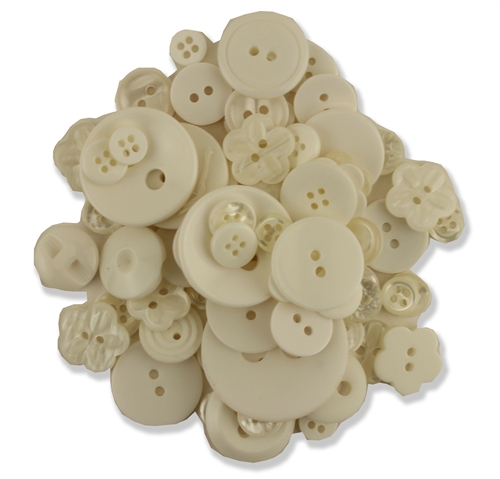
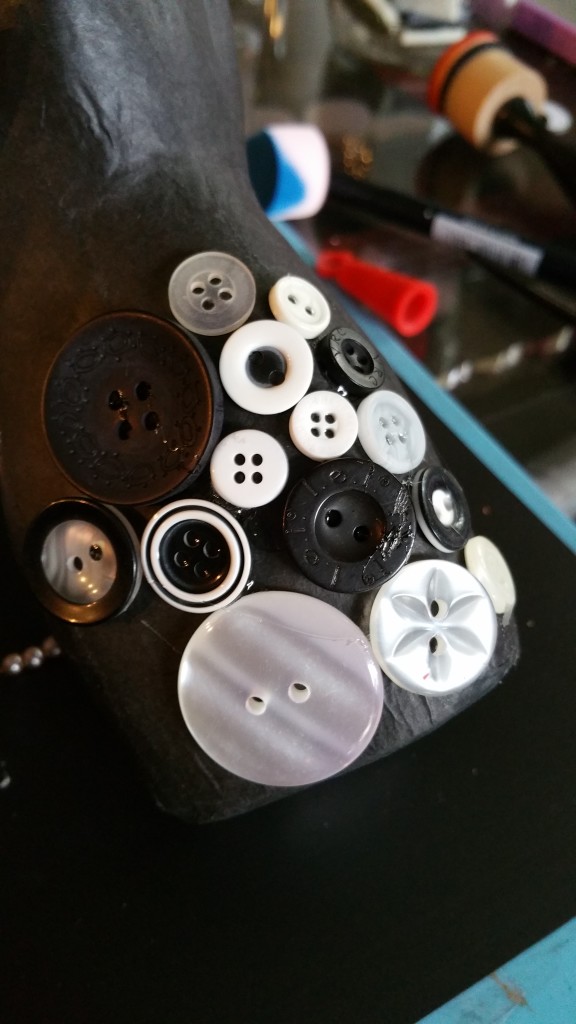
I used a combination of our “White” Button Bonanza, “White Wash” Button Basics, and “Ivory/Pearl” Haberdashery Buttons (pictured below) to fill the bottom of my tray. As long as you mix them throughout the project, it doesn’t matter if you mix the different products together to fill your button tray. And don’t feel limited to white in your color palette – this project would look great in a variety of colors, from pastels to holiday brights!
This button tray project is a bit time consuming but will bring years of beauty to your home! If you’ve made something with epoxy and buttons, we’d love to hear about it in the comments!
When you think of button magnets, you probably think of cute, brightly colored accessories for a classroom or a sewing room. But with the right button selections, button magnets can also be sophisticated accessories for flea market or farmhouse vintage style home decor.
Supplies needed:
Button magnets are so simple to make! Start by selecting buttons to create a coordinated set. Don’t forget to make sure they are all at least a little bit larger than the magnets that you plan to use! Next, cut the shanks off any that buttons that need it. (The buttons will attach more securely if you get the backs as flat as possible, so it pays to give some attention to detail on this step.) Glue the buttons to a round magnet using adhesive or a hot glue gun, pushing the buttons nice and flat on the magnets. Once the glue is dry, your button magnets are ready to use!
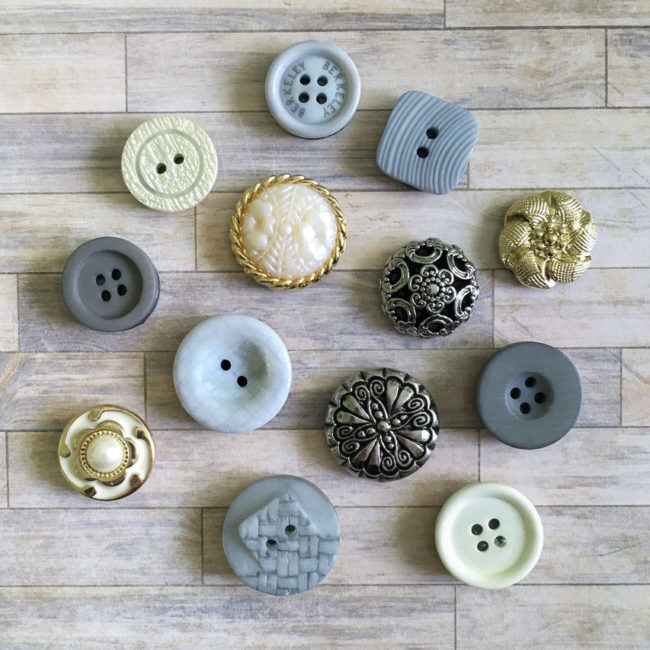
The trick to achieving a sophisticated look with button magnets is in the color and button selection. This “Wedding” Button Bonanza is full of creams and gray tones that are the perfect complement to many currently trendy home decor paint colors. They are subtle, and understated. Combine them with the metals of the Haberdashery set, and you have created an effortless collection that looks like grandma’s random button bag yet is perfectly coordinated.

These button magnets will look fabulous on a variety of surfaces – magnetic chalkboard, galvanized metal (see above), white board, even your fridge! They are an affordable way to create DIY wedding decor (hang up reception table assignments with them) or to add some style to a functional office board. What will you use them for?
Wanting an uplifting, fun, and carefree kind of project this week I pulled out the entire 28 Lilac Lane line, some paste, liquid adhesive, and a 6×6 wood board to make a rainbow!
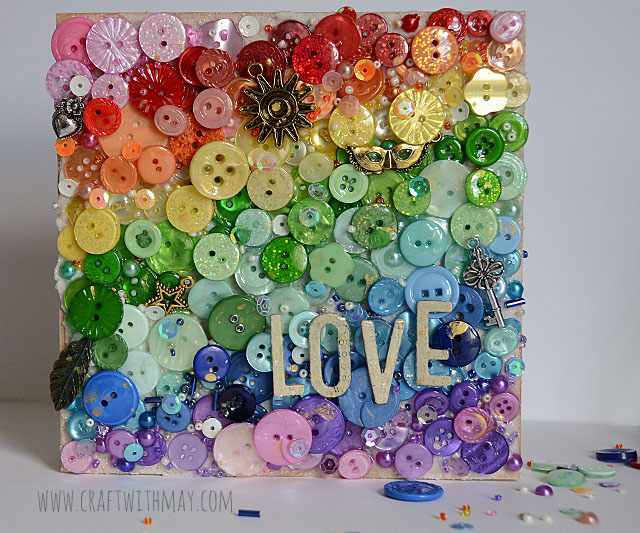
Did I really say the entire line? Yes, yes I did! I wanted to create a rainbow of buttons, beads, sequins, and pearls across this canvas and I wanted to have a wide variety. Beginning in the middle with green and working towards the edges, I just love the finished piece! Some charms from various kits as well as a few chipboard letters finished off my project before I used a glossy sealant to complete this piece. Note that I worked in layers, meaning that I built a base layer then went back over it several times to add more pieces and details. This project was such fun to make, and I love that it features at least one thing from every bottle and kit.

Want to make this with fewer items? Using the Dragon Fire, Pumpkin Spice, Hello Sunshine, Oh Christmas Tree, Winter Blues, and On Lilac Lane bottles would get you a lovely rainbow as well. I hope I’ve inspired you to create a bit of a rainbow with your next craft project, and get those fun buttons on display. For complete details and instruction be sure to watch my video below!
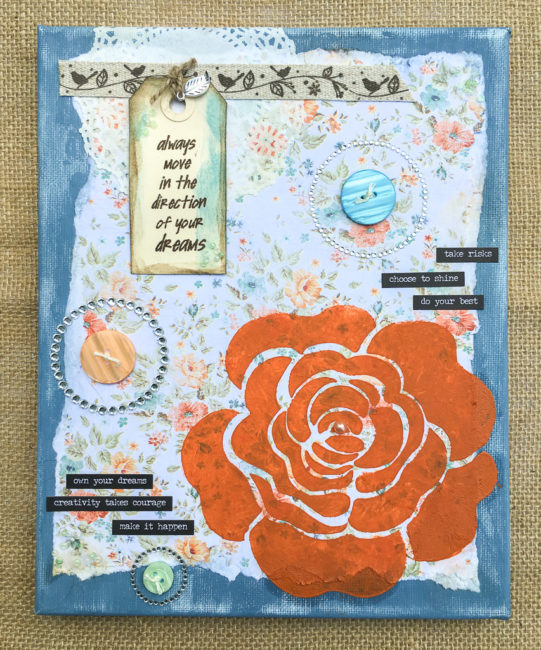
This time of year sees a lot of people we love embarking on new adventures, headed off soon to new schools, or new jobs. Wouldn’t it be nice to send a piece of ourselves, and a positive message, along with them? This inspirational mixed media canvas using 28 Lilac Lane products will remind them to reach for their dreams!
Supplies from Buttons Galore:
Other Supplies:
To get started on your inspirational mixed media canvas project, paint the front and edges of the canvas with the blue Milk Paint. Let the paint dry.
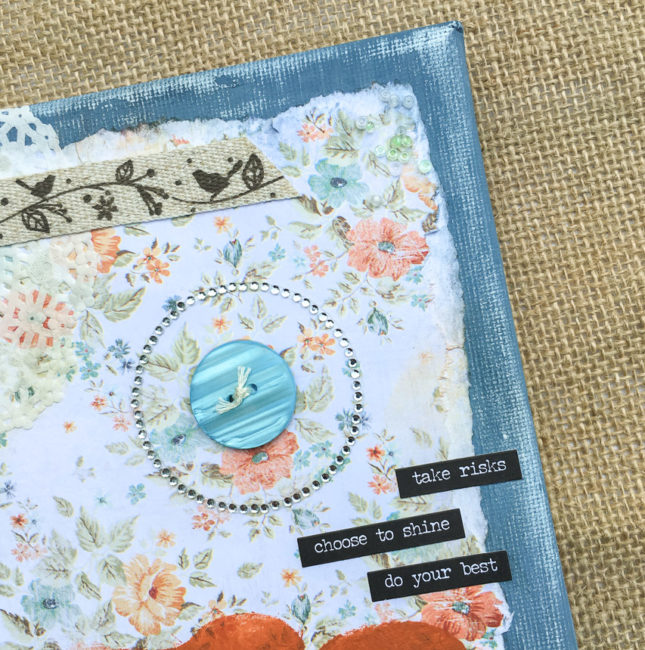
Tear the floral “Farmhouse” paper and adhere it to the front of the canvas using the PPA Matte Adhesive. Use a baby wipe or damp paper towel to smooth down the edges of the paper and adhere them firmly. (This will have the effect of also distressing the milk paint finish on the canvas.)
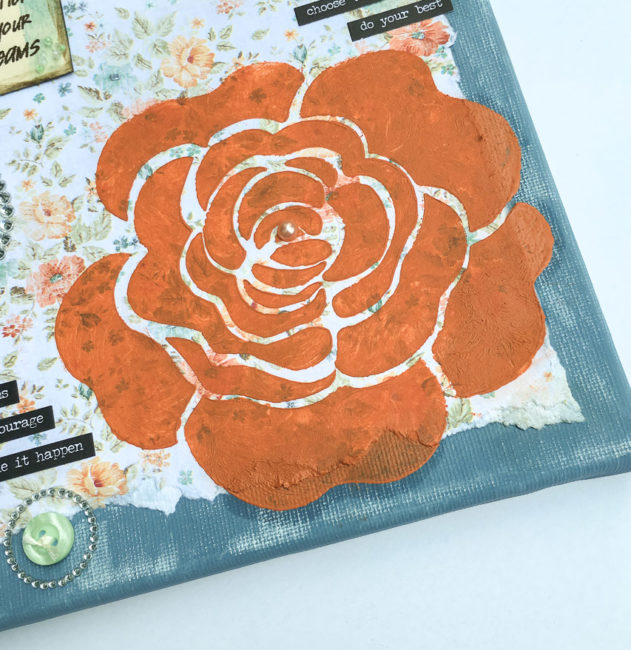
Once the paint and glue is dried well, use the stencil and stencil creme (in orange) to apply a rose design to the lower right hand corner of the canvas, over the paper.
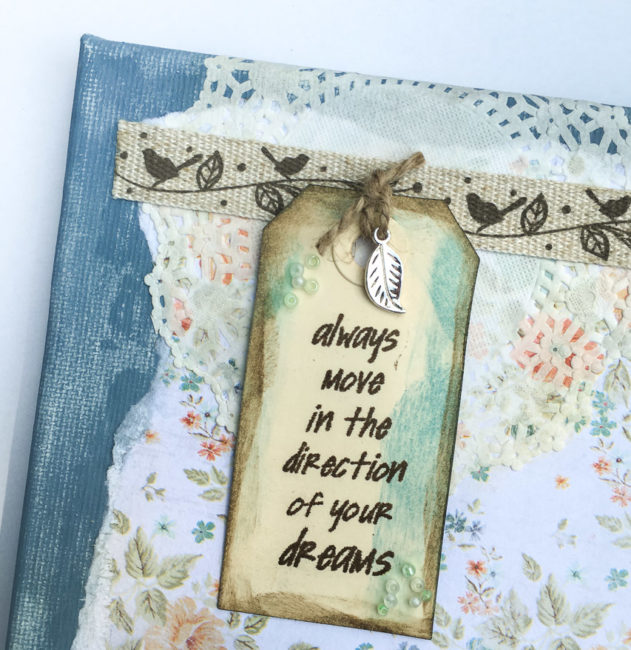
In the upper left hand corner, glue down a doilie on top of the patterned paper. When the glue is dry, smudge some Antique Linen Distress Ink on top of the cut outs in the doilie to highlight the design in them. Next, apply the twill ribbon from the “A New Leaf” kit across the top of the canvas.
To make the tag, die cut the tag shape out of a larger manila tag. Ink the edges with Broken China and Ground Espresso Distress Ink, and stamp the sentiment in Ground Espresso. Tie the charm from the “A New Leaf” kit onto the tag with some jute string, and glue some seed beads from the kit to the tag’s corners to finish it off. Glue the tag down.
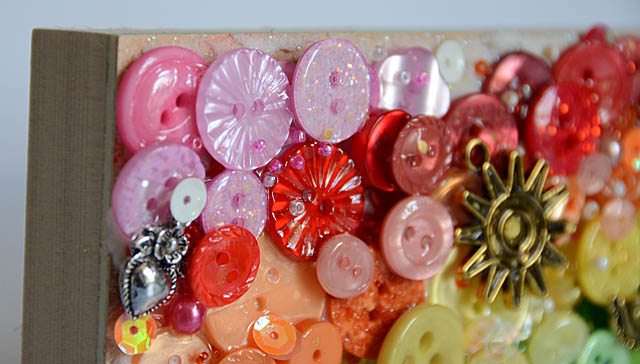
Apply some PPA Matte Adhesive in the corners of the canvas and embed some seed beads from the “A New Leaf” embellishment kit in it. Once that is dry, you can begin building the stickers, rhinestone and button elements in the rest of the canvas. Don’t forget to thread your buttons before adhering them so they look finished!
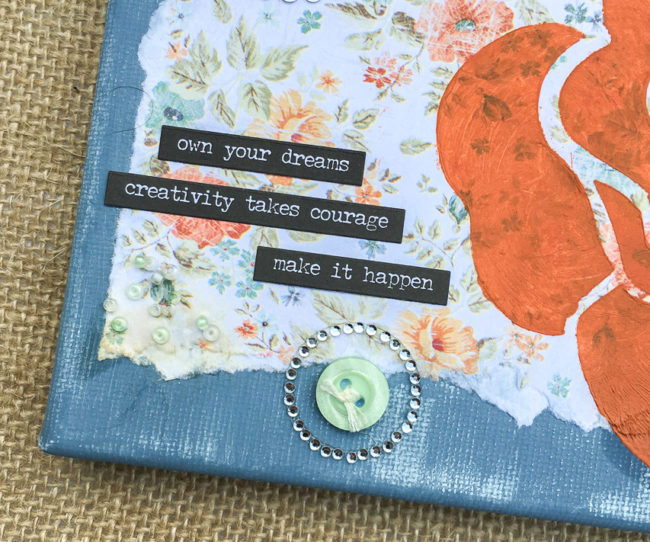
This inspirational mixed media canvas is fun and simple to make…and will let someone you care about know how much you believe in them. Who will you give it to?
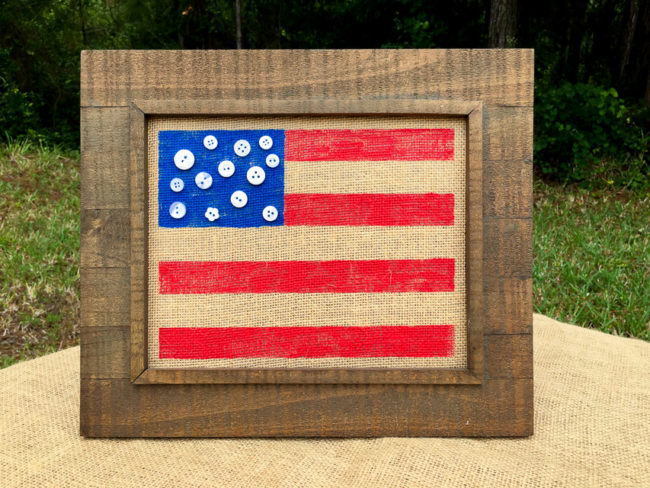
It’s time to make another addition to our holiday frame project! This time, we’re creating a rustic flag insert for the frame that will be perfect for showing your patriotic pride for the 4th of July or the upcoming Olympics!
(For those new to the series, the holiday frame project is a 8″x10″ frame that I’m creating a series of decorative inserts for to celebrate various holidays and occasions. To see previous installments in the series, click here.)
The hardest part of making this rustic flag project is…the math! To start, you are going to need to measure the opening on your frame, and decide how much border you want around your frame. Then use the painter’s tape to mask off the edges right up to the area that you want to paint.
Divide the remaining vertical area by 7 to determine the width of the stripes on the flag. Use painter’s tape to mark off the bottom stripe and fill in the stripe with paint. Remove the tape right away. While the stripe dries, determine how wide you want your blue area for the stars (I suggest about 40% of the width). Then mask it off with vertical strip of tape to protect it while you paint the top two red stripes. Measure down from the top to create your first stripe, lay down a piece of painter’s tape to protect the “white” stripe, and fill in the red stripe with paint. Remove the tape immediately after painting.
Letting each stripe dry before painting the next one, continue measuring and masking with tape before taping, until all 4 red stripes are painted.
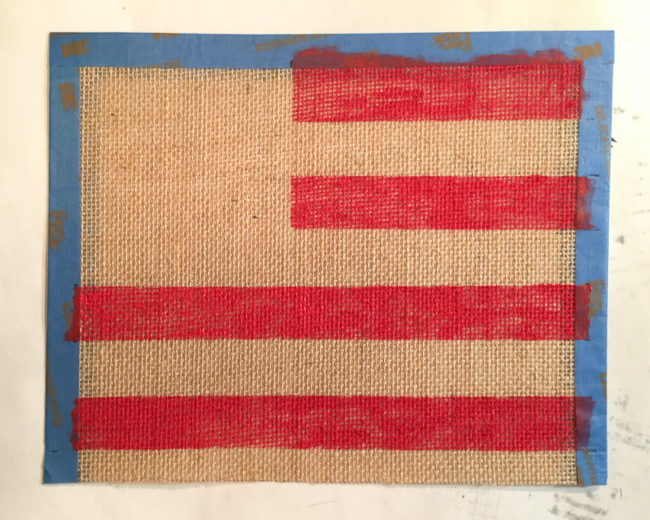
Once all of the red paint is dry, then you can lay down painter’s tape to paint the blue area.
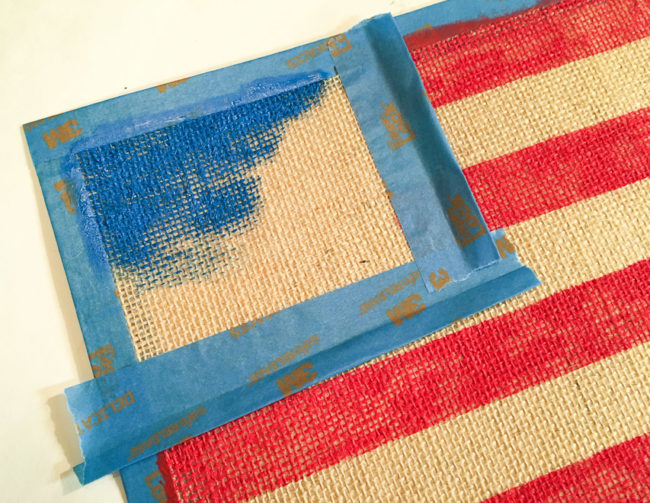
Peel the tape up as soon as you are finished painting, while the paint is still wet. Because of the open weave of the burlap, your paint will appear “patchy”, since in some places it will fill in the weave and in some it won’t. This adds to the rustic feeling of the project!
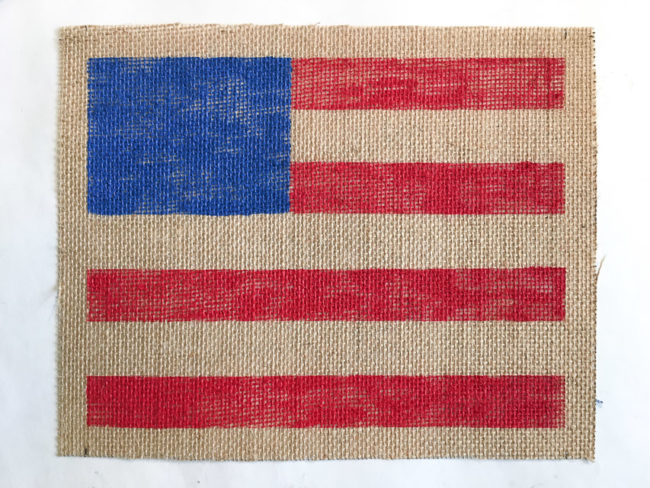
The final step is to select 13 small to medium sized white buttons from the Patriotic Mix of Button Basics. Arrange them in a random way in the blue area, and use a hot glue gun to attach them to the flag.
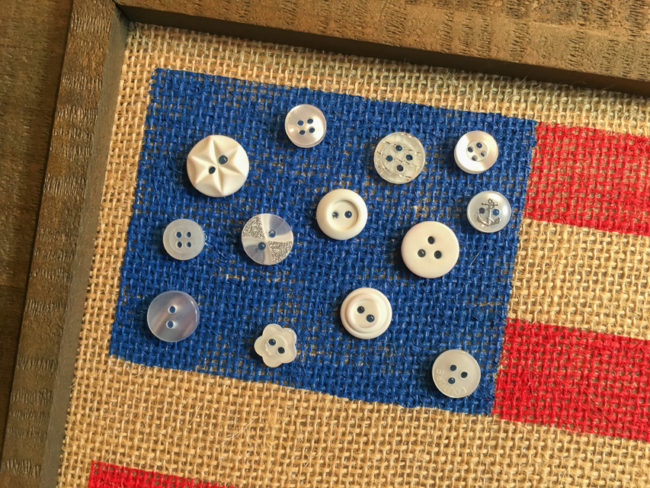
Now you’re all ready to put your flag in your frame and celebrate the 4th of July or cheer on Team USA for the Olympics this summer!

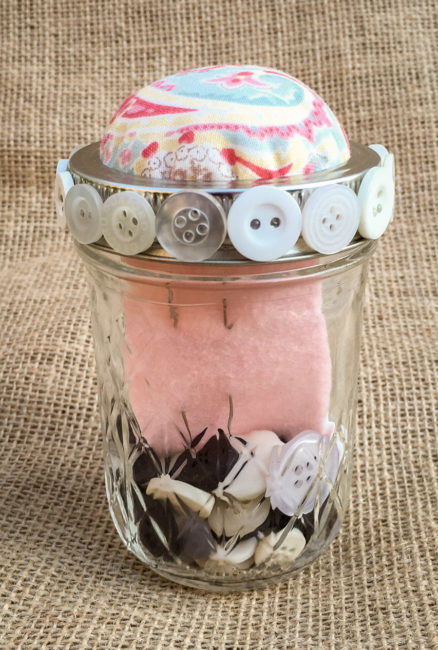
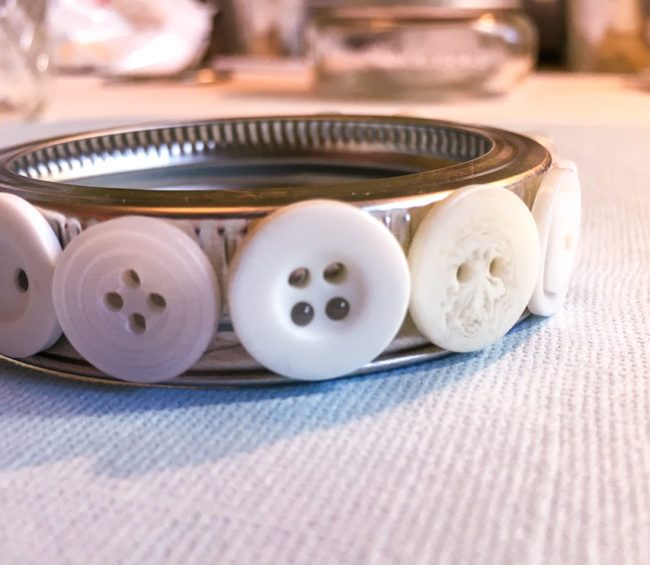
Mason jars are so trendy and so useful. They are perfect for making fun (and affordable) little gifts, like this mason jar sewing kit with a pin cushion top. And this project has another bonus – it’s perfect for using up those fabric scraps you just can’t part with!
Supplies:
To begin this mason jar sewing kit project, take the ring off of your mason jar. Select buttons from the Haberdashery collection that are approximately the height of the ring. Using the hot glue gun, attach them around the ring. The trick to getting the spacing even is to start adjusting with several buttons to go – select slightly smaller or larger buttons as needed to fill in the remaining space as evenly as possible, and then space them slightly apart if needed to avoid leaving a large gap at the end.
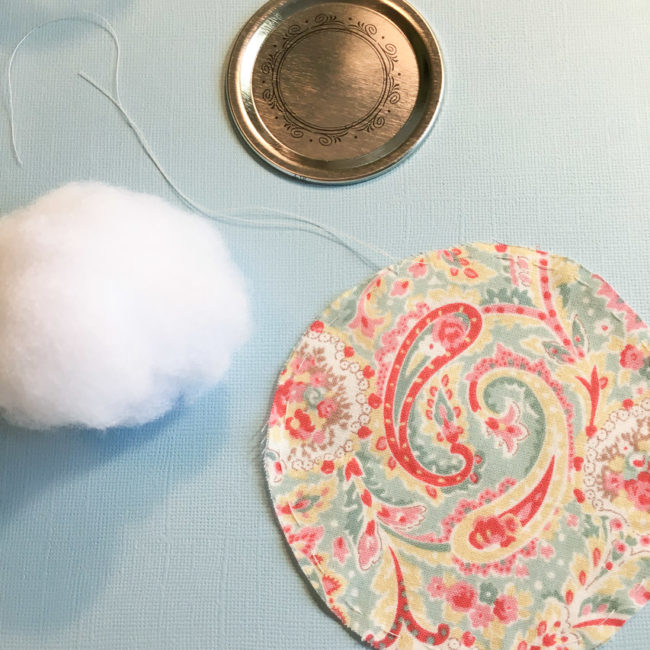
Once the ring is done, cut out a circle of fabric that is about 4.5″ in diameter (if you are using a regular mouth mason jar). Baste around the edges of it to create a gathering stitch, and leave the thread ends hanging. Ball up a a large wad of fiber fill and compress it so it is smaller than the jar lid.
Place the fiber fill on the top of the jar lid. Place the fabric on top of it – right side up – and then flip the entire thing over. Make sure the fiber fill stays bunched in the center of the jar lid! Pull the stitches to gather the fabric. When it snugs tightly onto the back of the jar lid, tie off the ends.Insert the lid with the fabric & fiber fill attached back into the ring and check its fit on the jar. There should be no fiber fill underneath the edges of the ring to ensure the lid screws on all the way. If it fits properly, use the hot glue gun to put glue under the edges of the fabric to seal it to the back of the lid. If the ring will not seal onto the jar, adjust the fiber fill away from the edges of the lid and try again.
The final step is to fill the jar with sewing supplies! A selection of buttons from our Buttons Galore Neutral Button Tote makes a great assortment to have on hand for replacing lost buttons on clothing. Add in a scrap of felt with some needles attached and a spool of thread, and you have an emergency mending kit with a top that will hold pins or needles!
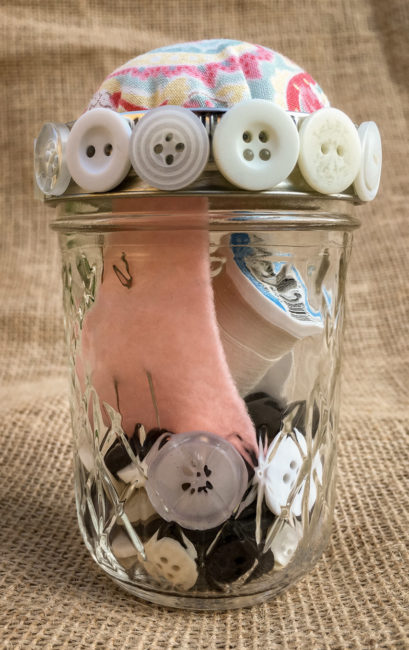
This is a great gift for a bride, a student leaving for college, or someone setting up house for the first time. For a more advanced sewist, fill the jar with buttons, pins, or other sewing necessities to create a handmade gift they’ll enjoy using regularly.
Today Buttons Galore is pleased to be welcoming guest artist Candy Rosenberg to share her beautiful button dress form project.

Going out on the town always requires a fancy dress, and this occasion is no different – 0nly this girl is dolled up with buttons from Buttons Galore! Buttons are so fun and versatile in crafting and I am really excited to show off this project.
My button fetish is no secret to those who know me so I am always looking for ways to use them in unique ways. I’d had this bare “girl” laying around for awhile when I got this invitation to guest post for Buttons Galore. Buttons…dress form…The lightbulb went off and I thought that I could make a dress from buttons for my girl!
 Covering an item like a dress form with buttons is not much different than covering a canvas or other flat surface. The major difference is that you have to consider three dimensions instead of two when placing a button in your collage. I poured out my bags of buttons and adhered them one at a time, seeing which ones worked best especially around her curves.
If you like Candy’s mixed media creations like this button dress form, don’t miss her previous guest post for Buttons Galore that featured Artist Trading Cards!
Candy Rosenberg resides in beautiful Southern Oregon and has been crafting since she was a little girl. Known for her vintage steam punk style and beautifully crafted dress forms, she still likes to color outside the lines so to speak. Keep tabs on her latest creations at her blog, A Vintage Girl, or follow her on Facebook,Twitter, Instagram, Pinterest, YouTube and Google+.
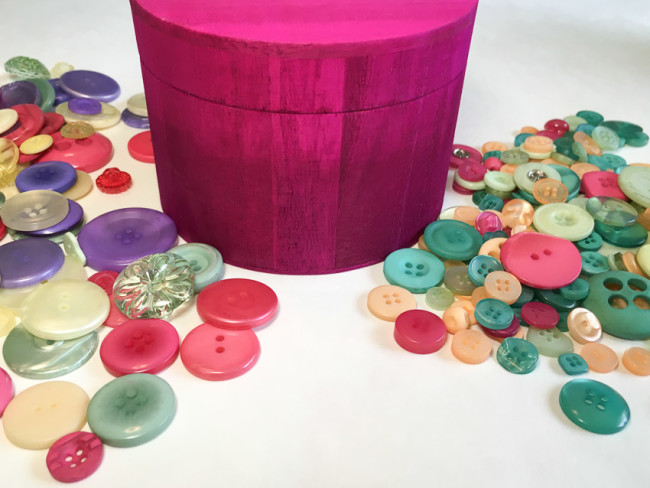
You can never have too many pretty little places to stash mementos and accessories. This little wood trinket box with a multi-colored button lid is a great way to hold your favorite jewelry, souvenirs like ticket stubs, or even office supplies!
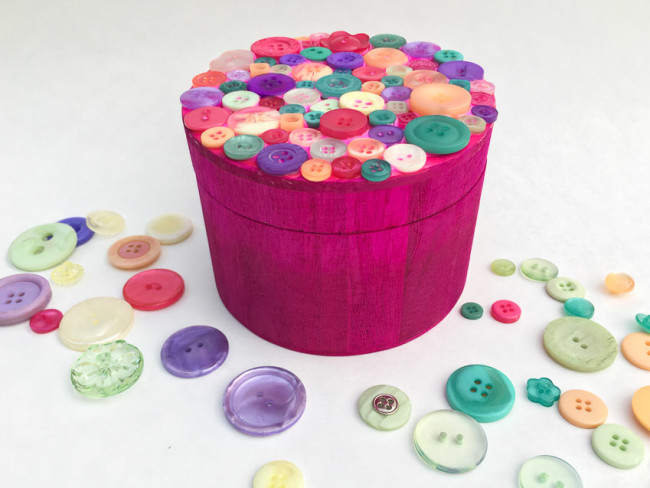
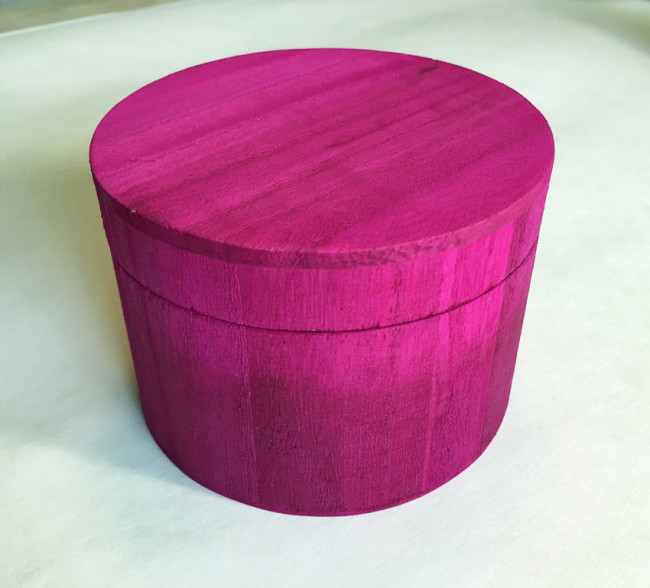
This wood trinket box starts with a fun ombre finish created using the brand new Plaid Ultra Dyes. These are somewhat like water soluble brightly colored wood stains, and blend. I layered several colors to get the effect shown here: Raspberry Beret and Hot Flash applied on the bottom, and the top area with several coats of Hot Pink. Then a coat of hot Pink was layered over the entire project. The end result was almost a dip dye effect.
To find a selection of lots of colors for my button collage for on the lid of the trinket box, I decided to pull buttons from two different button assortments. On the left is our Spring button box, with the purple buttons, and on the right is our Vacation button box, with the dark teal and peach colors. Both assortments share in common some pink and light green shades, making them well suited to work together.
I laid down a thick layer of white glue and then went to work filling in the lid with the buttons. The key (for me anyway) to achieving a random look is to try to not have buttons touch each other that are the same color. It’s also important to make sure that too many buttons of the same size aren’t clustered together in an area.
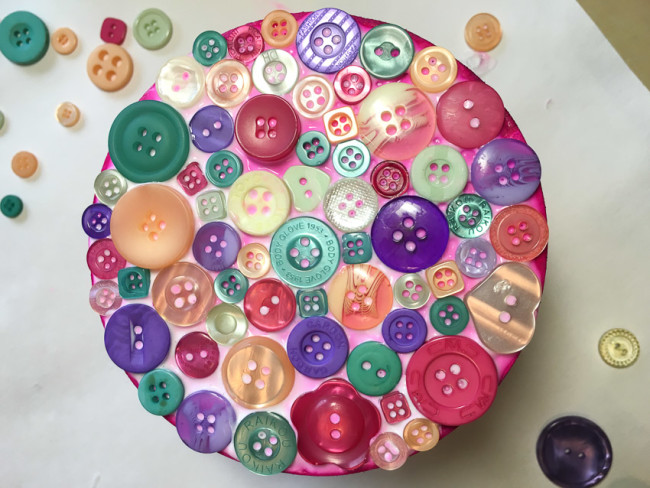
After the glue dries clear, that buttons will appear to be floating on the lid of the wood trinket box!
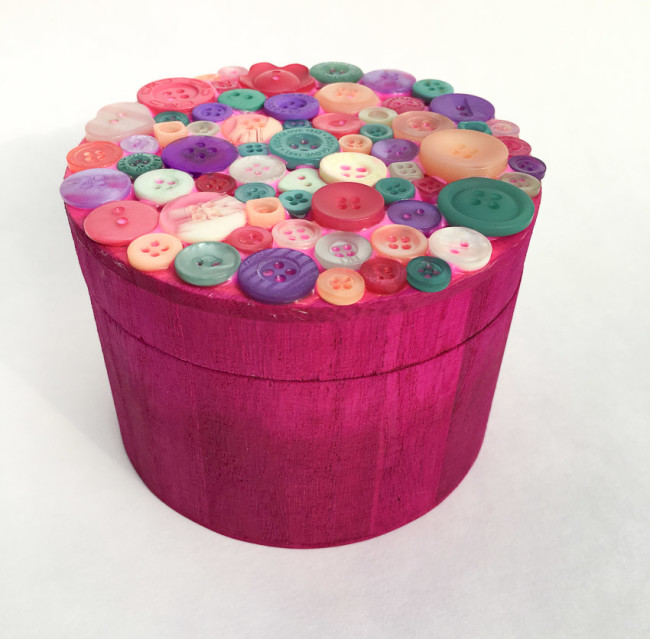
This wood trinket box with a button lid is a fast and easy project for all ages – a great project for a Mother’s Day gift or for summer vacation crafts for the kids! What will you use it for?
Supplies:
For those of you following along with the holiday frame project, there may be times when you don’t want a seasonal element in it. Today, I’m here to show you a welcome frame design for your frame for those in-between times of year!
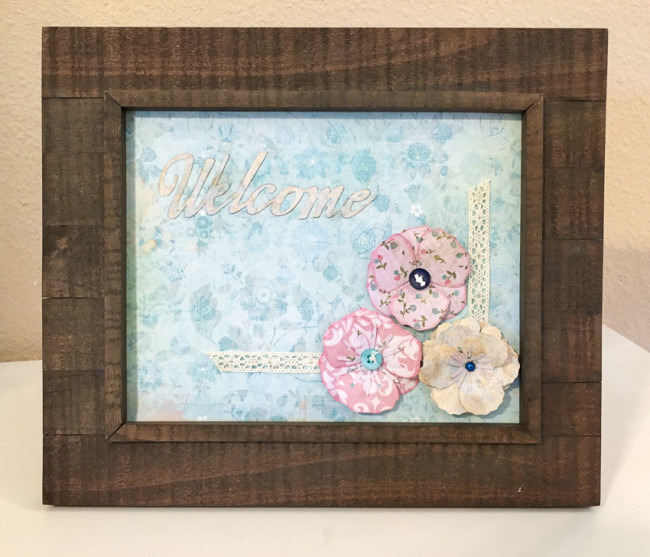
This simple design makes use of beautiful elements from our 28 Lilac Lane “Attic Findings” kit, as well as 3D die cut elements. All of the paper elements are created from a single paper pad for easy coordination of colors and designs.
To create this welcome frame project, the background paper was cut to 8″ x 10″ to fit the frame opening. Then the crochet trim from the Attic Findings kit was cut to create the border and glued in place. The word “welcome” was die cut (sized to just slightly more than 5″) and the edges were inked to provide a drop shadow before adhering it as well.
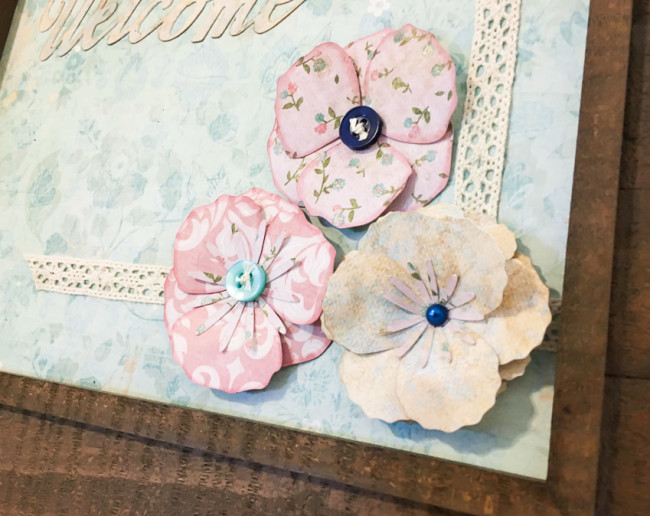
The three flowers were sized to about 2.25″ in diameter, and then cut from different papers. (The stamens on two of the flowers were cut from another flower design that wasn’t used on the frame.) The edges of the pink flowers were inked, and then the flowers were assembled.
The finishing touch on the flowers were the embellishments from the Attic Findings kit. Each flower got its own touch of contrasting color. The buttons were threaded with embroidery floss and tied off before adhering to give them a finished look.
Supplies:
This welcome frame is a beautiful way to fill your holiday frame in between holidays! In case you’ve missed them, don’t forget to check out the previous installments in the holiday frame series. What holiday would you like to see added to the series next?
This cupcake is sweet, easy…and calorie free! Perfect for celebrating a special occasion like a birthday or for decorating a kitchen, our cupcake canvas can be customized to suit any color scheme very simply. All that is needed to customize the design is to change the fabric colors, and the options are endless!
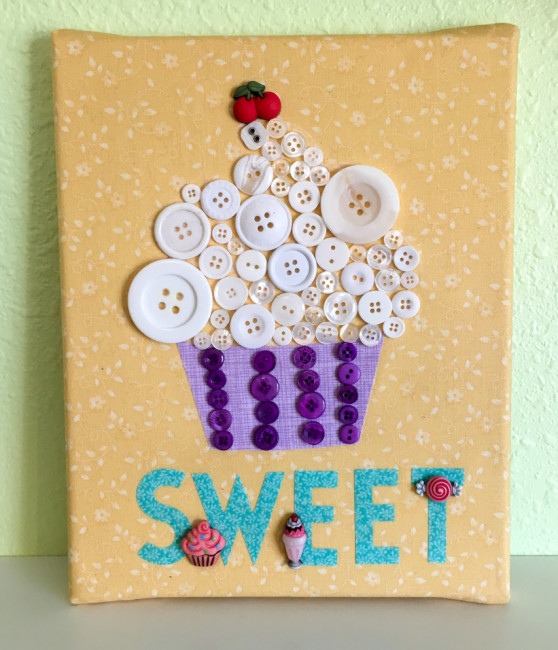
To start your design, iron Heat-n-Bond to the reverse of your purple and turquoise fabric following package instructions. Cut cupcake wrapper and lettering on your Cricut Explore machine following instructions in this blog post.
Cut the top of the cupcake out of cardstock to be used as a template.
Iron the fabric pieces in position following instructions on the Heat-n-Bond package. Trace around the cupcake topper template lightly with a disappearing fabric pen or pencil to create an outline of where to place the buttons for the frosting.
Wrap the background fabric around the canvas and attach to the back of the canvas using a staple gun. To create an extra neat edge, turn the raw edge of the fabric under before stapling.
Using a glue gun, adhere the buttons to create the frosting and the stripes on the cupcake wrapper.
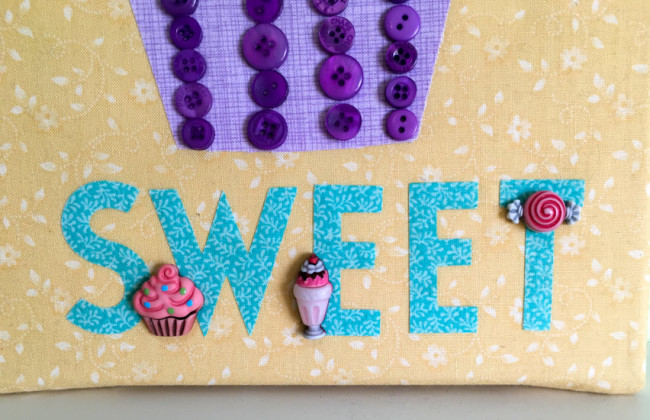
To finish your canvas, cut the stems off of a few 3D Sweet Delights buttons and use the glue gun to fasten them in place scattered around on your letters. Don’t forget to put the cherry on top of the cupcake!
Now you can enjoy your cupcake canvas, or treat someone special with it! (But don’t be surprised if you start feeling hungry….)
Supplies:
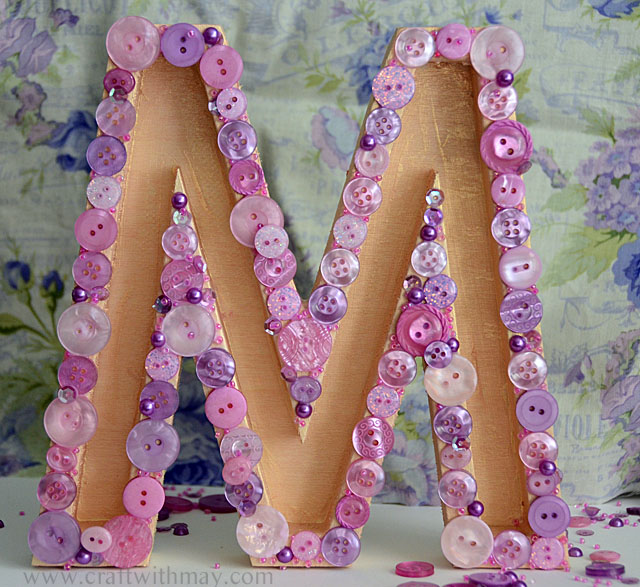
Simply gluing buttons to a wooden monogram is a fantastic project for so many reasons: It’s fun to do, it is easy and makes a great family craft, and it will look fantastic displayed in your home! Today I am sharing a video showing how I created the letter M for my studio with the “On Lilac Lane” bottle. Not to be biased – but this is my favorite bottle and color so it was the perfect choice for this project. From holiday or seasonal décor to bedroom décor creating not just button monograms but shapes of all kinds decorated with buttons and embellishments is a lot of fun.
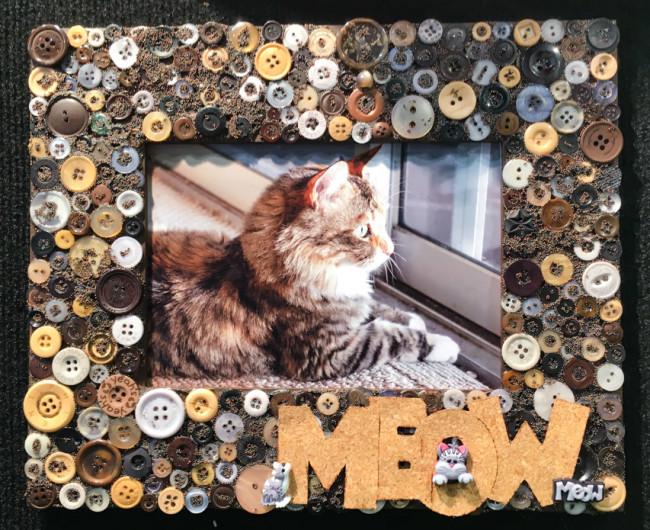
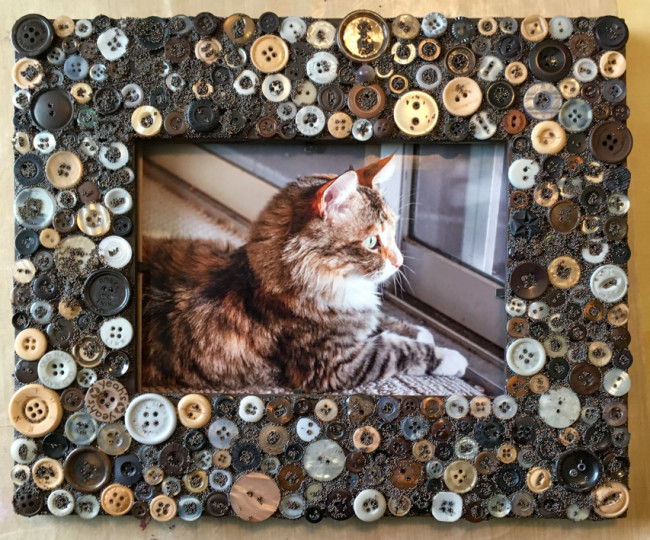
Saturday is National Love Your Pet Day, and what better crafty way to celebrate your pet than by creating a pet button frame to display your favorite photo of them?
Supplies:
This frame could easily become a dog themed frame just by changing the cork word to “woof” and using some of the dog buttons from our Pets & Pals collection.
To begin, paint the frame with the FolkArt chalk paint in Java. You may want to use some sandpaper first to prepare the frame’s surface for the paint. Don’t forget to paint the edges of the frame that will be visible!
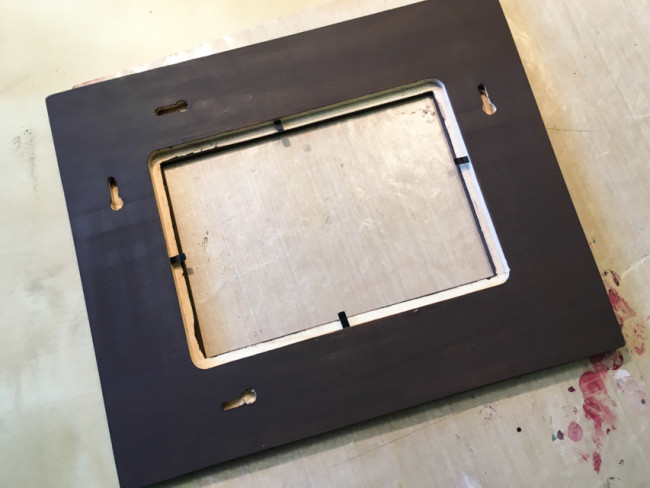
After the chalk paint is dry, buff the painted surface with the Plaid FolkArt Home Decor Wax to finish it.
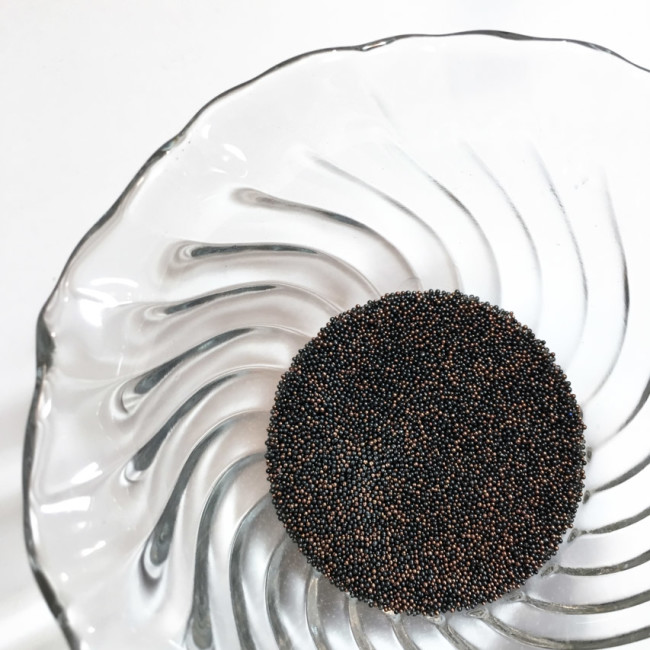
While you wait for the paint and wax to dry, mix the microbeads to create a variegated mix that is half brown and half black. Make sure to thoroughly mix the beads together to get a random distribution of color.
Next it is time to apply the buttons! Working one small section at a time, spread a thick coat of clear-drying white glue on the front of the frame. Position a mix of buttons to fill in the frame. After you are certain that the buttons are in their final position for that section – and before the glue has dried – sprinkle some of the microbead mix on top of any gaps between the buttons.
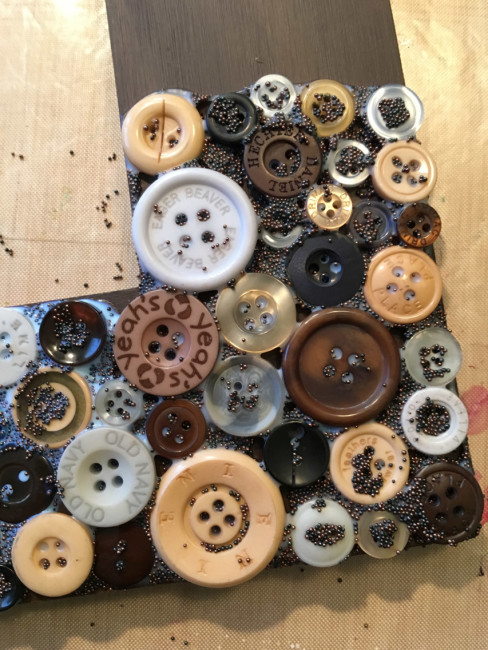
The benefit of using the white glue (versus say a hot glue gun) is that its invisibility and dry time gives room for adjustment as you build each section of the collage. You can nudge a button or move it completely if necessary to make your “puzzle without a correct answer” fit together in a way that satisfies you. You aren’t committed until the glue dries, which takes quite awhile.
I recommend letting one section dry before beginning another. While the dry time on the glue method allows for error, it also creates error – making it easy to accidentally nudge an entire section out of place while trying to wedge a button into a tight spot. Working with only a small wet section at a time minimizes the damage that sort of incident can do.
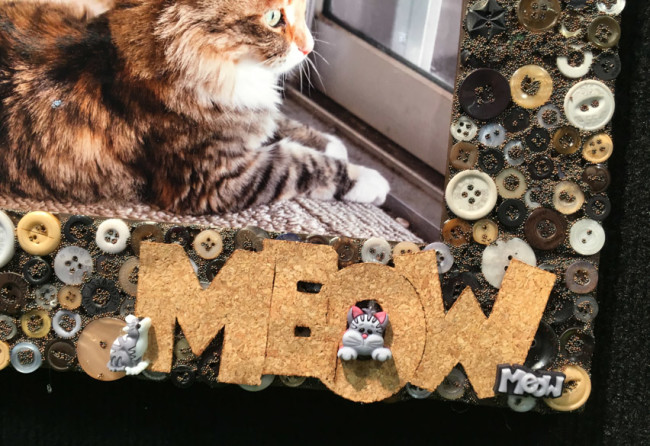 The title is a simple addition to the frame – it’s the materials that make it look fancy!
Cut the cork sheet on a Cricut Explore machine, and then ink the edges with Distress ink to create a nice shadow on it. Because the surface of the buttons is really uneven, you’ll need to adhere the cork with a glue gun even though the cork is self-adhesive.
Once the cork title is on, cut the shanks off of the buttons and use the hot glue gun to adhere them in place as well.
And that is it – your beautiful pet frame is complete! Now you can find the perfect photo memory to enjoy of your furry family member!
When it comes to decorating plain frames, buttons rule! The only thing that makes it better? Having sequins, pearls, beads, and charms to decorate with as well! Dreaming of warm temperatures and swaying palm trees I’m creating with the Tropical Twist kit today. The bright colors and playful details make it a fun choice for a project like this, though this project will work with any of my kits!
Supplies:
What would you put in a beautiful 28 Lilac Lane frame?
One of my favorite DIY décor projects is to take a simple little wooden birdhouse and add buttons, sequins, and more to it. Today I’ve got a tutorial featuring one of my new jars and a kit that coordinates nicely with it. I loved having multiple colors of buttons, pearls, sequins, and beads to choose from as I created this project.
Supplies:
Here’s a look at the finished projectt!
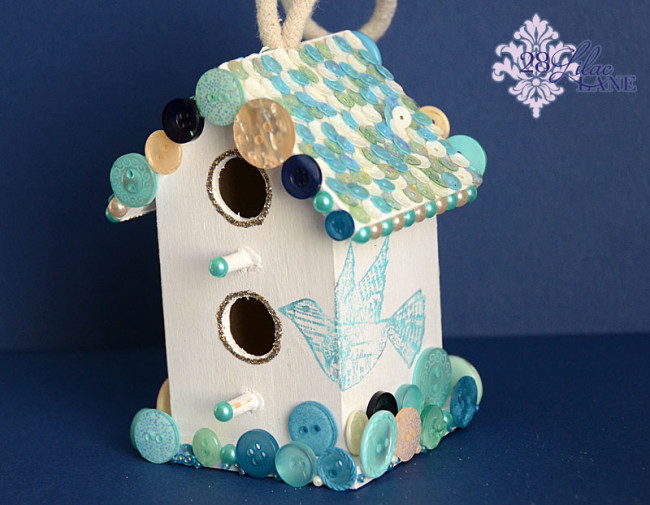
What will you make with 28 Lilac Lane?
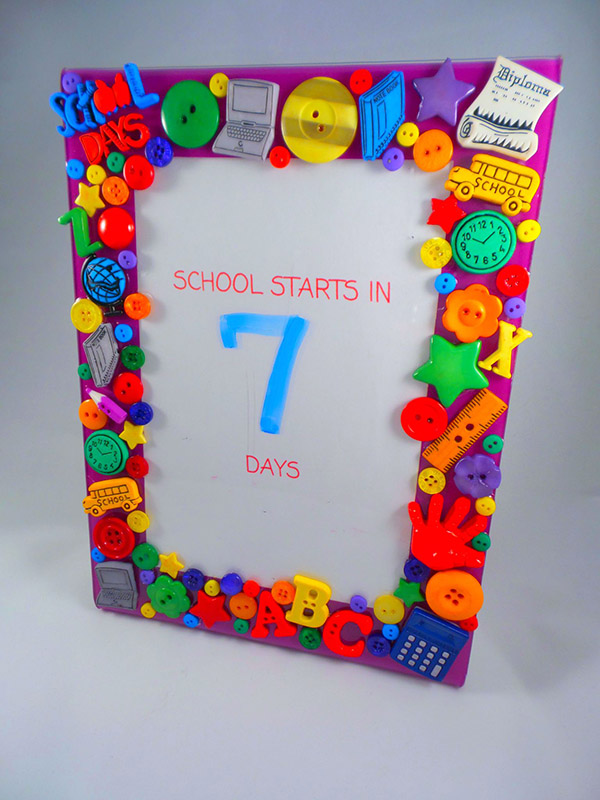
Today we’re joined by designer Lorrie McCullers, who is sharing a back to school project that is both a countdown calendar and school picture frame!
It’s back to school time! And what better way to keep track of time until the big day than with a countdown frame?
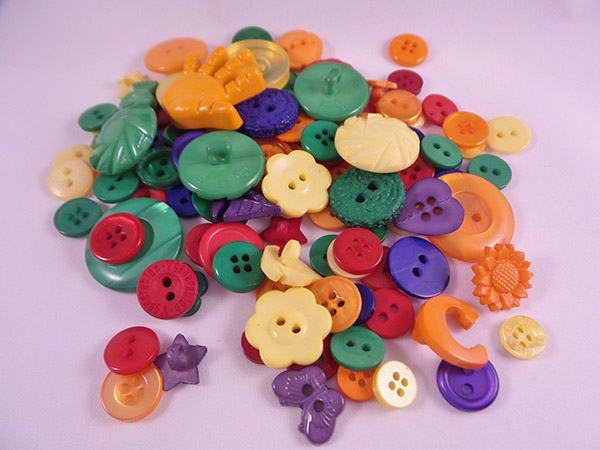
 I used three sets of buttons for this project: the School Value Pack, the Primary Grab Bag, and the Primary Tiny Round Buttons. I also used a pre-colored acrylic frame so there was no need to paint!
Supplies needed:
Buttons Galore School Value Pack
Buttons Galore Primary Grab Bag
Buttons Galore Primary Tiny Round Buttons
Deflecto acrylic 5”x7” frame
Aleene’s Liquid Fusion glue
button shank remover
dry erase pen
computer and printer (optional)
Directions:
Choose your larger buttons first. That way, you can fill in the empty spaces with smaller buttons.
Some of the buttons in the School Value Pack and the Primary Grab Bag have shanks on the back. To have your buttons lay flat to the frame, remove the shanks with a button shank remover.
Apply Aleene’s Liquid Fusion to the back of each button. Don’t apply too much or the glue will ooze out the sides of your buttons! Let dry for about 24 hours.
Print (or handwrite) a countdown for the first day of school, such as “____ days until school begins” or “School starts in ____ days!”
Keep track of the days with a dry erase marker. Acrylic frames are so great because you can just write on and wipe off!
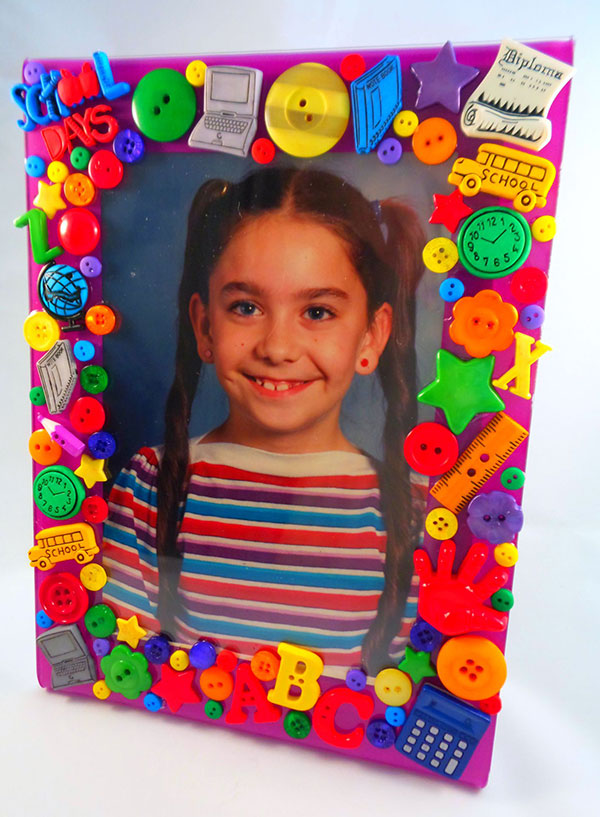
After school starts, you can then use your project as a frame for that first day of school picture of your kiddo! Since the dry erase marker comes right off, you can use this frame year after year. This is a great project for kids to help with as well as a fun gift idea for a favorite teacher!
Lorrie McCullers is a paper crafts designer who blogs at Forty11 Designs. She is a Craft & Hobby Association Designer Member and currently designs for Etch All and Deflecto Crafts. To see more of her work, visit her blog.
Lisa Fulmer visited us this week to share a project! We hope your enjoy her immensely creative interpretation of storage using the Farmhouse Button Bonanza!
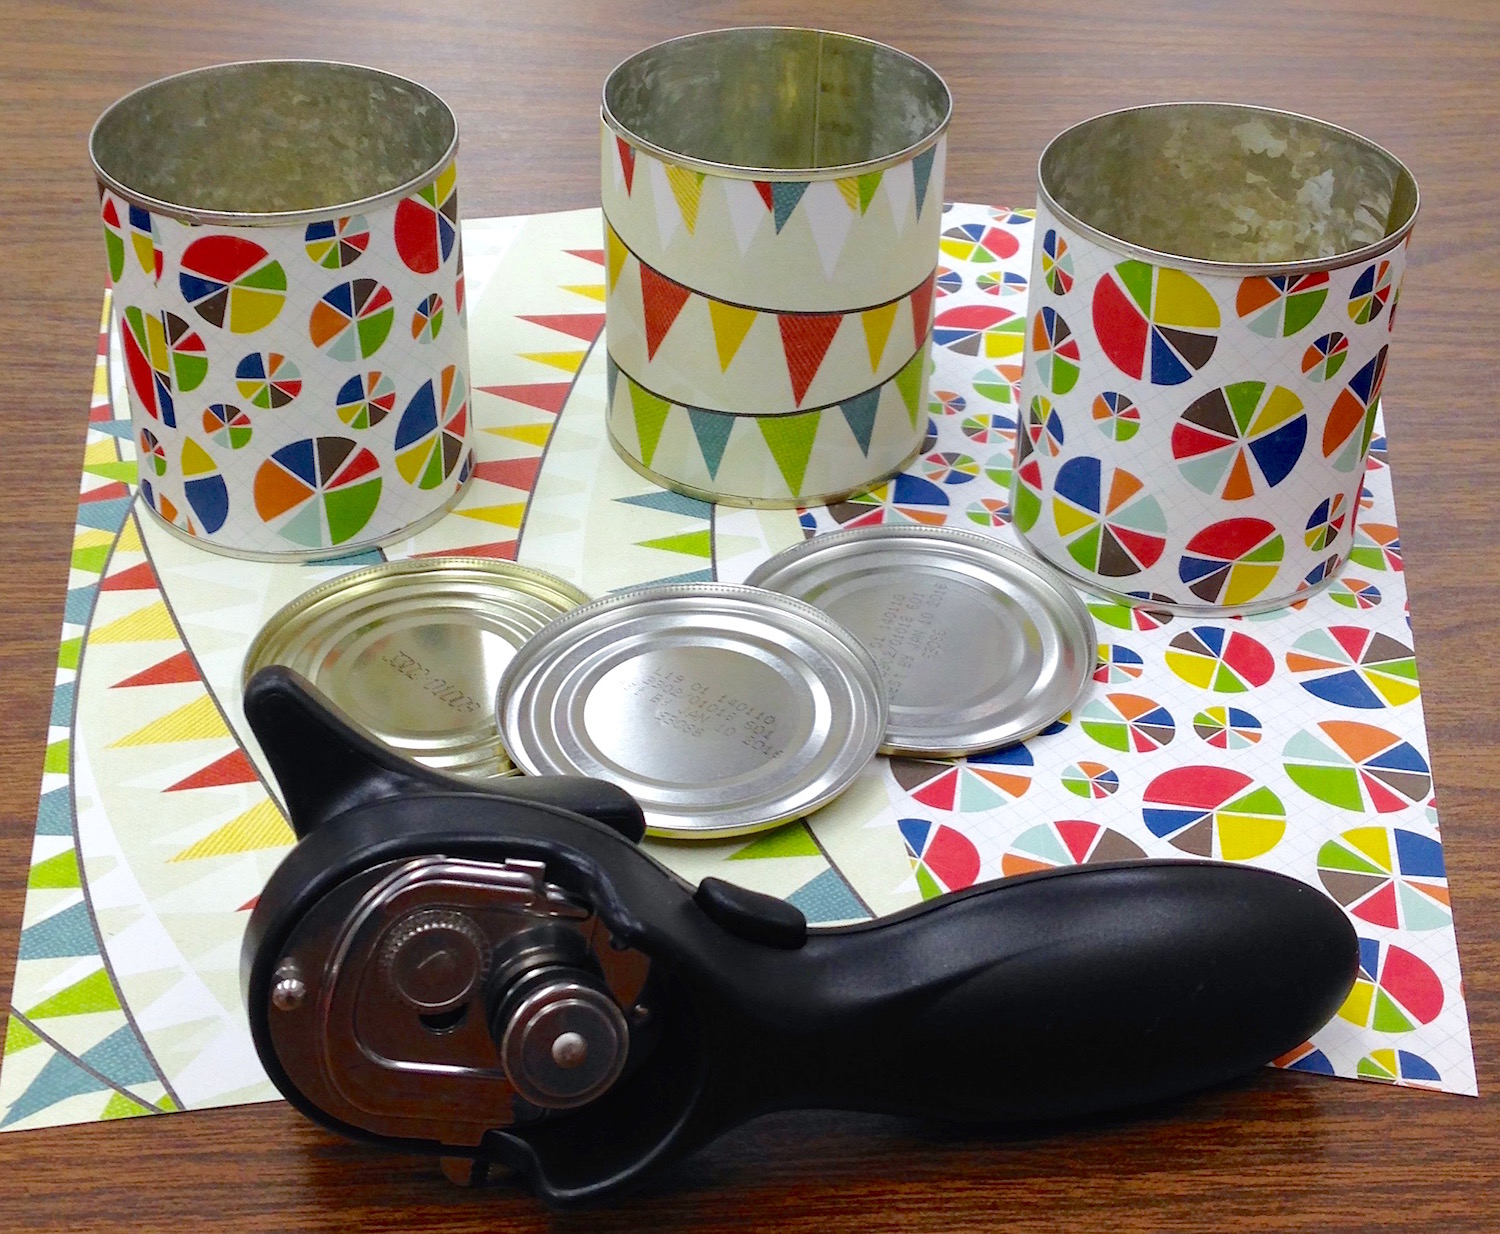
With the right type of can opener that leaves no sharp edges, you can turn any tin can into an adorable storage container!
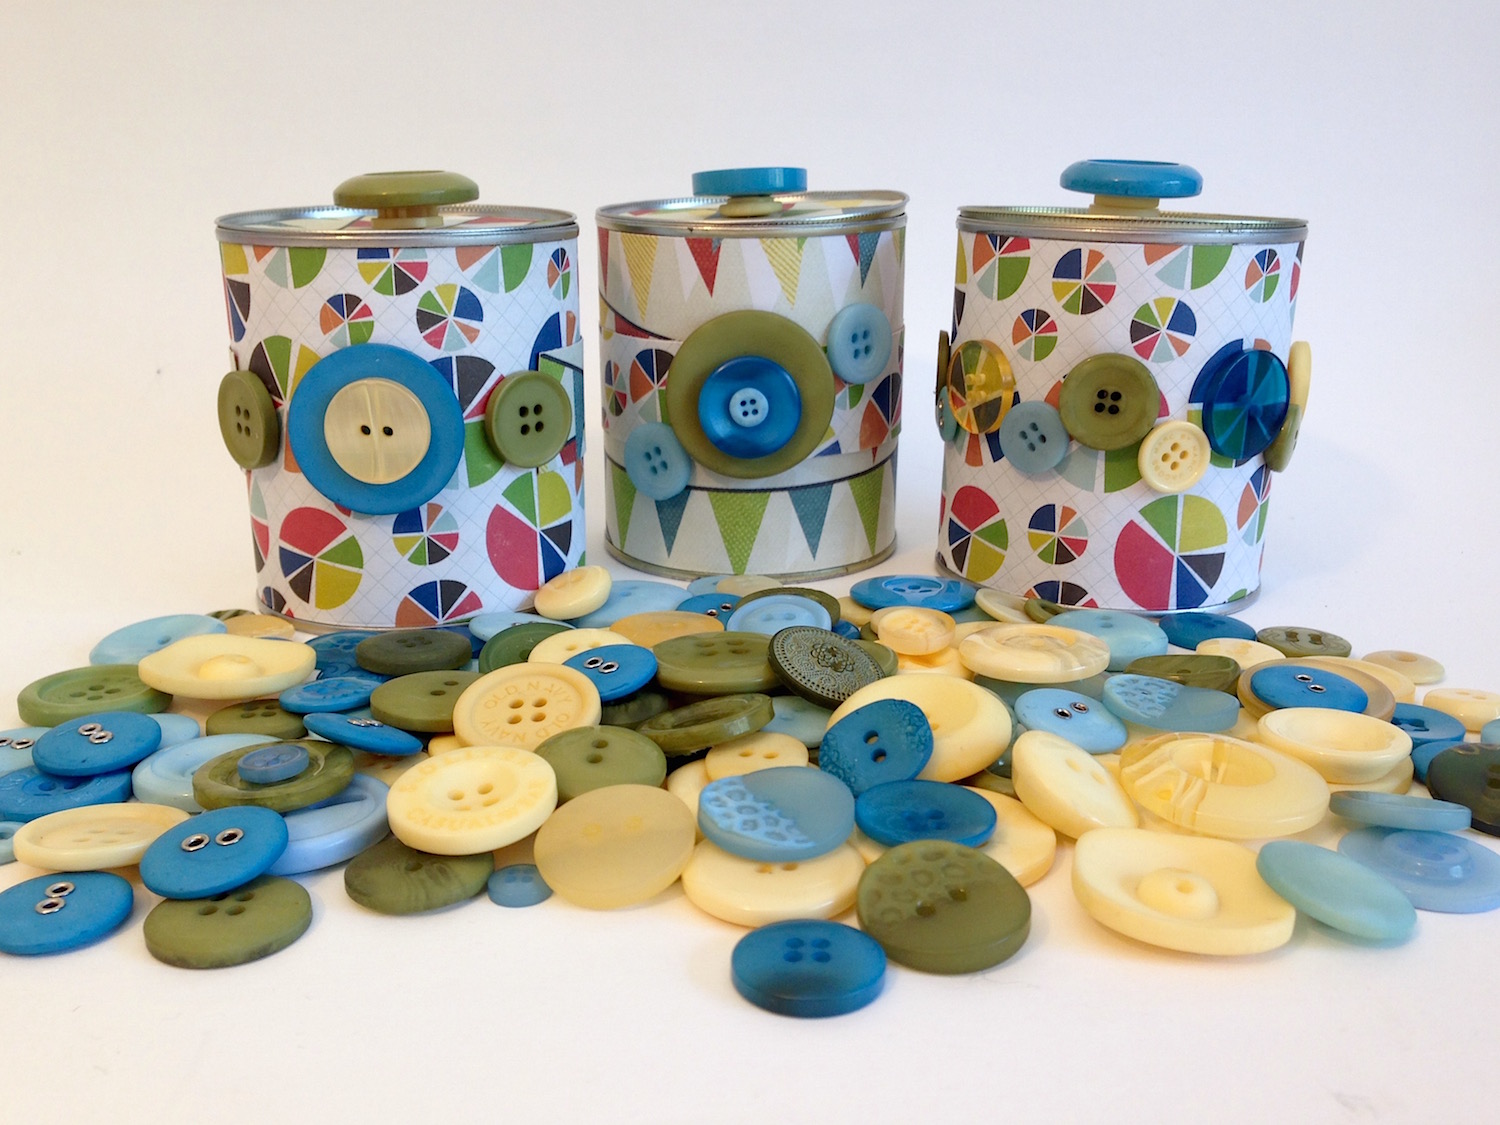
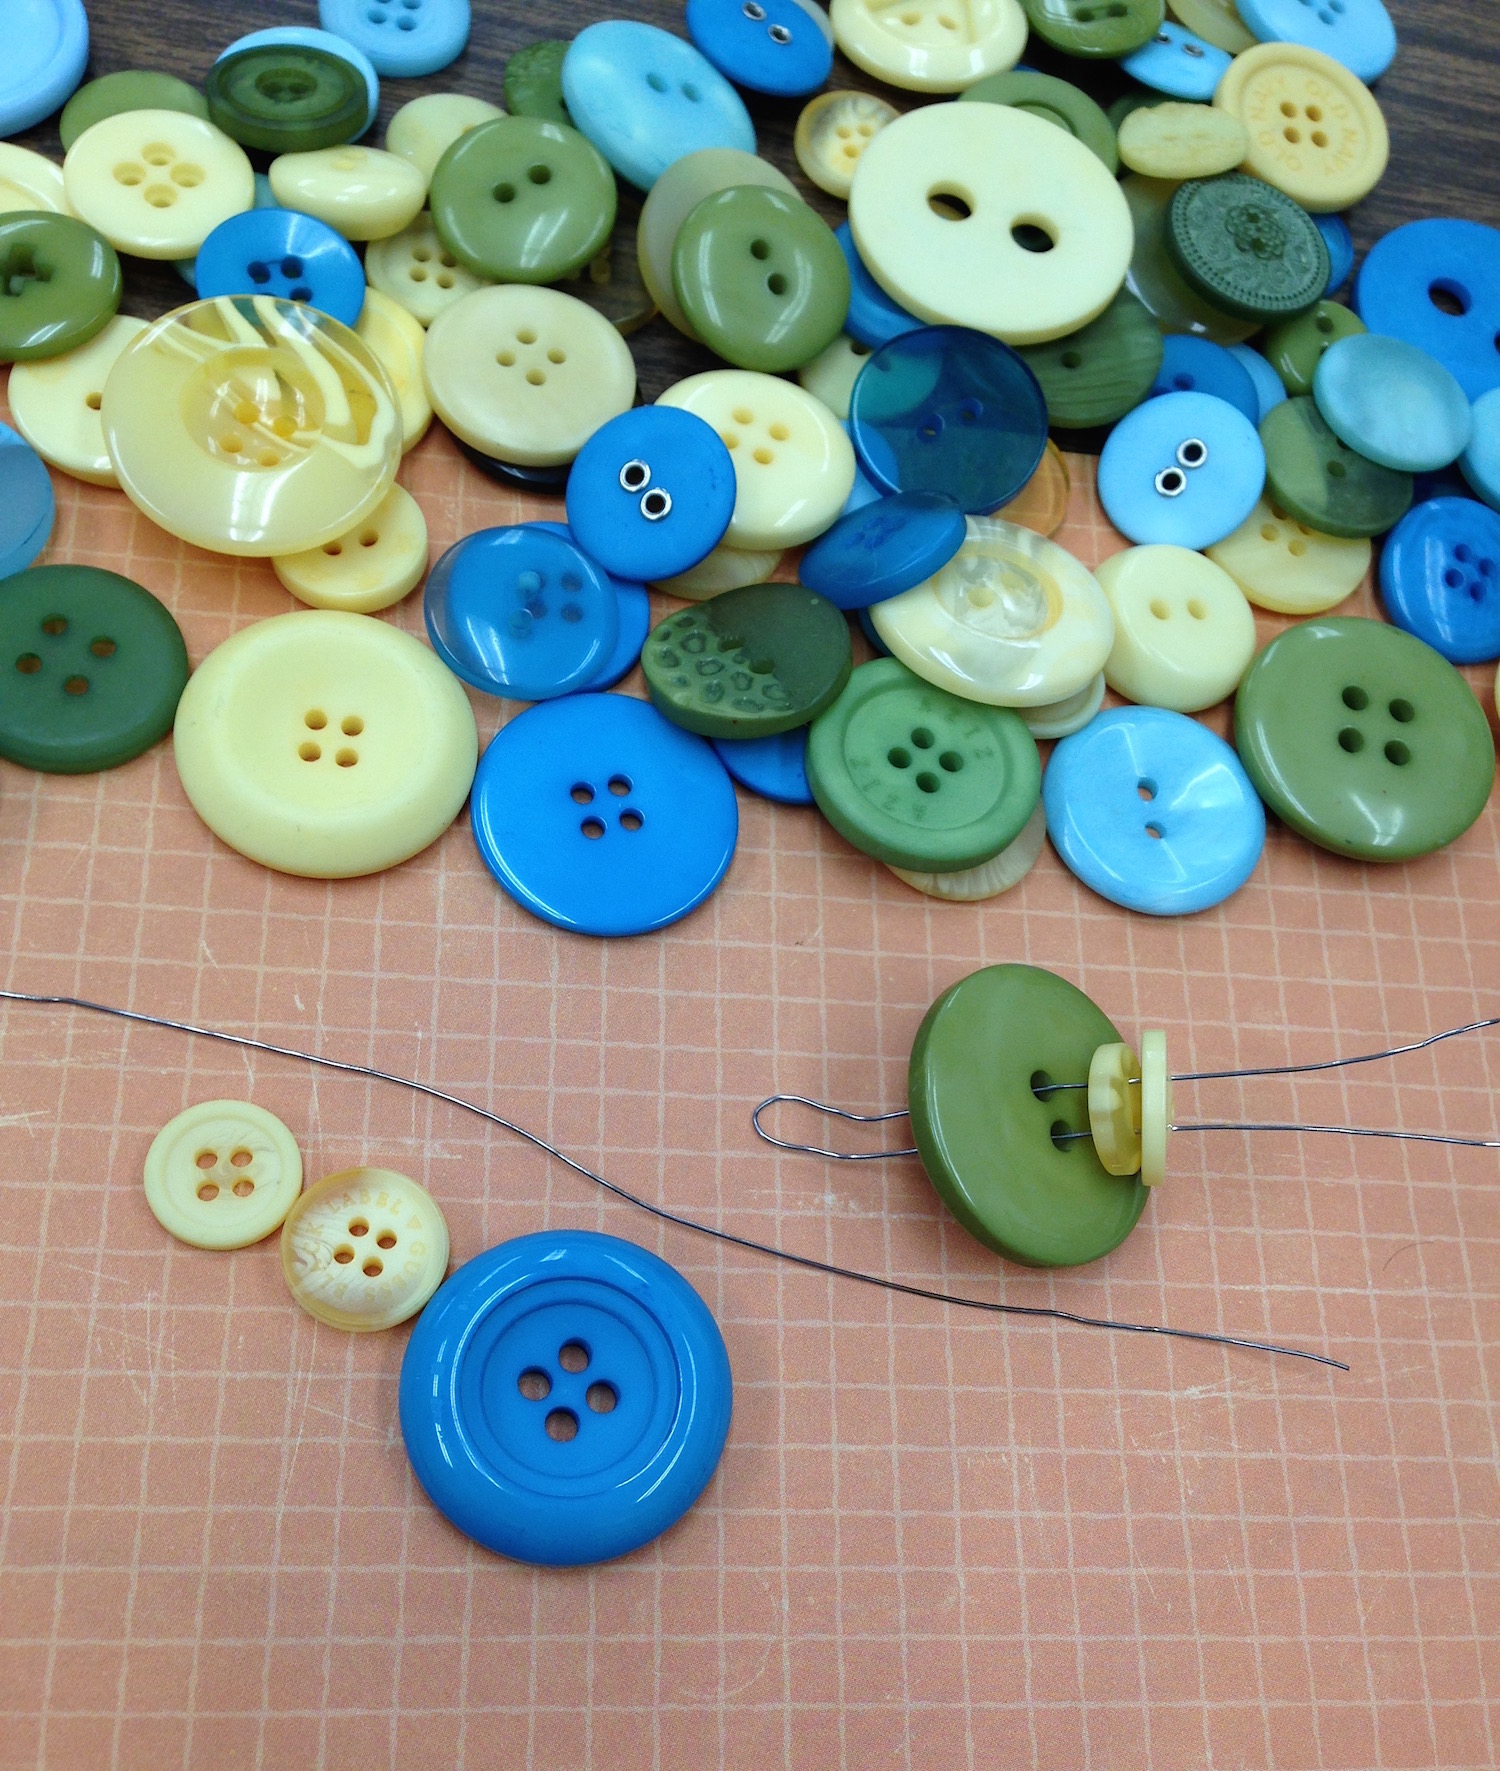
I used the Buttons Galore Farmhouse Button Bonanza in creams, blues and greens, along with some adorable scrapbook papers, to embellish these tin cans that used to hold mandarin oranges. A trio of these little tin can storage containers would be perfect for your desk or craft table.
Supplies:
 Directions:
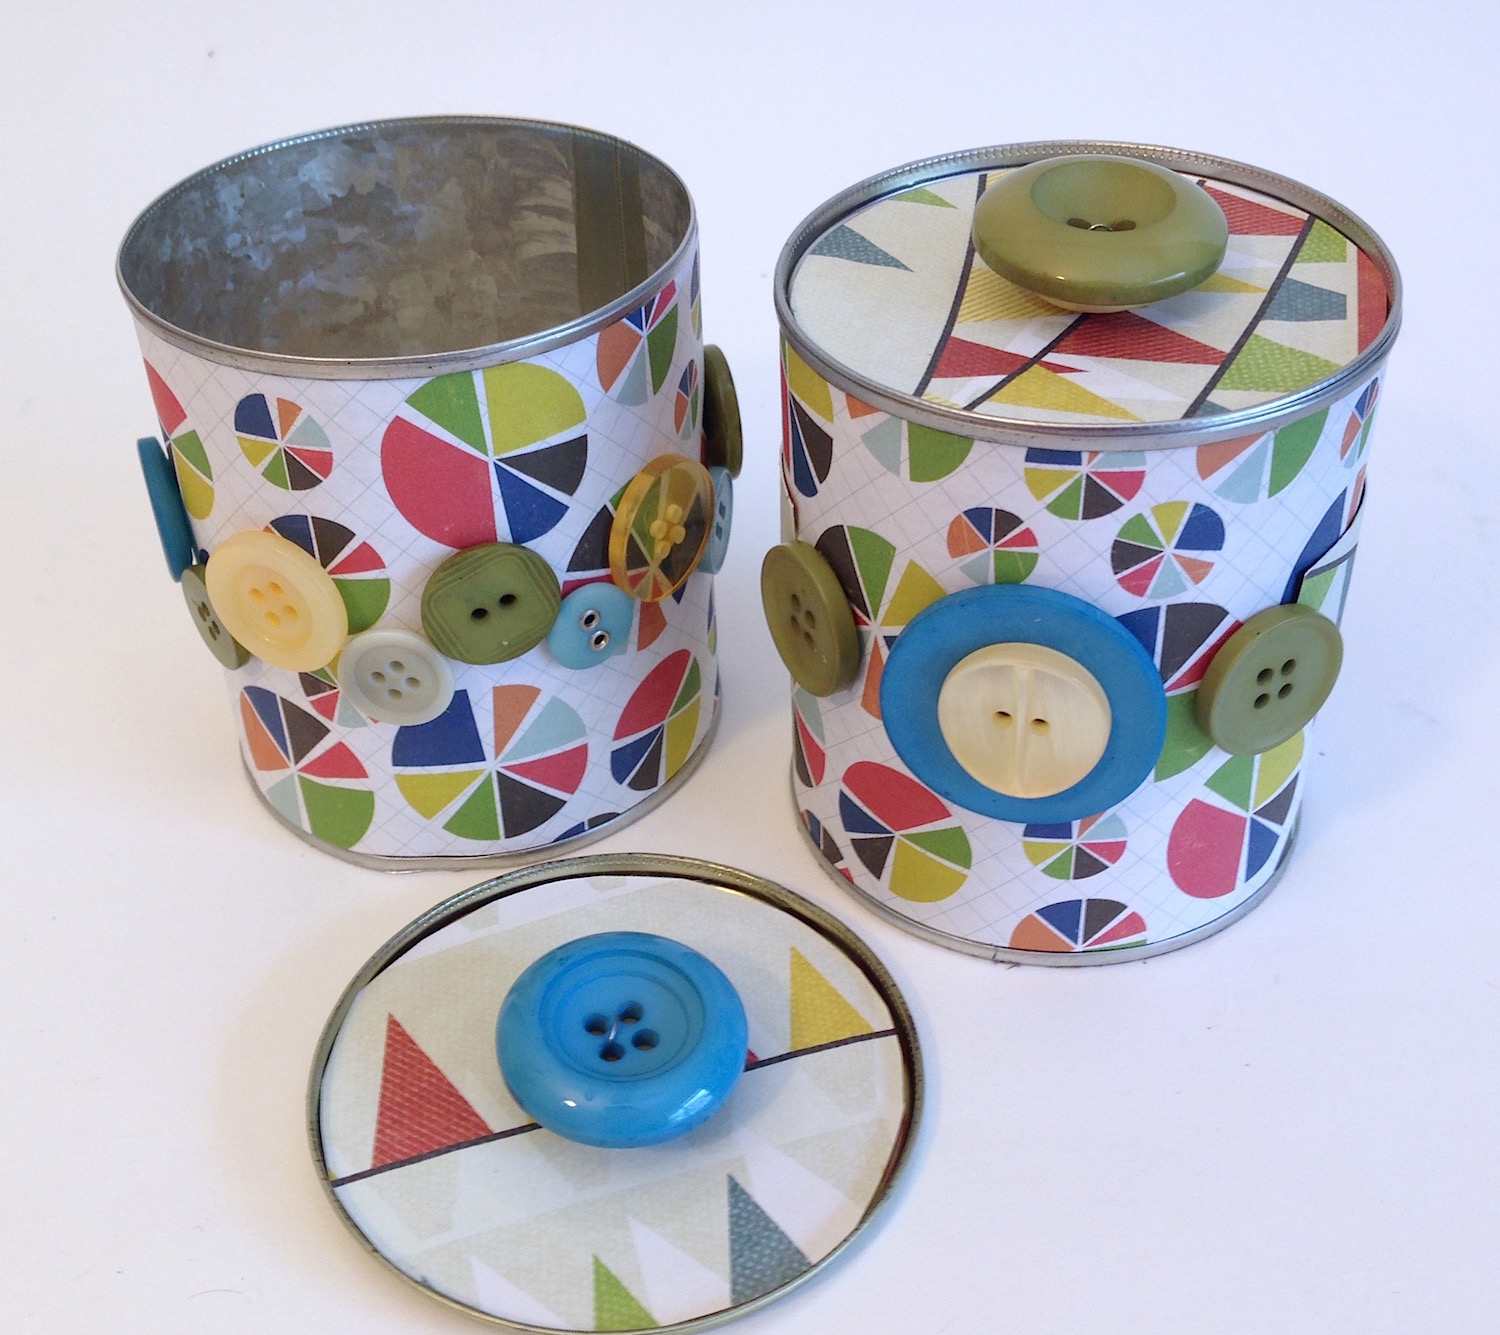 What would you like to store in these containers? They’d be perfect for storing buttons!
Lisa Fulmer is an artist, crafter, teacher, writer, on-air talent, as well as a marketing consultant. She’s also the author of two books – Craft Your Stash and Stylish Craft Foam Projects – and has worked with brands such as Spellbinders Paper Arts, Ranger Ink, DecoArt, SmoothFoam and Plaid. She’s currently a columnist and blogger for Bella Arts Quarterly magazine. To learn more about her work, visit her website.
This little garland is super festive and so easy to create. The mini shamrock garland can be used to decorate in lots of fantastic ways and is perfect for a fifteen MINUTE Friday project.

You will need scissors, green decorative paper, Candy Apple Green Buttons, Ribbon or Ric Rac and Aleene’s Always Ready Fast Grab Glue.
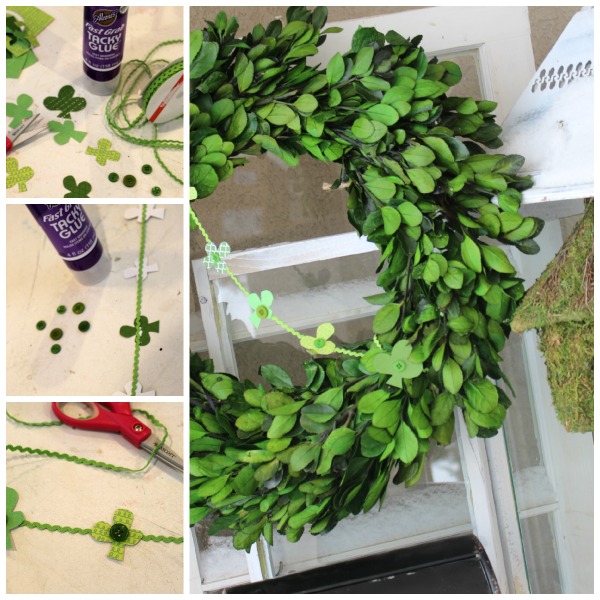
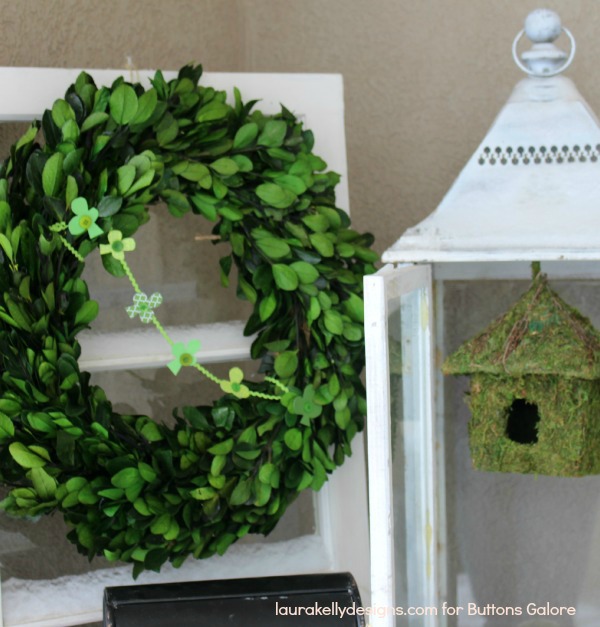
Ta Da! It looks so fun on this wreath on the front door.

Cheers,
Laura
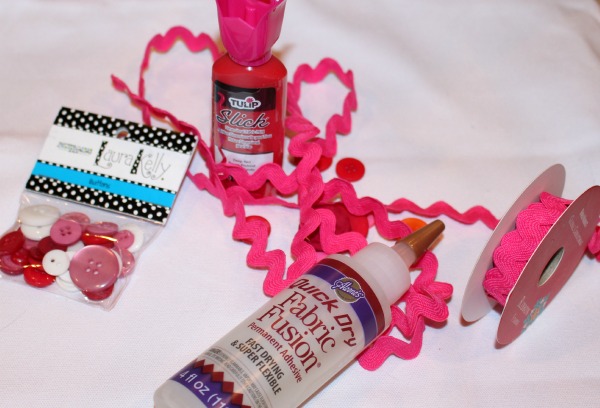
How cute is this pillow that I made with my Laura Kelly buttons and a few things from i Love to Create? I think is creates adorable decor for to celebrate the holiday of love.

I used Aleene’s Quick Dry Fabric Fusion to adhere the rick-rack around the edges. Then I used Tulip dimensional paint (red) to spell out love and add the buttons. I LOVE that it works as a paint and as an adhesive too!
There are so many ways to create with buttons and products from i Love to Create. Here are a bunch.
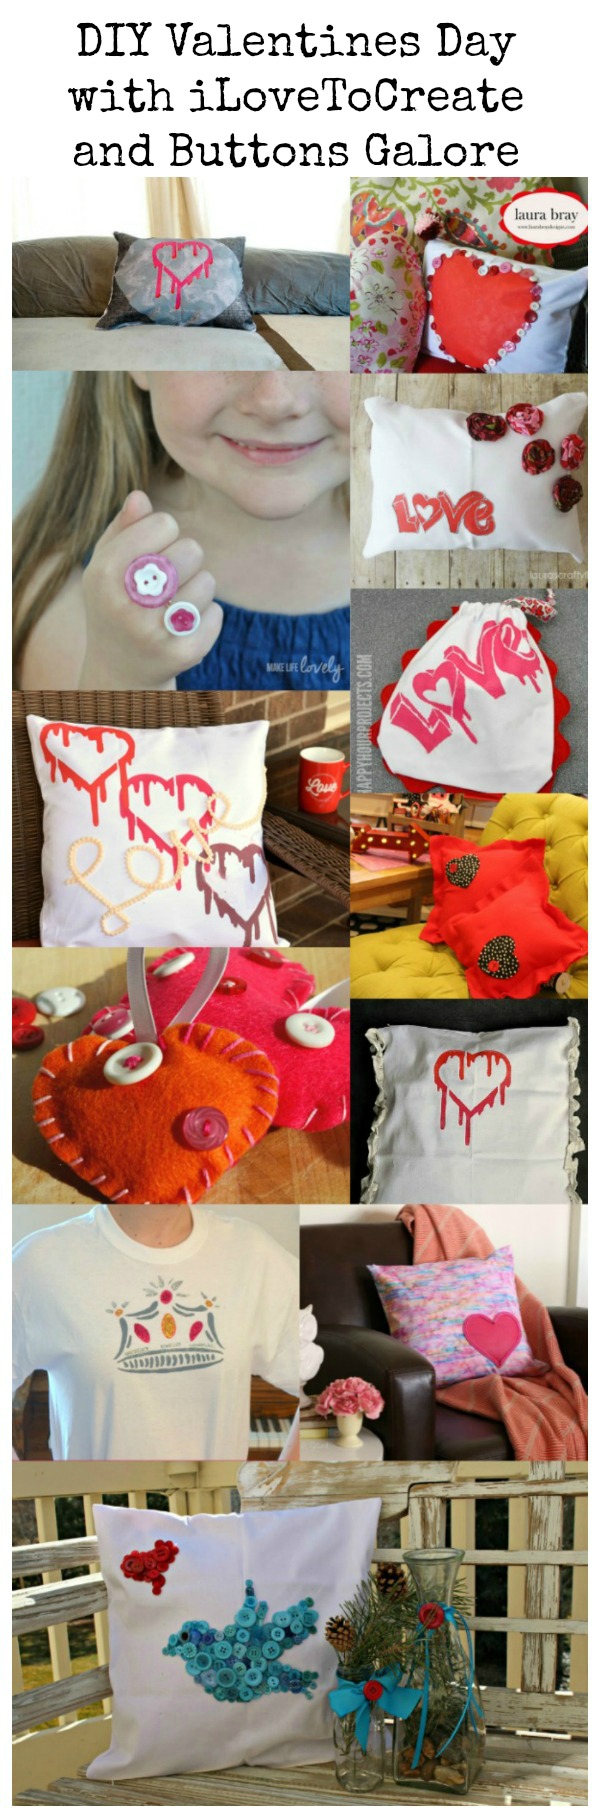
You can click around and check them all out.
You can also enter to win this awesome contest.
Cheers and Happy Decorating,
Laura
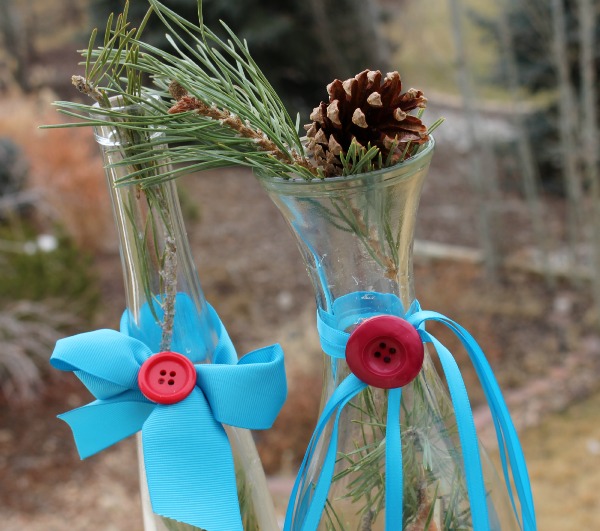
Fifteen minute Friday is all about creating projects that are quick, simple and fun. This week’s project is using recycled jars (that tall one is from honey) and adding ribbon and buttons to create decor.
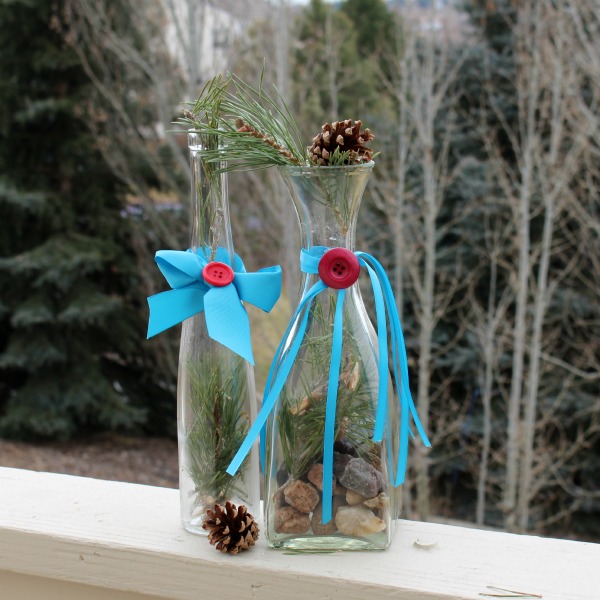
I simply tied the ribbons from Offray around the jars and bowed one while knotting the other. I secured the ribbon and added the buttons with Aleene’s Quick Dry Fabric Fusion because it works great and dries so fast.
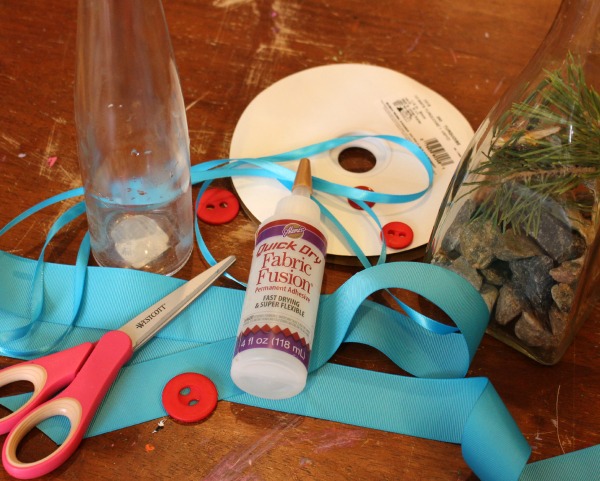
These two jars are a perfect addition to this amazing pillow that Laura Neiman created this week using these colors. Find out more about that over on her awesome blog HERE.
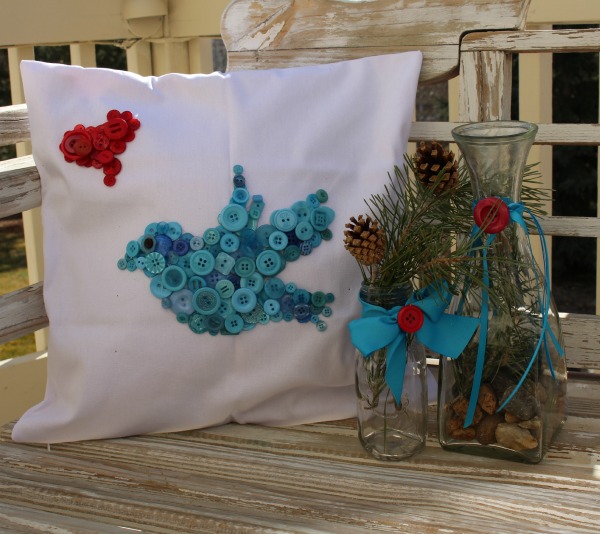
The buttons are all from my collection with Buttons Galore. The red buttons are Radiant Red and the blue in the bird is Robins Egg Blue. You can buy them all on the website of course!
Happy Creating!
Cheers,
Laura
Okay, so this is really cute don’t you think? It was wayyyyy easy to make and creates awesome decor initials with recycled cereal boxes. Yipp, it’s Fifteen MINUTE Friday!
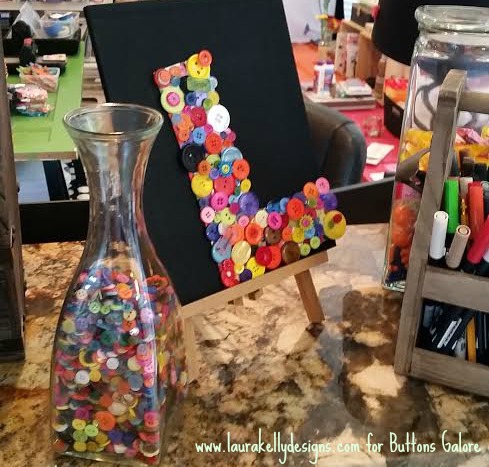
Cut your favorite letter out of the cereal box.
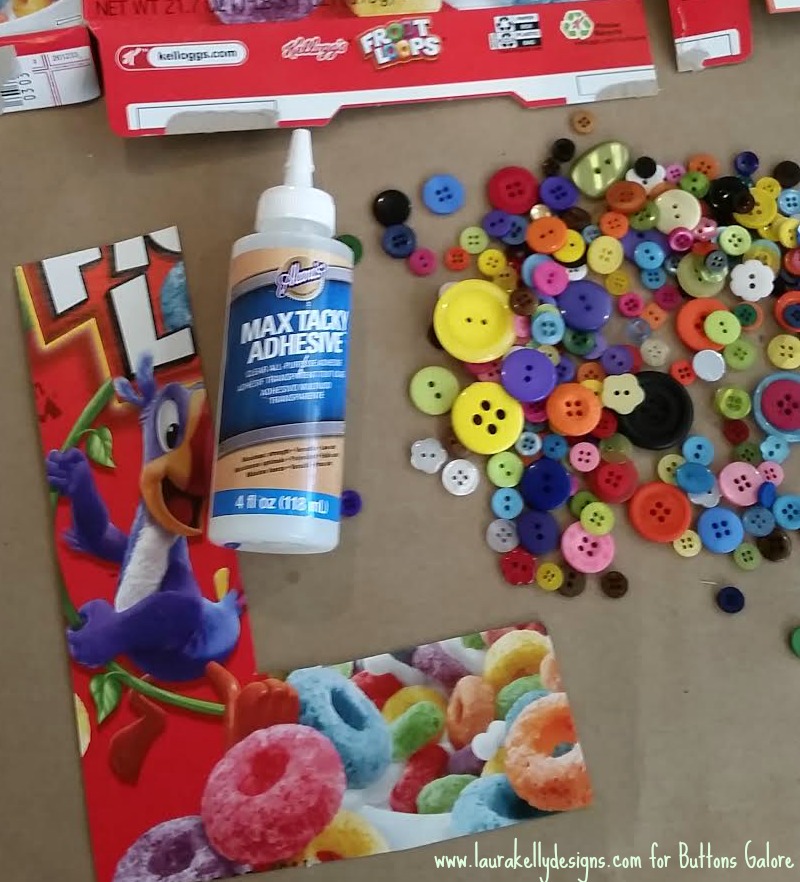
Cover it in Aleene’s Max Tacky Glue. This works best because it is thick so it won’t run and won’t get your cardboard soggy AND it is strong. Cover the letter with buttons. I used the Laura Kelly BRIGHTS collection.
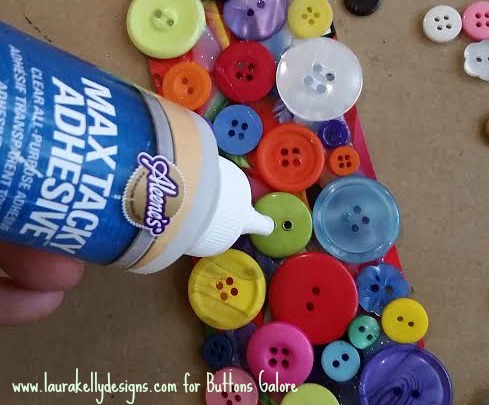
Add layers if you would like. I added some Embellishment Buttons to make my L for Laura super fun. I used the Retro Embellishment Set!
Let it dry completely then find a great place to display it.
Happy Quick Crafting with Buttons,
Laura
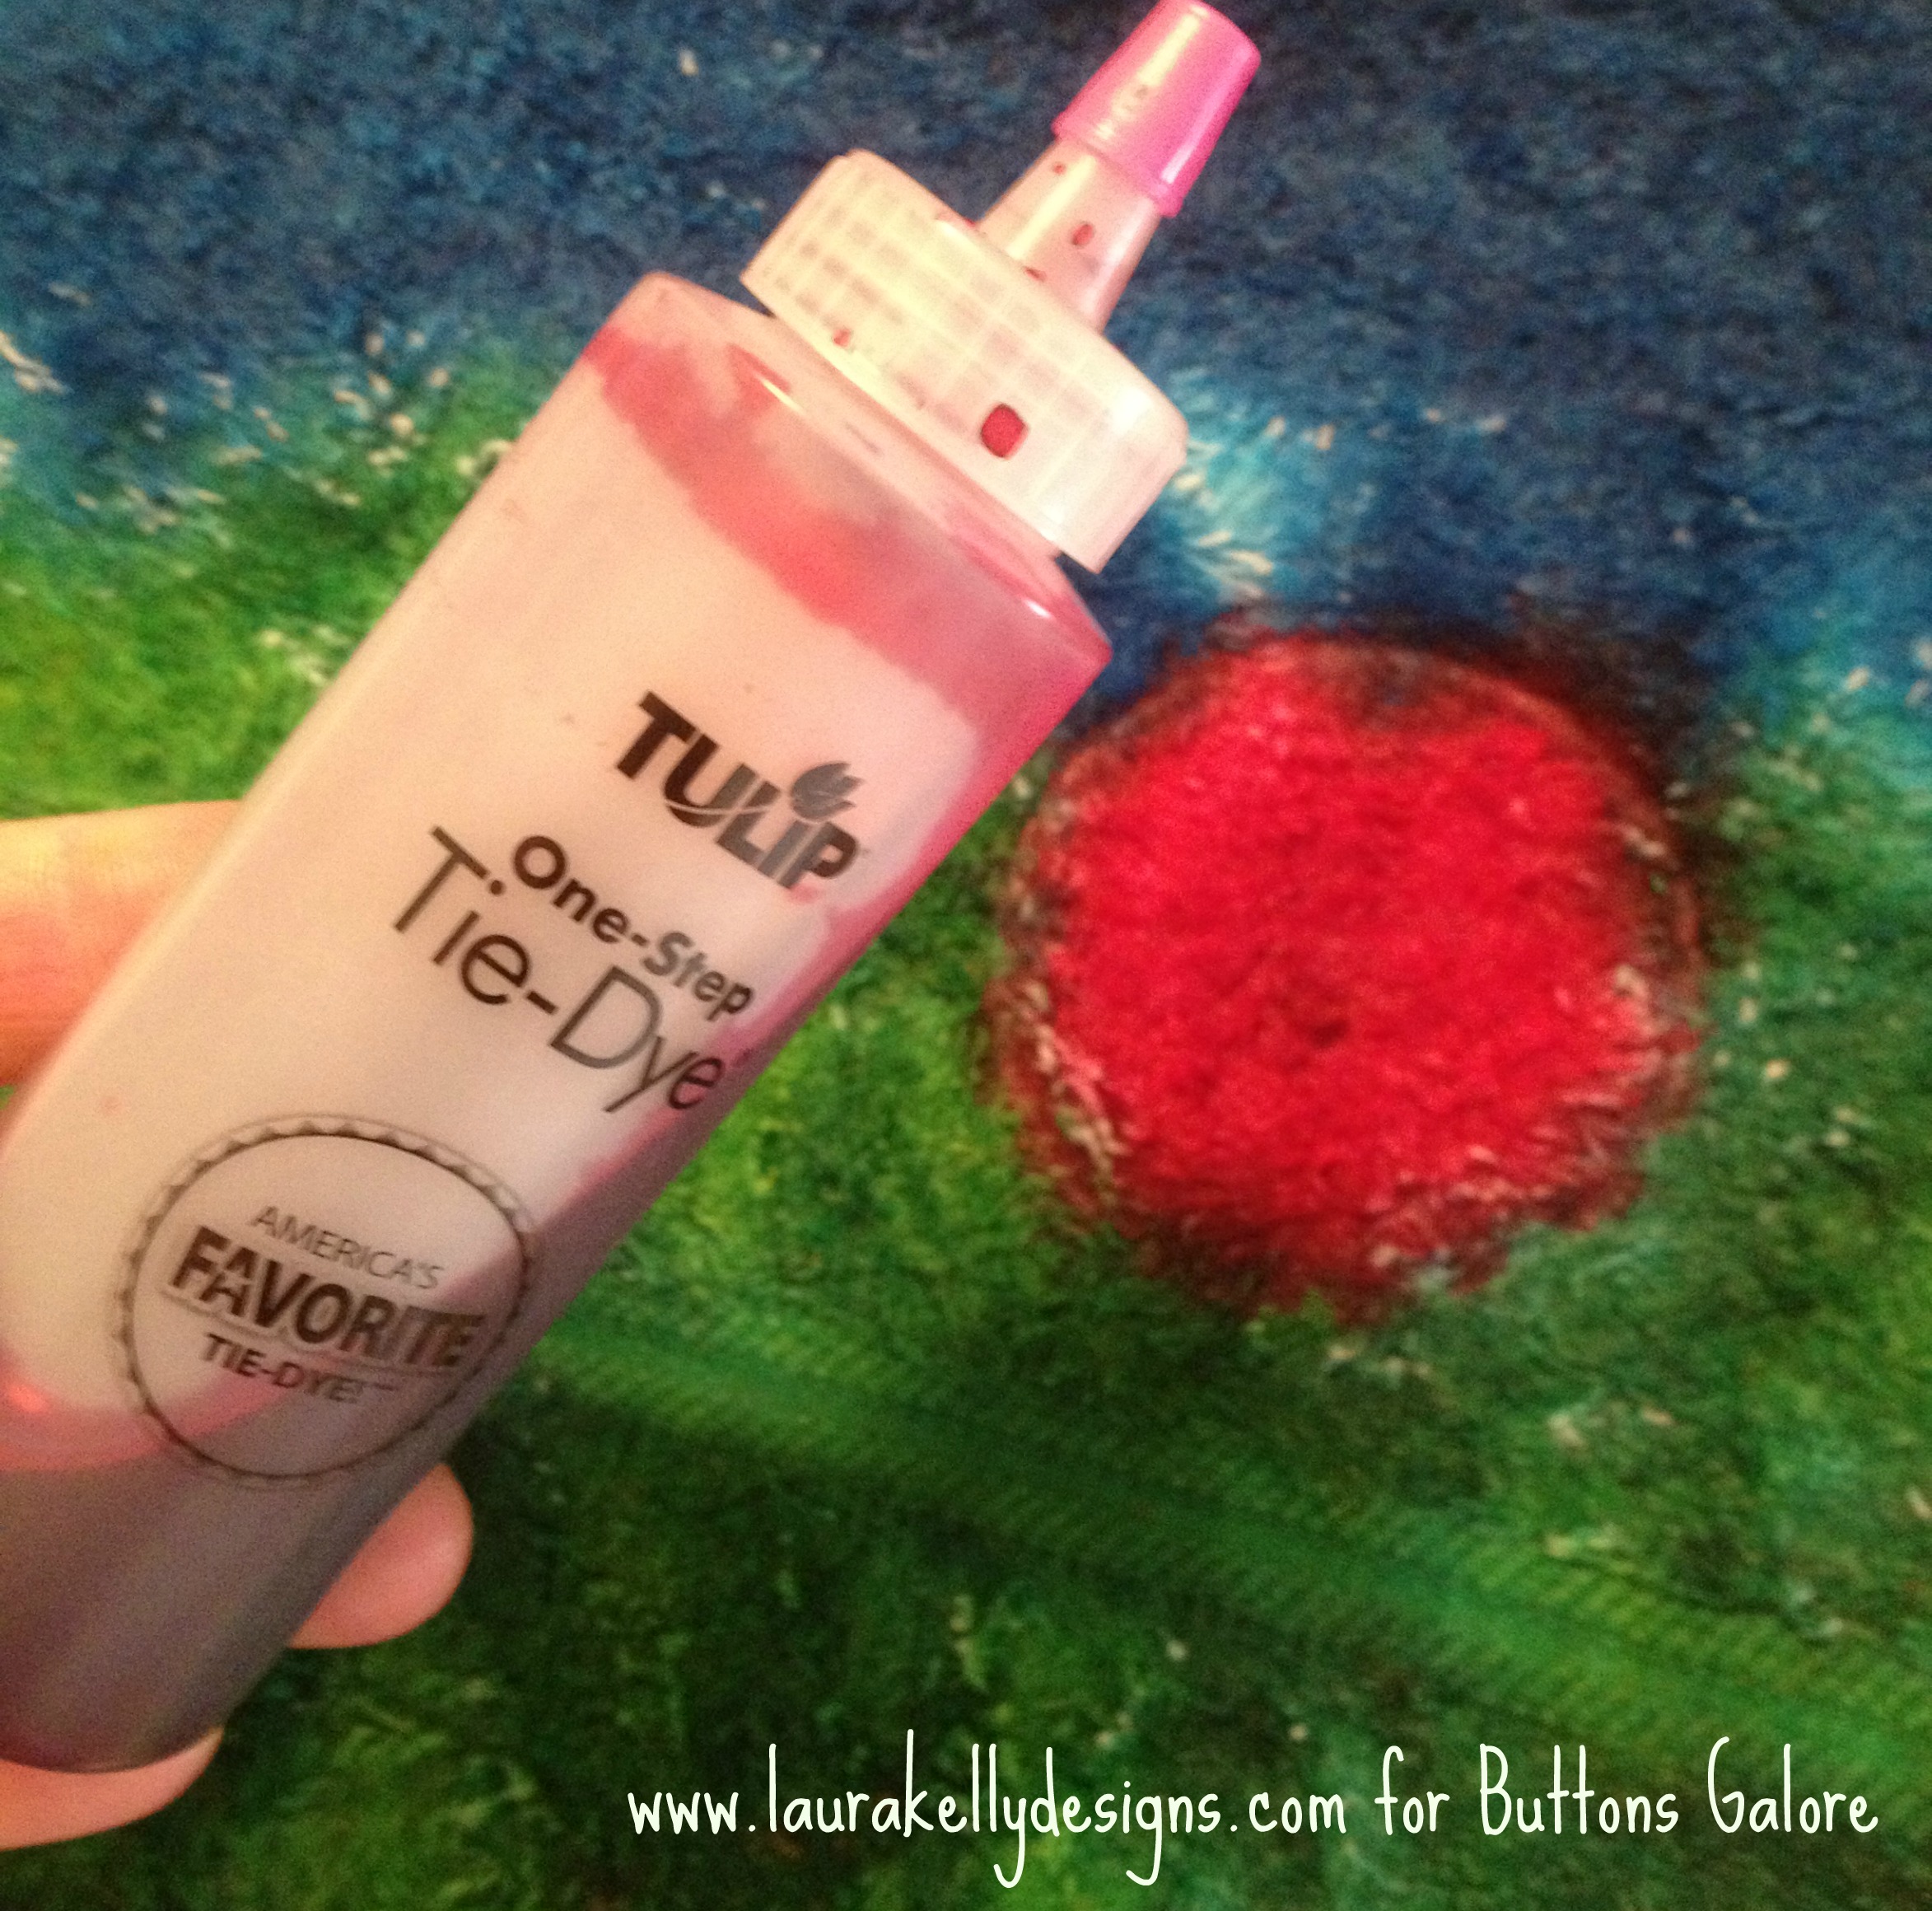
Cute right? You can buttons up this flower towel to dye for at your house to. The towel is super cute and really easy to make. It takes about 15 minutes of creating, but allow for a break in between dyeing and rinsing that is much longer, as in 6-8 hours.
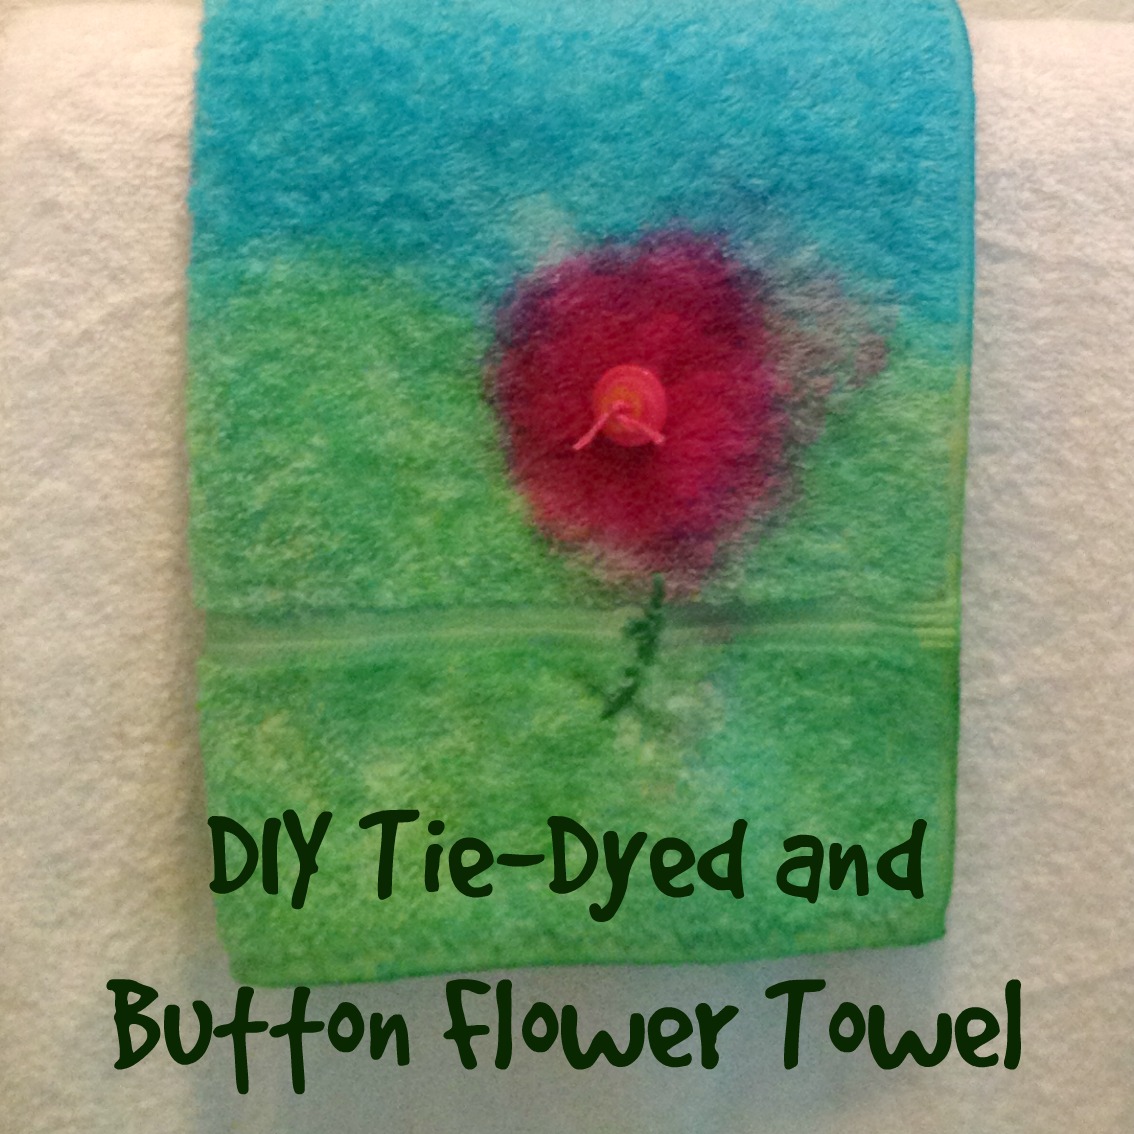
First, dye a white 100% cotton hand towel with Tulip One Step Tie Dye like so. I put a glass jar down over the area that I wanted to stay clean for the pink dye to create the flower when I did the green and blue.
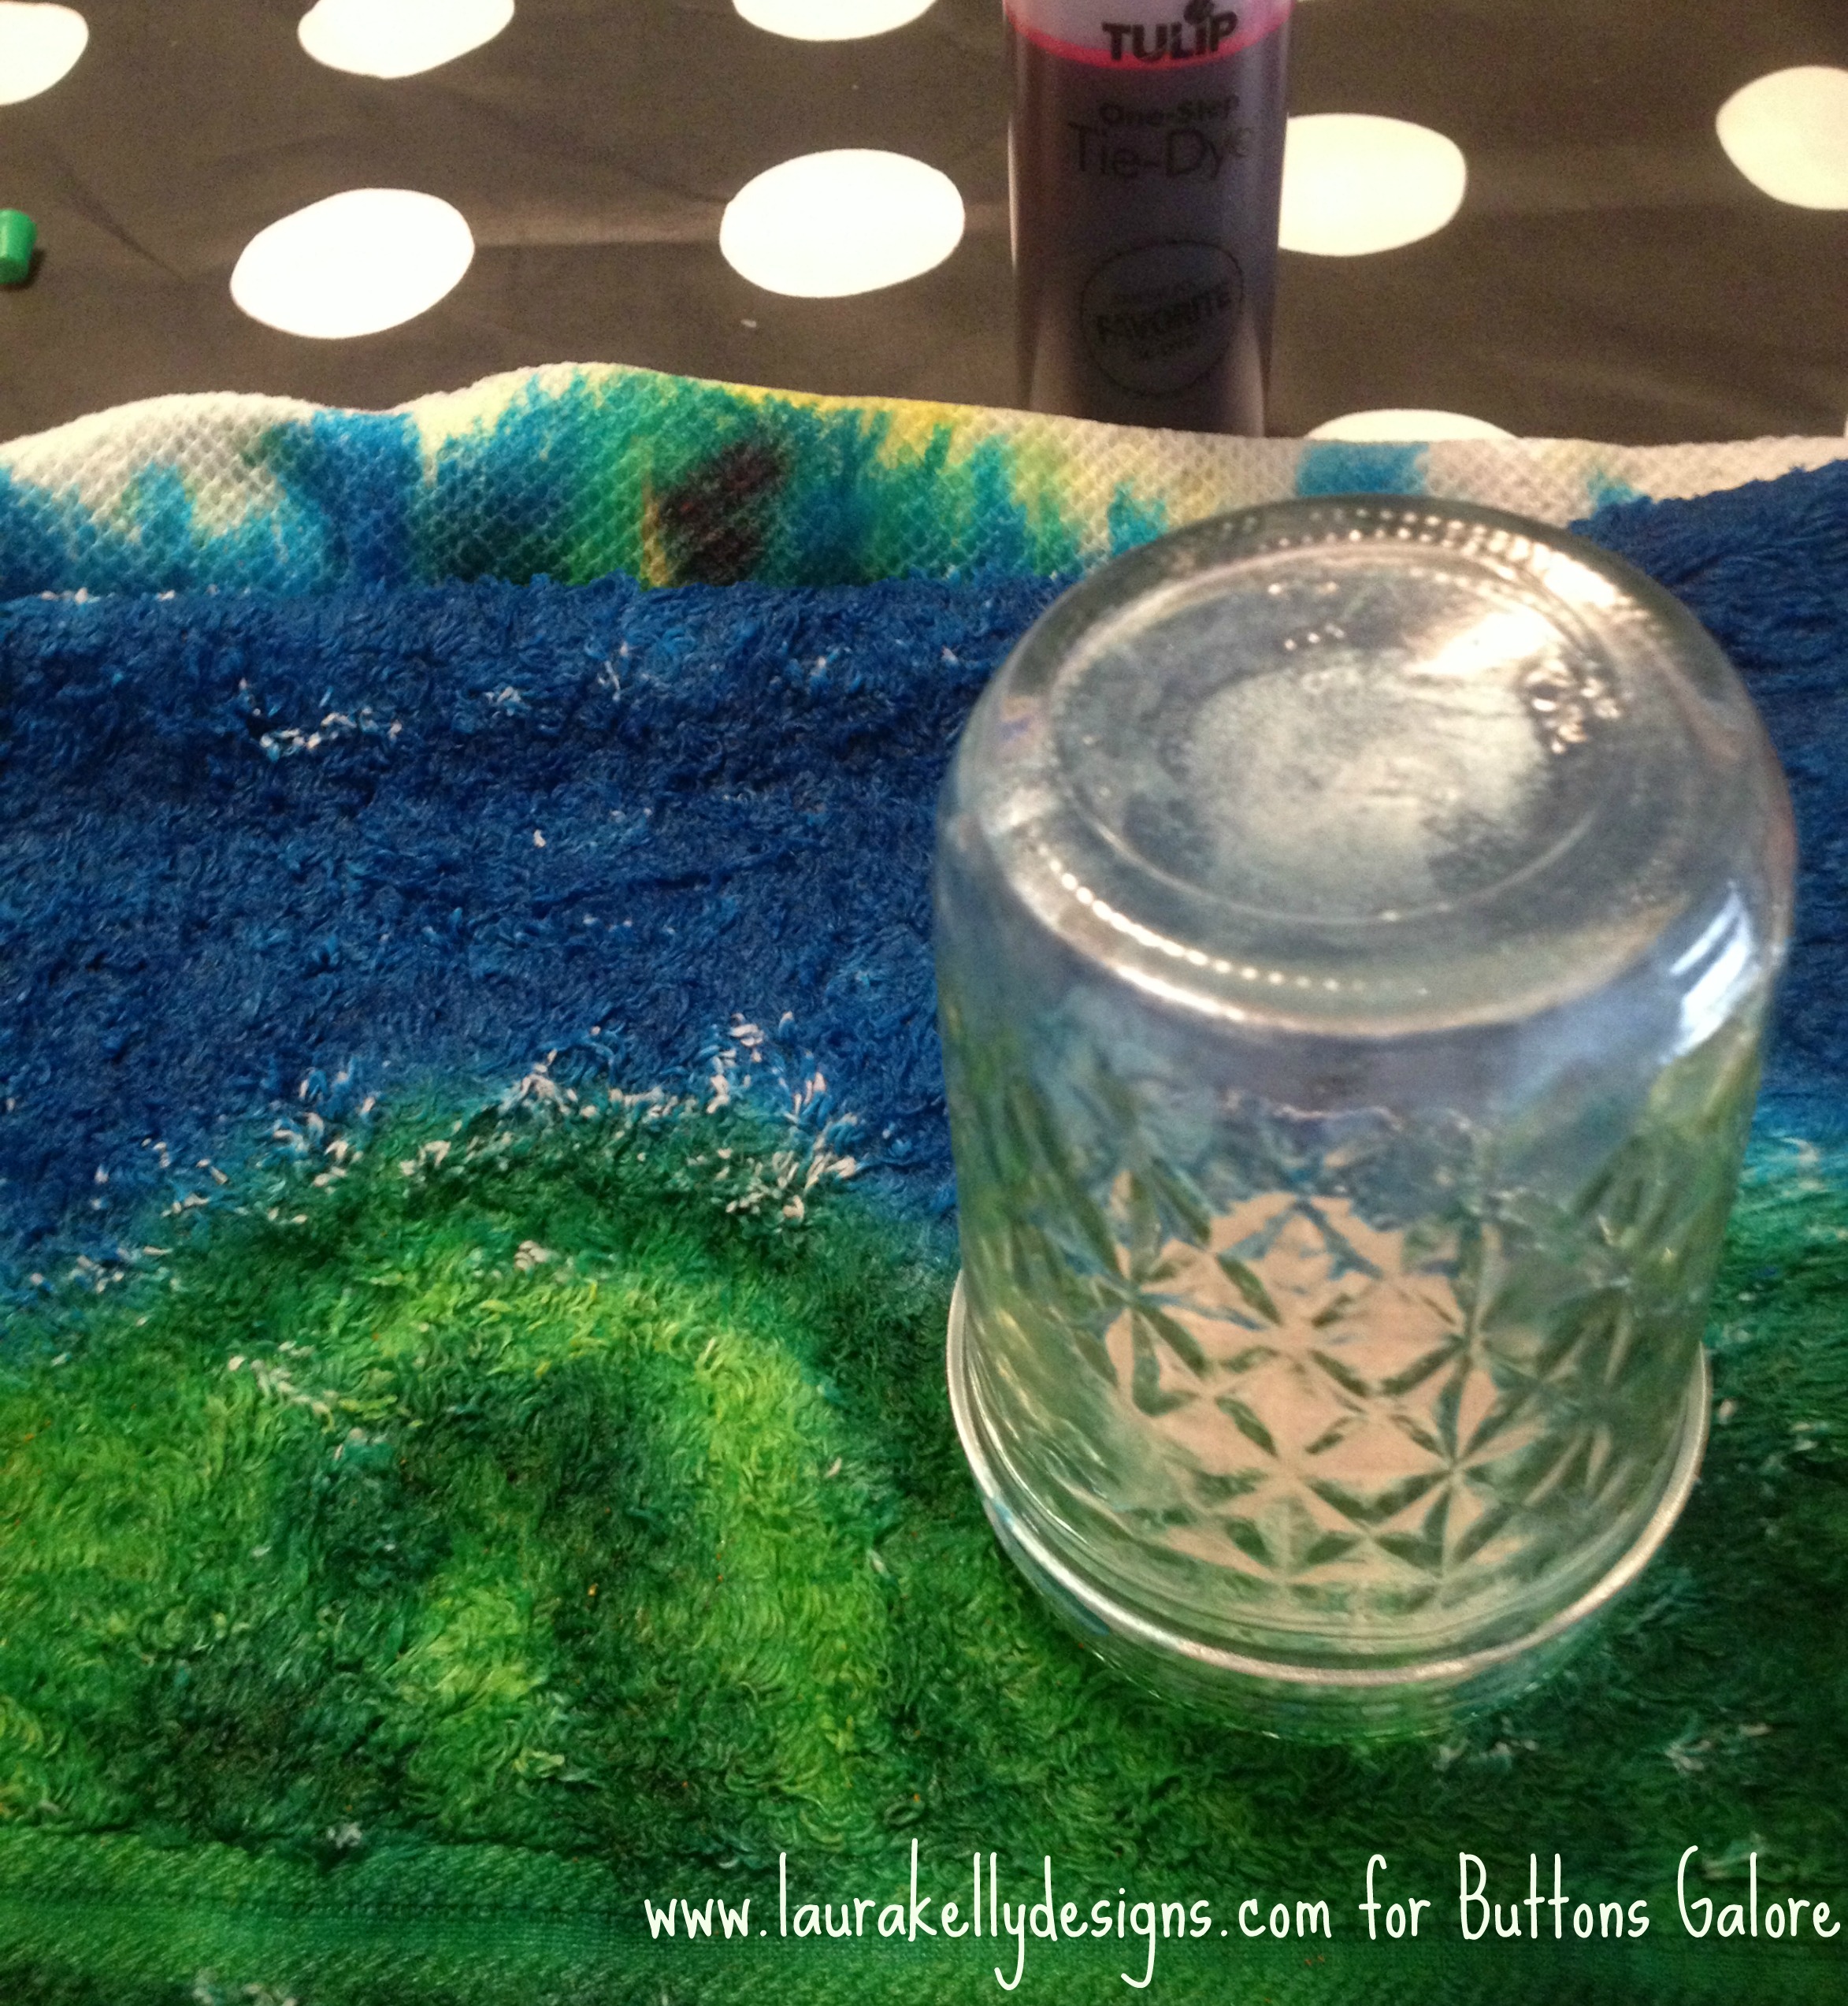
Then I added the pink.
Follow the process to set the dye and rinse the towel then stitch on the buttons and stitch a stem with buttons from my Laura Kelly collection and embroidery floss from Coats and Clark.
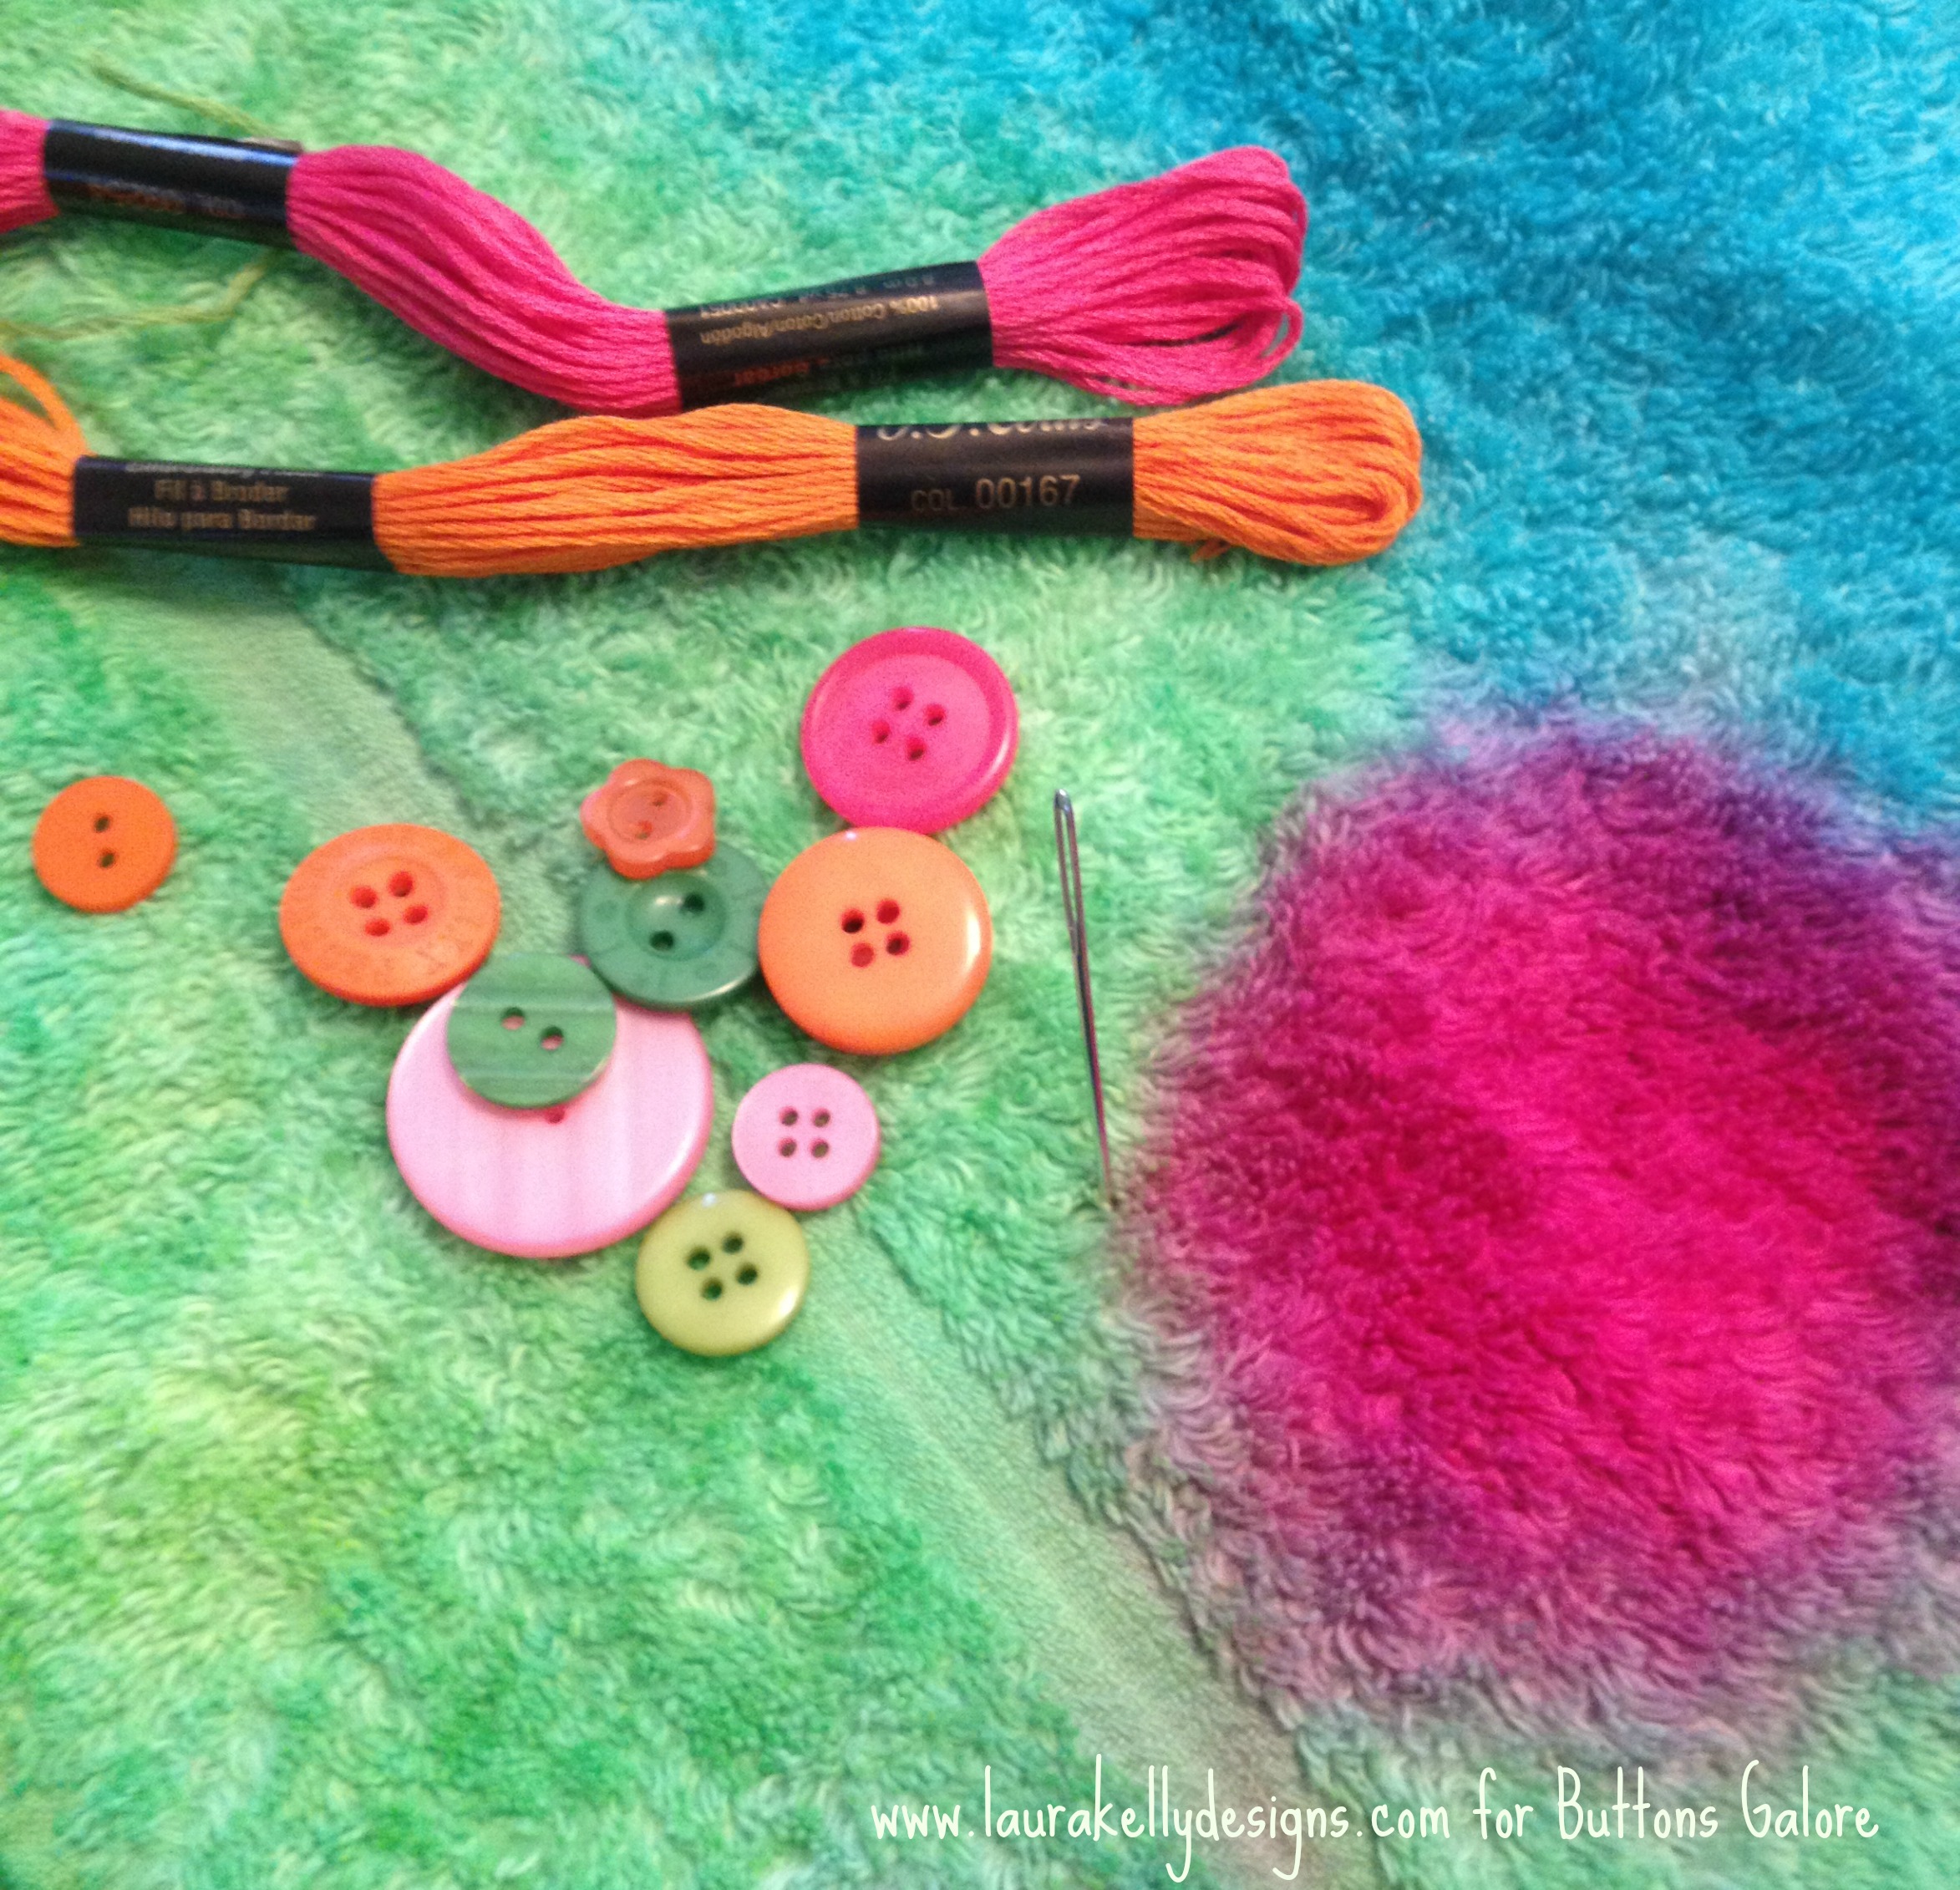
Ta Da!
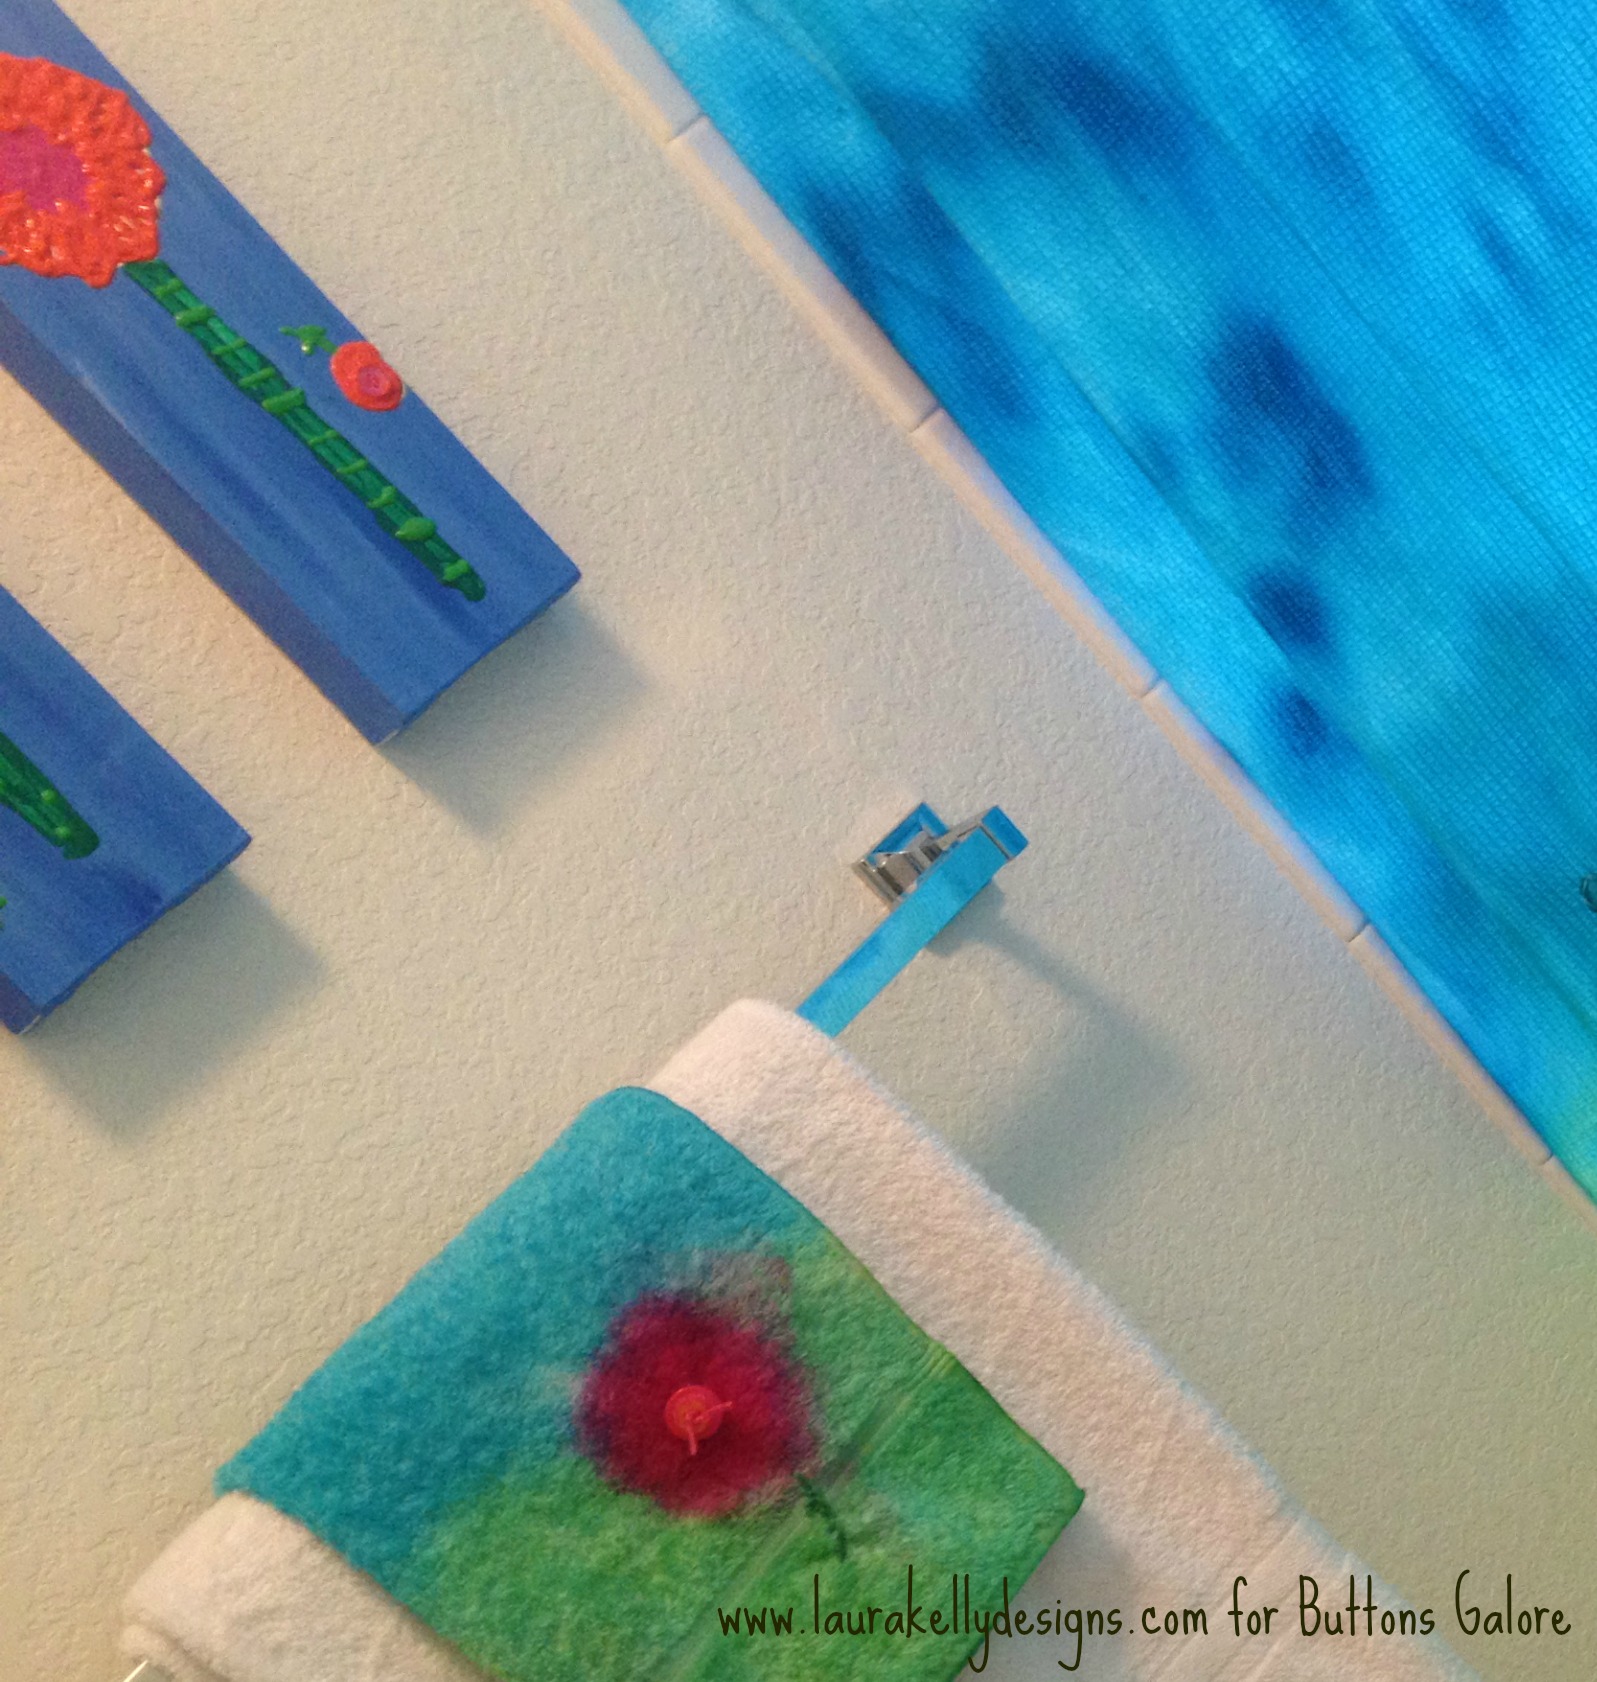
It matches the bathroom decor I created for Z. Check out the shower curtain on my blog.
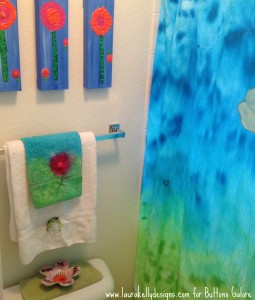
It used the same process and has buttons on it too. It just takes MUCH longer! I painted the canvases to match and that project is on my blog too, with buttons of course! Check out the flower canvas tutorial here!
Happy Creating,
Laura
This project is super easy and fast and creates coaster fun with felt and buttons.
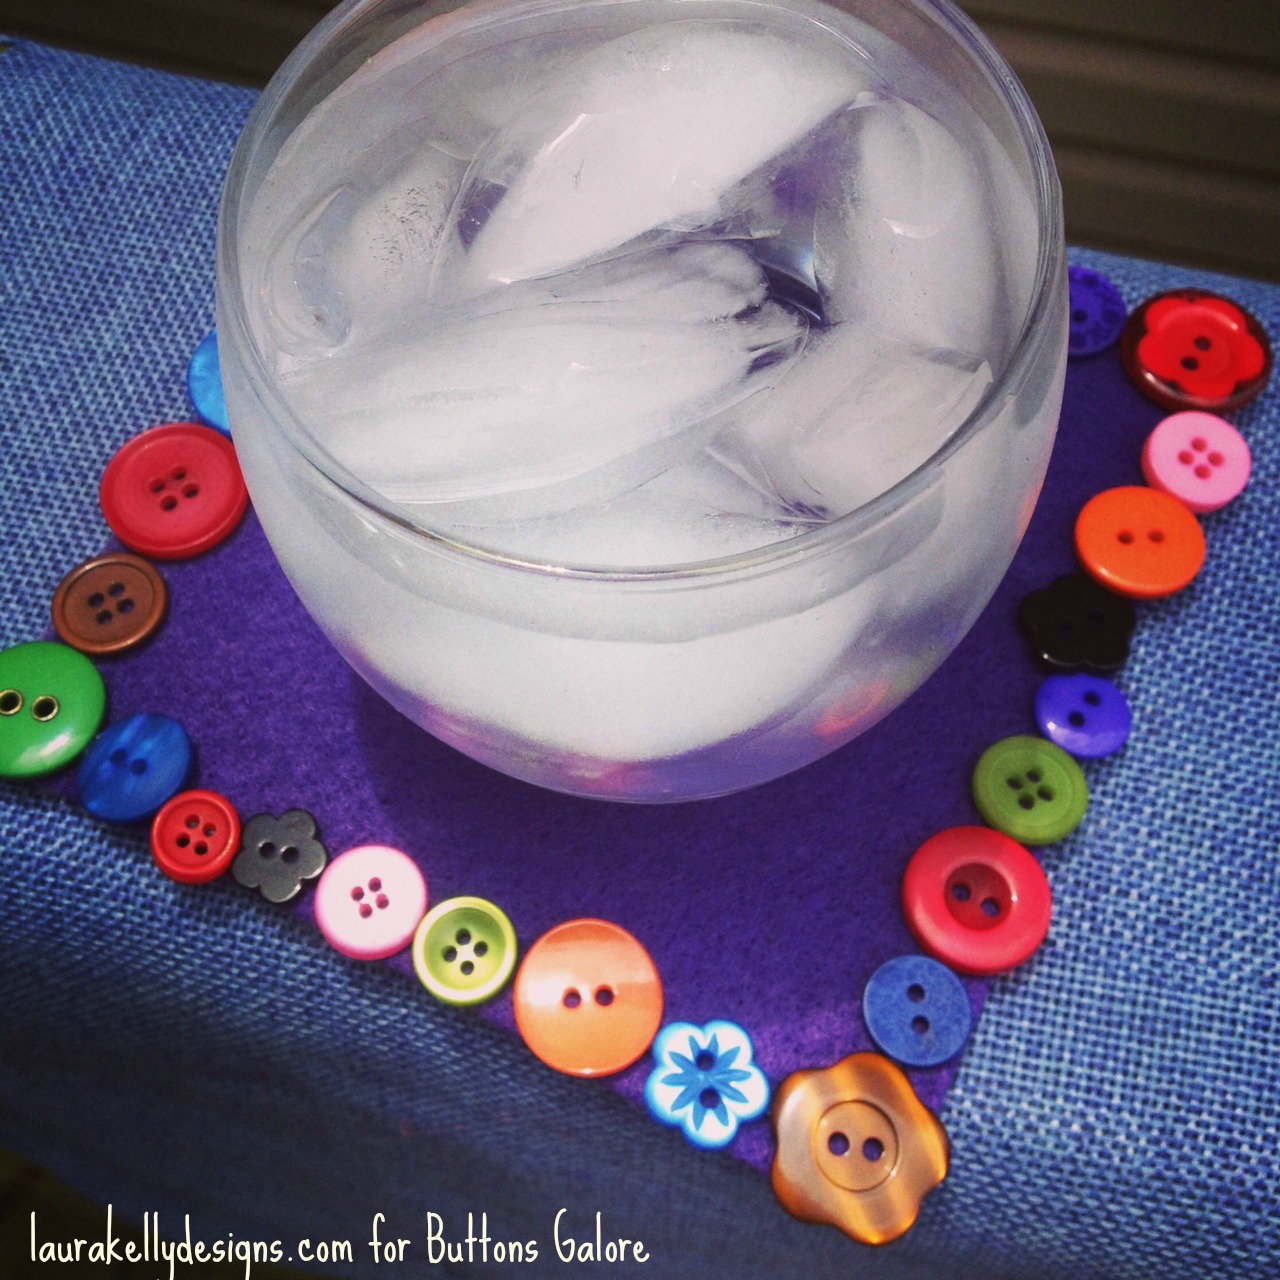
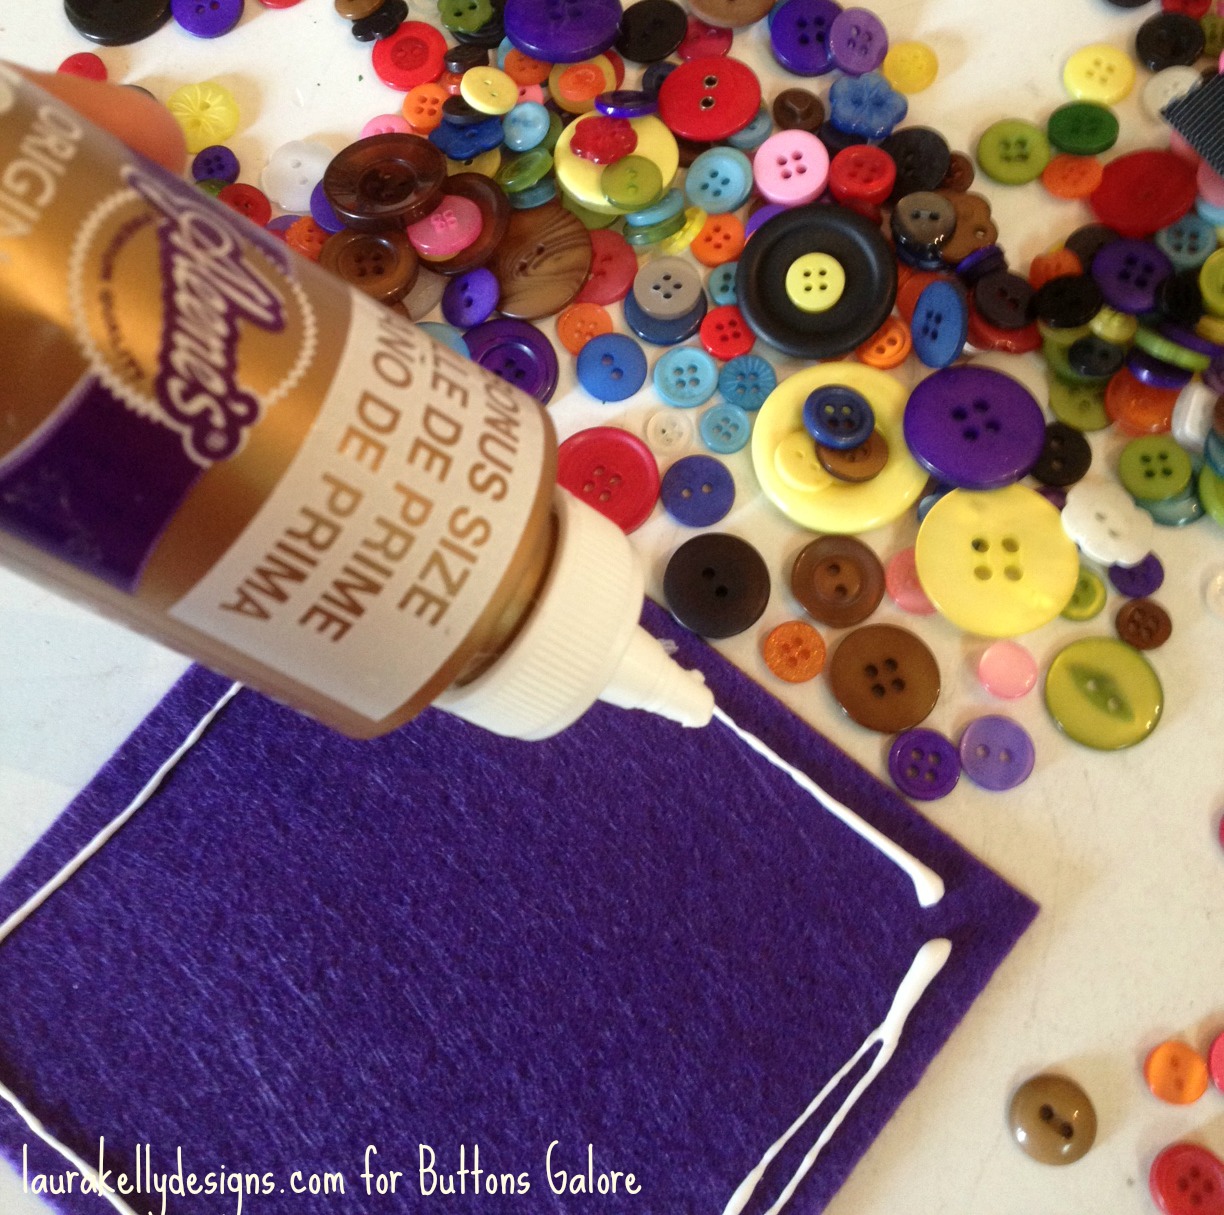
Cut your felt squares to 5 inches by 5 inches. You will need two squares per coaster. I used the high quality Kunin Felt to get a thick classy feel. Put a layer of Aleene’s Tacky Glue around the edge of one square then line it with your favorite buttons from the BRIGHTS collection by me, Laura Kelly, for Buttons Galore.
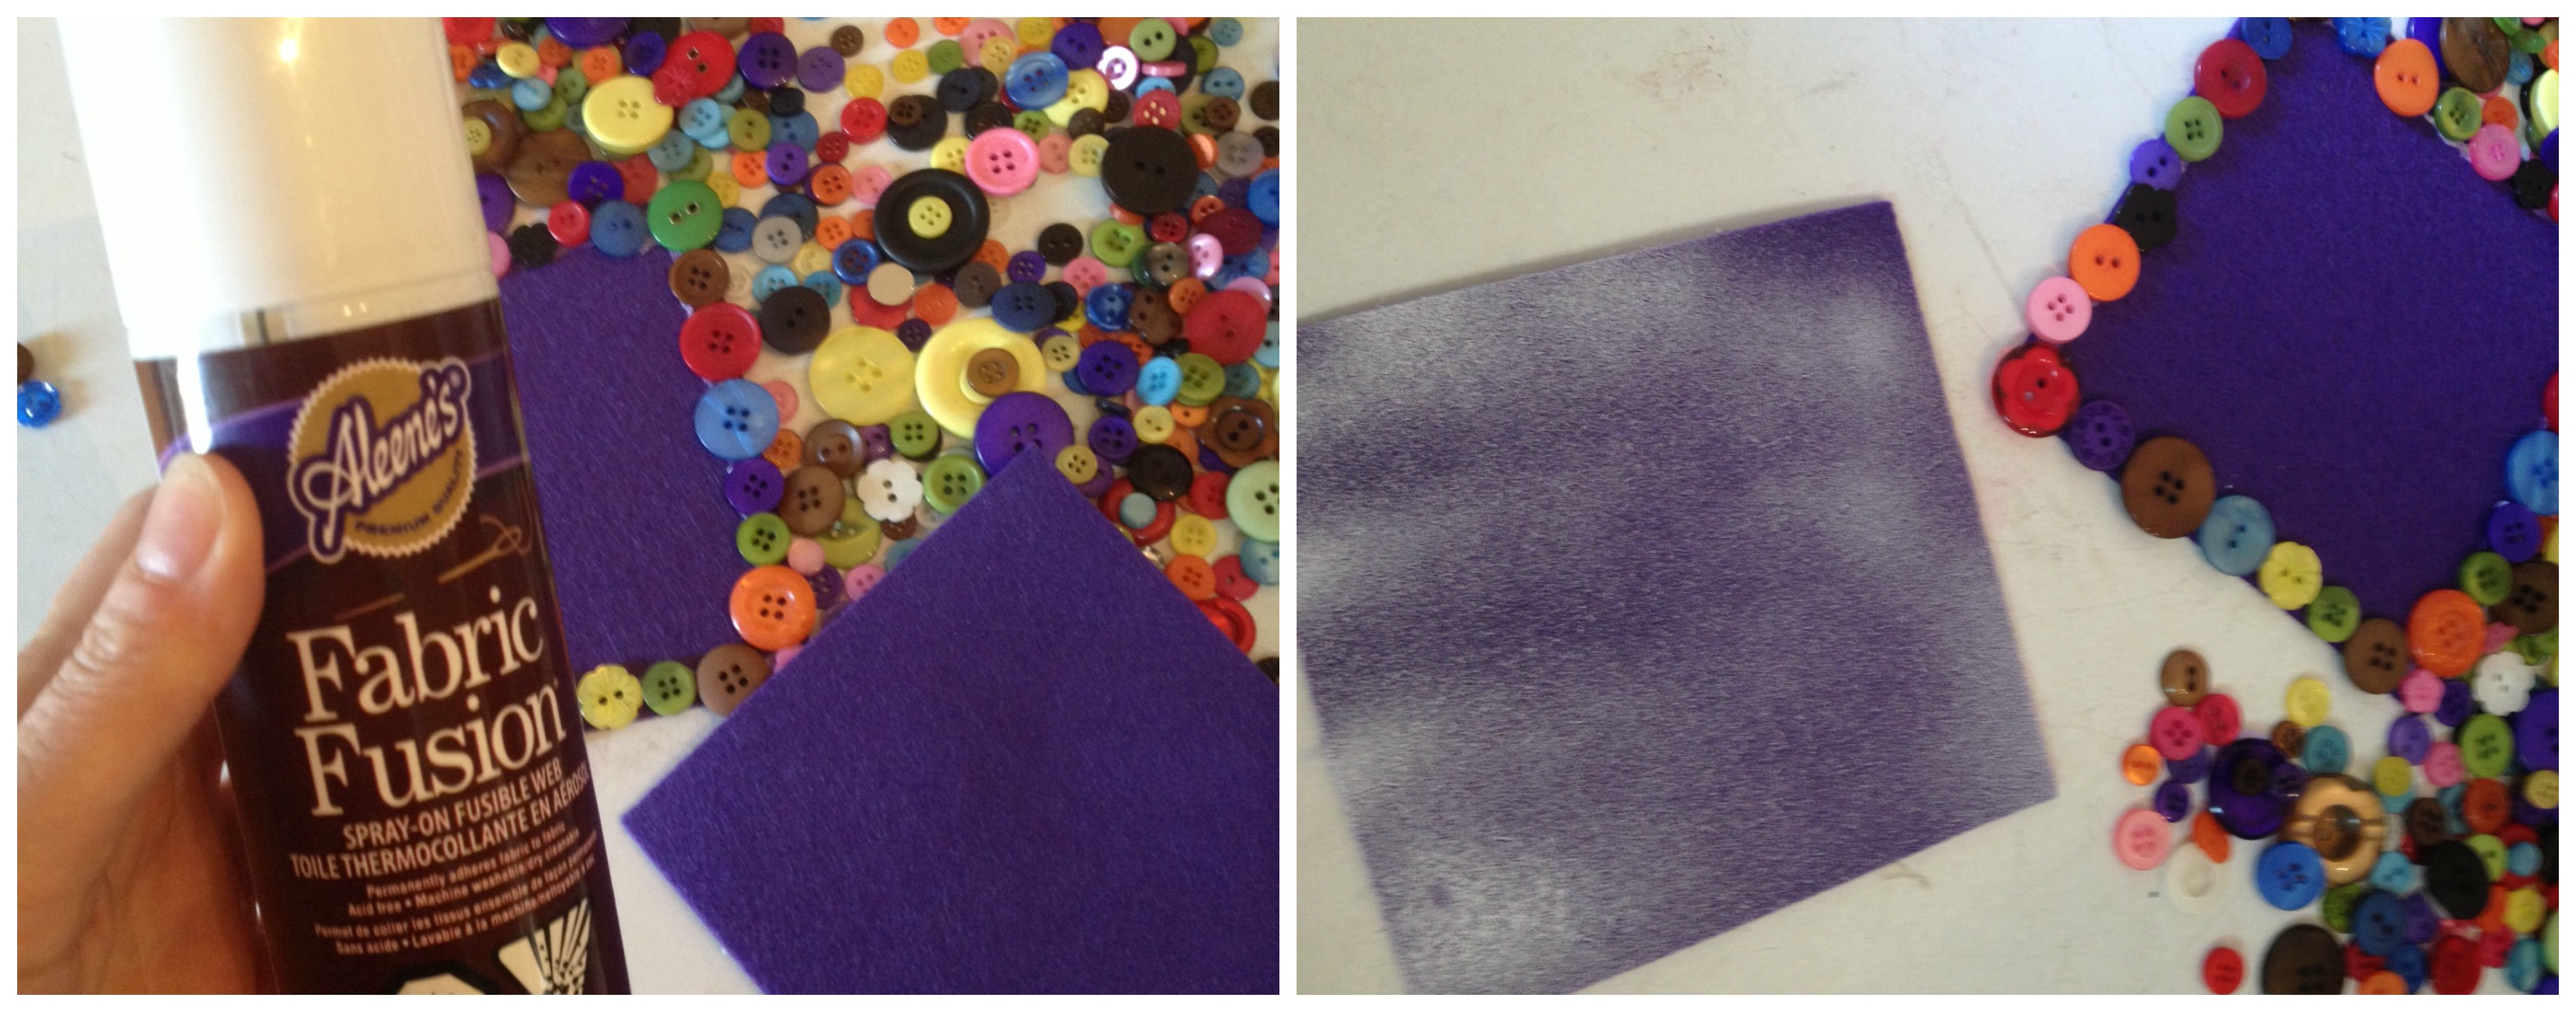
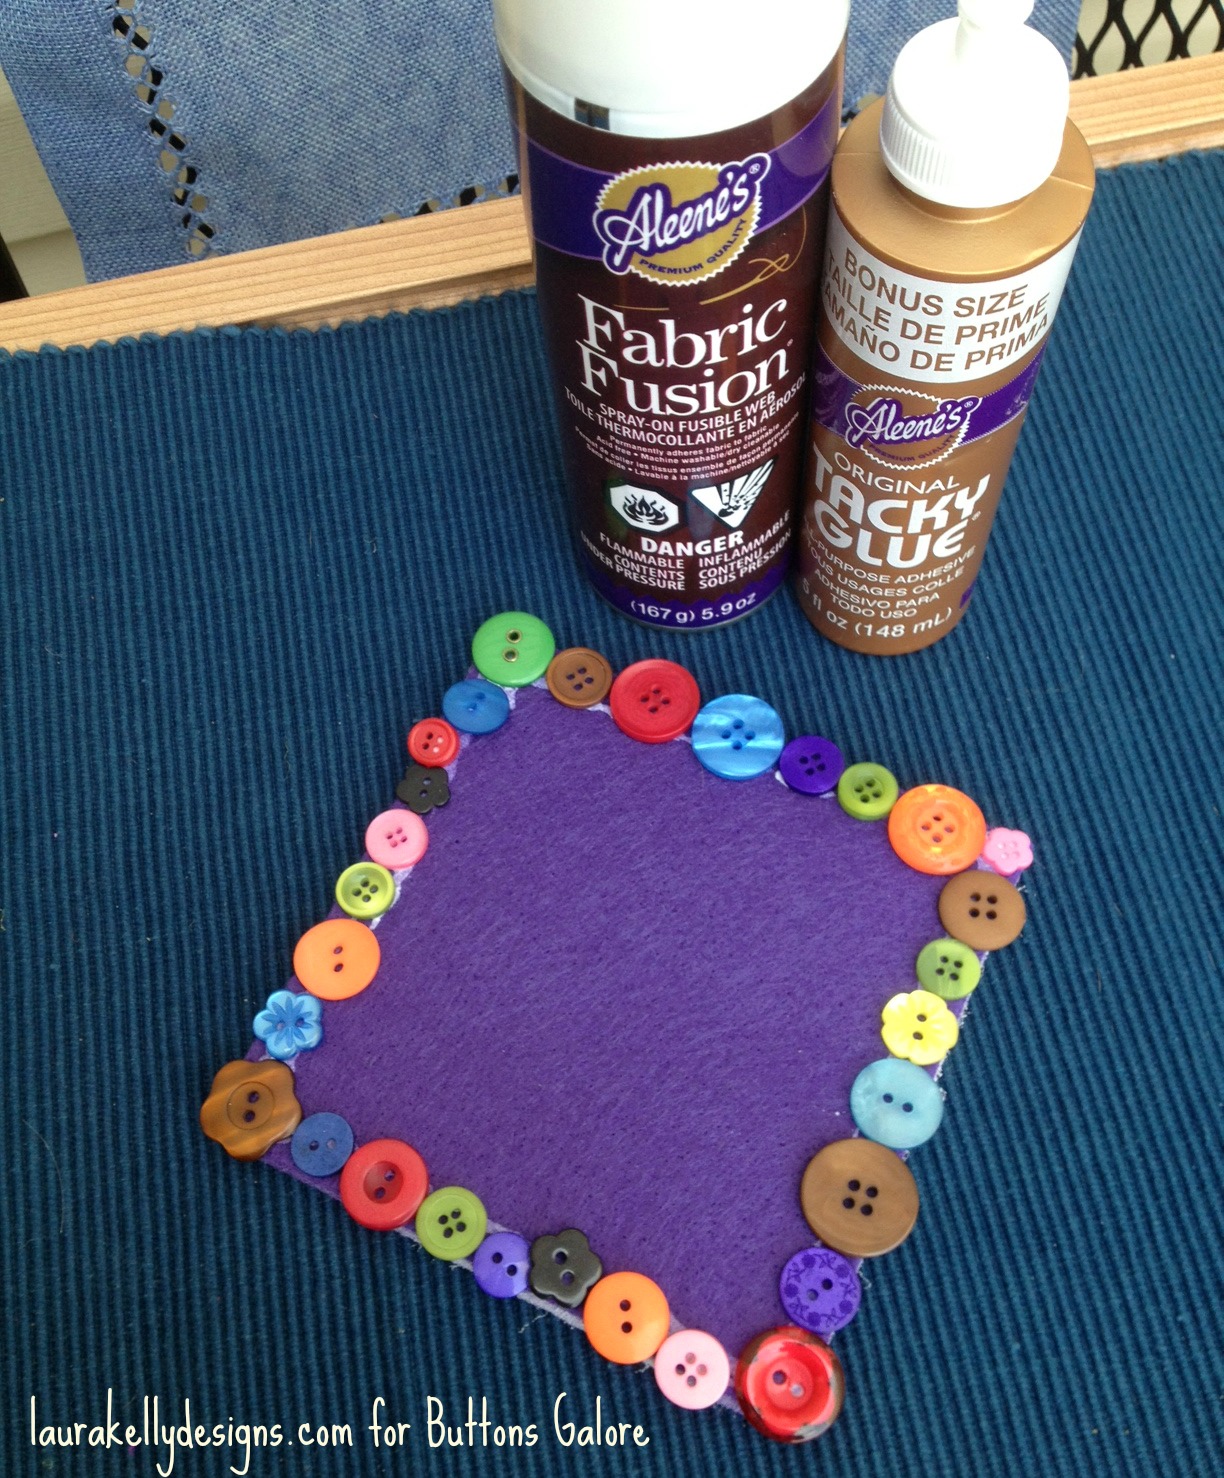
Spray the other square with a heavy layer of Aleene’s Fabric Fusion and put the two pieces of felt together.
Let it dry completely and it is ready for use. Create a bunch of these in different colors and you will be all ready for a cocktail party!
Happy Creating,
Laura
At CHA in January, I got a roll of this awesome mixed media artist cloth and decided it was time to use it. For today’s post, I stitched up a button flower garden in a matter of minutes!
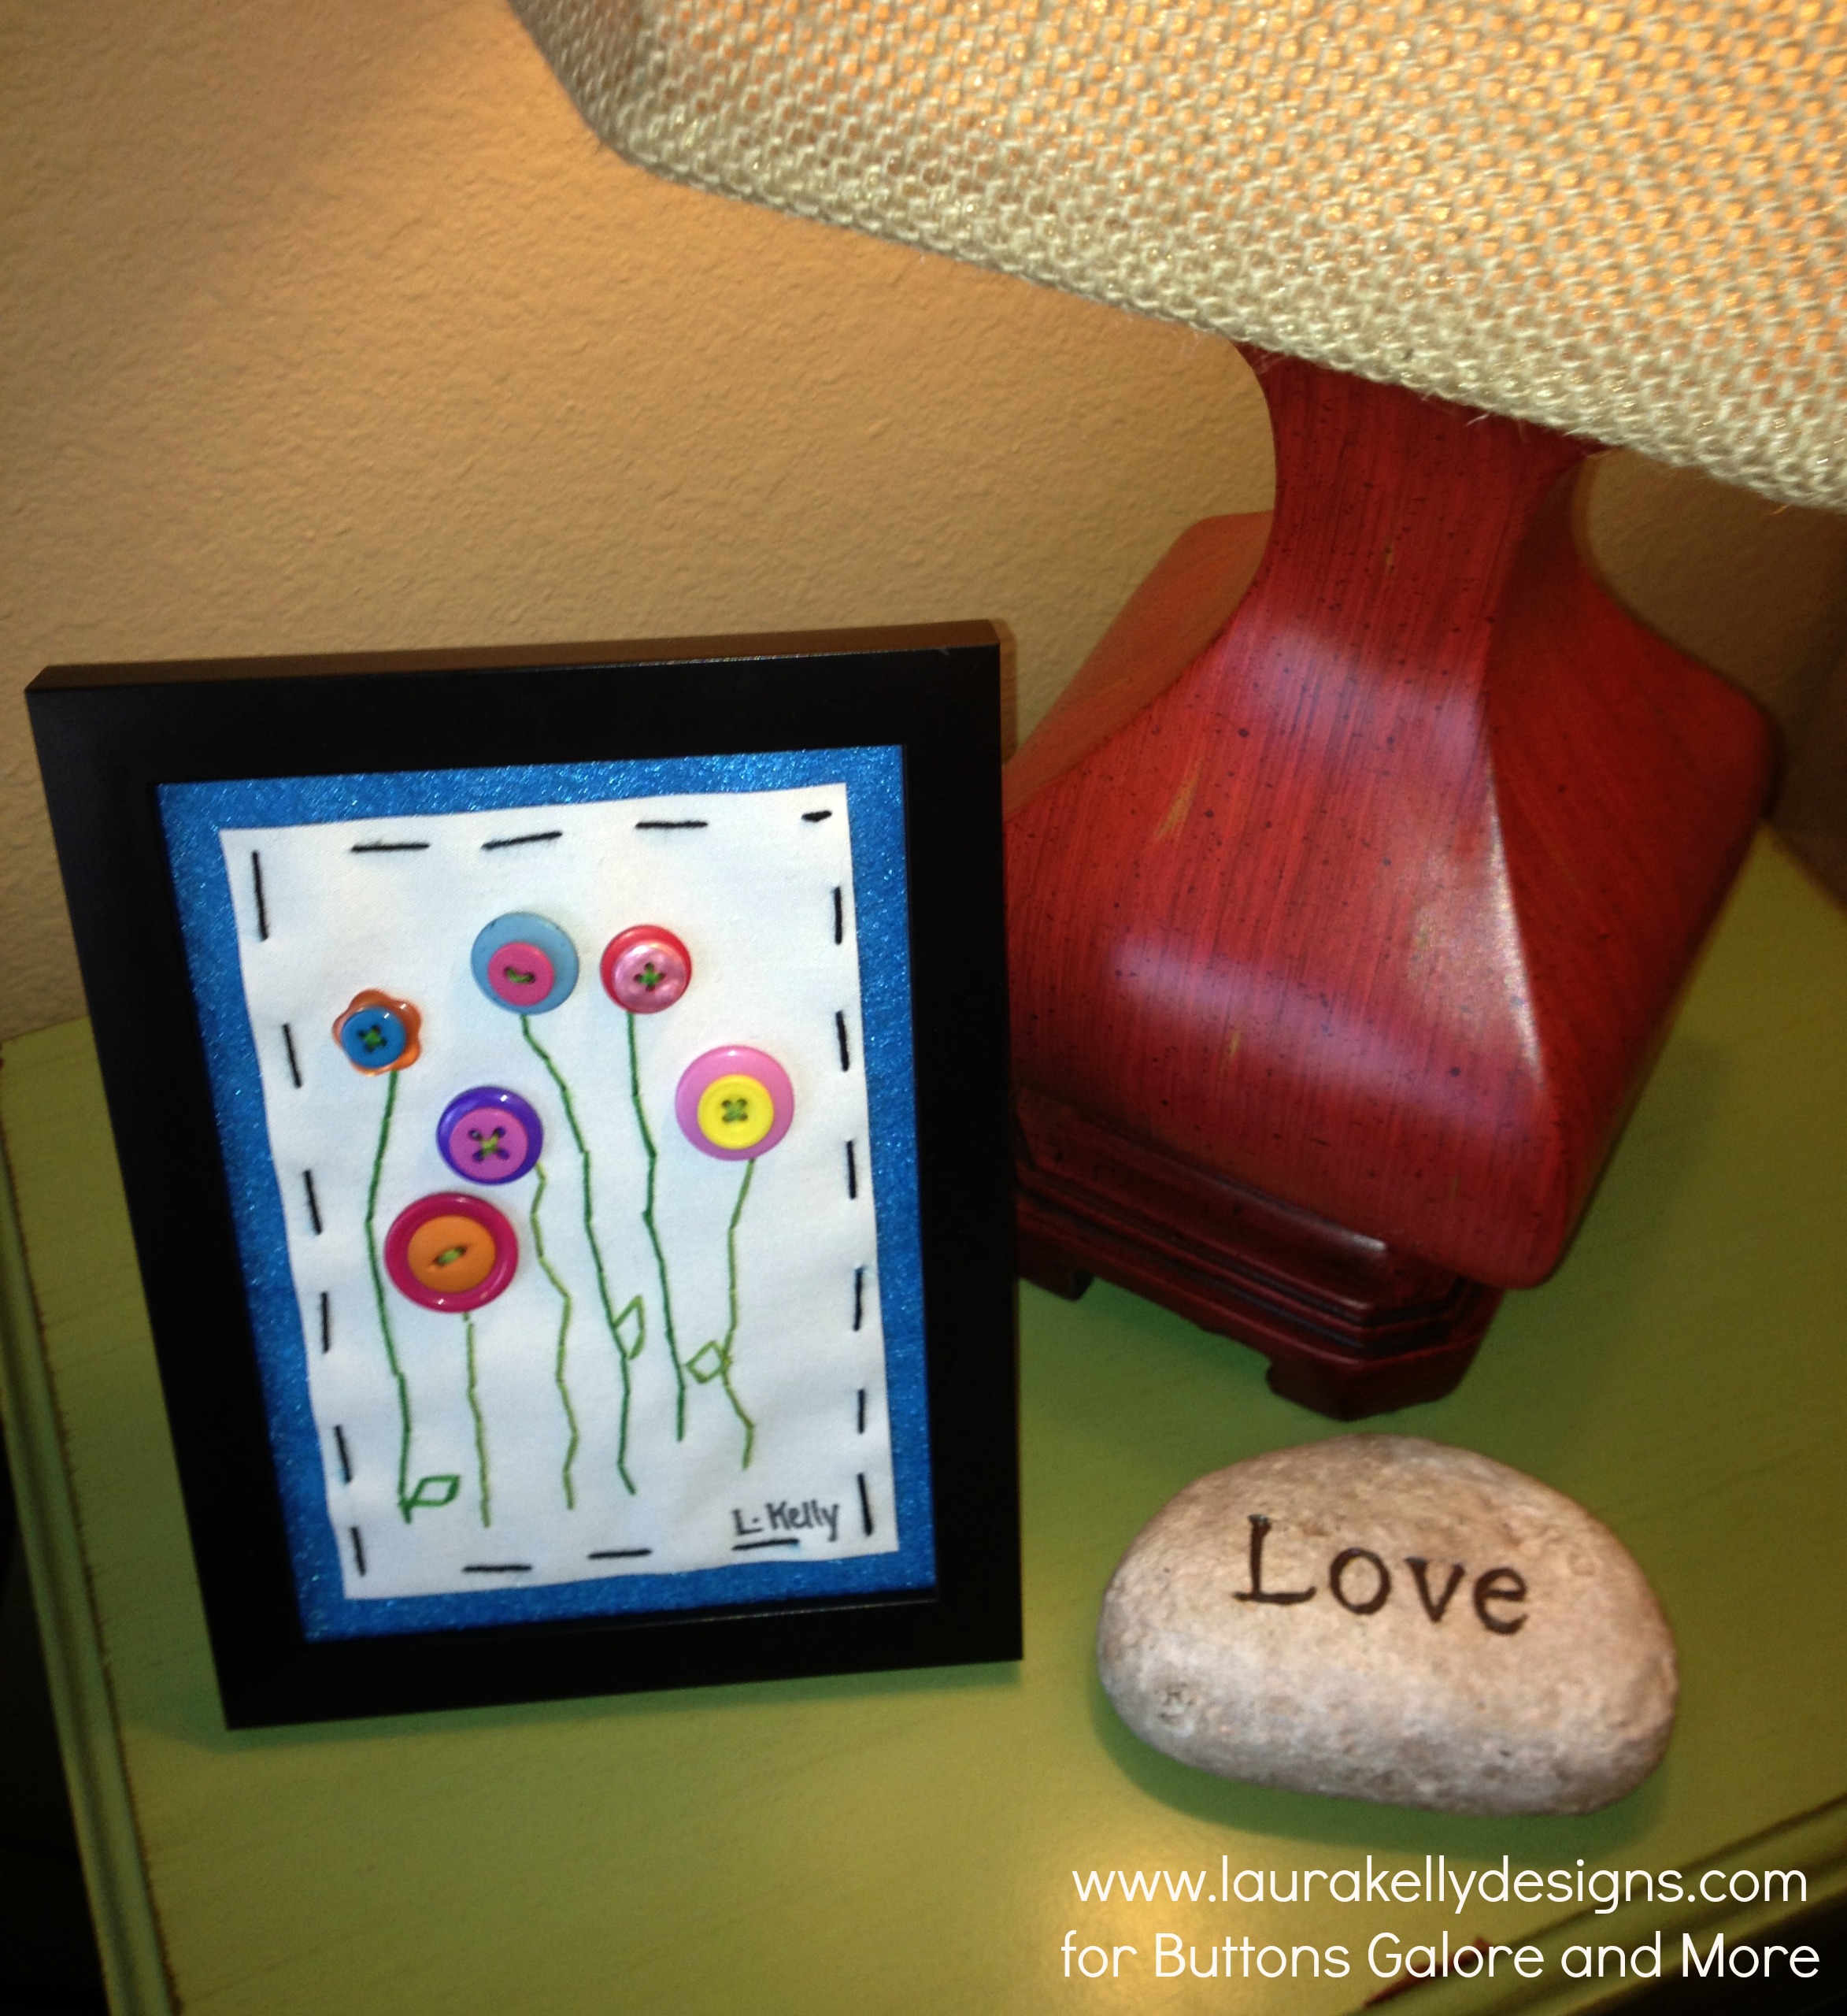
I had a 5 x 7 black frame so I decided to stitch on a cut 4 x 6 piece of the cloth so that I would have room to mat it with felt.
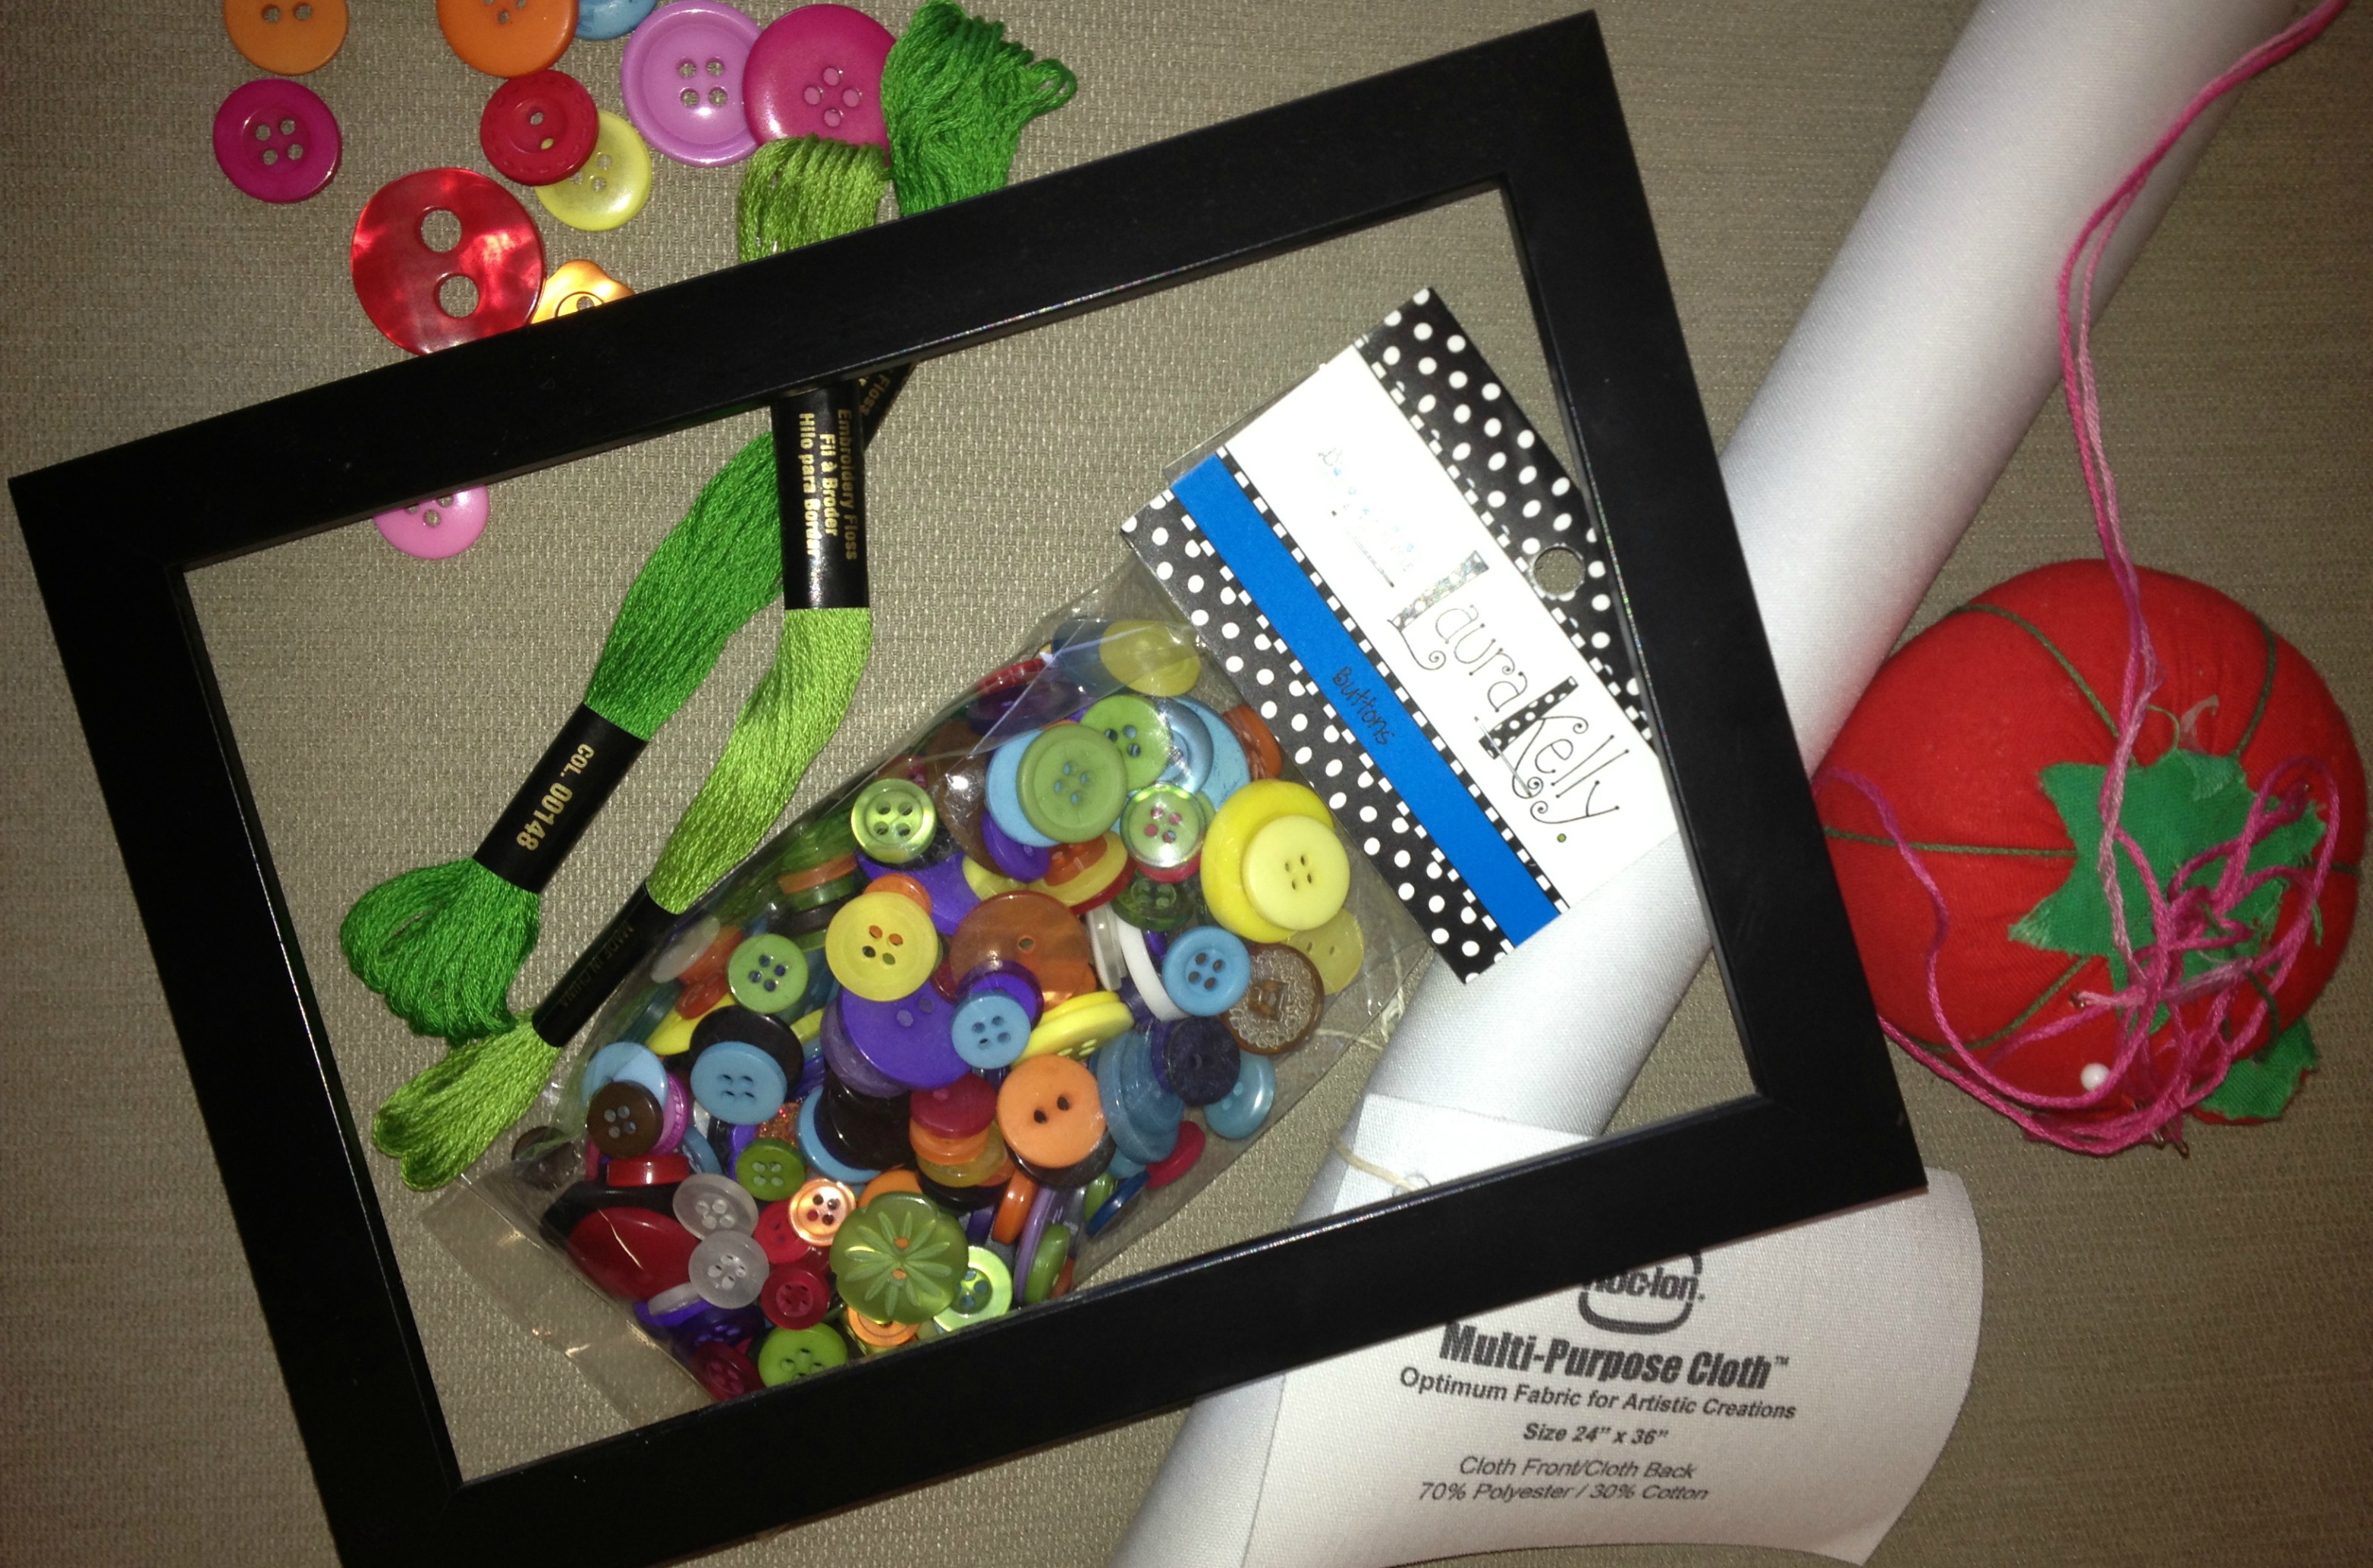
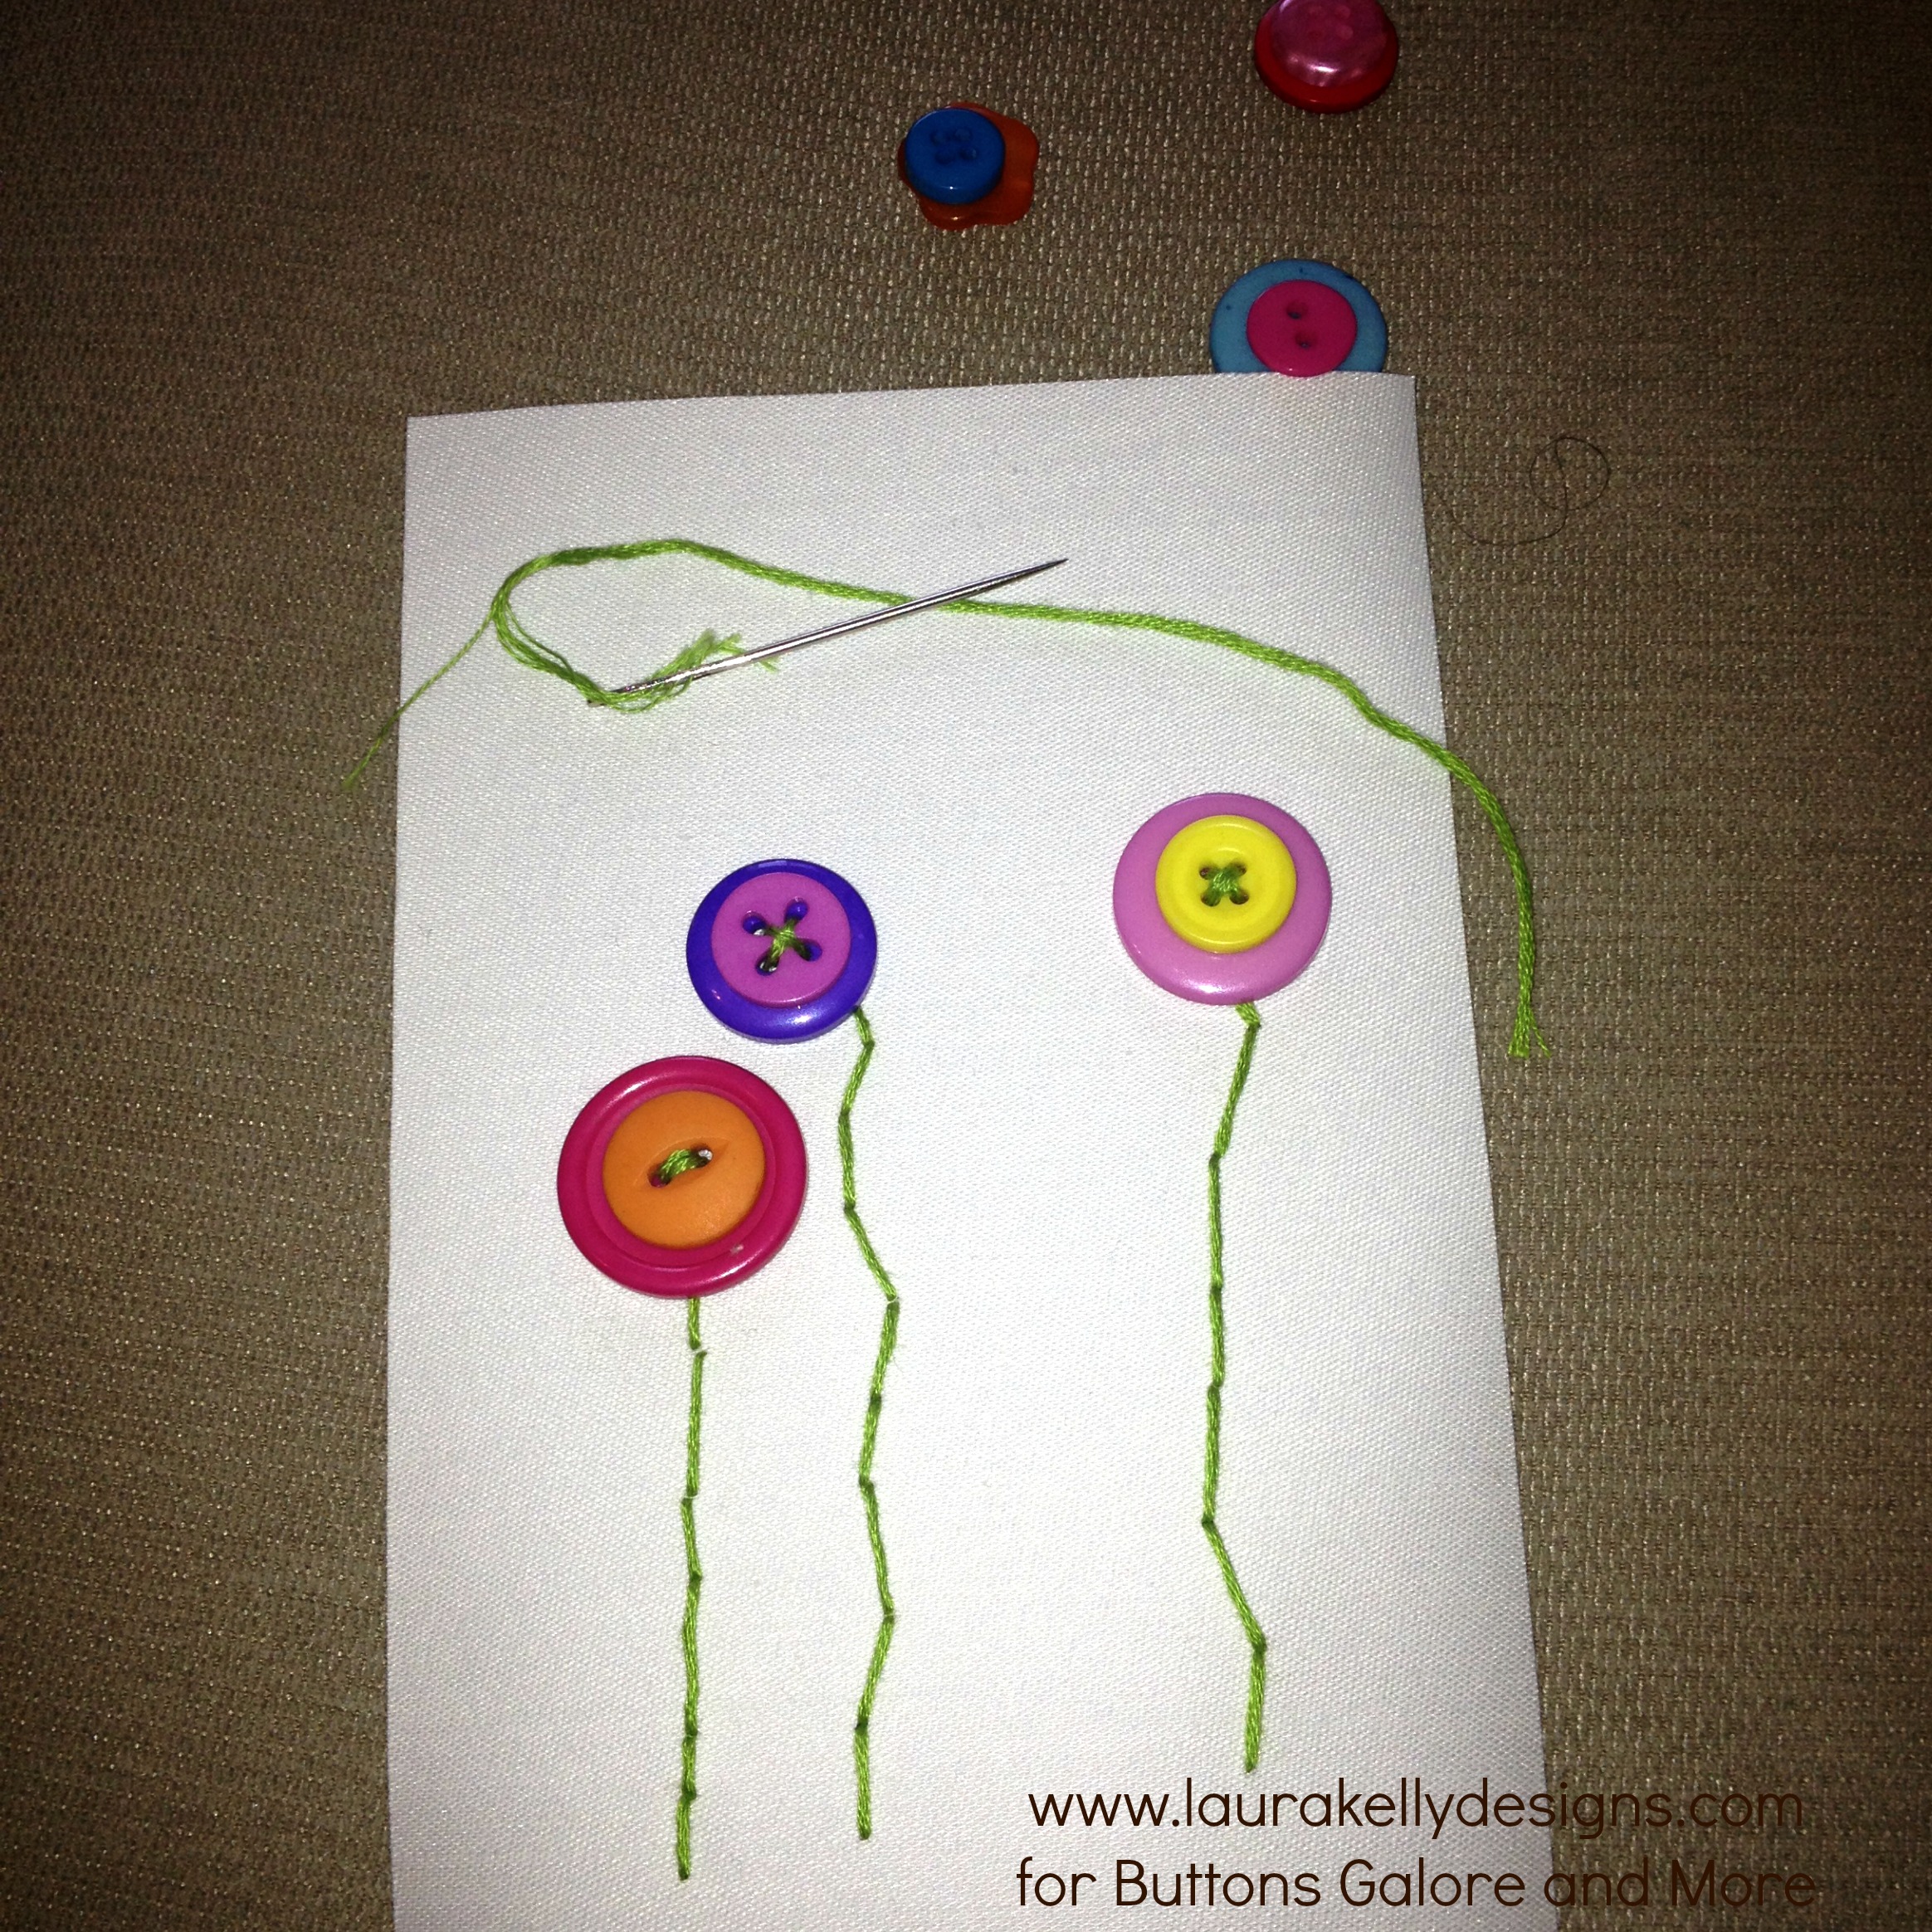
I used my Laura Kelly buttons from the mixed collection to create the flowers and embroidery floss in two shades of green to make the stems and leaves as well as to attach the button stack flowers.
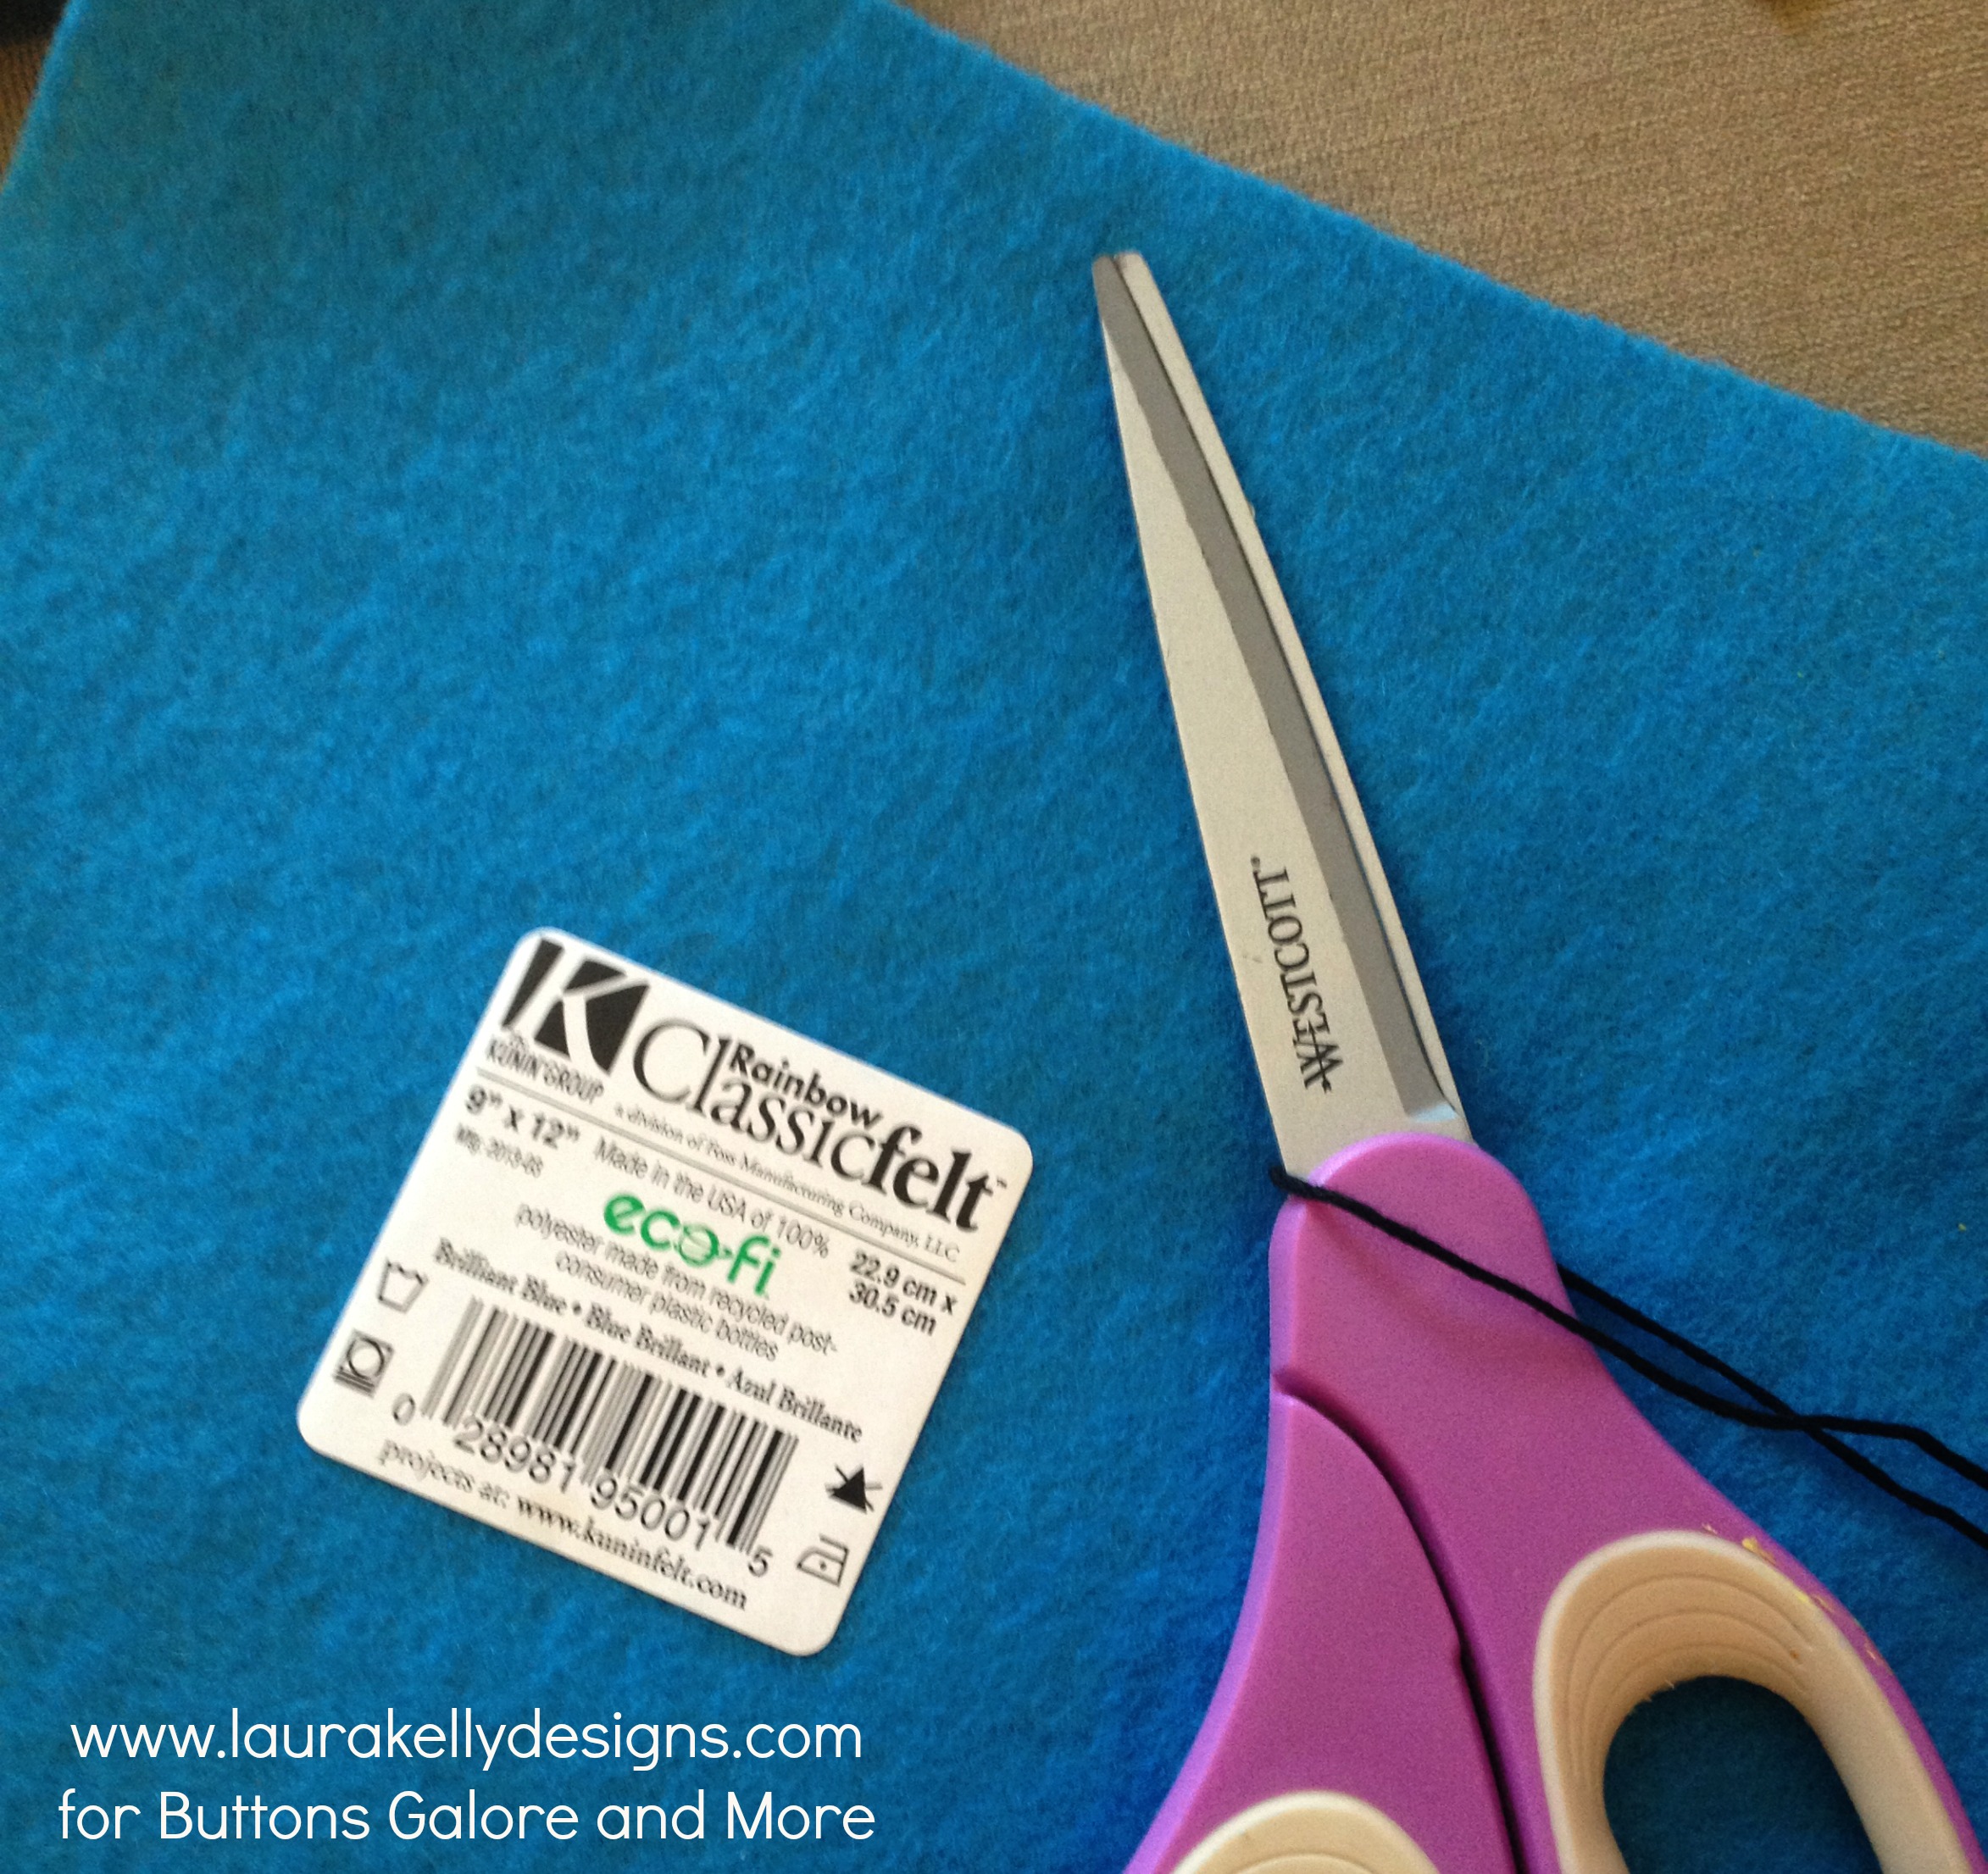
I cut a 5 x7 piece of beautiful blue felt from Kunin Felt and used it as the mat. I stitched the artist cloth right to it with black floss.
Ta Da! I think it is fun and so easy. This would be a great activity for kids to make a gift for Mother’s Day!
Cheers,
Laura
Create a boutique style DIY pillow cover with fabric dye and buttons. A premade canvas pillow cover is one of the best ways to customize your home décor. Today, I’ll show you how to make a unique pillow cover that will be sure to brighten up your living room. Best of all, there’s NO sewing involved!

Instructions:
See? I told you that was easy! To get more DIY home décor ideas, visit me on my blog at www.laurabraydesigns.com.![]()
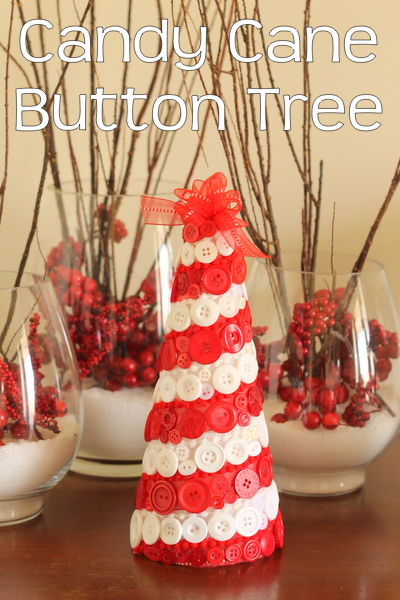
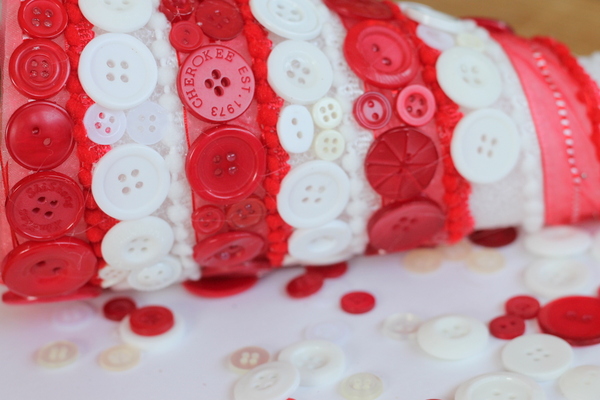
My candy cane button tree is the perfect addition to your holiday decor. Grab a styrofoam cone and get started on this fun tree today. It may look complicated but I will show you how to lay out your colors to get those perfect candy cane stripes every time.
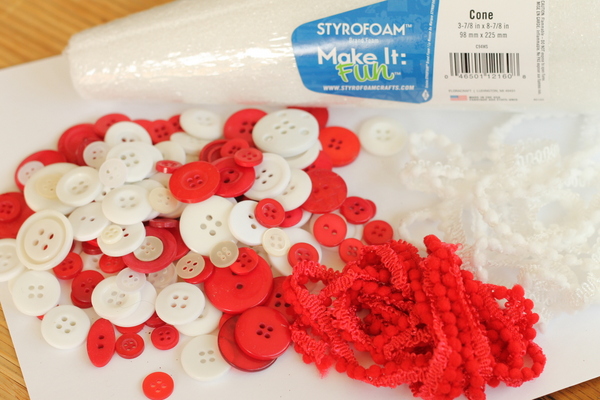
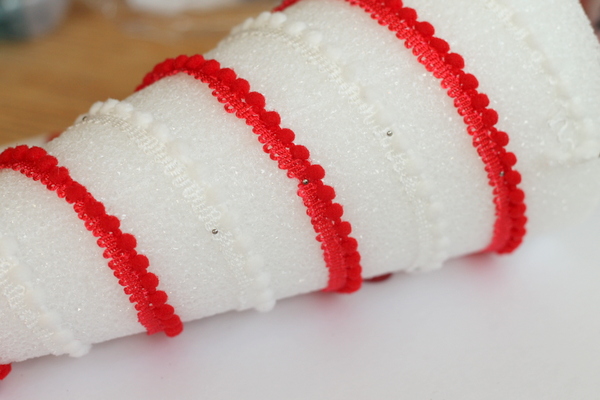
1. Wrap your red and white mini pompom fringe around the cone. Hold in place with sewing pins for now. Adjust until you like the spacing and location of your candy cane stripes. Hot glue your fringe into place and remove the pins.
2. You don’t want the white cone showing through your red buttons so add the red shear ribbon just in the “red” stripes of your candy cane. Again hold in place with pins for now.
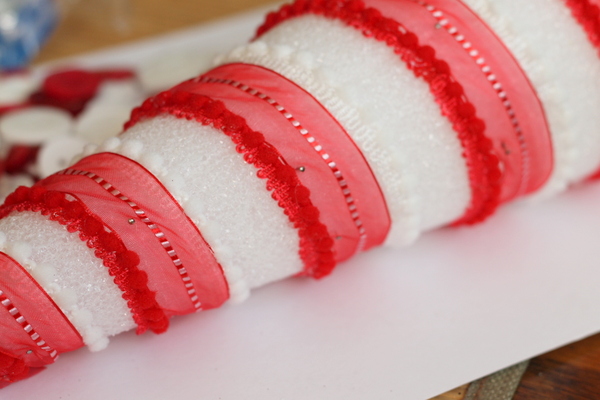
3. Because the ribbon is shear, there is no need to hot glue it down before you add your buttons. The hot glue will seep through the ribbon with the buttons on top. So start adding various size buttons with hot glue filling the red and white stripes all the way up the cone. Remove the pins in the shear ribbon as you go up the red stripe.
4. Once you reach the top, add a mini bow from some additional red shear ribbon. Again attach with hot glue.
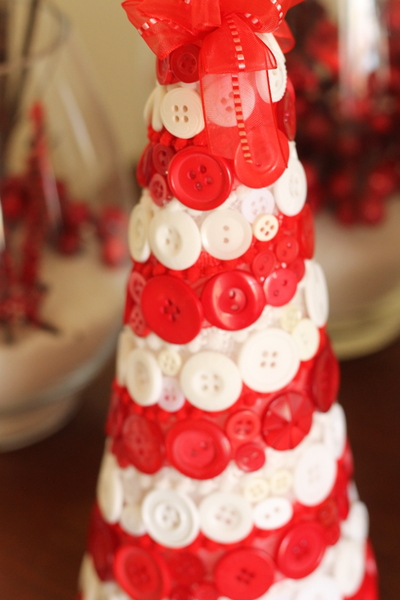
5. Use a hair dryer to remove any glue strings. You are ready to display your candy cane button tree for the holidays. This is a super fun way to celebrate the holidays in your home.

I love candy canes and of course candy cane button trees. How about you? Will you be making a button tree this holiday season?
A simple Thanksgiving Centerpiece – I made up in about 15 minutes using Buttons Galore Carved Wood Buttons and supplies I already had stashed. It seriously does pay off to hoard craft supplies.
This centerpiece happens to coordinate nicely with my Thanksgiving Dessert Table Decor that was featured on the Buttons Galore Blog recently too.
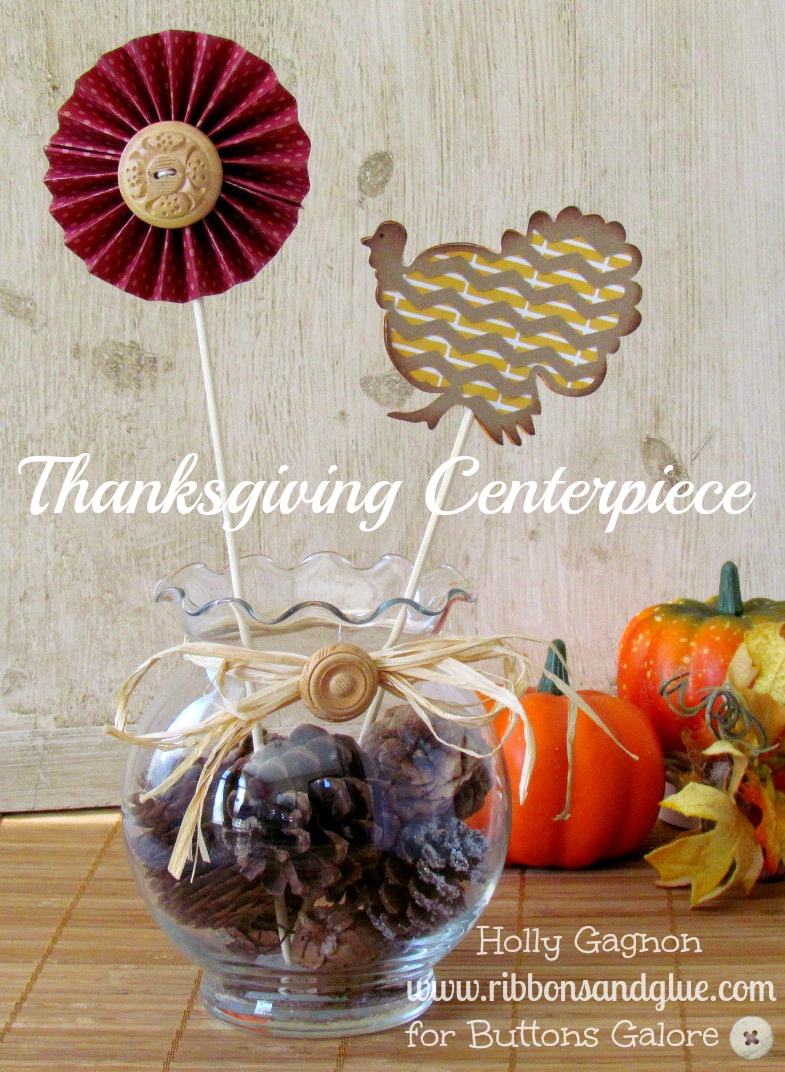
If I need to make up some quick and simple centerpieces, I always turn to making rosettes or finding something fun that can be stuck on a stick.

For this simple Thanksgiving Centerpiece, I added pines cones to a dollar store vase, made a 3″ rosette, added a BGM Carved Wood Button to the center then used my Silhouette to cut out a Turkey cut file.
If you don’t have access to die cutting machine, you could easily add more Fall rosettes in various sizes to your centerpiece along with Fall leaves or any other festive decor you like.
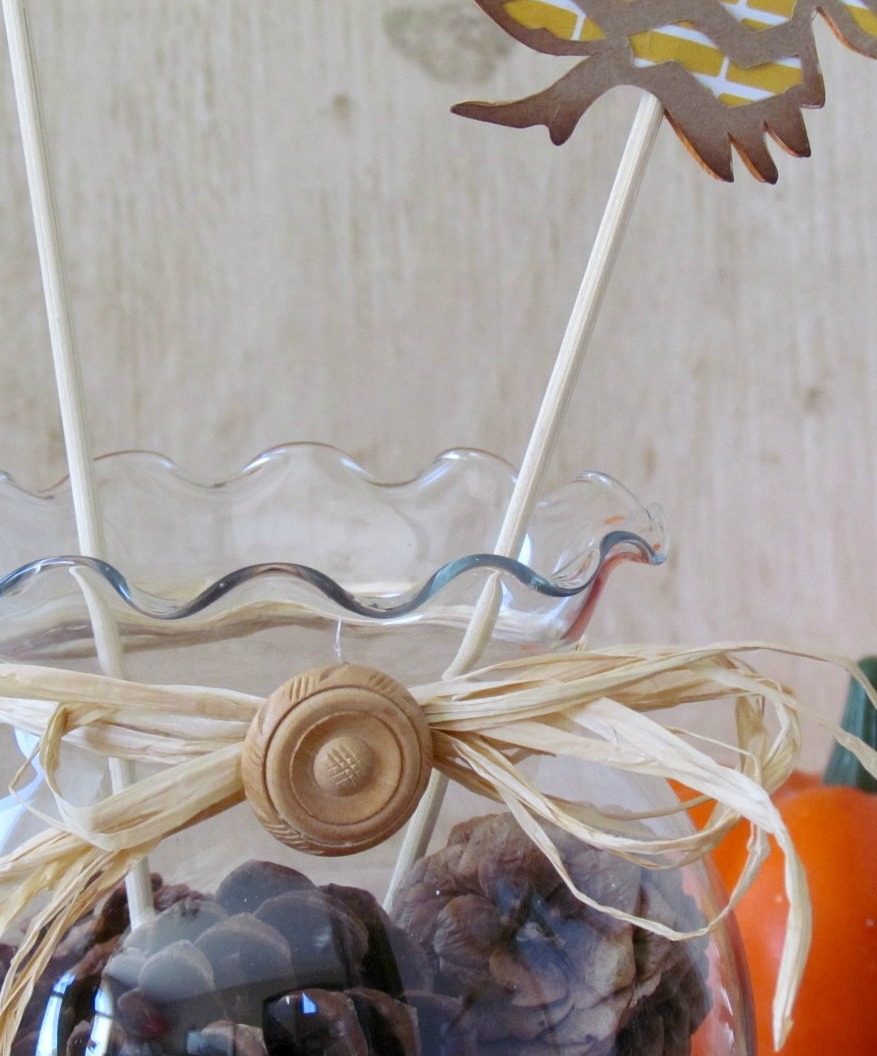
Everything just looks better on a stick right, right? Plus, Buttons Galore Carved Wood Buttons ties the Fall decor together nicely.
For more Fall inspiration head over to my blog Ribbons & Glue.

Like Me on Facebook!
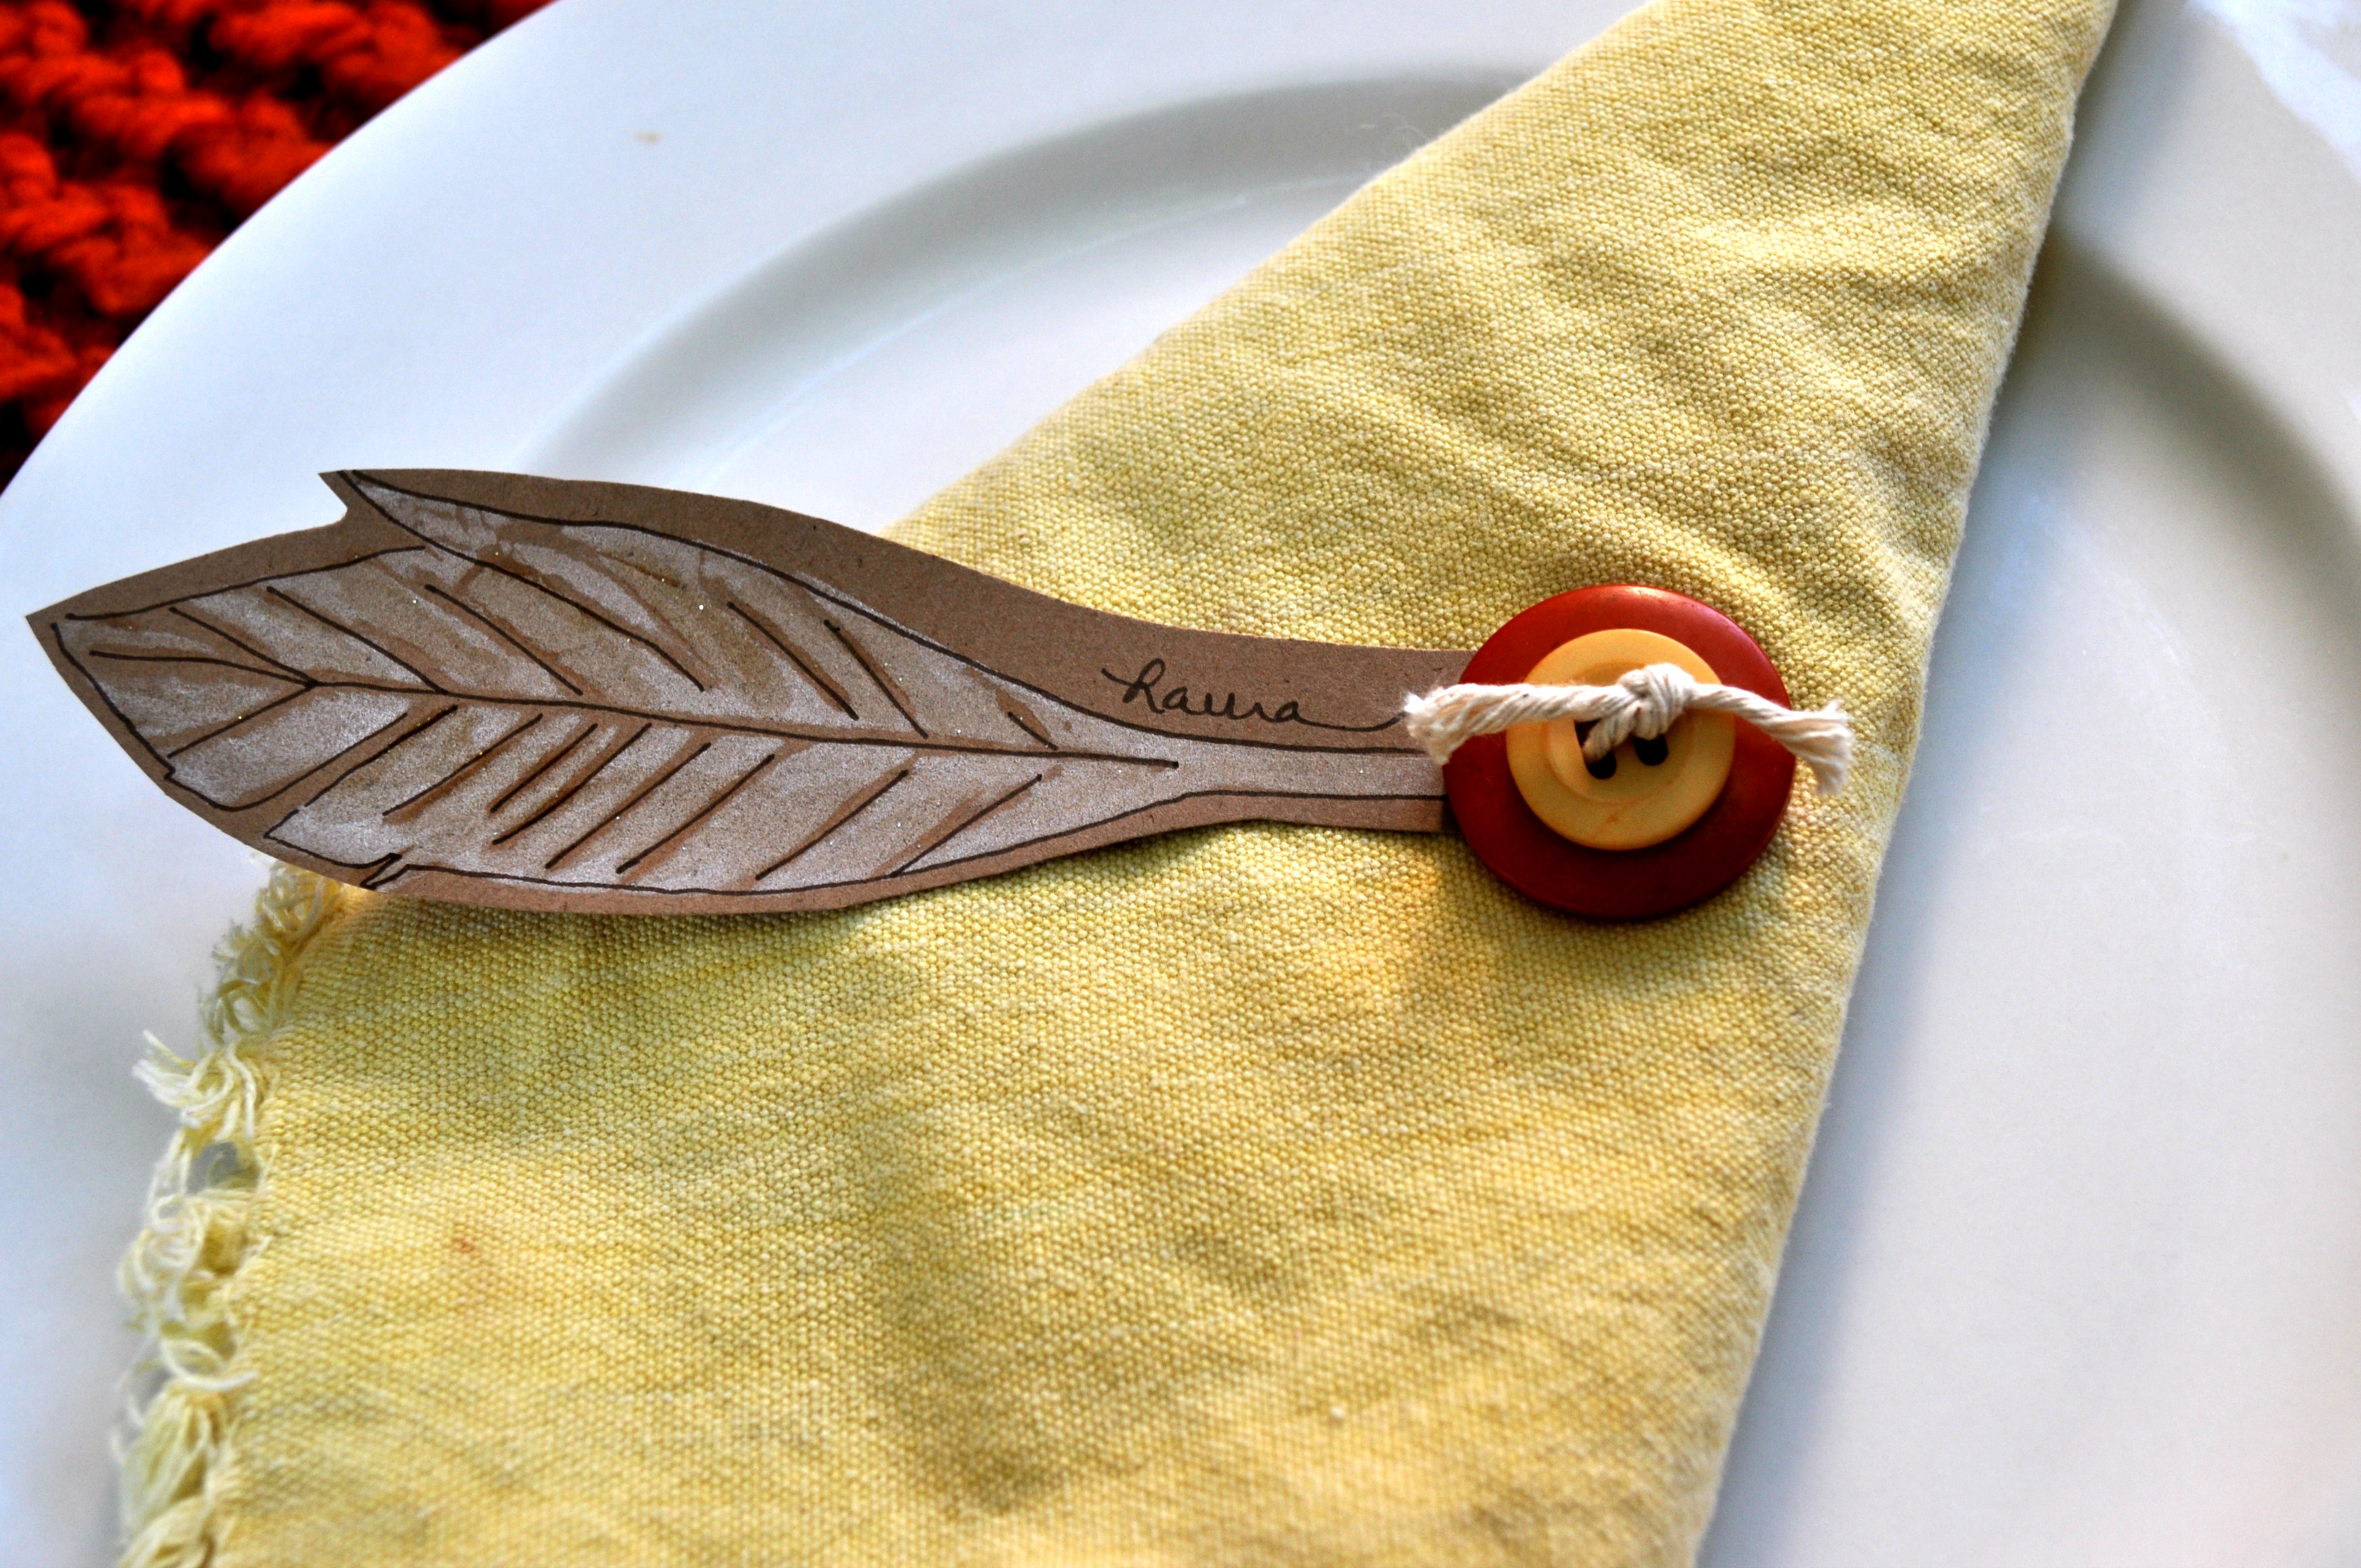
Thanksgiving is my favorite holiday. Not only is the ultimate holiday for foodies, but it’s also a time to gather with loved ones and enjoy each other’s company without the distraction of gift giving. I host 12-14 people at my house every year. I love preparing the meal, but I also love coming up with a great table setting. The easiest way to set a table is to come up with a theme and then build on it. This year, I’m thinking Feathers and Buttons just might be my theme for 2013. Here are two Thanksgiving place card ideas for your table.

This place card idea reminds me of childhood trips to the Natural History Museum. I loved to peer into the glass cases and see the natural collections. These simple place cards bring back those special memories of learning about nature.
Supplies:
Instructions:
Supplies:
Instructions:
Thanks for joining me today. If you would like to get a free printable, Thanksgiving planner, come and visit me on my blog, Laura Bray Designs.
![]()
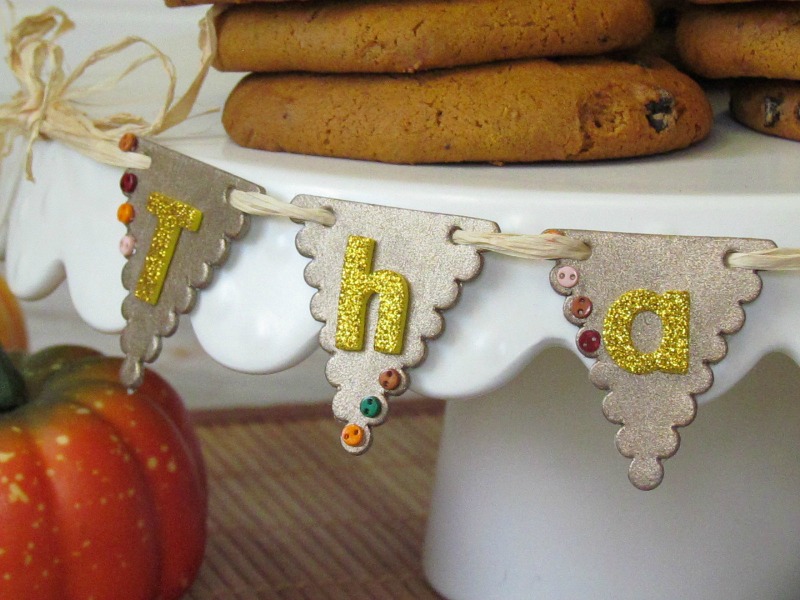
Holly here from Ribbons & Glue sharing a simple Thanksgiving Dessert Table Decor using Tiny Buttons from Buttons Galore that’ll add some glitz and sophistication to your Holiday table this year.
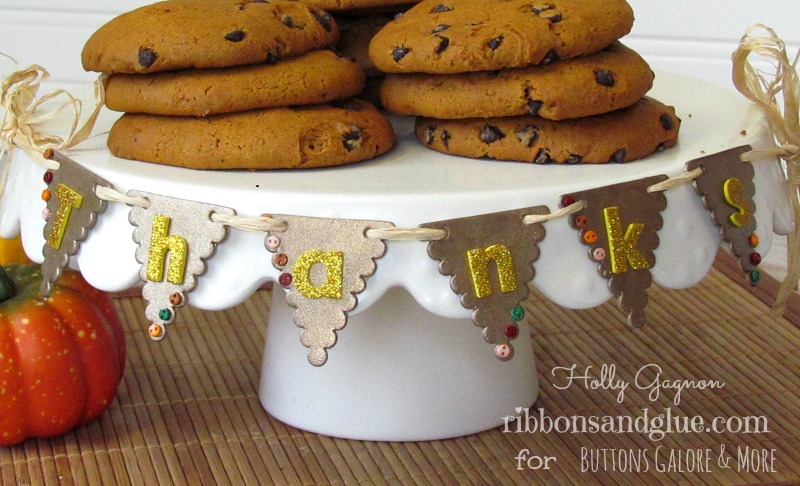
Thanksgiving Dessert Table Decor
When I think of Holiday gatherings, the first thing I think of is food and of course the yummy, rich desserts are the most important part. Show off those yummy desserts you’ve slaved over by creating this simple dessert table decor.


Like Me on Facebook!
For more Fall inspired crafts, visit my blog www.ribbonsandglue.com
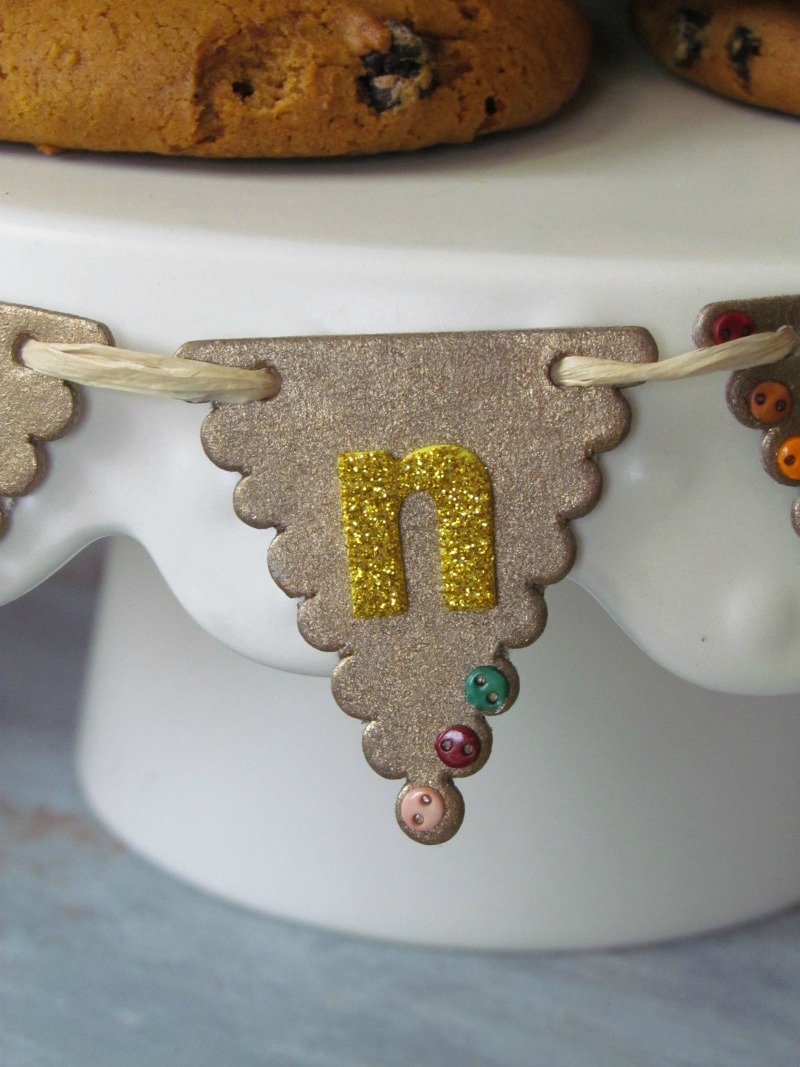
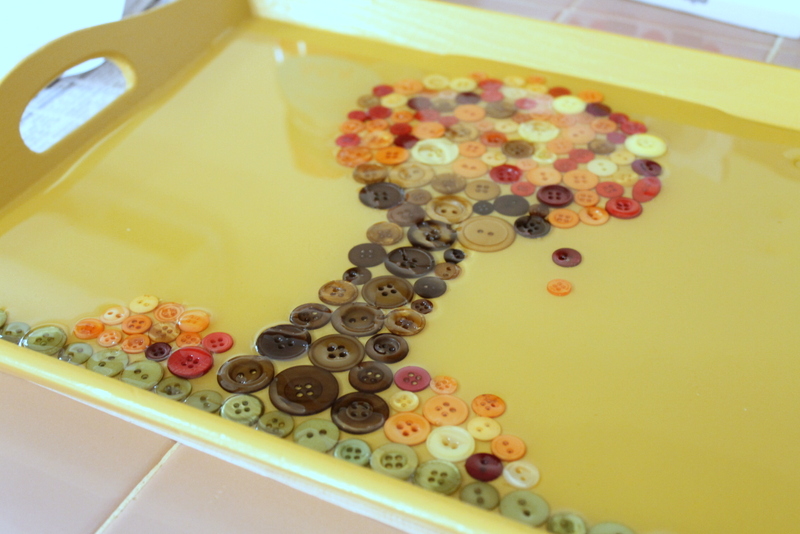
My fall button serving tray is one of my favorite buttons projects I have ever made. Plus it is easy to make which is a win win right? Grab your buttons and a thrift store tray to get started making your own version. Don’t need a serving tray for fall? Maybe use this same idea with a button ornament in the center for Christmas? Or a heart in the center for Valentine’s Day? I can think of all sorts of different tray designs for all seasons of the year.

I started with a tray from the thrift store for 99 cents and a bottle of Americana gloss enamels in Antique Gold.
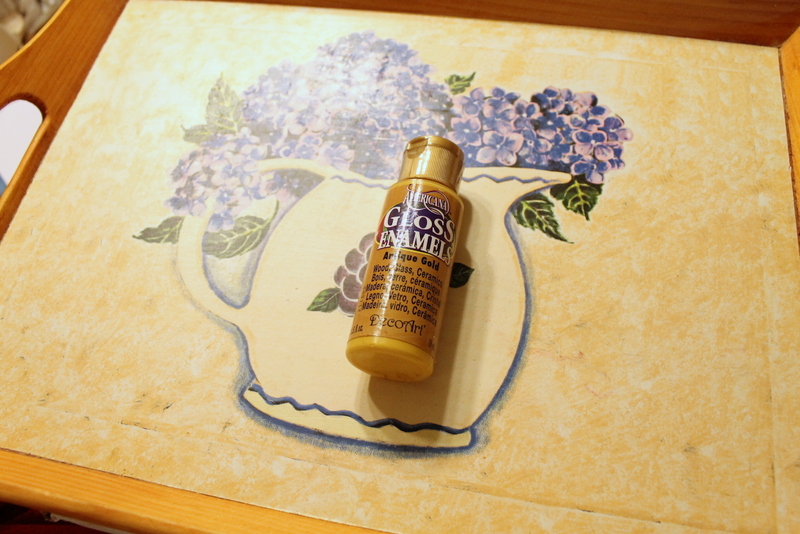
I painted my entire tray with 2 coats of the paint then grabbed some fall themed buttons from Buttons Galore and More.
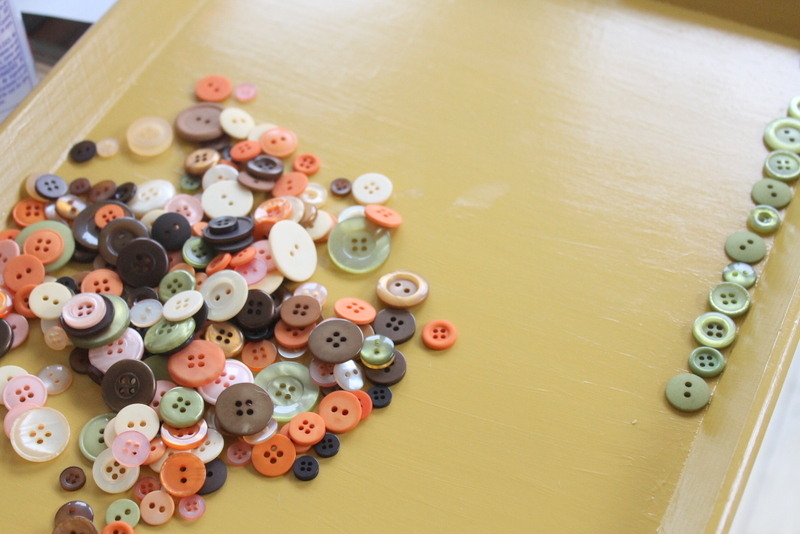
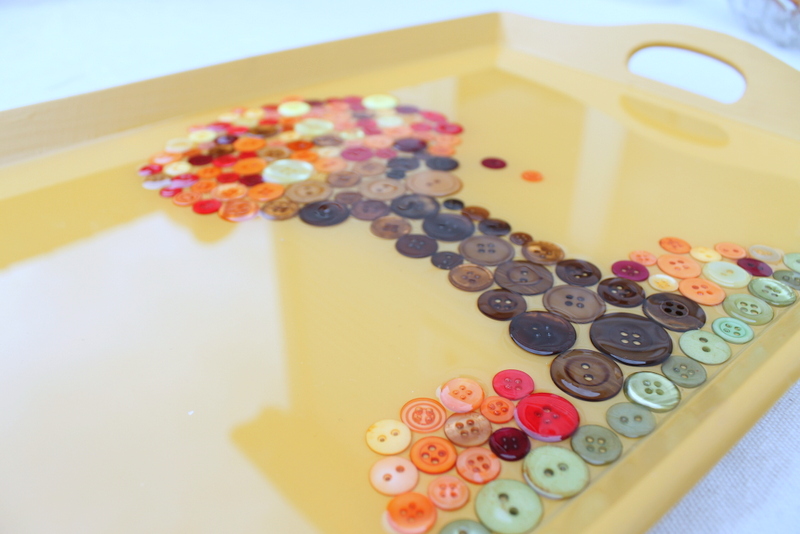
I laid the buttons out on my tray until I was happy with the arrangement. I then used my 3 in 1 Beacon adhesive to glue them directly to the tray.
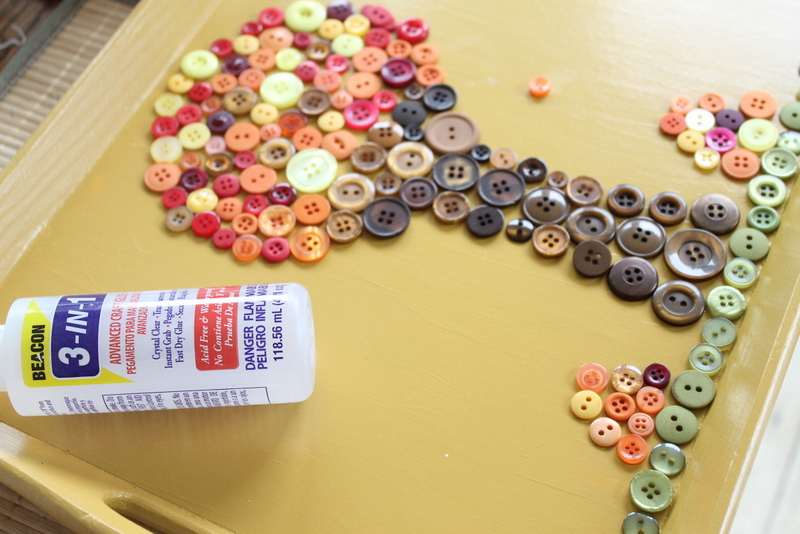
Once the glue was completely dry, I mixed a two coat epoxy to make my tray nice and smooth. Don’t be afraid of epoxy! Just mix and pour according to the package directions. I spent quite a bit of time using a flame to pop bubbles that come up from the epoxy itself and the buttons. Yes my finished project still has a few bubbles but overall it looks amazing. The buttons seem to create more bubbles than is normal with an epoxy project.
Allow your epoxy to dry for a nice long time before you touch it (don’t be tempted to touch!!). You will be left with a glossy flat serving tray with buttons in it! Now some of my buttons stick up just slightly out of the epoxy (there is a slight hump in the epoxy). This can easily be fixed with a second epoxy pour however the bumps do not really bother me for my needs so I am leaving them. You could also be extra careful when choosing buttons for your design and choose only the flattest buttons to include.
Just so you can see my entire button fall scene here is a picture of the entire tray.
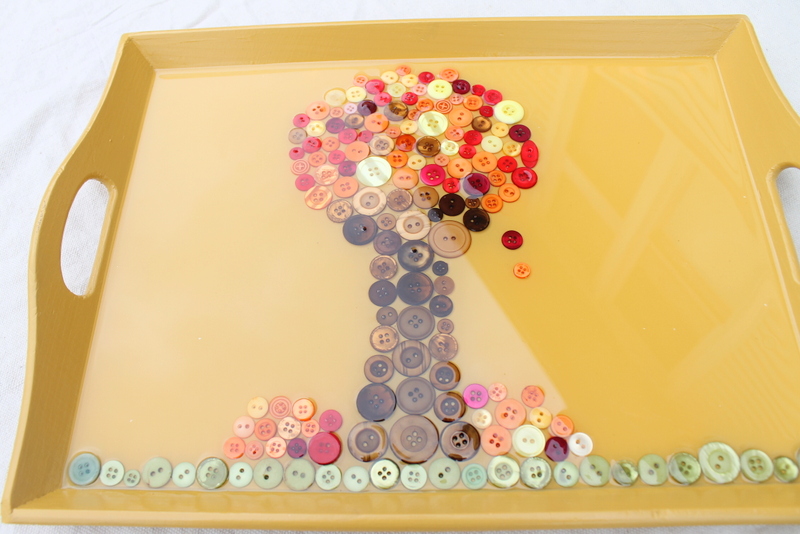
It is so darn cute I could eat it up. Speaking of eat it up, use your fall tray to serve snacks to the kids or for a wonderful addition to your Thanksgiving and fall themed parties. Want more buttons on your Thanksgiving table? Be sure to check out my rustic burlap napkin rings as well.
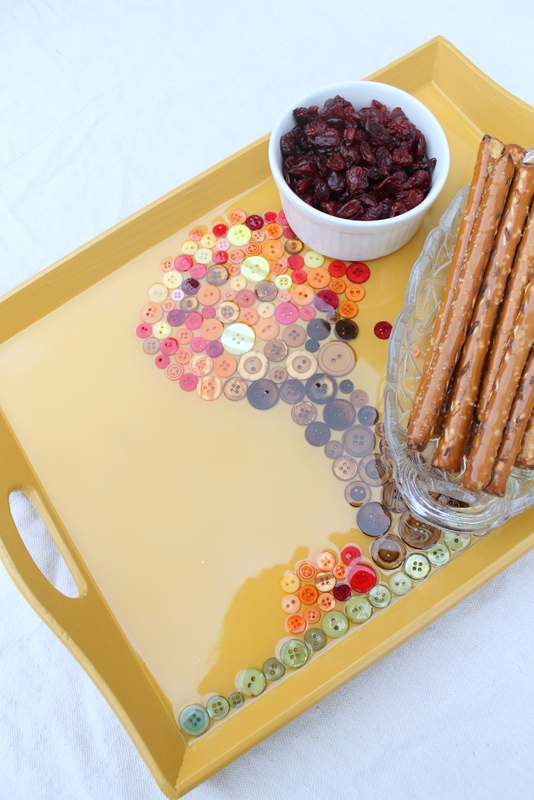
Will you be adding buttons to a tray anytime soon? Don’t let that epoxy pour scare ya! My fall button serving tray will make an appearance at our Thanksgiving meal and many snacks in the meantime.
These Button Pumpkin Stacking Boxes could be the perfect addition to your Autumn and Thanksgiving home decor. This post will give you a step by step tutorial on how to create something like these Button Pumpkin Stacking Boxes for your home.
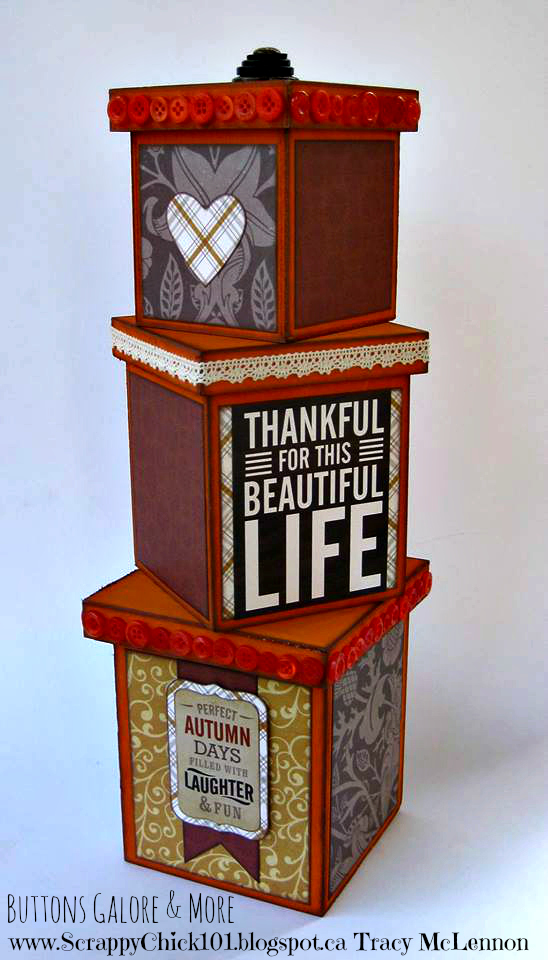
Project Recipe:

I started creating my Button Pumpkin Stacking Boxes by painting all the boxes and their lids with Spiced Pumpkin paint. I used a foam brush and it only took one coat of paint.
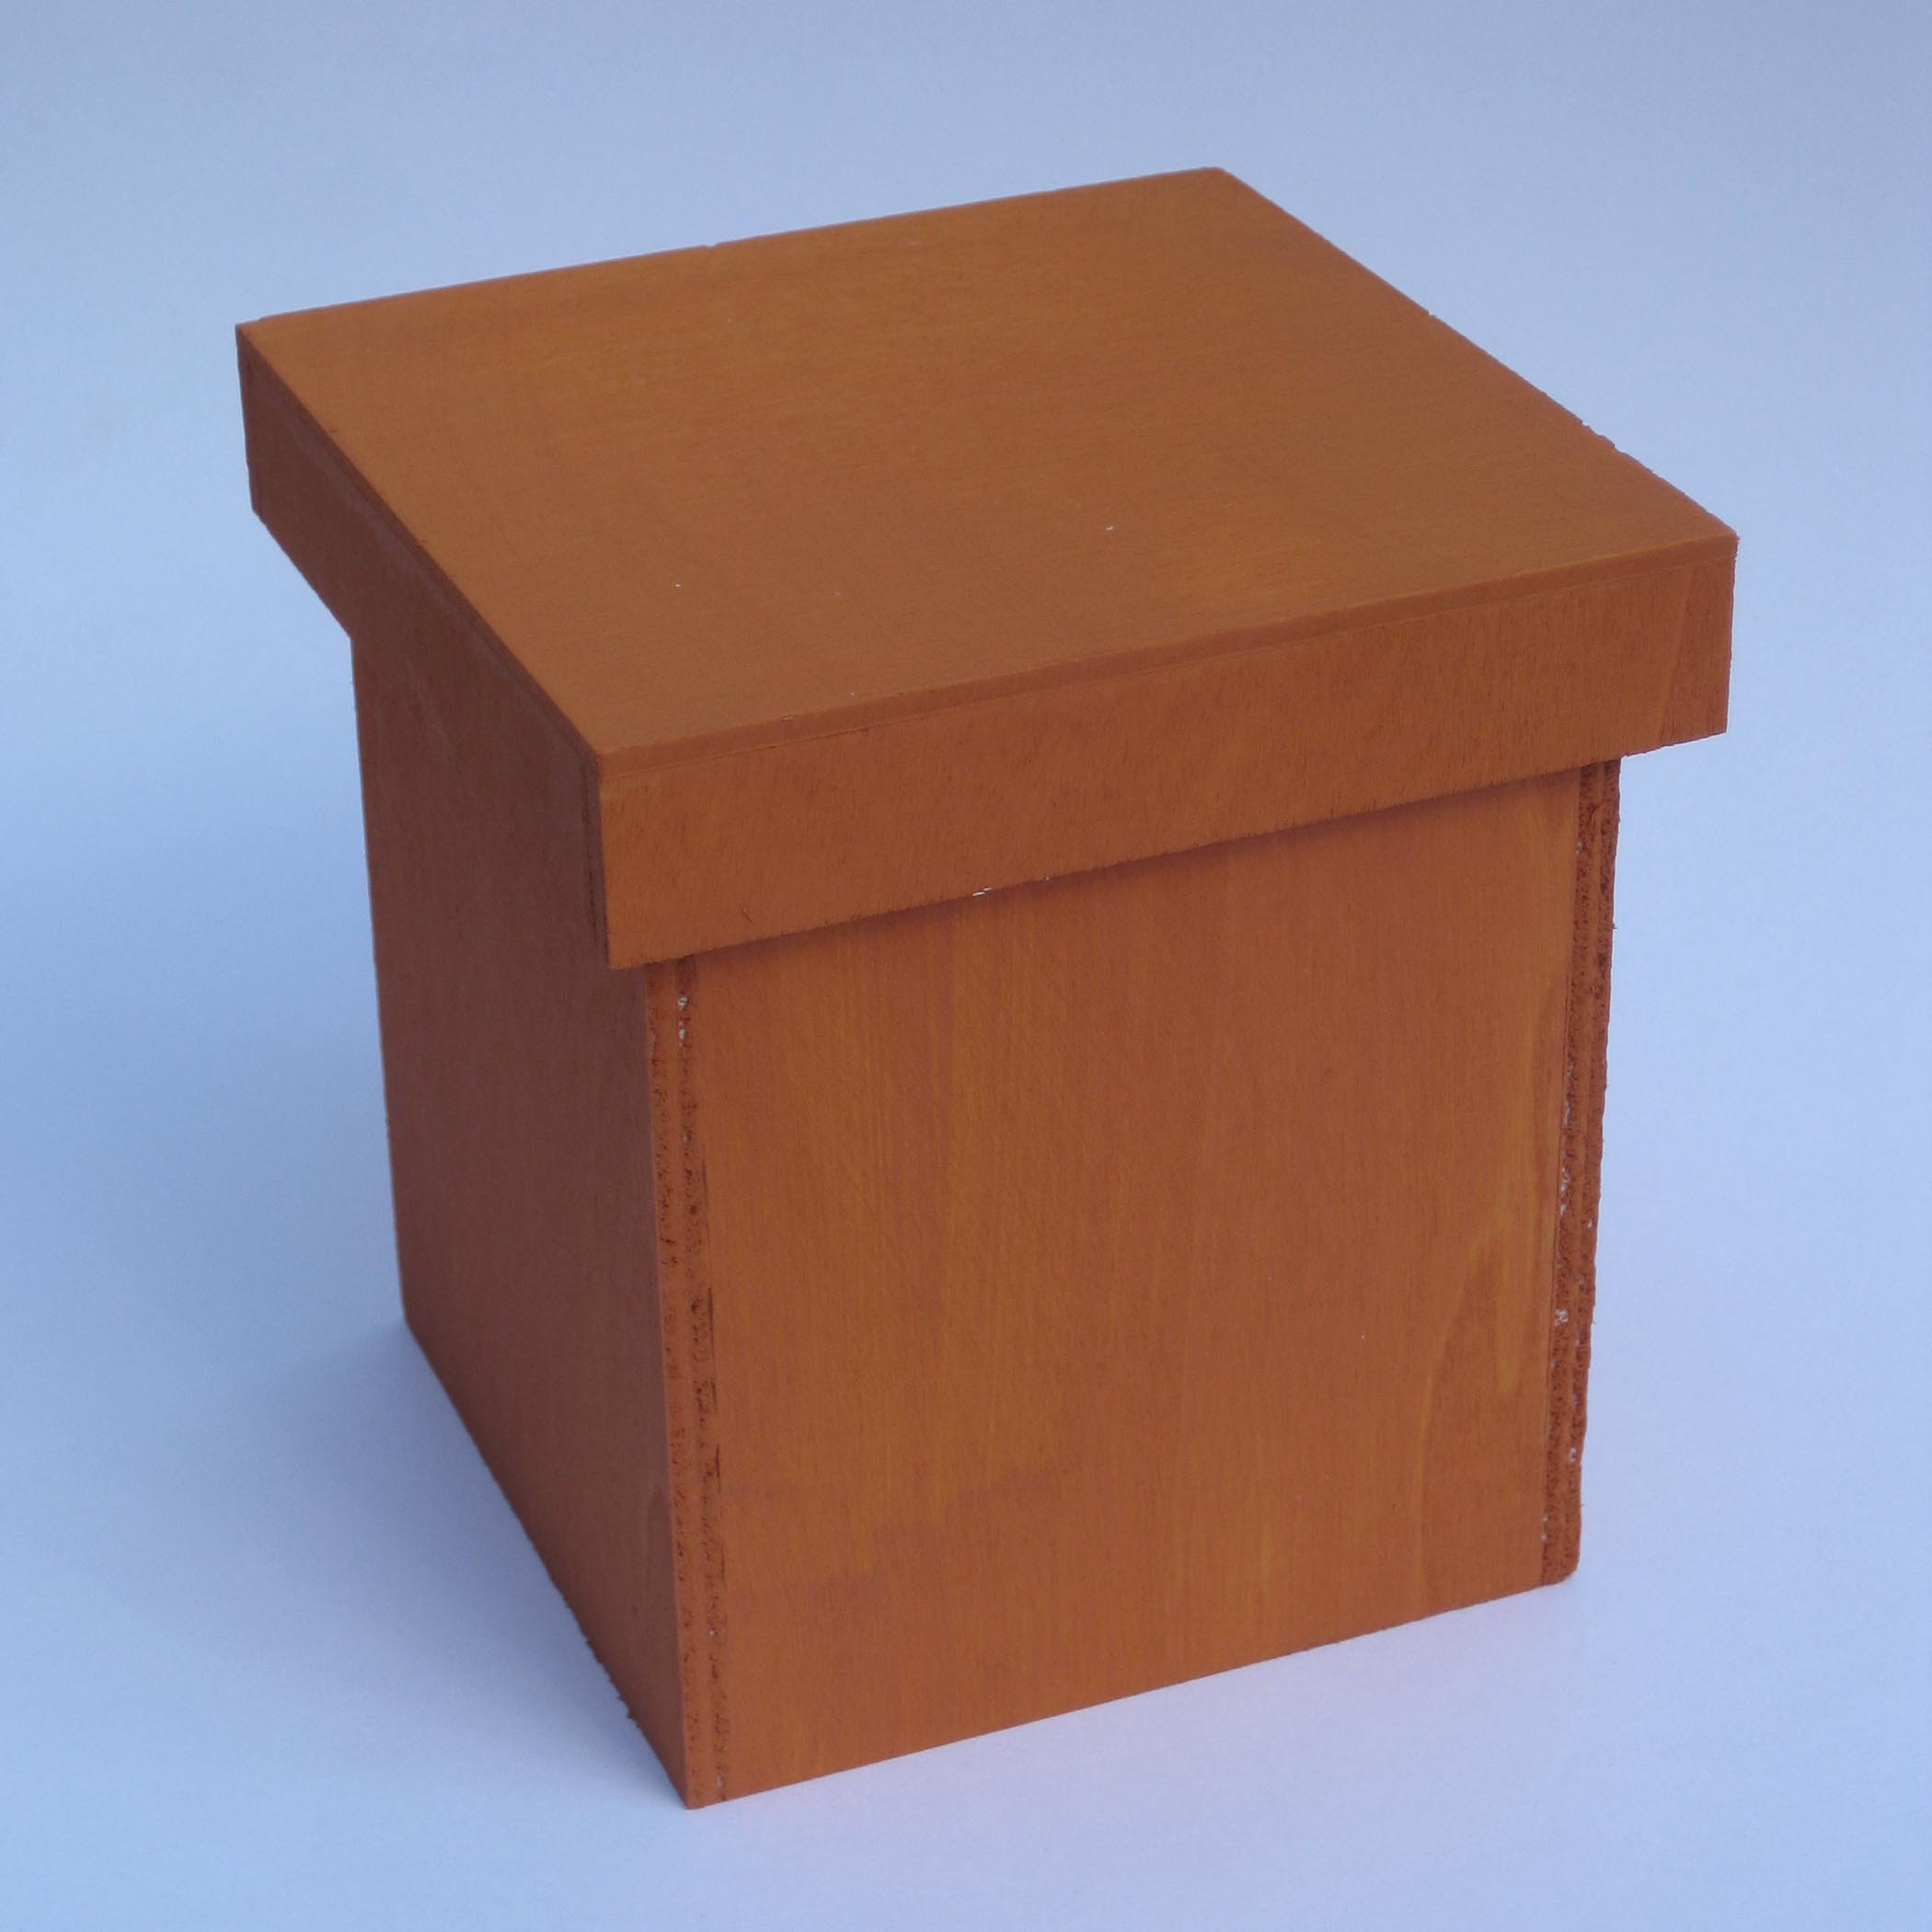
Once I had my boxes painted I then inked all the edges to give more of a distressed look.
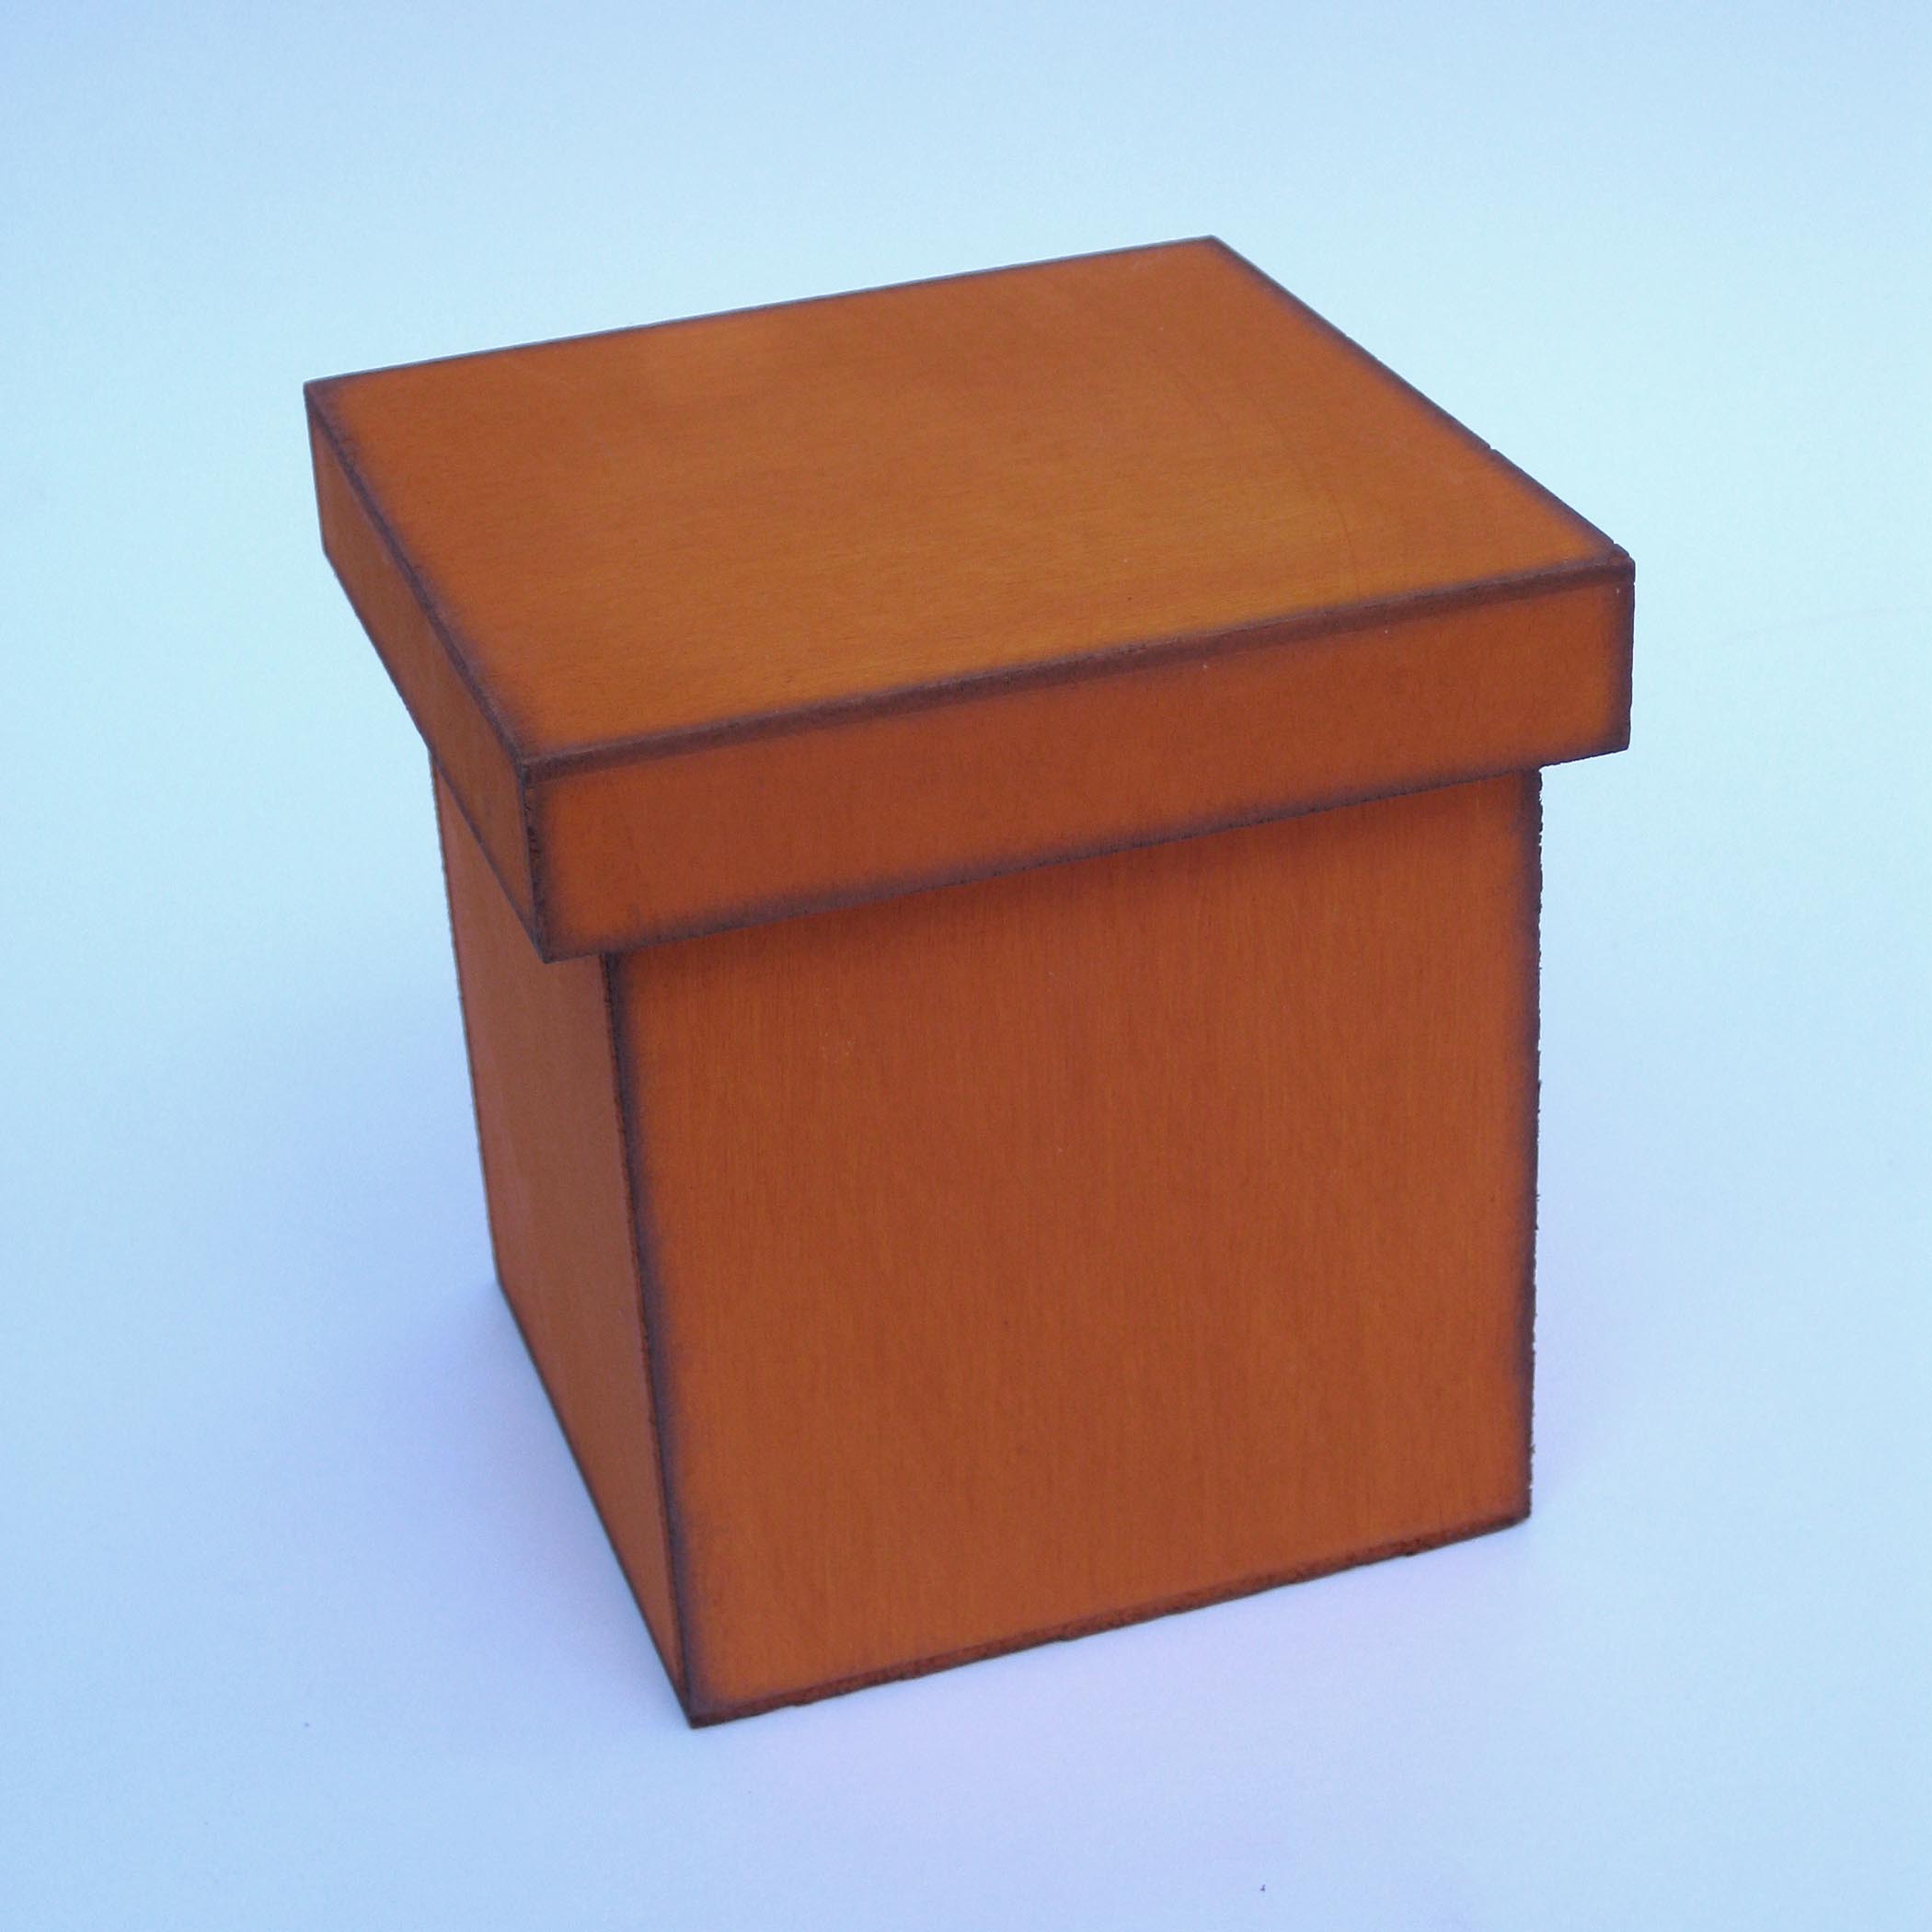
My next step was to cut patterned paper to fit on 4 sides of each of the boxes. I chose Echo Parks Fall Reflections Collection.
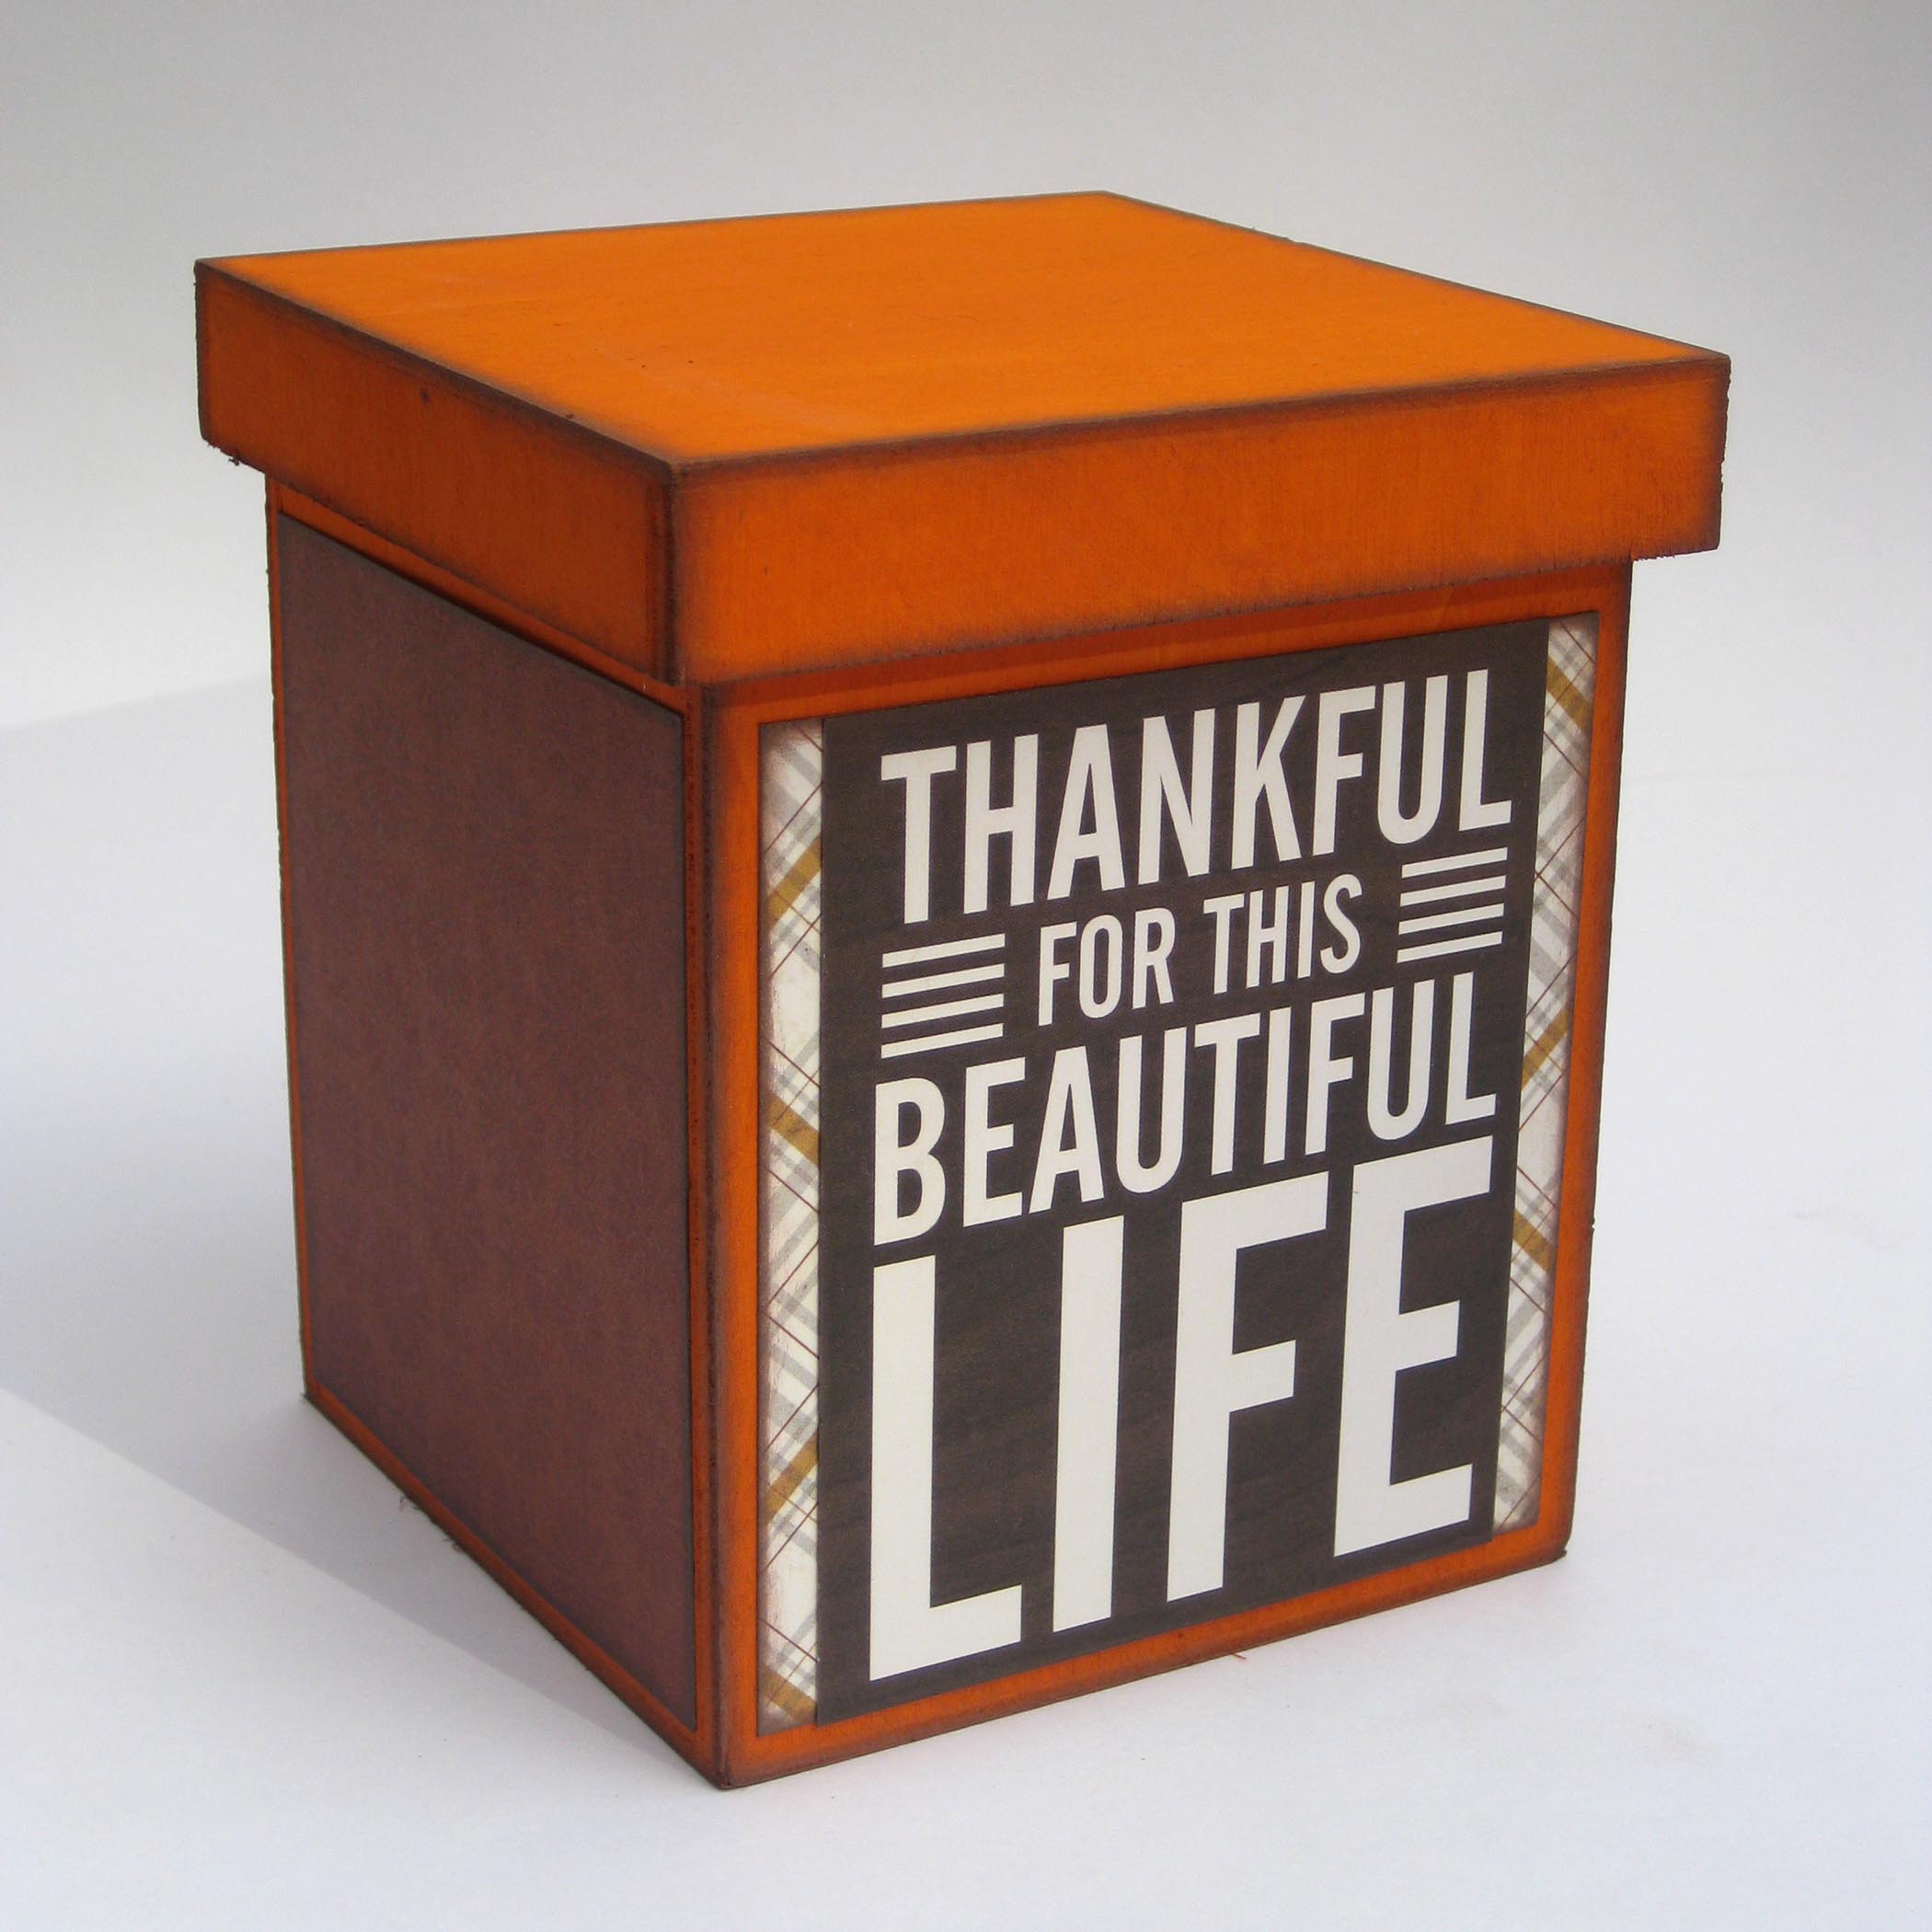
On the top and smallest of the Button Pumpkin Stacking Boxes I created a pumpkin stem by stacking brown buttons. I also added orange buttons around the lid of the smallest and the largest of the Button Pumpkin Stacking Boxes.
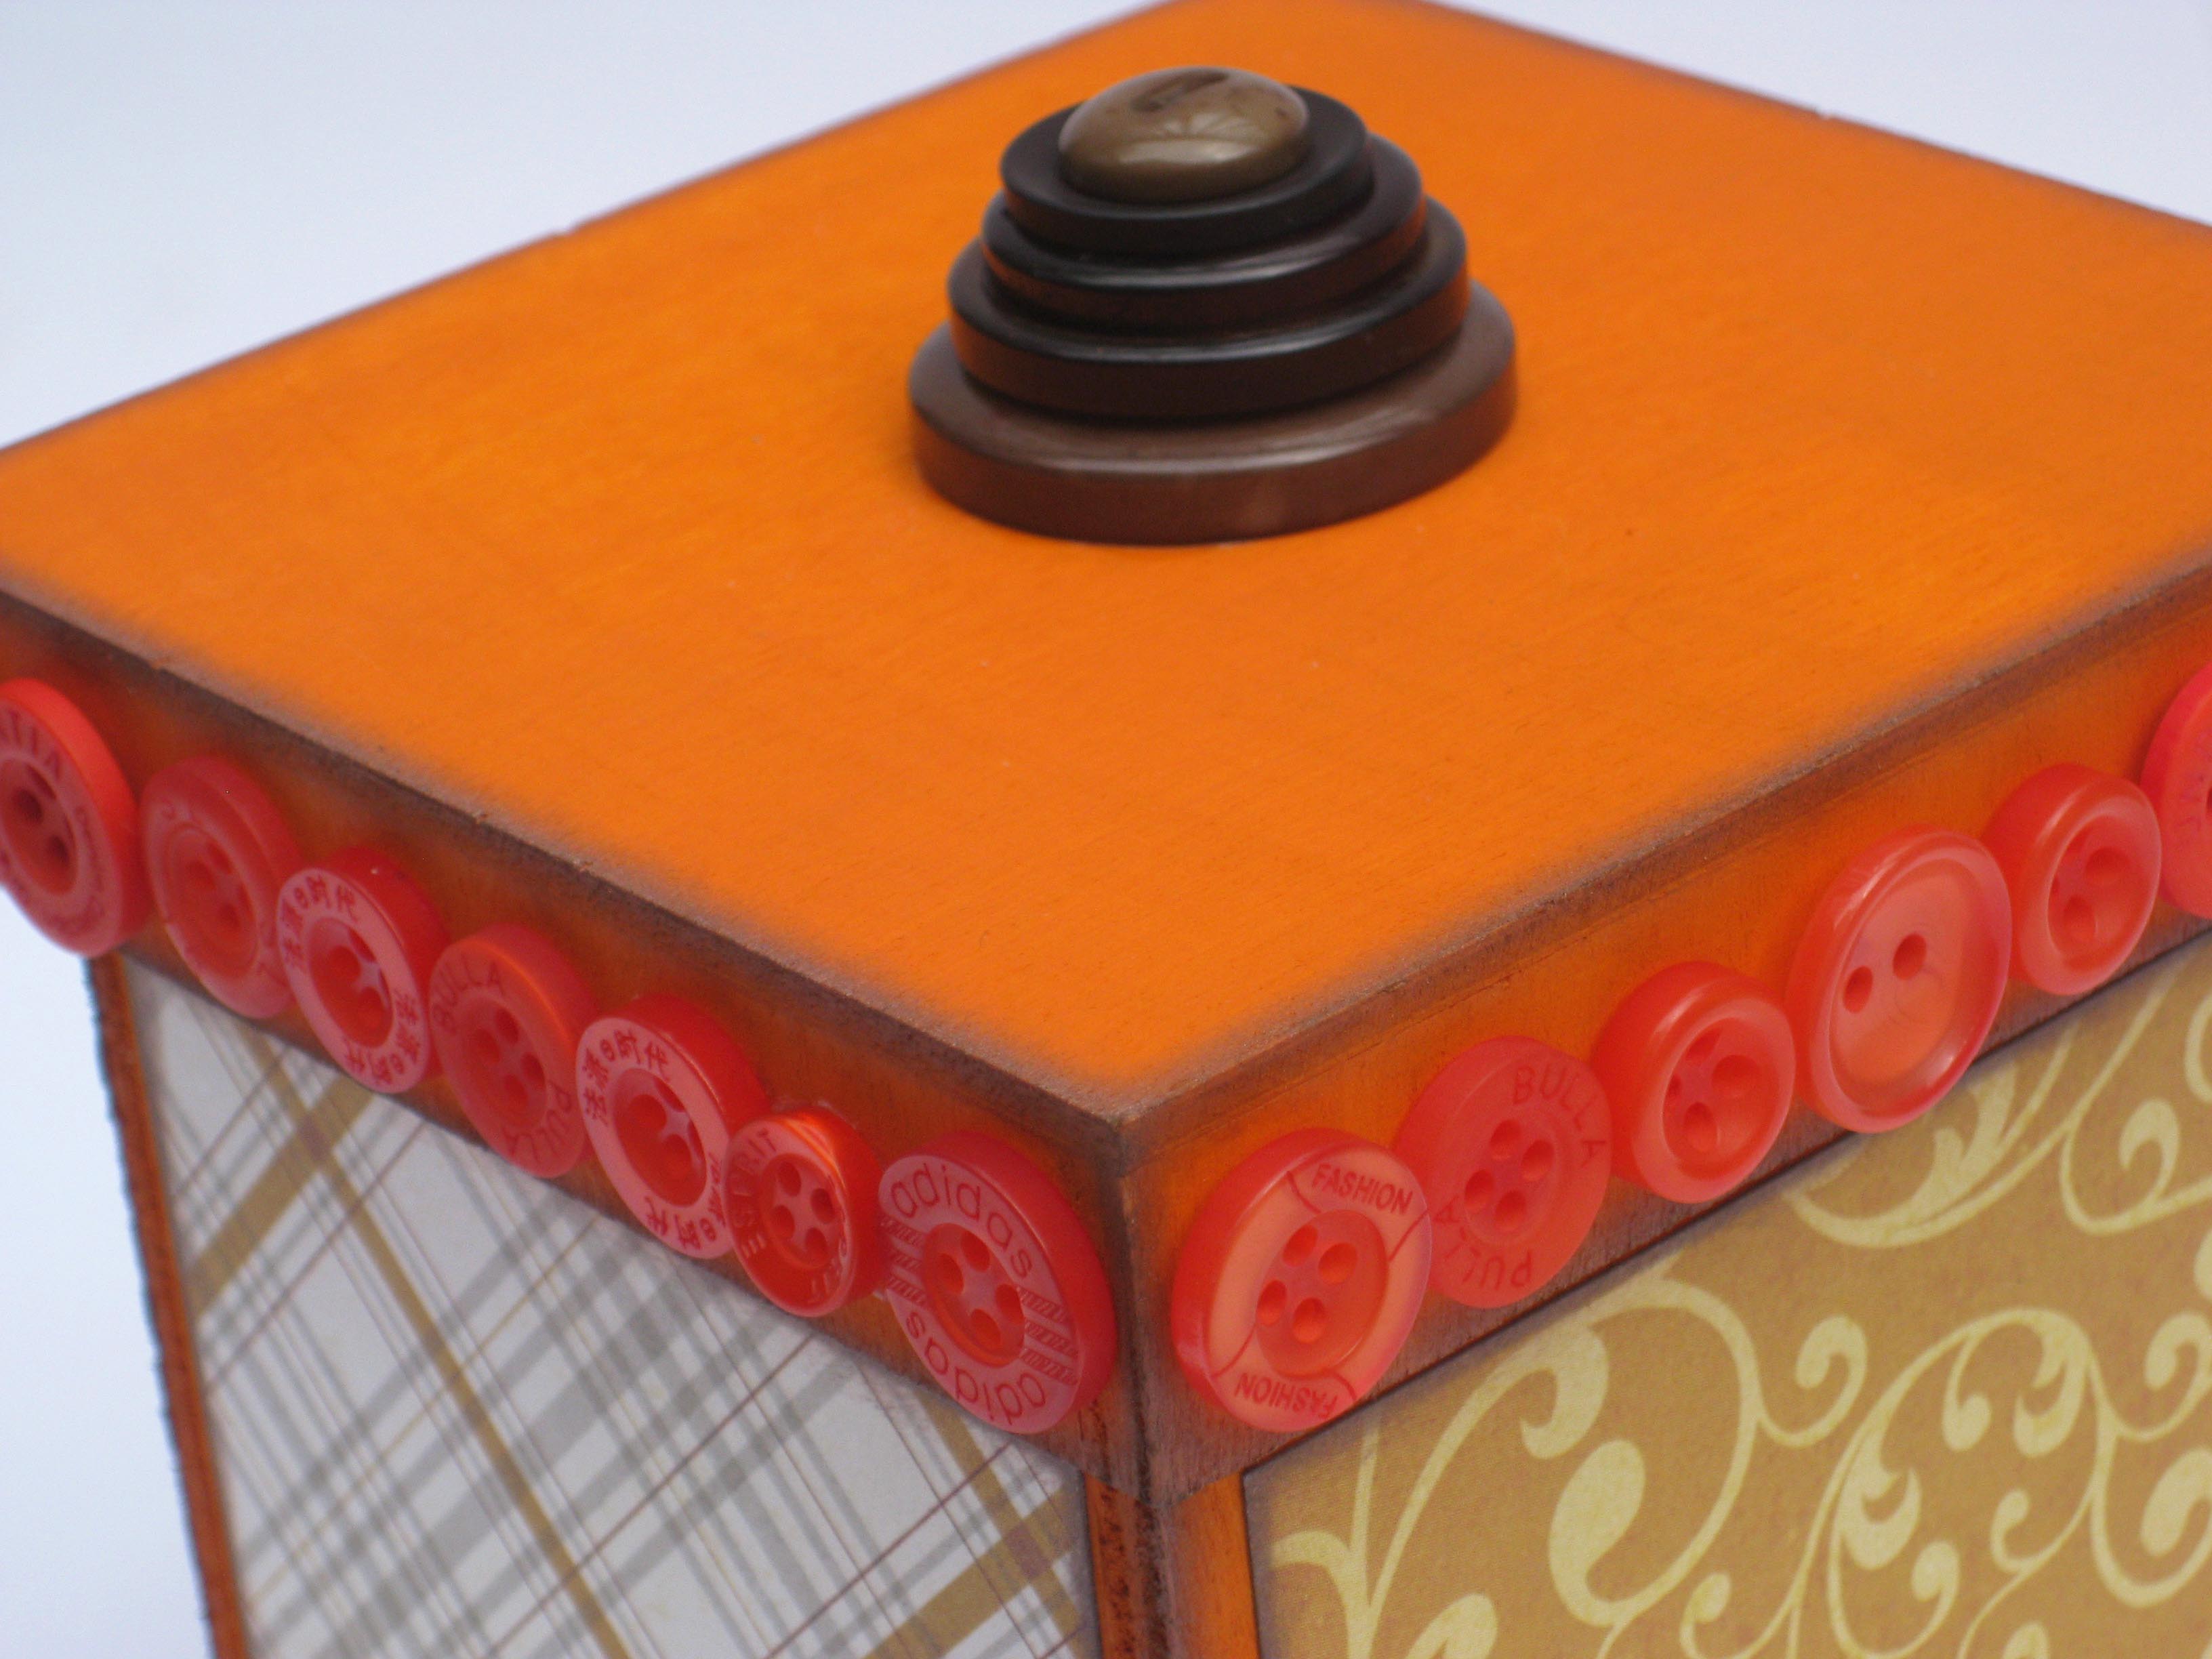
Then all there was left to do, was add a few more simple embellishments.
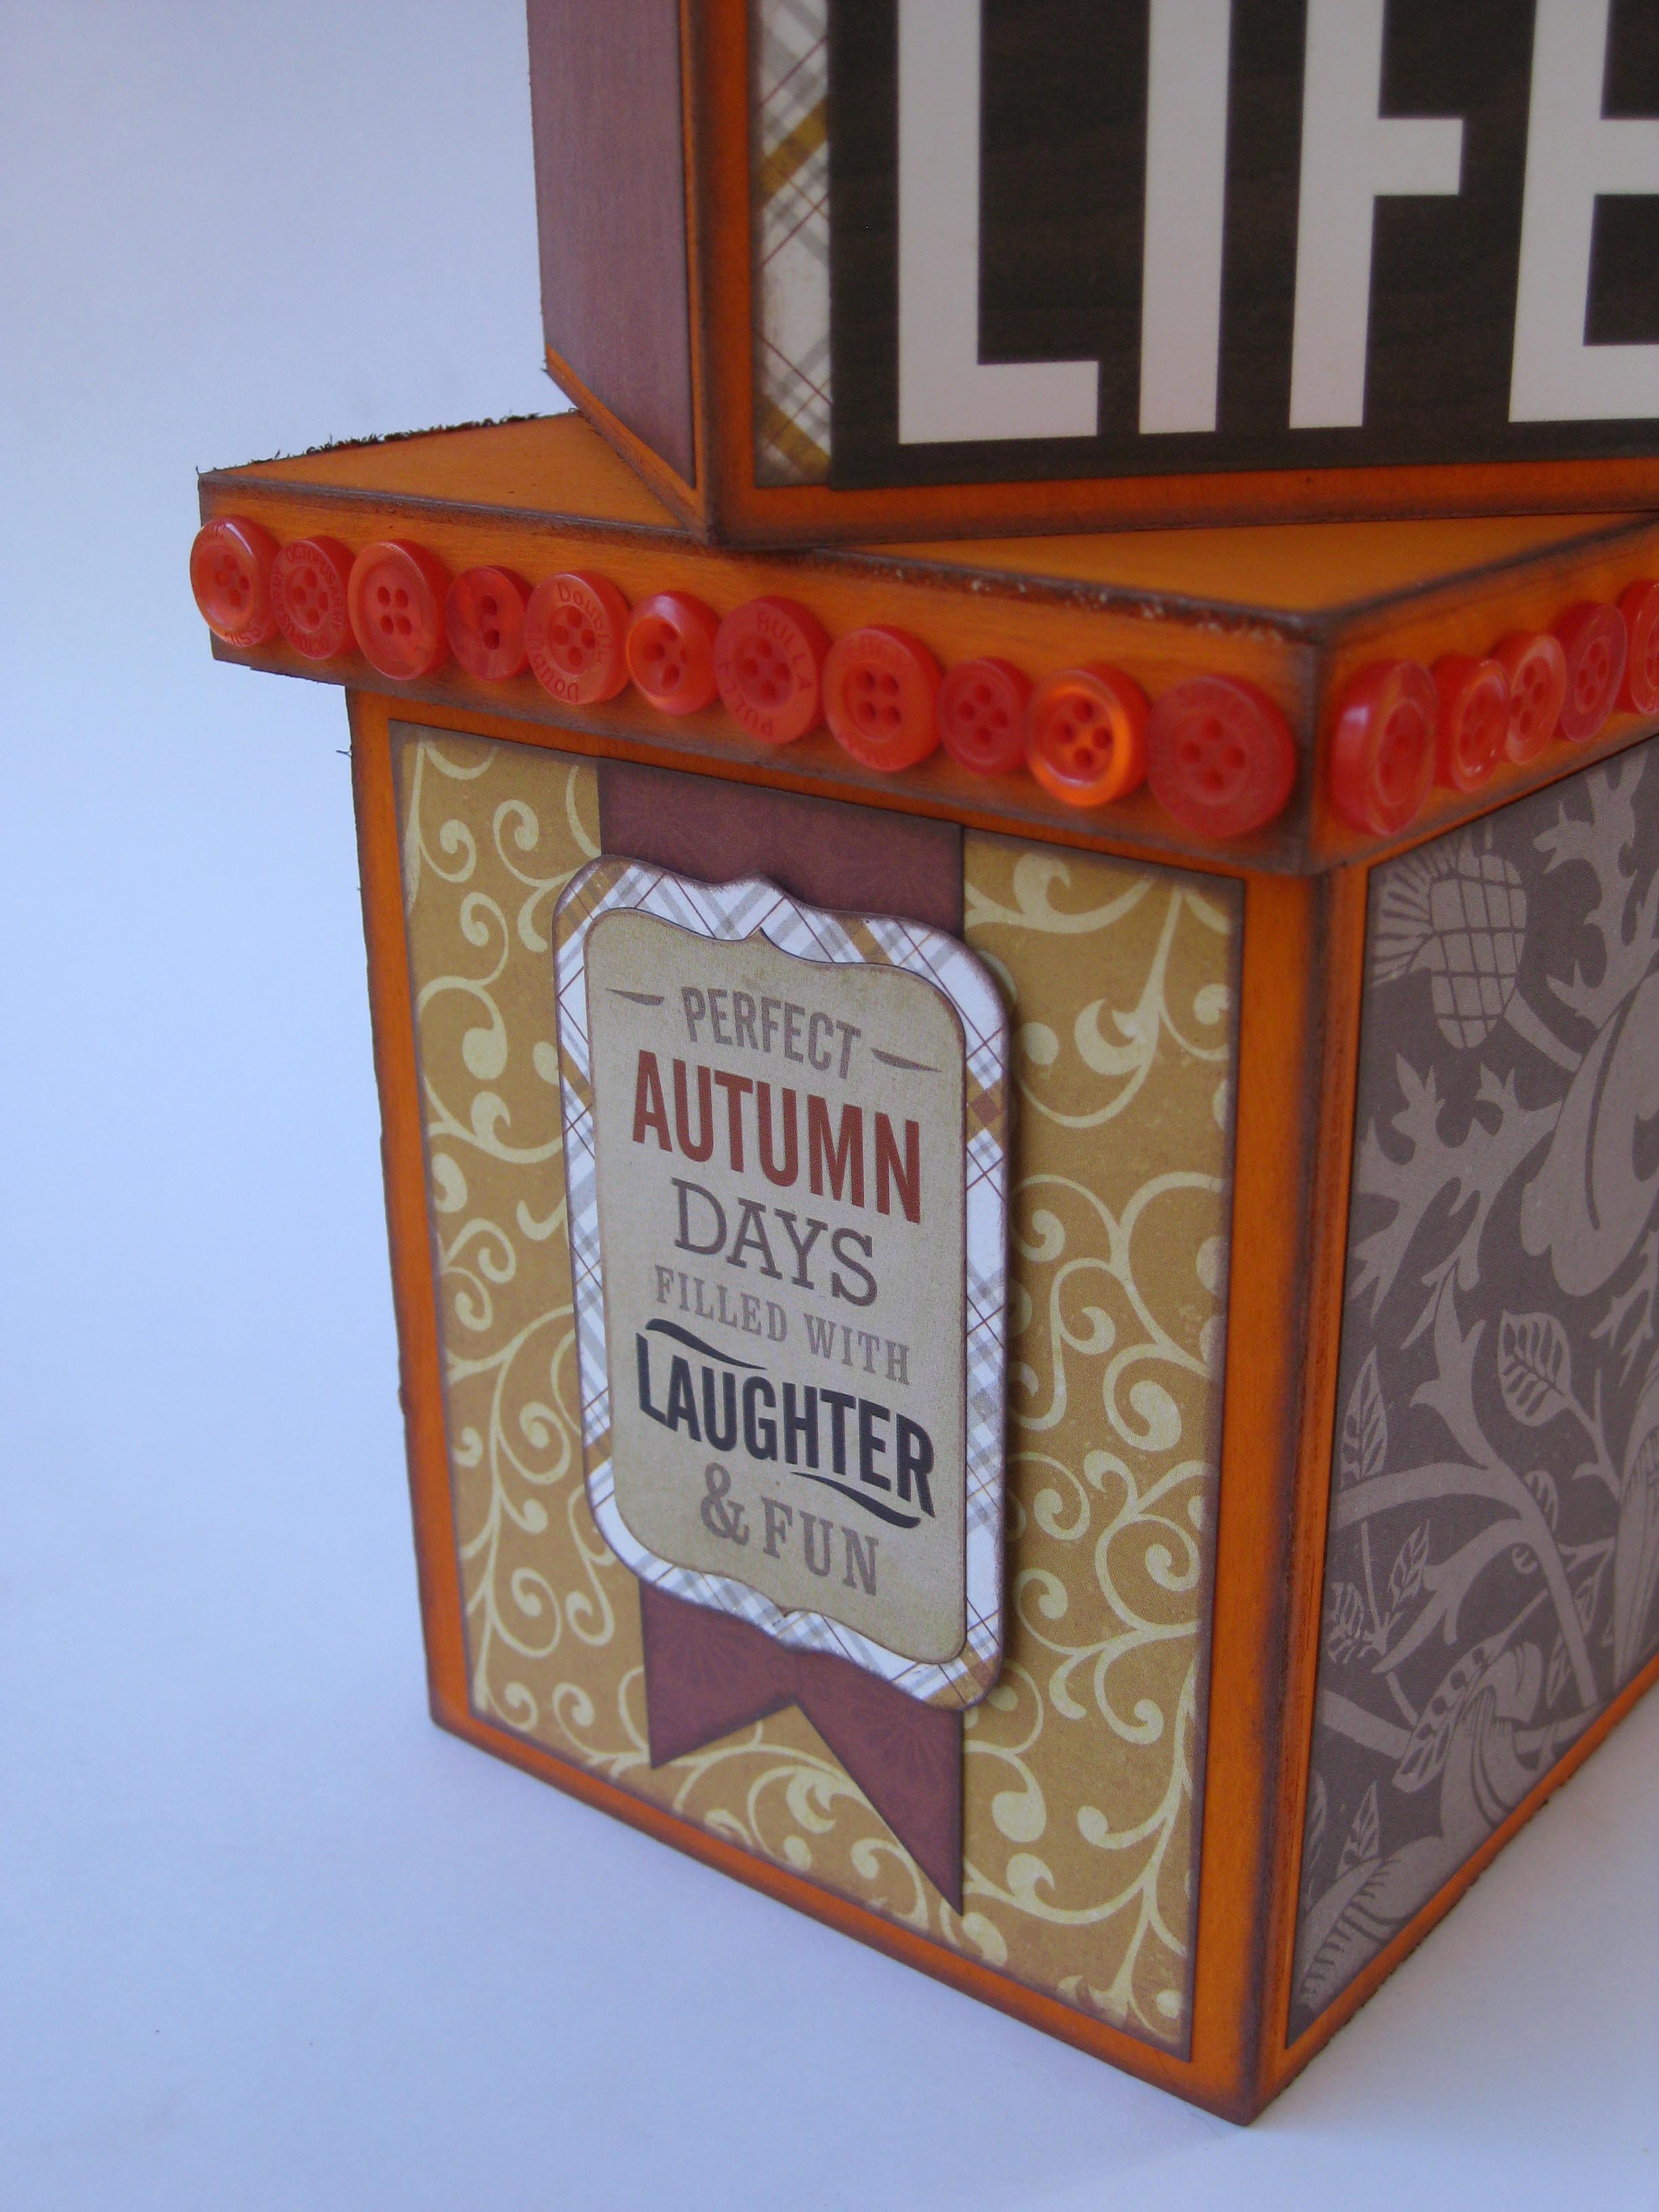
My Button Pumpkin Stacking Boxes are now ready to warm up my home’s decor for the holidays.
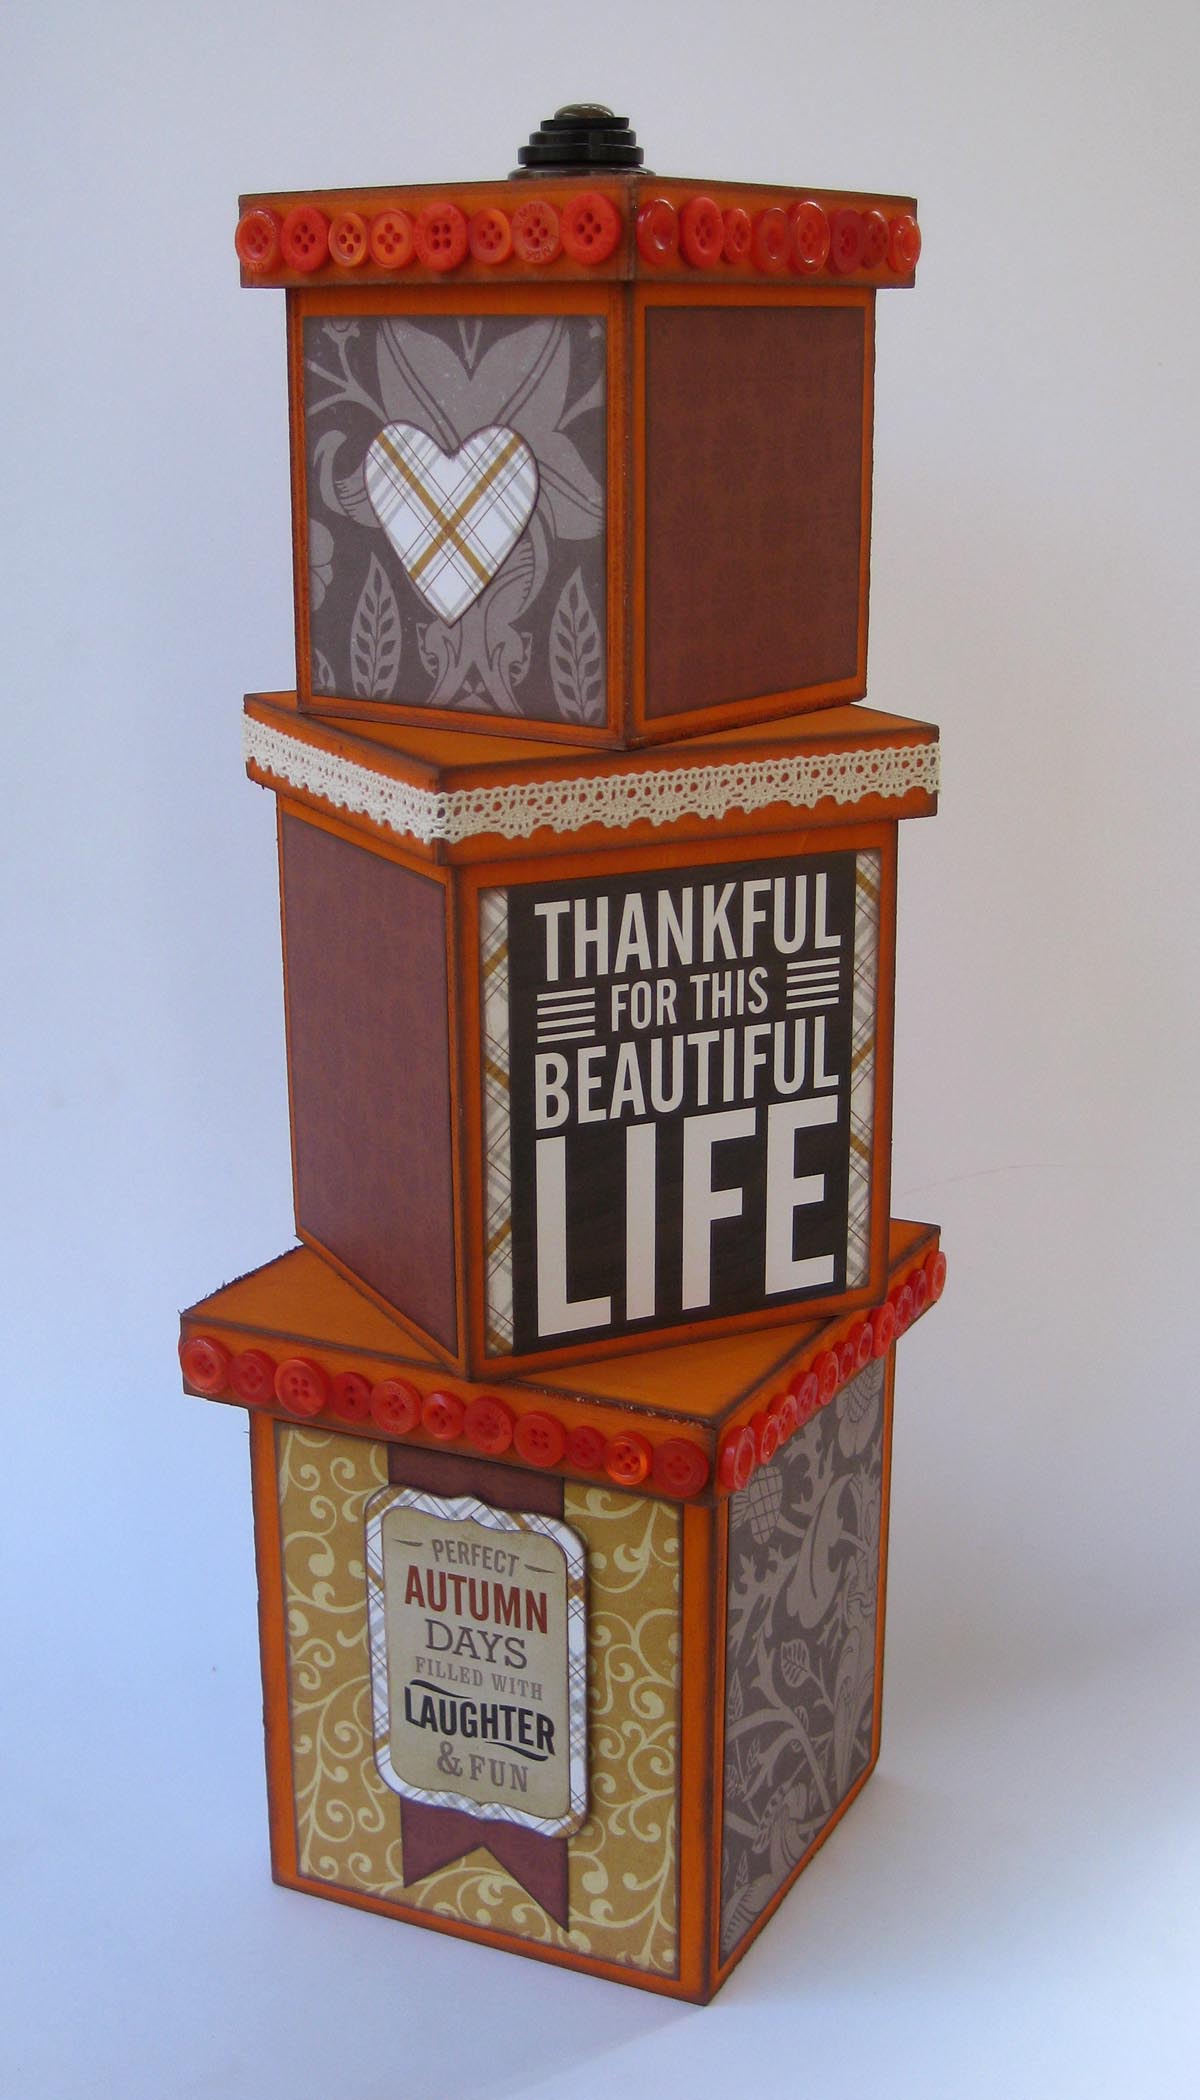
If you would like to check out more of my button and paper crafting creations, check out my blog Scrappy Chick Designs by clicking HERE. Thank you so much for stopping by.
My family hikes or goes for a bike ride every weekend and, inevitably, we always return home with a leaf, feather, or pine cone. The natural bits and bobs were piling up on the table, so I decided to create a nature mobile. I love how we can now display our finds in a piece of artwork and nothing is glued down, so we can change it out whenever we want.
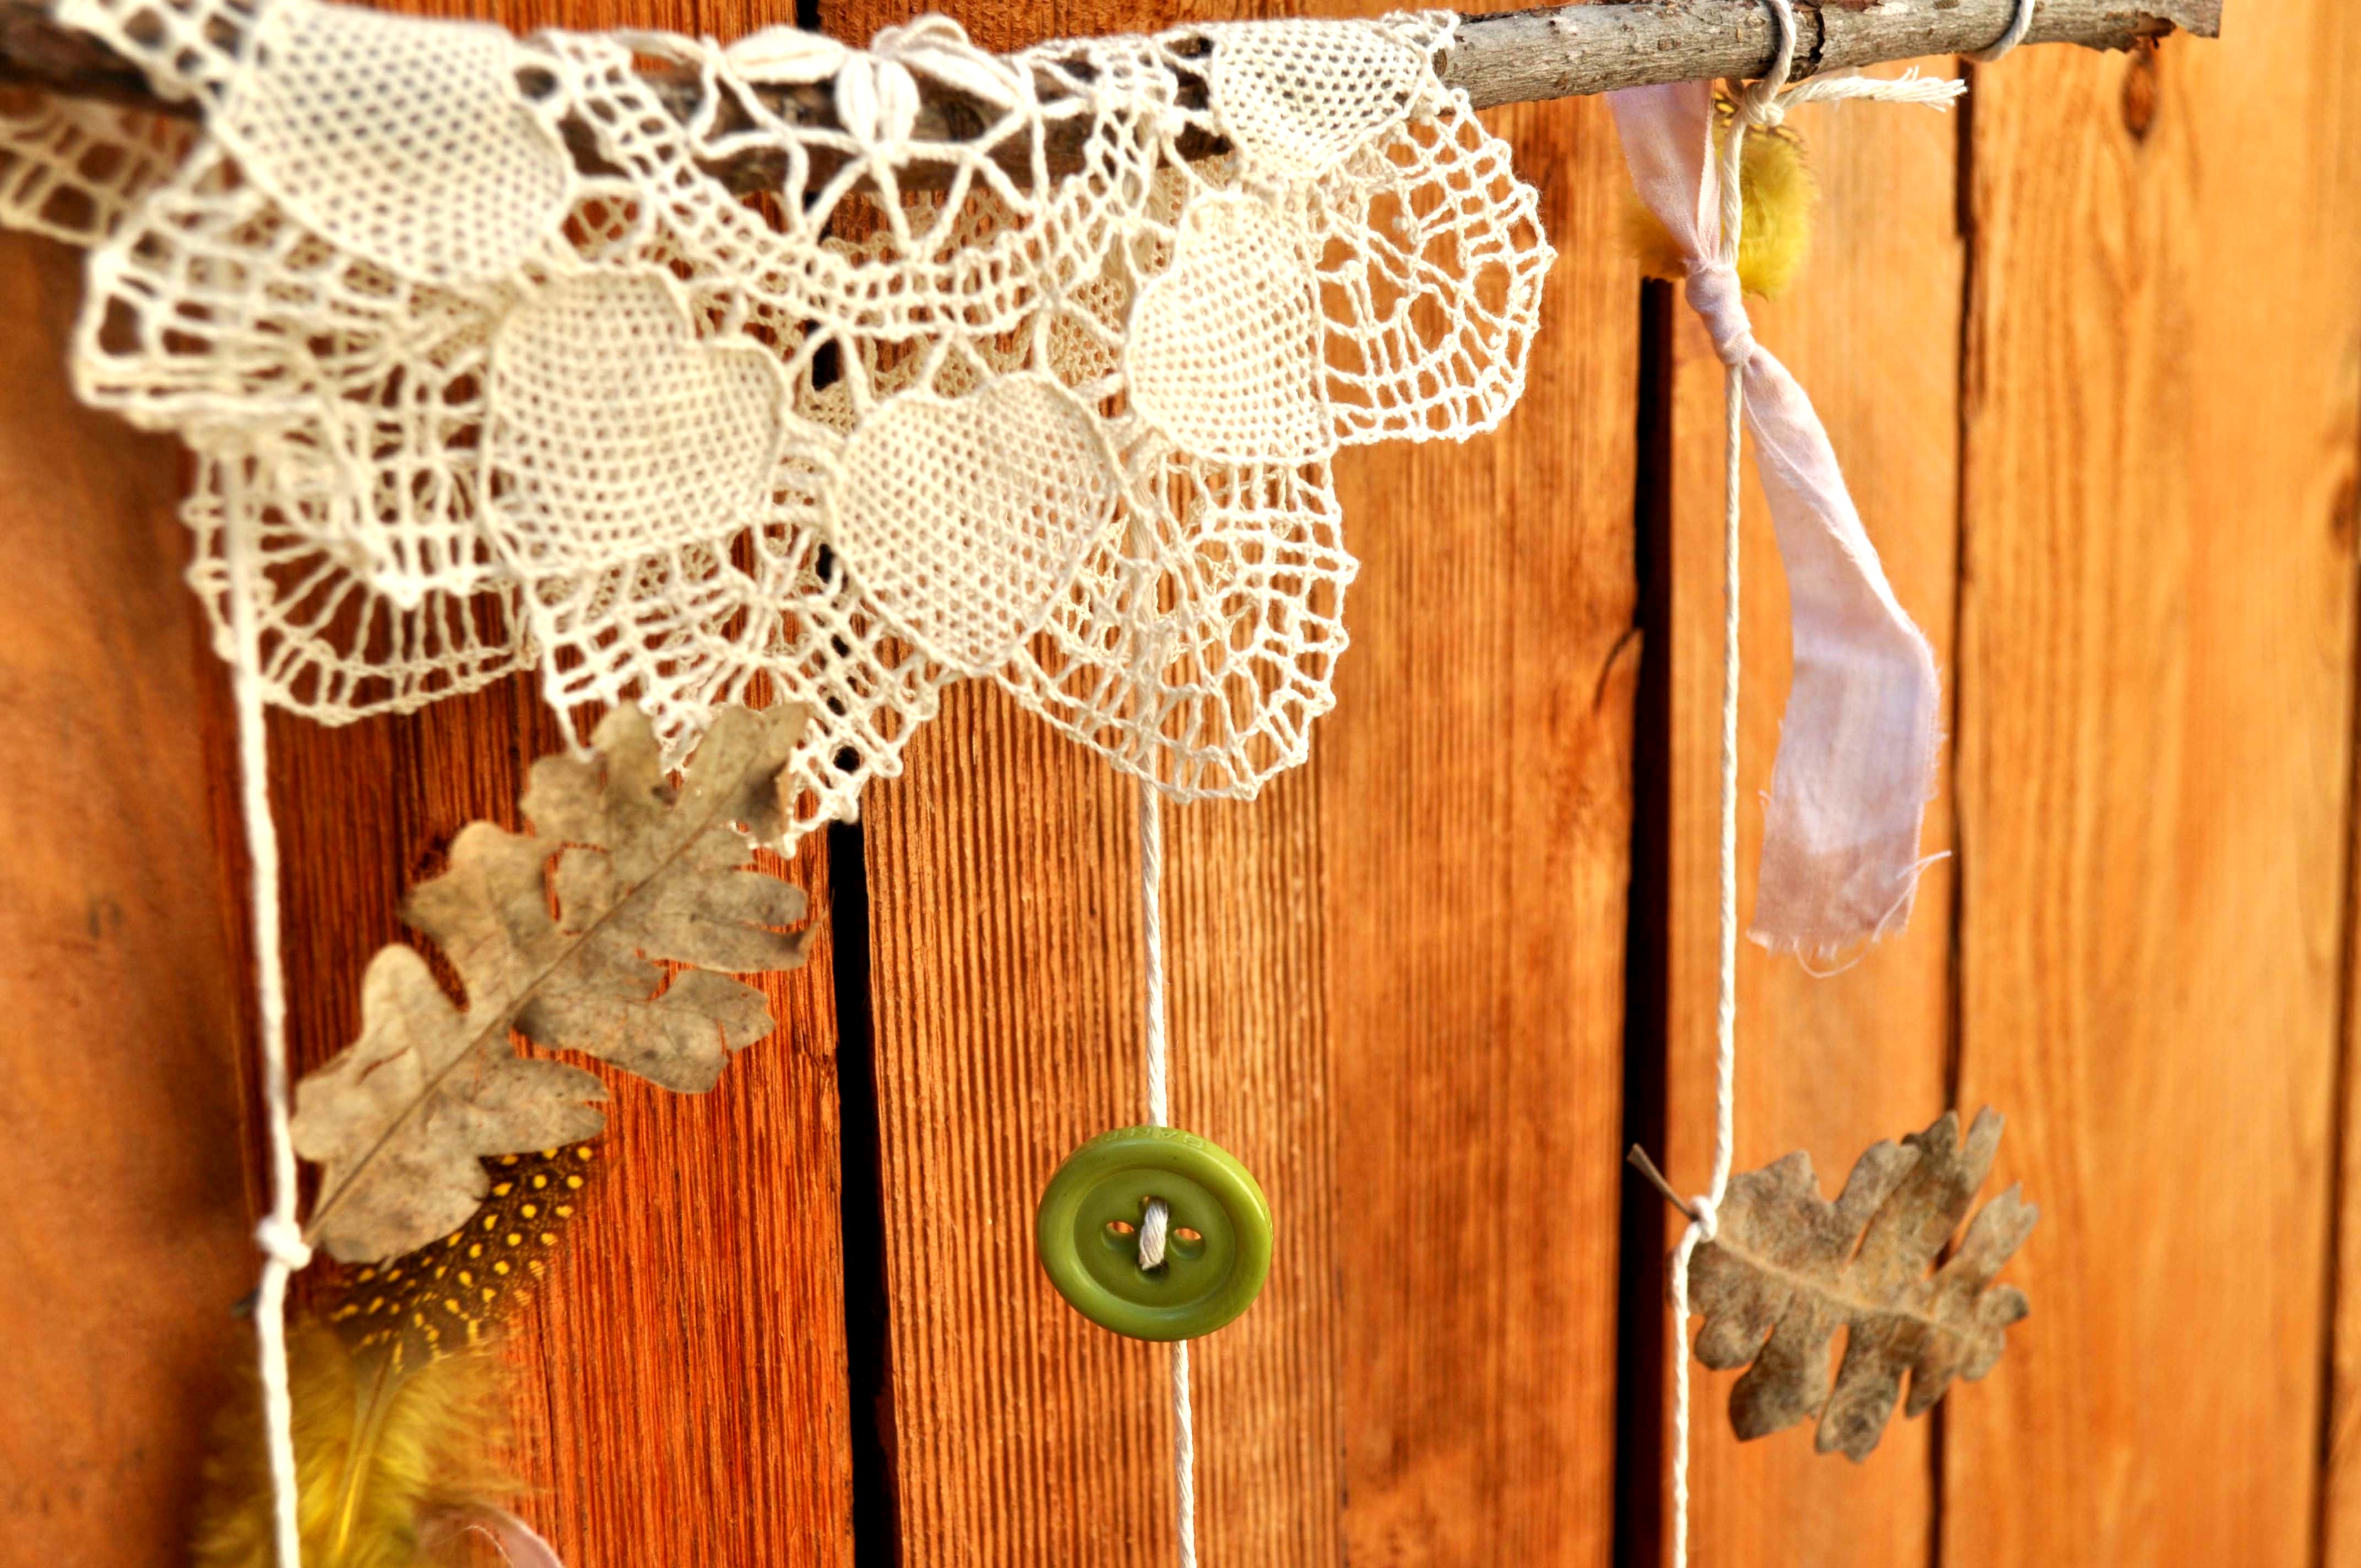
Supplies:

Instructions:
Thanks for stopping by today. Find out how to make another nature display on my blog, Laura Bray Designs.
![]()
Create a cute Fall Mum Jar for your table. Fill with your favorite treats or use to store things.
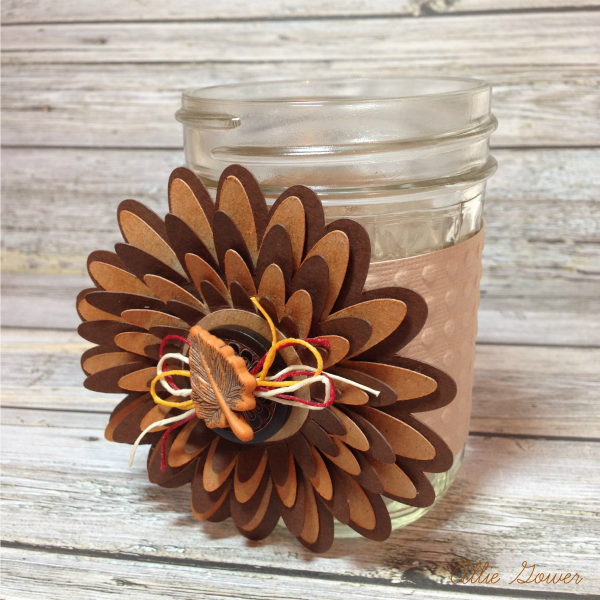

Autumn Value Pack

I could never get tired of Paris. Let’s make some Paris Wall Art! I was surprised at how easily this came together.
Thanks for joining me today.
See more of my creations at My Card Party.
Whenever I visit family, I like to give them a handmade gift. This year, I made the Grandparents (my in-laws) a Grandchildren Welcome sign embellished with Buttons Galore Haberdashery buttons.
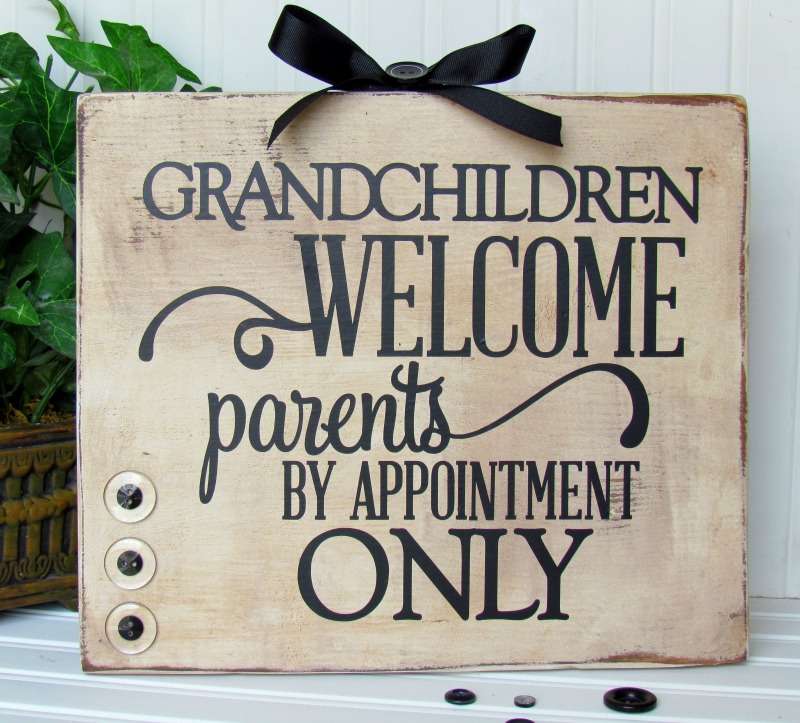
I cut, sanded, painted, stained and distressed a wood board. Yes, I did it all myself. You can view my previous BGM tutorial on how I created the look of my wood board here.
I then used my Silhouette and a cut file from Kolette Hall to cut out the black vinyl lettering.
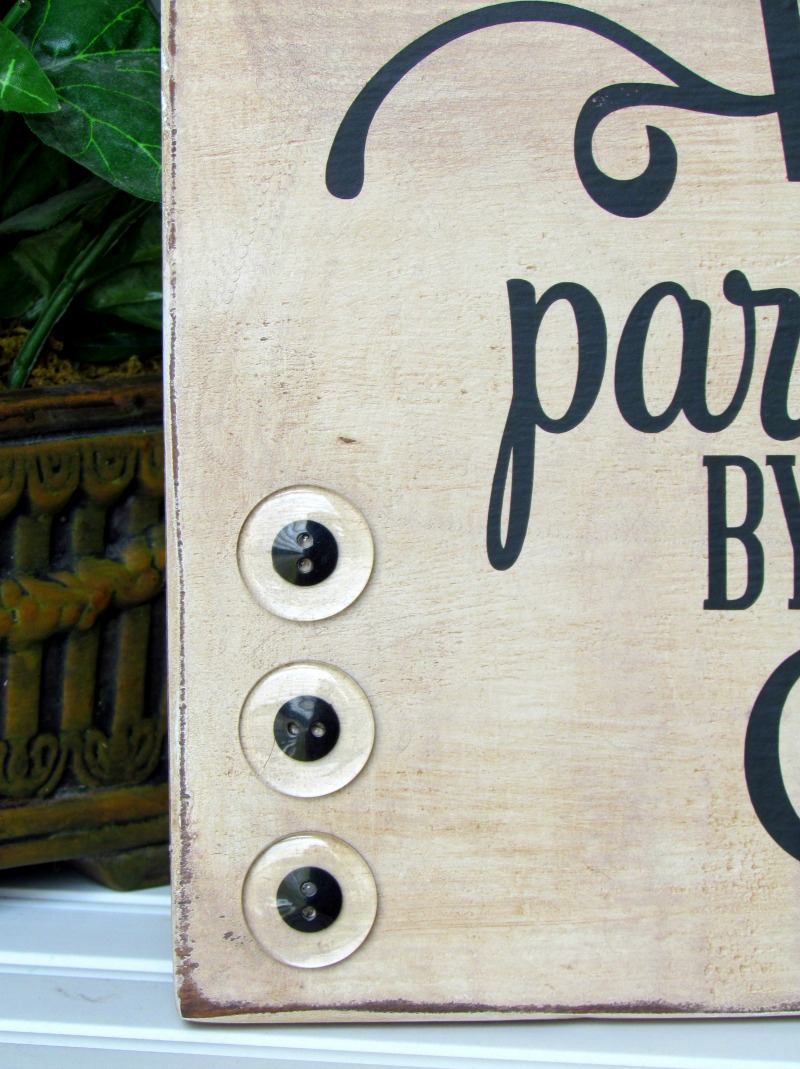
To give the Grandchildren Welcome sign a little something extra, I hot glued Haberdashery buttons along the side of the sign, added a big black grosgrain ribbon bow and another Haberdashery button in the middle.
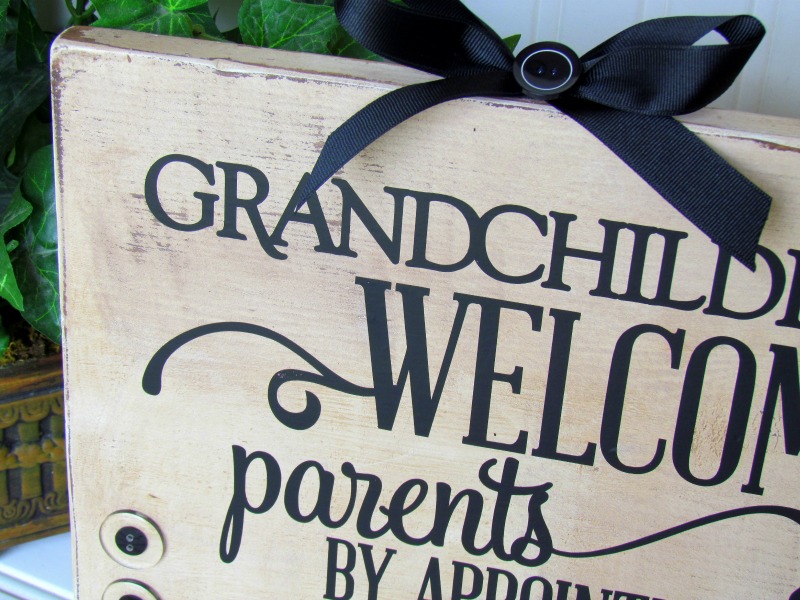
Like Me on Facebook!
 Looking to create some fun for this Halloween for your spooky table decor? These Halloween Napkin Rings using Novelty and various flat backed buttons from Buttons Galore and More are as much fun to make as they are to enjoy. With details such as paint, burlap and stamped sentiments, you will love the detail of these Halloween Napkin Rings.
Buttons Galore and More Halloween Novelty Buttons
Laura Kelly Hand Dyed Buttons in colors of your choice
Various unfinished wood shapes of your choice
DecoArt Americana Acrylics in Lamp Black, Pumpkin, Olive Green, Grape Juice and Snow White
Scraps of burlap
Tiny alphabet stamps and ink
Beacon Adhesives Premium Tacky Glue
Buttons Galore and More Shank Remover
Paint brushes, sewing machine and thread, scissors
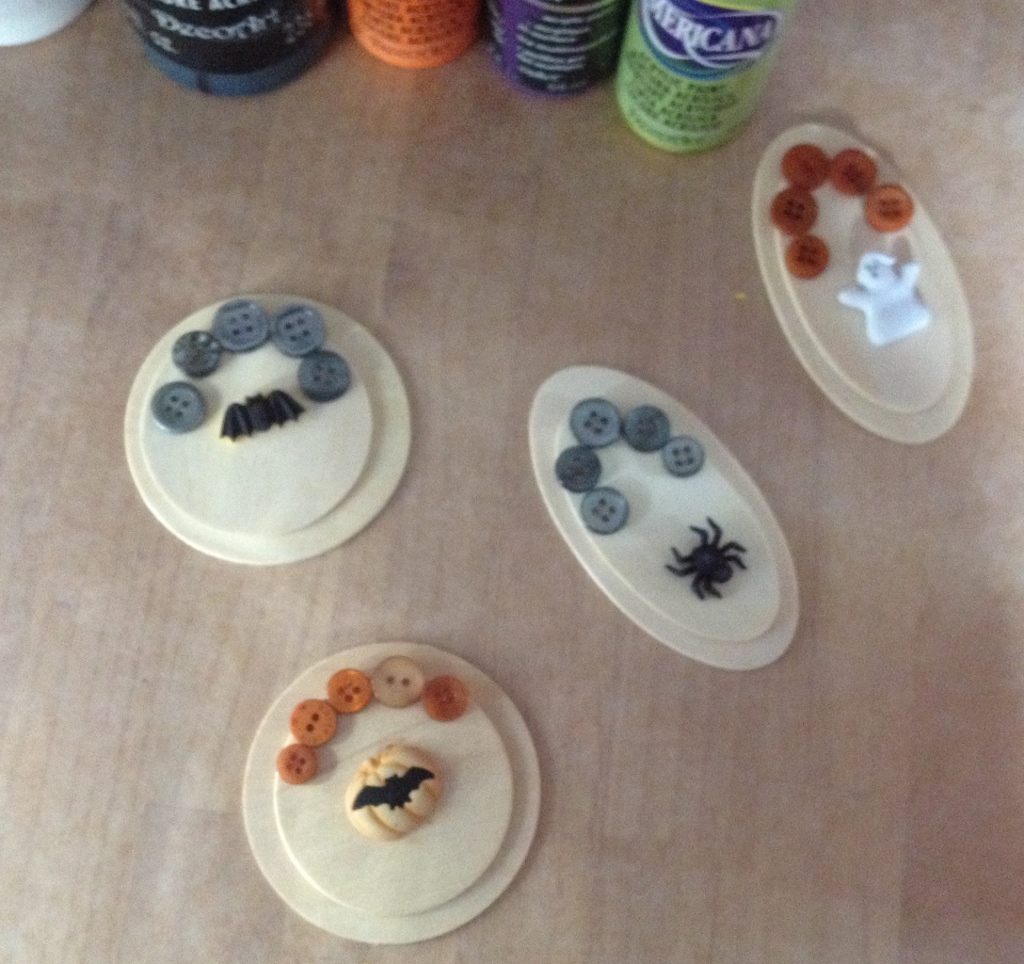 To create your own Halloween Napkin Rings, use the Button Shank Remover to remove the shank from the novelty buttons so that the novelty button lays flat on the wood. Lay out the design, layering the wood shapes and arranging the buttons on the shapes to decide on your design.
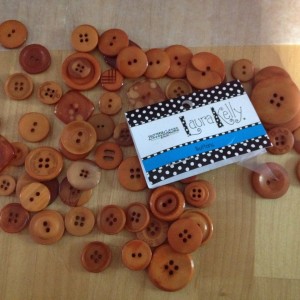 For my Halloween Napkin Rings, I used Laura Kelly hand dyed buttons in Smoke and Outrageous Orange.
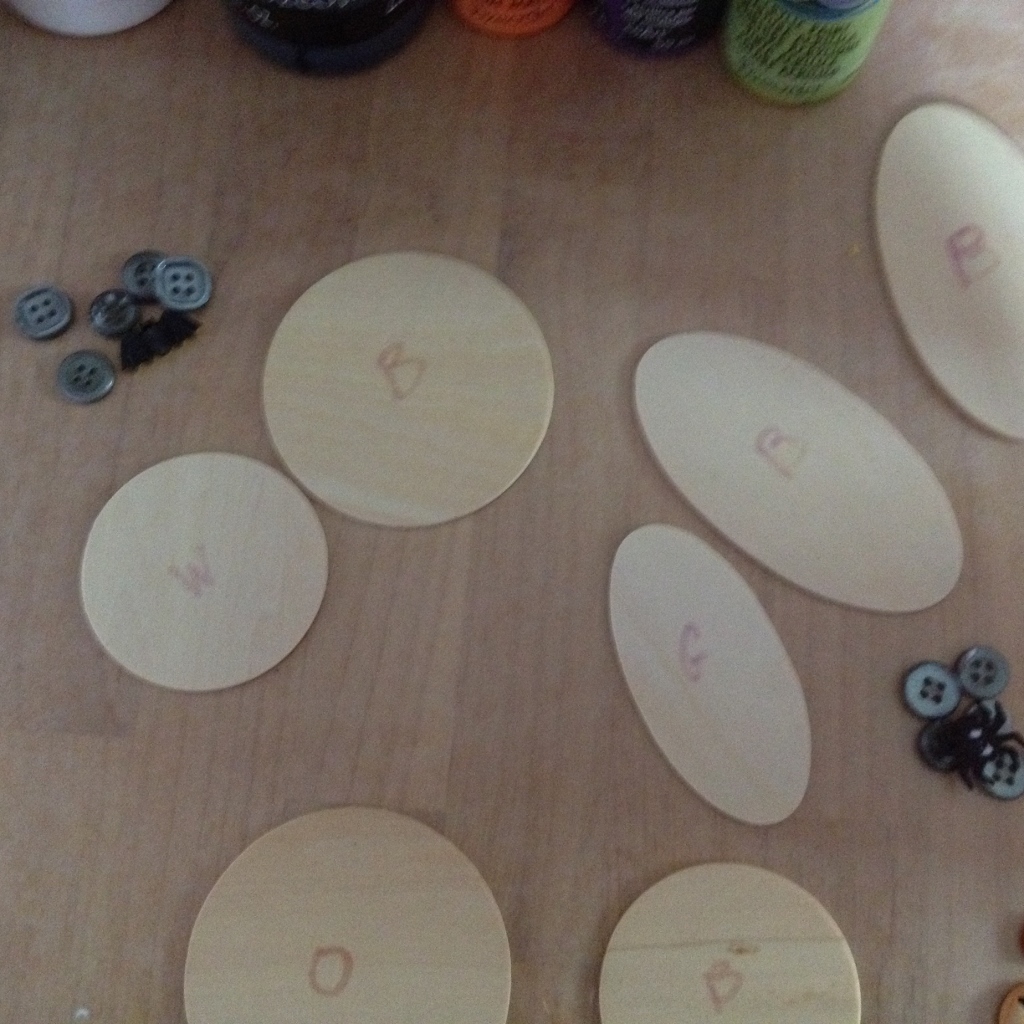 Since you will be working with so many shapes and colors, it is helpful to label your shapes with the first initial so you will know what color to paint it.
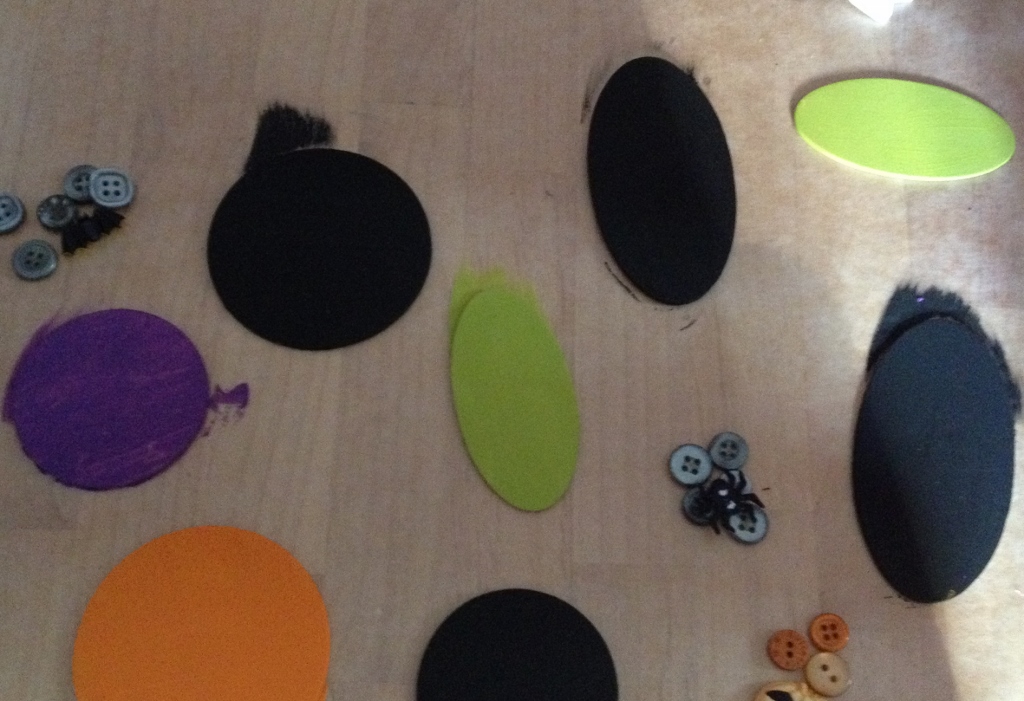 Paint your shapes front and back, using two coats.
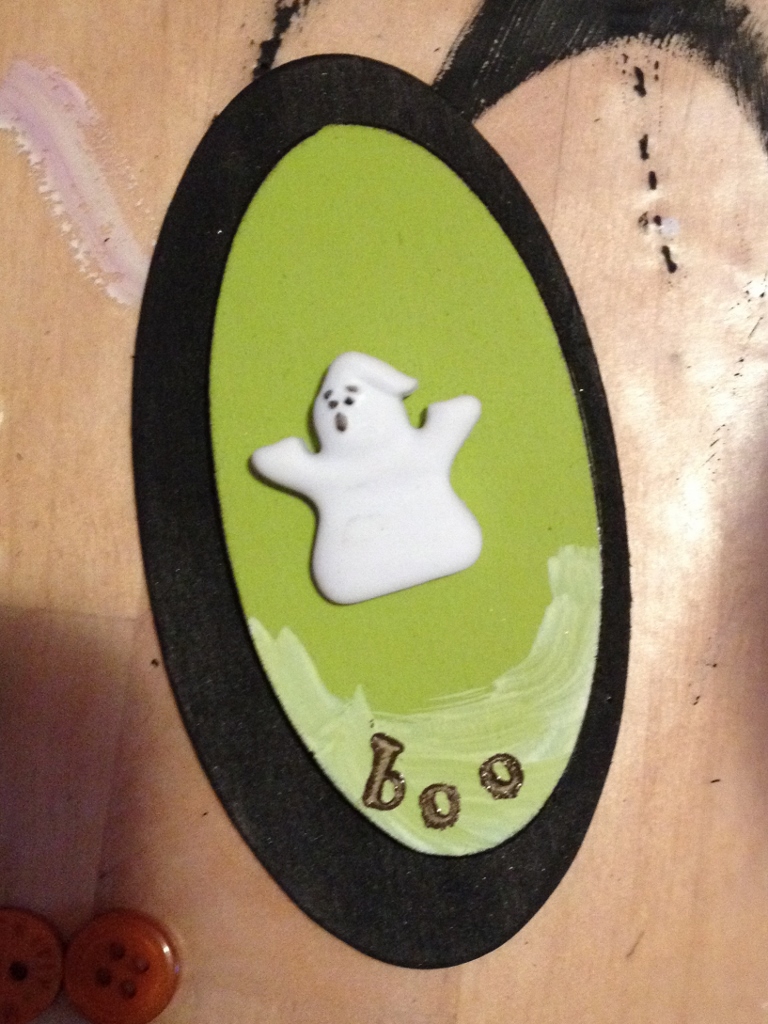 Layer your shapes and glue them together. Dry brush white paint on the bottom of the top shape. Use the alphabet stamps and ink to stamp the shapes. Glue the novelty button to the center of the shape.
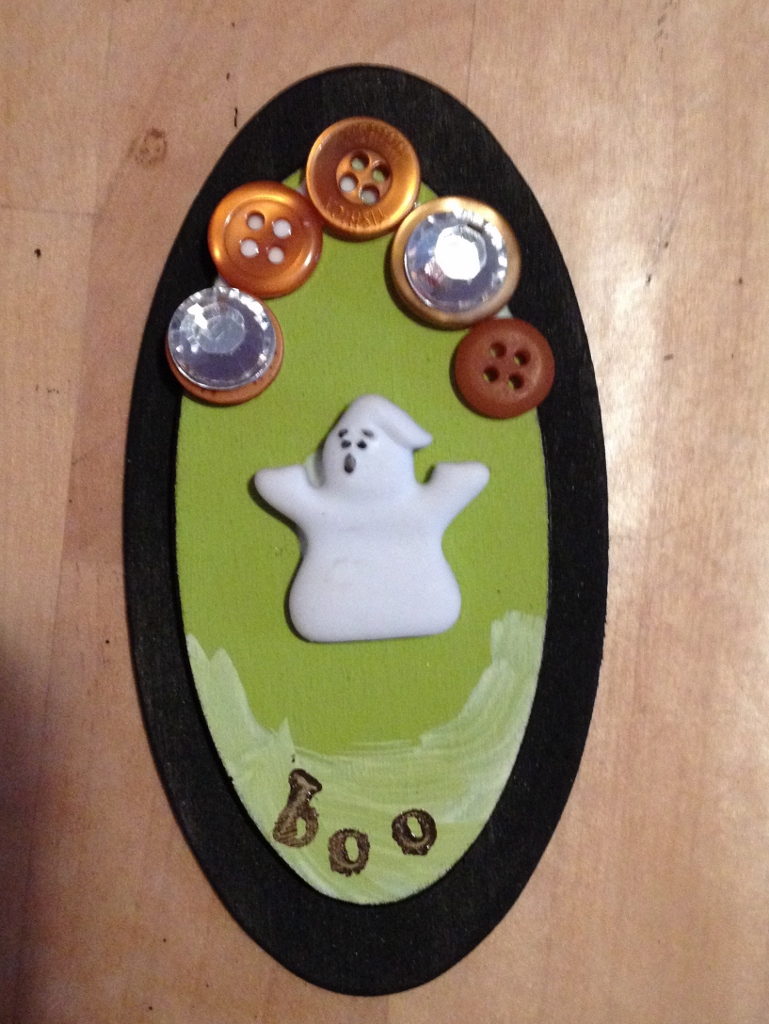 I also added some 9mm acrylic rhinestones to some of the buttons.
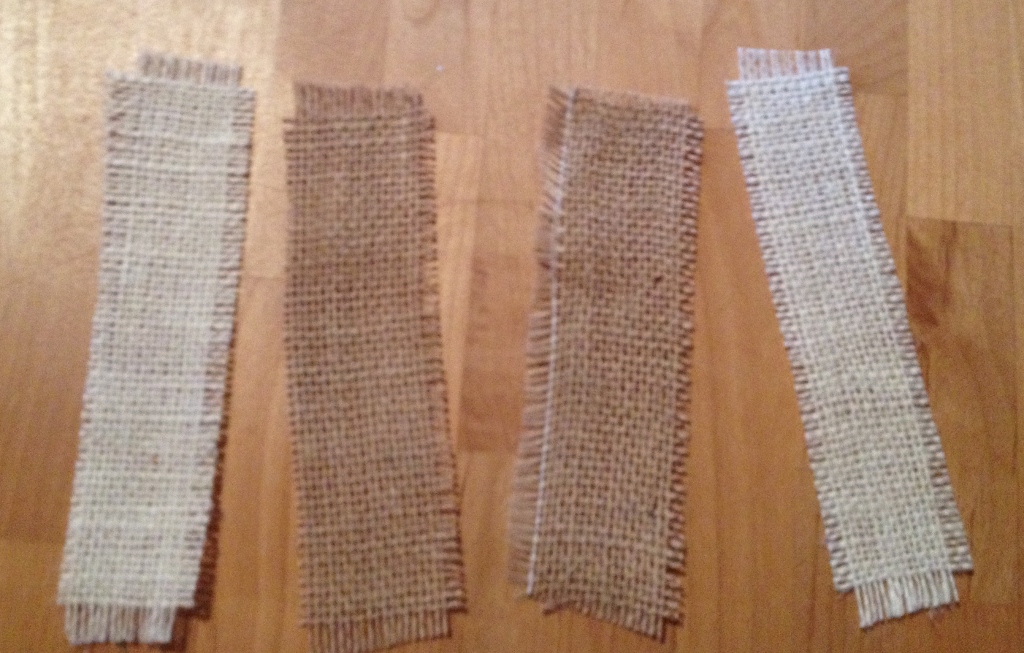 Cut some burlap into strips and use the sewing machine, thread and a zig zag stitch to sew the edges of the strips to prevent fraying.
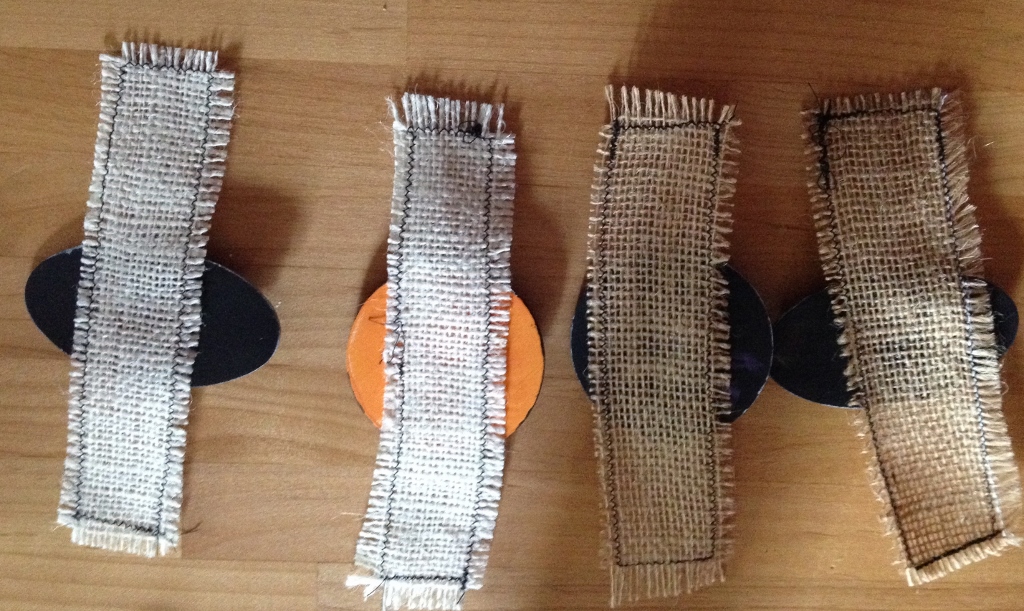
Glue the shapes to the center of each burlap strip and let dry.
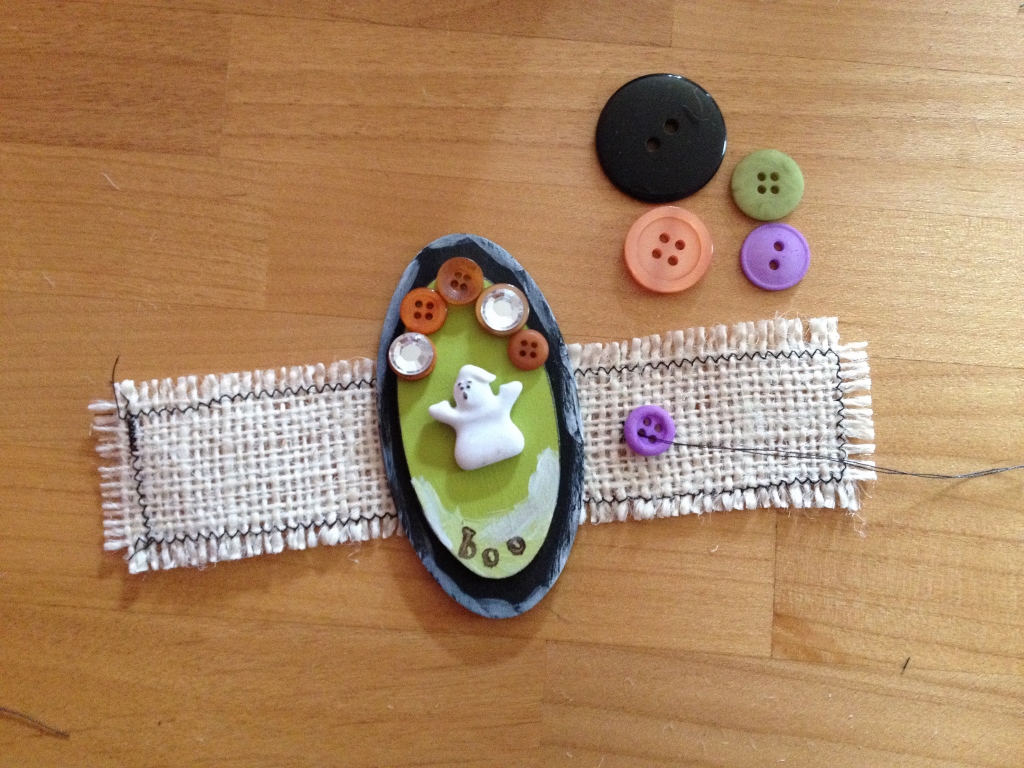 Sew buttons onto the burlap strips. I used orange, purple, green and black from the Laura Kelly Hand Dyed Buttons collection.
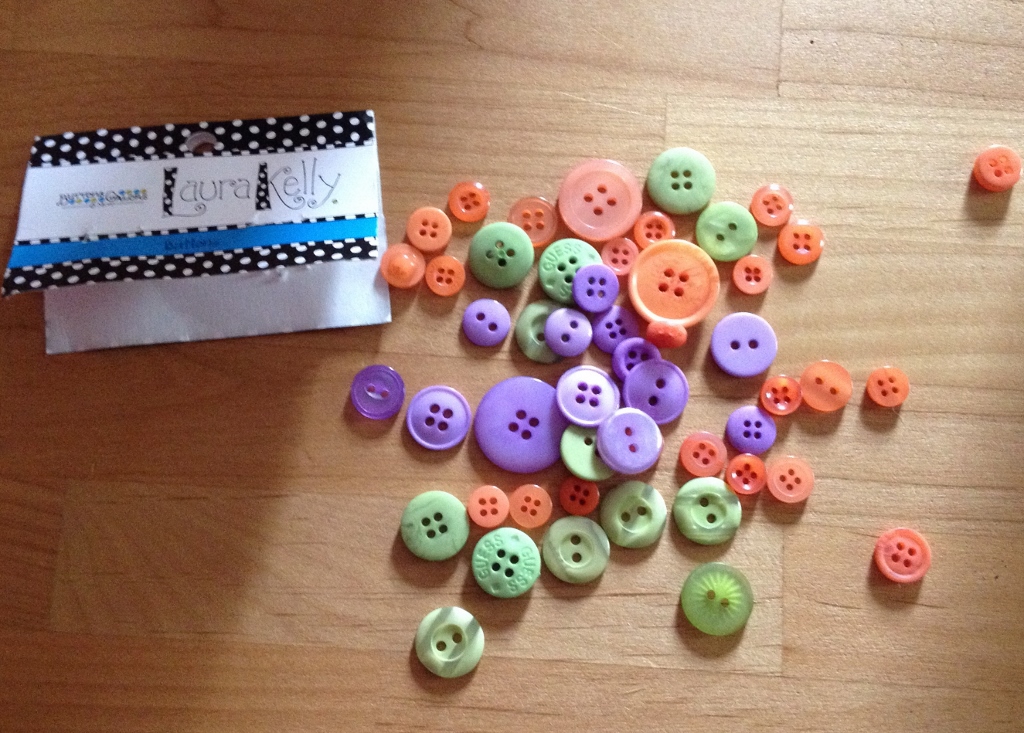
Once you sew on the buttons, use the center button to sew closed the burlap strip, creating a napkin ring.
 Create a set of these Halloween Napkin Rings to adorn a scary table setting using buttons!
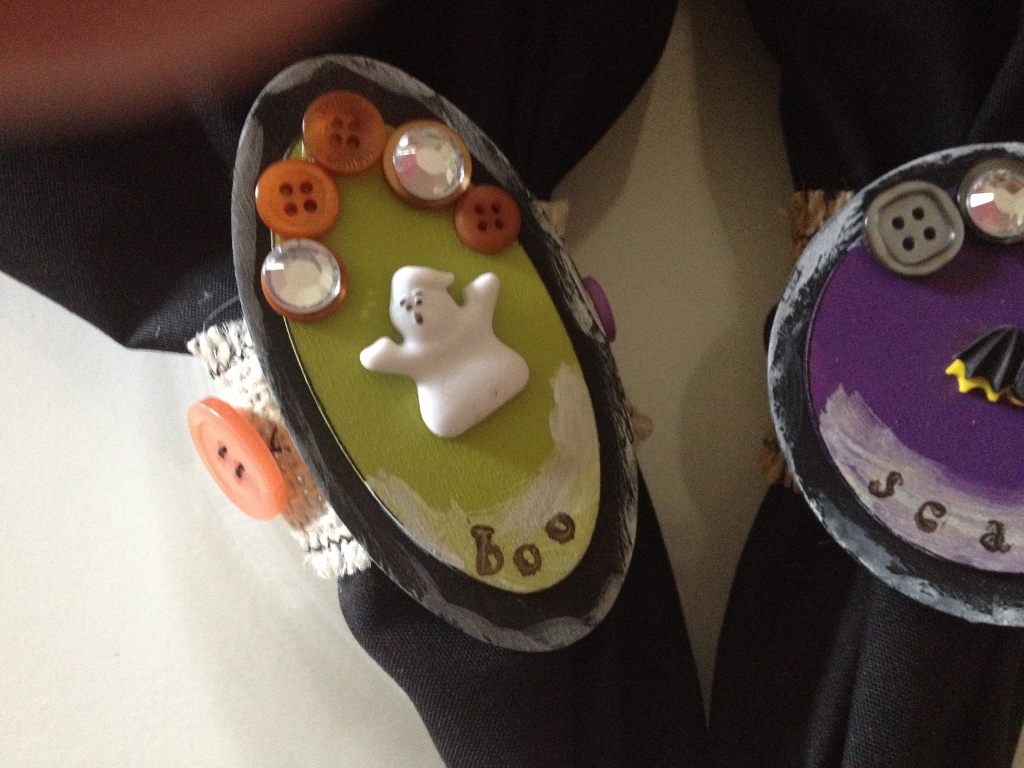 Live Life Creatively,
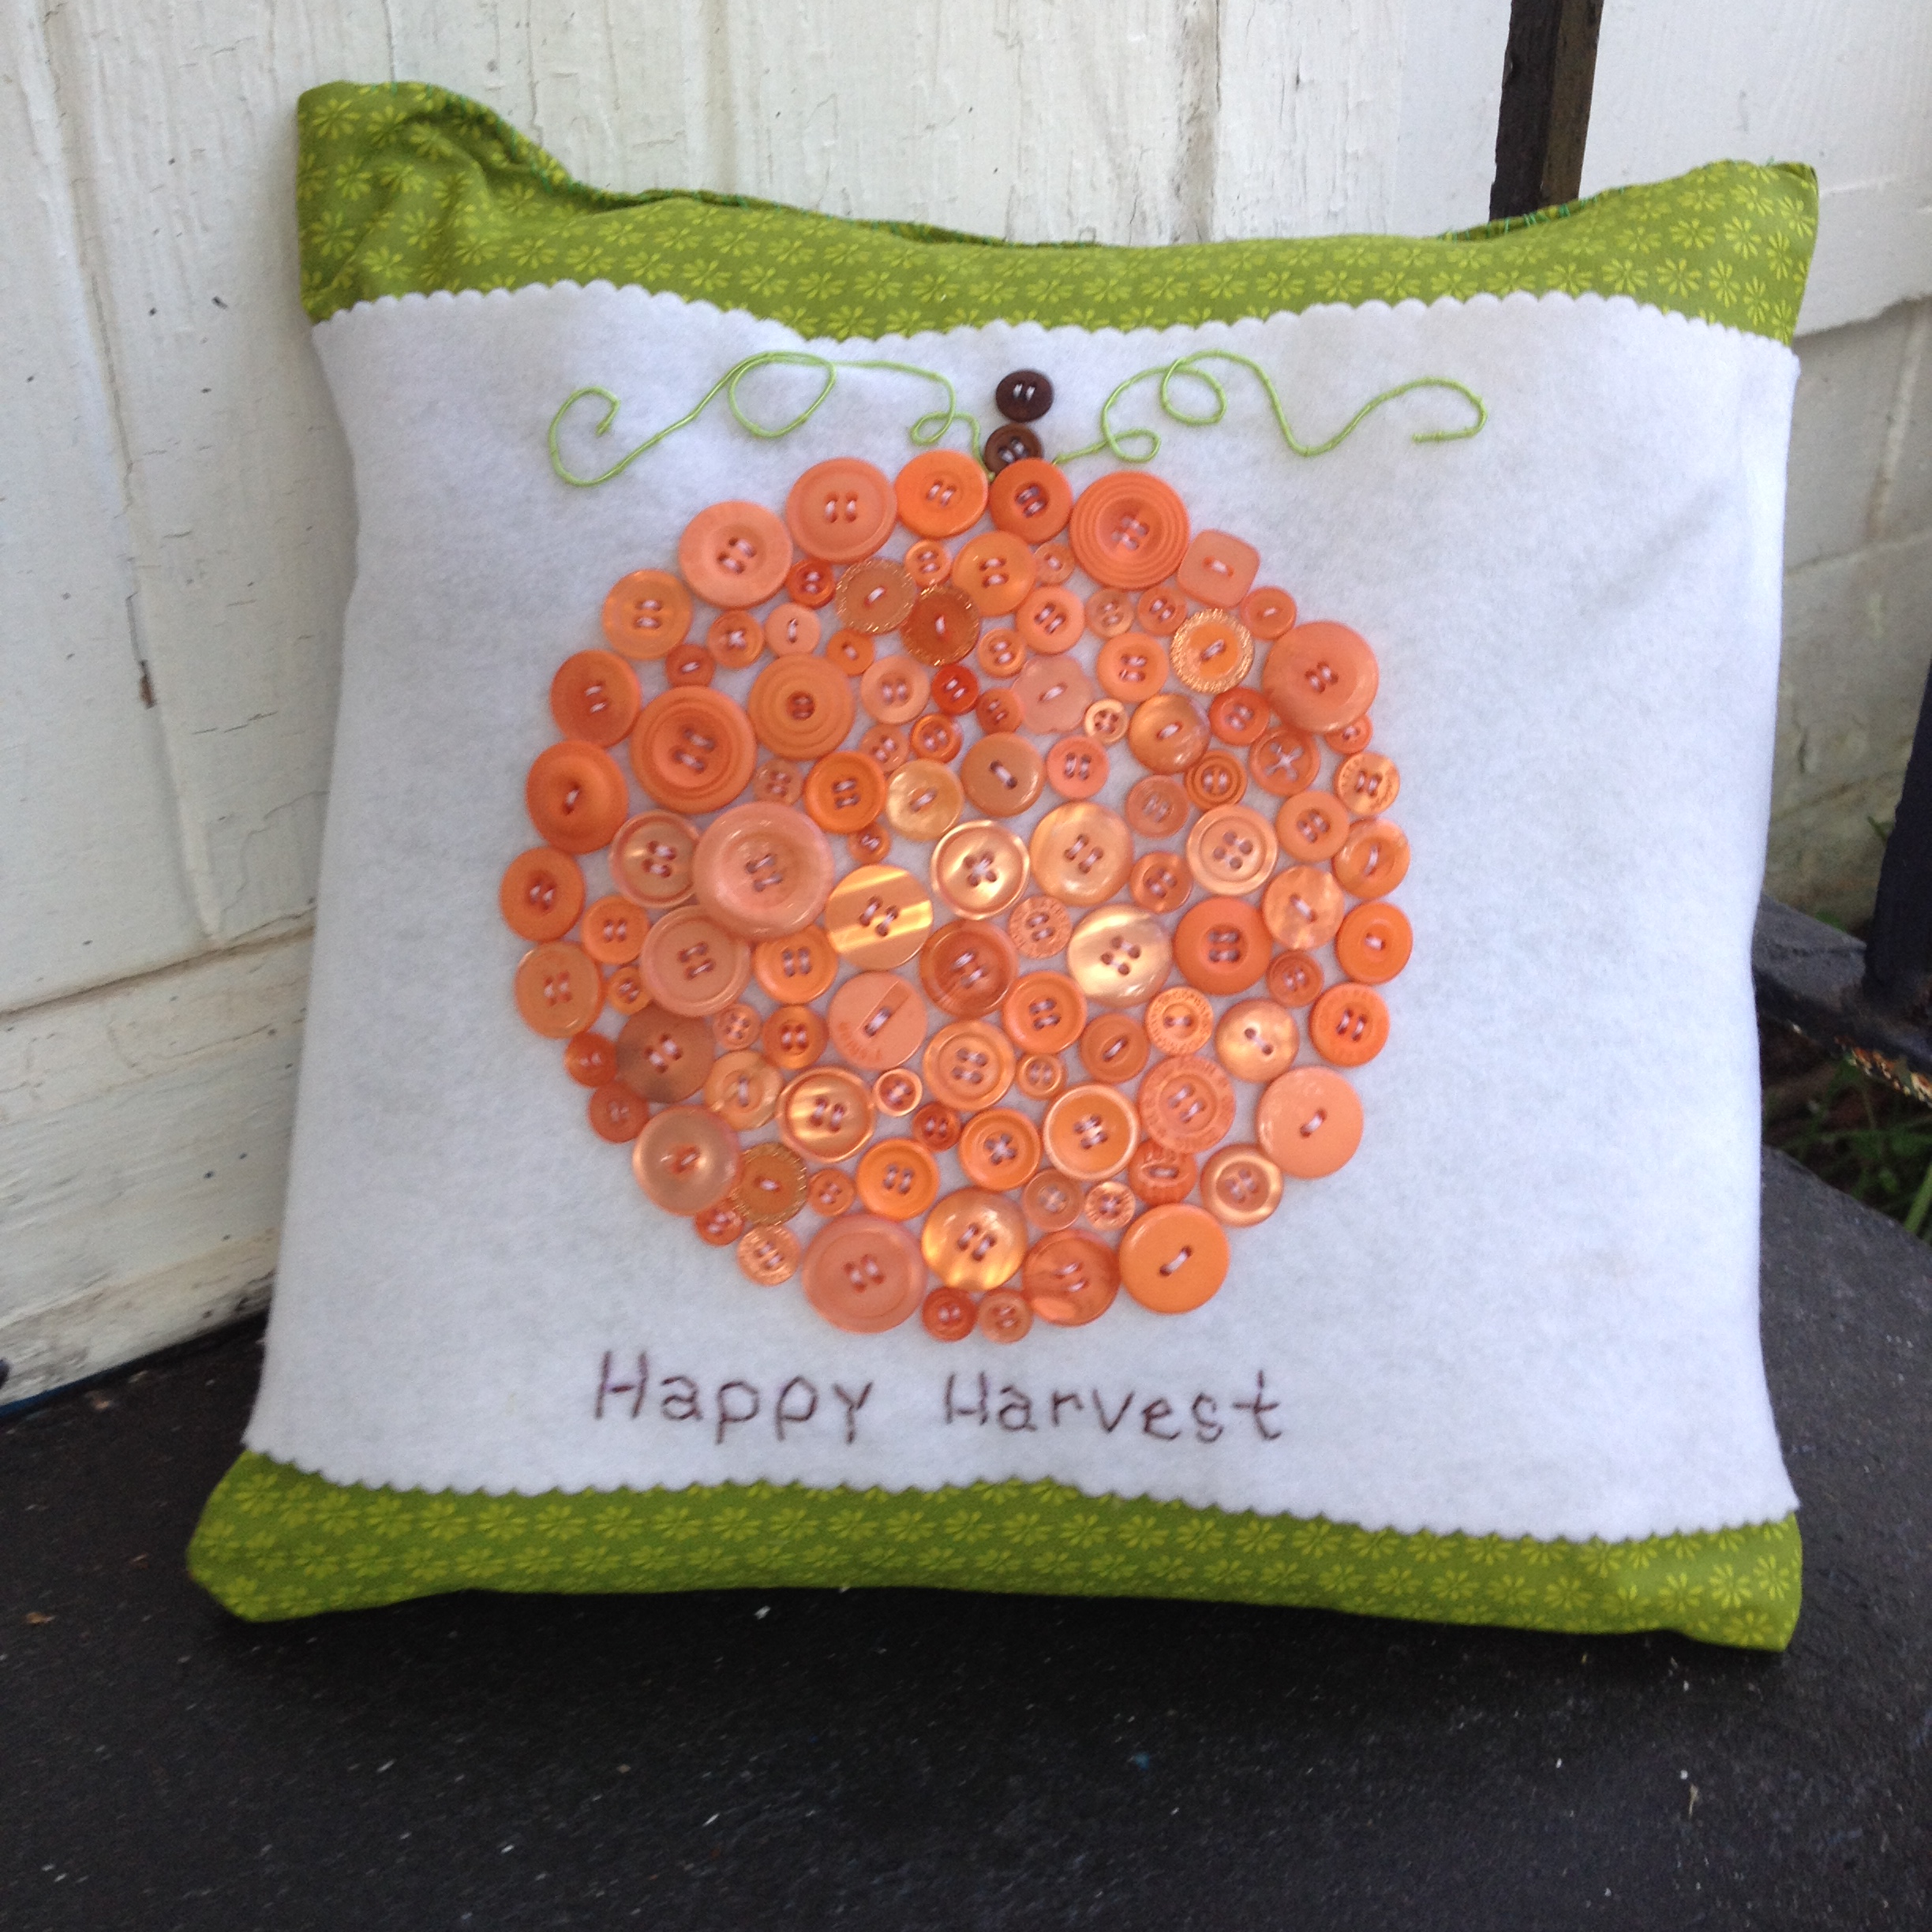 Its October! Time to think about refreshing your indoor decor with all things fall, spicy and harvest. One of the easiest ways to have found to give my decor a facelift is with pillows. Still easier pillow wraps! This easy to make pumpkin pillow wrap will have whet your appetite for making pillow wraps for every season. With an all seasons color like green, you can make pillow wraps for Spring, Summer, Fall and Winter. Here is my Autumnal version. Creating the pillow cover from scratch requires basic sewing experience but you can use a purchased pillow already covered and add your Pumpkin Pillow Wrap to it.
Square Pillow form in a size of your choice
Two green fabric squares that match your pillow form size plus 1/2″ seam allowance on all sides
Enough white felt to wrap around the pillow form snugly
Laura Kelly Hand dyed buttons from Buttons Galore and More in Outrageous Orange and Bold Brown
DMC Color Infusions Memory Thread in Light Green
Self adhesive Velcro Strips in White
Hand sewing needle and thread in white and light green
Brown embroidery thread (6-ply), embroidery needle
Scalloped edged scissors, rotary cutter and self-healing mat, scissors, sewing machine and thread, fabric marking pen
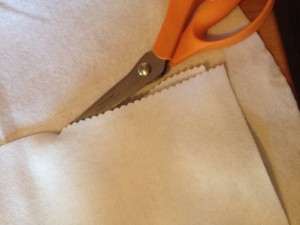 First, cut out the felt using the rotary cutter and mat. Trim the edges with the scalloped edged scissors. This will give your felt nice clean ornate edges that don’t have to be sewn.
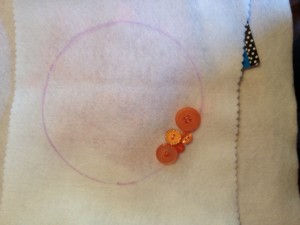 Use the fabric marker to trace a circle in the size of your choice. Remember that you will be sewing the hand dyed buttons to fill the entire circle so plan accordingly. Thread your needle and start the sewing the buttons on to create the pumpkin by pulling the thread from the back to the front. Just like you would sew on a button.
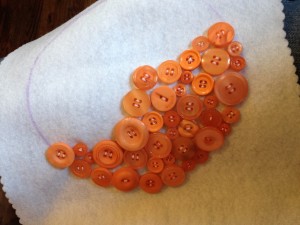 Continue to fill in the traced circle, using the traced lines at a guide to make your pumpkin. Use the smaller buttons in the package to fill in the smaller gaps.
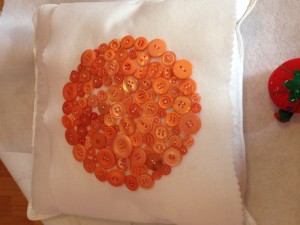 Finally, a complete circle of hand dyed buttons on your pillow wrap that we will now add details to resemble a pumpkin!
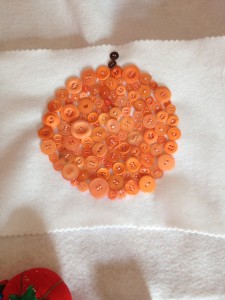 Use some brown buttons (2 or 3) depending on the size of your pumpkin to create a stem.
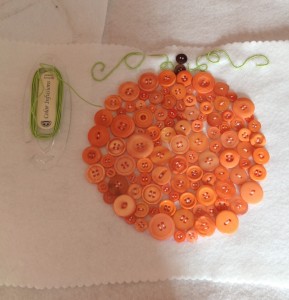 To create vines, I used Color Infusions Memory Thread by DMC in a light green. This can either can glued down or couched down with coordinating thread and a hand sewing needle. I find the couching down method to yield a neater and less messy result.
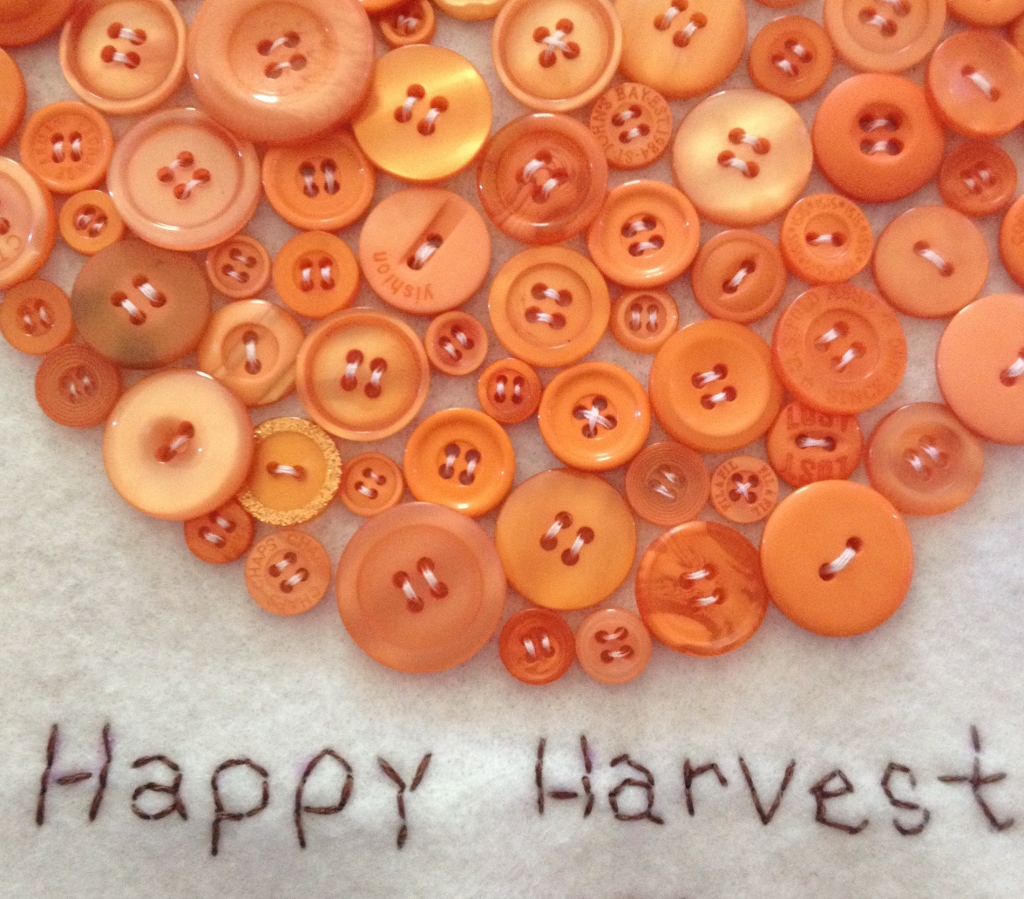
Thread your embroidery needle with three strands of the 6-ply brown embroidery thread. Use the fabric marker to write a sentiment onto the Pumpkin Pillow Wrap just under the pumpkin and back-stitch the sentiment.
 Iron your squares of fabric for the pillow cover front and back. Place the right sides together and machine stitch the left, top and right sides together using a 1″ seam allowance. Leave the bottom of the pillow open for turning and stuffing with the pillow form. Steam the seams open with the iron set on a steam setting and turn right sides out. Iron again and insert the pillow form into the bottom.
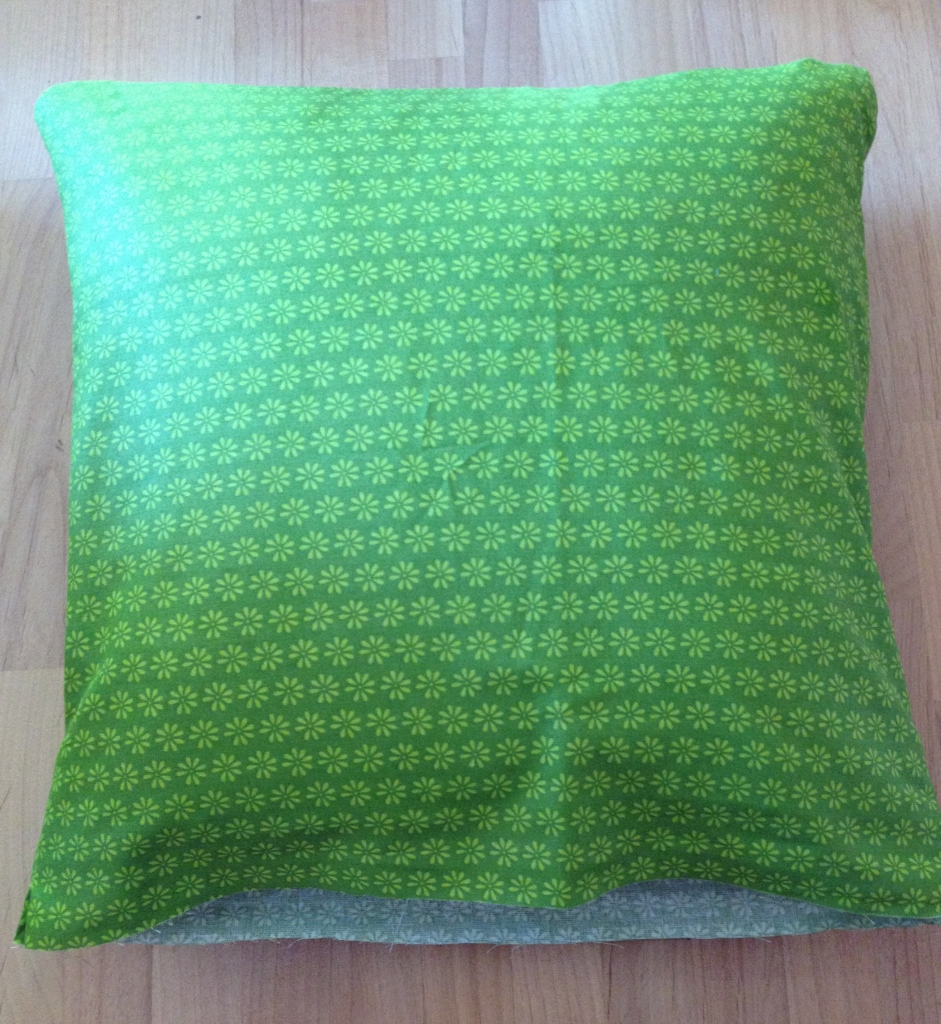 Sew the bottom of the pillow closed using a whip stitch, the hand sewing needle and thread.
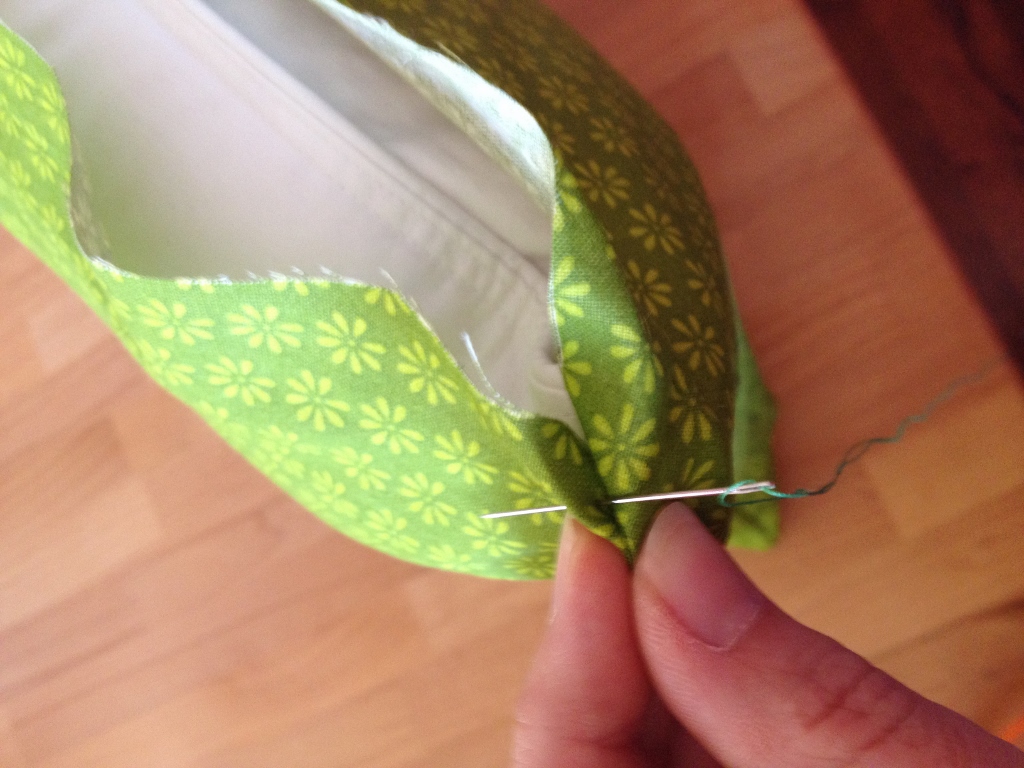
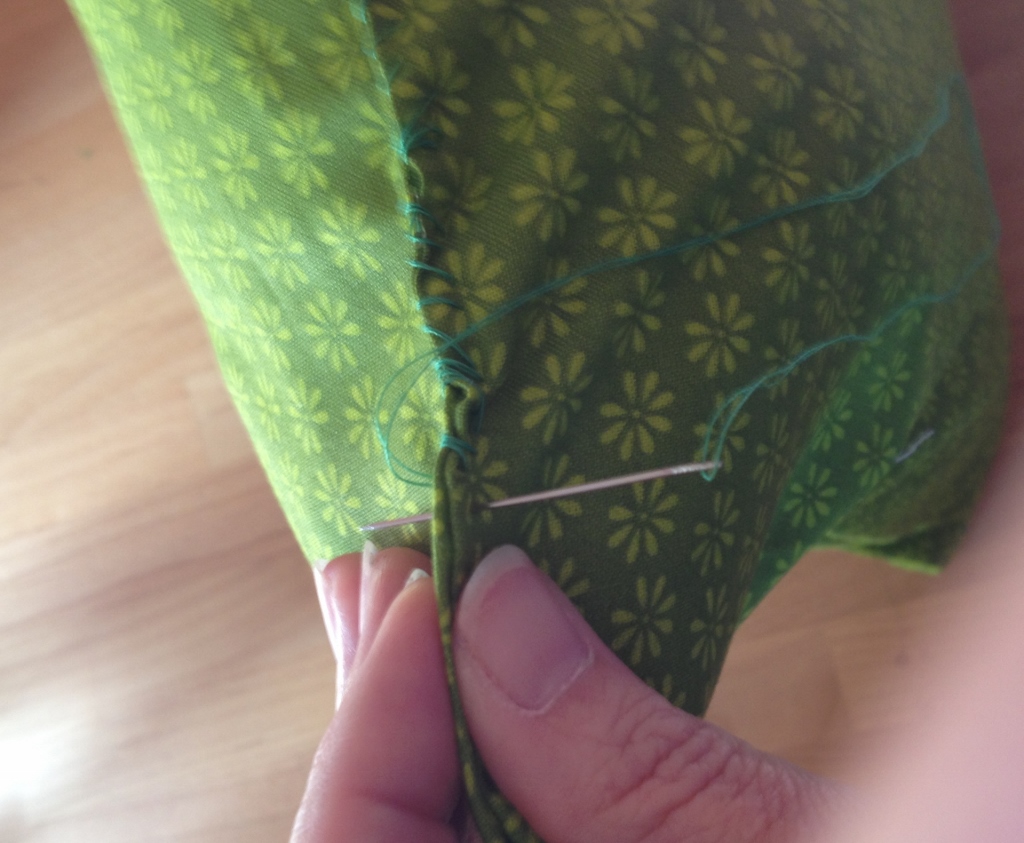 Add a strip of Velcro to the back of your Pumpkin Pillow Wrap as a quick and easy enclosure. I opted for the self adhesive version the sew on version will work as well.
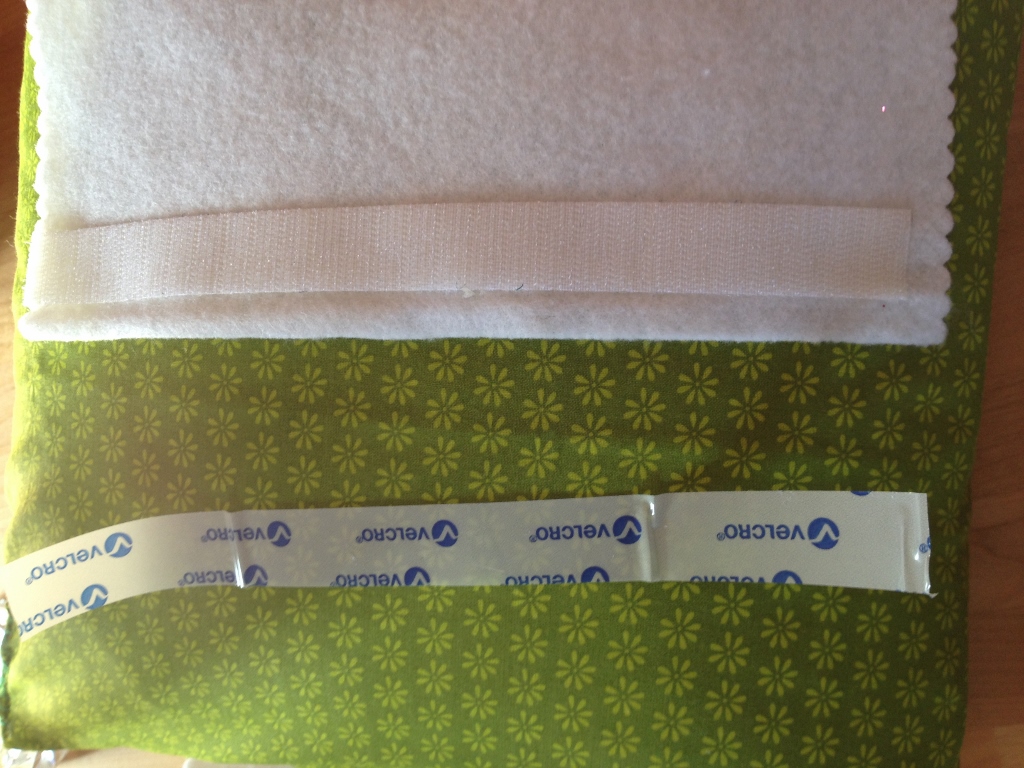 Now you have a Pumpkin Pillow Wrap that will not only be adorable for the Fall season, but it can be switched out seasonally very easily. Thanks for letting me share. Happy sewing!
Live Life Creatively,
How about a Button Pumpkin for your door? This will be fun to do with the kids.
I used Hot Glue, but the kids could easily use a Craft Glue or Glue Dots.

If you do use hot glue and you have a lot of strands of glue and messy areas, just hit them with a hair dryer or heat embossing tool – they’ll melt away – easy peasy. If you do not have an electronic cutter, print one offline onto cardstock or trace, or be brave and draw one by hand.
Enjoy. Happy Fall Y’all!
Allie here today making some Walnut Hollow Wall Art. This is really not hard, so colorful, and a lot of fun.
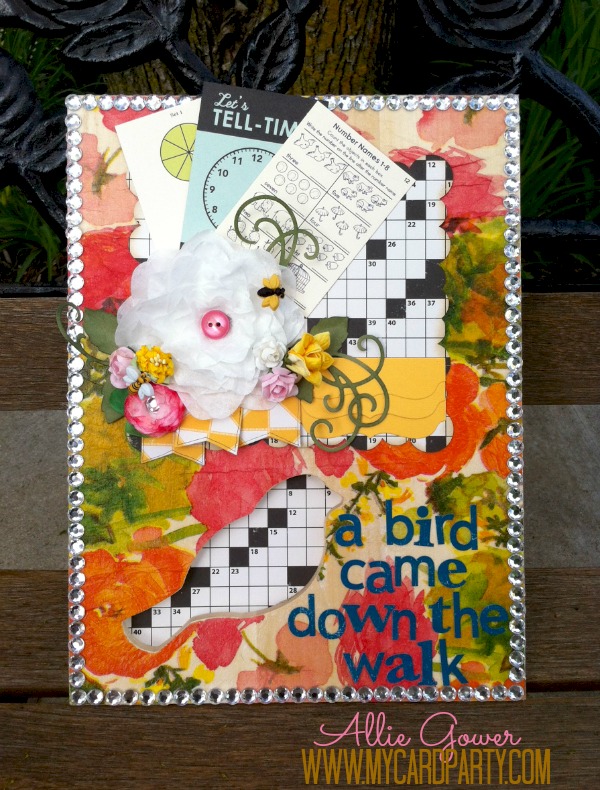
Note – I lined the back of board with matching paper so that the crossword pattern would show through where the bird cutout is.
Thanks for joining me today.
See more of my creations at My Card Party.
 The Autumnal Equinox officially starts September 22nd, 2013. It’s time to start thinking of all of the decorative projects you will be making to usher in this transitional season. How about making some Rustic Pallet Wall Art?
Walnut Hollow’s 14″ x 12″ Rustic Pallet
DecoArt Americana Acrylics in Espresso and Buttermilk
Fabric Scraps, wool felt scraps
Buttons Galore and More Laura Kelly Hand Dyed Buttons
Rub on sentiment
Wax candle, sanding block, sewing machine and thread, hand sewing needle and thread, tacky glue
Taking notice of the recycled wood pallet craze, Walnut Hollow recently introduced their new line of rustic pallets. I have to honestly say that I am super excited about all the cool possibilities for this line. Walnut Hollow came up all kinds of fun ideas for this line. These products can be ordered directly from Walnut Hollow’s website. By the end of December, you will be able to purchase them in Joann’s Fabrics and Crafts and in AC Moore in January.
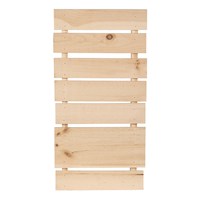
24″ x 12″ Pallet
Rustic Arrow Pallet
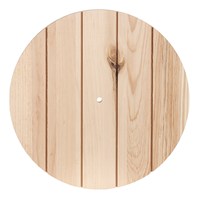
Paneled Wood Clock
These are just a few examples of the yummy surfaces offered in this product line. For this Rustic Pallet Wall Art project, I used the 14″ x 11″ rustic pallet.
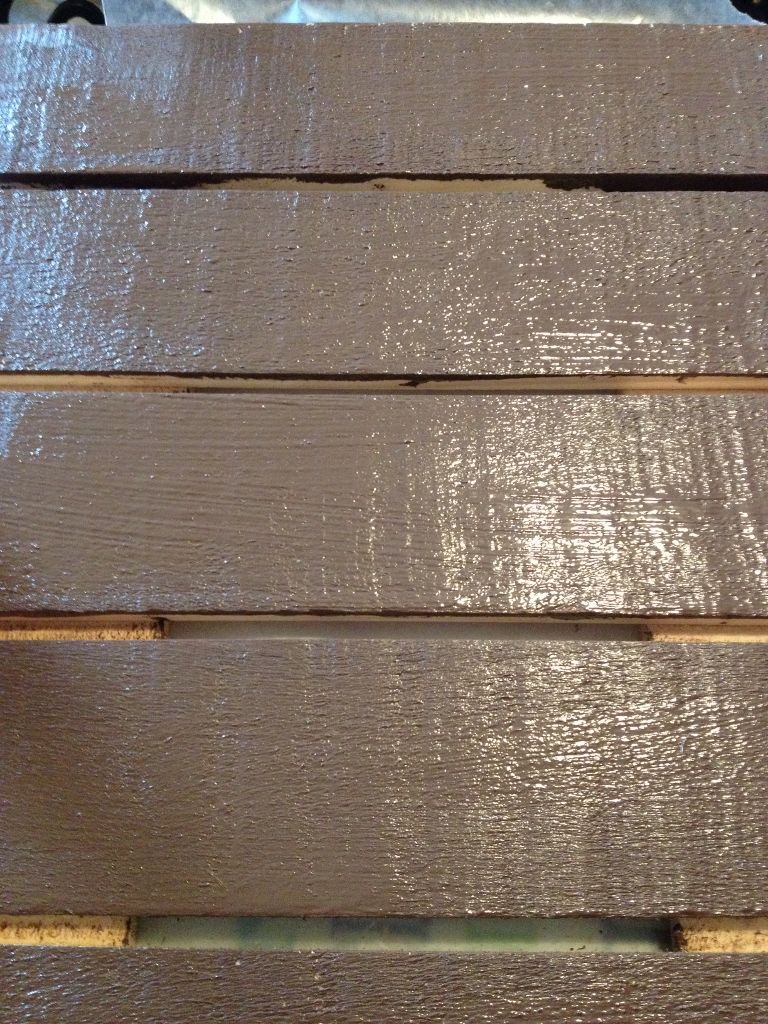
First I used DecoArt’s Americana Acrylics in Espresso to paint the front this brown shade. I waxed the surface once the pallet was dry in random areas and painted the surface Buttermilk.

Once I painted the entire surface of the pallet, I sanded the surface to reveal the distressed finish. Areas where the wax was applied will rub away easily resulting in a chippy looking finish. This technique also works well with Vaseline but the effect is a little more dramatic.

One of my favorite things to do with my leftover fabric and felt scraps is to create different sized circles and fuse the fabric circles to the wool felt circles. I use my sewing machine to play with the various stitches by sewing around the edge of the fabric to hold it in place on the felt. A button, sewn in the center makes the look complete. These are some of my favorite. I love the Laura Kelly Hand Dyed Buttons from Buttons Galore and More!

Use tacky glue to adhere the circles to the rustic pallet. Arrange an outer circle first, leaving a gap at the bottom so you can paint on a simple tree truck with the espresso brown paint.
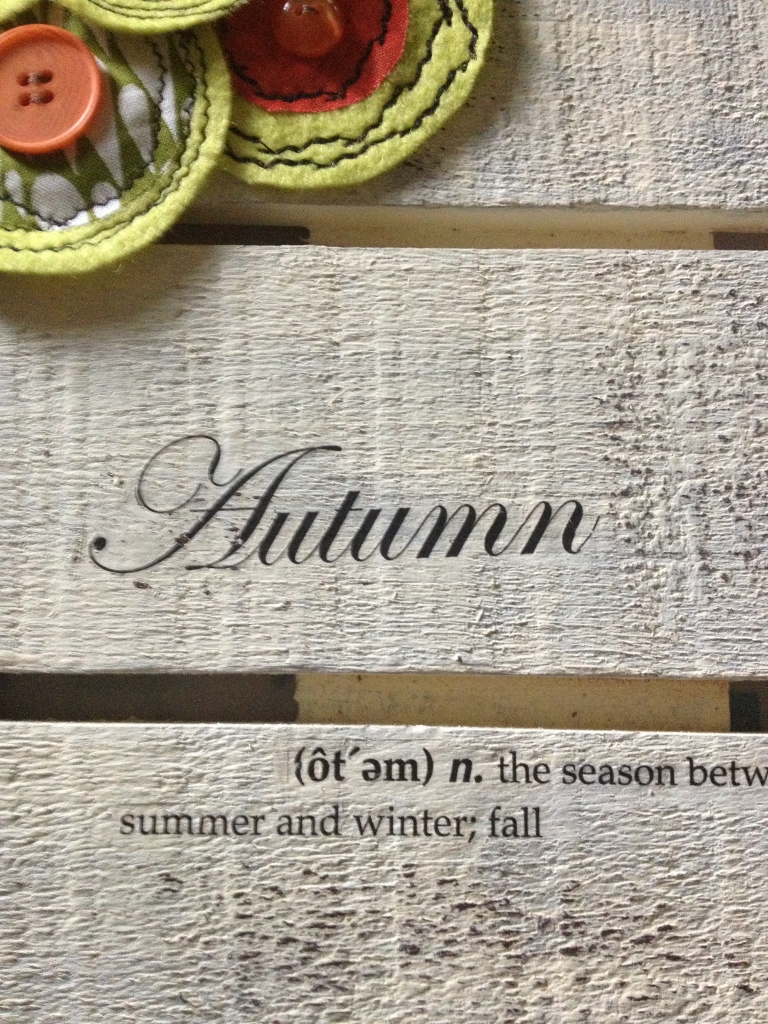
I finished the rustic pallet wall art with a couple of rub on sentiments to celebrate Autumn. This is wall art that you can display from the end of September into Thanksgiving before the holiday decorations go up! If you are not a huge fan of inside seasonal décor, use colors to coordinate with your home décor and a general sentiment instead. Then you can display it all year long!
Happy Autumn (soon),
Live Life Creatively,
Melony
A DIY button clock is fun and can make a pretty addition to any room in your home. I am going to show you a super simple way to make this cute clock yourself. Trust me you can make this clock at home in the colors of your choice easily.

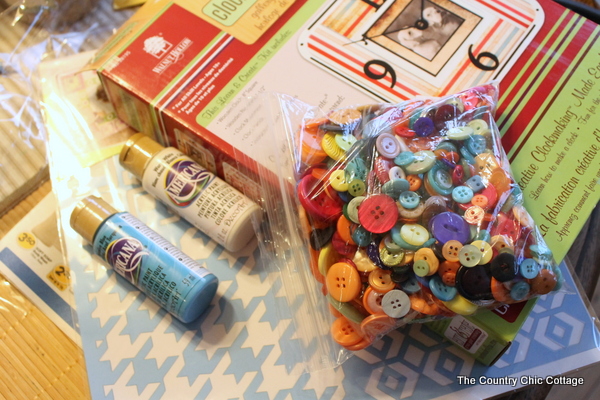
1. Paint your wood clock base from inside the kit. I did a base coat of white on the entire surface and allowed to dry. Then follow with your stencil and blue (or color of your choice). Paint your numbers that come with the kit in this step as well. Allow all of your components to dry completely before continuing.
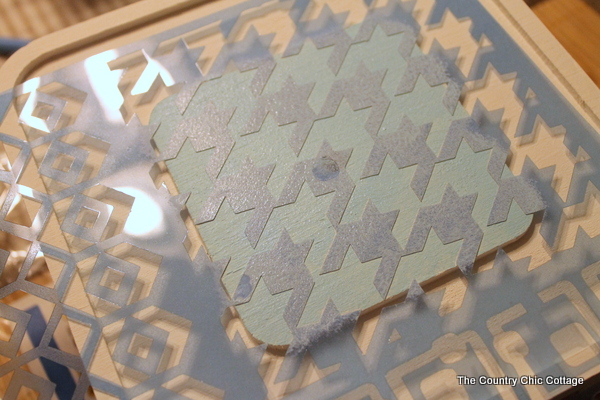
2. The rim of this particular clock kit is just perfect for laying in buttons. Layout your buttons and numbers until you are happy with the results. Pick up each button and hot glue to the surface. Once complete, use tacky glue to put your numbers into place. Allow the glue to dry completely.

3. Add in your clock movements from the kit and your clock is ready to hang. Please note that you may have to adjust the hands so they don’t hit your numbers (since they stick up).
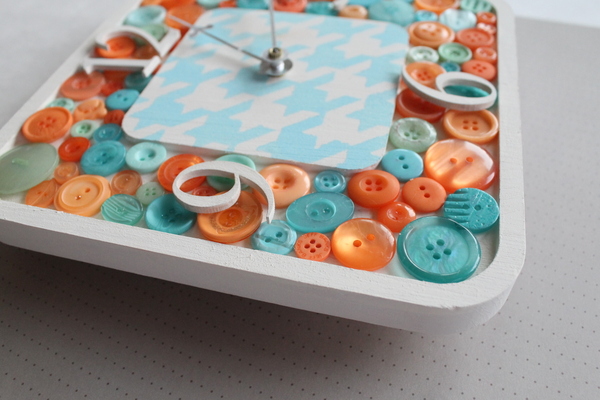
A simple DIY button clock that anyone can make. The kit from Walnut Hollow makes this one a breeze to complete. Grab your buttons and get started today!

Create colorful back to school projects with Rit Dye and Buttons Galore and More. We are co-hosting a blog hop with Rit Dye featuring back to school items for students of all ages. Below you will find directions to this project, links to the other projects and a Rafflecopter entry form to win a GREAT prize package valued at over $100.
Create a wooden gift box for the teacher and add a gift card to their favorite school supply store. The box can be reused on the teacher’s desk to hold miscellaneous items.
It is easier than you would thing to dye wood. Rit has a page dedicated to tips on dying wood and wicker.

If you would like to order any buttons from the site click this link to the Buttons Galore and More store and enter the discount code of RIT20 for 20% off your order. Use all caps or the code will not work.
If you want to view the designers blogs you can also click the links below.
There’s nothing I love more than a summer afternoon spent sipping a cool drink. To make the experience even better, I made some colorful coasters to protect my table. Get out the lemonade and red and white straws.

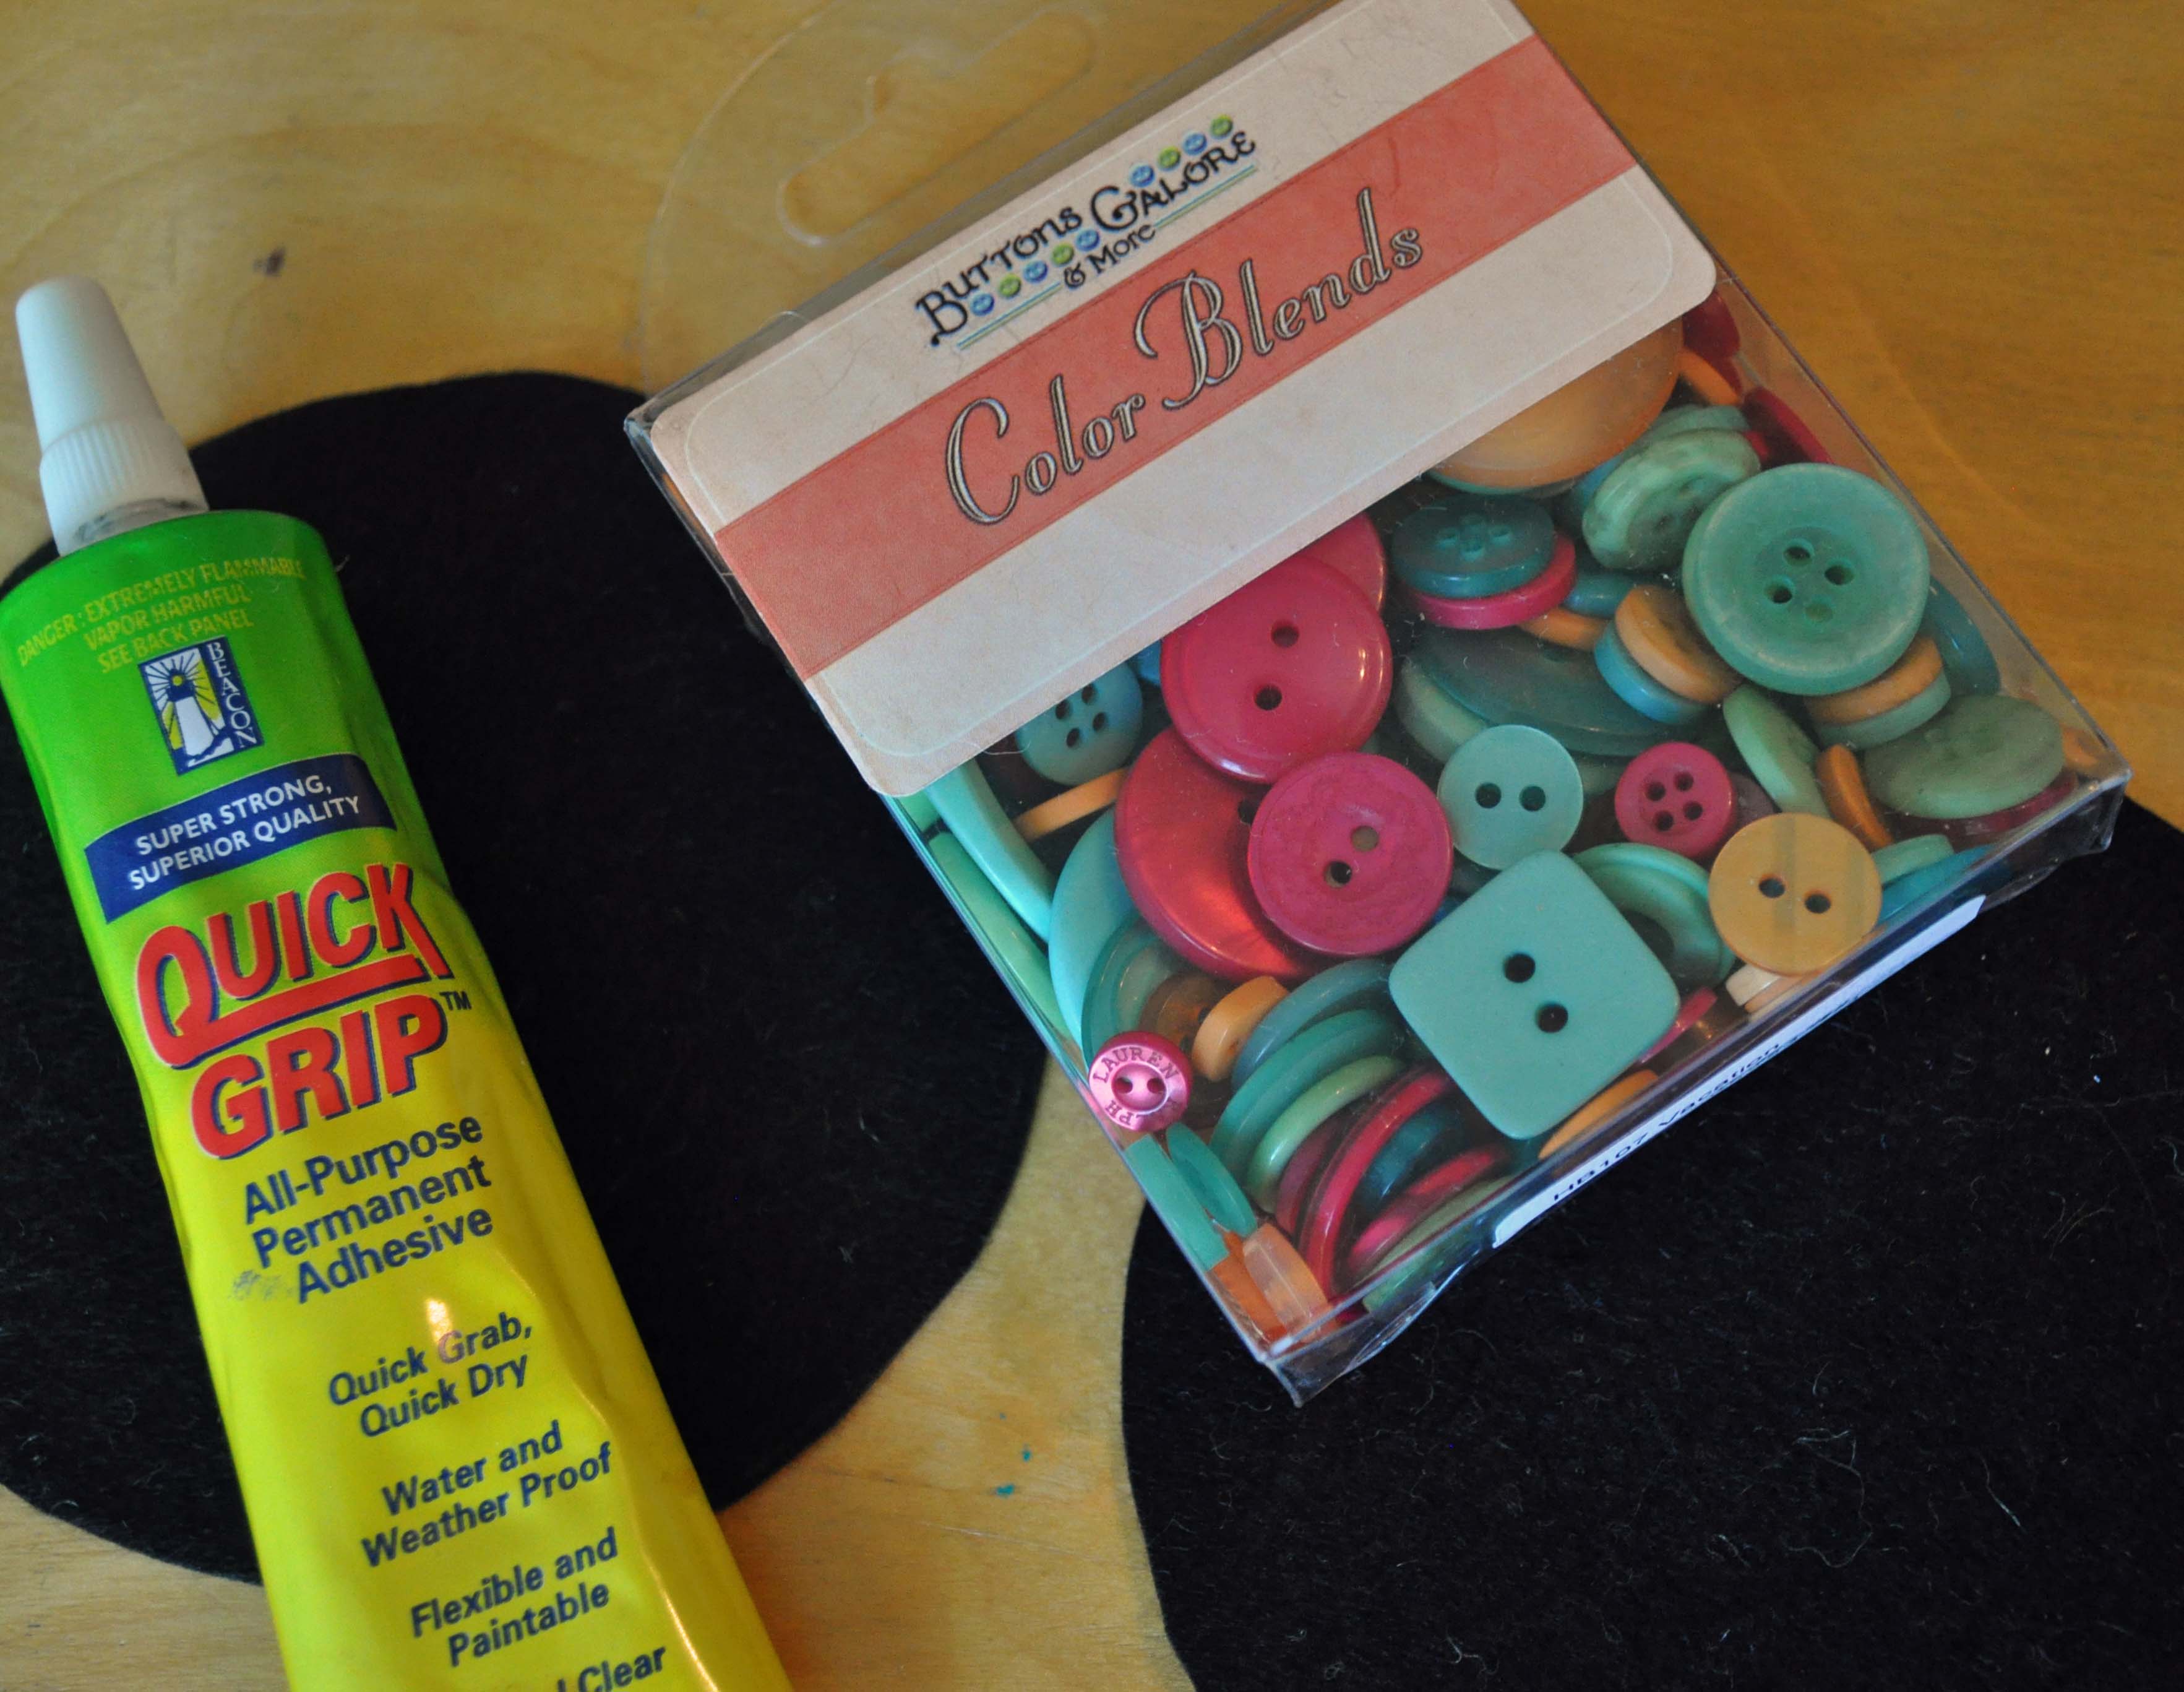
1. Cut circles from felt using the Shape Template. I used the 4″ diameter size circle.

2. Glue buttons onto the felt circle in a random pattern.
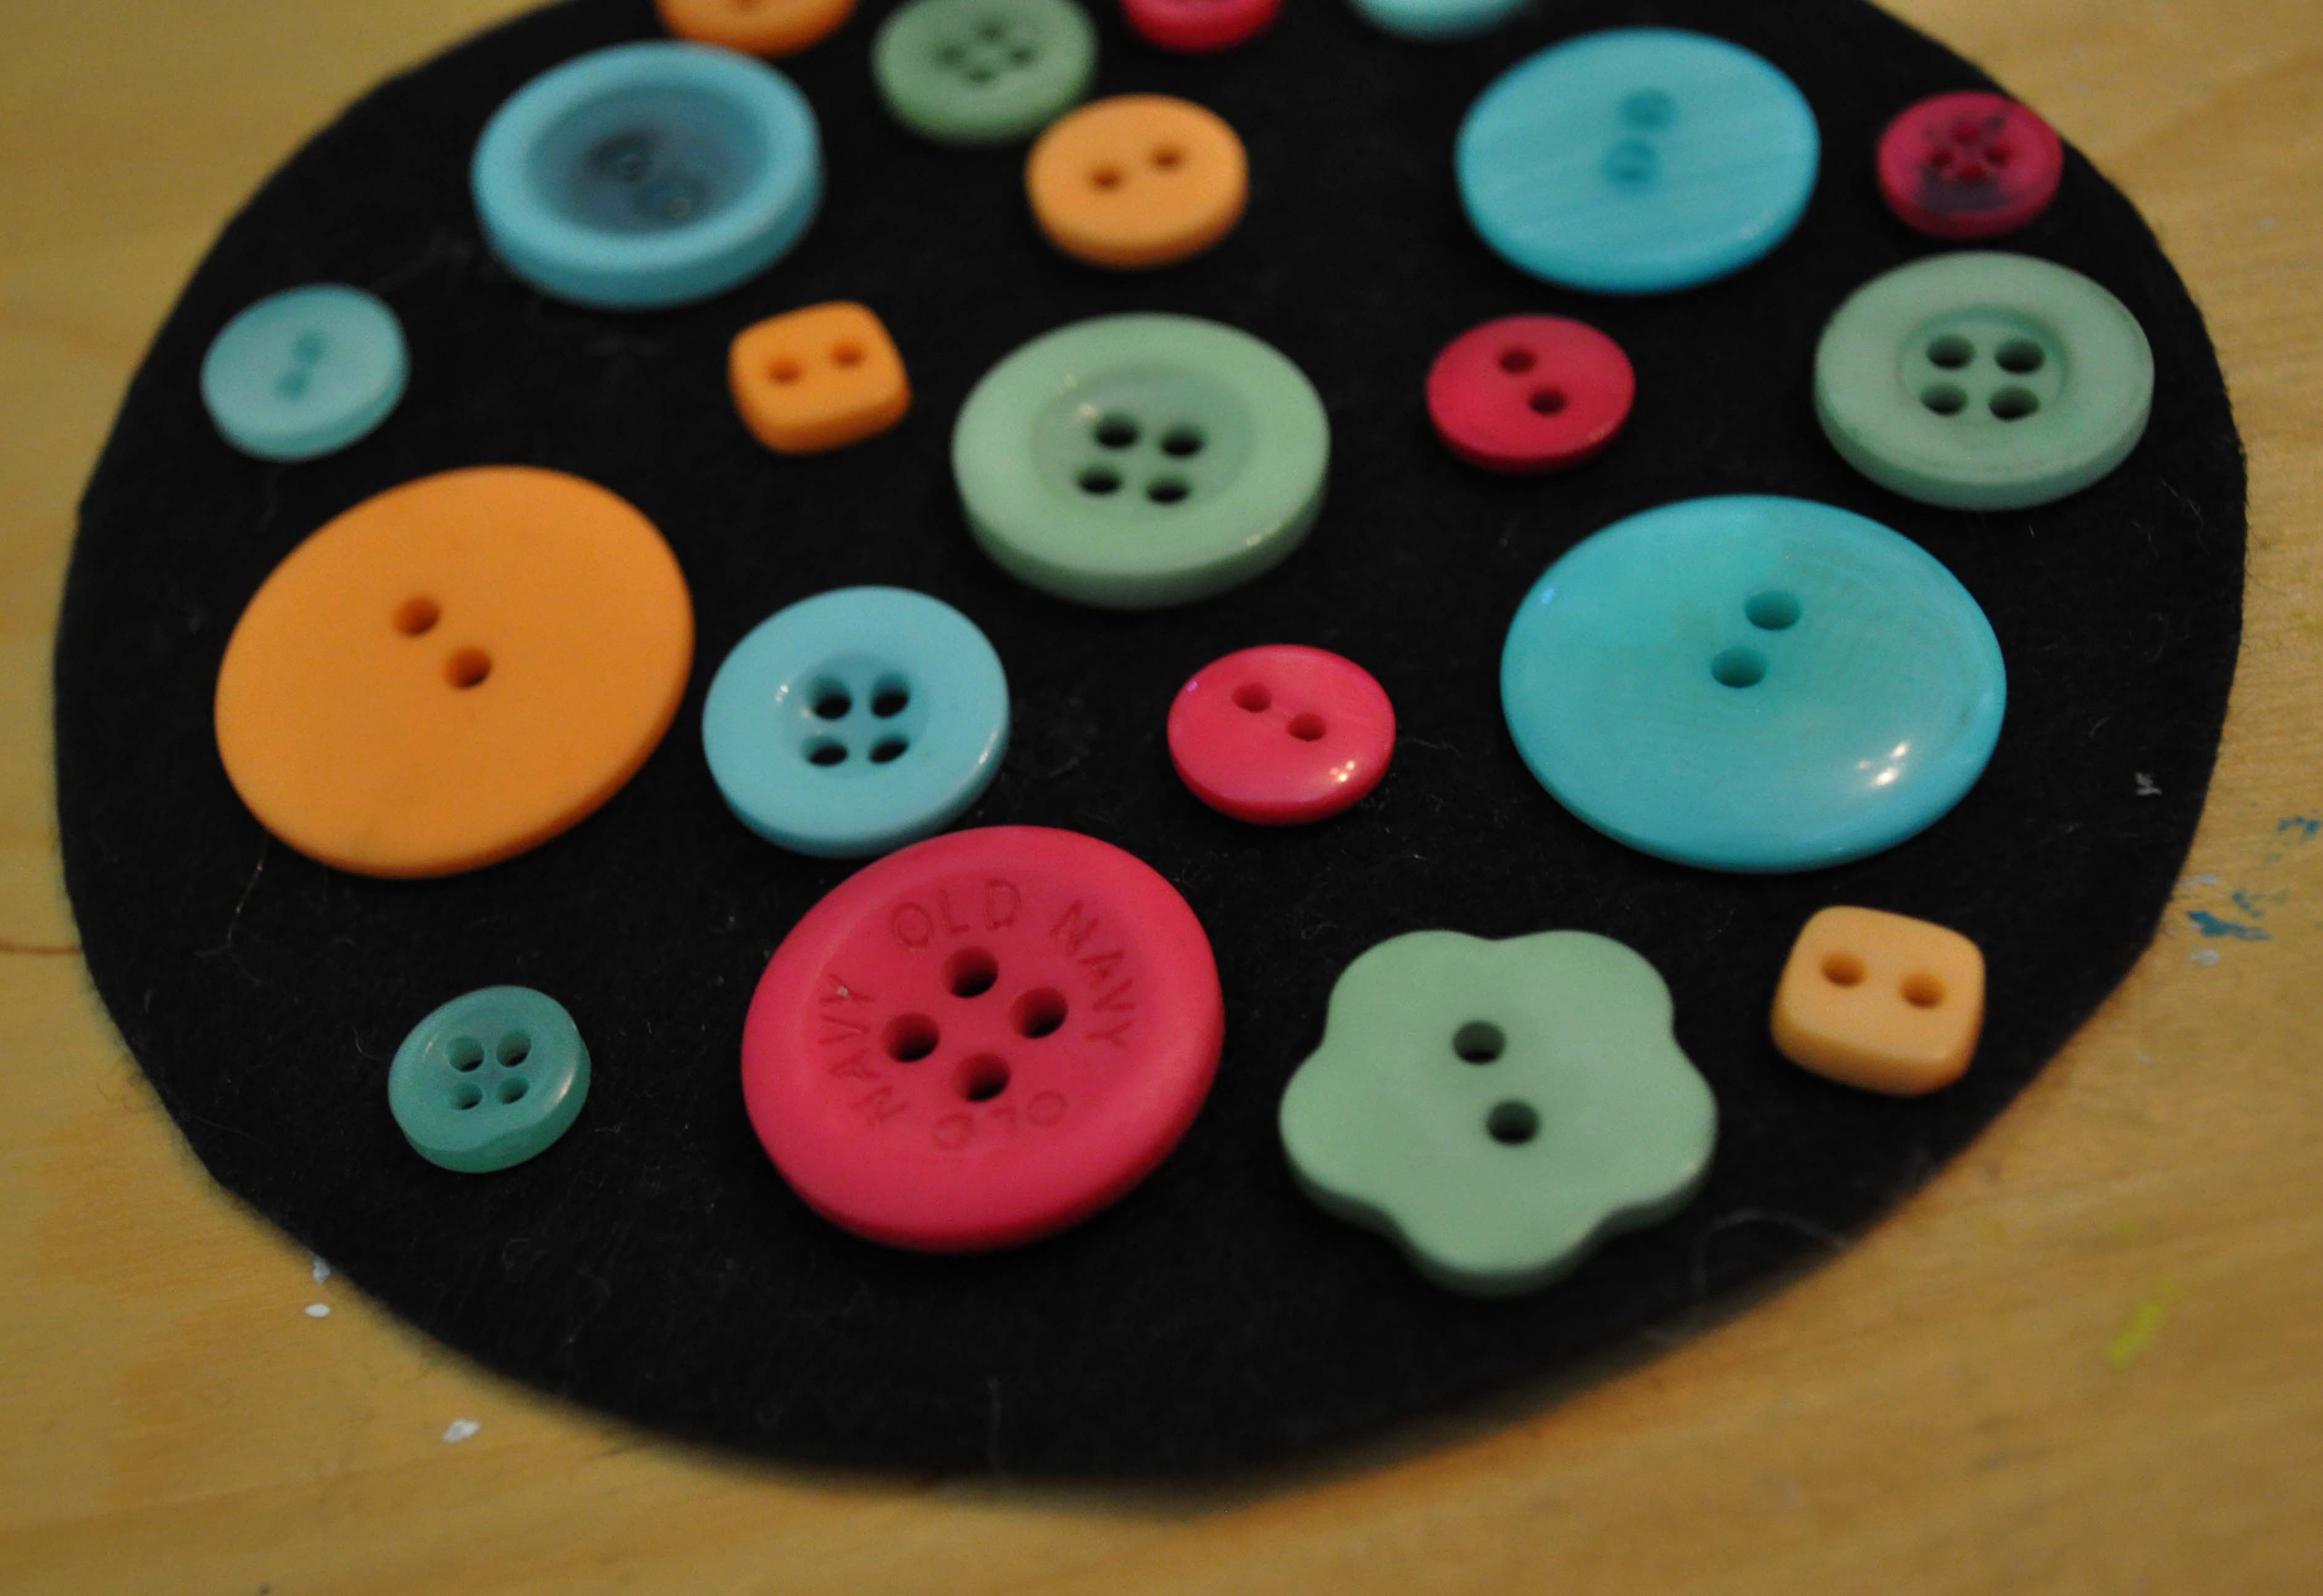
Tip: Make sure the buttons are approximately the same thickness as this will keep your coaster surface stable for your drink glasses.
Remember! These coasters should only be used for cold drinks. Hot drinks might melt the buttons.
Thanks for crafting with me today. To get more button craft tutorials, recipes, and lifestyle tips, visit my blog at www.laurabraydesigns.com.
![]()
Make this great beach theme button decor with a starfish for your nautical themed room. A great addition for summer or any time of the year. This button decor is easy to make and will look great in your home.
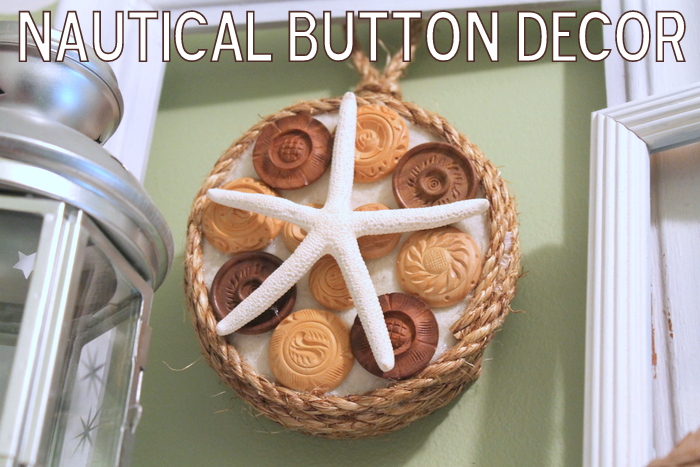
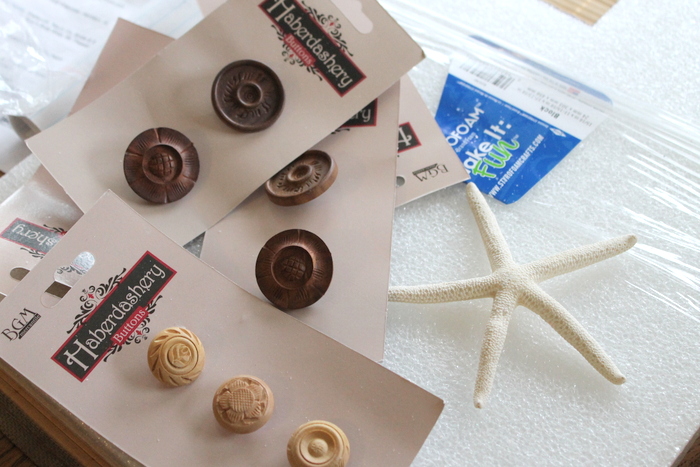
1. Lay your buttons out on your Styrofoam then mark the perimeter.
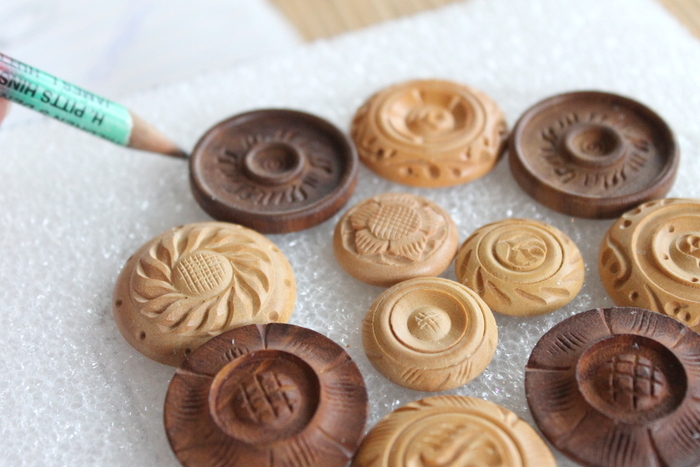
2. But around the perimeter with a Styro Cutter, serrated knife, or other cutting tool.
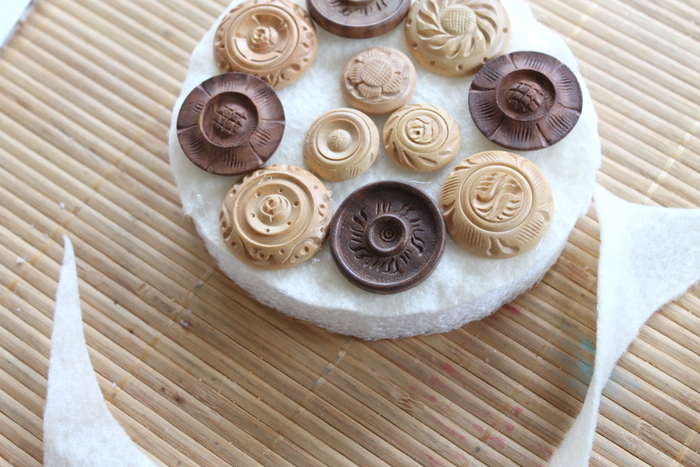
3. Cover the front with a scrap piece of white fabric. Then use hot glue to add buttons, rope, and starfish.
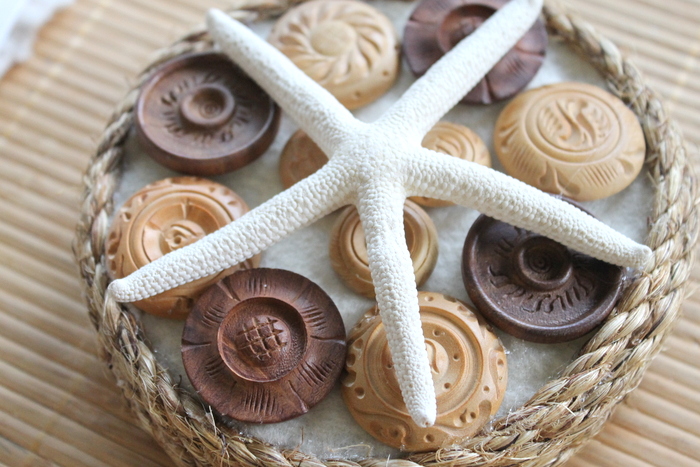
4. Add a rope to hang your project that is also secured with hot glue.

5. I added my beach theme button decor to the center of an empty white picture frame to really make it shine.
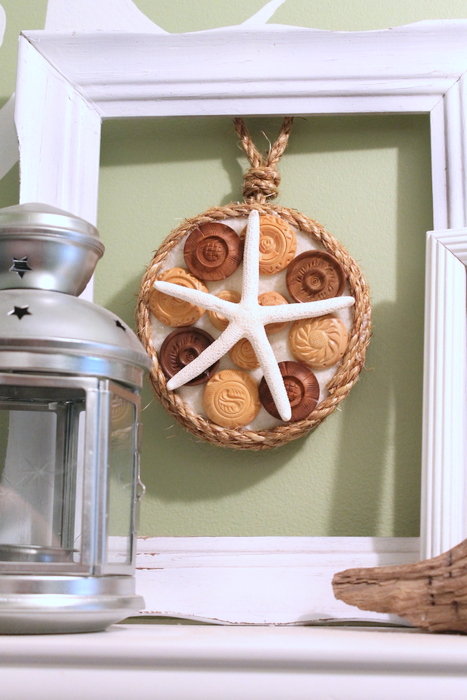
Enjoy this beach theme art in your bathroom or any other part of your summer home. This nautical inspired art will bring the beach indoors this summer.
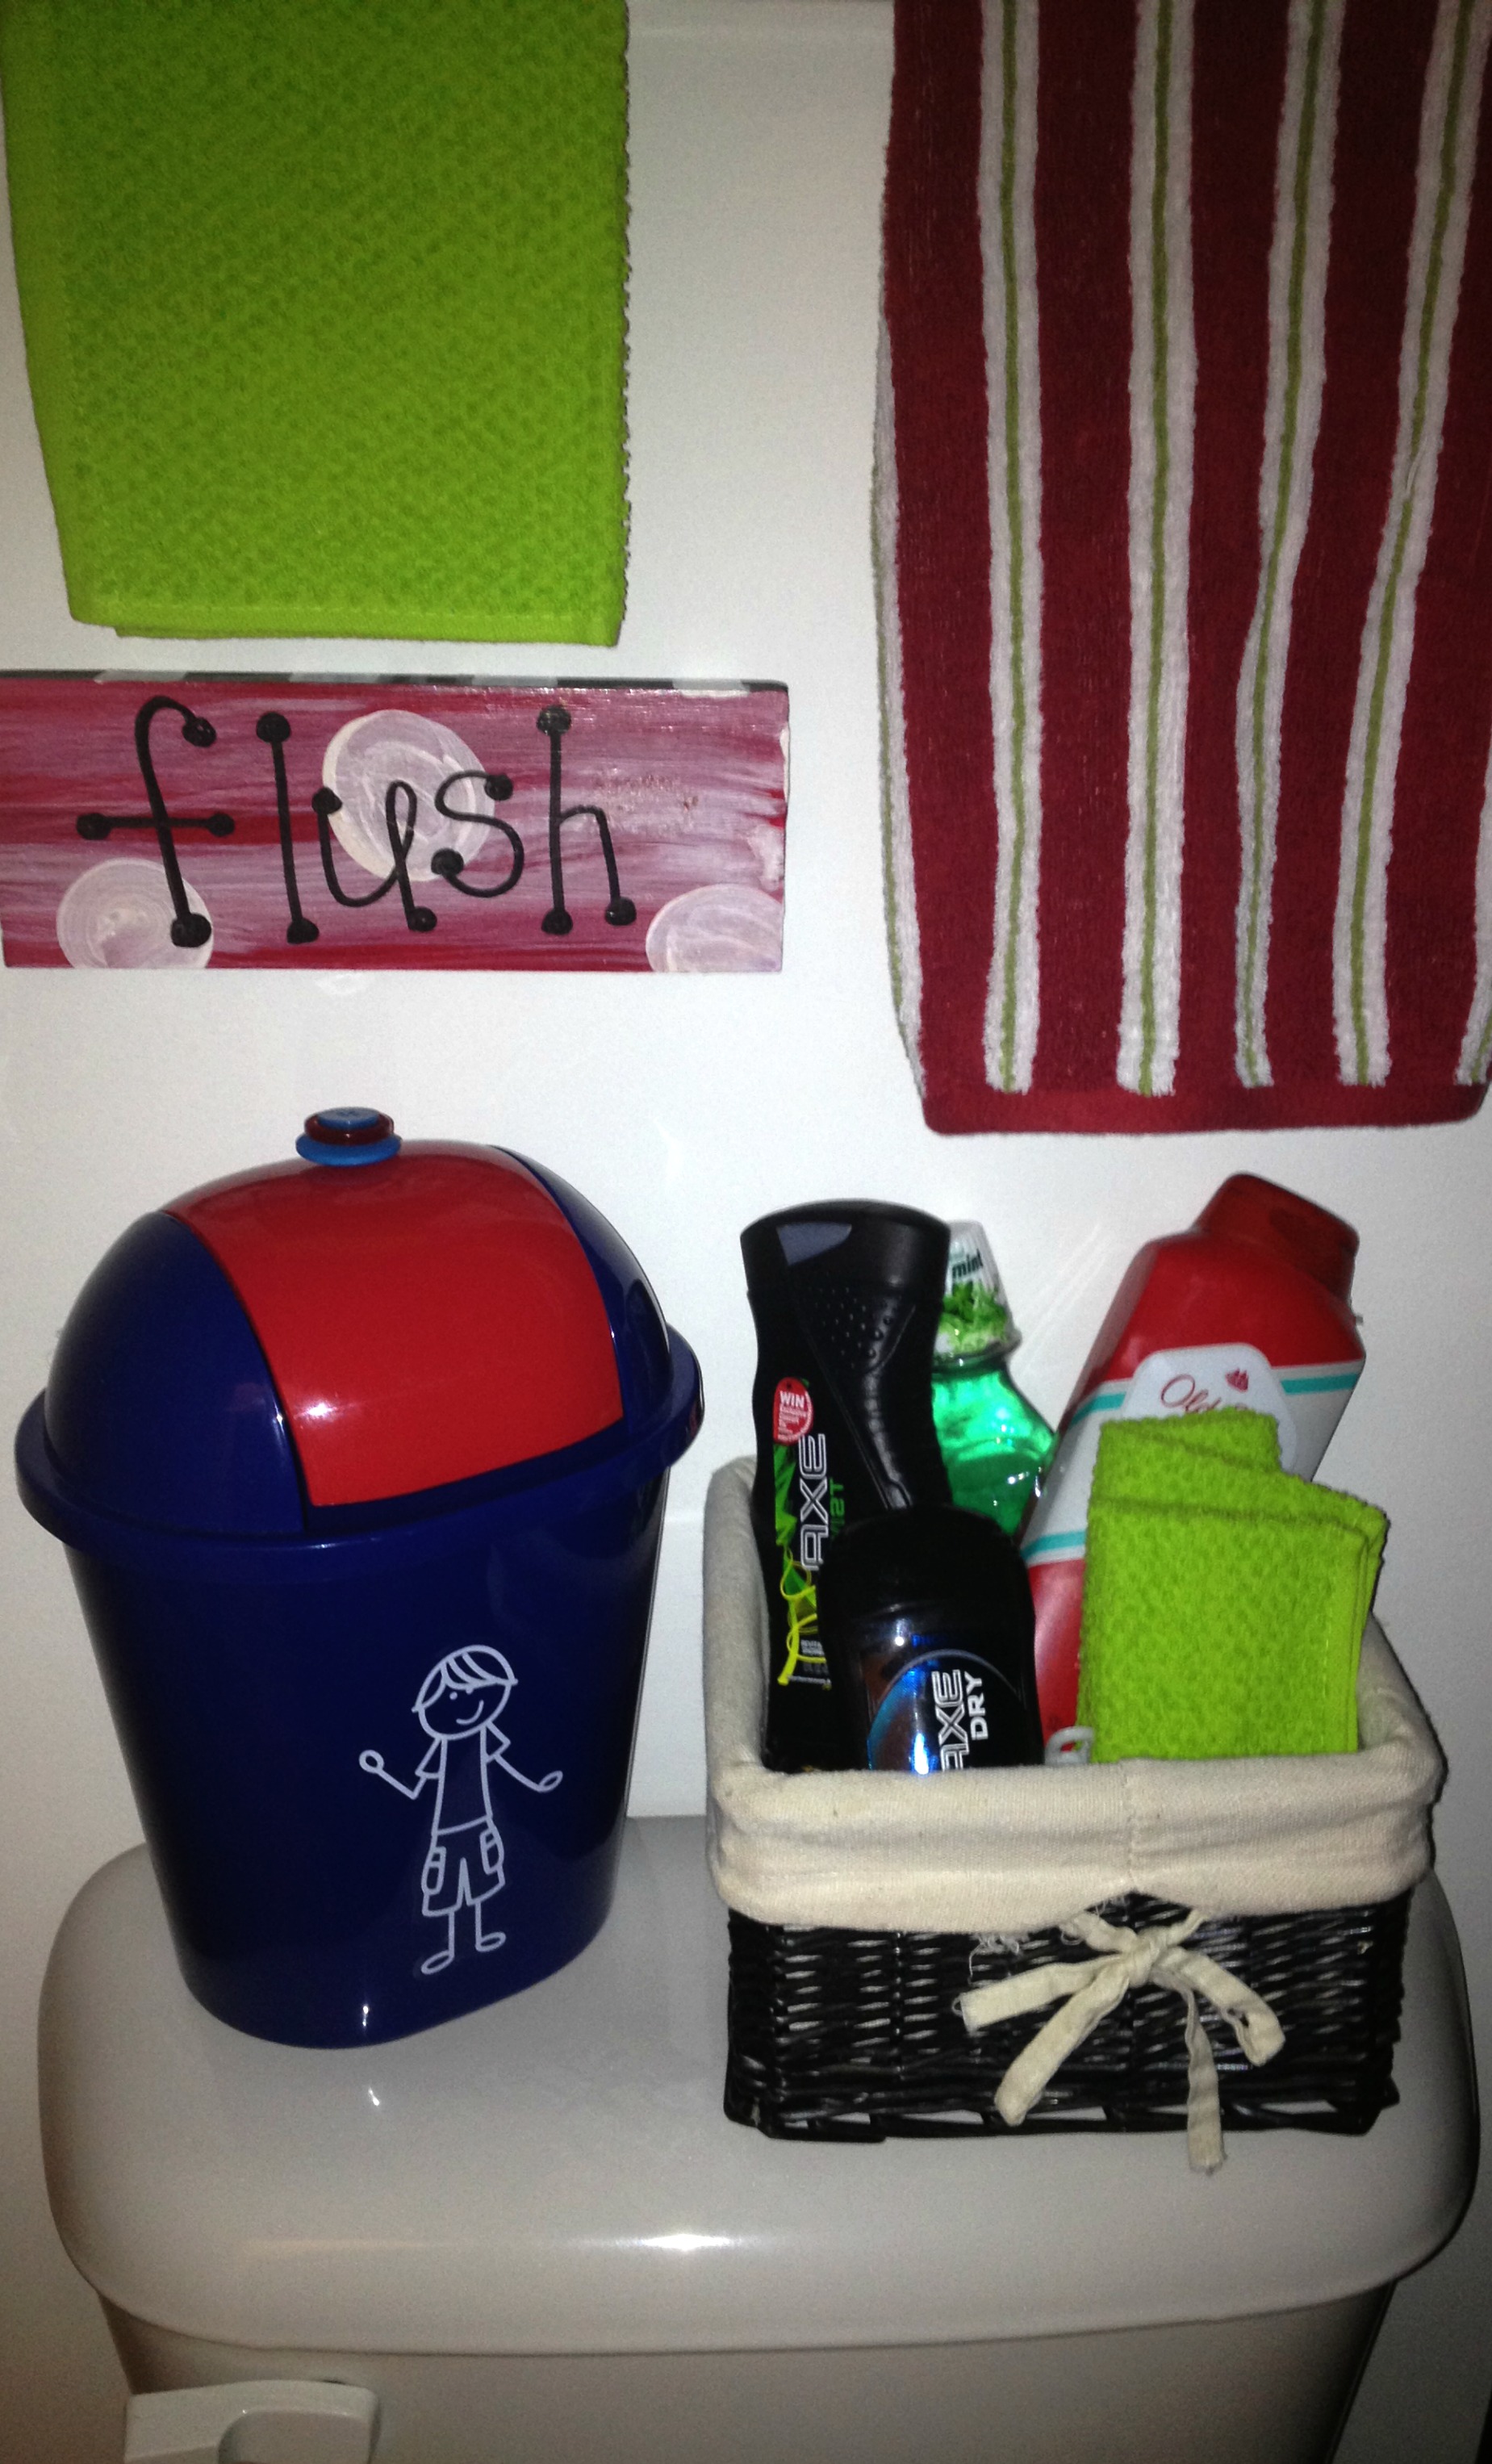
Welcome to the Me and My Peeps Blog Hop!
![]()
Here is the Peep and here are the buttons that I used to put this together (along with a little hot glue from Adtech).

What kid do you know that wouldn’t benefit from having this trashy little can to use in his bathroom or bedroom or playroom or any room. It would even be great for the car! The trash can came from the Dollar Tree. Yes, it was only ONE DOLLAR! Add a Me and My Peeps decal (you can get the AC Moore or at PlaidOnline) and a few buttons to the top and wa-la, you have a great little storage container. I think it would be fun to store Barbie clothes, doll shoes, Legos, BUTTONS, Crayons, or even use for…GARBAGE!
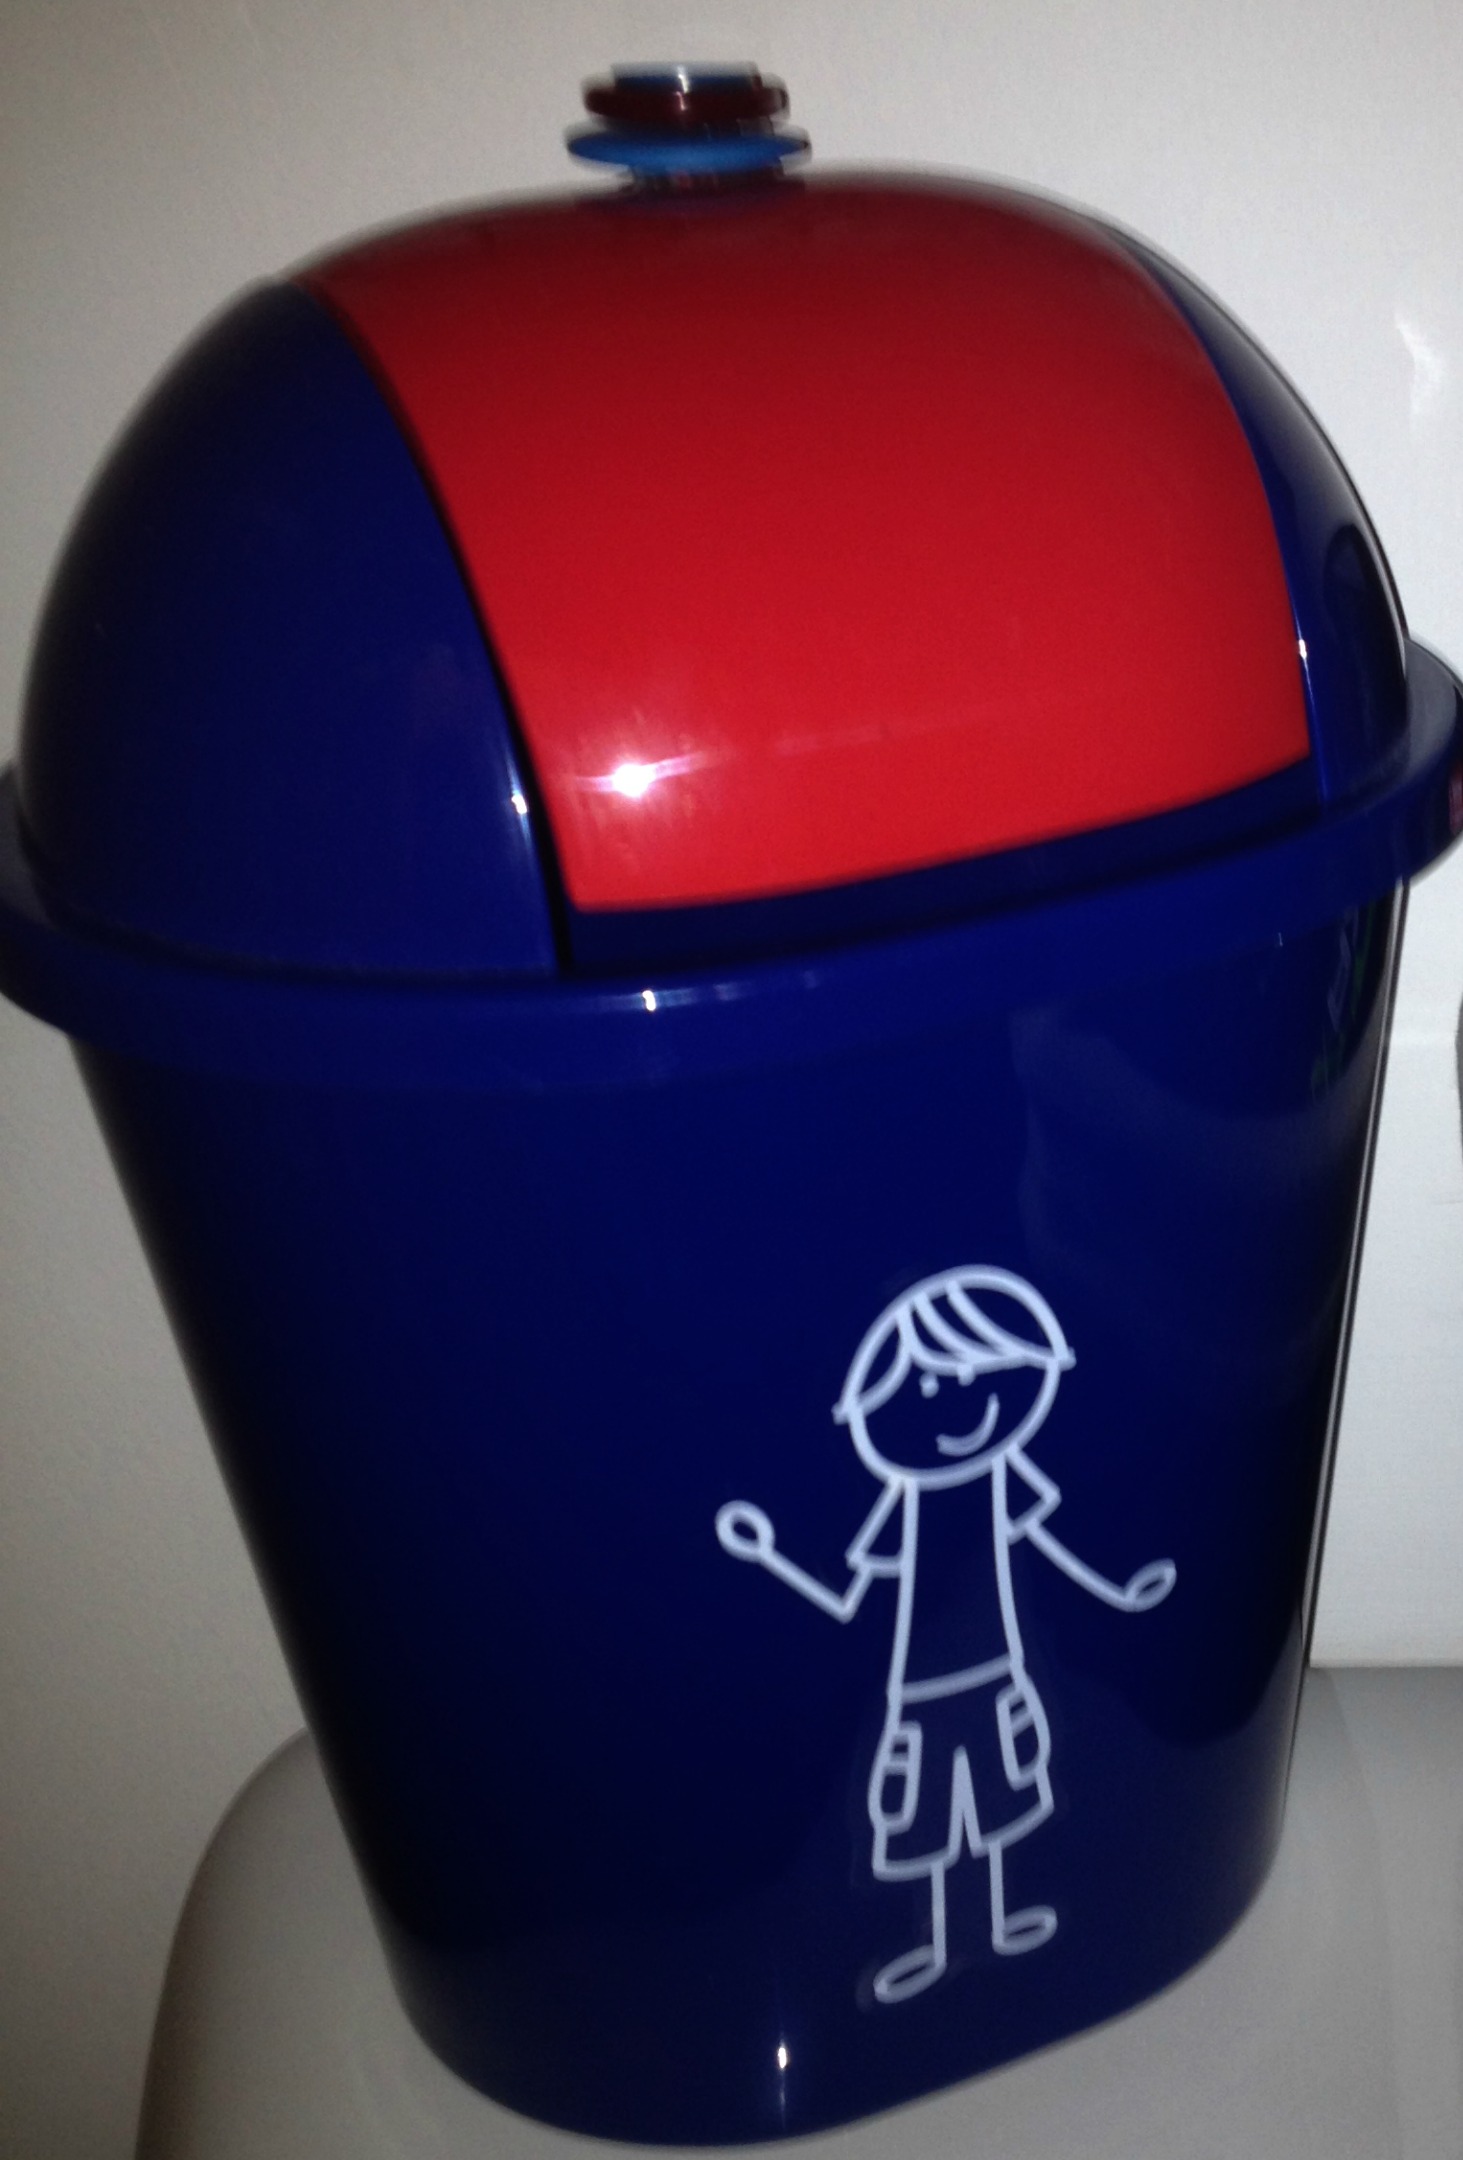
This would be fun for party favors too! You could let the kids pick their peeps and fill them with party goodies!
If you want to check out the rest of the Me and My Peep DIY craft projects, please click here and you will find a long list of fun ideas from the rest of our design team!
If you would like to win this fabulous prize pack, there are lots of ways to enter. Click on RAFFLECOPTER link below. Also feel free to leave comments. We all like to hear nice things…
Happy Creating and Have A Great Weekend,
Laura
Did you see the “how to” on this charm yesterday? If not, hop on back and check it out.

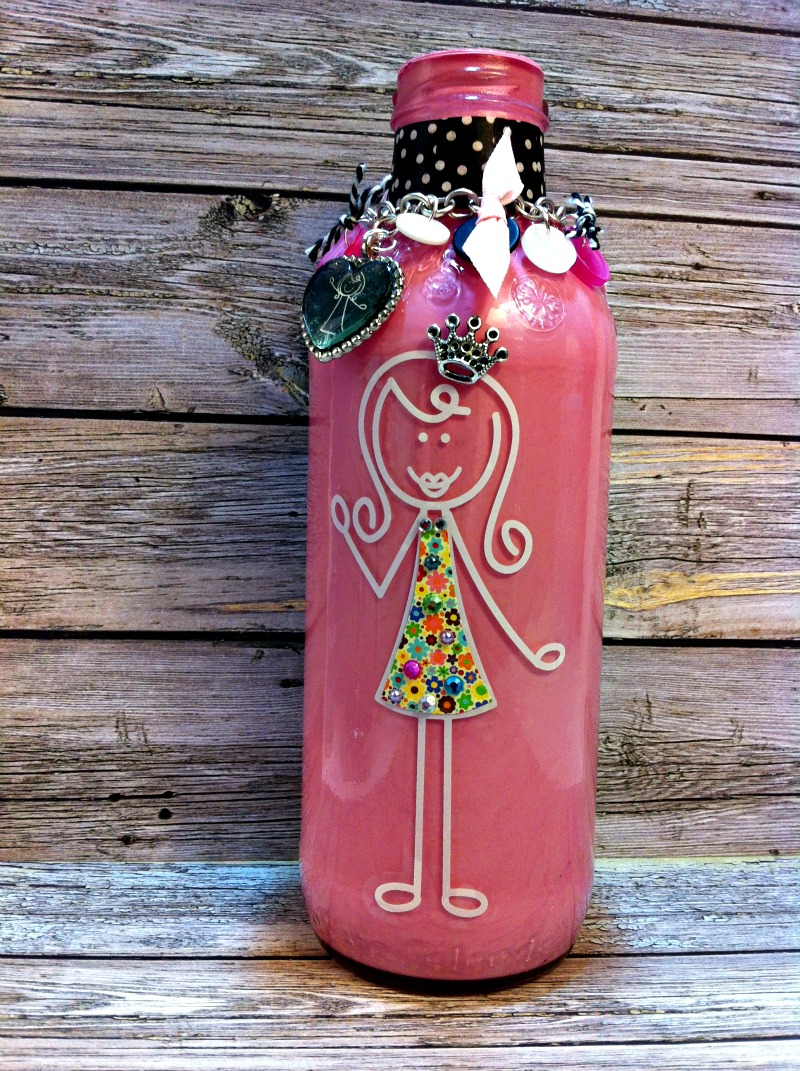
So c’mon, let’s get started!
Step One…. You’re gonna need supplies, a bottle – I used my favorite Calypso Southern Peach Lemonade bottle … some paint … and a peep.
Step Two… Pour some of that paint IN the mason jar and coat the insides. Let dry.
Step Three… Clean the outside of the jar and apply the decal.
I put a post it note on the packaging and made myself a stencil. I used the stencil to cut some Jillibean Soup patterned paper for Princess Peep’s dress. I added all kinds of bling from Want2Scrap, along with a crown (also from Want2Scrap). I adhered the crown with Dazzle Tac.
Around the opening of the jar, I made a little bracelet with buttons and snippets of ribbon. It’s just some jump rings and charms and buttons and stuff. Note, the neck of the bottle had a code that I could not wash off, so I covered the neck with small strips of washi tape.
Thanks for stopping by!
Please visit all of the talented Peeps playing with us!
Laura Kelly Designs + Niki Meiners + Laura Kelly Buttons + Plaid Enterprises + A.C. Moore + Cre8time
Day two
There is also an awesome CONTEST for a giveaway. [giveaway ended]
Happy Creating Connections with The PEEPS that you LOVE,
Me and My Peeps
 Did you know you can use buttons to create ribbon spools to hold your hand dyed and stamped ribbons and other trims? I ran across this fabulous creative living idea while reading a recent copy of Somerset Life by Stampington and Company. Oh so simple!
I used these fantastic buttons from Buttons Galore and More along with Laura Kelly’s Hand Dyed buttons (My favorite by the way)!
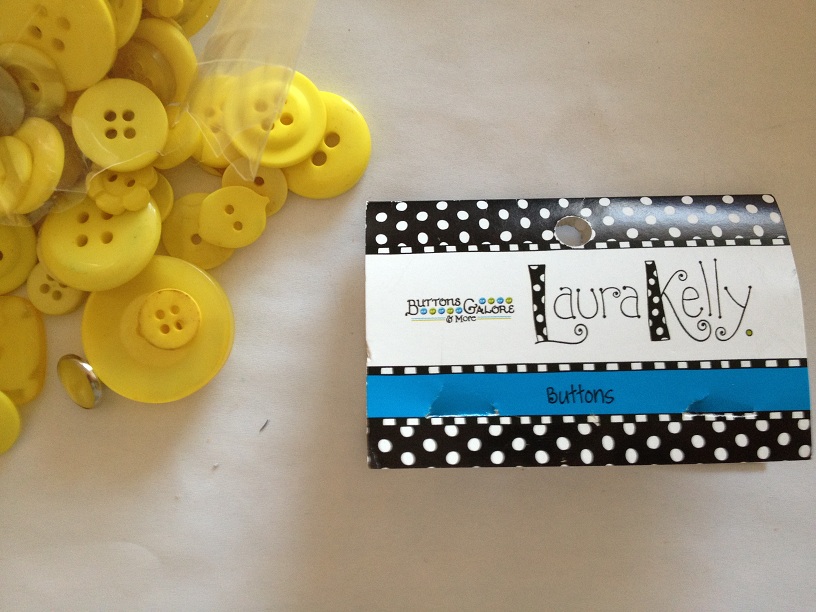
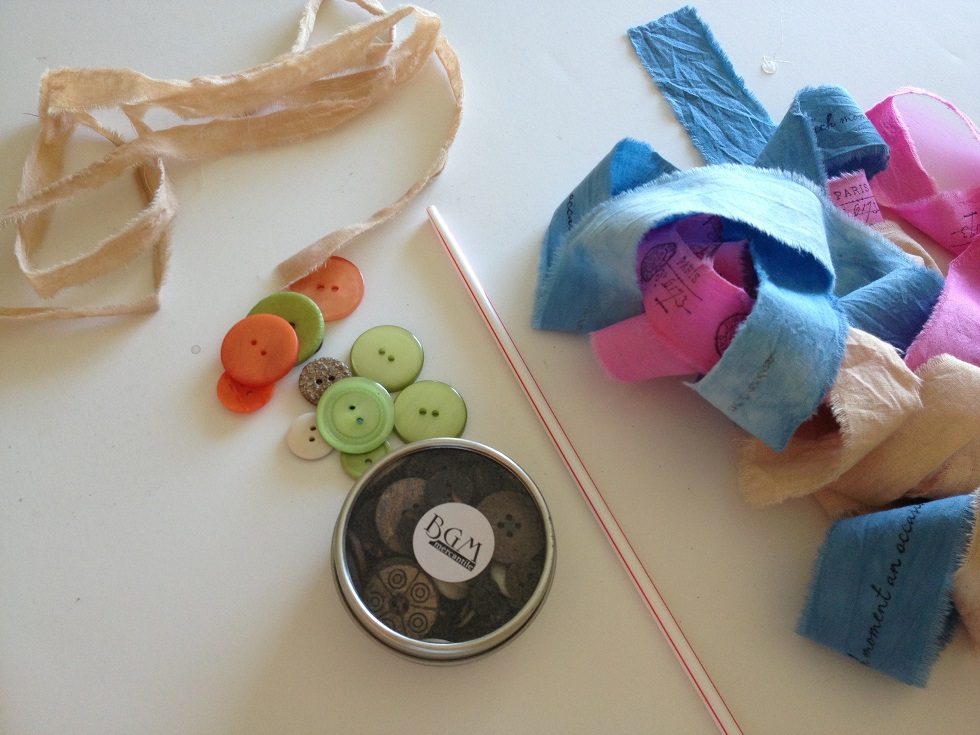
First, thread a very fine piece of fabric such as organza or lightweight cotton cut into a super thin strip and thread into a plastic drinking straw. I cut my straw down to about 1 1/2″.
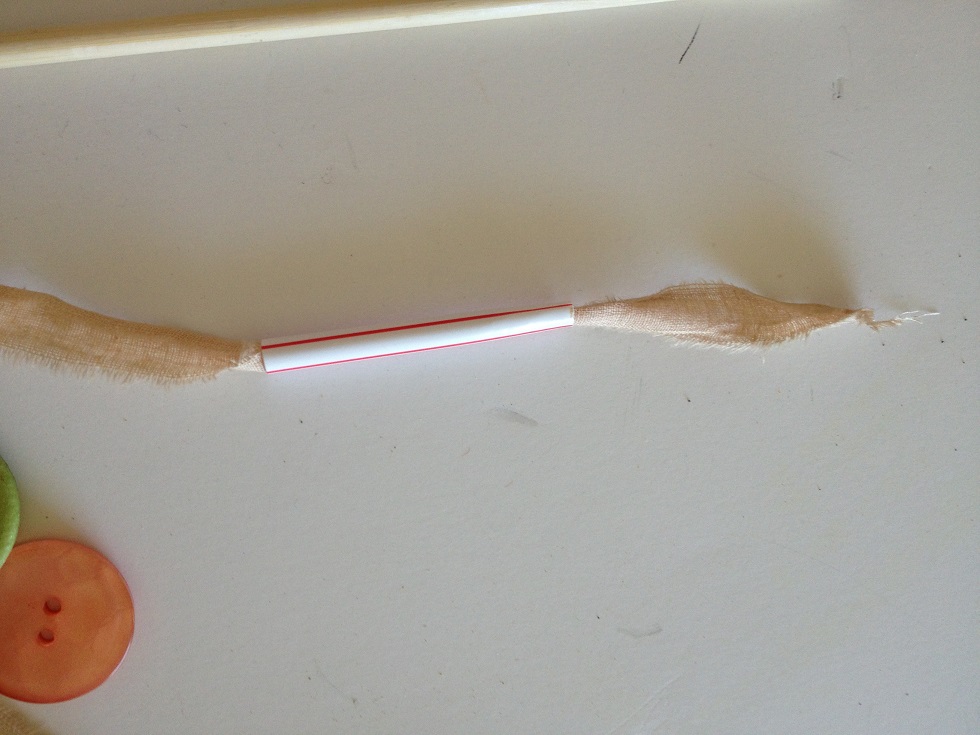 Notice how my piece of fabric is sticking out of both ends.
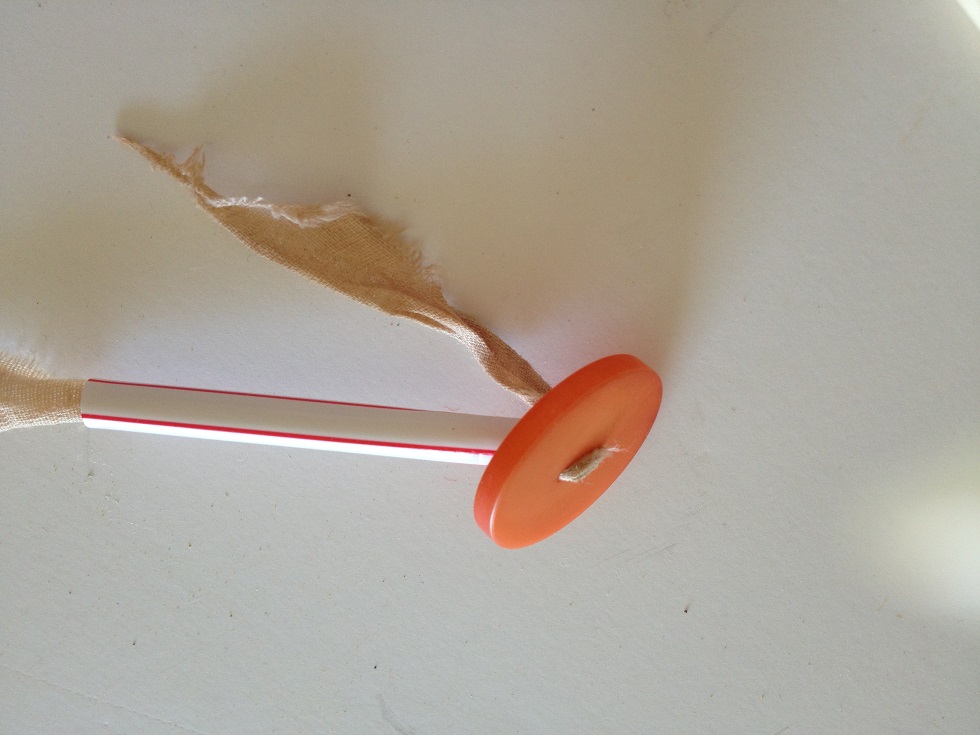 Then, simply thread through one of the buttons holes from the inside out and then through the second hole.
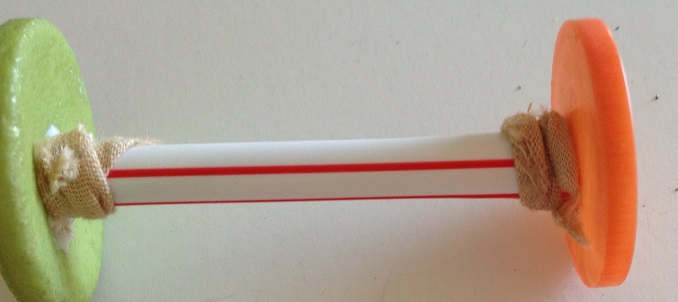
Then, roll you trims, ribbons, etc around the straw! What could be a better use for buttons? Hand made ribbon spools for all your ribbons.
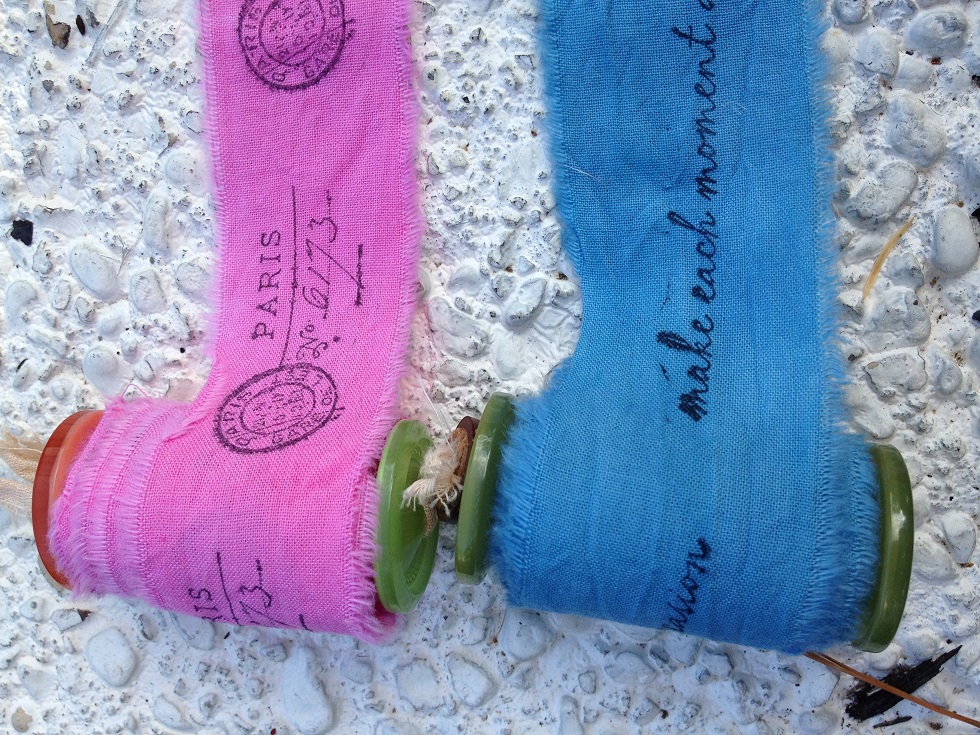
Live Life Creatively,
So, you’ve been eyeballing a distressed serving tray in a home decor store that you’re totally in love with but can’t seem to justify spending the money.
Well, no worries ’cause here is a simple tutorial on how to make your own distressed serving tray by using a Walnut Hollow Serving Tray and Buttons Galore buttons that will make the perfect {inexpensive} addition to your home decor.
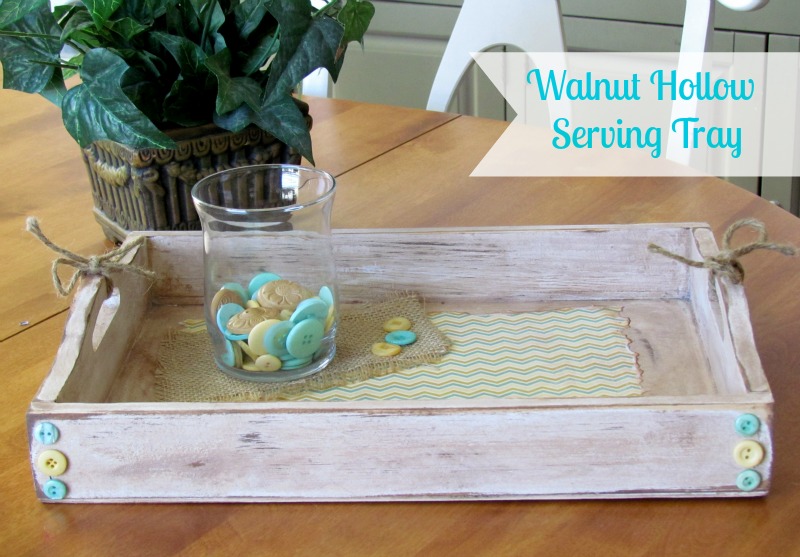

1. Paint 2. Sand 3. Stain
To give this tray a distressed look, I painted it white, used an electric sander to randomly distress areas and then applied a light coat of stain. ** Tip…A little stain goes a long way**
I applied the stain with a sponge brush then used a paper towel to quickly wipe off the excess. As you apply and wipe off the stain, you’ll begin to see the distressed areas become darker in appearance developing into your aged look. Just like magic!
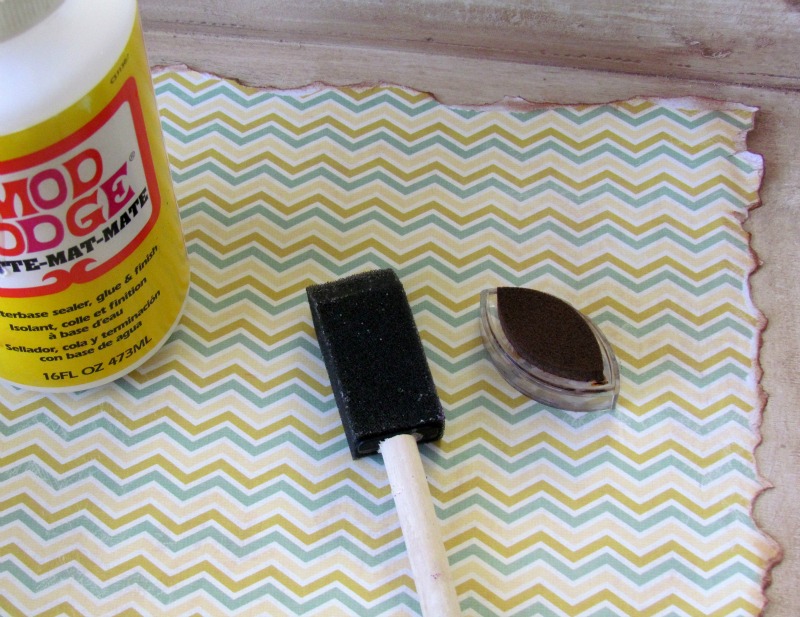
Use Mod Podge to adhere patterned paper on tray
While I was waiting for the stain to dry, I tore the edges off a piece of patterned paper and inked them with Colorbox ink to create a distressed look. When the stain was dry, I adhered the paper onto the tray using Mod Podge Matte.

Add buttons to wood projects
To complete my serving tray, I added some buttons from Buttons Galore Vacation & Zesty Lemon packs on to the four corners and tied the handles up with Hemptique Natural Cord. Adding simple buttons on to your projects can be an inexpensive way make them beautiful.
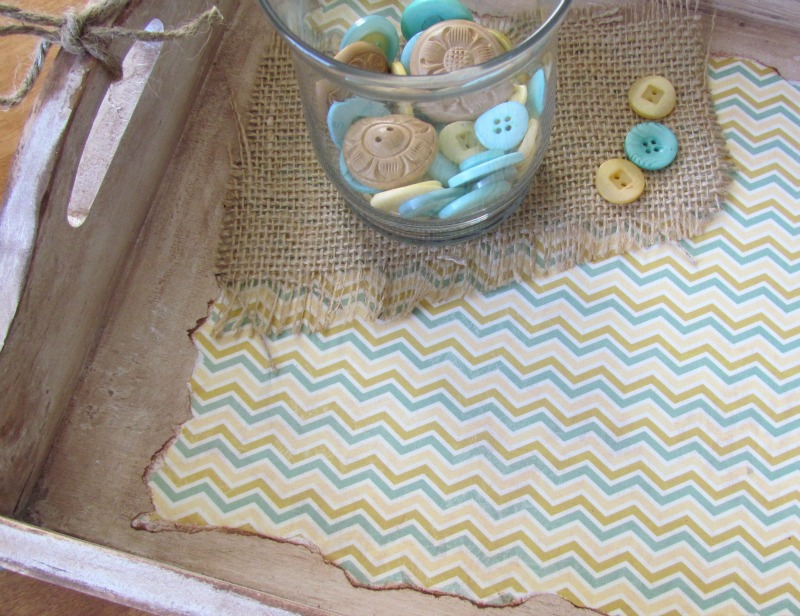
Use buttons as Home Decor accents
I’m totally in love with this tray. I even like how it’s displayed with a vase full of buttons. Buttons just make everything look better!

Like Me on Facebook!
I really enjoy creating home decor items from every day things that may already be in your home. This Button Memo Board is so simple to create, and you may even have a spare laying around to get crafty with today.
This is what I started with:

Something you may want to test before starting your Button Memo Board is, to test and make sure your pan is indeed magnetic.
I then used the liner on the pan itself as a template for my patterned paper.

I added some thin thread to my wooden buttons to coordinate with my chosen patterned paper.

Button Magnets by Tracy McLennon for Buttons Galore & More
I then used a glue gun to attach the magnets to the buttons.

I decided to add some flair by incorporating the rhinestones. They adhere just fine onto the pan, I used hot glue again for the buttons in between the sections of rhinestones.


Just a simple final touch with the large flower and a button added to the middle. I thought the burlap ribbon really added to the shabby chic look I was going for.


My Button Memo Board is complete and ready for the home. A great addition to any home, by a phone near you.

Want to make a summertime picture frame for your home? Here’s a simple frame embellished with a handmade Sunflower, garden sign and a Haberdashery Carved Wood button.
You could choose any flower to embellish your frame but a Summertime Sunflower really does make a beautiful impact.

I always enjoy seeing the Sunflower fields as we drive across country during our vacation. They really are a beautiful sight. One day, I’ll convince my hubs to actually stop along the interstate to take a photo in the field. He just can’t appreciate a purty photo op. Men.

A Haberdashery Wood Button makes the Perfect Sunflower Center
I used my Silhouette and a Lori Whitlock cut file to cut out the 3D Sunflower then inked the edges of the leaves and flower with Colorbox ink and added a unique Haberdashery carved wood button to the center. It really is the perfect center for a Sunflower!
I’m totally in love with all the Haberdashery Wood Buttons you can find in The Button Shop too. They’re all so unique in design.

On the other side of the frame, I hand cut out a garden sign and grass, stamped a sentiment and hot glued the grassy sign onto a dowel. A perfect Summertime frame to display Summer memories in.
Like Me on Facebook!
Picnics are such a great way to connect with family and friends. From creating the yummy contents in the basket to making the decorations for the outing, it is just good old fun! While some people spend lots of time on the meal in the basket, others prefer to spend time creating the parts of the picnic that create the atmosphere.
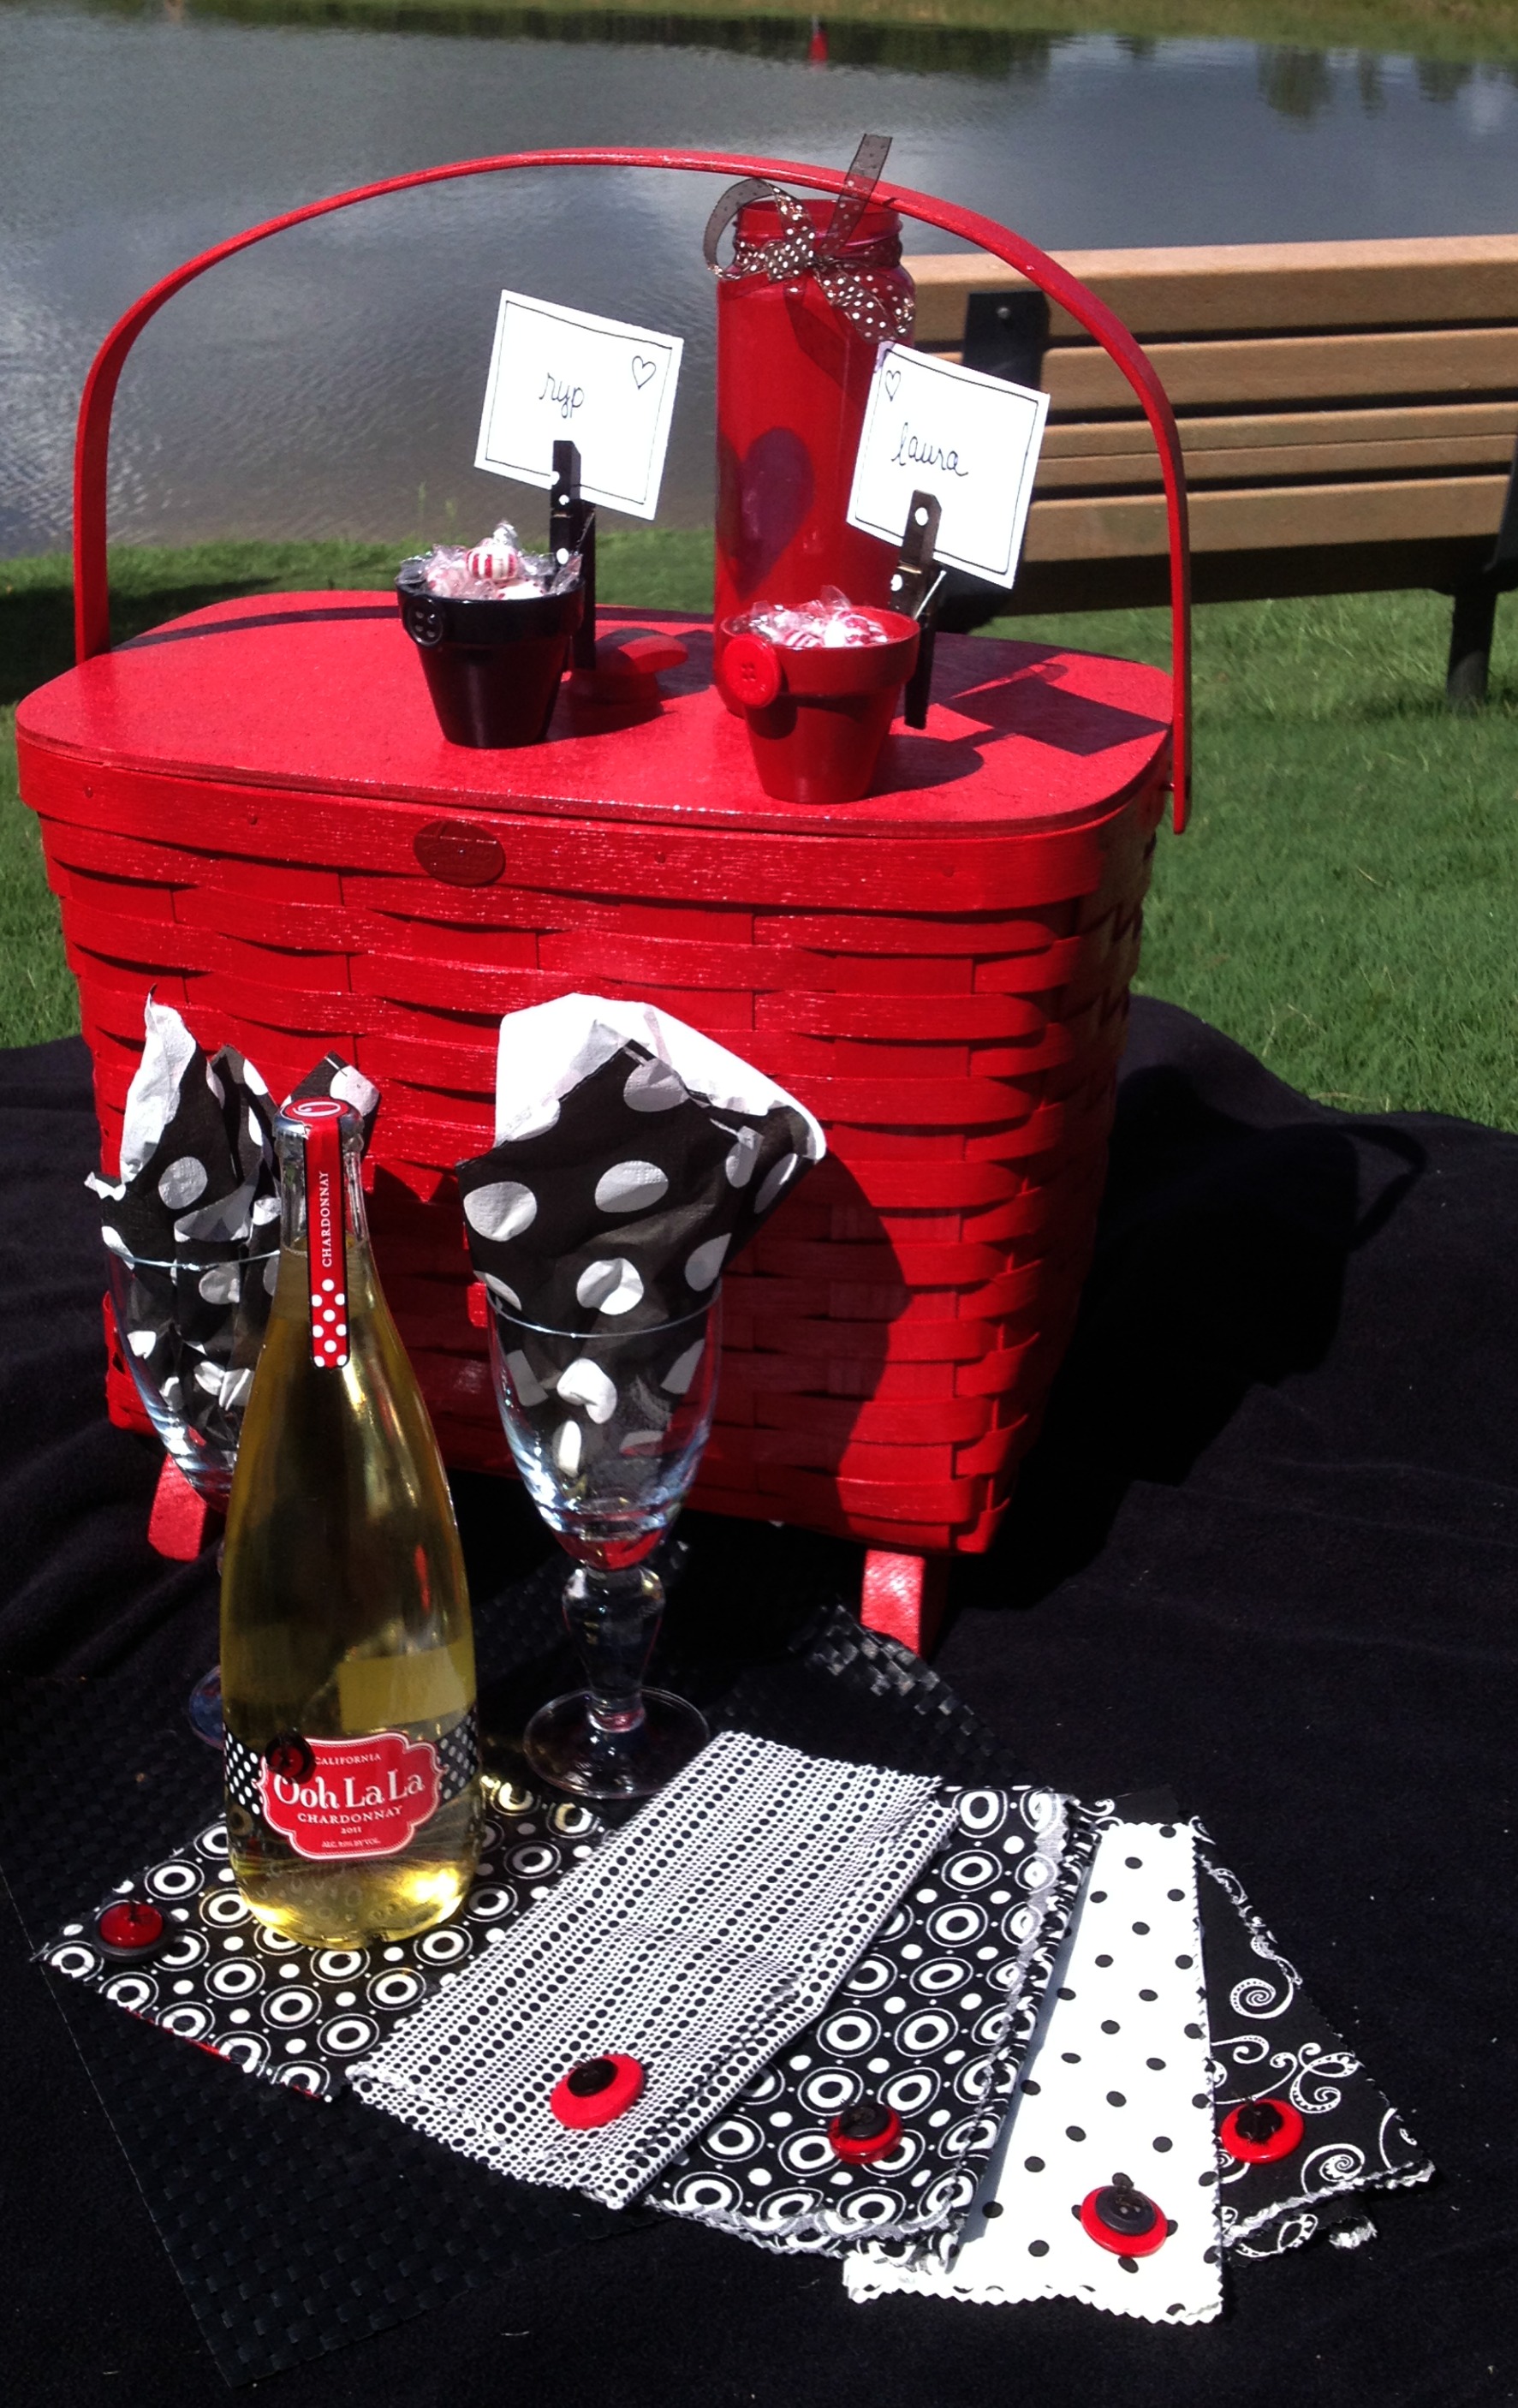
Here are some REALLY simple napkins that you can make from any fabric scraps (including outgrown clothing, towels, sheets or pillowcases) in a matter of minutes. You will need the fabric, pinking shears (I love Fiskars), buttons and embroidery floss (Coats and Clark for me). They are really fun to make out of bright colored towels for kids and holidays if you are looking for a twist on this simply button project.
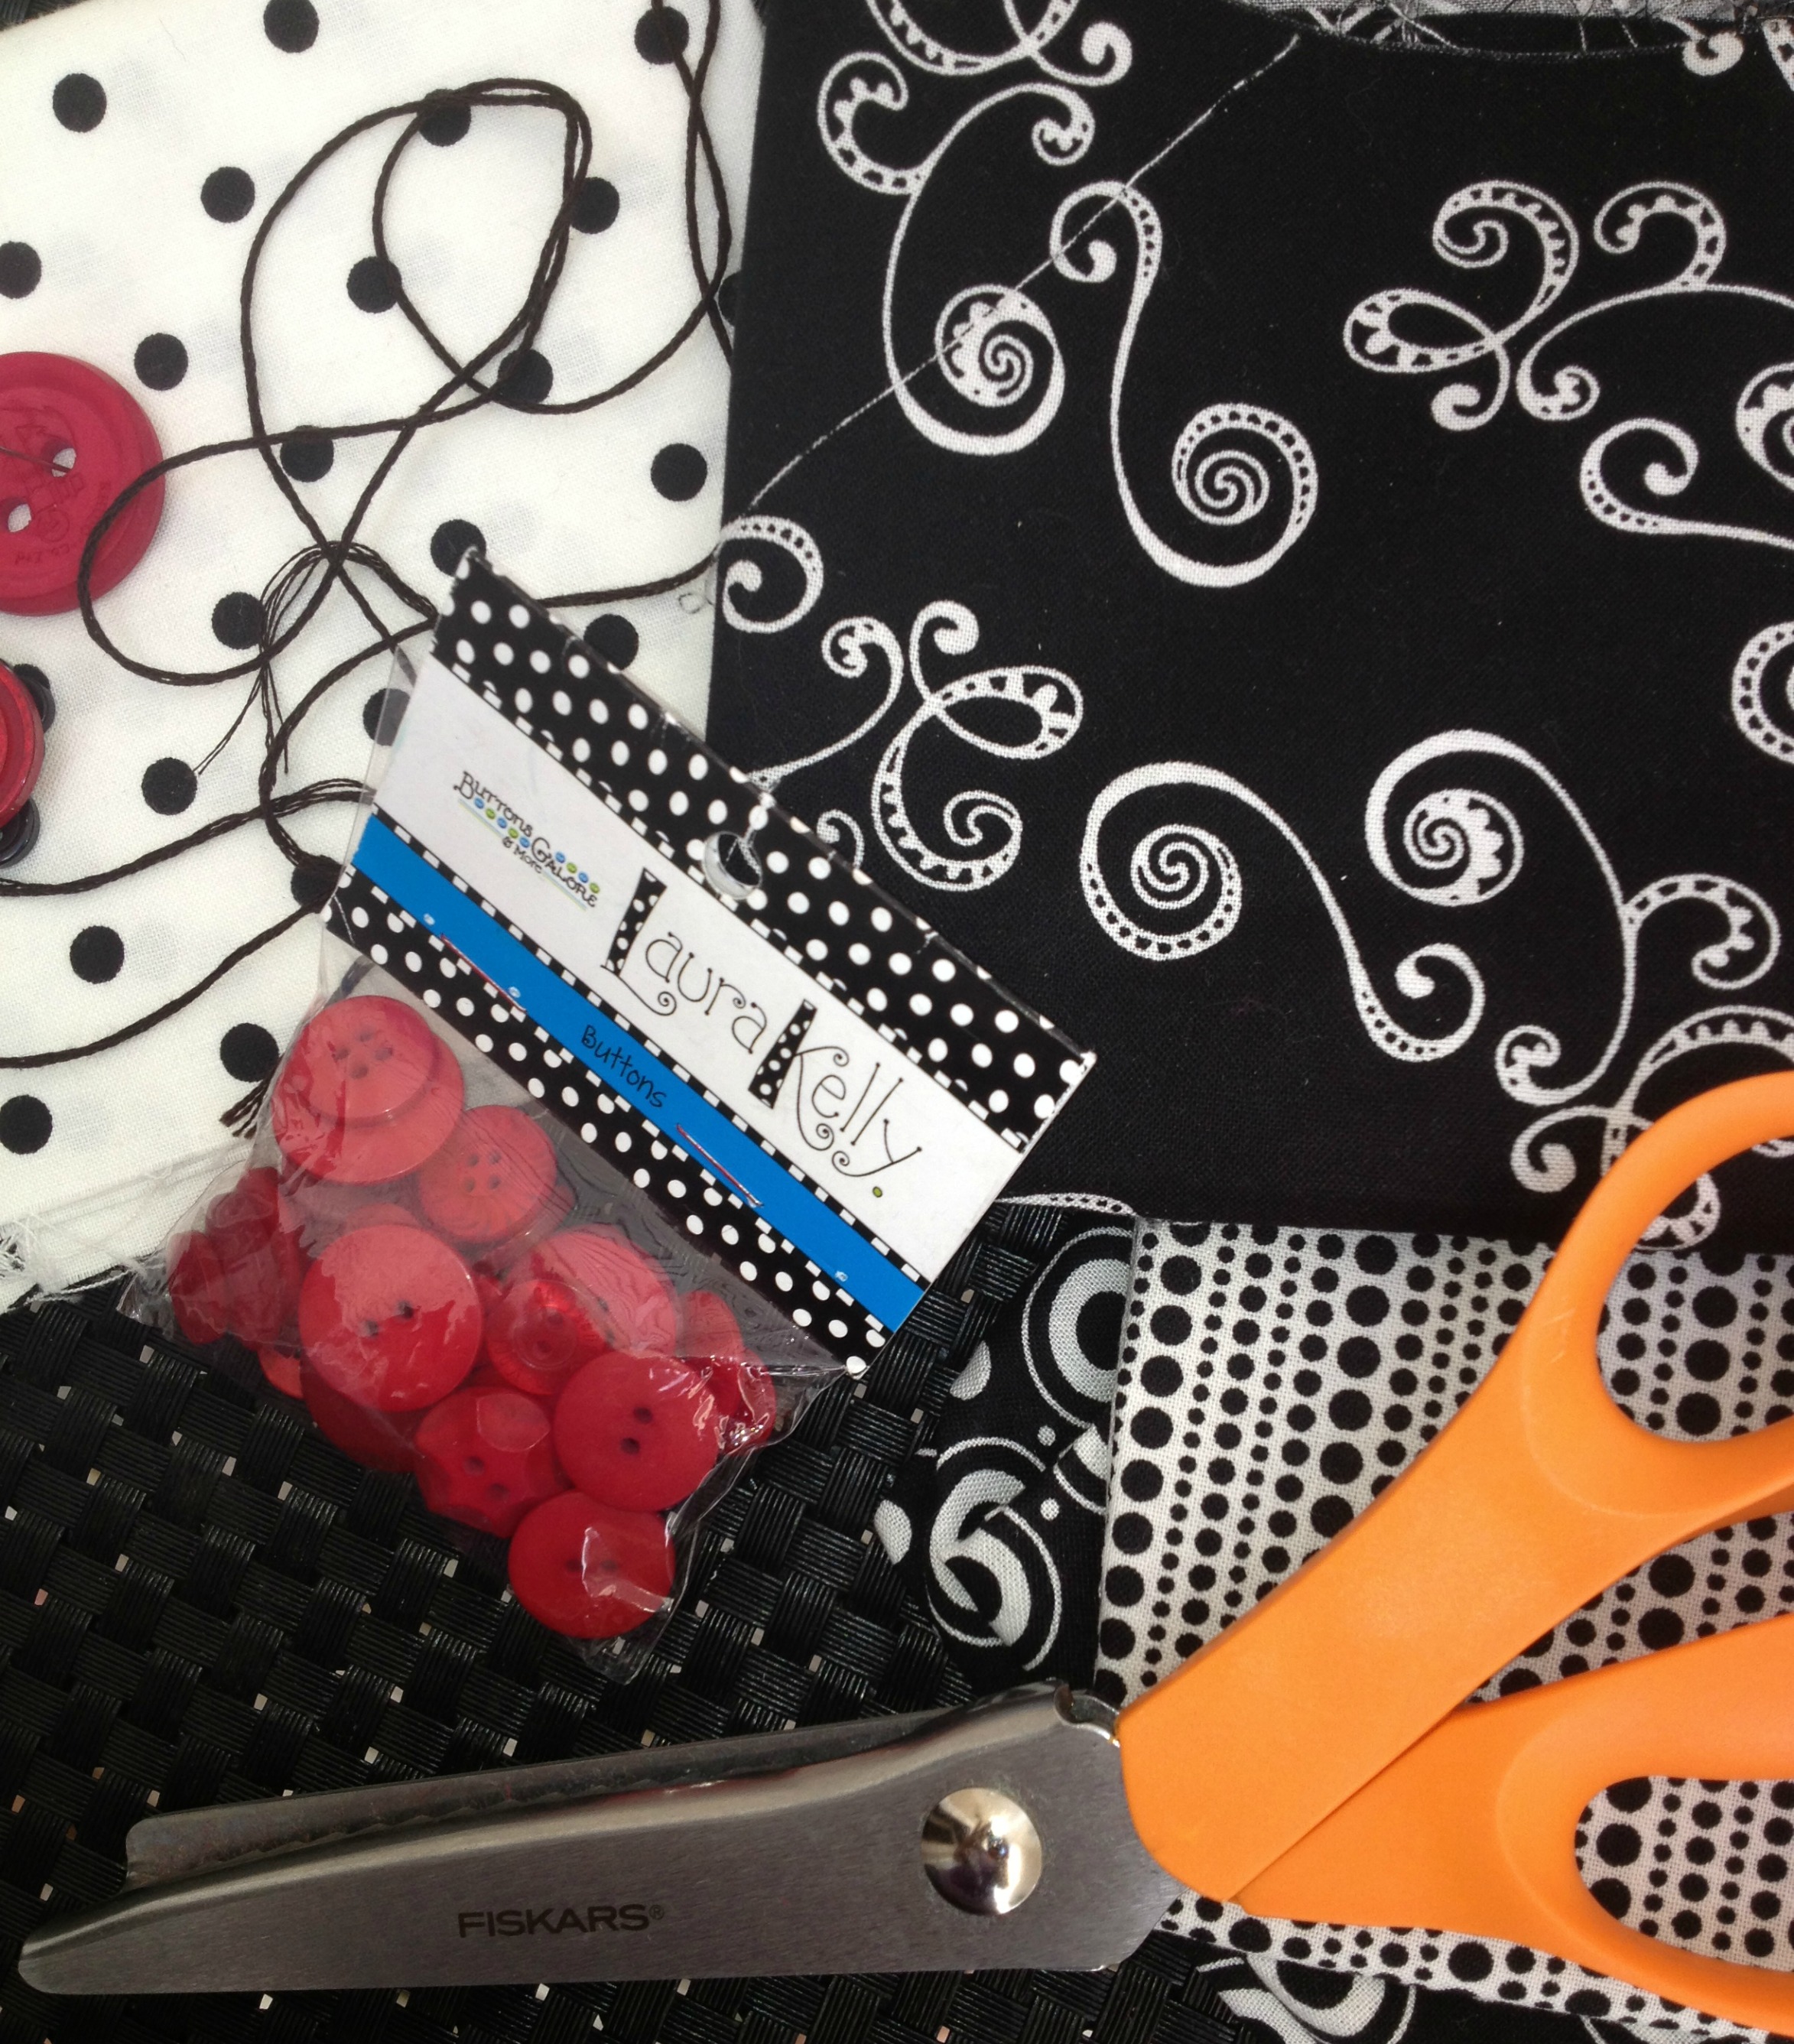
Cut the fabric into 16 x 16: inch squares. Pick a corner for each and add a few stitched on buttons. Voila! You have adorable, creative and festive picnic napkins.
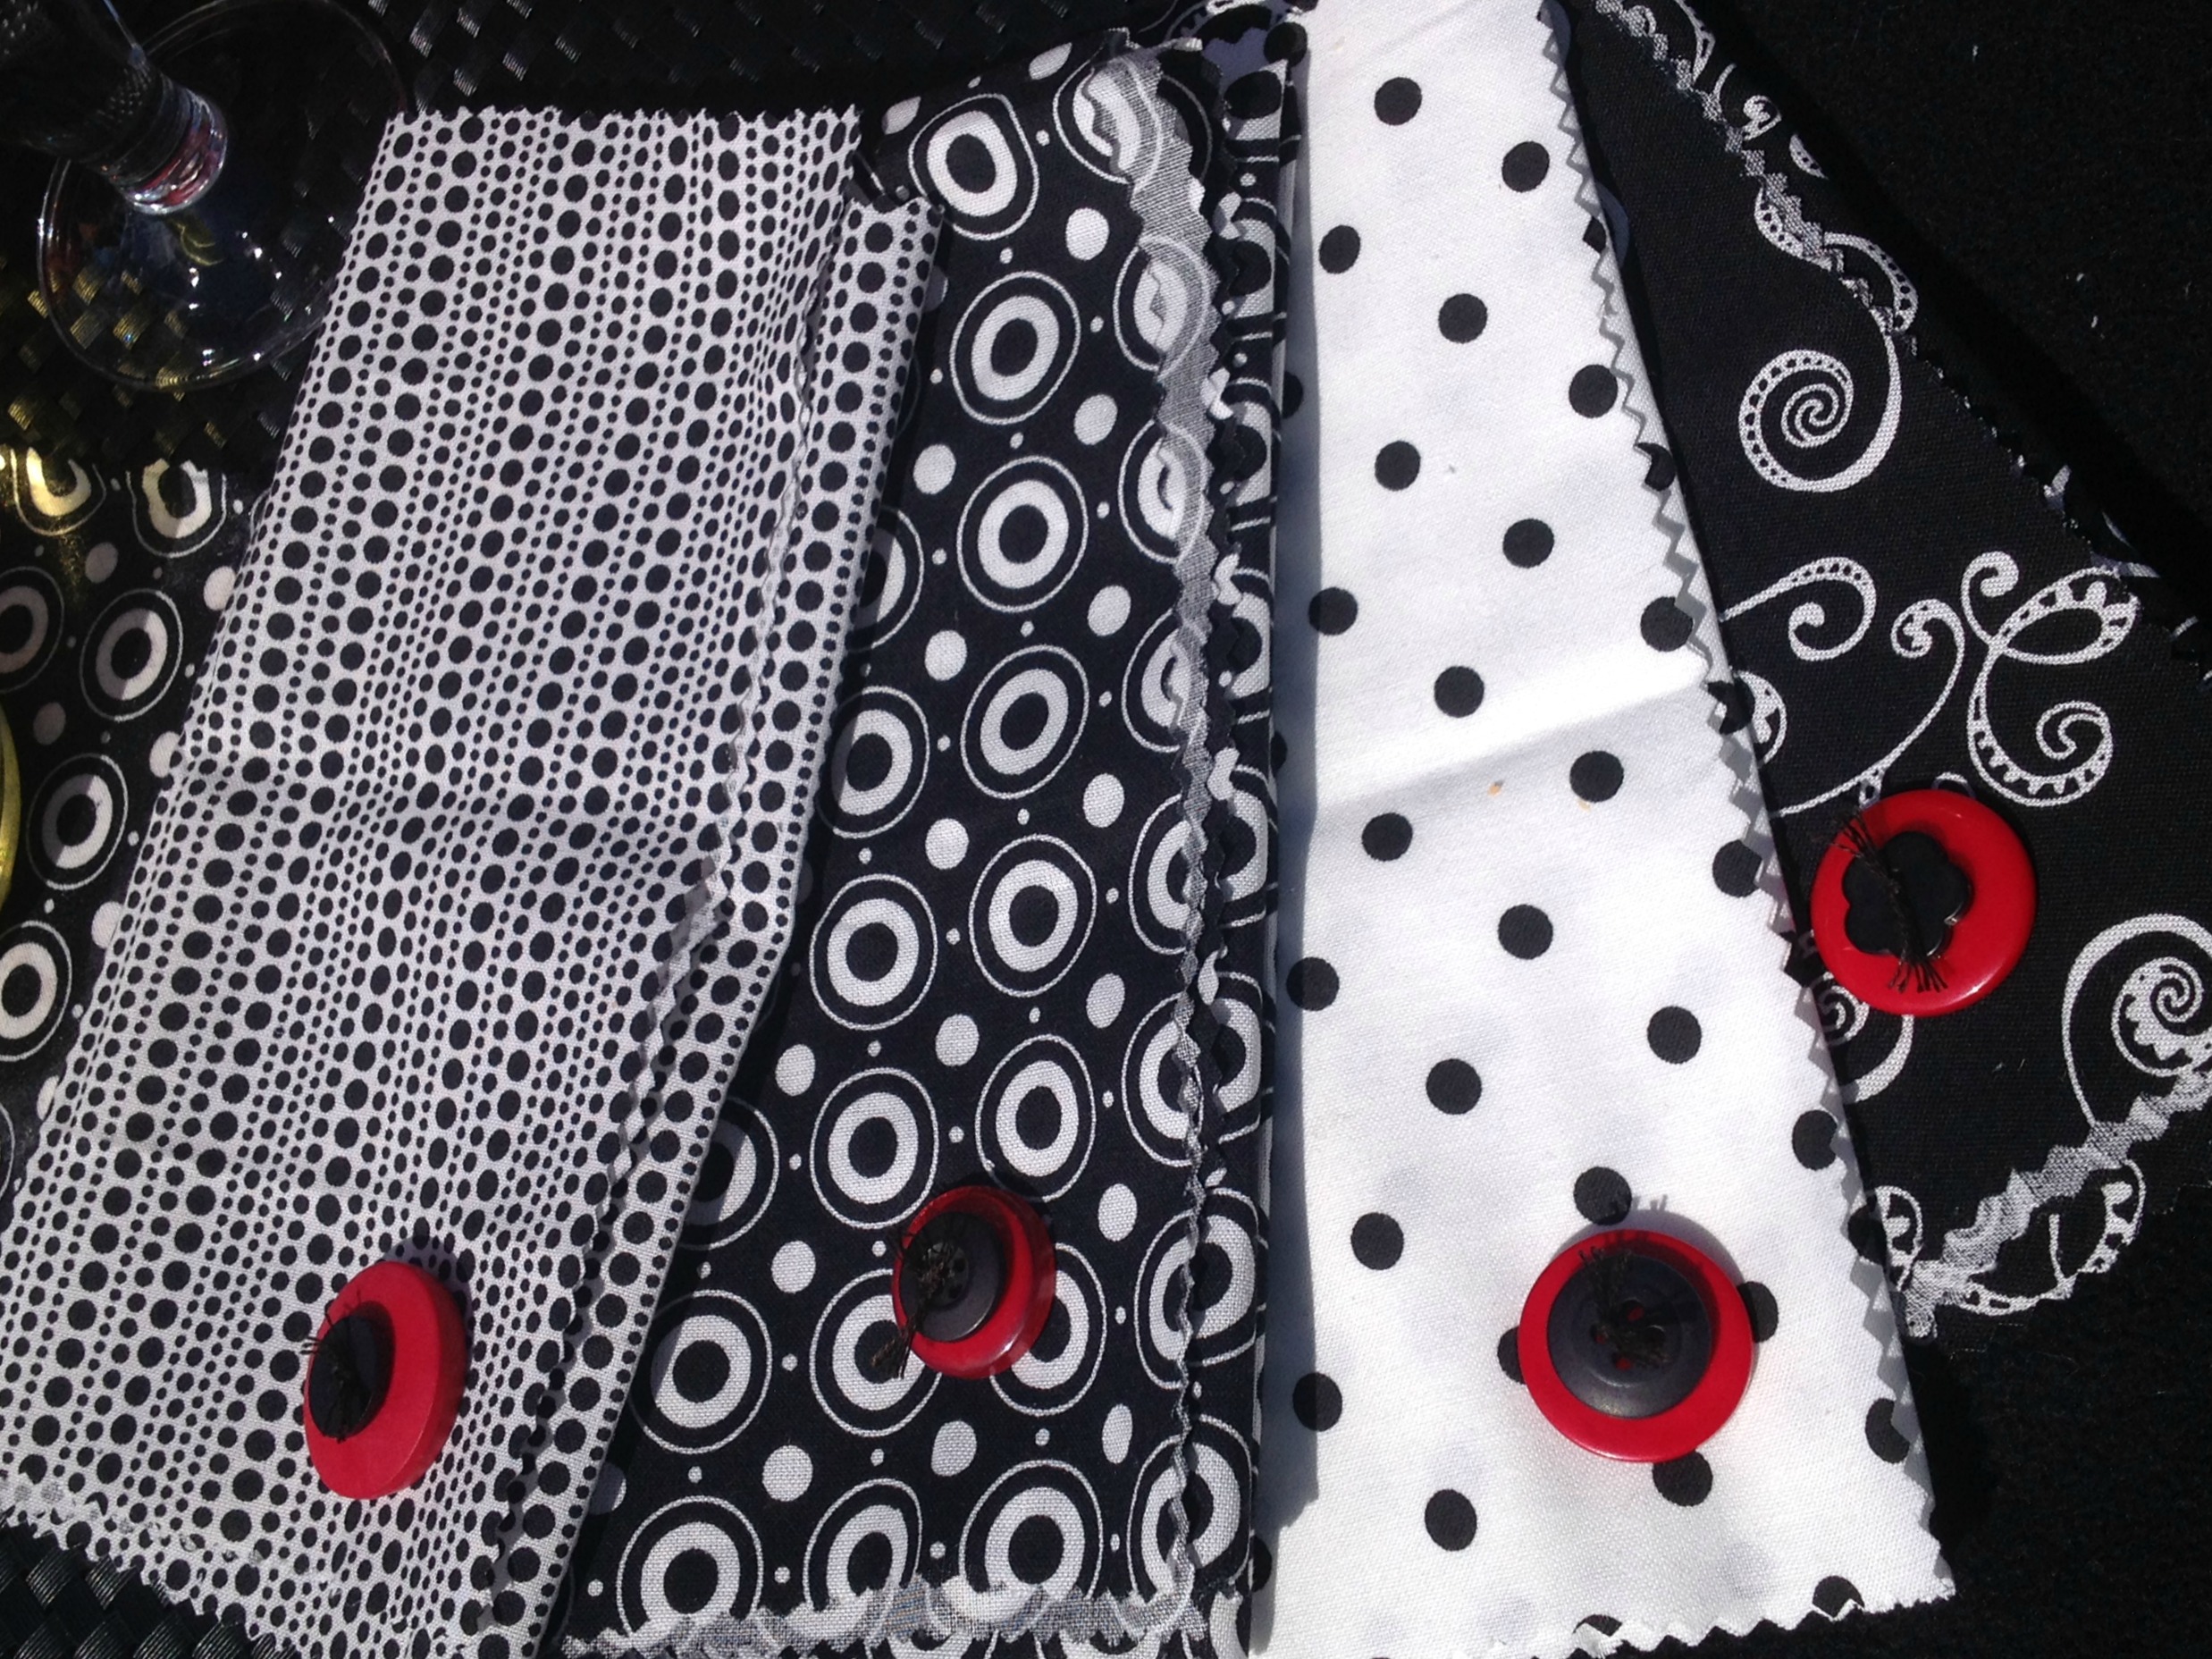
If you prefer, you can fold them in squares and make cocktail napkins.

If you love the festive RED picnic basket, place card pots and tall jar votive, check out my blog to find out how I got them such an awesome color. (hint: Krylon).
Happy Creating with Buttons,
Laura
This is the time of year where around every corner you seem to picking up some sort of Thank You gift. Teachers, coaches, neighbors and friends. All would love this bottle of wine and coordinating wine charm. This tutorial will take you step by step to create this “Charm”ing gift.
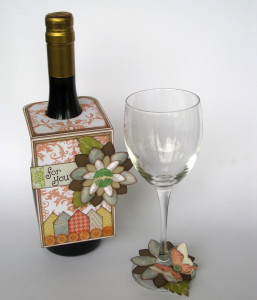
You are going to start by measuring the width of your wine bottle. I cut the white cardstock base just slightly larger than that measurement. My bottle of wine was just under 3.5 inches. The full size of the white cardstock is 3.5×8.5. The top section is 3.5×3.5. Just score a line at that point.
I used a 1.5″ circle punch to cut the hole for the neck of the bottle in the middle of your 3.5″ section of the white cardstock. I then took the circle I cut out and used it as a template to round the top corners.
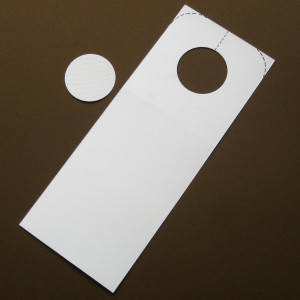
I then added a couple of layers of cardstock and patterned paper from the Teresa Collins, He Said, She Said Collection to decorate the base of the wine bottle card.
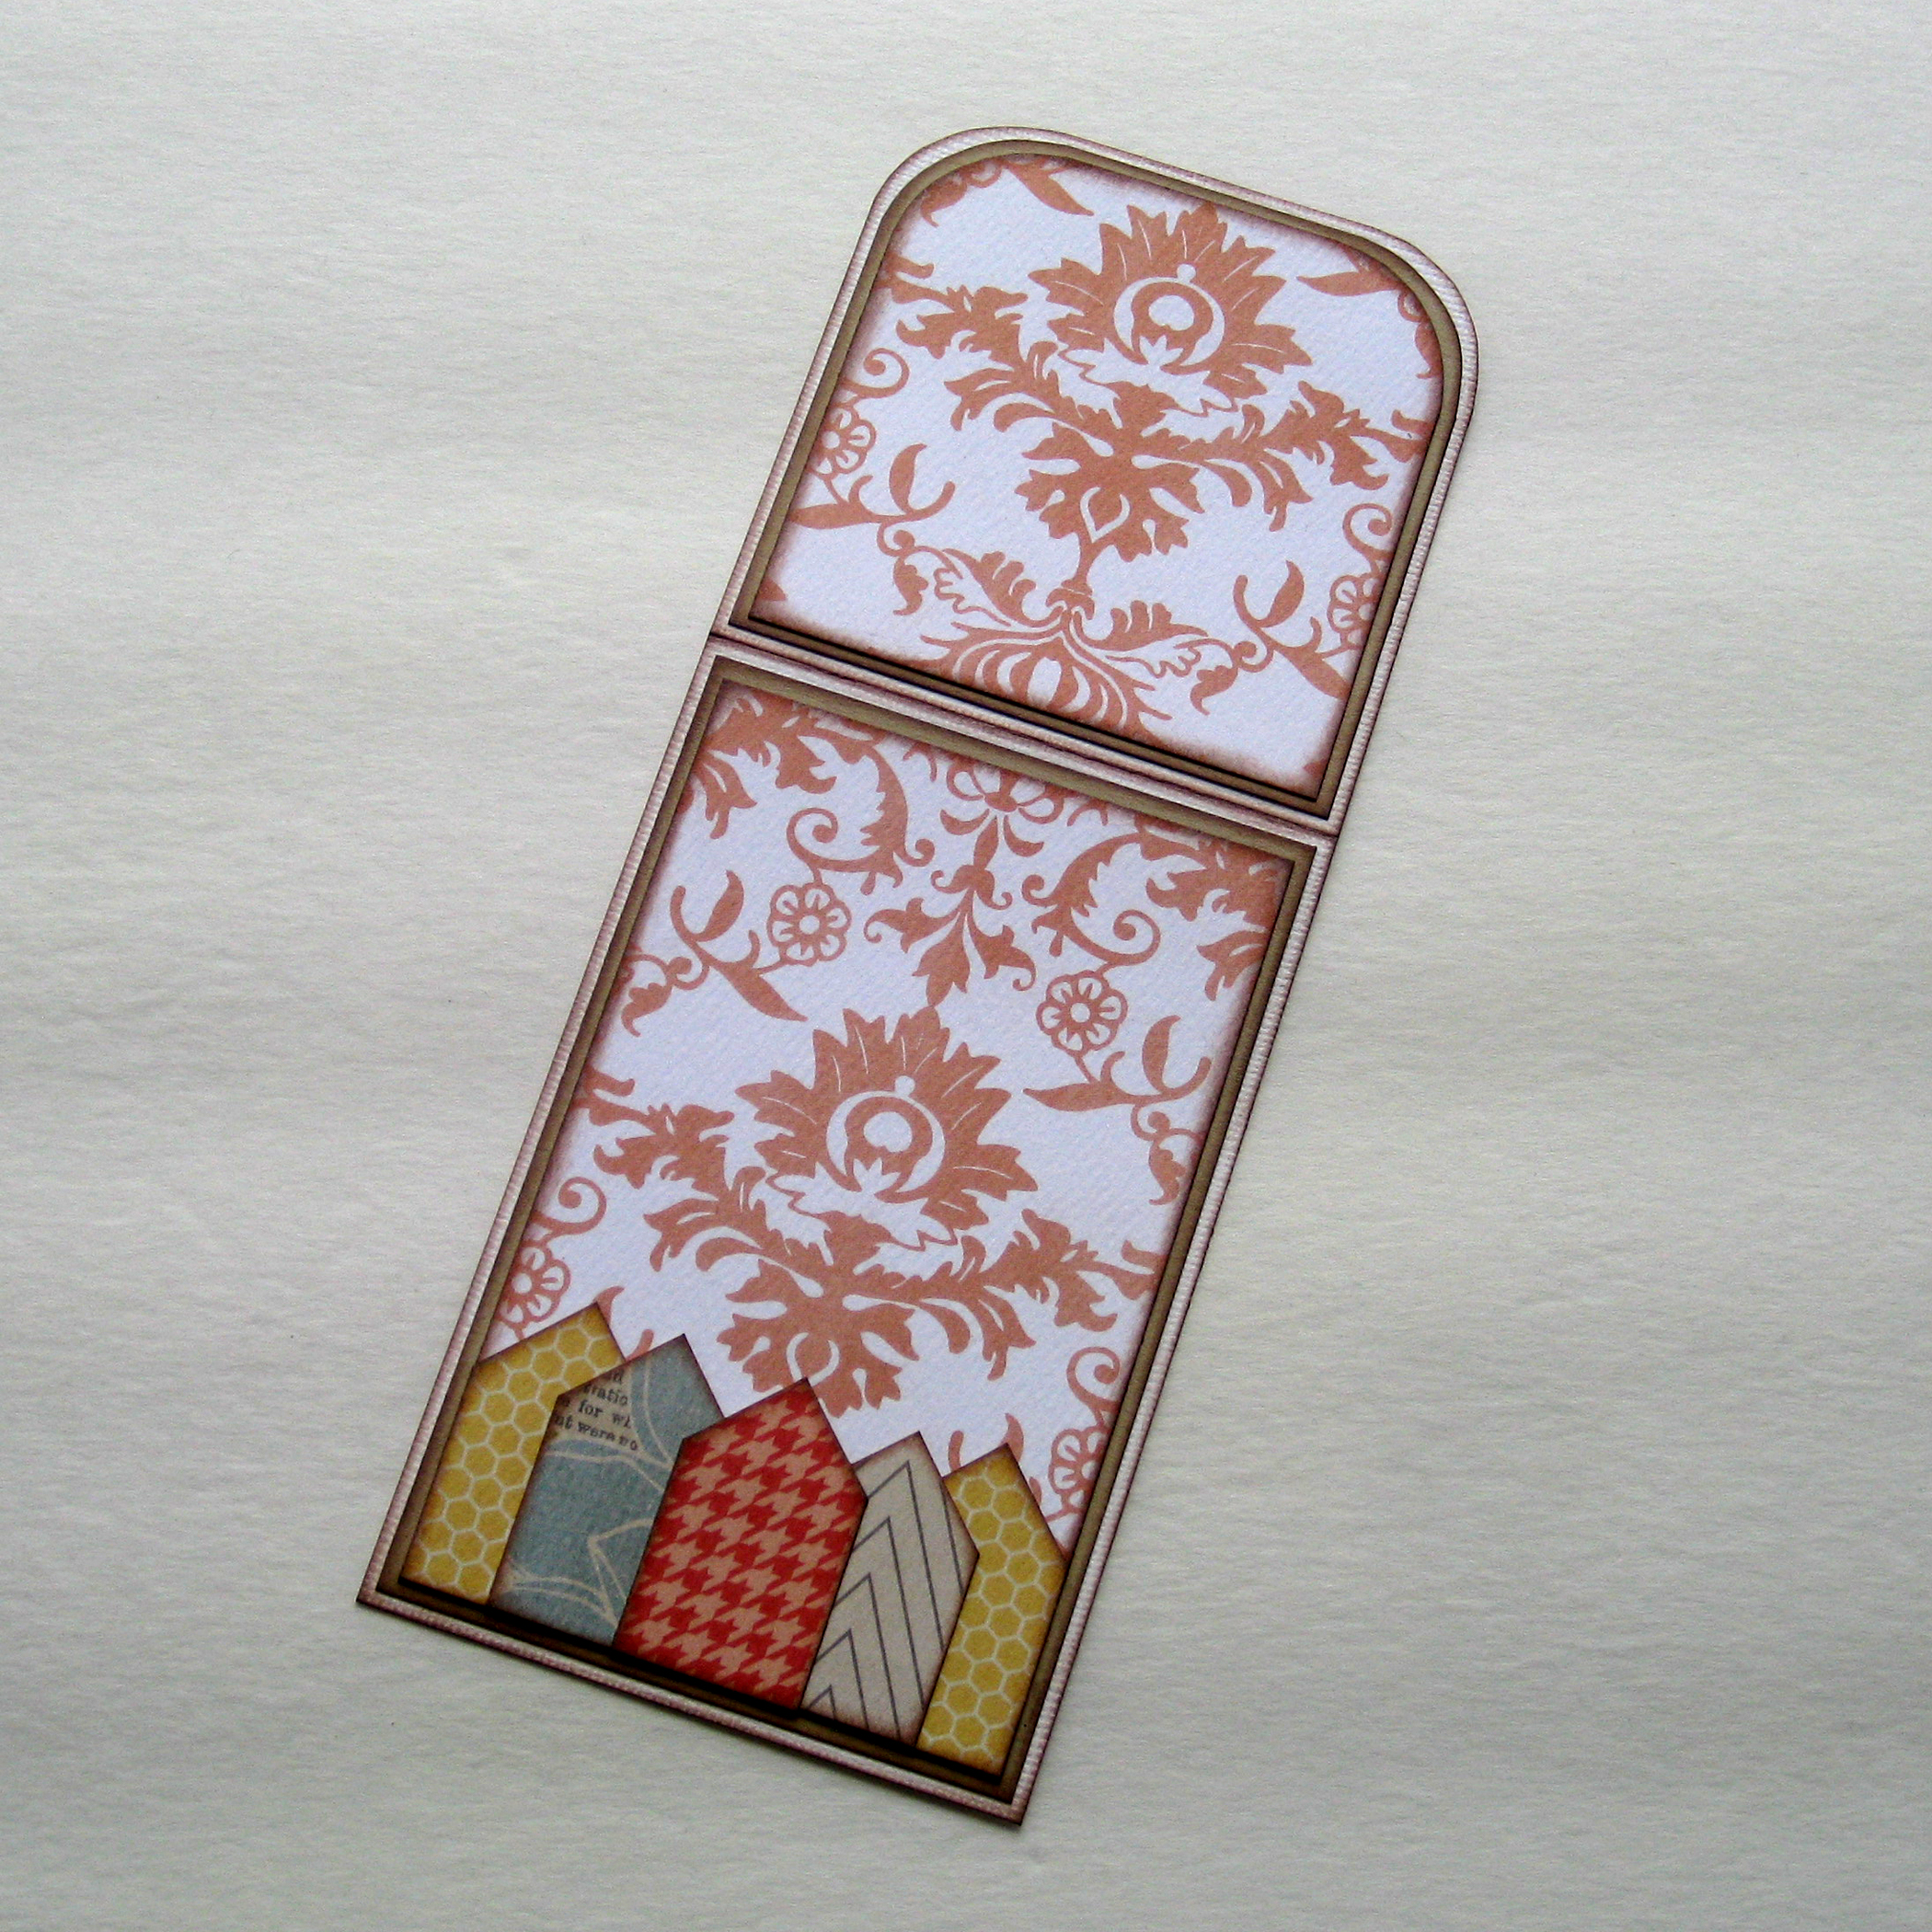
Once I had these layers complete, I re cut the hole on the top section of the card. I find using the punch upside down for this will make it much easier for you.
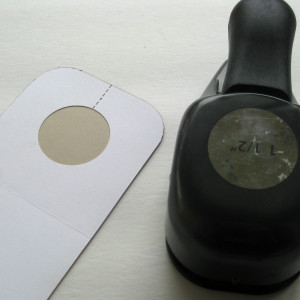
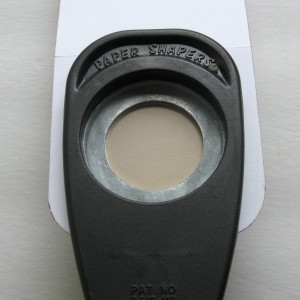
These are the pieces that I used to create the layered flower on the wine card.
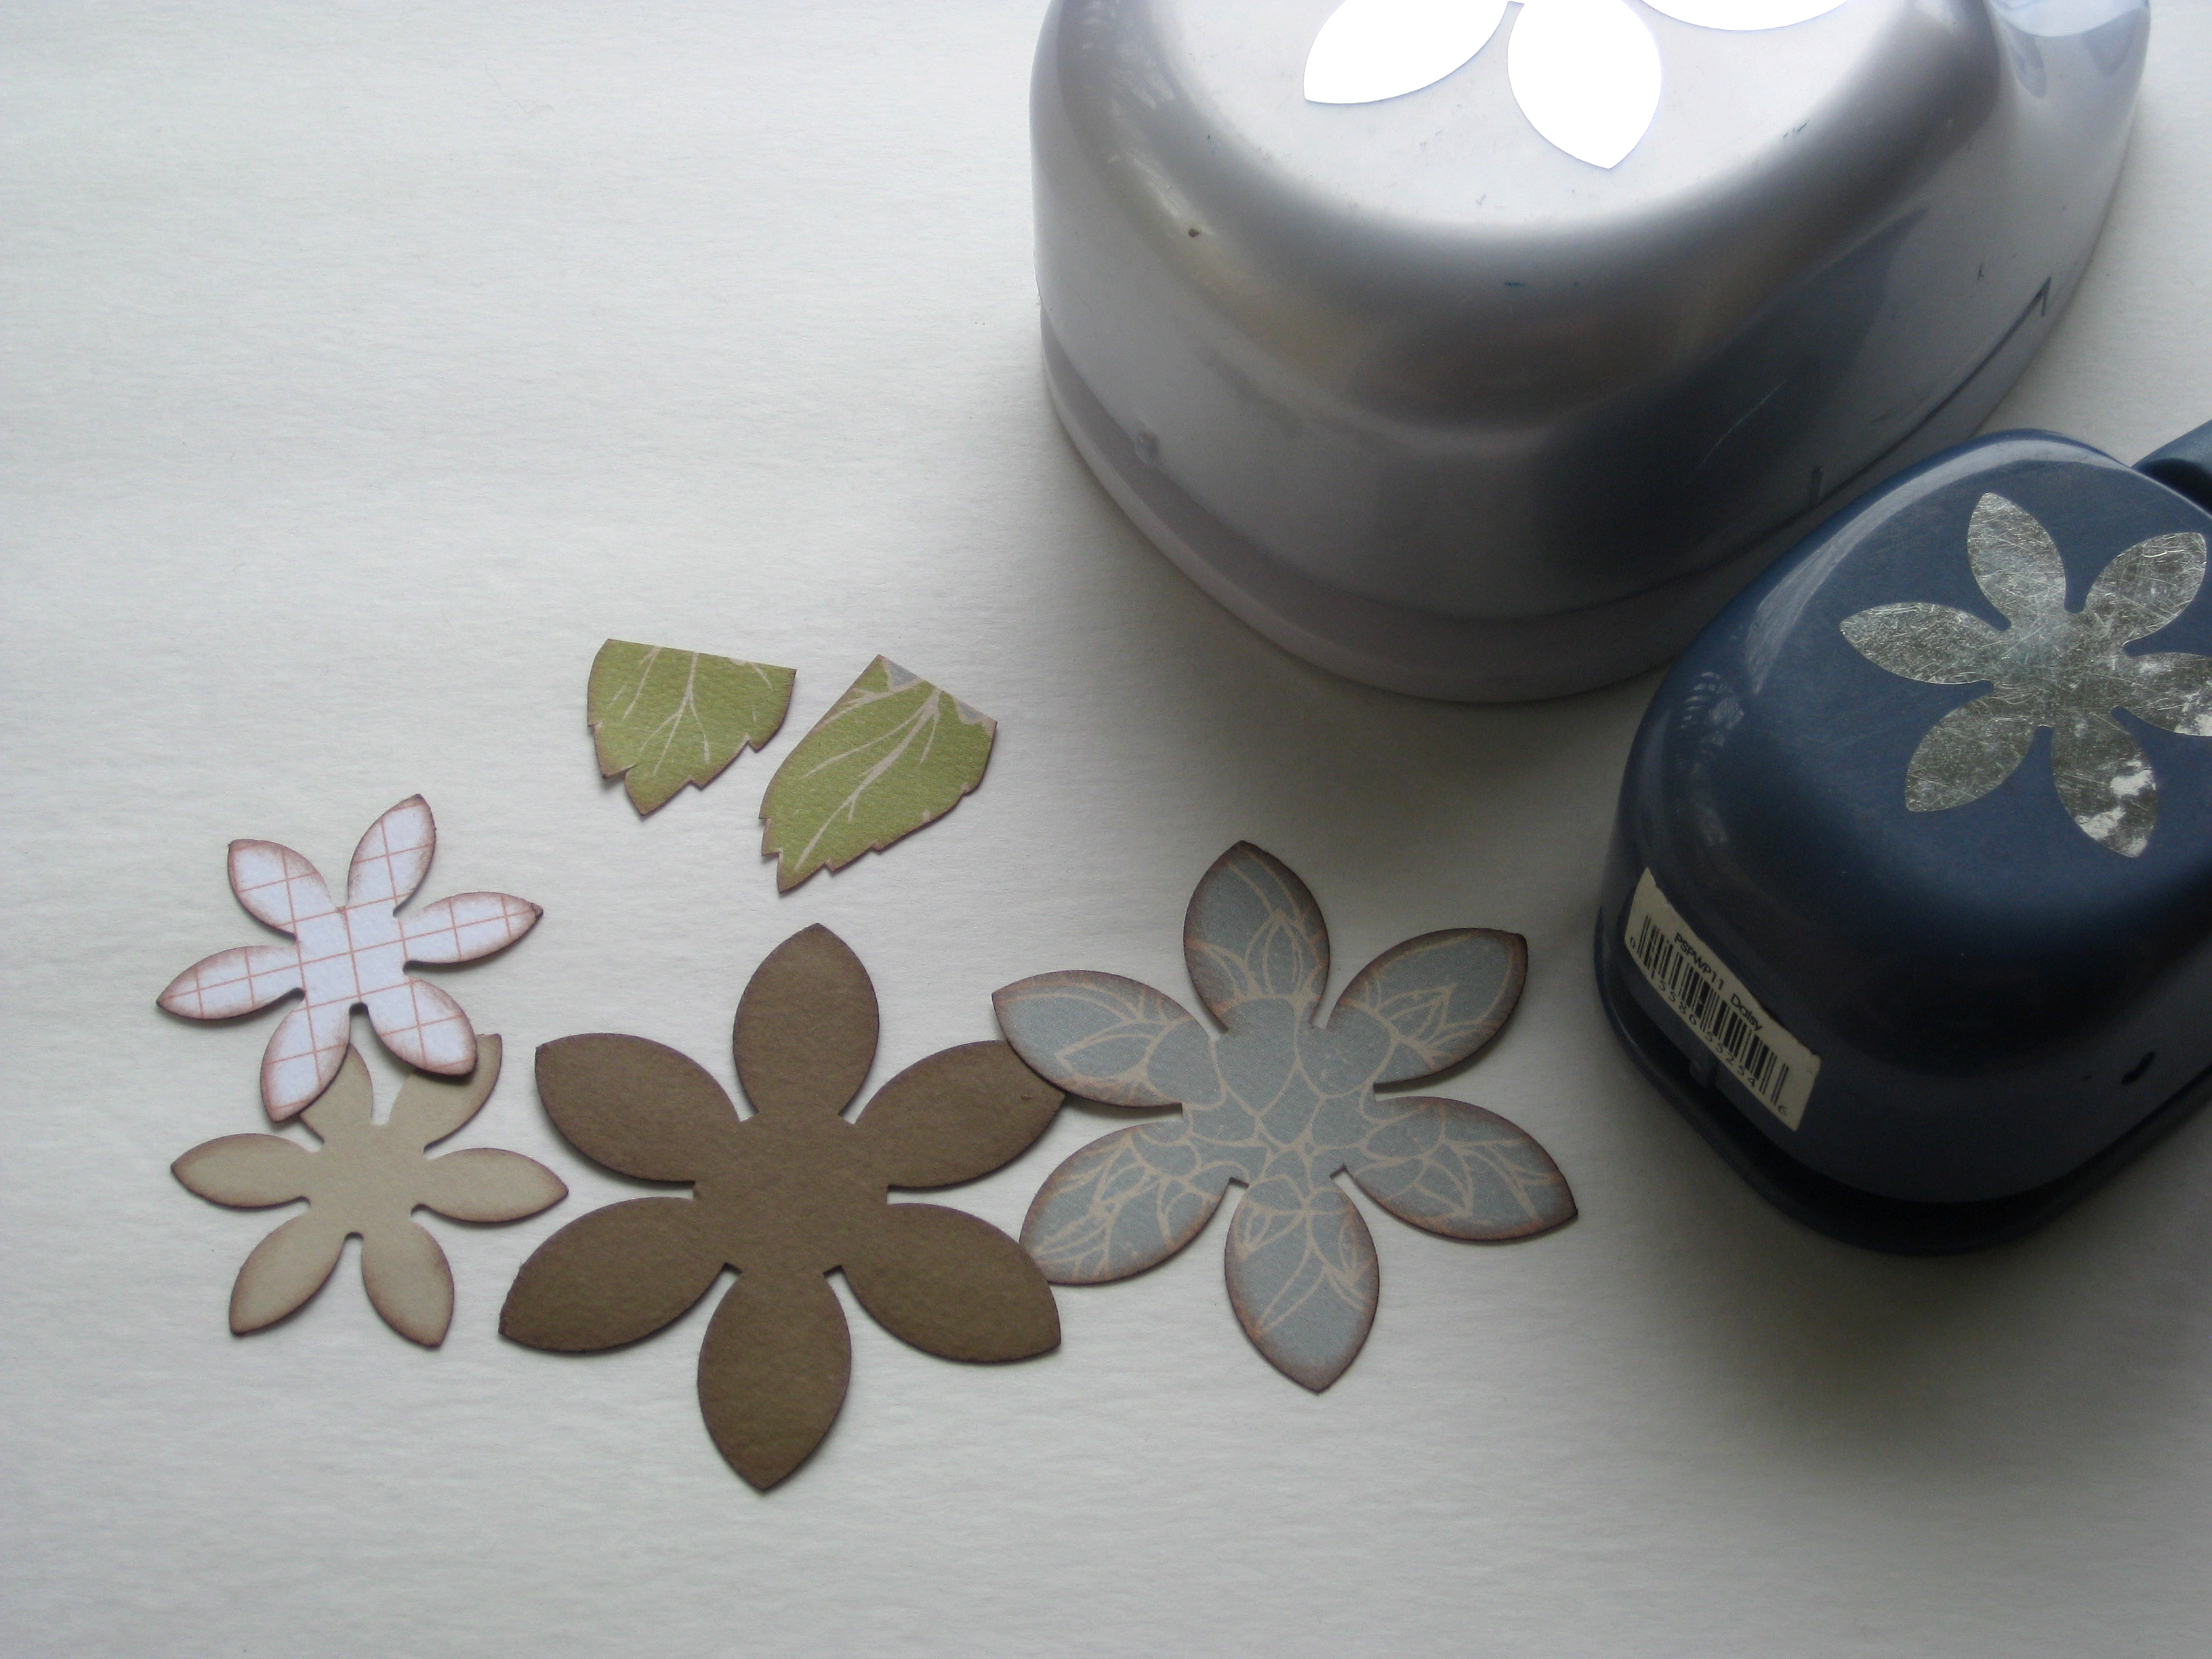
Add the large button in the middle as a finishing piece and adhere to the main section of the wine card. Then I also added sweet little peach buttons along the bottom of the card.
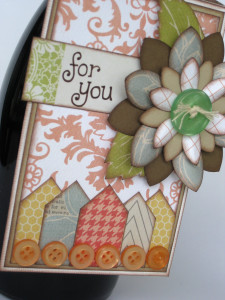
These are the pieces that I used to create the wine charm.
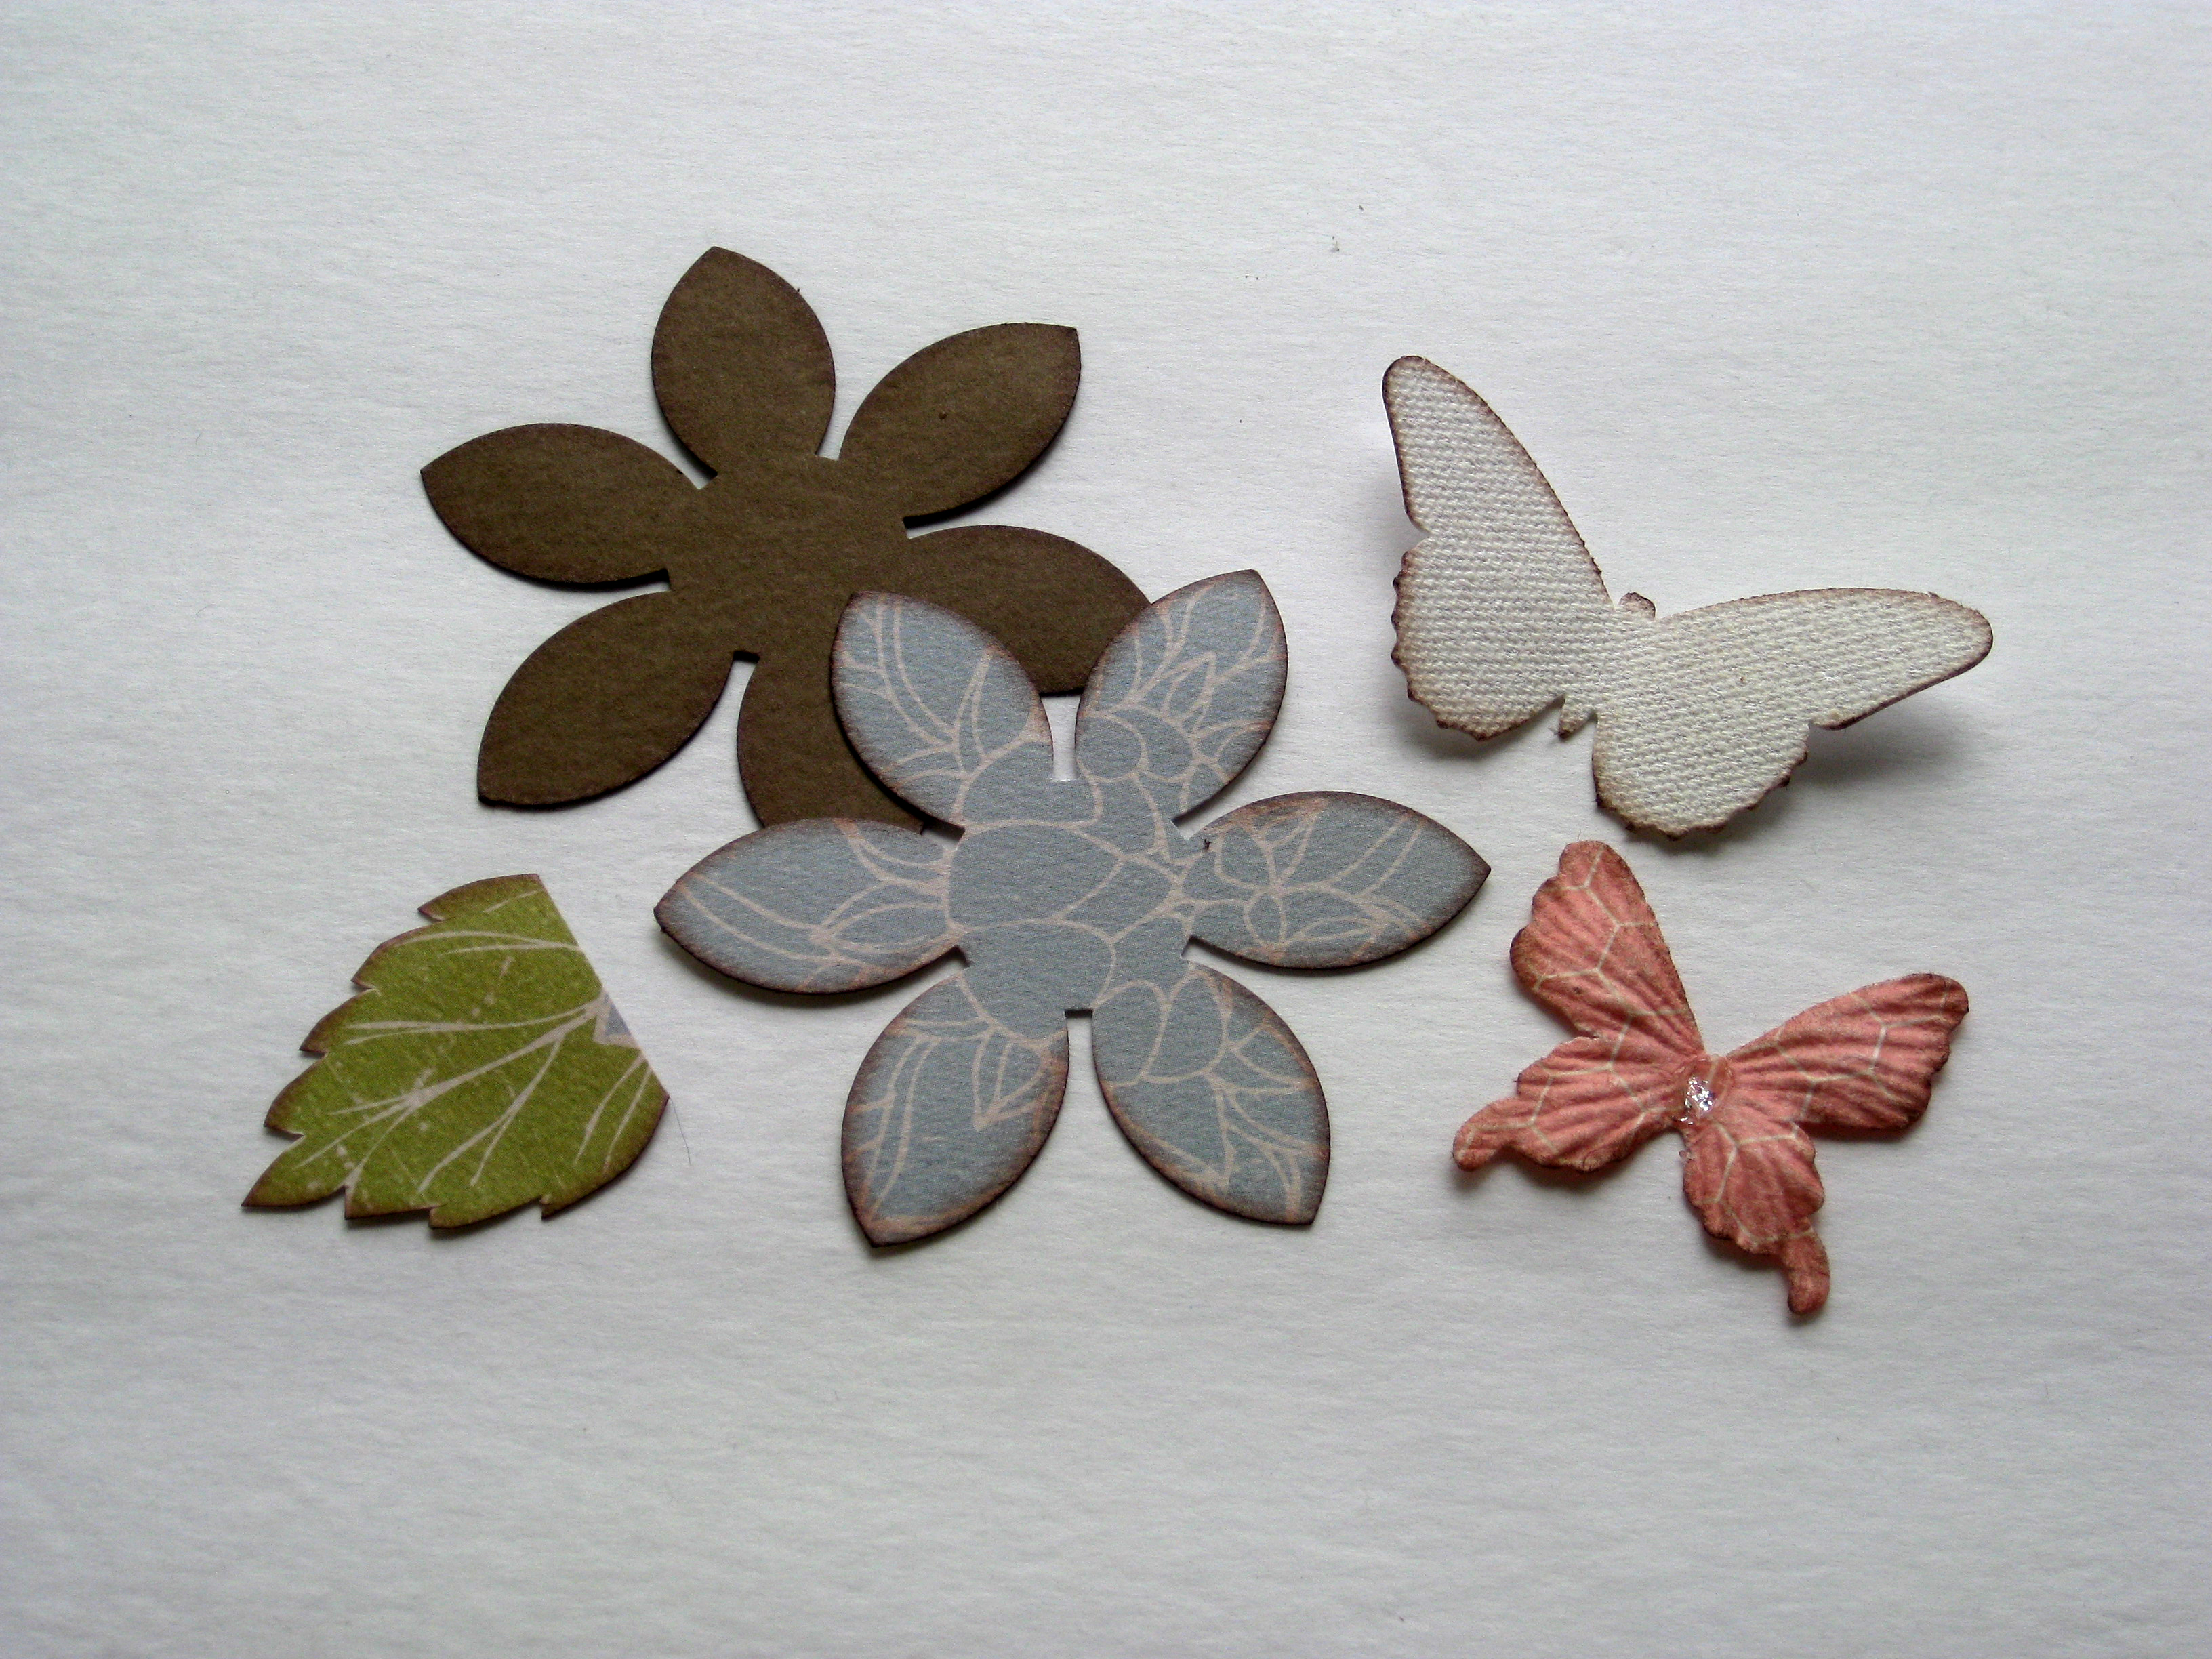
First I adhered the flowers together. I used my 5/8″ circle punch to create a template to trace onto the middle of the flower. I then cut in through the petals using scissors, and cut that circle out.
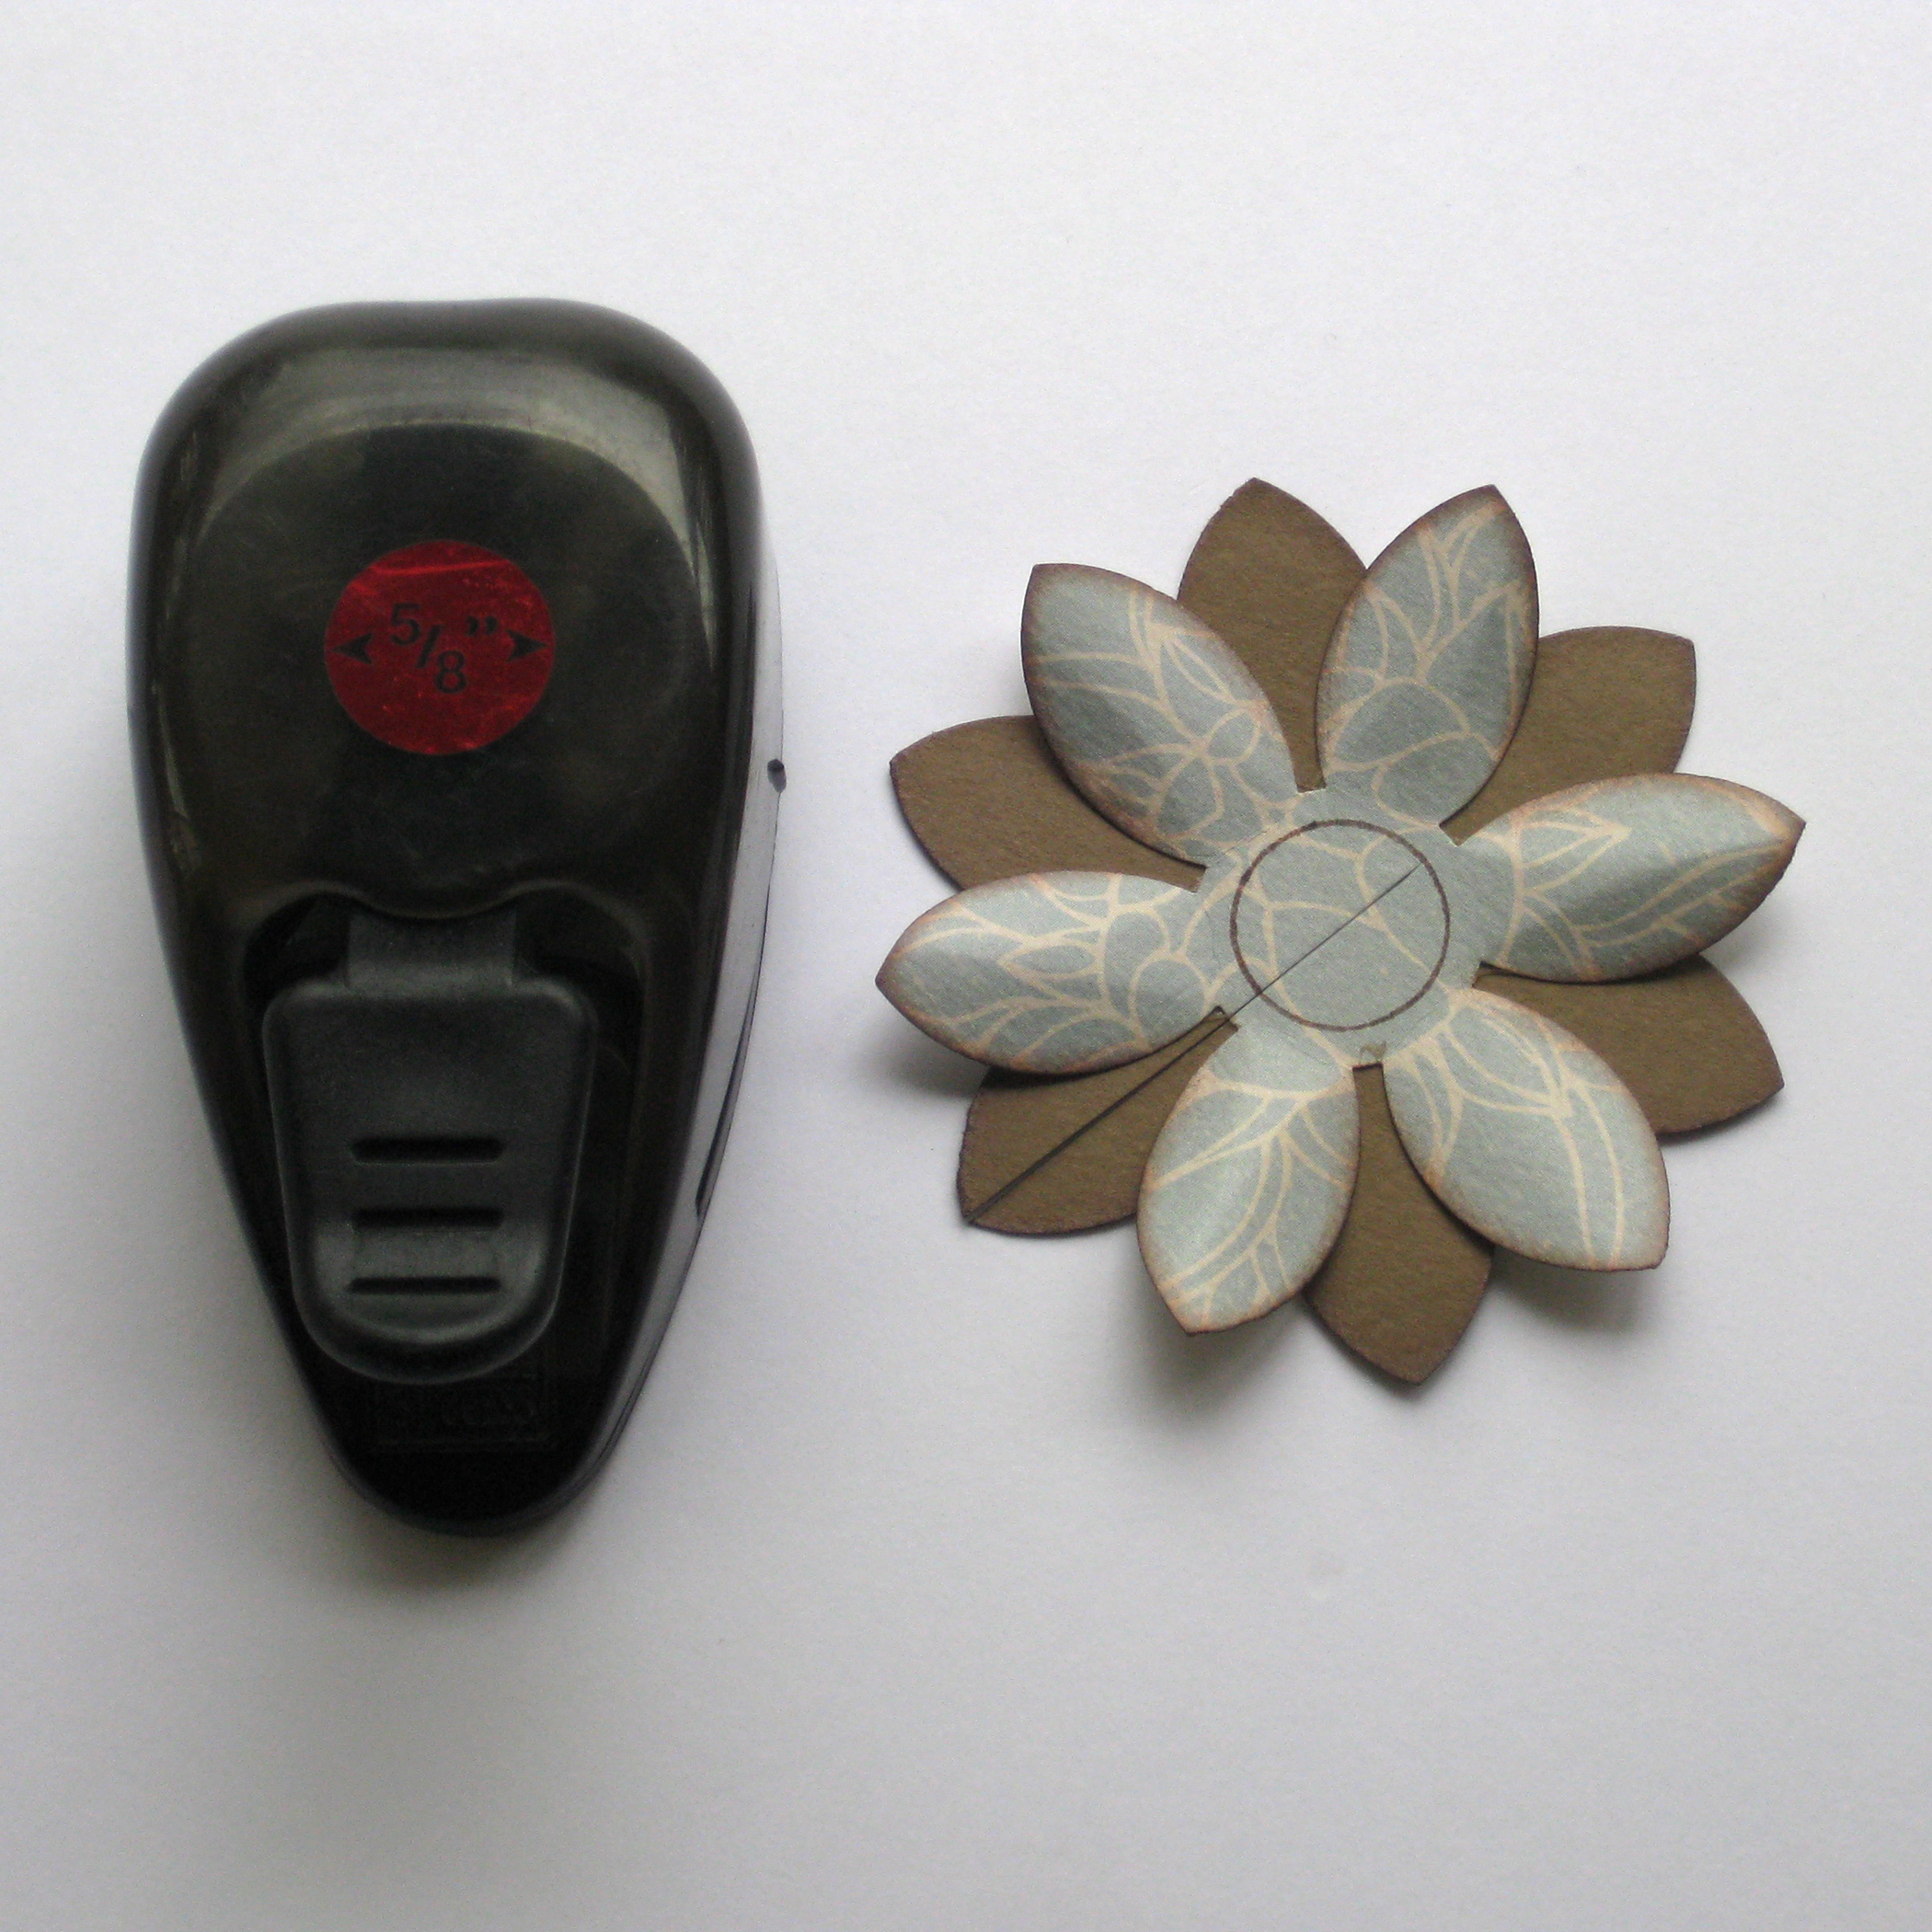
I added the sweet layered butterfly and leaf, with a small green button in the middle. Your charm is now ready for the stem of your favorite wine glass.
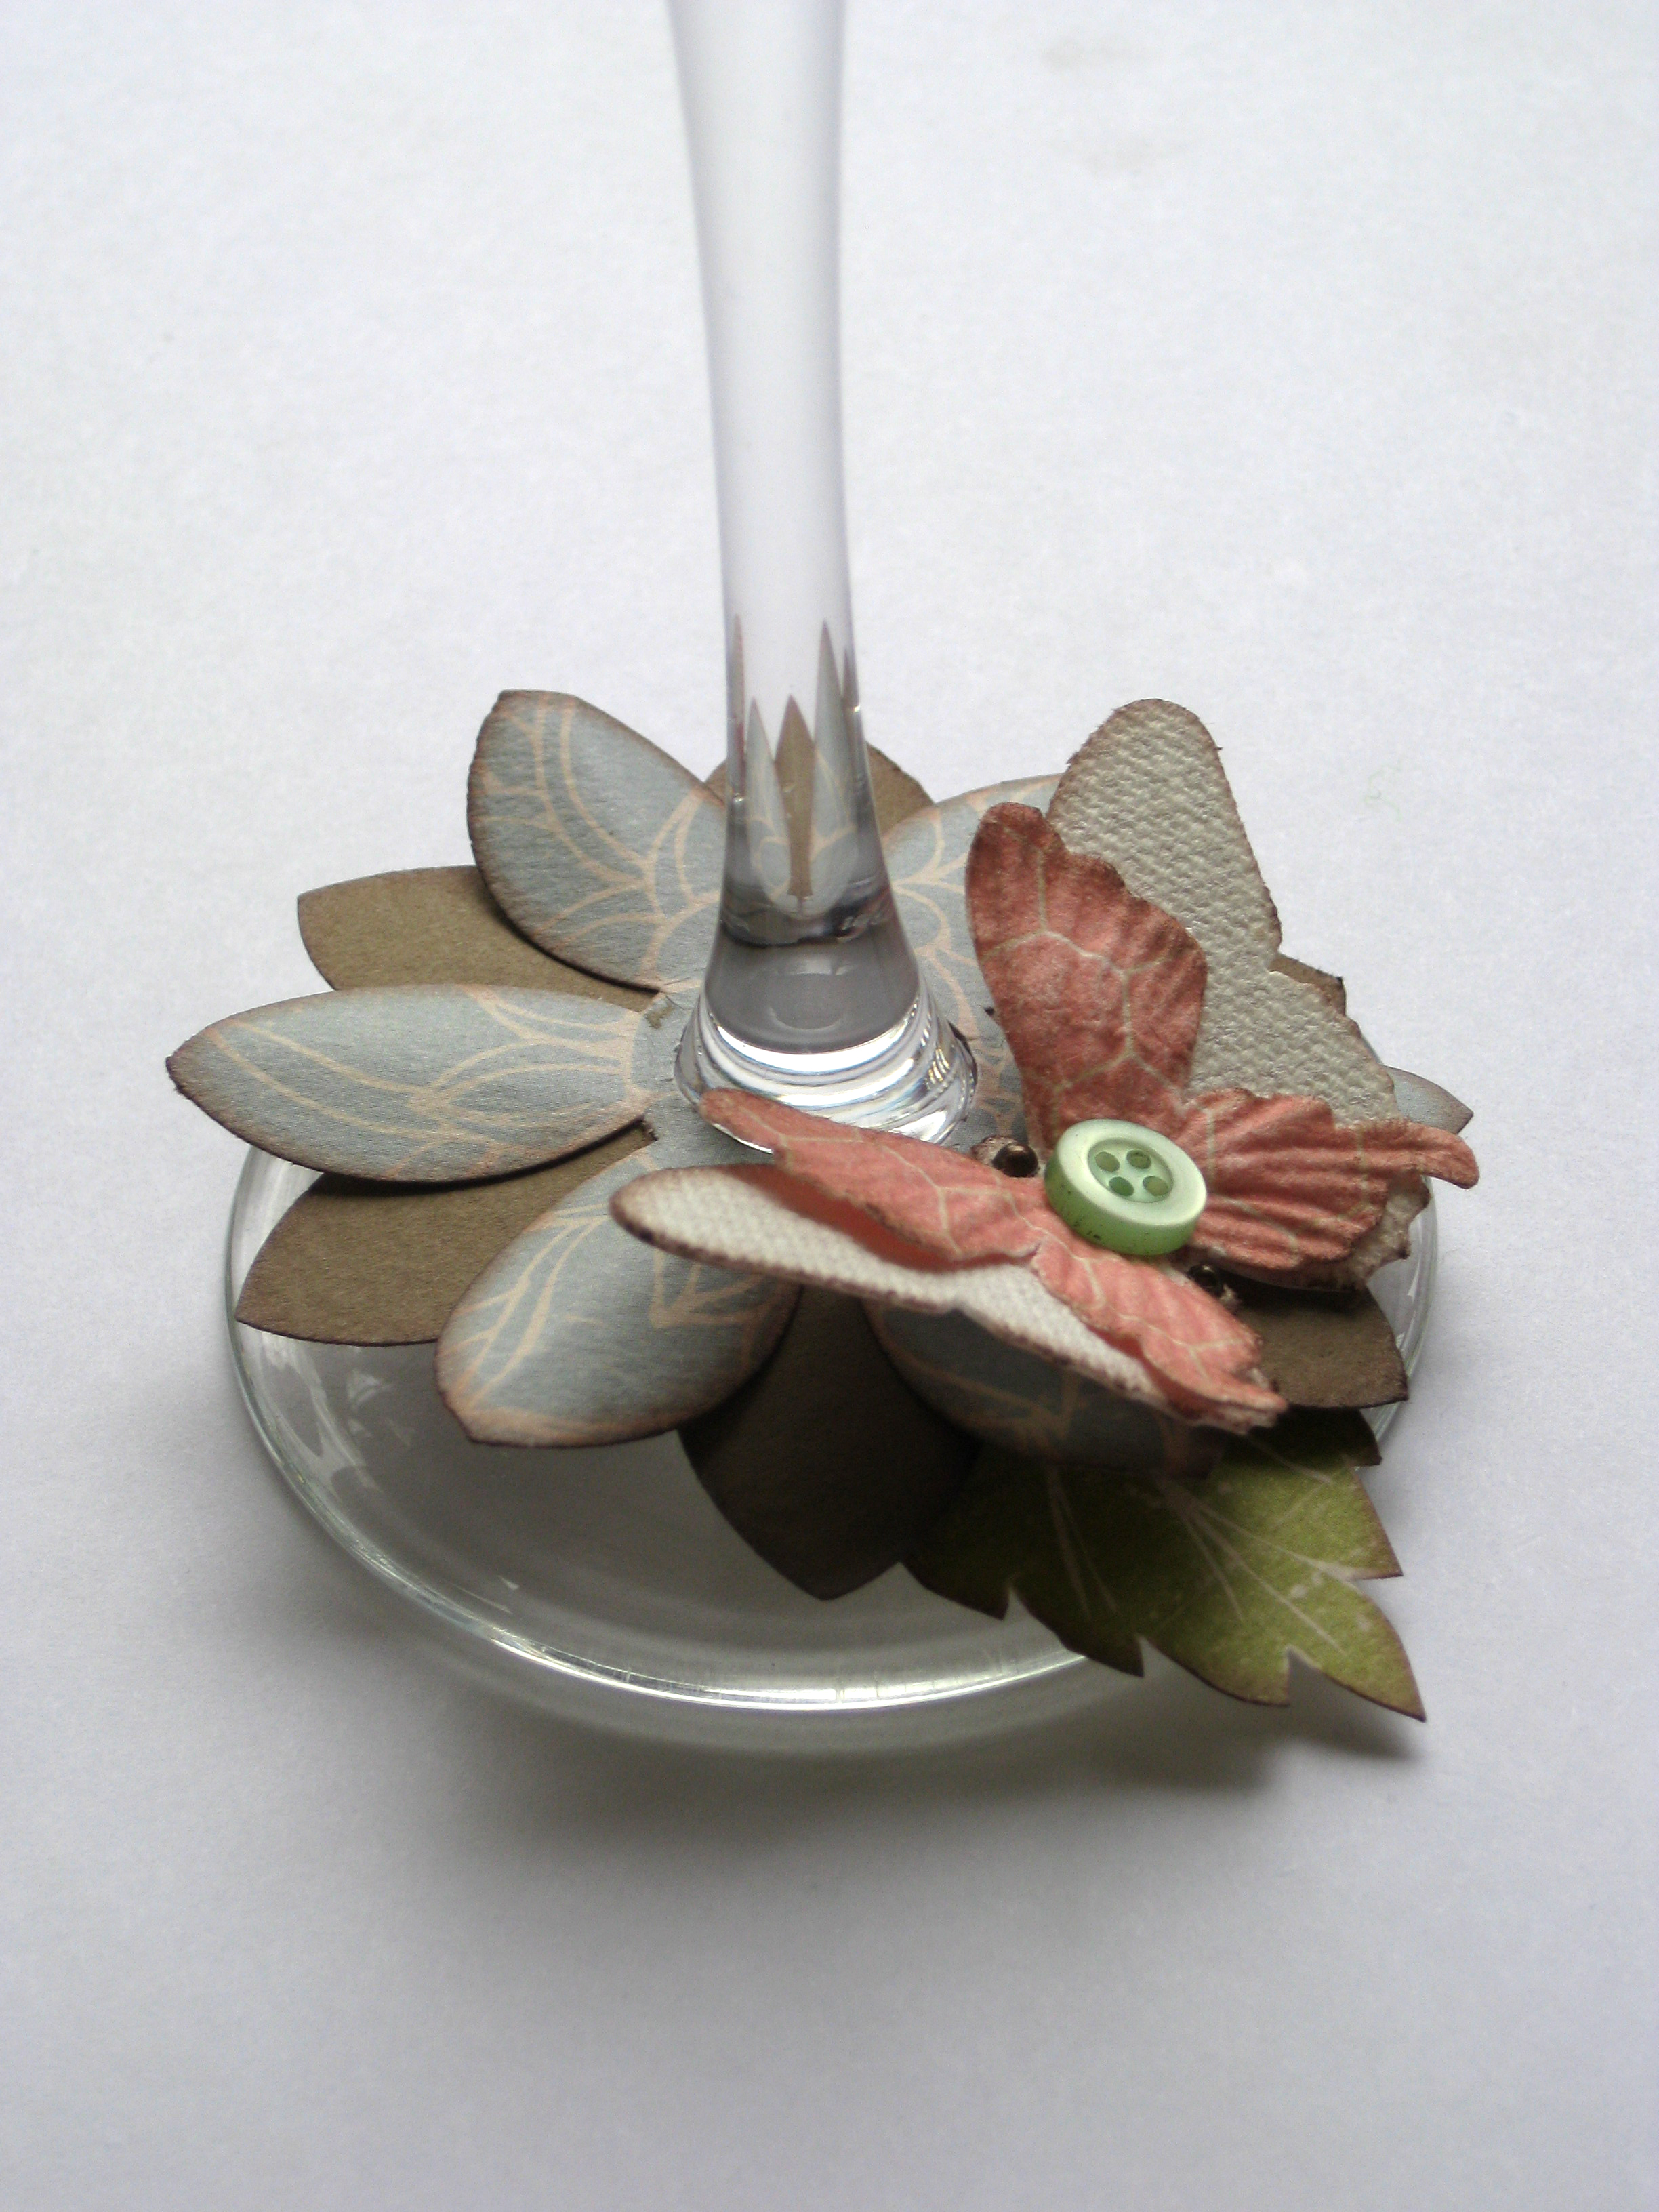
This is the finished wine card, ready for your favorite bottle of wine.
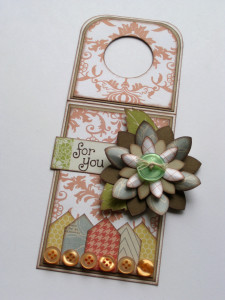
Products Used to Create This Project:
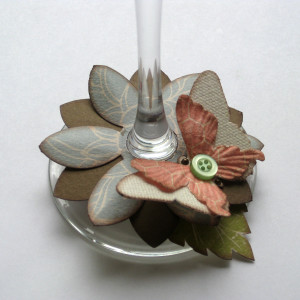
I hope this makes your gift giving just a little bit easier. Thank you so much for stopping by.

I love decorating empty cans and turning them into something fun and useful again. All those canned beans and soup can really be a DIY project waiting to happen. Add some fabric, ribbon and brightly colored buttons and you have yourself a whole slew of possibilities. For today’s project I decorated a can with patriotic colors and turned it into a pretty little flower vase, perfect for adding to the table for July 4th.
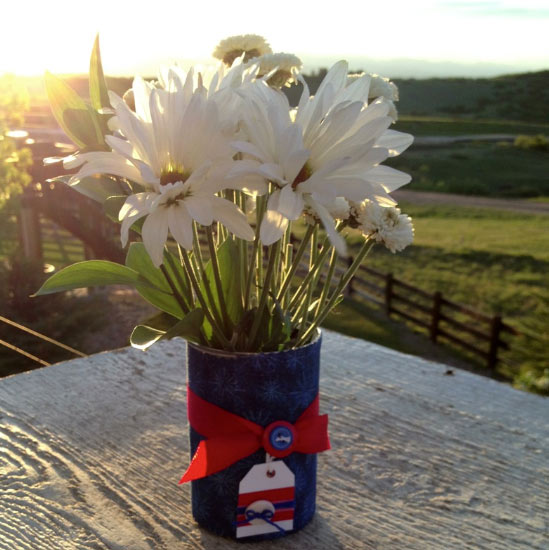
Red White and Blue flower vase
Materials:
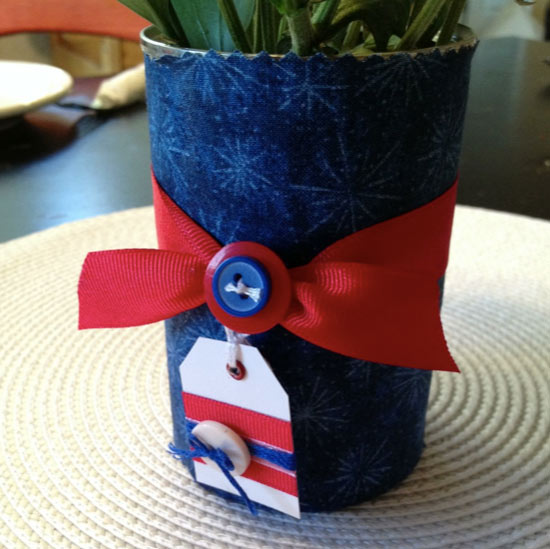
Patriotic flower vase DIY
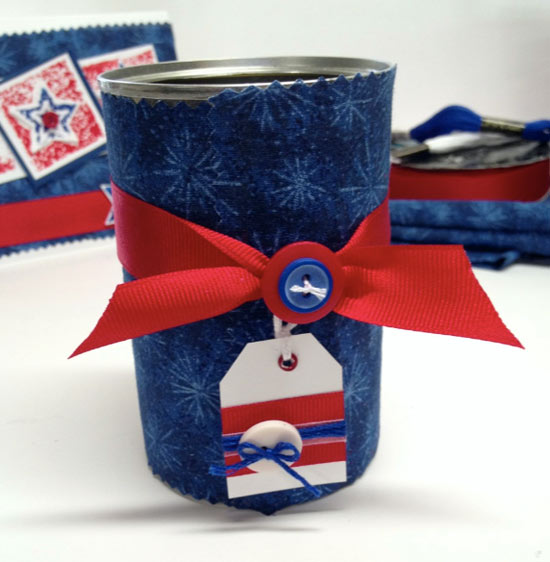
Recycled can to patriotic vase
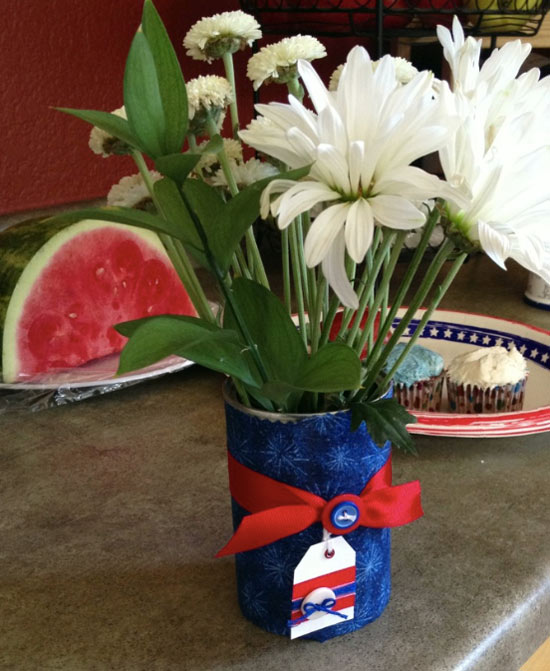
Simple patriotic flower vase
You can make a bunch of these patriotic flower vases to decorate for your July 4th festivities. I use these same kind of decorated cans as utensil holders and pencil/marker holders for parties. You can add a little sparkle by using glitter or rhinstones to the tag and ribbon wrap. You can even add buttons all around the can. Get creative and make your own fun patriotic decorations!
I can’t tell you how much I loved Laura Kelly’s America the Beautiful fabric and her mix buttons. These really inspired me to created something a bit primitive with a patriotic touch.
Now, I am definitely not a sewer, in fact I can sew better on paper than on fabric, but Laura Kelly’s mix buttons and her America the Beautiful fabric really made this project fun and very easy to create.
Here is what I created using Laura Kelly’s Mix Buttons collection and her

It really was very simple to create this Patriotic Wall Hanging using Laura Kelly’s Mix Buttons and America the Beautiful Fabric.
Step One: So, lets get started by gathering all our supplies:
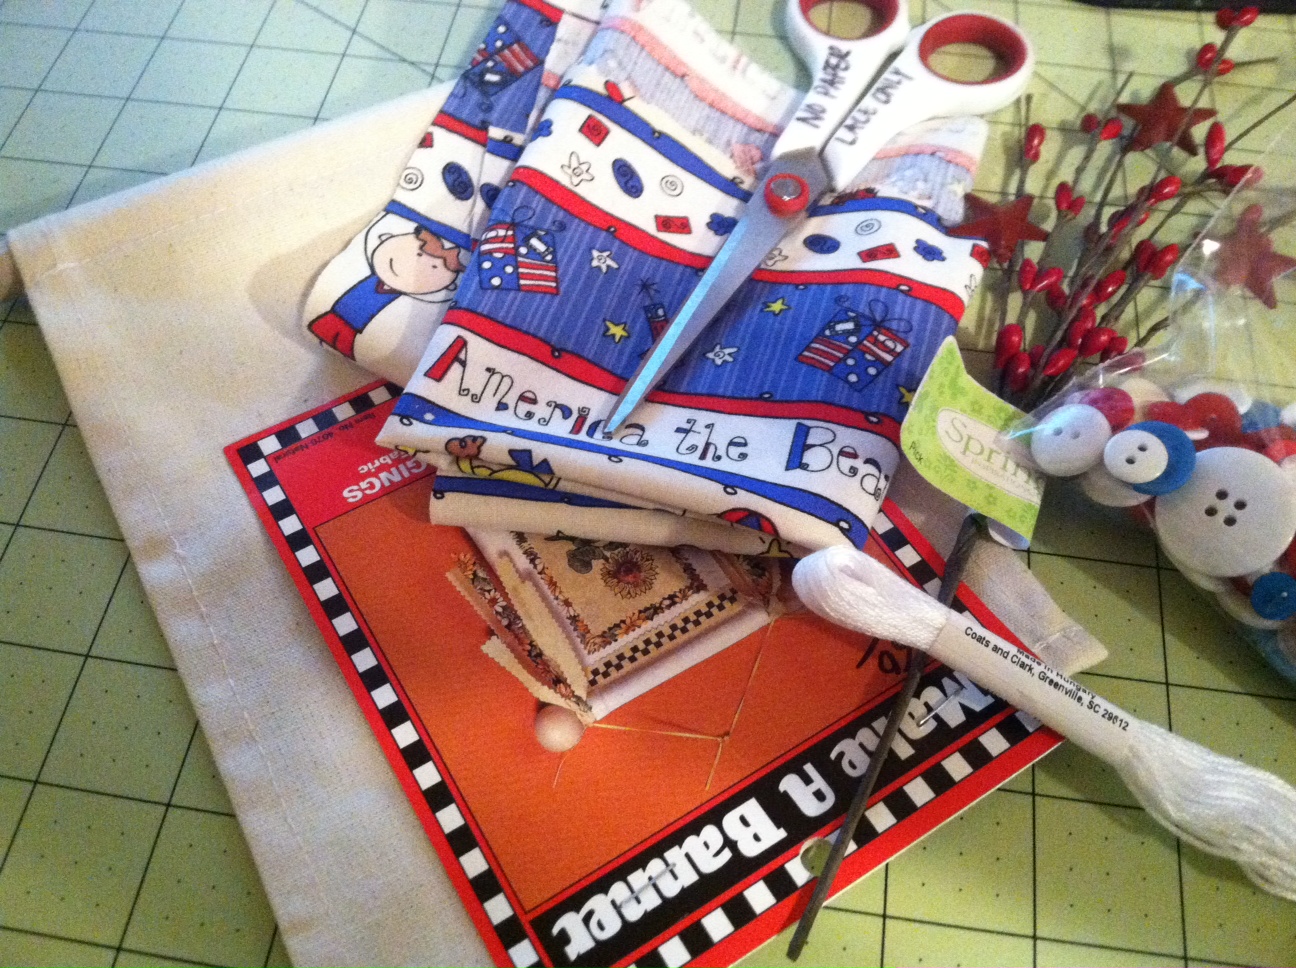
Once you have gathered all these lovely supplies, you can begin by cutting out your fabric.
Step Two:
I cut my Laura Kelly’s America the Beautiful fabric into the shape of a square. I used a contrasting piece of checkered fabric that I picked up at my local Walmart, which I used for the roof of the house. I cut that piece into a triangle.
Now be sure that you cut two pieces of each because once you have all the edges sewn you will stuff, but lets now go to our next step.
Step Three:
Now that you have 2 Square pieces and 2 Triangle pieces cut of your fabric of choice of course, you will need to take out your sewing machine or sew by hand whichever is easier for you. Sew one roof piece to the top of your square and do the same with the other two pieces. You will then have to house looking pieces of fabric. Now that you have those two you will place both pieces with the outside pieces facing each other and secure them with pins.
With a sewing machine sew the edges, but make sure you leave an opening.
Step Four:
Turn the fabric inside out and start stuffing with the fiberfill and sew the opening up.
Step Five:
Use Laura Kelly’s mix buttons to create a door knob and a window. I used embroidery floss for this stop to sew into my little house.
If you have an extra piece of Laura Kelly’s fabric go ahead and cut and create a chimney.
Step Six:
Now with the Beacon Fabri-Tac glue the house to the canvas and embellish with the twig and fence. I distressed my fence and added stars. I also sewed the word U.S.A with the embroidery floss.
I am not a perfect sewer, but I think this was a perfect and easy project to make. That anyone even beginning sewers could enjoy creating. Here is the supply list if you are interested in creating this awesome and fun Patriotic Wall Hanging using Laura Kelly’s Mix Buttons and Fabric
Buttons Galore Products:
Cross Promotion:
Other Materials Used:
I hoped you enjoyed this project, be sure to check out all our fun and amazing Patriotic Projects and Laura Kelly’s I love USA Blog Hop.
Today’s crafty inspiration is this red, white and blue altered canvas featuring fabric from Laura Kelly Designs and of course buttons! It’s an easy to create project for your home or for a gift.
All of the July 4th celebrations are fast approaching. So that means get out your Red, White and Blue, and get crafting.
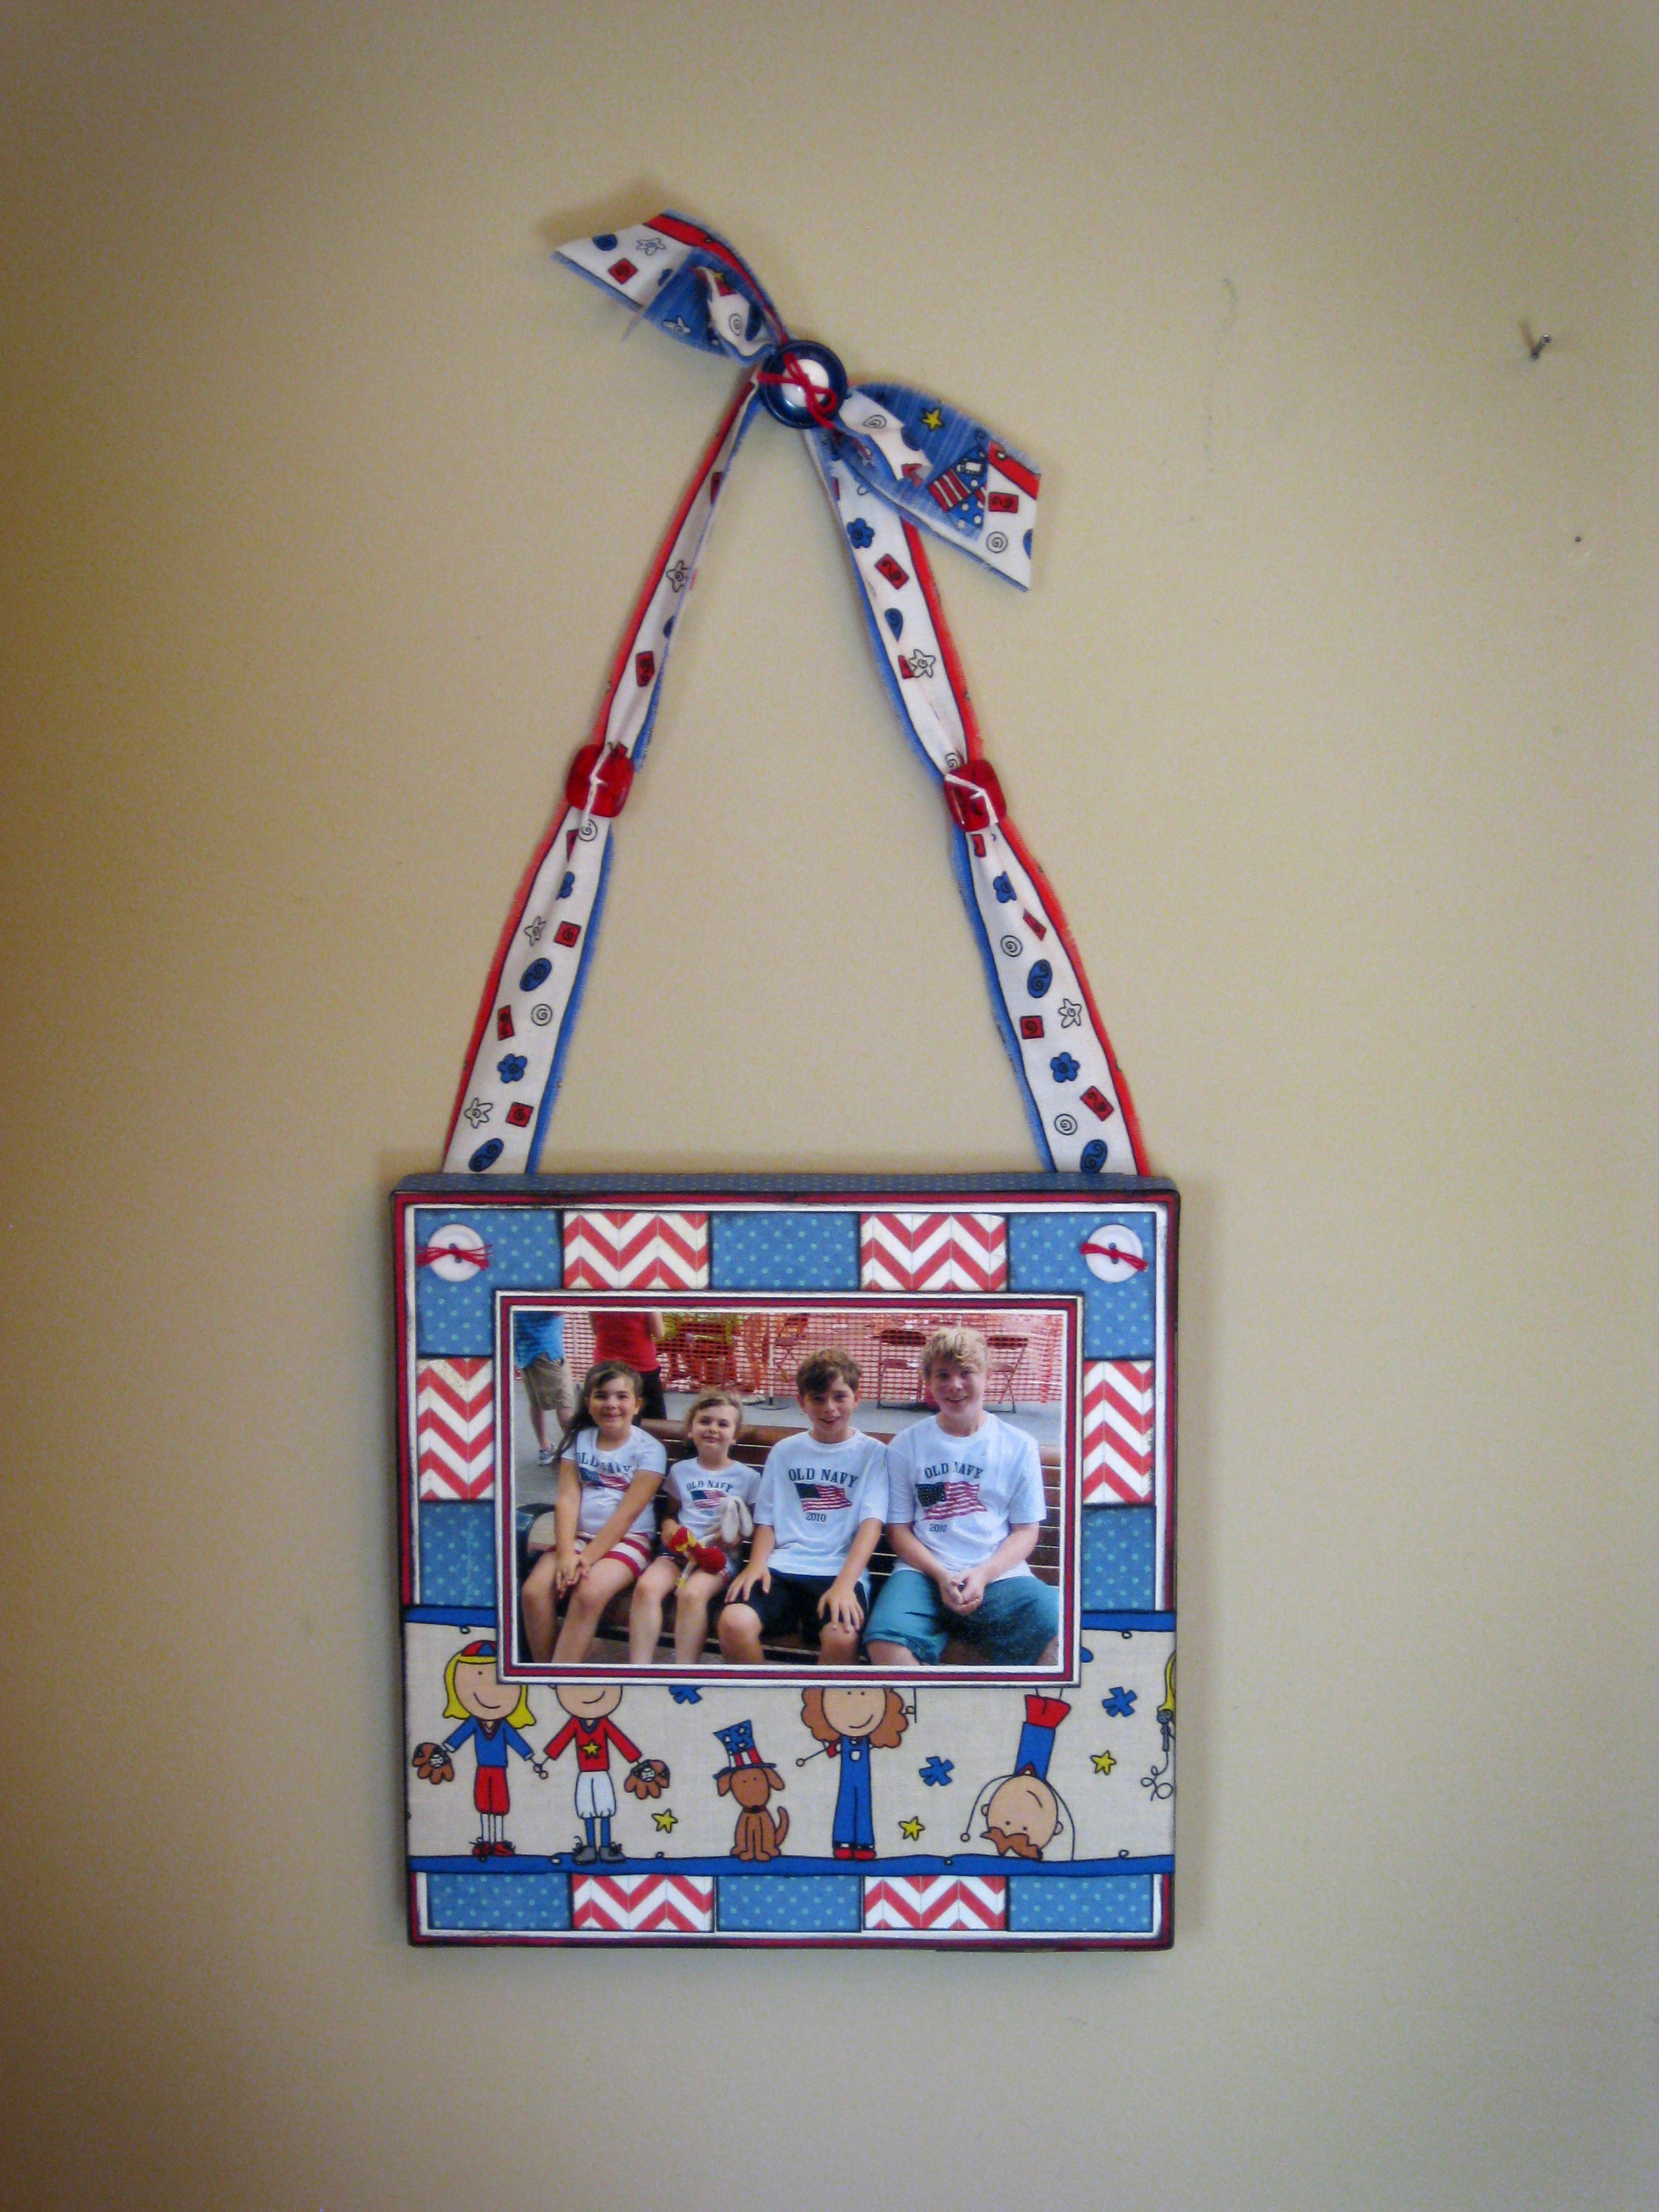
I started with and 8×8 canvas that I covered in cardstock and patterned paper. Tip: Make sure you use a strong adhesive that you trust for altered projects to ensure your paper will stay attached to your canvas.
Other Products Used:
Make sure to cover the sides of your altered canvas as well. I like to cover all surfaces that can be seen with patterned paper, ribbon or fabric.
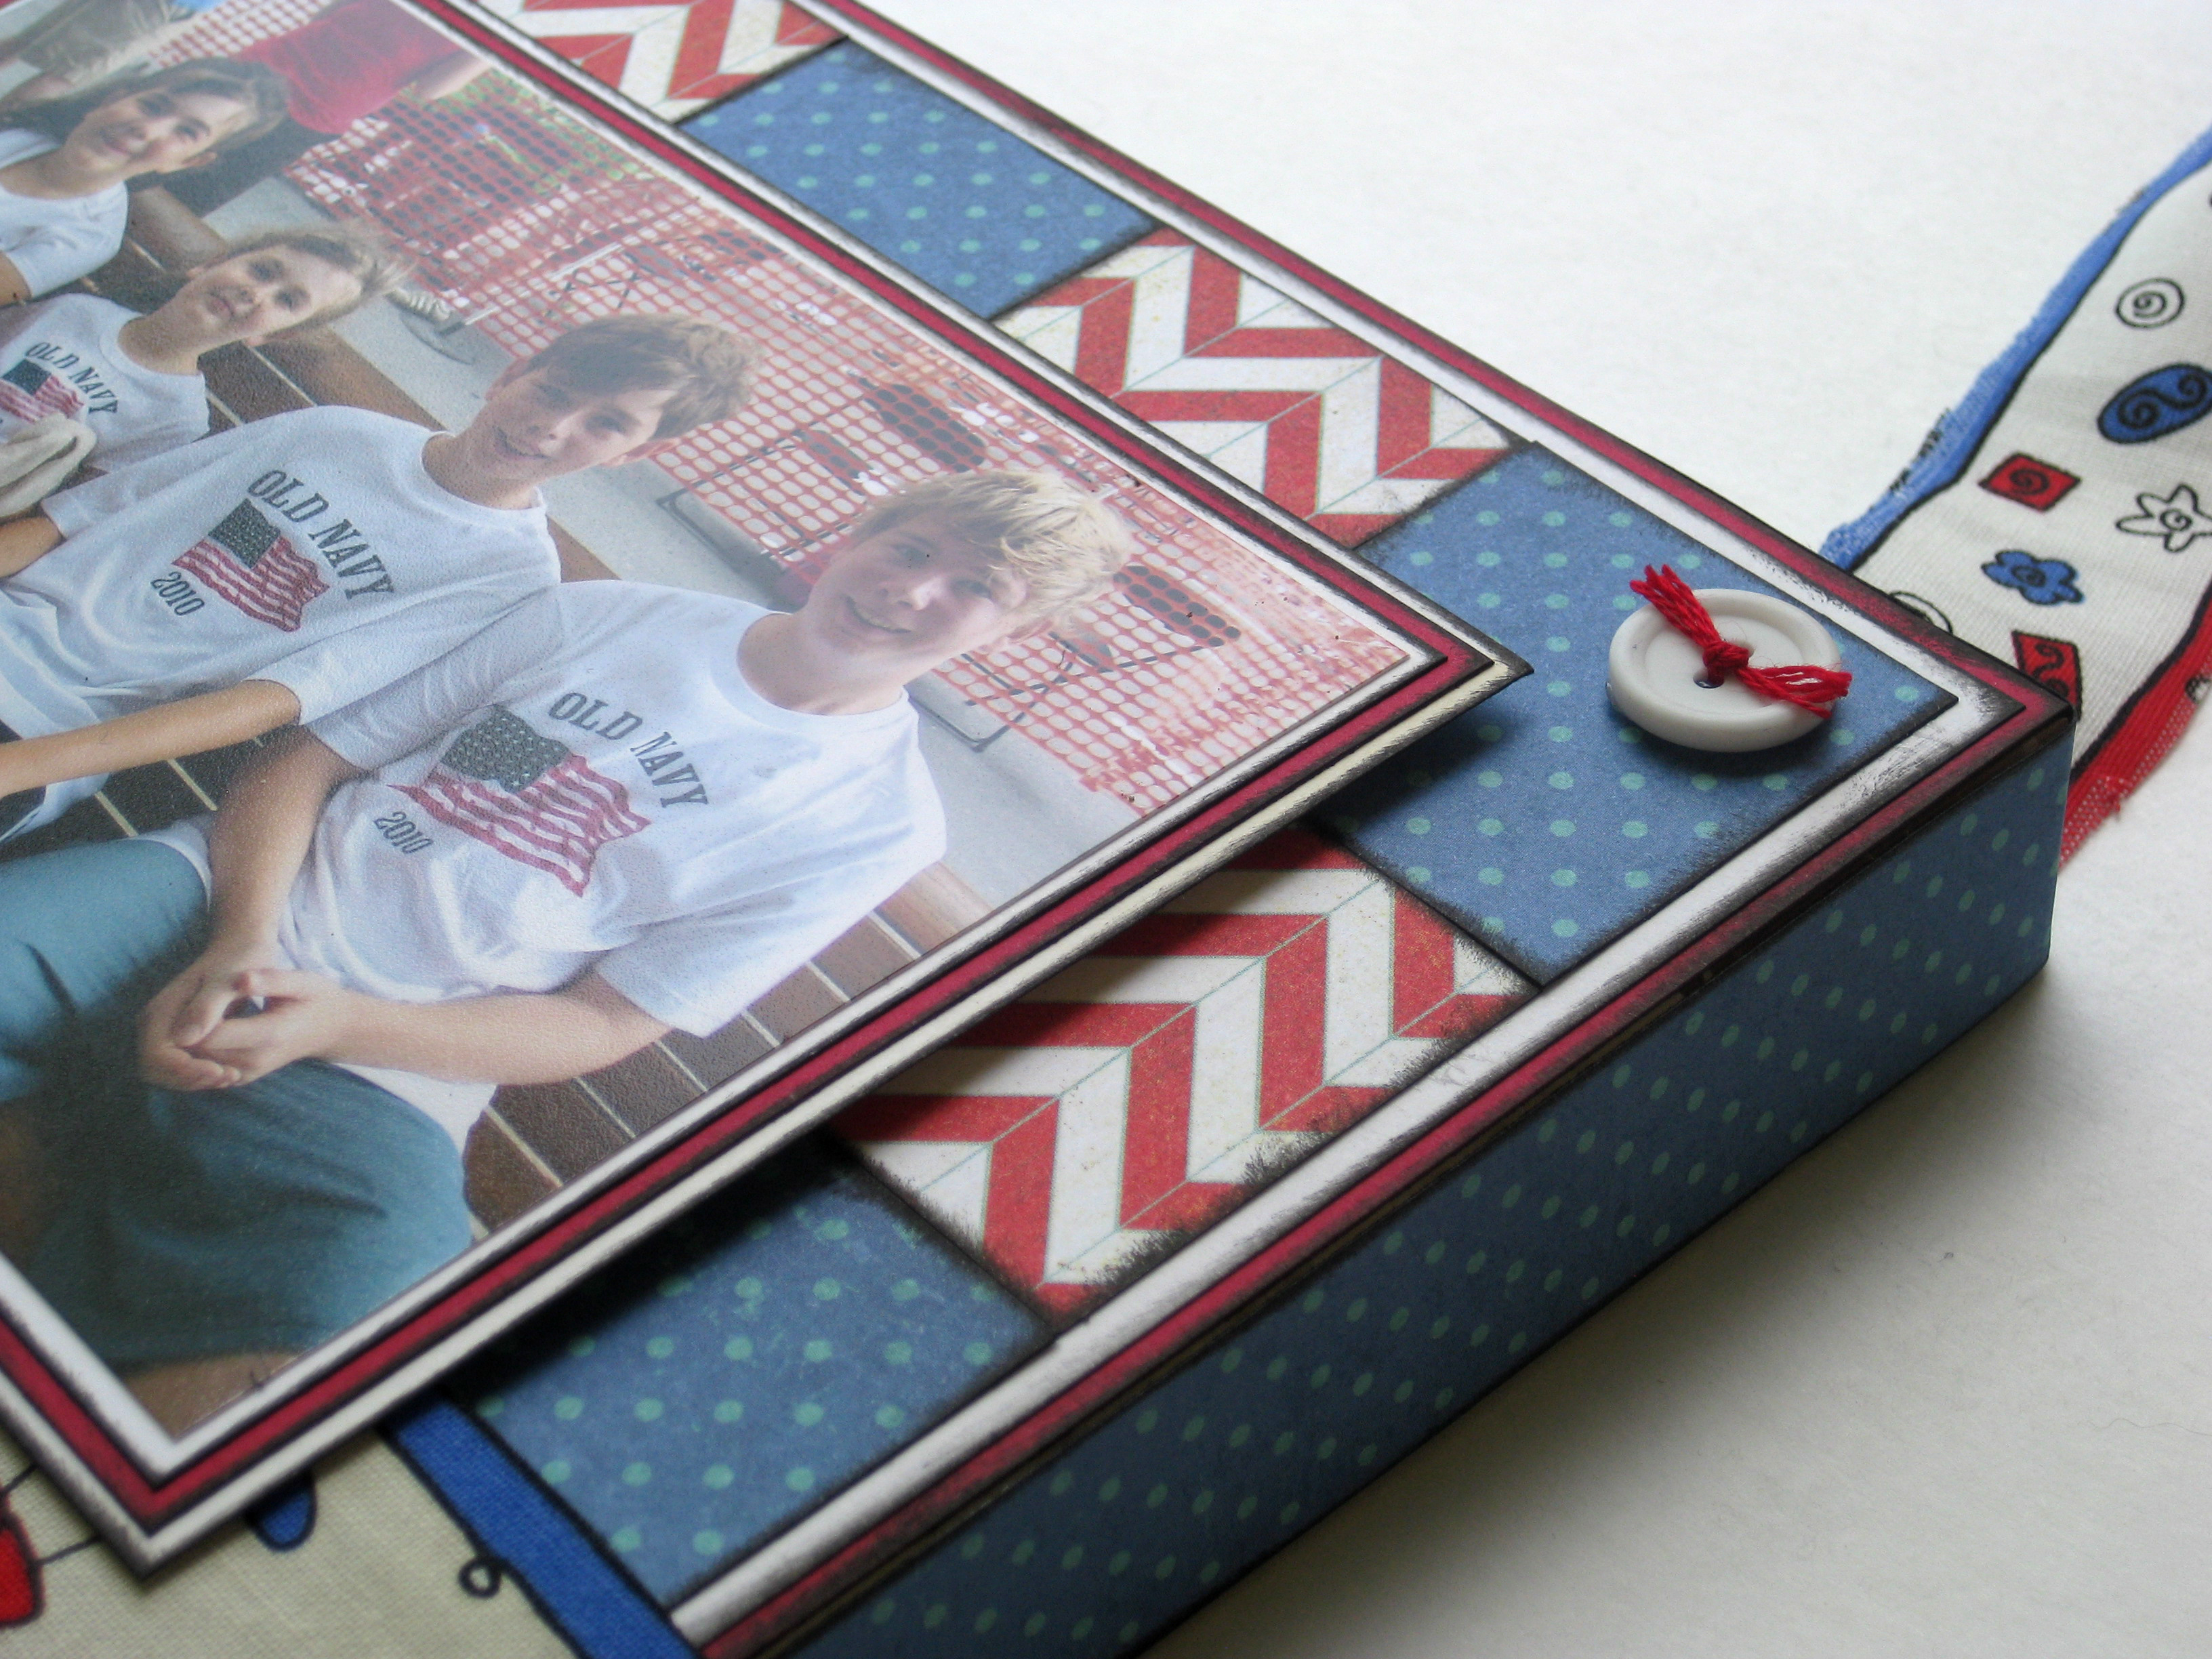

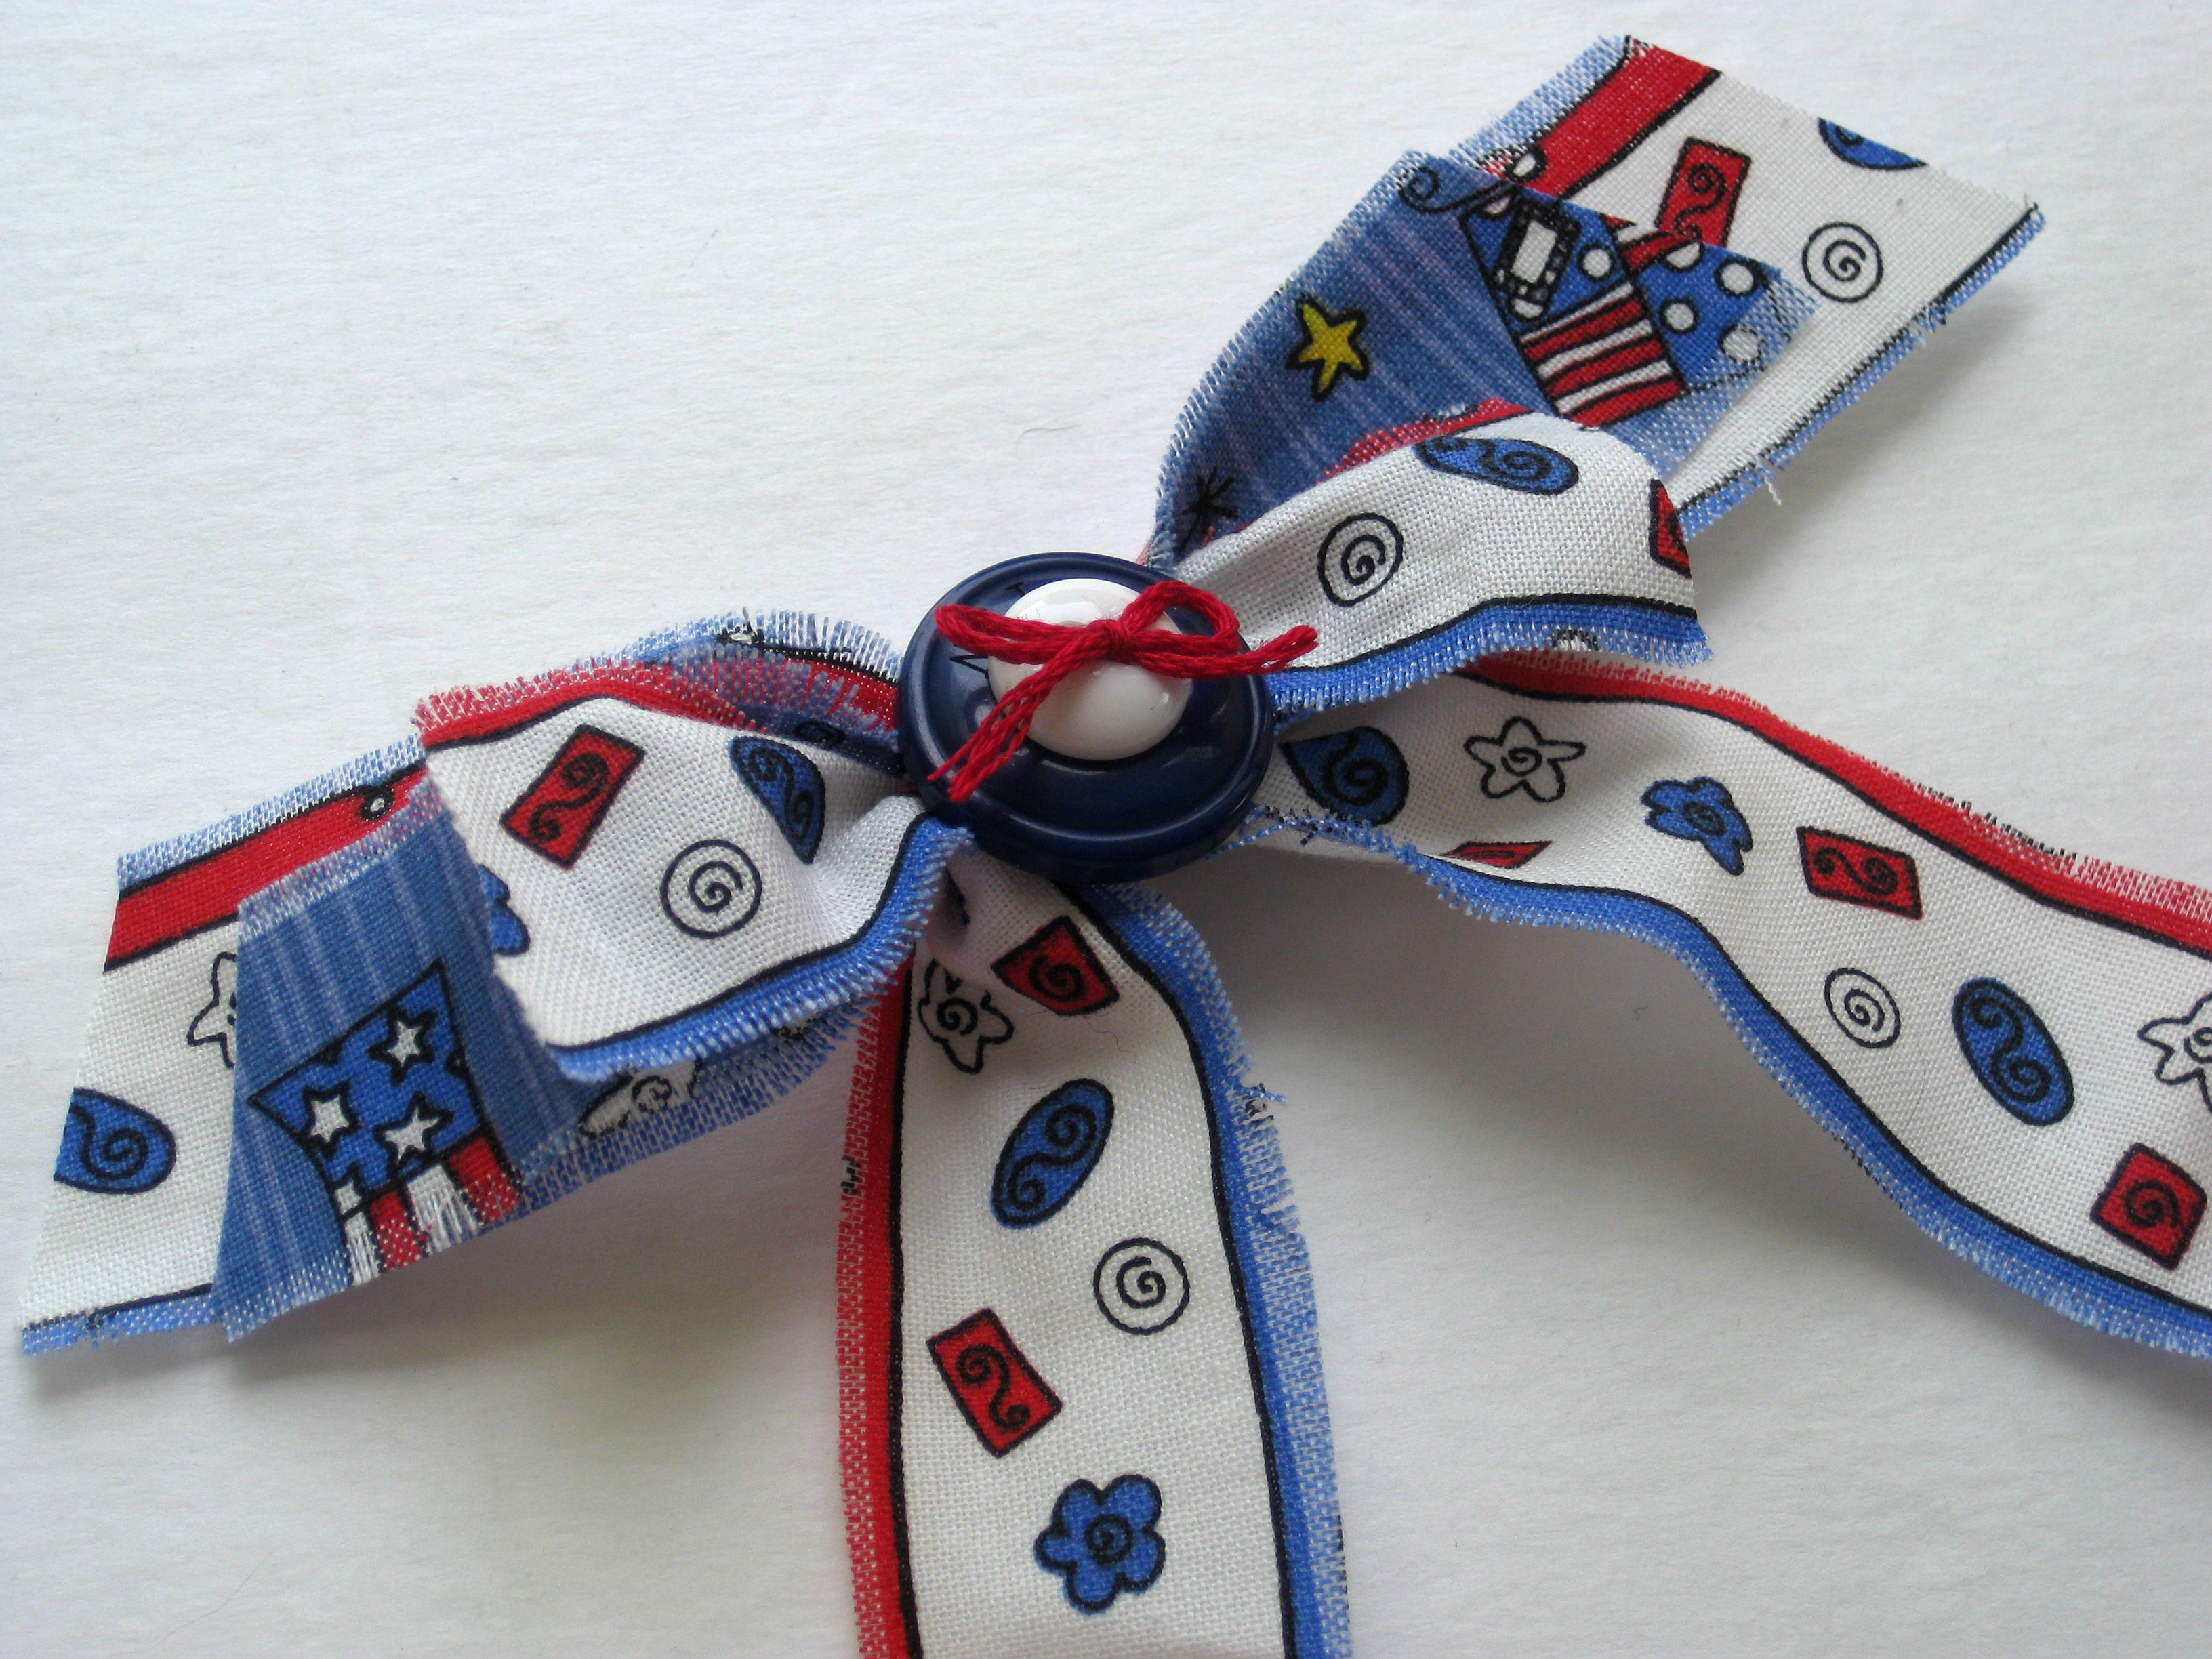
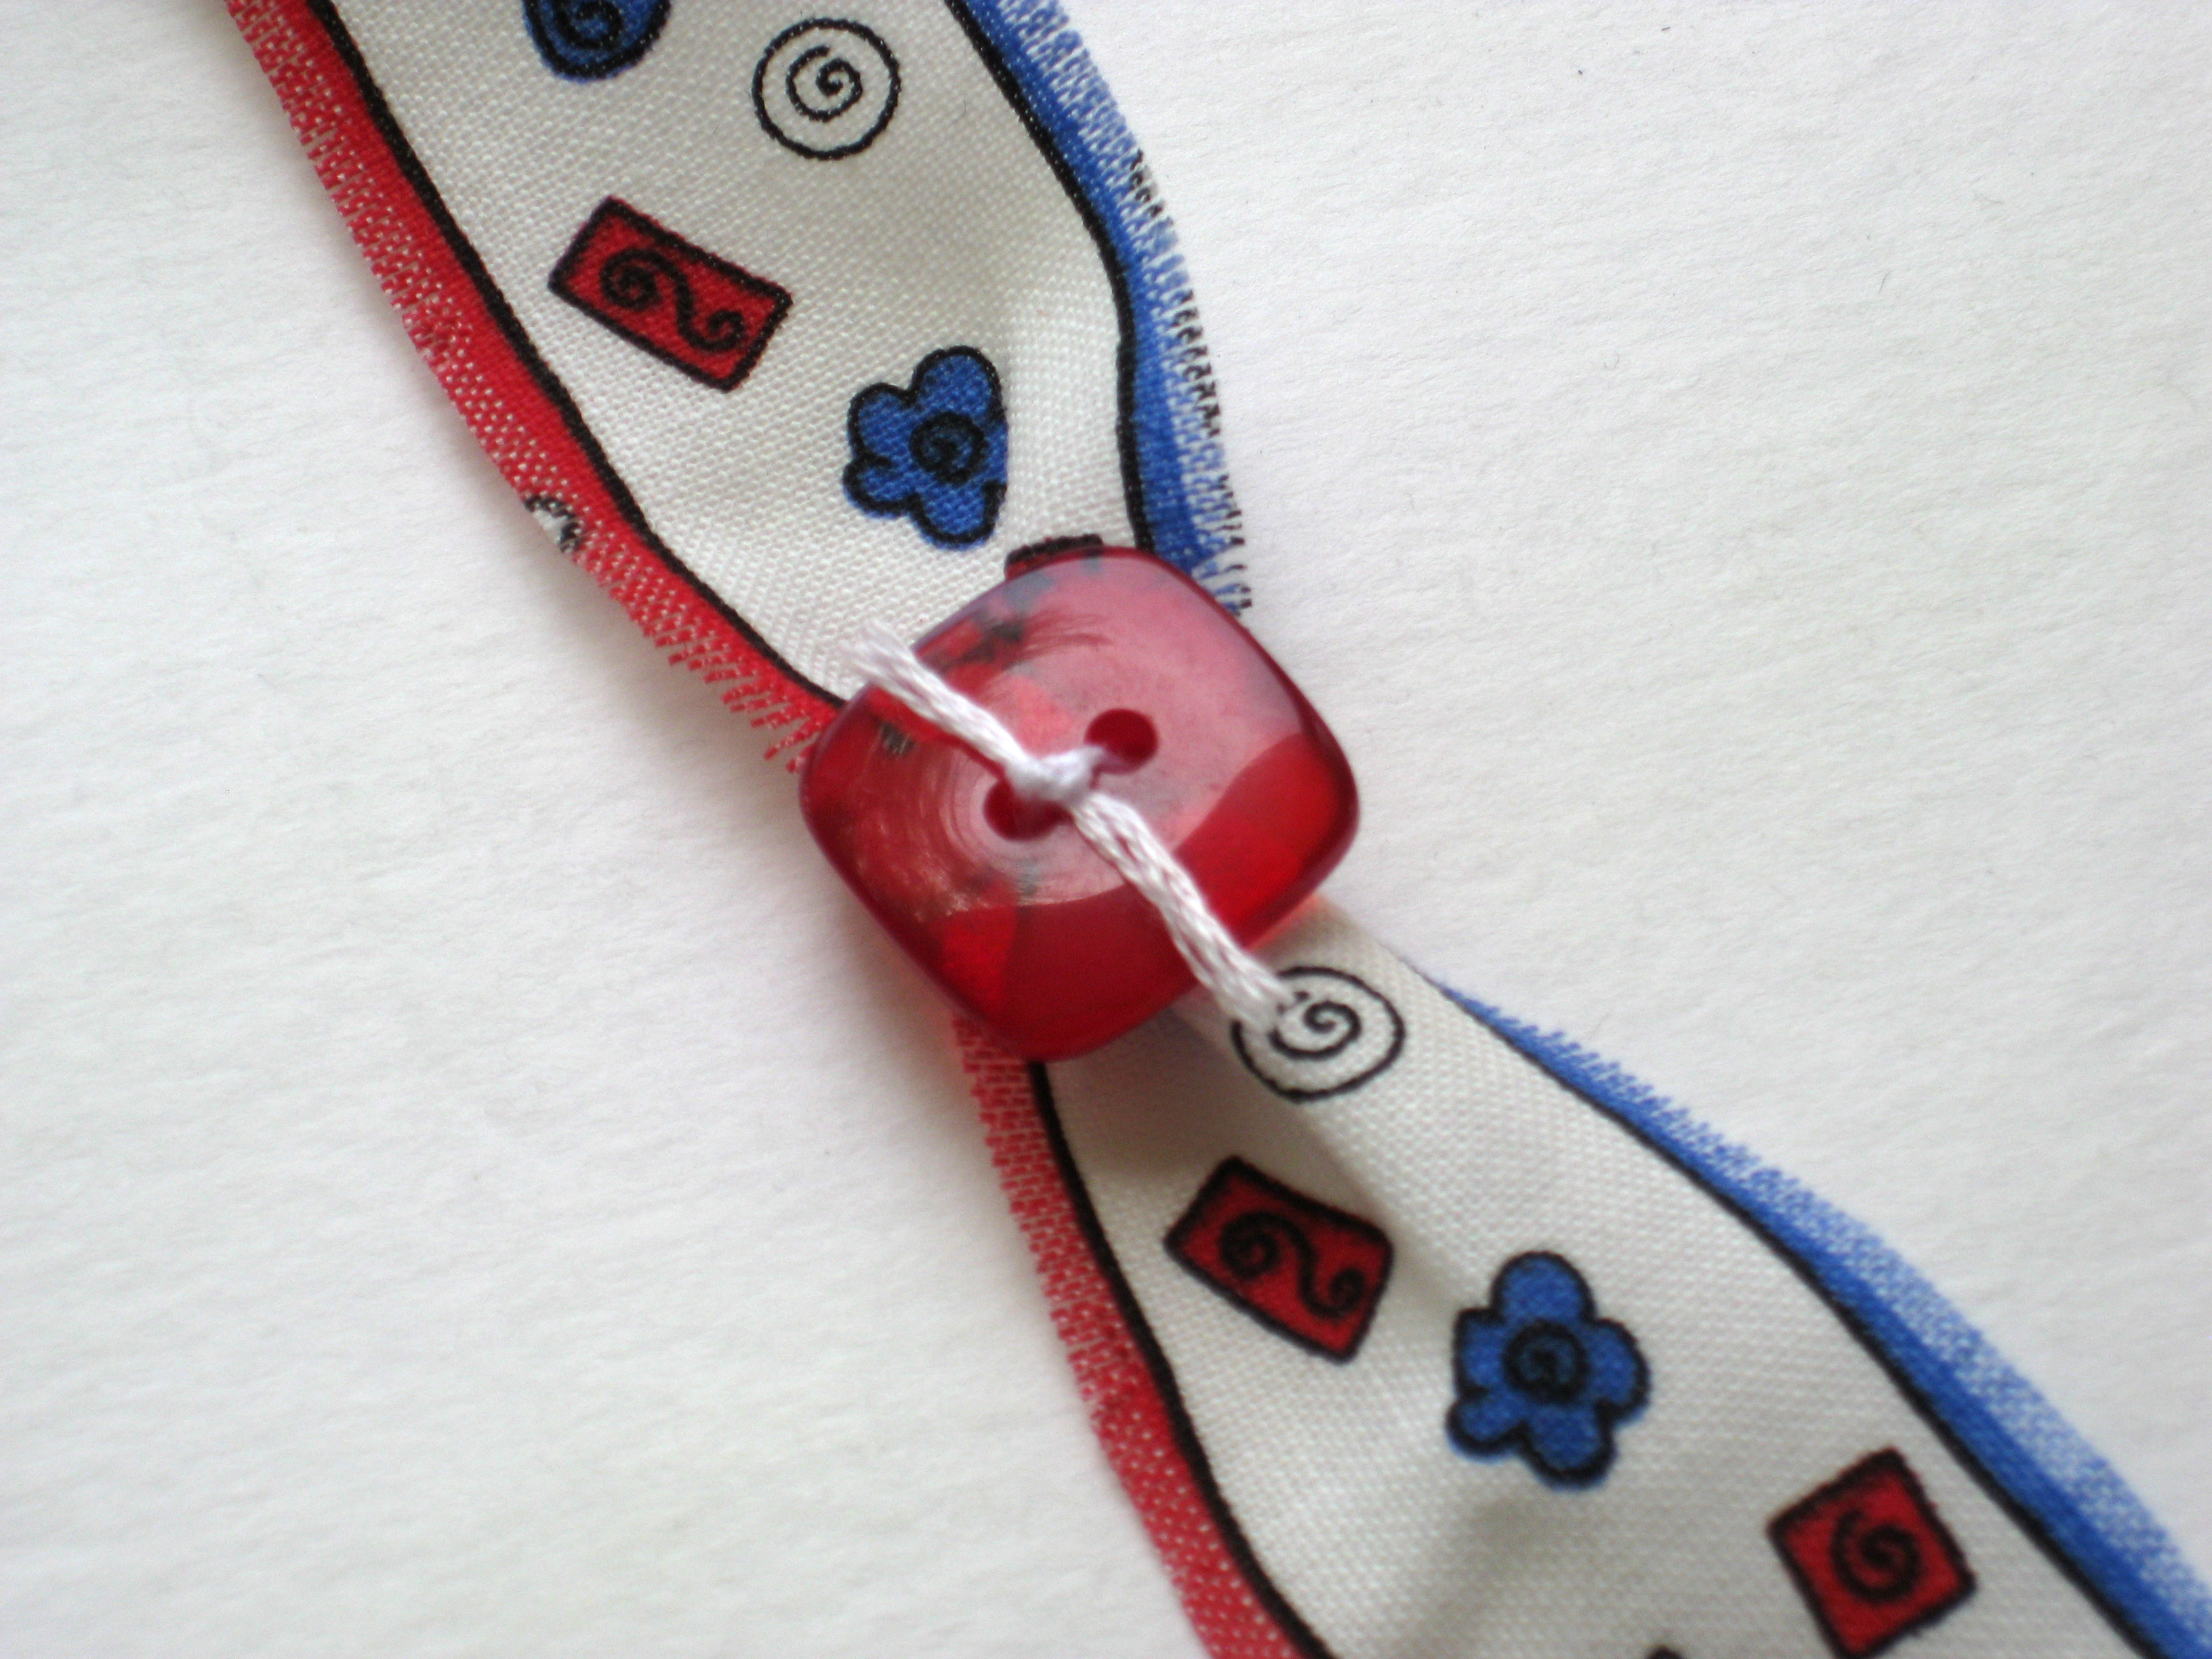
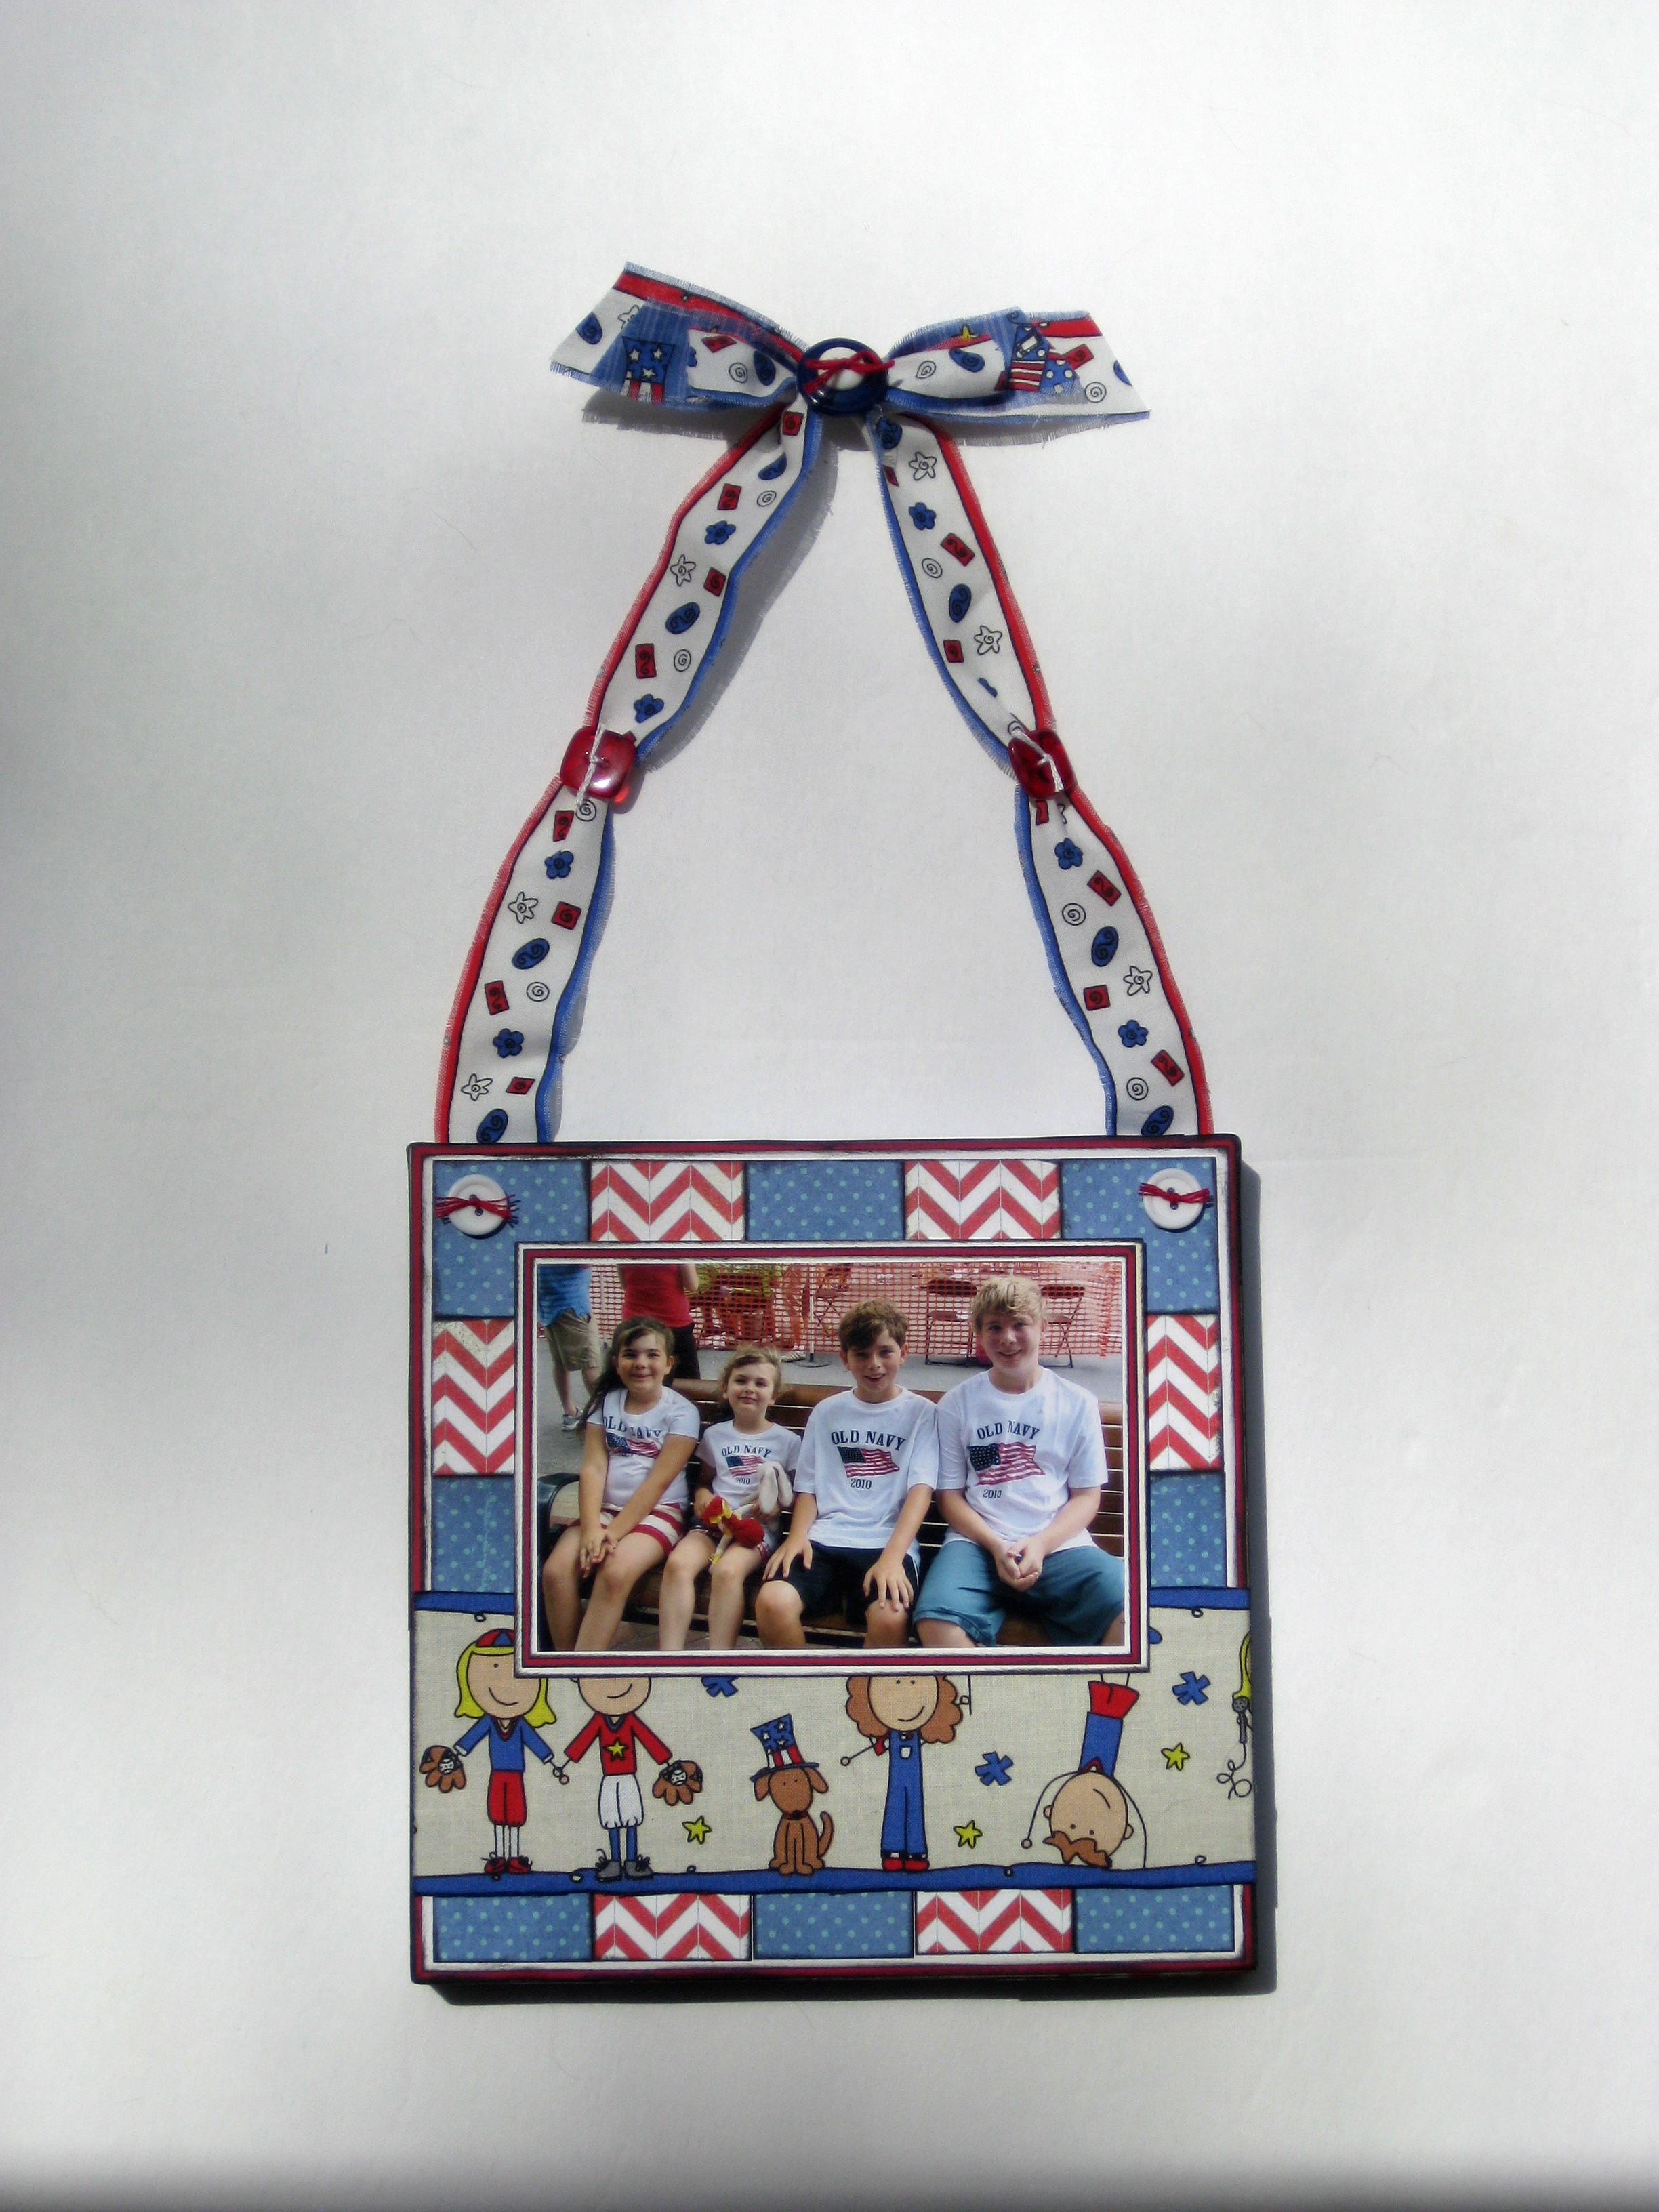
An altered canvas makes a great gift or display for your own home. Thank you so much for stopping by and I hope your 4th of July celebration is full of red, white and blue craftiness. A celebration to remember!
If you visit my house during the month of July this seasonal door wreath will welcome you at my front door. I decided to go big and bright this year using festive patriotic ribbon, painted stars, and red, white & blue buttons from Buttons Galore. I love the nostalgic look of the dimensional stars and the traditional Americana design.

I’m a sucker for wreaths. It’s a rule in my house to have a seasonal wreath on my door at all times. Of course, if I made a new wreath for every season, I’d have a lot of them to store. My husband wouldn’t like this very much either. I have a little secret to share when it comes to my seasonal wreaths. I don’t make a new wreath – I just recycle this grapevine wreath into something new every season.
My secret is to use a heat gun to melt off the hot glued embellishments. It works great every time!

Paint Paper Mache Stars with Plaid Craft Paints
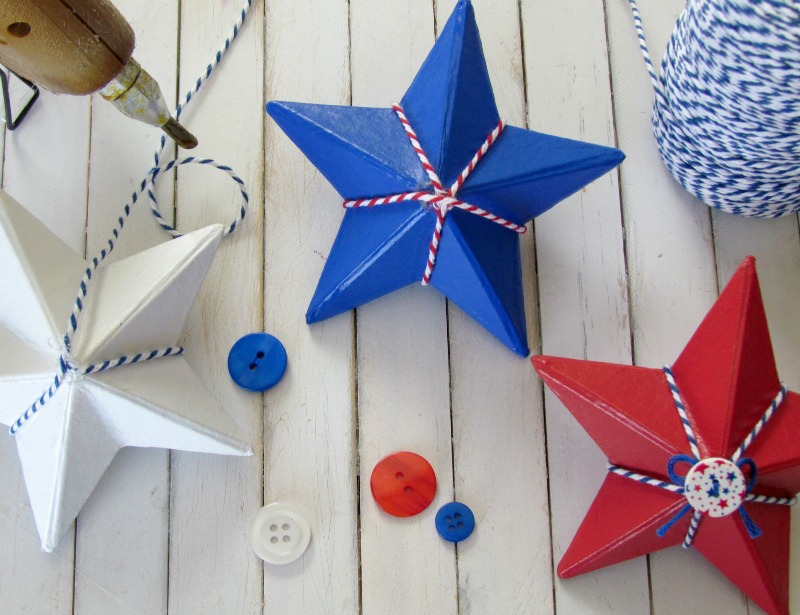
Add a dab of hot glue onto each side of star and wrap twine around
Add festive button from Buttons Galore to center.
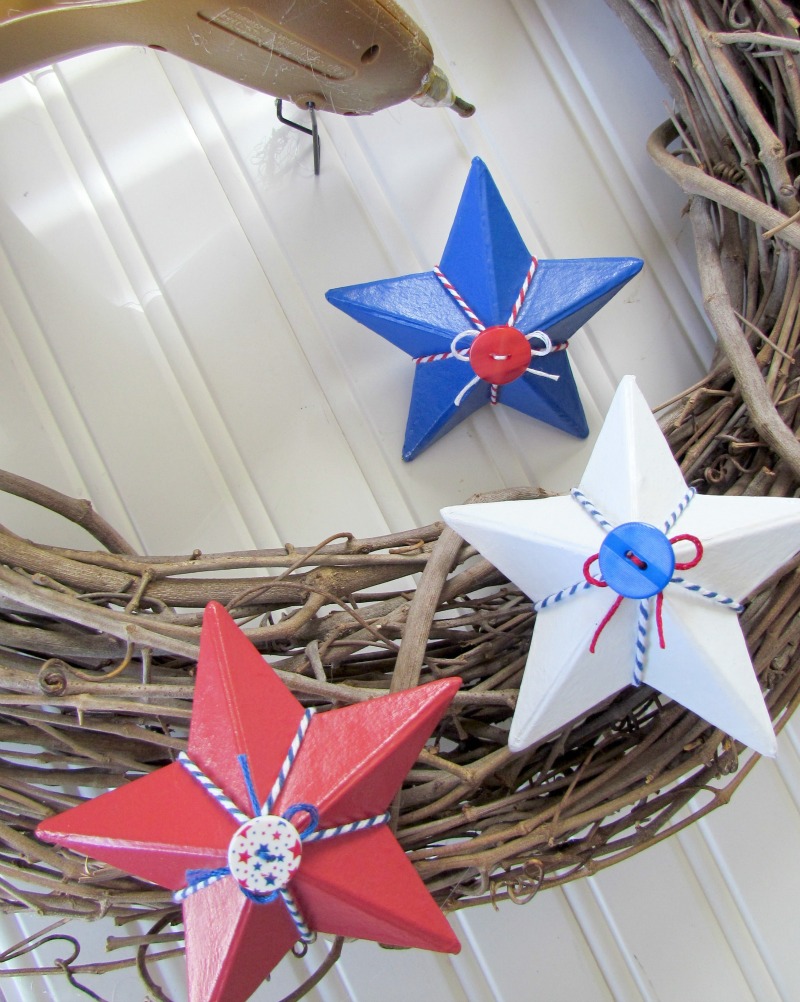
Hot glue painted stars onto a grapevine wreath

Add stacked buttons to the center of your patriotic bow.
I hope my idea of recycling the same wreath for the seasons inspires you to creative you own festive wreaths to welcome visitors at your door. Seasonal door wreaths are a nice festive touch.
Like Me on Facebook!
Are you looking for Americana decorations for the 4th of July for your home? This buttons and stars garland is the perfect solution. A great way to combine the red, white, and blue for a patriotic display that your family and guests will love.

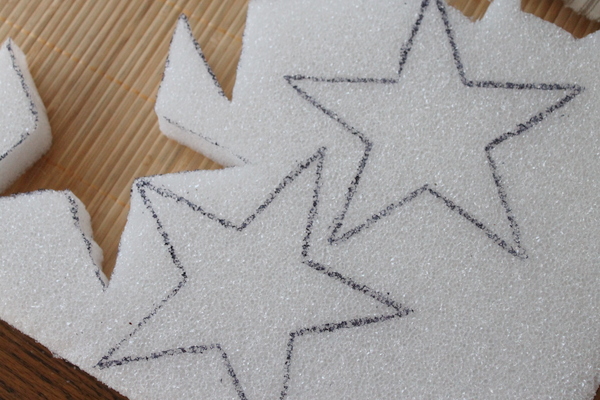
1) Cut stars from your styrofoam sheet as shown above. You could also substitute wood stars if you can find them. I used a Styro Cutter to cut my foam.
2) Cut fabric into squares leaving at least a couple of inches around your star.
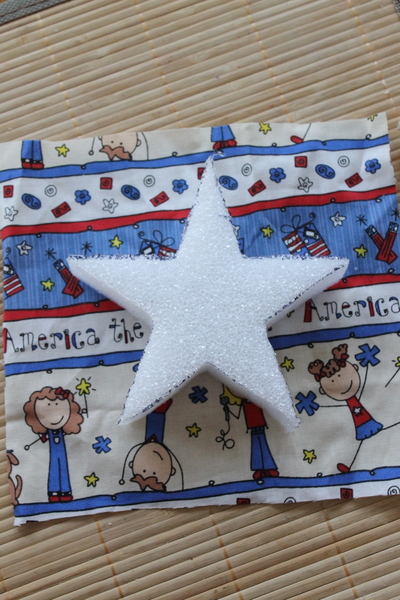
3) Cut into the square to the points on your star.

4) Use Mod Podge to adhere the fabric to the star as shown below. Trim away any excess fabric.

5) Cover the outer edge with ribbon and use Mod Podge once again to adhere it to your star.

6) Twist your red, white, and blue embroidery thread together to form one string. Add your stars and buttons to the string using hot glue. I assembled this garland right on my mantle.
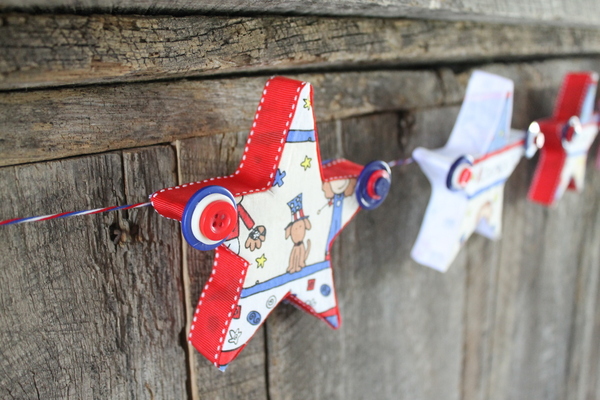
All that is left is to step back and enjoy your creation. A wonderful addition to your 4th of July decor. This buttons and stars garland will be the hit of your Americana decorations this year.

Well, I wanted to continue my love for dolls and share a doll that I created using Buttons Galore & More Haberdashery wooden buttons. These buttons are just so darn cute that you can paint and distressed to make whatever your heart desires.
My Haberdashery Primitive doll is a gift for a very special lady, and I know I’m way over due, but I decided that instead of one Primitive Doll I would make her two for her long wait, I just hope she likes it as much as I do.
To make this doll I used Michelle Allen Raggedy Doll pattern along with Buttons Galore & More Buttons to give her some accents.
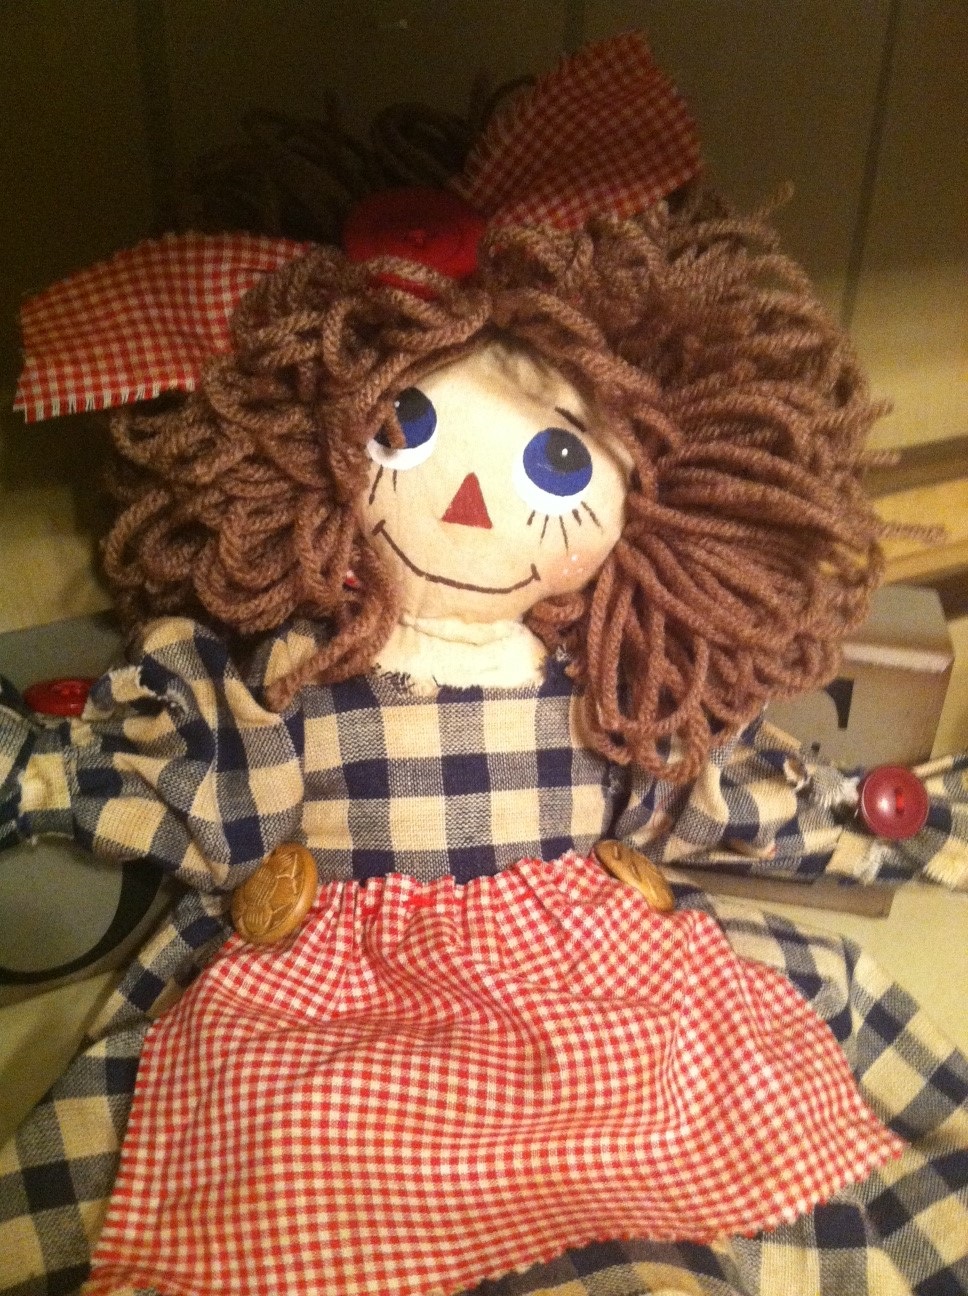
I used Buttons Galore & More Haberdashery buttons for her upon, which I distressed with inks to make a little bit old.
For her hair, I used Buttons Galore & More Nautical Buttons.
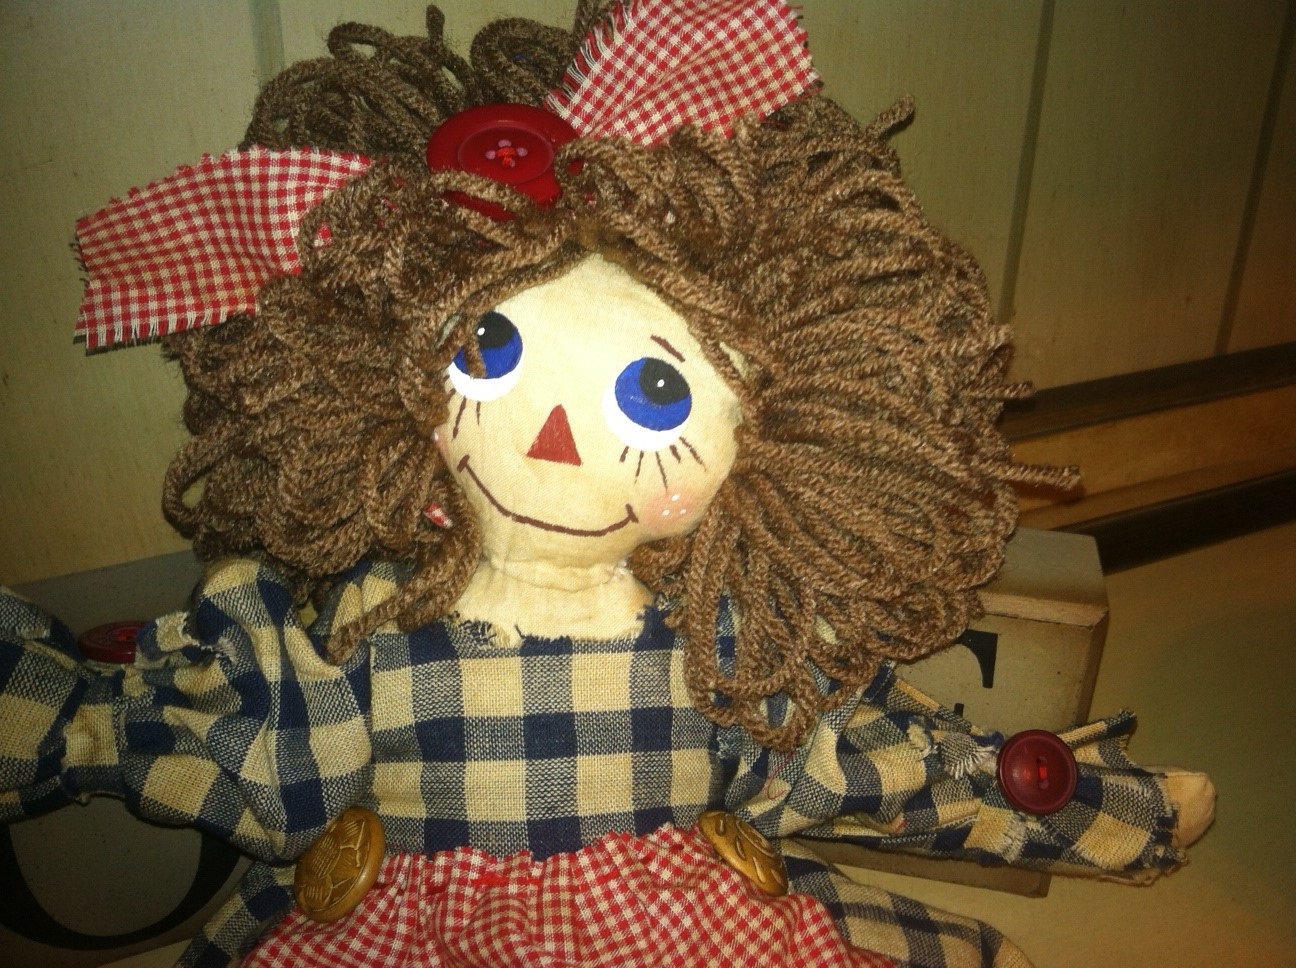
I also used the same Nautical buttons for her arm pieces.
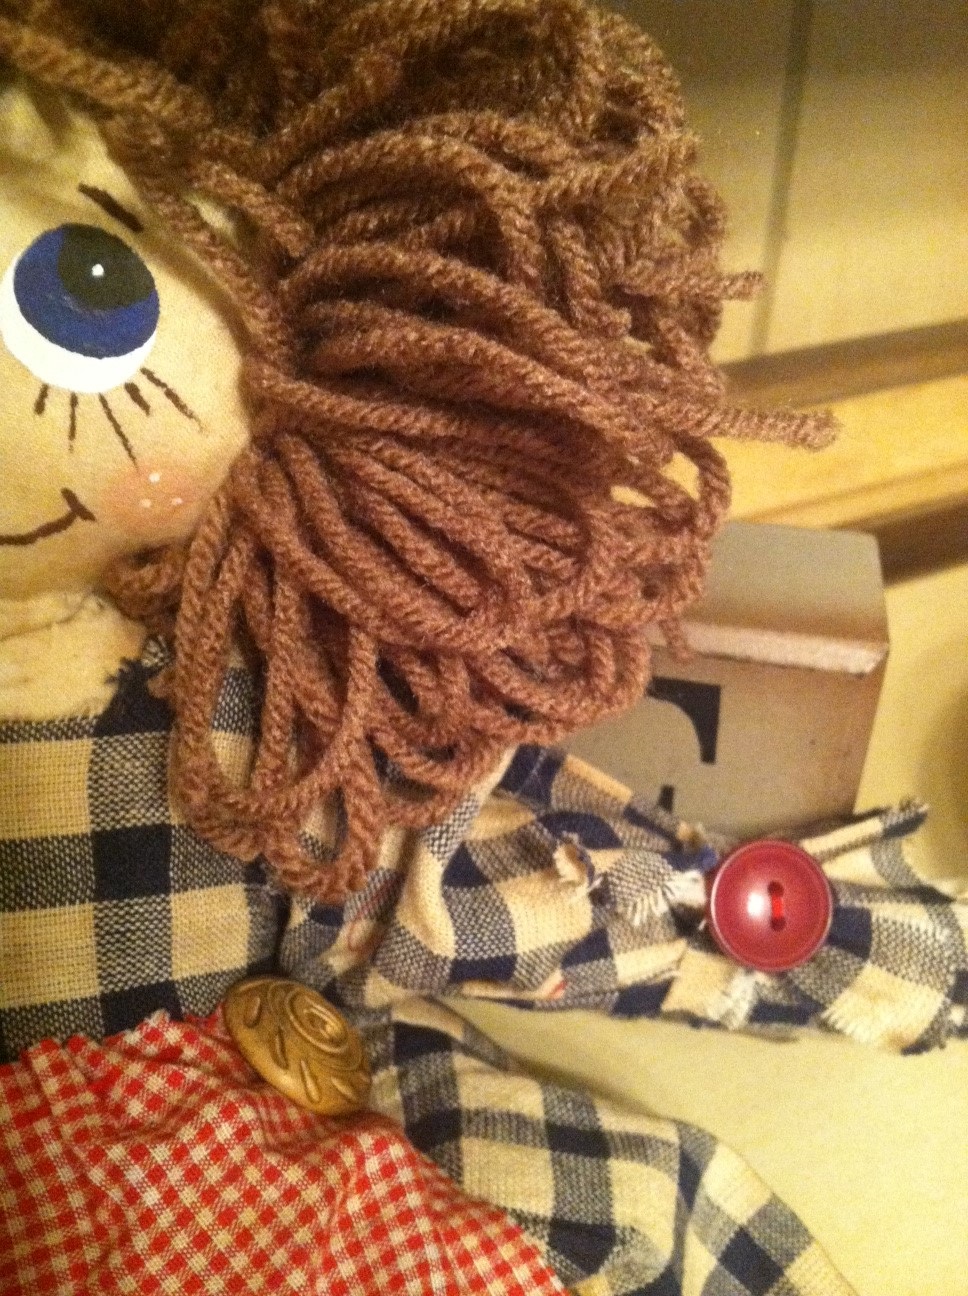
Buttons Galore & More Supplies Used:
Other Supplies Used:
Well, I hoped you enjoyed this project!
Hi, Allie here and I’m sharing my Patriotic Craft – a Country Chic Flag. We are your LAST stop on the I Love the USA Blog Hop today. Are you hopping with us for this amazing Patriotic Craft Party? You should arrive here via Jen Hadfield’s Tator Tots & Jello Blog.
*******If you’re just getting started – be sure to visit Laura Kelly at Laura Kelly Designs so you don’t miss a SINGLE project! (Also, this is where you enter for the great prizes)******
The designers have worked long and hard to bring you patriotic inspiration. We have gathered top name designers in their respective fields such as: sewing, scrapbooking, card making and many more. We hope you can share in their pride and enthusiasm for all that America stands for and the beautiful country that she is.


designed by Allie Gower for Buttons Galore
Materials needed:
I’ve used lots of Patriotic Buttons along with Laura Kelly’s Beautiful America Fabric. (click the links to purchase) We really appreciate you hopping with us today. Are you inspired to create something patriotic?
If so please share your projects with us on our Facebook page or on Pinterest or even Twitter using hashtags #ilovetheusabloghop #craftpatriotic #laurakellyart
Four more days left of the I LOVE THE USA BLOG HOP… so, keep hopping. Don’t forget to share your crafts too. We really do love seeing what you all create. Comments are always welcome. We all like a little love now and then, right? From all of us at Buttons Galore and More, we wish you a creative, happy and safe Flag Day and 4th of July too! Keep crafting!!!
To enter the I love the USA BLOG HOP, enter the -> a Rafflecopter giveaway
I love the look of chargers, but they are so pricey! Sometimes they can cost more than the plates themselves. Here’s an easy, inexpensive way to create DIY plate chargers. They really complete the look of a table setting and add that extra little pop of color. Take your table from blah to beautiful in just a few easy steps.


That’s it! You can use buttons to match your dishes, your kitchen or a special occasion. A rainbow of options is open for your selection.

It really doesn’t get any easier than this!

![]()
I was inspired by this wooden birdcage the moment I saw it on the Walnut Hollow website. I knew exactly how I wanted to incorporate buttons onto the project. This birdcage is made to be a clock, it has the hole in the middle for the clock’s hands. But I knew that I wasn’t going to use it for that purpose. Instead I wanted to decorate it as if it were a canvas or photo frame to hang on the wall or sit on a mantle.
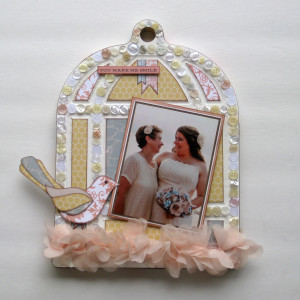
Every once in a while you need to create a template of sorts to cut paper to a very specific shape. I use a technique I learned back in elementary school. Take paper and a crayon and simply rub over top of your project. Then I just cut out the odd shapes and used them as templates on my chosen patterned paper by Teresa Collins.
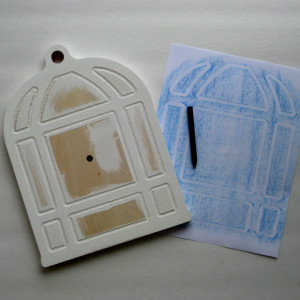
The little bird I drew and hand cut myself. I love how it turned out.
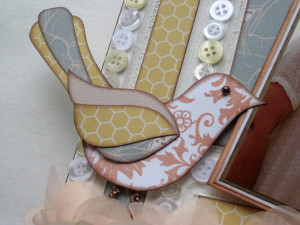
I used a mixture of colors of buttons from white, cream to light pink. If you were wondering how many buttons were used, well that would be 120!
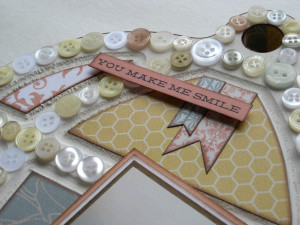
I also covered the sides of the wood with patterned paper.
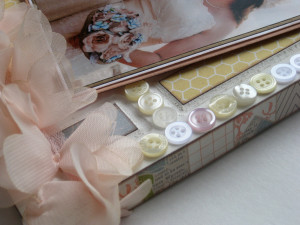
Products Used:
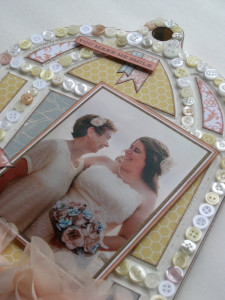
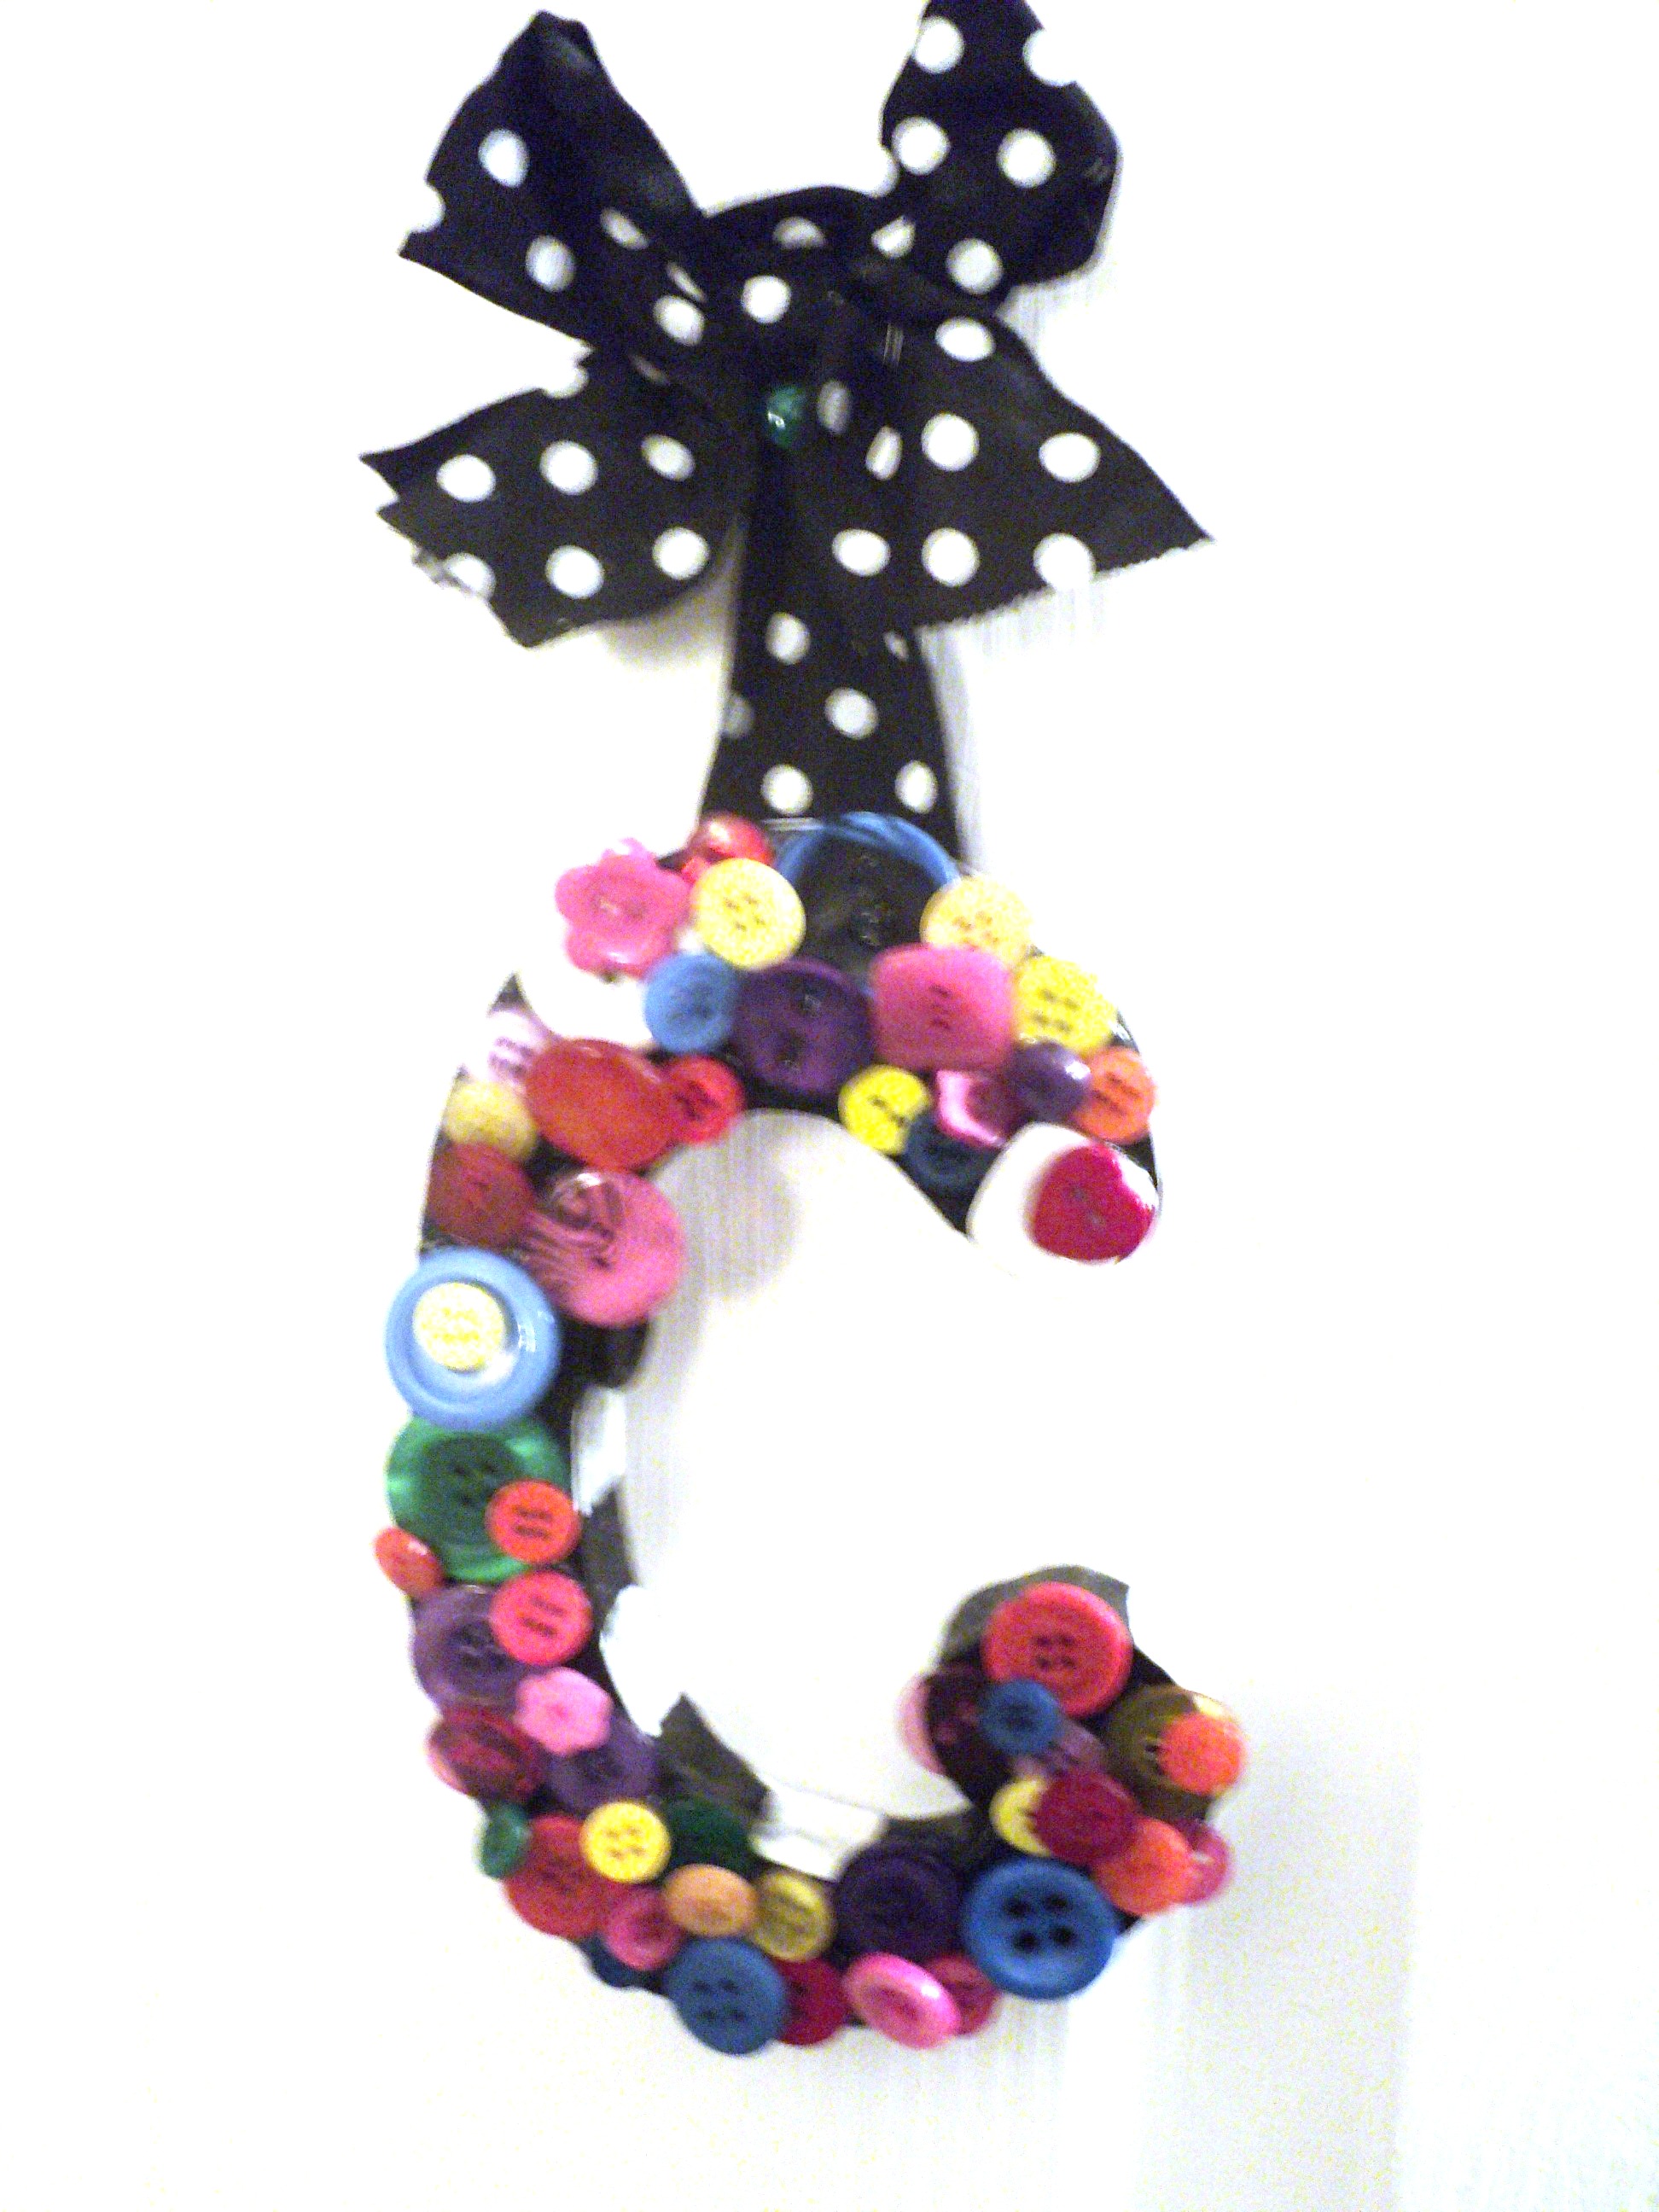
For a quick and personalized gift, cover a monogram in buttons and add a bow to hang it up. You can use letters made from wood or cardboard. They are sold in all kinds of sizes at the craft stores. The best way to adhere buttons to them is with Ad-tech hot glue and a glue gun.
This letter “C” (for Chloe) is covered in buttons from the Laura Kelly collection.
Happy Creating!
Father’s Day Gift idea: with buttons and paint both masculine and patriotic.
With Father’s Day just around the corner it’s certainly FUN to bring out those old pictures, buttons, and brads, and creating something that will be enjoyed by everyone!
This coming Father’s Day turn a simple photo frame and buttons into an amazing wall decor that will hold not just a picture but your keys as well.
For my project this month, I would like to introduce you to the special man in my life. He is not only a loving husband and father, but he’s a fisherman as well! From the time he was able to walk, his grandfather taught him how to fish and here I share a simple Button & Photo Wall Decor for Fathers Day that I created using a picture I found of my husband fishing when he was just four years old. Now, he’s not really a fisherman, because he can’t catch a fish to save his life, but today he caught a red fish with a little help from my creative hands.

This perfect Father’s Day Gift – Buttons & Photo Wall Decor can created using:
Brads, Haberdashery Buttons, & Frame
It’s as easy as 1-2-3! So, let’s create a Button & Photo Wall Decor together!
Buttons Galore & More Products used:
I also used:
Step One:
The very step I always recommend everyone to do is to gather all your supplies. It just makes things a lot easier.
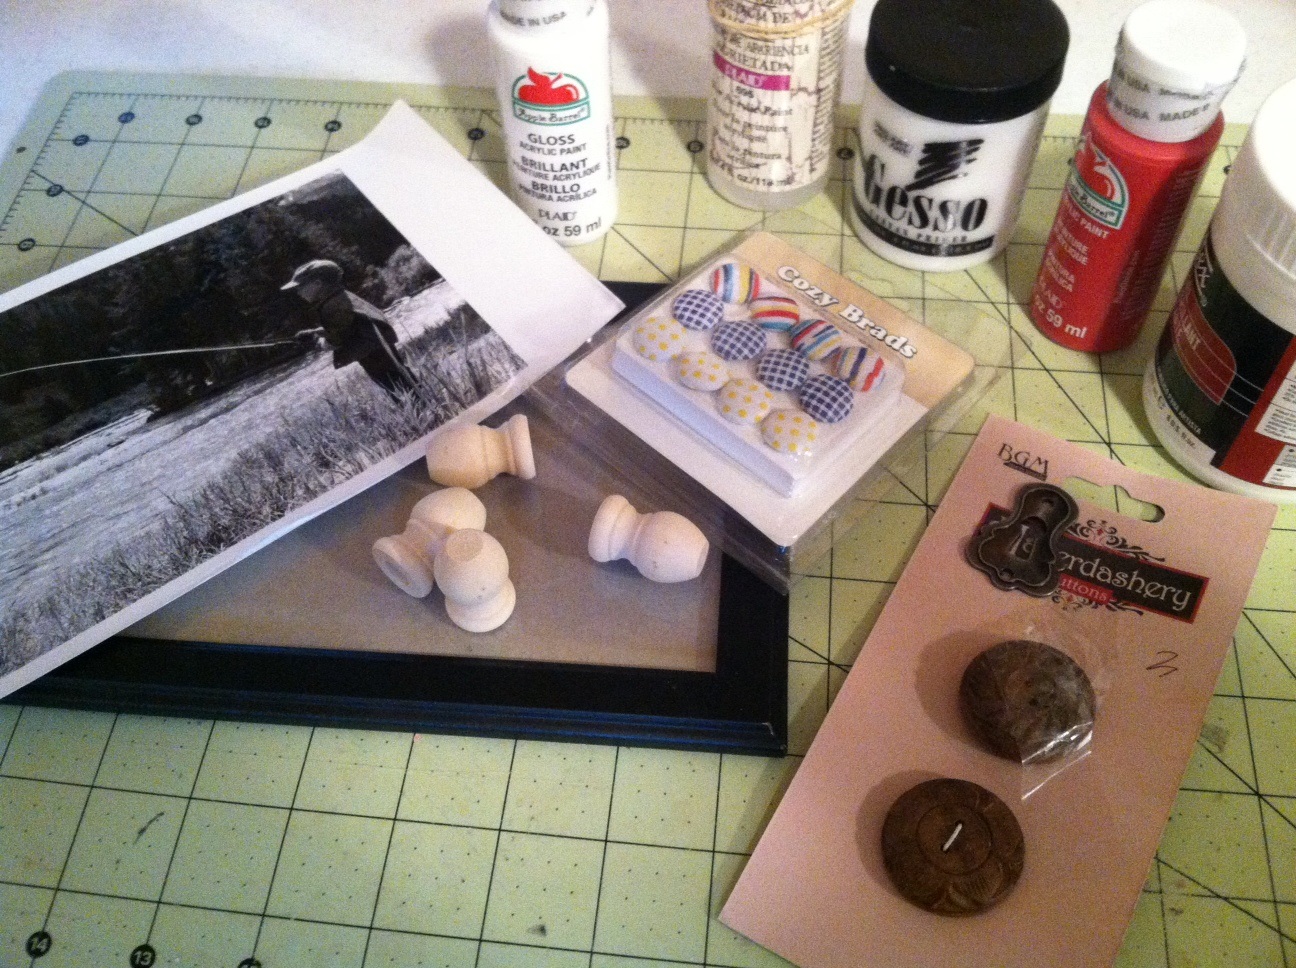
Step Two:
Apply a coat of gesso to the frame using a bristle paint brush and either let it air dry or use your heat gun to make this process quicker.
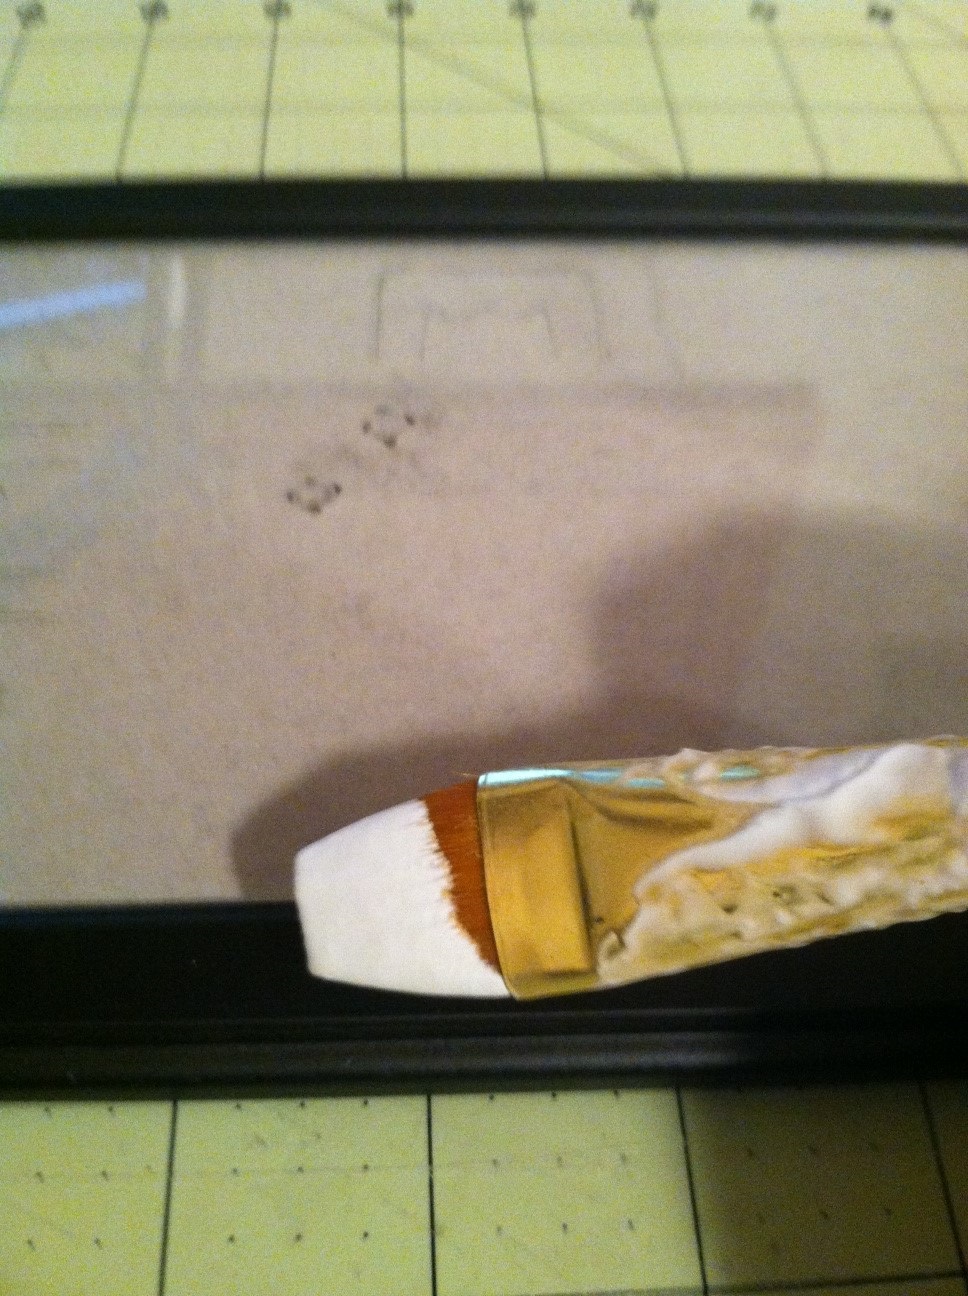
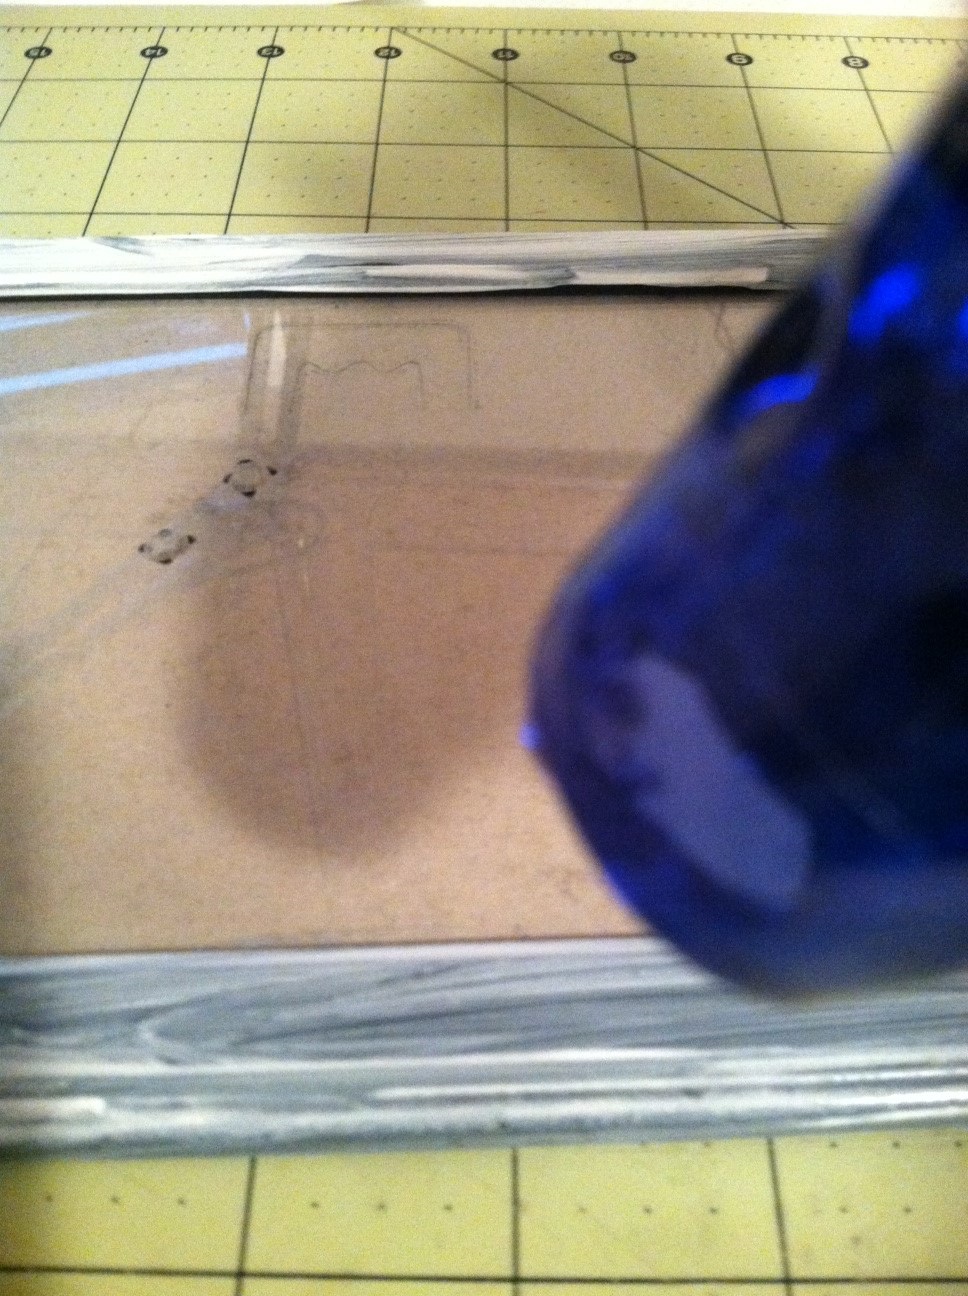
Make sure that you allow the gesso to properly dry before you begin your next step.
Step Three:
My favorite step is applying the first coat of acrylic paint. For this project I used Apple Barrel Flag Red as my base coat for the frame.

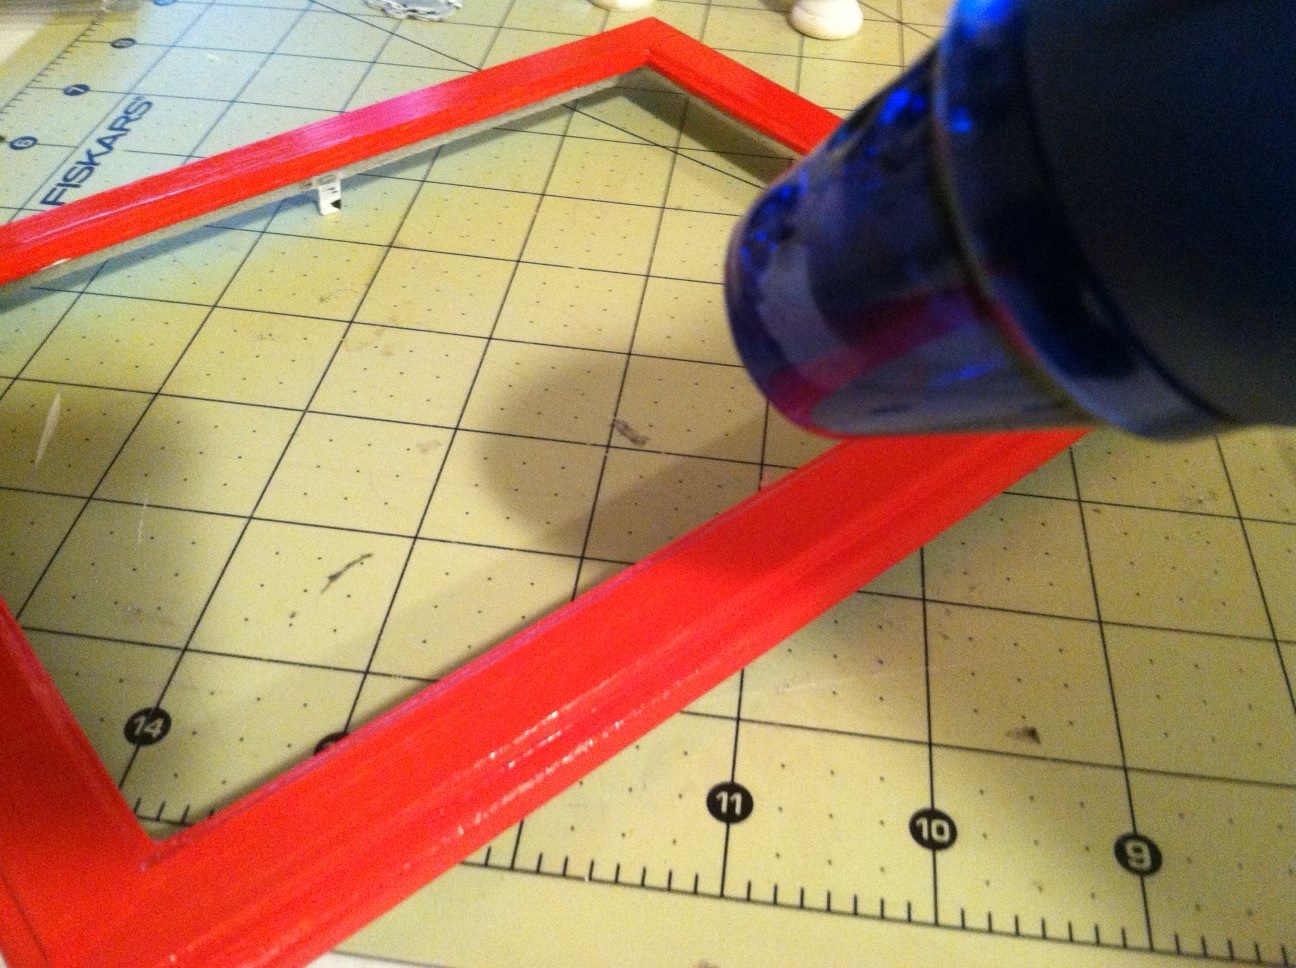
Don’t be afraid to apply a little heat to the frame to speed things up just be sure not to apply it directly to the paint or it may bubble up. Once you have the frame completely painted with the base coat you can apply a layer of Folk Art Crackle Medium. Make sure you apply the crackle to the entire frame. Let this air dry for about 20 minutes. Once it is completely dried you can apply a light color as the top coat. I used a Lite Mocha from Apple Barrel and as you can see the red it peaking out of the cracks. I really love taking something new and making look/appear old.
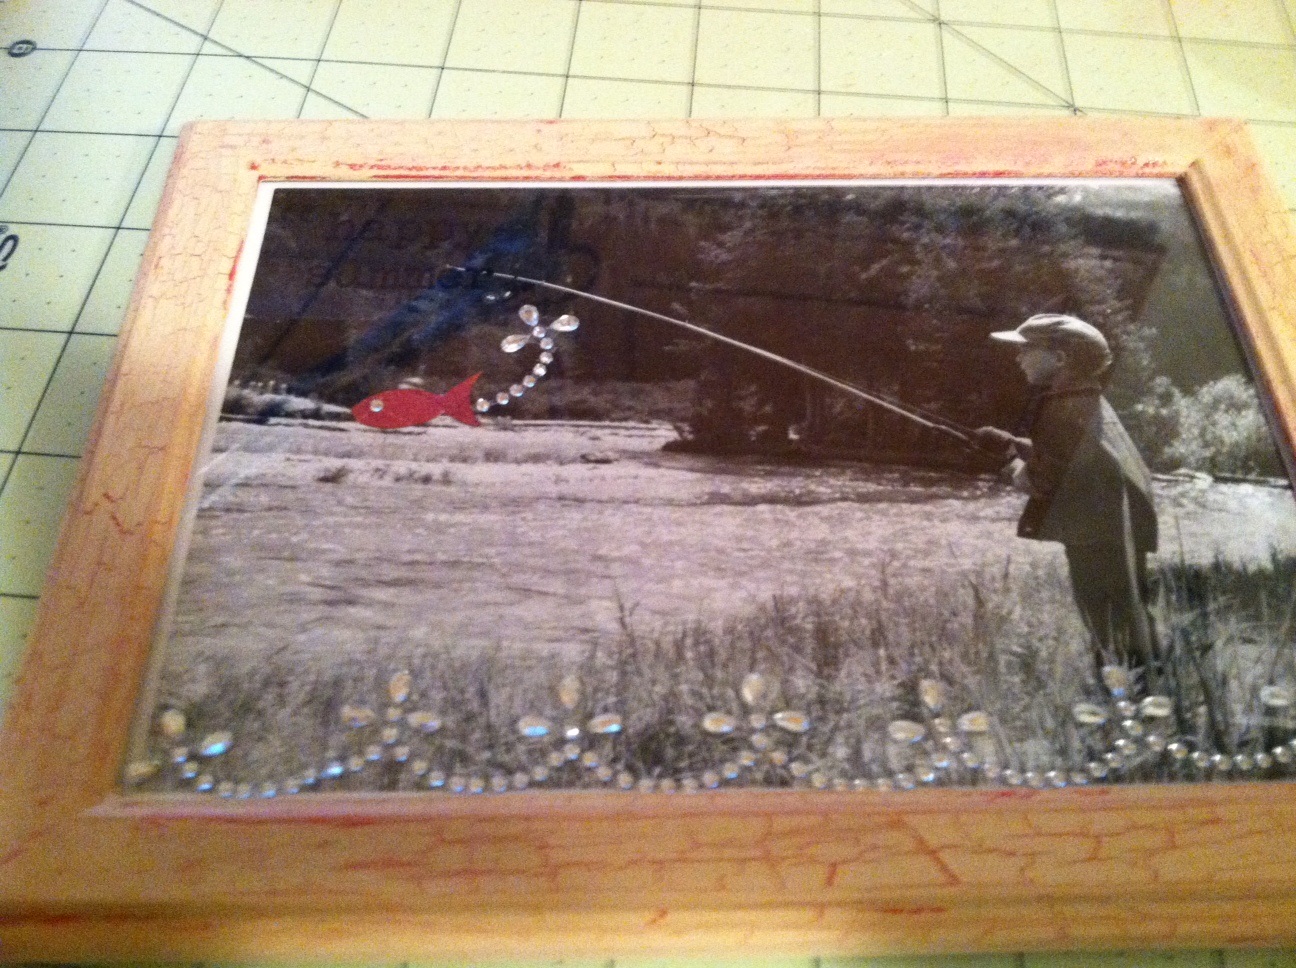
I purchased some unpainted wooden knobs at my local Walmart and painted them Flag Red and I distressed it just a little to go with the frame. I then took the Cozy Brads “‘All Boys” and hot glued them to the knobs. I also painted the Carved Wooden Buttons with the same Flag Red acrylic paint and hot glued a piece of 1″ Grosgain Blue Ribbon to each Carved Wooden Buttons. I hot glued these to the frame like you see below.
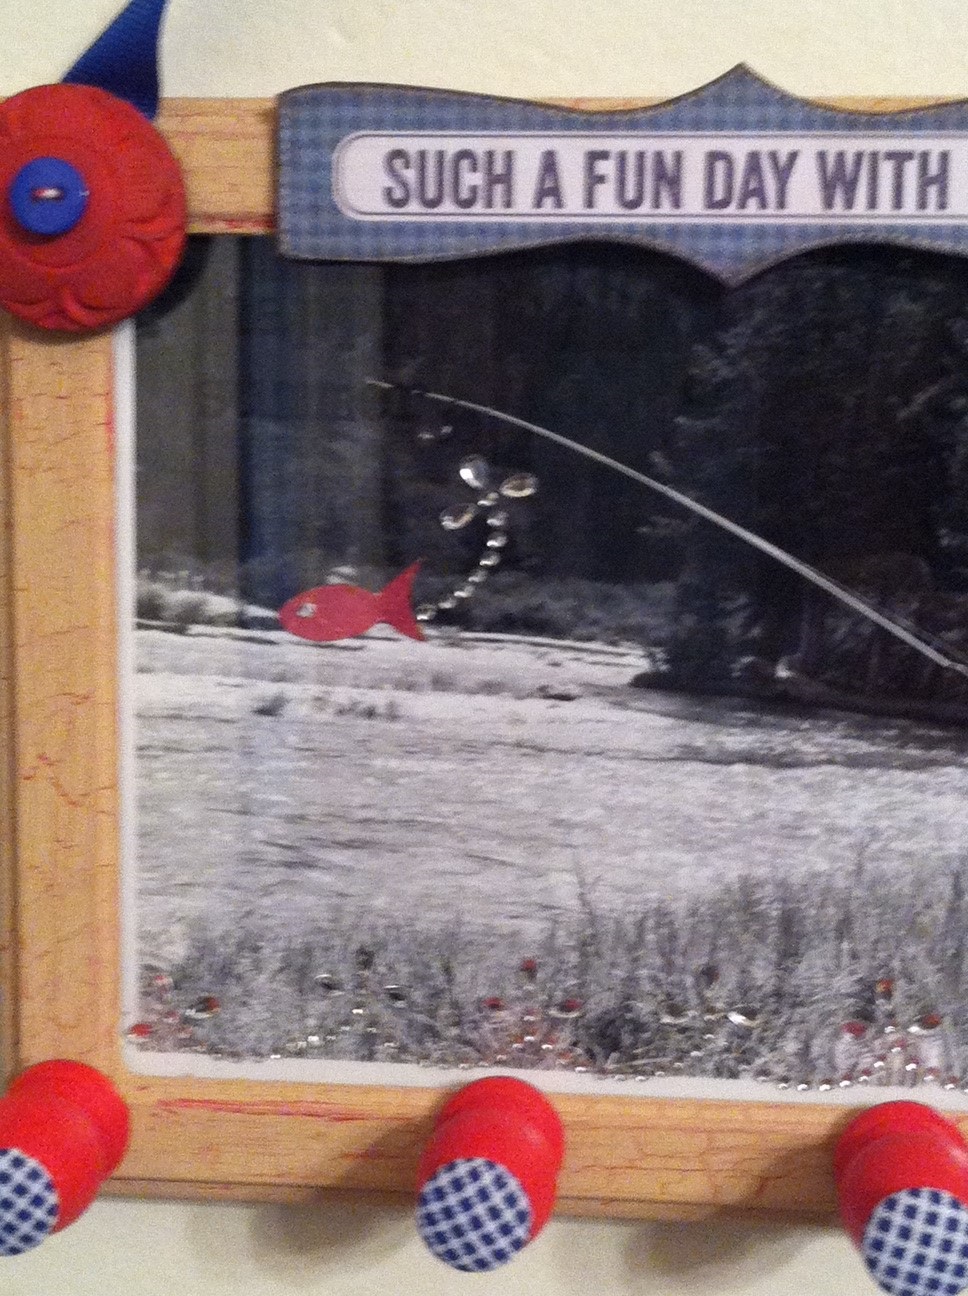
My final step was to adhere my husband’s picture to a piece of cardstock that I cut to size and for this I used Glue Dots! It was a lot safer and easier! I wanted to give the picture a little flare so I cut out a red fish and added a piece of bling to the eyes and used a piece of Want2Scrap Nina Brackett – Fancy Waves to the tail of the fish to make it look like it just came out of water. To finish this project off I them applied the rest of my Want2Scrap Nina Brackett – Fancy Waves to the grass or edge of the picture at the bottom.
So there you have it an EASY & FUN, Project that will definitely WOW your special man this Father’s Day.
It is springtime and that means gardening, planting, flowers and sunshine.

If you are working towards creating a colorful flowerpot garden, here is a fabulous QUICK and easy way to add bright colors.
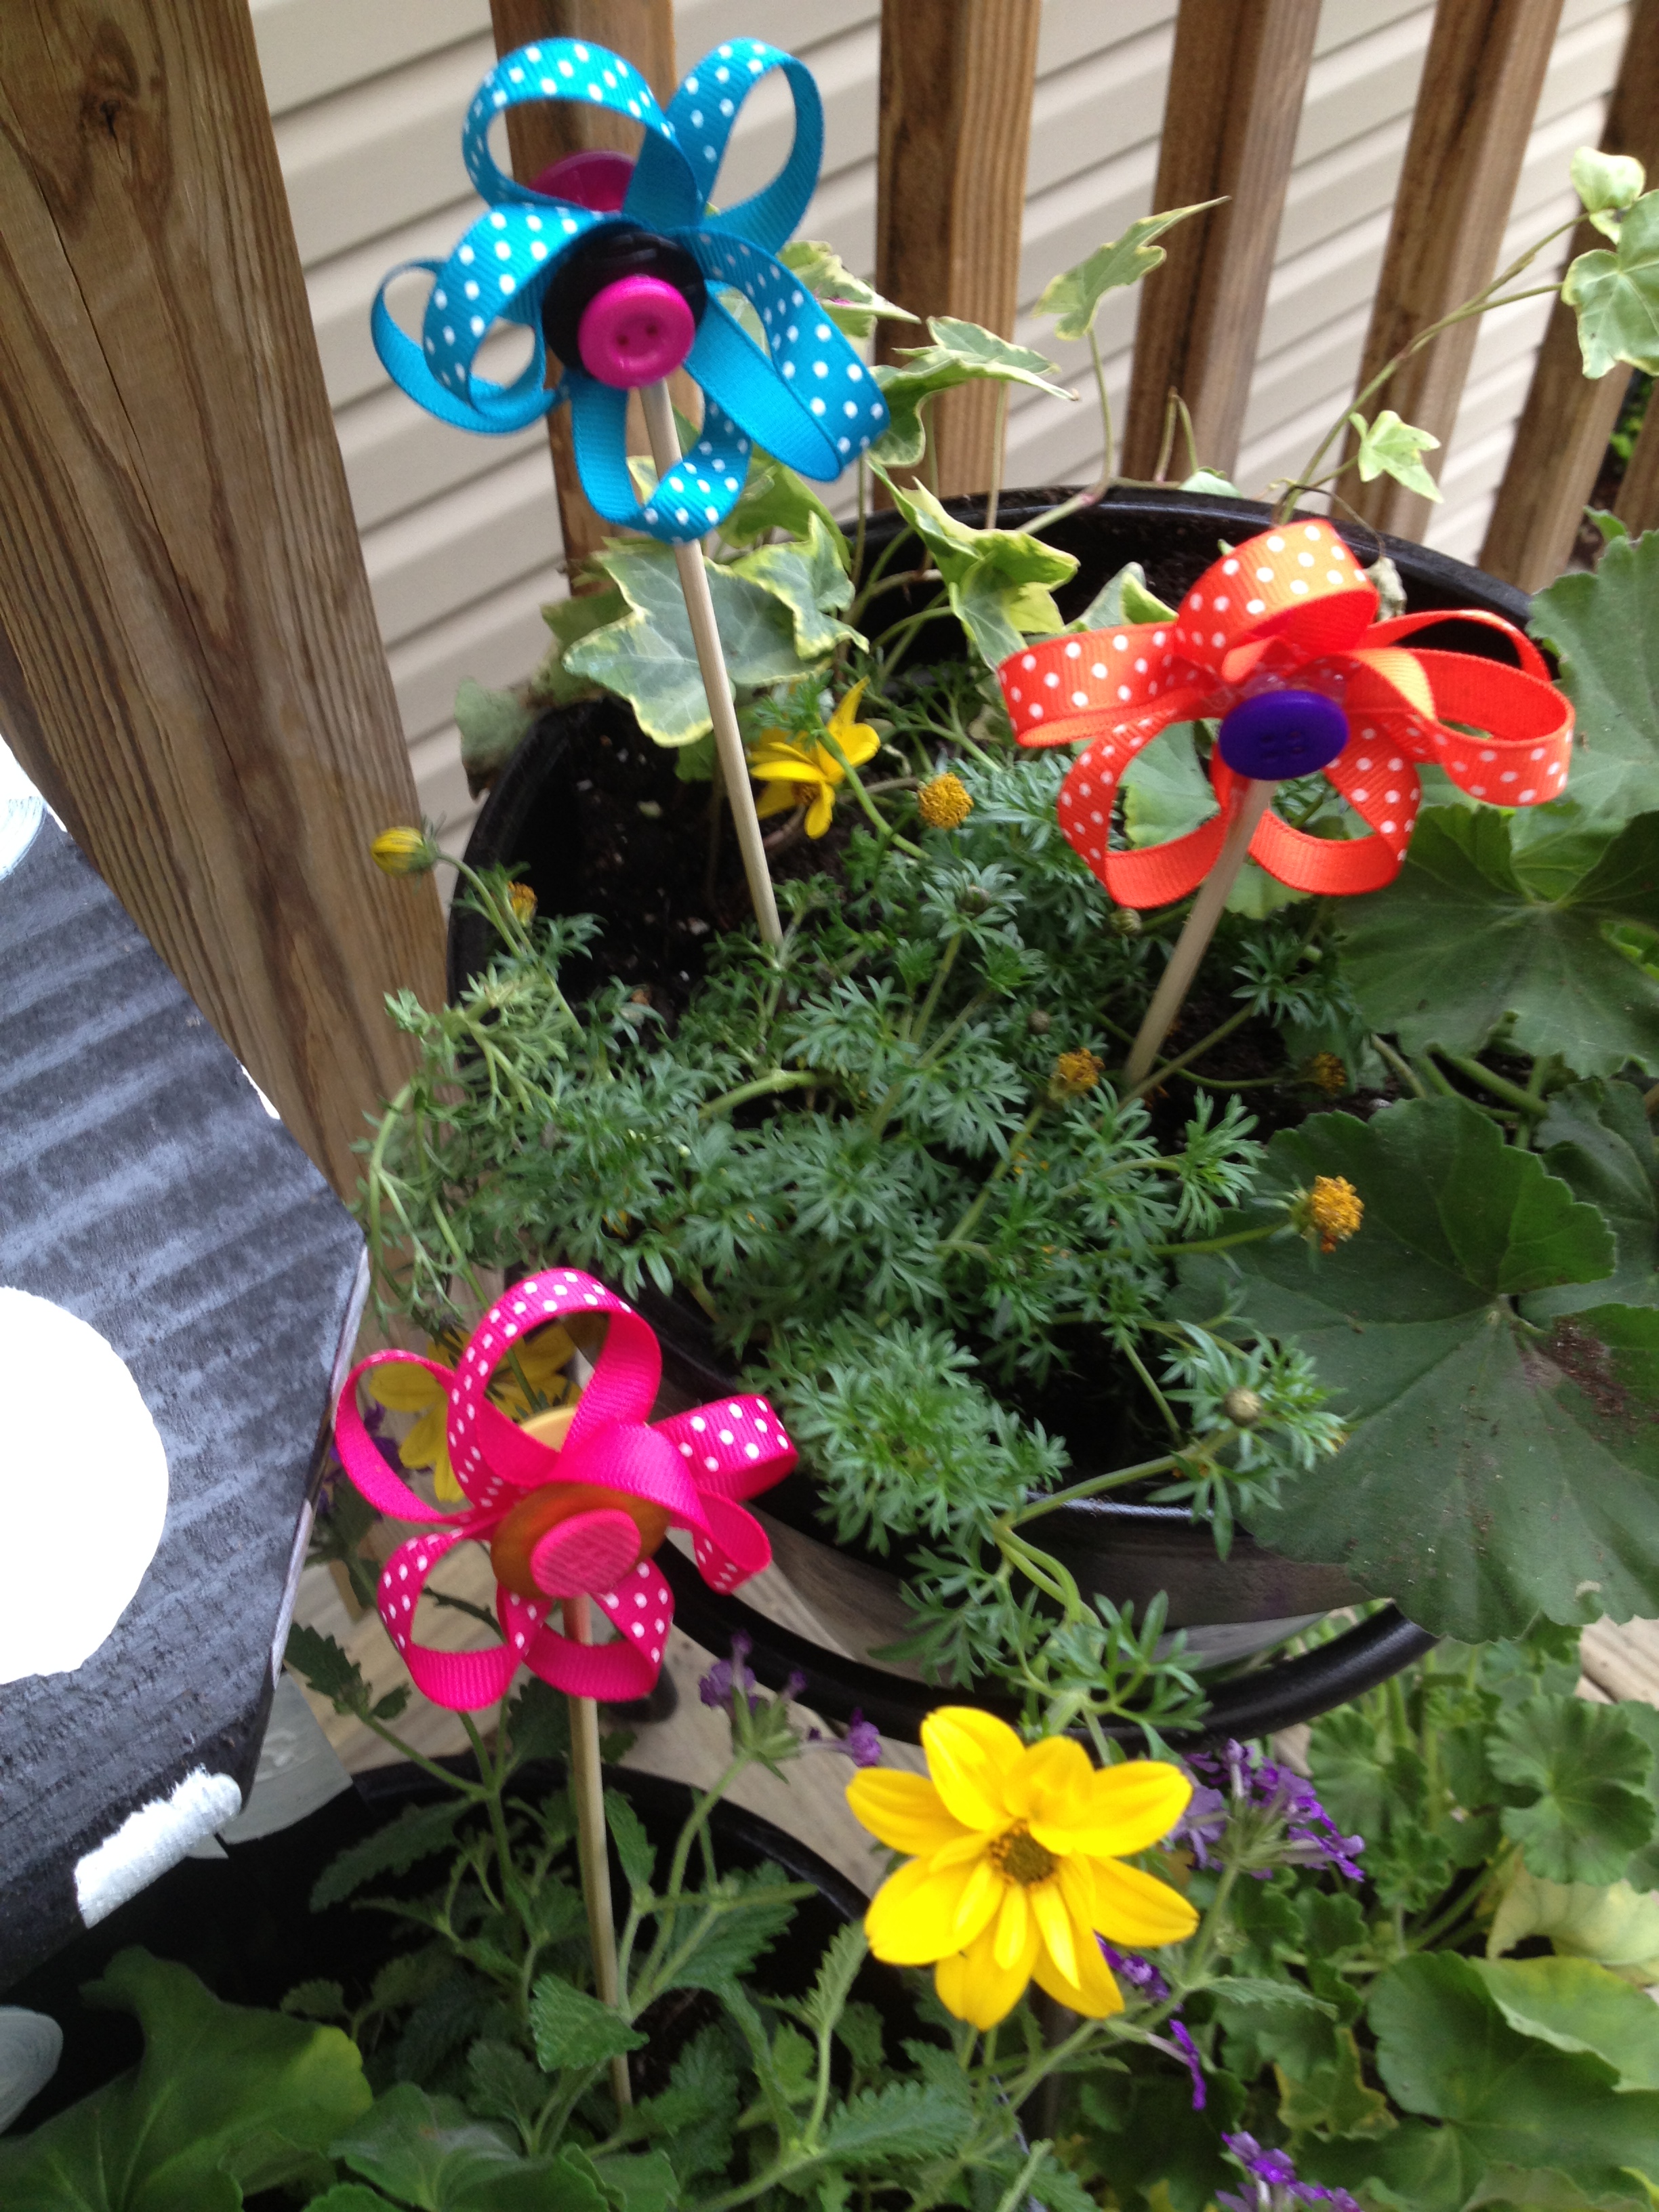
grosgrain ribbon, bright Laura Kelly colored buttons, hot glue (I use ad-tech high temp) and wooden skewers!
Use grosgrain ribbon loops to create petals and then hot glue gun buttons to the centers to add color and hold them together then hot glue the to the non pointed end of the skewer. Flip them over and hot glue a button to the backside so that if they turn around in your garden they will still look cute.
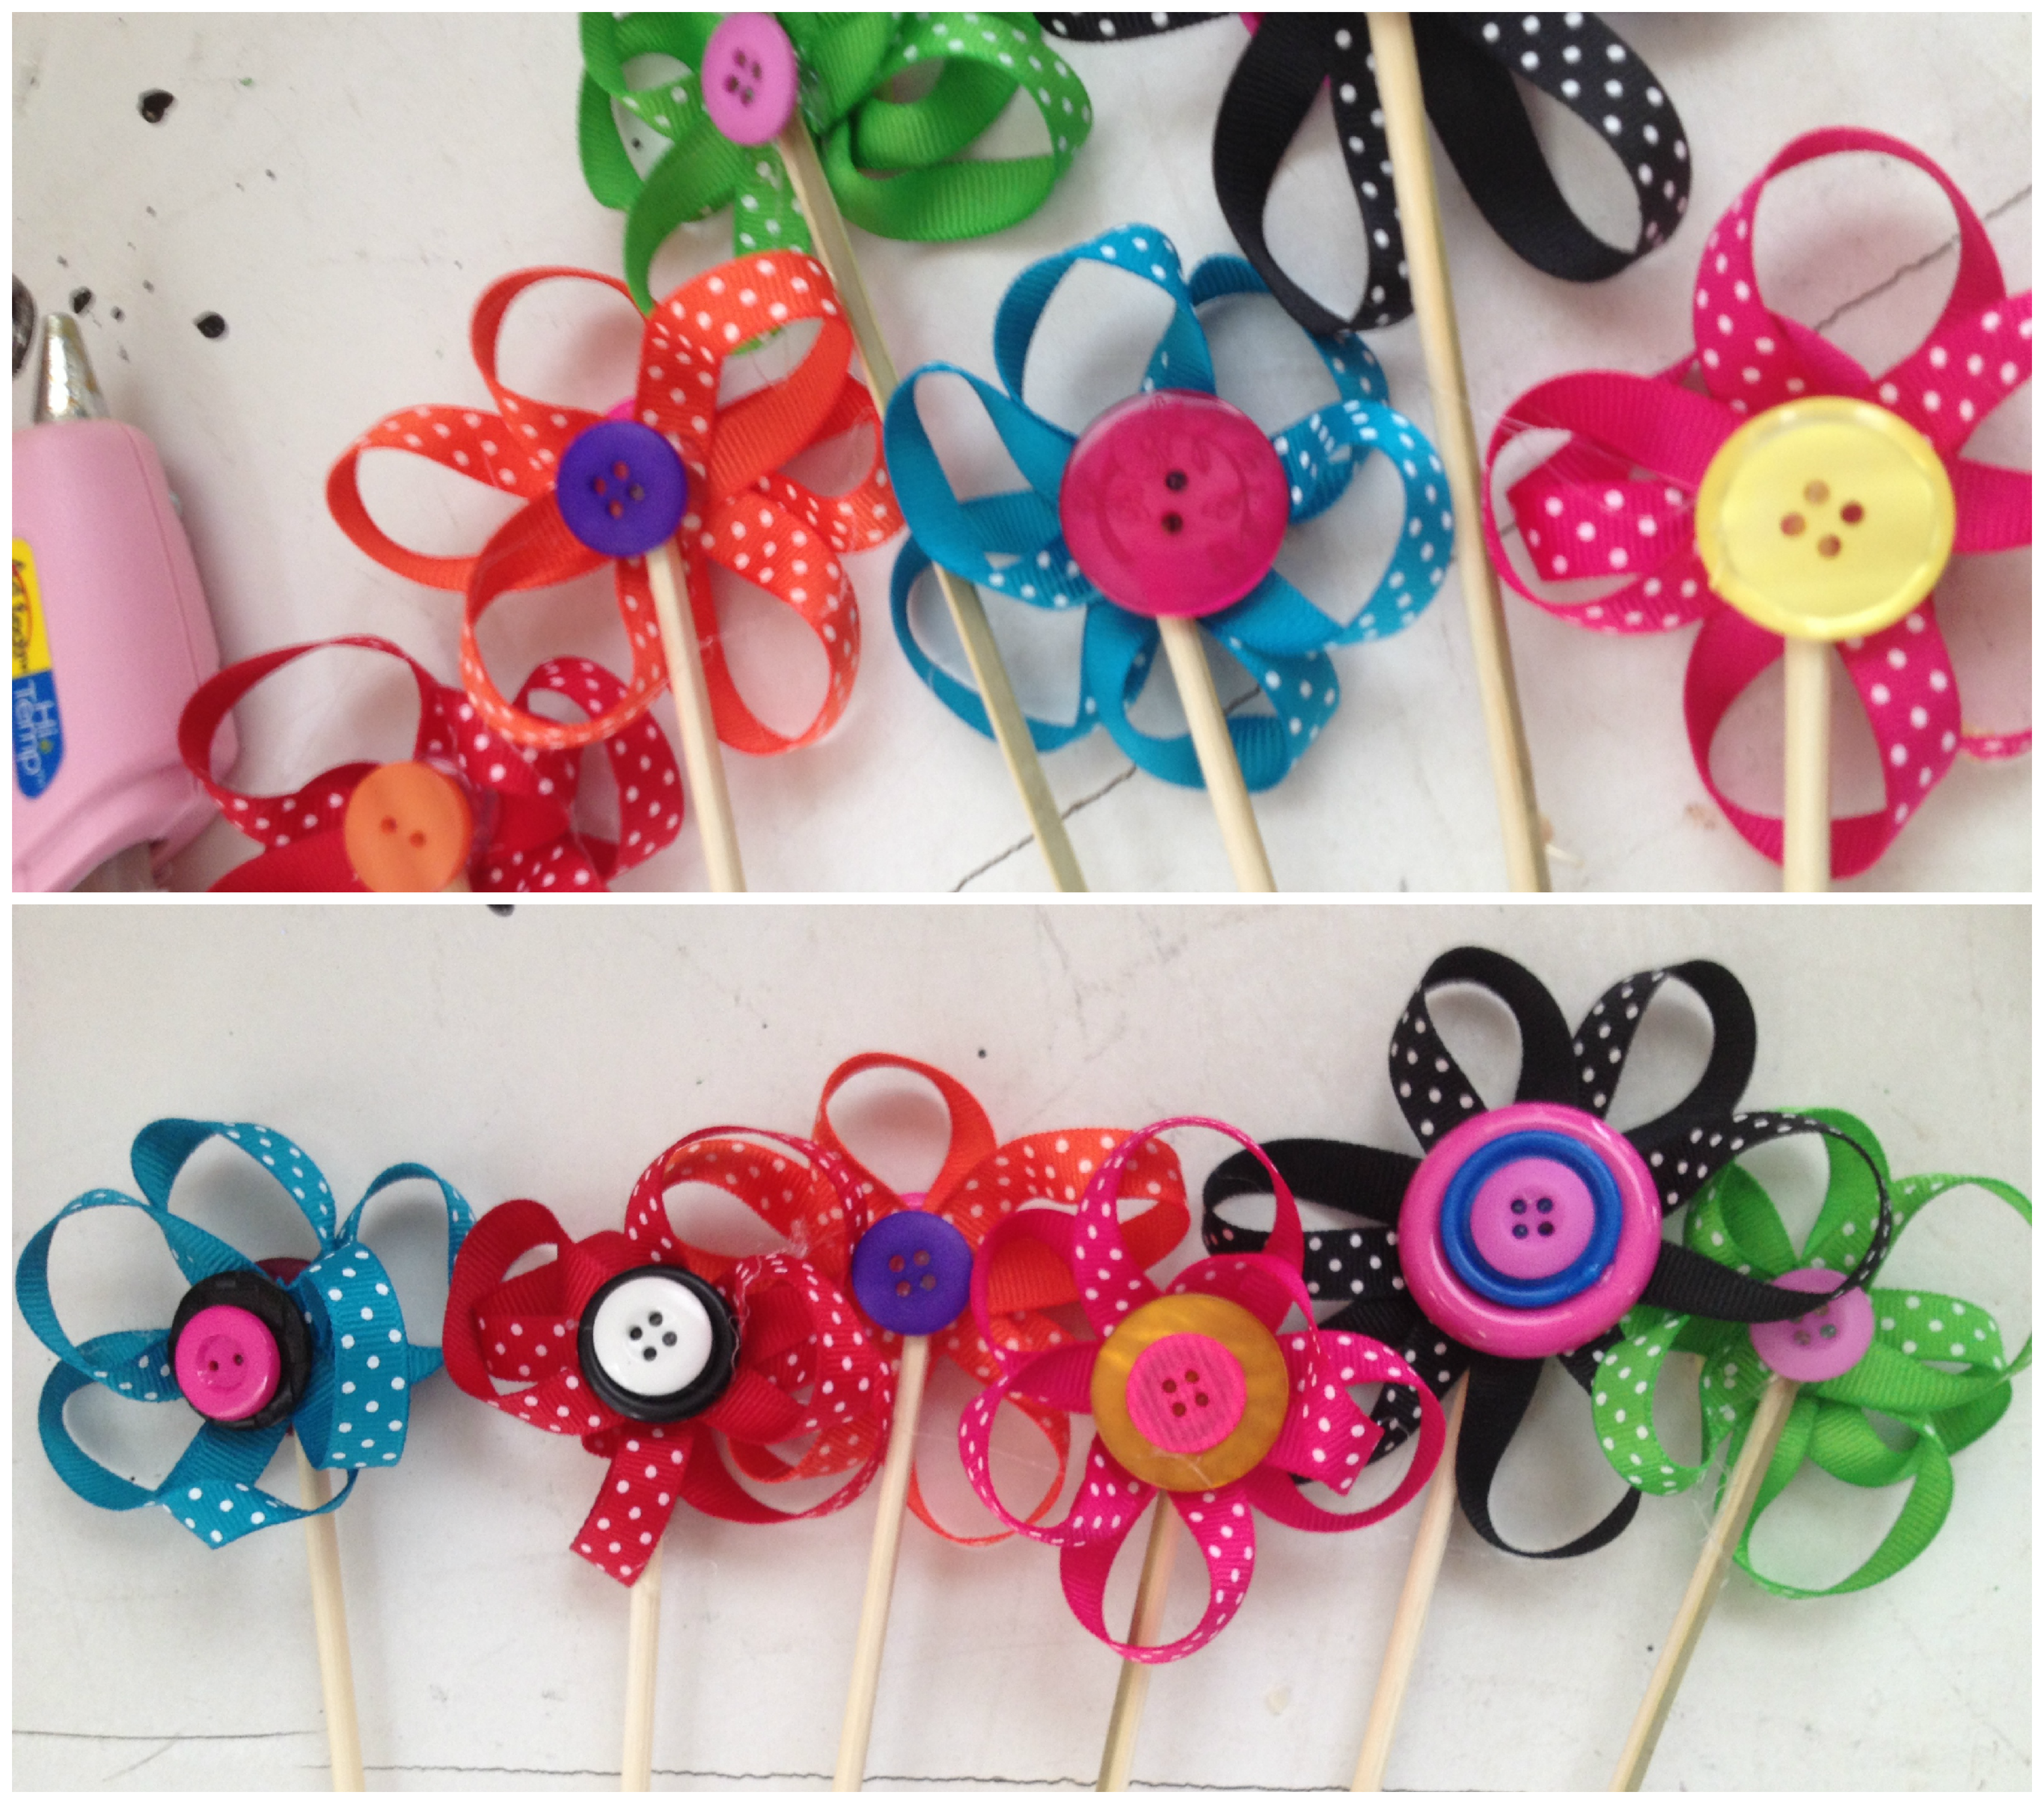
What a fabulous way to create color in fifteen minutes. These flowers withstand the weather and last all season long. Of course they are pretty indoors too. You could even make a whole pot of just these and never have to water.
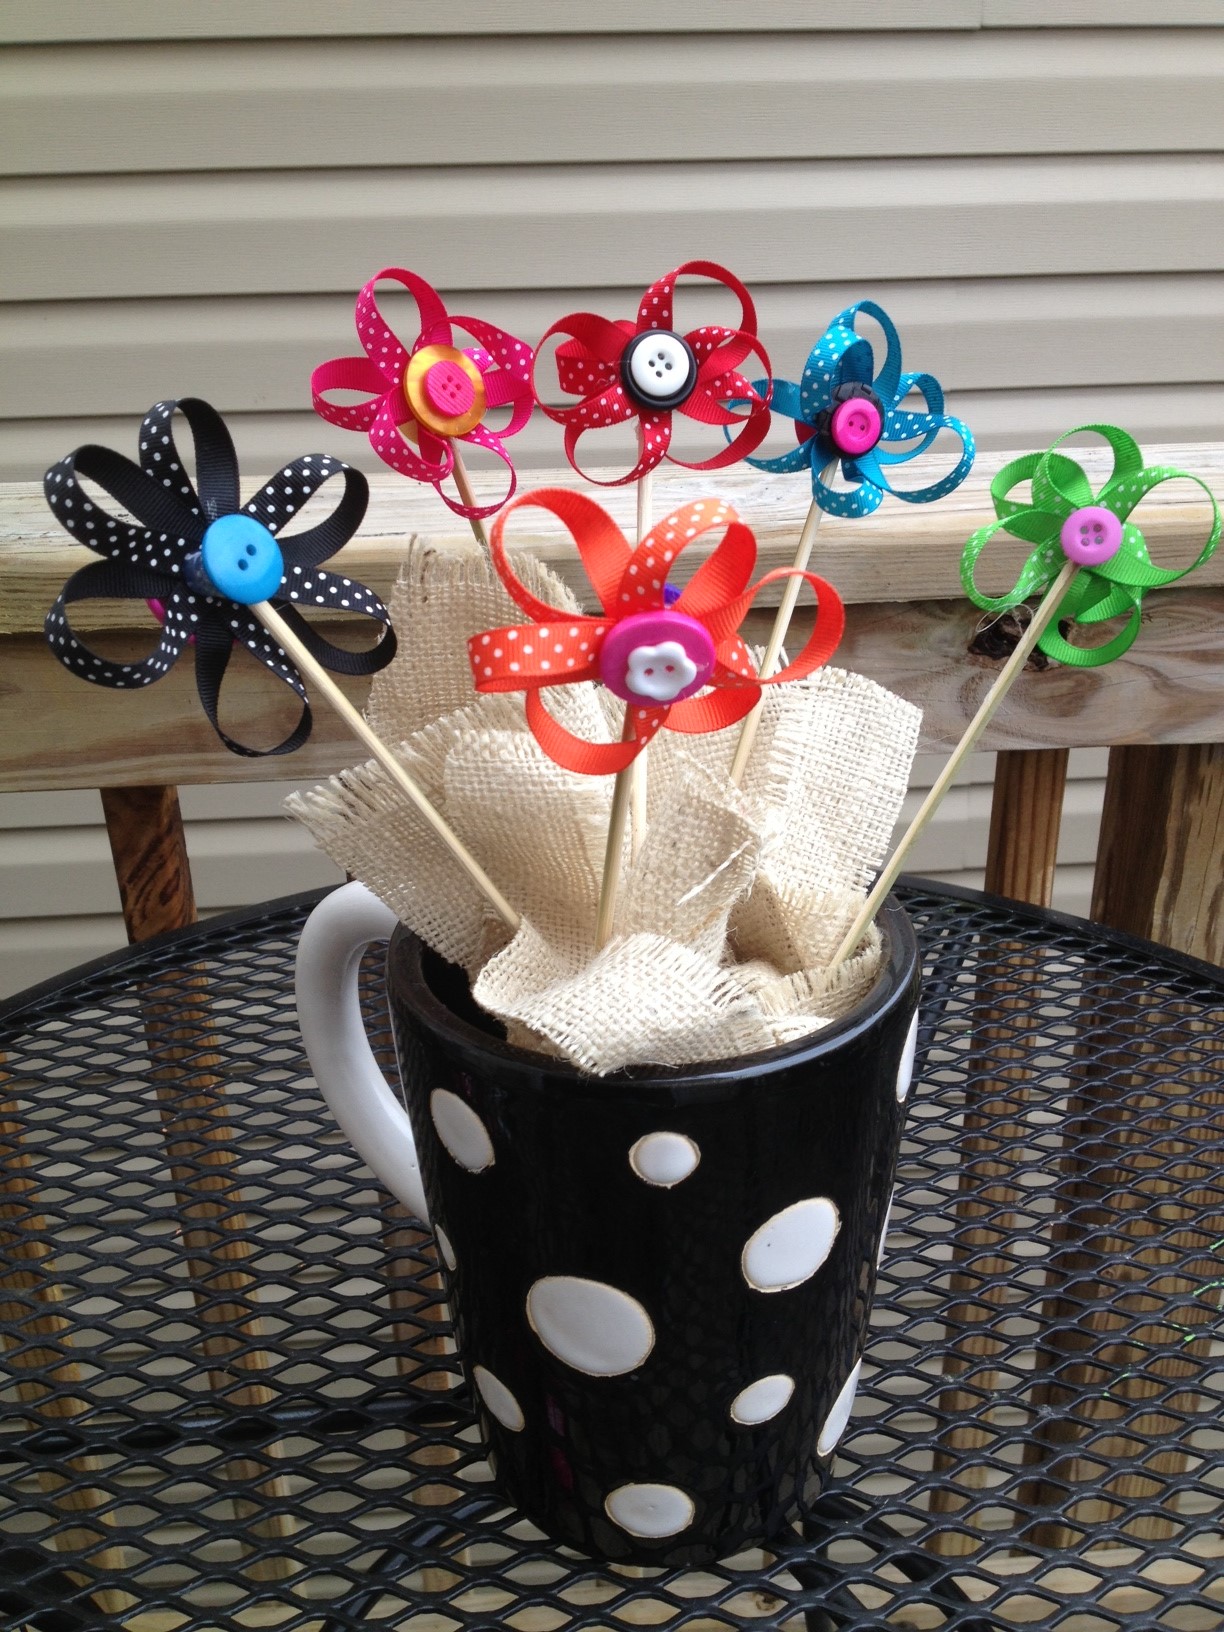
If you want to know where the polka dotted flower pots came from, hop over to my blog and find out.
Happy Fifteen Minute Friday with Flowerpot Flowers!
Each of the designers were sent buttons and birdhouse. We asked them to decorate them in any manner they desired. Any theme, any materials and any colors could be used on the birdhouses.
Niki our DT Coordinator created the pieces below. She is ever the overachiever and decorated a trio. But, since she is in charge of the team she does not get a chance at the prize. PRIZE? Yes a prize. Vote on this post at the bottom. Vote for your favorite designers project. Her projects were inspired by a cool and relaxing color combination of coral, poppy, grey, brown, aqua and cream.
We would love new follower in Facebook and on Pinterest

The designer with the most votes at the bottom of this post will win a $10 Starbucks Gift Card and one commenter on one of the DT members blog will also win a $10 Starbucks Gift Card, a $10 pair of FISKARS scissors and a button assortment. Total value of prize is $25.
The blogs are listed bellow – visit them and then come back here and let us know your favorite. You could win a prize
Allie
Tracy
http://
Angie
http://
Mai
http://
Holly
http://www.ribbonsandglue.com/
Jen
http://www.100directions.com/
Laura Bray
http://laurabraydesigns.com/
Laura Kelly
Carla
http://carlaschauer.com/
Upcyle Recycle Repurpose savant queen, Mel Designs – Melony Bradley has a way with truly turning trash into treasure. Her creativity never ceases to amaze me. If you would like see other projects that she has created you can check out her blog. She does fantastic tutorials and almost every post has one. She accents many pieces with sewing, ink, buttons paint and sew much more
I love the little tid bits she adds to every project. This is a cool desk set.
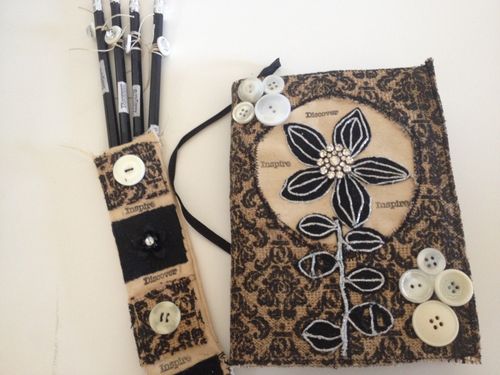
A fantastic laundry room organizer.

It’s spring. These 3D Button Flowers would be so cute for Mom, or any Spring birthdays, or just as a pick me up.
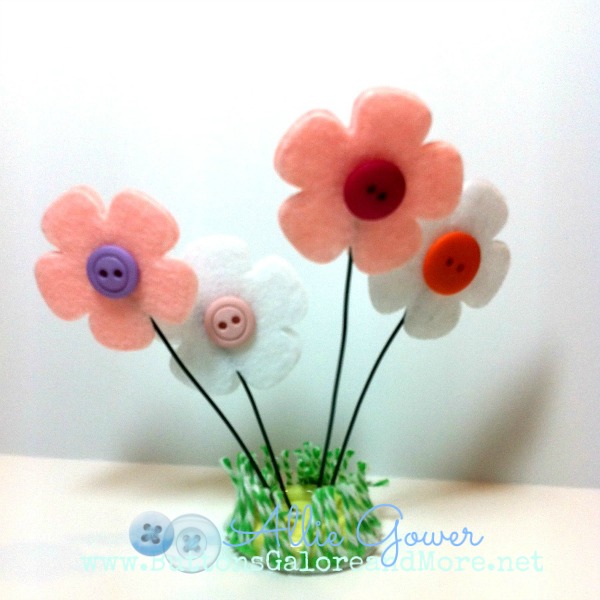
These are SO simple to make.
You need the following supplies:
Buttons, Twine, Sturdy Wire, Felt,
Yes, that’s IT!
I die cut some flowers using a Spellbinders Paper Arts die called Blossoms. You could also just cut out flowers, or use ready made flowers.
I chose a large button with four holes. I thread two wires through the holes. I sandwich flowers on the “stems” and add buttons.
I put a circle of felt on the button of the button to help keep the sculpture upright. I added some twine around the edge of the button to create grass.
TOOLS USED:
Thanks for stopping by today. Hope you’re inspired to make something 3D!
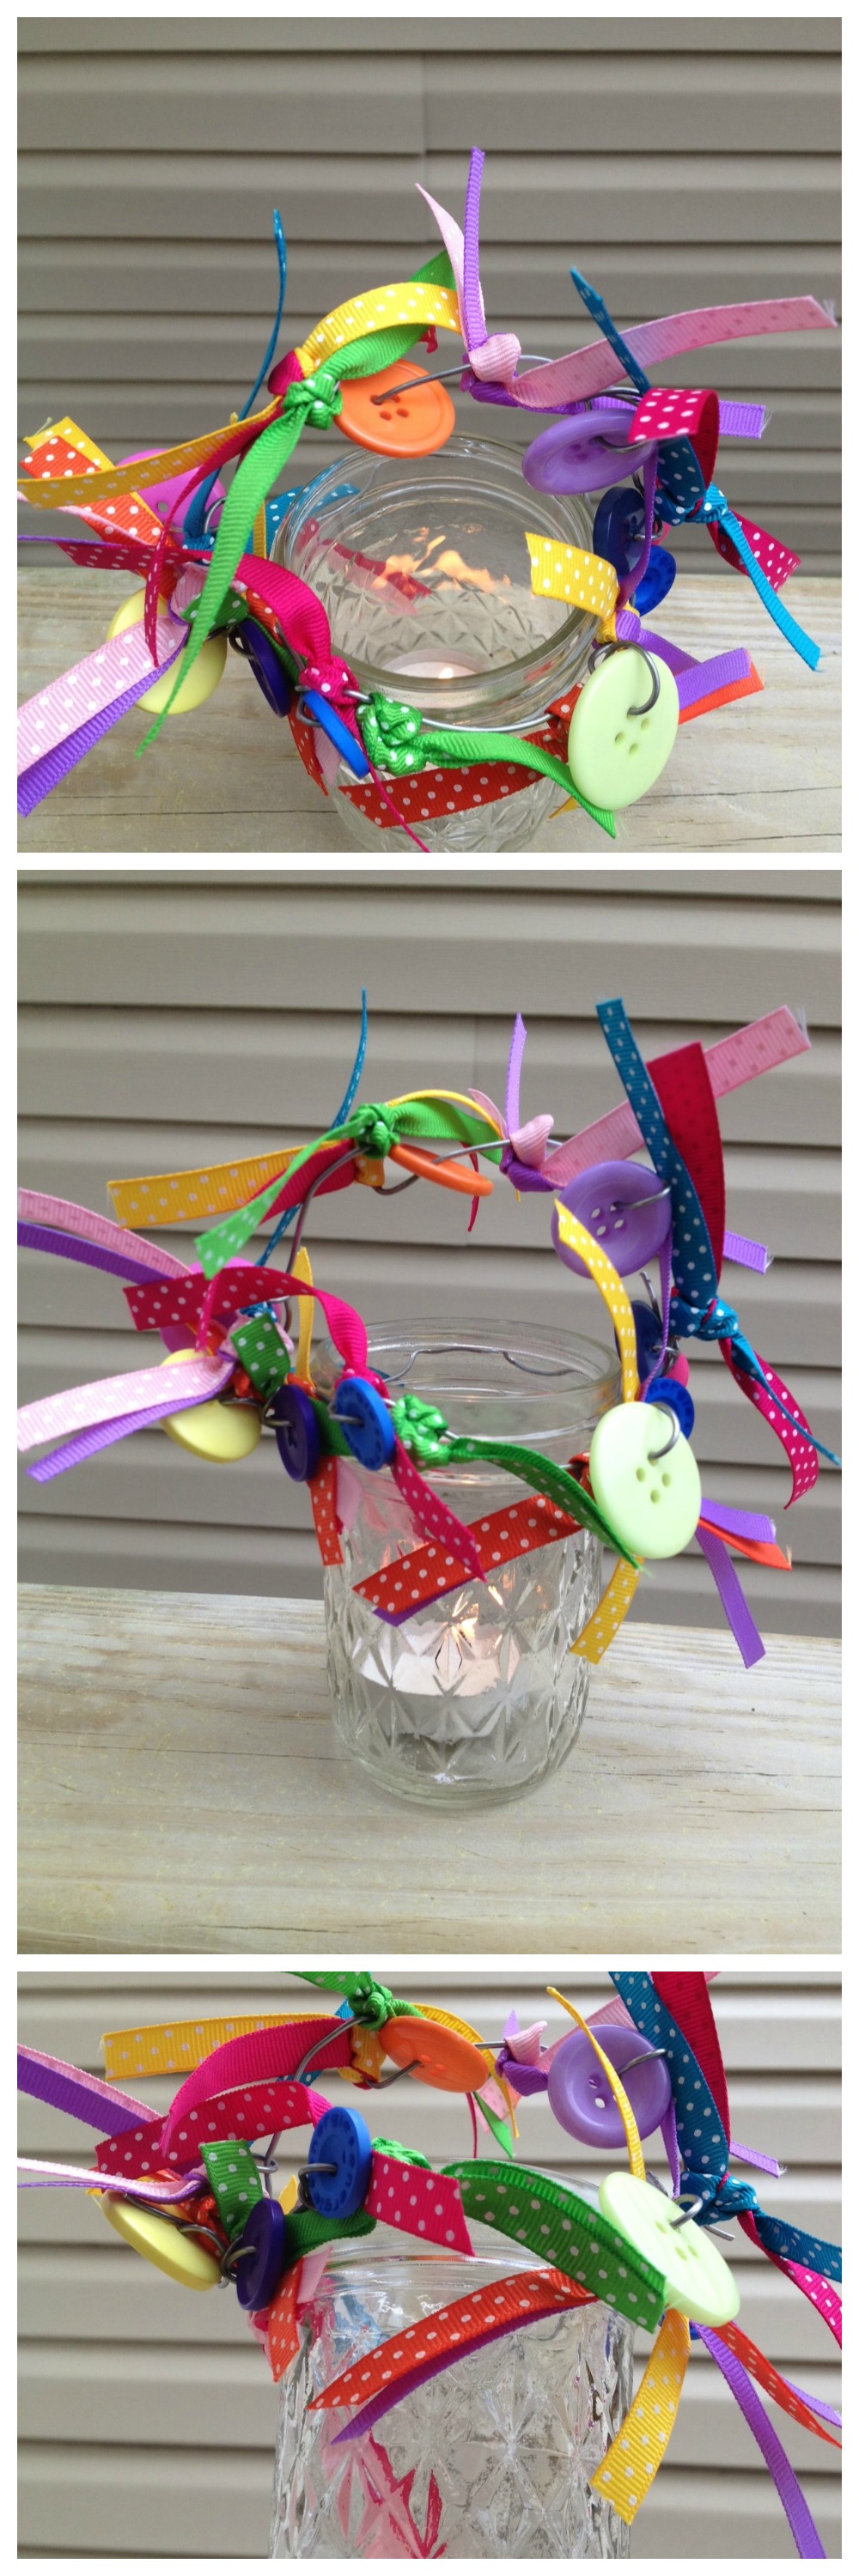
Spring sprang and summer is on the way which means warmer weather and more time outdoors…whether playing, celebrating or entertaining. This little recycled mason jar acts as a great fairy lantern that can be used as a candle jar, party decoration or a jar to be filled with goodies for favors.
To make it you will need assorted Laura Kelly buttons, wire that it easily bendable (I used electrical fence wire from the garage) and feeds through the button holes and pieces of ribbon (5 inches long) and a mason jar without the lid.
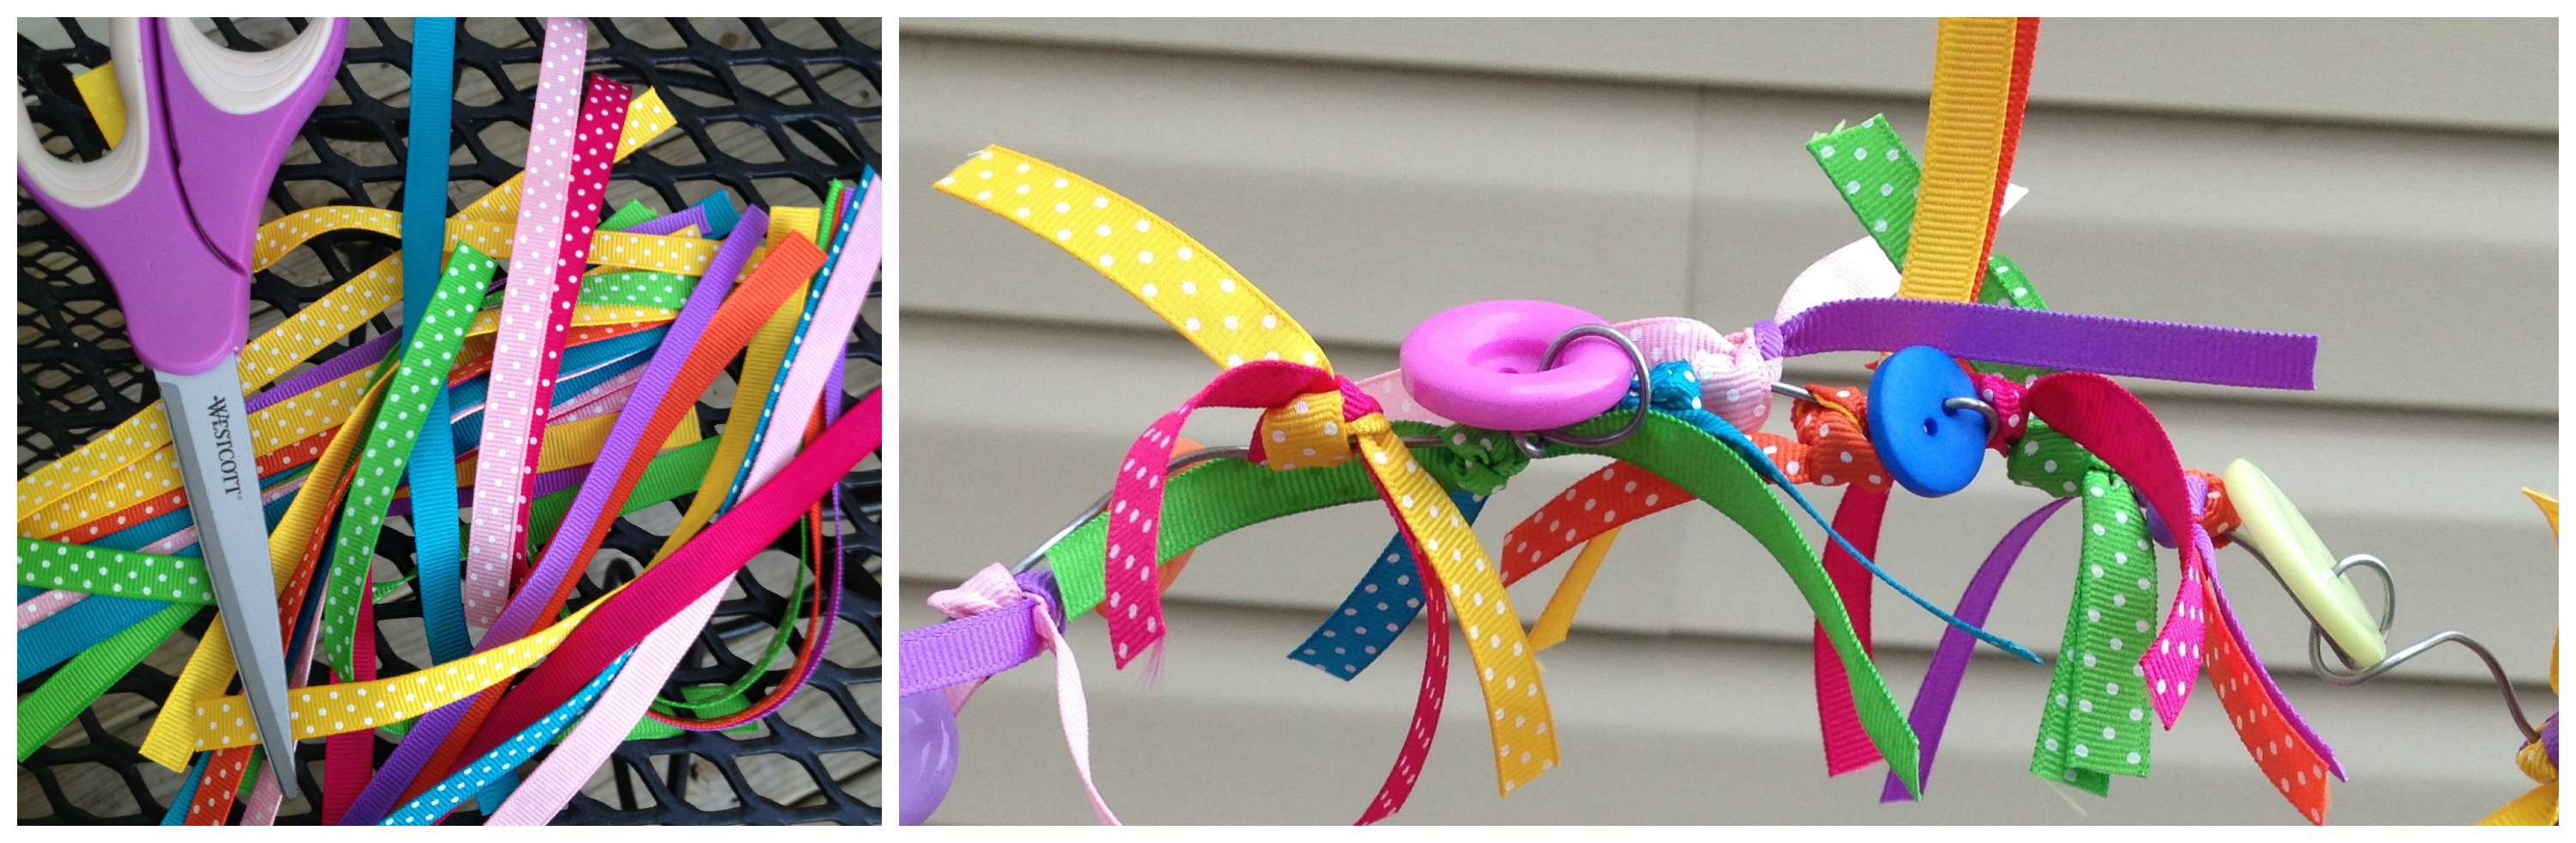
To make it simply feed the wire through the buttons twisting and turning to create bright and colorful design then tie the ribbon pieces in knots along the wire. Twist the wire to go around the top of the jar then use the remaining length to create a handle, twisting the wire through the piece that went around it to secure.
It is simple, fun and easy and makes for a great quick project that you can complete in around fifteen minutes! It is one of those creations that has lots of great uses and ways to spread bright joy and light.
Looking for DIY wedding decorations for your wedding? These candle wraps with buttons are perfect for your ceremony. Plus there are two different looks to choose from. These wedding decorations can be modified to work with any style.
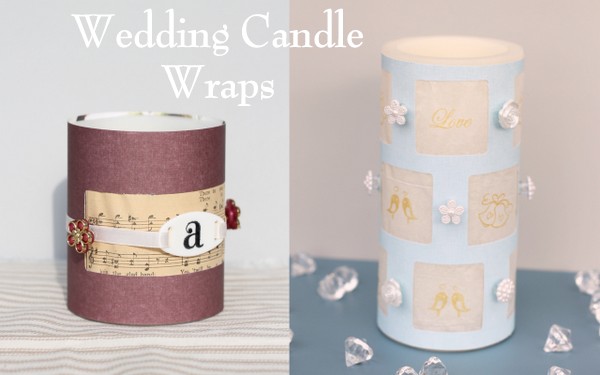
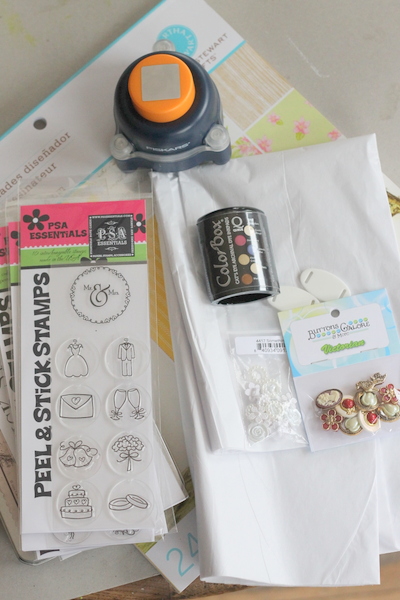
For the blue candle wrap, cut a sheet of paper so that it fits your candle. Punch out a pattern of windows in your scrapbook paper with the Fiskars Everywhere Punch.
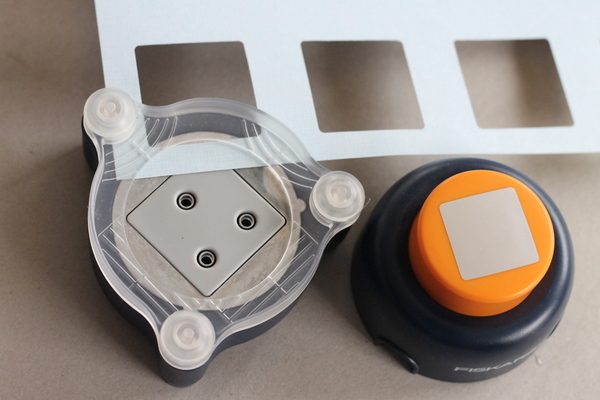
Cut a sheet of tissue paper slightly smaller than your paper and tape to the back.
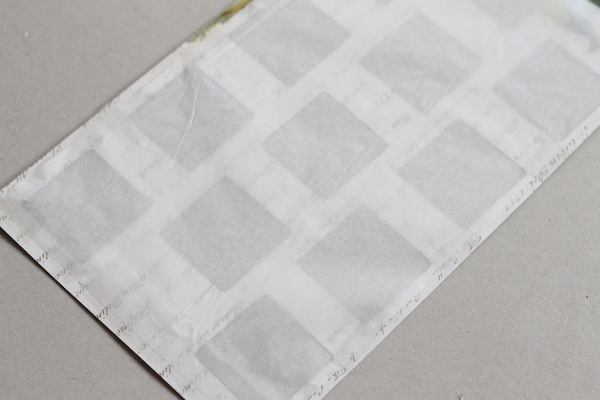
Use various stamps to decorate each window of your candle wrap.

Wrap the candle and secure with tape in the back. The candles I am using are wax sleeves that accept battery power tea lights. There is no threat of fire when using these types of candles. Add random buttons from the Something New button pack around your candle wrap. Use hot glue to secure your buttons.
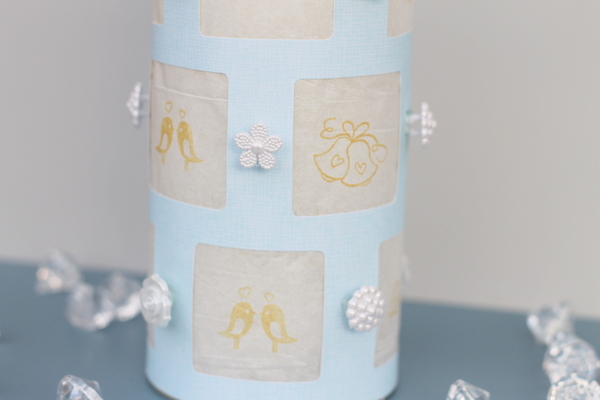
Add this one to the center of your wedding table for a beautiful centerpiece. A collection of these would look great at your wedding reception.
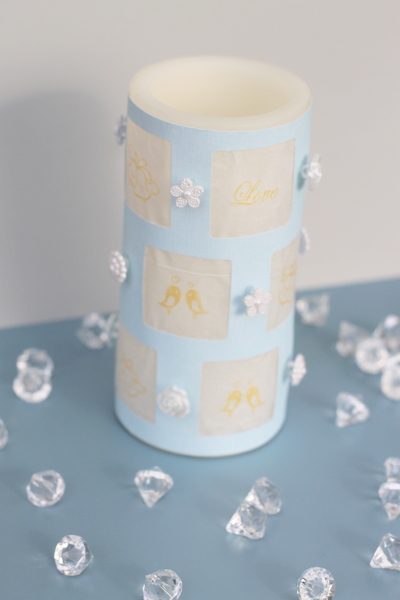
Now for the second version just to show that these can be customized to any wedding theme. For this version, again I cut the paper to size. This time I used my Fiskars Everywhere Punch to make an elongated hole.
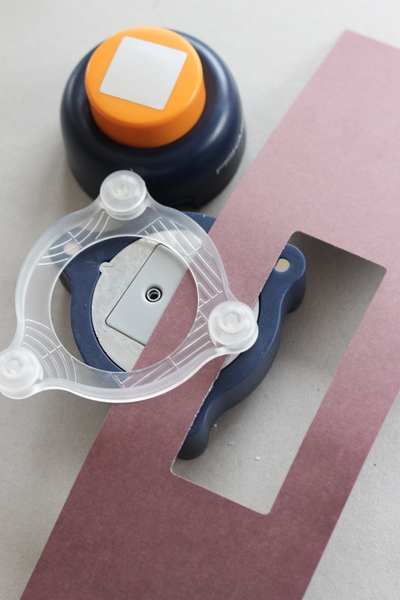
I cut some sheet music to size and taped it to the back of the paper over the window.
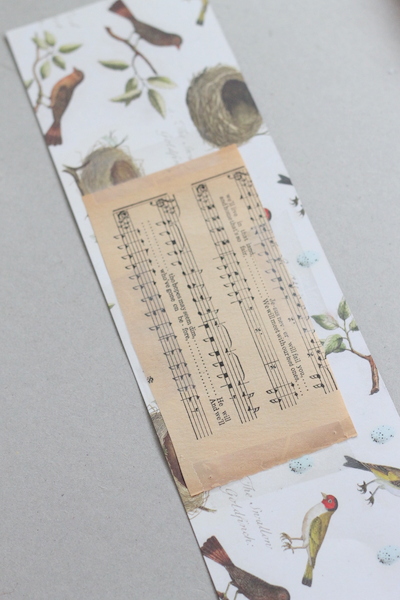
Stamp the blank shape with the monogram of your choice. Then thread through some ribbon. Glue the shape and the buttons to the ribbon ONLY. Do not adhere to your wrap in this step.
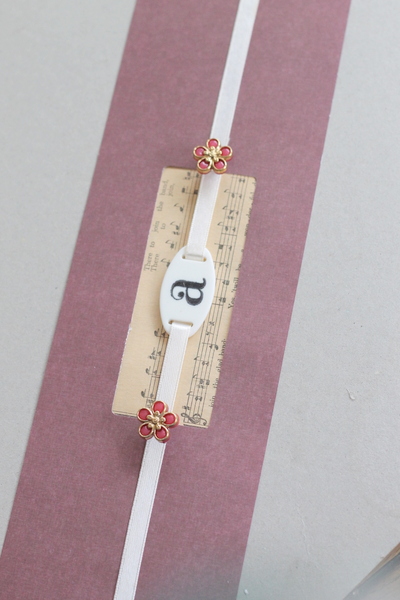
Wrap the paper only around your candle first and secure with tape. Then add your ribbon and secure with hot glue.
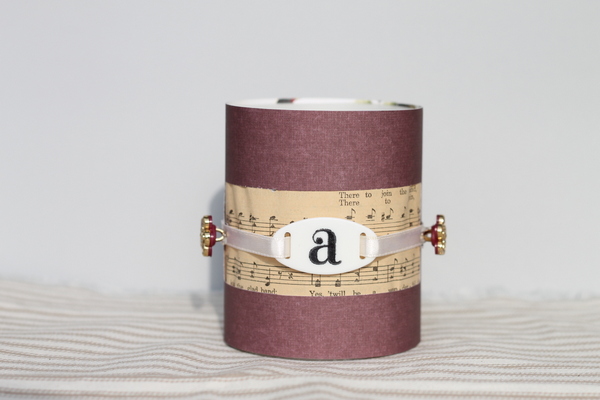
You can change up the paper and buttons on your candle wraps to match your wedding theme. These are a quick and easy addition to any wedding decor. Not getting married anytime soon? These could also be customized for any season or home decor. Grab your buttons and get started on your wedding decorations today.
You can add your own pretty handmade art to every guest table at your wedding reception with just a few steps. Use the Buttons Galore and More blank craft shapes to create mini masterpieces that coordinate with your wedding theme. You can use these pieces to embellish candle votive holders, make into wedding party gifts or even as jewelry for the bride and bridal party. I played with different colors and color combinations, use what works for your event theme. I used the idea of dragonfly decor.

Wedding Votives with Dragonfly Decor Art by Jen Goode

Start Ups are mini canvases for your own art

Spray layers of Smooch Spritz to add color

Finish with Champagne Smooch Spritz
Tips:
Don’t be afraid of adding more color. If you don’t heat set, you can wipe off some of the excess color and start over. Although you may not be able to wipe off all the color, you will be able to remove quite a bit of it.
If your stencil comes loose from the heat gun use, simply reapply with more adhesive spray.
Most importantly, have fun creating your own personalized dragonfly decor!

Dragonfly Art sparkles

Add color layers to other Start up shapes

Wedding votives with handmade Dragonfly art by Jen Goode
A Bridesmaid Gift Box idea – So your big day is coming up and you want to give your Bridesmaids a handmade gift from the heart since they’ve been puttin’ up with your Bridezilla attitude.
How about making them an elegant Bridesmaid gift box using buttons and glitter? You could even personalize the Bridesmaid gift box more by using your wedding colors or even their favorite colors.

Simple and elegant Bridesmaid Gift Box made by using buttons and glitter.

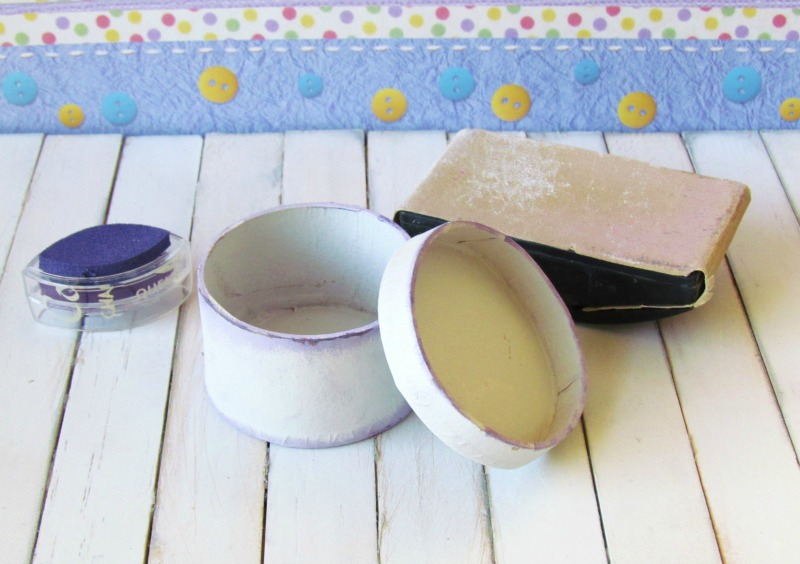
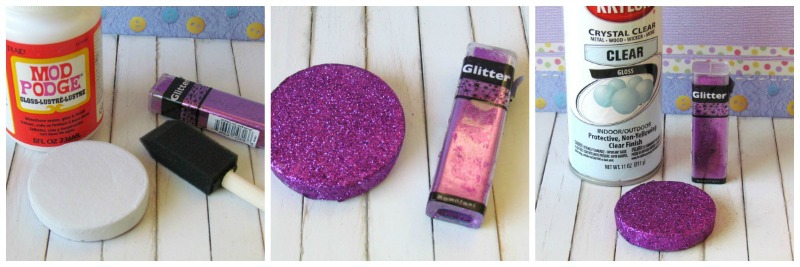
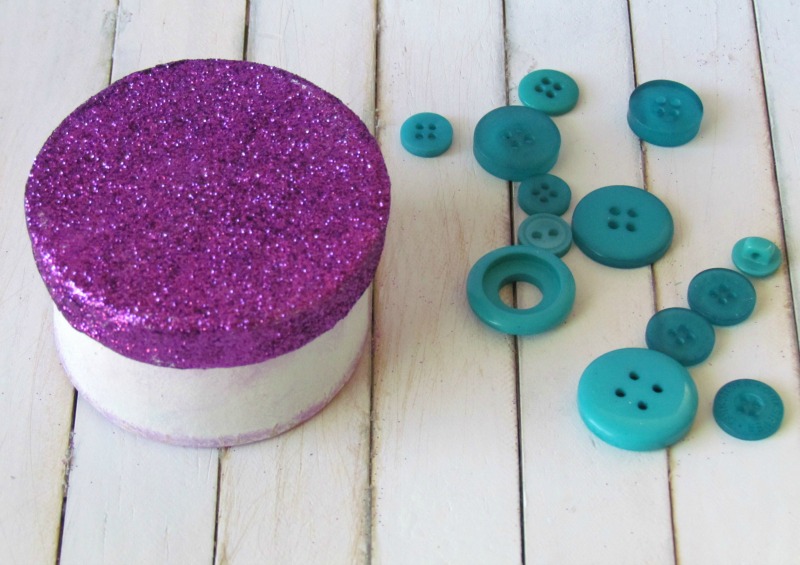
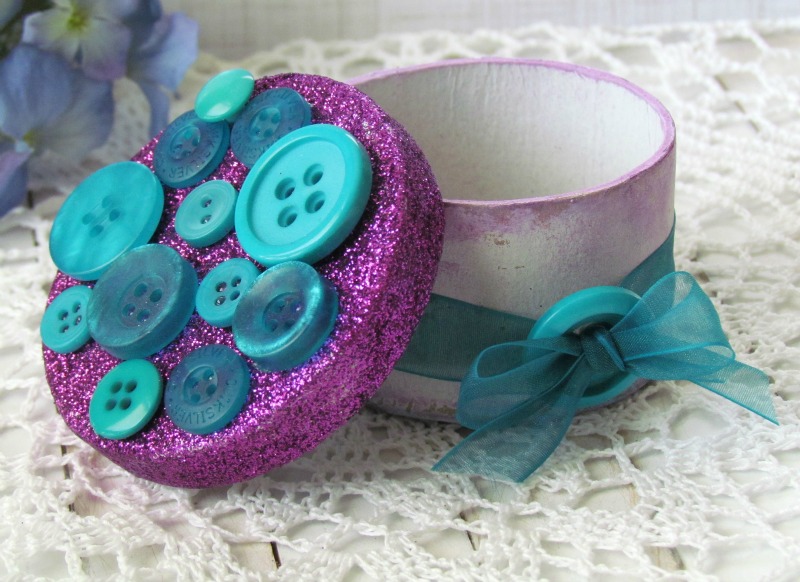
Now that your elegant Bridesmaid gift box is made, it’s time to add something sentimental inside for them to remember your special day and how they helped you to get there. Maybe a piece of jewelry, a gift card to their favorite eatery or even an IOU for a night out on the town after your big day.

A clothespin craft is simple, fun and most importantly inexpensive.
I love using ordinary household items to make seasonal decor. I always try and shop my house or dig through my bins of craft supplies to see what I can come up with first before I run out the door to the craft store. Of course, making a bee-line to the craft store is seriously tempting. It’s also much cheaper and fulfilling to up-cycle things you may have lying around. Like empty (clean) cans.
My name is Holly and I have a confession to make. I am a Can Hoarder. Yep- Coffee, tuna, soup, Pringles, yadda, yadda…if I can turn a can in to something pretty, I’m keeping it!

Just like this clothespin craft for Spring that I made from a tuna fish can. Yes, A tuna fish can. You can use this clothespin craft idea for kids too. The buttons might not be as straight though. LOL
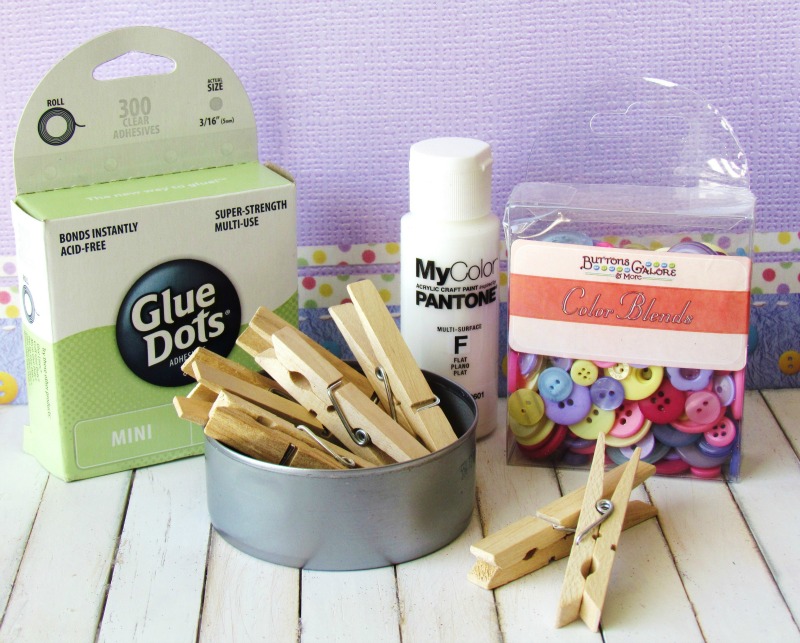
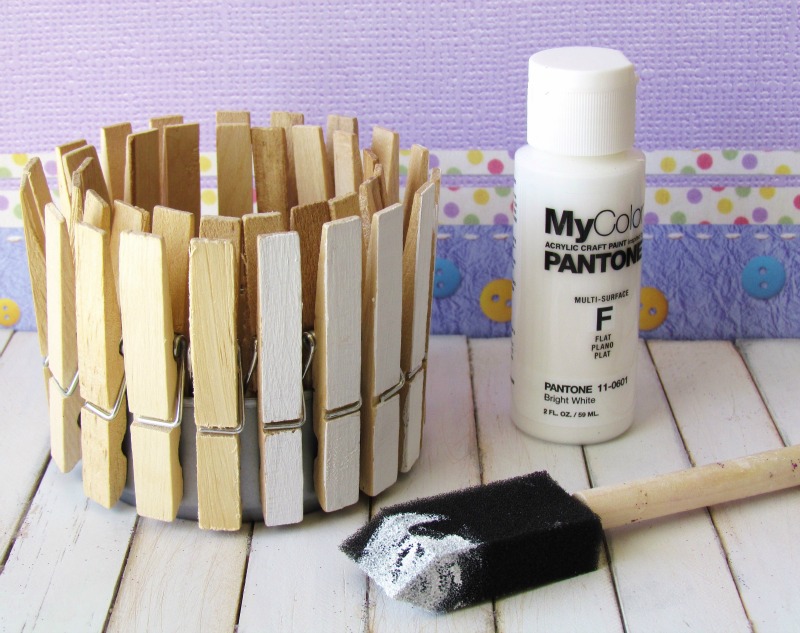
Clip clothespins on can and paint edges white.
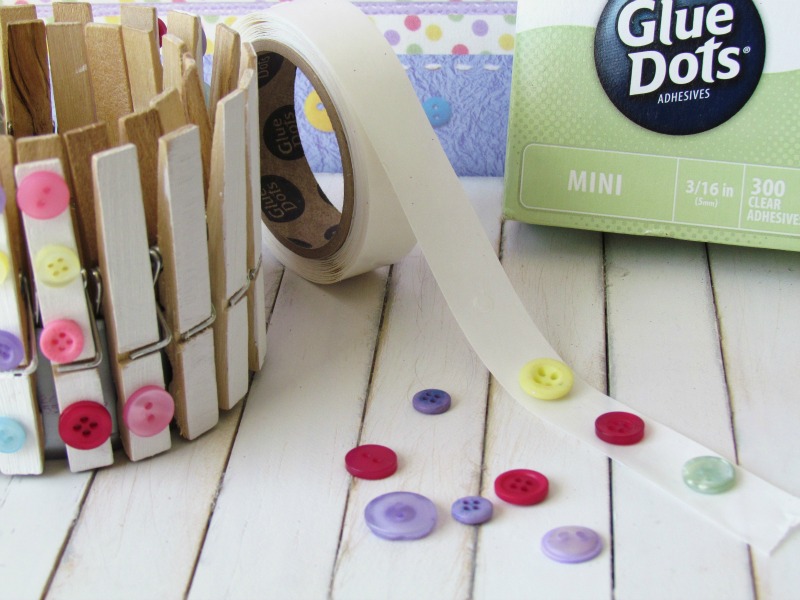
Adhere buttons to clothespins using Mini Glue Dots.
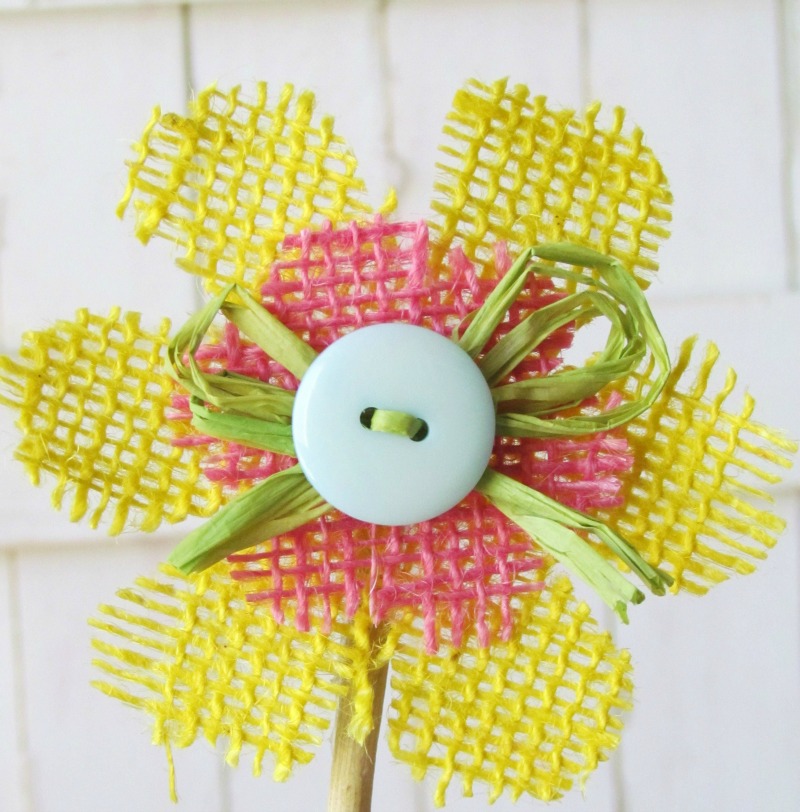
Cut a flower out of burlap, add a button center and attach to a dowel.

Fill it up and Enjoy!.
Now that your DIY craft project is complete, it’s time to fill it up. Let you imagination run wild with the contents.
You could fill your clothespin craft decor project with a small plant, flowers, a candle or candy. I choose candy. It gave me an excellent reason to buy some Cadbury Eggs- Yum!
Make an embellished lamp shade and light up your room. This craft is so easy, so quick and creates such a bright and happy addition to your studio decor or any home decor. I think it would make a great addition to a tween room. Especially for the girl that is into DIY and wants to express her favorite colors.
The only things you will need are a lampshade, Laura Kelly’s bright colored buttons and HOT glue. You could kick it up one notch further and add a ribbon to the edges. If I were doing it I would use a polka dot ribbon as they are my personal favorite.
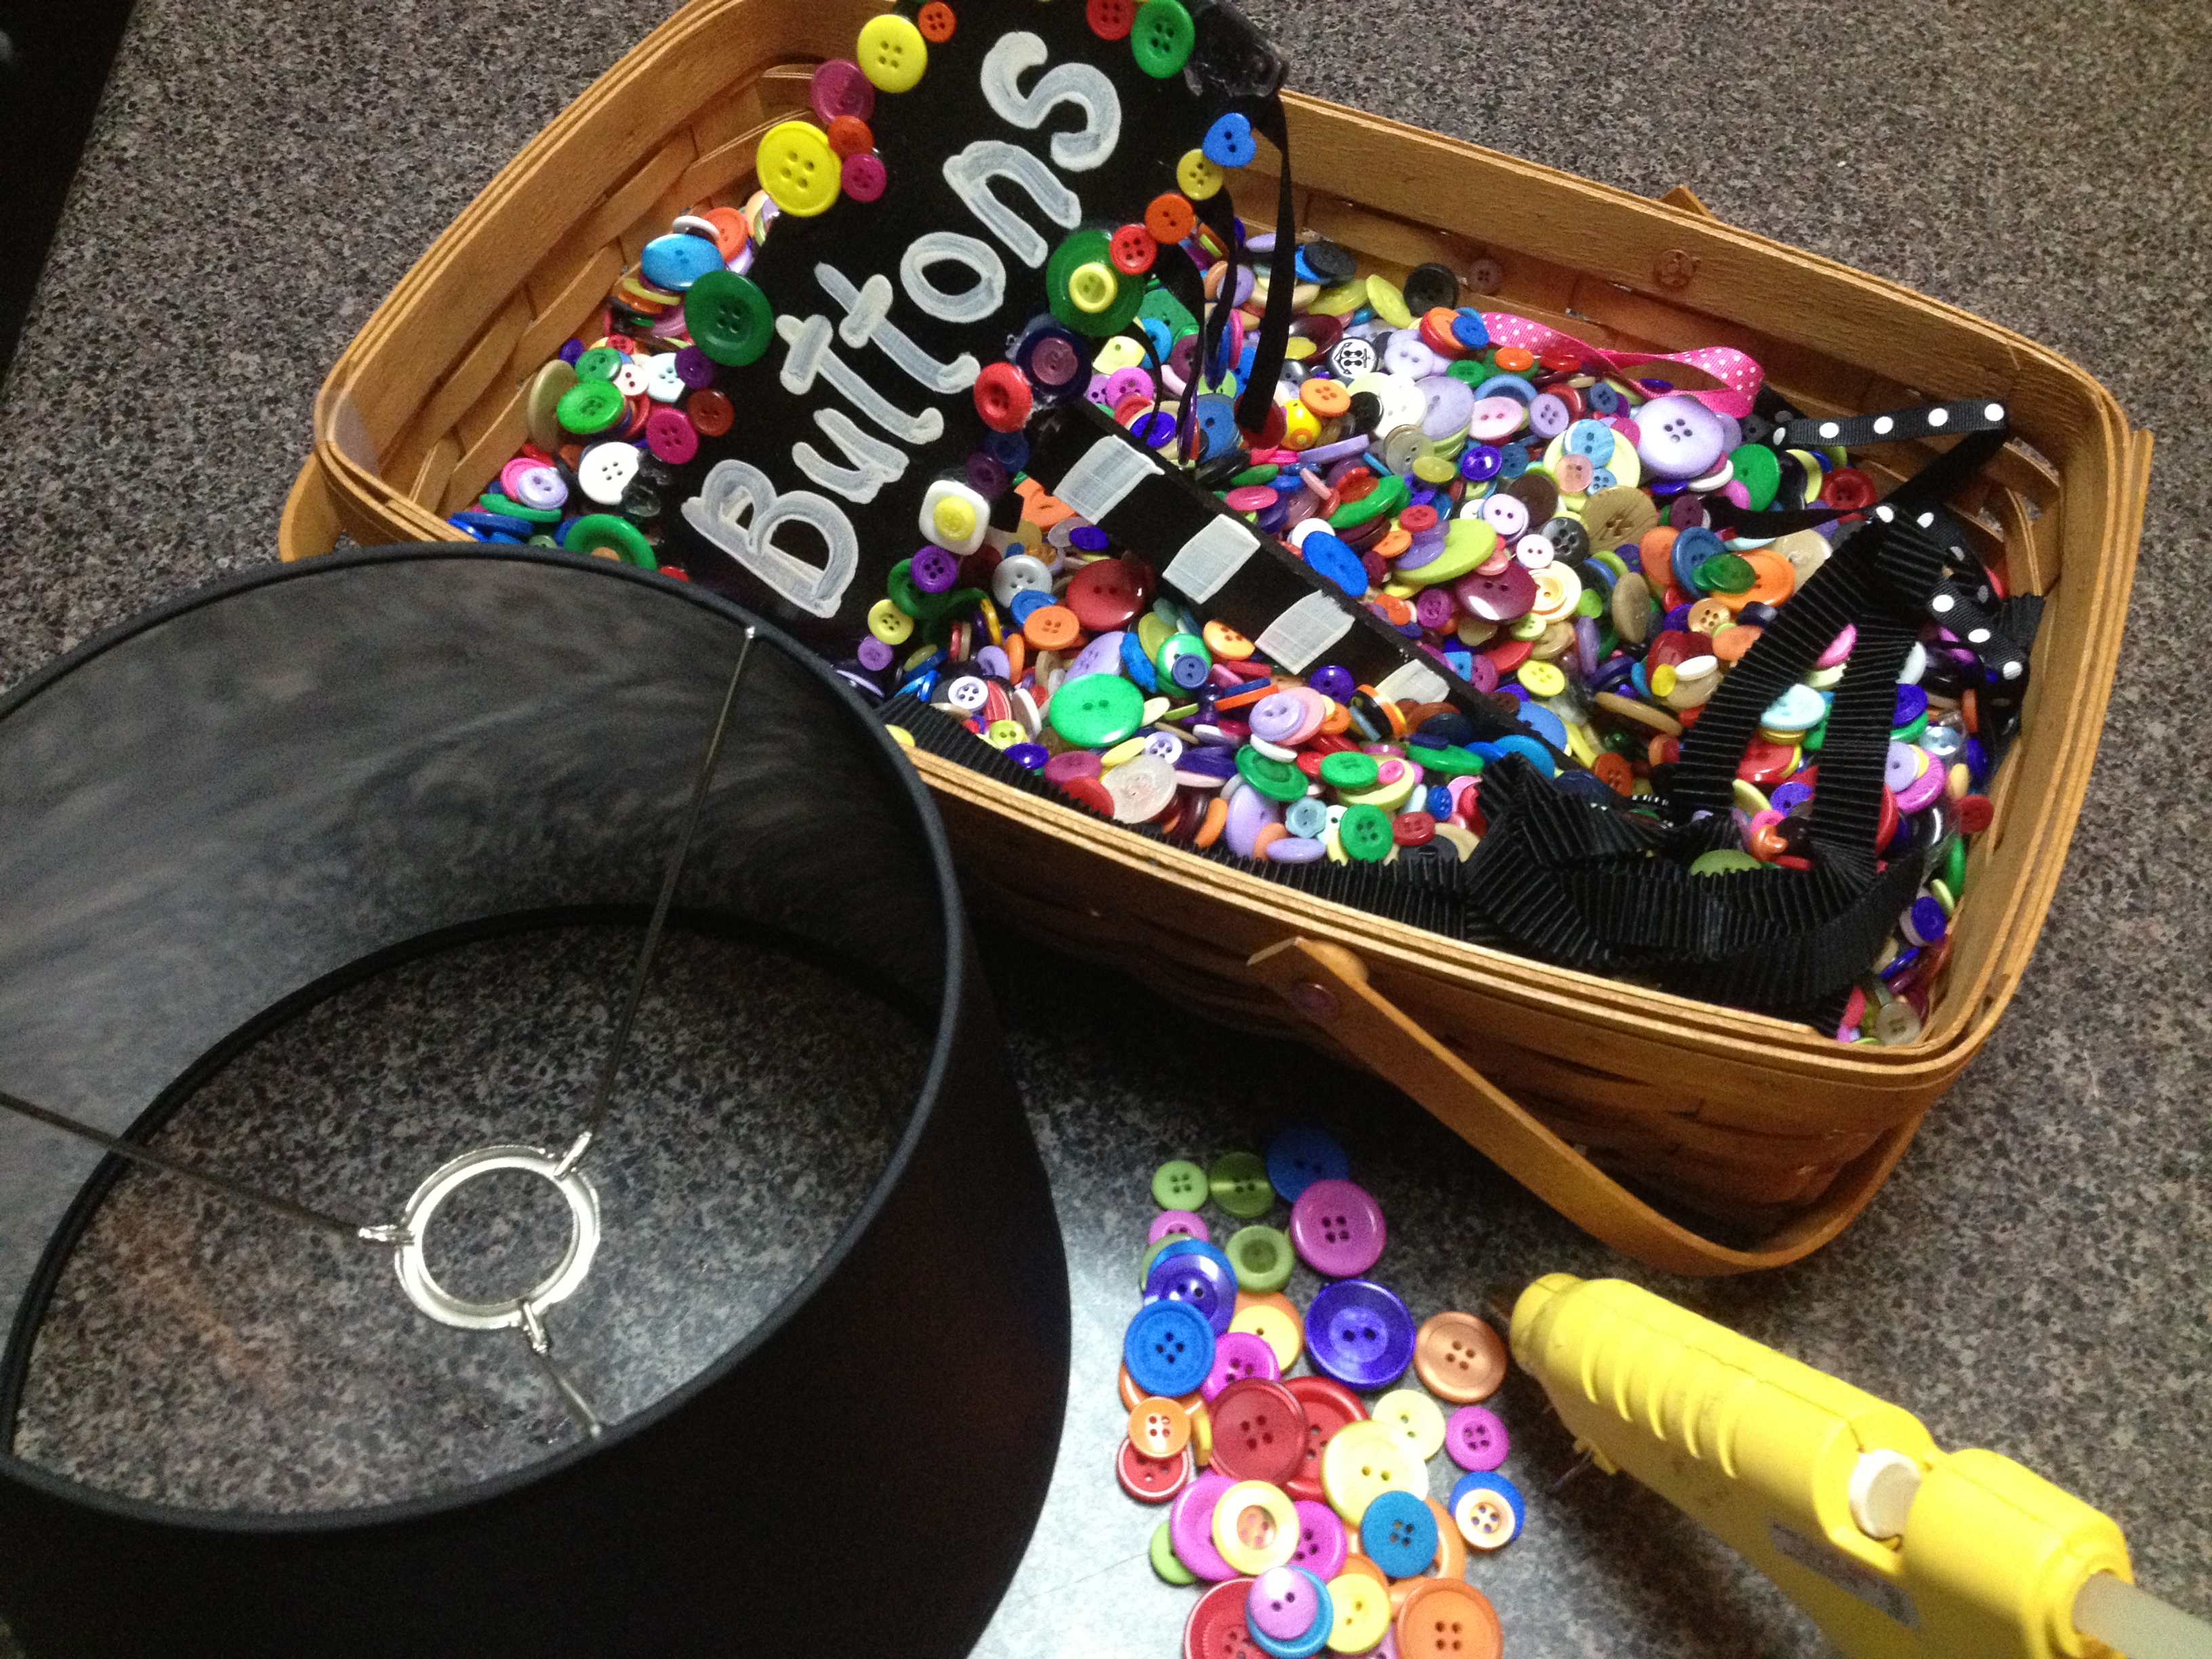
Make two layered button stacks in whatever colors will best accent the space your shade will go. Use the hot glue to adhere them together. Allow the glue to cool.
Carefully glue them to the lampshade with the hot glue, space the button stacks as desired.

Put the lampshade on a lamp and place the lamp in your desired location. Turn the light on and enjoy it!
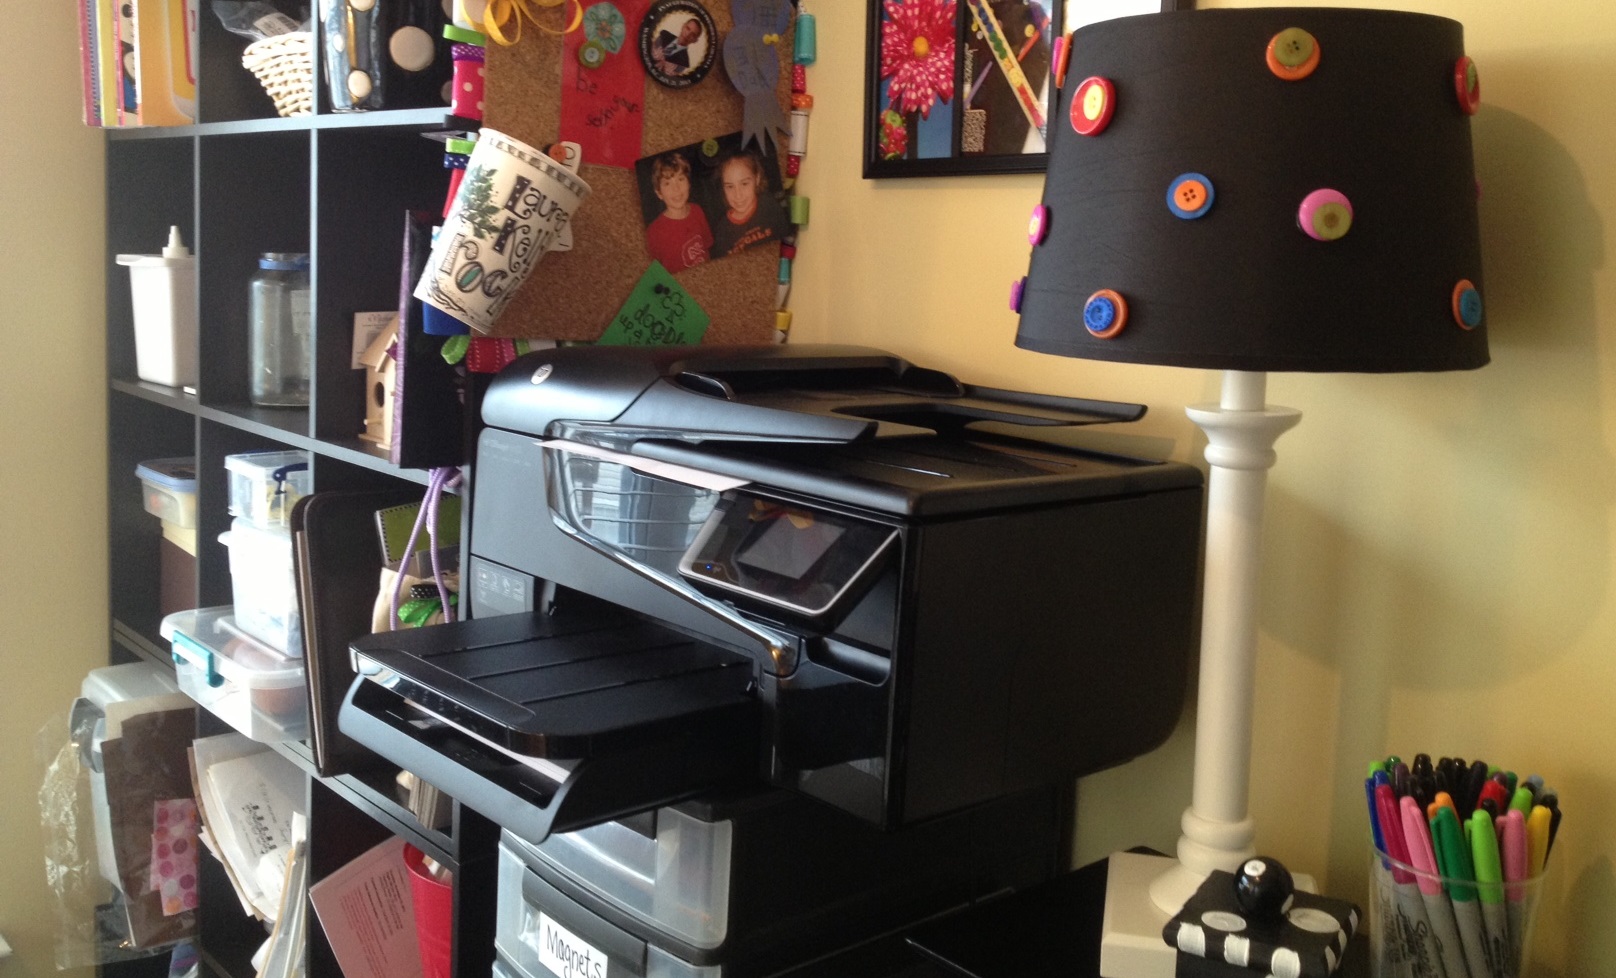
Happy creating and decorating!
Check out my paper flower tutorial and create a pretty paper flower Pick me up- The winter months can be long, dreary and very cold depending on where you live. Here on the east coast of Canada it has been one wicked winter so far. Sometimes you just want to create something to brighten someone’s day, or even your own day. So that is what I did one afternoon. I created this sweet and simple little bouquet of paper flowers in quirky and bright tones. Sure to brighten anyone’s spirits. Try this one for someone special or for yourself. It’s amazing what a simple crafted surprise can do a person in the hectic world that we live in.
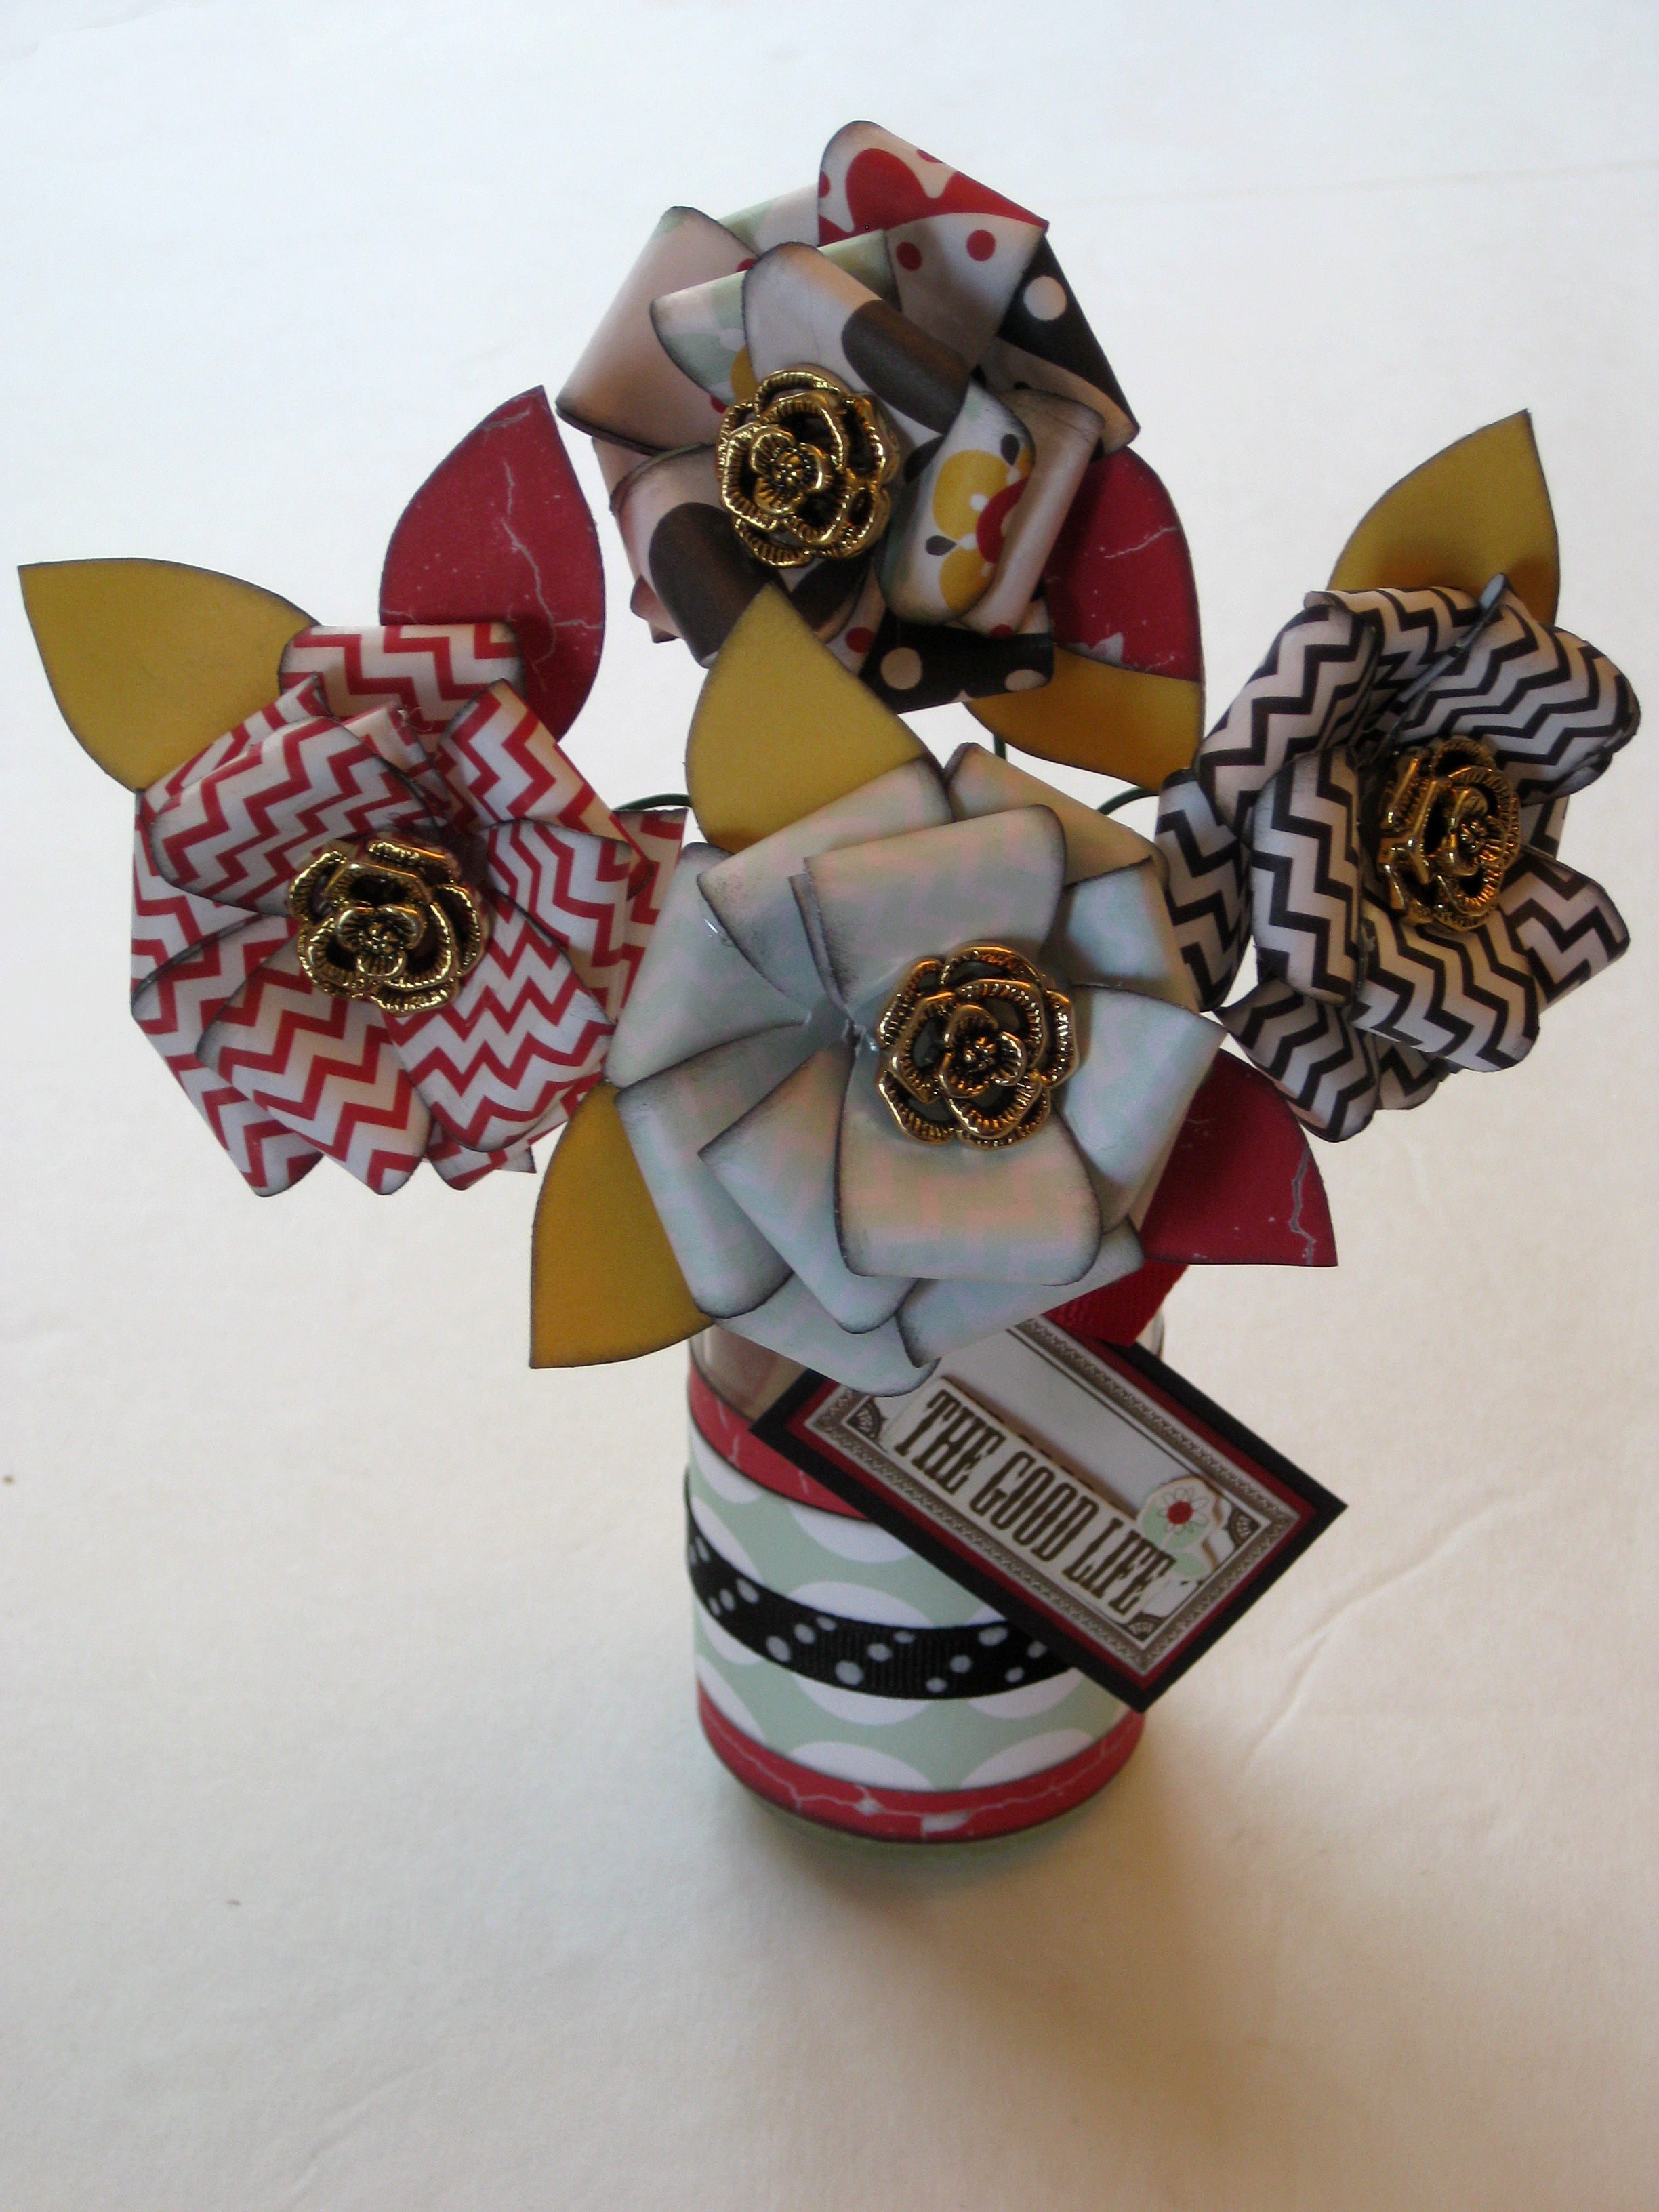
First you are going to select your pattern paper. Using the XXL flower punch, you are going to cut out 4 flowers from each pattern you would like to use. Once you have all your flowers punched, you are going to cut them accordingly. Two of the flowers remain as they are with just a simple cut up the to middle of the flower between 2 of the petals. One flower is going to have one petal removed completely. The remaining flower will be cut so that you have a section with 2 petals and a section with 3 petals. The image below shows what your pieces should look like for each of the flowers you want to create.
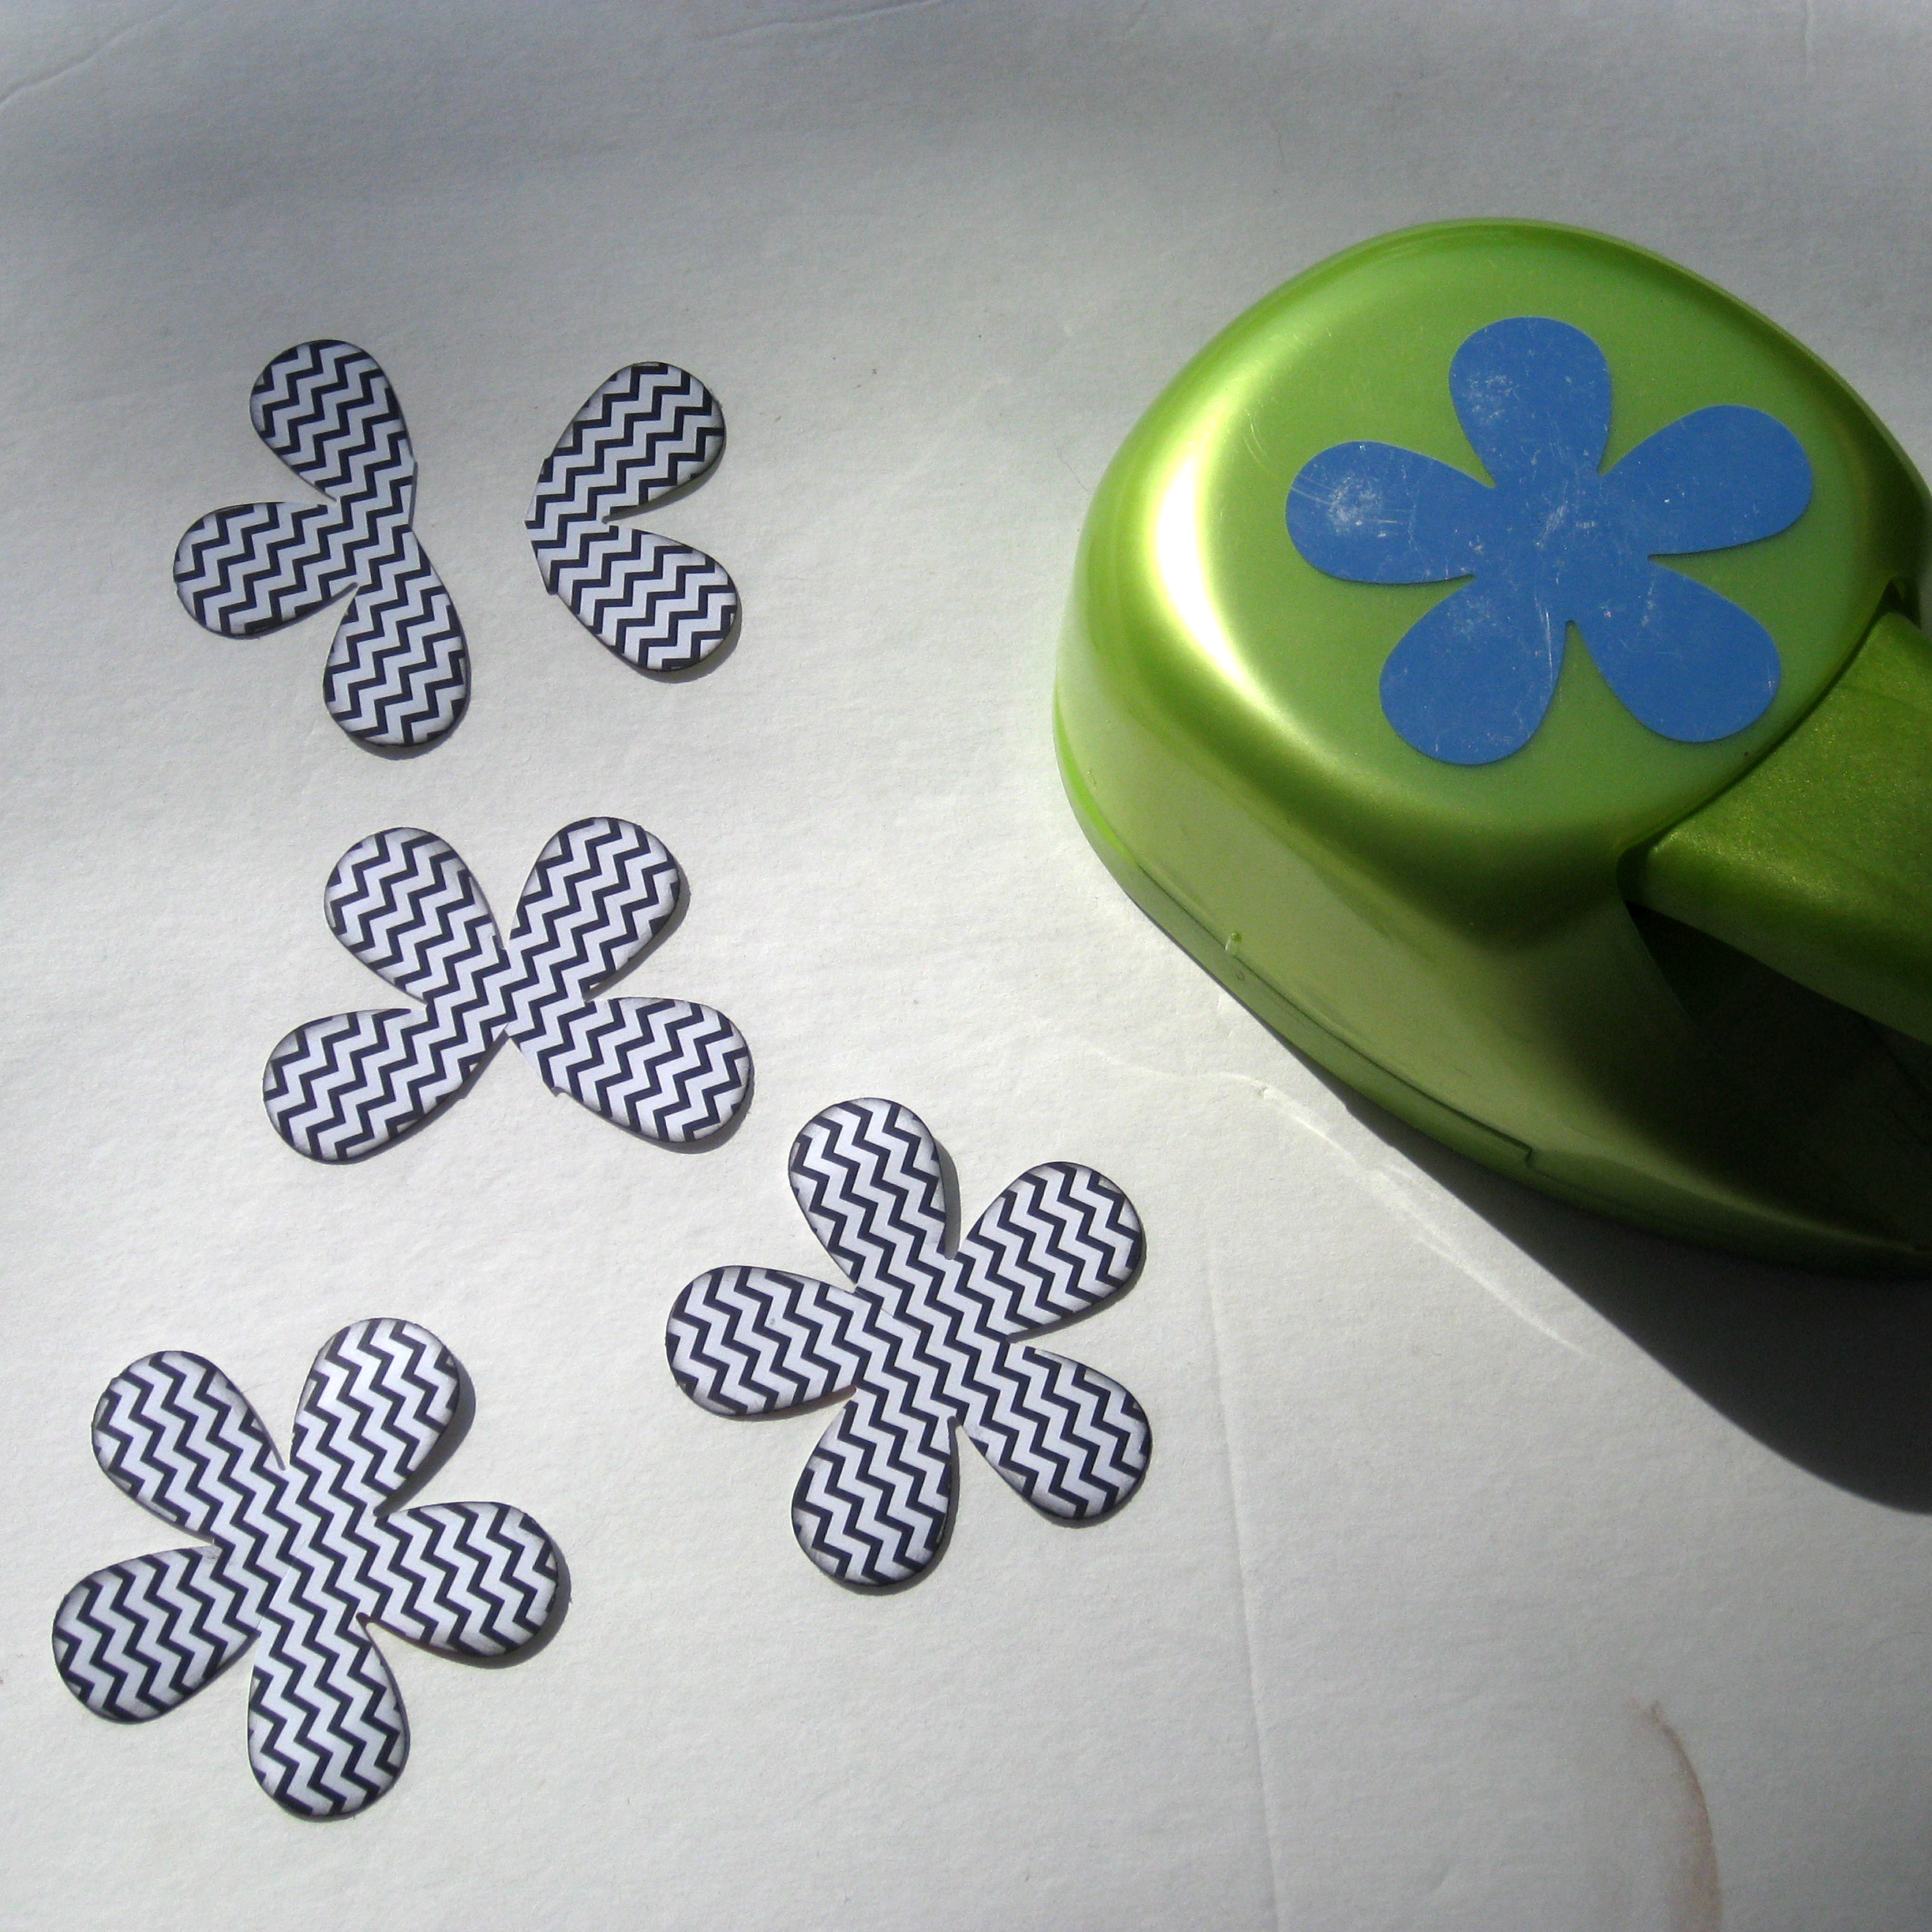
Next, you are going to take these pieces and glue them into shape using Fabri-Tac adhesive. Starting with the 5 petal flowers, you are going to put adhesive on one of the petals next to where you have cut. Then you are going to pull the petal on the other side of the cut, on top of the one you just added glue to. This creates sort of cone shape. You are going to repeat this with your remaining pieces. Treating the missing petals as your cut. For these flowers I actually did not end up using the 2 petal piece, as the buttons I chose to use were larger. However if you have a small button in mind, you will want to keep the 2 petal piece. The photo below now shows the shape of all the pieces.
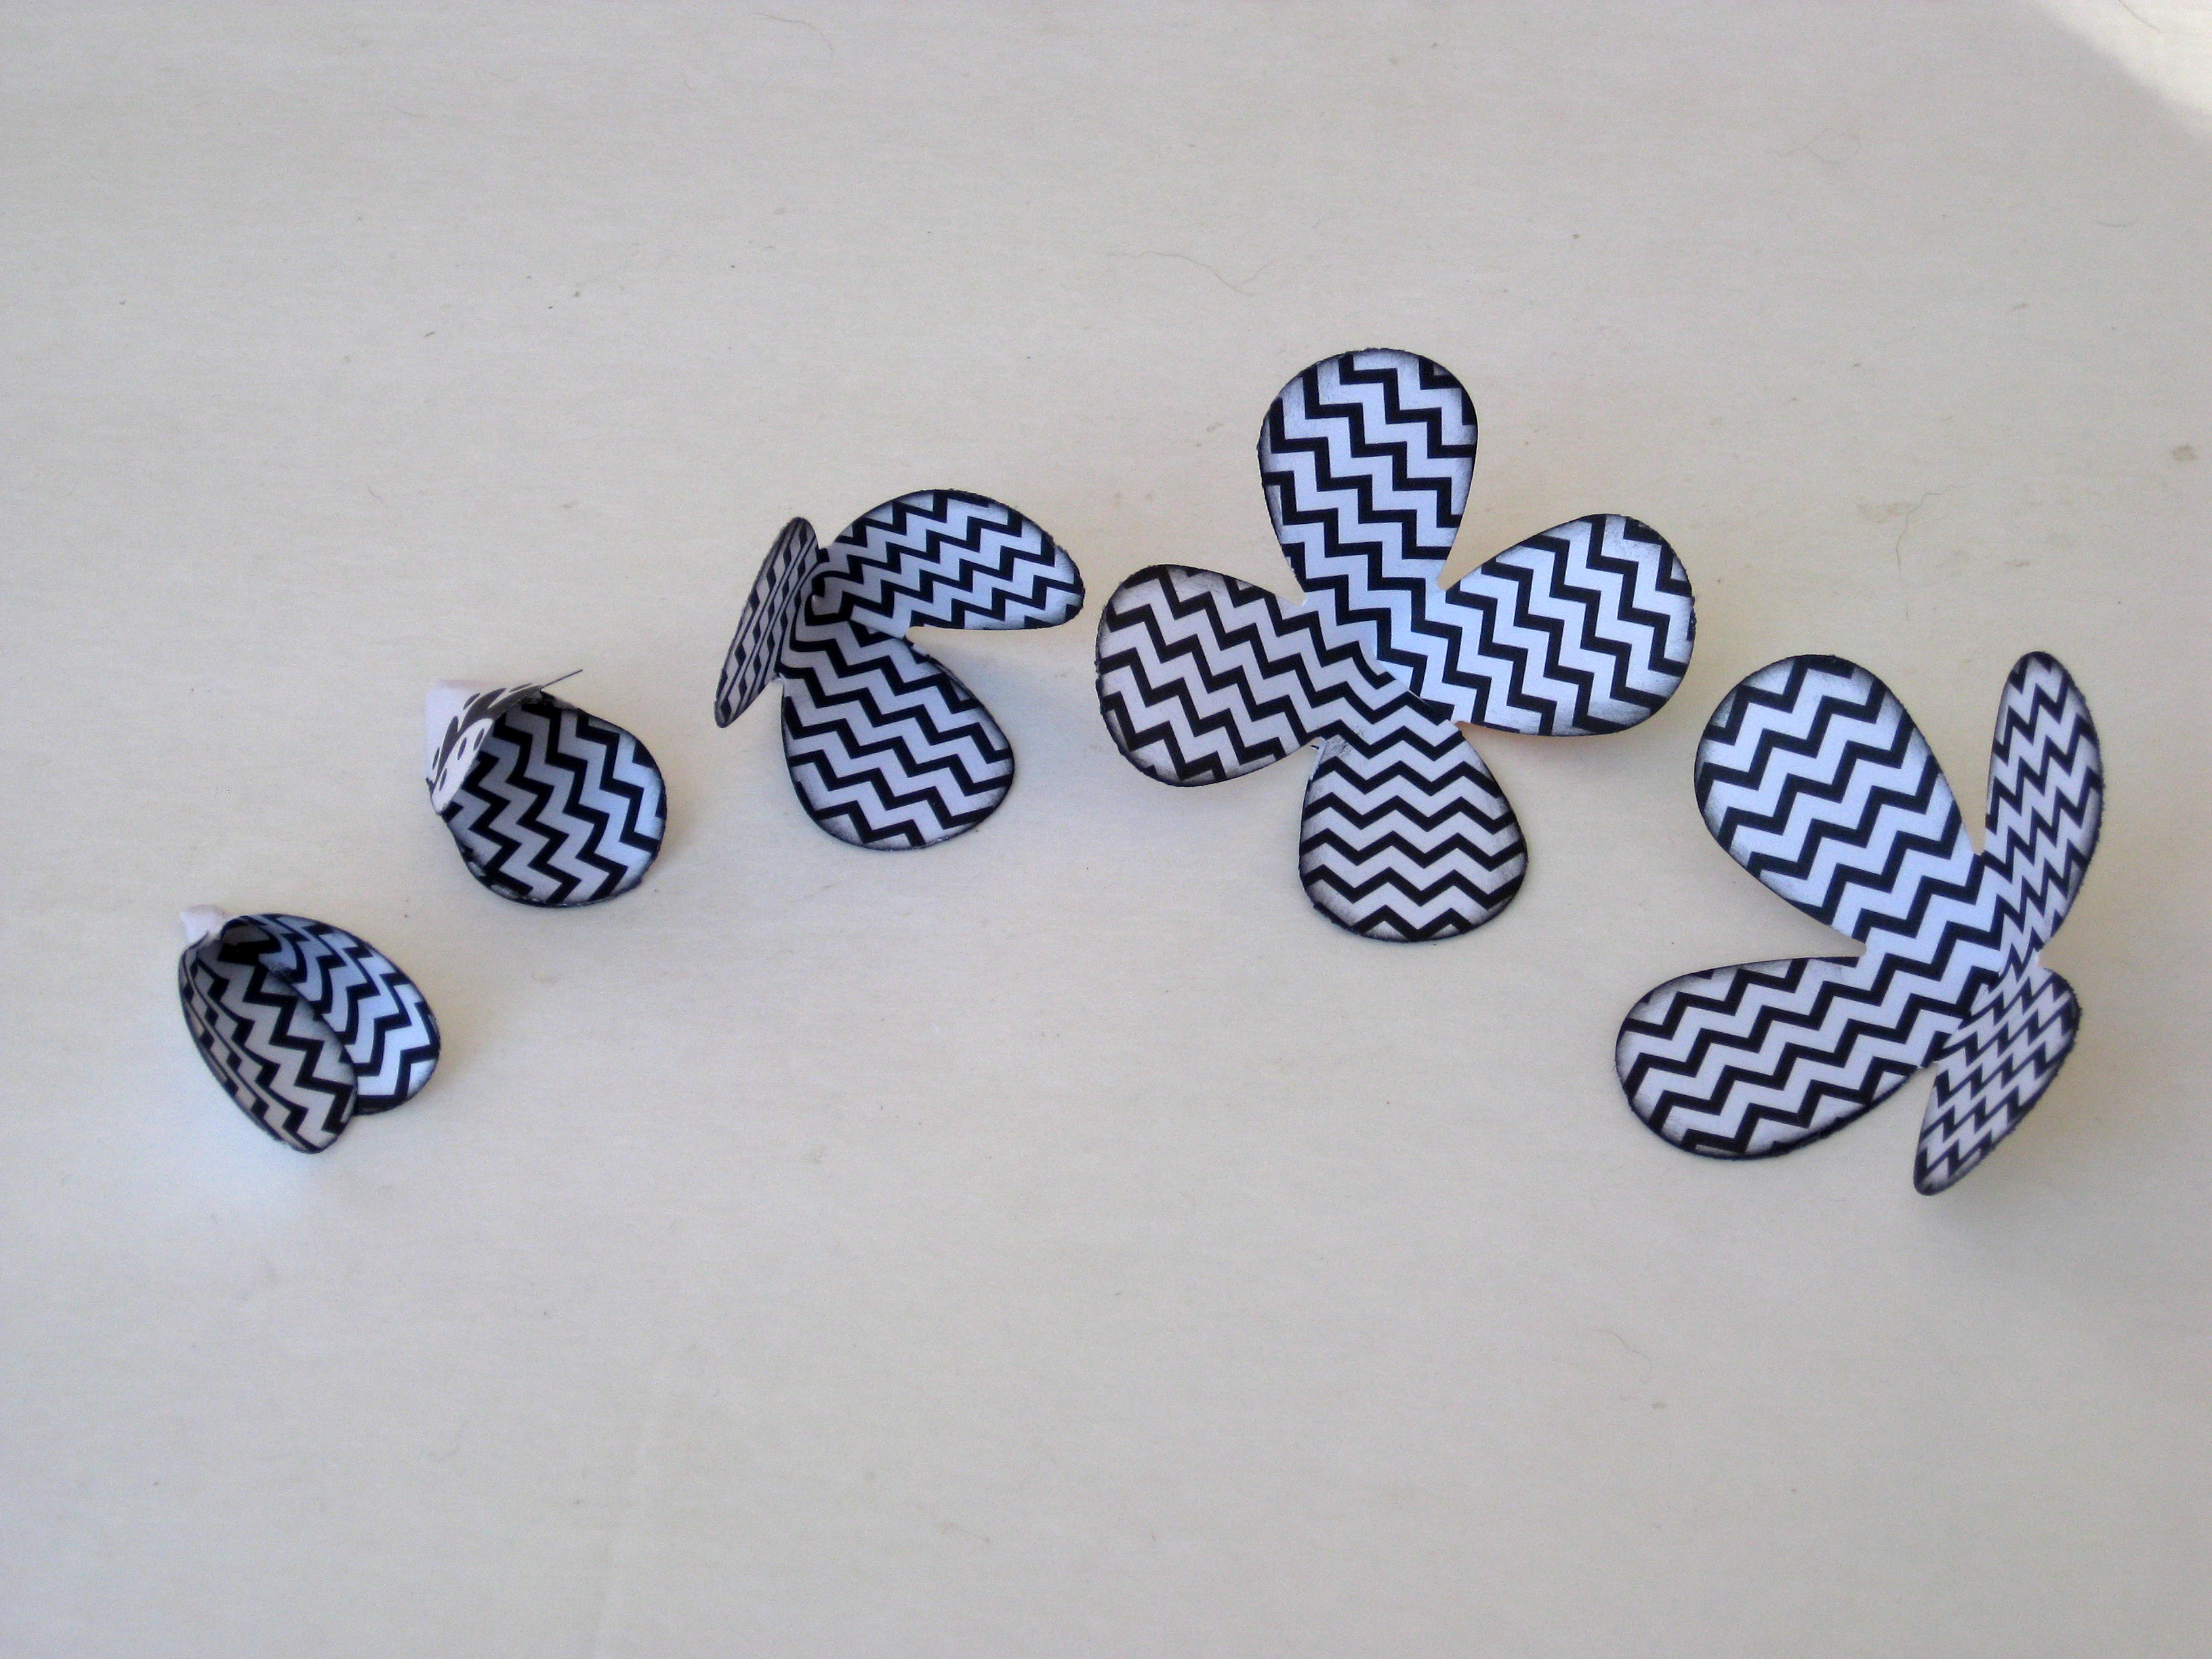
For the next step you will need something to roll your petal around to shape them. This can be a multitude of things. I use a BBQ skewer, it seems to give the the amount of curl that I like. Some other objects that could work would be a pencil or pen, an actual paper shaping tool, a nail or even just rolling the paper in your fingers can work. The image below shows some of the pieces after they have been rolled and shaped. They are now ready to assemble.

For assembly I used hot glue, as always just be careful. You are simply going to layer your flower gluing from largest to smallest. However if you would like your flowers to be on craft wire like mine, it starts with the first 4 petal flower. I poked the wire through the bottom of the flower and then looped the end of the wire so that it would not go back through the hole. Add a generous amount of hot glue and adhere the other 4 petal flower on top. Once all your layers are secured, you are free to add your gorgeous vintage button to the middle of your flower. These vintage buttons can add flare to any project, I thought they added such pizzazz to these funky little flowers.
I used a small unwanted empty crafting flower jar as my vase. I put a small amount of craft clay in the bottom for the wire to stick into and stay in place. Then I added strips of coordinating paper around the bottle to hide all the goings on inside. Then I added a bit of coordinating ribbon. I also made a tag from a coordinating cardstock sticker. Tie your tag around the top of your vase and your beautiful little bouquet is complete.
Thank you so much for crafting along

My love of mixed media runs deep. Very deep. Seldom is there a project that I complete without adding paint, sewn elements, stamped components and especially glitter. When I opened up a delightful assortment of buttons from an ordinary corrugated shipping box last week. my heart leapt when I discovered these fantastic carved wooden buttons from Buttons Galore and More from the Haberdashery line. I immediately started rifling through the remainder of my goodies and discovered these fabric covered Cozy Brads and these amazing camoes.
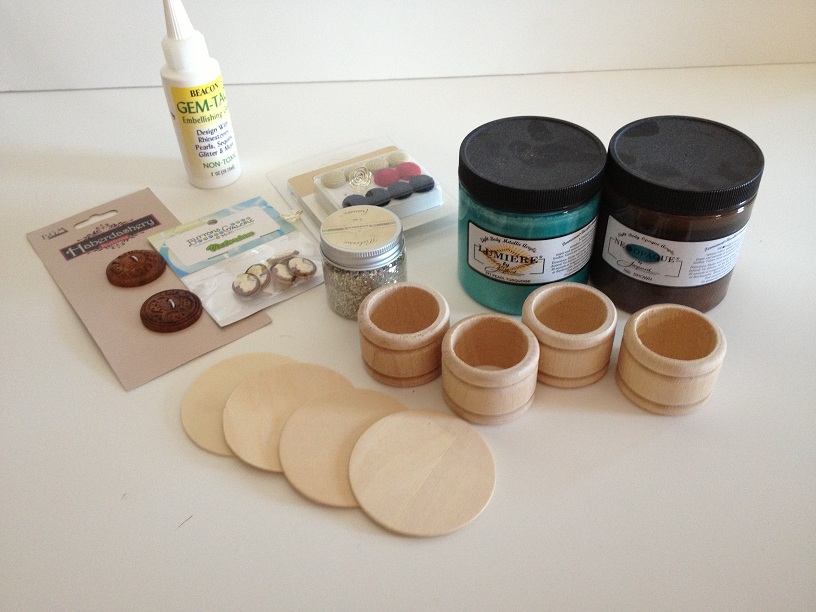 I grabbed some wooden napkin rings, some Gem-Tac Glue by Beacon Adhesives, some art glitter and some Neopaque paints from Jacquard Products so that I could make these fantastic wooden napkin rings.
I played with the arrangement several times before coming up with one that suited me. I used the button shank remover to remove the wood shank from the wood carved buttons and the cameos. I also discovered that is could be used to remove the flange from the fabric covered brad.
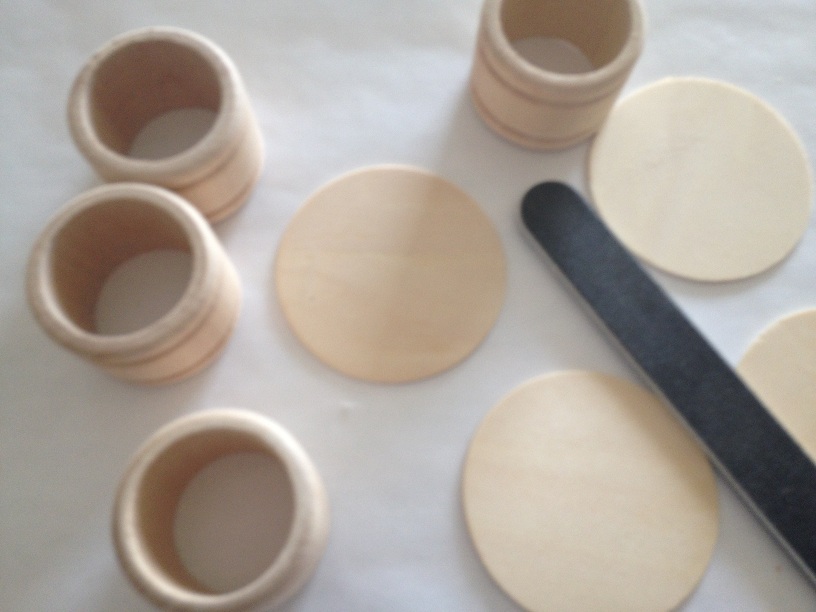
I carefully sanded the pieces before setting about painting them. I nail file works well with wood napkin rings since it allows you to get inside the ring in order to sand away the rough areas.
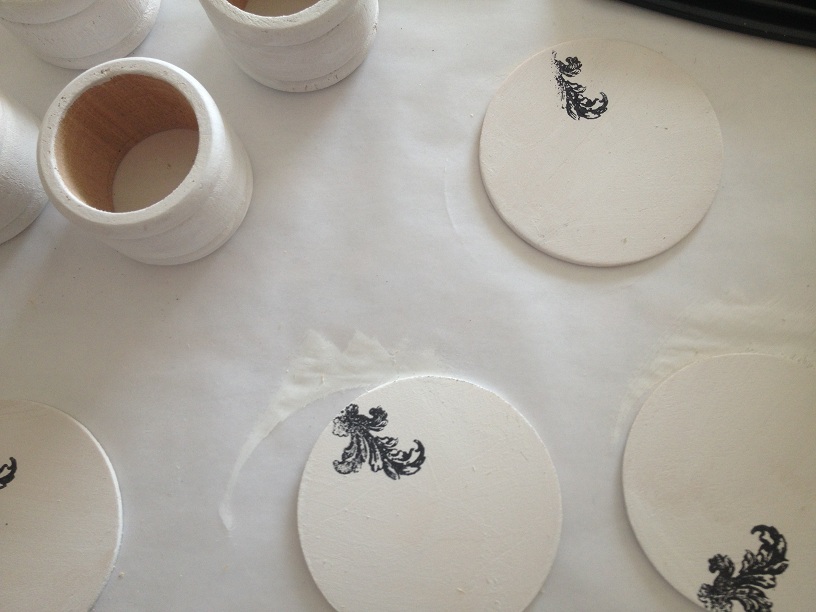 Once the front of the wood disks are dry enough and while you are waiting to add additional coats to the napkin rings, use an ornate motif and solvent ink to stamp the front of the napkin rings.
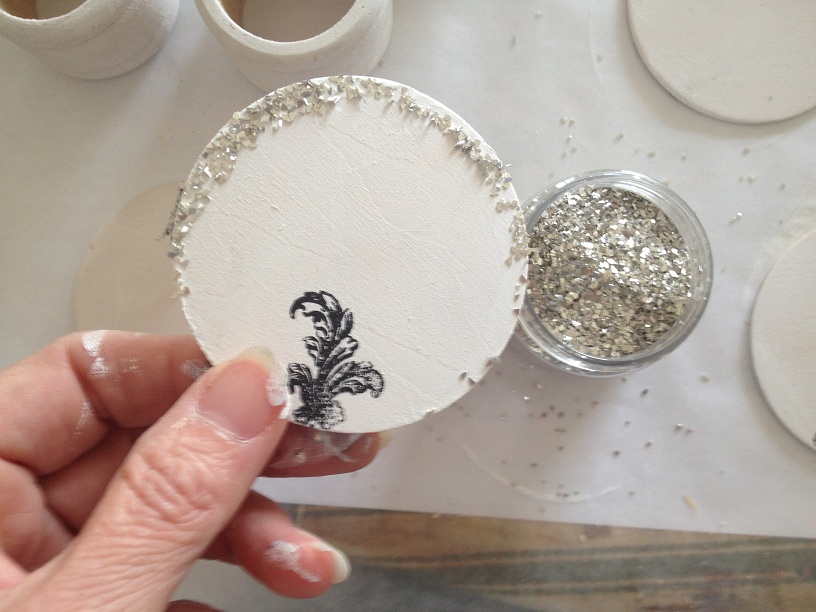
Coat the edges of the disk with some of the gem-tac glue and sprinkle on glitter to give your napkin rings some extra sparkle.
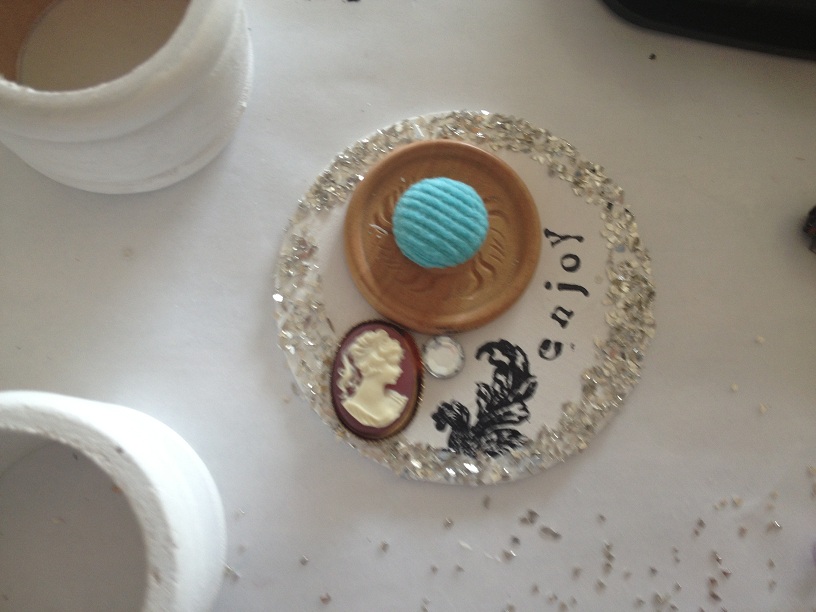 Next arrange your buttons as before and glue down using the gem-tac. I also added an appetizing sentiment stamped with alphabet stamped and solvent ink. I placed the de-flanged cozy brad in the center of the carved wooden brad.
 Sewn elements were added in the form of small scraps of hand dyed fabric that were gently stitched and then glued to the rings.
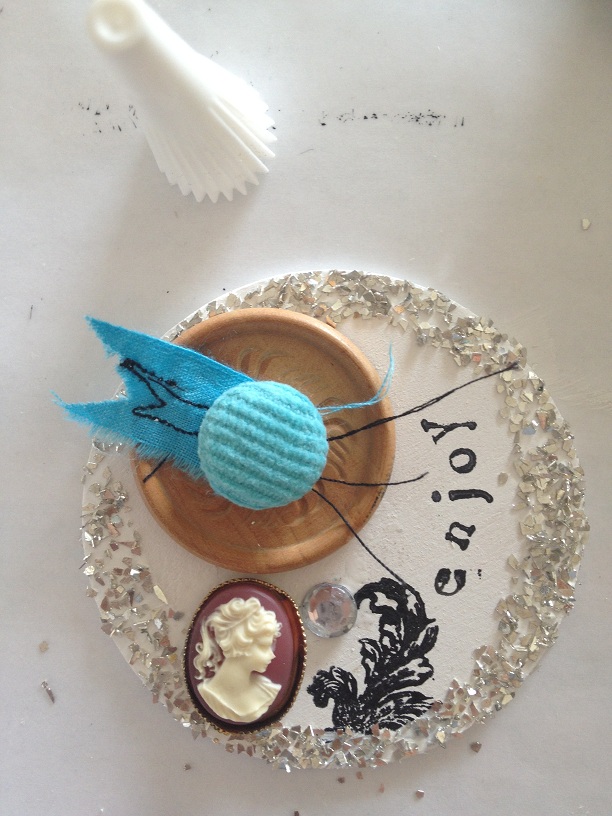 Use Neopaque in black to add a very heavy dry brushed coat to the napkin rings.
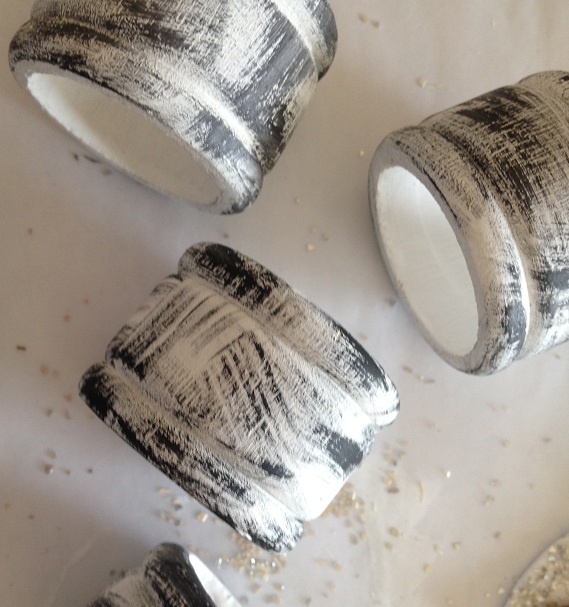 Finally, use a generous amount of gem-tac to glue the embellished disk to the napkin ring.
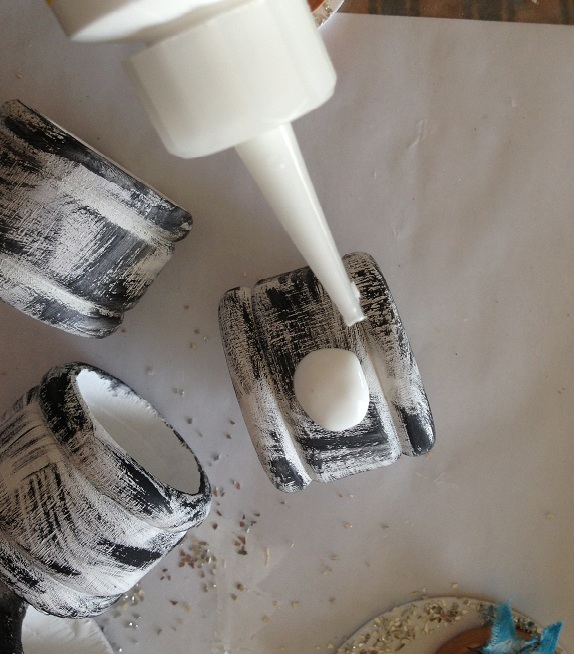 Enjoy your artfully buttoned embellished shabby chic napkin rings!!
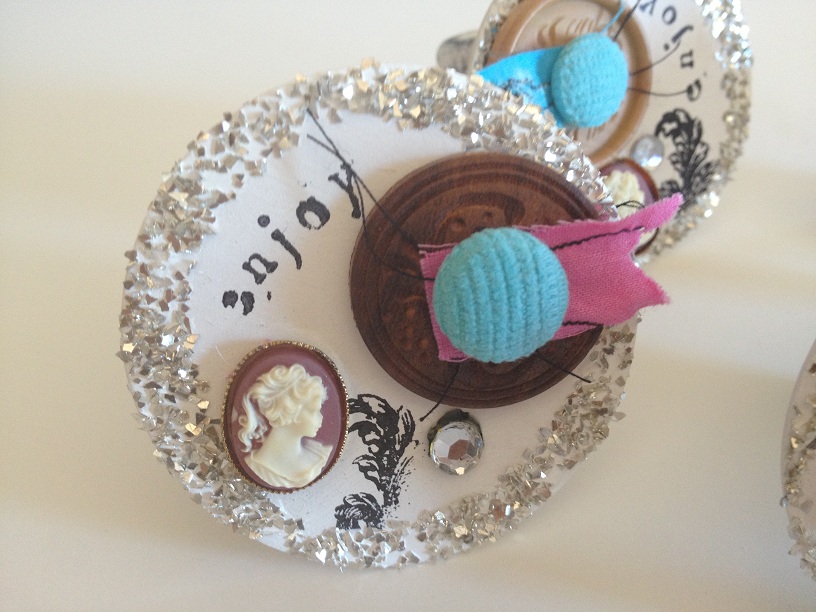 Live Life Creatively,
Melony
Today I am going to show you some Easter table decor in the form of a handmade utensil pouch. Your Easter table will never look better once you make this table decor. These utensil pouches are perfect for your Easter celebration. Plus they are easy to make and will really impress your guests. Learn the basic technique of creating these then put your own spin on the front for a personalized table for any holiday.
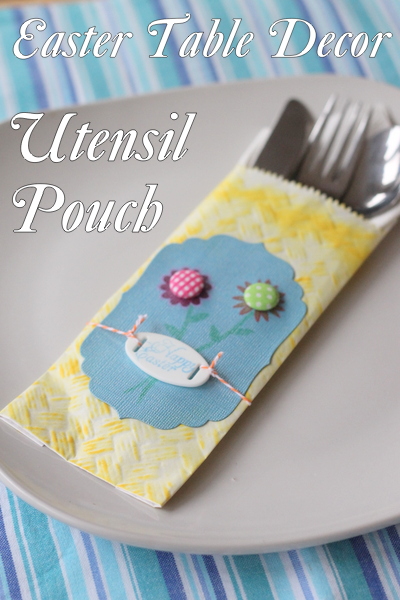
I used a cookie bag that I purchase in bulk for the base of my utensil pouch. You should be able to find something similar in a party supply store or online. I ran it through with the Spellbinders embossing folder and was happy to see that the embossing looked wonderful! I wanted a punch of color on the plain white bag however so I went over lightly with the chalk ink from Clearsnap in Yellow Citrus. Just allowing the embossing to really come to life.
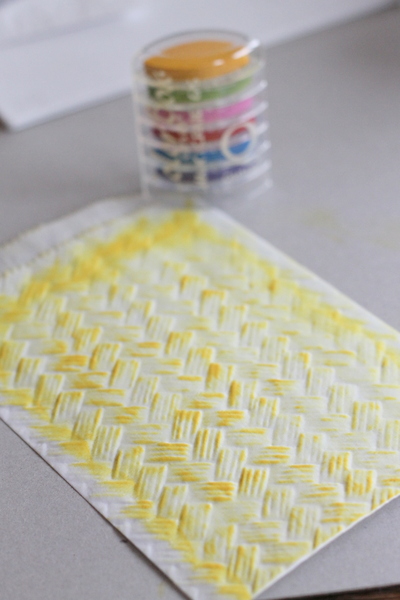
The cookie bags are actually a little wide to be used for a utensil pouch. I used the utensils as a guide and then folded over the excess on both sides. I used Mod Podge to adhere the excess on the back of the pouch.
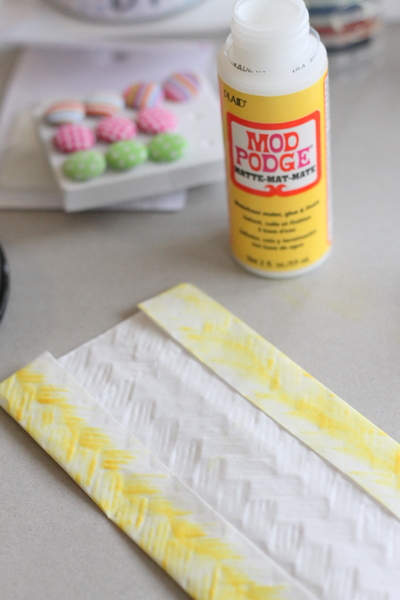
Now let’s work on the decoration for the front. I cut a shape from card stock using the Spellbinders dies. I then used some flower stamps to add two flowers. I used fine line craft markers to color in the stamps then added the button brads to the center of both flowers.
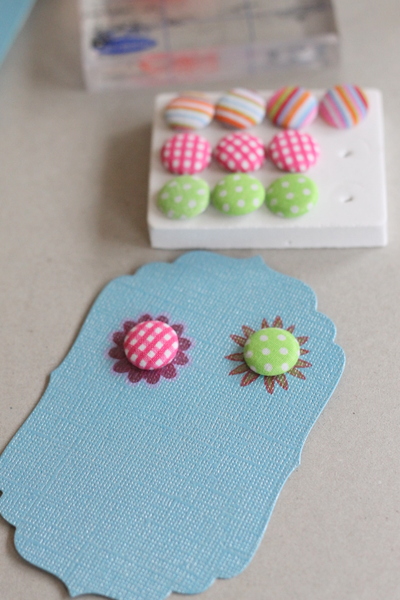
I then drew stems and leaves on my flowers using the same set of fine line craft markers. I stamped “Happy Easter” onto a small oval slider using the Colorbox Ink.
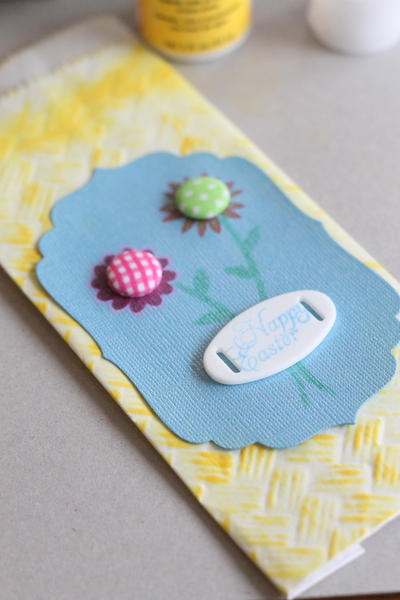
The cardstock shape was applied to the bag using Mod Podge. I then used hot glue to attach the slider to the front. I tied baker’s twine to one side of the slider, ran it around the back, and tied the other end to the opposite side of the slider. Make the twine taught but don’t cinch your pouch.
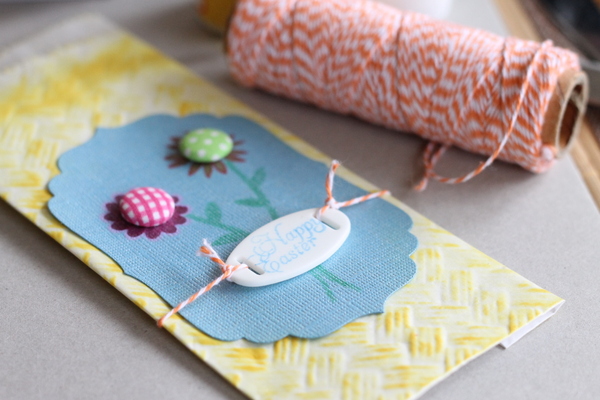
Add a napkin and your utensils for a festive addition to your Easter table. I think the basket weave emboss is perfect for spring but you could incorporate other emboss folders you have to put your own unique spin on this idea.
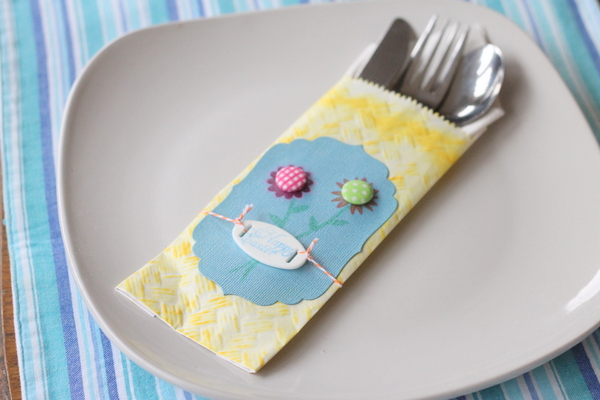
Make your Easter table decor extra special with the addition of personalized utensil pouches. A perfect way to set your table in style.
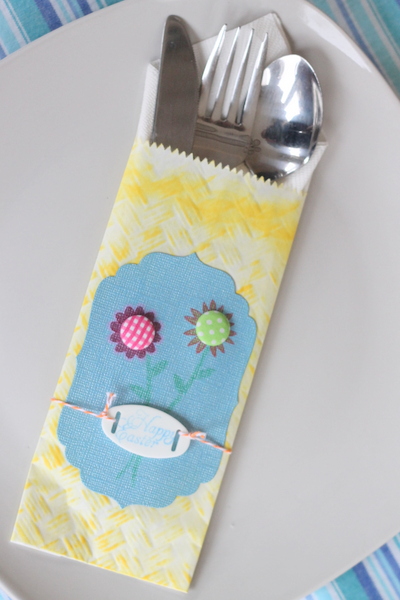

This quick craft is festive and FUN!
Once the button stacks are cool, carefully adhere them to a glass votive with the hot glue.
Place a candle in the votive and you are ready to let that little light shine some joy in the world.

Embellished hand towels are one of my favorite home decor crafts. I think little holiday touches, throughout the house, make everyone smile and turns an ordinary day into something special. Today, I have a DIY project for an embellished Hand Towel. It’s simply a matter of embellishing a store-bought hand towel with ribbons and buttons. You’ll be amazed by how easy the project is and how cute your guest bathroom will look when you hang this cute, embellished hand towel in it!

2. Fold the towel in half in order to establish the center mark of the towel. Place a button on top of the ribbon at the center mark and stitch in place.

3. Sew buttons on either side of the center button.
It’s best to gently hand wash the towel once it has been decorated. Alternately, go ahead and drive your family crazy by telling them the towel is only for decoration and not to be used.
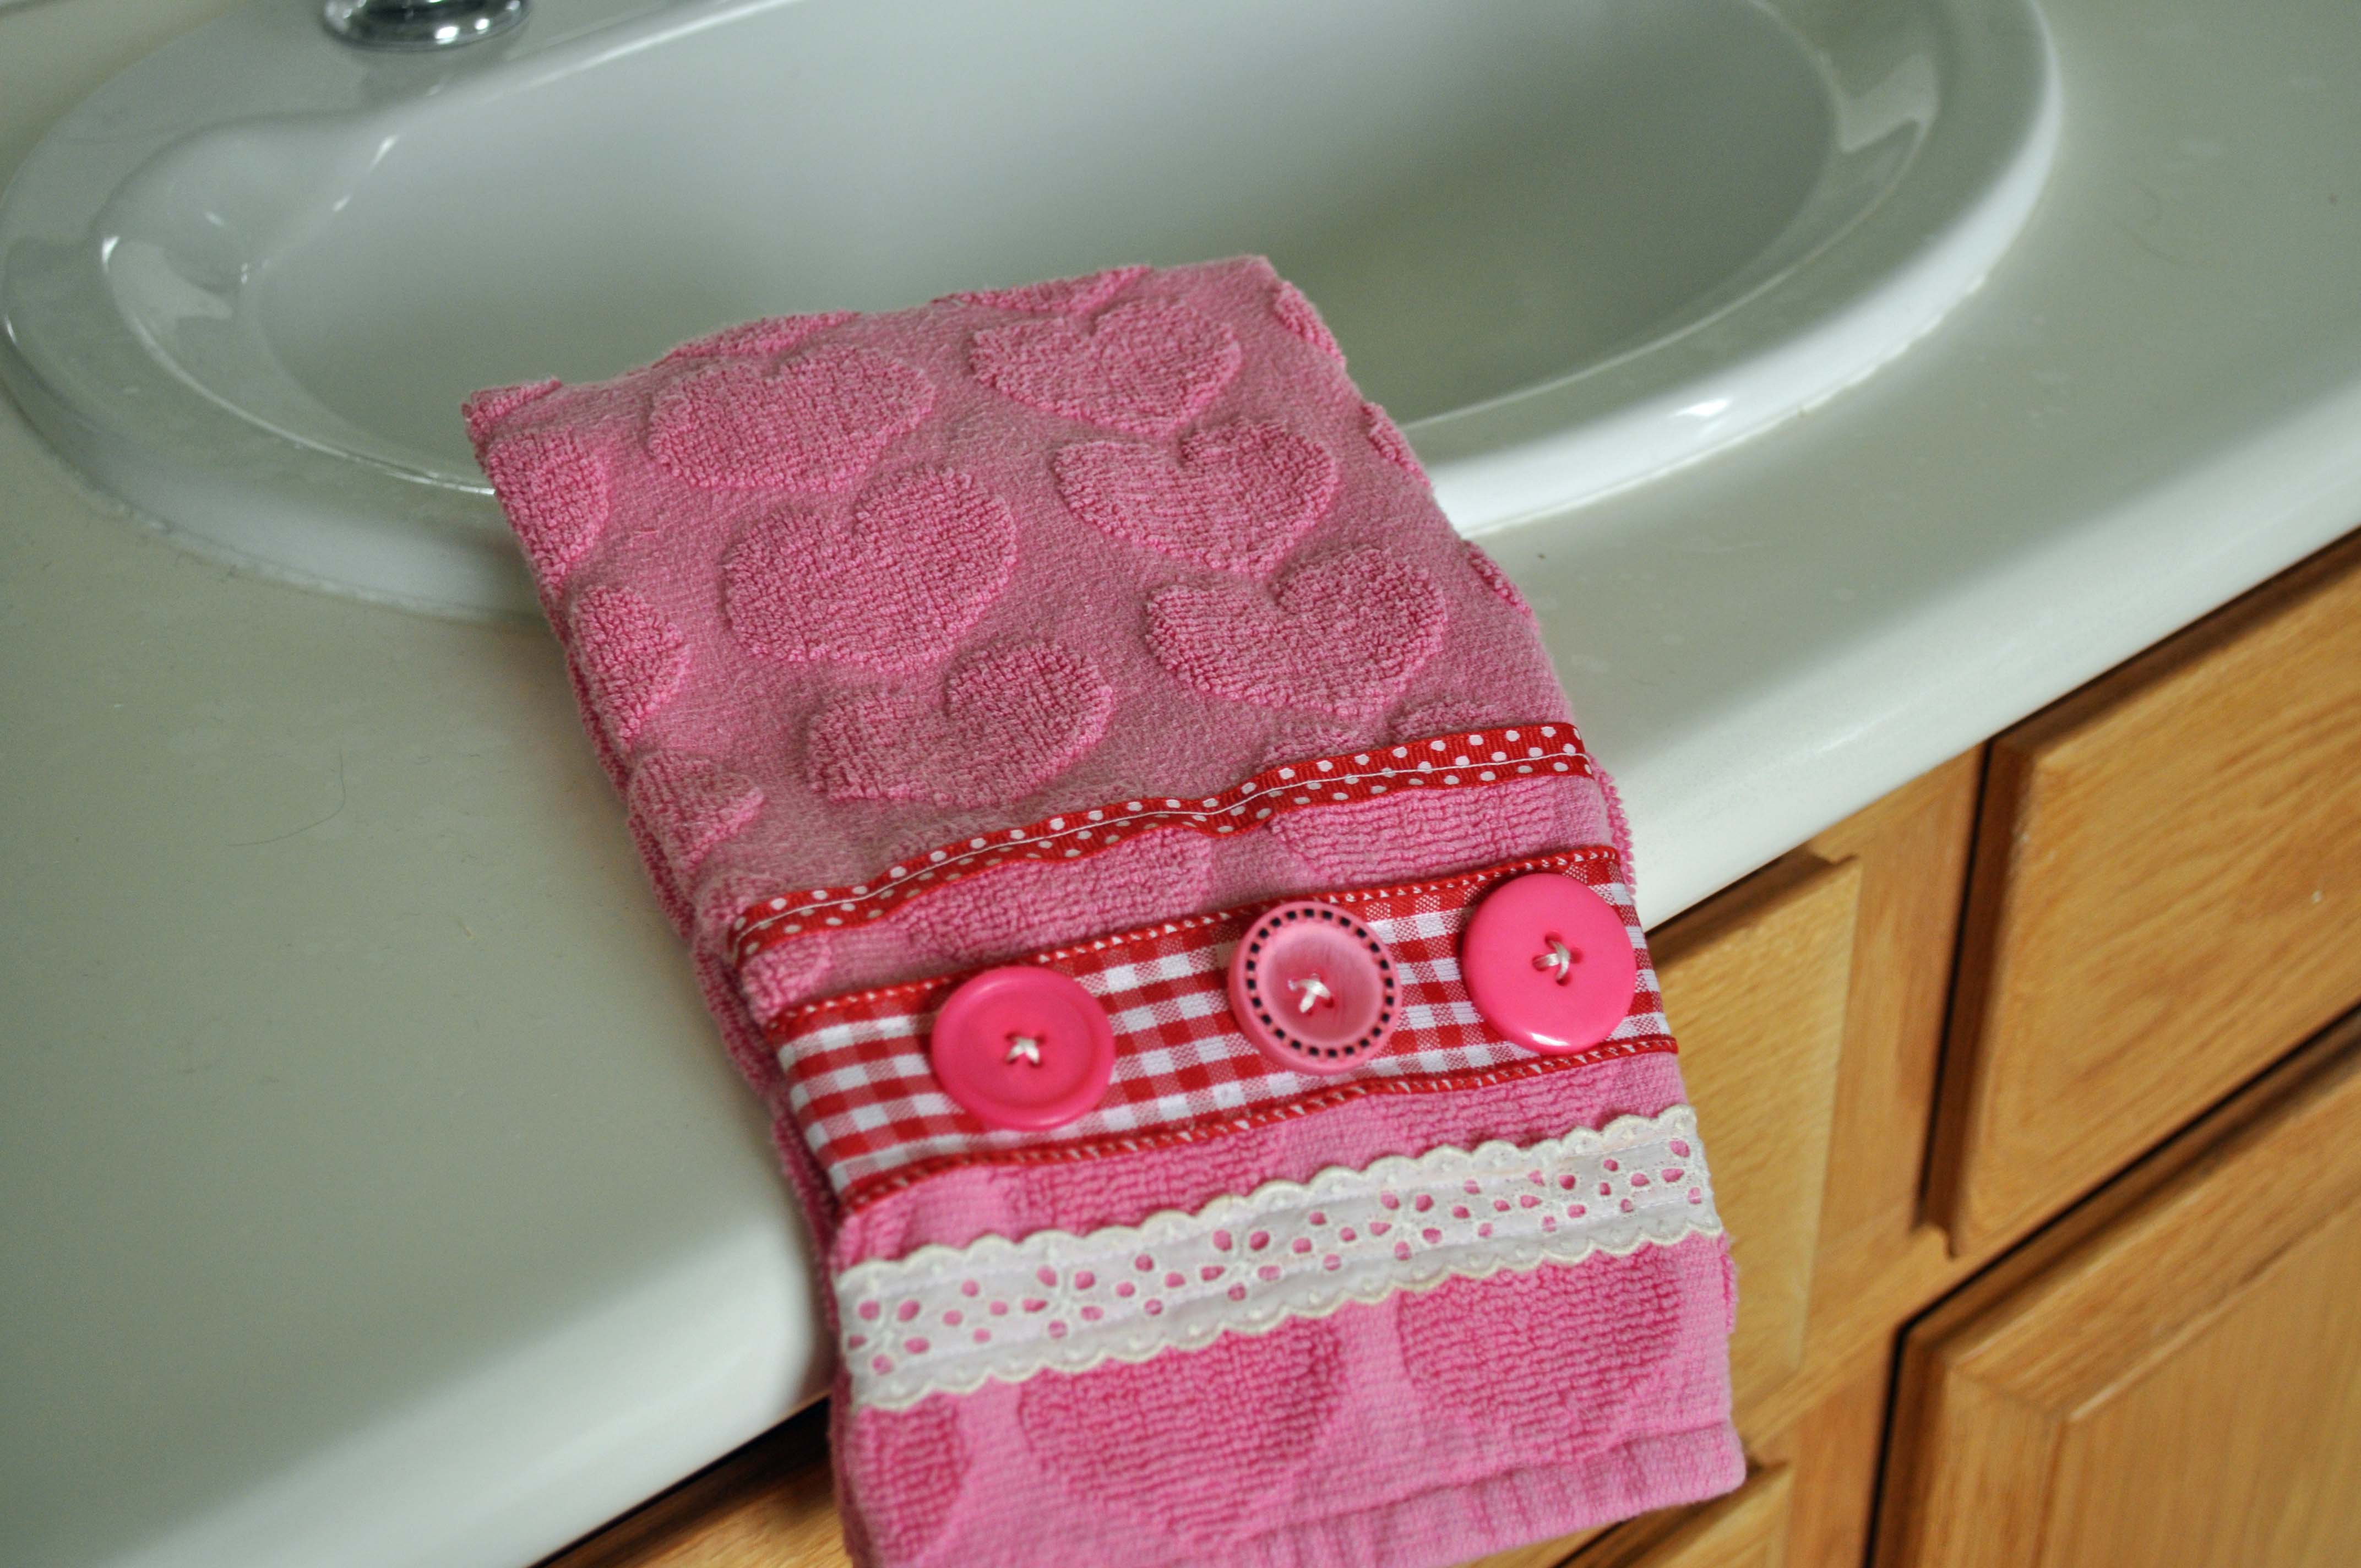
![]()

OH ME…OH MY!!!….I am soooo “over the top” excited about my guest designer post here at Buttons Galore & More!
Buttons have ALWAYS been a passion of mine…one of my favorite “collections”.
I have been crafting some way or another most of my life….Recently I have been drawn to mixed-media….because I can use bits & bobs of all my “stuff” to make ART!
I also enjoy music…and wordage….so, here I have encorporated my “loves” into this canvas.
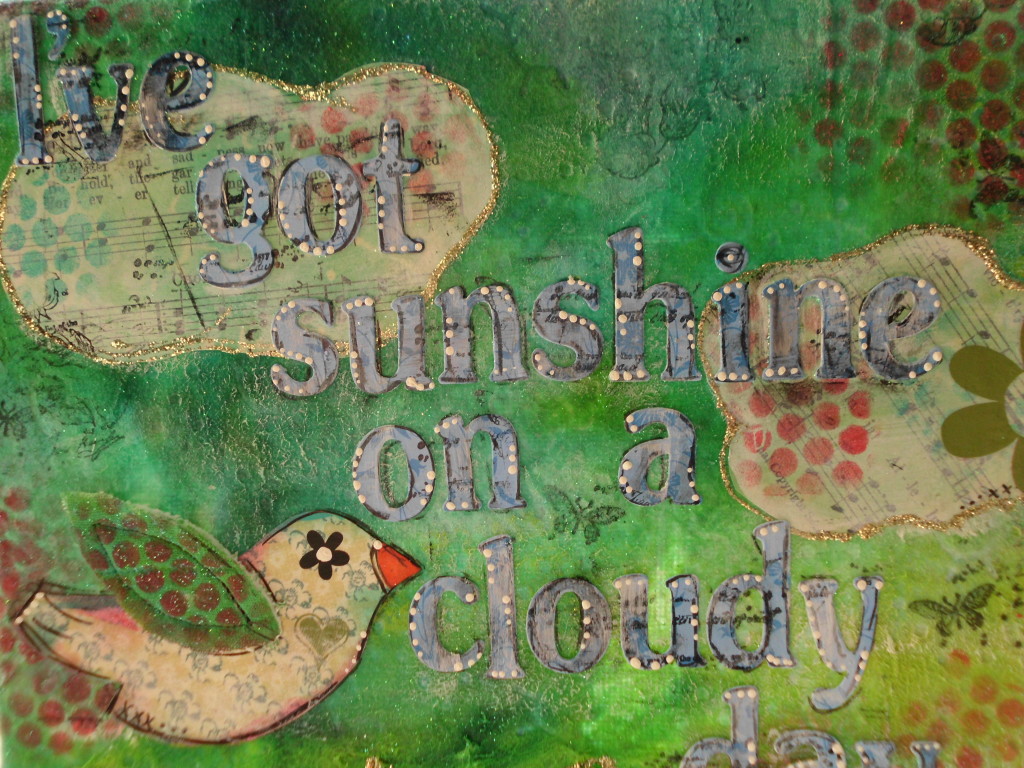
I have taken an 8×10 canvas….added loads of texture….vintage music pages,along with (believe it or not) babywipes that I used to wipe up some inks and paints from a previous project…..some inks, rubber stamps,rub-ons, great alpha stickers from my stash and an ANTIQUE quilt piece “rescued” from a dresden plate quilt piece….it realy looks like sunshine…doesn’t it?…..and to top it all off….a YUMMY assortment of buttons from ButtonsGalore&More….these just make me HAPPY!
With my favorite medium Mod Podge, it all comes together in a fun piece of art…..Each time I create these canvases…even tho the same products are used, they all come out uniquely OOAK!(one-of-a-kind)
I currently have my wares for sale at my etsy shop http://www.etsy.com/shop/Studiobeecreations
..more items being added this week!
Loveeeeeeeeeeee all of the assortments BG&M offer for my creative pleasure!
creative blessings, Debbie
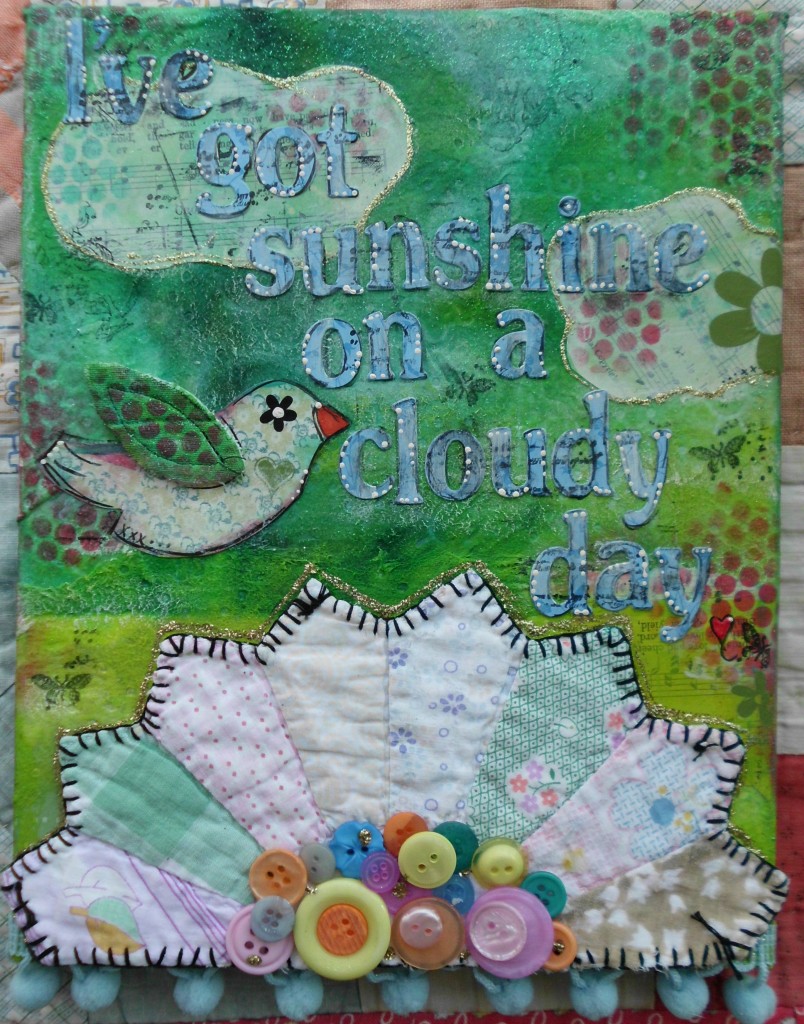
Make a button topiary. As the Ohio winter lingers on, I find that I am incorporating more bright cheery decor into my home. This trio of button flower topiaries fits the bill perfectly, adding a touch of Spring inside to hold me over until the snow melts and the daffodils peek through the ground again. You can make the button topiary as large as you would like. I chose to make a trio of small button topiaries.

Buttons Galore & More Products used:
I also used:

First, paint each flowerpot using yellow acrylic paint. Apply multiple coats as necessary. Paint one coat of yellow glitter paint over acrylic paint and let dry completely. Cut foam balls in half, placing one half in each painted flowerpot, and glue in place. (Steps a & b, above) Spread glue over foam ball and press green model foliage into glue to secure (Step c).
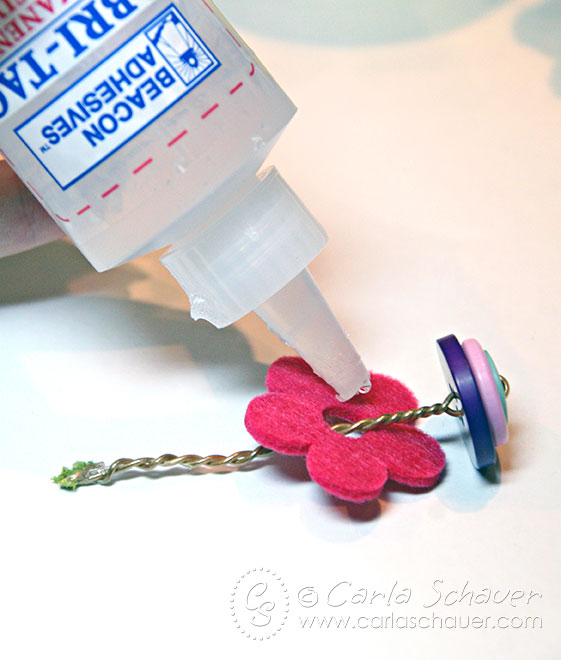
Cut 8″ length of craft wire. Choose 3-4 buttons of various colors and sizes from Color Bulk Buttons, and thread one end of wire up through holes on buttons. Bend wire in half using needle nose jewelry pliers and thread back down through button holes from top. Twist wire ends together under button “blossom” to add strength. Glue felt flower to back of several blossoms if desired (I added them to large button topiary only).
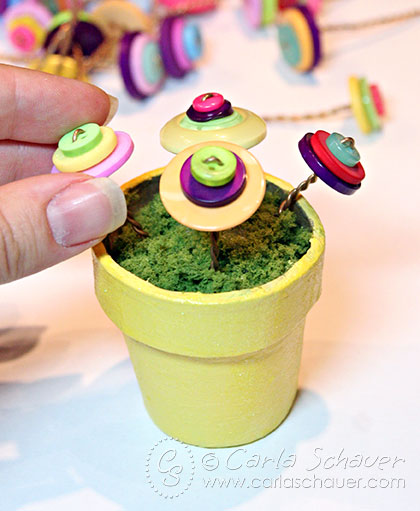
Once all the flowers are finished, start adding them to the flowerpots. Add a small dab of glue to the ends of the wire stems and gently push into the foam ball to secure. Fill in remaining spaces, bending wire stems as necessary to create arrangement. Repeat for additional flowerpots.
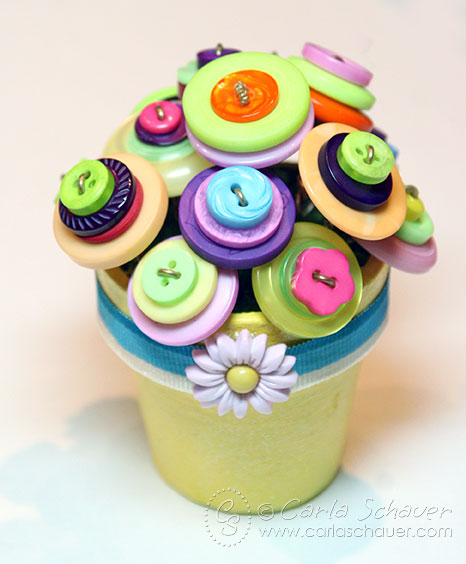
To complete the button topiary, wrap each flowerpot with coordinating ribbon and glue into place. For small topiaries, remove shank from Daisy Delights button and glue over ribbon ends. For large topiary, remove shank from Daisy Delights button and glue in center of Tangerine Stitched button. Glue button stack over ends of ribbon.
Enjoy the touch of welcome Spring color of a button topiary !
Thanks for stopping by,
Carla

A styrofoam button ornament – This quick craft project is bright and cheery and EASY PEASY! It is great for a kids craft on a rainy day, scout activity or for a girls night in.
1. Using a Styrofoam ball in the size of your choice, cut a piece of ribbon 10 inches long and tie a bow in the middle. Attach both ends of the ribbon to the ball with a straight pins.
2. Place your first button on the ends of the ribbon. Secure it following step 3.
3. Place the buttons on the surface of the styrofoam. Use a straight pin to hold the button in place. (If you want you can also use HOLD THE FOAM glue to hold them in place) Use multiple colors of the round buttons and the push pins to cover the entire surface.
If you would like to create multiple Styrofoam ball ornaments, you can find them sold in bags and separately at your local craft store. They are most often found in the floral isle. I am sure you can order them on line too.
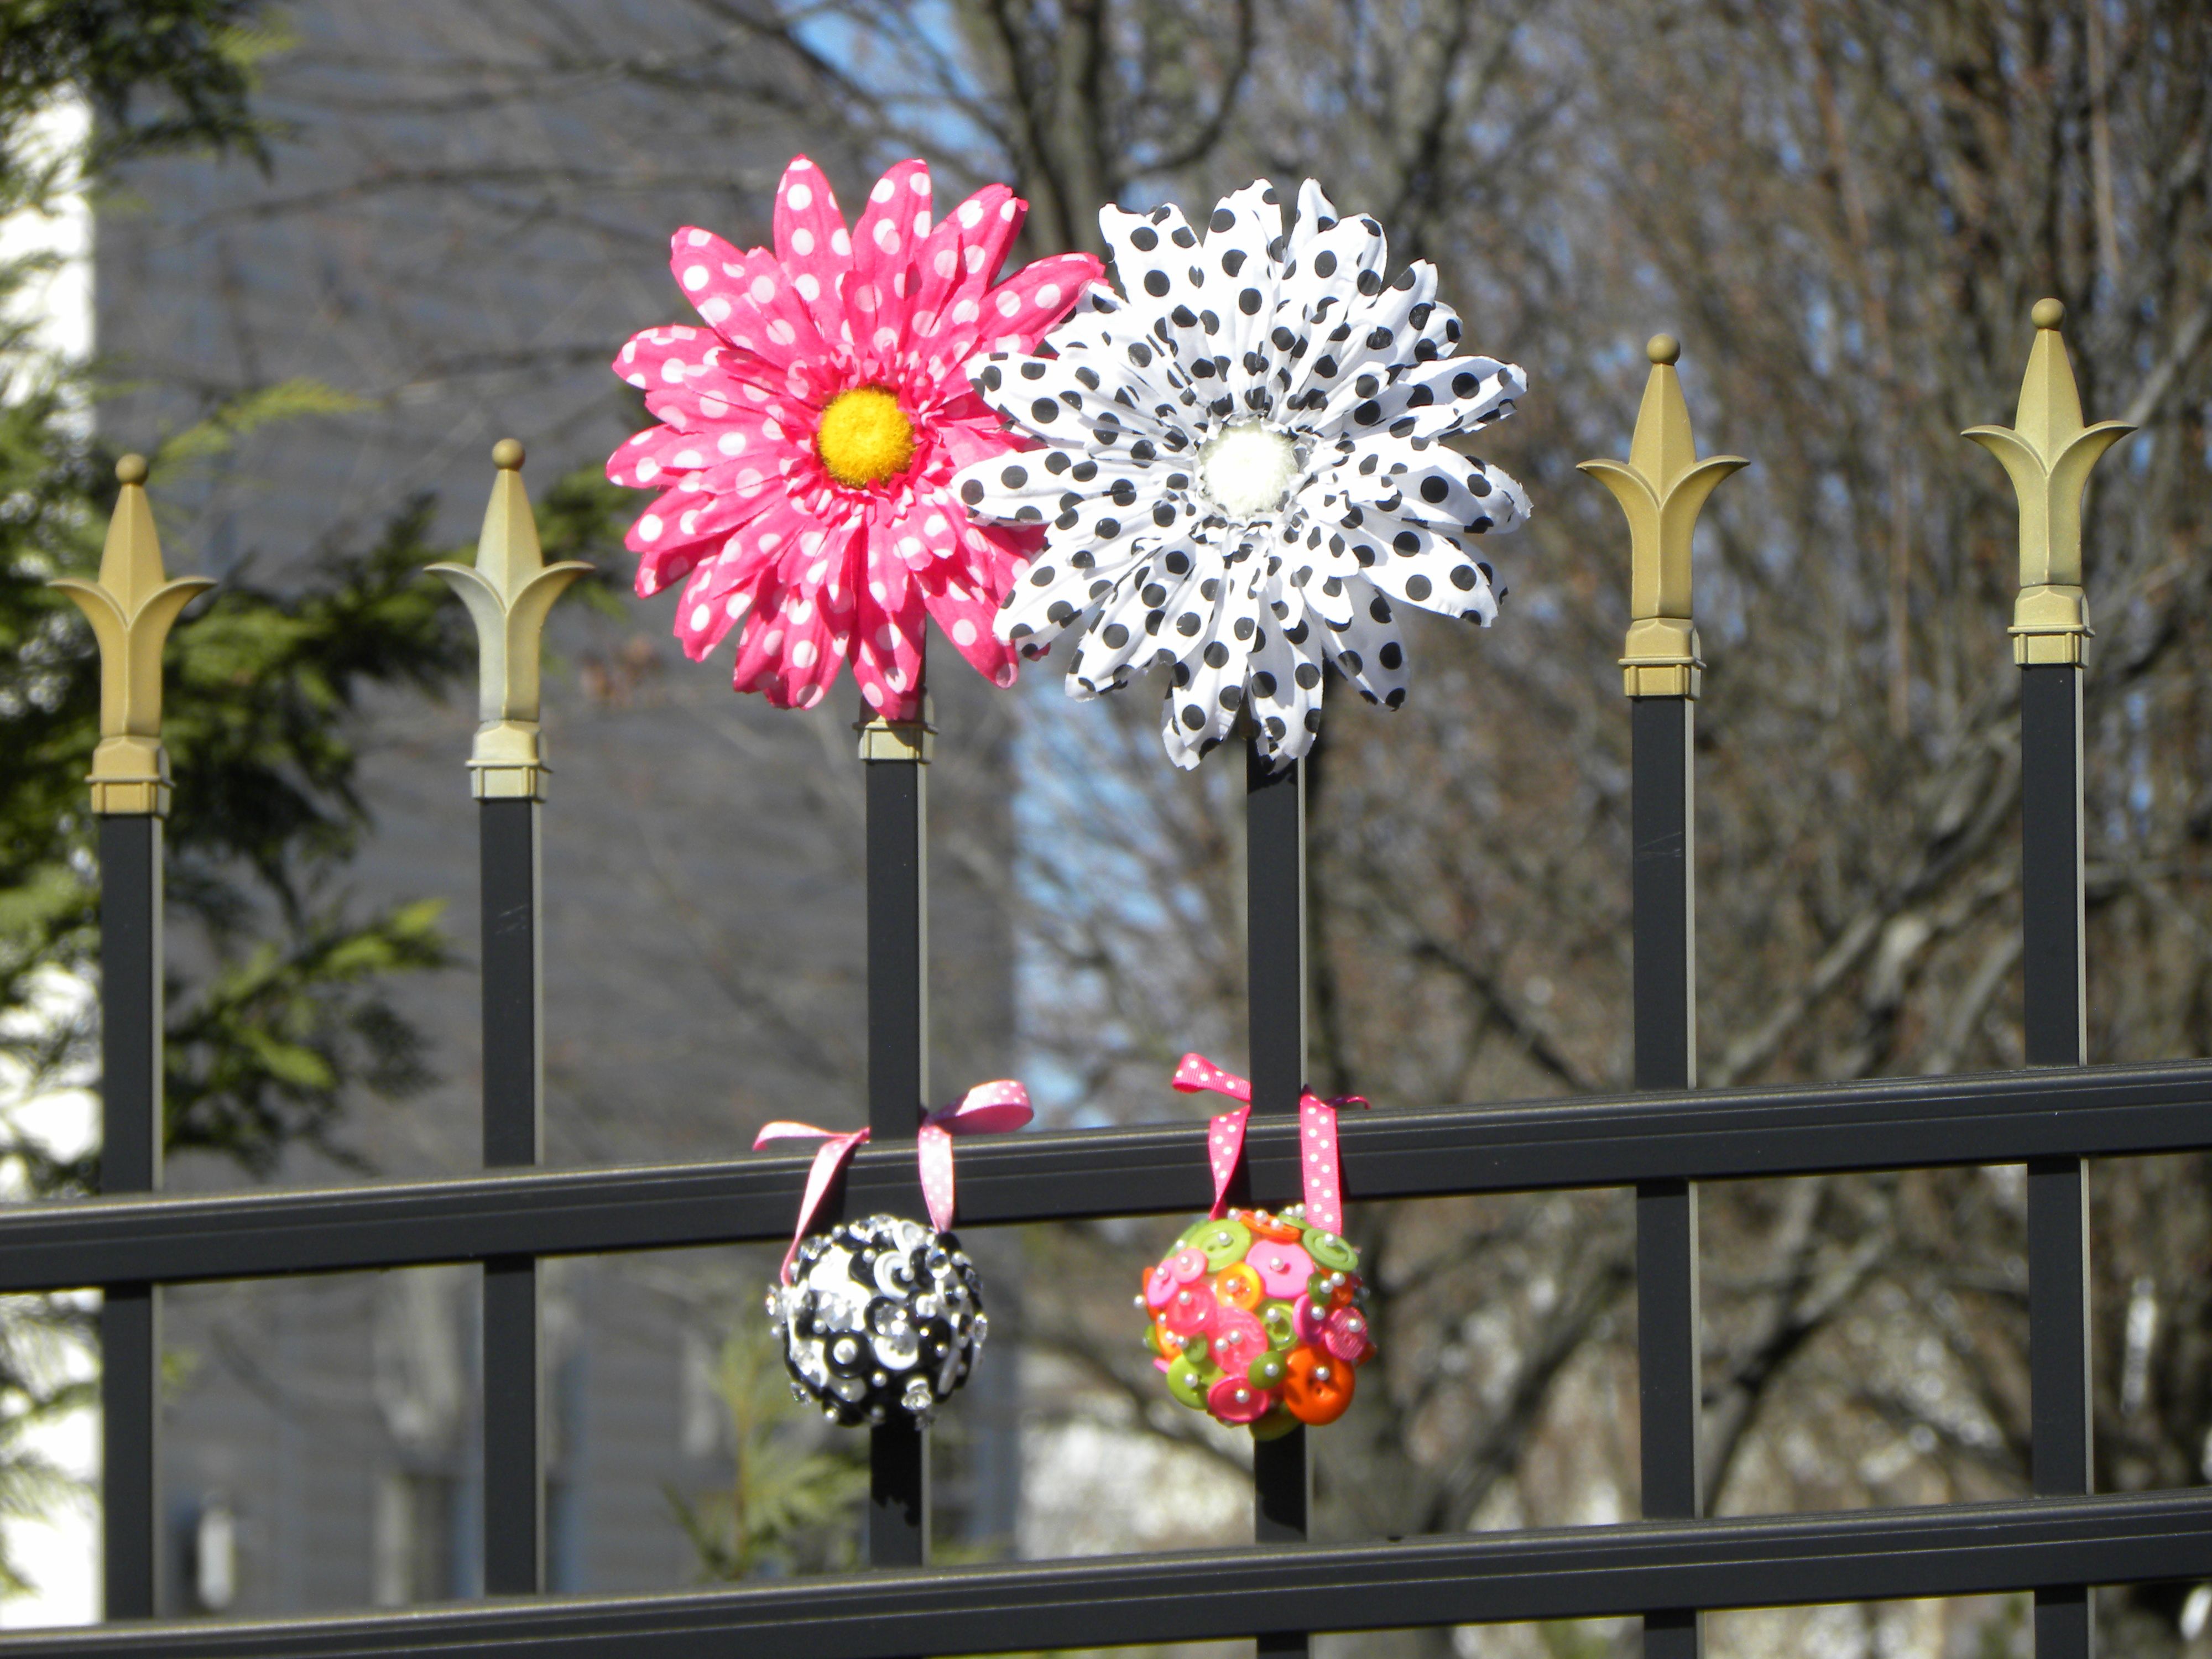
Art Quilts are fun to make. Create some ART by making a little Mixed Media Quilt using some great buttons, trims and specialty stamps. Once you create one you will be hooked and want to create several using words that inspire you. Oh, by the way the specialty stamps used in this project are from my new line of stamps from Unity Stamp Company so be sure and check them out as they have so many possibilities! You can use them for making cards, scrapbook pages, mini books and so much more.

Assorted Buttons by Buttons, Galore and More
Faux Quilting Stamps by Unity Stamp Company
Crafter’s Ink by Clearsnap color of choice
Beacon Fabri Tac
Threads by Kreinik
Trims by Expo International
Font by Duetica
Assorted Flower Dies by Sizzix
Non Stick Scissor by Westcott
8” x 8” Muslin (2), 8” x 8” Batting, Needle, Pins, Acrylic Block, Paper Towels
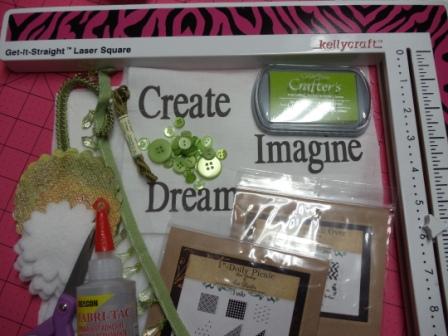
Gather supplies
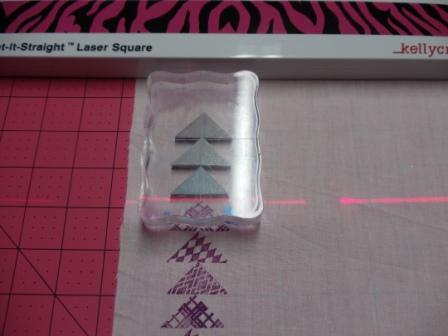
Square fabric using laser square.
Place 3 one” triangle stamps onto clear block, ink up and stamp onto fabric three times to create a Flying Geese Quilt Pattern, using the laser square to line everything up straight.
Place fabric on top of batting and second square of fabric; use thread to quilt around flying geese pattern.
This is where the you use your creativity to arrange the die cut flower, buttons, words and trims into a pleasing manner then sew or glue into place.
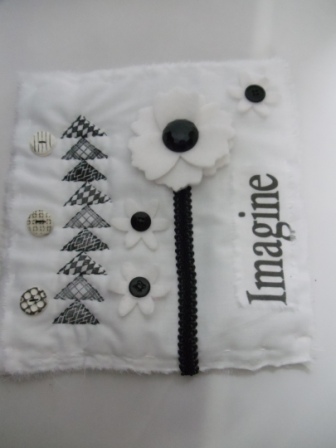
Each mini quilt will take on a look all their own, be creative and have fun!
Napkin rings are essential to the holidays. Button napkin rings are even better. I created a quick and easy holiday craft using Rustic Coconut Shell Buttons. These beautiful buttons have a wonderful natural feel and I thought they would be perfect for a Fall table.

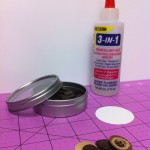
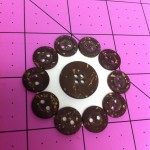
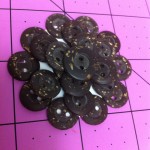
This is really a simple project. I’ve shown some of my steps above. I use 3-in-1 Glue from Buttons Galore. In addition to being inexpensive and lasting a long time, 3-in-1 Glue holds well and dries relatively fast. When dry, it’s completely clear.
I will share a tip, before gluing, I laid out the buttons until I had them layered the way I wanted them, and then I adhered them to a paper circle. I just punched out some cardstock. In the photo, I’ve shown the buttons on a white circle simply so you can see it. In my completed project, I inked my circle brown so that it wouldn’t be shown.
Once my buttons were dry, I attached the piece to a ring of grungepaper that I had covered in lace [My Mind’s Eye]. I accented it with the leaves [Prima] and bits of bling [Want2Scrap].
I think napkin rings would be a great craft to do with kids. The button centerpiece would be fun on a pin or bracelet, too. Imagine the options with these rustic flower buttons. They would not only make great napkin rings, but a broach, a hair clip, a scarf holder and so much more. You could make giant ones for curtain tie backs.
I love to make recycled jar crafts and one of my favorite ways is by upcycling the jars to make vases, candle holders and other home decor pieces. They’re usually quick projects that you can use for your own center pieces or home accents and you can give them as gifts. Here’s a fun little project you can make to dress up your fall table. Grab yourself some of the Buttons Galore and More fall buttons, some glue and you’re ready to get crafting. For this project I used an empty tomato sauce jar, but you can use any jar you like, just make sure to remove the label, wash and dry it before you get started.

Glass jar vase with buttons designed by Jen Goode

Fall button materials for glass jar vase
note: make sure to have your hot glue gun set on low heat so you don’t burn yourself while handling these small buttons. If you prefer, use craft glue and allow for dry time.

Glue embellishments in place

Center art is 3 buttons glued together

Buttons and burlap make pretty fall decor

Hi there! I have a quick no-sew fleece pillow idea for you. It’s quick it’s easy and so festive! You will want to make a no-sew fleece pillow for each season
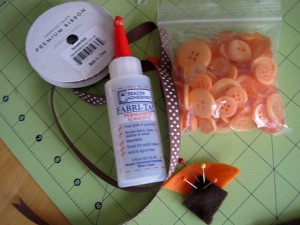
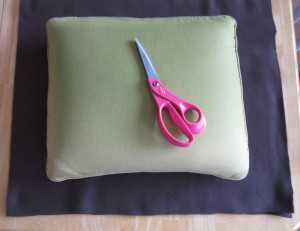
Cut two layers of polar fleece material approximately 3-4″ wider then the pillow you plan to cover. No need to be exact, this project is really forgiving
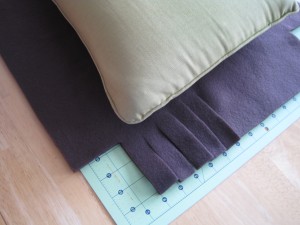
Cut away the corners of the fabric and cut strips all the way round the outside edge approximately one inch thick.
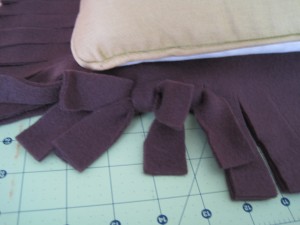
Once everything is cut, tie the top and bottom matching strips together in a double knot creating the fun fringe look. Don’t forget to insert your pillow before you tie your pillowcase closed.
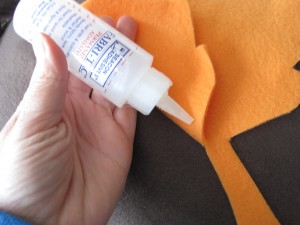
Embellish your pillow front with fleece scraps cut into shapes representing your theme. I free-handed a maple leaf shape for fall. Glue on fleece shapes and other embellishments like ribbon and buttons to complete the no-sew fleece pillow.
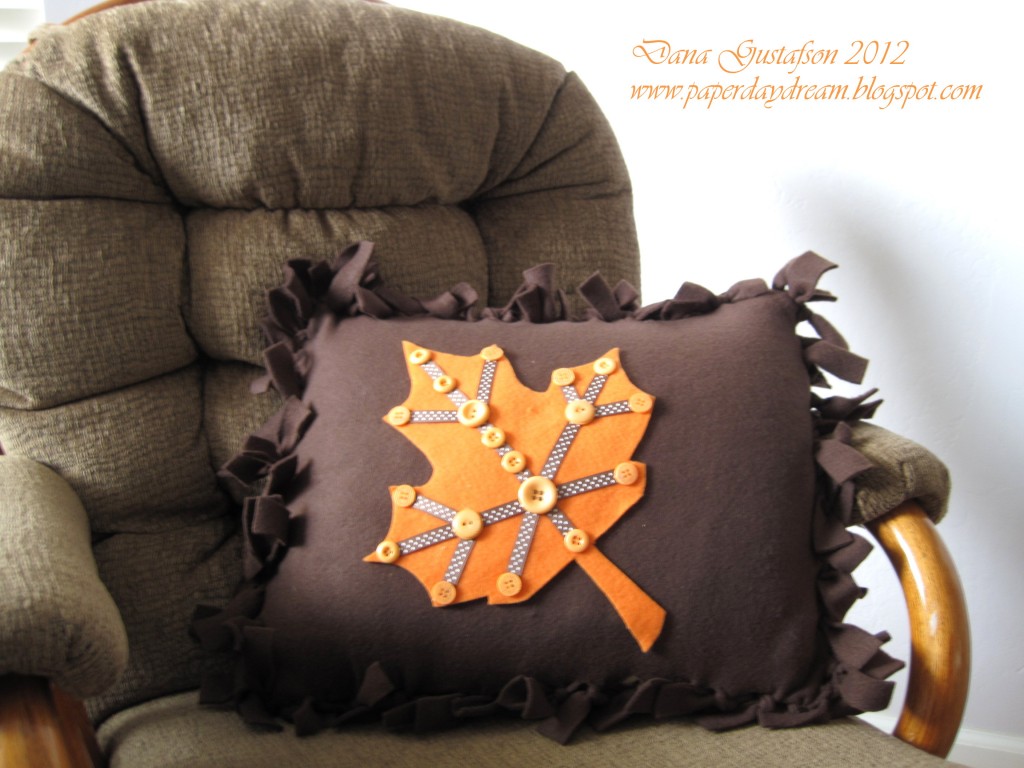
Enjoy your new festive pillow! Not only is it fun to look at but it’s cozy too!
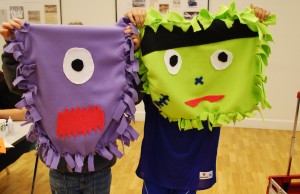
This is a great project for kids!
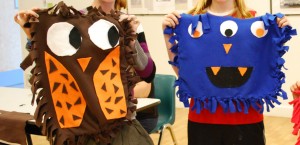
Thanks for stopping by!
Ribbon Wreaths are trendy right now, with photos appearing on blogs and Pinterest. This tied ribbon version with button accents is a great way to get autumn colors and textures in a wreath that is easy to create.
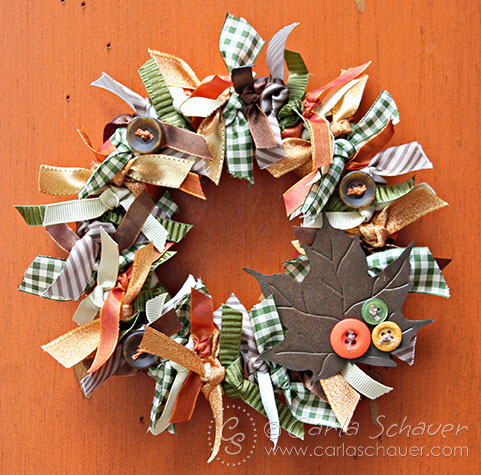
Making a ribbon wreath is a straightforward process that begins with a simple wreath form. For this wreath, I used a STYROFOAM Brand Foam wreath form approximately 8″ in diameter. I painted the front of the wreath using a foam brush and orange acrylic paint to camouflage the form in case it happened to peek through the ribbons.
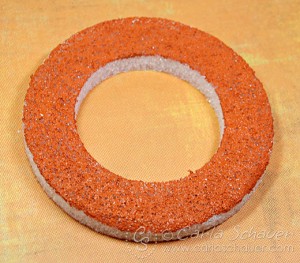
While the painted wreath form is drying, I gathered my ribbons and cut several lengths of each. My form required around 50 pieces, each 10″ long. Widths ranged from 1/2 to 1″.
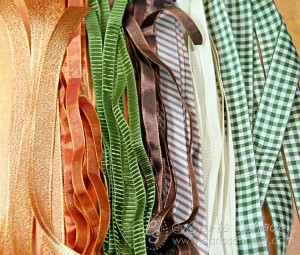
Once the form was dry and the ribbons cut, I tied the pieces around the form. I began with the wider ribbons, and filled in the spaces with the narrower pieces, adjusting the location of the knots as necessary.
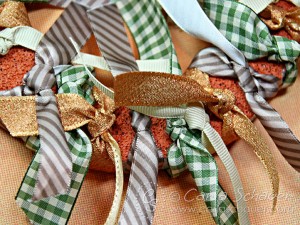
Once all the ribbons were tied around the wreath form, the whole project looked pretty scary. It resembled a big autumn-colored ribbon Medusa.
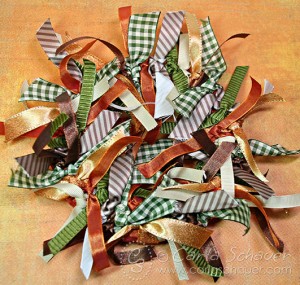
But once all the ribbon ends had been trimmed to approximately 1.5 inches long (use sharp fabric scissors for clean edges), scary Medusa transformed into a pretty tied ribbon wreath ready for embellishing.
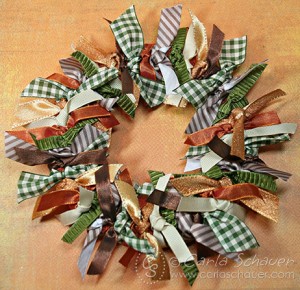
I added thick marbled dark brown buttons from the Natural Grab Bag tied with orange embroidery floss, and a large aged metal leaf as an accent. Three additional buttons from the Autumn Grab Bag tied with cream floss top the leaf for additional coordinating color and texture.

With no time or labor-intensive techniques to deal with, this tied ribbon wreath can be assembled quickly and easily. Dive into your ribbon stash and make one today!
Thanks for stopping by!
Carla
Halloween wall art? Buttons Galore & More buttons and supplies make Halloween SO much fun, it’s spooky!

Autumn is the PERFECT time to get crafty, and I couldn’t help but be influenced by the most wonderful inventory of buttons from BG & M and the subtle changing of light and shadow as the days are becoming shorter… So HERE I go, sharing with you a technique rich, button festooned project, to get your inner hoot owl, hooting! Let’s make halloween wall art with buttons.
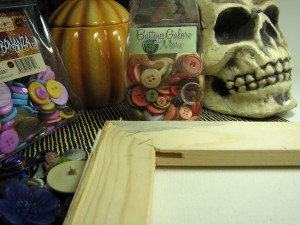
Suggested supply list –
1. Artist (value) canvas
2. Inspirational graphics of your choosing (i.e. scrapbook paper, free digital images, old print ads, etc.)
3. Acrylic paint/ Gesso/ Artist Paste
4. Seasonally colored buttons from Buttons Galore & More
6. Decorative tissue tape
7. Pipe cleaners
8. Google eyes
9. Jacquard Lumiere 3D acrylic paint
10. Sharpie Markers
This project is shared for YOUR inspiration – I hope you’ll create something specific to your needs for fun and holiday decor! What follows is a guideline to assist you in your creative travels. Enjoy make halloween wall art with buttons.
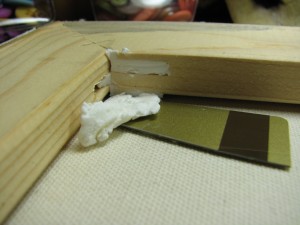
Remove packaging materials from value canvas, flip to the backside. Fill support gaps in stretcher bars with Artist 3D medium (spackle!) using tool of your choosing.
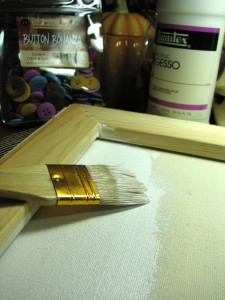
Prepare the raw canvas with gesso, so that acrylic paint can be applied. Let dry. Paint the wooden frame in a complimentary color for your project. Finish the OUTSIDE edge of the frame with decorative tape.
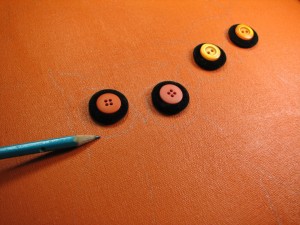
Since buttons were the inspiration for MY project, I sought a design that could feature buttons as eyeballs! A pair of spooky, Halloween owls were the next logical choice for my decorative canvas. By placing the buttons on the canvas, I sketched out owls at a scale that would really make the buttons stand out! If you are not comfortable with sketching freehand, you can get beautiful results by blowing up a printed image and then using graphite transfer paper BEHIND the artwork, trace the image from the front and then have our lines appear, similar to this drawing.
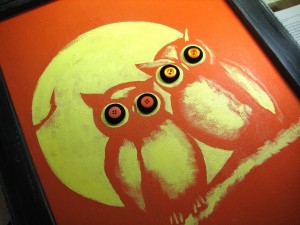
By painting in the highlights, first, I could confirm the scale, but mistakes could be easily covered with leftover background paint. Using a limited palette makes this SO easy! (And SUPER spooky!)
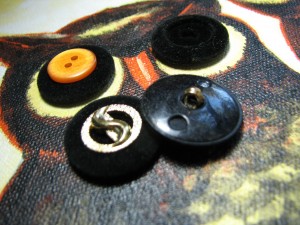
For this project, I immersed myself with buttons! While Buttons Galore & More is a wealth of seasonal themed, as well as EVERY color and shape of buttons imaginable, I was searching for classic buttons, to create a spooky, vintage look. In a FAT bag of miscellaneous goodies from a BG & M grab bag, I found a wealth of these snazzy, faux velvet and gold buttons. It was easy to snap the shank off the back, remove the gold, and then fit a SCRUMPTIOUS orange button into the recess.
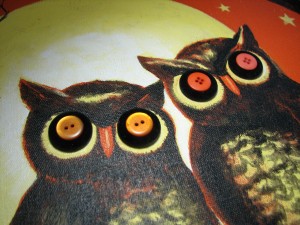
I LOVE the character that was created with these stunning buttons! Beacon 3 in 1 craft glue makes for easy and secure button festooning… (Plus, it’s FUN!)
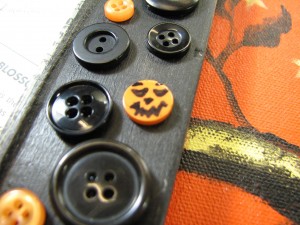
A button WITHOUT holes was a perfect, pumpkiny surprise for this craft-addicted girl… Add SHARPIE marker = PUMPKIN FACE! Trick OR Treat, babies! It’s ON!
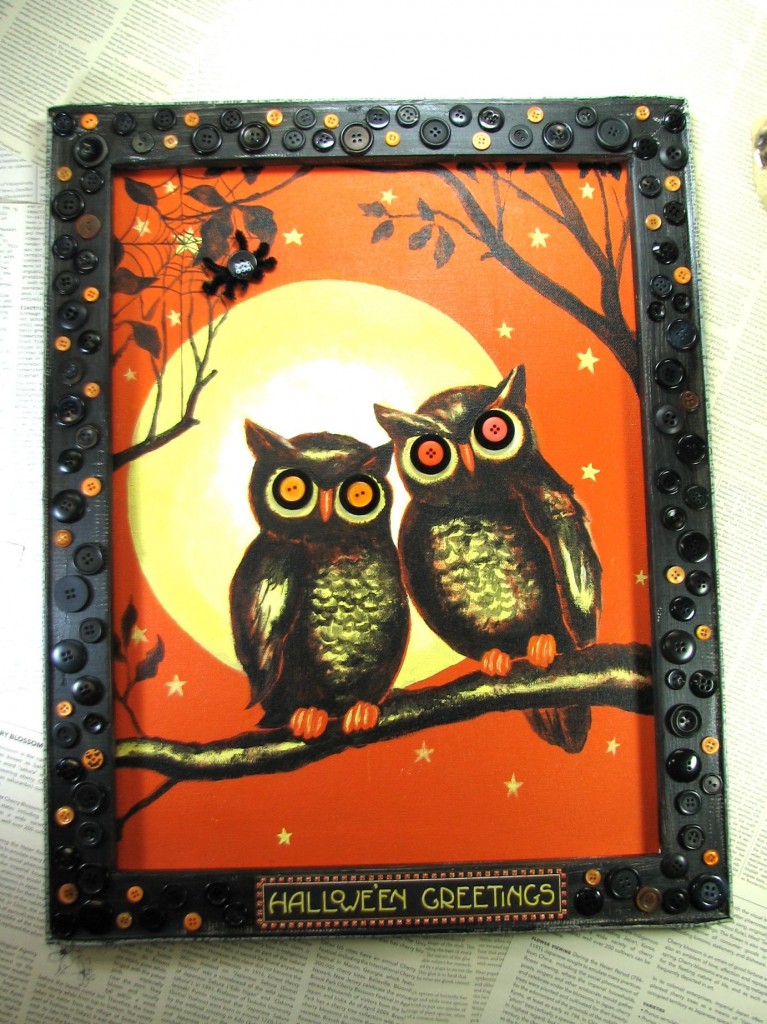
Did I mention, I LOVE HALLOWEEN CRAFTS!?!
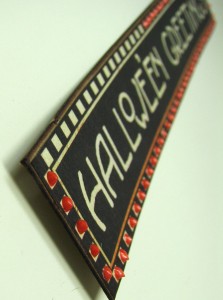
… And GREAT materials! Look how this gorgeous Lumiere 3D paint from Jacquard and some Sharpie marker brought this sentiment up a few zillion watts!
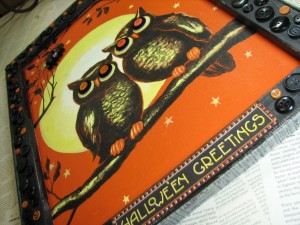
Oh, gawsh… And did I forget to mention, SPIDERS?
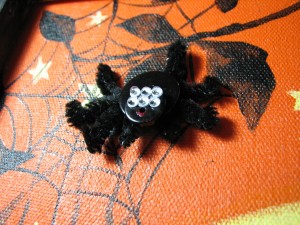
No need to shriek… This one’s perfectly tame! Pipe cleaners, buttons and GOOGLY eyes…! Give the exterminator the day off, buttons BUGS are fun to make!
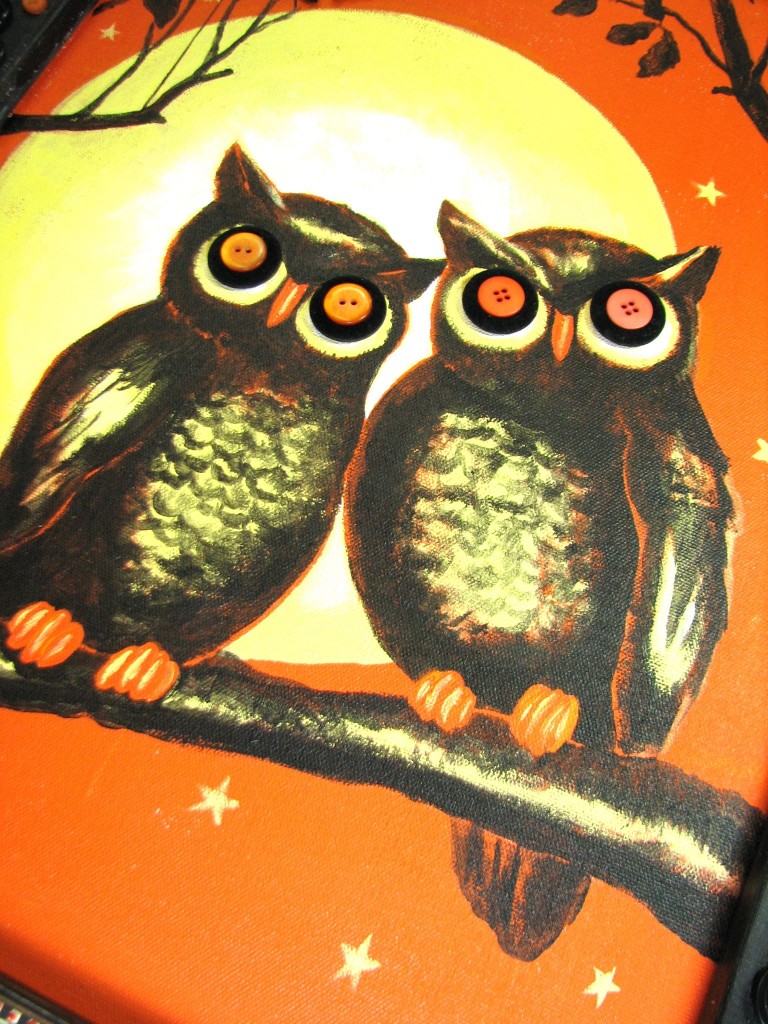
Thanks for taking this eerily creative and crafty journey with me! I hope you’ll be inspired to make halloween wall art with buttons and supplies from Buttons Galore & More! Have FUN!
Who doesn’t love the dollar aisle? I picked up some simple photo clips the other day that I knew I could dress up with theme buttons to customize them for my daughters. It’s so quick and easy!
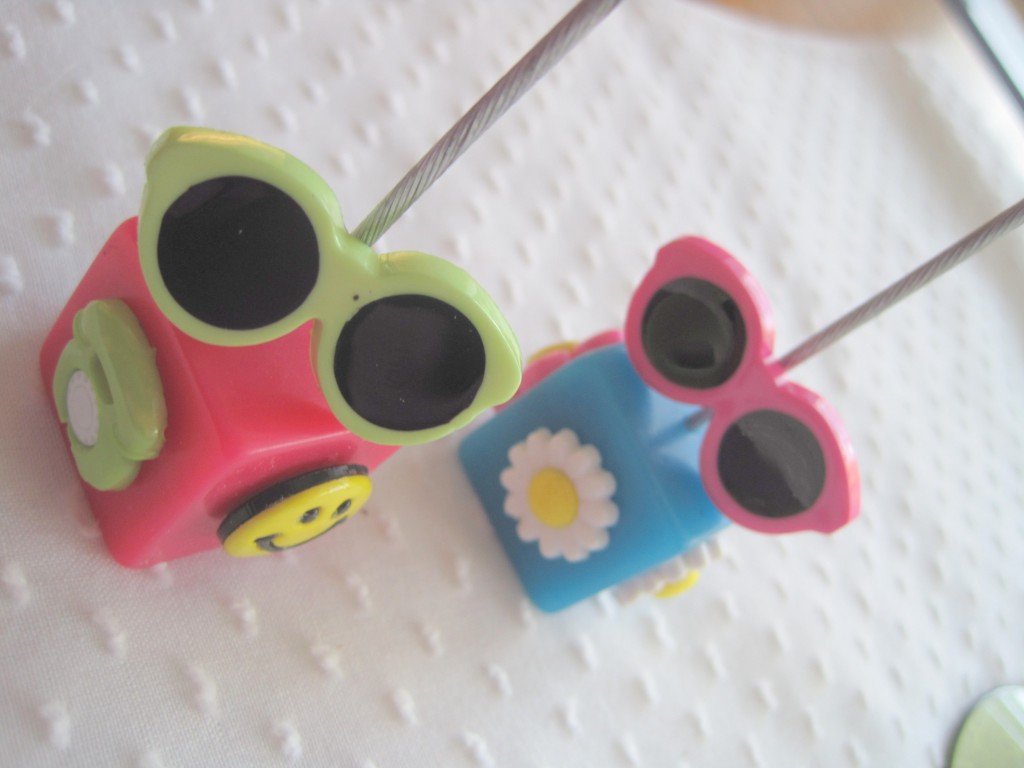
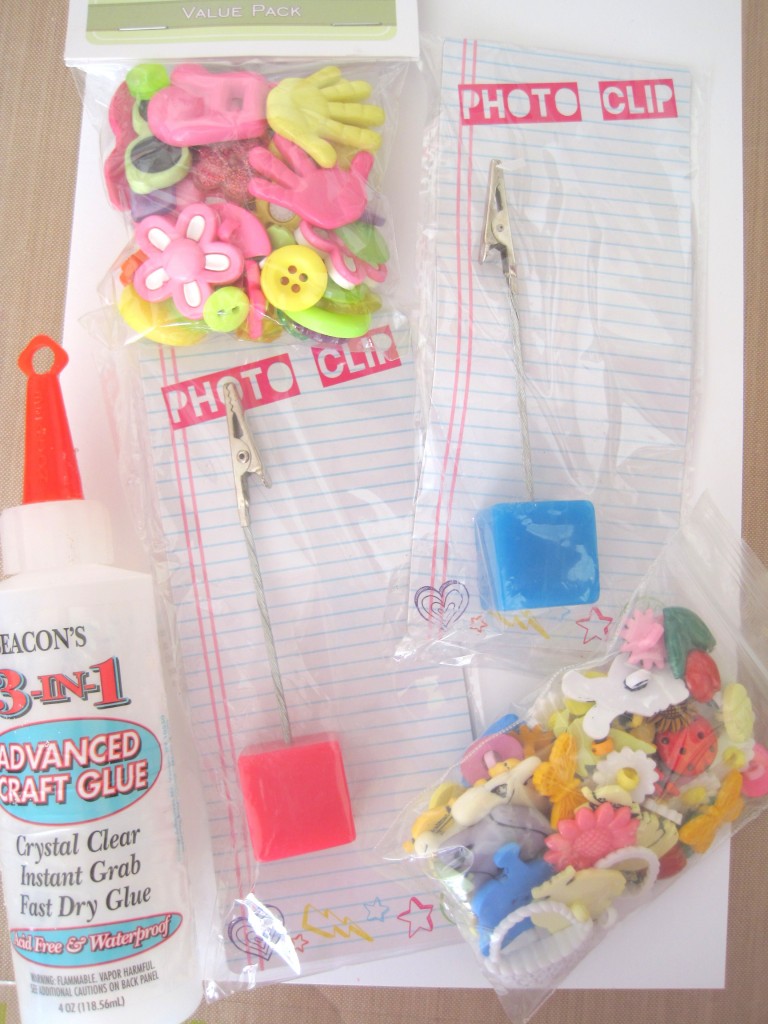
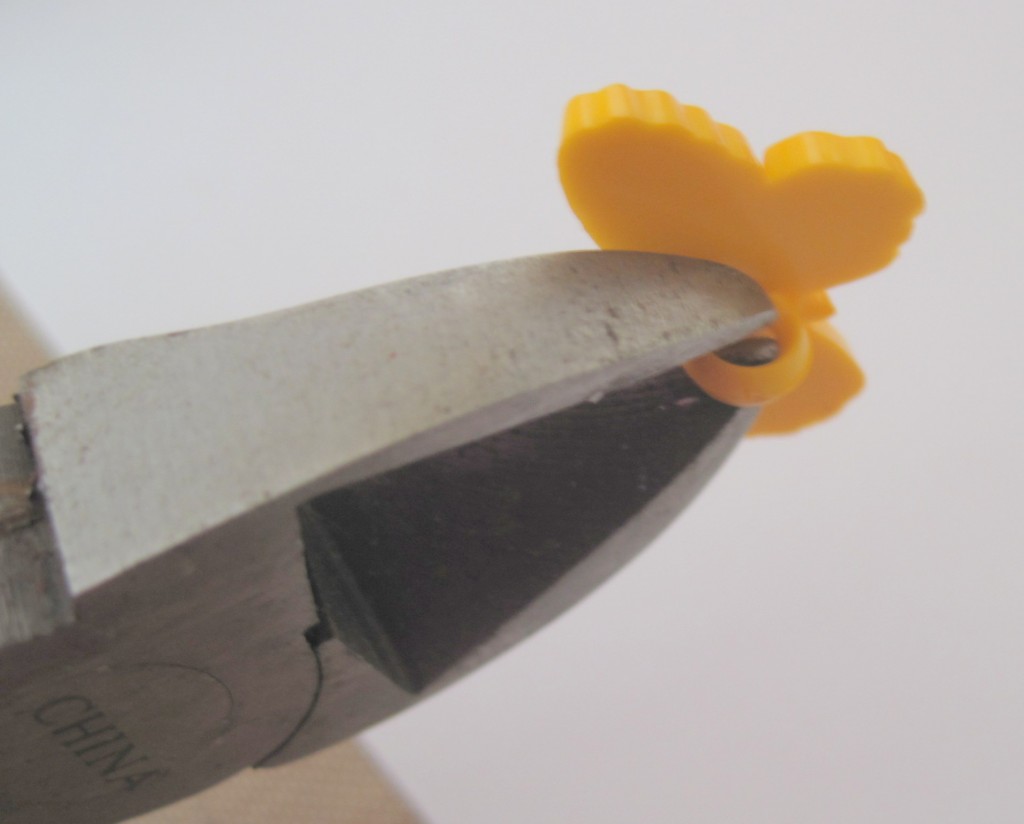
Start by removing the shanks from buttons.
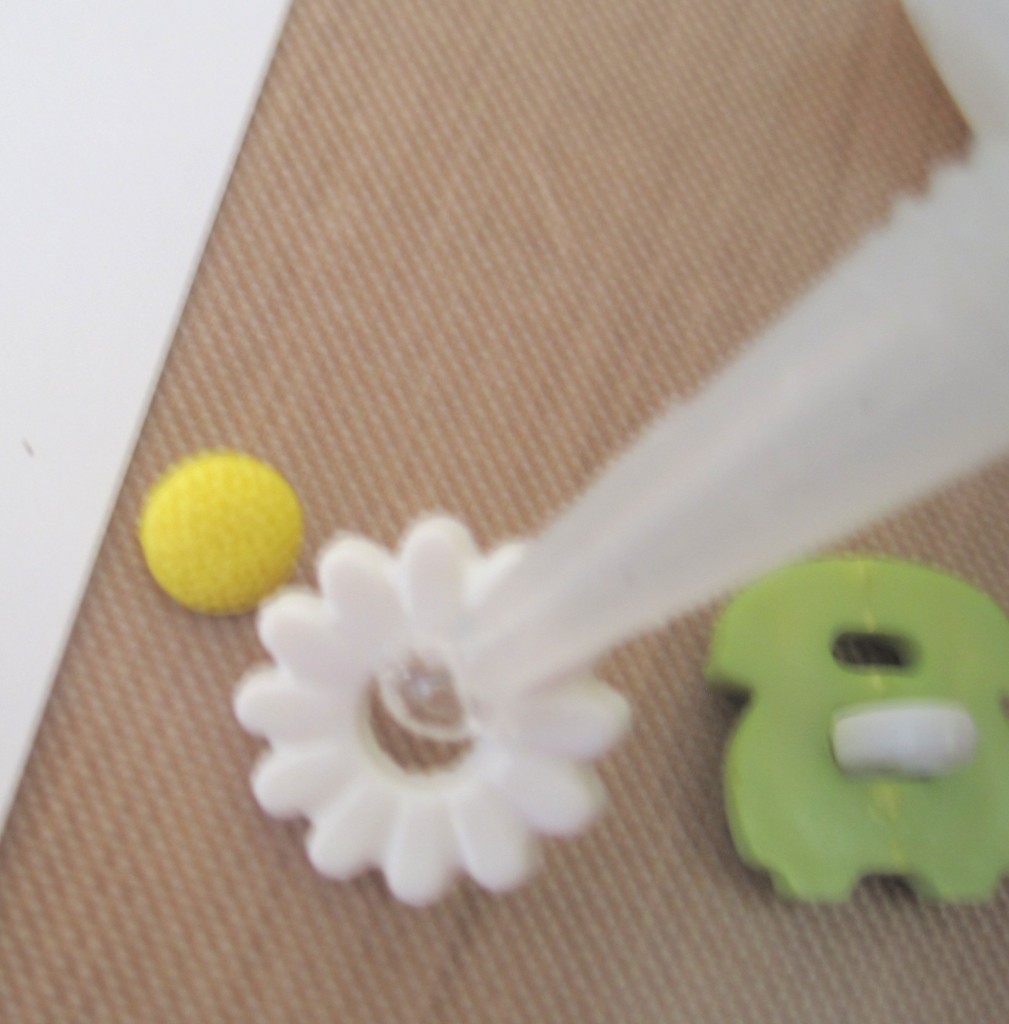
If the theme button has layers, glue them back together with a dot of glue.

Adhere the chosen buttons to the four sides of the photo clip cubes.
The sunglasses are a fun moving element by just clipping one side of the button shank and snapping in on the wire .
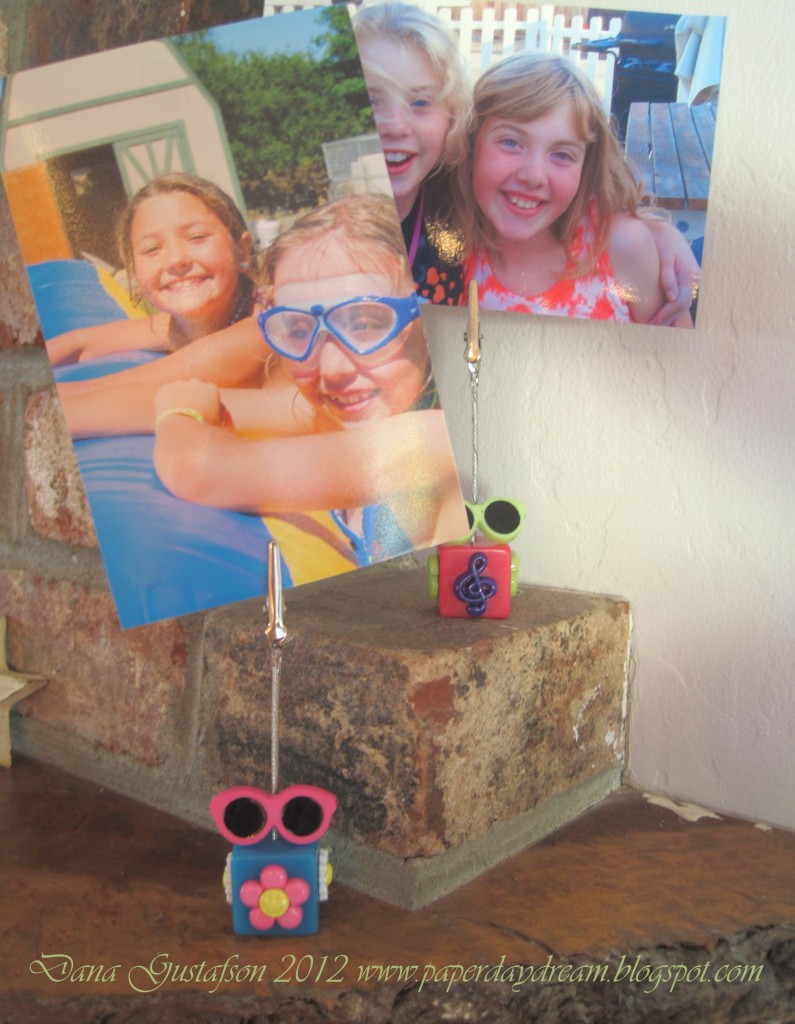
Final step…add cute pictures of fun times! This is a fast and easy way to customize a photo holder with theme buttons. Less than a half an hour including dry time and you have a great project.
It’s time to get busy making something to freshen up the house! We have been busy all summer and as the Autumn season fast approaches having a few handy tutorials on how to make personalized gifts and hand made home decor just seems fitting. So today I have a Personalized Monogram Home Dec project to share with you. Enjoy!

Supplies Needed: Buttons, Brads, Micro Beads, Gem Tac (R), Scrapbook Paper, Hot Glue Gun, Scissors, Frame

Print letter of your choice as large as you would like finished monogram to be. Place beneath paper and put against a well lit window to serve as a light box. Then trace onto scrapbook paper.

Outline one third of the traced letter with Gem Tac.

Fill in the area fully with Gem Tac.

Place as many buttons as fit onto the glue covered area.

Quickly cover the entire surface with micro beads.

Remove excess beads before moving onto next step.

Continue covering the entire traced area a bit at a time following the steps above.

Cut the prongs off of the brads using strong sharp scissors.

See how much flatter brads lie once the prongs have been removed?

Hot glue the altered brads to the surface of the monogram randomly. Here I chose to hide "barren spots" with the brads. :)

Once your piece has fully dried, place in a frame and you are ready to enjoy your brand new PERSONALIZED home decor!!!
I would love to see what you make! Please leave a comment with a link to your personalized home decor projects! :) I will be sure to pop over and leave you some love on your project!! :)

Tutorial Tuesday is a regular post on Big Box Detox and they have a fun,quick and easy tutorial on how to make magnets out of buttons. I can picture these magnets on my fridge. They would make a great back to school project to place inside a locker. They might even make a nice teacher gift too.
I think the Granny’s Stitched Buttons and Big Ol’ Buttons would work great. You could even layer other buttons on top of them. If you were looking for Christmas gifts to have on hand you could make a bunch of these and package them in a pretty gift sack and have them on hand when you need a last minute thank you or hostess. gift. After who does not like buttons?
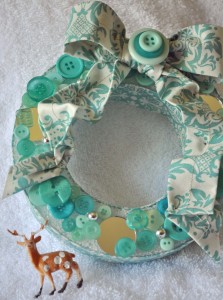 Christmas in July? With much of the United States suffering through a massive heat wave, I think we could all use an escape to something cool! When challenged by Styrofoam and Buttons Galore and More to create Christmas decorations, I’ll admit to struggling, but one look at the cool, aqua of the Mint Cooler Color Blends buttons, and all I could think about was ice. The great thing about this wreath is that it can be used for Christmas or Hanukkah. It could even just be used throughout the entire winter season. I few snow men and you have a Winter Wonderland!
Supplies:
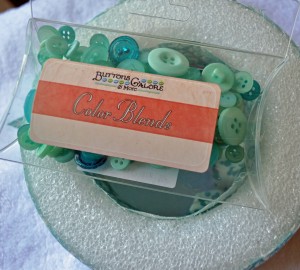
Directions:
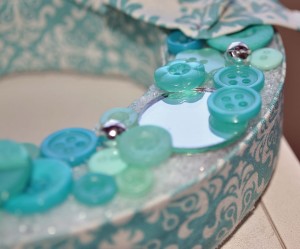
So there’s your super quick, holiday project! If you get started now, you’ll have your holiday decorating “buttoned” up before you know it!
Craftily yours,
Laura Bray
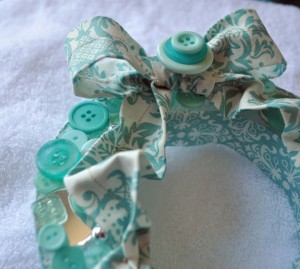
Winter Wonderland Wreath by Laura Bray
Tuesdays, we like to feature people we find on the internet. Margot Potter aka, the Impatient Crafter, is the crafty inspiration today. Often, we select designers because of a really cool craft technique or because of a fantastic use of buttons. Well, her garden craft piece is both. I would like to call her creation JUNQUE-TASTIC! Margot shares a tutorial with you on how to create the beautiful finish on the wood. I think it would make any garden that much happier.
Margot Potter’s inspiration was Craft Wars, the new TV show. If you have not watched the show you really should. It is not a traditional craft show. It is a crafting competition. It is on Tuesday nights at 10pm.
 To view the full tutorial please visit Margot’s blog – The Impatient Crafter Not only will you see the full tutorial for the Craft Wars Inspired Junk Drawer Bird house but you can view many of Margot Potter’s other work too. She also has a list of the other Craft War Vets who participated and their projects.
Hi all! Ryann here with a quick and easy tutorial to share with you today featuring burlap and buttons. Making little banners is a great way to use up scraps of paper or fabric because it doesn’t take much of either to put together a great little project to use for family celebrations! Your banner can be as big or as little as you want it, it all really depends on how large of a word you want to use. I find it’s best to use an odd number of pennants to achieve the “best” look for a banner.
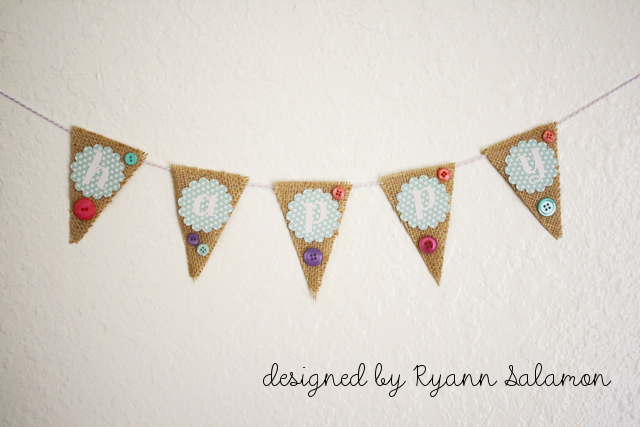
Supplies Used:
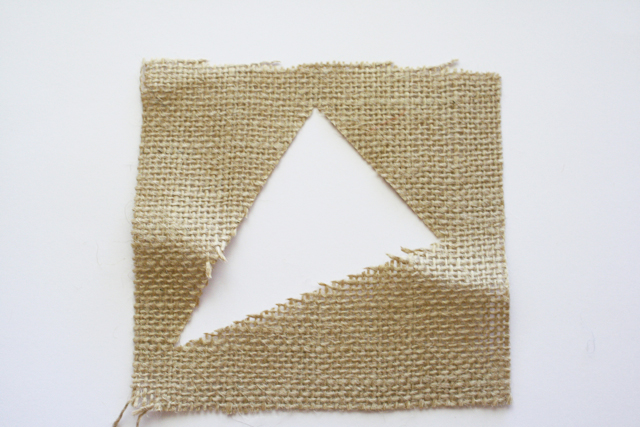
1. Die cut enough pennants to make your banner. If you do not have a pennant die cut, trace a triangle shape on a piece of heavy weight cardstock and use it as a template.
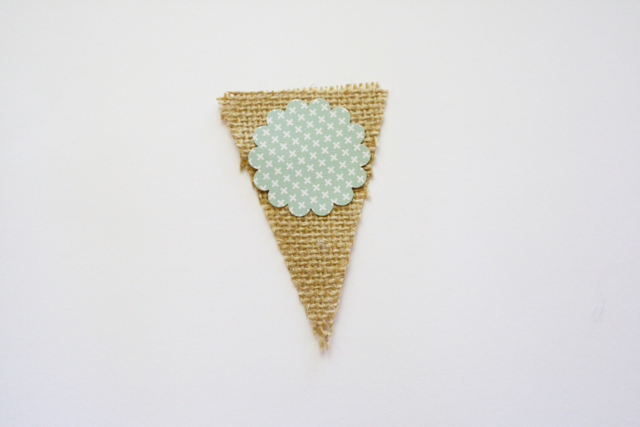
2. Cut out enough scalloped circles to place one on top of each burlap pennant. Place alphabet stickers onto scalloped circles to create message.
3. Decorate with buttons.
4. Thread burlap pennants with twine.
The possibilities are truly endless when making pennant banners from burlap and buttons. If you wanted to make a longer banner such as “Happy Birthday”, you could split your sentiment into two banners and have one hanging below the other. I’m going to hang my little “Happy” banner in my craft room! :) I hope you will give pennant banners a try – they are so simple to make and fun to have! Thanks for joining me today!
I have been having fun embellishing with buttons from the Color Bulk Button collection. I decorated a fun frame that houses a favorite picture of my son going away on his first fishing trip. This was his first sleep away experience and he had such fun. While he got to get away, and be free, my daughter and I had the first of many mother daughter nights. FUN! June kind of kicks off vacation season for most families.
I started with a simple wood frame and papered it and added a few embellishments. I then set to work on the big embellishment, a jumbo bottle cap from Maya Road. I cut some burlap that I received in my monthly box from Buttons Galore. It was a gift from our DT Coordinator, Niki Meiners. I die cut the burlap and placed it in the bottle cap.
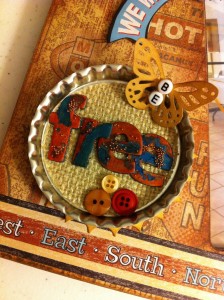
Also in our DT box was some Jacquard products, these wonderful bottles of 3D Lumiere – which is a glue, and a dimensional paint. I painted some Maya chipboard letters. Before they dried, I actually stuck them to some scratch paper and ripped off some of the paint, then went over them with ink and added some copper balls (also in my DT Box). I decorated with some buttons from the Color Bulk Buttons set. This is a great collection of buttons on all colors and sizes. It’s perfect for all projects!
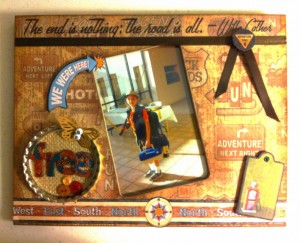
I finally added a punched butterfly and some beaded letters, and it reads “BE FREE!” At the top it says “The end is nothing, the road is all.” from Willa Cather – this was a rub on from the paper collection – which is from my very old travel stash.
Supplies
Thanks for looking today!
I don’t do as much decorating for the patriotic holidays as I’d like. I do have quite a few family members in the military, so I think I get more caught up in remembering their service than I do decorating. This year I wanted to change that, so when I was challenged with using burlap in a button project, I knew right away what I wanted to do…

paint burlap and button American flag decor by Jen Goode
Make an American flag decor sign using buttons and burlap. Using some paint on the burlap, it’s easy to get that rustic look with lots of fun texture and interest without having to create a super detailed piece. This project can easily be created in just a couple hours. I used Decoart craft paints for this project. Feel free to use what you have on hand.

Burlap and button project supplies
Materials you need:

Tie twine and glue buttons for faux sewn look

Welcome patriotic wall art
Step by Step instructions
Tips:

Patriotic wall decor using buttons and burlap
I was at a show last week and spotted this giant button in New York City. I really wanted to be able to get a giant set of chalk markers to color in some fantastic, vibrant art on it. You know, liven it up a bit, add some personality. A big black button is just begging for some color!
I didn’t get closer, so I’m not sure what that little building is the button is sitting on. I’m also a little confused why there are 5 button holes instead of just 4, but regardless… how fun is that!?

Giant button in NY City
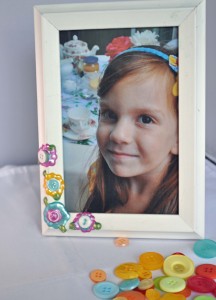 You probably know by now that I love all things bright, cute and floral. I found a plain, white, photo frame in my closet and knew that plain just wasn’t going to cut it around here, so I grabbed a few bottles of Jacquard’s Lumiere 3D paint and some buttons and got to work. The great thing about using the 3D paint is that it’s also an adhesive, allowing you to have a seamless look without dealing with a glue mess. I also love how the paint squeezes through some of the button holes to give more interest to the design.
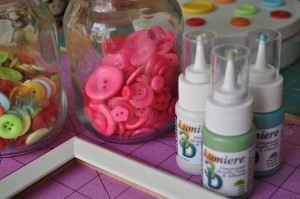 Supplies:
Instructions:
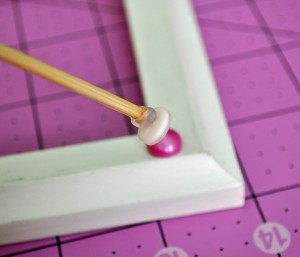
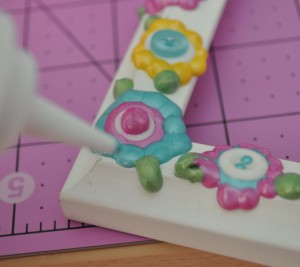
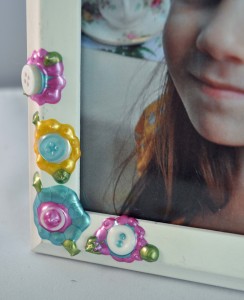
I really love collage and mixed media. I’m sure I’ve said it before already, but really, I love collage. The idea of mixing textures to create a cohesive piece of fabulousness is a fun challenge I really enjoy. It’s neat to see what you can come up with when you mix odds and ends and some fantastic color. So, today’s project is an example of such fun… button art using Jacquard Lumiere dimensional metallic paint, fabric, old book paper and of course buttons!

Heart and Swirls button art by Jen Goode
Materials you’ll need to make this button art:

steps to make button art
How to make your own button art
This dimensional paint is also as adhesive, so while you can use it to create pretty pieces, you can also use it to “glue” things in place.
Something to note, The directions I’m sharing are not in the order I did things… I painted the heart and then did the background which turned out to be a bit backwards, so instead, I’m sharing steps in the order I should have done them.

Button art and illustration by Jen Goode
Layering buttons creates a more interesting look and compliments the dimensional paint. Choose buttons of different sizes and finishes to create a more interesting art piece. I really like mixing shiny buttons with flat finish buttons to add more dimension between them. Use buttons in your own decor to add a little fun interest and detail!
Tell me about your favorite button art!

PLease welcome this weeks guest designer – Linda Auclair. Linda is an avid paper crafter who is know for her prolific work and her fantastic use of embellishments. She is a natural pairing with Buttons Galore and More. She does such fun and timely work that we are going to feature today and next week too. Both projects have a patriotic flair and are perfect to display for Memorial Day and the 4th of July. If you would like to view more of her lovely work please visit her blog.
Materials used –
NicoleCrafts wooden décor heart (purchased at AC Moore)
Echo Park Paper’s “4th of July” Mini Theme Collection Kit http://www.parttimesally.com/
HAB602 Nautical Trim Collage Kit http://www.buttonsgaloreandmore.com/product/HAB602.html
DF93 Patriot Matte Round buttons http://www.buttonsgaloreandmore.com/product/DF93.html
CH34 Star Charms http://www.buttonsgaloreandmore.com/product/CH34.html
Tattered Angels chipboard alphabet
Jillibean Soup Alpha Beans alphabet stickers in Roma Red
The Twinery Twine in Marachino and Denim http://thetwinery.com/
Stickles Glitter Glue (Ranger)
Mod Podge Decoupage Medium (Plaid)
Folk Art acrylic paint in Brilliant Ultramarine (Plaid)

Instructions:


Hi all! Ryann here with my take on a mixed media canvas piece. Now I am first and foremost a card maker, but every once in a while I like to stretch my boundaries a bit and try something new. I recently took a paper doll tag class from Julie Nutting and left feeling inspired to create my own paper doll. After deciding on a mixed media canvas, I began my project!
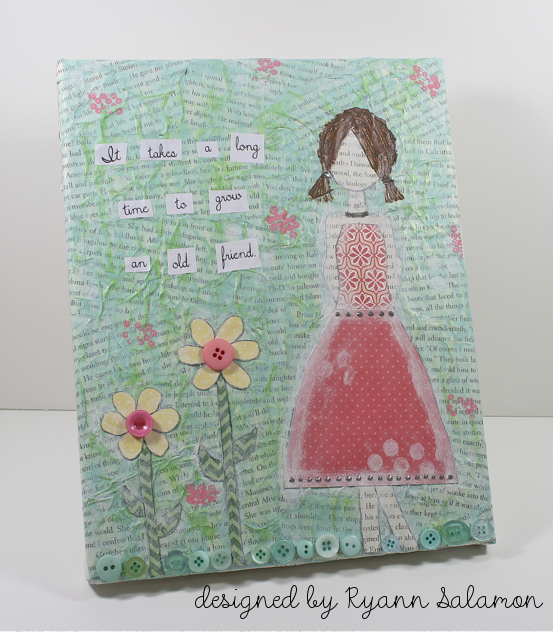
Supplies used:
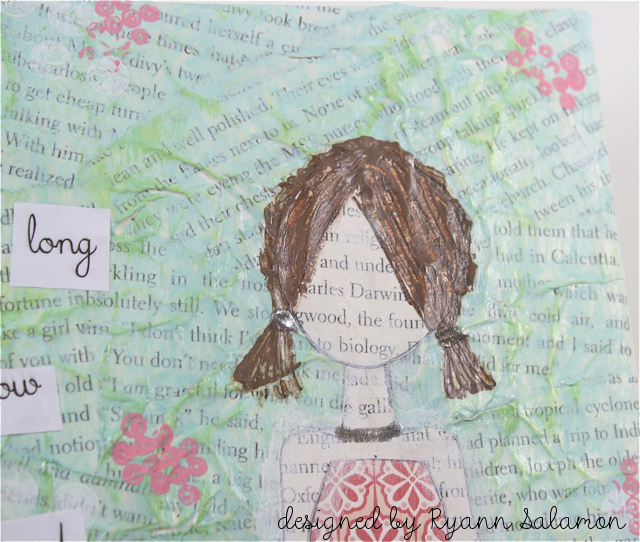
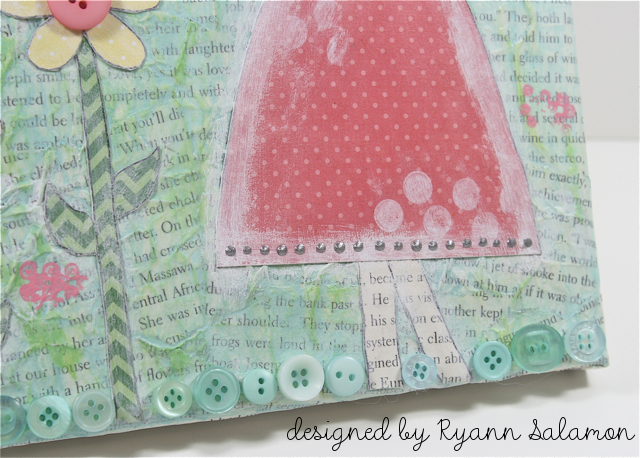

Make a quick and easy memo board using a VELCRO® Brand Memo Board, Buttons and Ribbon…..the theme of these can change easily by the buttons you use….Make several for gifts but be sure to keep one for yourself!
Supplies:
Assorted Buttons (Brilliant Pink BB84 was used here)
VELCRO® Brand Memo Board
VELCRO® Brand Sticky Back Adhesive
Beacon Adhesives Felt Glue
Kreinik Threads
Scissor
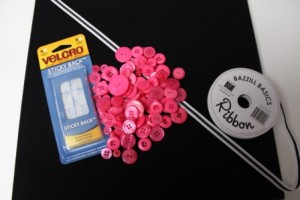
Gather your supplies
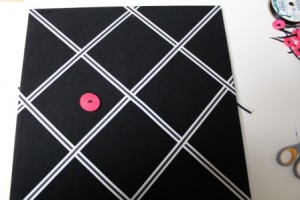
Place ribbon on memo board from corner to corner in a large X; cutting as needed; then place ribbon to create a square as shown in photo. Glue in corners and where ribbons cross.
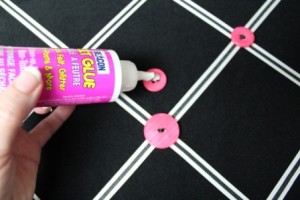
Sew thread onto buttons then glue onto board....
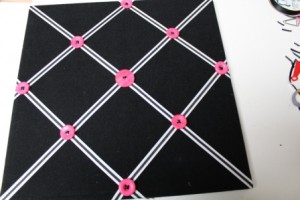
where ribbons cross. For a finished look glue ribbon around edge of memo board also.
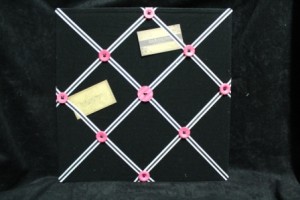
Now you can place cards onto the memo board under the ribbons.
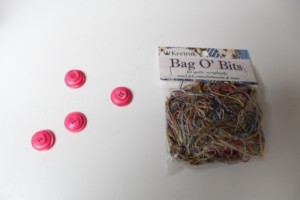
For a more useful board pick out some buttons to layer on top of each other....
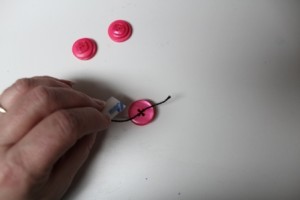
stack them together and tie off with thread.
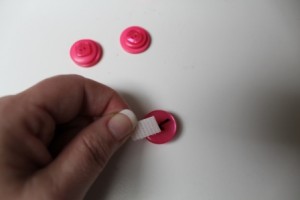
Add Velcro Sticky Back Adhesive at the bottom over thread.
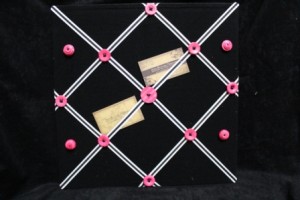
These buttons will stick the the memo board giving.....
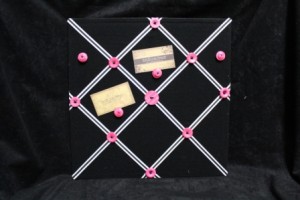
you more ways to hold your papers on the memo board.
Today’s Internet Inspiration is from a product partner Helmar. Their Designer Trudy made a darling mixed media canvas collage.

This is a quote from Trudy about our products.
“I love buttons and am excited to share my mixed media canvas with you. I used lots of buttons form our prefered partner company Buttons Galore’s – Candy Apple Green mix and a few from some of their other beautiful assortments.”
You can see the post HERE

Burlap and buttons make a great wrap for a bouquet that will last longer than a week. I love fresh flowers, but they do not love my budget. A more budget friendly idea is the tin can that I repurposed.
Sizzix Tattered Florals and Leaf Die Cut
Beacon Adhesive – FabriTac
Jute Cording, Burlap, Styrofoam, Krylon Spray paint, Westcott Scissors and kraft knife.
Buttons – Tangerine Tango, Class
Directions:
Clean and dry tin can. Spray paint can. Let dry and repeat.

Place floral foam inside can.

Cut burlap to fit. Adhere burlap with Quick Grip.

Slide buttons on to jute cording. Wrap cording around container. Adhere buttons into place. Add a second layer of buttons where desired and glue into place.

Add flowers into container.
This recycled tin can vase will work for any type of flowers, fresh or hand made.

It’s spring time and that means planting time! All the gardeners I know are pouring over seed catalogs and dreaming about their summer crops. Today I have a super quick, super fun homemade project that will help you remember which pot you planted lettuce in and which pot has the peas: Button Garden Markers!
The fun thing about this project is that it really inspires creativity. I used orange buttons for carrots, green buttons for peas and lettuce, and red buttons for tomatoes. But the possibilities are endless. Purple buttons for bunches of grapes, yellow for squash. What else can you dream up? The possibilities are only limited by the size of your garden!
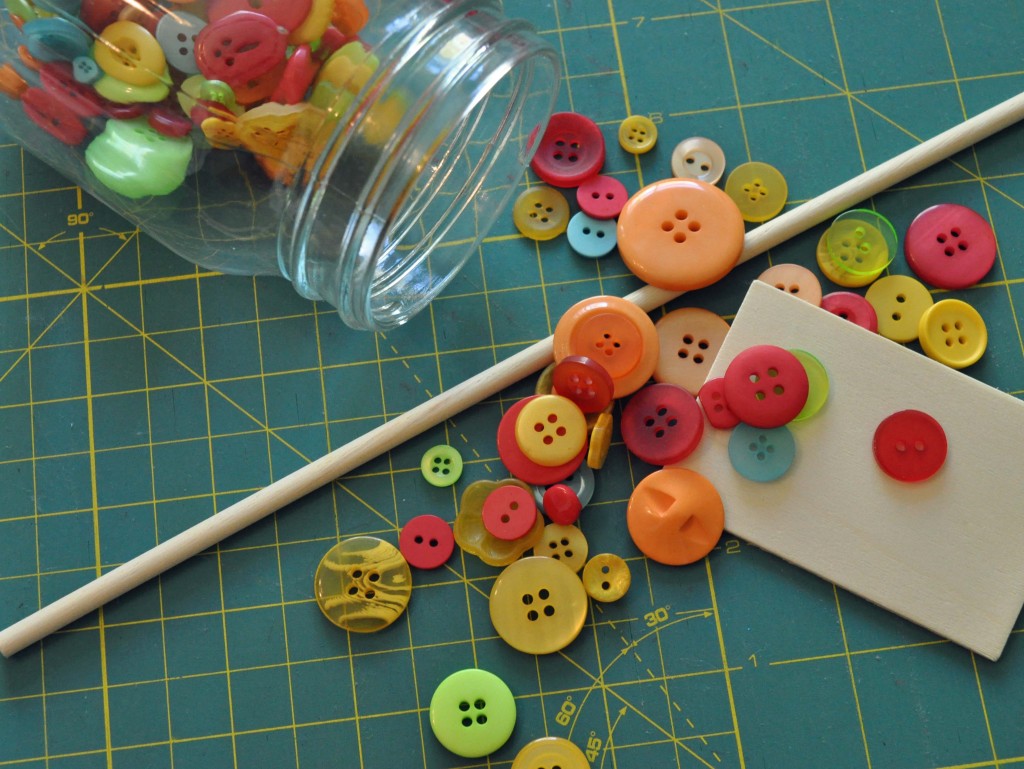 Supplies:
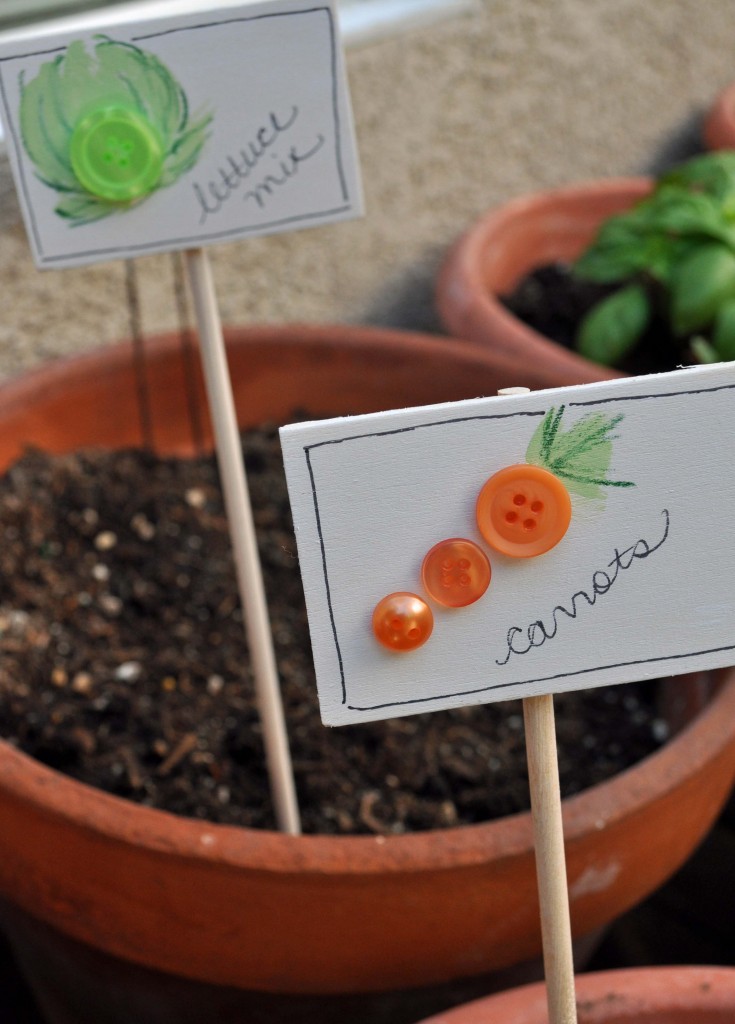
Decide which veggies you need to mark in your garden and gather up the appropriate buttons. For this tutorial, I’ll tell you how I made the Carrot Garden Marker.
See? I told you it was easy. Now – a word to the wise. This is a crafty project and it looks really cute, but remember if you are using these outside, they will need to be protected. I would recommend using paint and glue that you know can stand up to sun, heat and rain, or sealing them with a waterproof sealer.
Sometimes a few buttons can finish off a piece perfectly. This month is National Frog Month, so I thought it would be fun to create some wall art with one of my printable images… a frog, of course! I found some cute little flower shaped buttons in my green button bonanza which I thought would be a perfect fit for this project.

Happy Frog and Fly wall decor with button accents by Jen Goode
Materials you need:
Tools and other supplies:
Steps to make your own Happy Frog and Fly wall decor with button accents

Print, color and adhere frog art on background papers

Add ribbon and buttons to edge of art card

Finished Happy frog art with cute flower buttons
This same wall art can also be created as a greeting card, just leave out the frame and adhere to a blank card. You can turn your pretty colored art into super cute decor with a few fun accents. Buttons add dimension and interest. Find interesting button shapes and add them to your craft projects for an added touch. If you are looking for more button craft ideas you can check us out on Pinterest and while you are there enter our Pin it to Win it Contest
Depending on what part of the world you’re living in, it may or may not seem like Easter is right around the corner. Where I live, Mother Nature has been up to her old tricks: there have been days where I’m not sure if it’s time for Christmas OR Easter, but I’ve had it on the brain, so Easter Craft is WHAT I’m sharing with you today, these adorable hand painted bunny characters.

Beautiful buttons from Buttons Galore & More, Rose Garden, button tote collection, was such a splendid influence, so with a little help from some seasonal friends, and some re-purposed tin scraps, I met the Easter Bunny and his gal pal, halfway down the bunny trial: CHECK IT OUT!
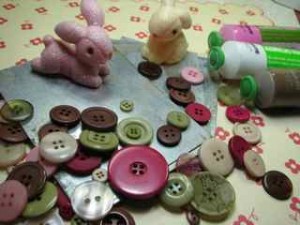
The thought of our standard Easter display feels a little out of date, these days. Since I’m crafting with SUCH extraordinary buttons from Buttons Galore & More, I decided to conjure some images of Peter Cotton Tail, to make something “keepsake” and classic feeling, created with my own two hands. It all started with some sketching…

And then CUTTING! Scissors indicated for metal, cut this material easily. Using a standard, crafting felt pen, I made my marks, that could easily be removed by rubbing. From 5 individual squares of 4 x 6″ galvi/tin, I cut bunny body parts… To be ENJOYED, not harmed! {!}

These individual pieces will be joined with simple brads, with long shanks, once painted and embellished. Careful planning in the early stages is the best way to ensure a great results to your seasonal {and ANY!} craft decor project.
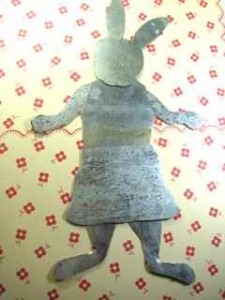
Mixing a desired shade of “bunny” creamy brown, I gave each piece two coats of paint. Bunny “details” were added, as desired. Once dried, they were then painted with clear, crystal adhesive, then dried completely. When dried, the edges were sanded. More adhesive added where desired.
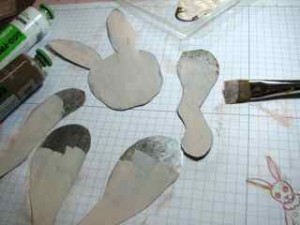
Once pieces were dried, they were assembled using a “metal friendly” punch, and then fitted with a brad. Once in place, the brad was lightly smashed with a craft hammer to give a more vintage feel. I’m hoping these guys will grow old with my family, so I need them to stay sound. With the character’s parts, functioning, buttons were added to embellish and complete a classic flavor to these Easter Characters. Adhered with Beacon’s 3 in One Craft Glue, with careful storage, these fabulous details should last for years!
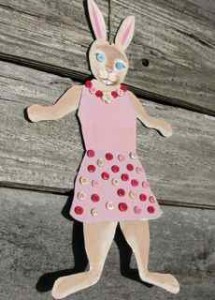
I’m rather smitten with lil’ Easter Girl!
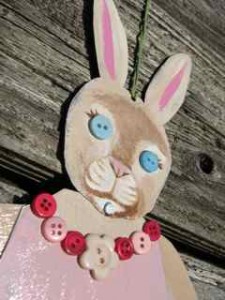
But SHE appears smitten with Peter Cotton Tail!
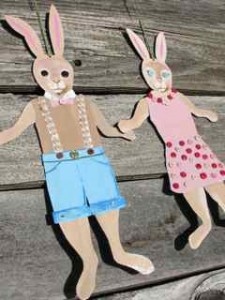
Aren’t they the cutest pair!
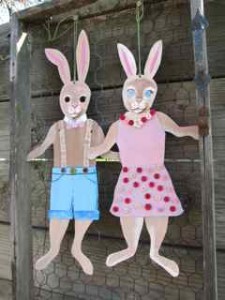
I hope they have inspired YOU to look at your personal inventory of “leftovers”, toss in some incredible buttons from Buttons Galore & More, and make a seasonal treasure for you and YOUR family to enjoy for years to come! It was a pleasure to share this fun button embellished spring project with you! Have a splendid day!
Buttons Galore & More Products Used:
Rose Garden Button Tote – HB104
Class Button Tote – HB108
3 in 1 Craft Glue
Cross Promotional Items –
Loden Colored Twine

Wall Art it its most regal
Are you a fan of the Monarch? If not surely you can appreciate that time and the talent that went into this regal creation. The creator of this piece also designed a Union Jack that is pretty complex too.
Check out this pinboard on Pinterest

Embroidery Canvas Hoop Art from Spellbinders
Buttons, Embroidery floss and and hoops are a few of my favorite mediums to use together. This home decor project from the Spellbinders Paper Arts team show how well they work together. The Spellbinders team often uses Buttons Galore and More buttons. Check out this adorable embroidery hoop project here for directions and a materials list.

Handmade love notes are not just for Valentine’s Day. I’m sharing a little trash to treasure project with you using heart buttons and a paper box. The box hada little accident. I have several other boxes like it that I’ve decorated with my favorite Authentique papers, and this was my last box, so I wanted to use it for something special.
I took pictures along with way. A little love, a lot of tape, some heart buttons (of course) and other Doo-Dahs, and I think it outshines all my other boxes. There is a funny little story about embellishments below too.
Do you love, love, love Clearance? When my kids were little, they thought Clearance was a person. We regularly visit Uncle Clarence to see what he’s got for us. [insert chuckle here]
Anyway, I got the beautiful chunky glitter encrusted flower on clearance. It’s from Prima. The bad news, if it was on clearance, maybe they don’t make them any more? Sorry! Any gorgeous flower will do, and you could always add your own glitter.
Do you love those crocheted flowers? My friend Linda Weber makes them. I make things or send her stuff I don’t need, and she sends me hand made flowers. It’s a sweet barter system.
I added a small leaf underneath the rose, it’s from Creative Impressions. To the centers of the handmade flowers I added yes, a favored heart button, and a button from my Buttons Galore and More stash and used Beacon’s to glue it all down.
Supplies:
Additional Supplies

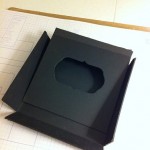
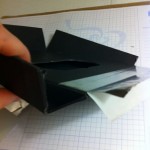
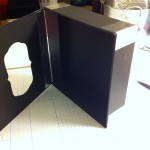
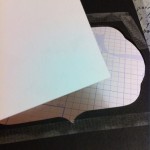
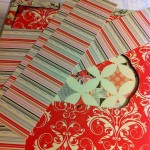
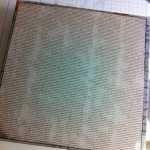
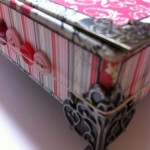
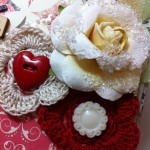
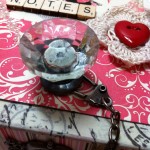
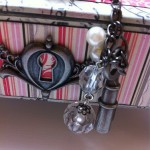
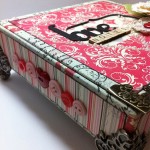
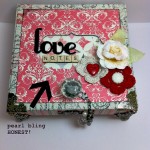
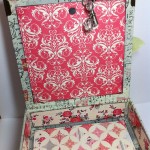
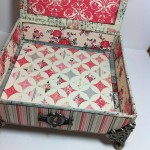
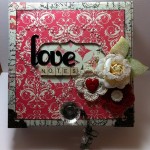
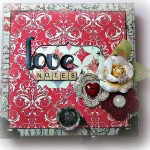

Suzi Blu in Paris
Hi, this is Allie, shivering in Minnesota, getting ready for some snow. I hope you are warm and happy wherever you are today!
I have a fun altered frame to share with you today. I started with a blank MDF frame from my local craft store.
I used the following supplies:
I decoupaged a pretty napkin onto the frame. The frame was rather dark, so I actually decoupaged a second layer on top. It is layered slightly askew, to give the frame a little more of a 3D effect. Once everything was dry, I stamped the girl and painted her. I added Ruby Slippers Stickles to her lips. Every girl loves to sparkle!
The butterflies you see above Suzi Blu and in her hair are from the napkin – they were cut and decoupaged onto cardstock and then mounted to the frame. I arranged the buttons as desired, then glued them into place.
To finish it off, I gave the girl a small bouquet.
The project was simple decoupage and paint. I am sure you have an old frame that needs a new look. Buttons are great for dressing up everything. This particular set of Vagabond buttons was the perfect assortment of colors and sizes for the project. The jar is chock full of buttons, and I still have plenty left for another project!
Thank you for stopping by.
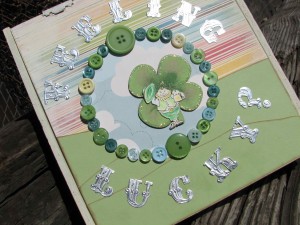
Button embellished St. Patrick's Day Keepsake box
Is the luck of the Irish with you?
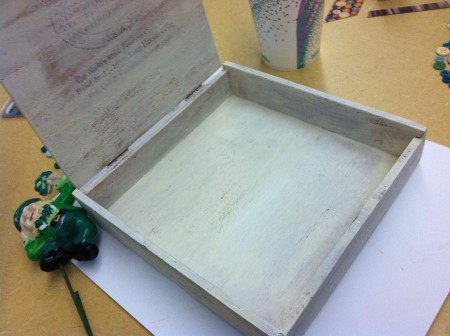
It was WITH ME, when I re-purposed this old cigar box, to become a sparkling keepsake, with a St. Patty’s Day twist…
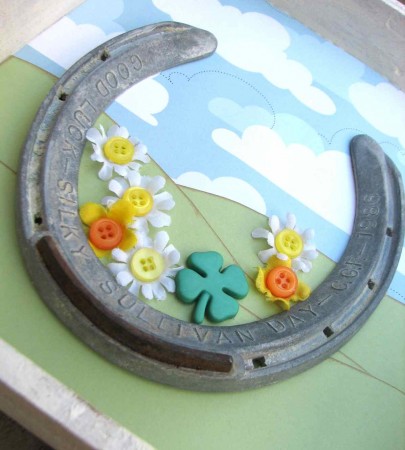
A delightful assortment of Buttons Galore & More buttons and just the right amount of good old Irish magic…
Buttons Used:
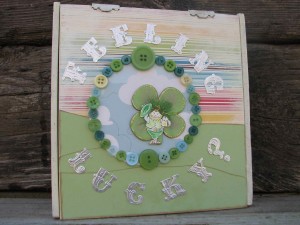
The spirits moved me to create this festive, button embellished medallion, to house a wee-leprechaun and invite contemplation of one’s sense of optimism…
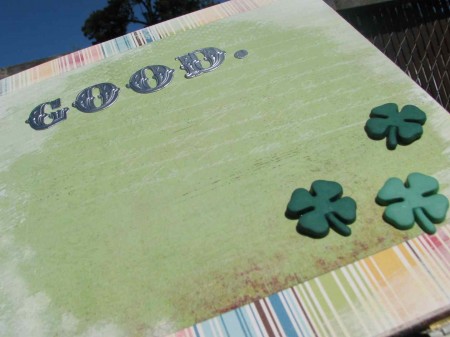
And being, ever the optimist, myself – I confirmed what EVERYONE should feel….
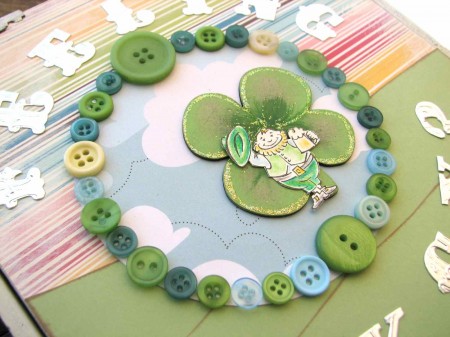
L-U-C-K-Y!
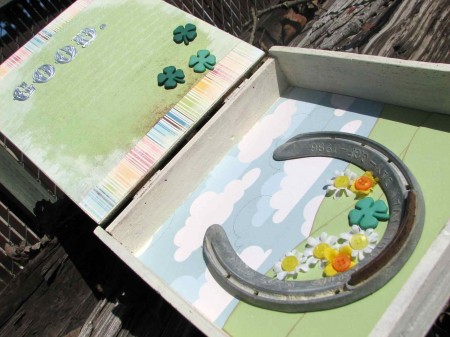
And HOPEFULLY, inspired as well!
I hope you do a little jig and get your BUTTONS on – it’s a great time for crafting with Buttons Galore & More!
Thanks for visiting!

Button embellished Wedding Keepsake
A wedding is such a blessing and a wonderful occasion. I love to add something handmade to every gift I give to the lovely Bride and Groom or on an anniversary. This keepsake acrylic wall hanging is the perfect addition to a gift or the perfect anniversary gift. It is a great way to memorialize the date of the wedding and show that you really care.
Supplies Used:
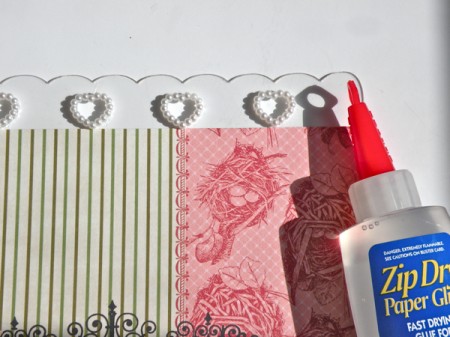
After I added paper to my acrylic base I used my Zip Dry and the Classic Hearts adhering them over each cutout.
Then using a foam pop dot I lifted up the Flat Back Heart Button adhering the Valentine’s Day Charm underneath.
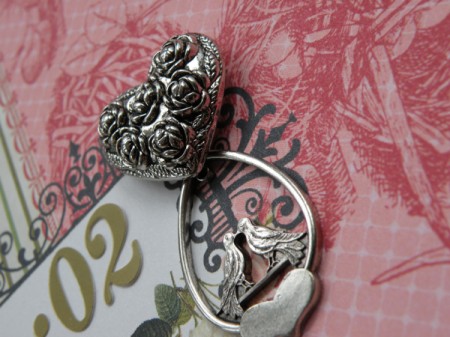
I also added the Valentine’s Charms in and around the Ribbon Rosettes I also used with my vintage ribbon stash that was from my grandmother.
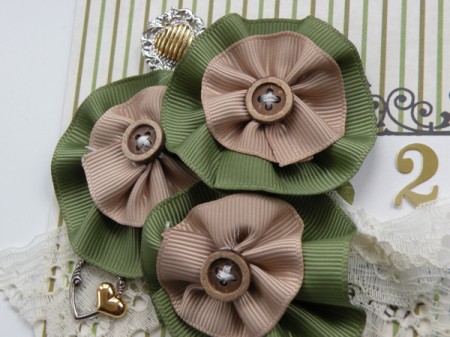
In the end this is what I came up with, it’s soft and beautiful and will last a lifetime.
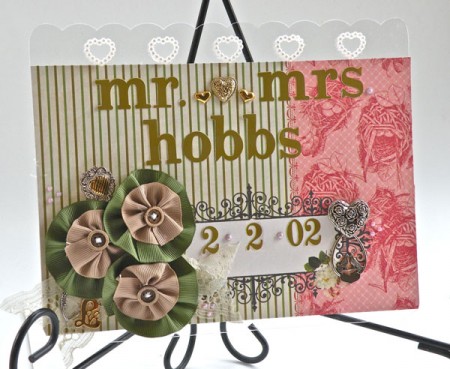
You could easily add fabric, lace or anything else you can find to make it personalized.
Thanks for coming by today ~ Pinky

Concentric Circle Button Pillow
This modern pillow was created by die cutting leather flowers and adorning the center with buttons. The finished size is 12×18”- perfect to tuck into a corner of the sofa or on a small chair.
Materials
Tools
Other Supplies
Directions
1. Cut fabric for front and back of pillow to 12.5 x 18.5. Die cut leather flowers 18 times. Add a dab of glue to secure layers. Sew button into center.
4. Place wrong side of fabric together. Secure with straight pins. Sew closed with a sewing machine leaving an opening large enough to fill interior with batting. Turn pillow right side out and fill cavity with batting.
5. Sew the opening closed with either a machine stitch or by hand.
by Niki Meiners www.365daysofcrafts.com

Our Design Team Member Laura Bray needed a little inspiration for using up some gold and silver buttons from our Gold and Silver Grab Bag … so she grabbed a can of spray paint and created some adorable wall art. You can read all about how she did it in her blog post Button Decor.
I think that one or two buttons in a small frame would be an excellent idea for an ornament too, don’t you?

Recently one of our Facebook fans posted a photo on the wall of a finished project. I thought it was so cool I just HAD to share!
Notice the mirrors rescued from the trash in the above photo?

And see what they are becoming here?
You’ve got to go visit Notions and Devotions to see more!
Do you have a project that uses Buttons Galore and More buttons that you like to share with other button crafters? Maybe a blog project you’d like me to link to and share with our community? Be sure to head over to the Facebook page and share your photo!!
P.S. Our welcome page on facebook always has exclusive content just for our friends! :)
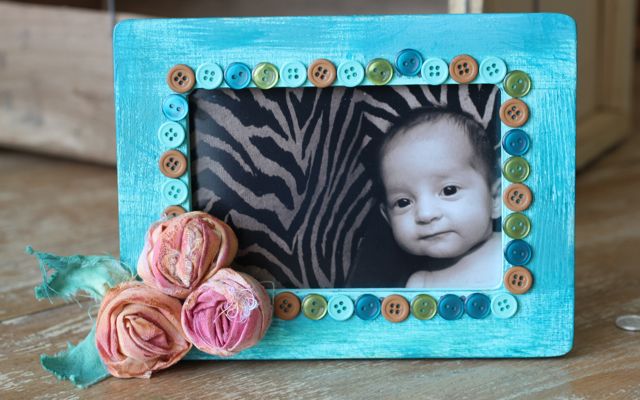
Button and rosette frame by Niki Meiners
Looking for a holiday gift or a for a fun decoration? Why not make a frame embellished with buttons and rosettes? I love the blank wood frames from Michael’s. I usually purchase a dozen or so when they go on sale for $1. They are great, low cost homemade gifts. To make this project:
Tools and Materials:
Blank wood frame, paint brushes, 3 colors of paint ( similar colors work best), glue, floral decoration and buttons green, waterfall, and bittersweet.
Directions:
Paint wood frame with paint color of choice. Dry brush on other colors. Glue on rosettes and buttons as shown.
Toodles,
Niki

I’ve been recording a new video about once a month featuring my favorite crafts made with buttons.
This is last months’ video.
Why is it a month old?
Well, that’s because I keep the video and share it EXCLUSIVELY with our facebook friends first.
When you get to our facebook page, and you haven’t liked us yet, you’ll see the Landing Page where I have a link to the video.
So, what are you waiting for? Go like us and see THIS MONTHS video FIRST!
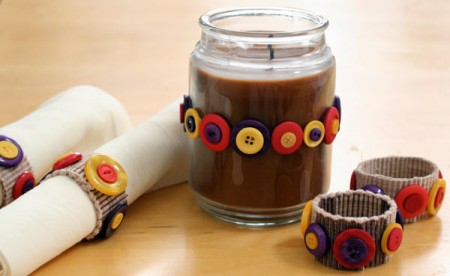
Autumn button napkin rings and candle by Jen Goode
Buttons are such a great embellishment for your table settings. Grab yourself a bag of Autumn colored buttons and make a center piece and some festive napkin rings and let the family gatherings begin! I made this set of 4 button napkin rings and embellished a glass candle holder with the same button set.
Materials you need:
How to make fall button napkin rings:
To embellish the candle jar, simply use the craft glue and place buttons as desired. Hold the jar sidewise for a few minutes to prevent the buttons from slipping before the glue has a chance to dry.

Autumn button napkin ring detail Jen Goode
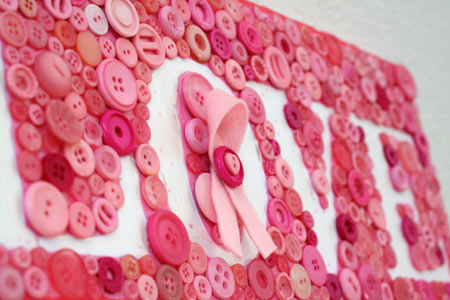
Pink Ribbon Button Art Love Plaque by Jen Goode
I have been loving all of the button collage and plaque art I’ve seen lately so I decided I wanted to try to make one myself. The pink ribbon push in October is very important to me and my family, so I thought this would be a great direction to go with my project this month. I’m not a pink girl, but for support and family love, I will surround myself in it proudly!
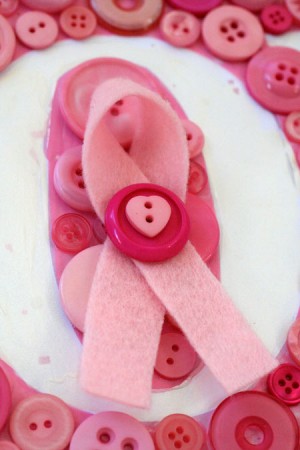
Pink Ribbon Button Art Love Plaque by Jen Goode
Supplies:

Pink button assortment of Button Bonanza packs
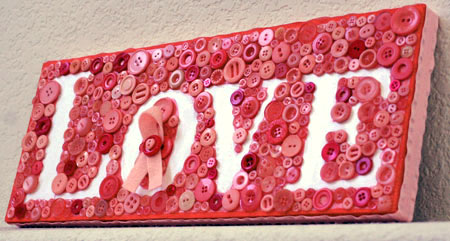
Pink Ribbon Button Art Love Plaque by Jen Goode
How to make your own Pink Ribbon Love Plaque:
Now let me start by saying, I was in a hurry to get started on this piece so I put mine together a little differently than I would recommend. I made my piece on foam core that I then glued to a piece of wood. However, I recommend you just use a base of wood and skip the foam core all together. Mine works fine, but it’s an unnecessary layer. So let’s get started!
Either print out words on your computer using white letters on a pink printed background, or hand draw letters on to your board.If you print your word, adhere the printed paper to the board using glue or Mod Podge that you brush on for full coverage as if you were decoupaging the paper in place.
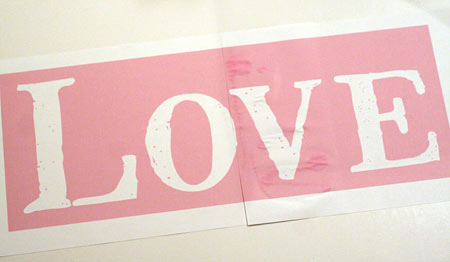
print your word out and glue to your board
Glue buttons on the negative space of the board, meaning the area around the letters. I brushed the glue on for more coverage and less globbing of the glue.
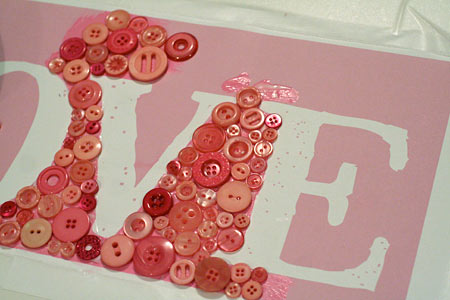
Glue buttons on to the negative space of the art
Finish the edges of the board with paint and glue on the ribbon.
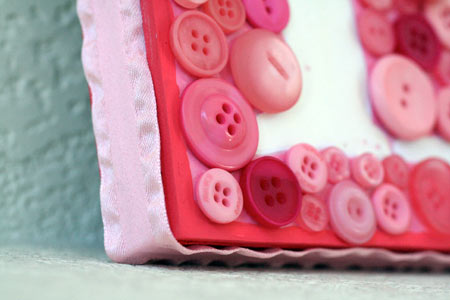
Finish edges with paint and ribbon
You could optionally add eye screws to the top of the board and a ribbon so you could hang your plaque. I chose to set mine on the mantel.
Finally, make a pink ribbon and adhere it in the center of the O. I used a small piece of pink felt to make my ribbon and then added two pink buttons in the center.
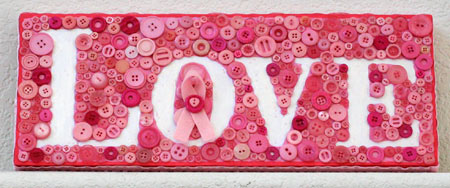
Pink Ribbon button art by Jen Goode

Button Monograms are all over the interwebs these days but I must say that this is one of my favorites! Please visit the Spellbinders blog to see how to make one of your own.

Fall Button Pillow from Make It and Love It
I thought this was a lovely decorative pillow and I just had to share it with you. I love the graphic quality and the colors. Don’t you? PLUS this could be switched up for any decor colors or holiday season. I love versatile crafts!
You can find the tutorial – that includes making the pillow – over on the blog Make It and Love It – Fall Button Pillow
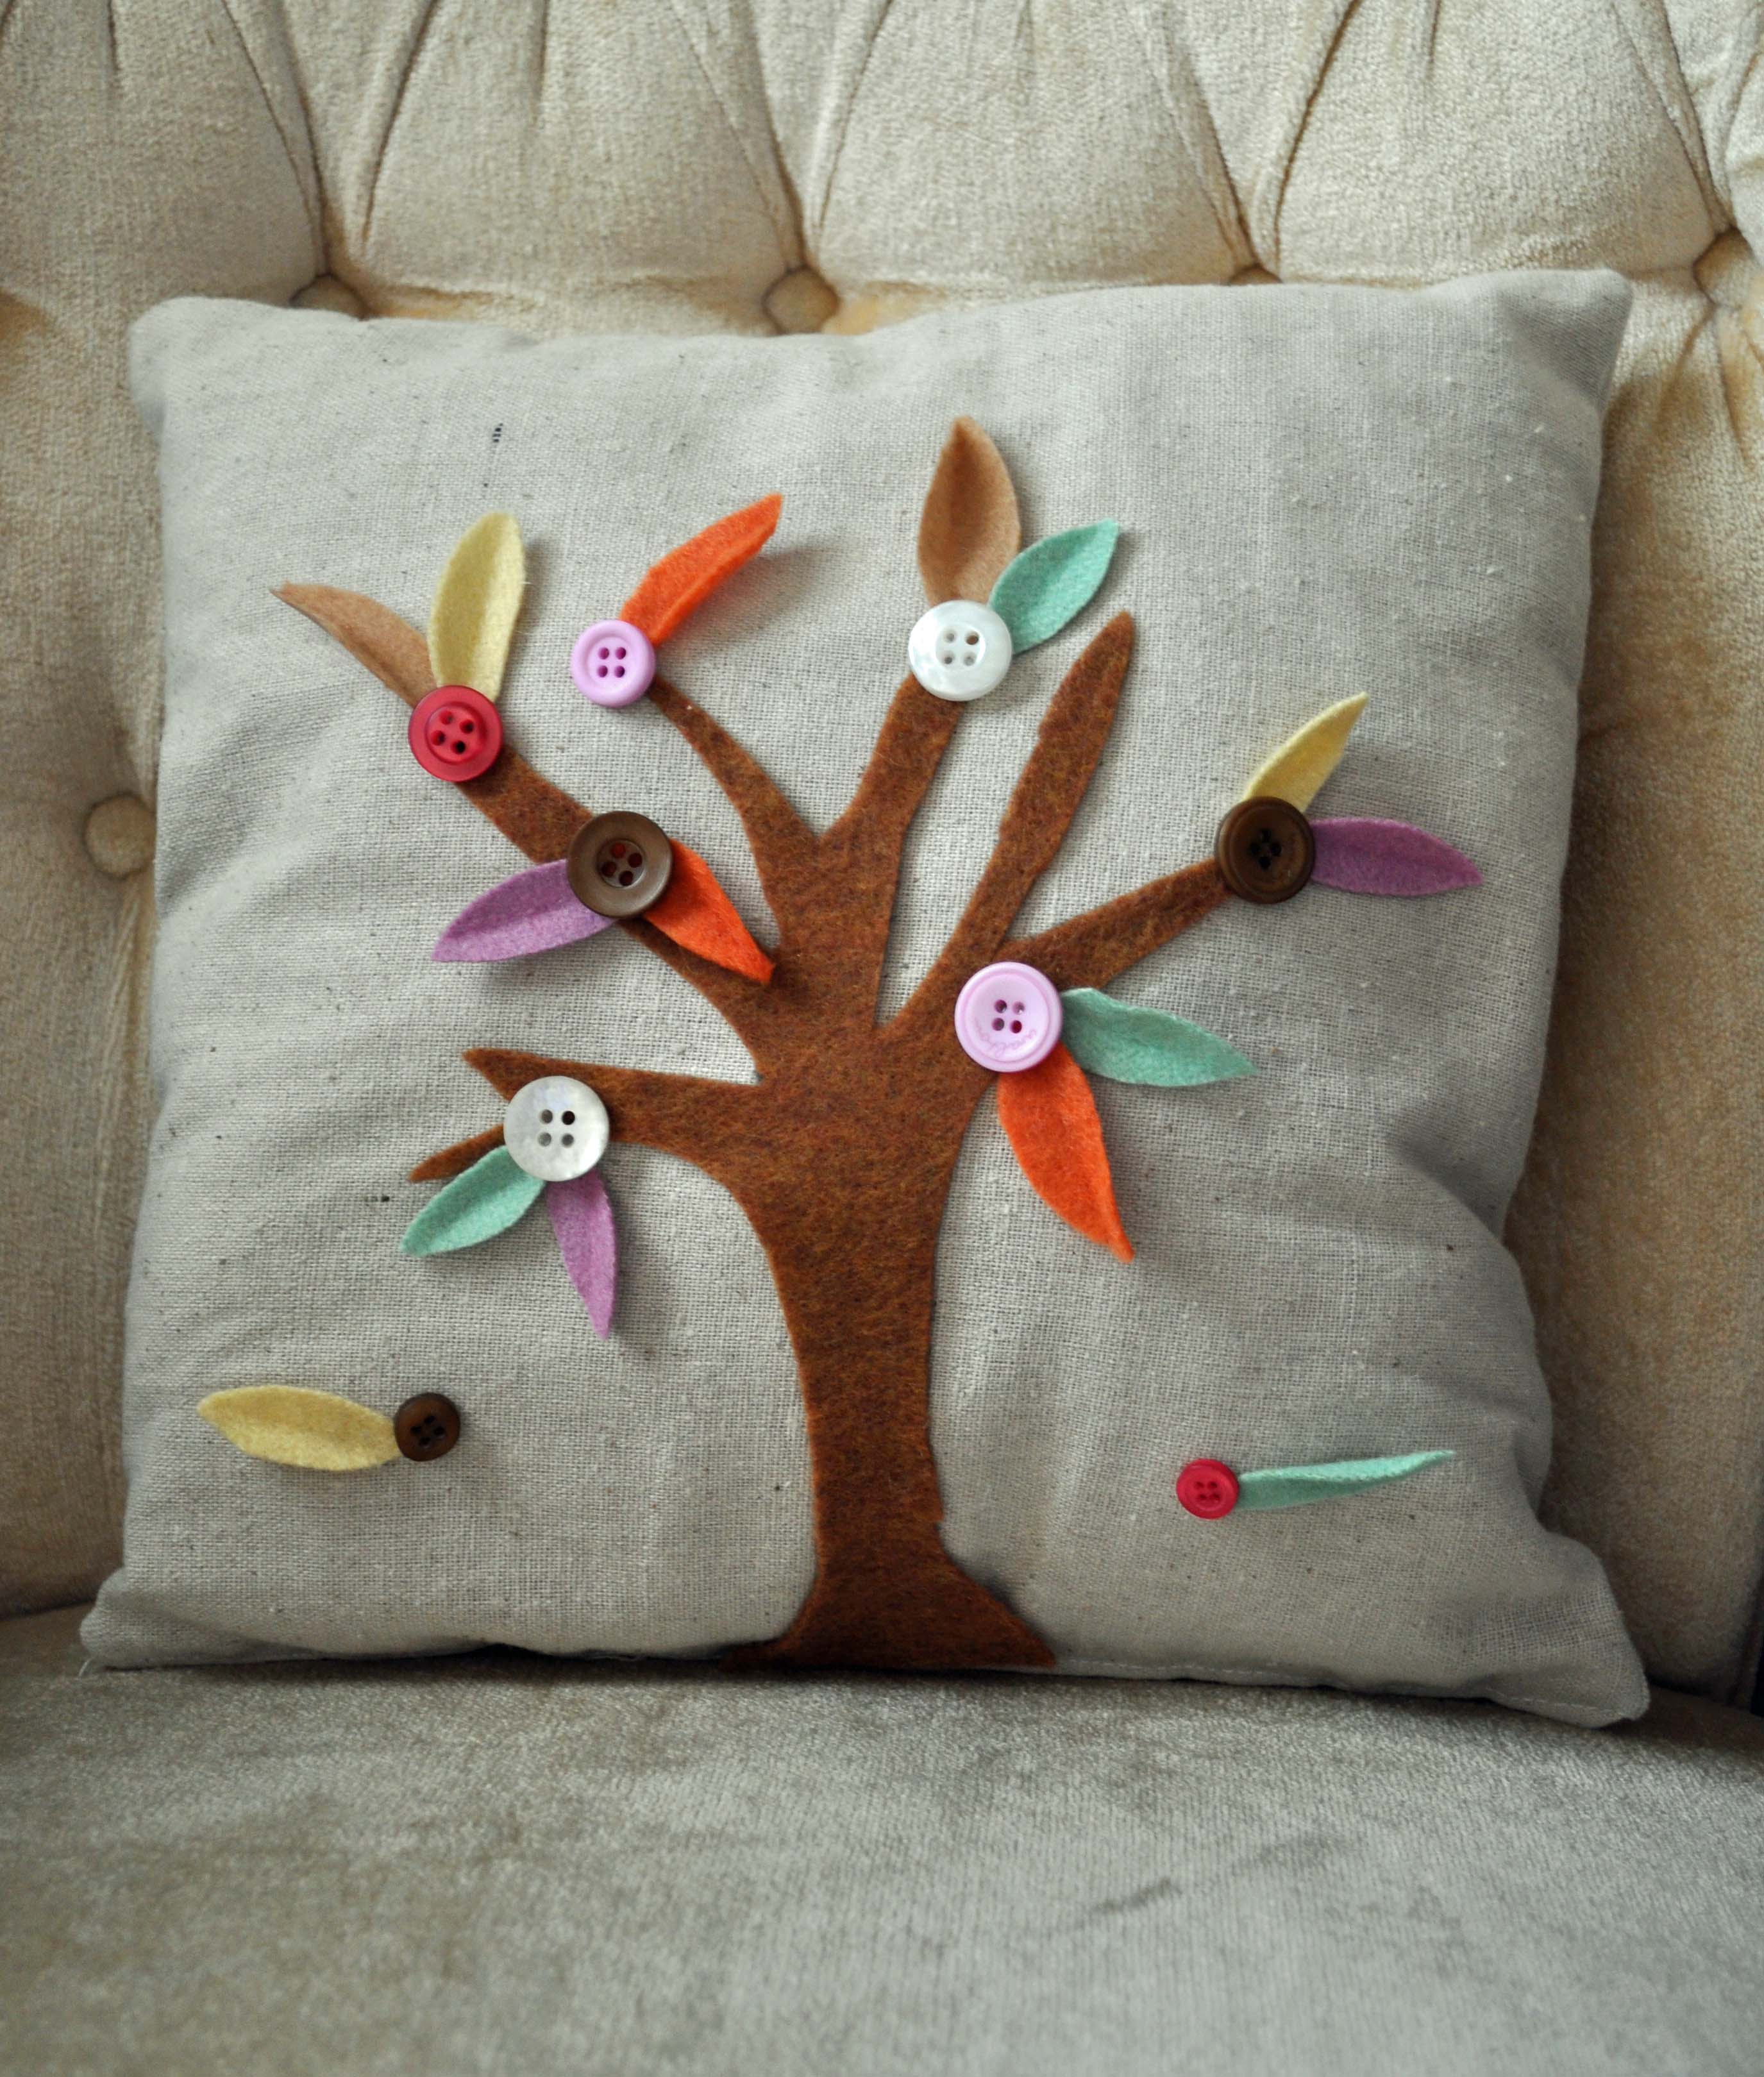
I can hardly believe summer is already winding down! Fall will be here before you know it. The best way to change a room’s decor for the change in seasons is pillows. They are fast and easy to make (or buy) and, with neutral furniture, can add interest and color to your room. Plus you can change them on a whim!
I live in Southern California, so I don’t get to see the trees go into their full Fall beauty. I designed this pillow to bring a little change of season into our lives.
Fall Tree Pillow
Supplies:
Instructions:
From the brown felt, cut out a silhouette of a bare tree. To get my tree shape, I just did an online image search, cut out a tree shape I liked, and then traced it onto the felt.
Cut leave shapes (simple ovals with pointed ends) out of the colored felt scraps. Vary the sizes.
TIP: Once the leaf shape is cut out, fold it in half and press it with a hot iron. (Be careful because they are very small pieces and the iron is HOT!) This gives your leaves a dimensional look that really makes your pillow pop.

Using Fabri-Tac, attach the tree silhouette to your pillow. Glue leaves onto the branches and around the base of the tree.
Glue buttons onto the tree branches and scattered amongst the leaves on the ground.

This is a very peaceful and beautiful bit of mixed media art from our own Design Team member Niki Meiners. Handmade home decor. You can’t go wrong with that!
You can read more about it on 365 Days of Crafts.
And here are some supplies to get you started:
“Spring Green” Button Bonanza Bag
“Emerald Green” ToHo Seed Beads
“Natural Mix” Bulk Buttons for the trunk if you’d like

I’m loving this adorable button art from Mod Podge Rocks. Leave it to Amy to find a simple way to add a whole lot of color! Please visit Mod Podge Rocks to see how it’s done.
And here are some recommended supplies:

Super cute framed flower art from the designers at Spellbinders. Go here to see how it’s done.

Buttons and Embroidery Line Work
Isn’t this gorgeous!?!? I love the simplicity and the colors and it could easily be made to match any decor or for any holiday season too!
Be sure to visit Doe C Doe for complete instructions and you’ll find our “Shades of Red” Button Bonanza in our store so that you can make one like this for yourself!
It may be a little early to start thinking of fall leaves… but maybe not.
Last week I introduced you to Start Ups here and I made an easy “metal” piece to put on all sorts of Mixed Media or Scrapbooking projects.

This week I used the Start Up Leaves and my trusty collection of Ranger Alcohol Inks to create multi-colored fall leaves.

The colors I used were Oregano, Butterscotch and Red Pepper.
Oh, the possibilities!
What would YOU use Start Up Leaves on?
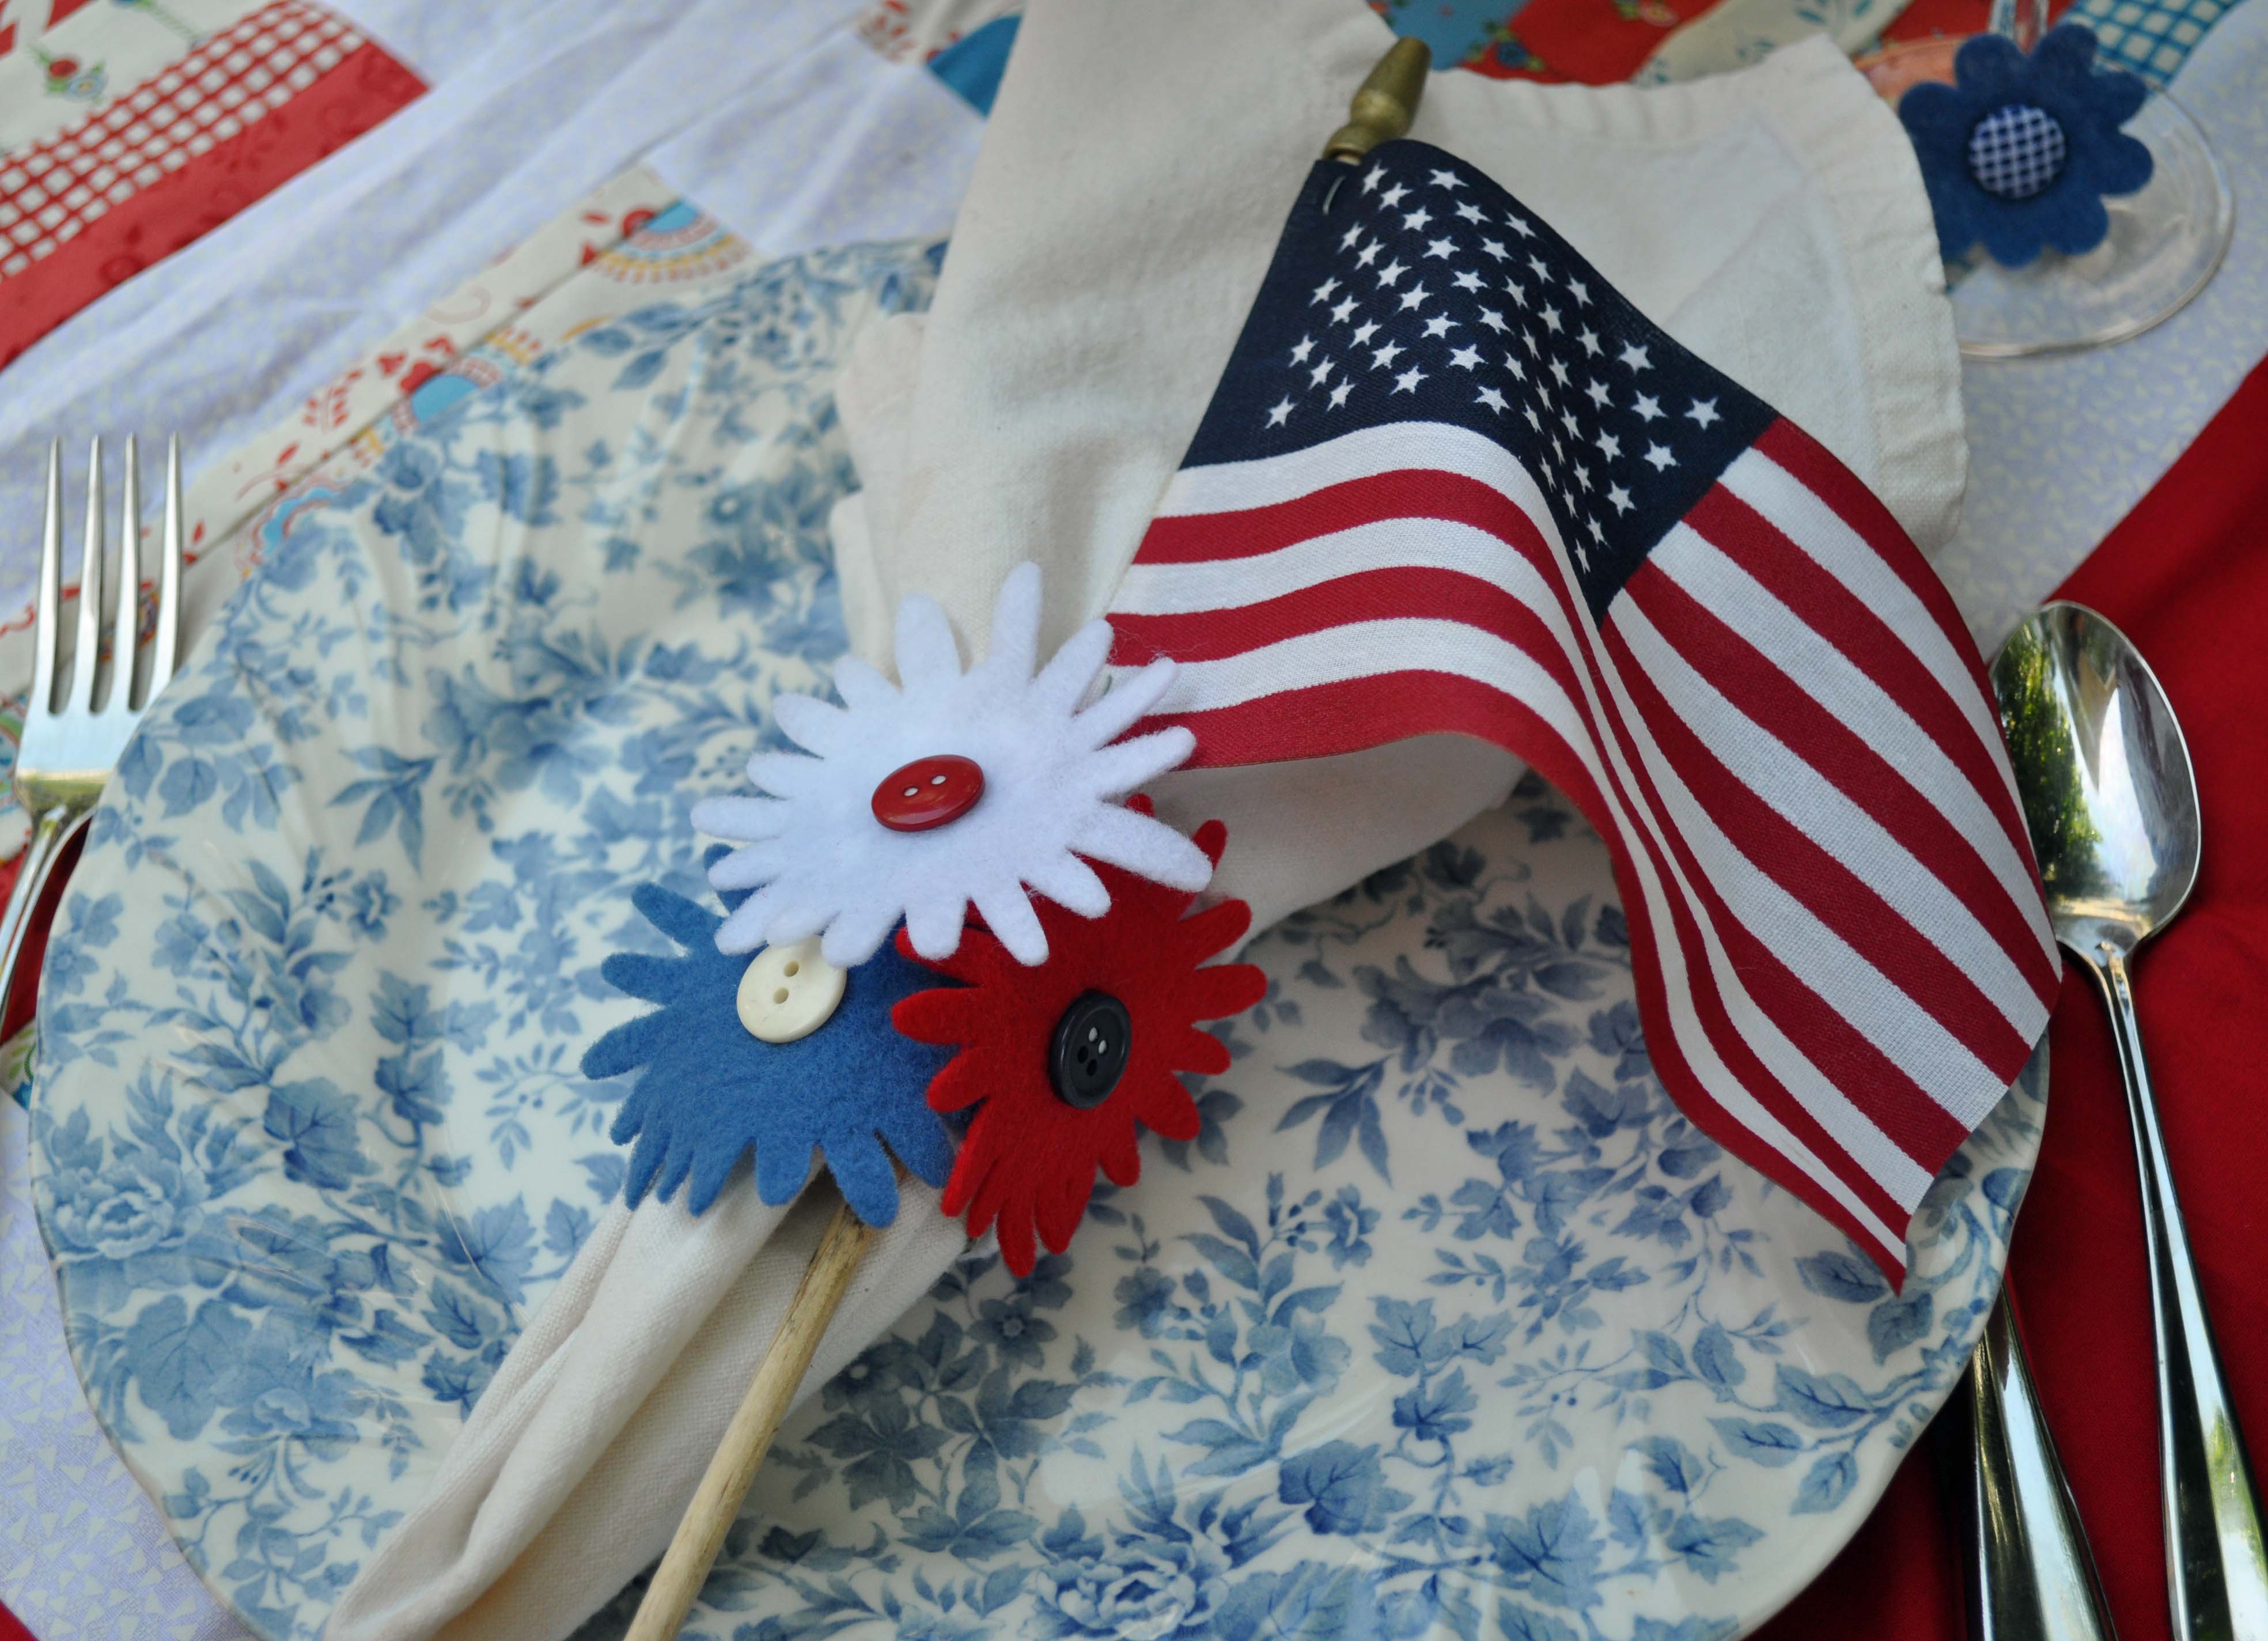
Happy Fourth of July to all our U.S. readers! Today, I thought I would share a cute tutorial for festive napkin rings. They are so easy you can probably whip-up a set for this afternoon’s BBQ!
Supplies:
Instructions:
Now, slip a napkin and maybe a little flag into the ring and you’ve got a party!
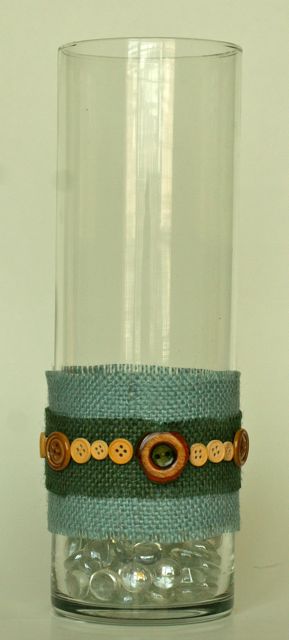
Country Chic
Burlap has been one of my “old favorites” and I am so pleased that it is back en vogue in the crafting world. To create this chic candle holder I used a glass container that I purchased from the dollar store.

Button Detail
Tools:
Scissors, Embossing stylus
Materials:
Wood buttons, Blue and green burlap, Beacon Adhesive Fabri-Tac, Rusted Heart, Bo-Bunny Rub ons, glass marbles and a candle.
Directions:
Cut blue burlap into a 3×9 strip and fray edges. Cut green burlap into a 2×9 strip and fray edges. Adhere strips to container. Adhere buttons randomly around the center.
For a variation add rub-ons to rusted metal heart. Trim heart with the tiniest buttons. Add butterfly rub on to glass exterior.
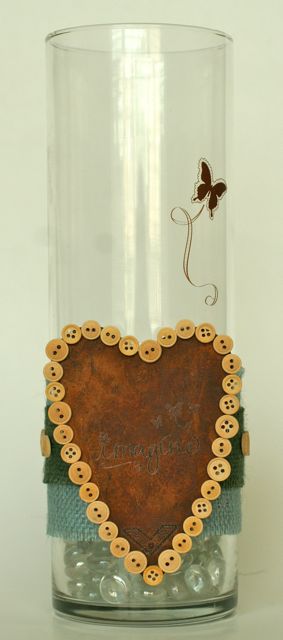
Country Chic - Variation
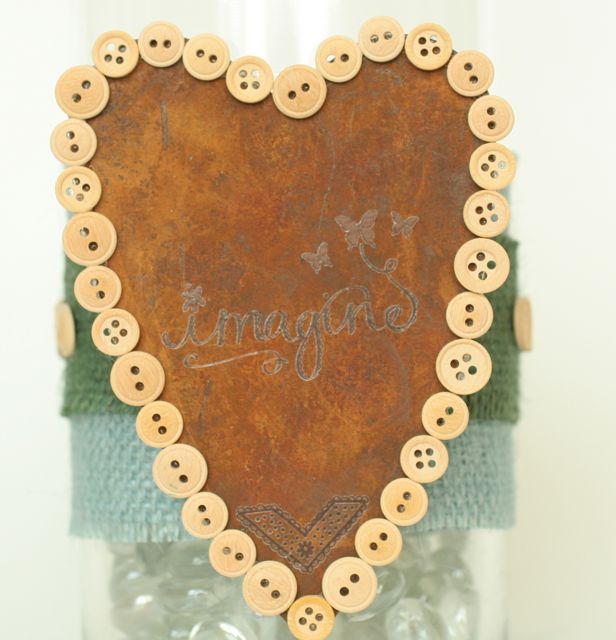
Rusted Heart Details
I hope you have enjoyed this country chic candle container.
Toodles, Niki

Drink Charms by Laura Bray
This is a fun new twist on drink charms for parties AND the charms double as a charming party favor as well.
You can read all about how to make these lovely drink charms on Design Team member Laura Bray’s Blog post here.
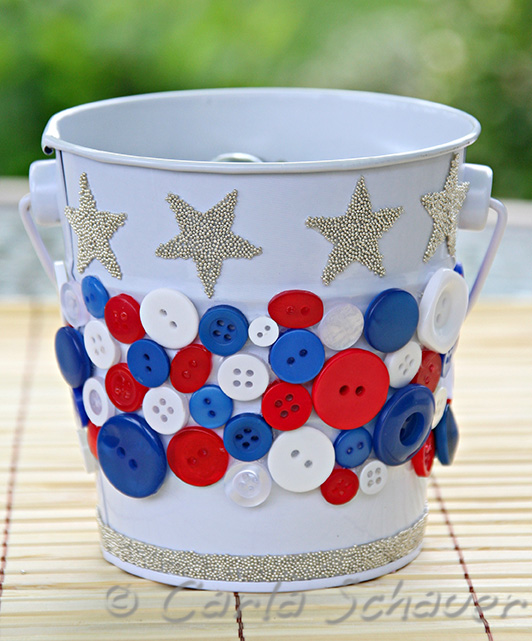
The 4th of July weekend is the perfect reason for a celebration barbeque in the backyard. Use these $1 white metal buckets and Button Bonanza All American Mix by Buttons Galore & More to make patriotic décor perfect for the party!

Design Team member Vicki O’Dell has a (nearly) weekly blog post about her thrifting finds and the projects she makes with them. This fun and funky suncatcher from a vintage Jell-o mold is a perfect example of the fun crafts you’ll find on vickiodell.com.
Of course it’s embellished with buttons from Buttons Galore and More … a Button Bonanza in Purple Passion to be precise.
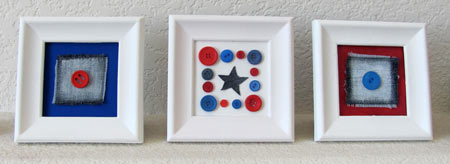
Patriotic mini art frames by Jen Goode
There are so many great ways to create extra decor pieces for July 4th and other patriotic holidays. Add a little extra fun to your home with buttons in red, white and blue to show off your American spirit. This 3 piece button art requires only a few supplies and is fairly quick and easy to create. I used many recycled pieces and scraps including buttons from a grab bag button pack which added to the variations of sizes and colors I had available.
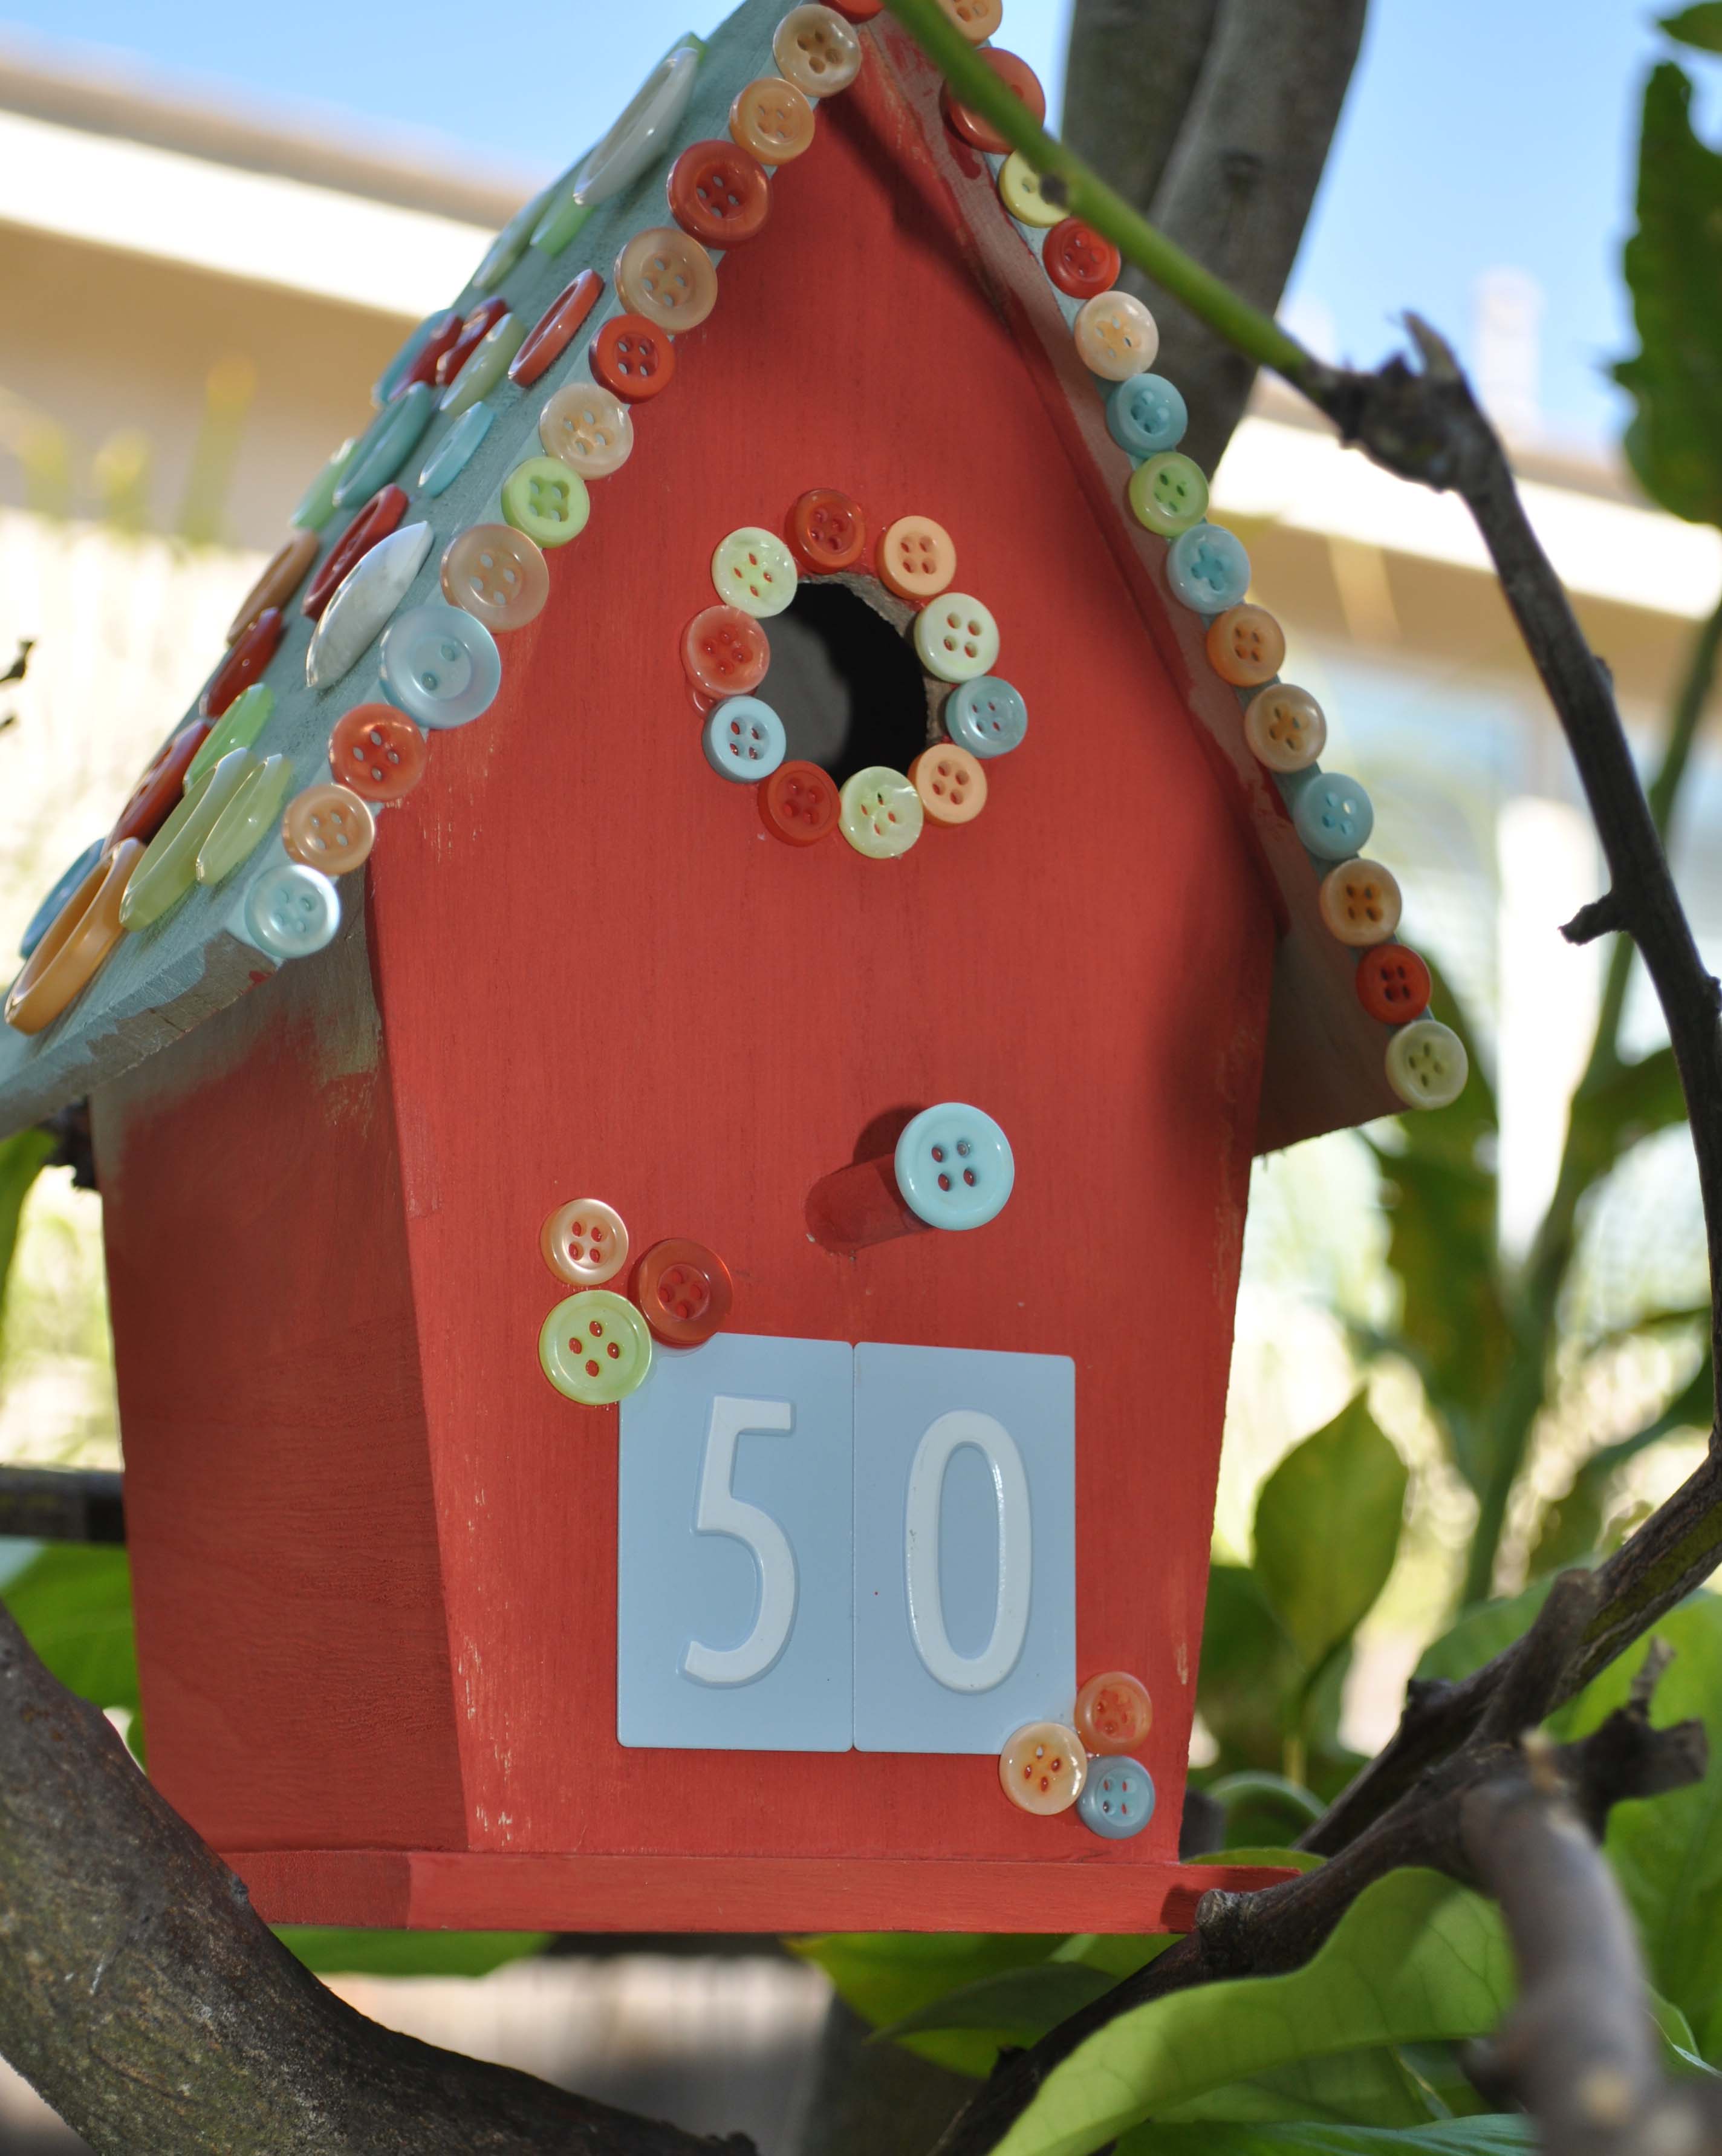
This is a quick and easy project to do with your children, but you could also do a few for yourself too. Match the button colors to your decor and you’ll have a striking piece of art for your home.

I don’t know about your house but in my house we have FOUR young people. They are VERY BUSY young people and each one has a bulletin board. They are a super easy way to communicate within such a busy family. (Besides text messaging that they tend to read and then forget) A note on a bulletin board is a little harder to forget. It stays there, quietly reminding, until the event or reason for the note has passed.
Anyway, why have a boring bulletin board when you can have one that fits your decor, your personality or your hobbies?

This bulletin board uses a cork tile, a bandanna and a 12×12 frame along with a few other supplies.

Cover the cork tile in Mod Podge.

And then smooth the bandanna over the Mod Podge and let dry.
Here is a tip: Before spreading any Mod Podge decide which portion of the bandanna design you want to see on your bulletin board. Don’t cut it all out ahead of time. Just figure out where you want to place the bandanna. (Cutting out the fabric ahead of time makes it too hard to line up.)

While the Mod Podge is drying you can make your thumb tacks or push pins. I simply hot glued white buttons to a flat topped thumb tack. Be careful of that hot glue! You could also use Amazing Goop or a cool temp glue gun a well. Poke the tacks into a piece of corrugated cardboard or foam core while they are drying to keep them upright.

My button push pins.
After the Mod Podge is dry cut away the excess fabric and insert it into the 12×12 frame.

Now you can embellish to your little hearts’ content. I used hot fix rhinestones in two sizes, Thickers alphabet stickers and the heads from 4 “silk” daisies.

Isn’t this fun? Girlie but not too girlie. Country but not too country.
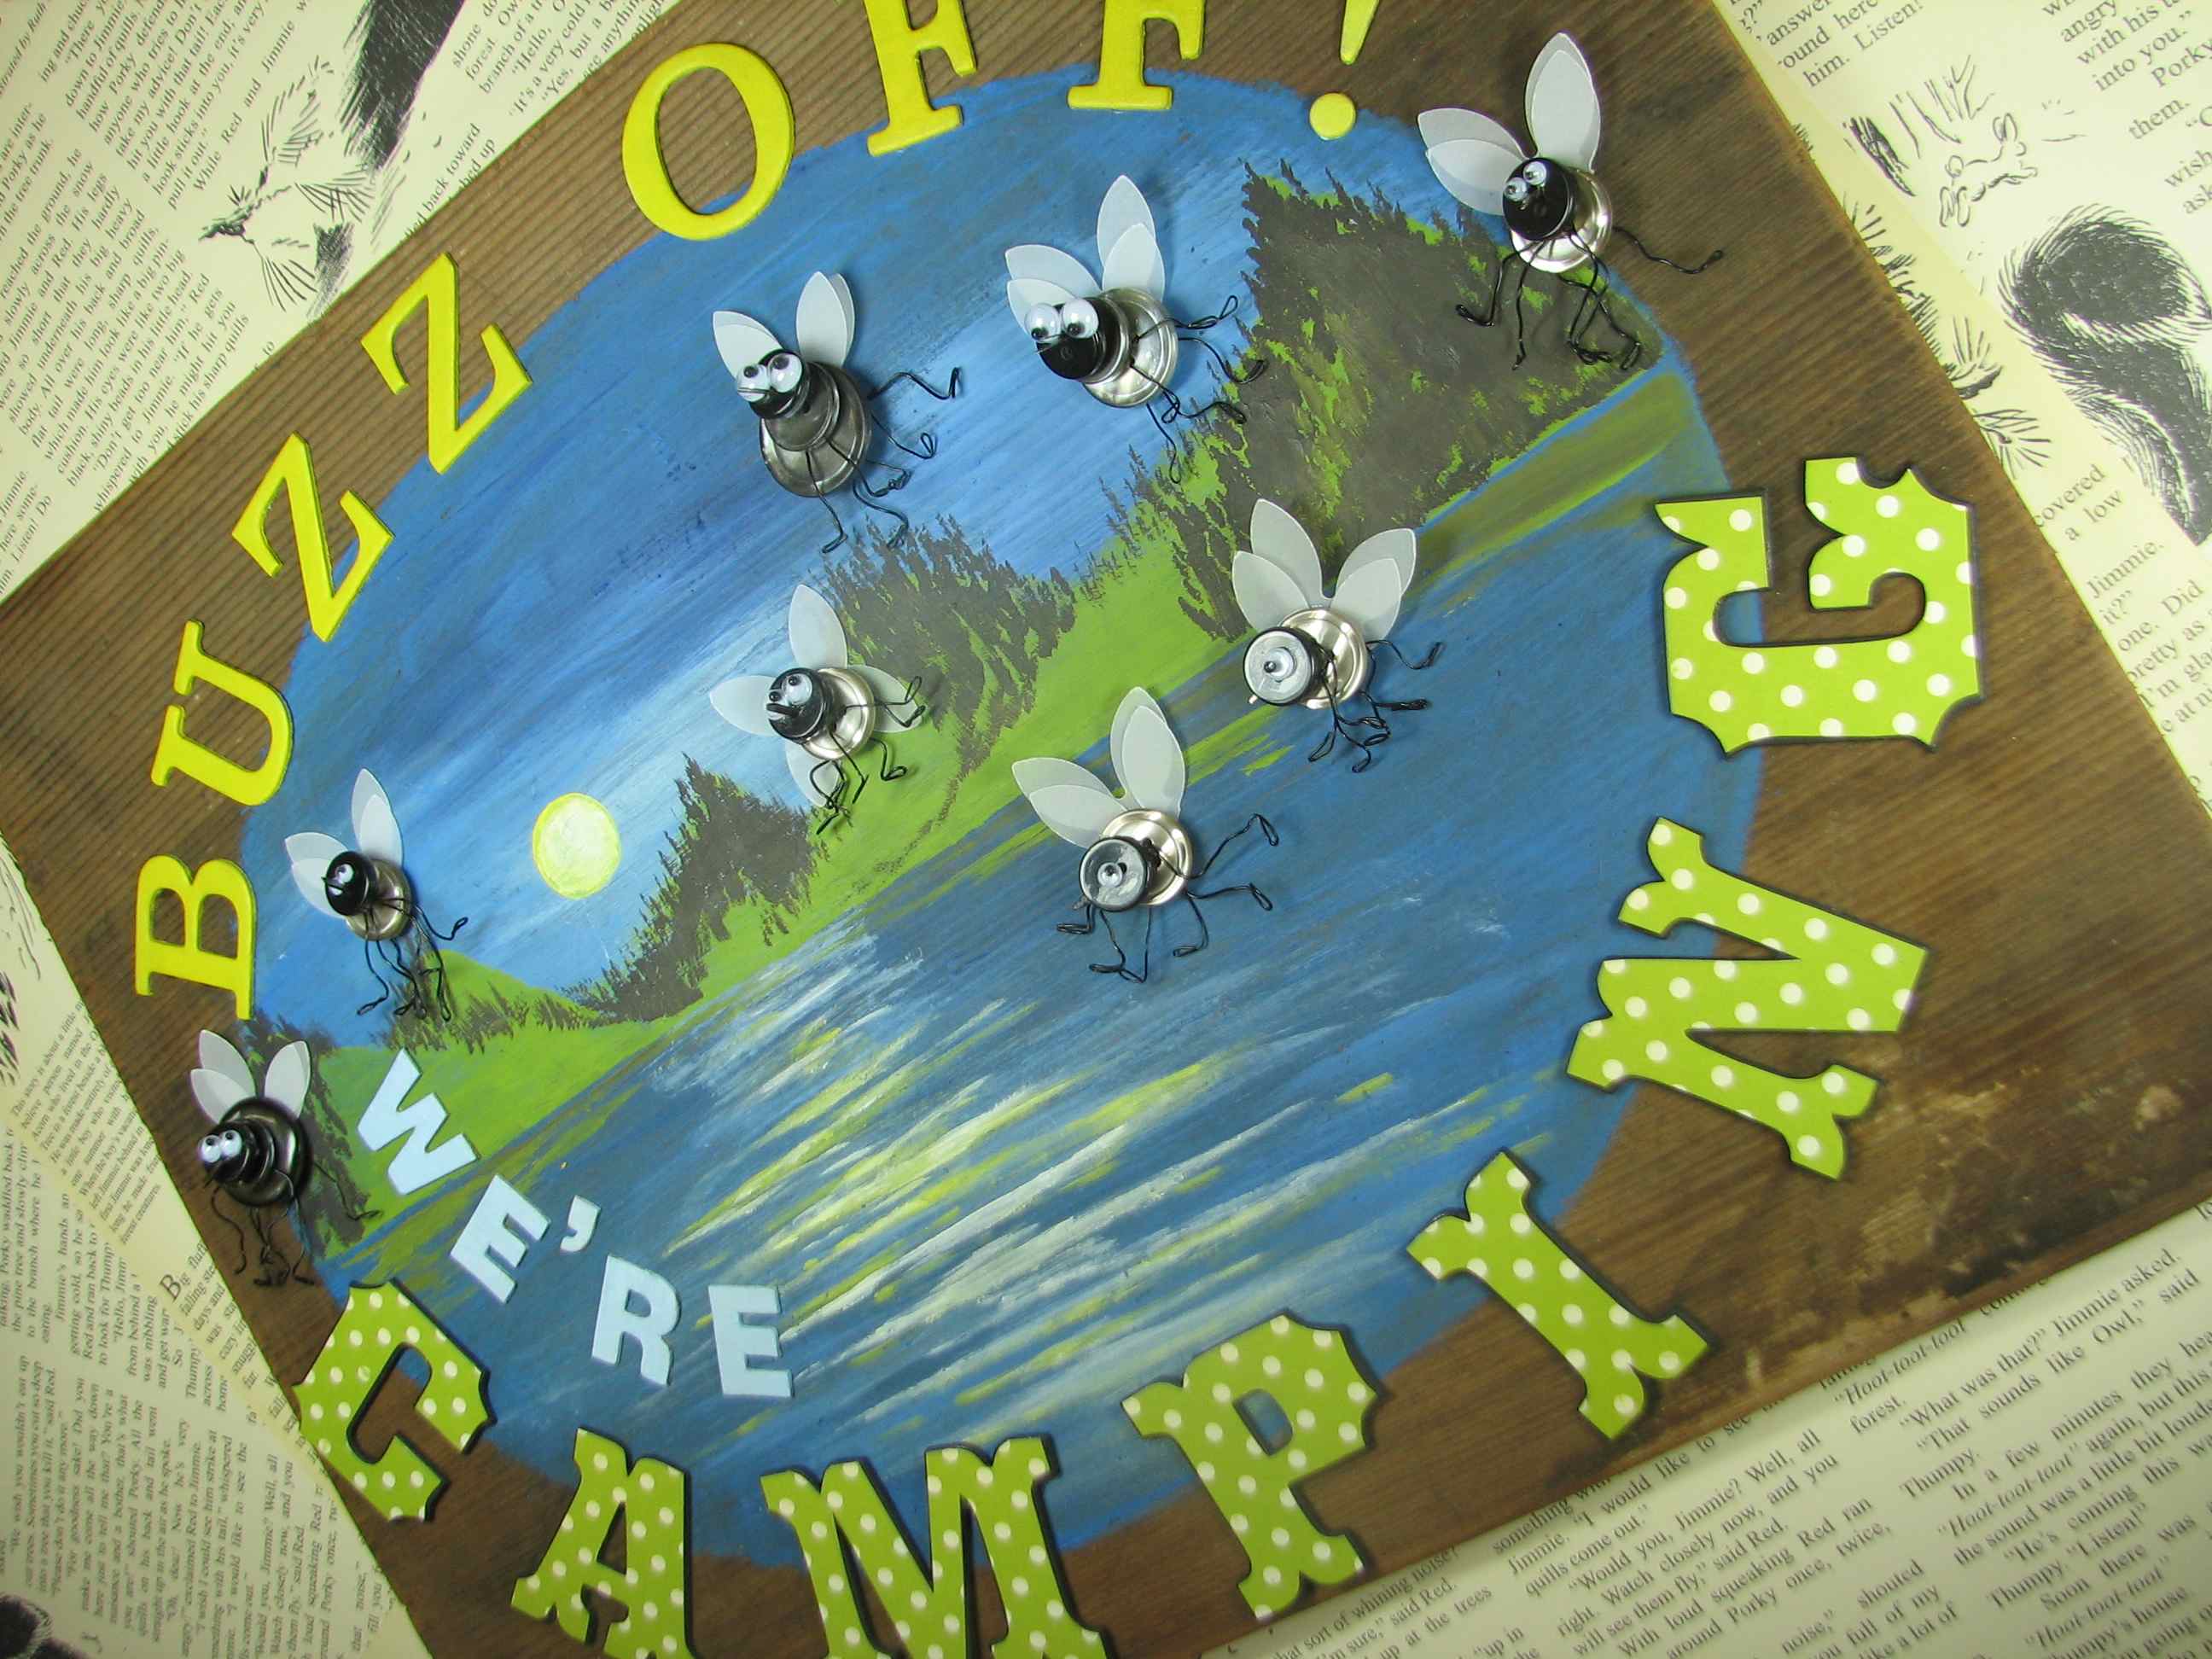
It’s the season when our plans shift to wide open spaces and the great outdoors! I just love CAMPING! Pack up the kids, the tents, chairs, granola bars… Camera, inner tube and….
The BUG spray!

Here’s a special gift for Dad- a handmade frame with a photo of someone who loves him!

These quick and easy Button Bugs are a great solution to the “Mom, I’m bored” statement that we hear all Summer long.
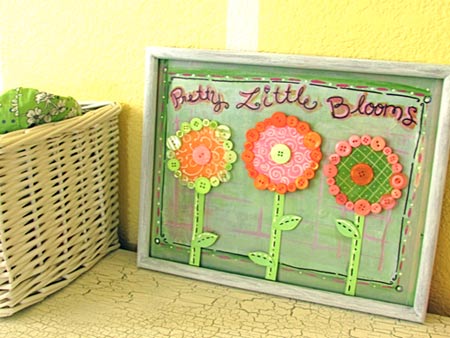
This project can be made using a variety of recycled materials combined with your favorite pretty buttons. Add a touch of color to your decor for a flower garden inspiration all year long. I created this project to accent pieces in my daughter’s bedroom, but you can adapt it to fit where ever you’d like some “pretty little blooms”.
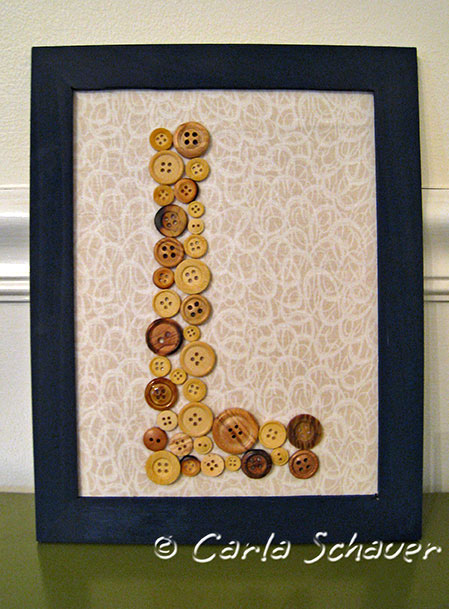
Add texture and detail to a simple framed monogram using a variety of wood buttons from the Haberdashery collection. These buttons are a gorgeous mix of natural wood colors, and I couldn’t resist showcasing them in a project that let their beauty take center stage.
In order to play up the texture of the wood, I covered chipboard with neutral fabric to create a background that didn’t compete with the wood buttons. The buttons were then arranged to make the monogram, and glued into place using fabric adhesive (Beacon Fabri-Tac). A simple inexpensive Ikea wood frame painted navy gives just enough color to draw the eye to the project.
On a wall or on a table, this monogram is a great way to easily personalize a room.
Thanks for stopping by!

I’m madly in love with these pillows!! I’m a big fan of COLOR and I just LOVE that strip of BUTTONS down the right side of each pillow.
Even if you aren’t the kind of person who likes bright colors there might be something here for you. I can see these made in more neutral shades looking just as wonderful. Actually, I can imagine them for several different seasons as well. Can’t you?
Perfect for clearing out your stash of fabrics too!
If you’d like to learn how to make these for yourself please head on over to Carla Schauer Designs.
And you’ll land amongst the stars!

This time of year, many fine folks are spreading their wings and moving up in the world. This project goes out to all of the graduates out there, large and SMALL!
Here’s a hybrid home dec/scrapbook memorabilia collection to get your buttons sparkling for attention – check out my quickie forgotten fine art canvas makeover!

Old canvas was stripped from this frame. The frame was then painted with acrylic paint.
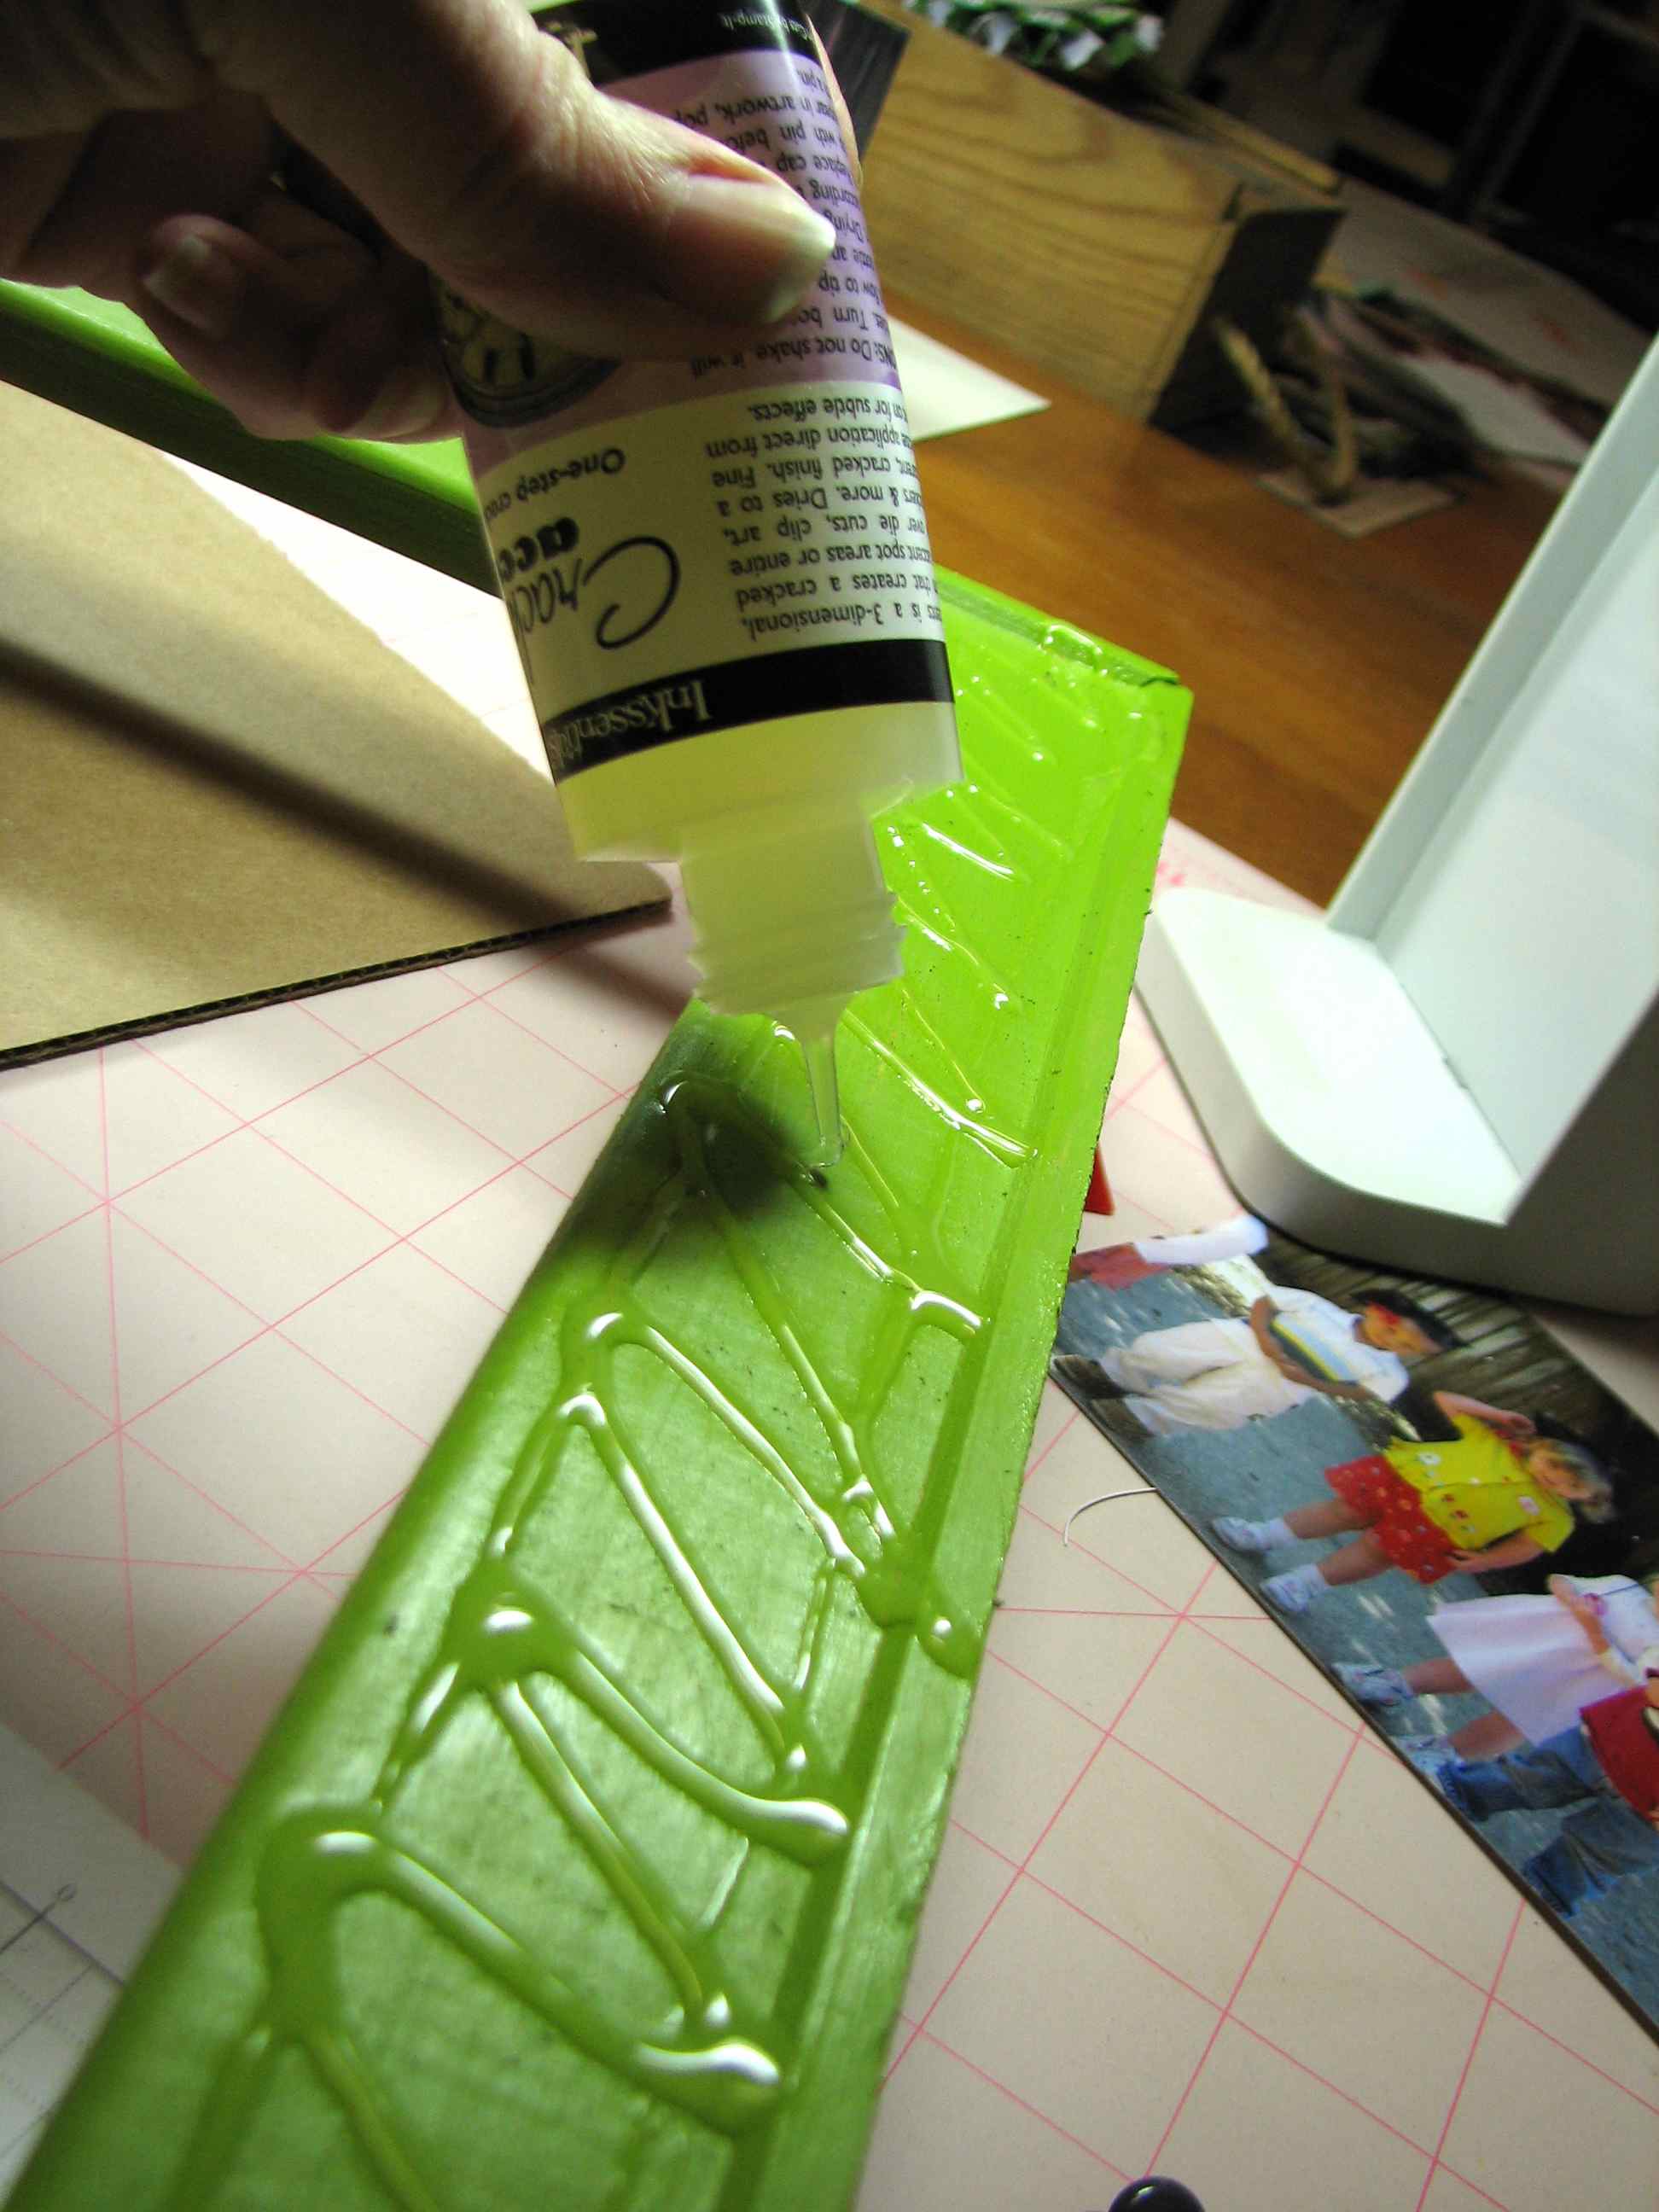
Once dry, crackle medium was applied and spread, generously. Let dry, at least until tacky.
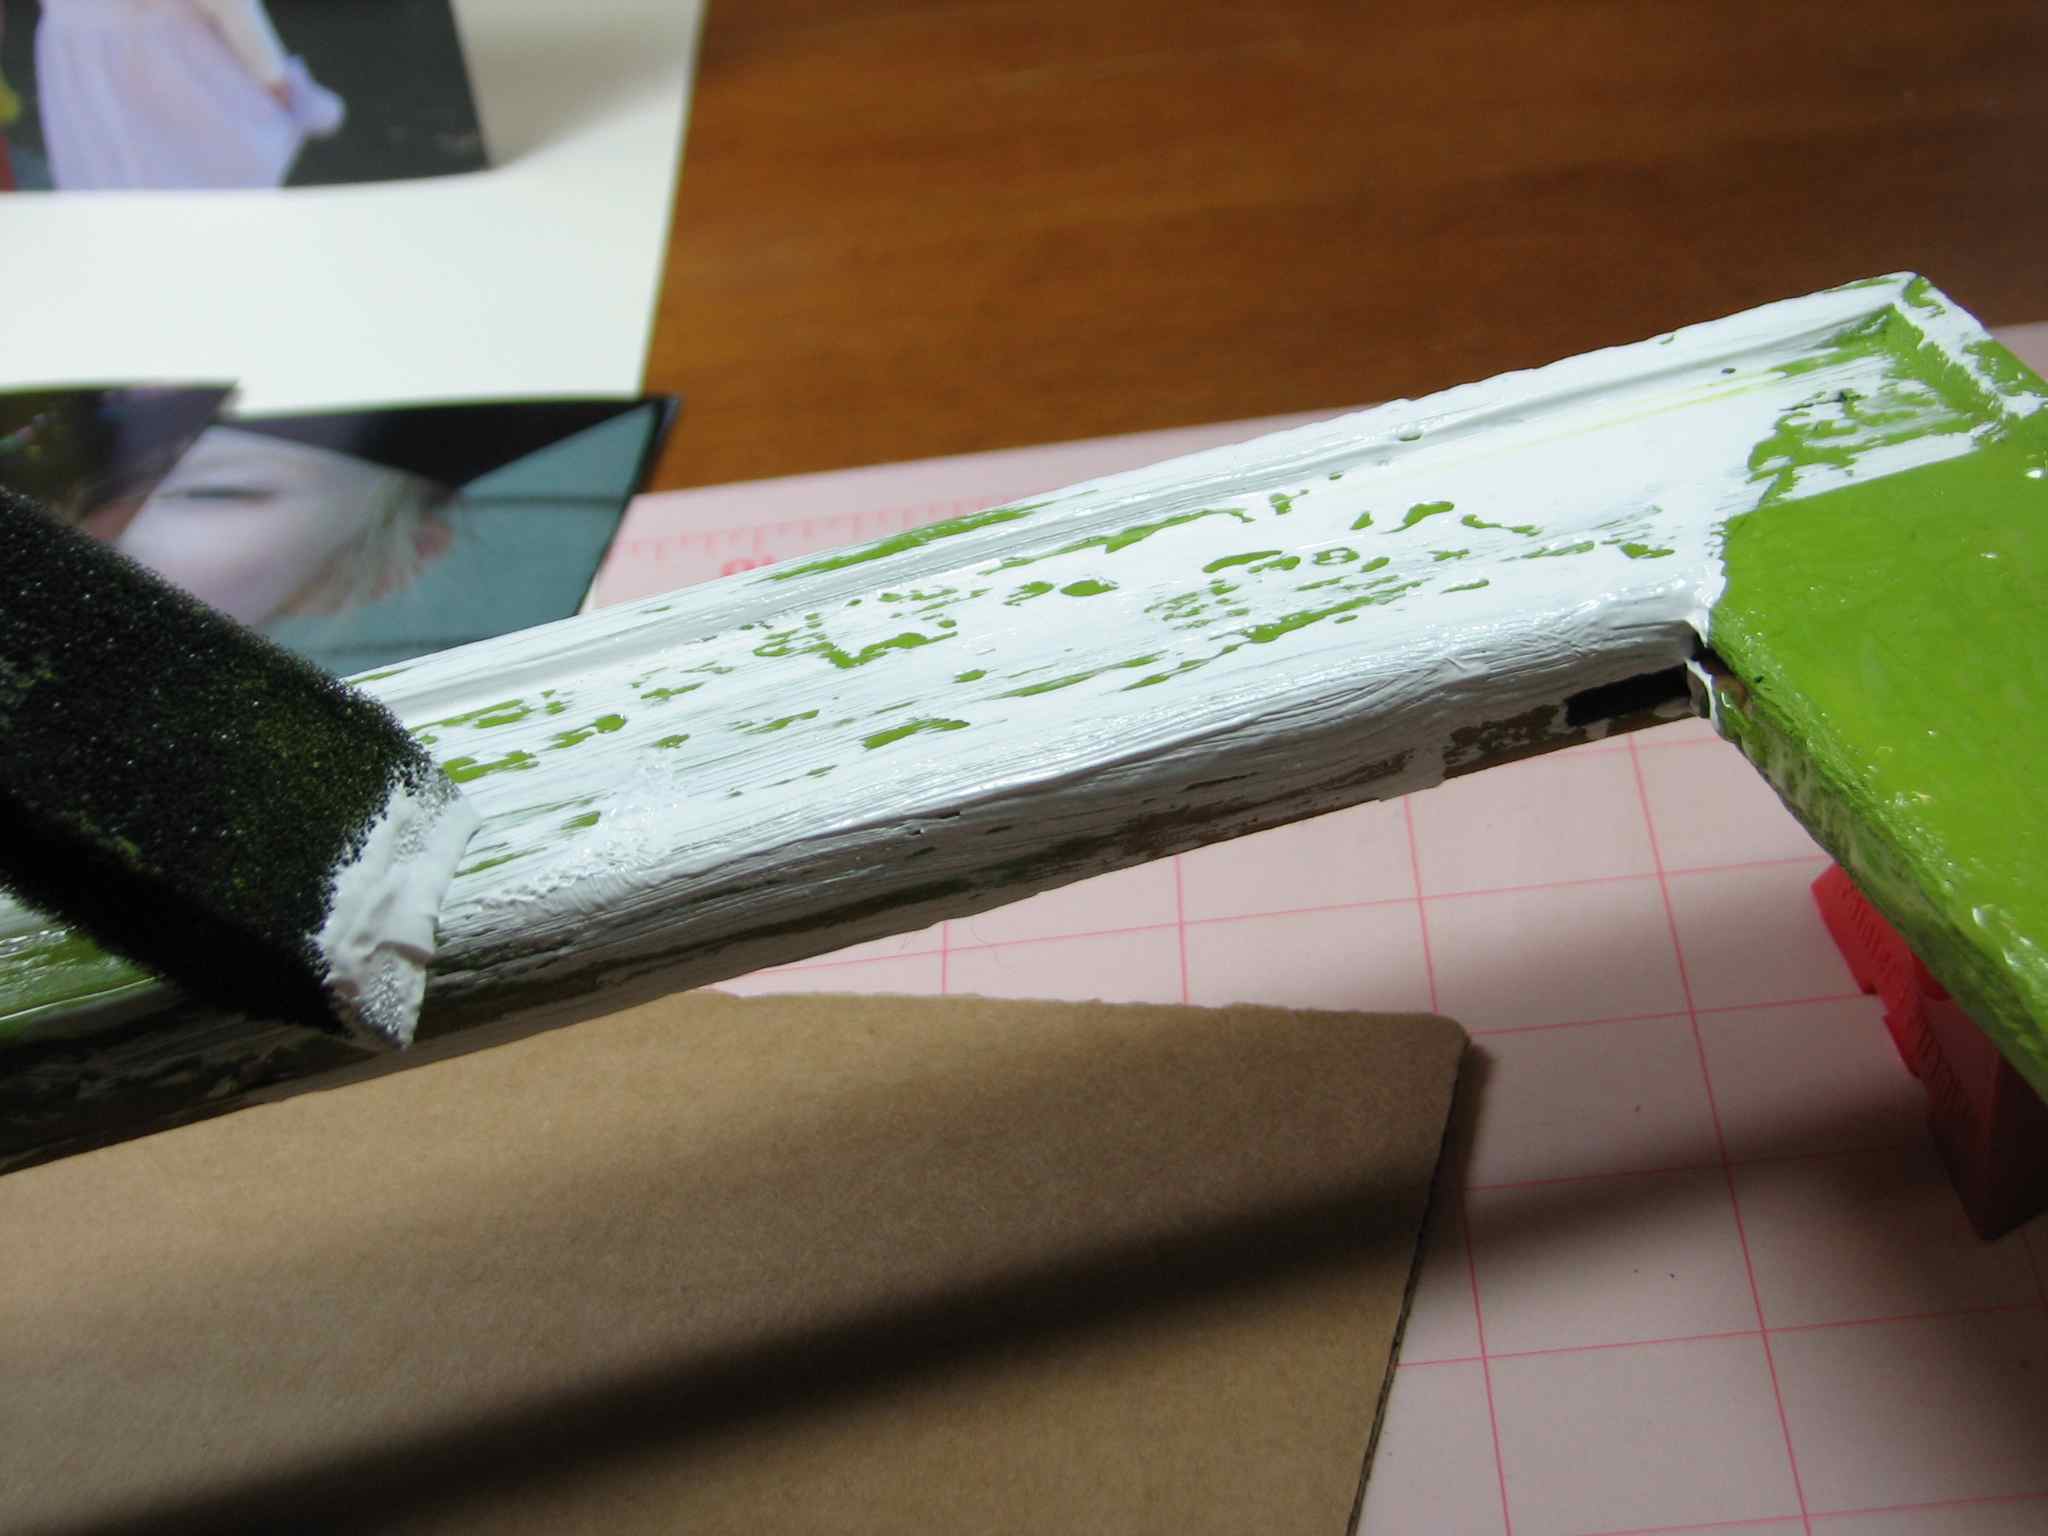
Spread 2nd color over crackle medium. (The 2nd coat doesn’t have to be perfect.) Let dry for several hours.
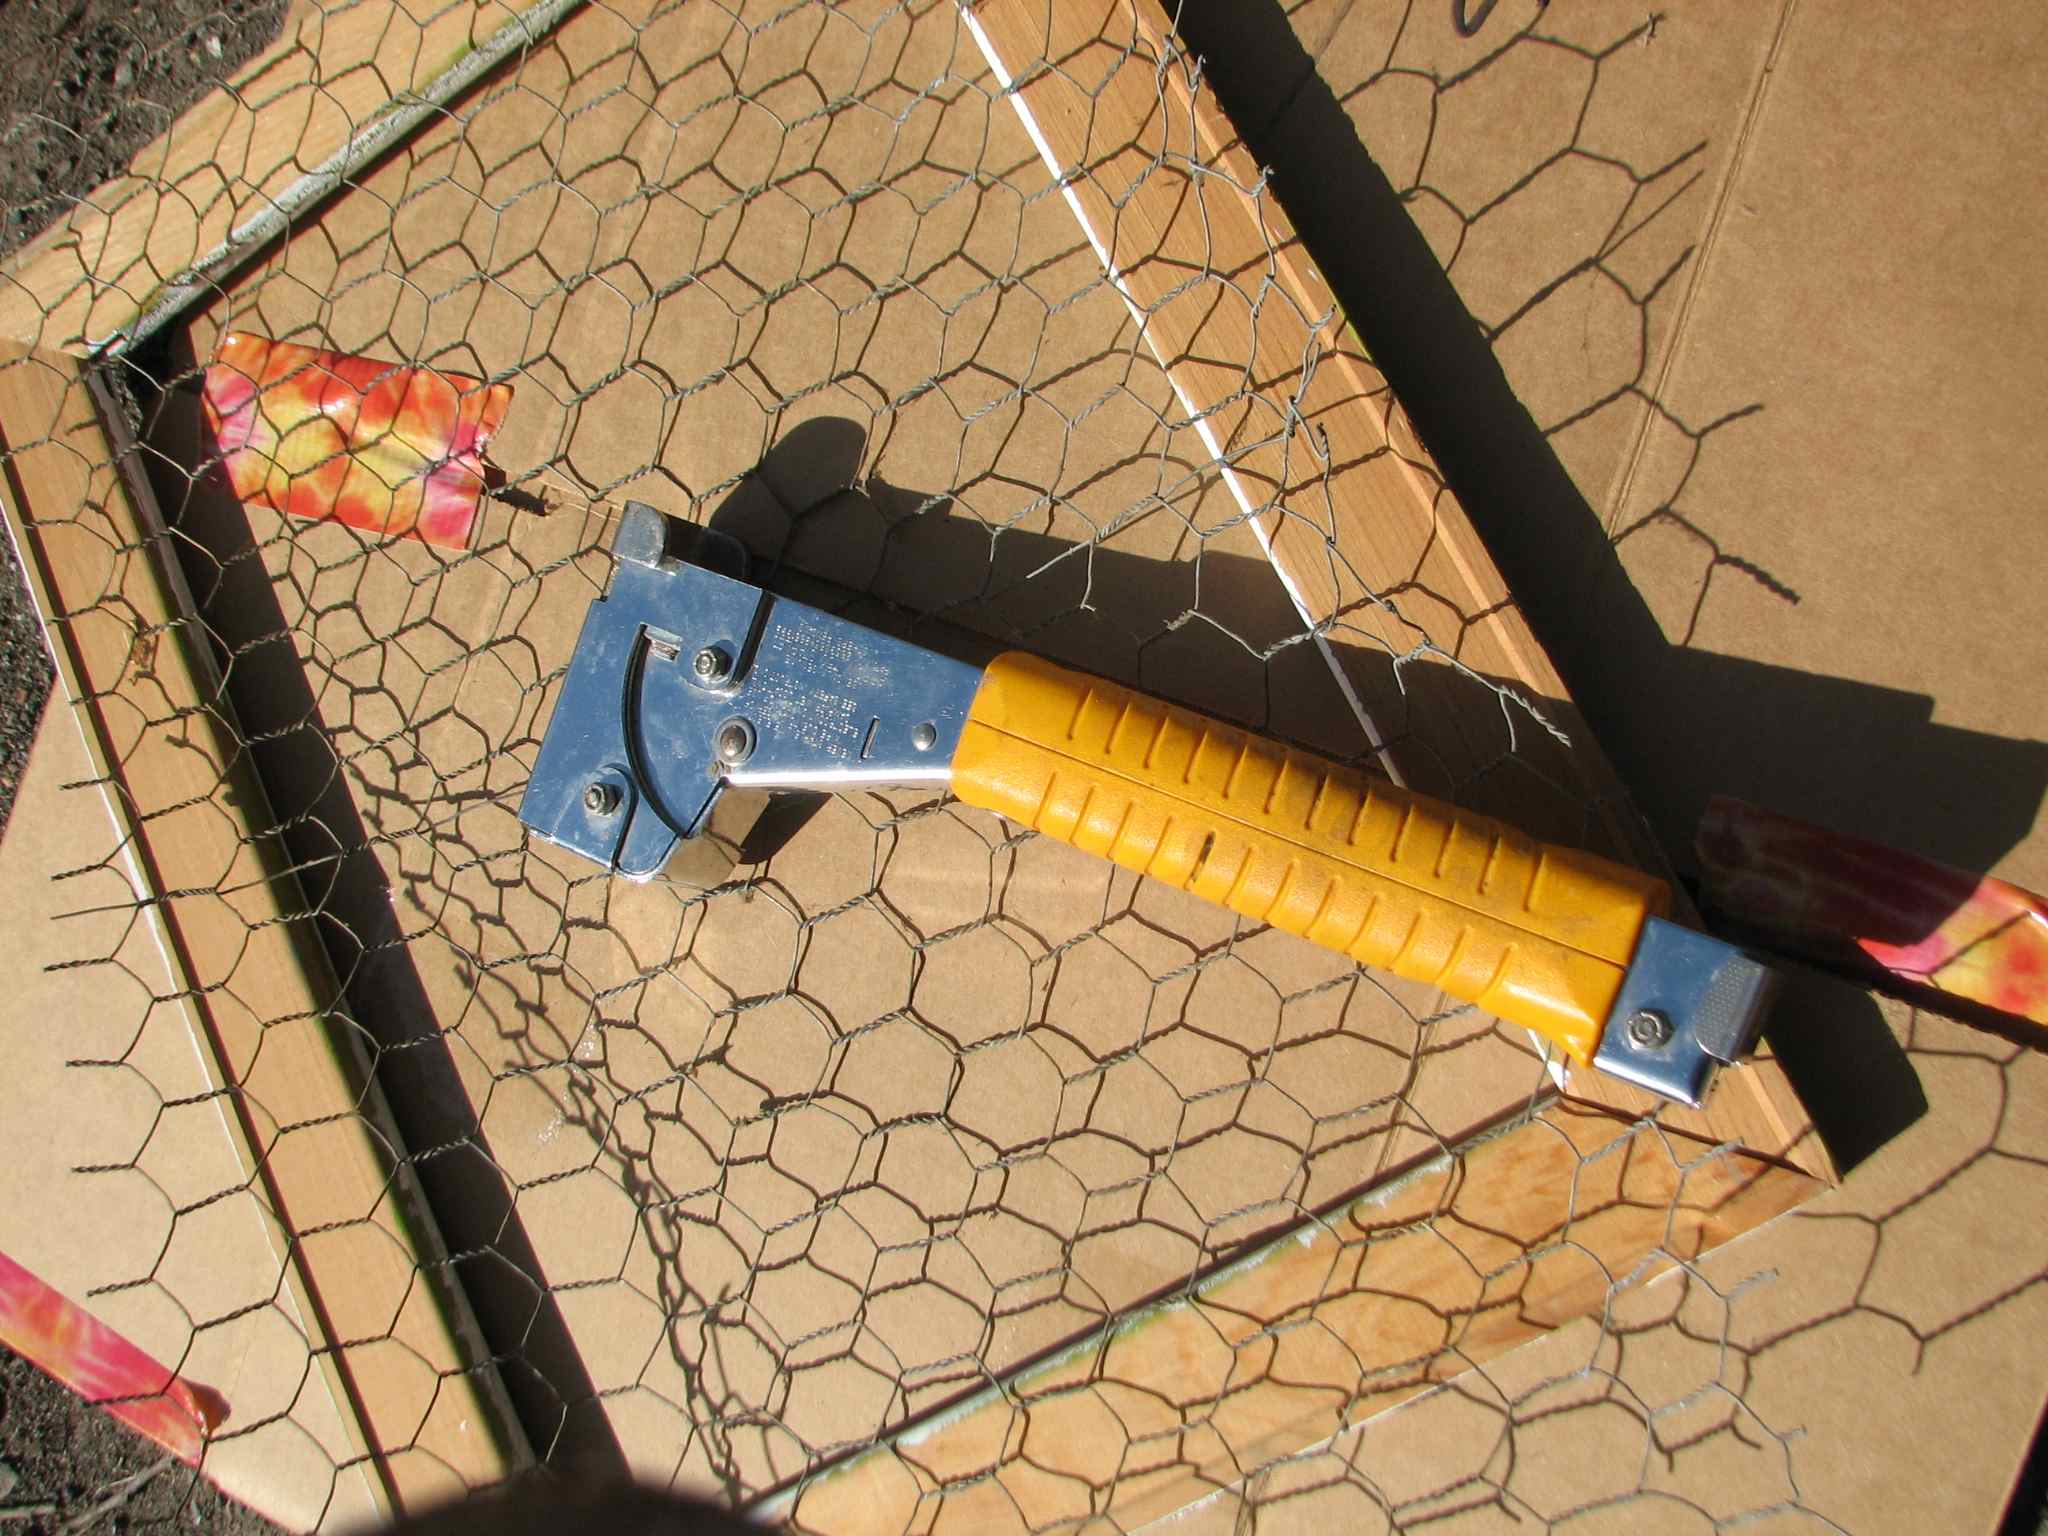
Once dry, attach chicken wire to the backside with strong staple gun.
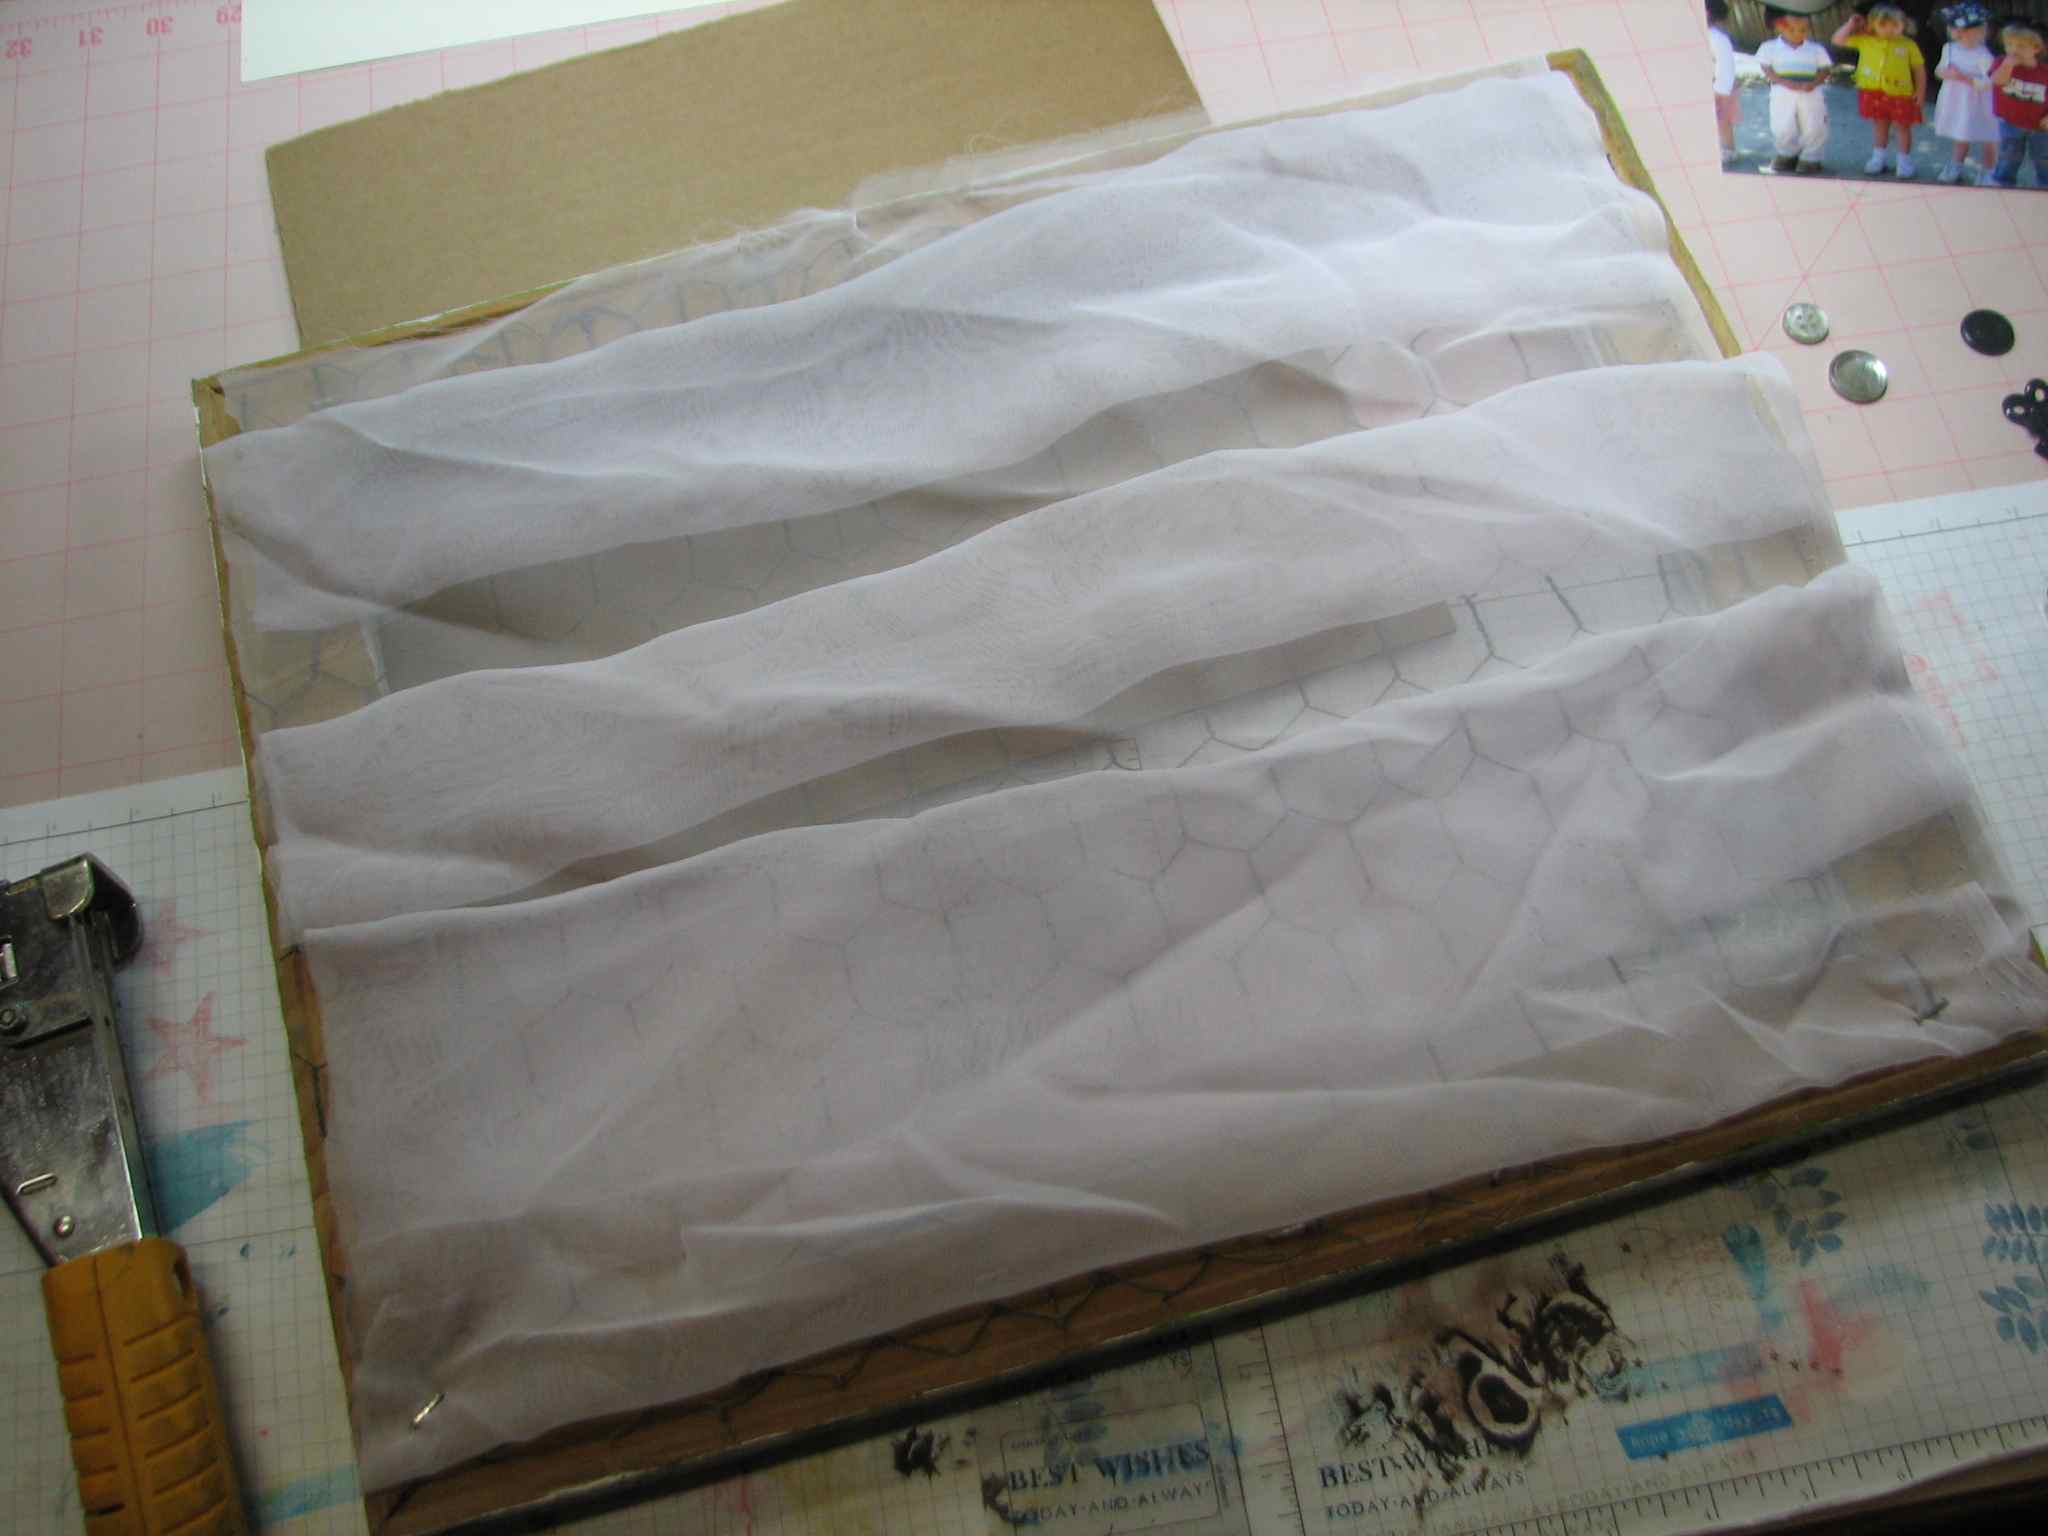
Drape fabric onto the back of chicken wire and attach.
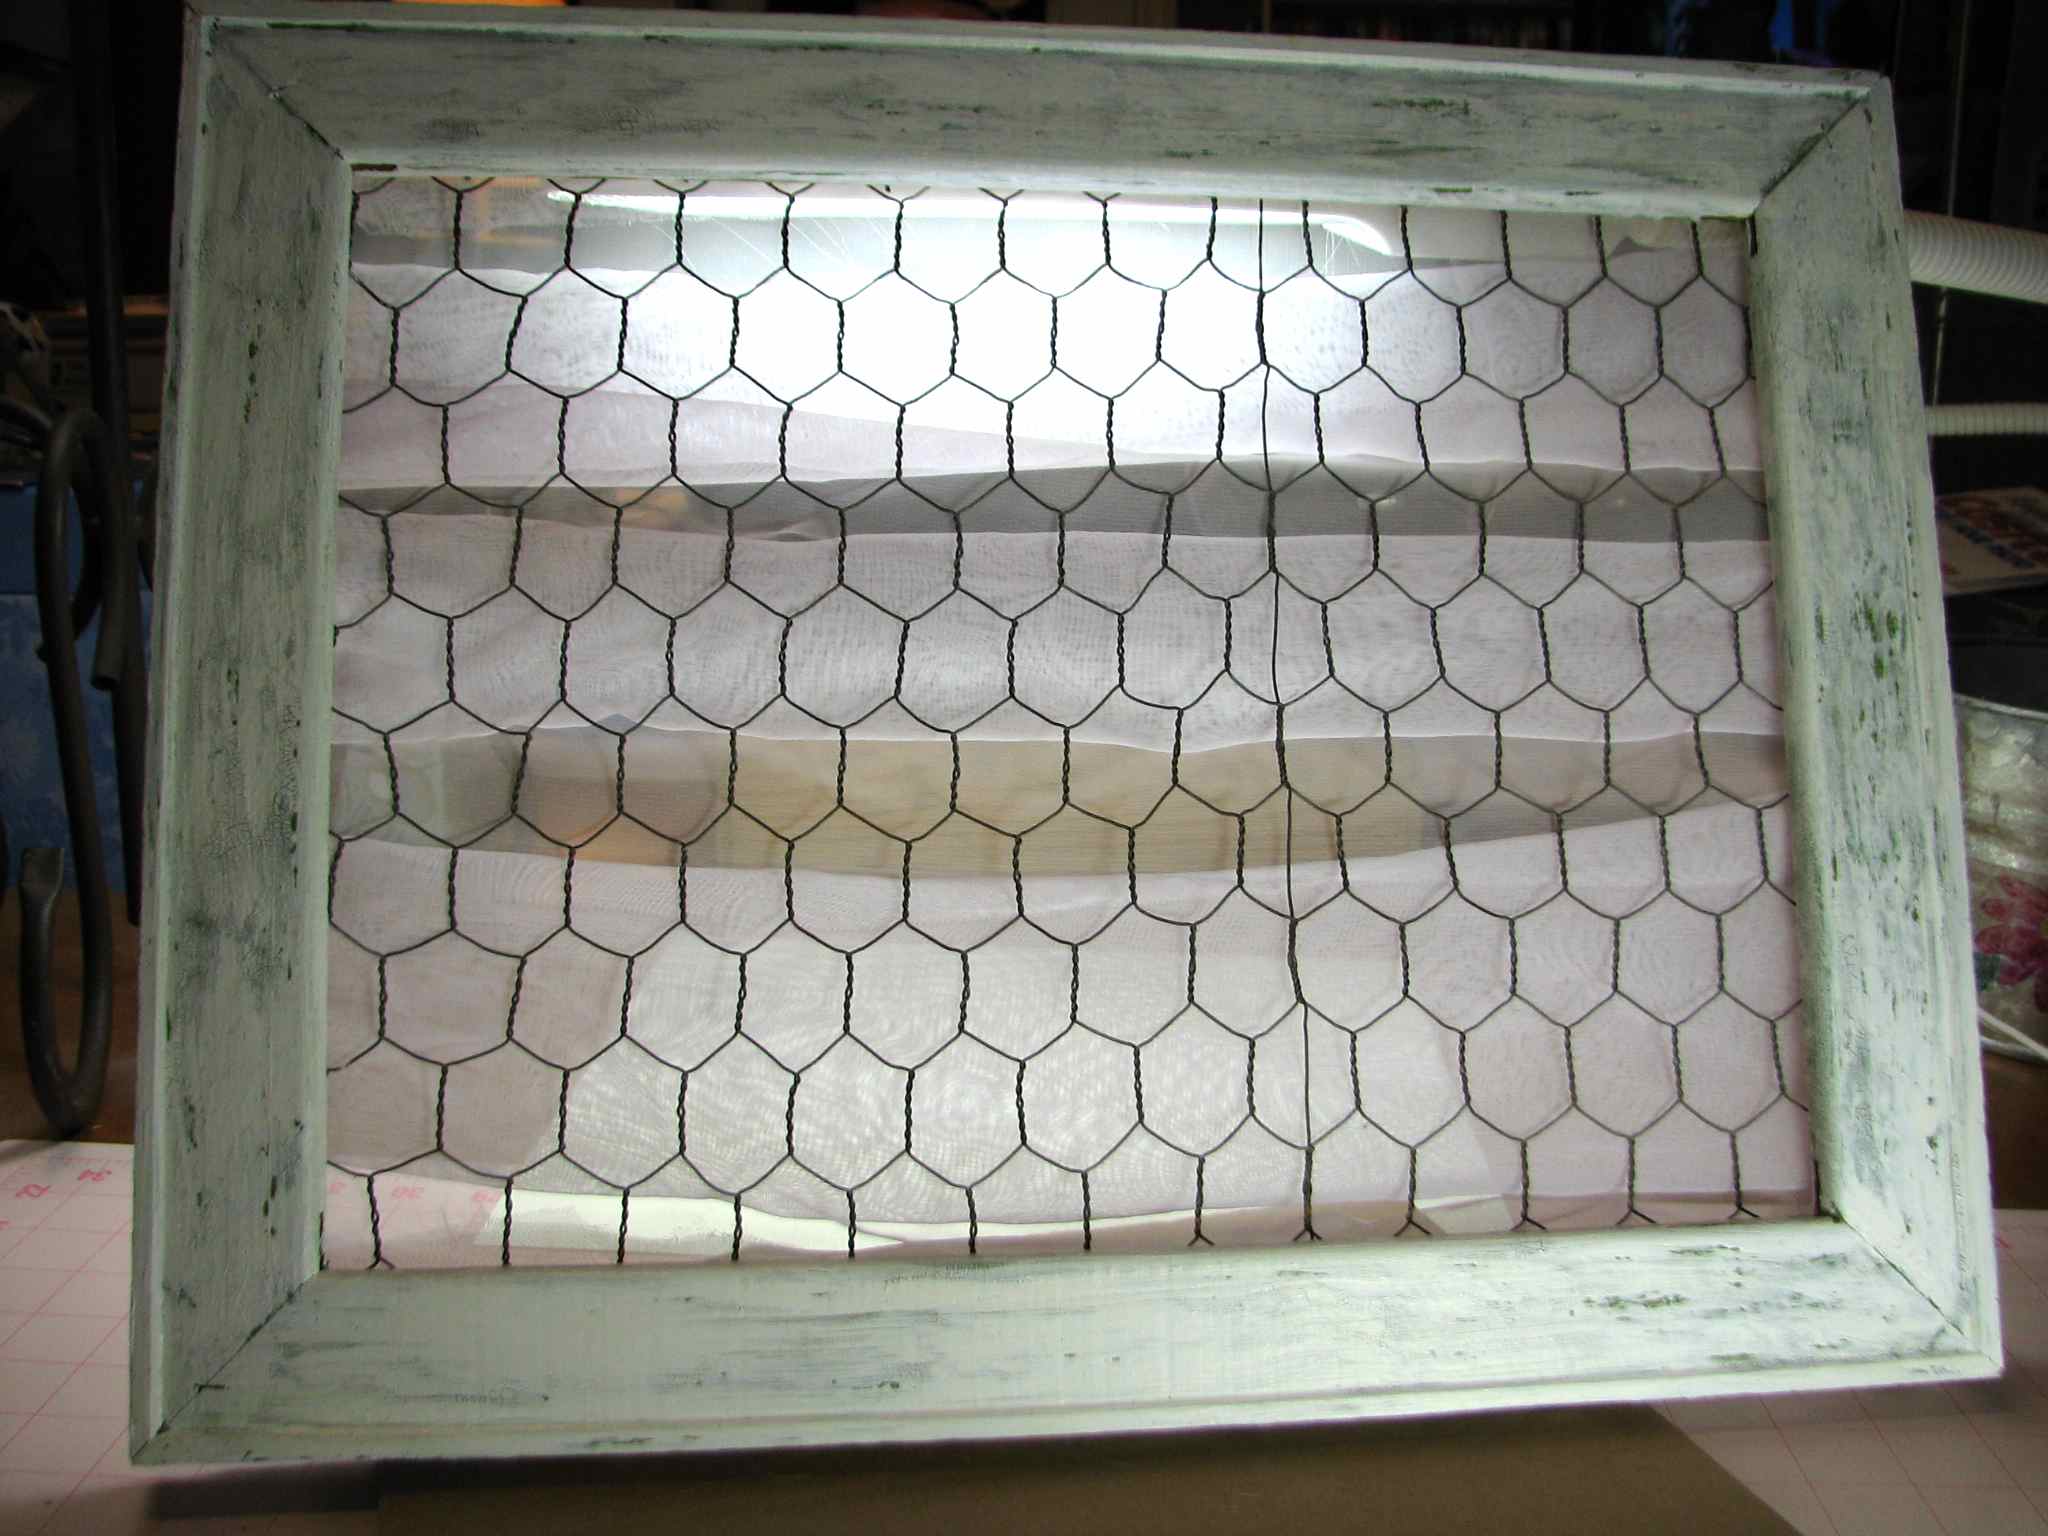
Cut stars from card stock and embellish with baker’s twine embellished buttons from Buttons Galore & More.

Lay out pictures and embellishments, memorabilia, etc.
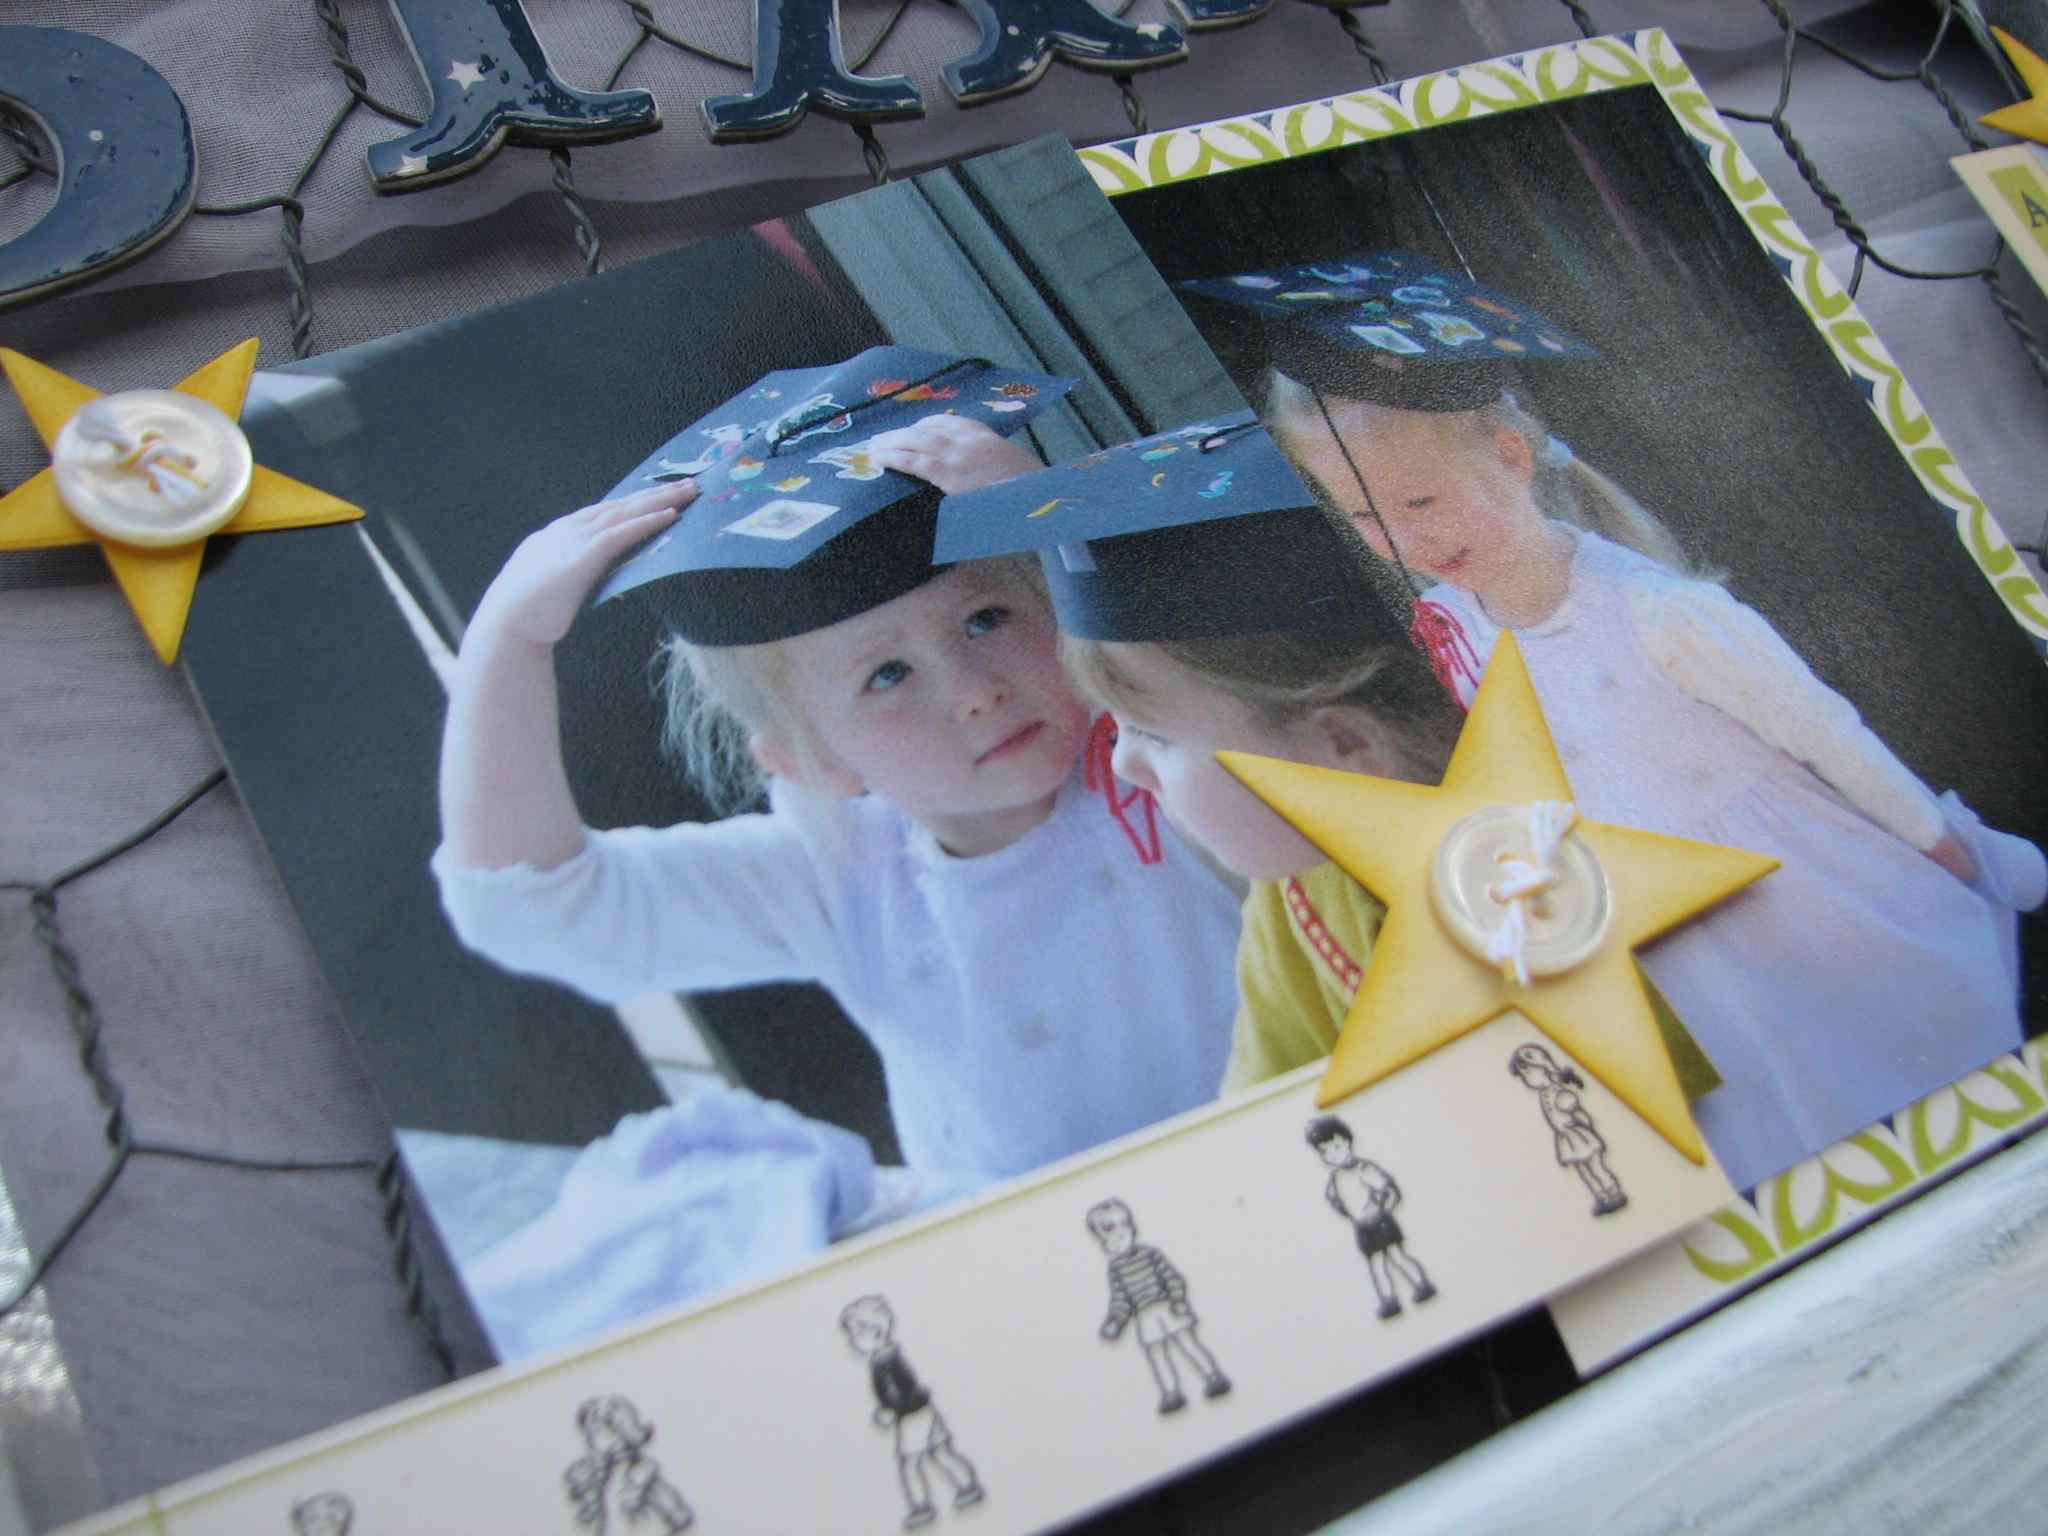
Secure with glue, tape or clips, as desired.
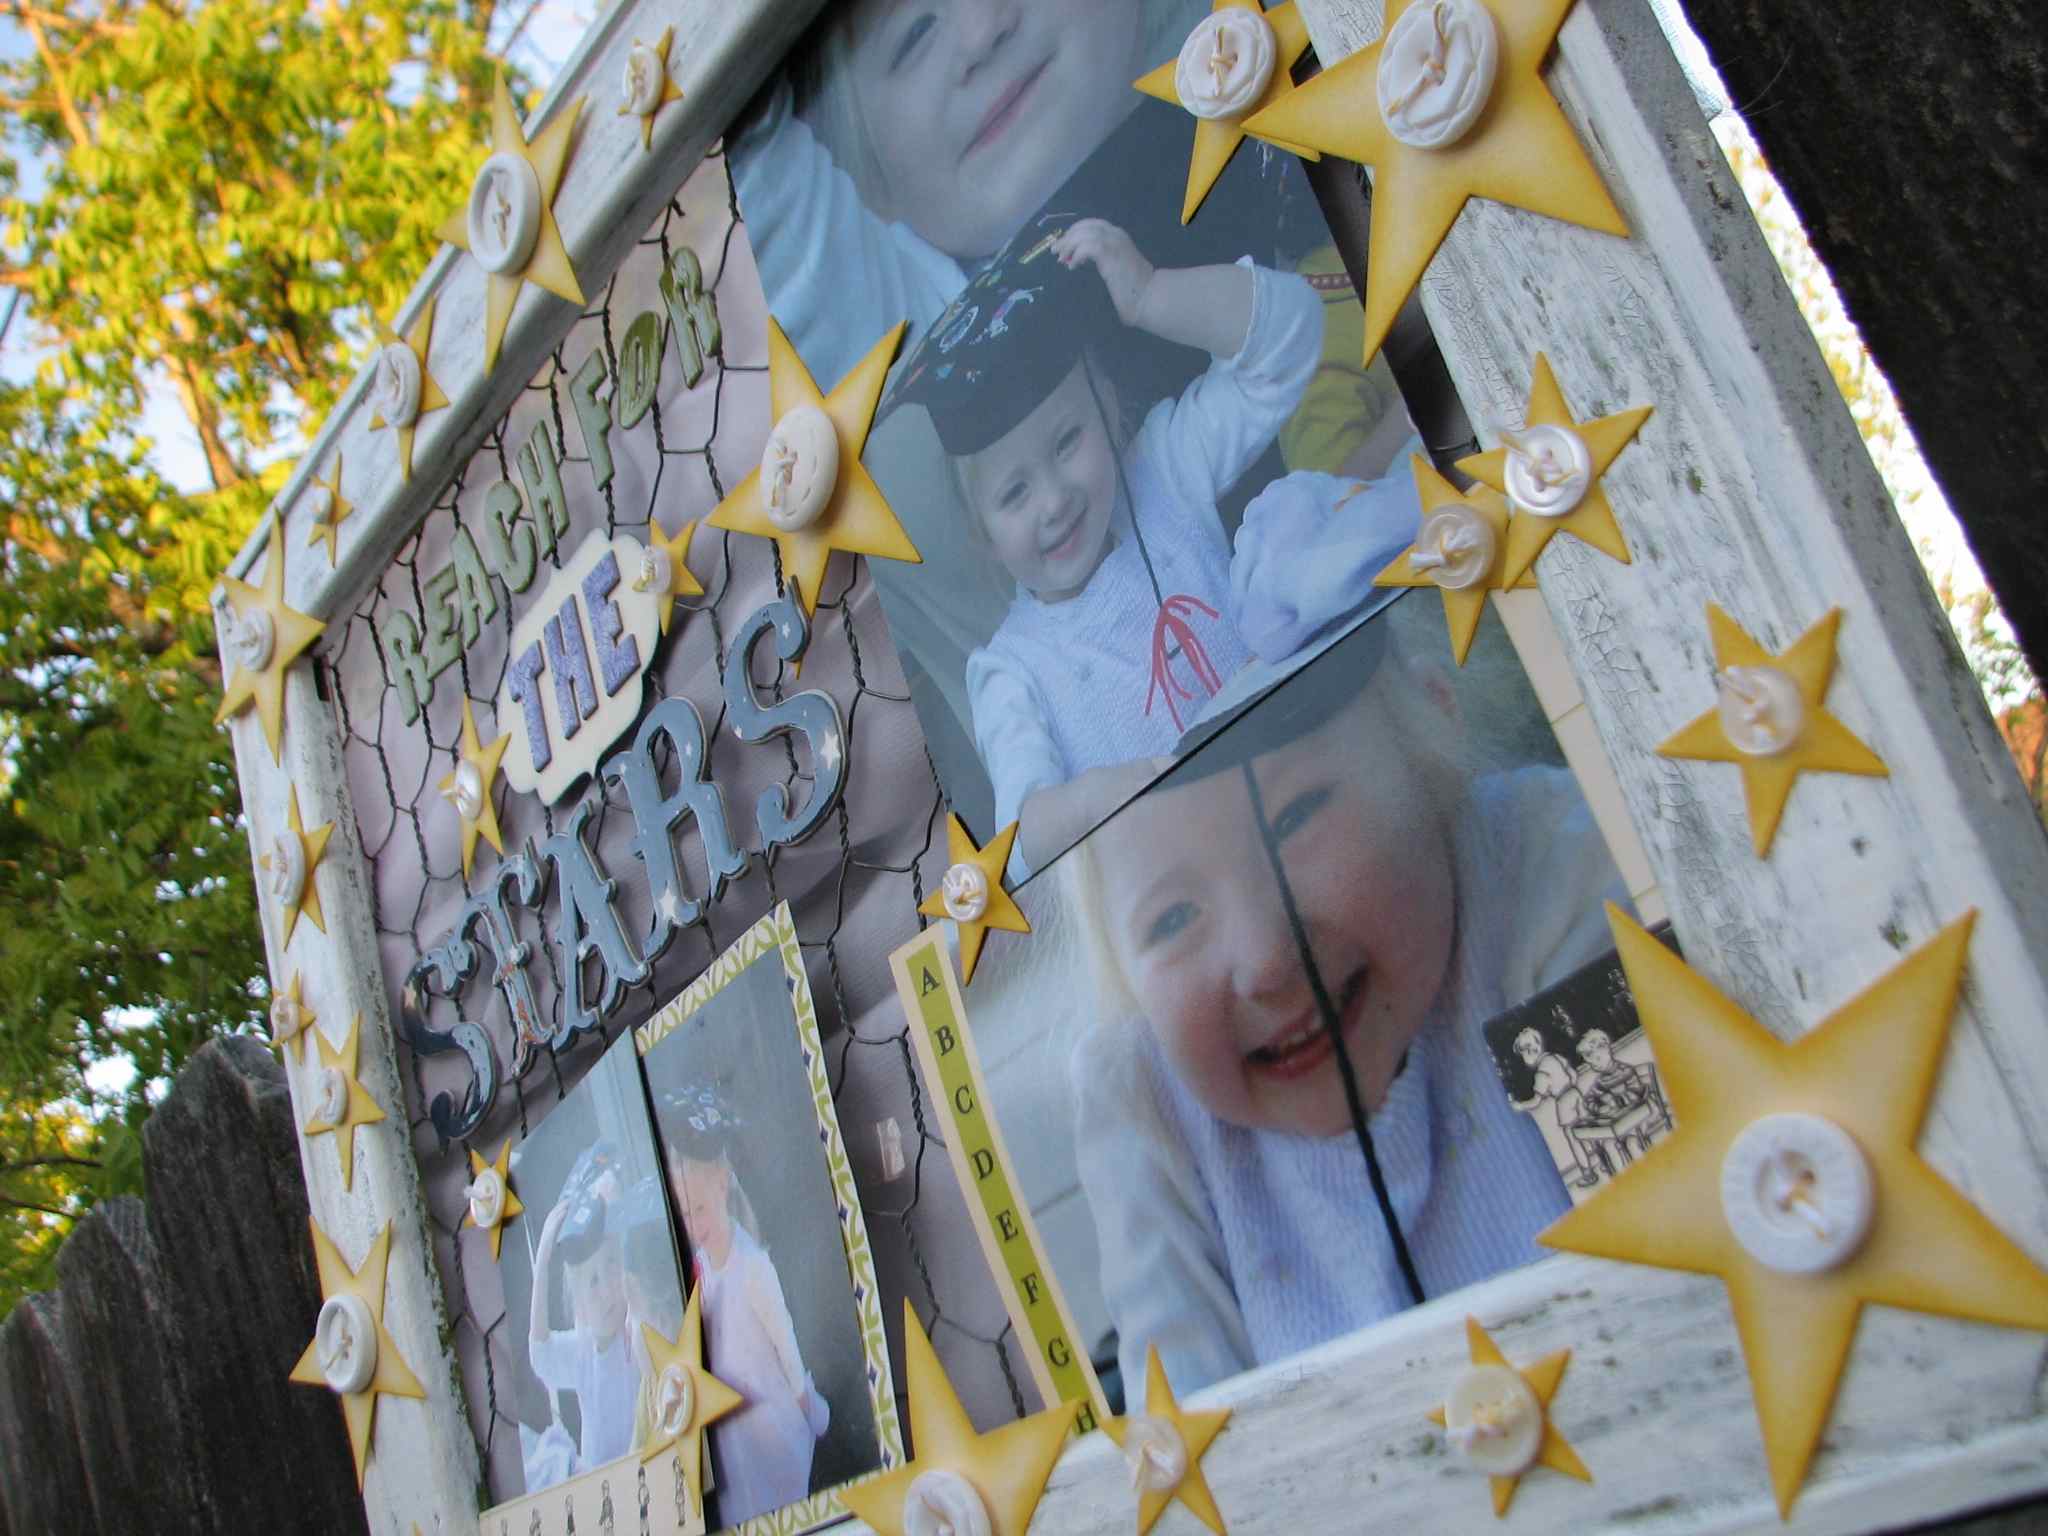
Give the grad in your world a big hug and blessings to REACH FOR THE STARS!
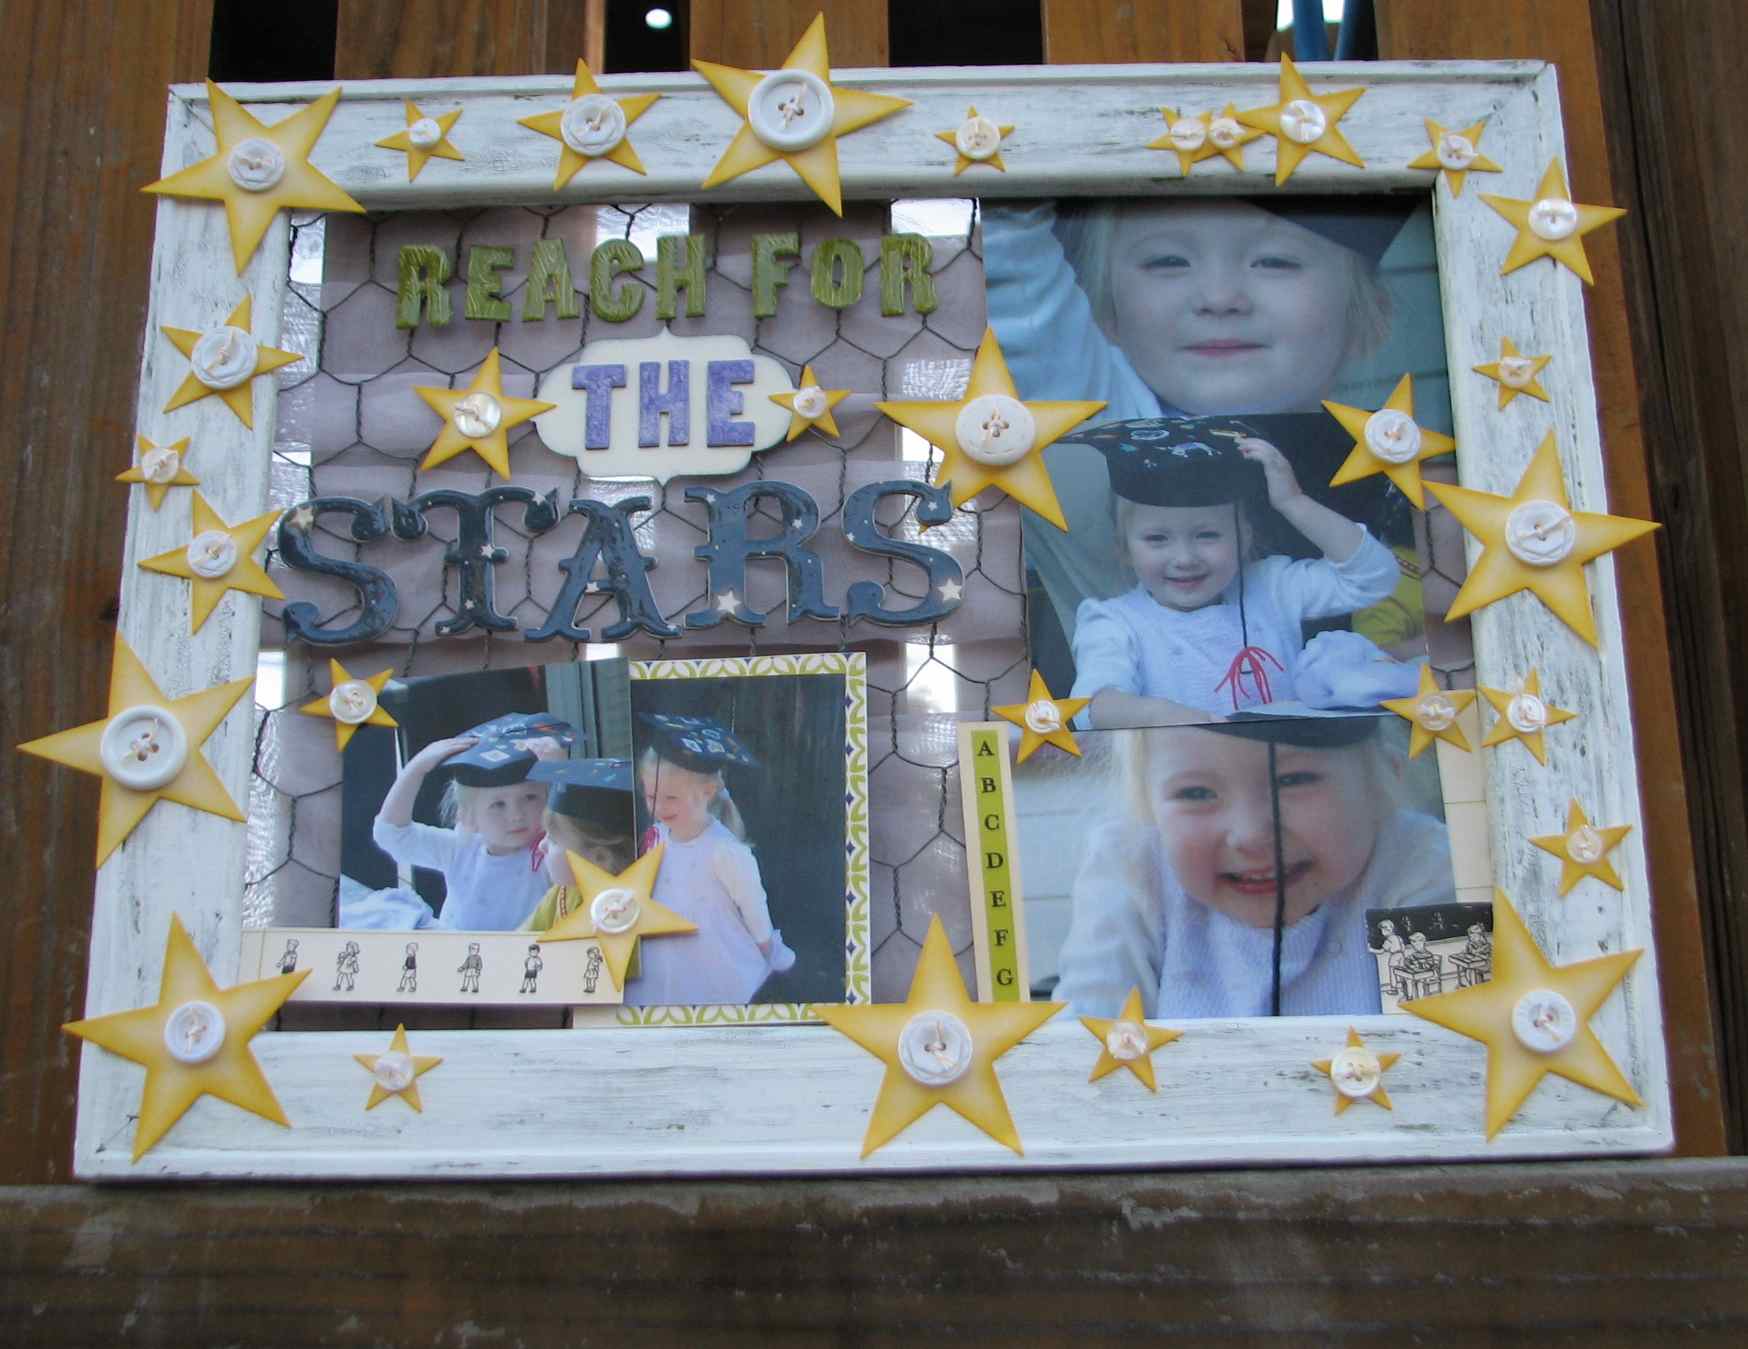
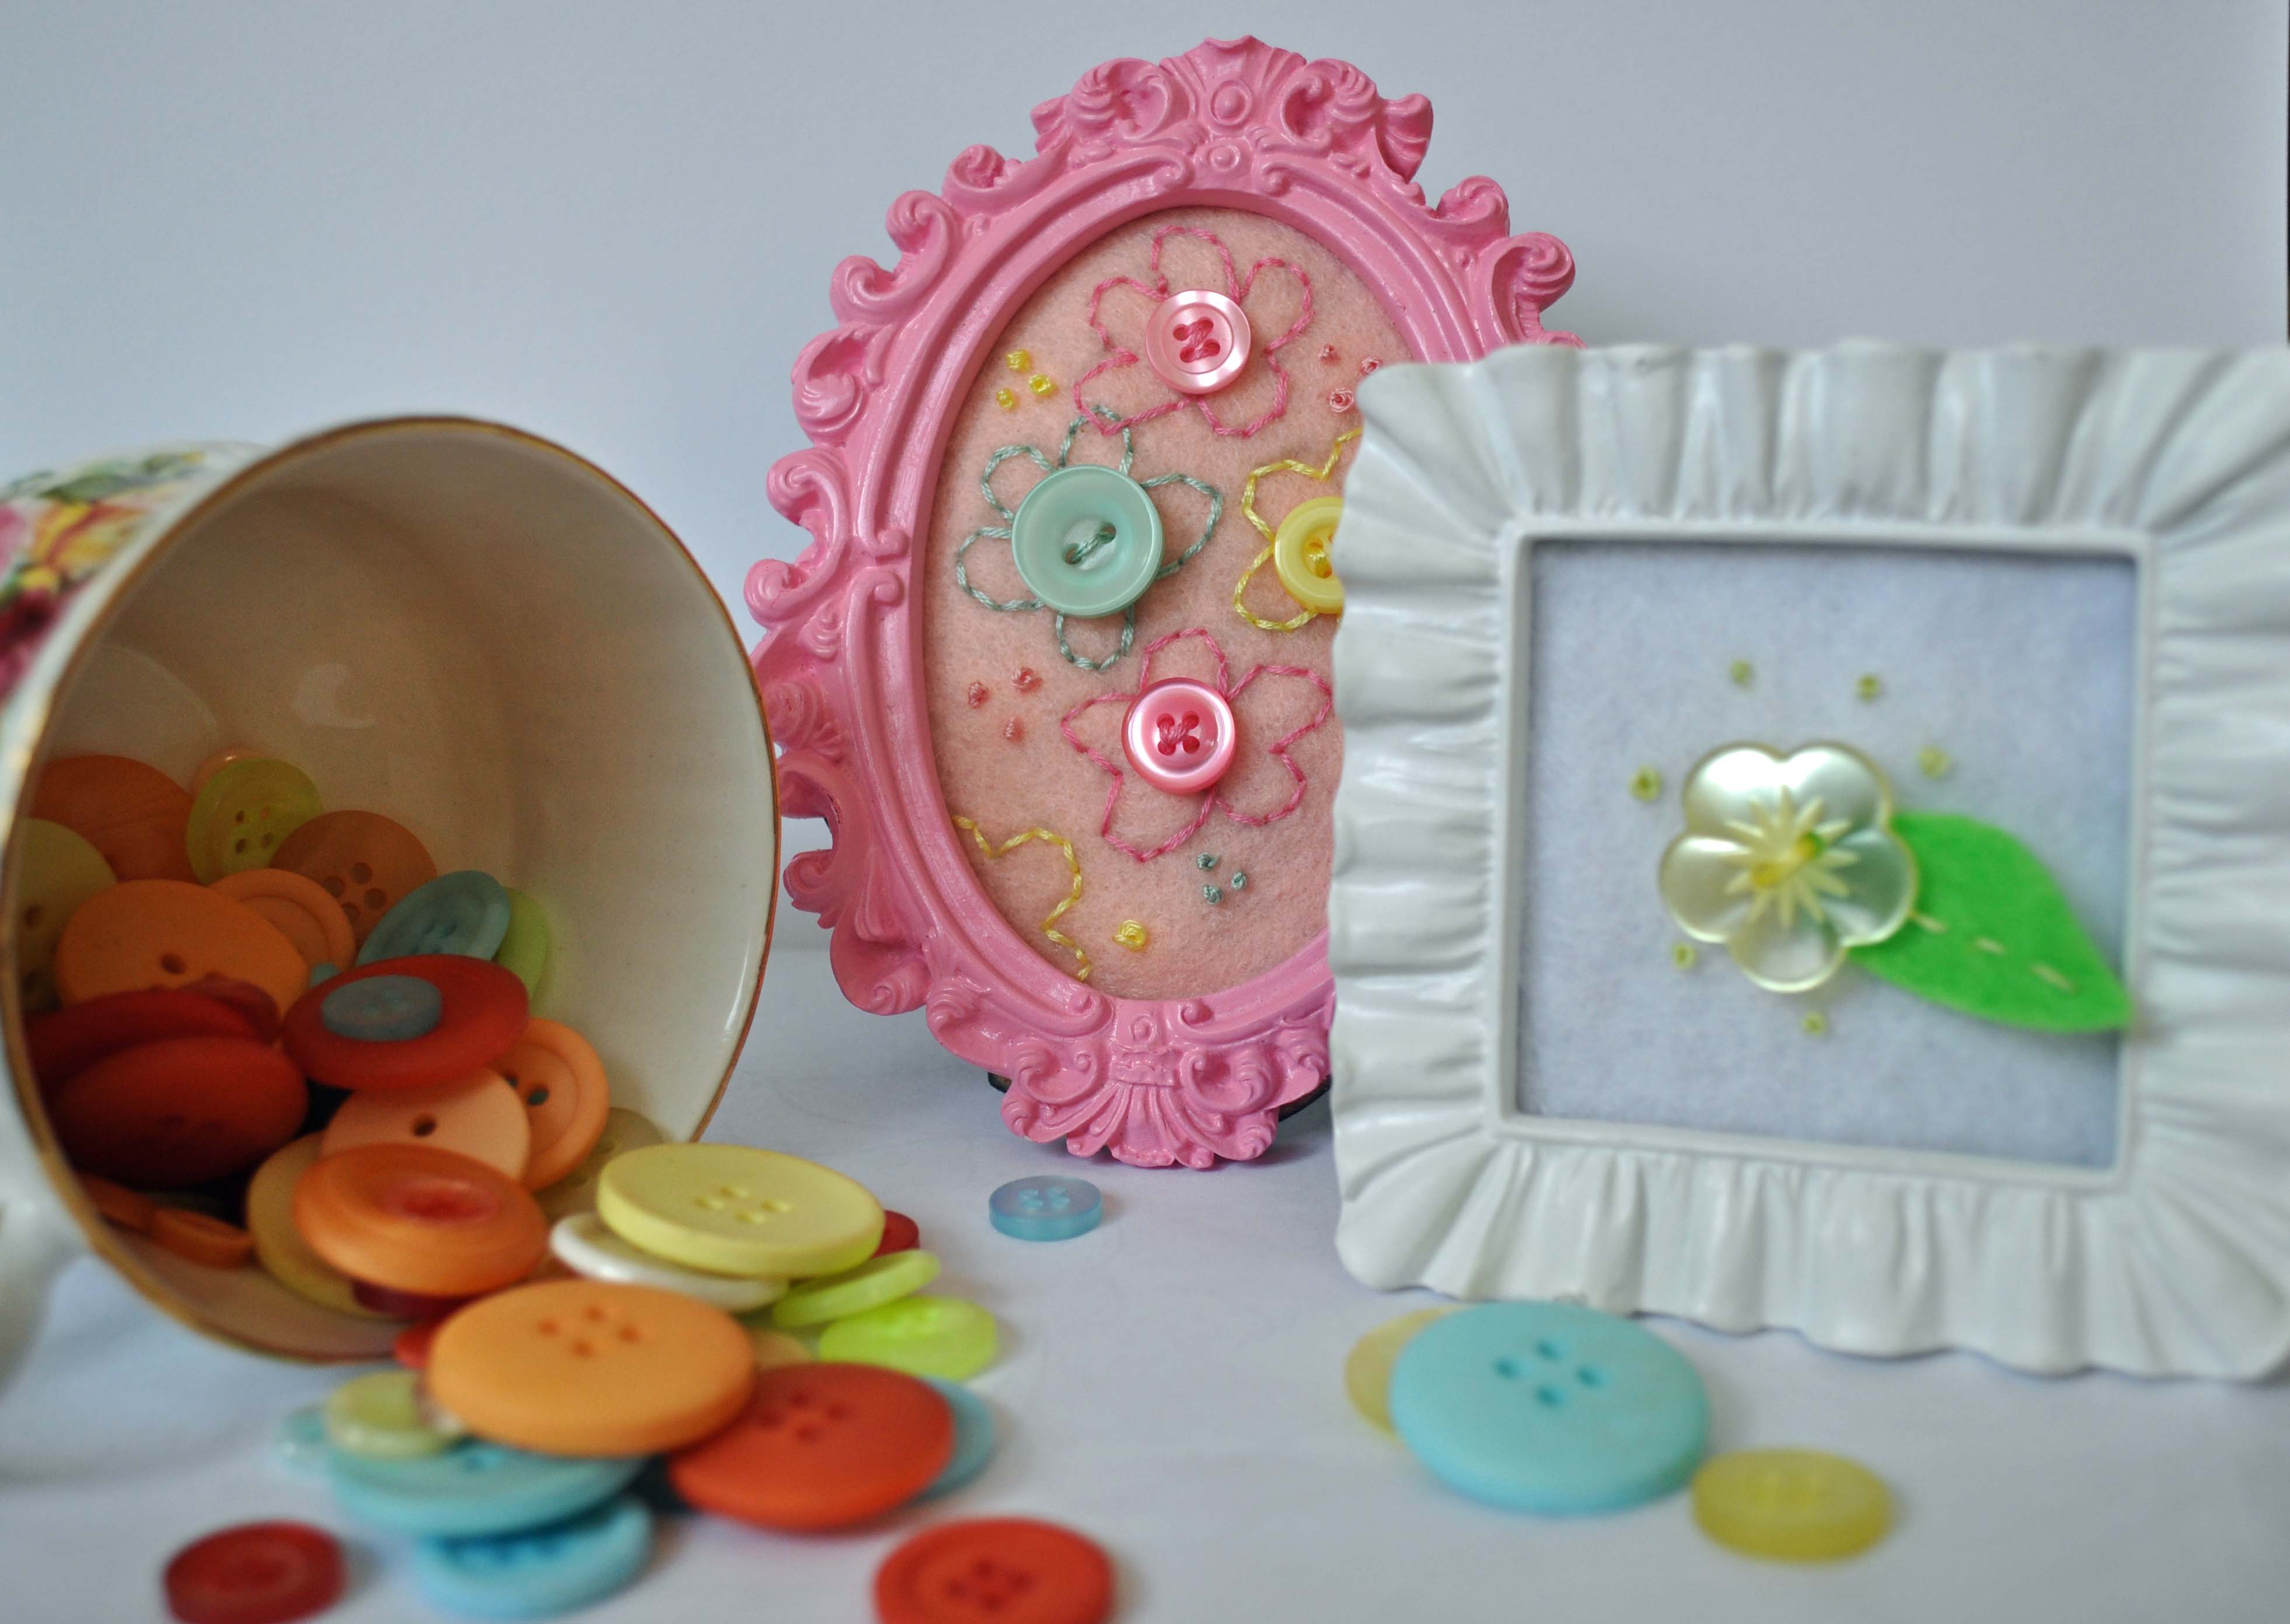
I love buttons and don’t want to just hide them in a box somewhere. I showcase some of my favorite buttons by creating little pieces of art. This is a super quick project that is great for a beginner button fan!
For my first blog post here on Buttons Galore… I chose my new obsession. Art quilting. I can eat, sleep and breathe it (and I used to be a paper girl ). It’s fun to go out of your comfort zone to test your creativity and try something new! Give it a try.

Easter Egg Crafts with Buttons- NIki Meiners
Creating simple Easter decorations does not have to be a chore. You can create easy DIY home decor with a few simple materials. You can customize the colors to your taste.
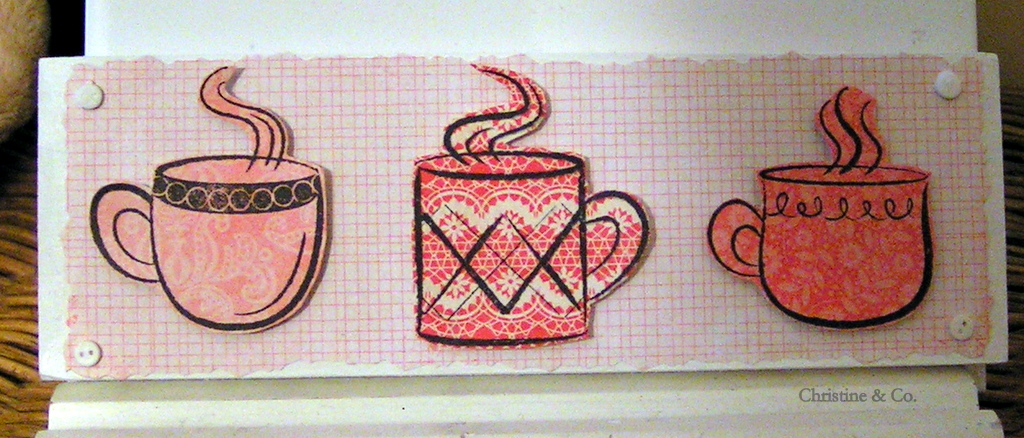
This a “Simple but Sweet Coffee Plaque” from Christine at Christine and Co. I love her tag line “Because I’m rarely alone”. I’ll bet you can relate to that? I know, I can!
I like the way she used our buttons to anchor the corners of her project. Please go over and visit her tutorial here. You won’t believe how simple it really is!

Here is a fabulous button craft project from Think Crafts created by my wonderfully crafty friend Amy of Mod Podge Rocks. I think it would be super in a kids room. Don’t you?
You can visit the tutorial to make a button embellished coat rack of your own here. And while you are out surfing on the web stop by Mod Podge Rocks here and say “HELLO” to Amy.
Isn’t this adorable? What is super impressive is that all of the buttons are SEWN on! The stitched “lucky” is just the icing on the cake. Super cute!
Please visit the Sweet Little Smoothie blog for the complete tutorial.


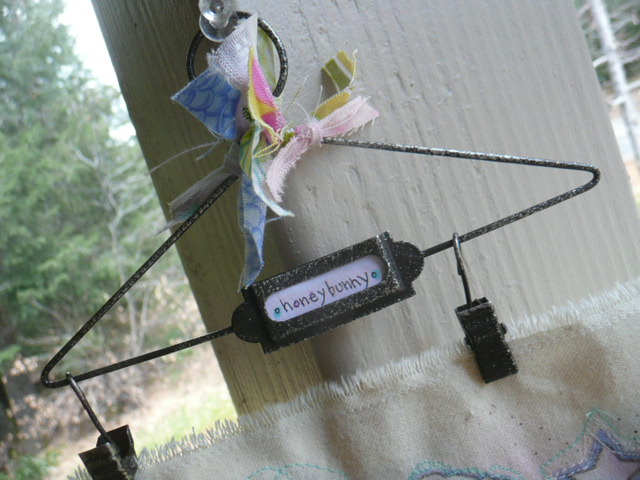