
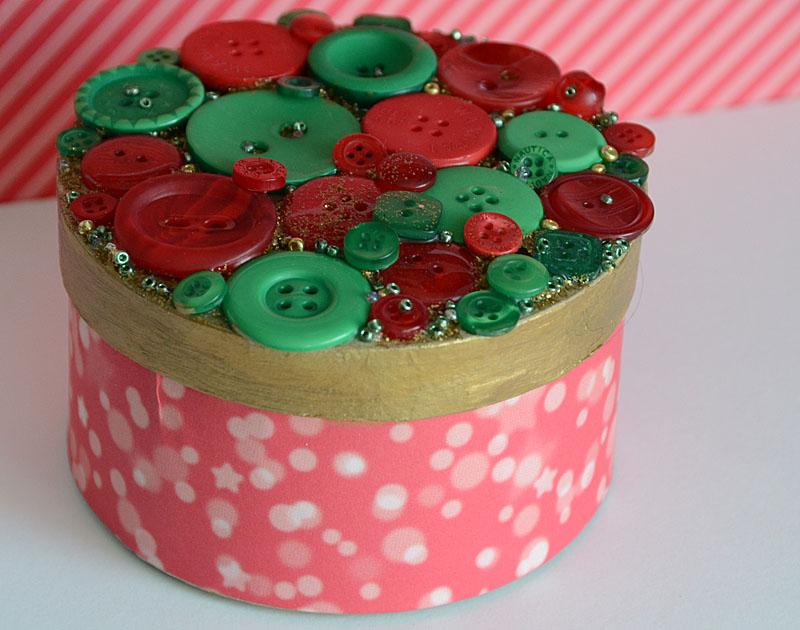
When it comes to gift giving, I love to put handmade touches on the wrapping when giving store bought items and one of my favorite ways to do this is with a decorated box. I’m known for making these gift boxes and in fact, the perfect item to decorate the top with is buttons! Today I’ll share with you just how easy this can be.
Supplies:
- Button Basics in Watermelon
- Button Basics in Candy Apple Green
- paper or wood gift box
- seed beads
- liquid adhesive
- paint
- patterned paper
Step by step:
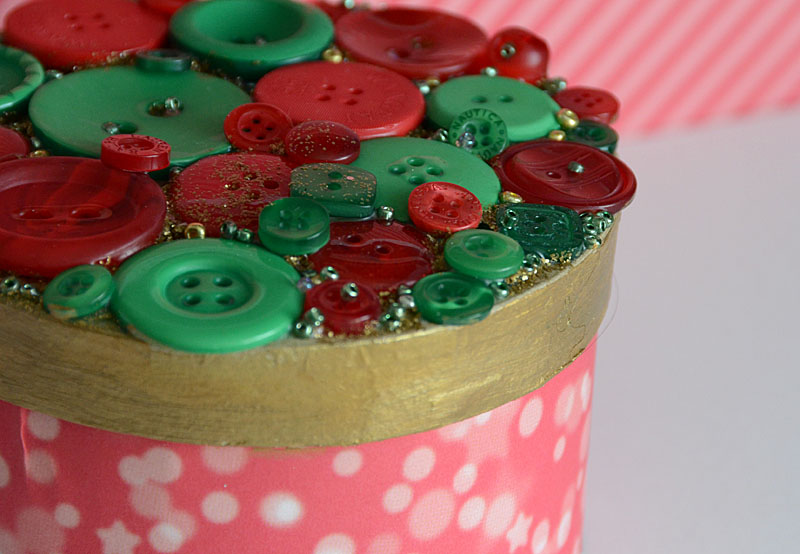
1. Remove the lid from the box and paint the sides, or cover in patterned paper. For this box I covered the bottom in patterned paper, and painted the top edge with gold acrylic paint.
2. Place a good amount of liquid adhesive onto the lid top, keeping it away from the edges. If some spills over, simply wipe away or brush back onto the top.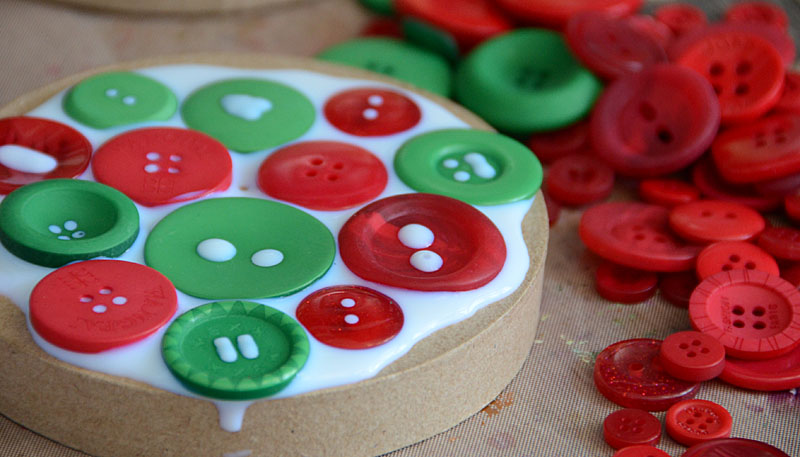
3. Begin by placing a few large buttons, then fill in areas. For a box like this I like to start at the middle and work out. Layer on a second layer of buttons if desired.
4. Once you are happy with your buttons, sprinkle something tiny like the seed beads that I have used on this box. This fills in any gaps and adds a great layer of texture and fun added dimension as well.
5. Allow the lid to fully dry before placing a gift inside the box, closing, and gifting!
Latest posts by May Flaum (see all)
- Make a Wreath Card with Wisteria Hues Mix! - March 2, 2017
- Announcing New 28 Lilac Lane Embellishment Bottles! - October 5, 2016
- Oh Sweet Autumn with 28 Lilac Lane Autumn Afternoon! - September 29, 2016
No comments yet.